

Subscribe to continue reading
Subscribe to get access to the rest of this post and other subscriber-only content.
Subscribe to get access to the rest of this post and other subscriber-only content.
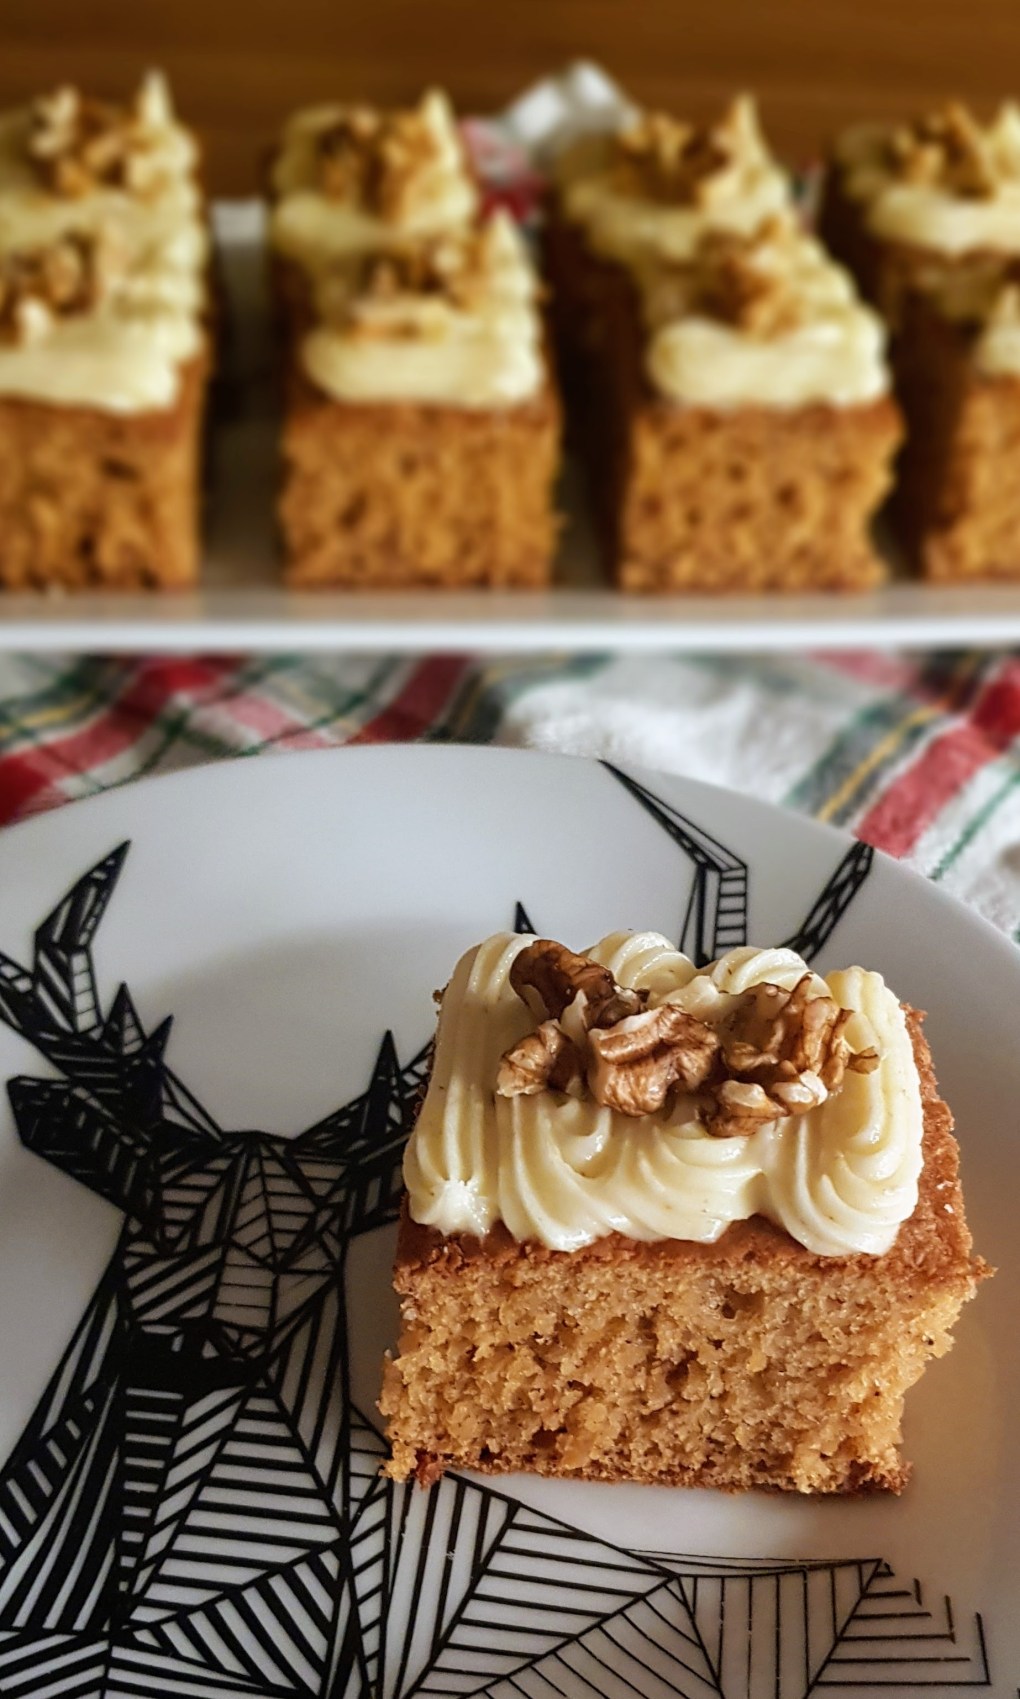

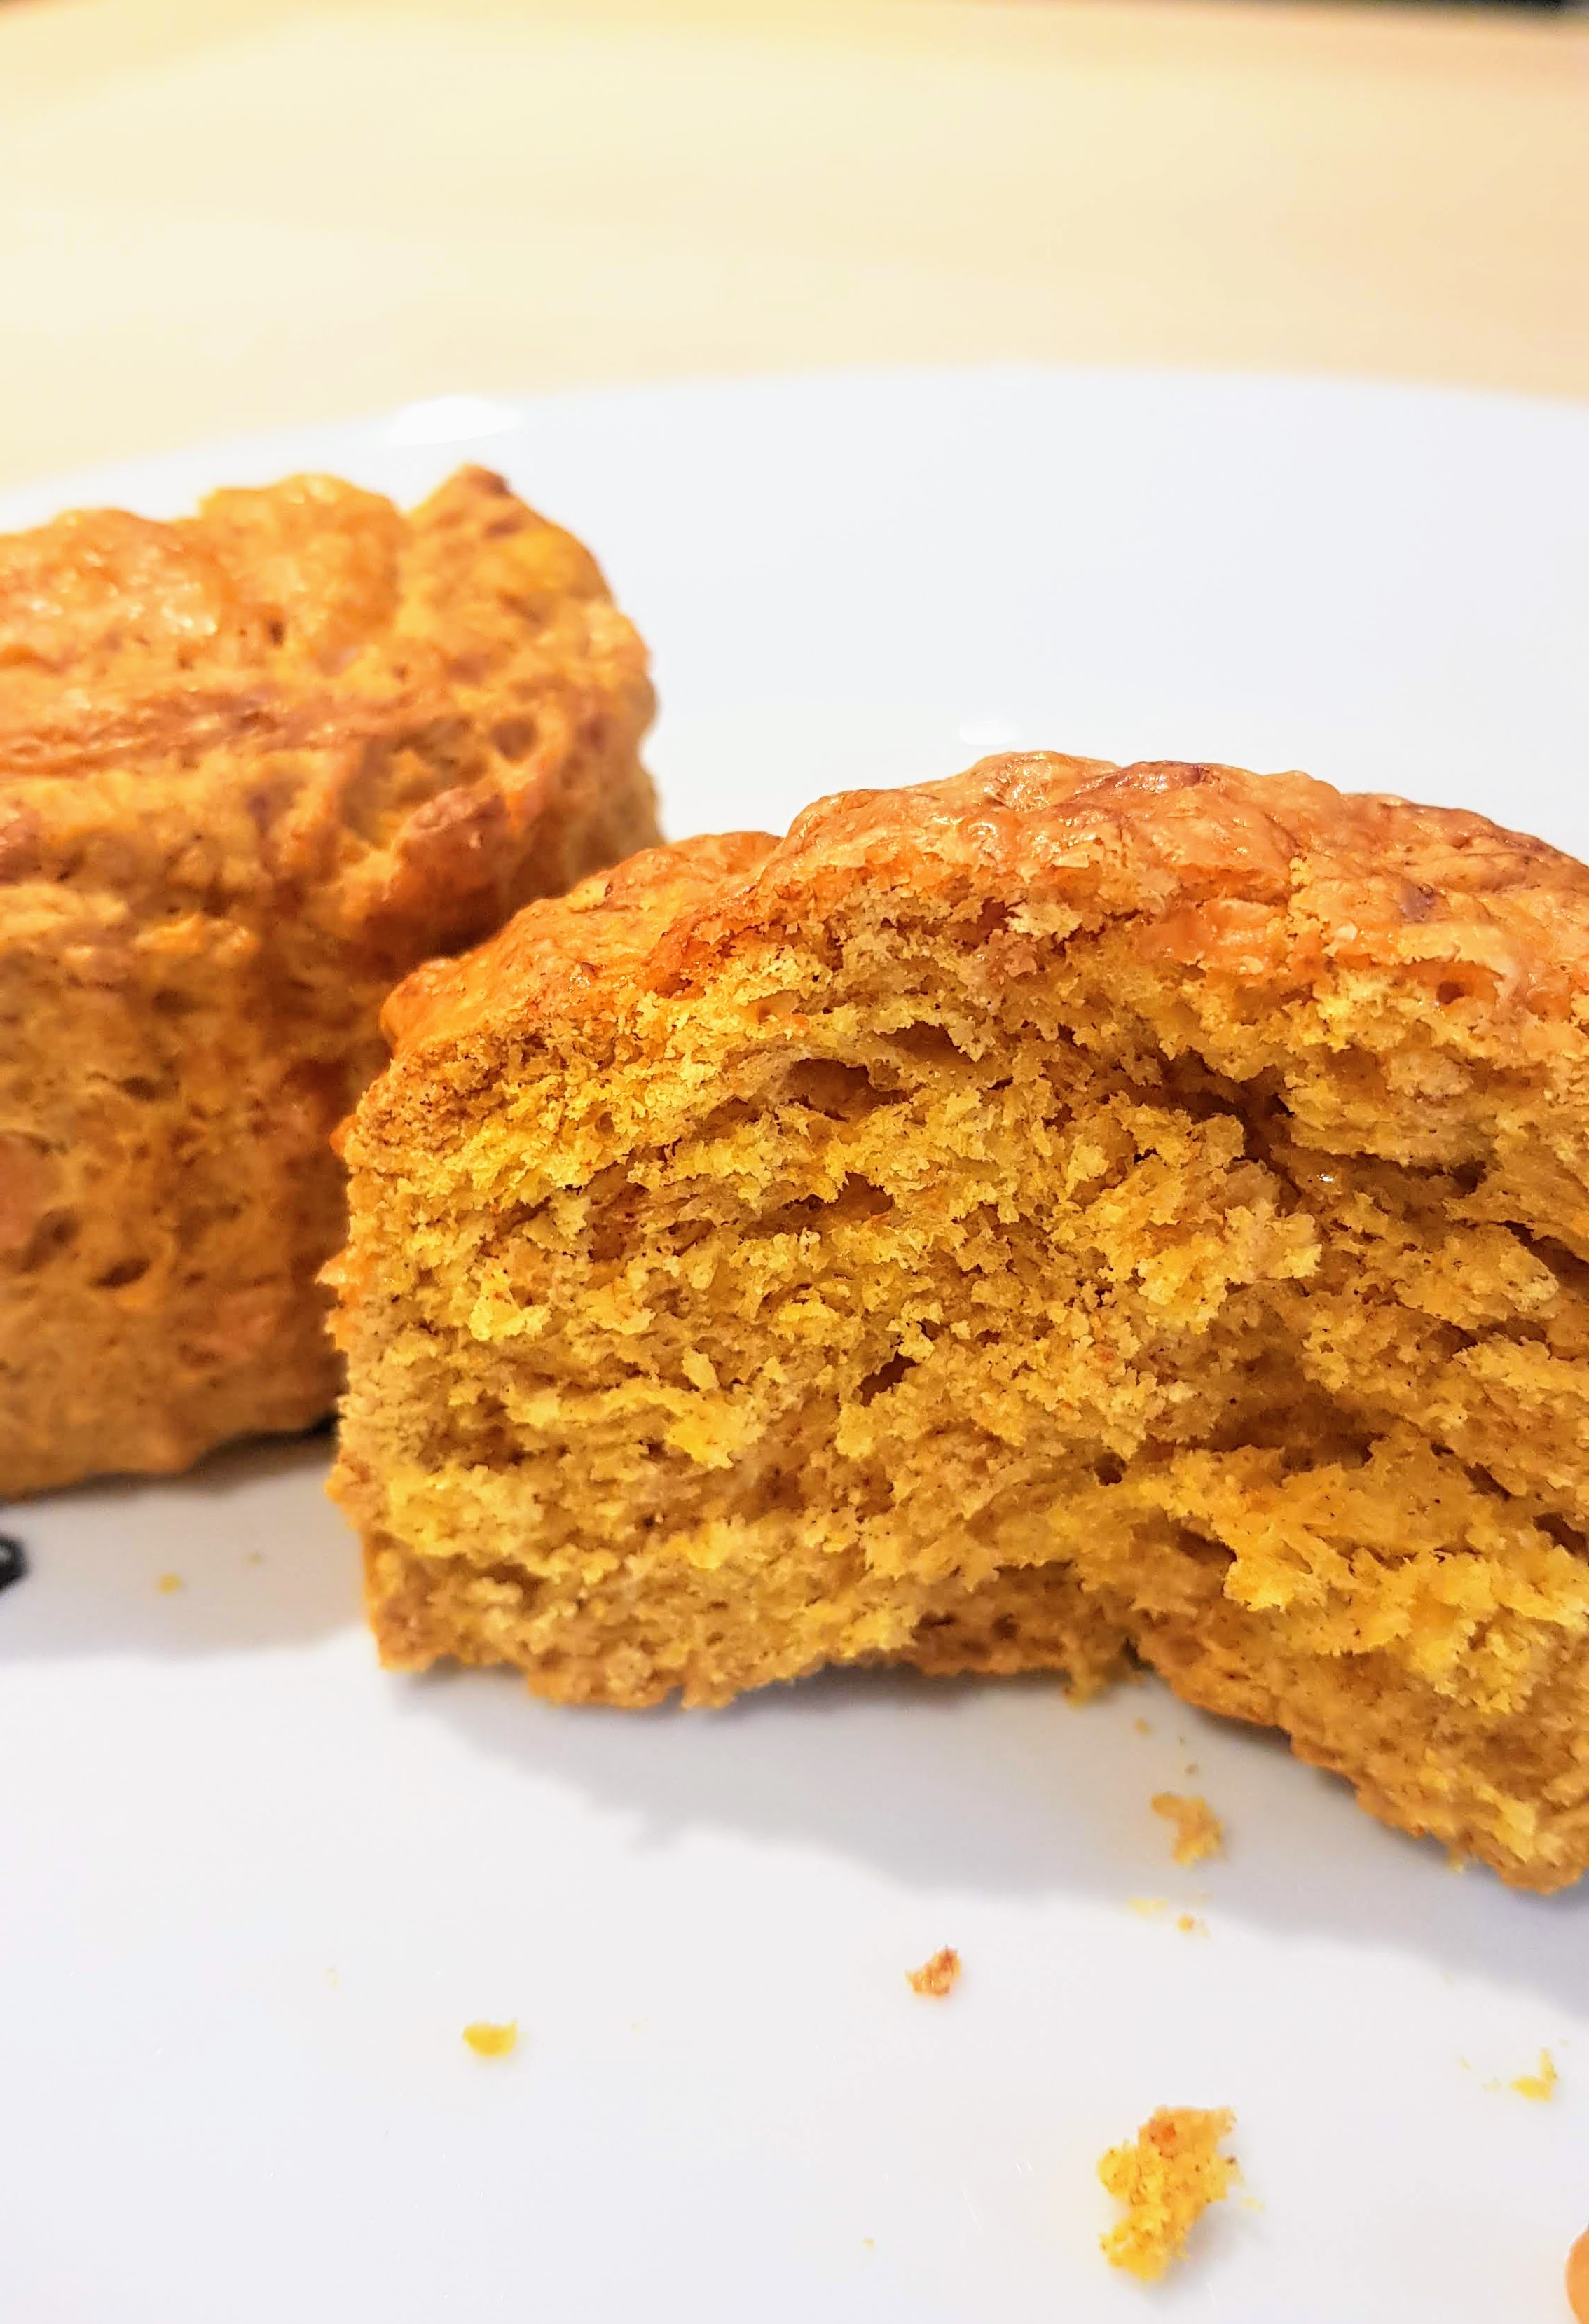
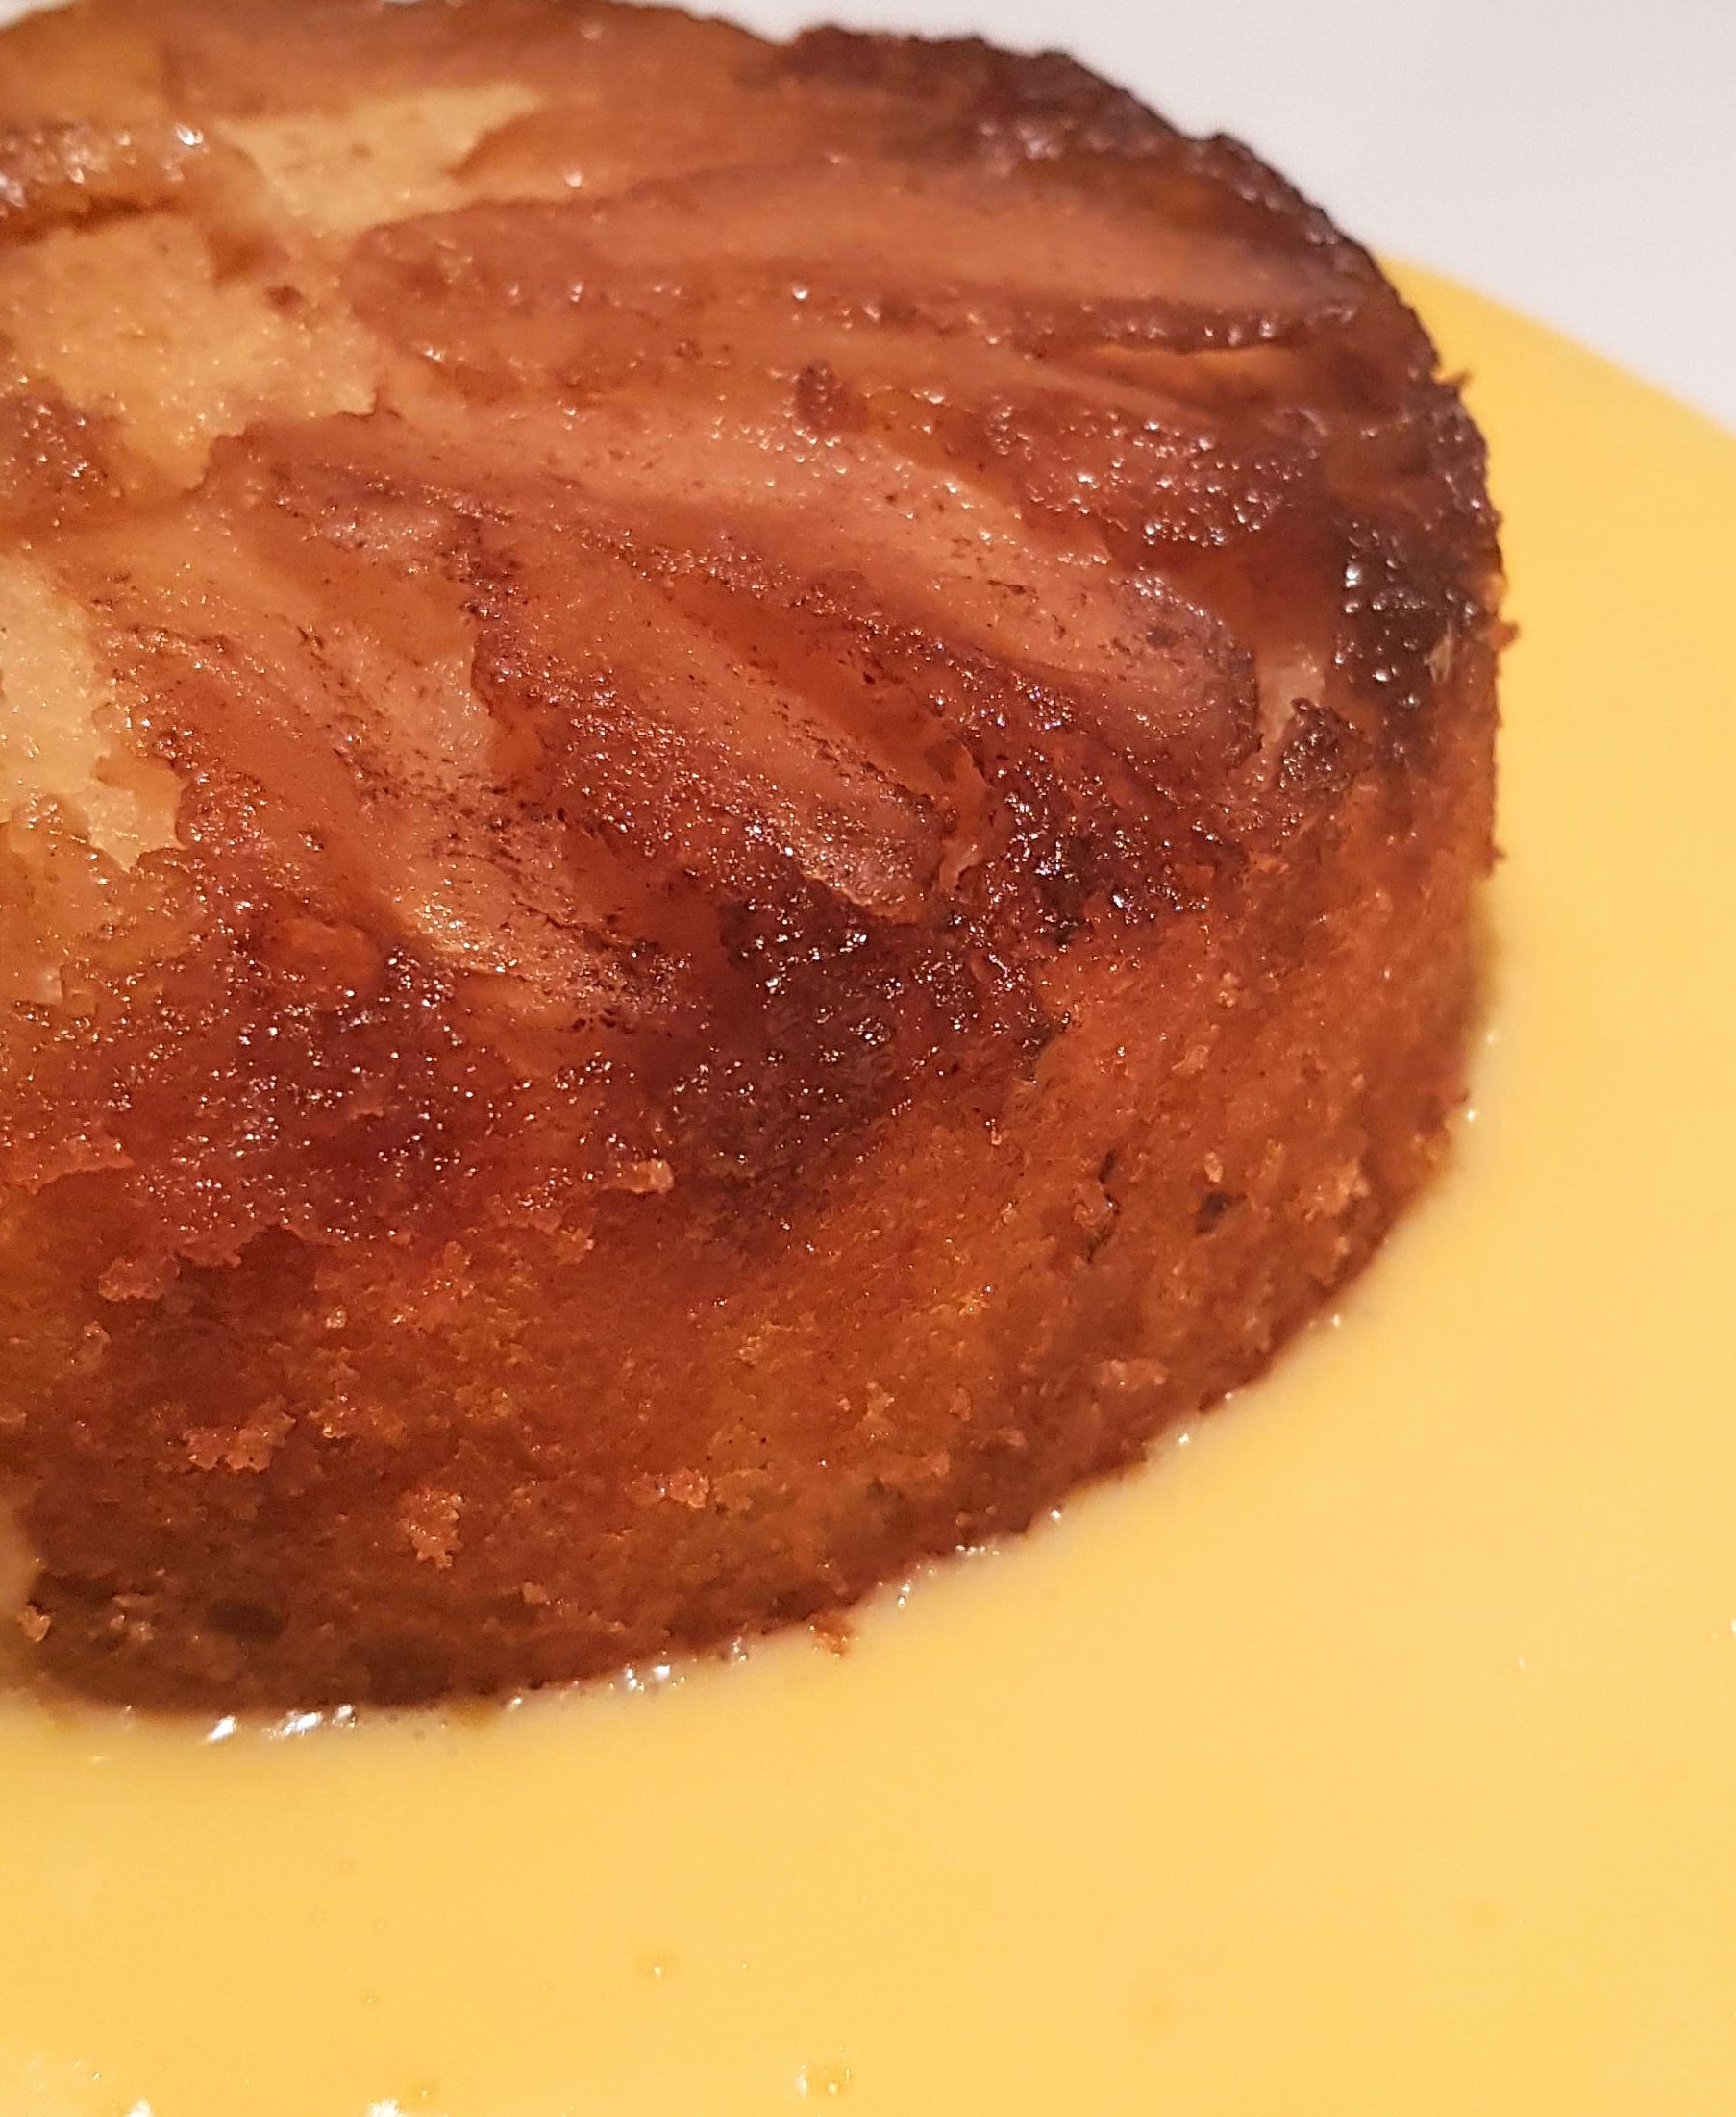
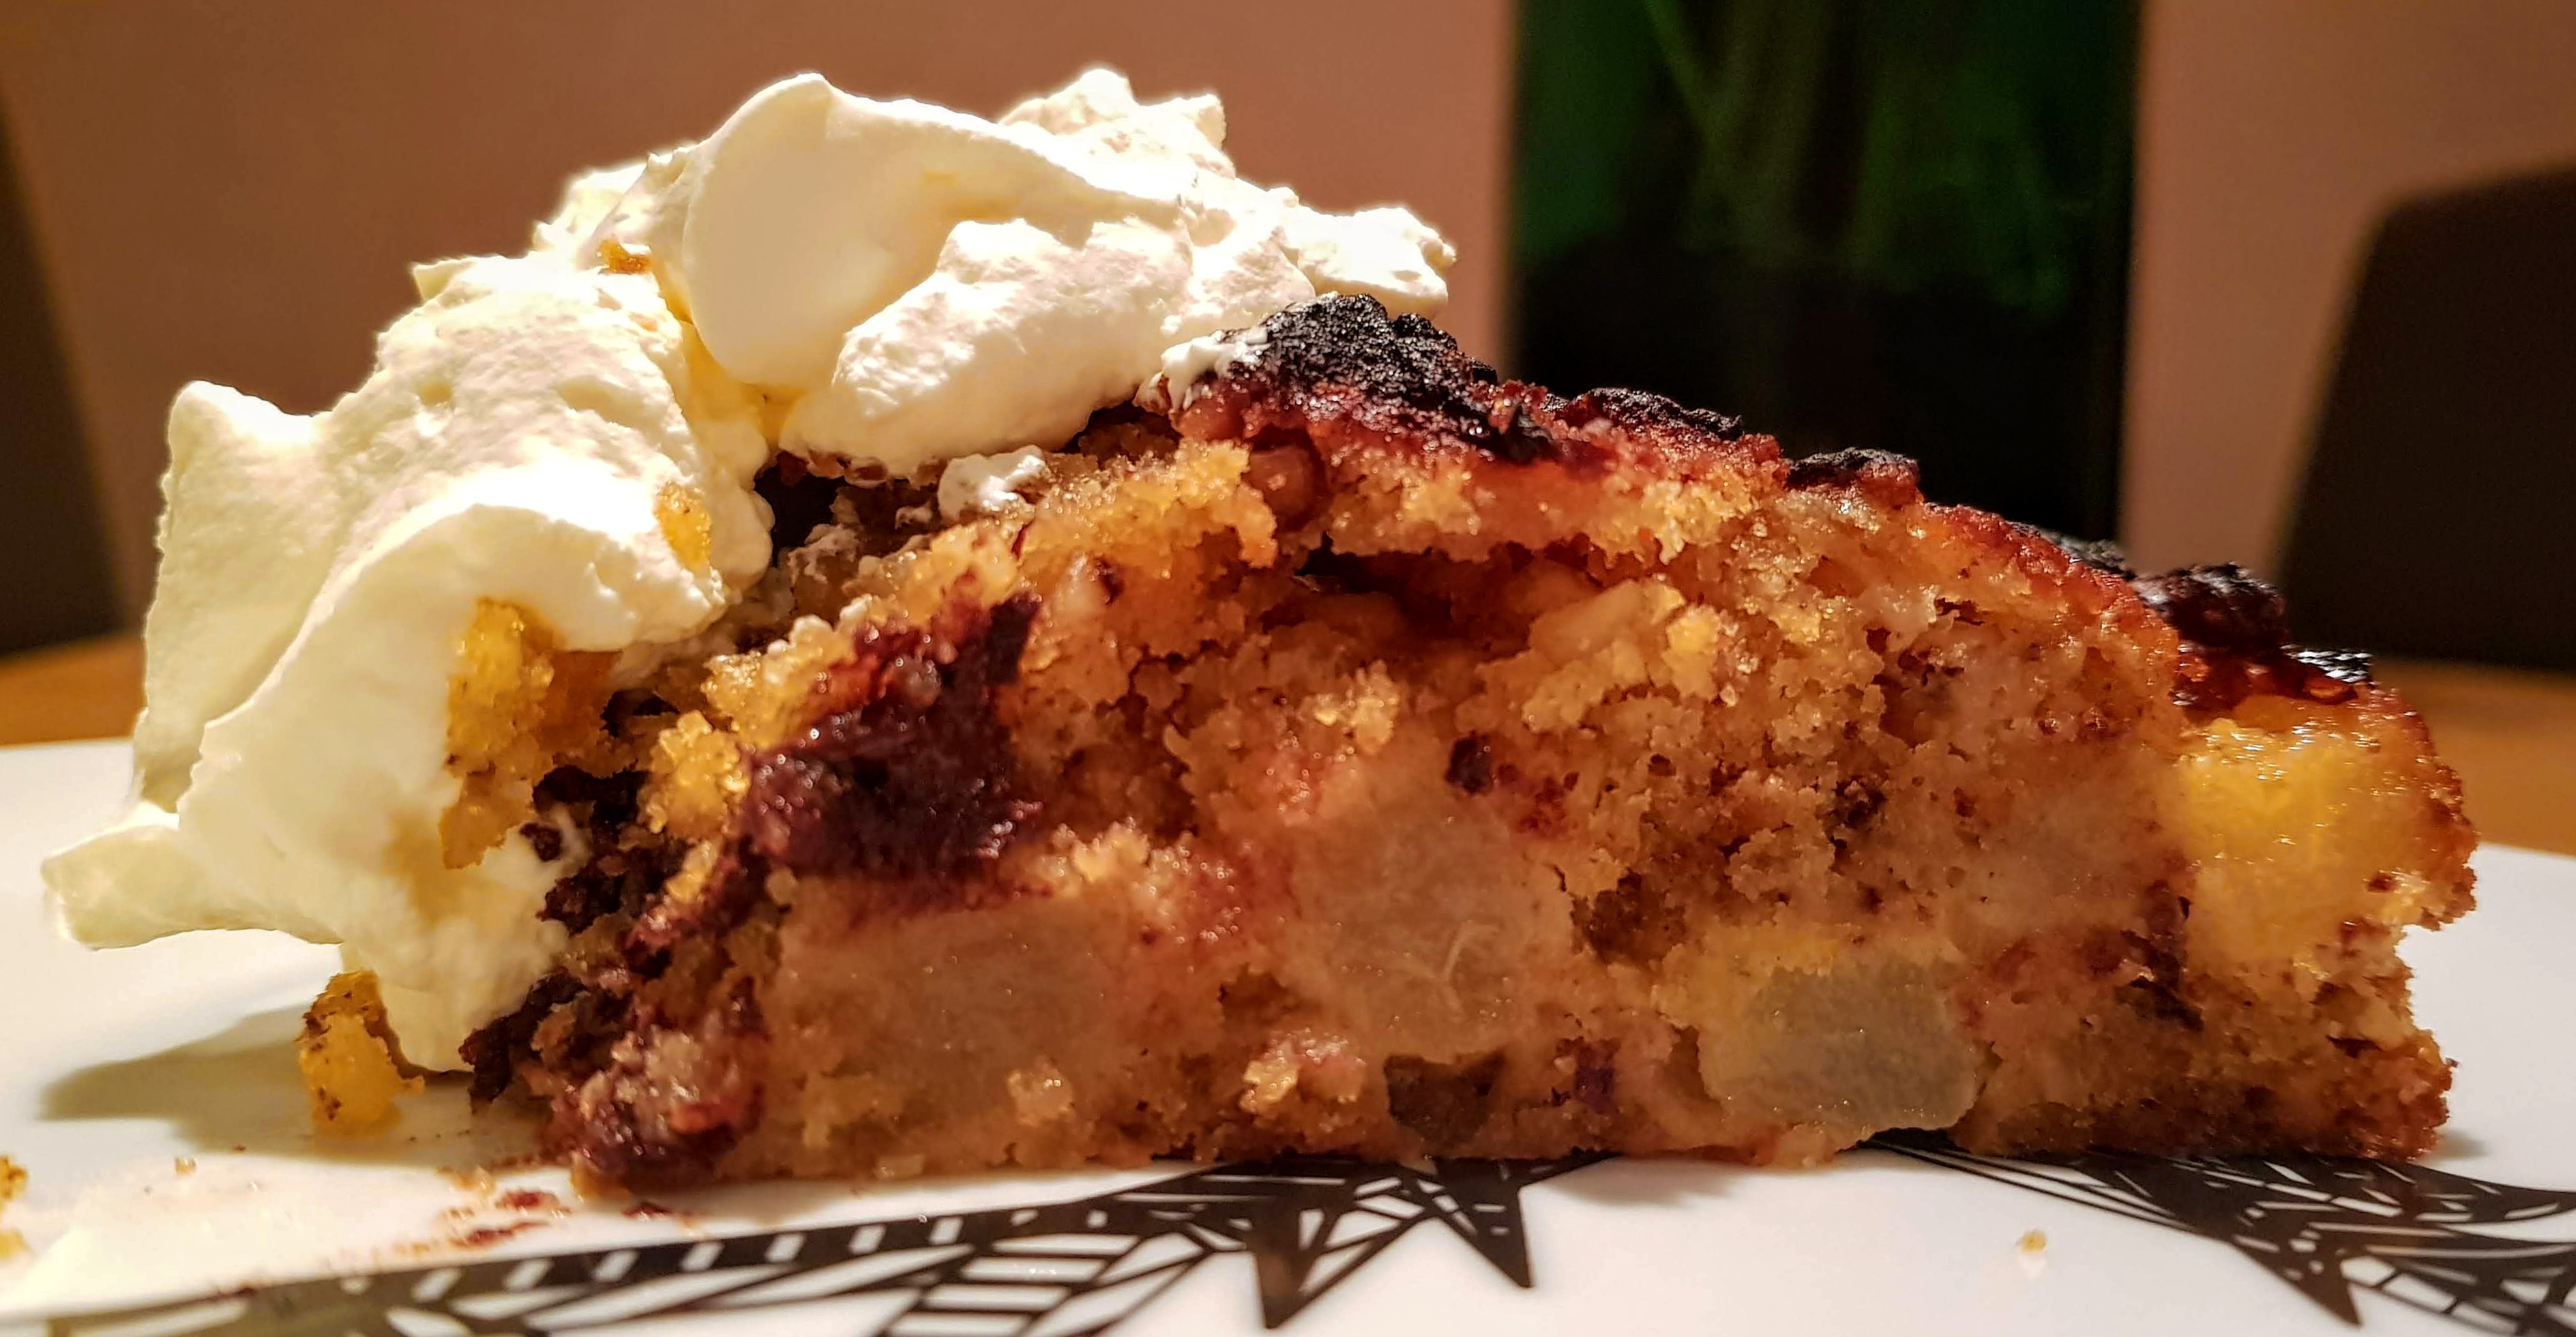
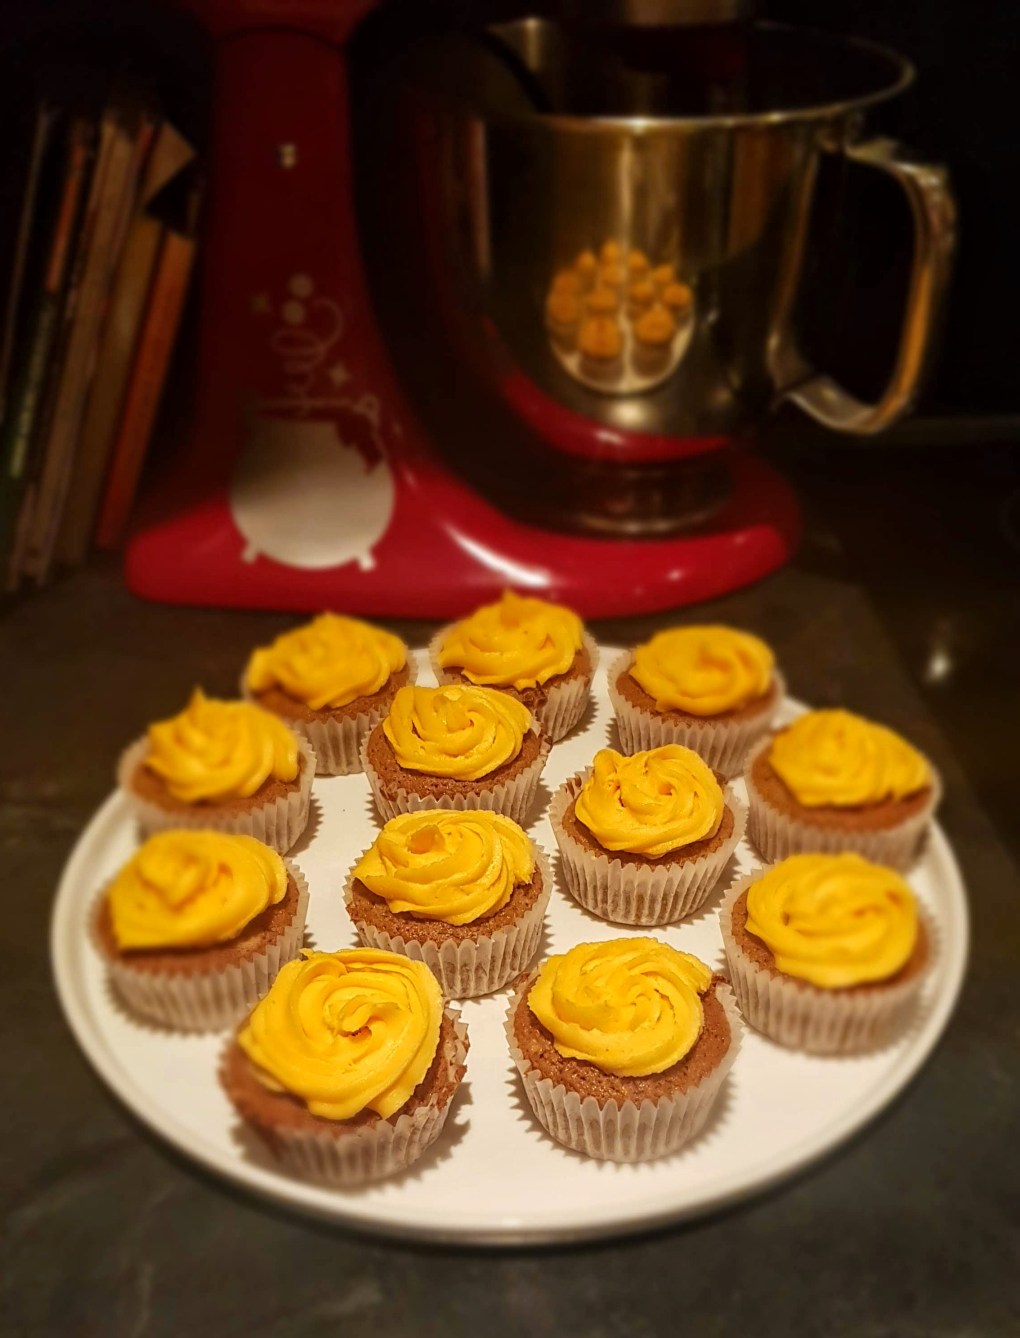
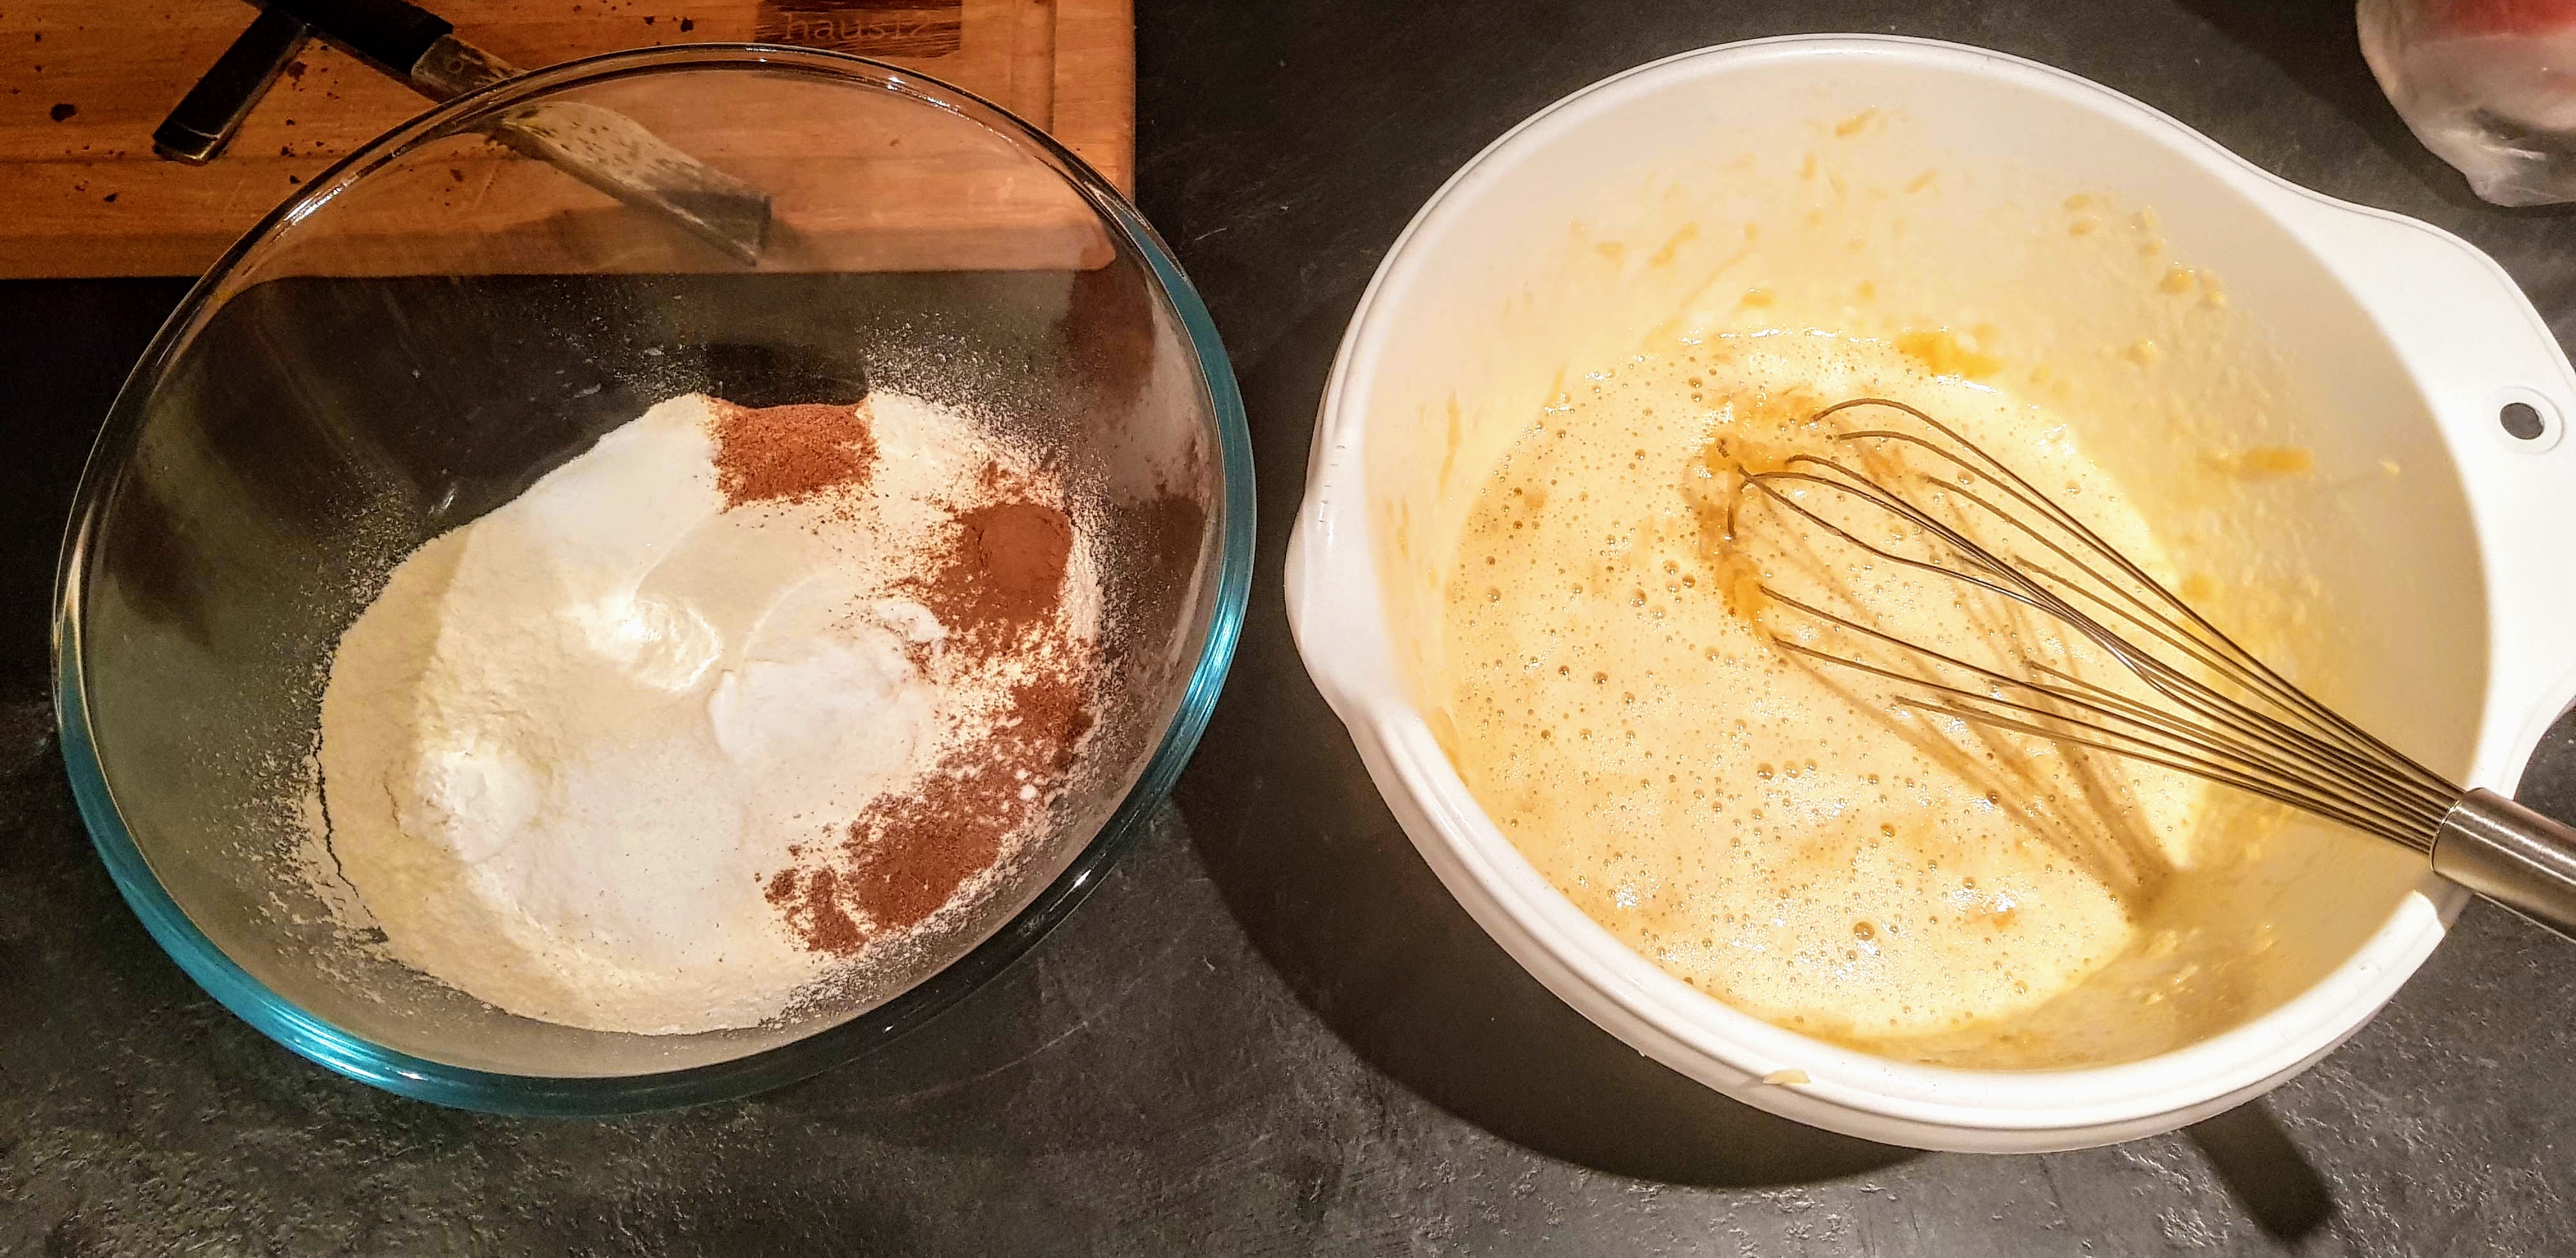
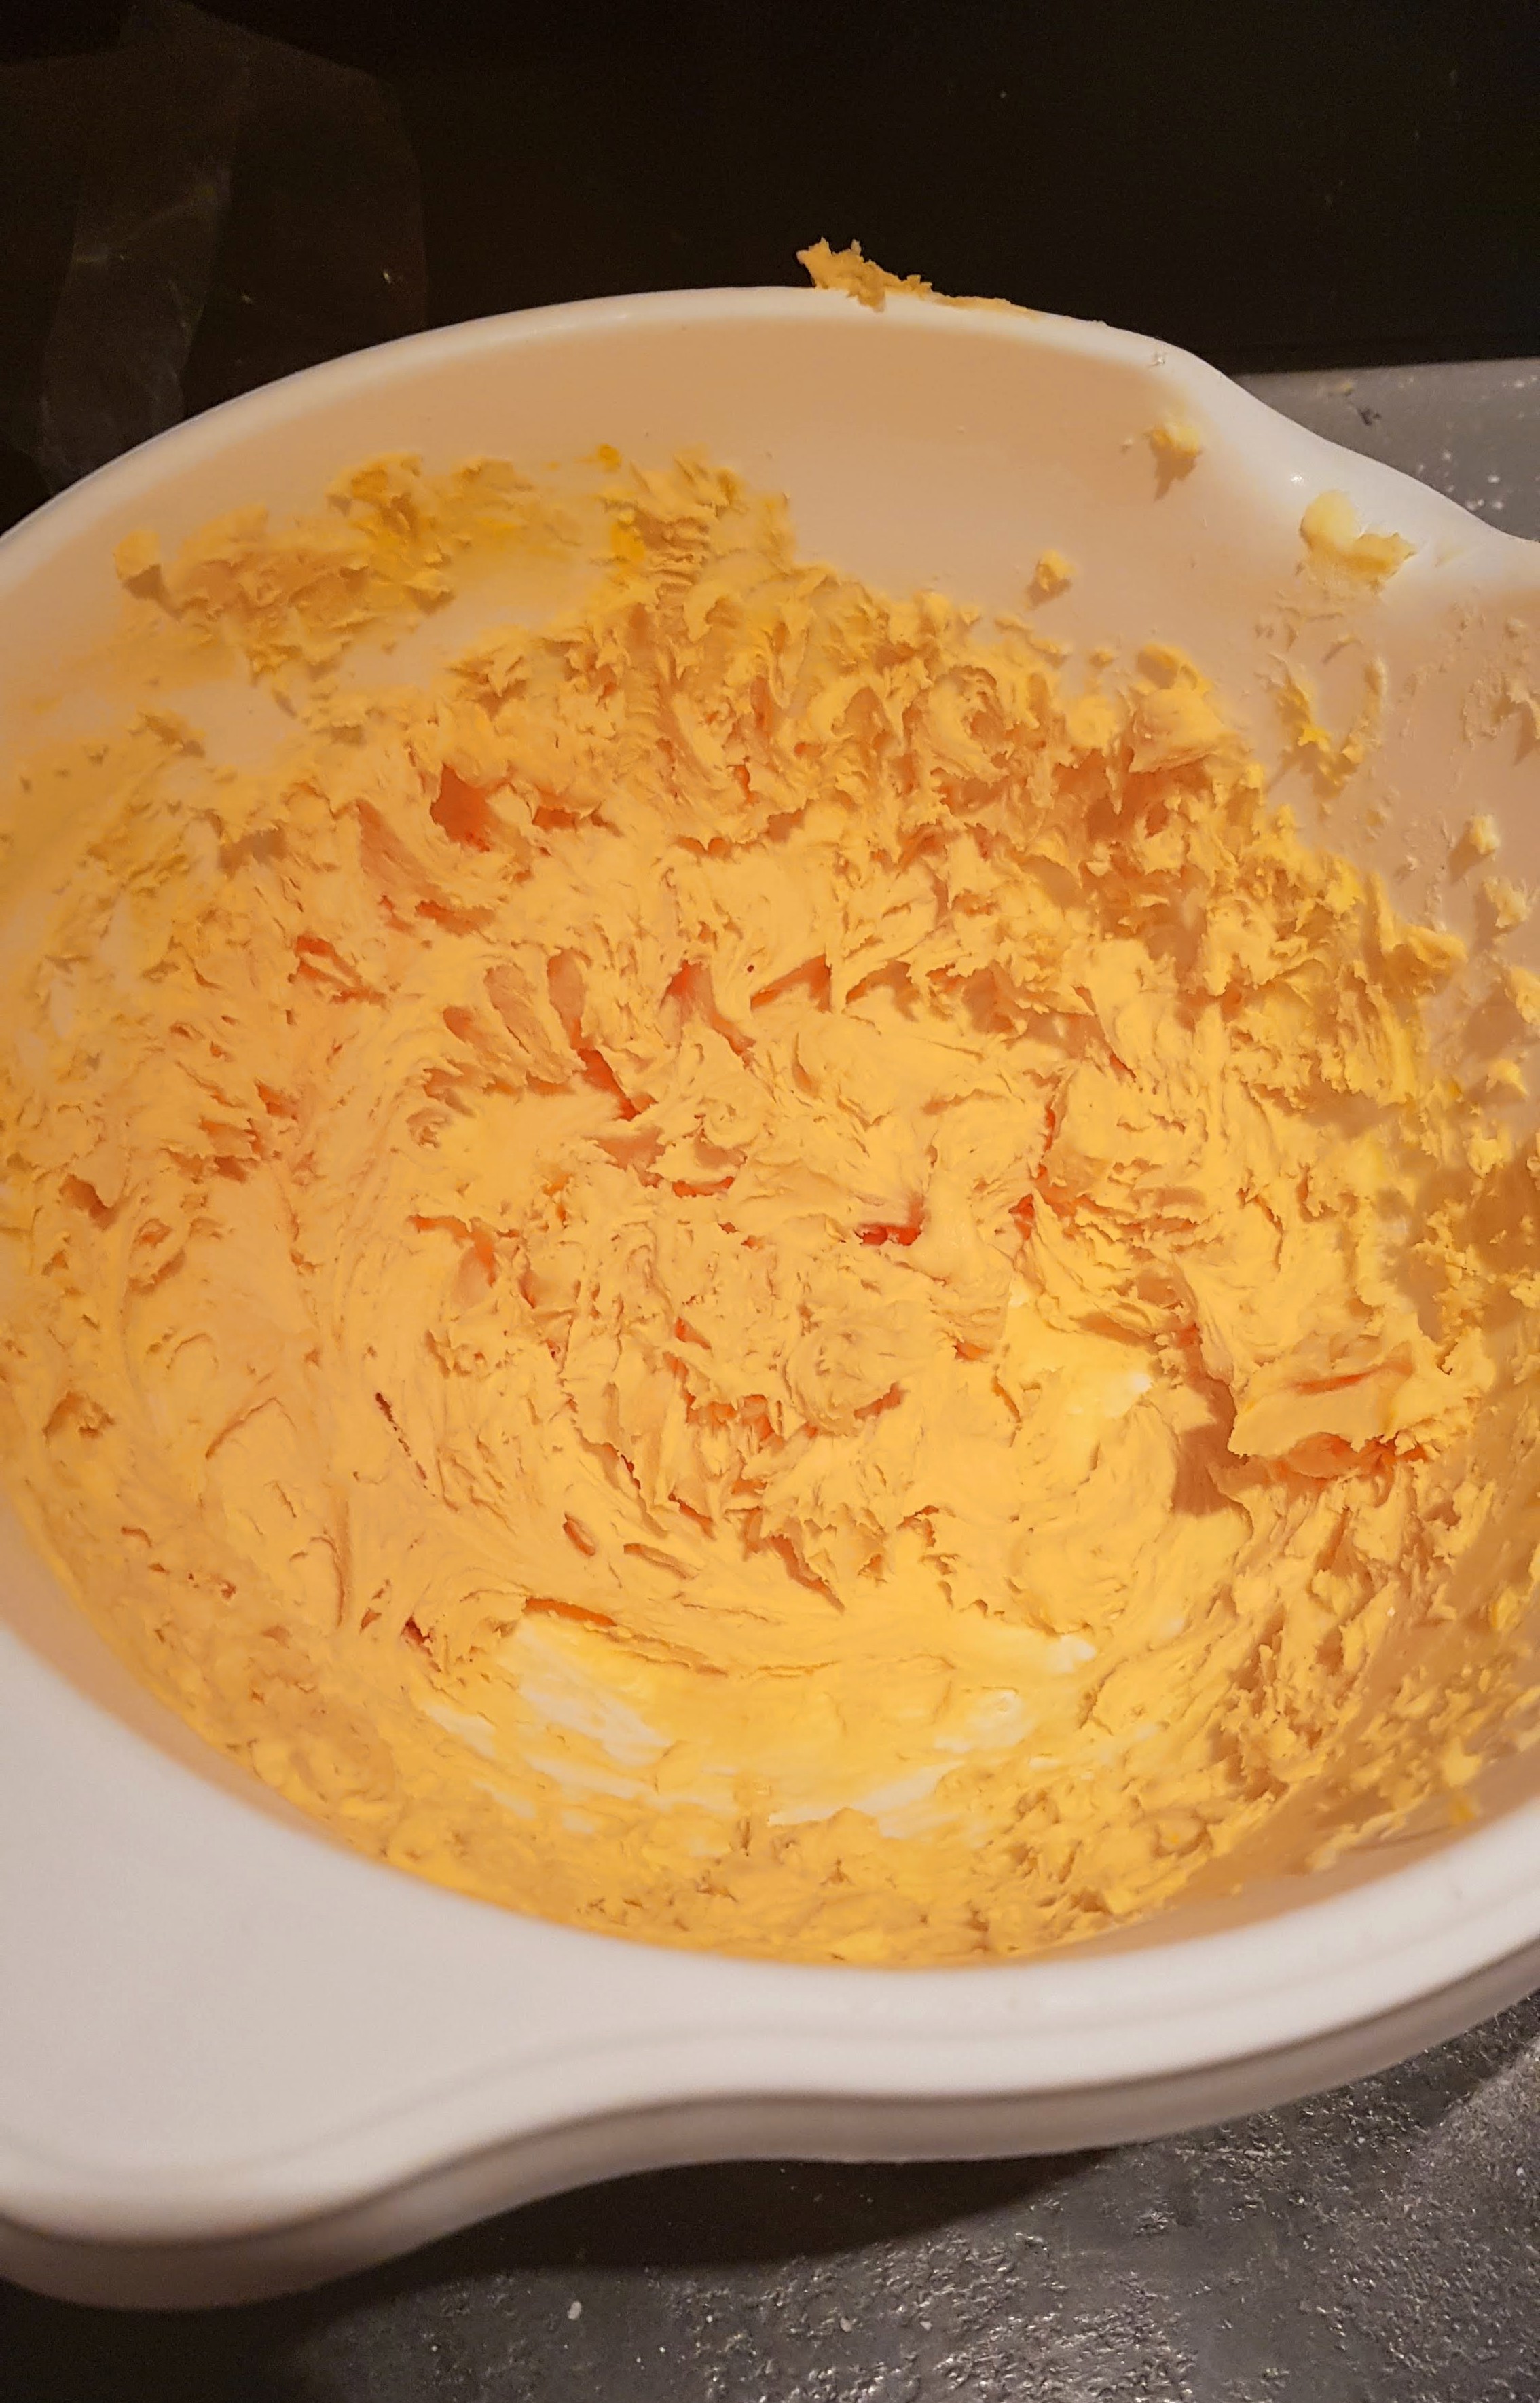
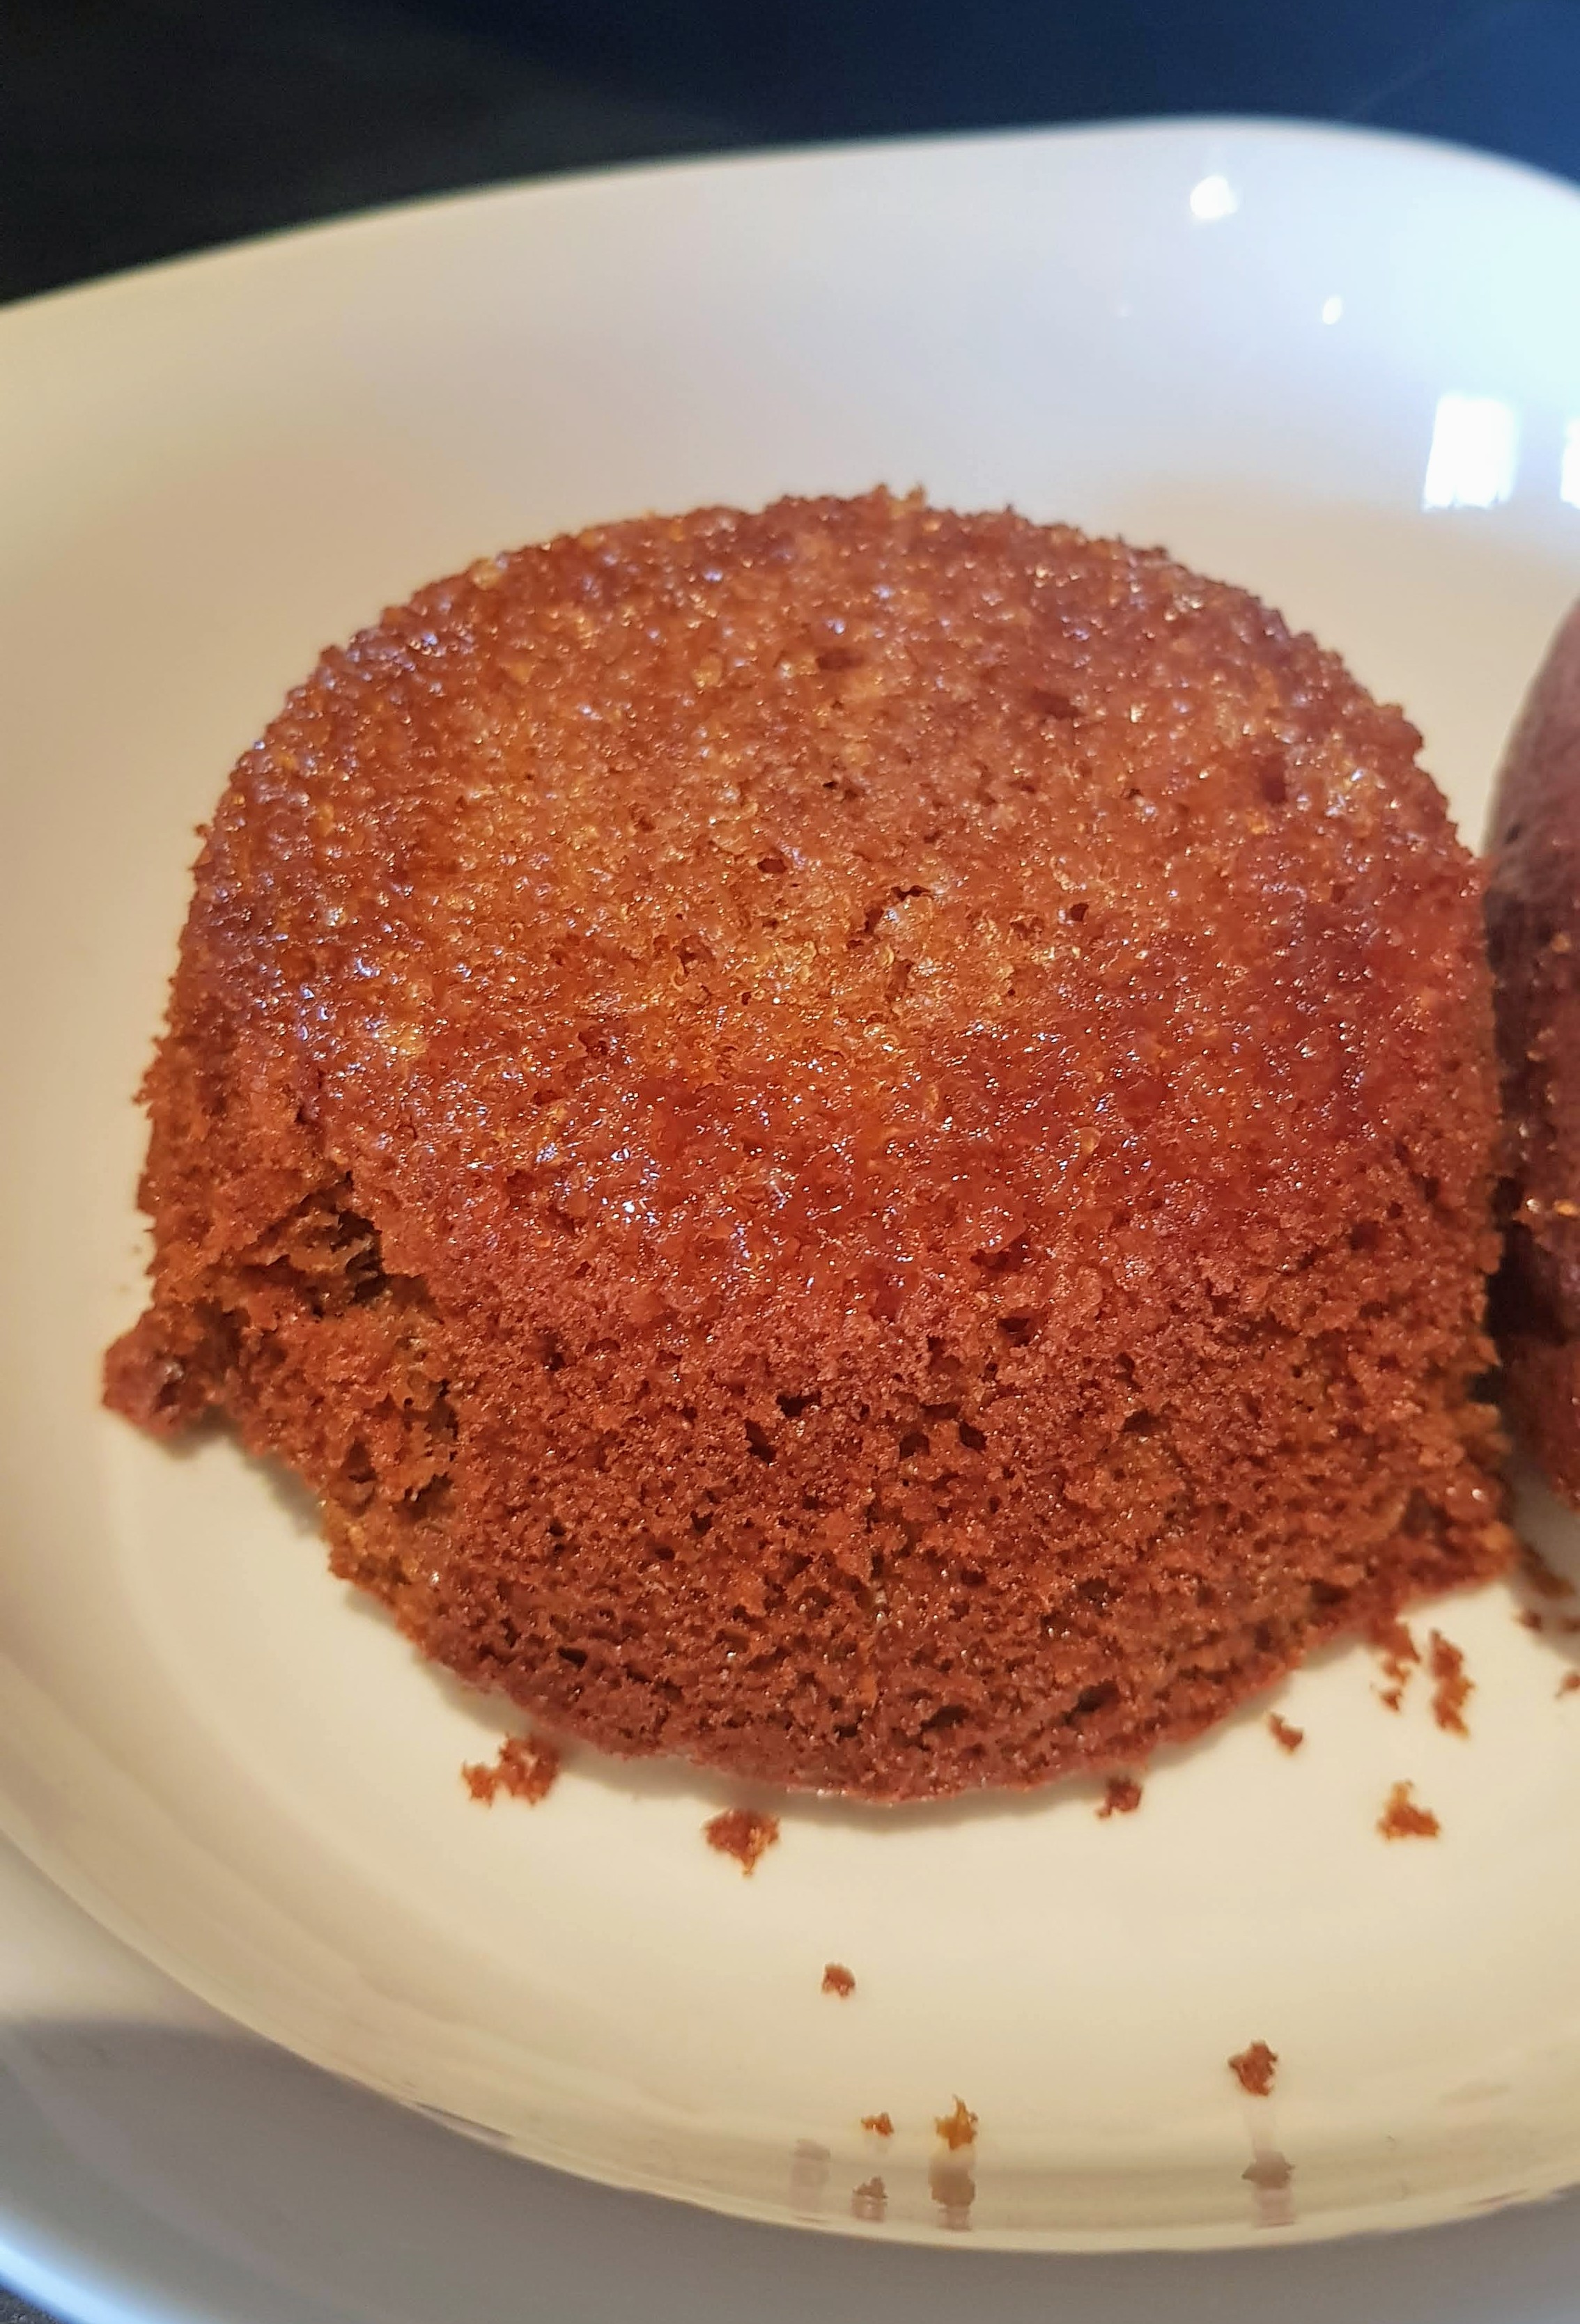
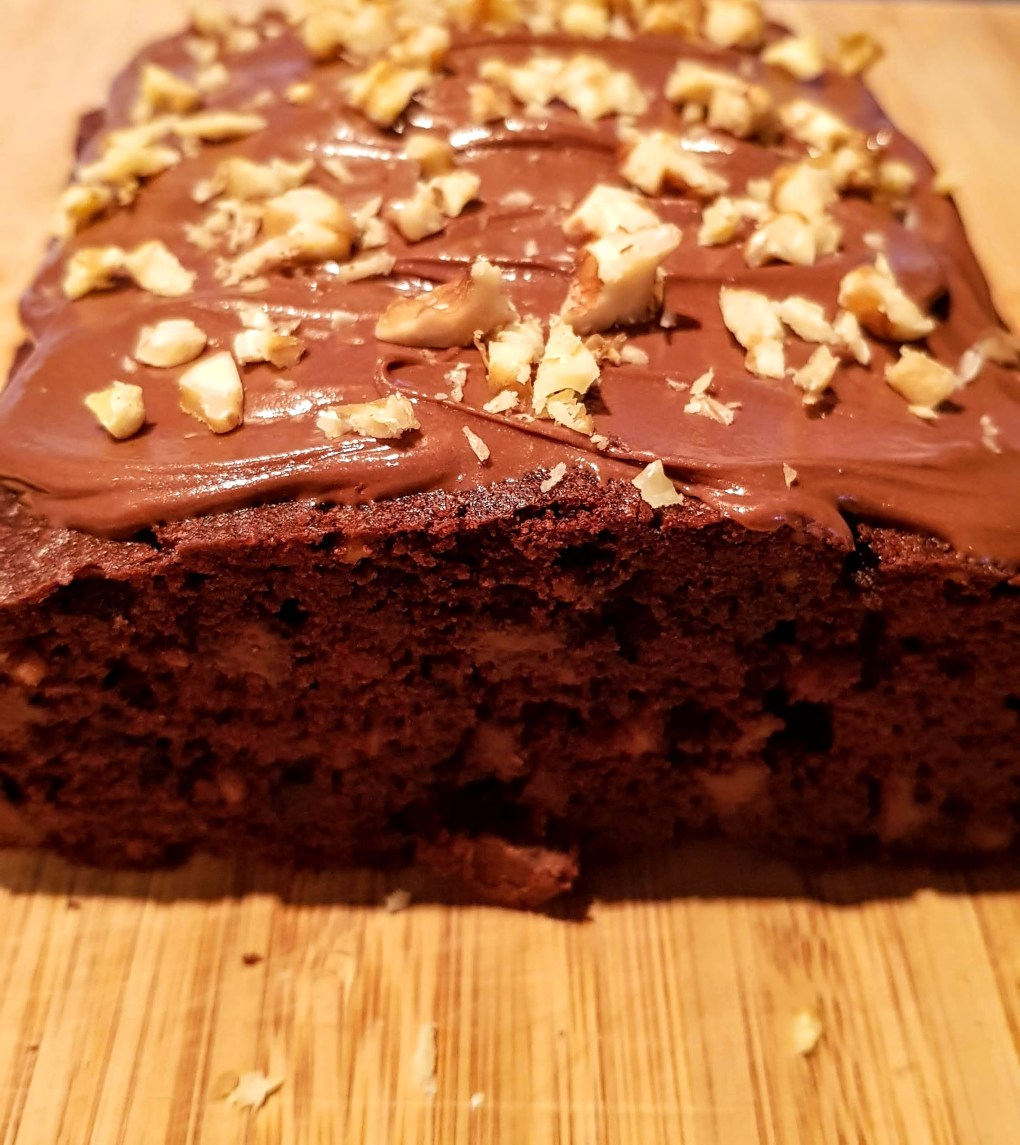
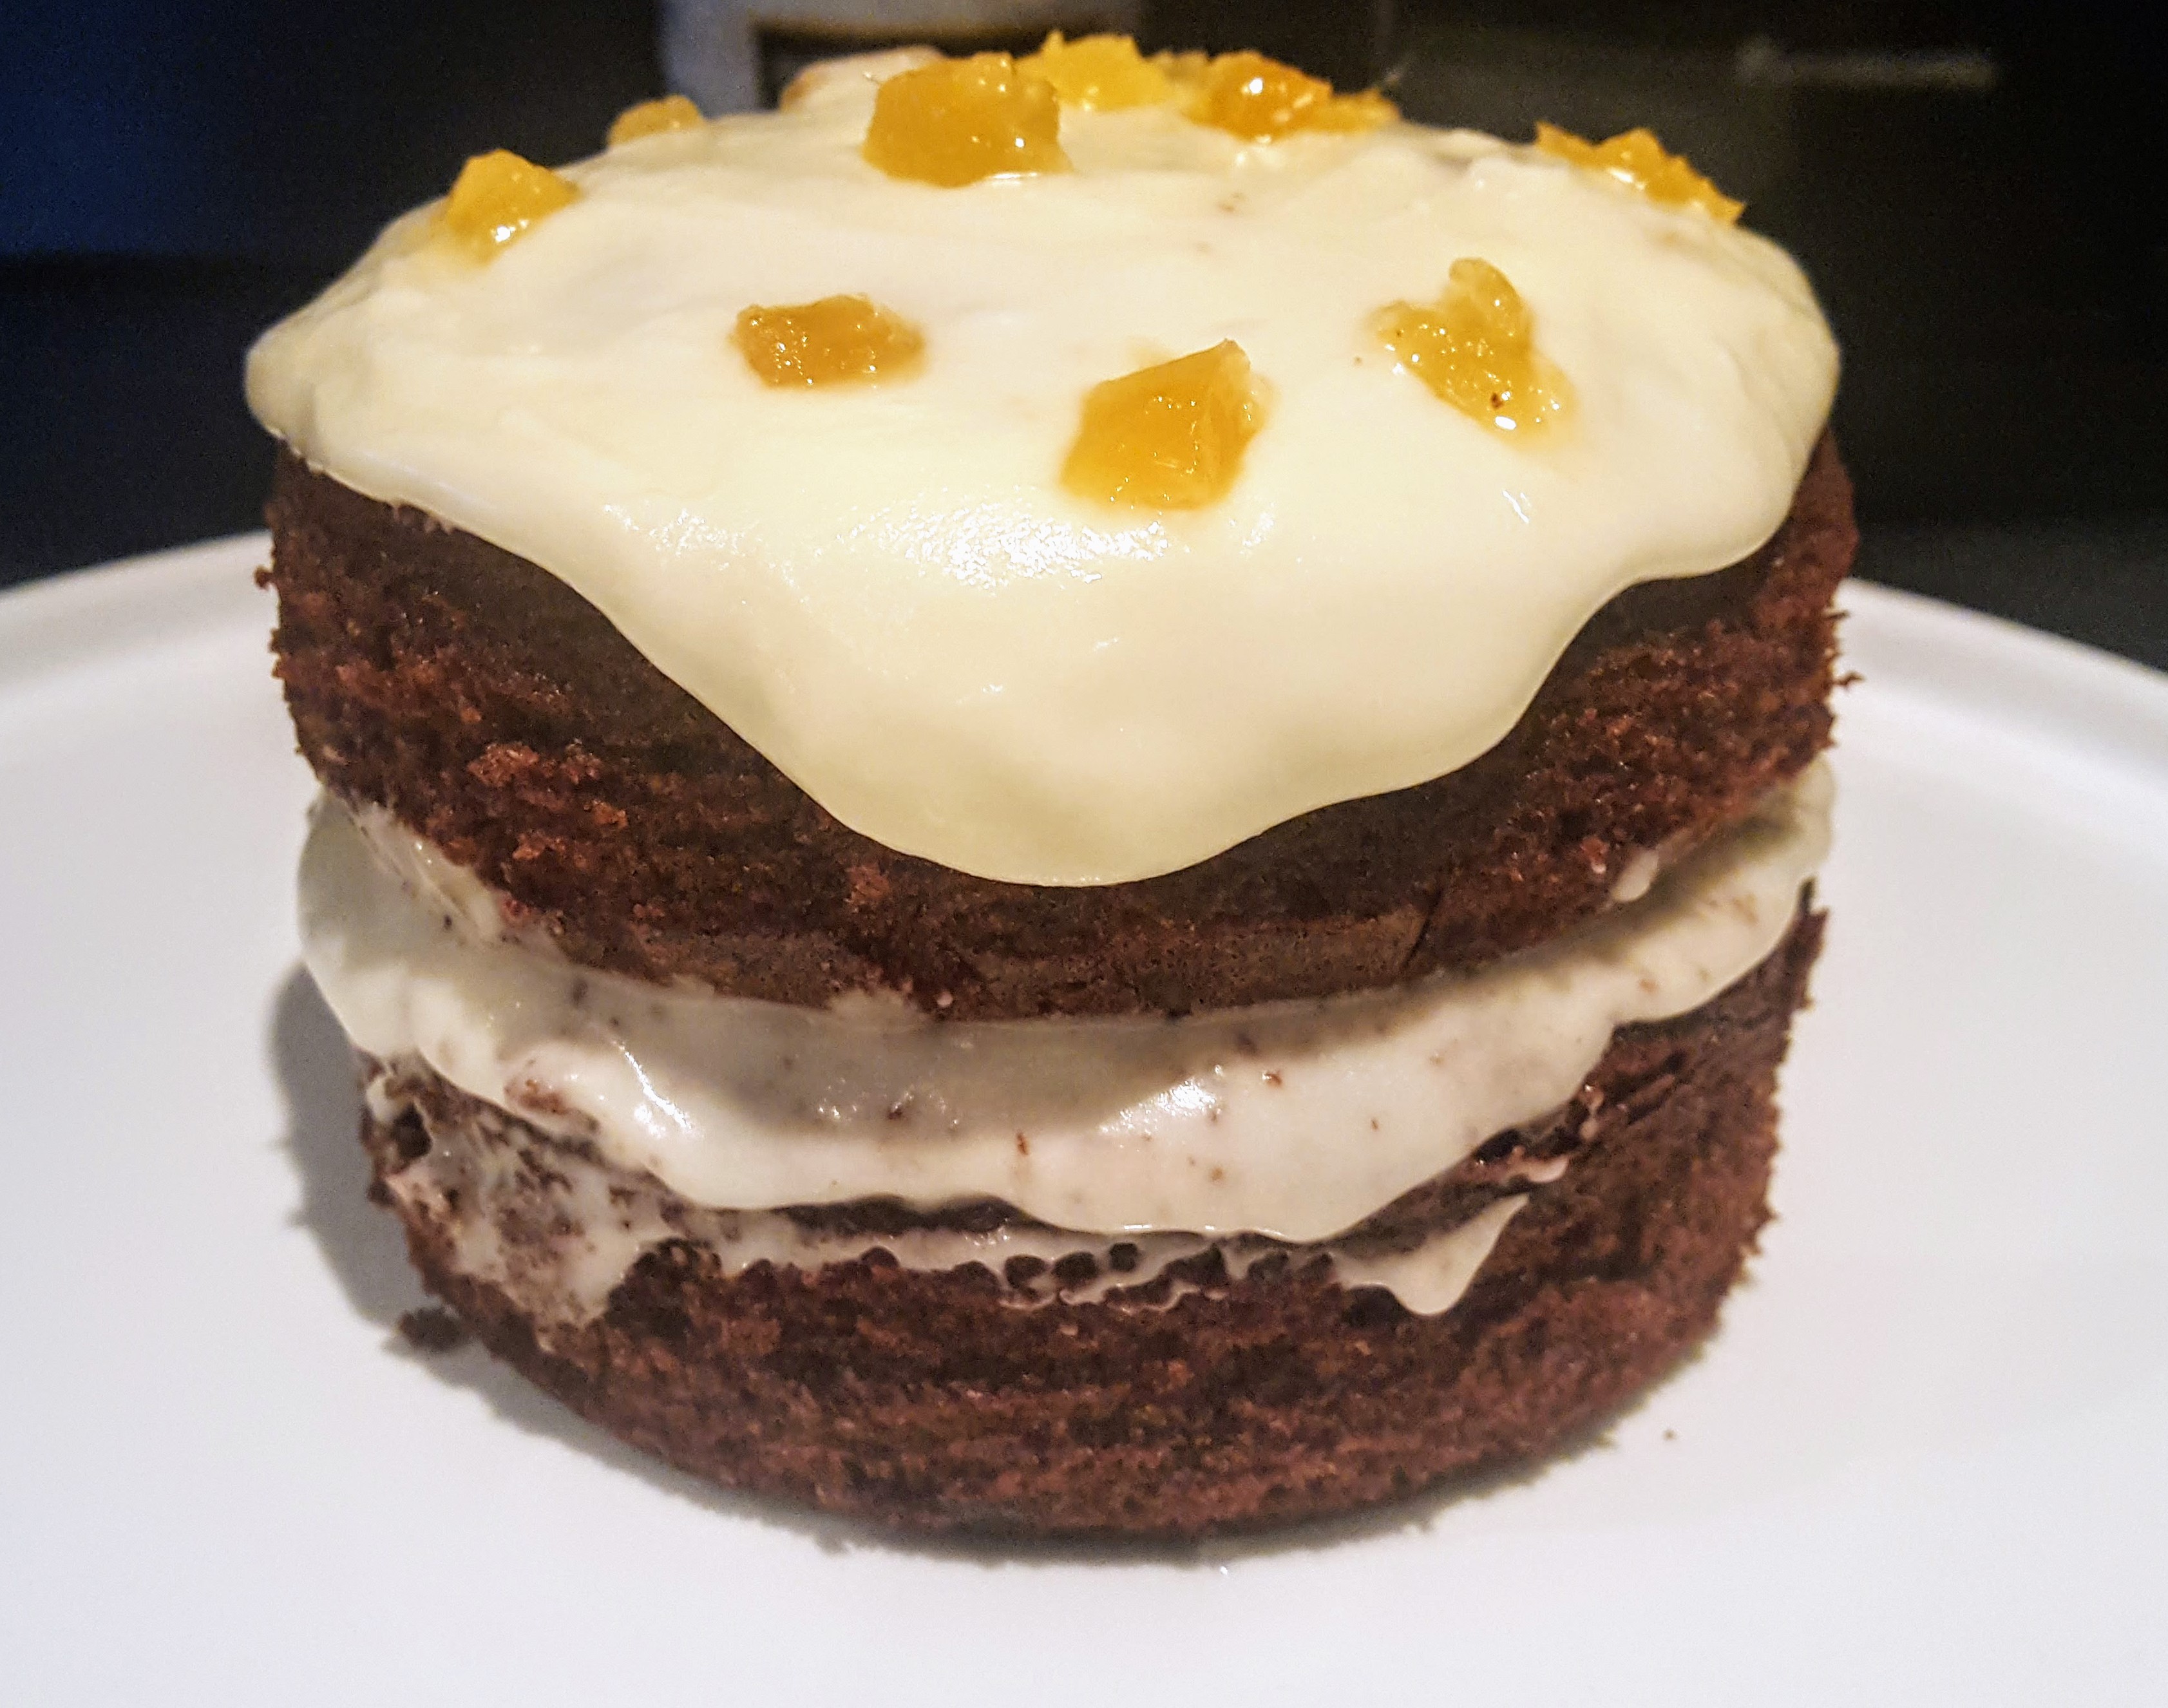
My lovely neighbour handed over some more Neeps (Turnips) the other day, this time instead of the normal Haggis, Neeps ‘n’ Tatties, I decided to make a cake! Well after all you get carrot cake & courgette cakes so why not a Neep cake? This is one of those recipes that doesn’t sound inviting but once you try it, it’s delicious and not what you were expecting. The little bit of Nutmeg through gives a lovely soft spice and the brown butter frosting giving that nutty sweetness. You have to give this a try if you have leftover Neeps (Turnips).
Makes 12 Cakes
250g Plain Flour
150g Grated Raw Neep (Turnip)
3 Eggs
175g Light Brown Sugar
2 Tsp Vanilla Extract
100 ml Milk
2 Tsp Baking Powder
1/2 Tsp Baking Soda
2 Tsp Ground Nutmeg
1/2 Tsp Salt
For the Brown Butter Frosting
400g Icing Sugar
2 Tsp Vanilla Extract
3 Tbsp Milk
115g Unsalted Butter at room temperature
Handful of chopped walnuts or hazelnuts to top


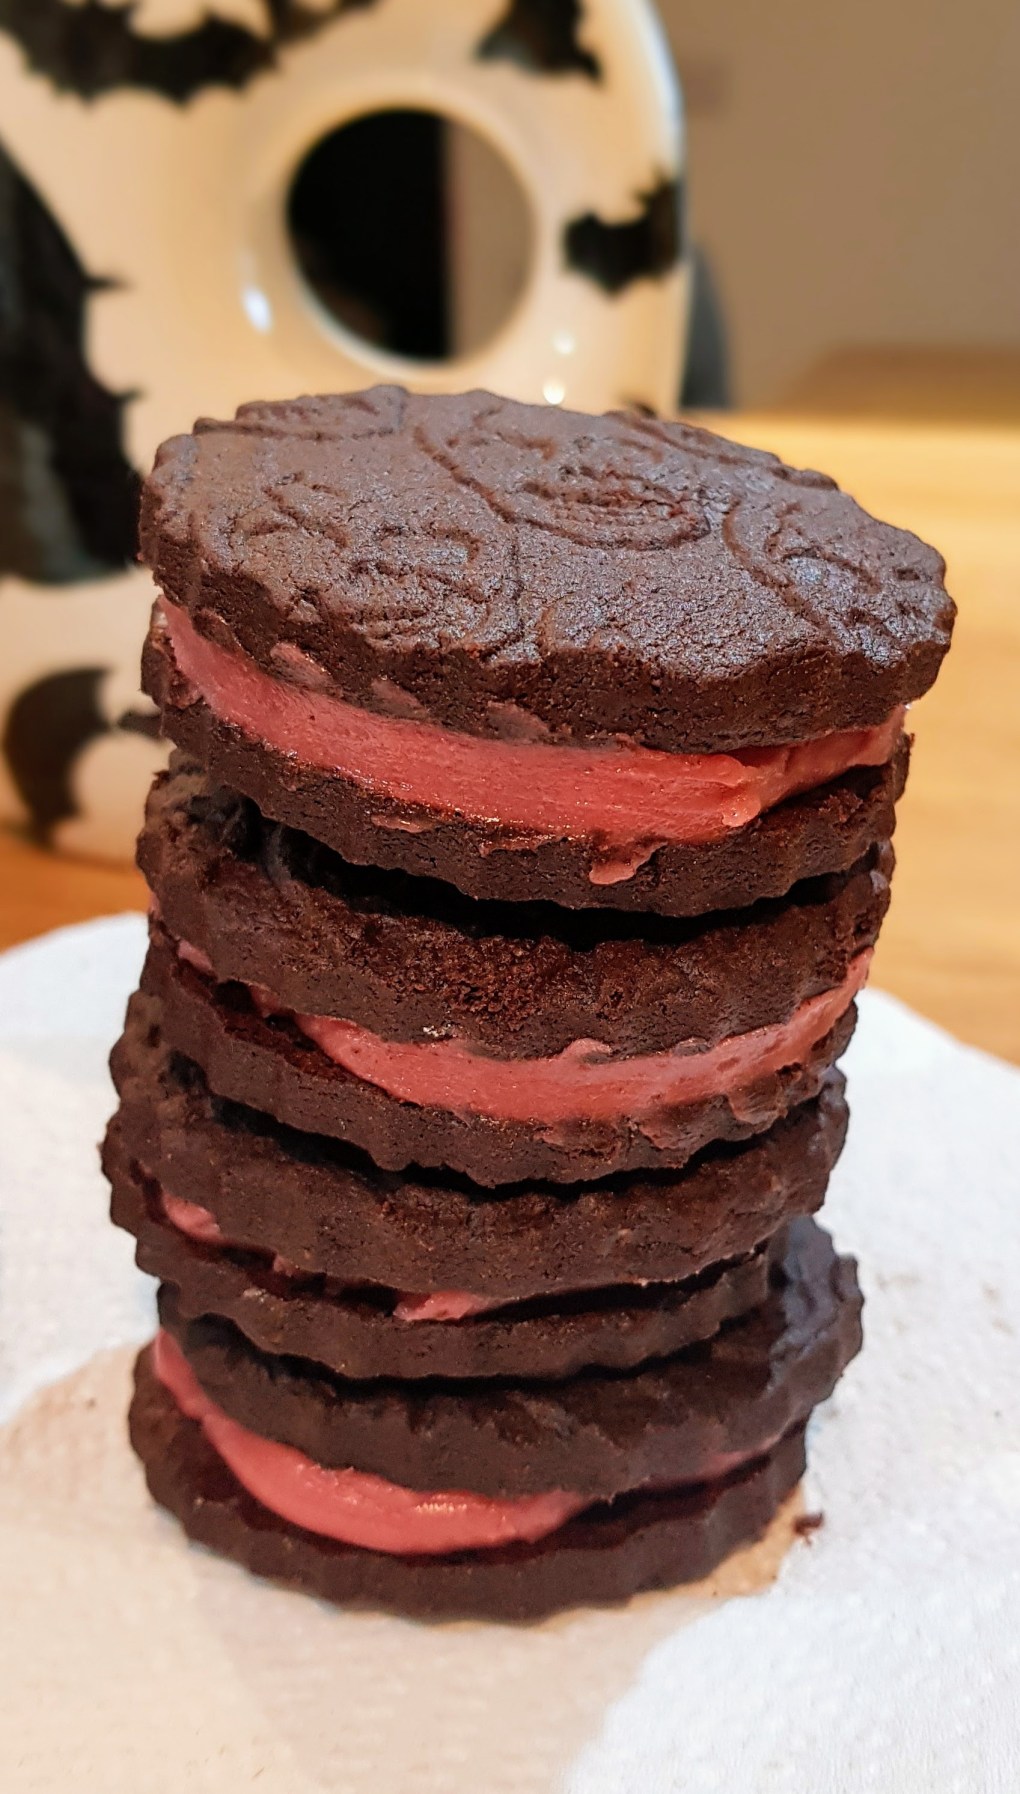

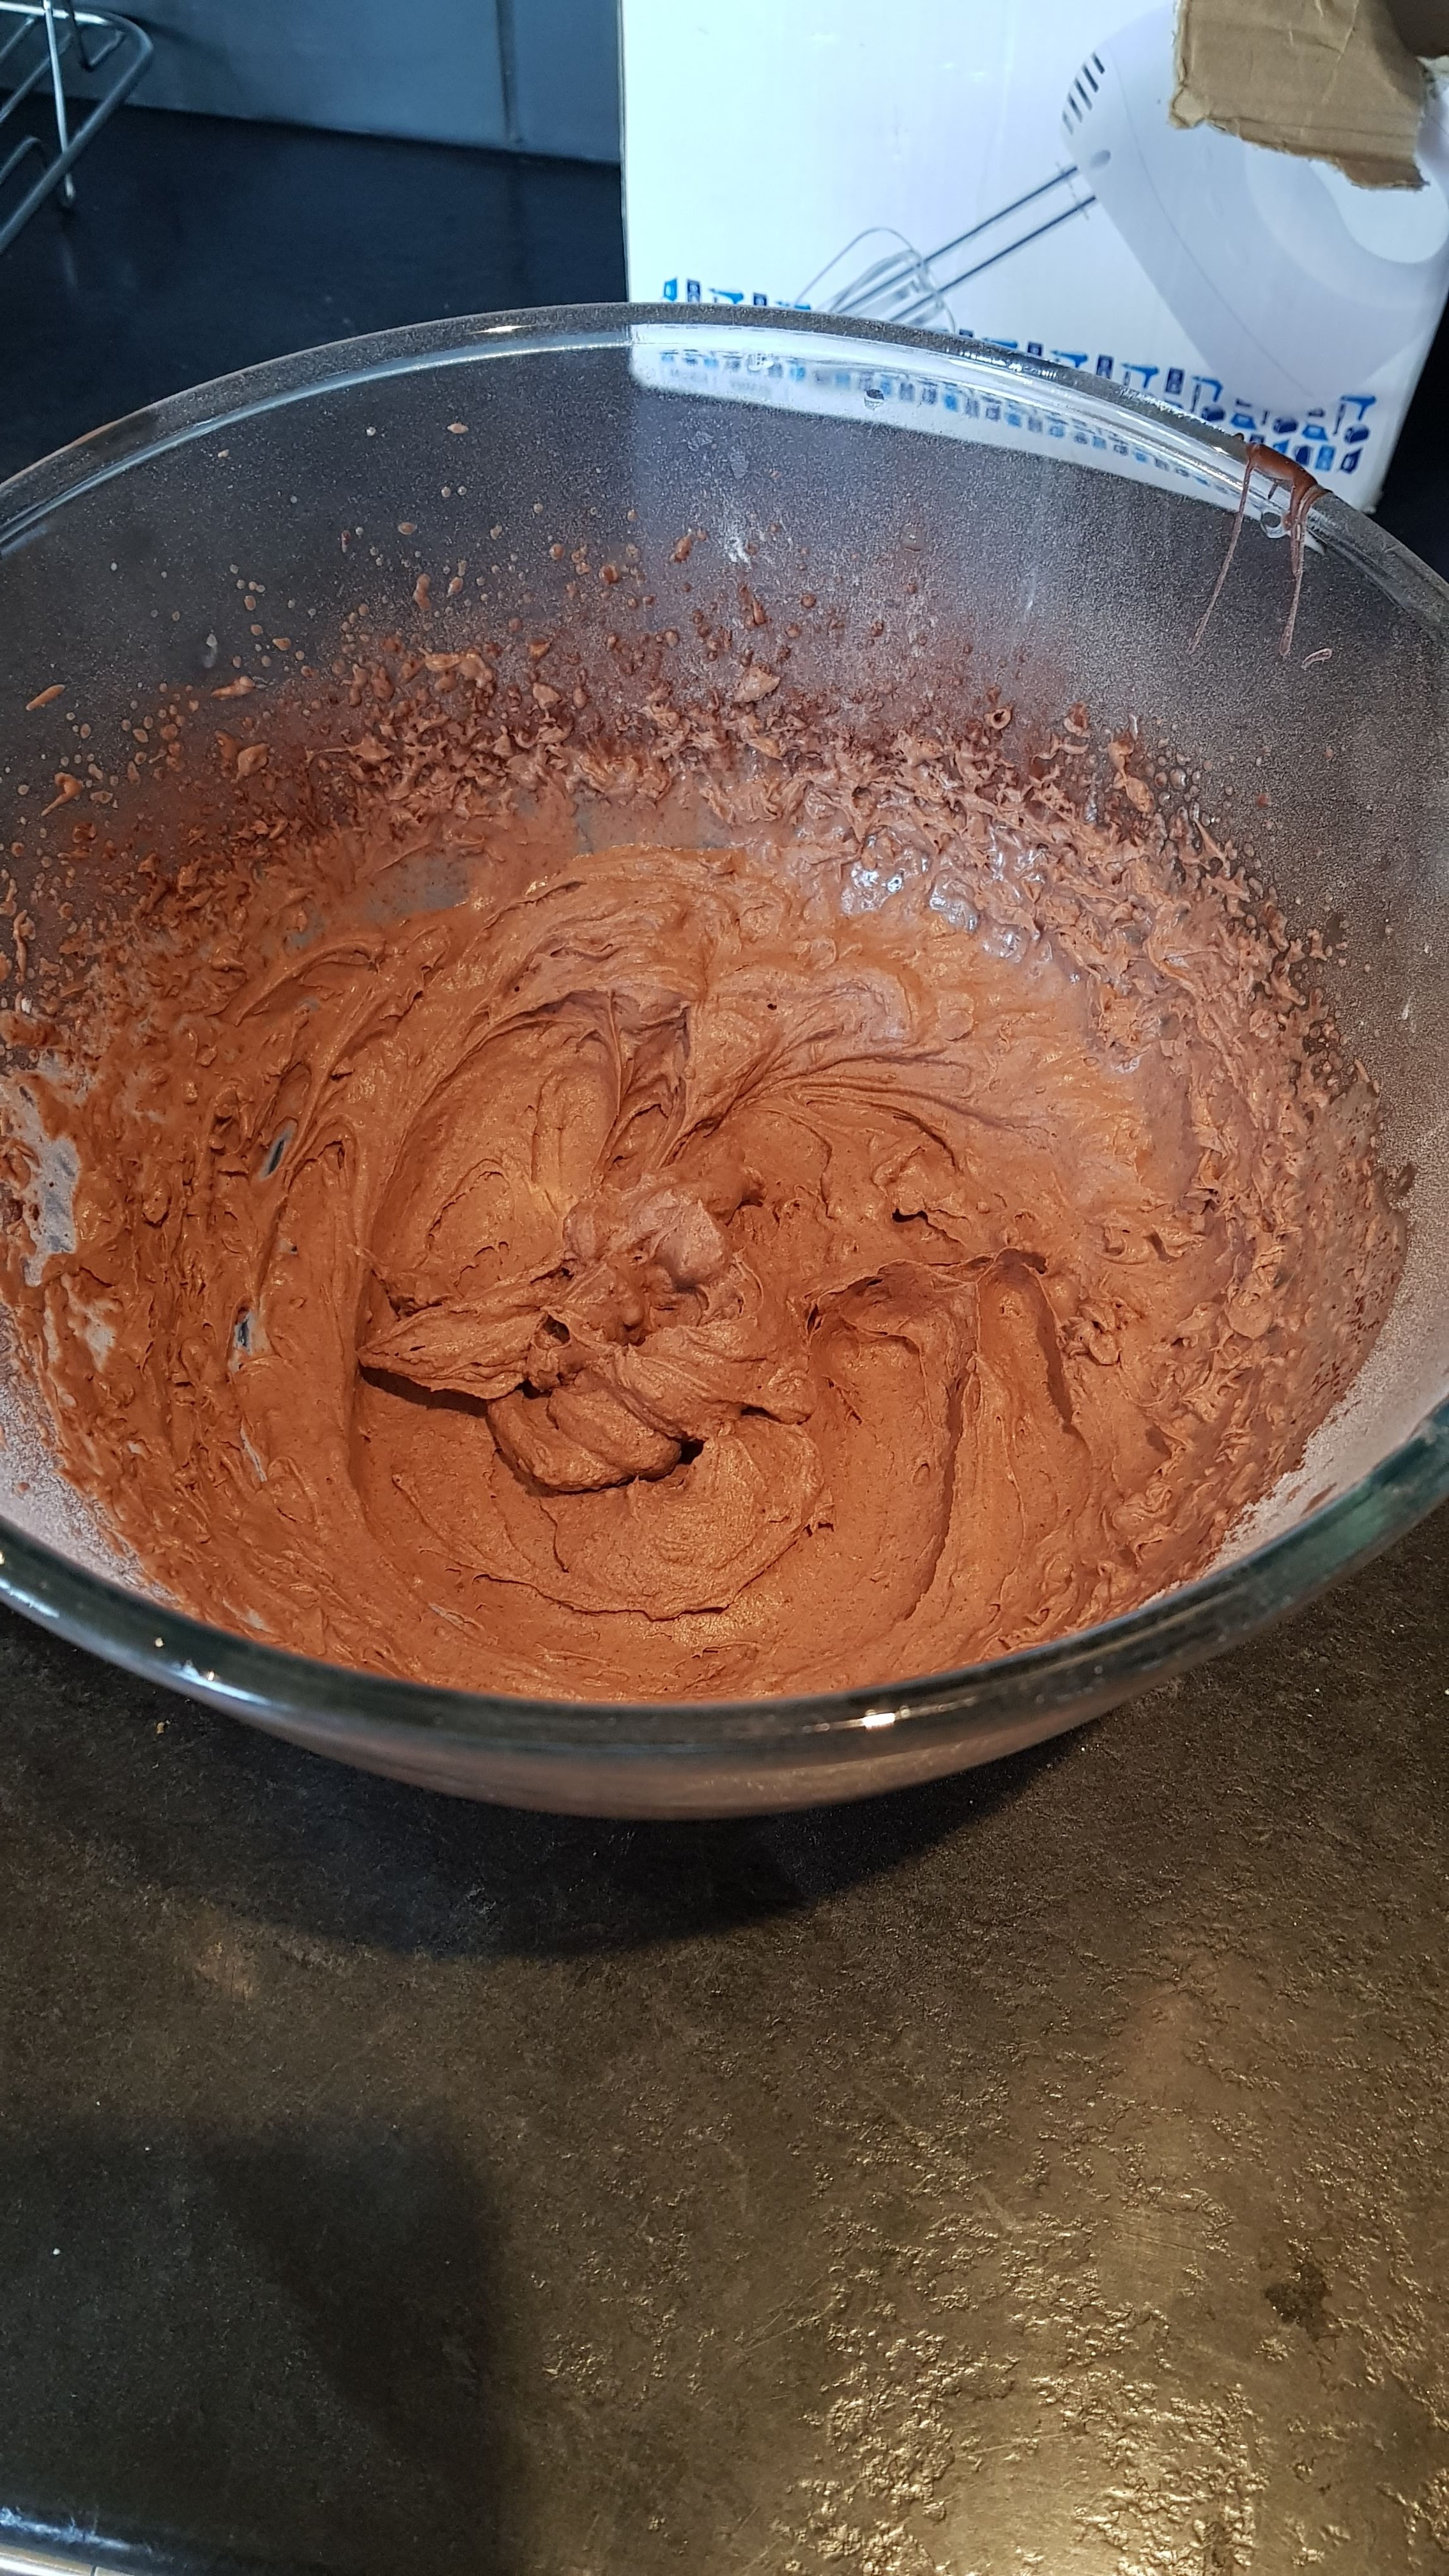
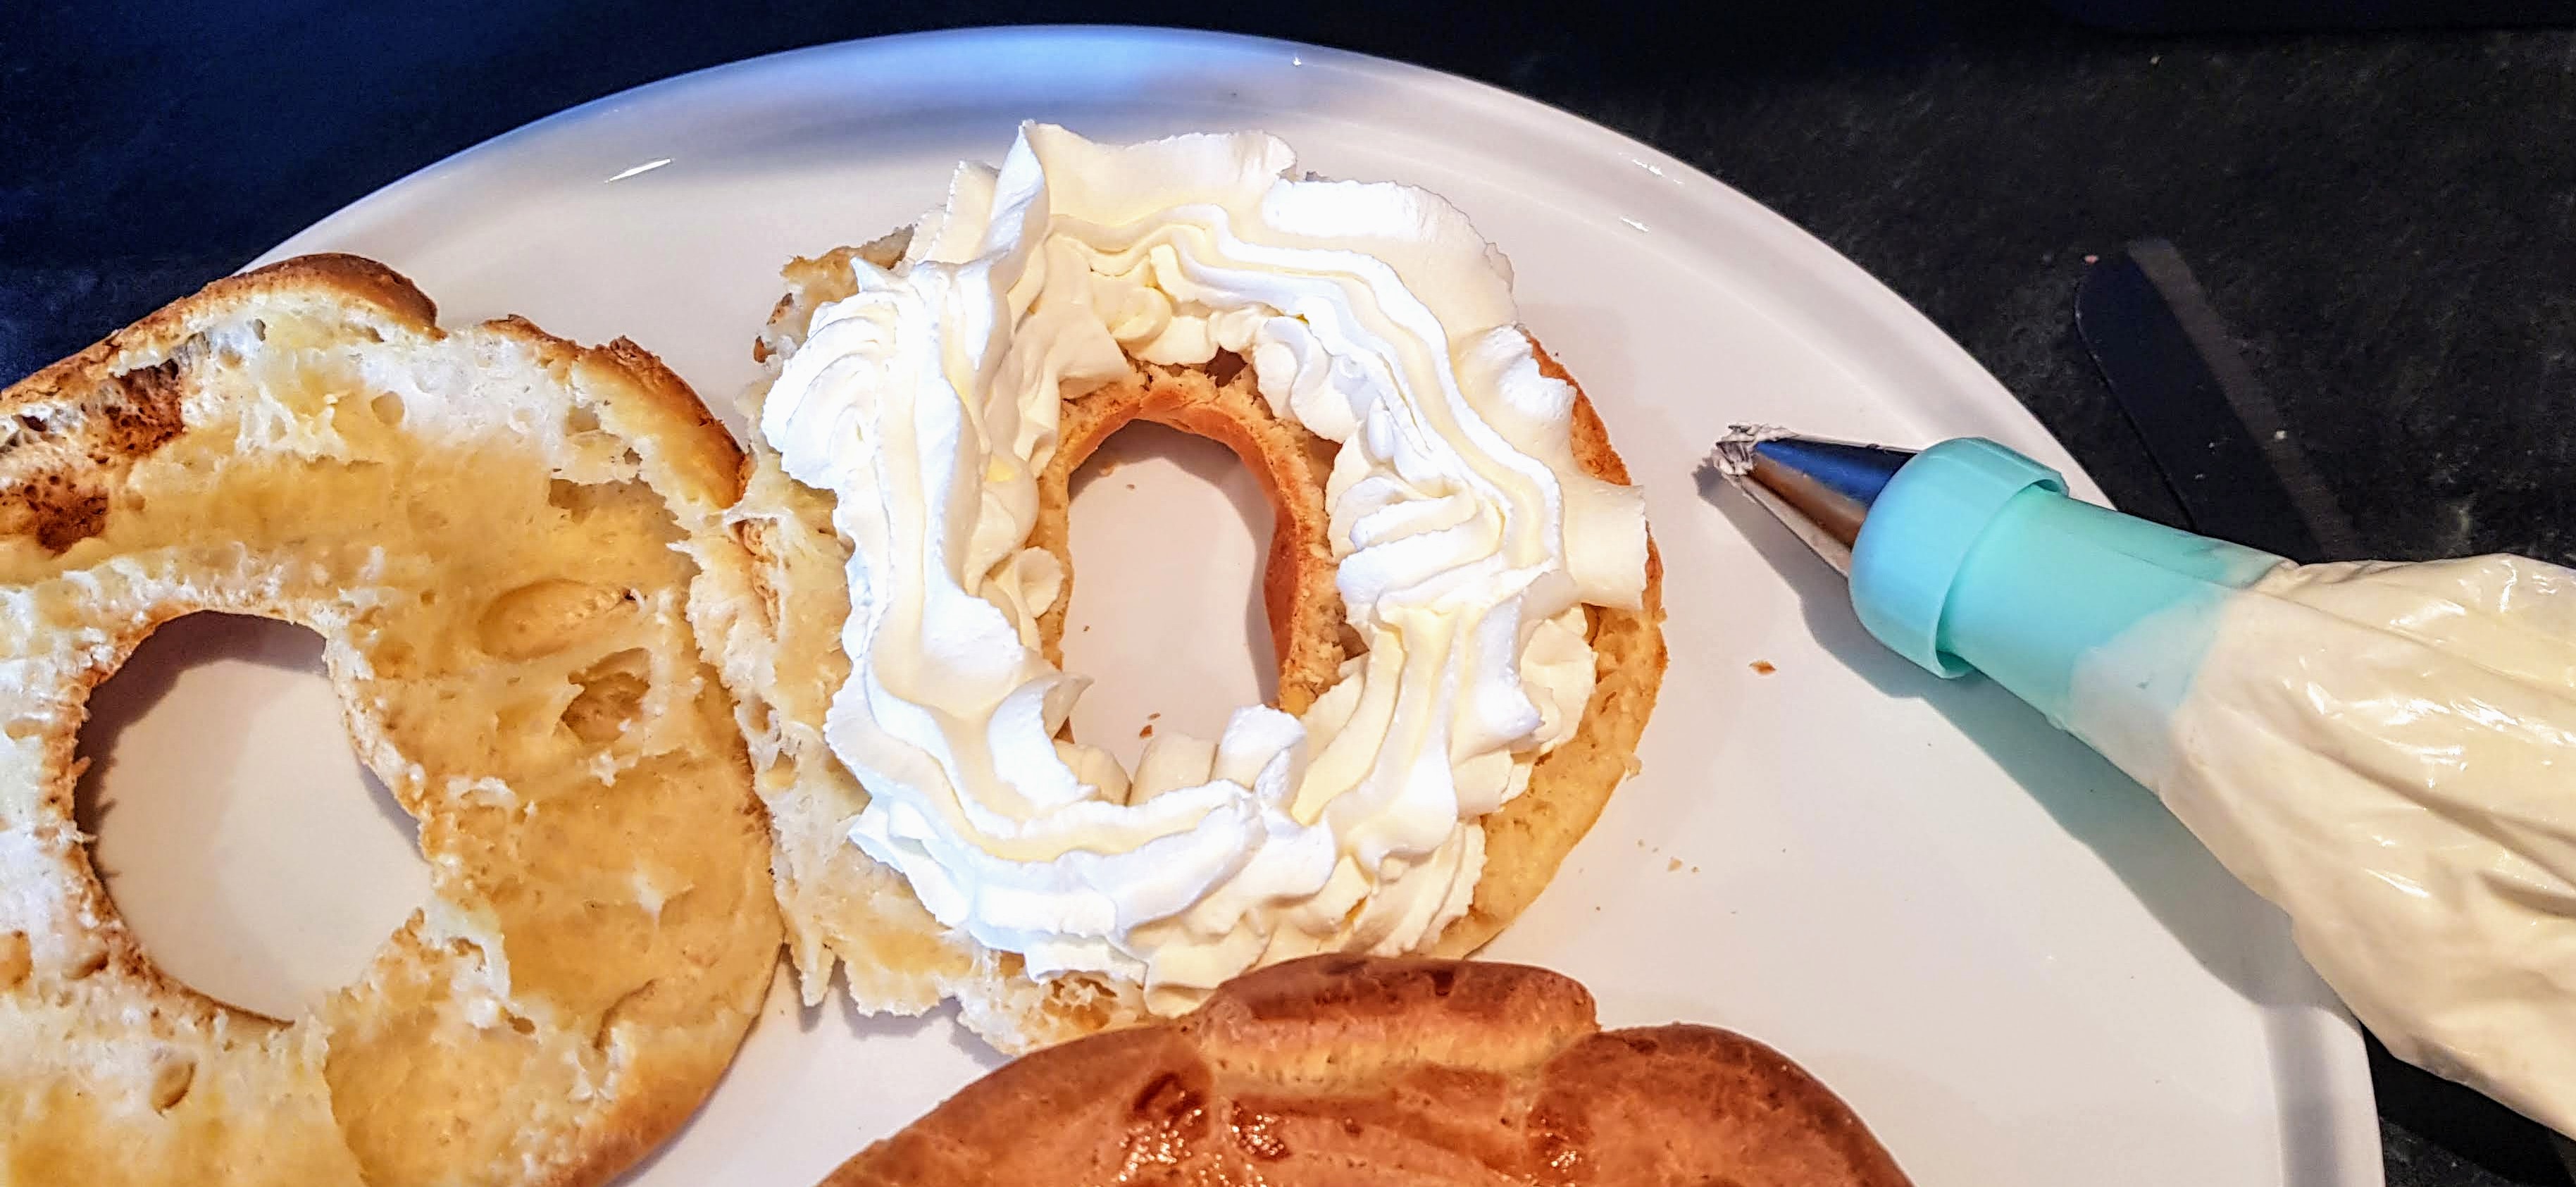
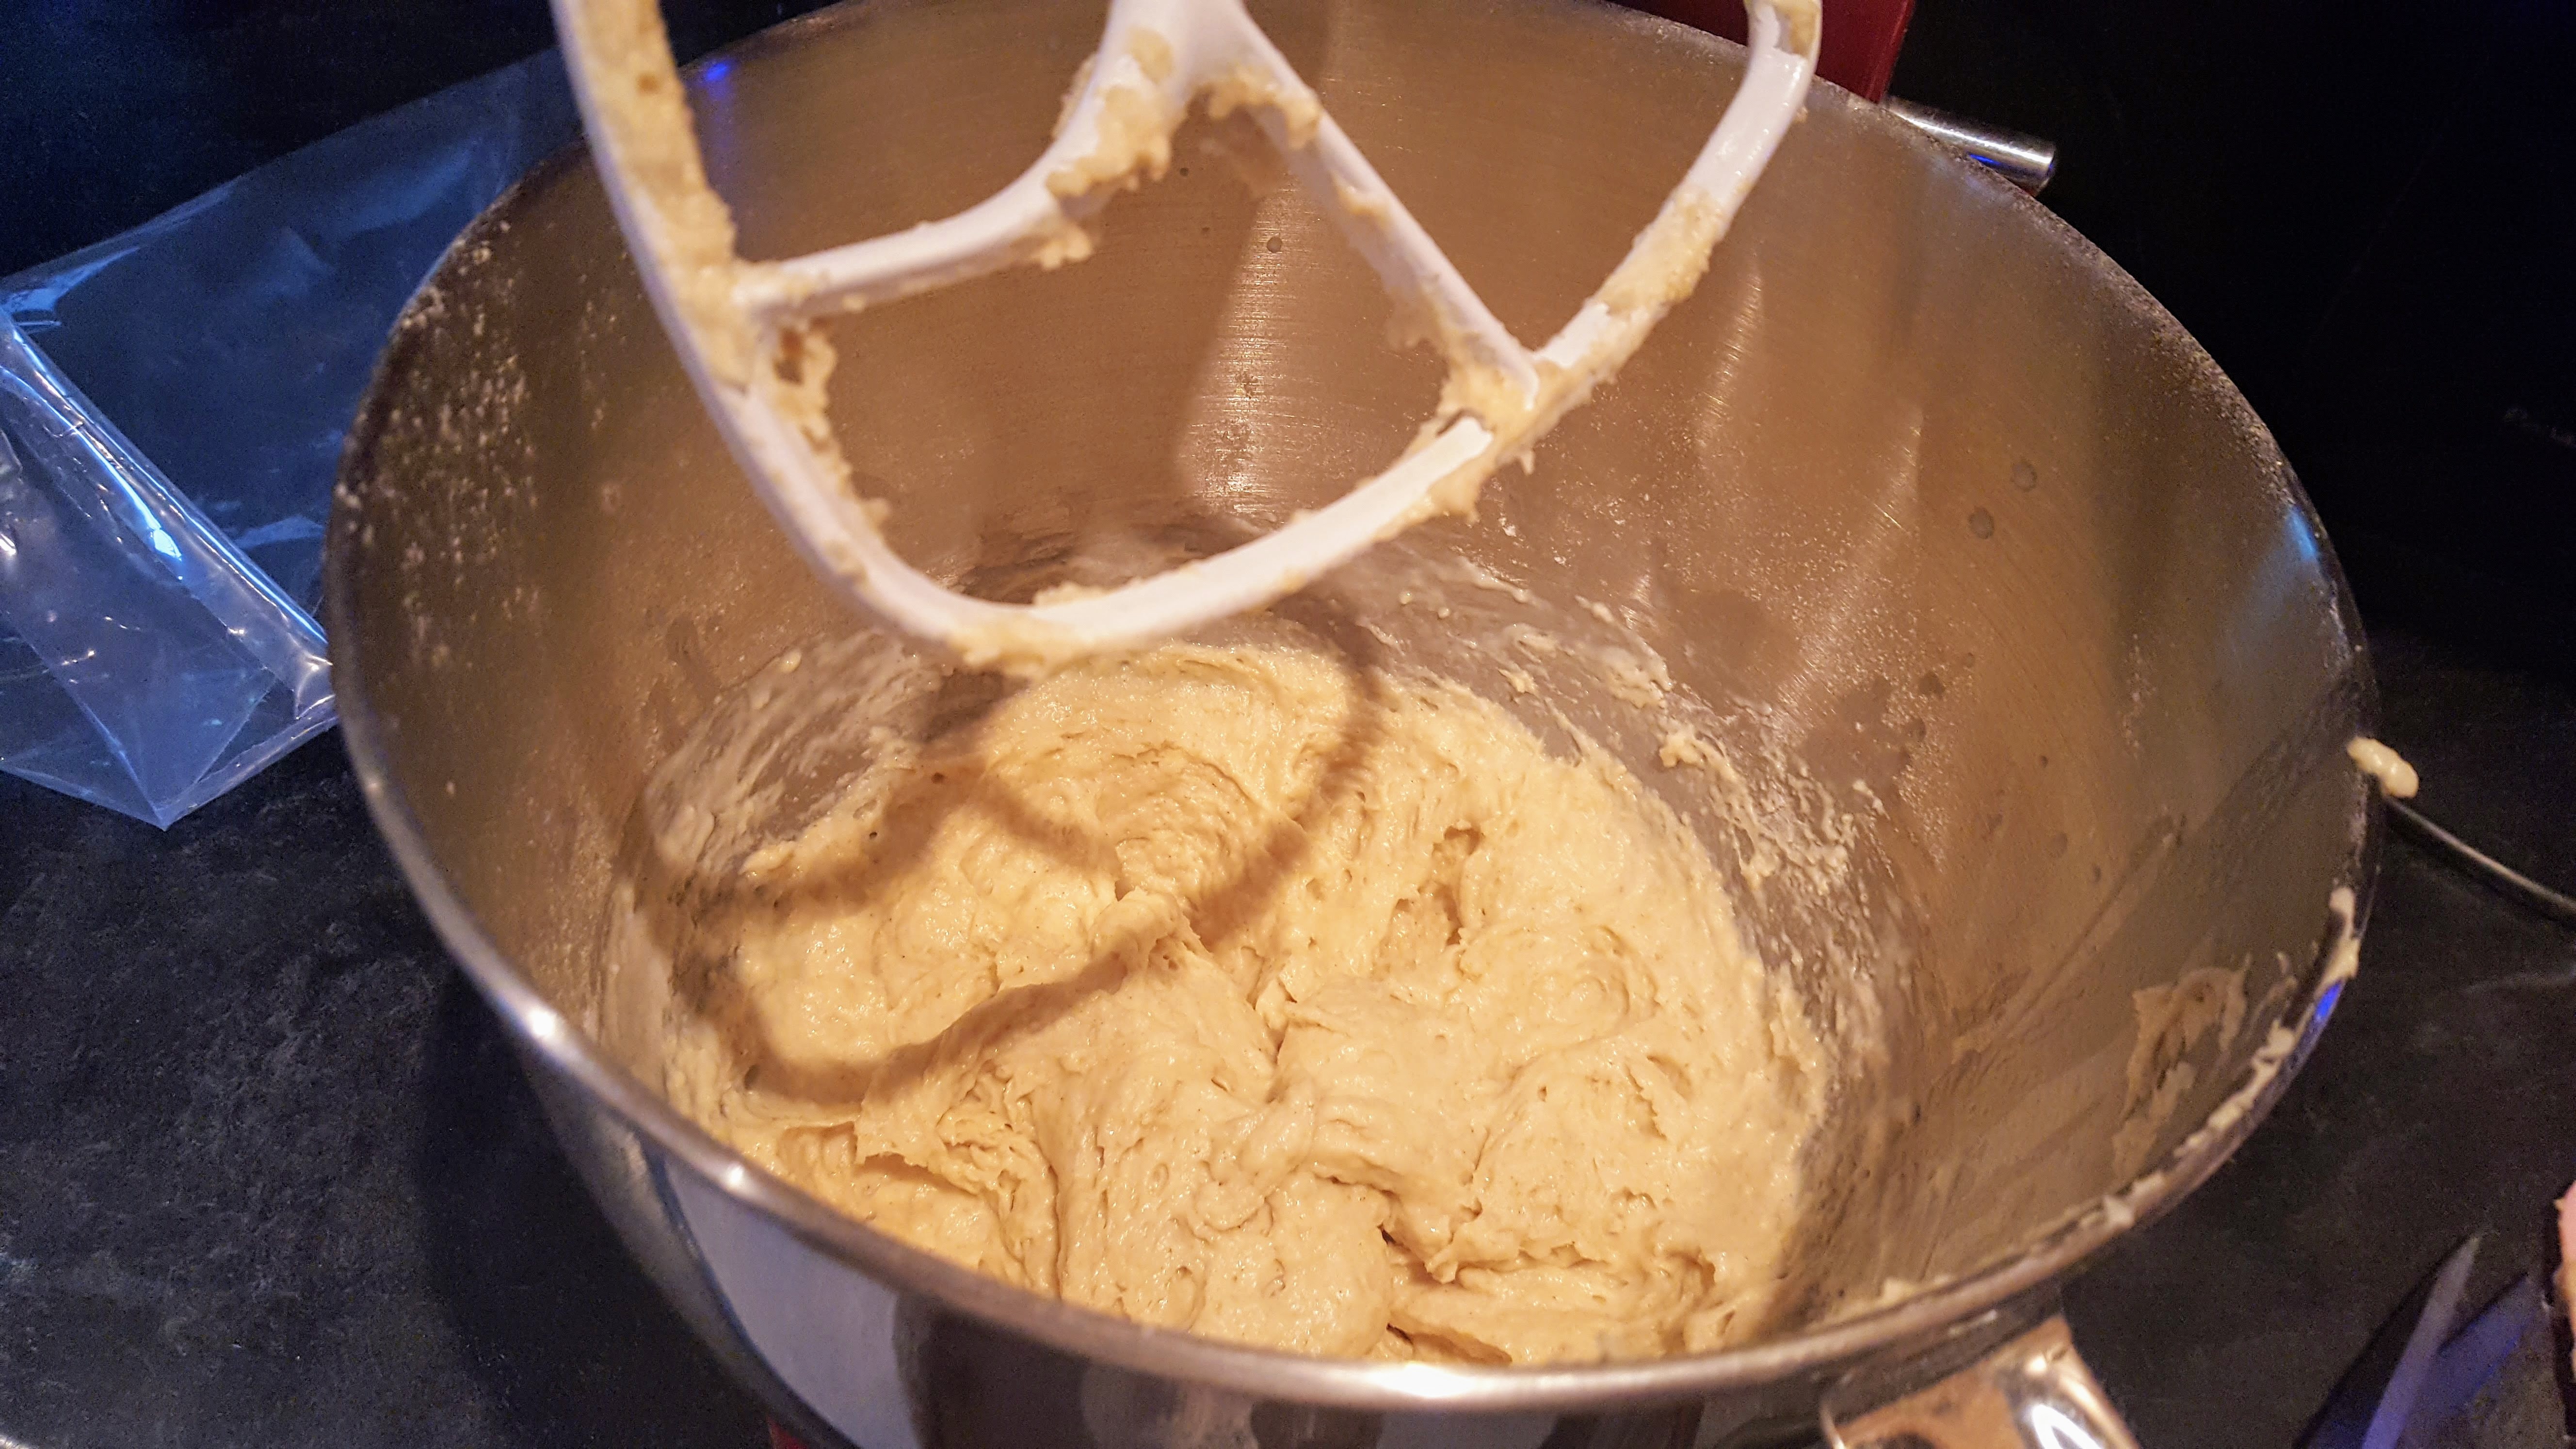
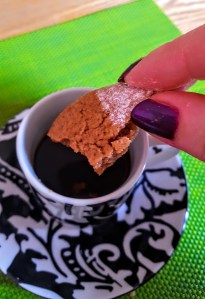
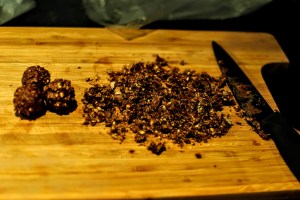
Oh Yum! Do you have a sweet tooth? Do you love Chocolate? Do you love Salted Caramel? Well, you will love these delicious biscuit creams. Perfect with a warm cuppa in the morning, afternoon or evening!
I do love experimenting, I was initially going to try espresso chocolate but decided that might be too many flavours and I’m glad I didn’t as these turned out so delicious. Want the recipe? Here you go. If you try, let me know what you think.
Makes about 8 Biscuits
For the biscuits:-
120g Plain flour
35g Cocoa Powder
35g Powdered Sugar
100g Butter
1 Tsp Vanilla Extract
For the Cream Filling:-
75g Butter
65g Powdered Sugar
1 Tsp Salted Caramel Flavouring
1 Tsp Pink Pitaya Powder
I used my skull & bat embossed rolling pins from https://pastrymade.com/ , they have so many designs, you’ll be stuck for choice.


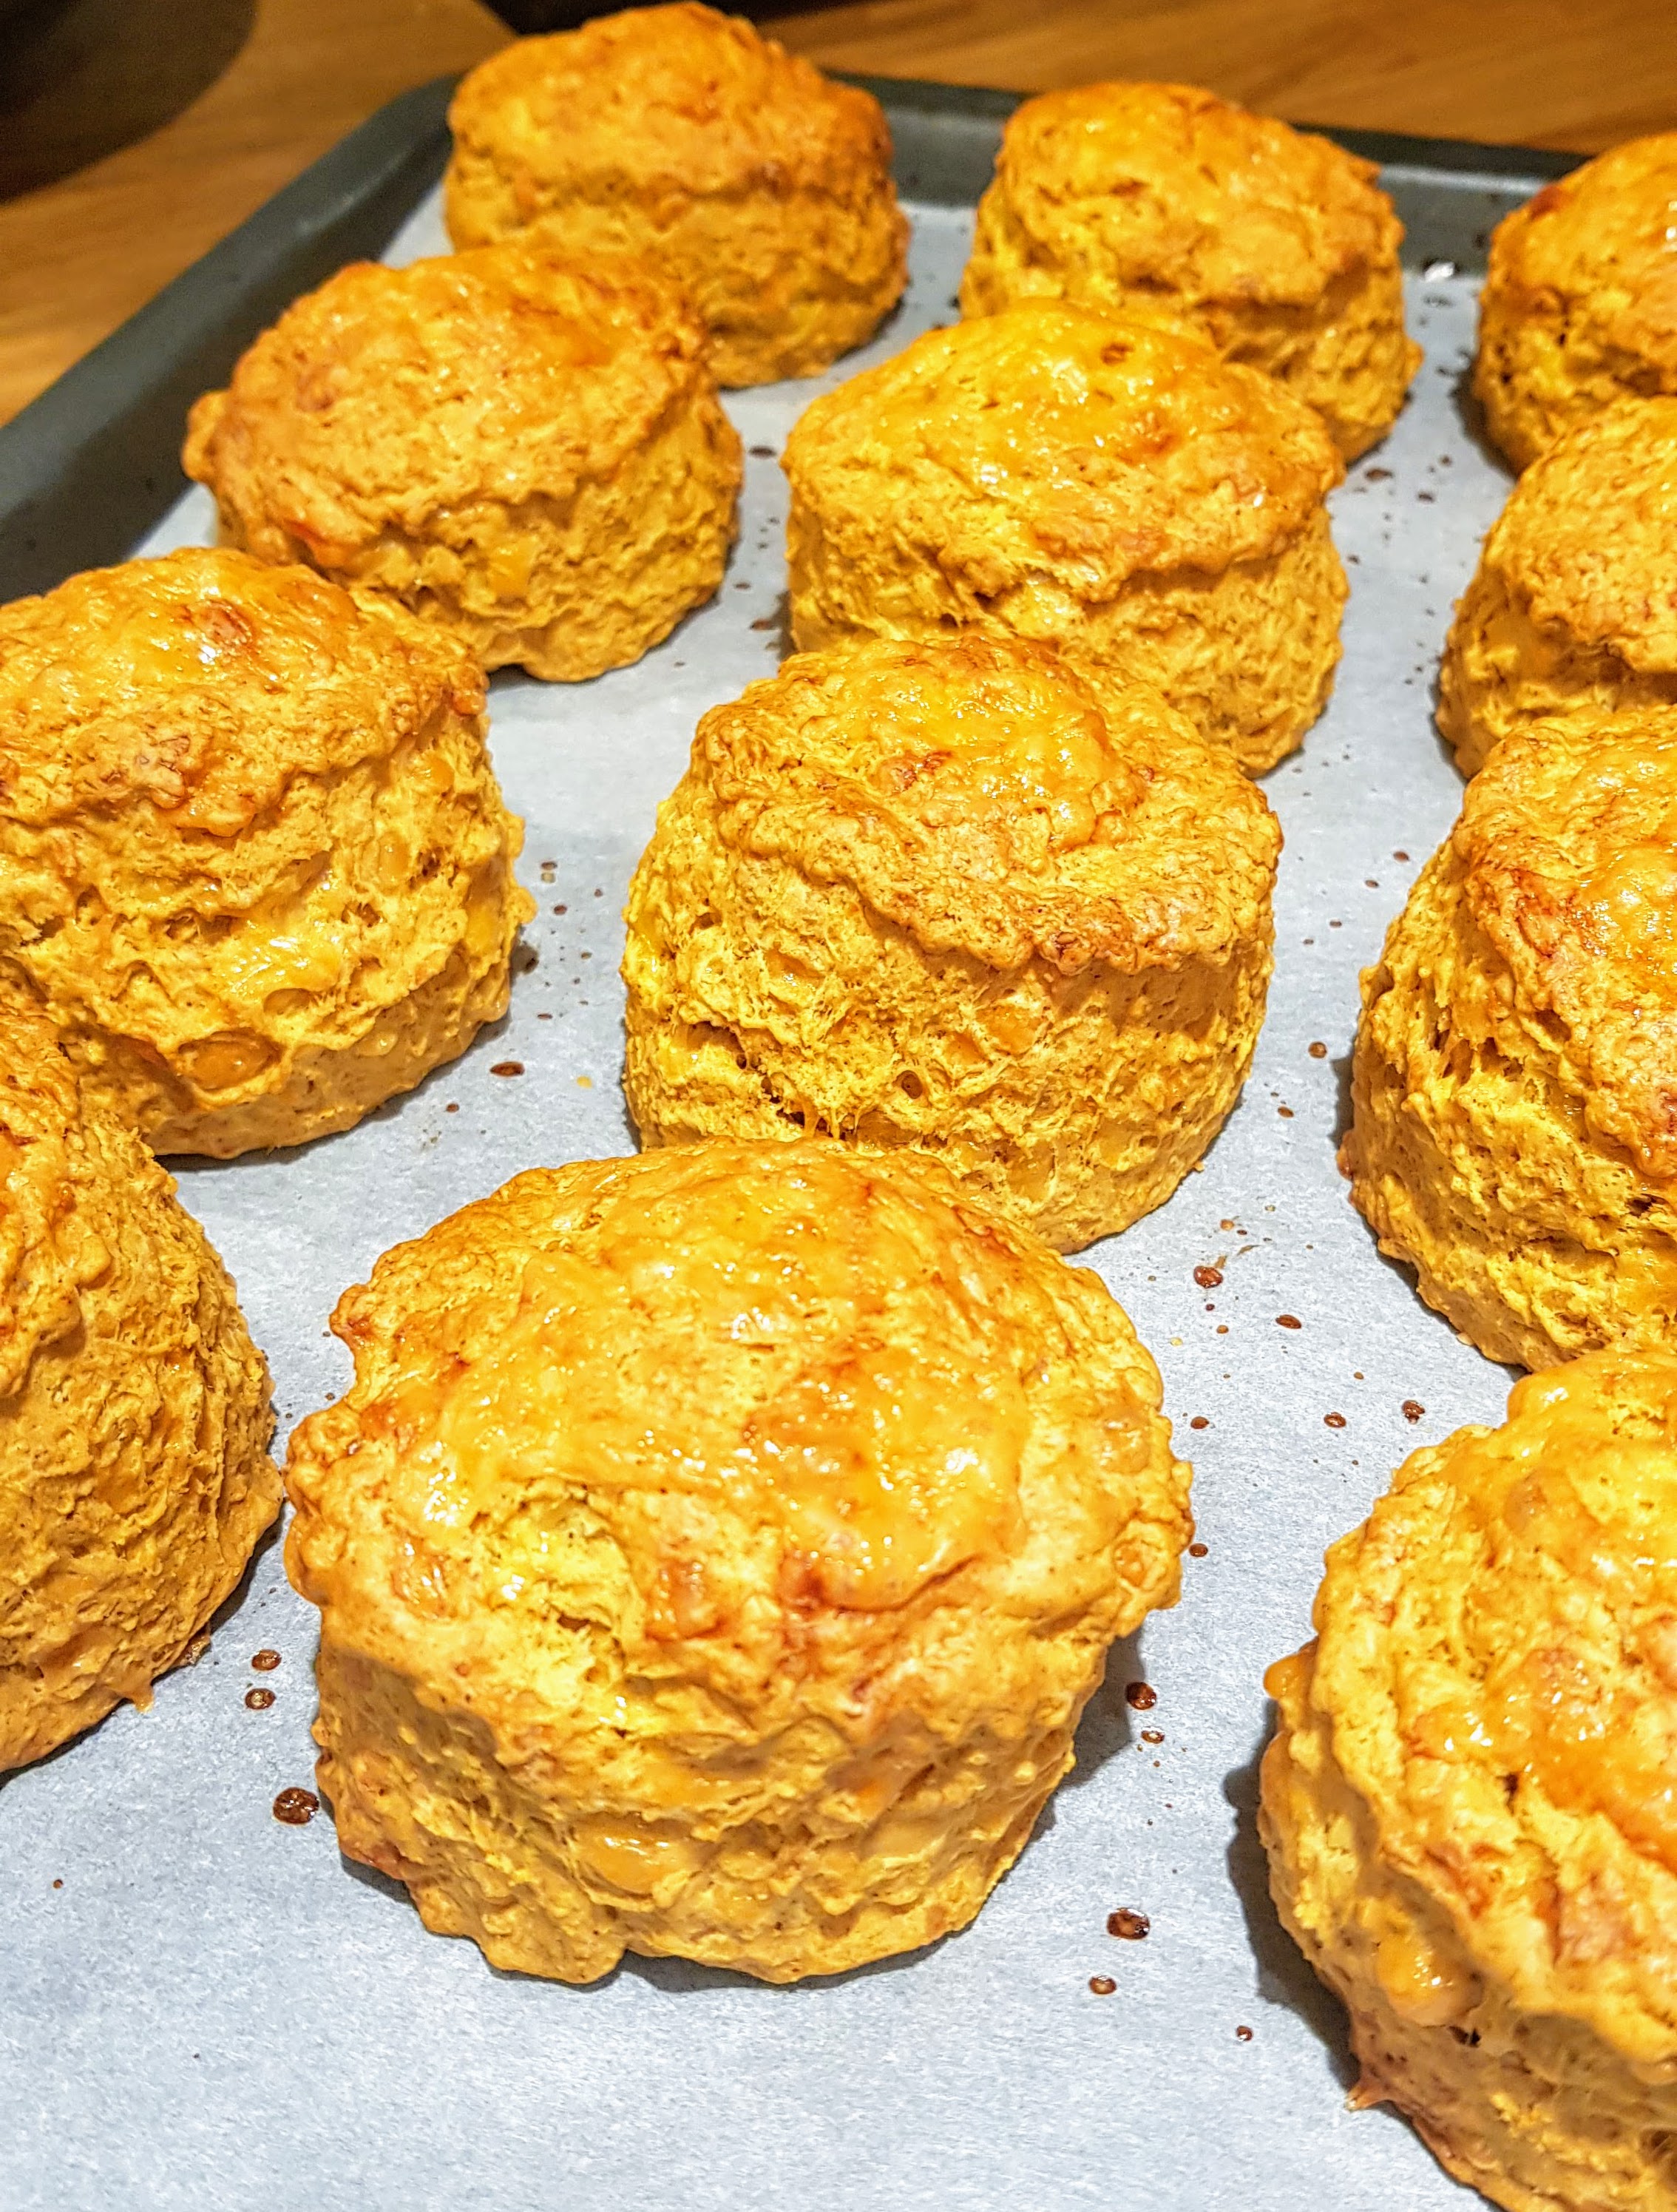
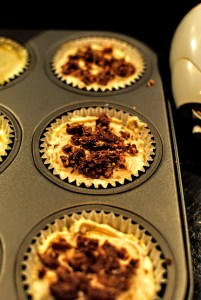
OMG! What can I say, these are super tasty and very moreish. I do love a good scone, especially with butter & jam but I wanted to try something a bit different, we were having some pakora for dinner (Irn-Bru Chicken pakora recipe here https://cookingwithluce.wordpress.com/2021/05/16/irn-bru-chicken-pakora/) so decided to try an Indian inspired flavour to go with. The curry powder lends that nice warmth of Indian spices to the cheese without being overbearing.
These scones are simple and quick to make, you can also change up the spices to suit your own palette.
Makes 12
400g Self Raising Flour
100g Butter, softened
4 Tsp Baking Powder
3 Tsp Curry Powder
1.5 Tsp Smoked Paprika
1.5 Tsp Turmeric (or Mustard Powder)
200g Grated Cheese (I used a good Scottish Mature Cheddar)
2 Eggs
Milk to Bind


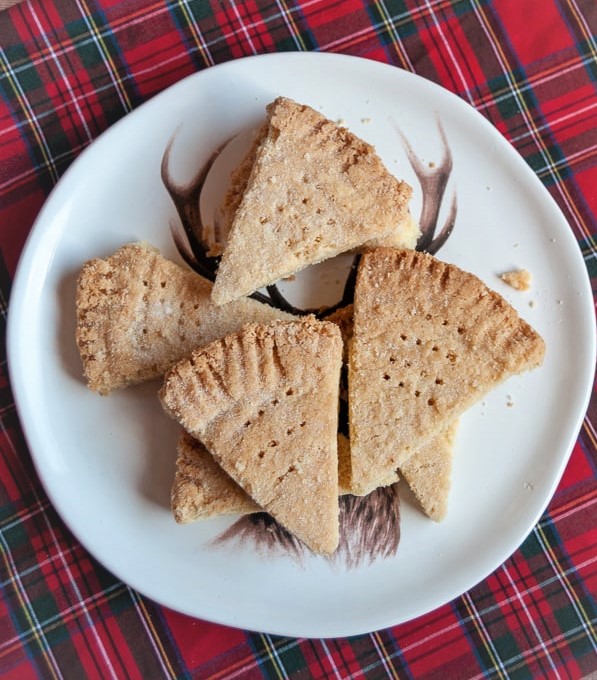
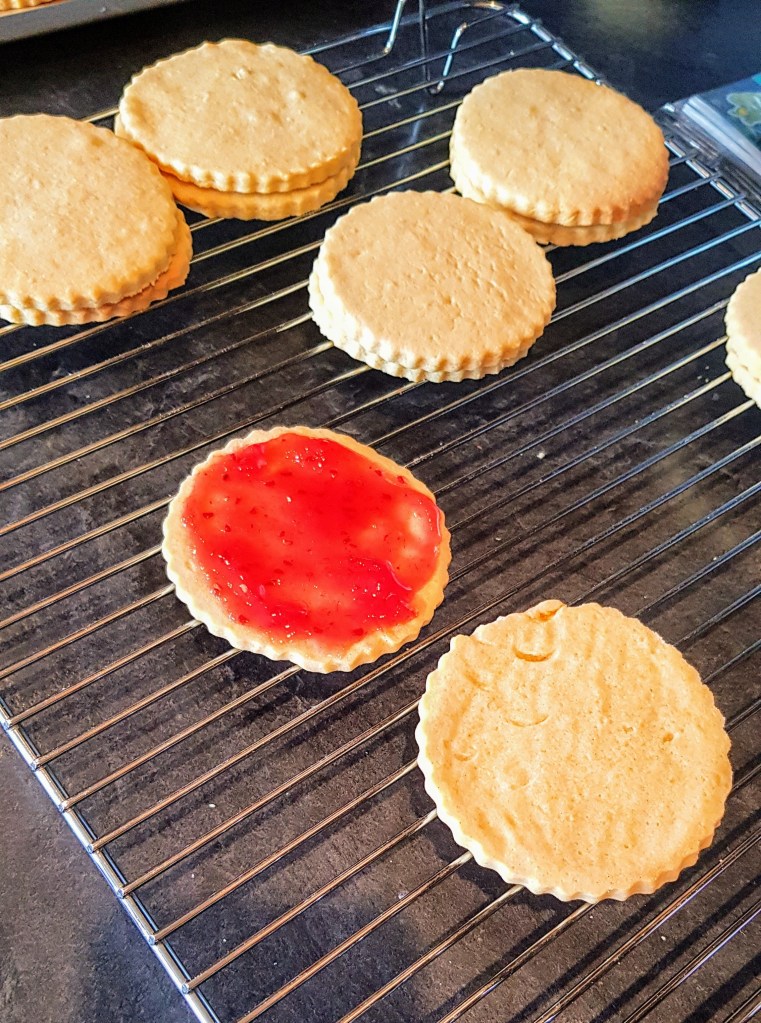
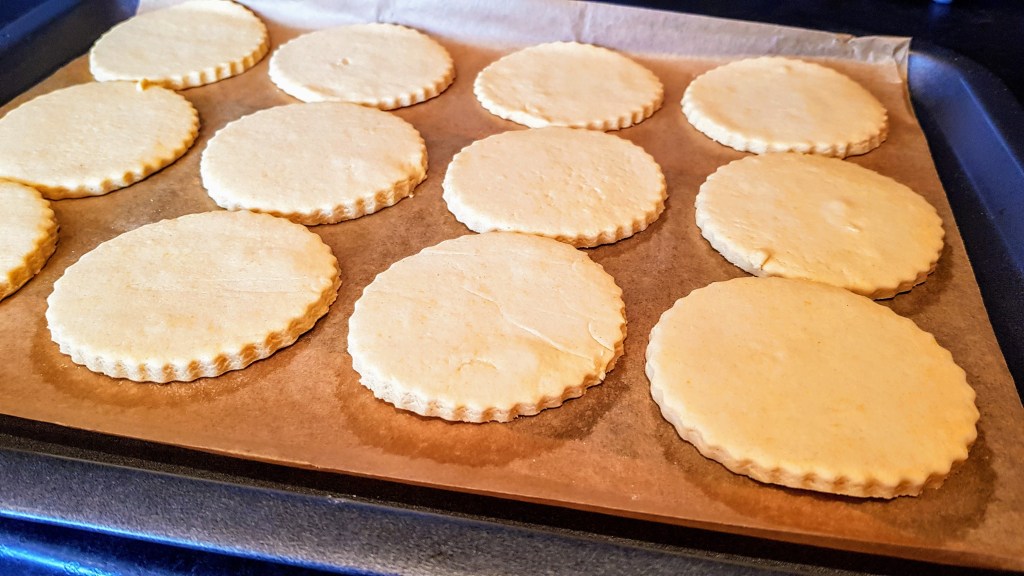
I do love shortbread, I think it’s mainly because I grew up with it, we would visit my Gran’s house and get shortbread for a snack but more so every New Year as this is the tradition in Scotland.
Through the ‘Taste of Scotland’ scheme that promotes authentic and innovative Scottish cooking, Scottish cuisine has enjoying a renaissance and now many believe that the best food in Britain is to be found north of the Border. The story of shortbread begins with the medieval “biscuit bread”. Any leftover dough from bread making was dried out in a low oven until it hardened into a type of rusk: the word “biscuit” means “twice cooked”. Gradually the yeast in the bread was replaced by butter, and biscuit bread developed into shortbread.
Shortbread was an expensive luxury and for ordinary people, shortbread was a special treat reserved just for special occasions such as weddings, Christmas and New Year. In Shetland it was traditional to break a decorated shortbread cake over the head of a new bride on the threshold of her new home. The custom of eating shortbread at New Year has its origins in the ancient pagan Yule Cakes which symbolised the sun. In Scotland it is still traditionally offered to “first footers” at New Year.
Shortbread is traditionally formed into one of three shapes: one large circle divided into segments (“Petticoat Tails”); individual round biscuits (“Shortbread Rounds”), or a thick rectangular slab cut into “fingers.” However, these days as we see some amazing cookie cutter shapes, they can be cut into whatever you like. As it is the Winter Season here just now, I decided to go for some lovely Snowflake Designs.
From memory when my Gran’s used to make Shortbread, the rule of thumb is always 3,2,1, 3 parts Flour to 2 parts Butter to 1 part sugar. Stick with this and you can’t go wrong.
Makes about 10-12 Shortbreads
115g Plain Flour
55g Rice Flour
115g Butter
55g Sugar (Caster or Icing) – (Extra Sugar to finish)


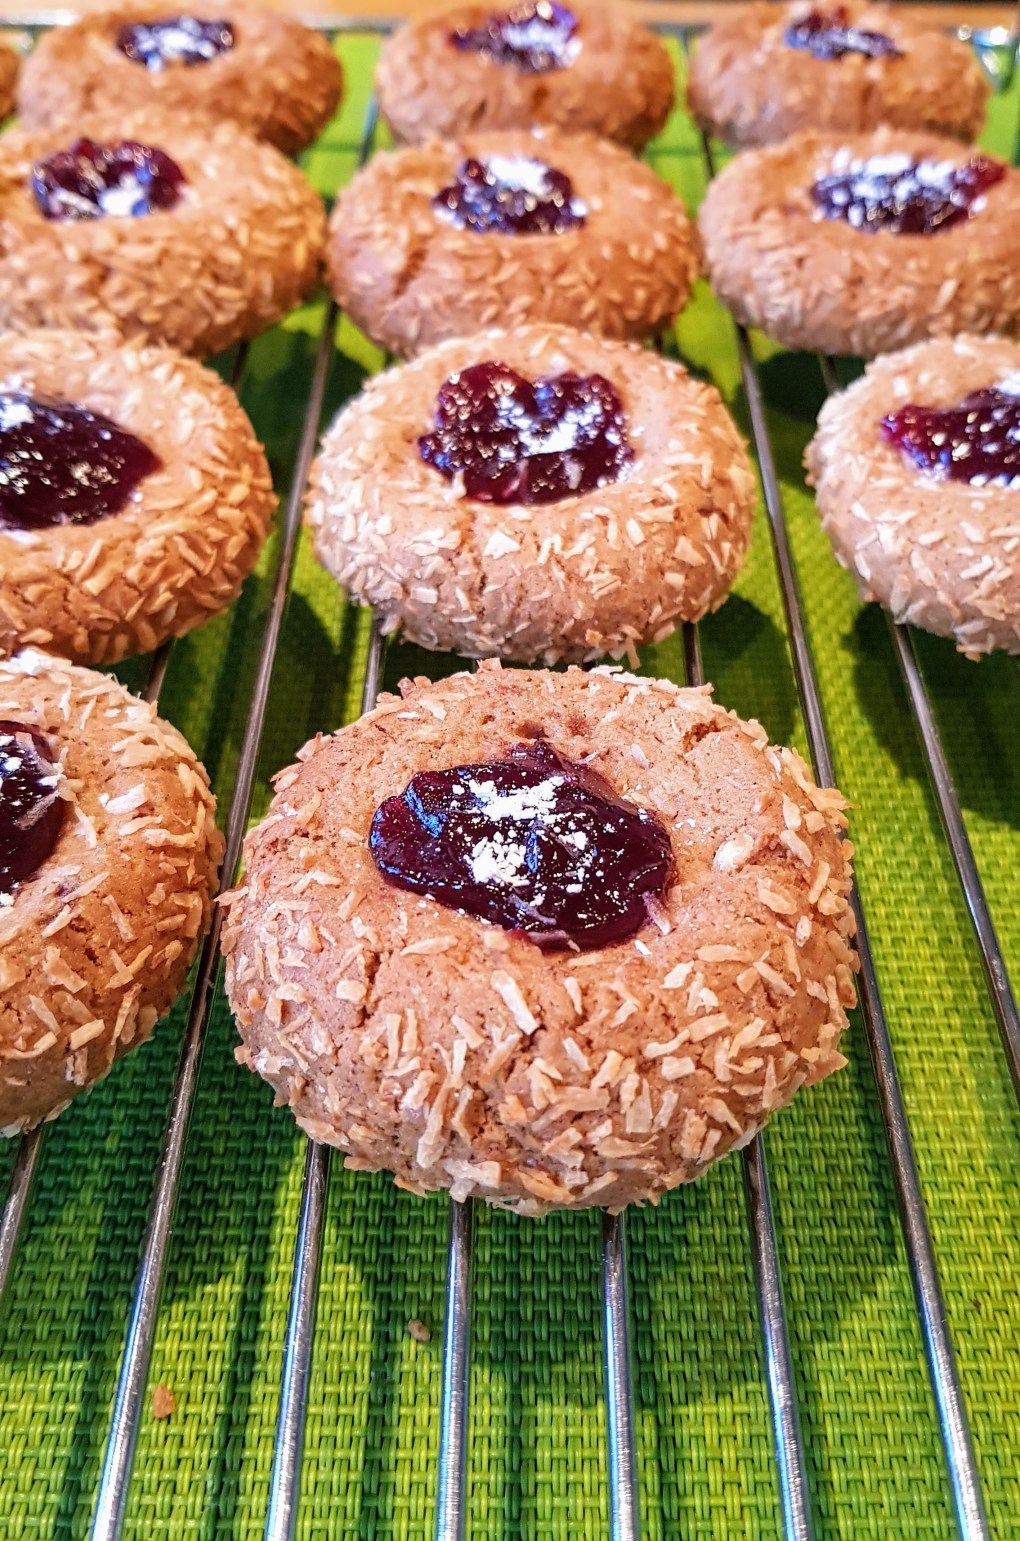

Oh yum…..these were so tasty. I do love experimenting with flavours and using up what I have in my cupboards, sometimes my best recipes come from emptying my cupboards and using whatever is in there and trying things out…lol!
As it is coming up to the festive season I wanted to try some festive flavours and of course gingerbread is almost one of the all time favourites. With the coconut I wanted to create a snowy feel/look. I call them kisses because of the Jam, when you bite in you get the lovely gingerbread flavour and then the Jam gently kisses the back of your throat….yum! Baked in under 15 minutes these are a perfect quick snack with a cuppa. Will be best up to 3 days stored in an air tight container.
Makes about 20-24
200g Self Raising Flour
100g Rice Flour
1/2 tsp Baking Powder
Pinch Salt
2 Tbsp Olive Oil
40g Softened Butter
100g Dark Brown Sugar
1 Egg
2 Tbsp Honey
Finely Grated Zest of 1 Orange
For the Spice: 1 Tbsp Ground Cinnamon, 1 1/2 Tsp Ground Ginger, 1/2 tsp Ground Cloves
100g Desiccated Coconut
Rasperberry (or any flavour) Jam
2 Tbsp Icing Sugar for decoration.


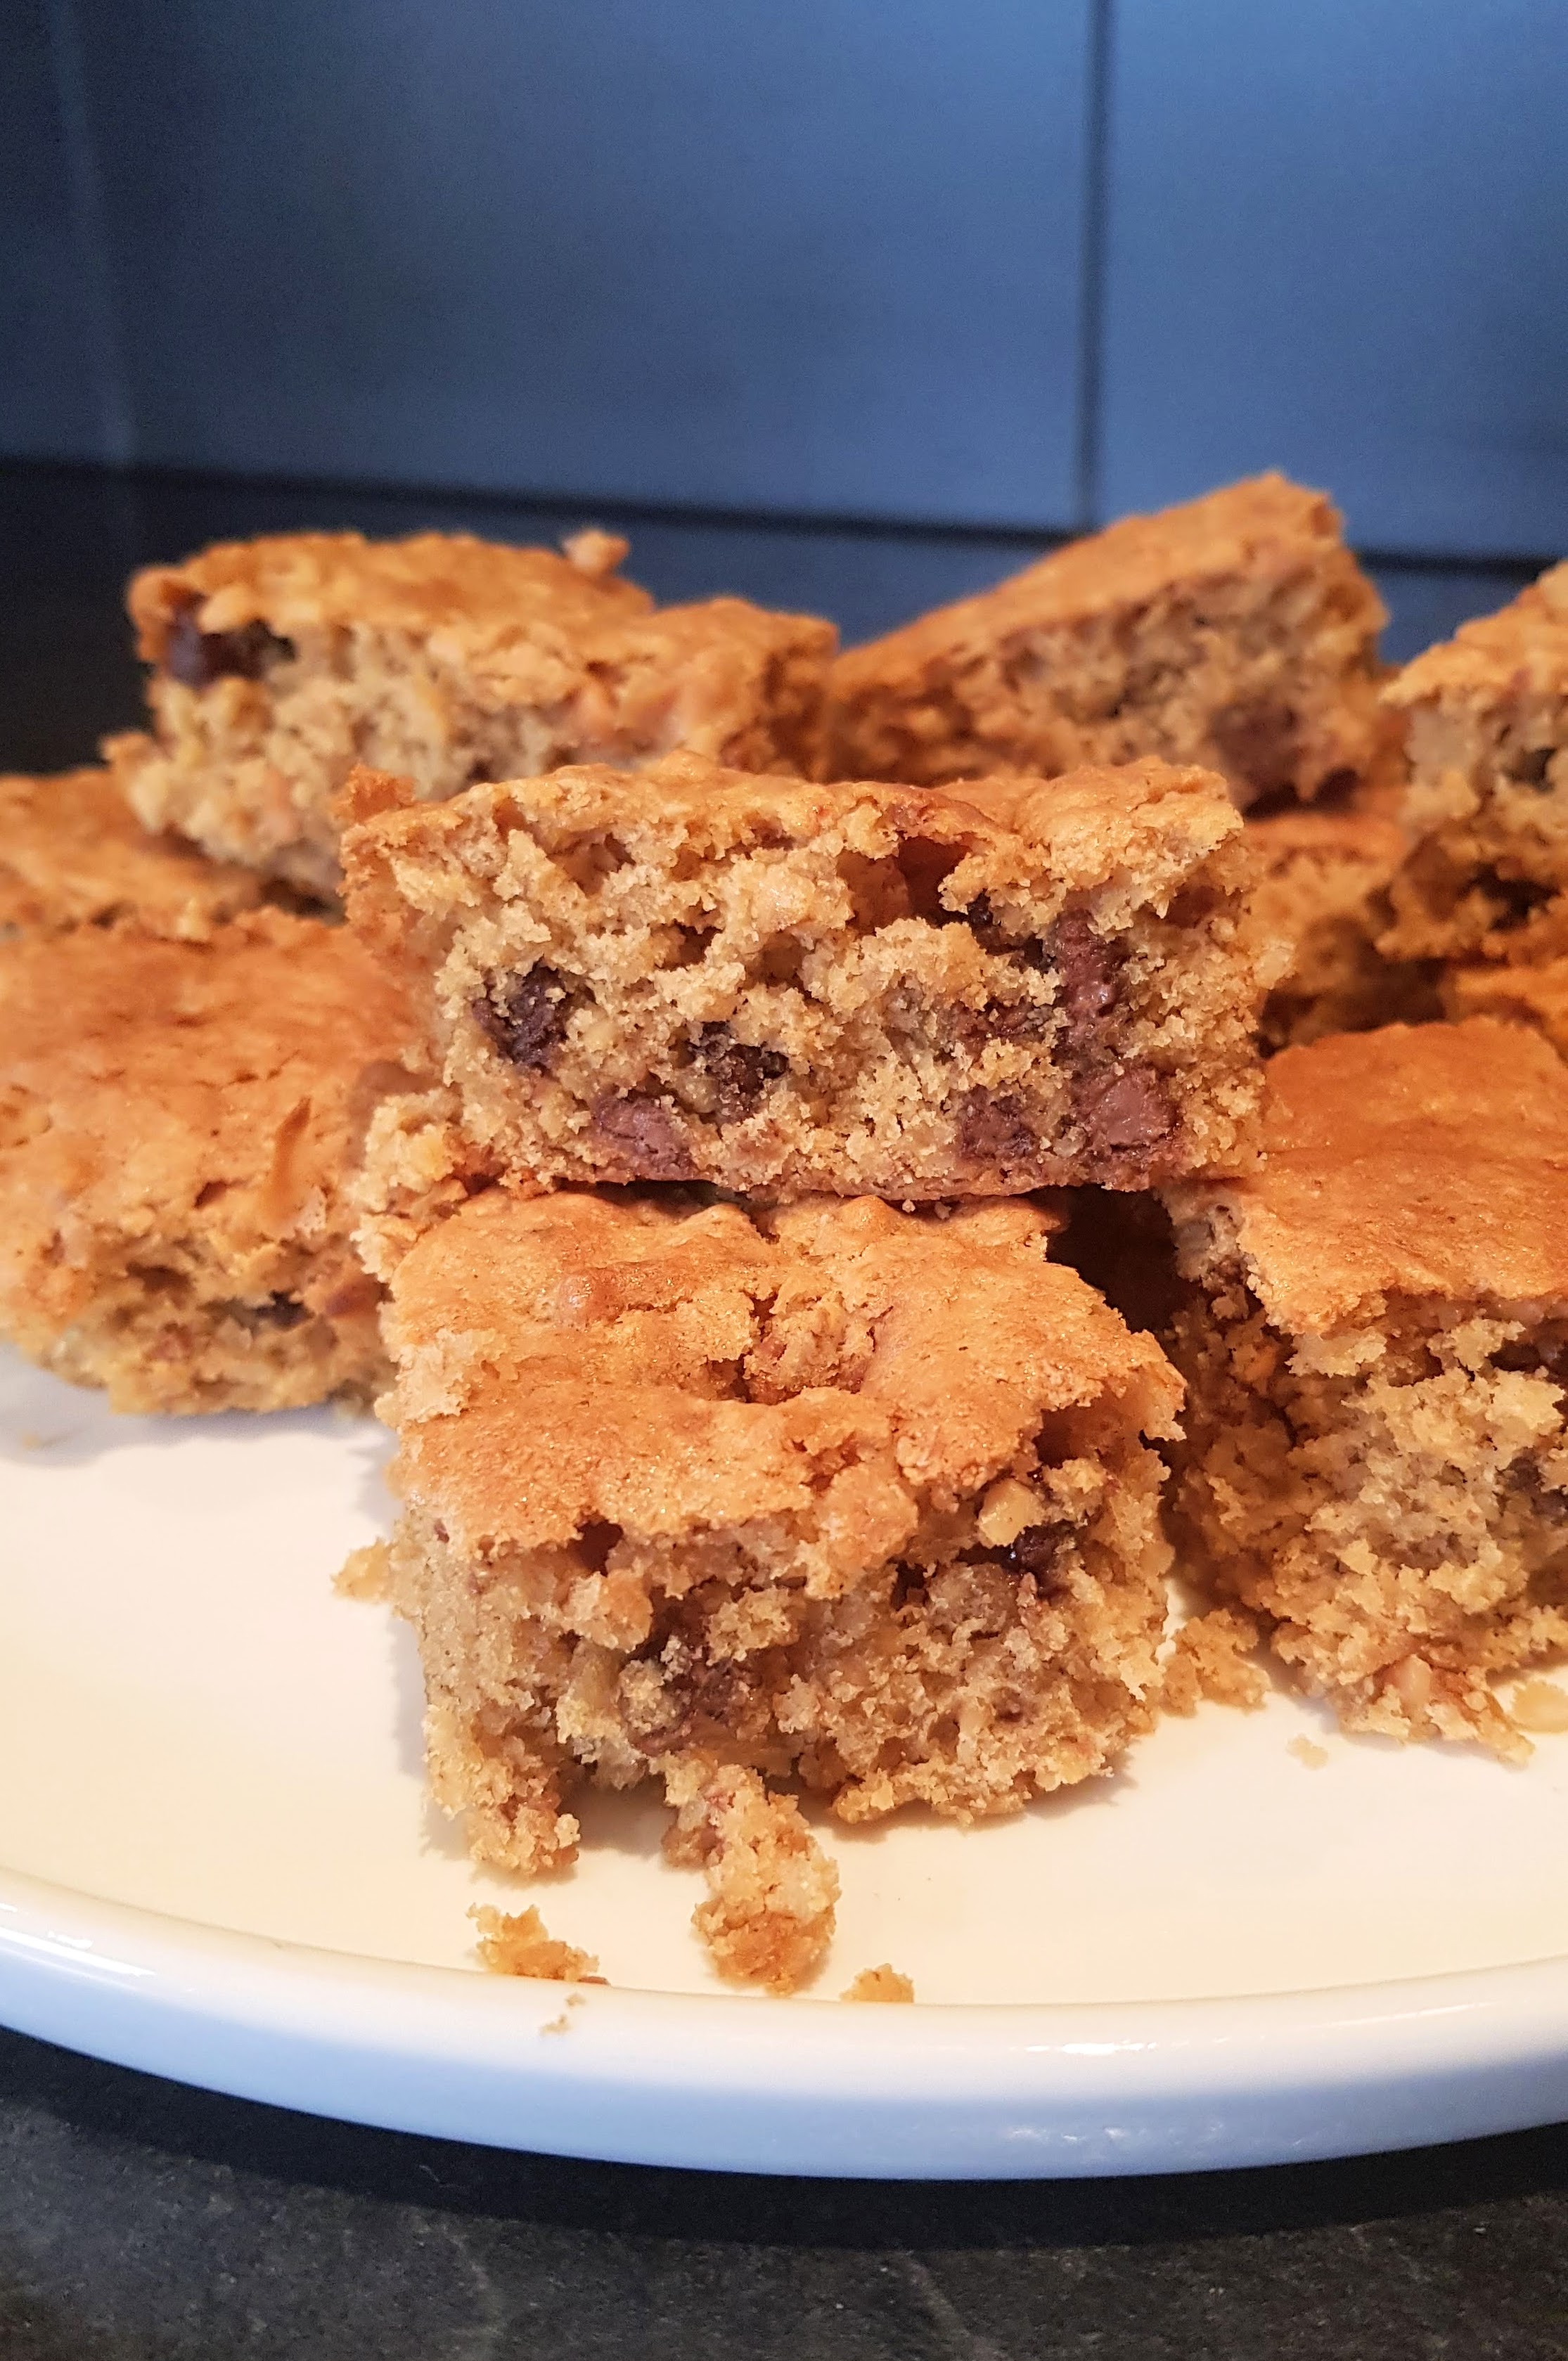
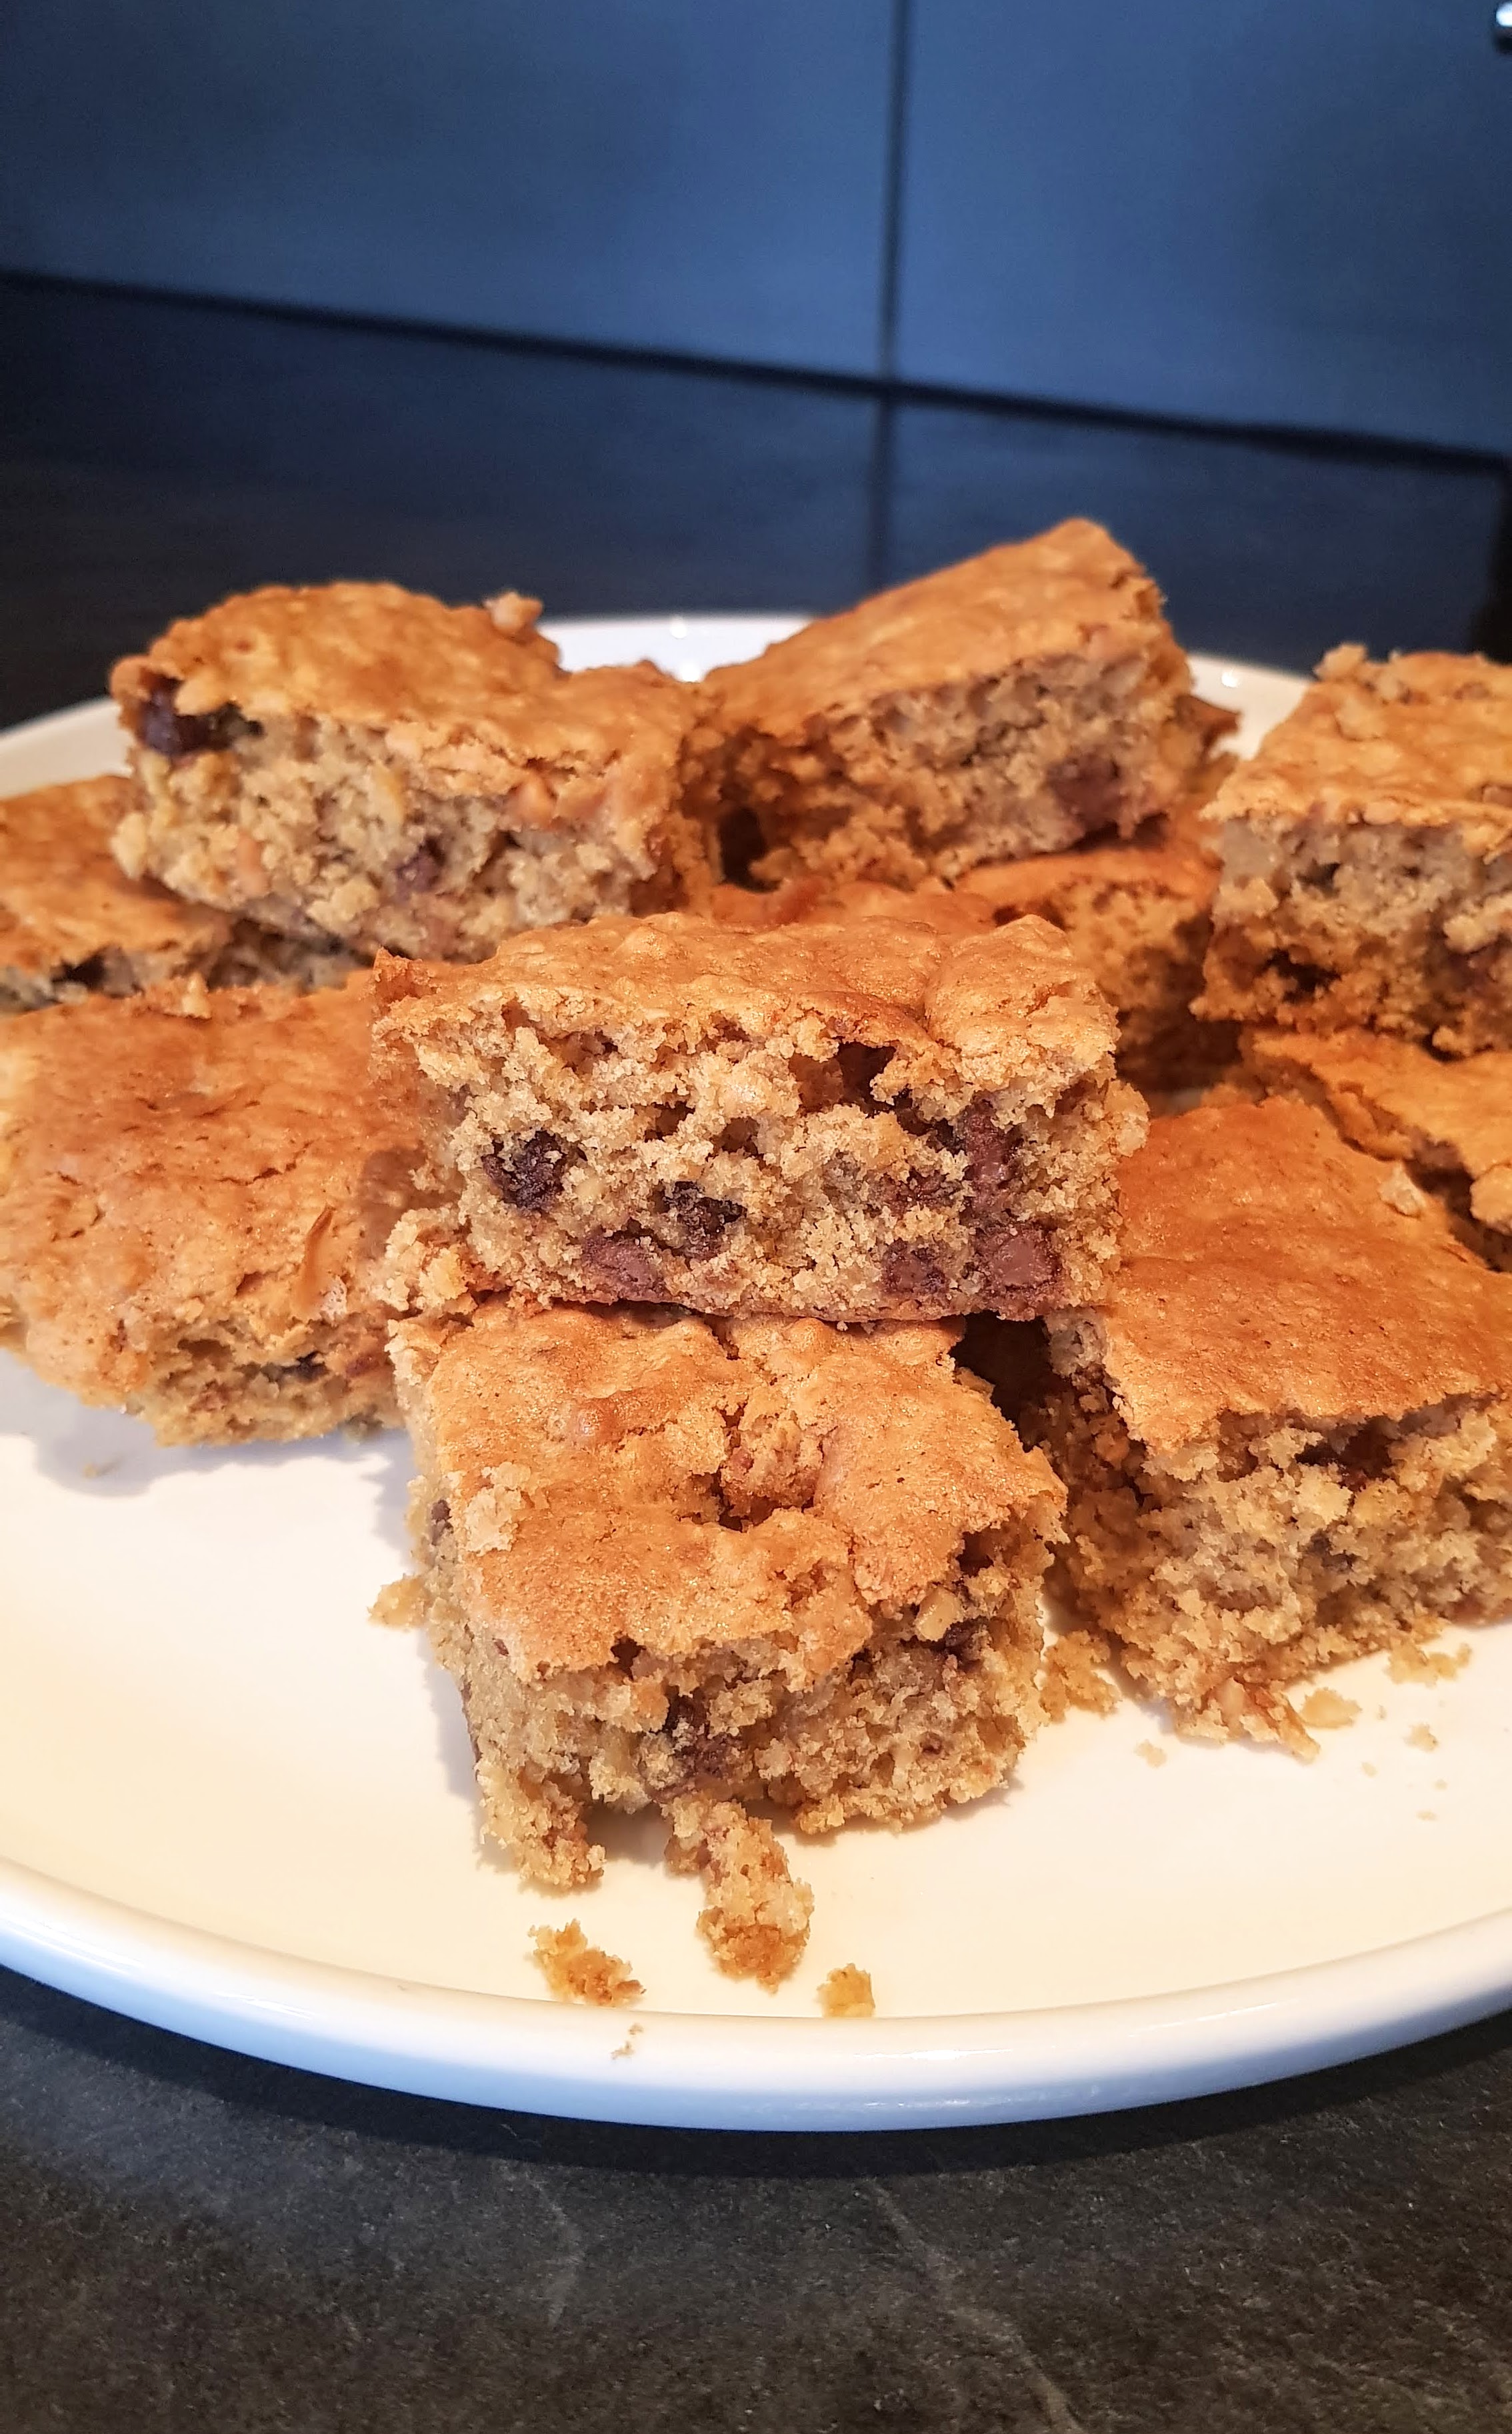
OMG! Well what can I say, if you love Peanut Butter like me these are delicious. They are also very light and cut up into small squares they are only about 70 calories per square, so in my book that’s a guilt free treat with my cup of coffee.
We always have a little treat on a Sunday, it’s something to look forward to while we relax and chill after our working week. Peanut butter is a good source of protein, fiber, folate, phosphorus, potassium & magnesium. And yes, peanut butter does have fat, but the fat is monounsaturated, which is more cholesterol-friendly.
I first saw this recipe from a Diabetic Website https://diabeticgourmet.com/ when my mum was a Diabetic, unfortunately I never got round to making them for her. This recipe I change a little to suit our sweet tastes….lol!
Makes 16 small squares
60g Butter
120g Caster Sugar (Splenda if diabetic)
40g Light Brown Sugar
100ml skimmed or semi skimmed milk
60g Peanut Butter
1 tsp vanilla extract
1 egg
120g Self Raising Flour
90g Rolled Oats
1/2 tsp baking powder
Pinch salt
120g Chocolate Chips
1. Beat the butter, caster Sugar and brown sugar until well combined.
2. Stir in milk, peanut butter, egg and vanilla until blended. Gradually mix in combined flour, oats, baking powder and salt until blended. Stir in chocolate chips.
3. Spread mixture evenly into a 9 x 9-inch baking pan covered with greaseproof paper. Bake in preheated 170 deg oven for 25 minutes or until a knife inserted near center comes out clean. Leave to cool on wire rack. Cut into squares.
4. Store in airtight container at room temperature, will be best for up to 3 days.

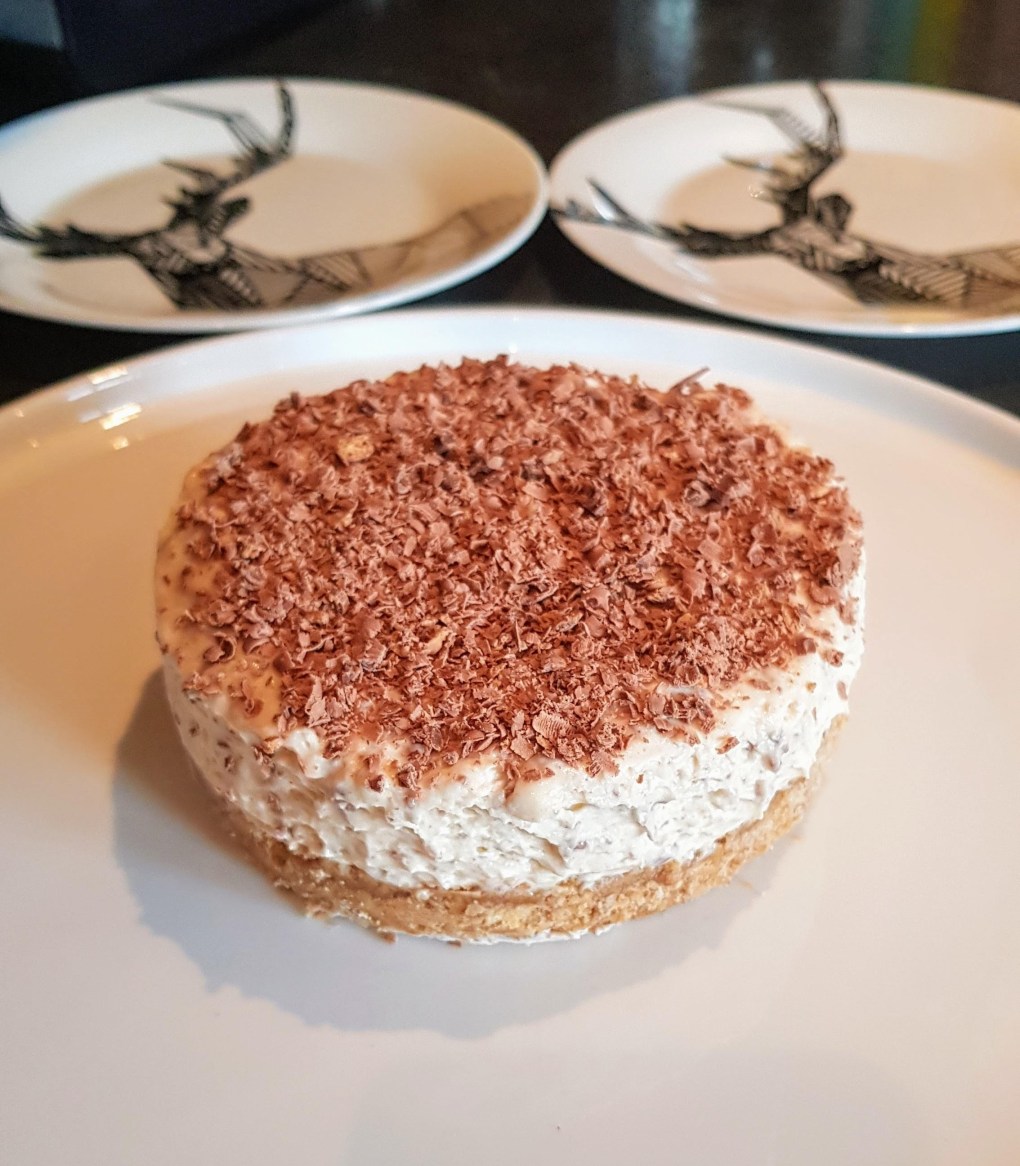

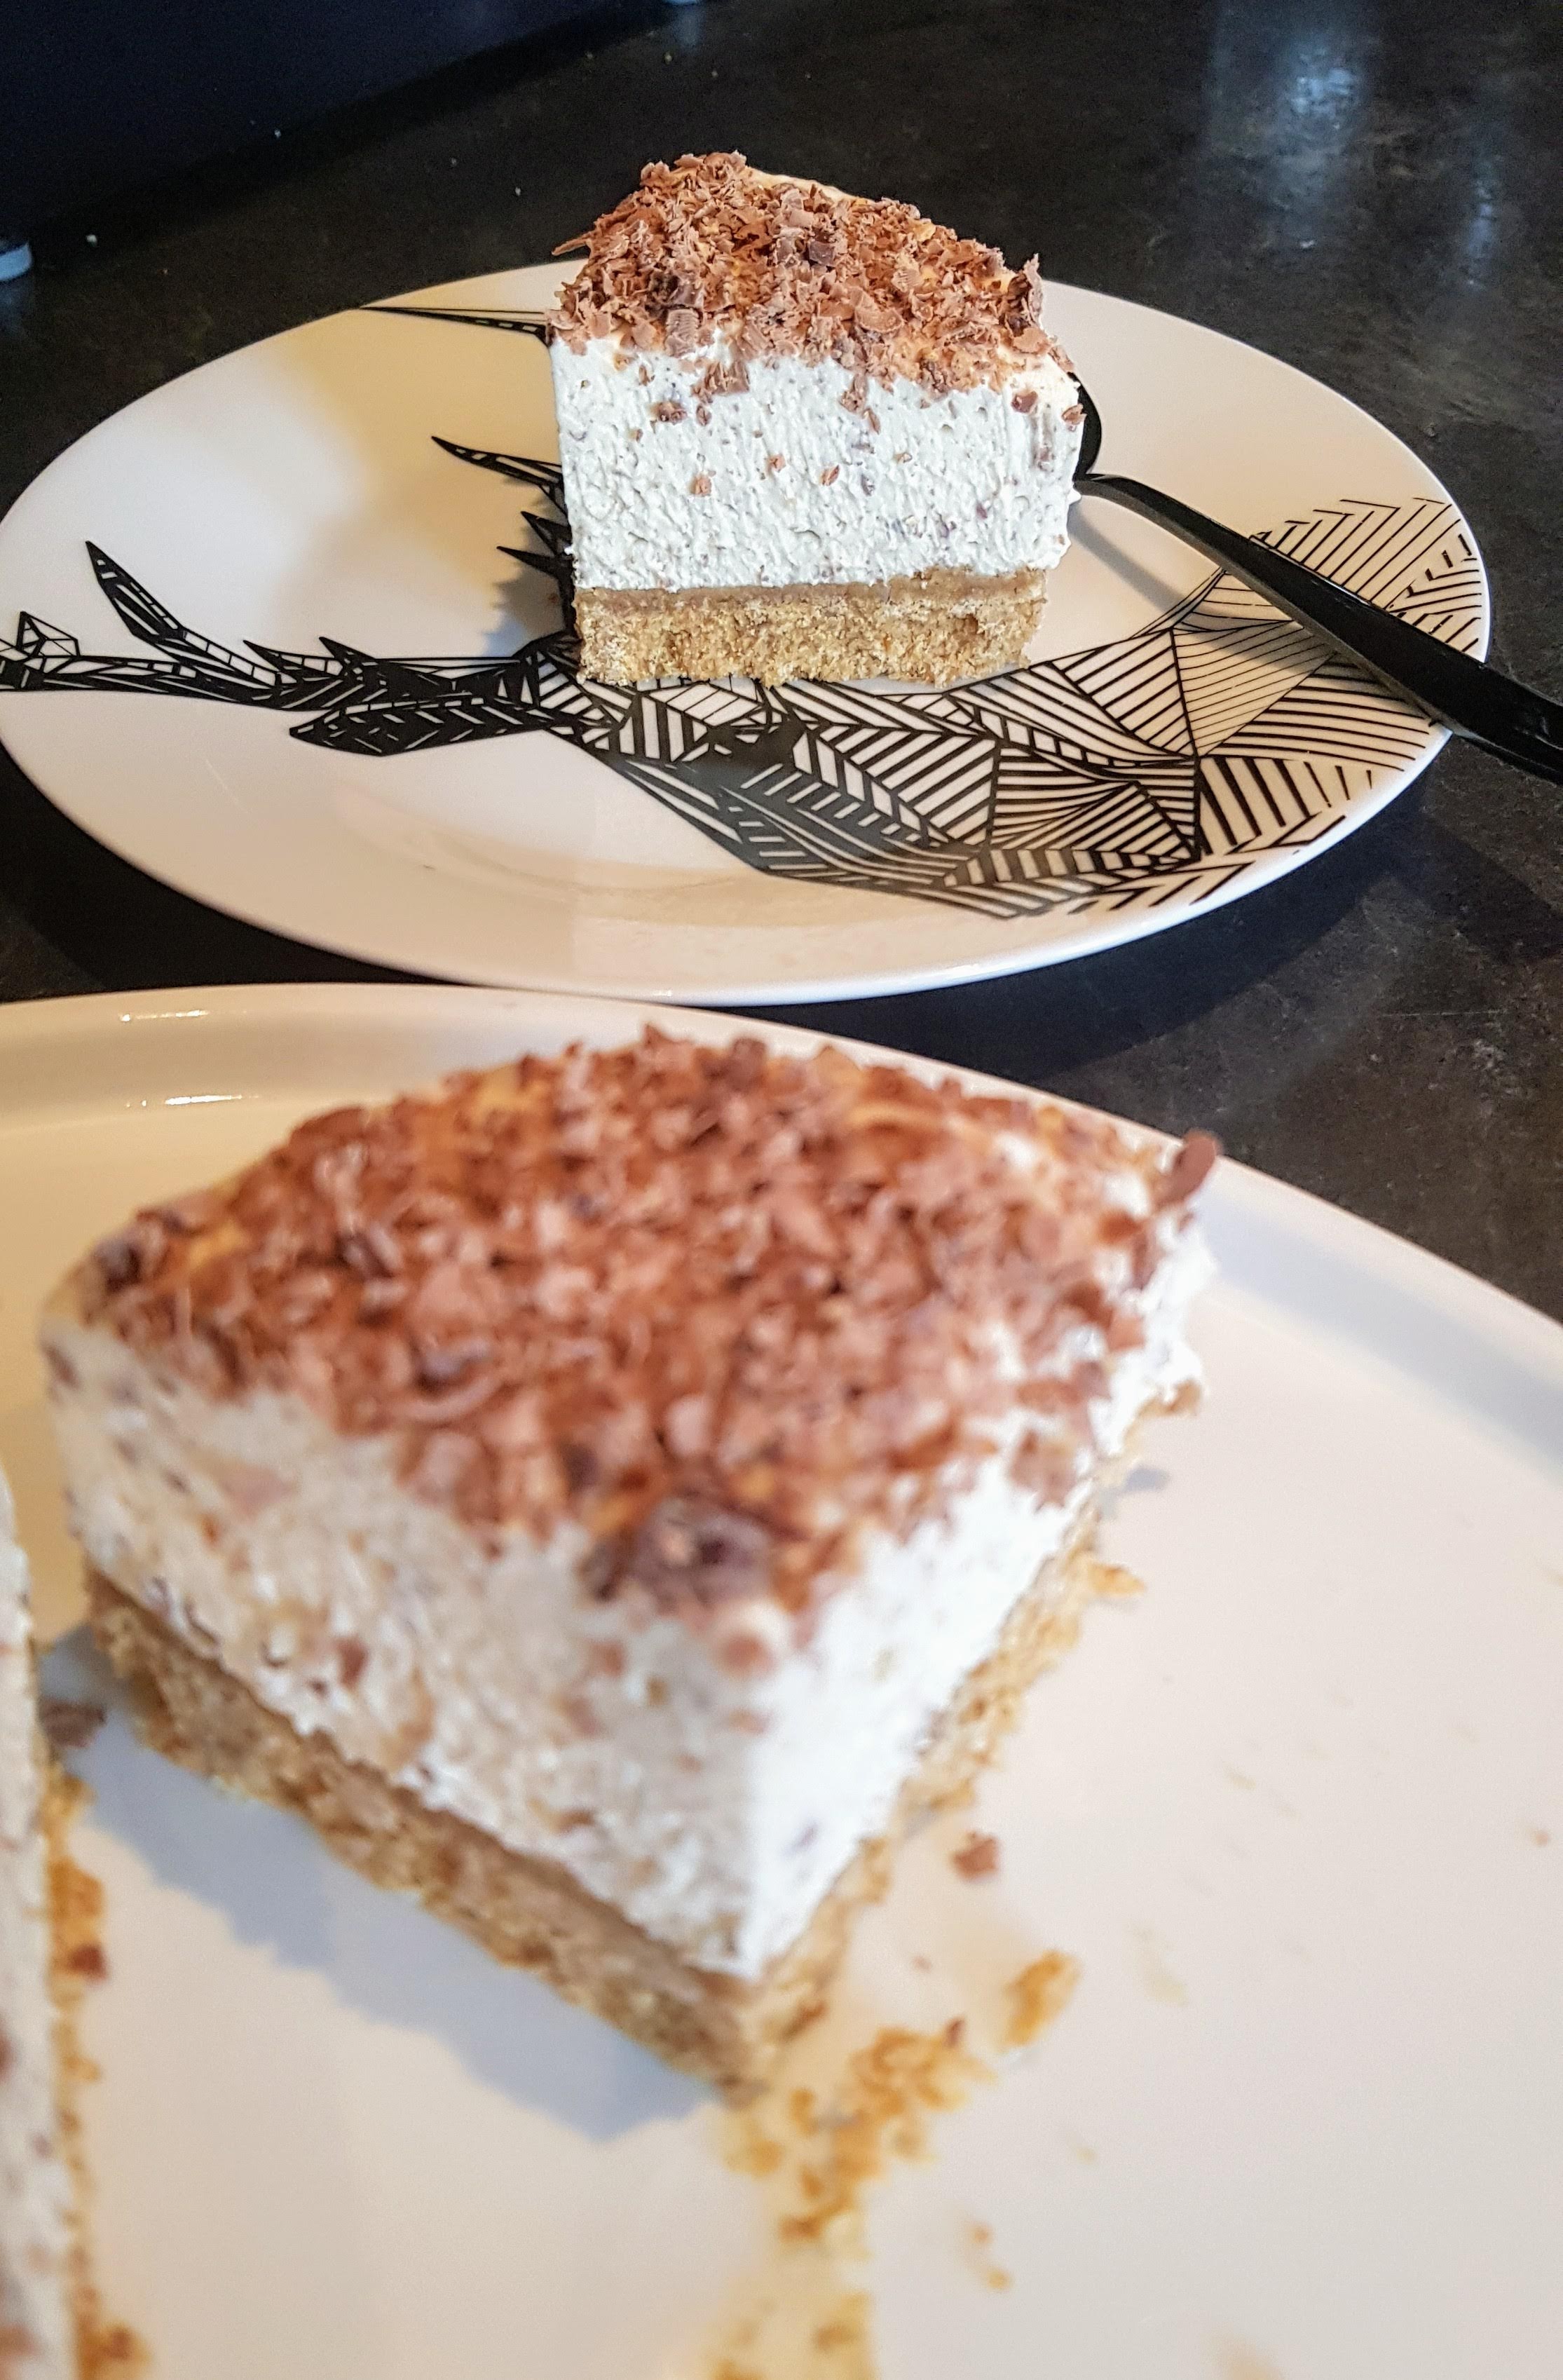
It was National Cheesecake Day on July 30th, 3 days after my partners birthday & he wanted Cheesecake for his dessert. We must have went through every flavour on the planet until he decided that it was Crunchie he was going to settled for. To be honest I was glad as I do love a Crunchie Bar, it’s just that lovely melt in the mouth honeycomb that I like. This was delicious!

Makes a Deep fill 9″ Cake
300g Cream Cheese (I use Philadelphia & full fat, it dosen’t work with the lighter one)
150ml Double Cream
80g Icing Sugar
3 Cadburys Crunchie Bars – Blitzed in a processor
1 tsp vanilla essence
13 Digestive Biscuits – Blitzed in a processor
50g Melted Butter
Milk Chocolate shavings for the topping


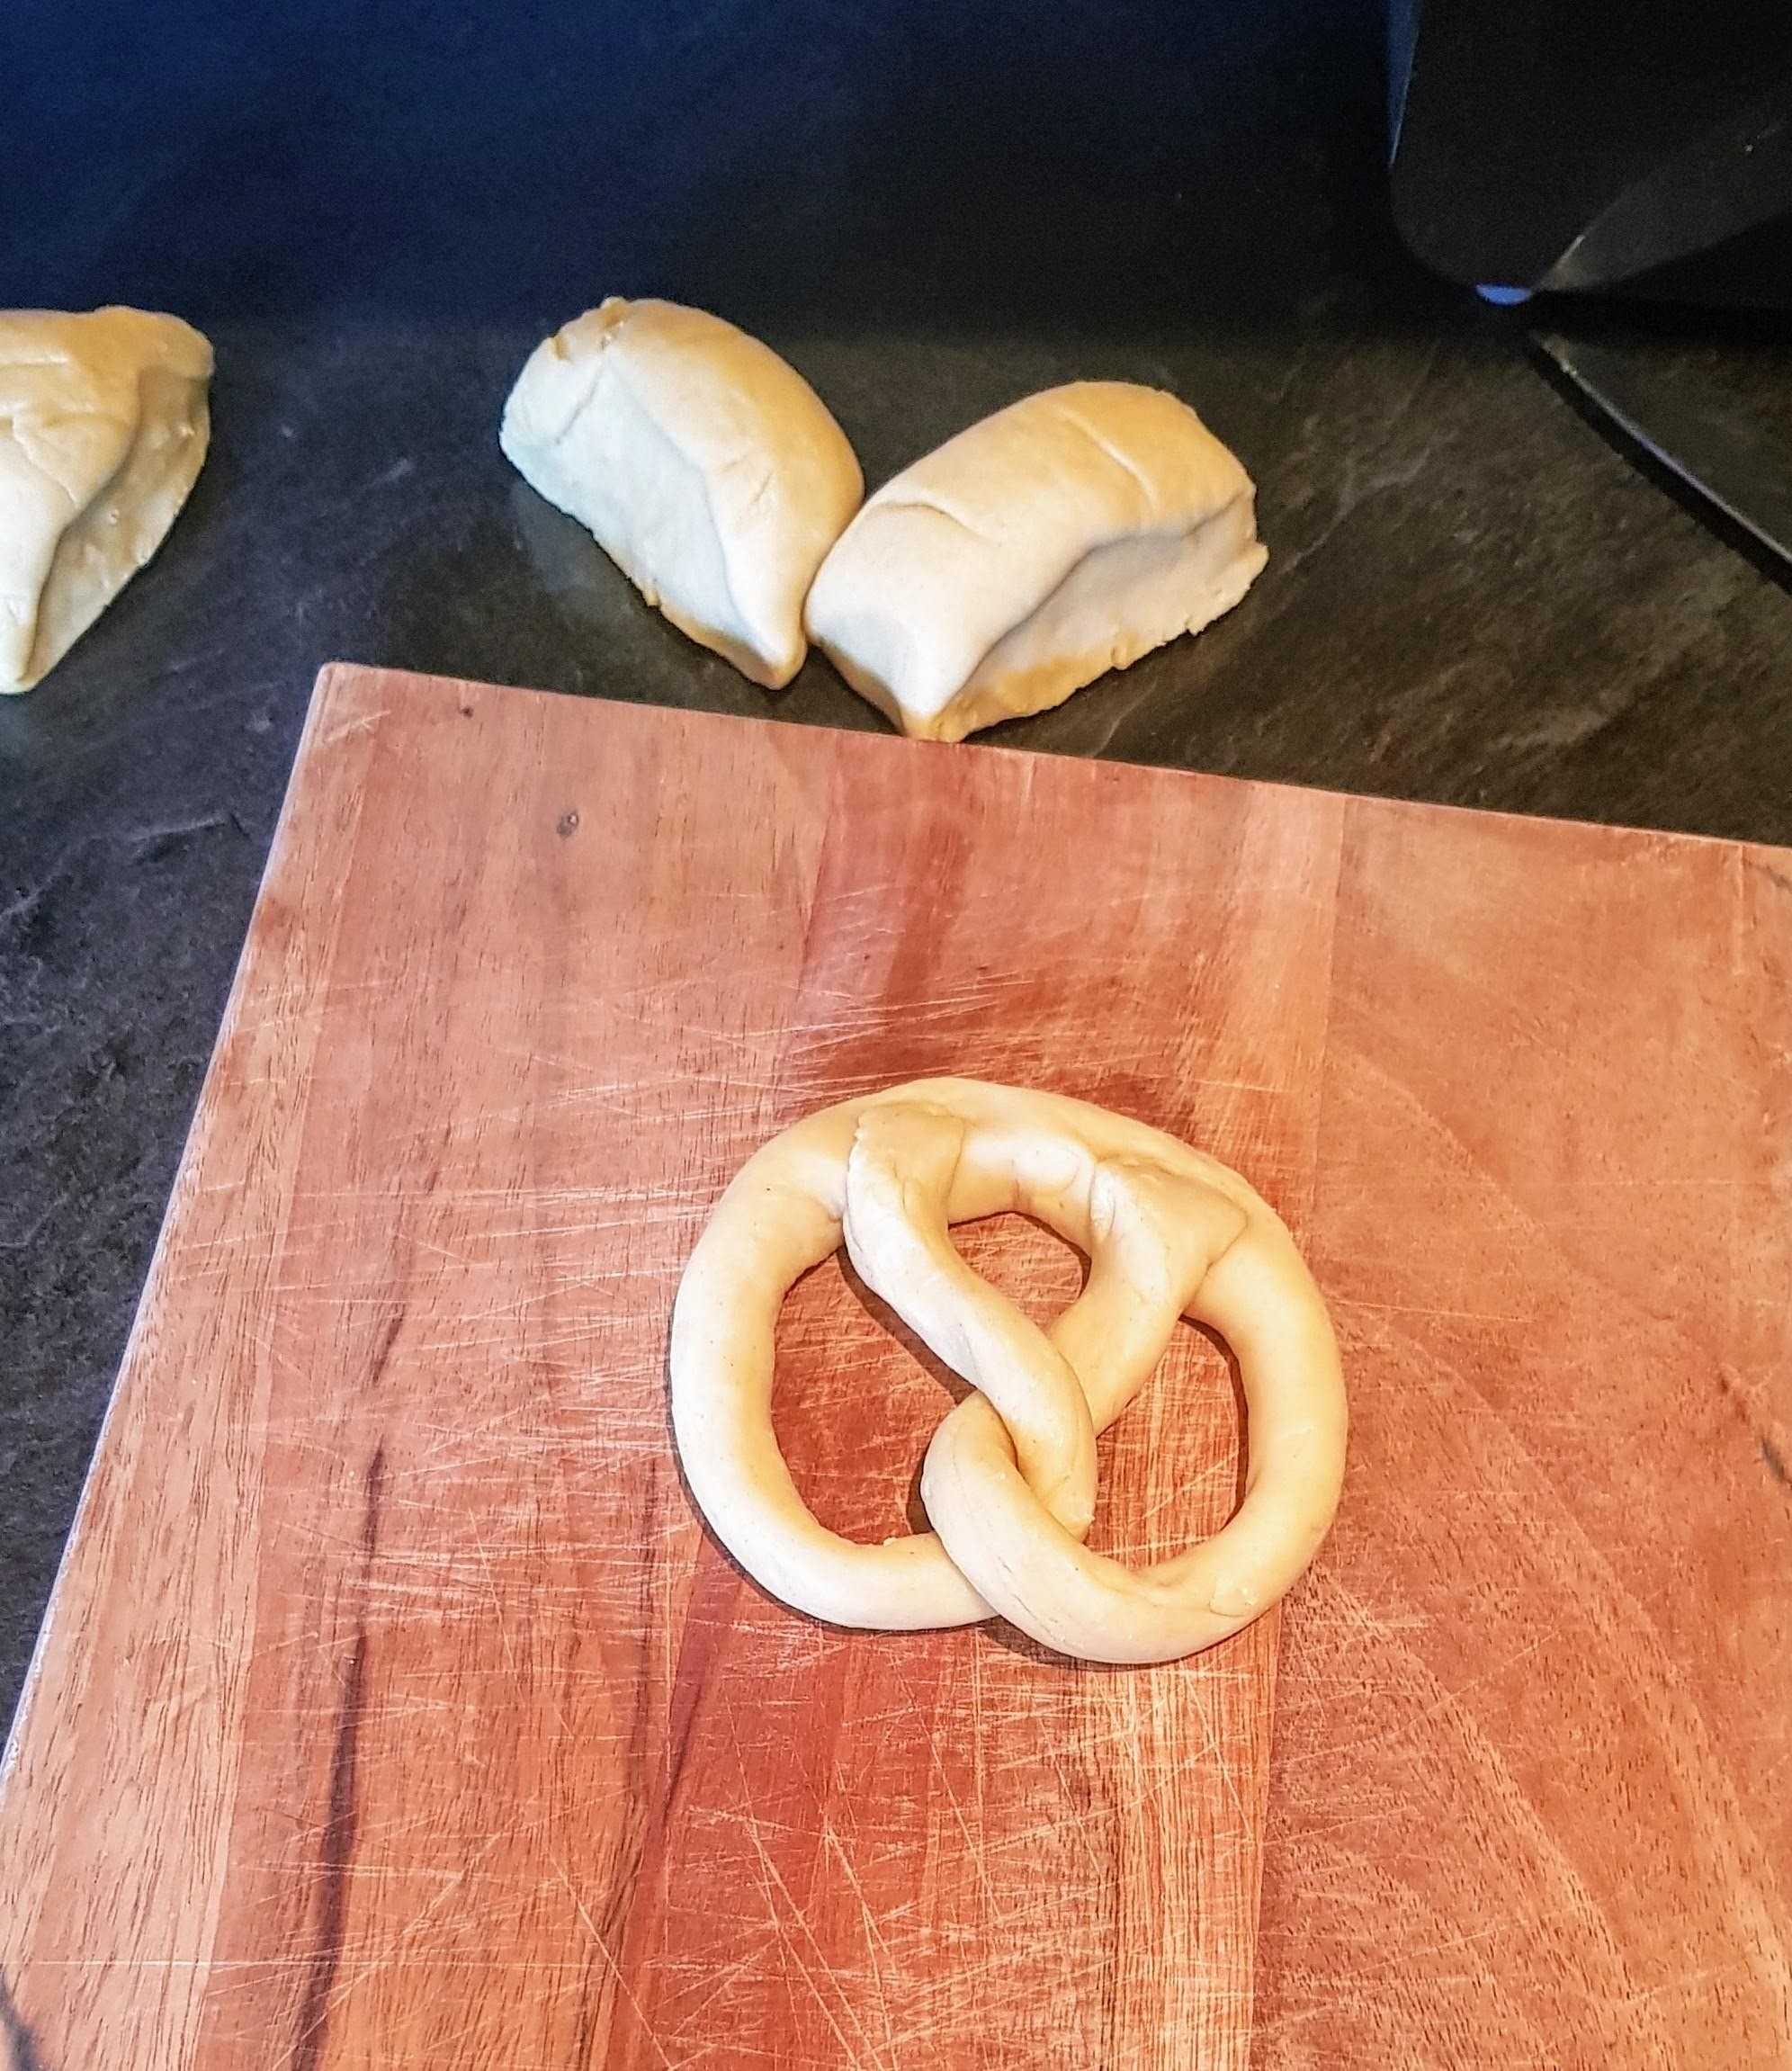
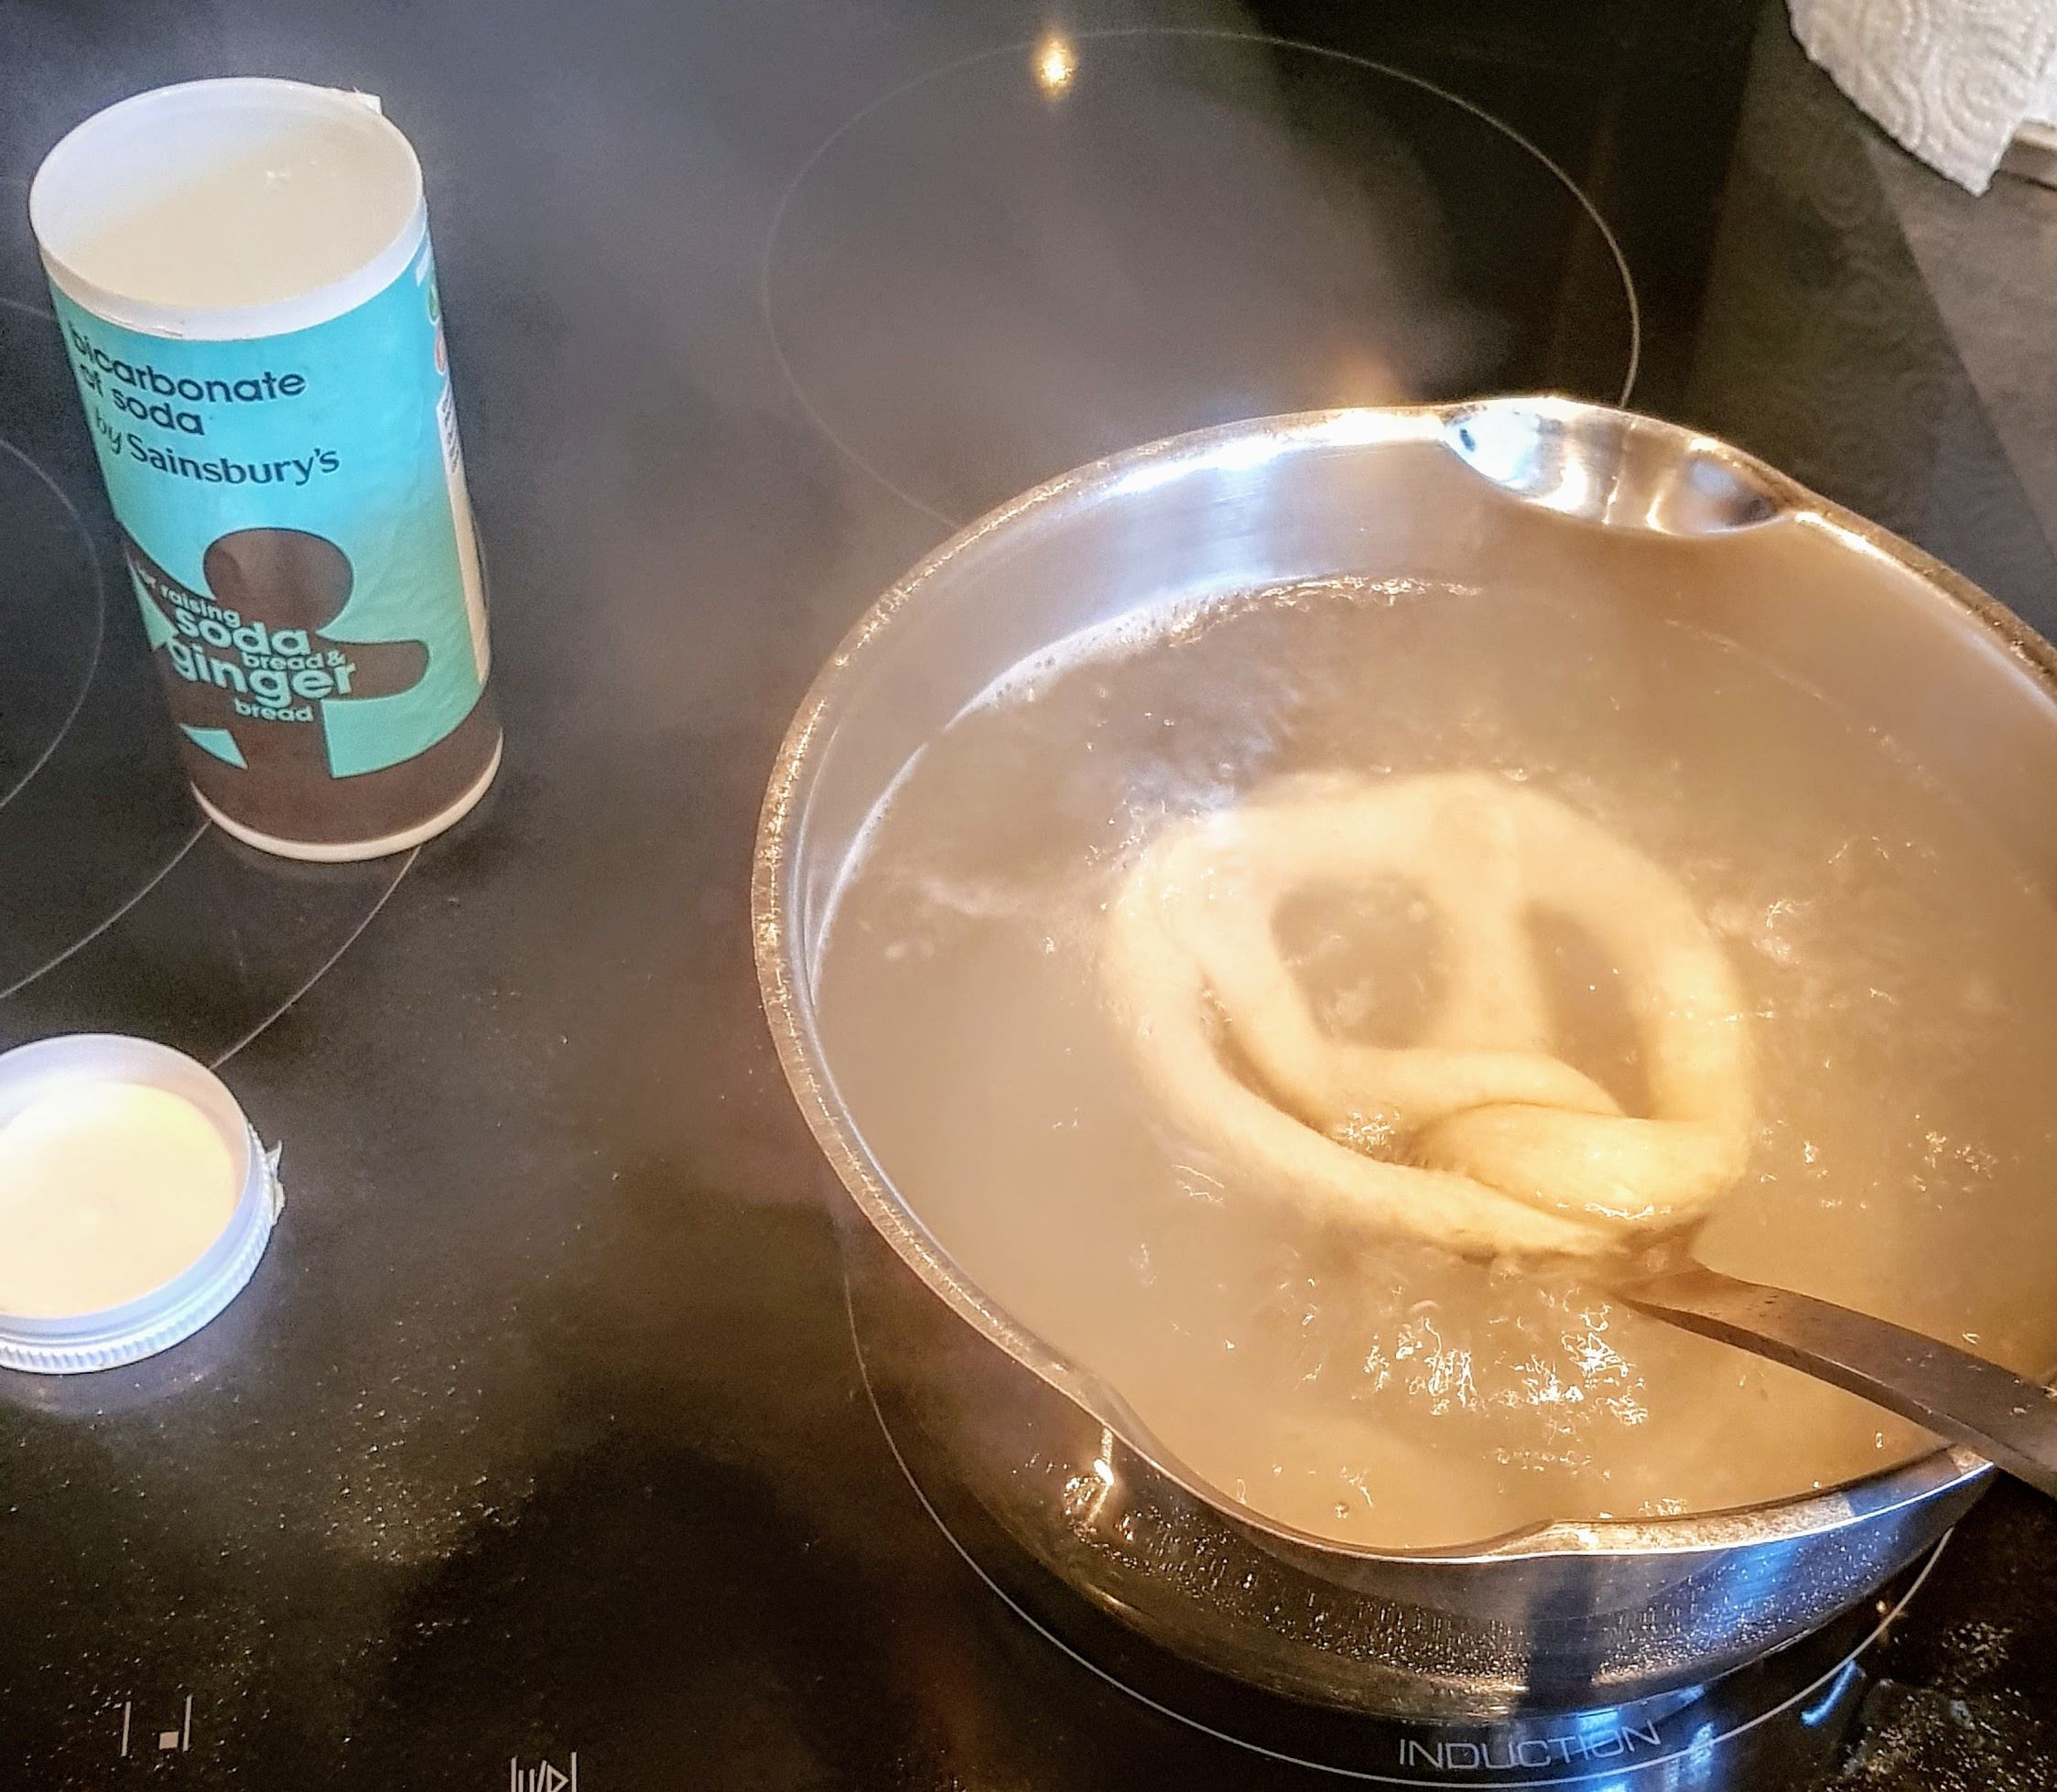
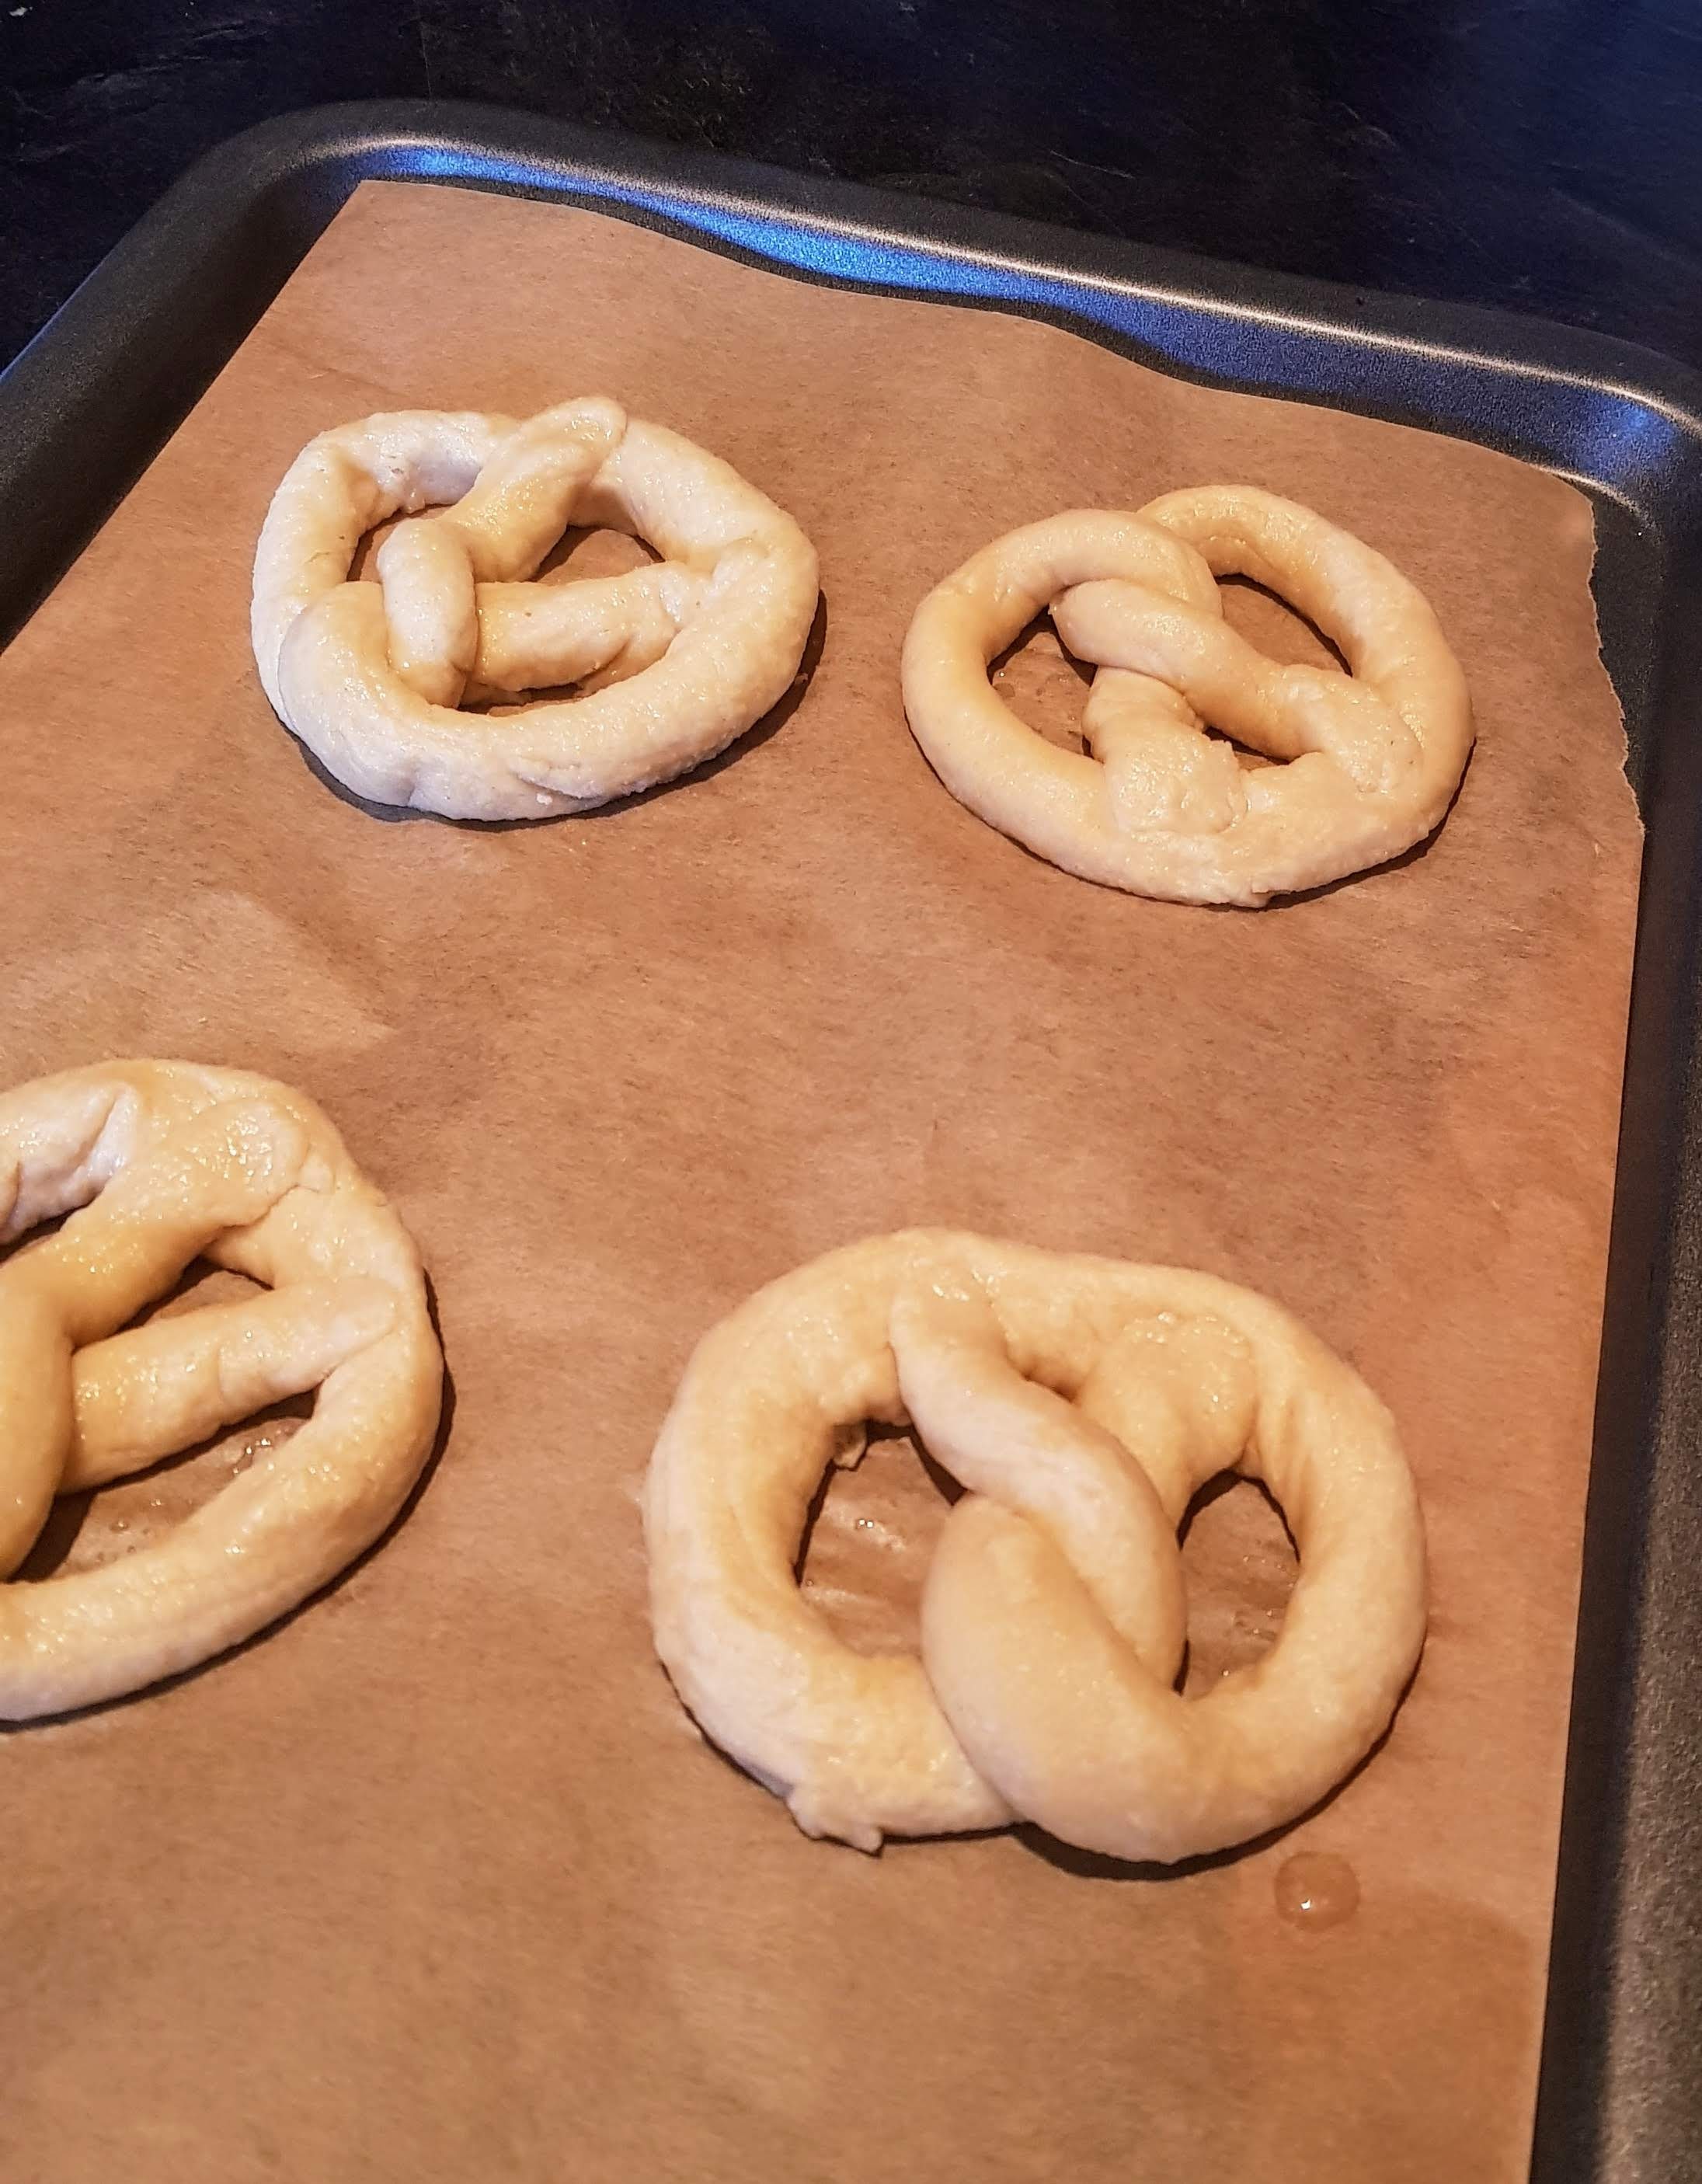
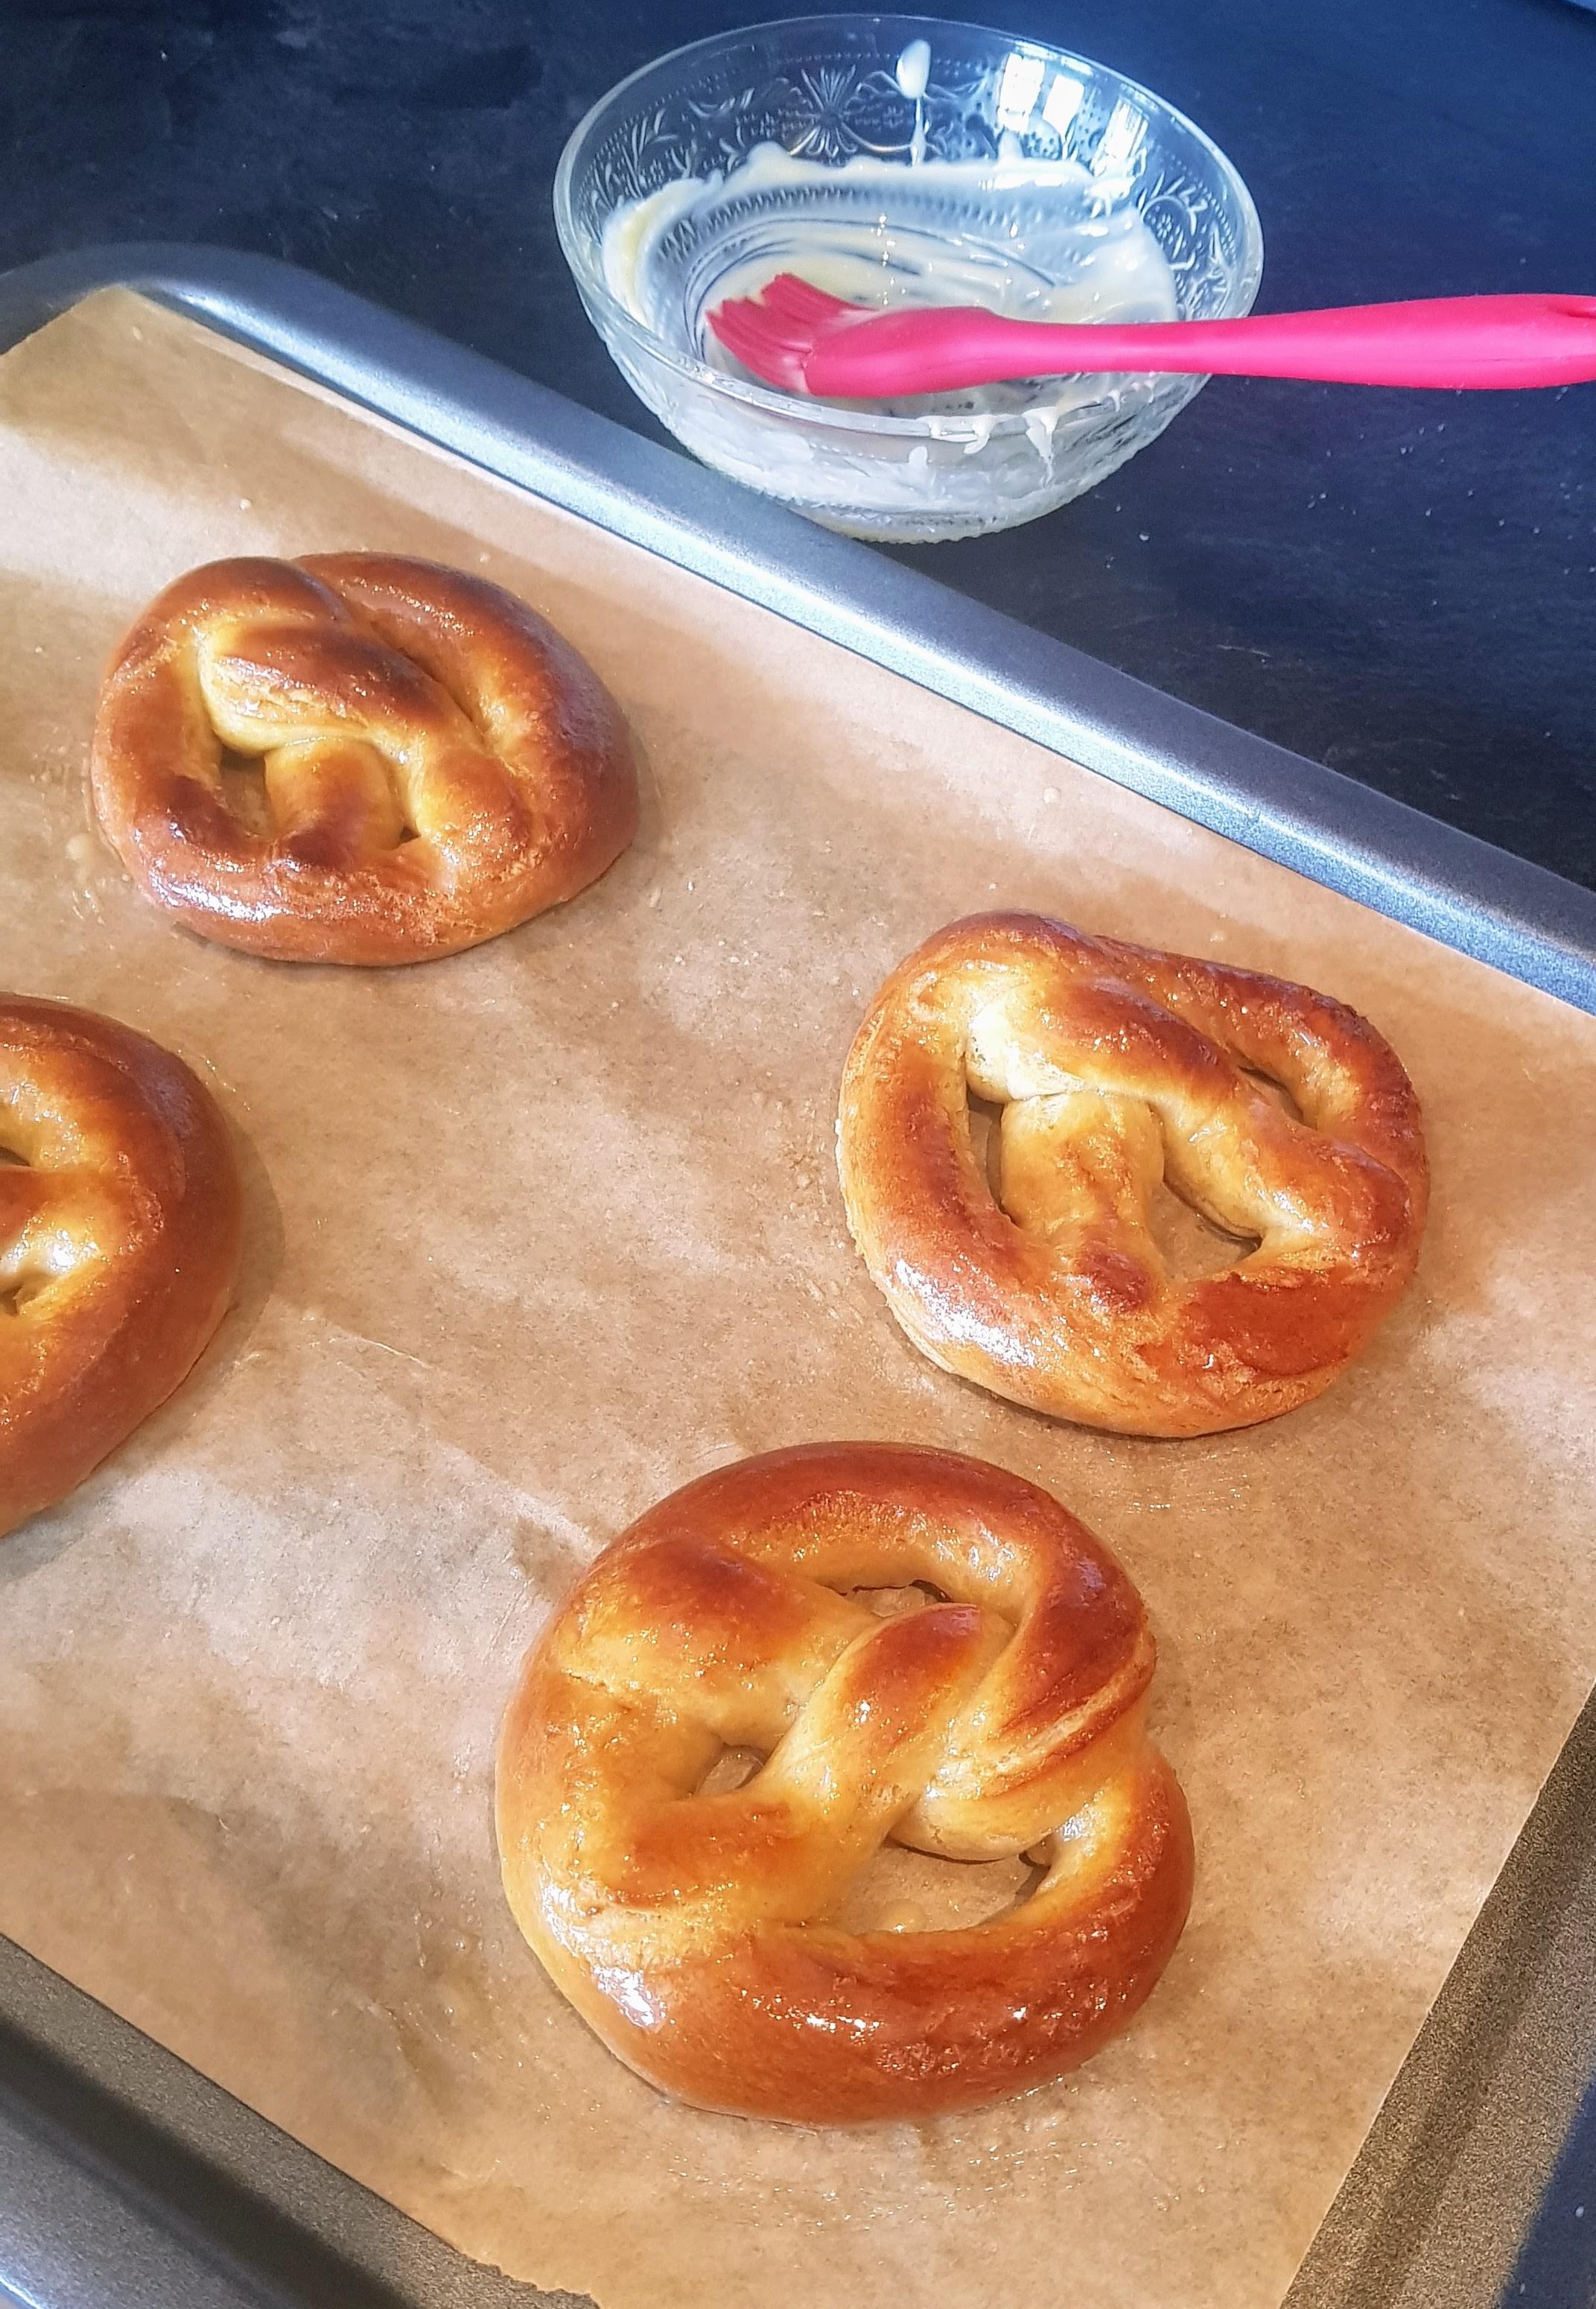
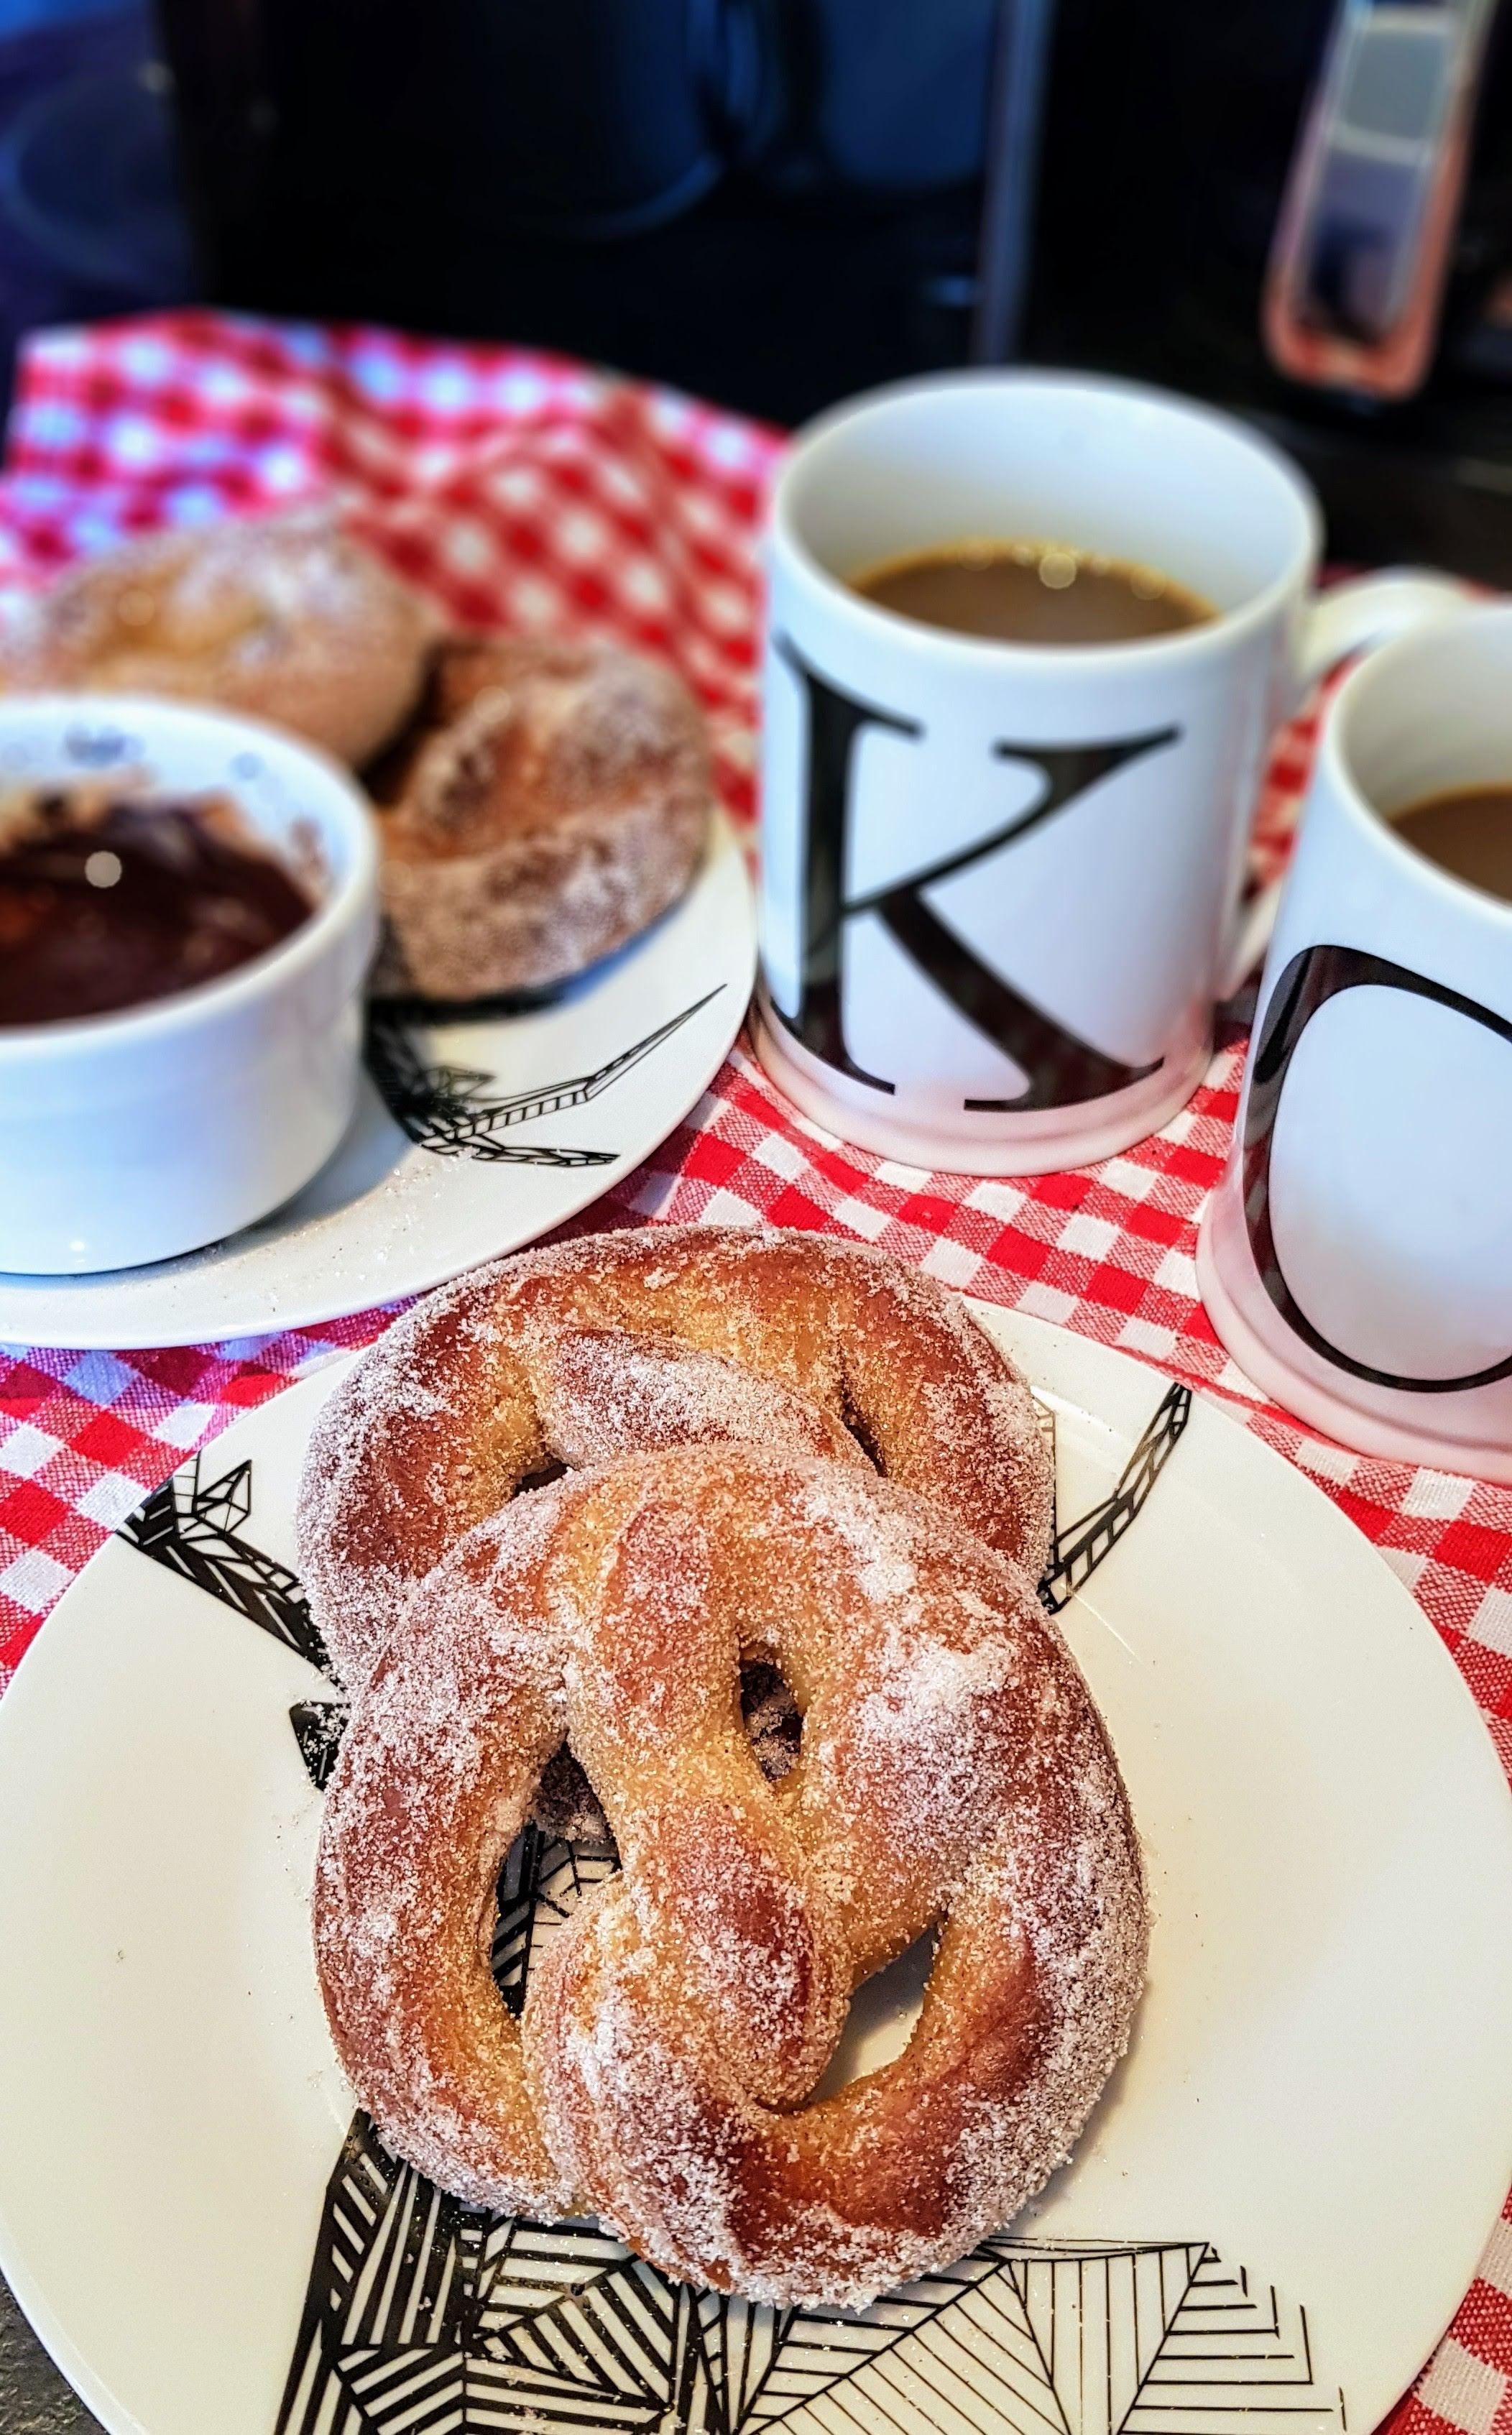
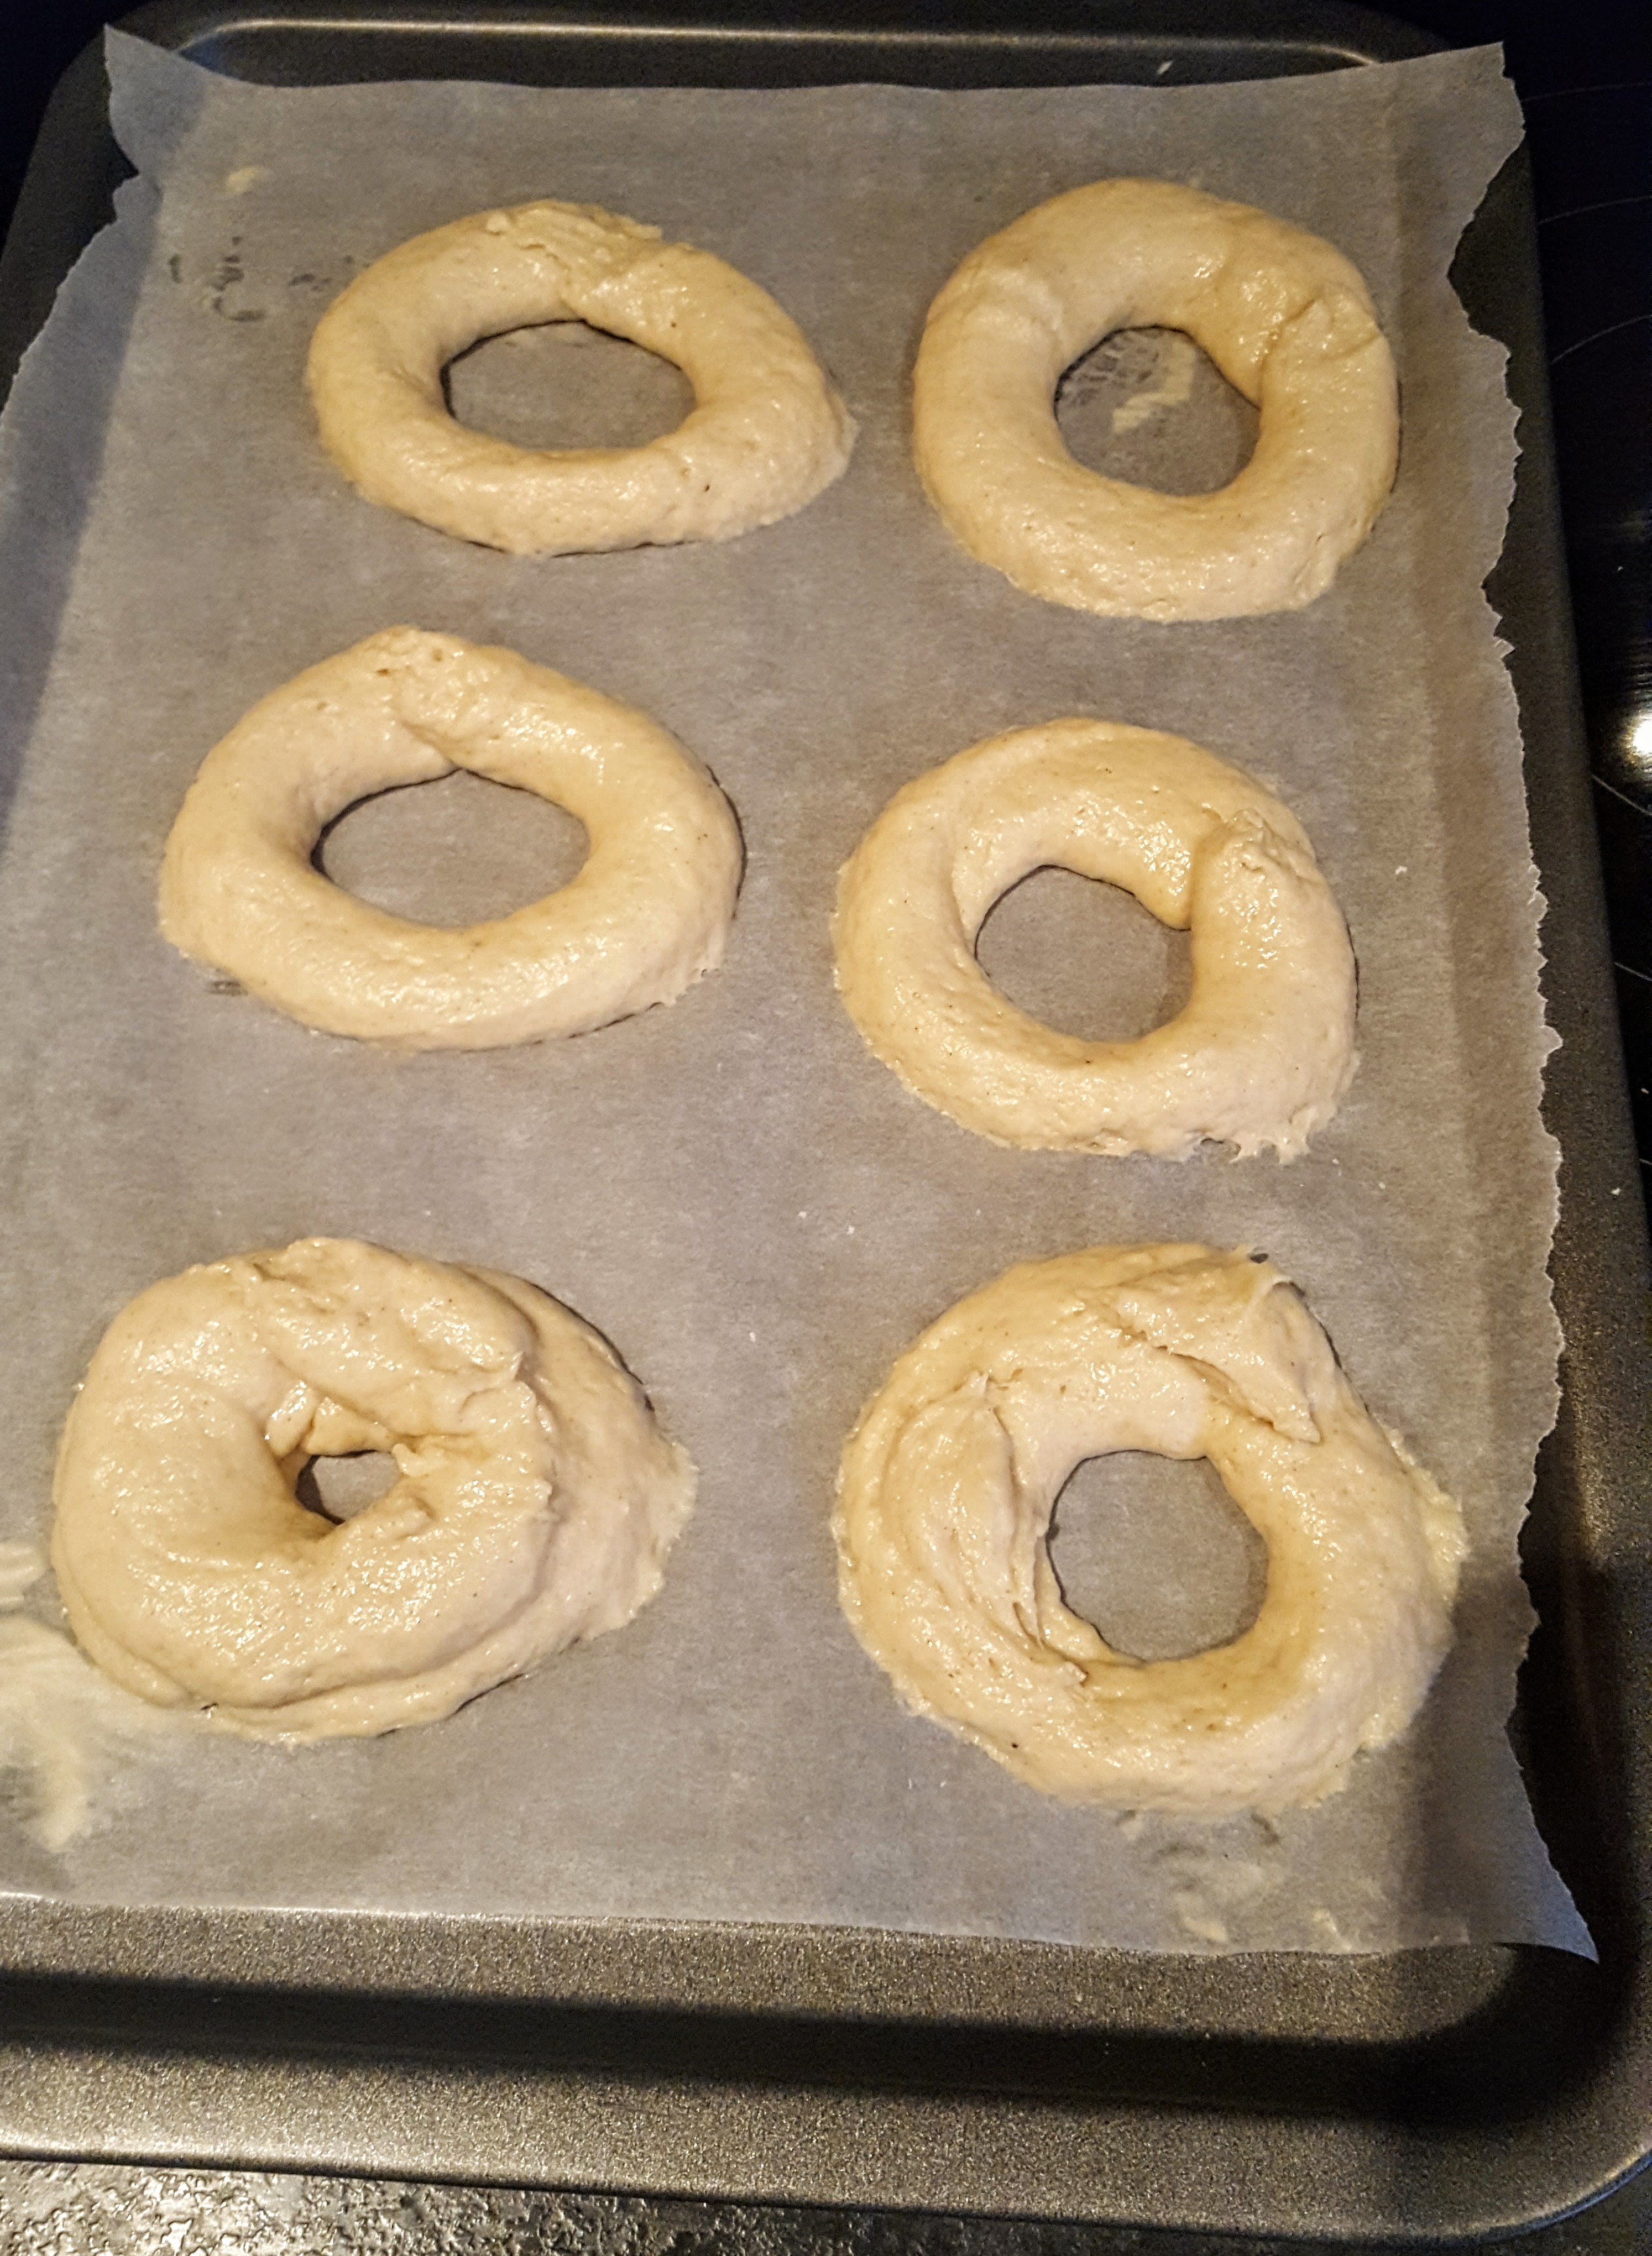
OMG! Delicious! This was a recipe from BakedIn https://bakedin.co.uk/pages/pretzels . First time I’ve tried the Pretzel shape too, fairly easy.
Sunday for me is a chillout day and normally a baking day, so today I decided to give these a go for our Sunday Brunch picnic at home. Sugar & Spice & all things nice……so yummy!
Makes 4
150g Strong White Bread Flour
1 packet 7g Dried Yeast
15g Caster Sugar (plus 40g for Topping)
1/2 tsp Salt
2 tbsp Bicarbonate Soda
1 tsp Ground Cinnamon
100ml Milk
40g Butter (plus 30g melted for coating)
50g Chocolate (if using a dip)


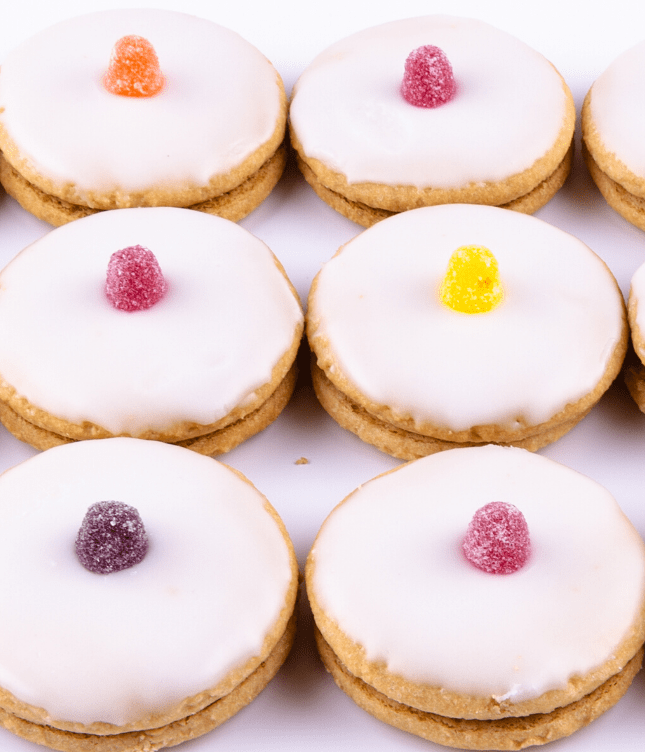
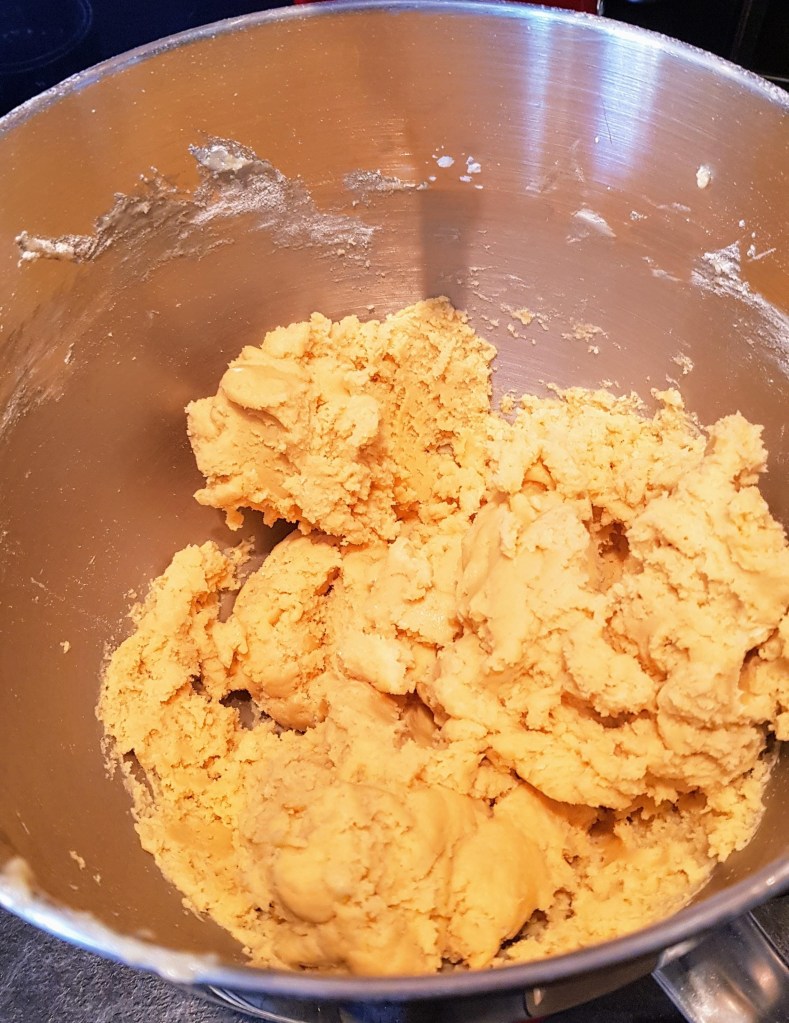
For a while now I have been trying to perfect my Empire Recipe, and finally I have found a ratio of ingredients and cooking times that work perfectly. (please bare in mind that not all ovens are the same, so you timings may vary slightly). The traditional Scottish way is to decorate with a Jube Jube (they are like big jelly tots), although most people tend to put a cherry on top. To be honest it’s whatever you like, there is no right or wrong. I have even experimented with alternative decorated toppings.

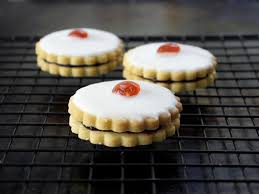
There was a great post from Scotsman Food & Drink a while ago about the largest Empire Biscuit made which measured 36″ diameter. Read all about it here:-https://foodanddrink.scotsman.com/producers/worlds-largest-empire-biscuit-unveiled-scotland/
A bit like Shortbread quantities my Empire quantities are similar, if you start with the flour then butter then sugar and just half quantities as you go, you won’t go wrong.
Empire Biscuit Recipe – this makes 12 biscuits (24 individual biscuits)
450g Plain Flour with an additional 50g being Custard Powder to make 500g
250g butter
125g Caster Sugar
1 large egg
1 tsp vanilla extract
Pinch salt
Raspberry Jam
Royal icing is best & JuJubes (or cherries) Recipe for Royal icing here:- https://cookingwithluce.wordpress.com/2020/01/25/royal-icing/


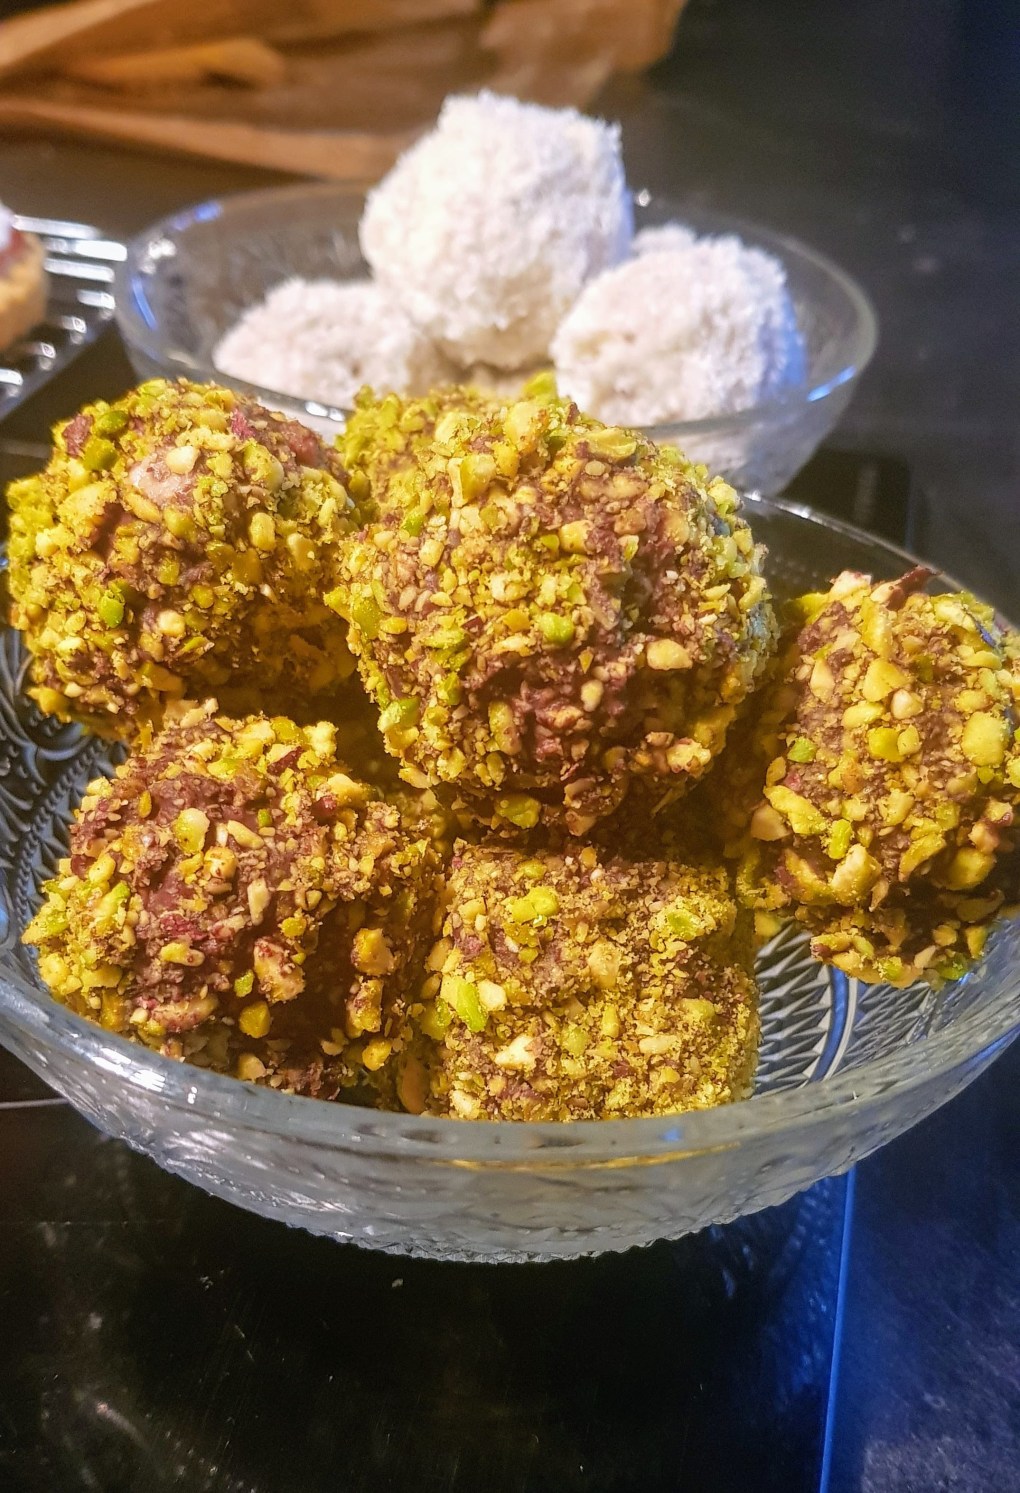

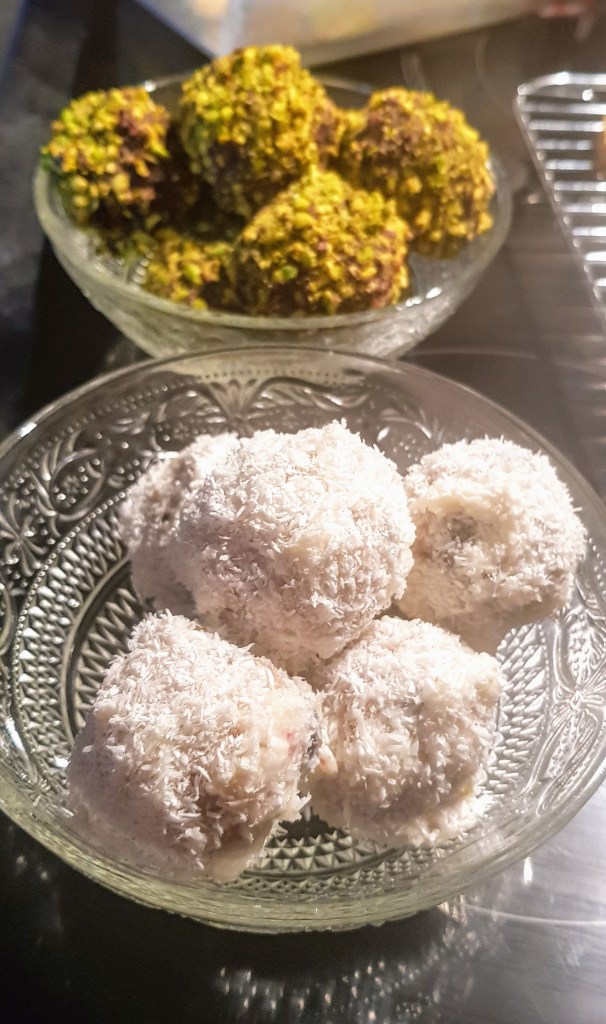
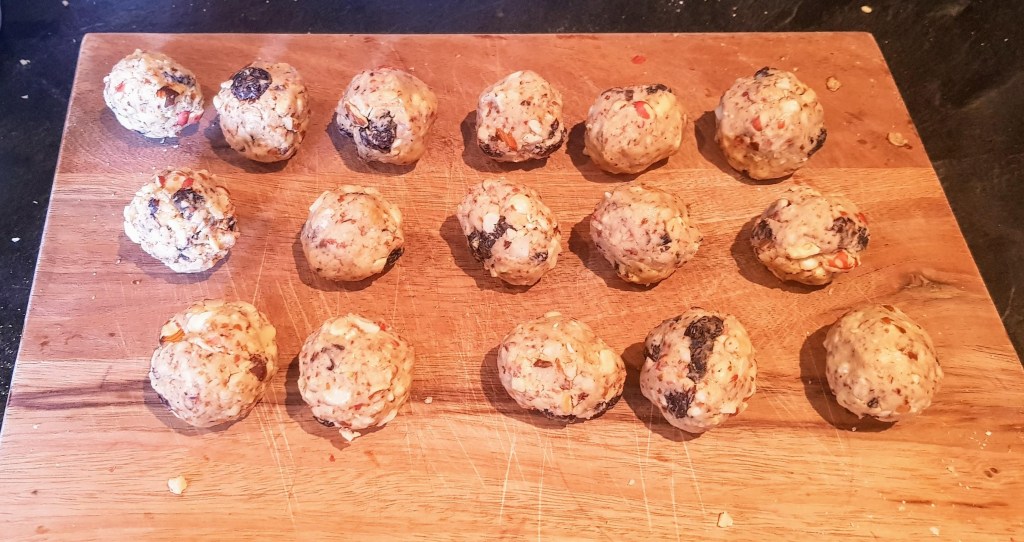
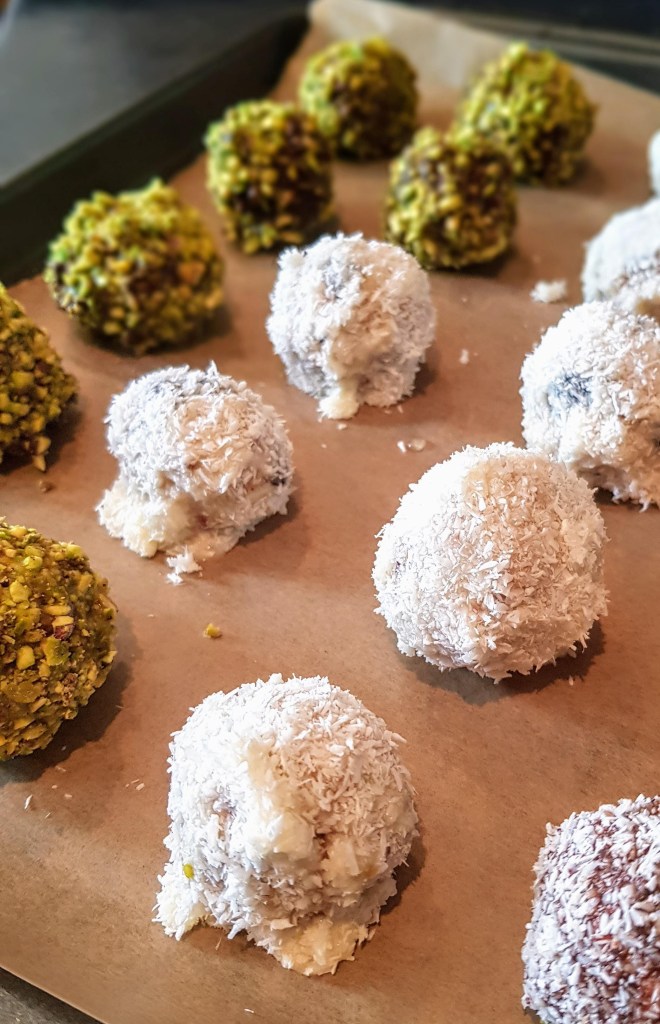
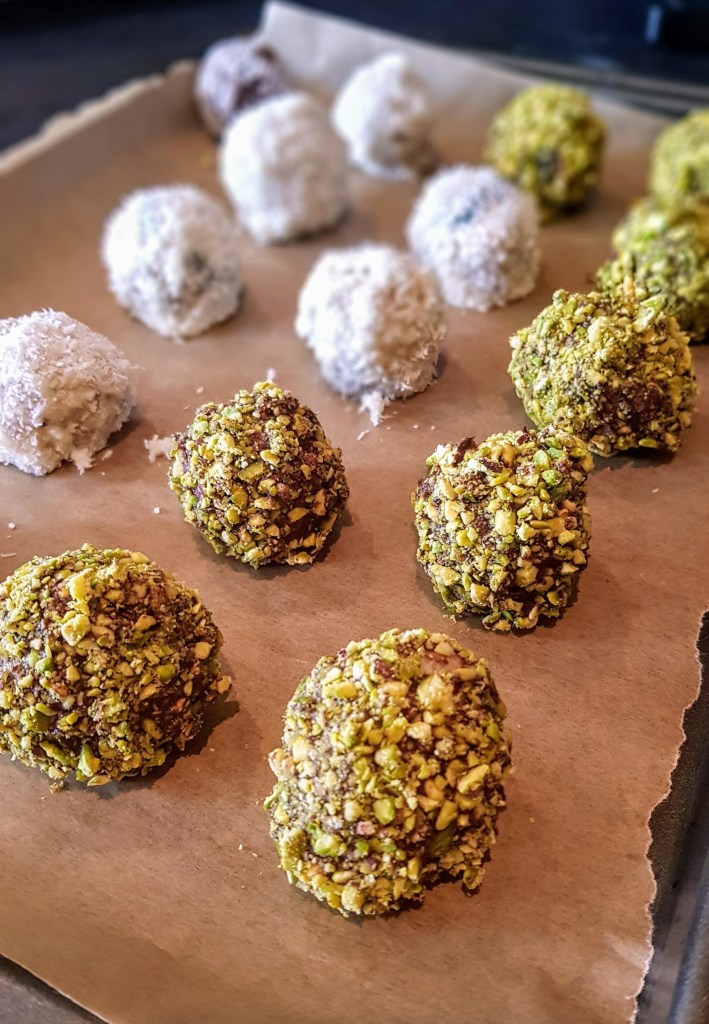
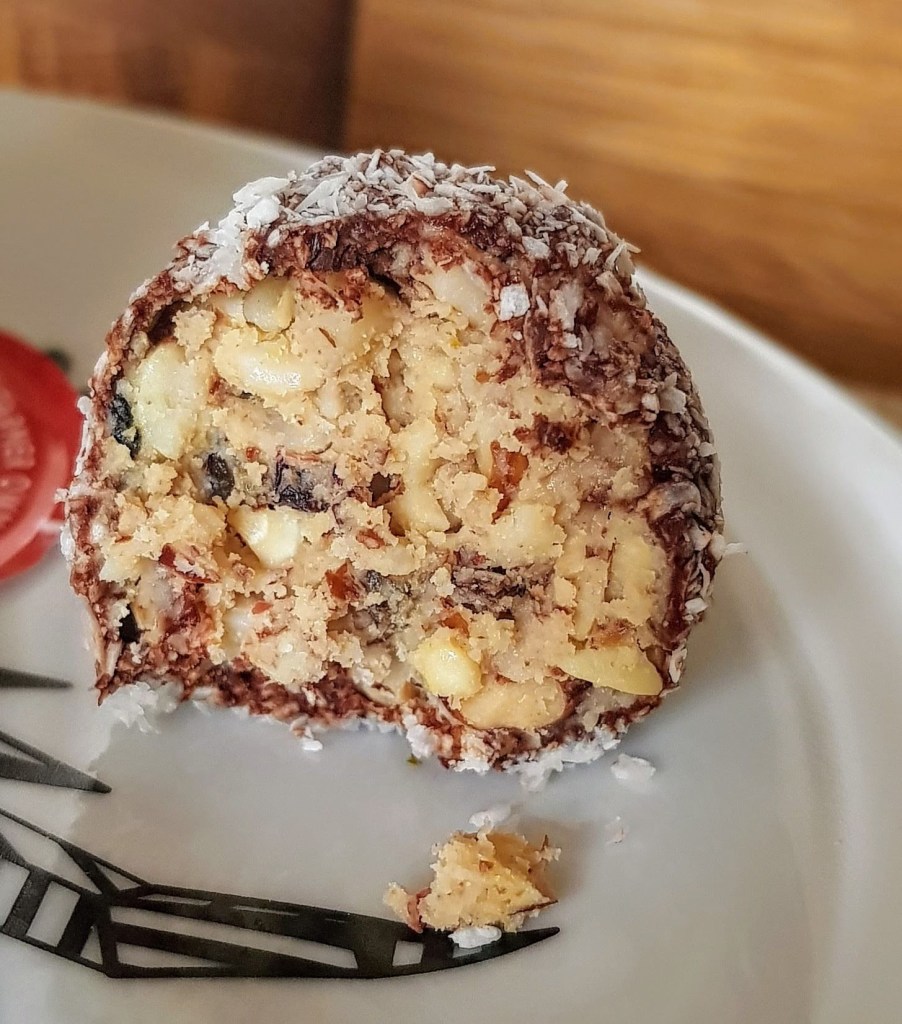
As the Covid19 Lockdown is slowly and gently easing, we are now allowed to travel to the mountains again. We have longed to get back outdoors and into the picturesque landscape we call home. The Scottish Mountains are my headspace, a place where I grow, think, be at peace, laugh and get fitter…lol! To read more about the Scottish Munros, Corbetts, Grahams etc, head over to my travel post https://atomic-temporary-46532287.wpcomstaging.com/2020/07/08/a-list-of-scotlands-mountains/.
Anyway, back to food, my first passion. To walk or climb the Scottish Mountains you need energy firstly (then waterproofs…lol), so I made these to pack and take with us for a wee boost when needed. Great for a pre workout snack too & also Gluten Free.

Makes about 16
For the Balls:-
4 heaped tbsp of Crunchy Peanut Butter (good quality, I use Whole Earth)
200g chopped mixed nuts & raisins (I used a food processor to chop finely)
2 tbsp Icing sugar
Coating/Topping:-
Choice 1:-
Dark or Milk Chocolate, 1 tbsp Butter – Melted together
Chopped Pistachios
Choice 2:-
Butter icing – Icing Sugar 80-100g, 1 tbsp butter – Melted together
Desiccated Coconut
Of course you can use any coating or topping you like.


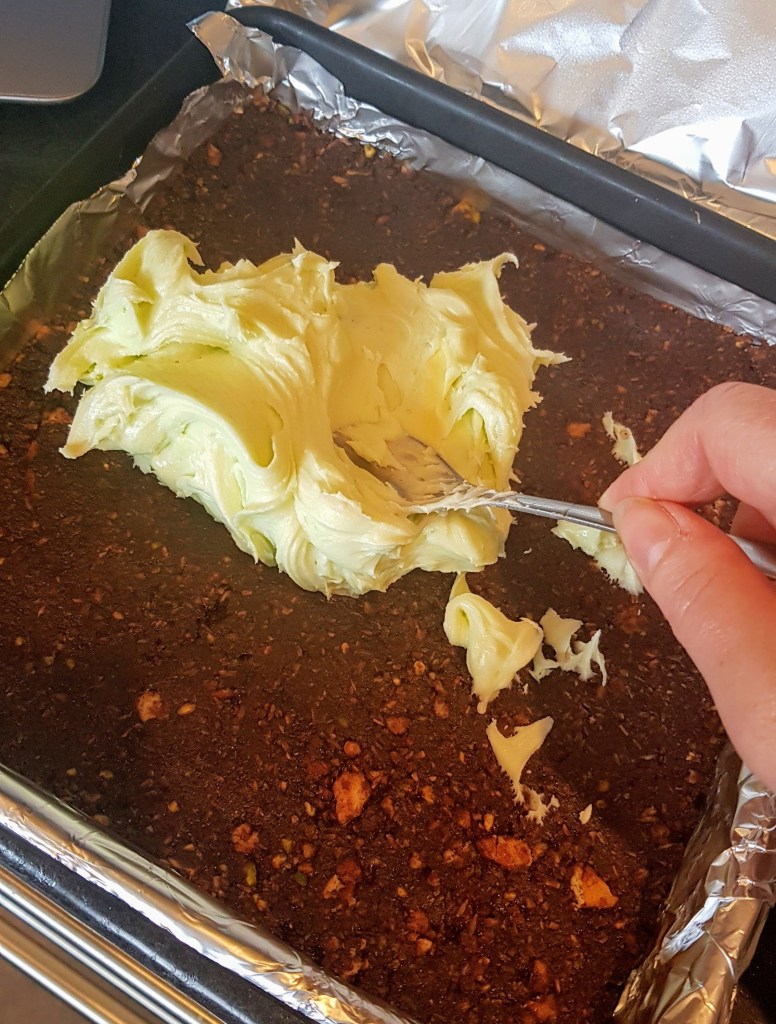
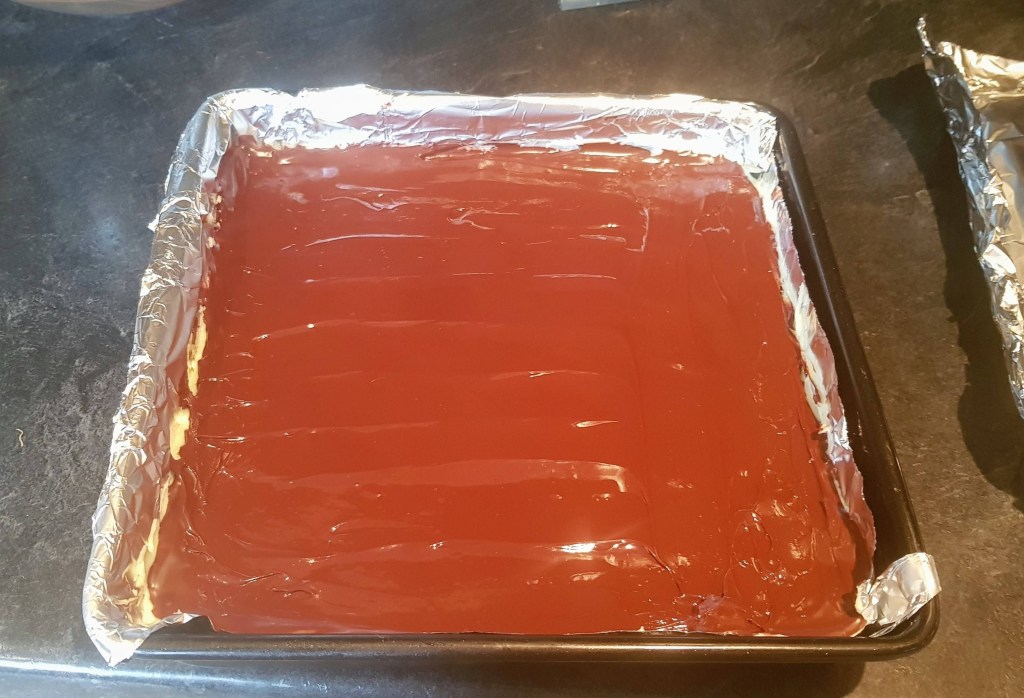
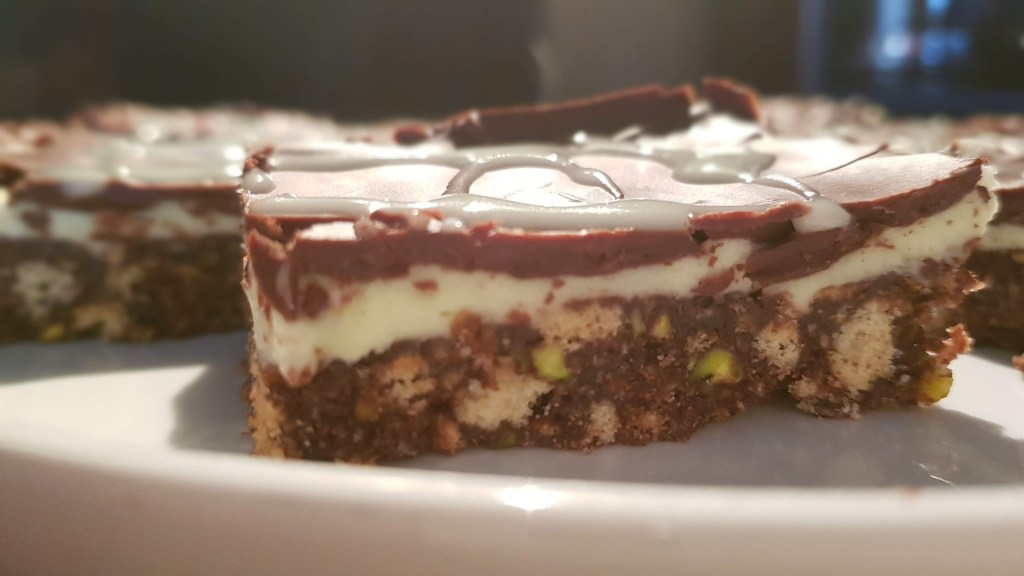
I was looking through all my recipes the other day and came across this one from my Gran’s old Cookbooks, one I hadn’t tried before. So with the wet weather to day was that day I was going to try these. Back in the day my gran always used margarine for baking, personally I think butter is a much better flavour so this was the 1 thing that I changed & I added in some pistachios to the base to give it a bit more crunch.

Makes about 16-20 squares (depends on how big a slice you want…lol!)
For the Base:-
200g Digestives, crushed
120g Butter
50g Light Brown Sugar
1 heaped tbsp Cocoa Powder
1 tsp vanilla extract
2 heaped tbsp desiccated coconut
40g Chopped Pistachios
1 egg beaten
For the Peppermint Centre:-
50g Butter
3 tbsp milk
1/2 tsp peppermint extract
230g Icing Sugar
Green Food Colouring
For the Chocolate:-
140g Milk Chocolate (55% cocoa) I use Lindt, definitely my favourite.
40g Dark Chocolate (70% cocoa)
1 tbsp butter


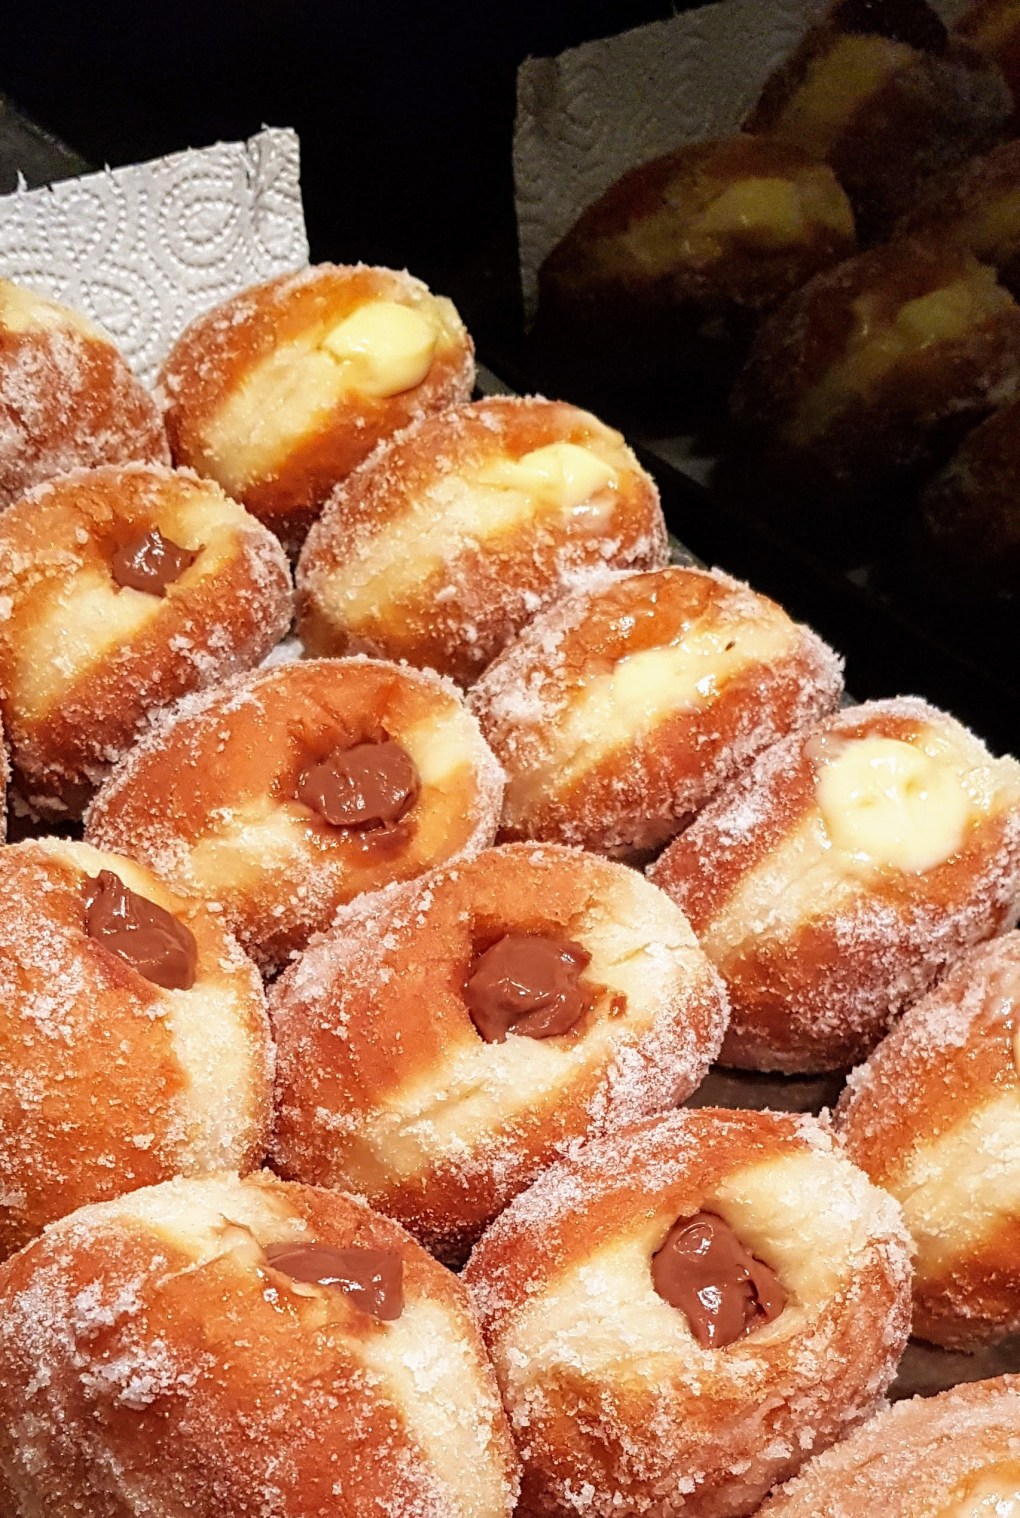
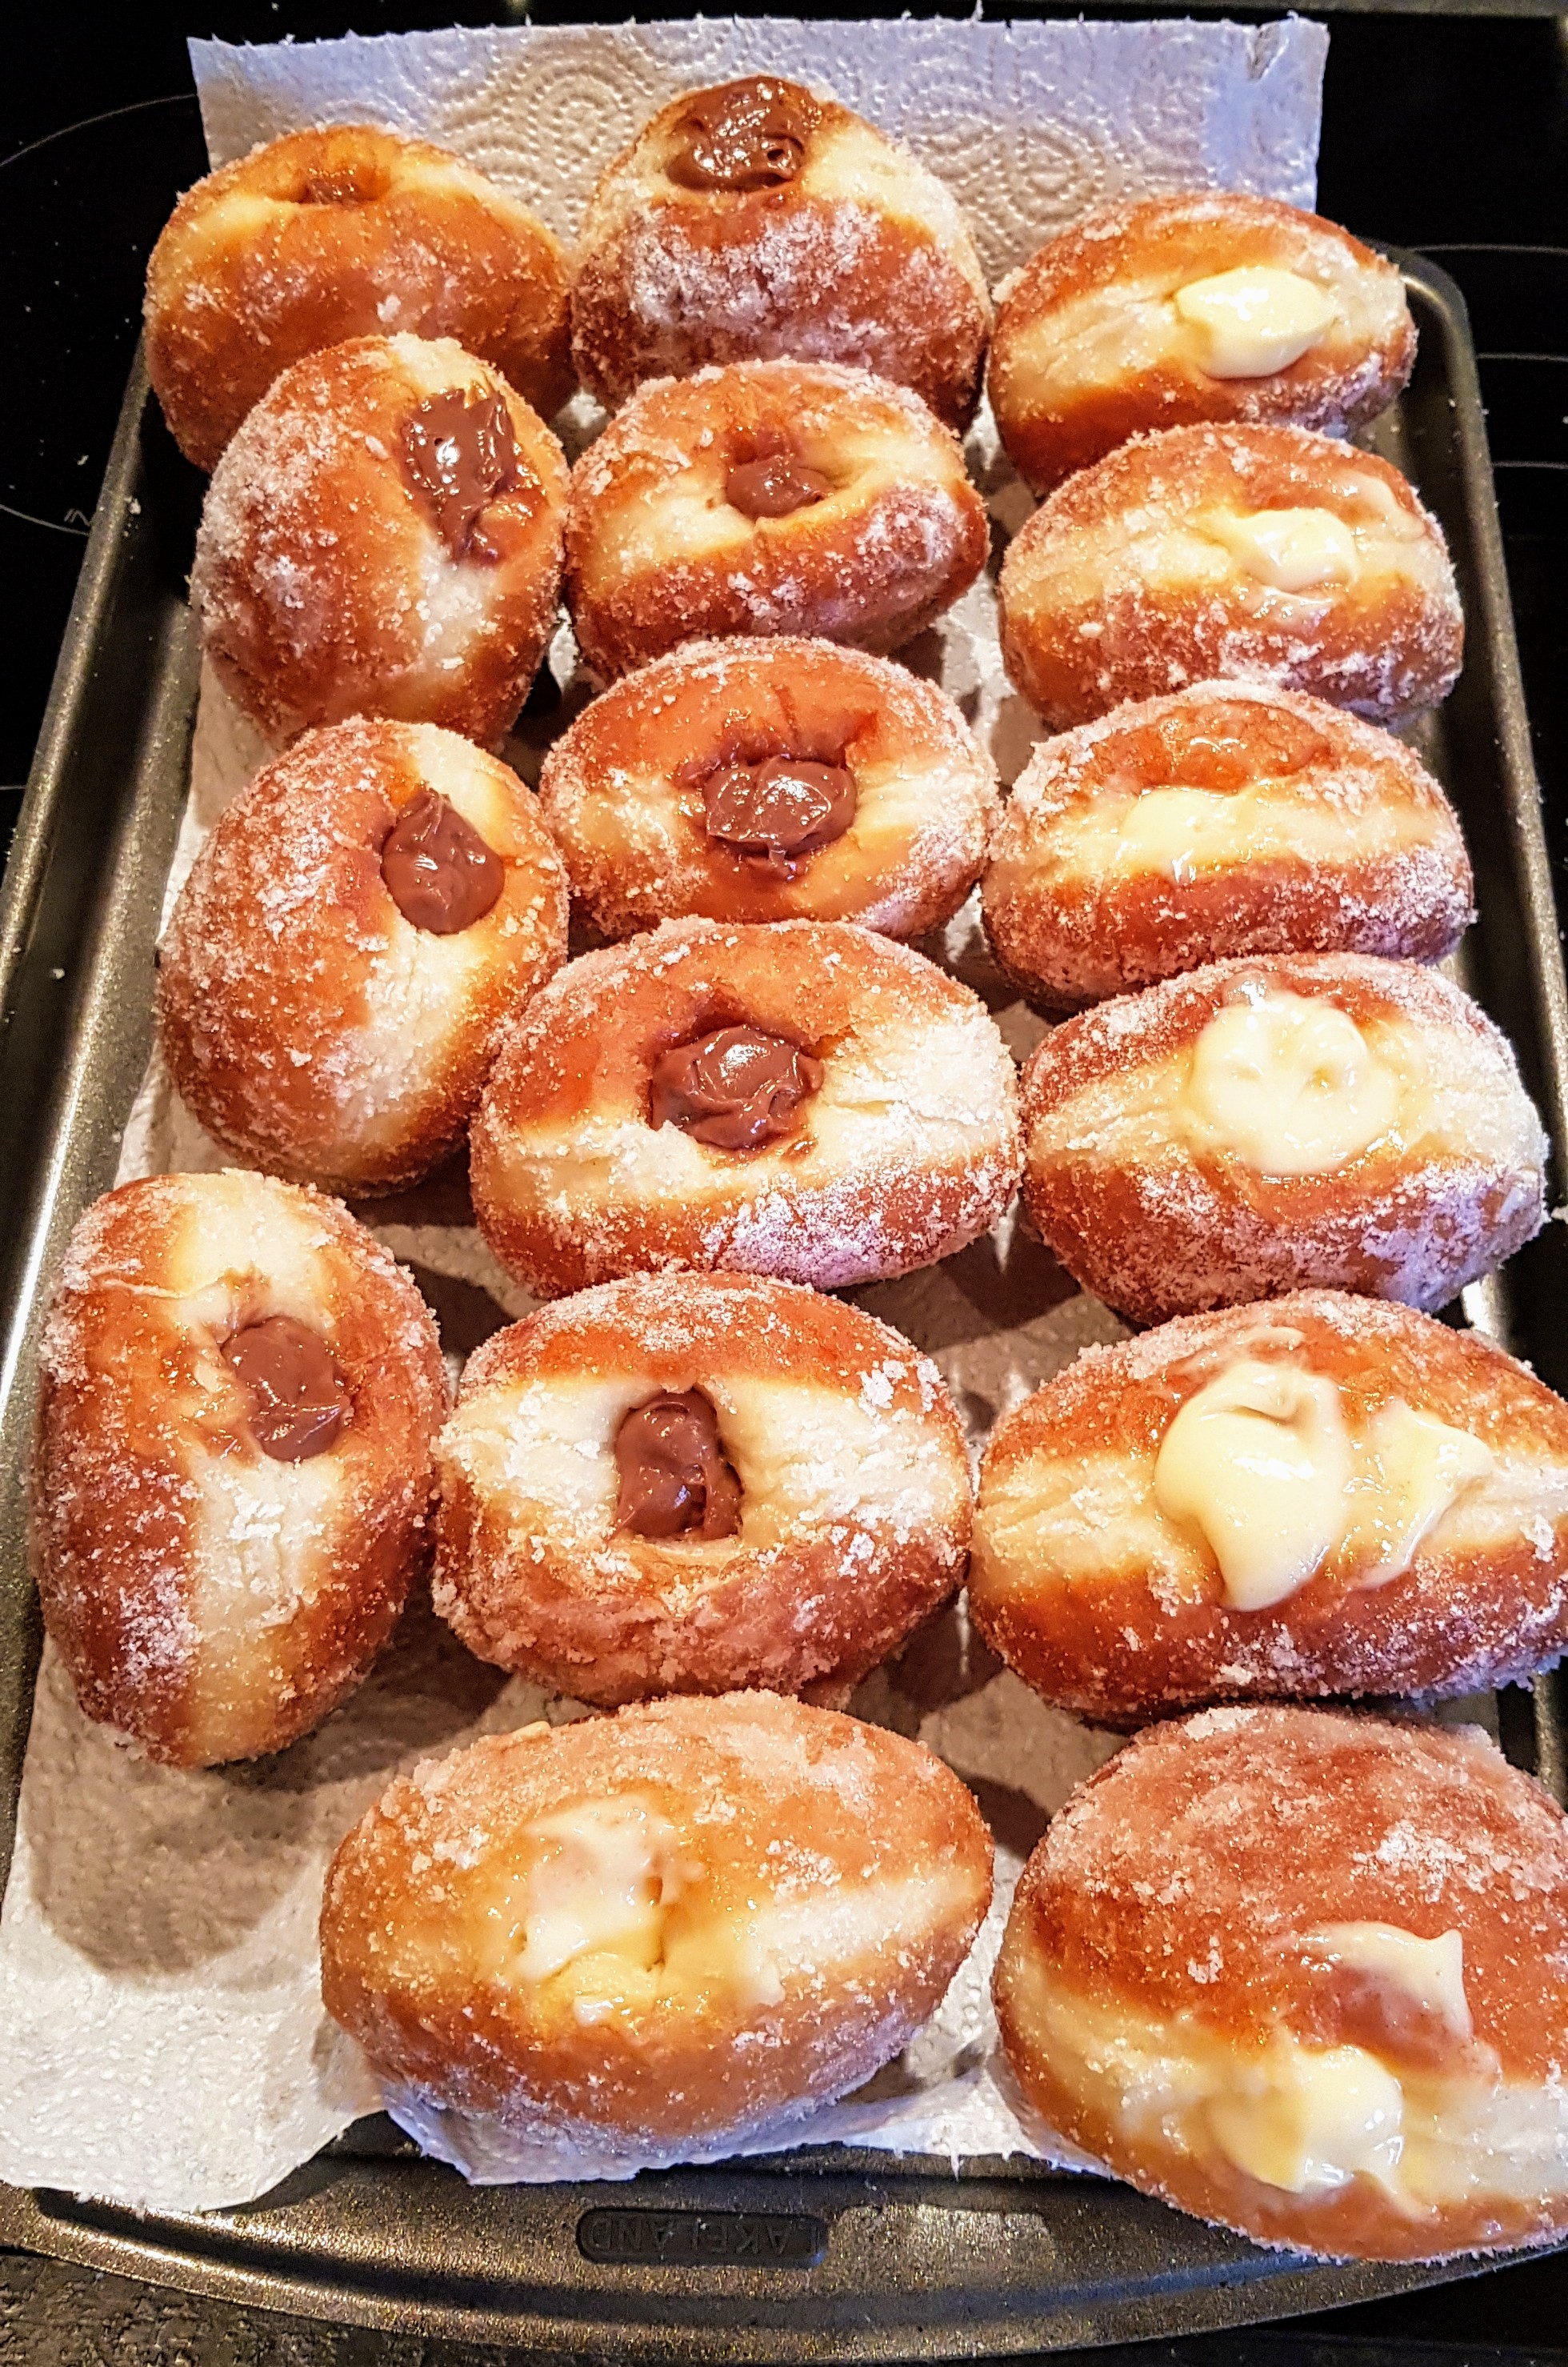
Any doughnuts I’ve made I normally fry but I decided to give the baked kind a go. I bought a doughnut tray ages ago and forgot all about it until I was clearing out my cupboards…lol! Having loads of colours in my baking drawer I went for it and got my creative flare going. I’ve loads more ideas now, so watch this space on my designs coming soon.
Makes 8-10 – Large size doughnuts
90g Butter, Softened
130ml milk at room temperature
1 Dried Yeast Sachet
1 egg
Pinch of salt
40g Sugar
1 tsp vanilla essence
270 plain flour


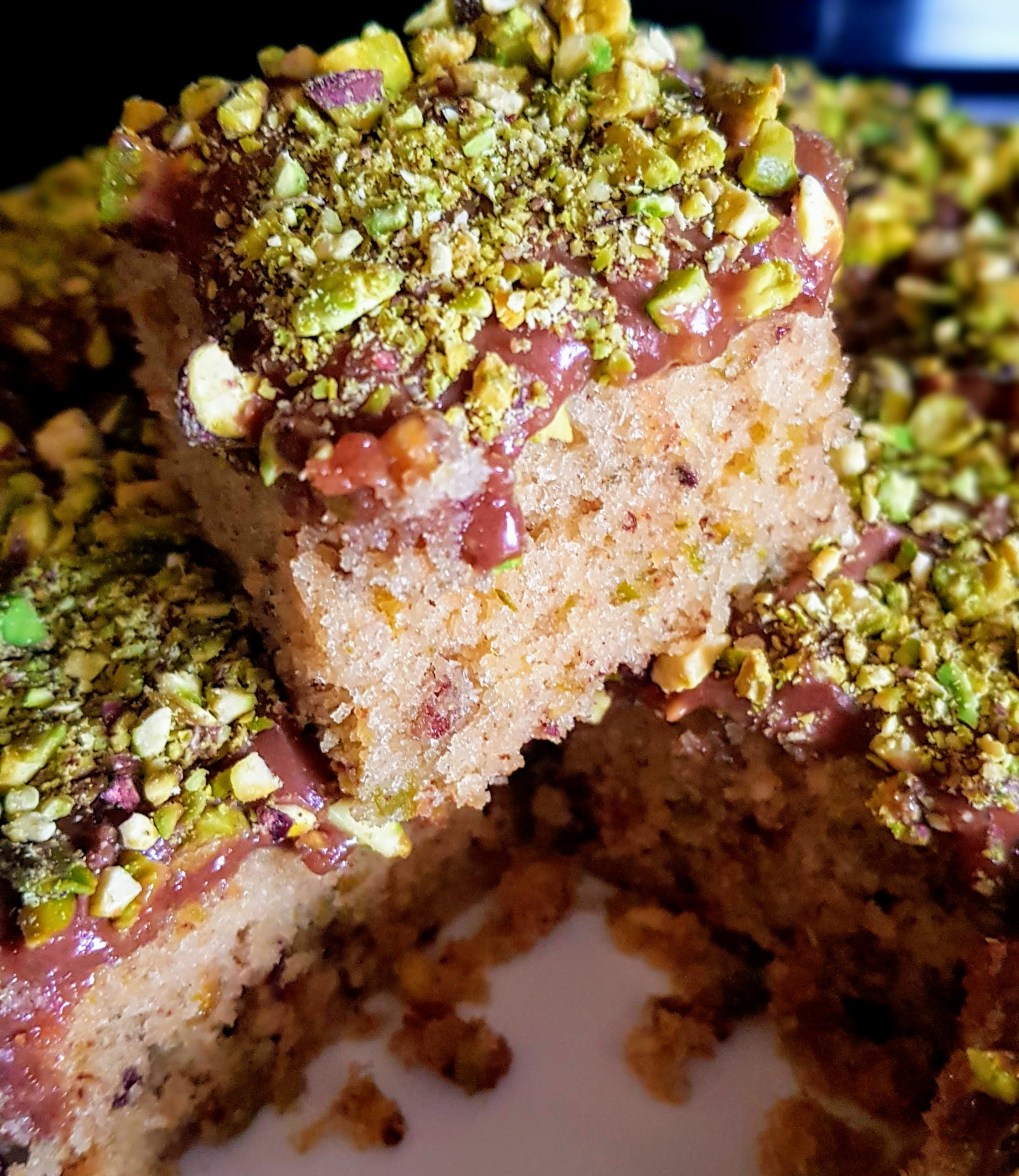

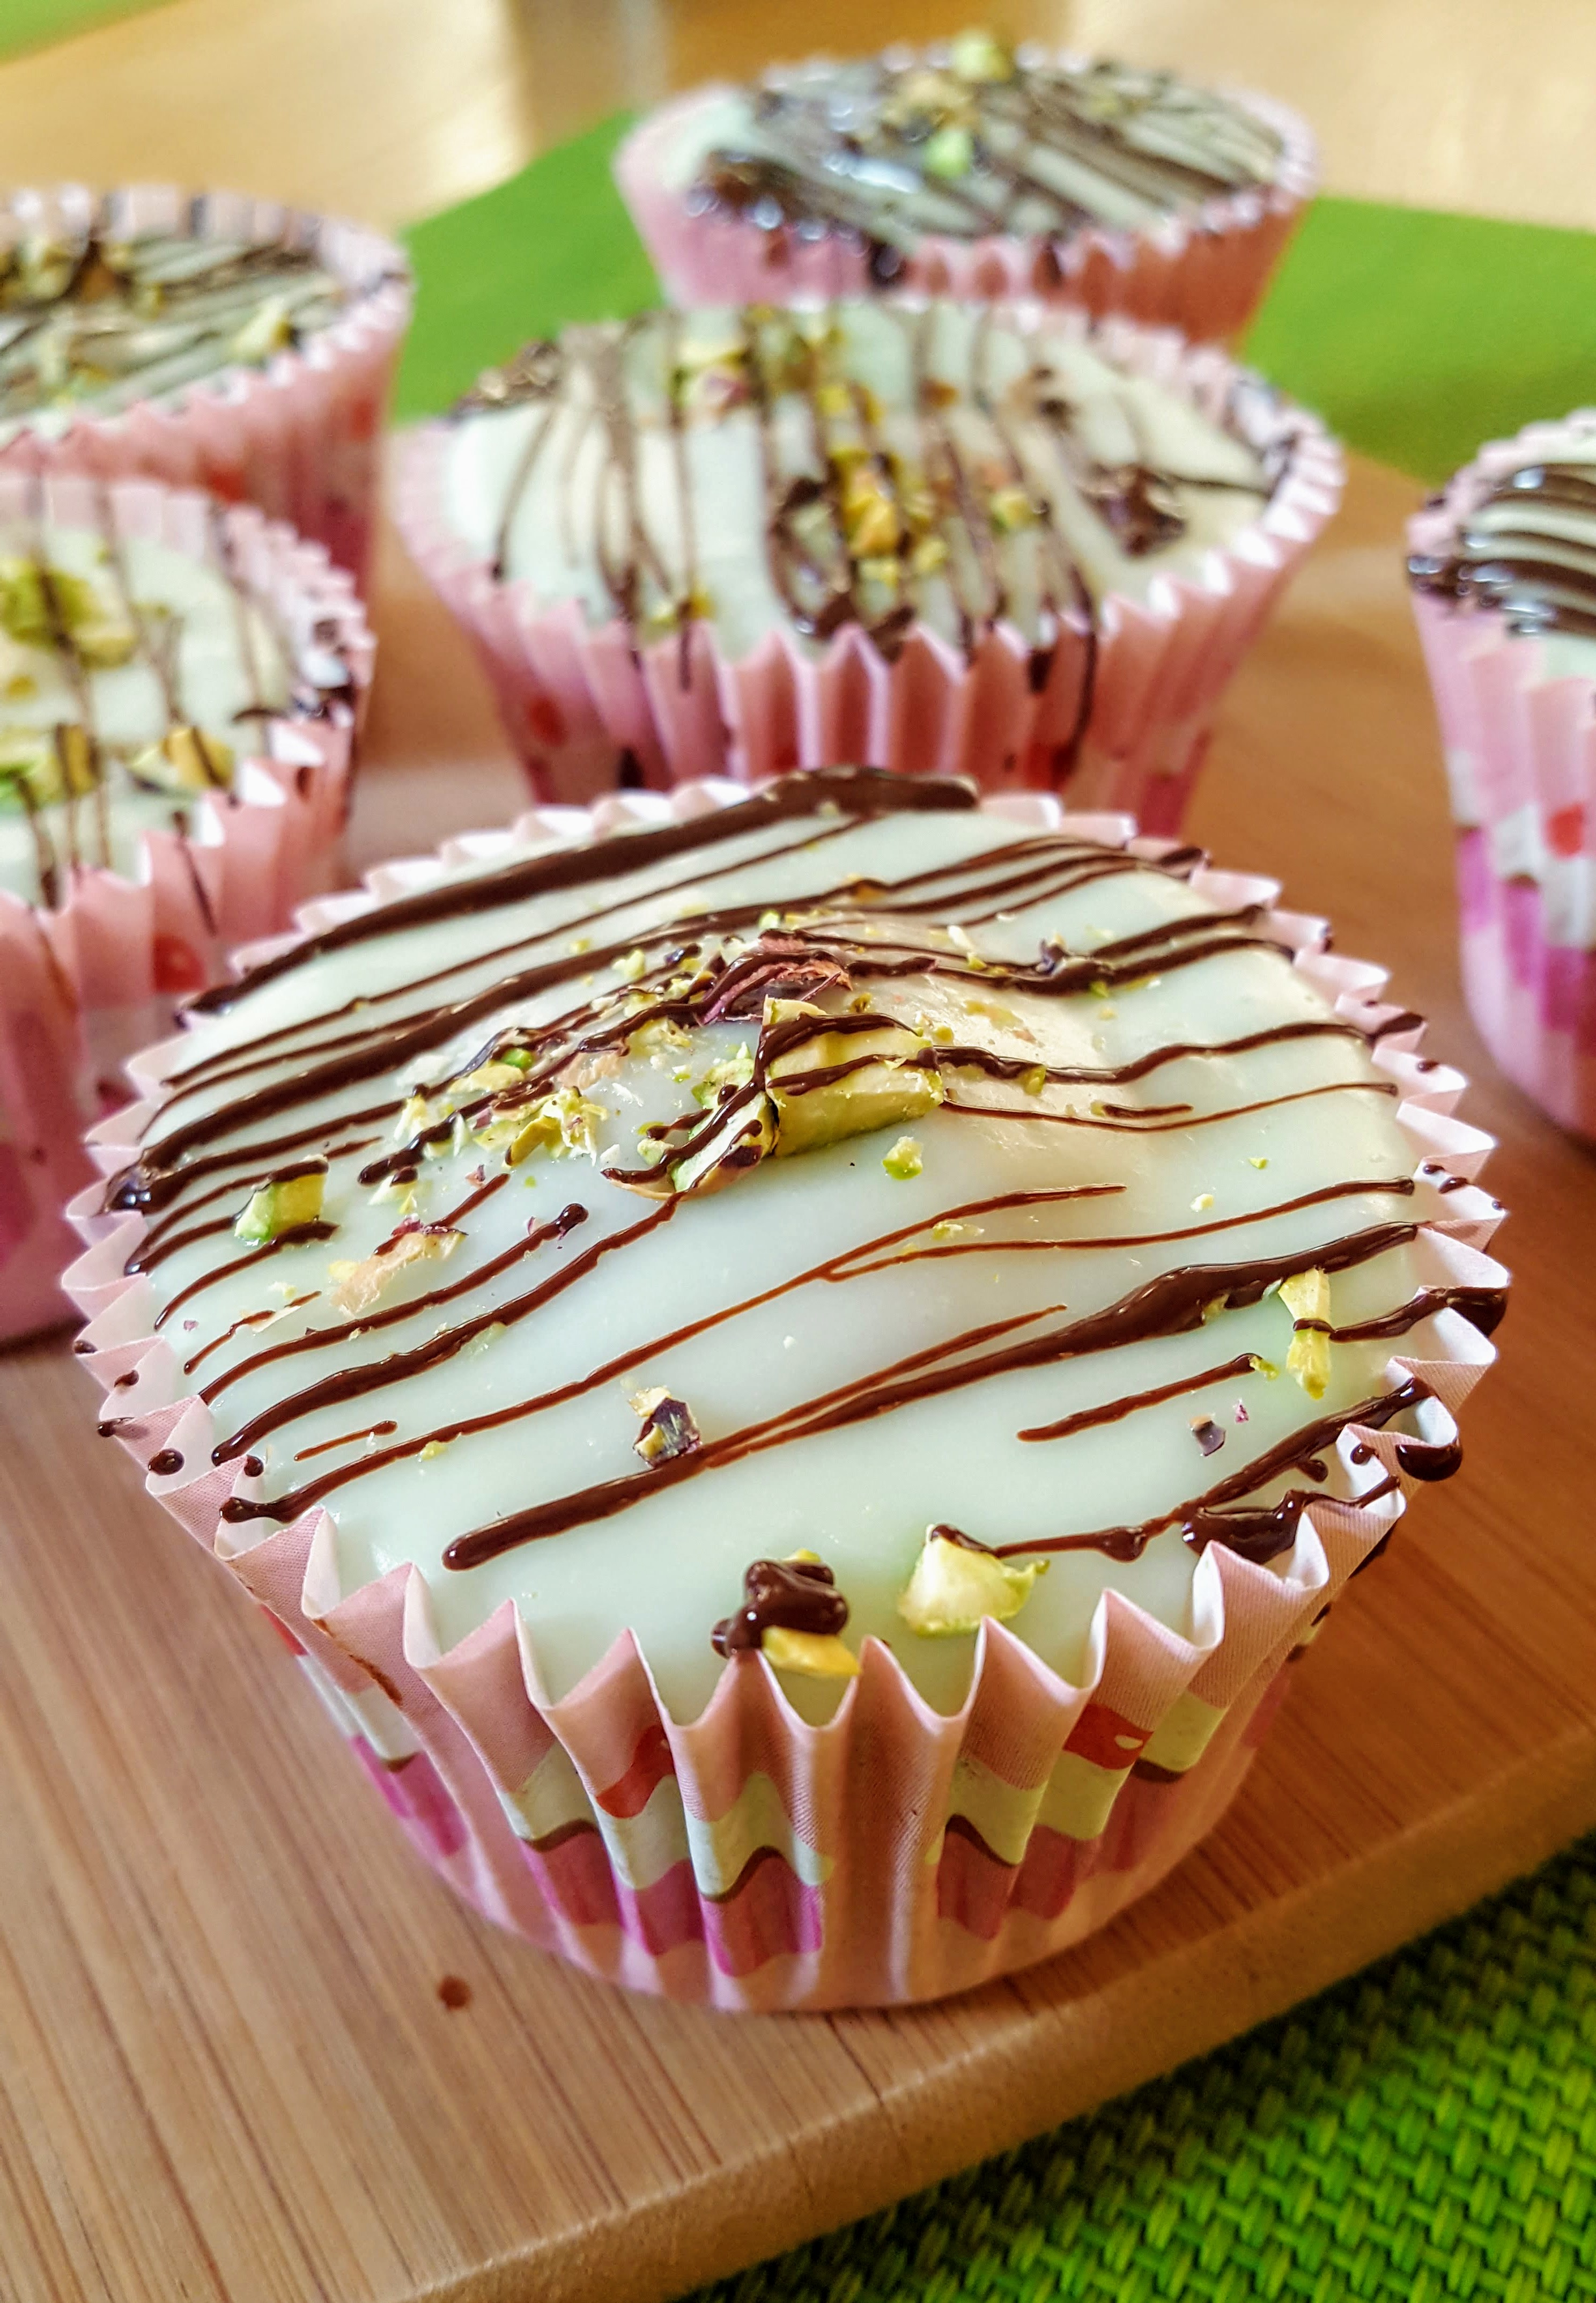
I hope everyone is doing o.k. in these unusual times. If you are like me, I get bored very easily and need to be doing something productive with my day, so today I was talking to a friend and saying how we miss our coffee & cake dates at our fav coffee shop, then idea to use up whatever was in my cupboards to bake a cake and have a virtual coffee & cake date. I do love pistachio’s and always have some on hand, so this little cake bite was perfect.
Makes about 16 squares
150g shelled pistachios
200g milk chocolate (I used Dairy Milk bar)
200g golden caster sugar or light brown sugar
200g soft butter
3 eggs
200g Self raising flour
100ml milk
50g butter for chocolate
100g icing sugar
Pinch salt


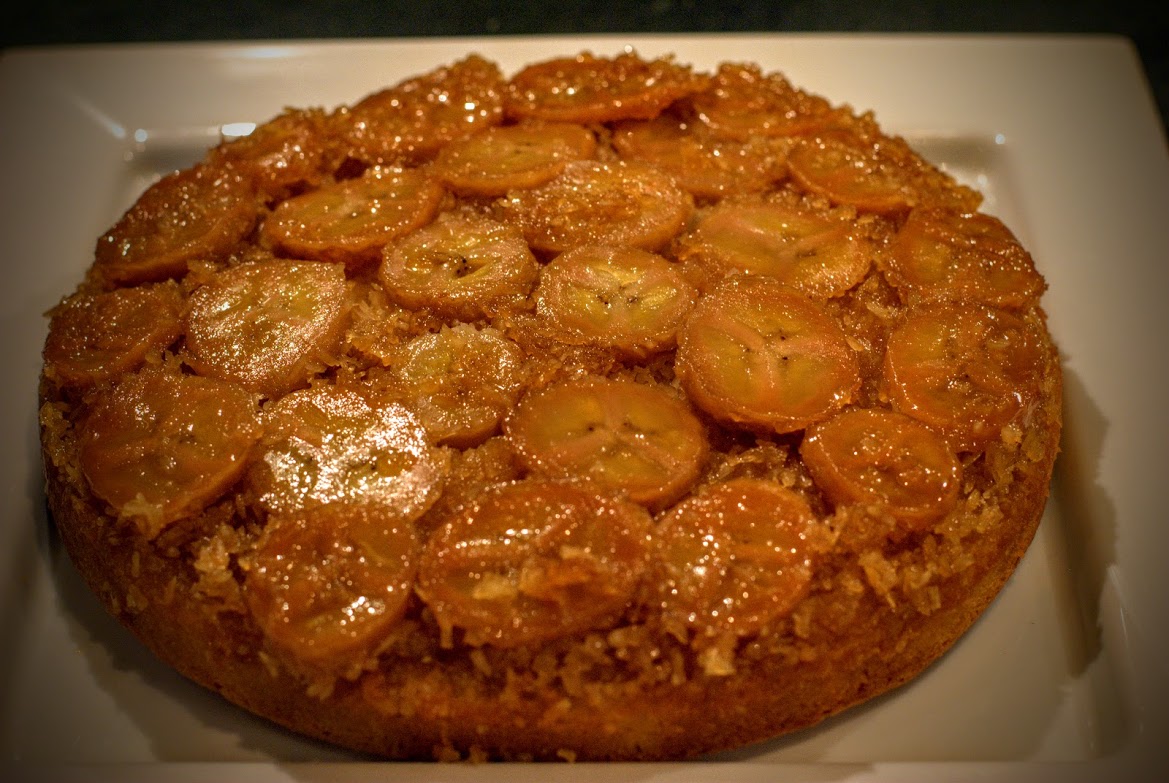
I do hate food going to waste so I used up my leftover apples and made an upside down cake and served with custard……OMG! Yummy! Scrummy!
Classic desserts don’t come much better than this. It was an extremely windy and cold day today so this little warming dessert was just a perfect home comfort Sunday dessert.
Makes 2 small individuals (2 x 4-5″ tin) or 1 large (10″ tin)
For the caramelise apples:-
2 Apples (of your choice)
60g unsalted butter
70g Brown Sugar
1/2 tsp ground cinnamon
*
For the cake:
2 eggs
110g unsalted butter
110g Self raising Flour
110g Caster Sugar
1/2 tsp ground cinnamon
1 tbsp milk


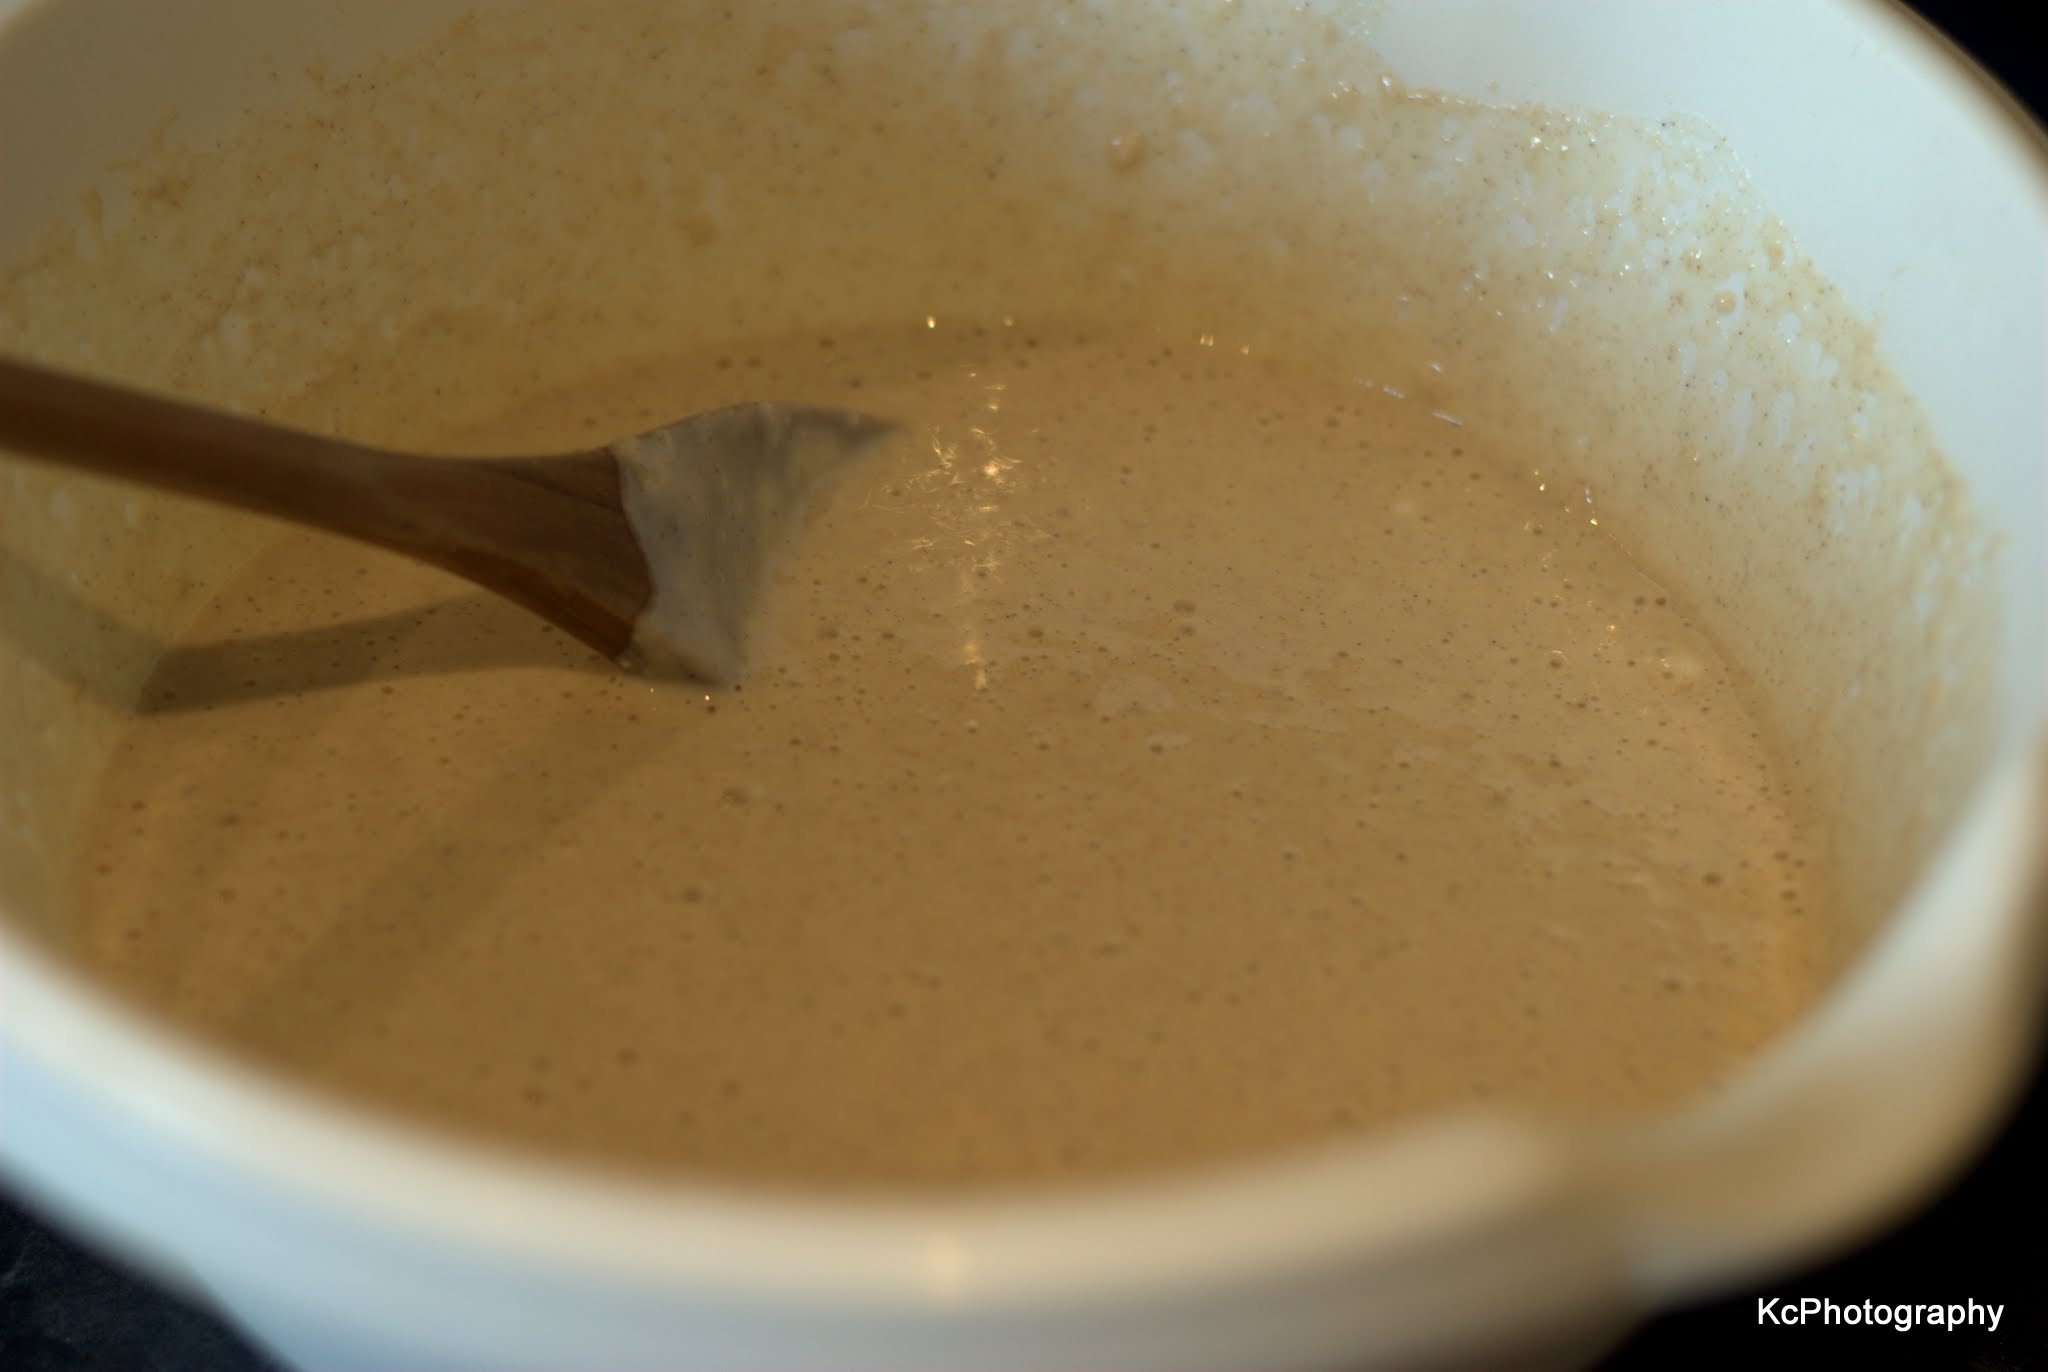
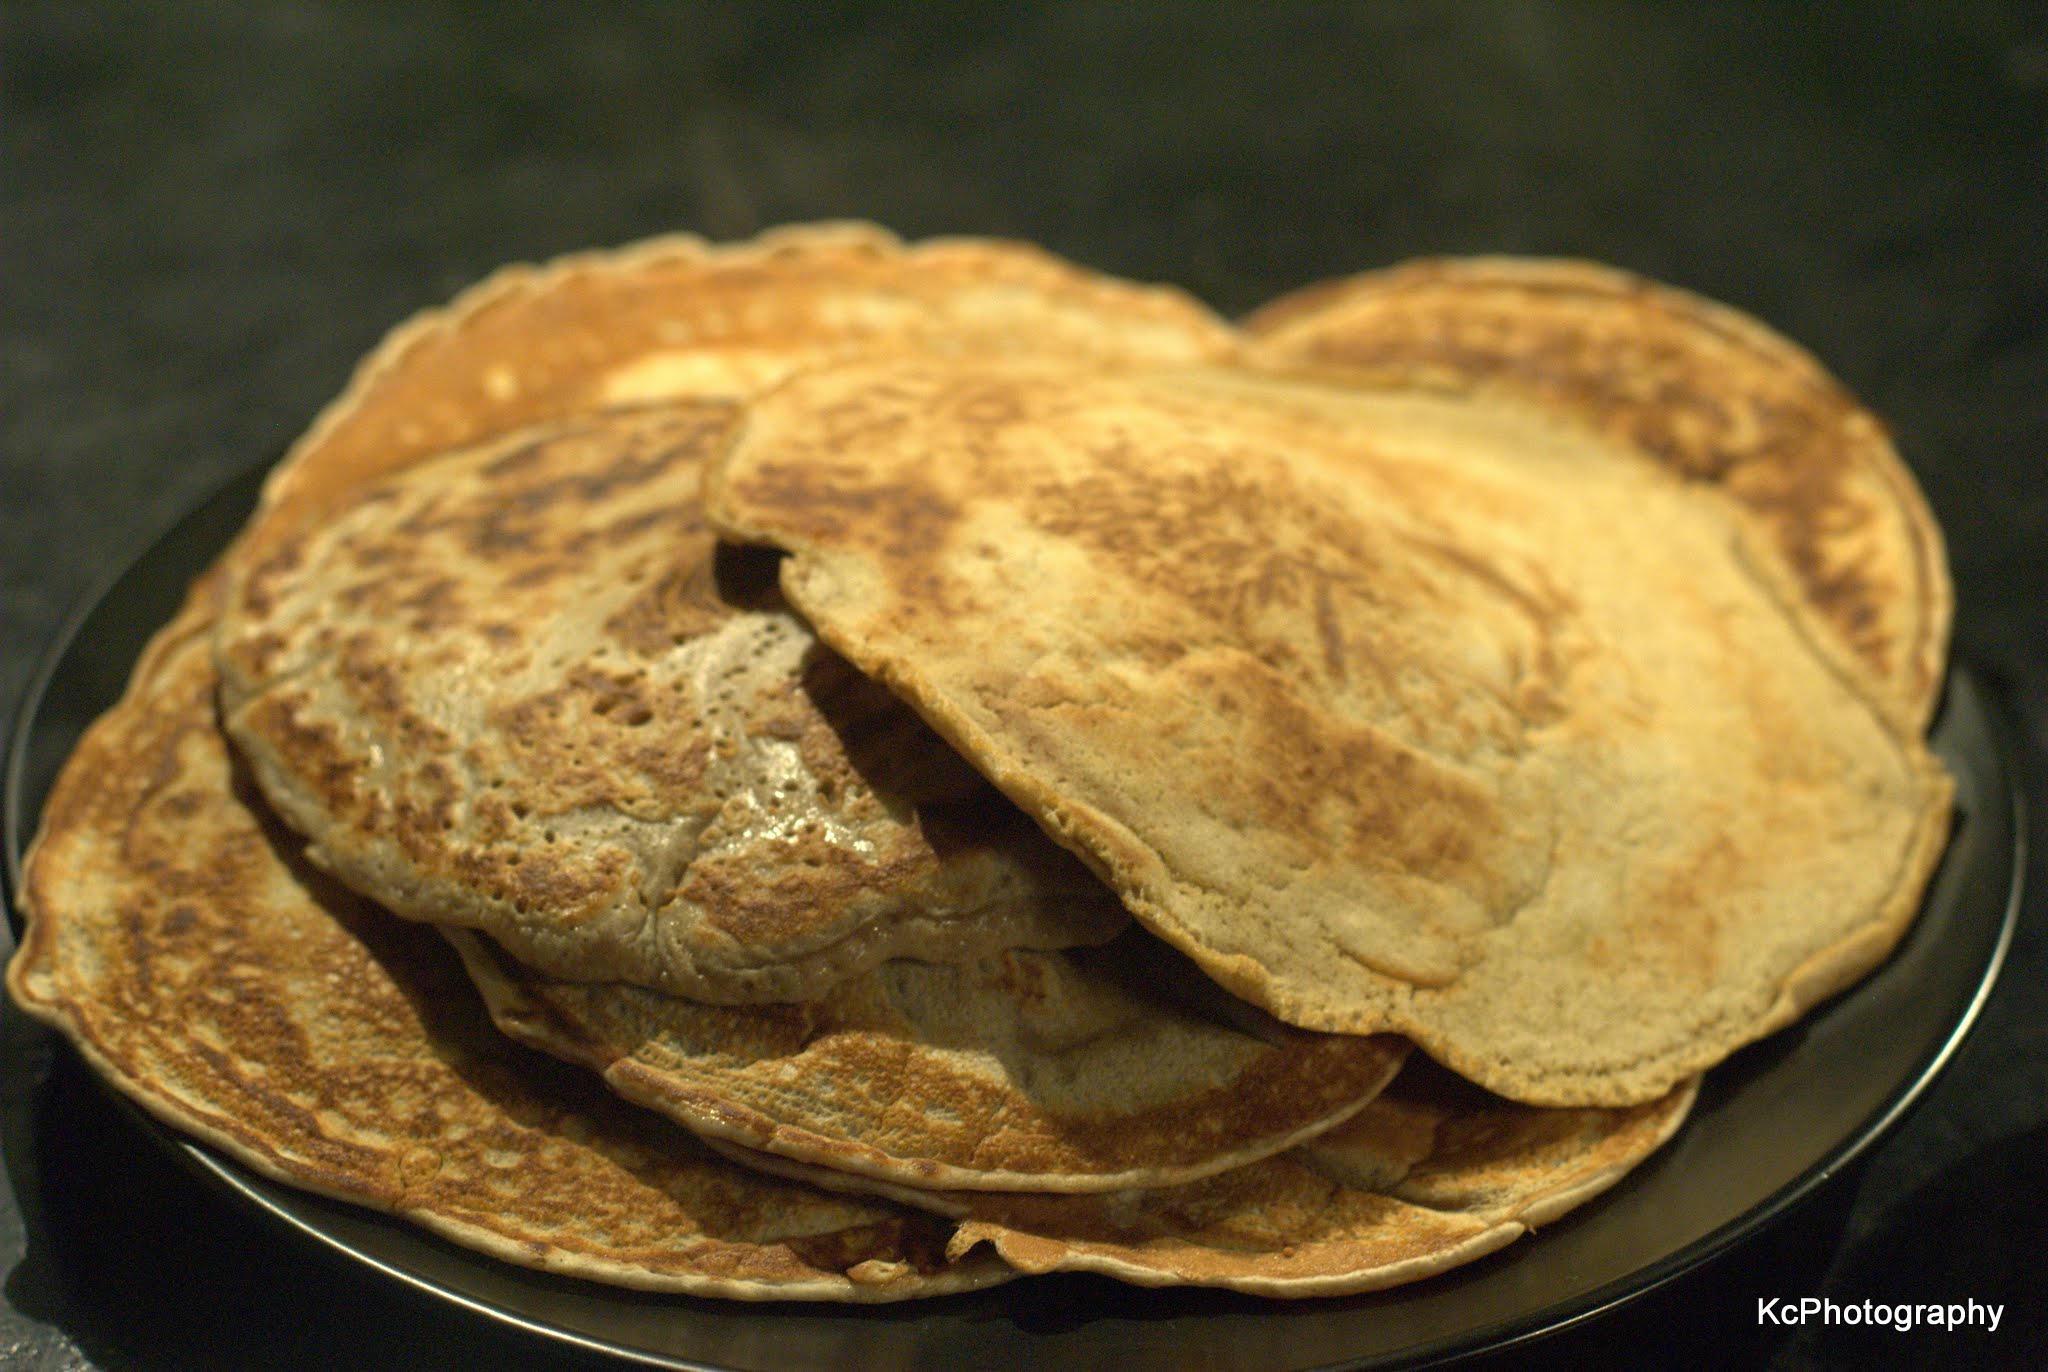
Today was a day of using up leftovers and I had bananas that were crying out to be used. This little recipe is so easy to make and delicious too, you can store for 2-3 days in an airtight container or freeze if you are making a large batch. Gluten Free too.
A great healthier option too with the oats having 4 grams of fiber & 6 grams of protein. In addition to fiber, oats are rich in magnesium, zinc and iron. The bananas which are loaded with fiber, potassium, vitamin B6, vitamin C, and various antioxidants. The Peanut Butter is a good source of magnesium too.
A great grab & go breakfast option or simply a little snack in between meals.
Makes 12
200g Scottish Oats
60g Peanut Butter
2 small bananas, mashed
1 egg
3 tbsp Maple Syrup
120ml milk
1/2 tsp cinnamon
1/4 tsp salt
1 tsp baking powder
1 tsp vanilla extract
3 Dark Chocolate squares, chopped (or you can used choc chips)


I am always trying to improve my recipes and my icing for my Empire Biscuits just wasn’t right, so I decided it needed to be a bit harder and went for Royal Icing. Turned out this is much better as it goes hard pretty quick. Good if you want to decorate them.
Makes enough for a 20cm Cake or 12 biscuits.
400g Icing Sugar
2 egg whites or egg white powder
1/2 tsp water

I made some Scottish Empire Biscuits using my trusty Recipe.


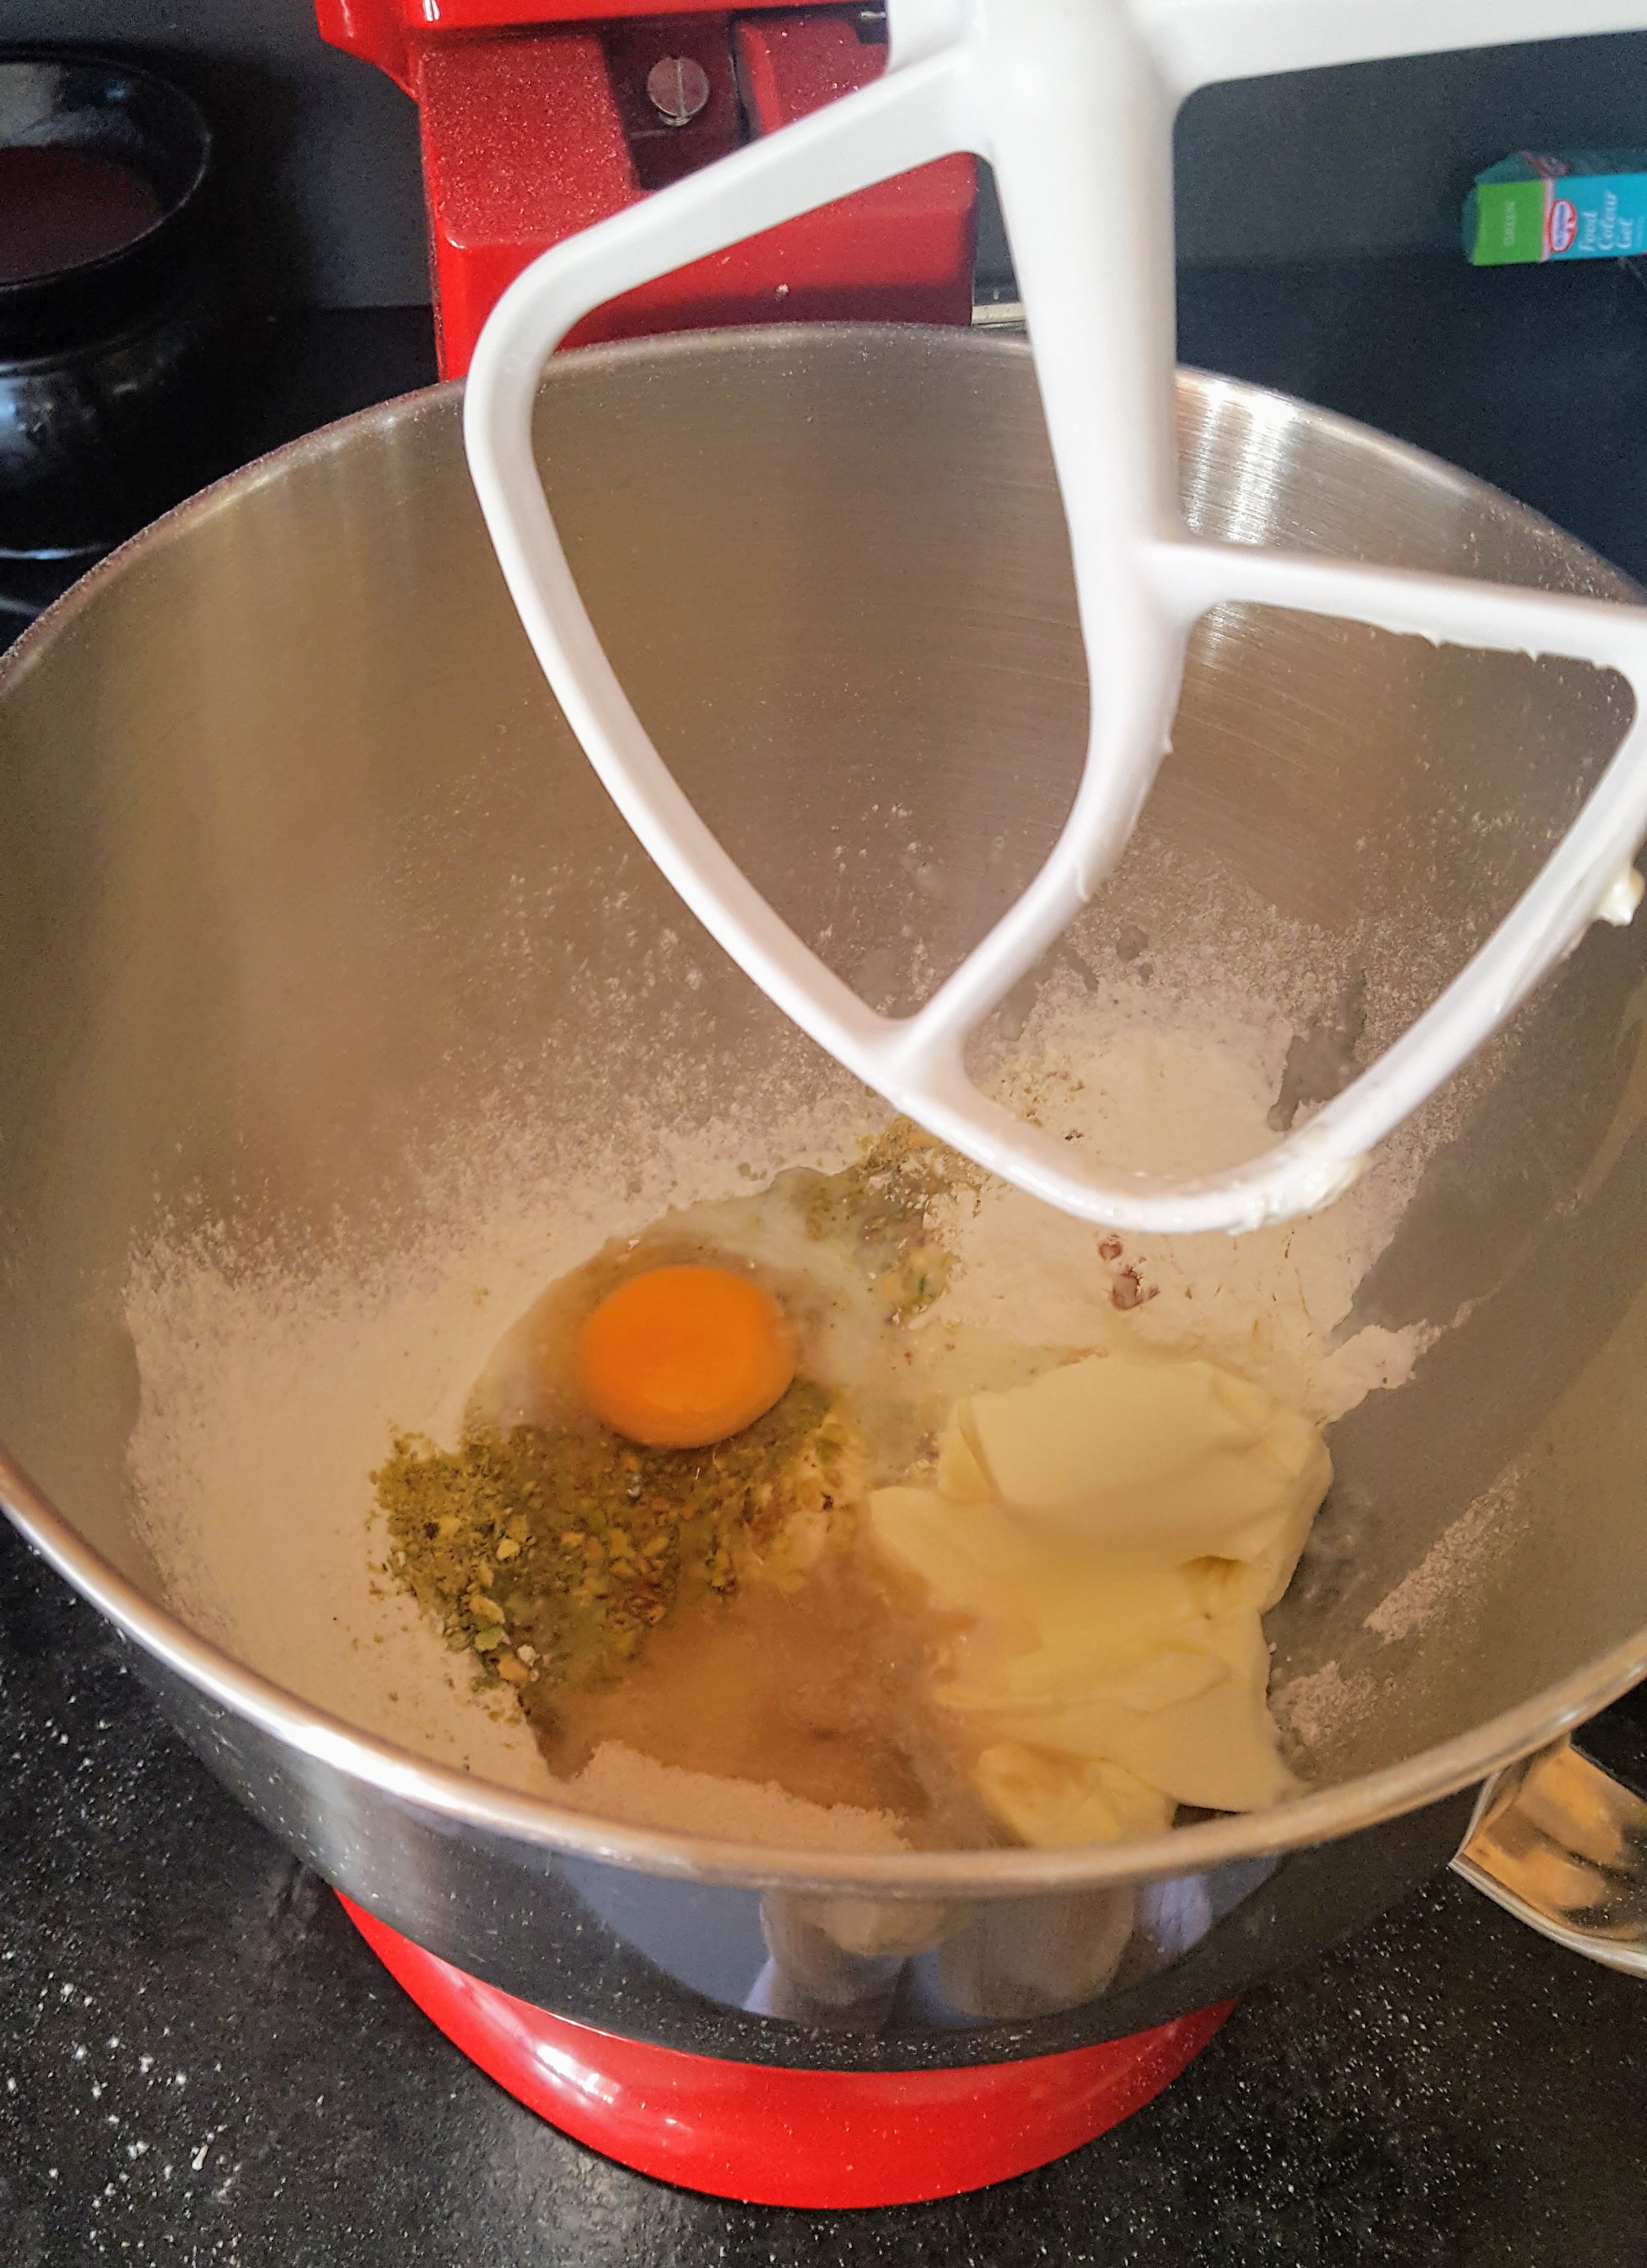
Oh Yum, I love Pistachios and had some in my cupboards to use up, so I though I would give this little delight a go and I wasn’t disappointed.
For the Crust
100g Plain flour
35g Cocoa Powder
70g Chopped Pistachio’s
1/4 tsp salt
70g unsalted butter, room temperature
35g Demerara Sugar
1/2 tsp vanilla extract
For the Pistachio Paste
65g Pistachio’s
35g Demerara Sugar
1/4 tsp salt
1 tbsp olive oil
For the Filling
150g Milk Chocolate
120ml Cream
50ml Milk
1 egg beaten
Pistachio’s chopped to garnish


Oh yum……Pears are in season at the moment so I wanted to try a different dessert with them, this was so delicious and the texture was crunchy too.
Makes 8 servings (or 6 big ones…lol)
100g chopped hazelnuts
140g self raising flour
175g butter cut into small chunks
70g Caster sugar
80g dark brown sugar (10g from sprinkling)
2 large eggs
4 small pears – peeled, cored and diced
50g dark chocolate, chopped into small pieces


I had some pumpkin left after making my pumpkin soup recipe tonight so I decided to give pumpkin cupcakes a go. Yummy!
Makes 12
160g Plain Flour
1 teaspoon allspice
1 teaspoon baking powder
1/2 teaspoon cinnamon
1/2 teaspoon bicarbonate of soda
1/4 teaspoon nutmeg
1/4 teaspoon salt
250g grated pumpkin
100g Light Brown sugar
60g caster sugar
75ml olive oil
2 large eggs
For the buttercream icing:


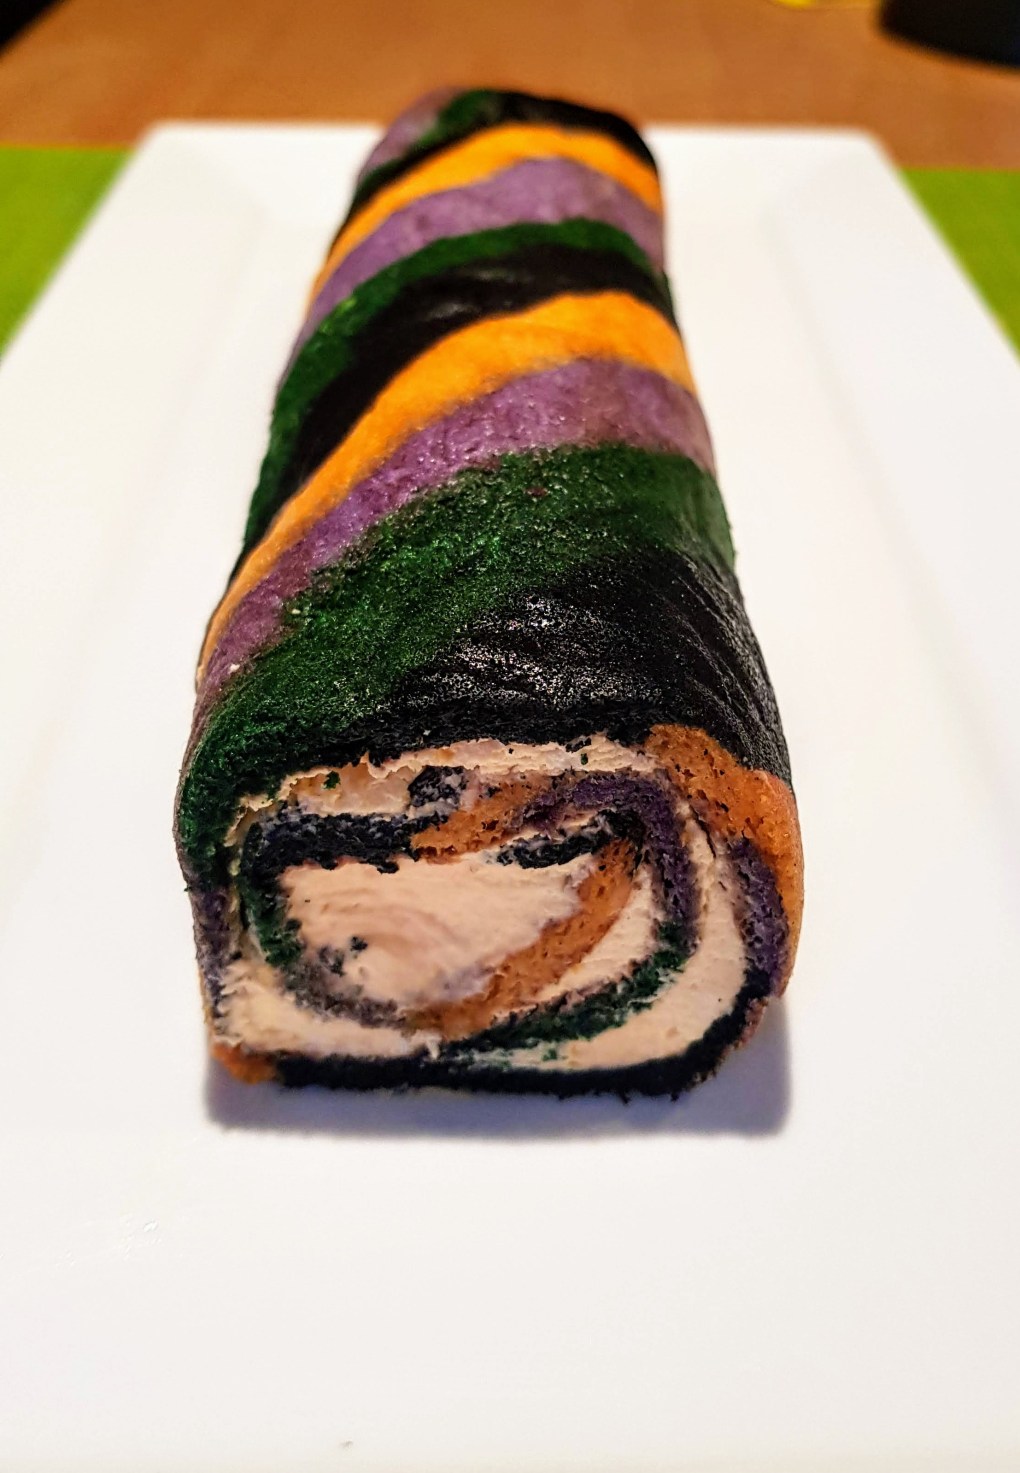


I used my original swiss roll recipe for this and just changed the colours and filling.
For the orange and black one I piped circles onto the baking sheet like a chequered board and then dragged a toothpick through the two colours to create the pattern.
The other was just strips of colours.
The chocolate orange filling was chocolate Whipped Cream frosting with orange juice & zest through.
120g whipping cream
100g powdered sugar
75 g cocoa powder
1 tsp vanilla essence
1 orange zested and juiced.
They do create a lovely bright addition to your halloween table.


Oh yummy! We fancied a wee coffee n cake afternoon since we were having a lazy one. I recently visited the Coffee Festival in Edinburgh and discovered loads of amazing coffee roasters and new flavours, one of them was a new Cold Brew infused with CBD made by Hamilton Street Cold Brew, if you want to feel motivated, uplifting but with a little bit of calm in your day then you have to try this. I also picked up some amazing Chocolate by chocolate tree in Edinburgh, Artisan chocolates and organic chocolate are just some of their creations.
Makes 6 Servings
For Cake mix:-
110g unsalted butter, softened
110g self raising flour
110g Caster Sugar
2 eggs
50ml CBD Cold brew (if not using add milk)
50g Cocoa powder
2 tbsp boiling water
For the whipped cream filling:-
100ml whipping cream
50g Icing Sugar
1 tbsp cocoa powder
1 tsp vanilla essence
For the drizzle:-
1/2 bar of Salted Caramel Chocolate – melted


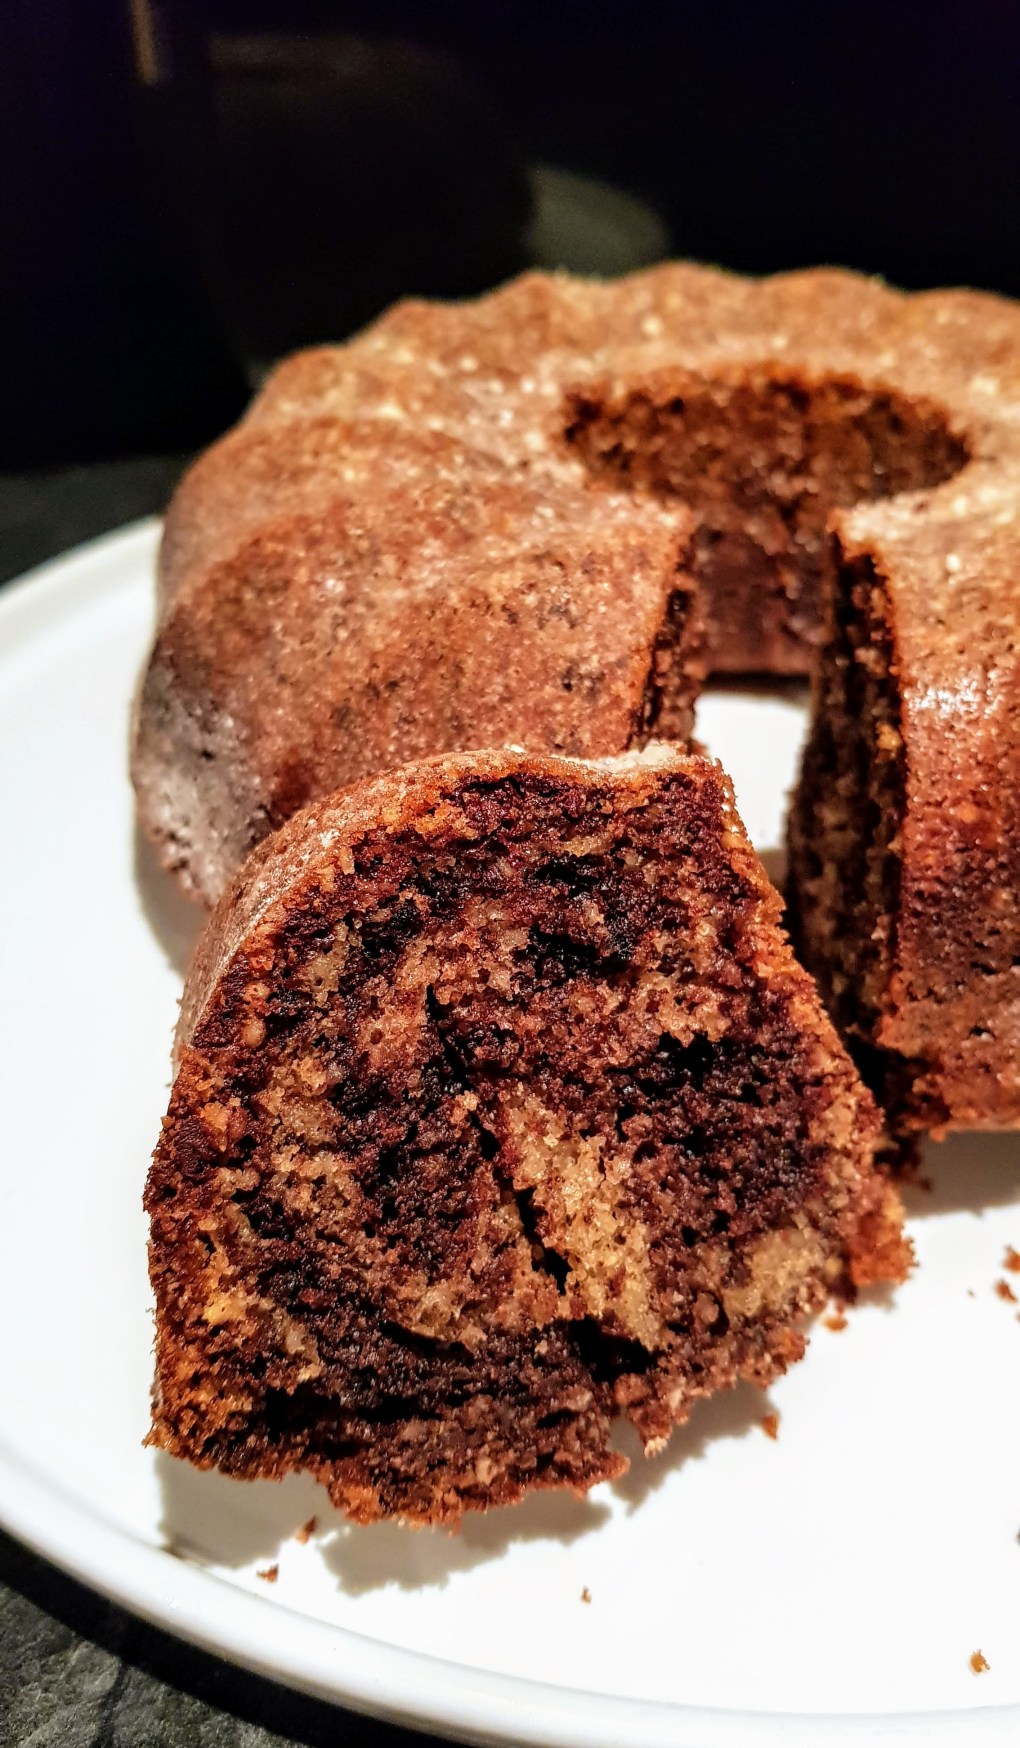

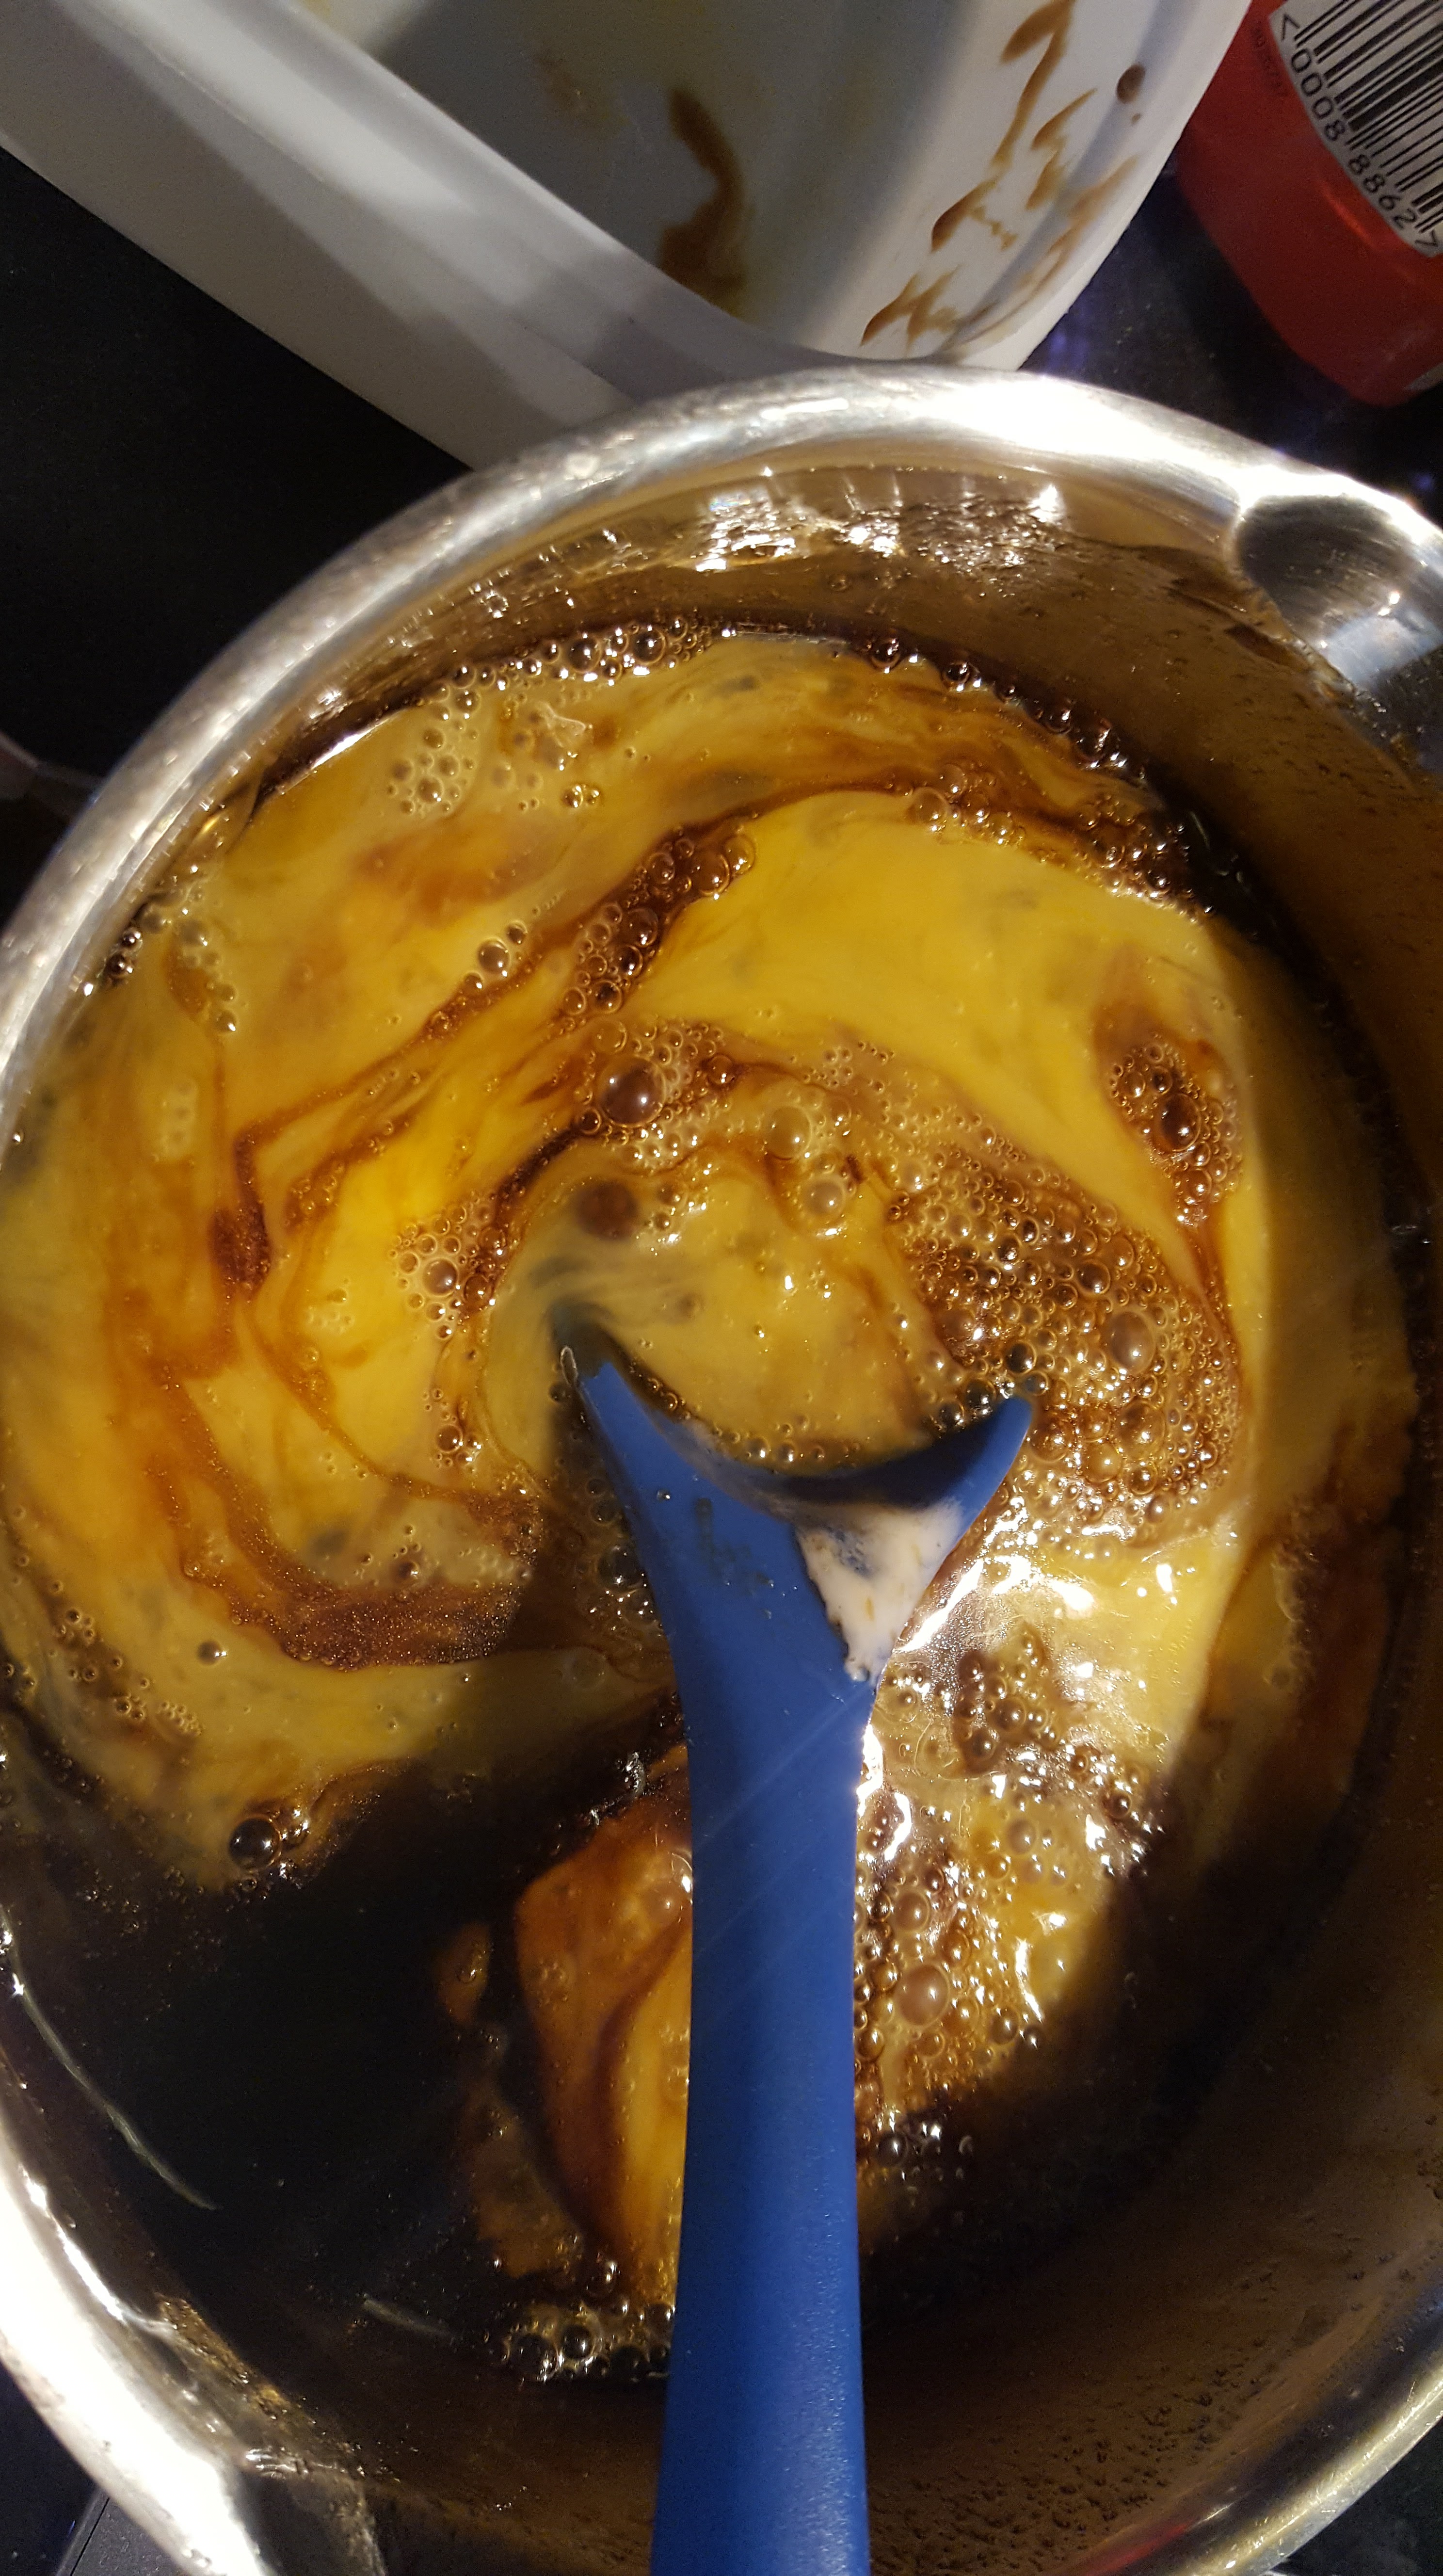
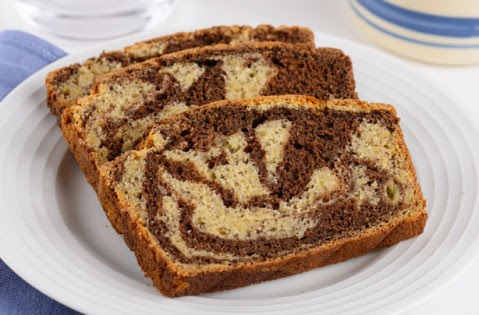
Oh yummy! I fancied something a little naughty with my coffee this weekend so thought I’d try out my new Bundt cake tin. It was supposed to be marbled, however, I think I put to much chocolate into the mixture and swirled it too many times…….lol! The flavour was fantastic though.
A Bundt cake is a cake that is baked in a Bundt pan, shaping it into a distinctive ring shape. The shape is inspired by a traditional European cake known as Kugelhupf, but Bundt cakes are not generally associated with any single recipe. The style of mould in North America was popularised in the 1950s and 1960s, after cookware manufacturer Nordic Ware trademarked the name “Bundt” and began producing Bundt pans from cast aluminium. Publicity from Pillsbury saw the cakes gain widespread popularity.
Ingredients for 1 Bundt tin
180g softened butter
225g caster sugar
3/4 tsp almond extract
2 tsp baking powder
180 g plain flour
75g ground almonds
3 large eggs
2 tbsp milk
3 tbsp cocoa powder with 3 tbsp water – mix to a paste
100g dark chocolate chips
Icing sugar to decorate


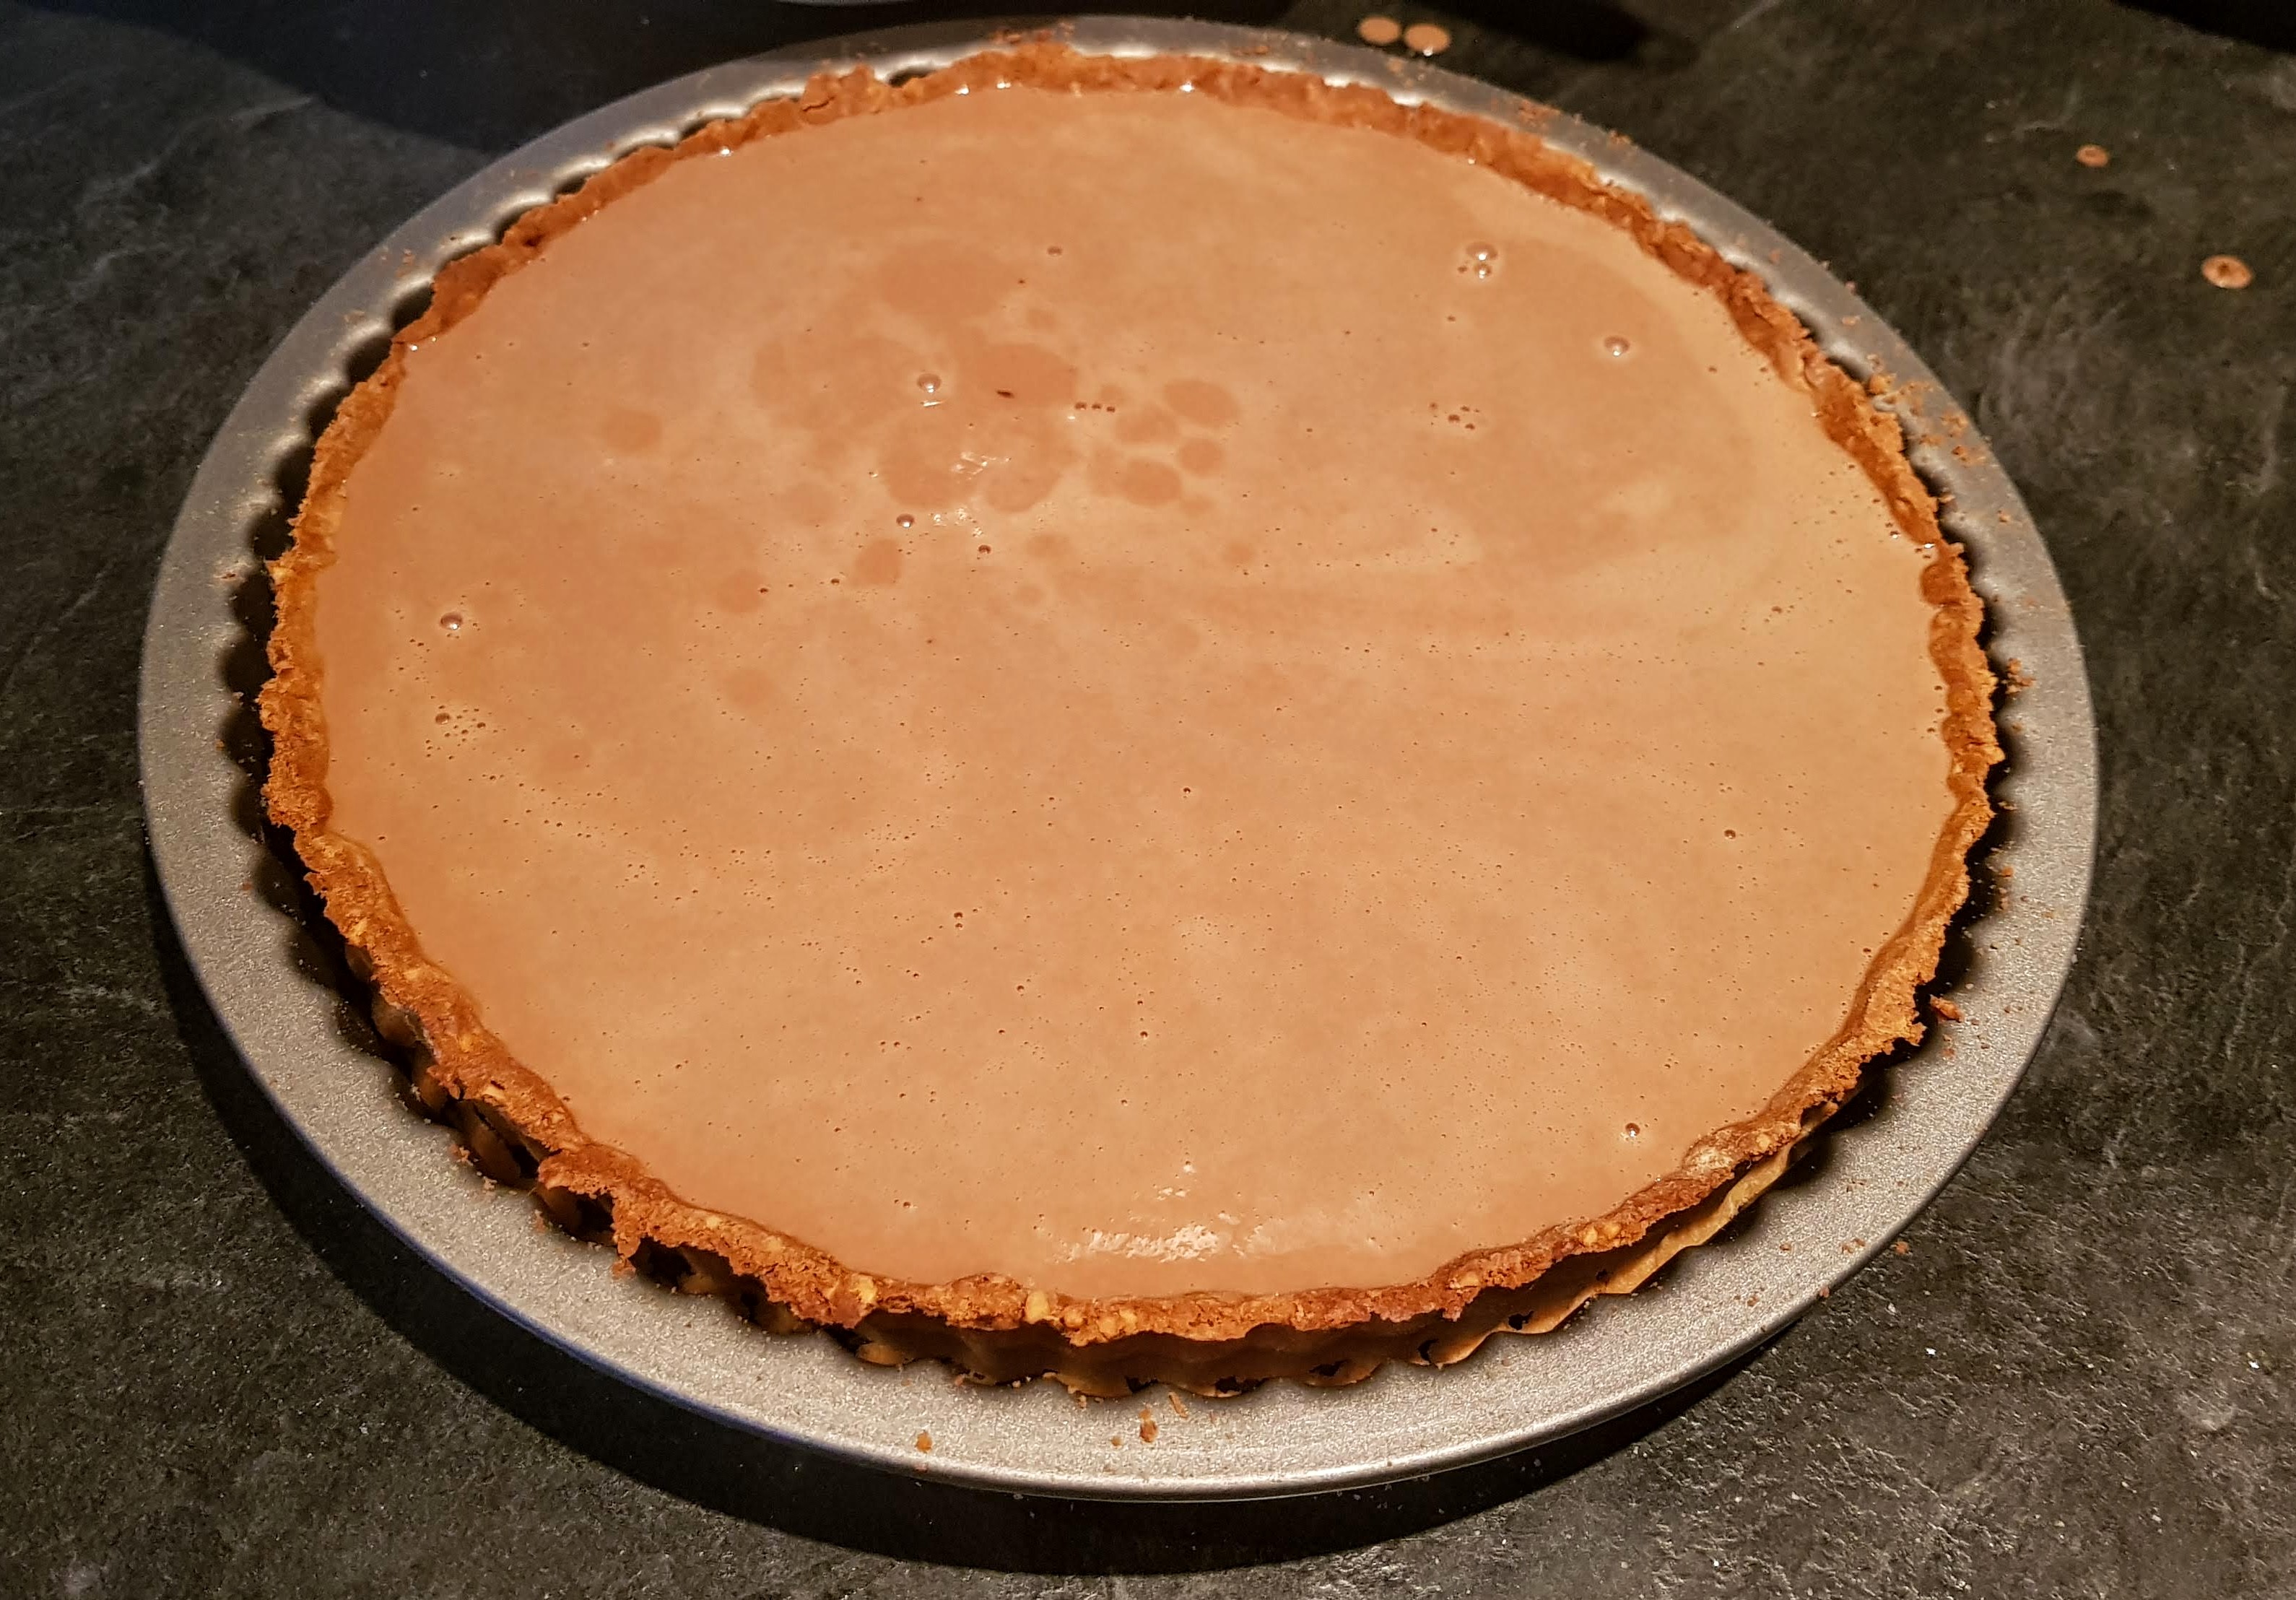
I was watching James Martin on Saturday morning and he made a raspberry chocolate tart, we sat there dying to try a bit. Unfortunately, I didn’t have any raspberries so a hazelnut version it was.
I decided to do a hazelnut nut pastry just to add extra flavour.
For the Pastry:-
125g Plain Flour
50g Icing Sugar
50g Crushed Toasted Hazelnuts (plus 10g for decoration)
Pinch of salt
80g Butter, cold, diced
1 egg yolk
For the Filling:-
300ml Double Cream
125ml Whole Milk
200g Dark Chocolate or Milk Chocolate with at least 40% cocoa solids
2 eggs
50g golden caster sugar
pinch salt
1/2 tsp vanilla extract


I had some egg white left over from a recipe that only required an egg yolk, so I decided to try patterns on meringues, turned out o.k. I thought. I’m know dying to try more patterns and colours……watch this space.
All I done was draw lines inside a piping bag with orange food colouring and then filled the bag and piped, quite simple actually but creates a great visual pleasure.
MERINGUES – makes about 18.
4 Large Egg Whites
115g Caster Sugar
115g Icing Sugar


I wasn’t really sure what to call this as it was a mishmash of 2 cakes….I was going to bake a chocolate tart and realised I didn’t have all the ingredients for the sweet pastry. So I decided to make a biscuit base instead. Then I discovered I didn’t have double/whipping cream but only single cream, so I therefore now had to bake. Despite all my misfortunes, this did actually turn out quite nice.
I was only making a small one for my other halves birthday, he loves chocolate…lol!
Makes a small portion for 1 or 2
For the filling:-
100g Milk Chocolate, minimum 35% cocoa
100ml single cream
50ml whole fat milk
1 egg
For the base:-
4 Digestive biscuits
1 Crunchie chocolate bar
1 tbsp butter – melted
For the toppings:-
small chunks of honeycomb to decorate
small edible spray glitter (optional), it was a birthday after all.


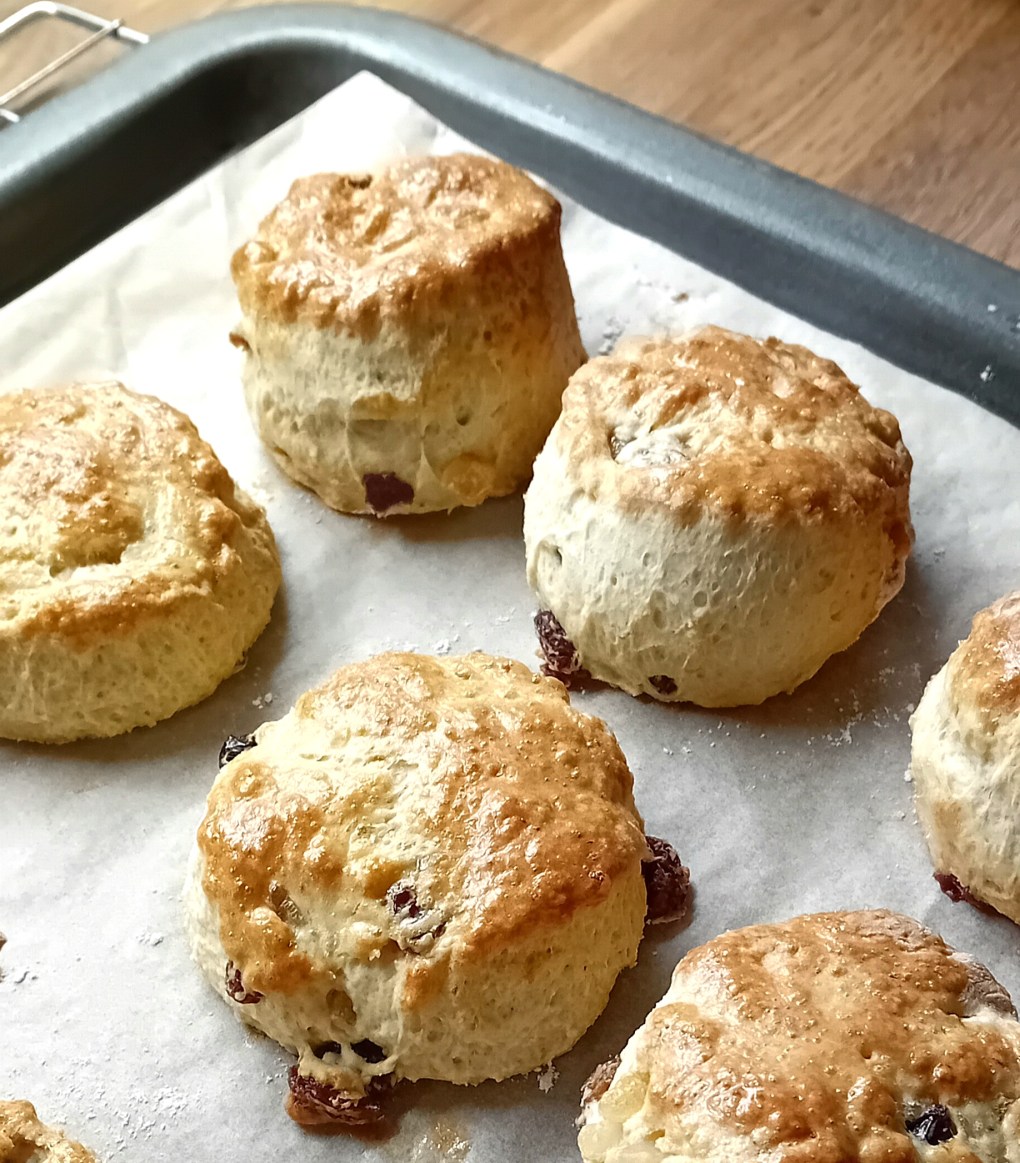
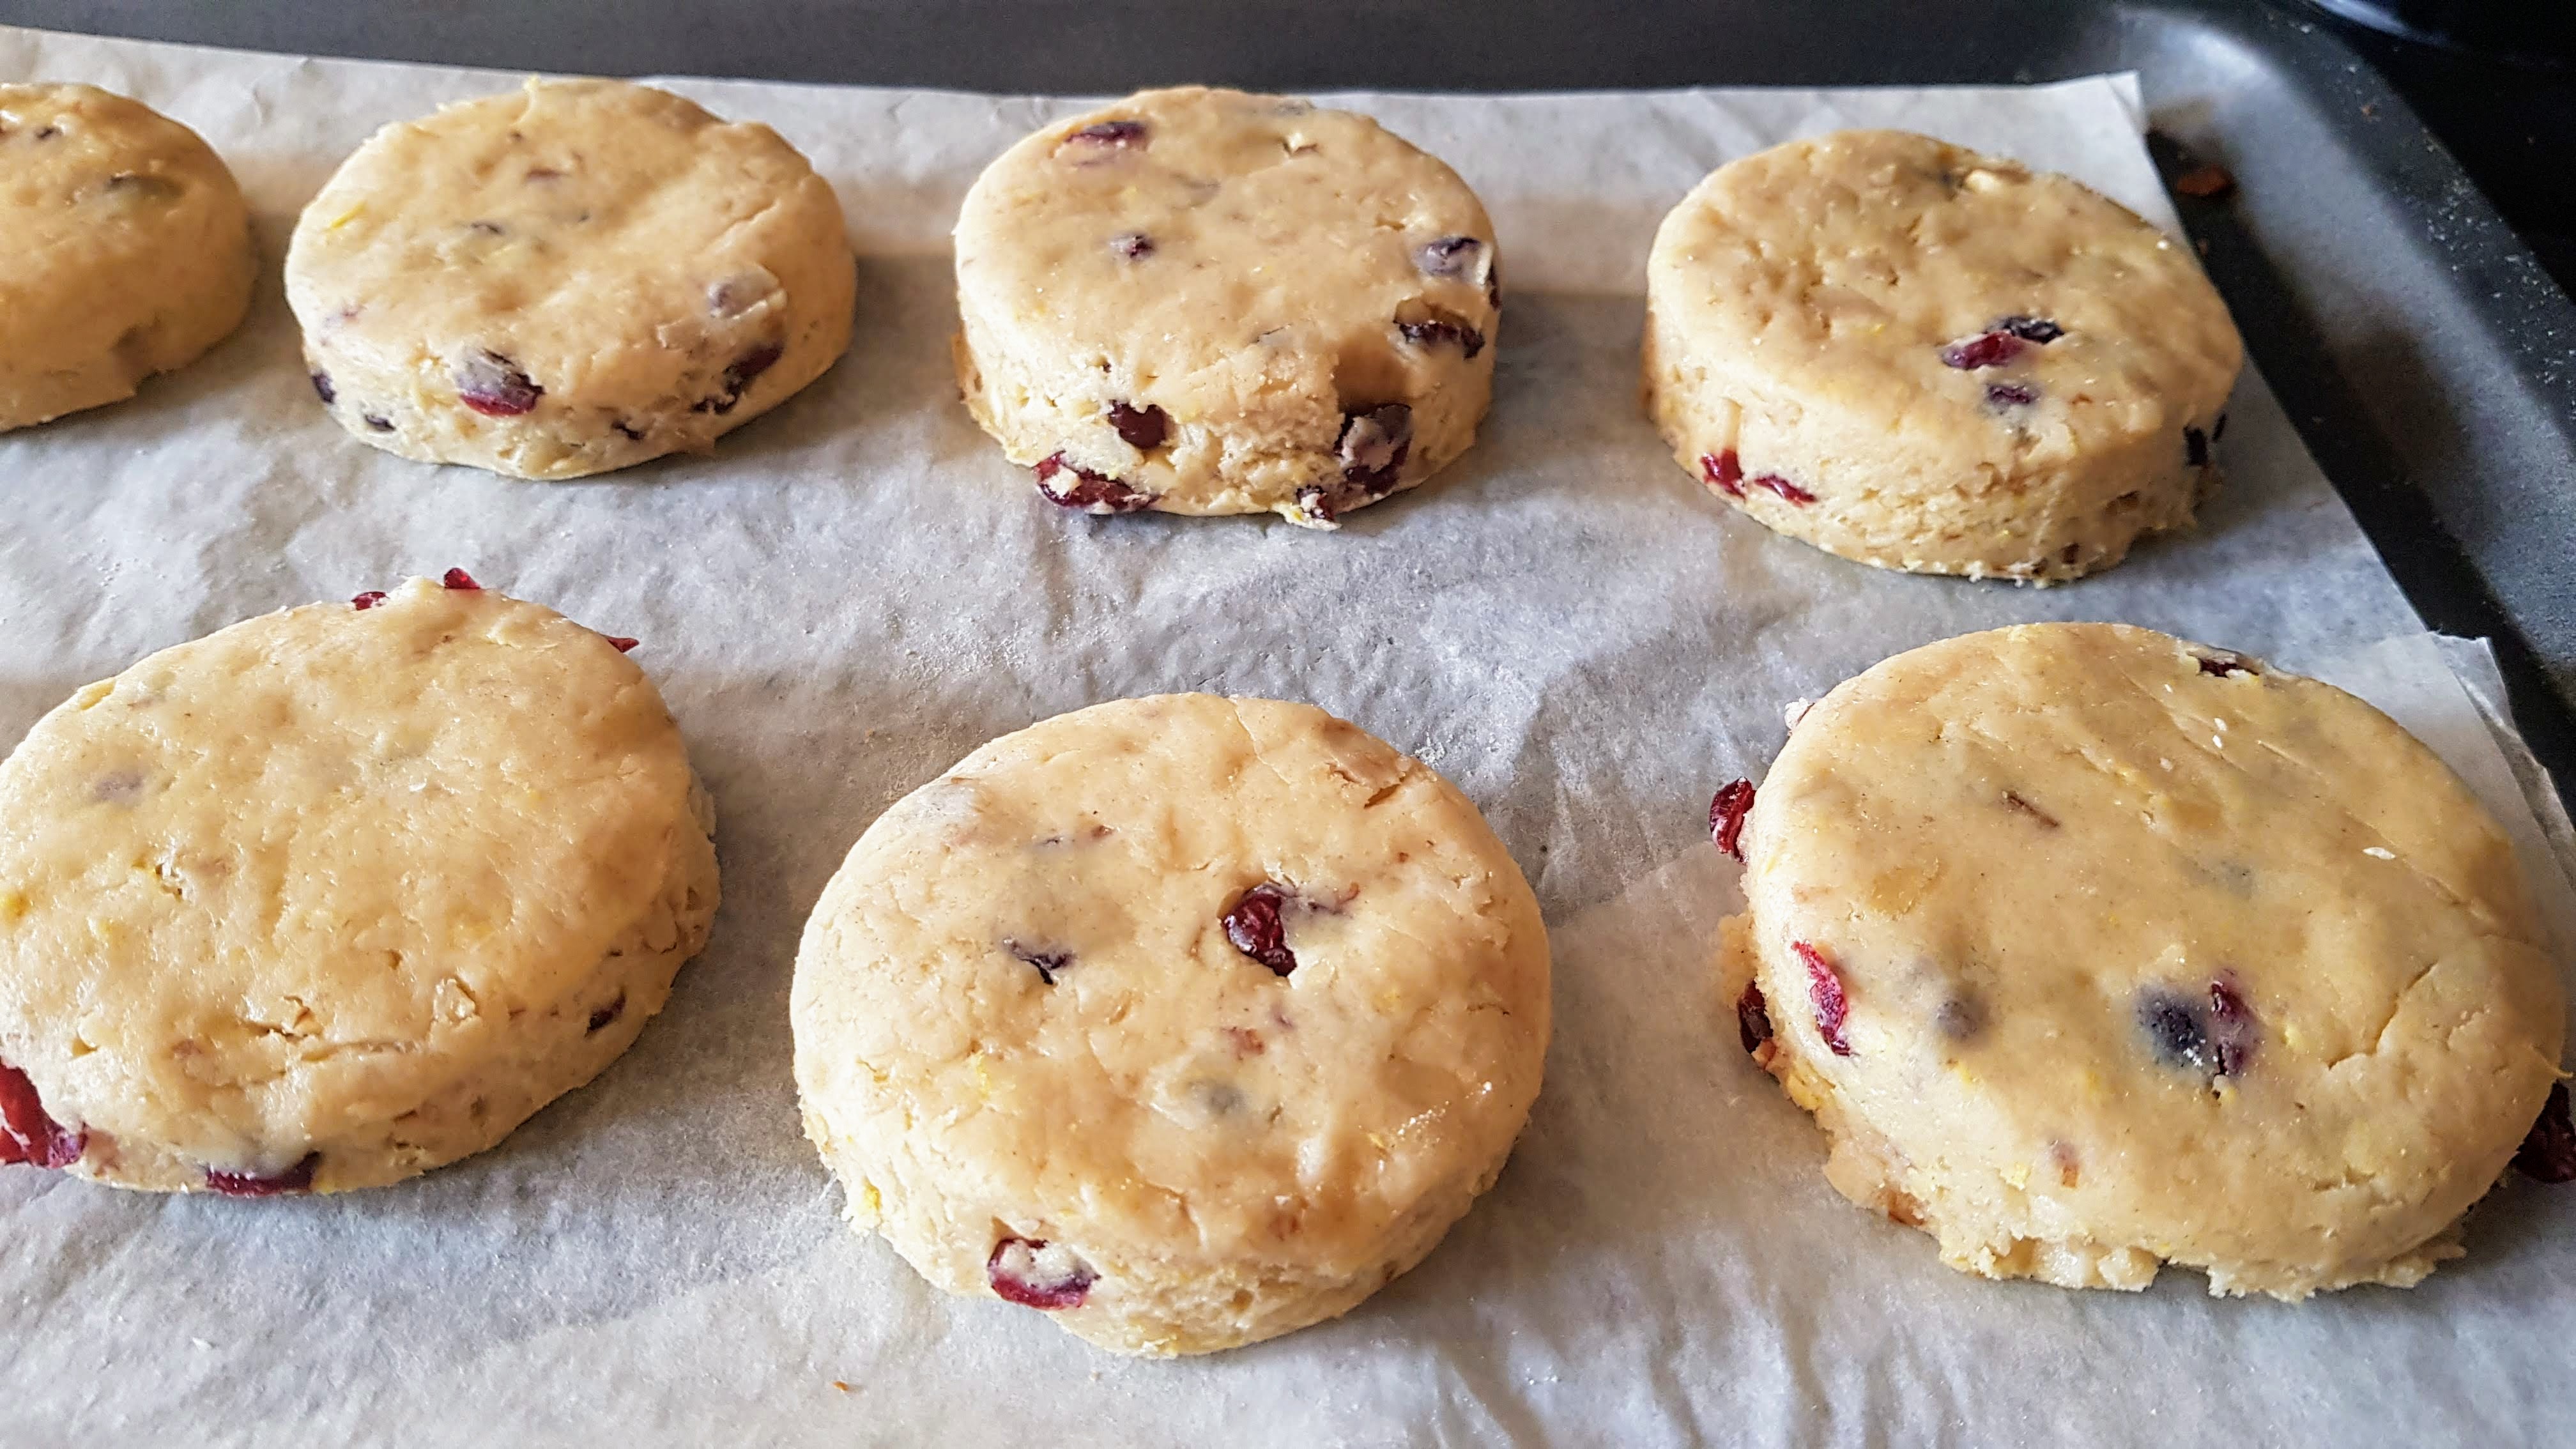
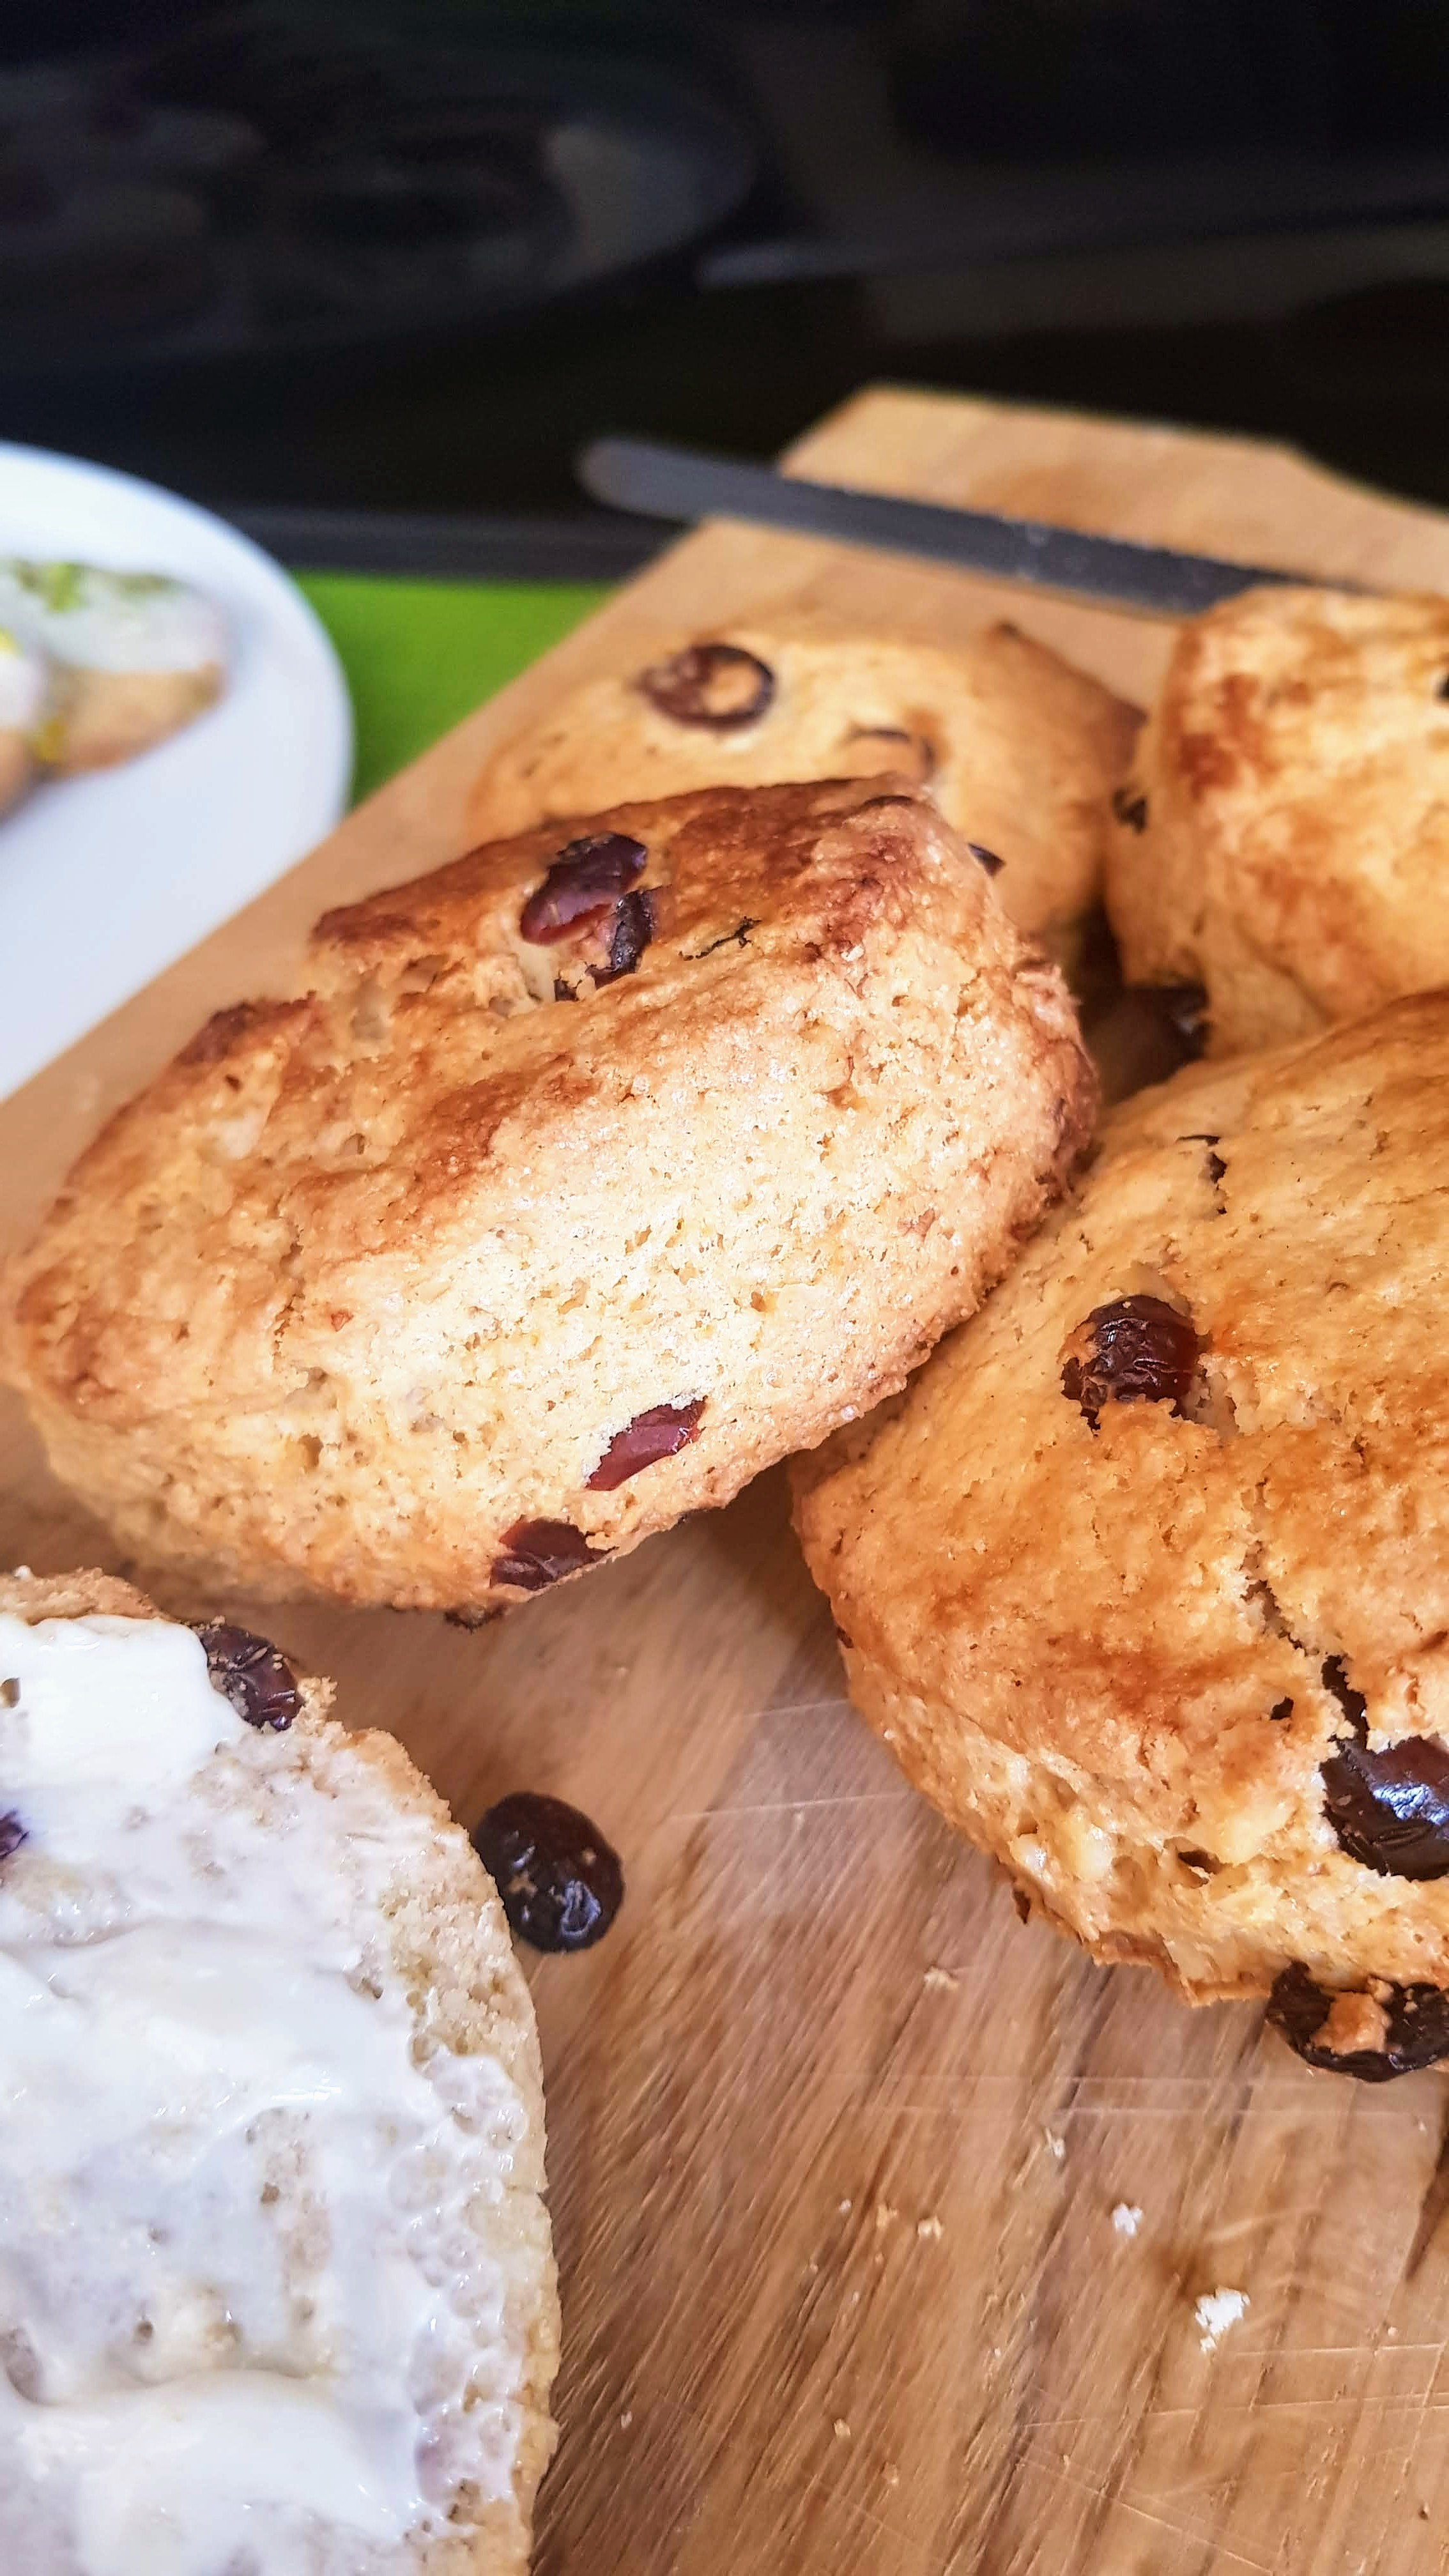
Oh yum. I’ve not had a scone in a while, so looking in my cupboards I had some Walnuts & Cranberries to use up and decided to give it a try. These were absolutely delicious, served with a good quality butter they were perfect with a cuppa. Lovely little afternoon tea scone.
Makes 6
100g Light Brown Sugar (or white caster sugar) (plus 1 tbsp)
2 tbsp lemon juice
300g Plain Flour
1 tbsp baking powder
Freshly grated lemon zest – 1 lemon
1 tsp salt
75g unsalted butter
50g dried cranberries
50g chopped walnuts
50ml Milk
50ml Double cream


This was my first attempt at sweet pastry, it was actually quite simple and tasted amazing. I was making a bakewell tart. (recipe to follow)
250g plain flour
50g icing sugar
125g unsalted butter, cool
1 tsp vanilla essence
1 large egg
Splash of milk


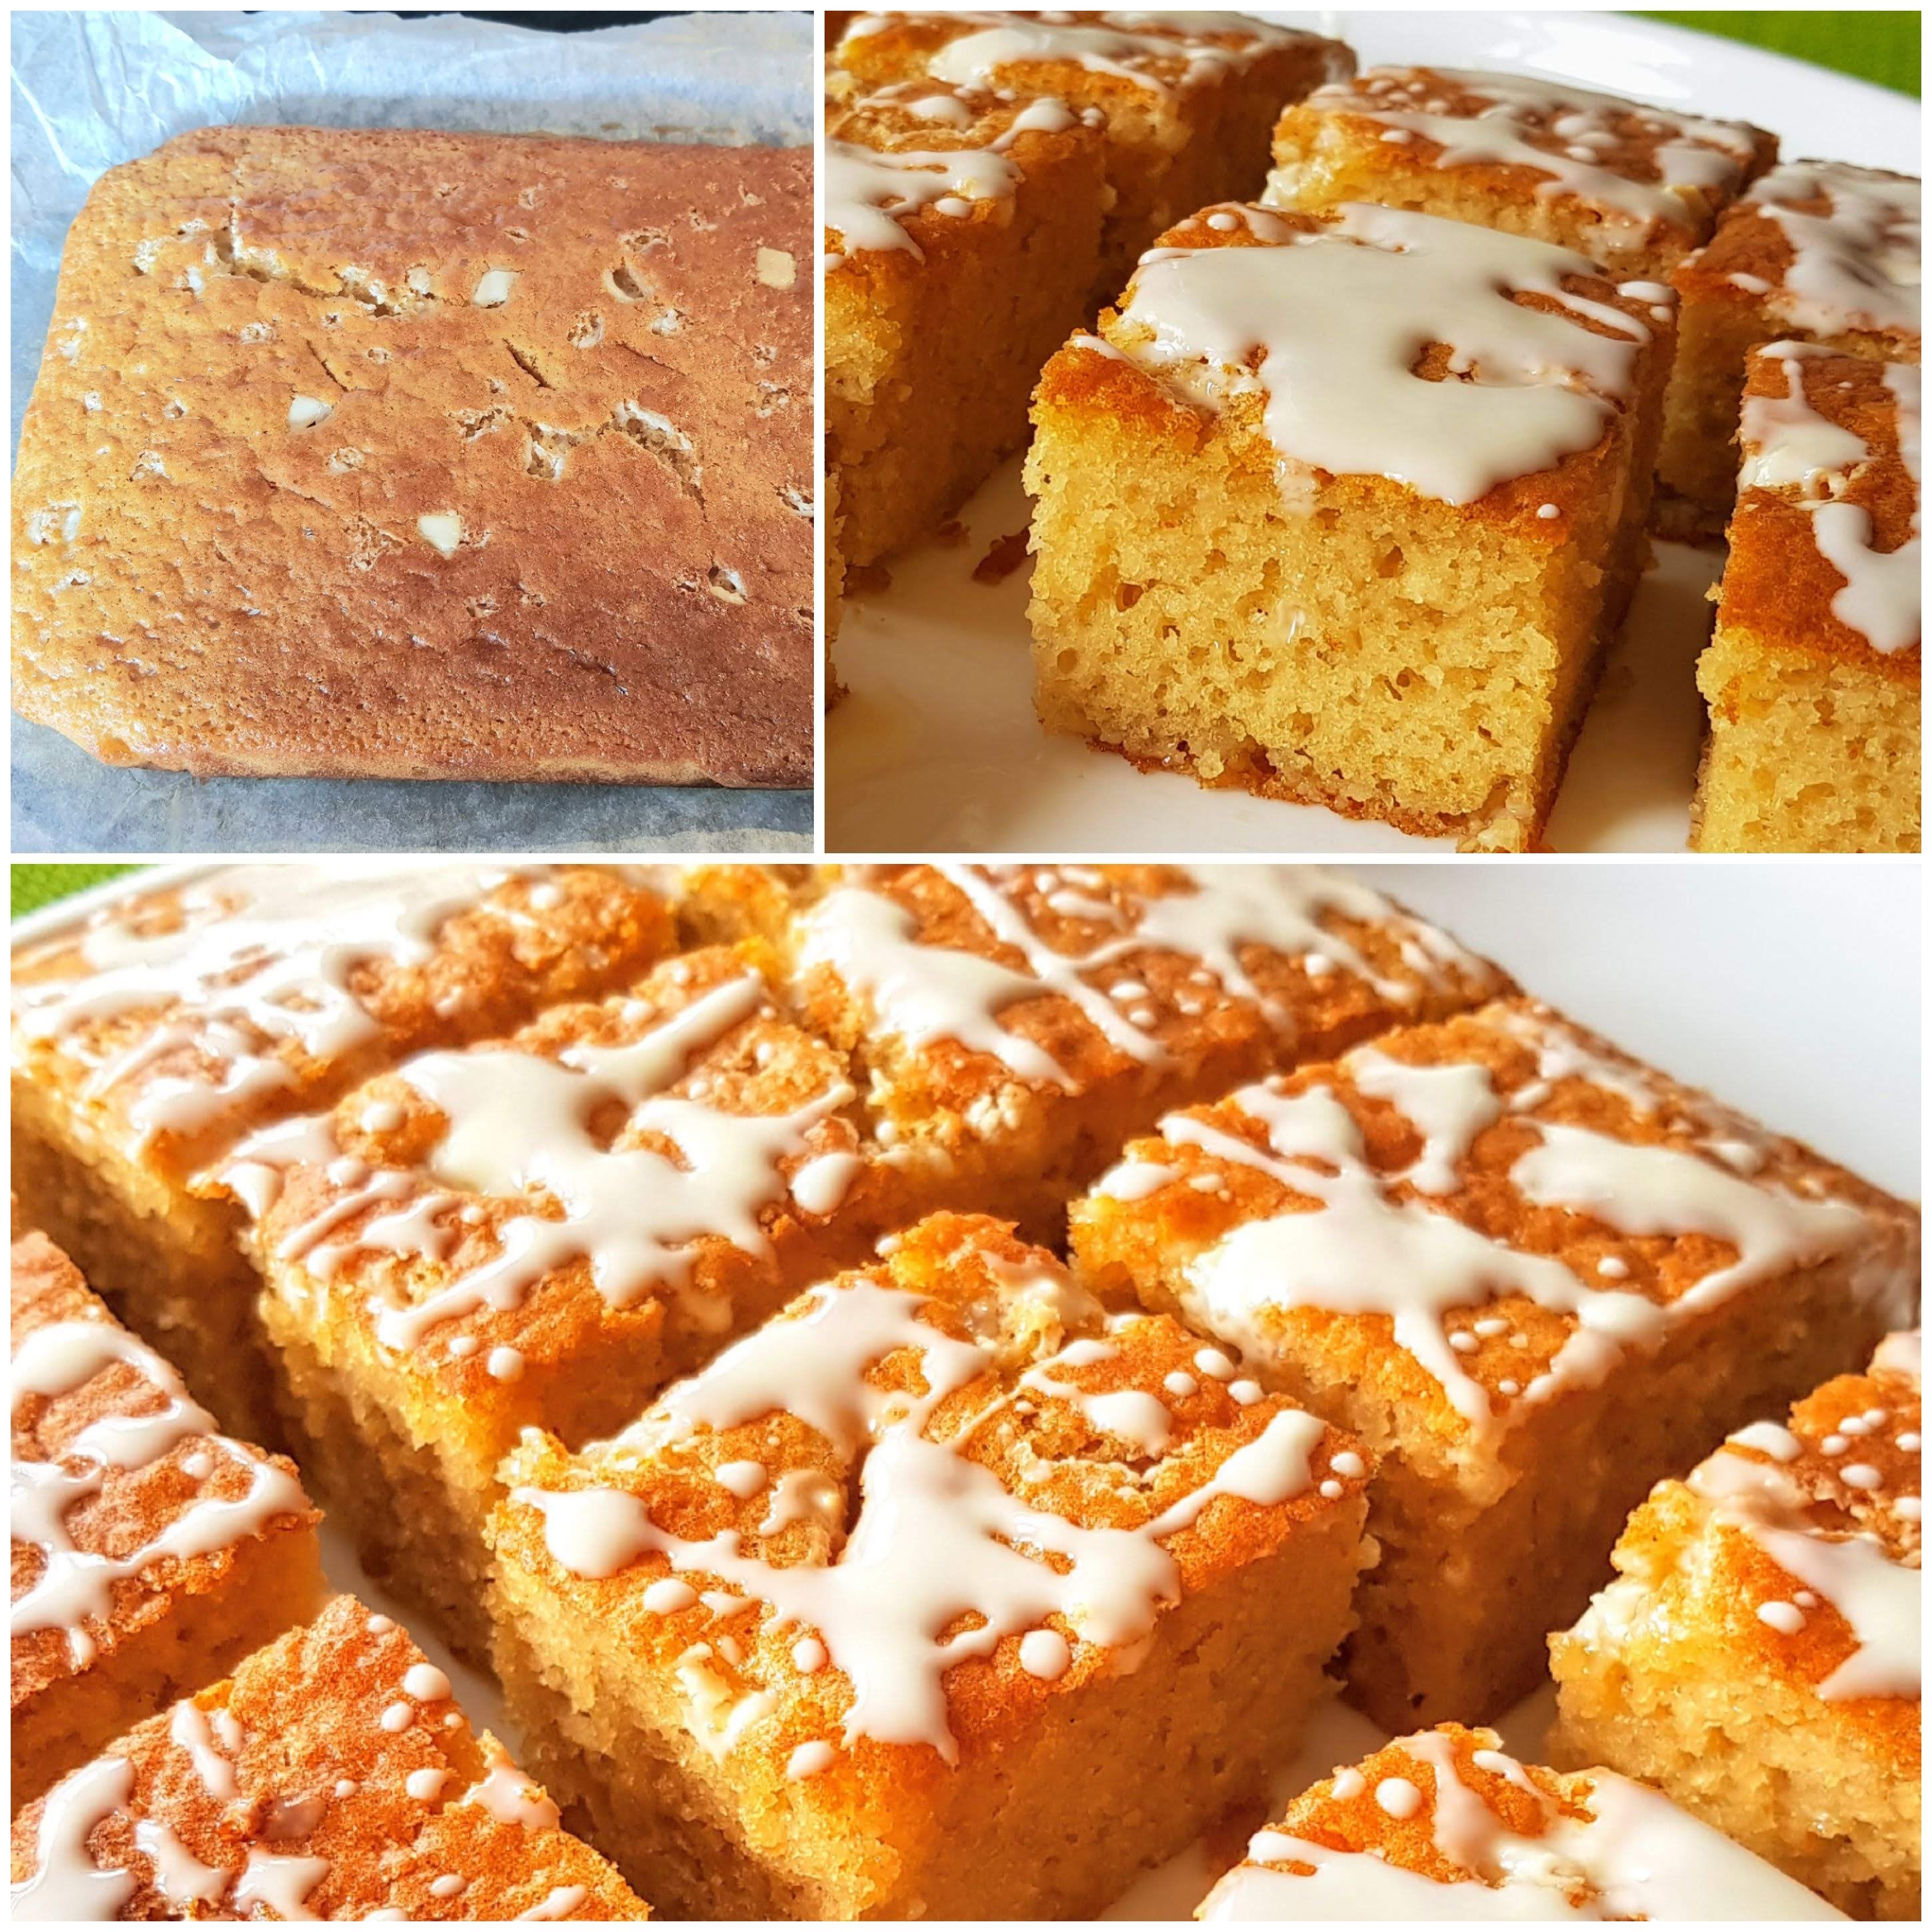
OMG…..I saw this recipe from PON and just had to try as it was lower in calories. (I’m always curious how the flavour will be without all the sugar etc…lol). I have to say these were delicious. I did change the recipe slightly, but still low in calories. Just 70 calories a slice.
Makes 15 slices.
100g Self Raising Flour
50g low fat butter (I used lurpak lighter)
4 medium eggs
1 tsp baking powder
1 tsp vanilla extract
4 tsp clear honey
50g White chocolate chips (20g to melt for topping)
4 tbsp light brown sugar (or use sweetener for lower calories)


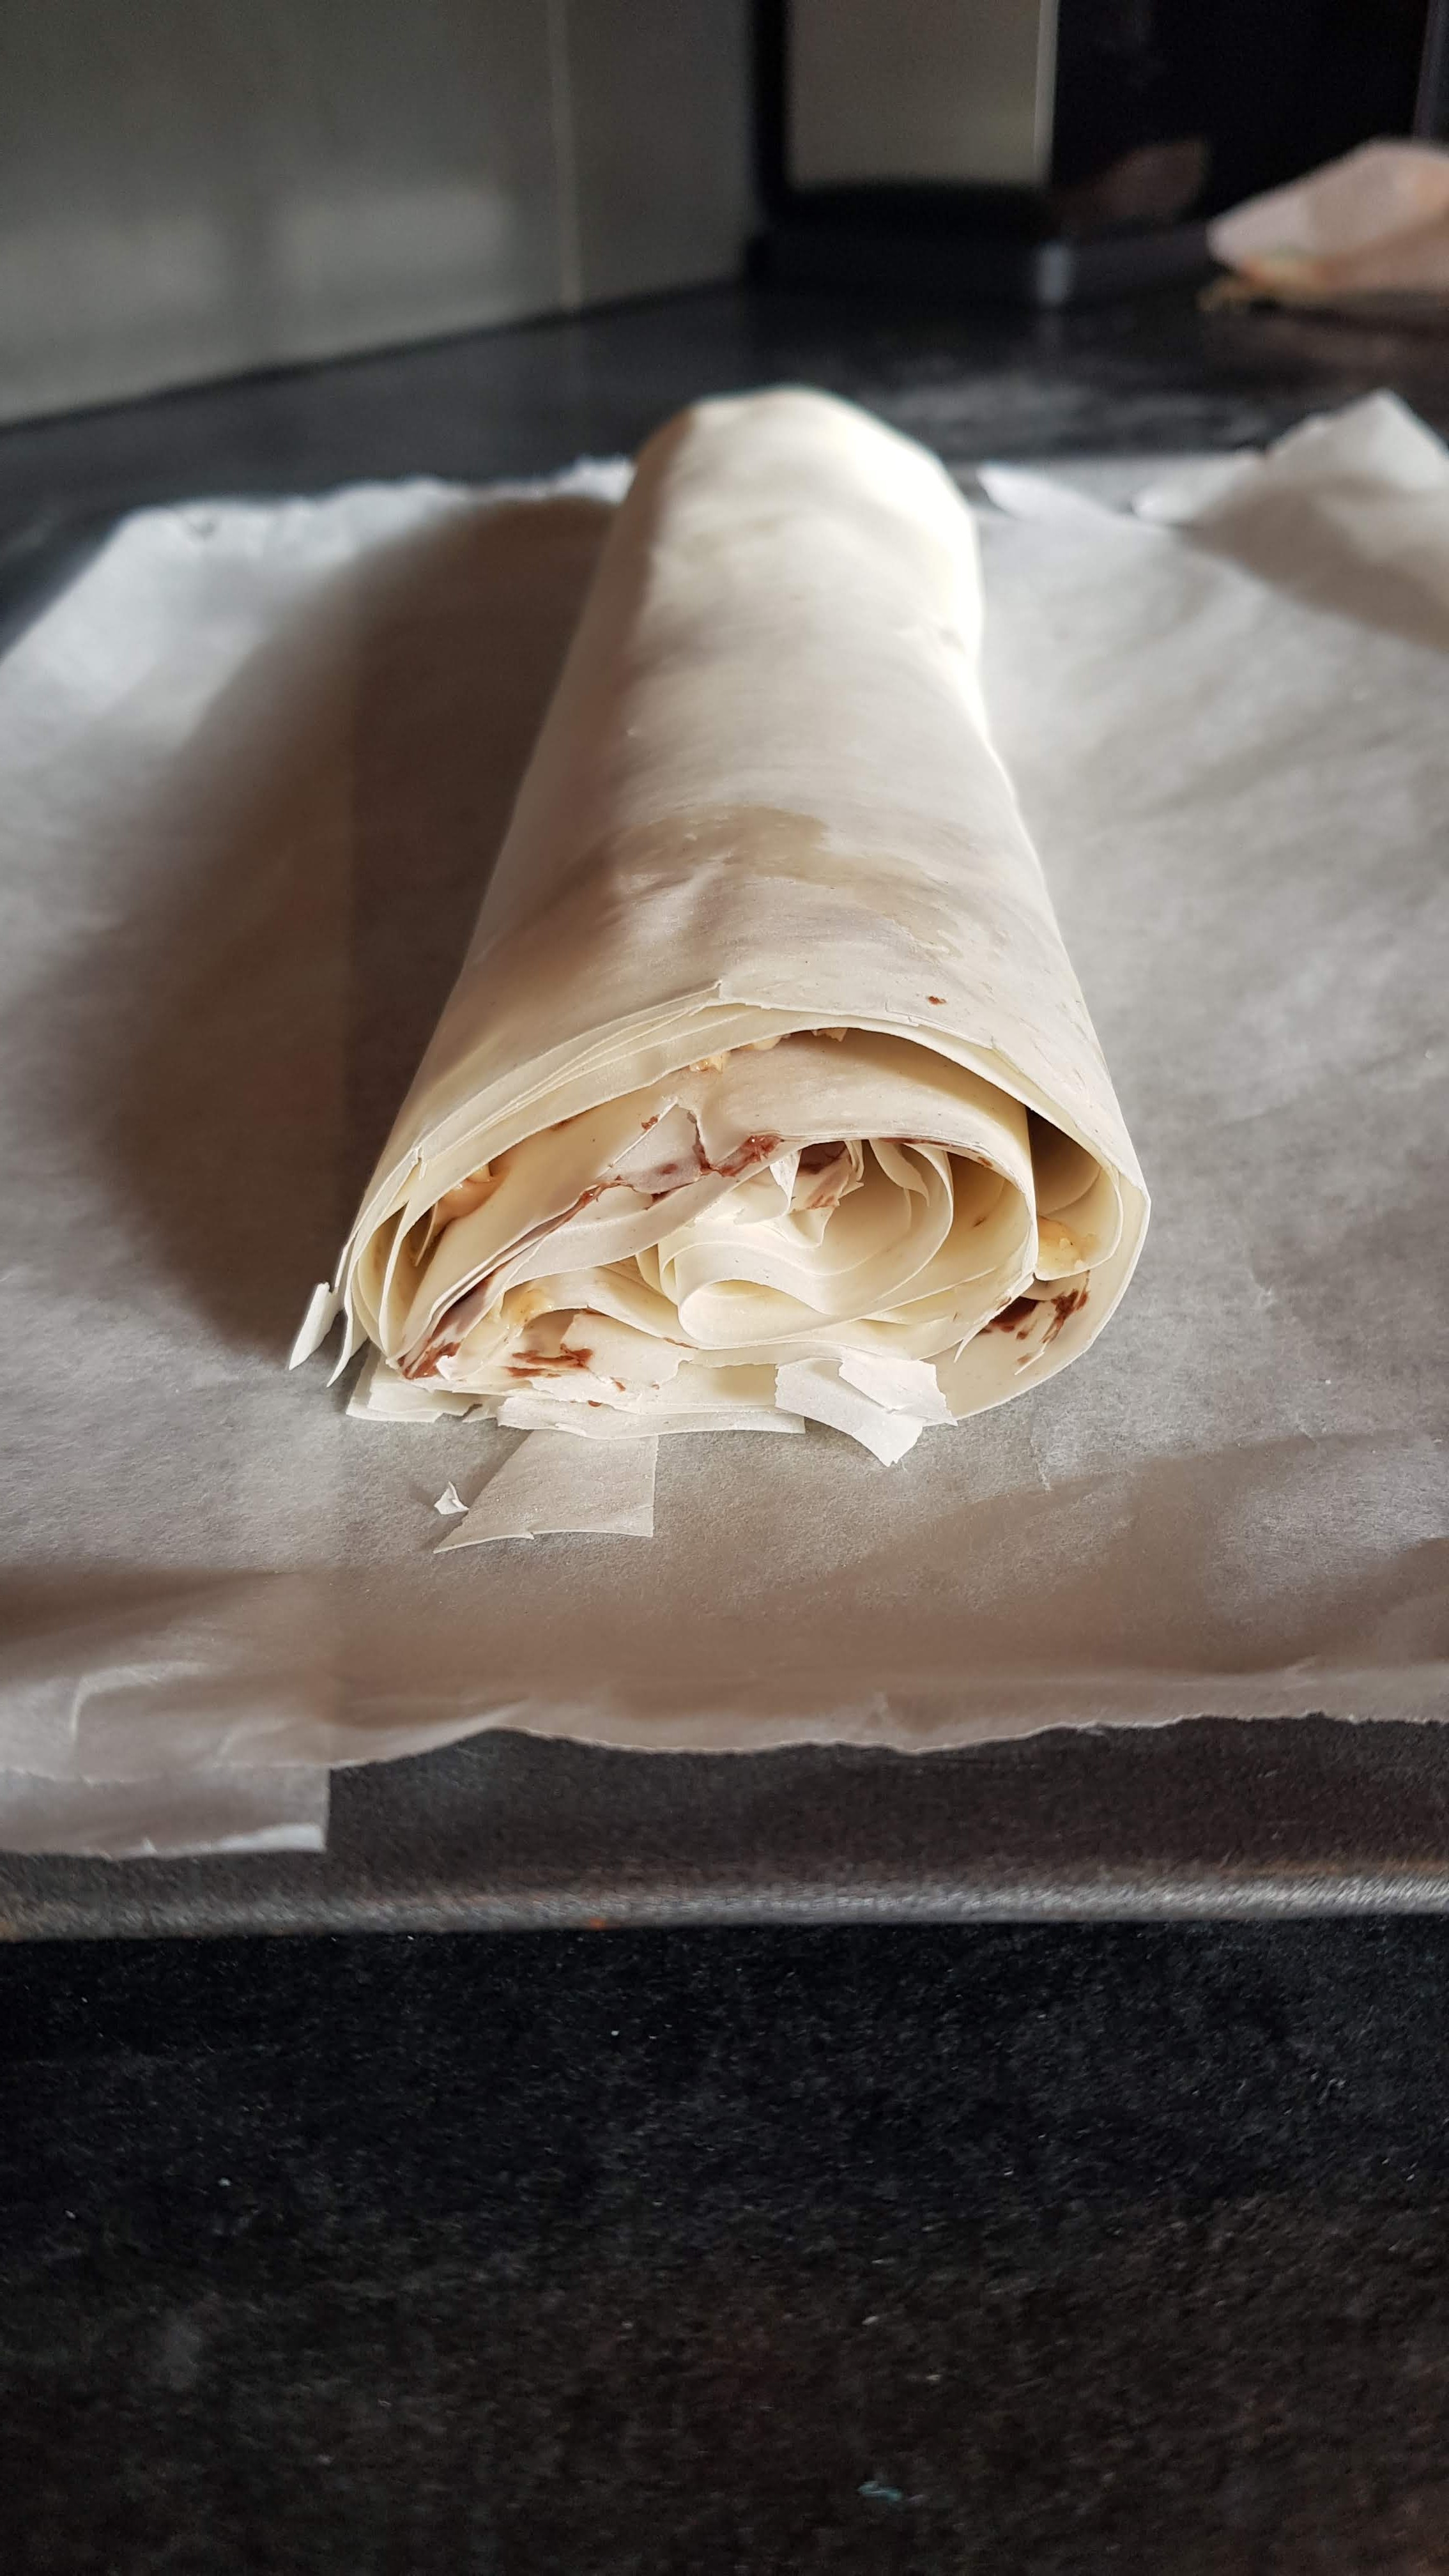
I’ve been dying to try this recipe for a long time & it was just as dreamy as I thought. I love peanut butter, so any recipe with it in I simply have to try.
This was so easy and quick to make, just 3 ingredients.
1 packet of Filo Pastry (I only used 8 sheets)
3 tbsp Peanut Butter (I used crunchy but you could use smooth if preferred)
3 tbsp Nutella (got to be Nutella…lol)
Slice up and serve.


Well what can I say apart from sweet, luxurious and low calorie count! Yes, you heard right, LOW CALORIE Count, this little pudding is just 233 Kcal. Trust me too, you won’t believe it is a slimming version, the taste is so delicious. Another great little find from PON, I adapted slightly to my own tastes.
Makes 4
75g Self Raising Flour
1 tsp baking powder
1 tbsp black treacle
3 tbsp light soft brown sugar
50g reduced fat butter
2 large eggs
1 tbsp honey
1 tbsp maple syrup


Happy Easter Sunday Everyone!
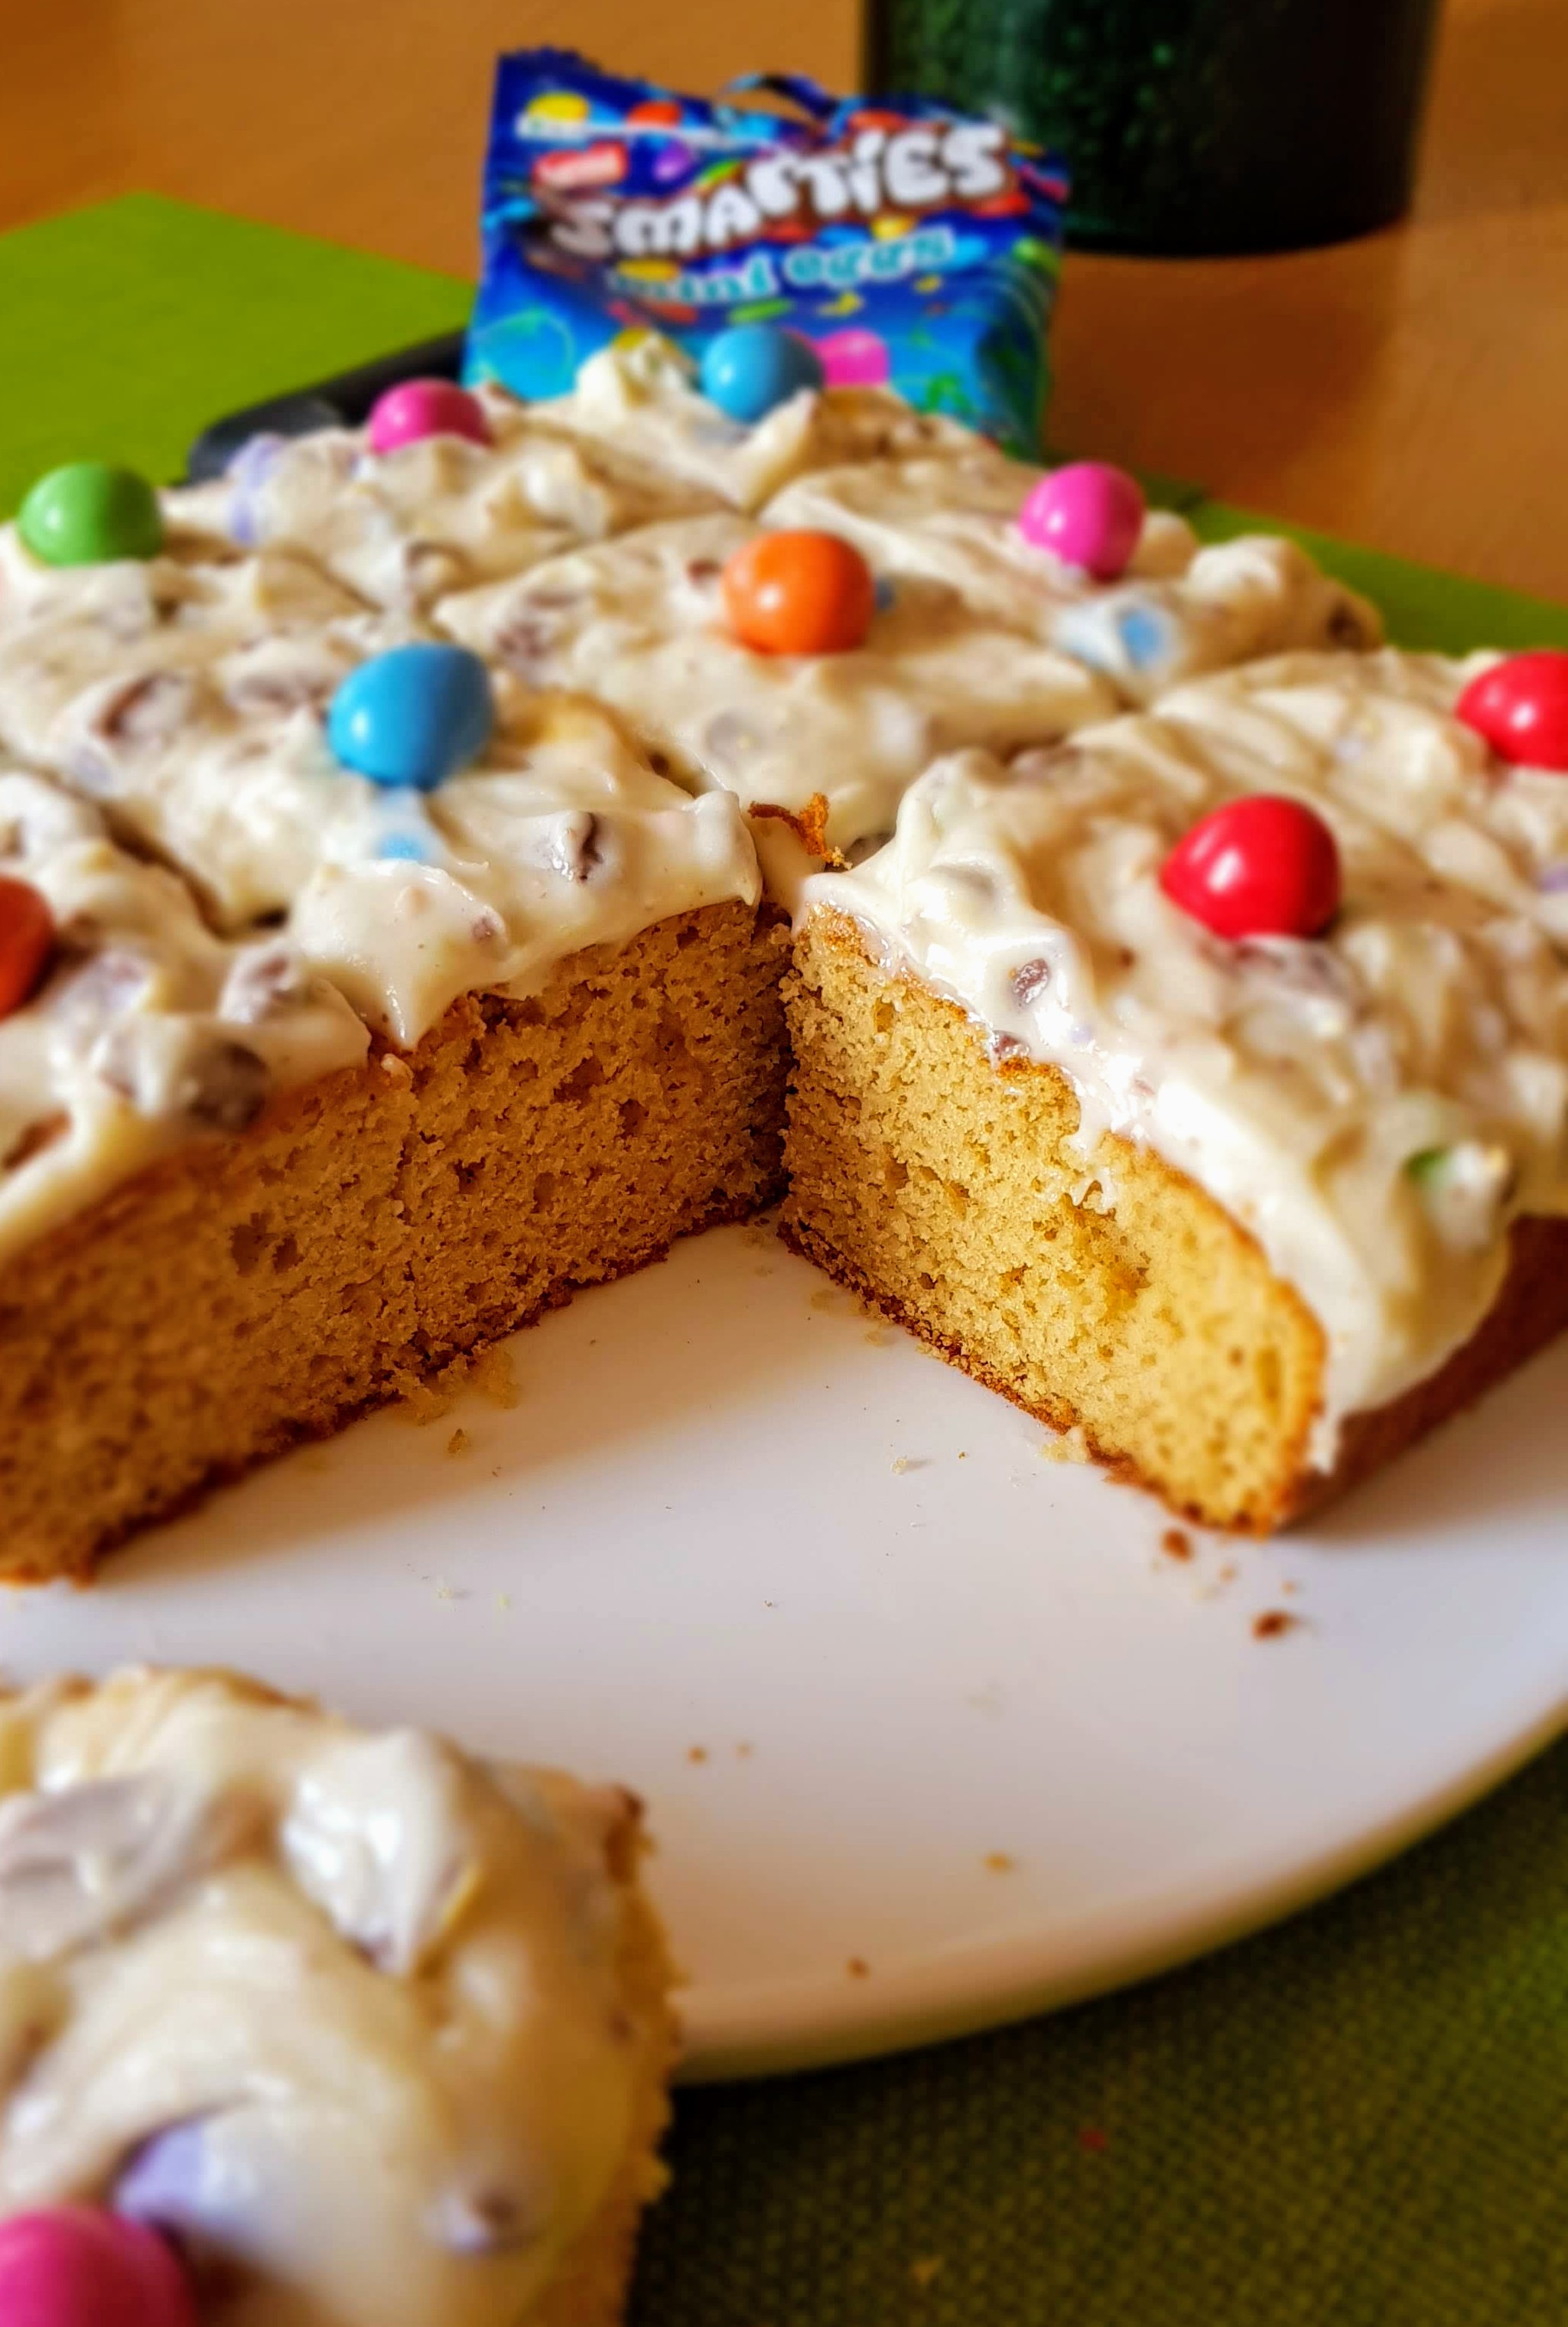
It’s Easter Weekend, and I just had to bake. This is what I made and it was delicious, full of flavour with a crunch and very light! Think of a slightly caramel sponge flavour with a super crunchy smarties frosting. Yummy!
Perfect with a lovely cuppa.
Makes 12 large slices (or 24 smaller ones)
60g Butter, softened
250g Brown Sugar
1 Tbsp Vanilla Essence
3 Eggs, 1 Egg Yolk
250g Self Raising Flour
Pinch of salt
1/2 Tsp Baking Powder
For the Frosting
60g Butter, softened
200g Icing Sugar
1 Tbsp Maple Syrup
1 Tsp Vanilla Essence
1 Tbsp Milk
1 Bag of Smarties Eggs


5. Meanwhile to make the frosting, cream the butter in a bowl and add the icing sugar. Add the milk, maple syrup, vanilla and mix until combined.
7. Using a rolling pin gently break down the smarties eggs until you have small pieces then add to the frosting mix and mix through. Refrigerate until needed, this helps thicken the frosting up
8. Once your cake has COMPLETELY cooled, top with frosting spreading evenly. Slice up & serve. Yummy
(These can be kept up to 4-5 days in fridge or 2 days at room temp in a air tight container.)


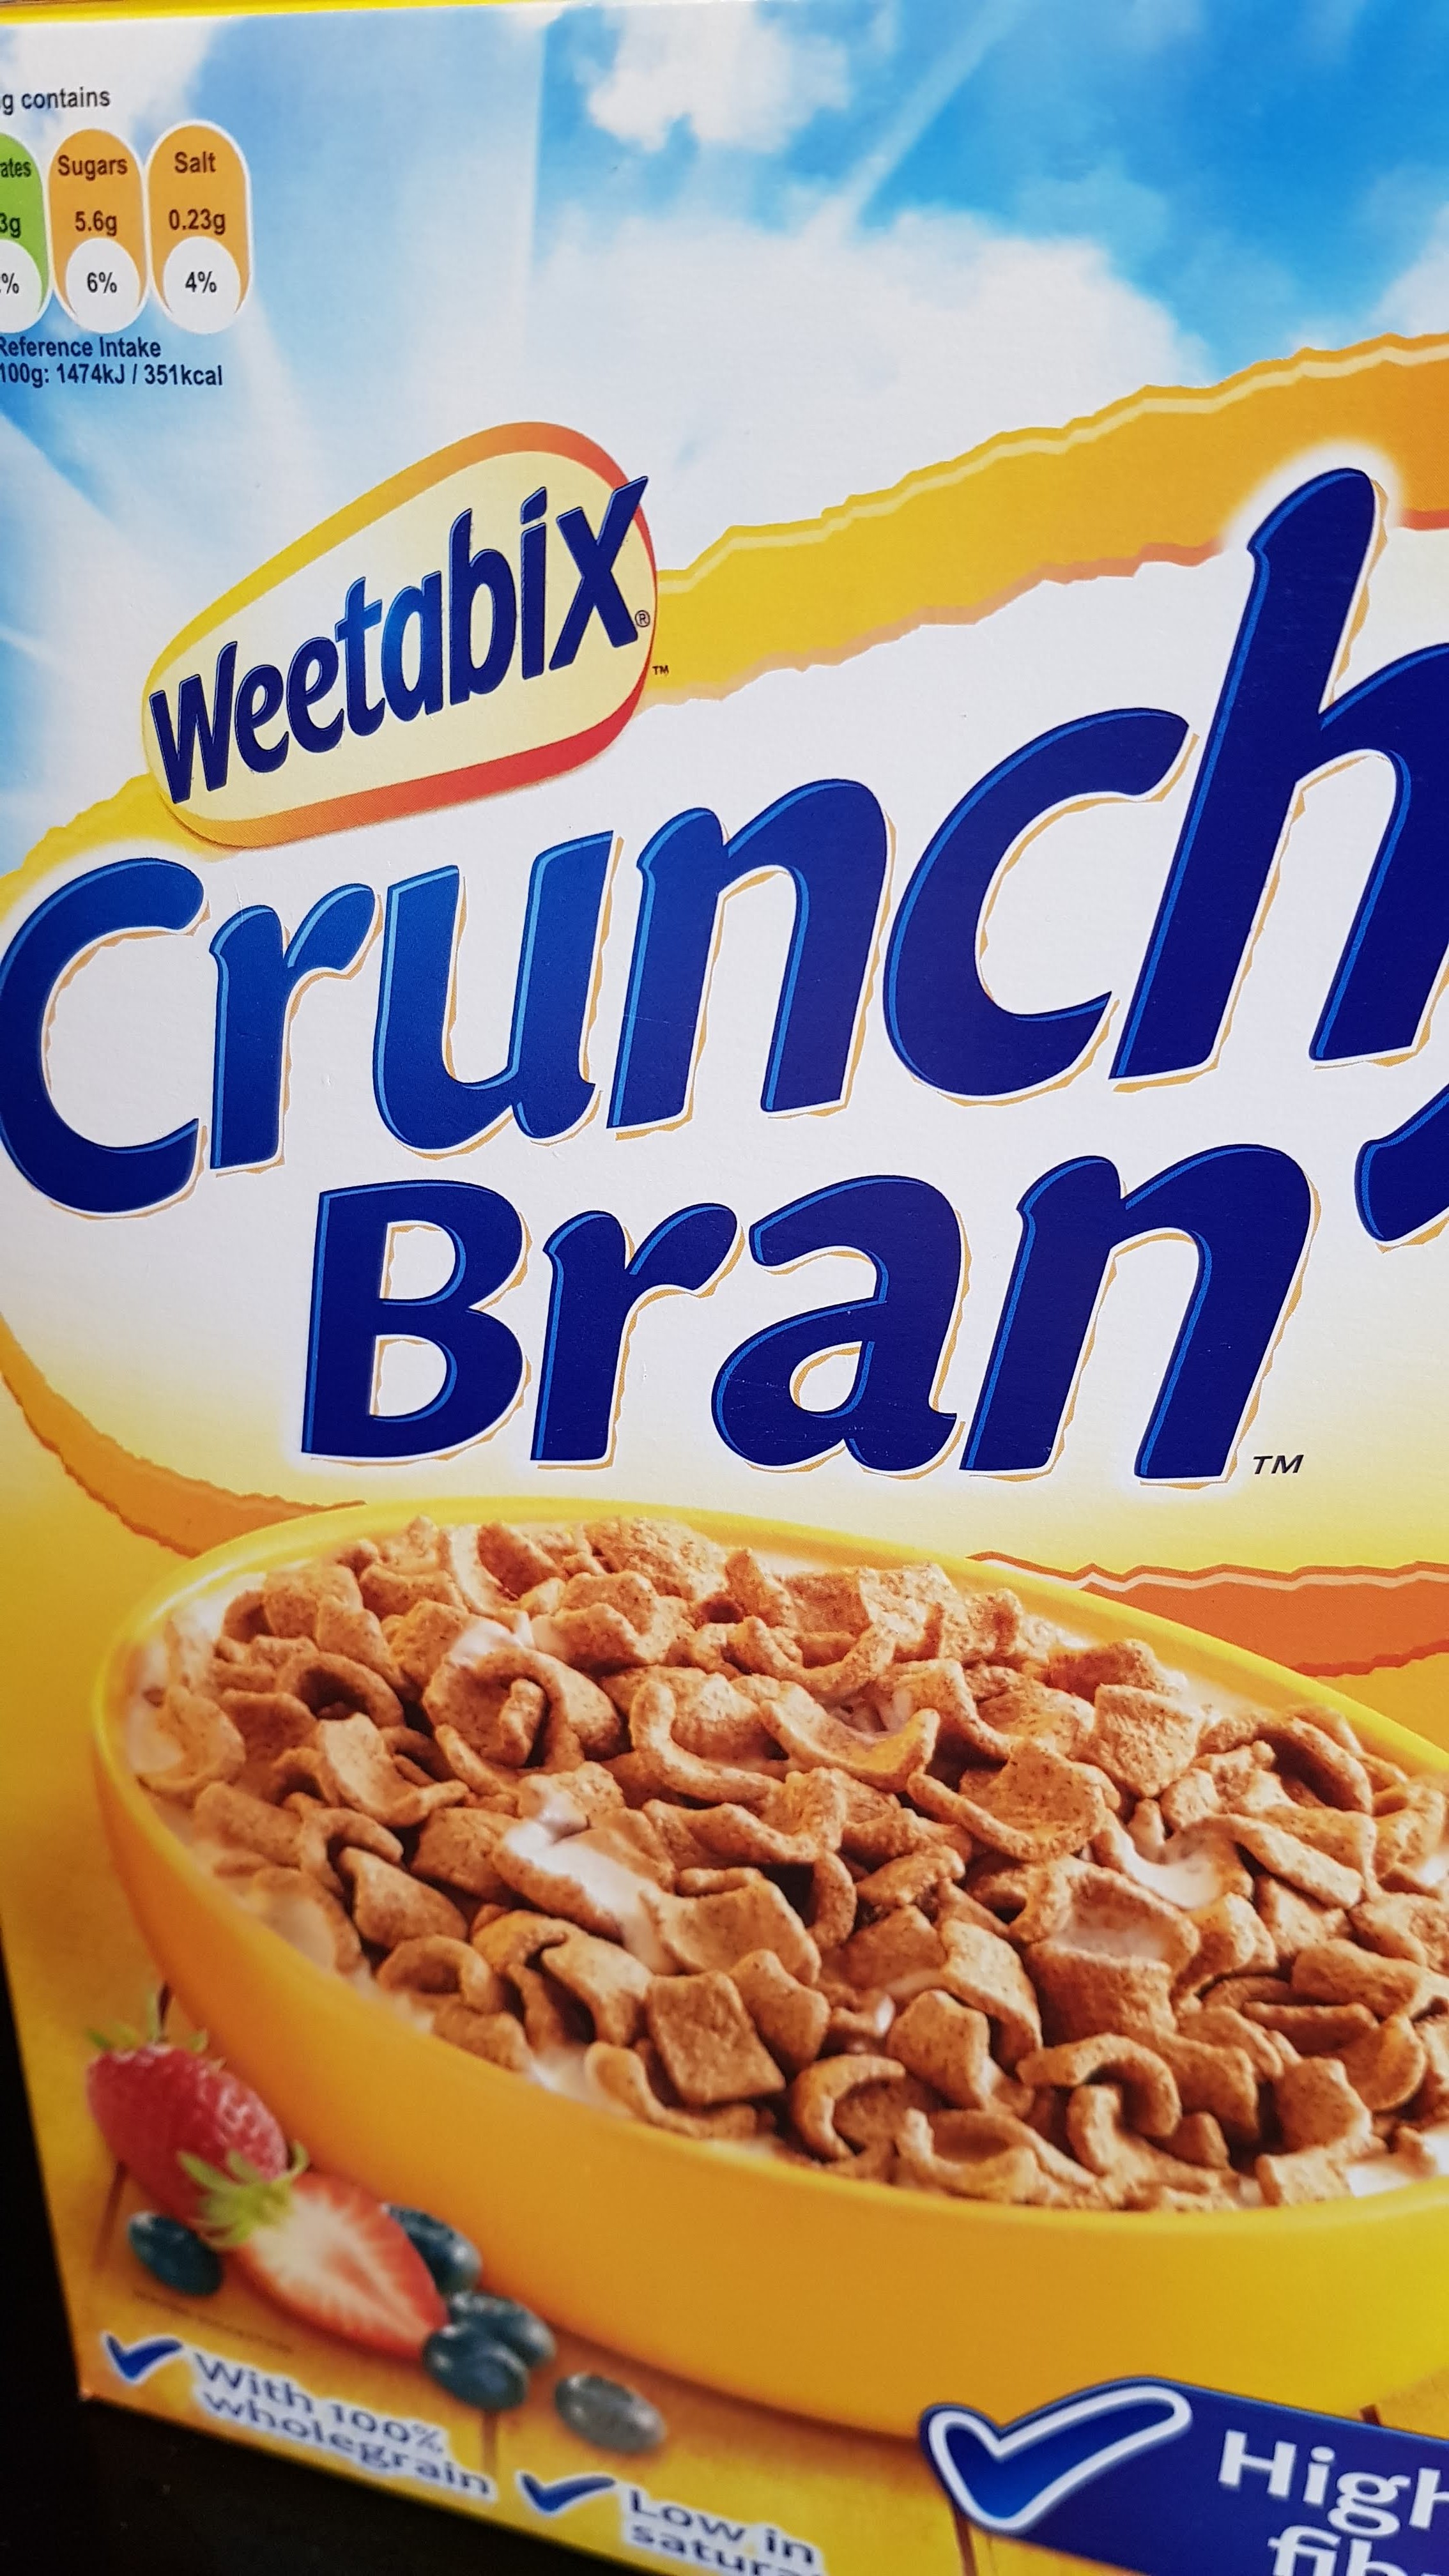
I’m not a fan of marshmallows but I was cleaning out my kitchen drawers and came across a bag (not sure why they were in there…lol!), they had to be used up, so Rocky Road was the only thing I could think of where I had all the other ingredients and it was quick and easy to put together. My partner was absolutely delighted, he has a very sweet tooth.
Makes 6
100g milk chocolate chips – melted
30g butter – melted
1 tbsp Maple Syrup
40g mini marshmallows
80g Crunchy Weetabix bran (you can of course use digestive biscuits or other biscuits of your choosing)


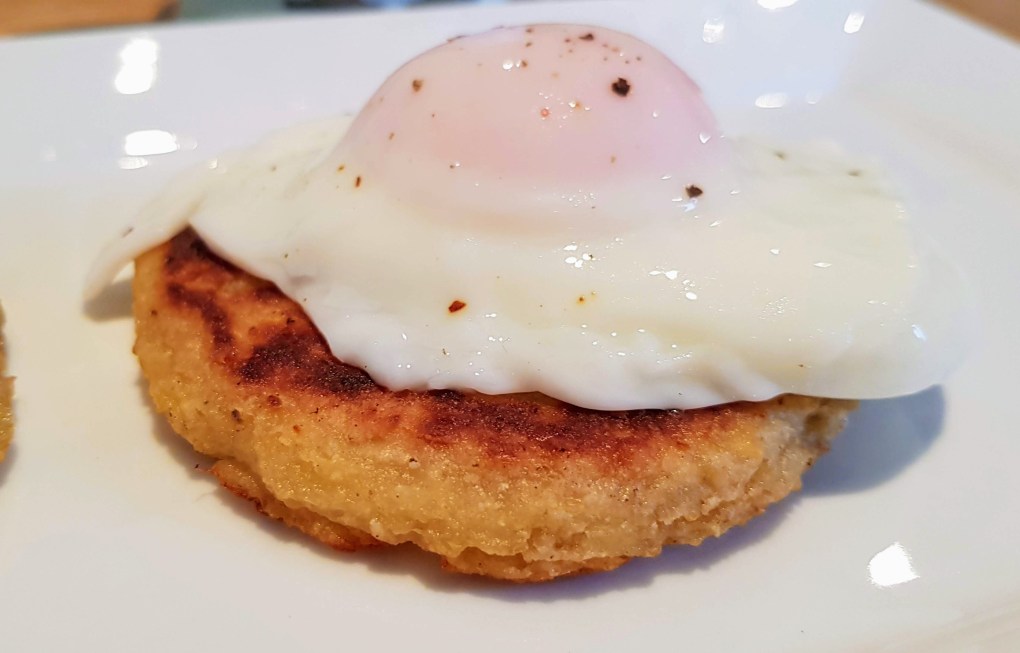

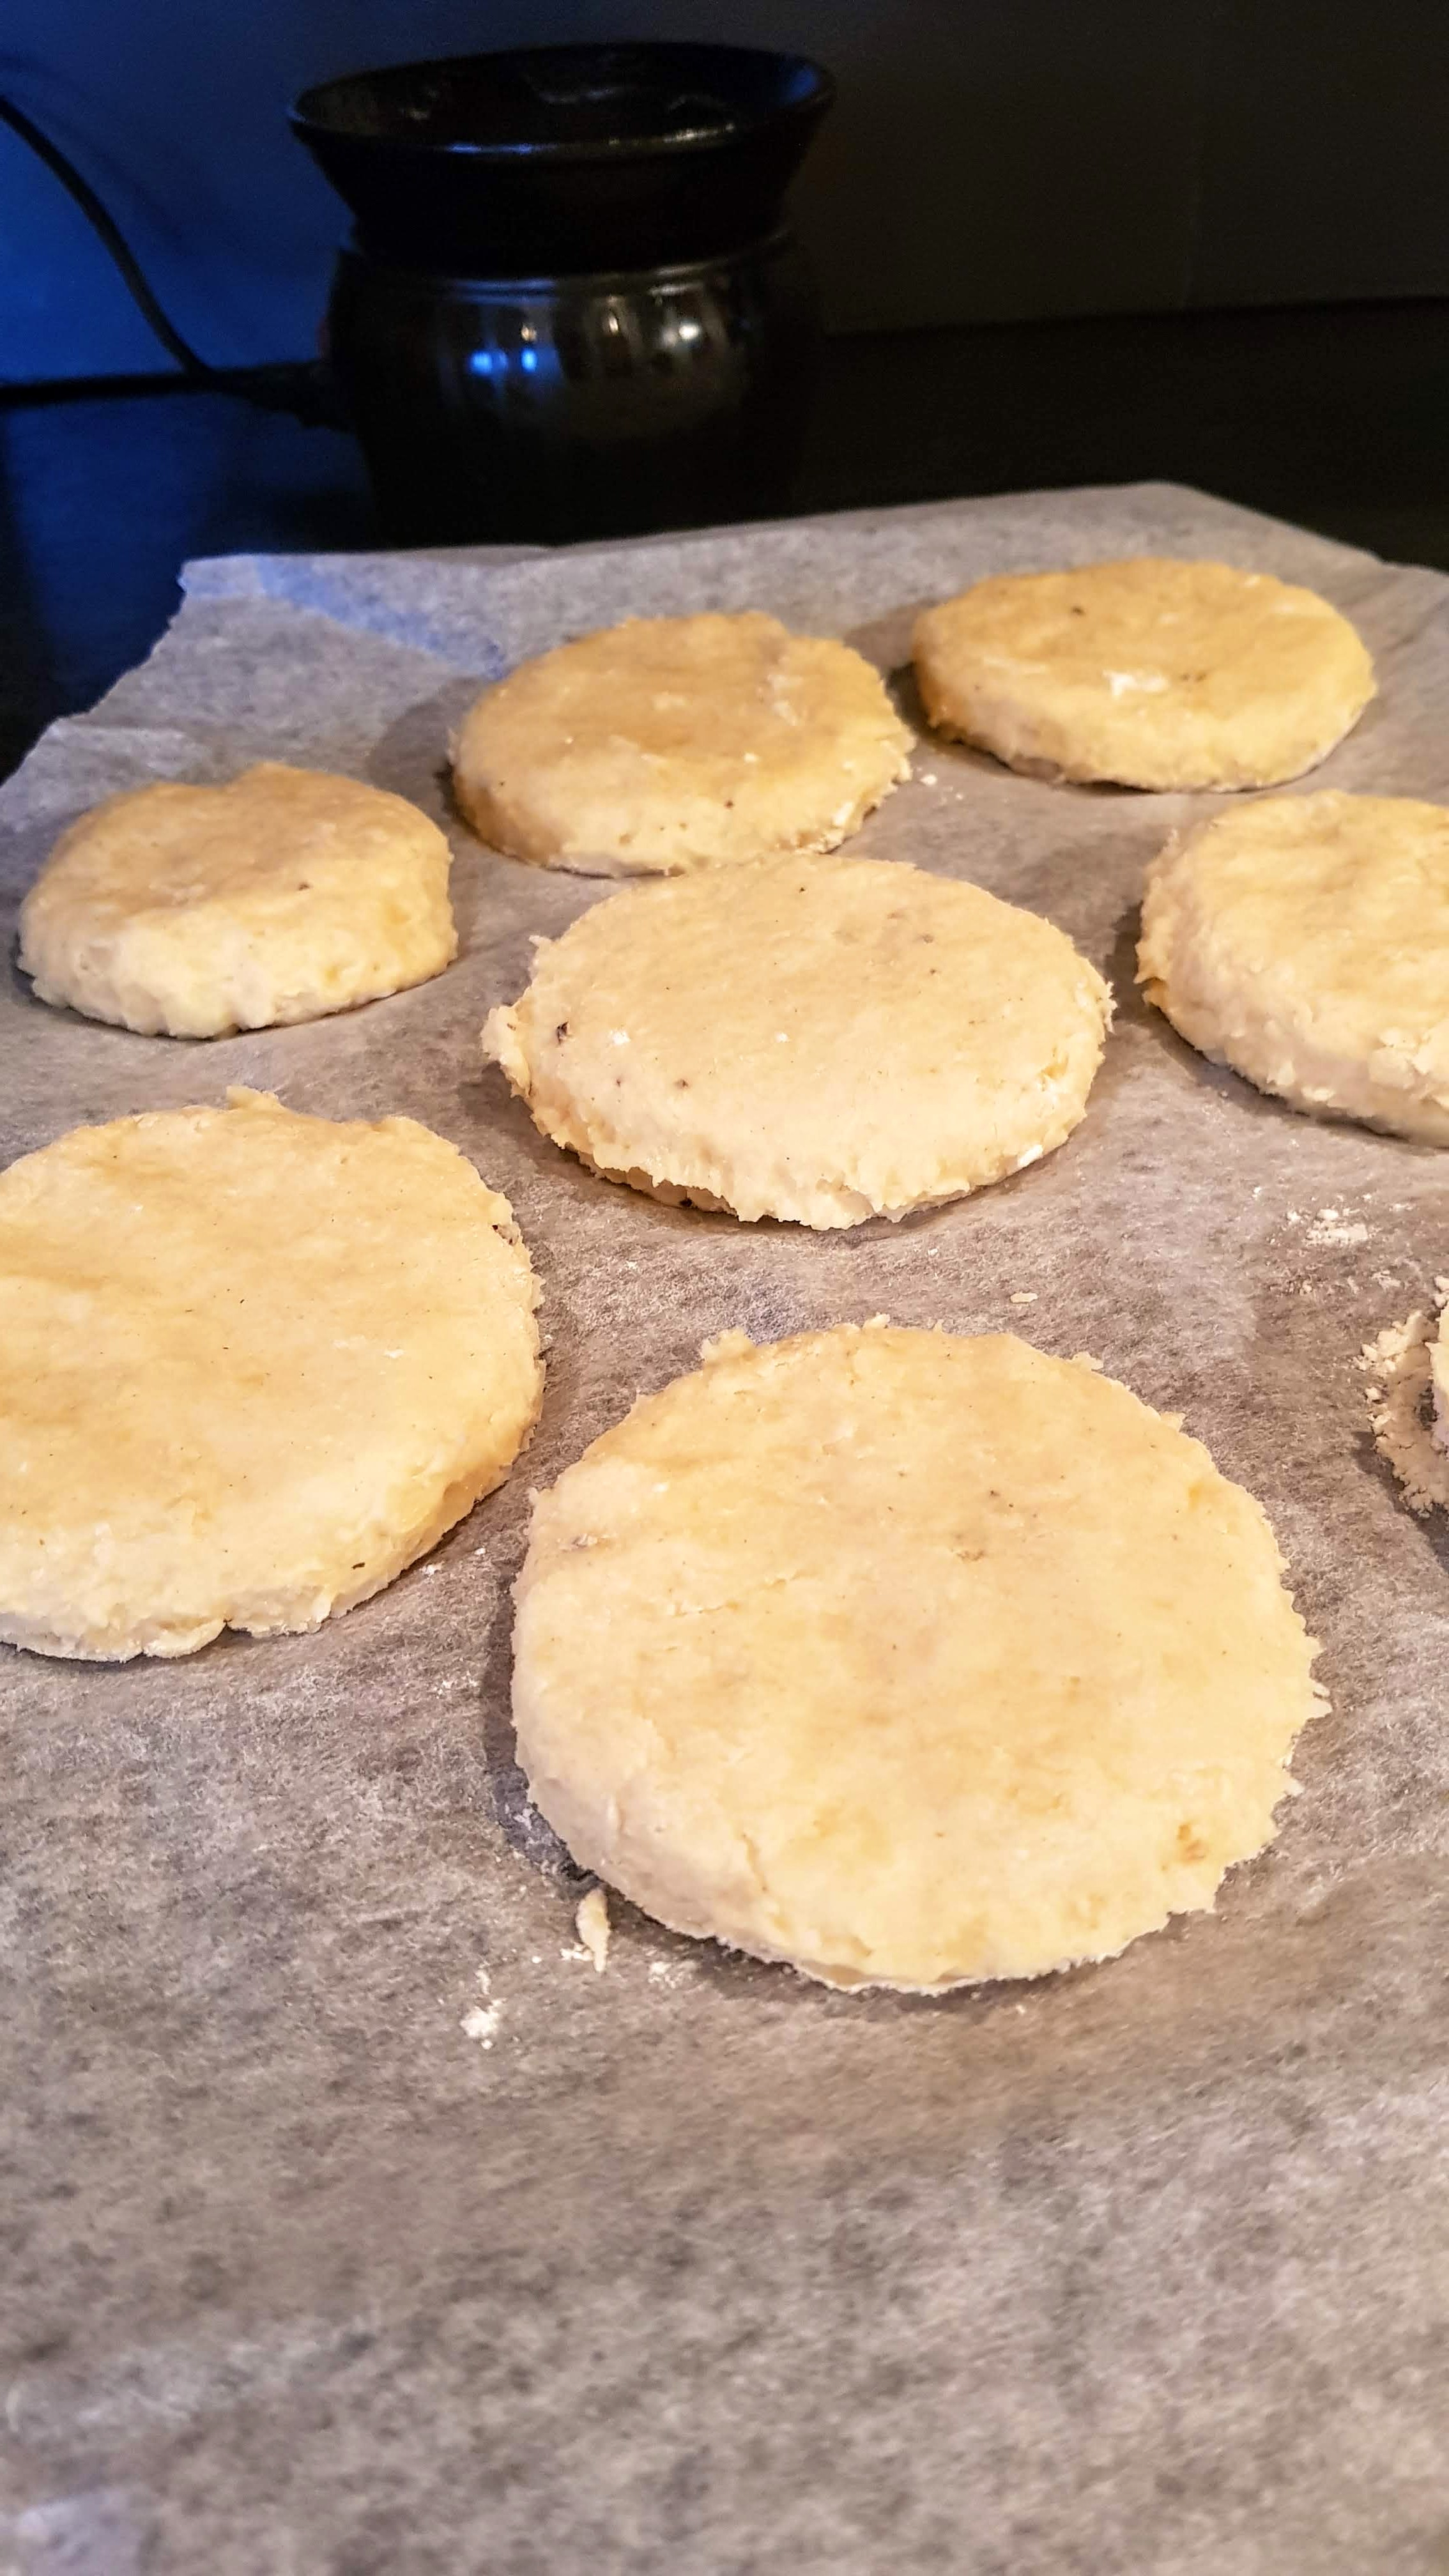
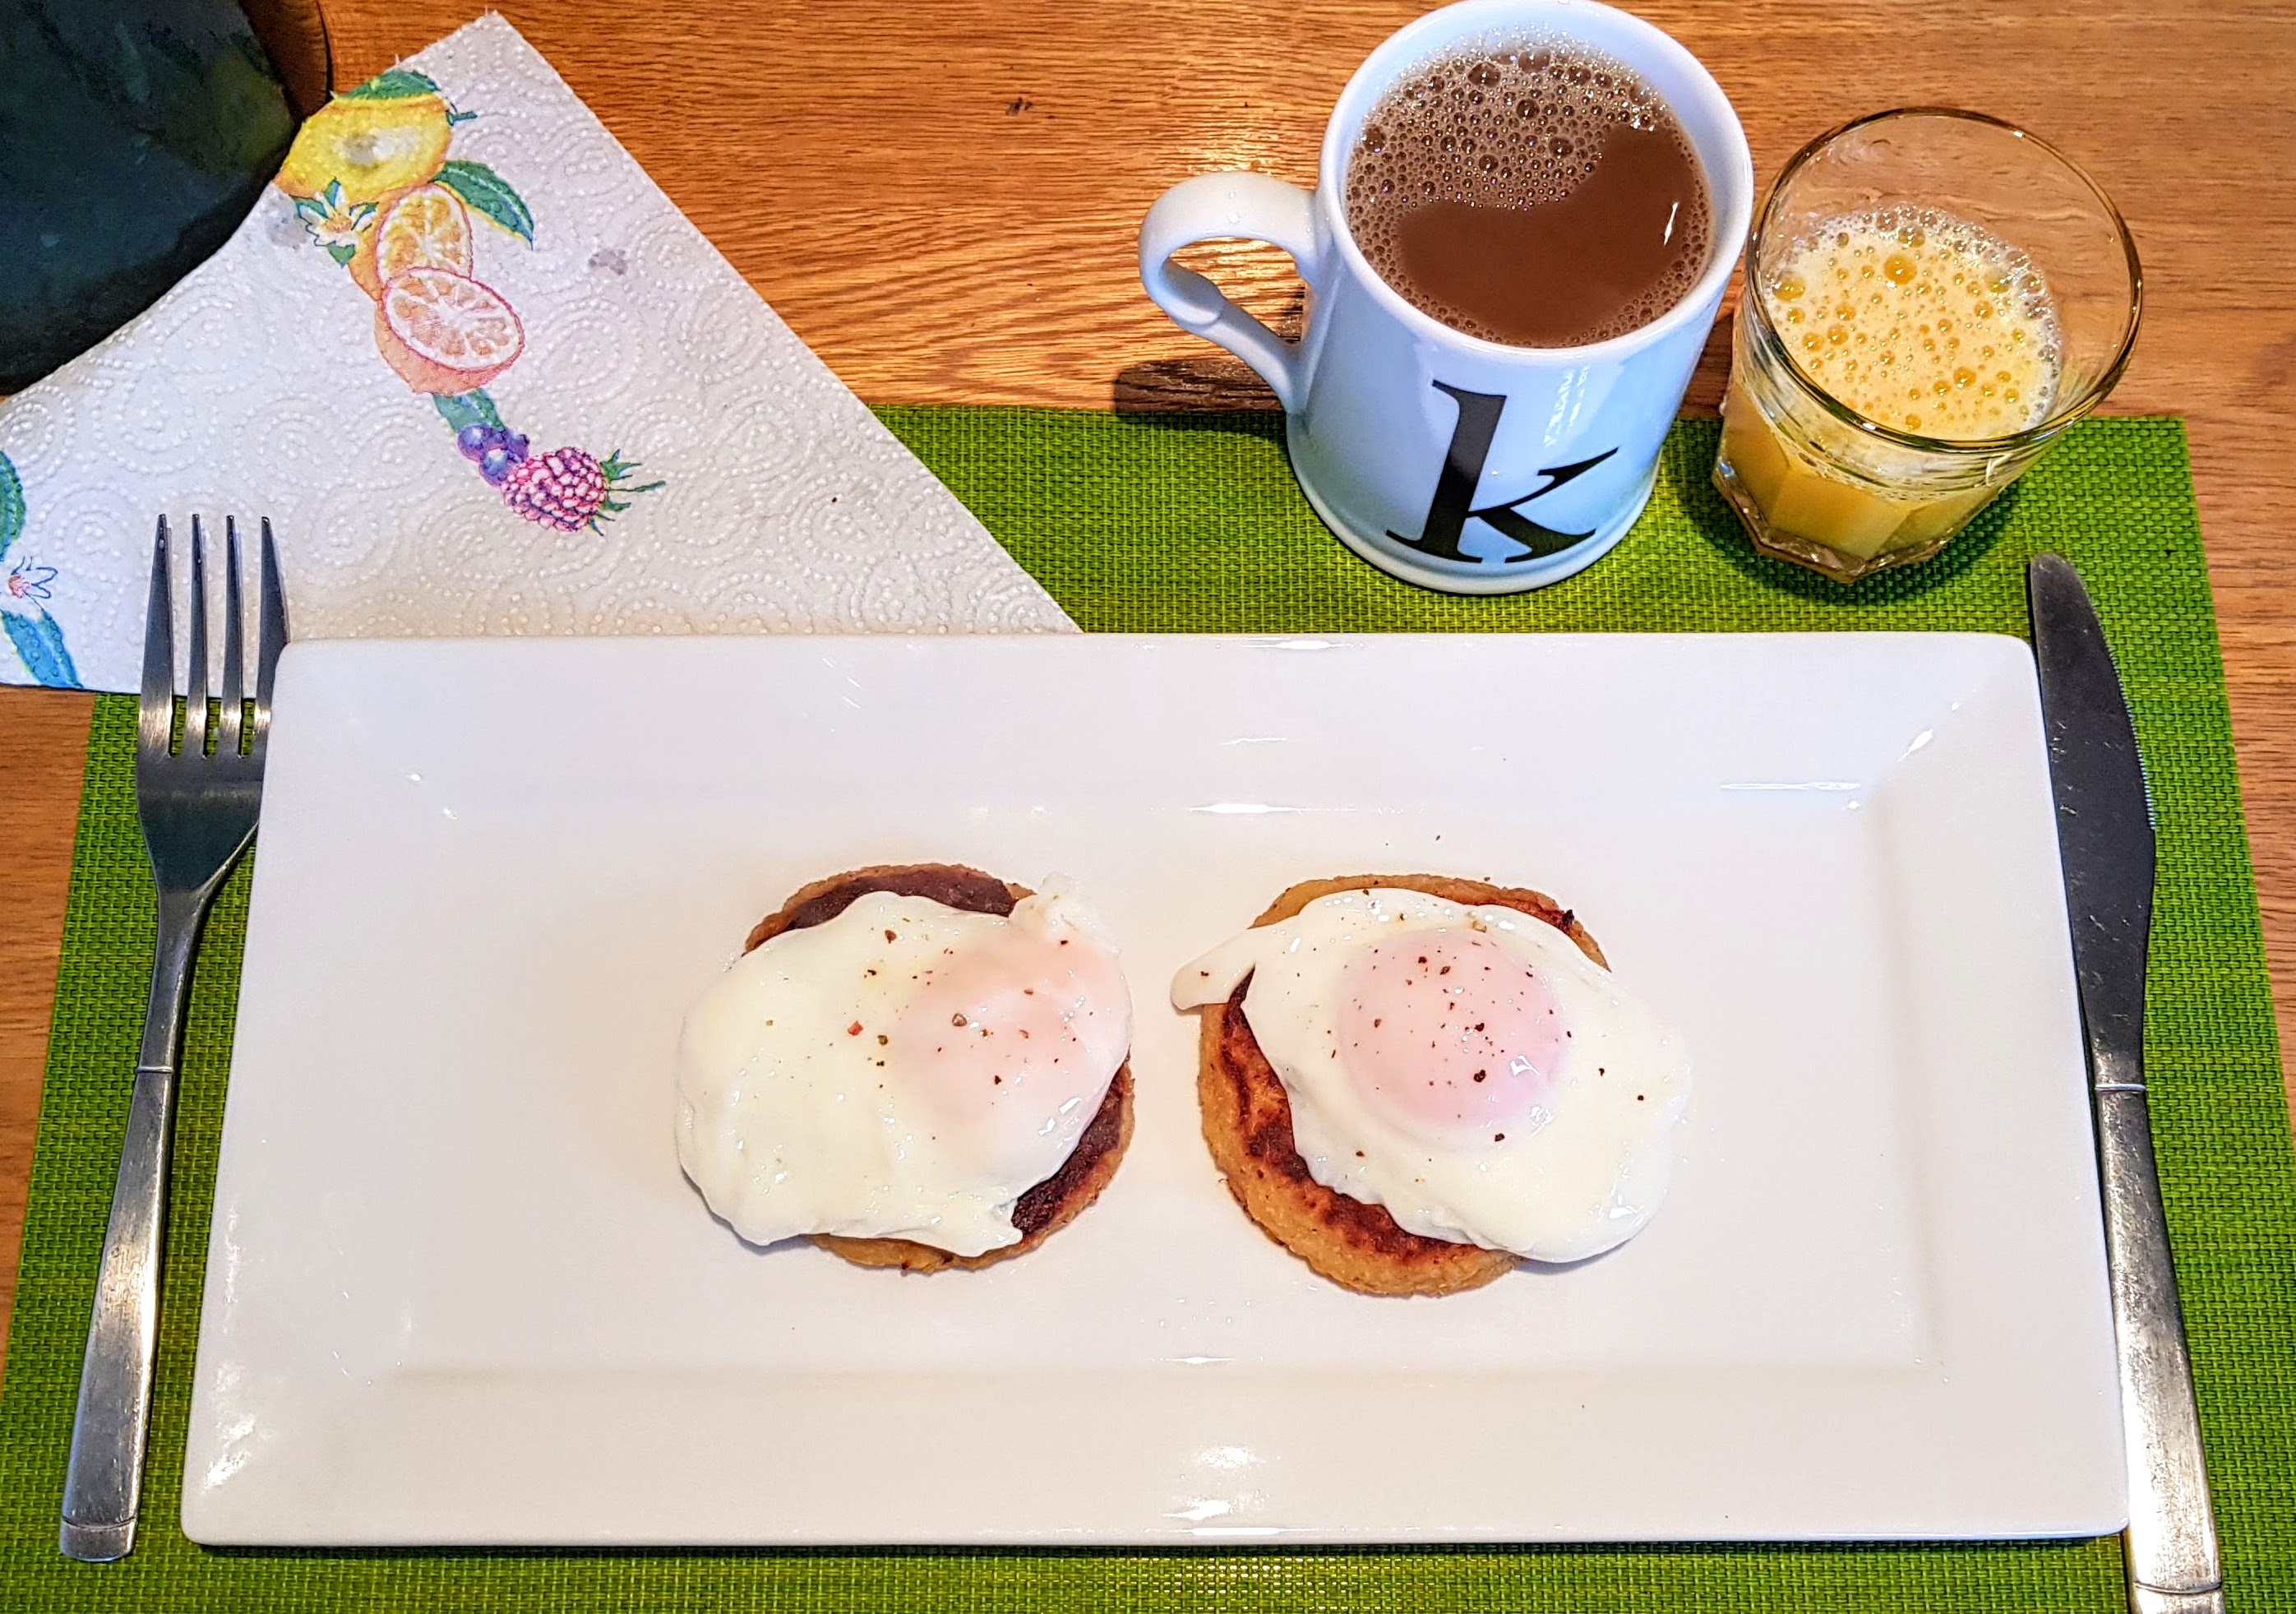
After my recent visit to Ireland and just had to try a proper Irish Potato Cake. They are also known as Fadge or Farl in Northern Ireland and Tattie Scones (potato scones) in Scotland. These are a traditional breakfast item.
Makes about 8
4 potatoes (preferably a starchy potato, such as russet)
3 tbsps plain flour
1 tsp baking powder
Salt & pepper to taste (I use rainbow peppers, more flavour)
1 tsp onion powder
30g melted irish butter
30g irish butter to cook with


OMG, this was so yummy! We had a soup ‘n’ pudding kinda day and this is what I decided to try.
Serves about 8
110g plain flour
2 tbsp cocoa powder
110g golden caster sugar
50ml olive oil
50ml walnut oil
55g dark chocolate, chopped
55g chopped walnuts
2 large eggs
1 1/2 tsp baking powder
1 tsp vanilla extract
pinch of salt
100g melted chocolate for topping
30g chopped walnuts for topping


Oh I know I keep going on about it, but this Crisperplate is just magical, it has saved me so many minutes in my kitchen and has given me perfect cooking results every time. This time it was a little afternoon treat.
Makes a 12″ cake
150 g Caster Sugar
225g Self Raising Flour
100ml milk
110g butter softened
2 eggs
1 tin of pineapple rounds (drained)
1 tsp vanilla extract
Whipping cream to serve
1. Mix everything together (except pineapple) in a mixer until smooth
2. Preheat Crisper for 2 mins, then pour on batter evenly
3. Place pineapple on top
4. Bake on Crisp setting for 10 minutes.
5. Serve with a large dollop of whipped cream.


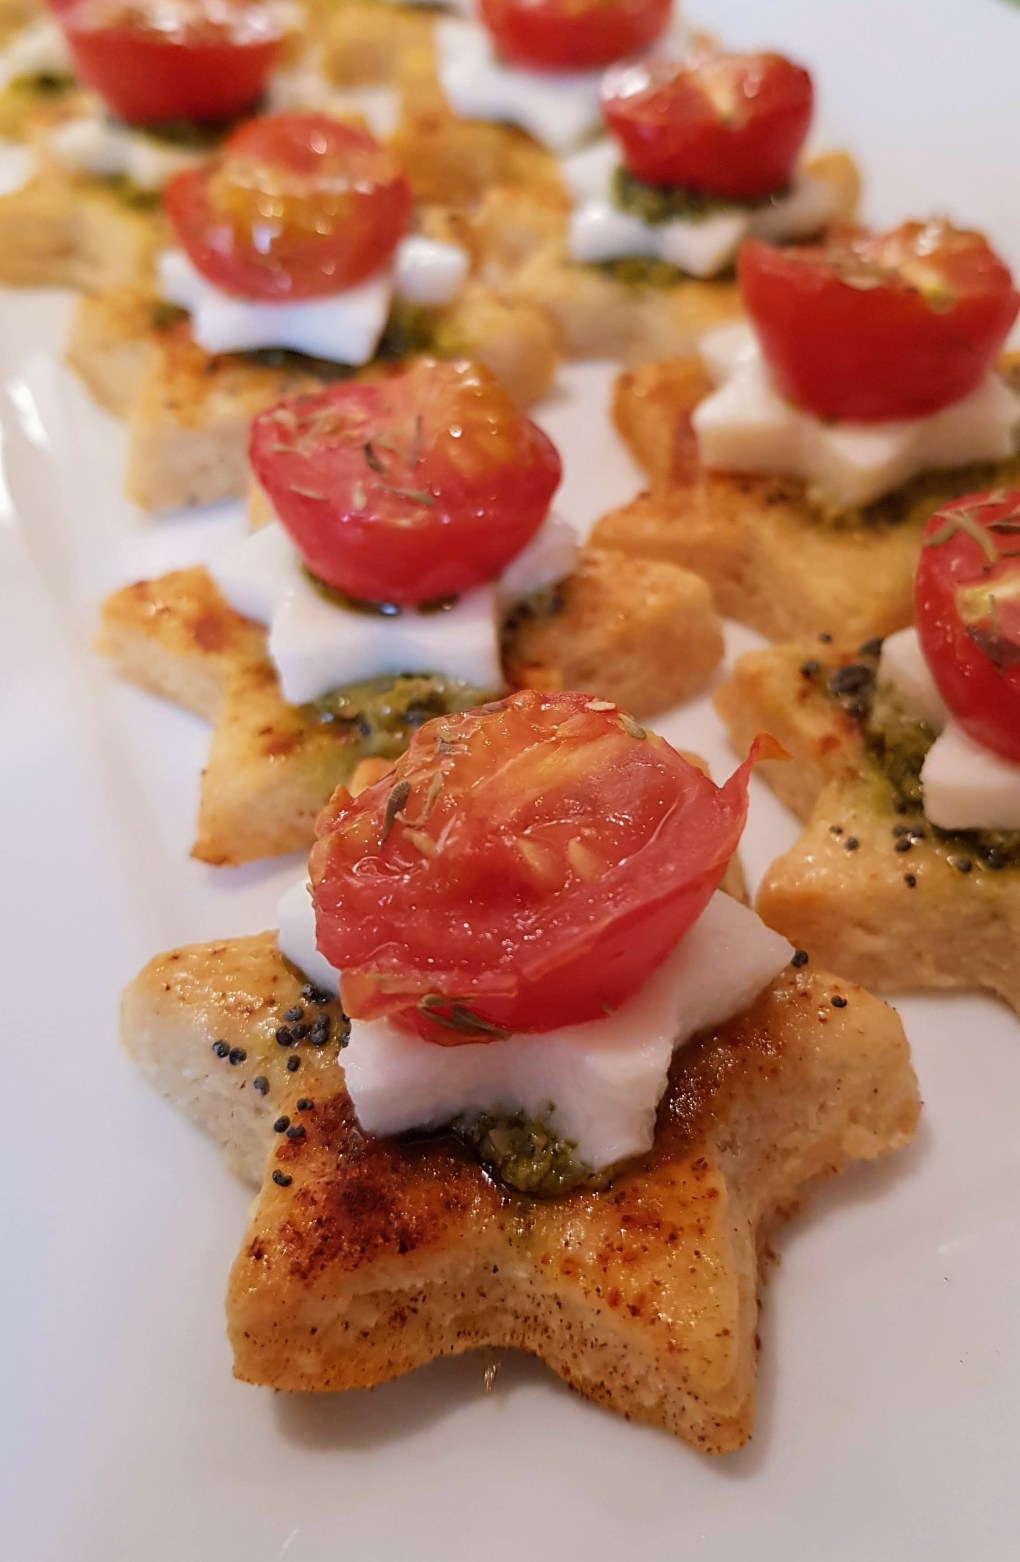

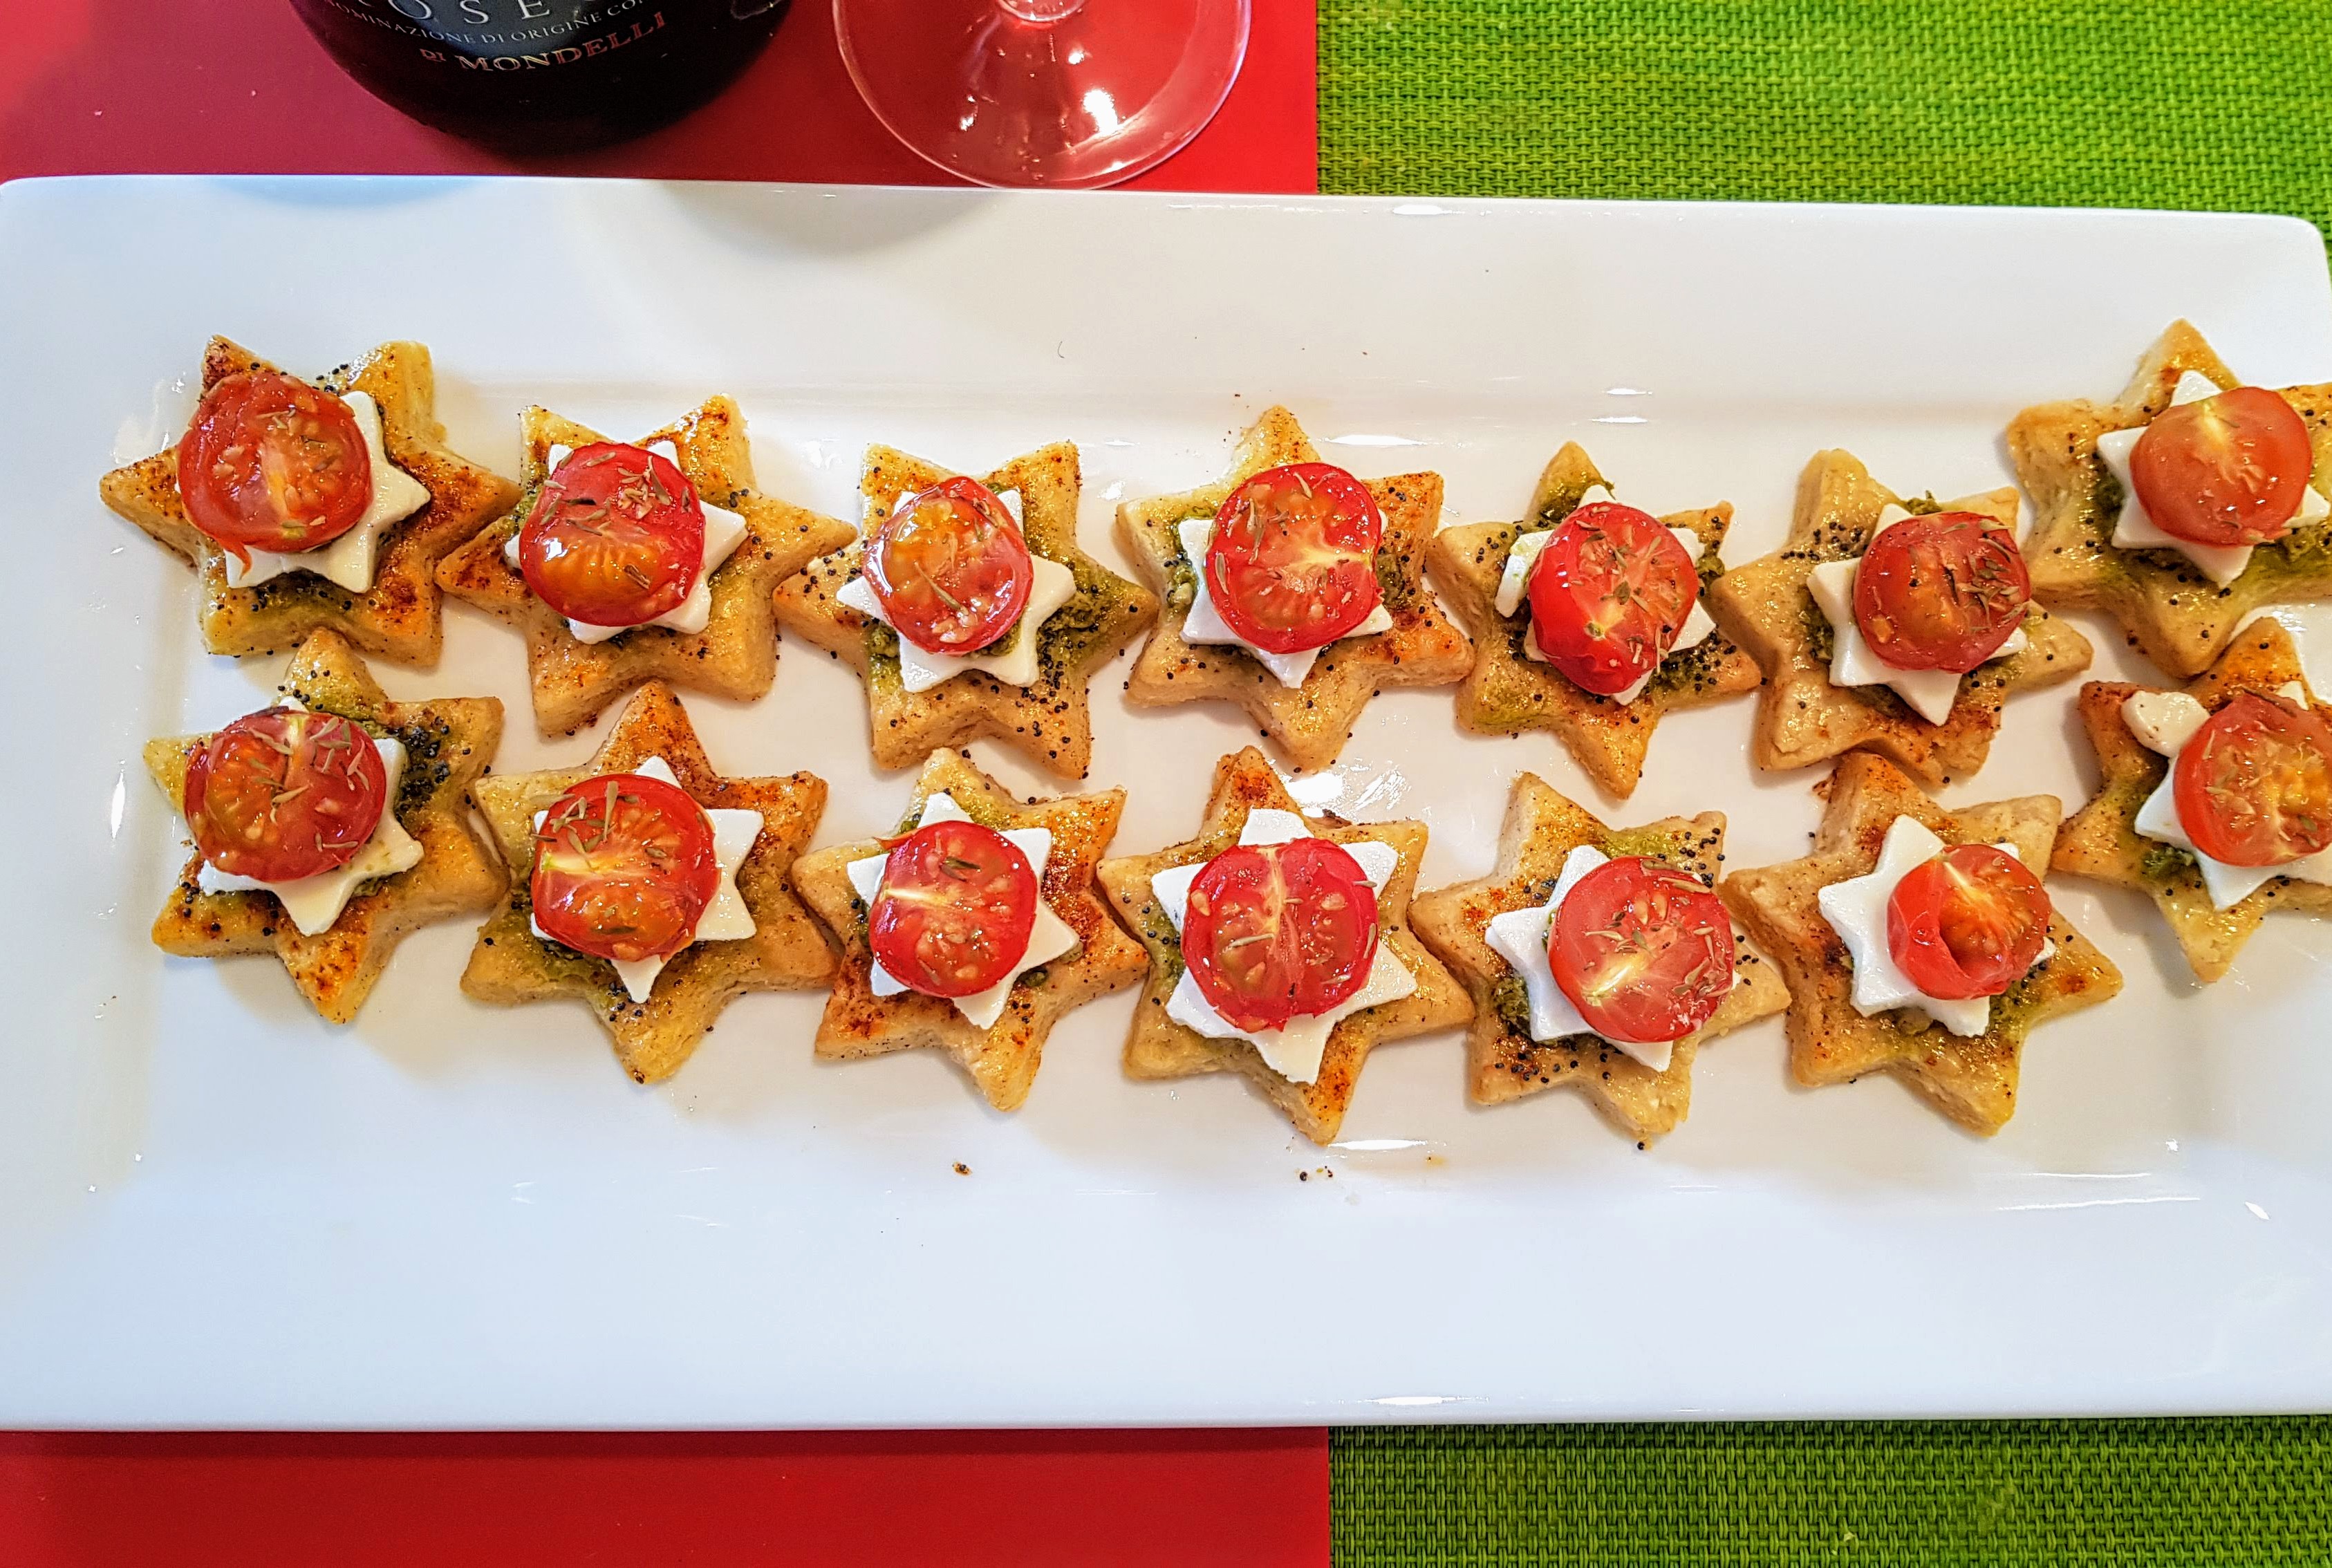
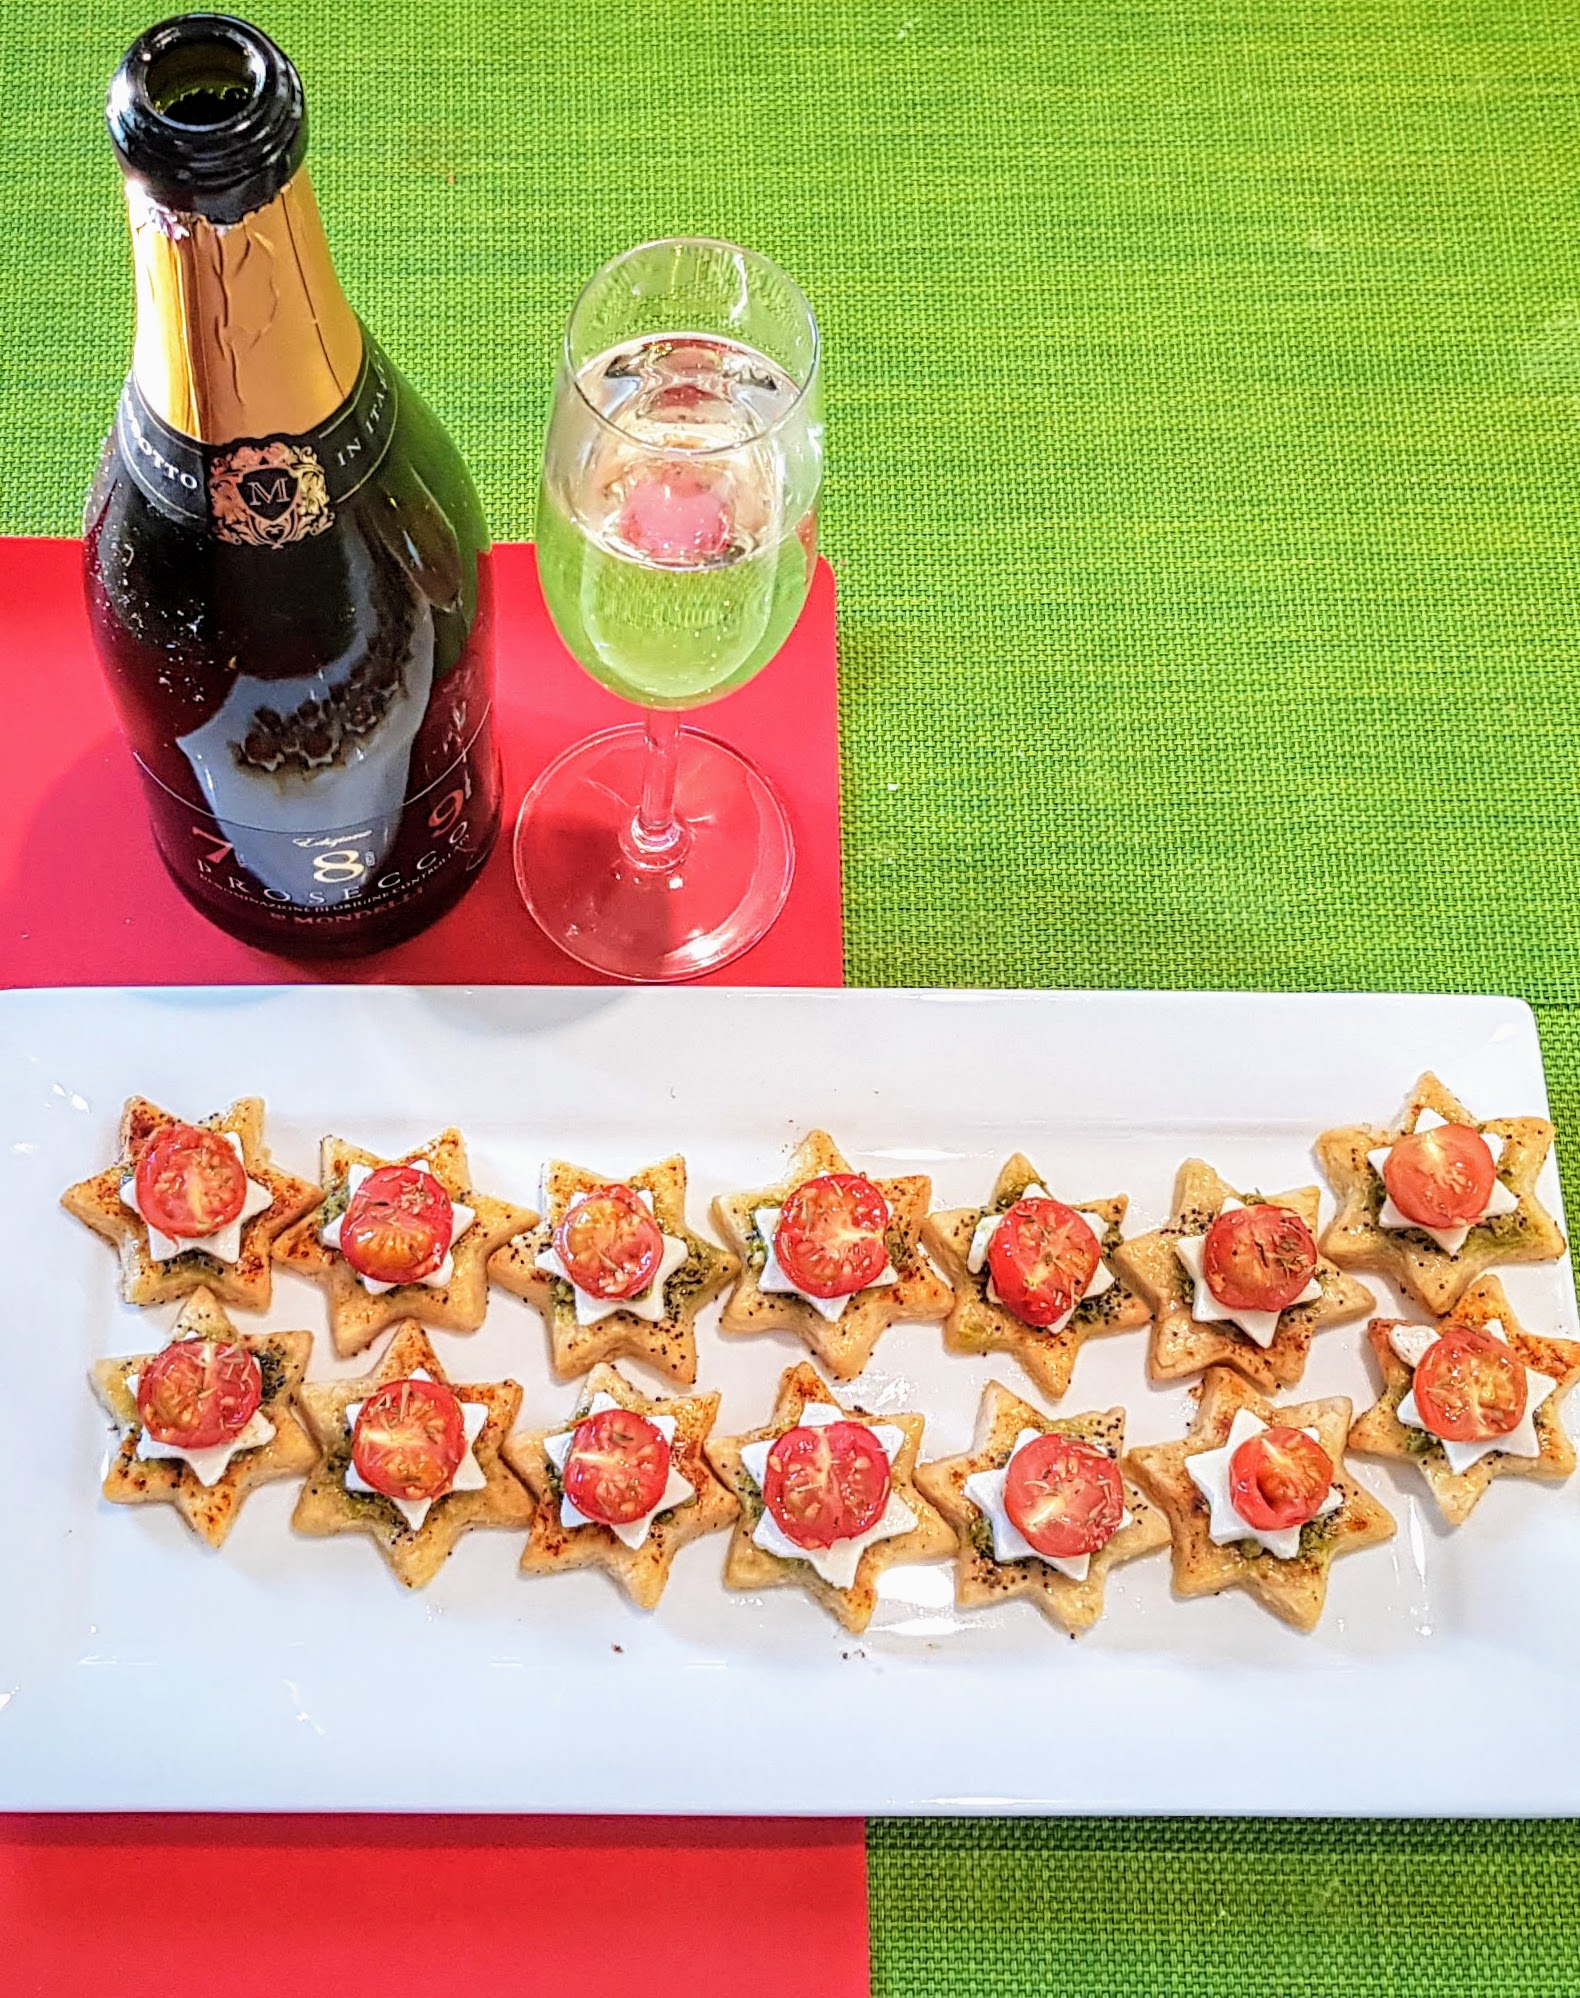
OMG! These are so delicious and perfect for the party season. Little bite size pieces of deliciousness.
Makes about 12
8-10 Vittoria Tomatoes
Dried Thyme
150g plain flour
75 g soft butter salted
40 g grated parmesan
1 egg
250g mozzarella
Green pesto
Paprika & poppy seeds
1. Pre heat oven to Fan 160 deg, Line a baking sheet with greaseproof paper.
2. Sift the flour into a mixing bowl, add the butter and parmesan, add in half the whisked egg, slow speed on mixer mix together.
3. Tip onto a non stick surface and bring together with your hands until you have a dough, flatten slightly. Wrap in clingfilm and chill for 30 minutes.
4. Meanwhile, heat crisper plate and cut tomatoes in half, sprinkle with salt & thyme and cook for 2 minutes. Remove and allow to cool slightly. 
5. Take a small 3cm star cutter and cut the mozzarella into thin stars.
6. Remove the dough and roll out and cut with a 5-6cm star cutter, place on baking sheet and bake for about 10-12 mins or until slightly browned. 
7. To serve, once stars are cooled, spread a little pesto on star then place mozzarella star, a little more pesto then the tomato half.
8. Yum! Gorgeous with some prosecco.


These are perfect for a little bite size treat at Christmas and they look the part too. I first saw this recipe from Madaboutmacarons and just had to try.
I added a little orange liquor for a different flavour and they were delicious. (optional)
Makes about 12
50g raisins
40g dried apricots, finely chopped
40g dates, finely chopped
5 tbsps orange juice (or 2 tbsp orange liquor and 3 tbsp orange juice)
60g desiccated/shredded coconut
60g caster sugar
40g Scottish oats
40g candied orange peel, finely chopped
2 tbsp unsweetened cocoa powder
50g coconut oil – melted if solid
2 tsp Christmas Spice – See below for recipe mix.
(Spice Mix:- 2tbsp ground cinnamon, 2 tbsp ground ginger, 2 tbsp ground all spice, 1 tbsp nutmeg, 1/2 tbsp ground cloves, pinch black pepper) This can be stored in an airtight container.
50g White Chocolate – melted.
Yummy!


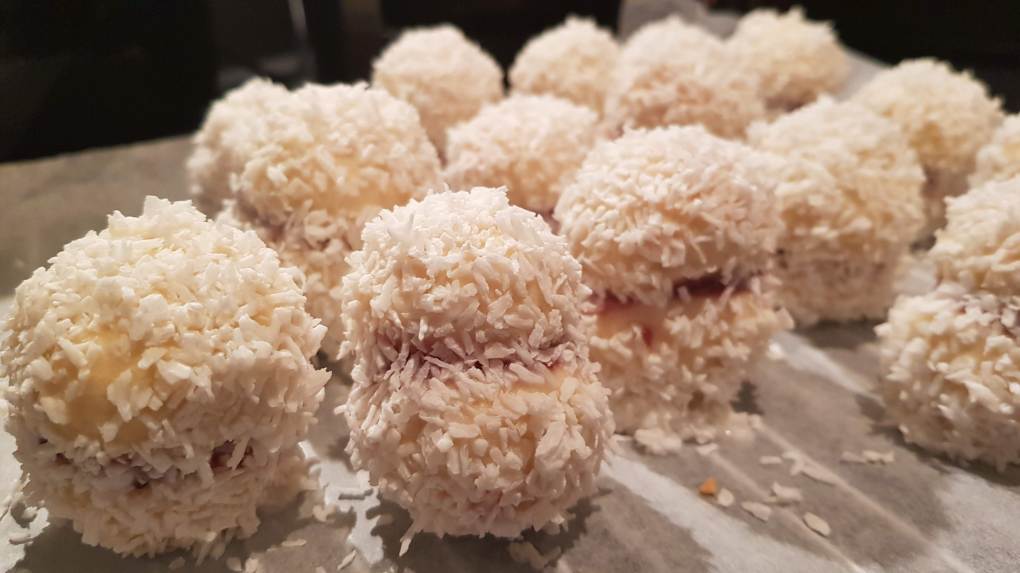

These are a traditional little treat in Scotland, you can have them 2 ways:- 1 with marshmallow in the middle or as I’ve baked with jam. Either way they are lovely. These are perfect for Christmas time and they keep for up to 4 days in an air tight container.
Makes about 8-12
50g unsalted butter
50g caster sugar
pinch of salt
225g self raising flour, sifted
1 egg
1 tbsp milk
Good raspberry jam (I like Mackay’s)
confectioner’s (powdered) sugar (icing sugar)
unsweetened shredded coconut (do not use sweetened)


I have been dying to try this stain glass design for a while, so why not just in time for Christmas. Very simple to create too.
Makes about 16 biscuits
175g Plain Flour
2 tsps ginger, ground
Zest 2 oranges
100g butter, chunks
50g golden caster sugar
1-2 tbsp milk
1 tbsp oil for greaseproof paper. (to prevent sweets from sticking)


Decorate any way you like.
For Glass like Baubles:-
12 fruit flavoured boiled sweets
Place 1 sweet or ½ of sweet into the centre of the biscuits, sweets should be level with the biscuit once melted. (Should melt in the oven ok.) Allow to fully cool and harden before transferring to a rack. – Sprinkle icing if you wish or decorate.


Just be aware that if eating these the candy is very hard. (Watch your teeth)
If using for decoration on your tree, pierce a hole at the top of the cookies and thread some ribbon through and tie.


Keen to get a good biscuit, you can’t go wrong with these flavours. So yummy!
Makes about 15 biscuits
125g Butter – unsalted
175g Golden Caster Sugar
225g Plain Flour
2 tsp baking powder
75g Chocolate 70% – chopped small
Zest of 2 oranges
1-2 tbsp orange juice


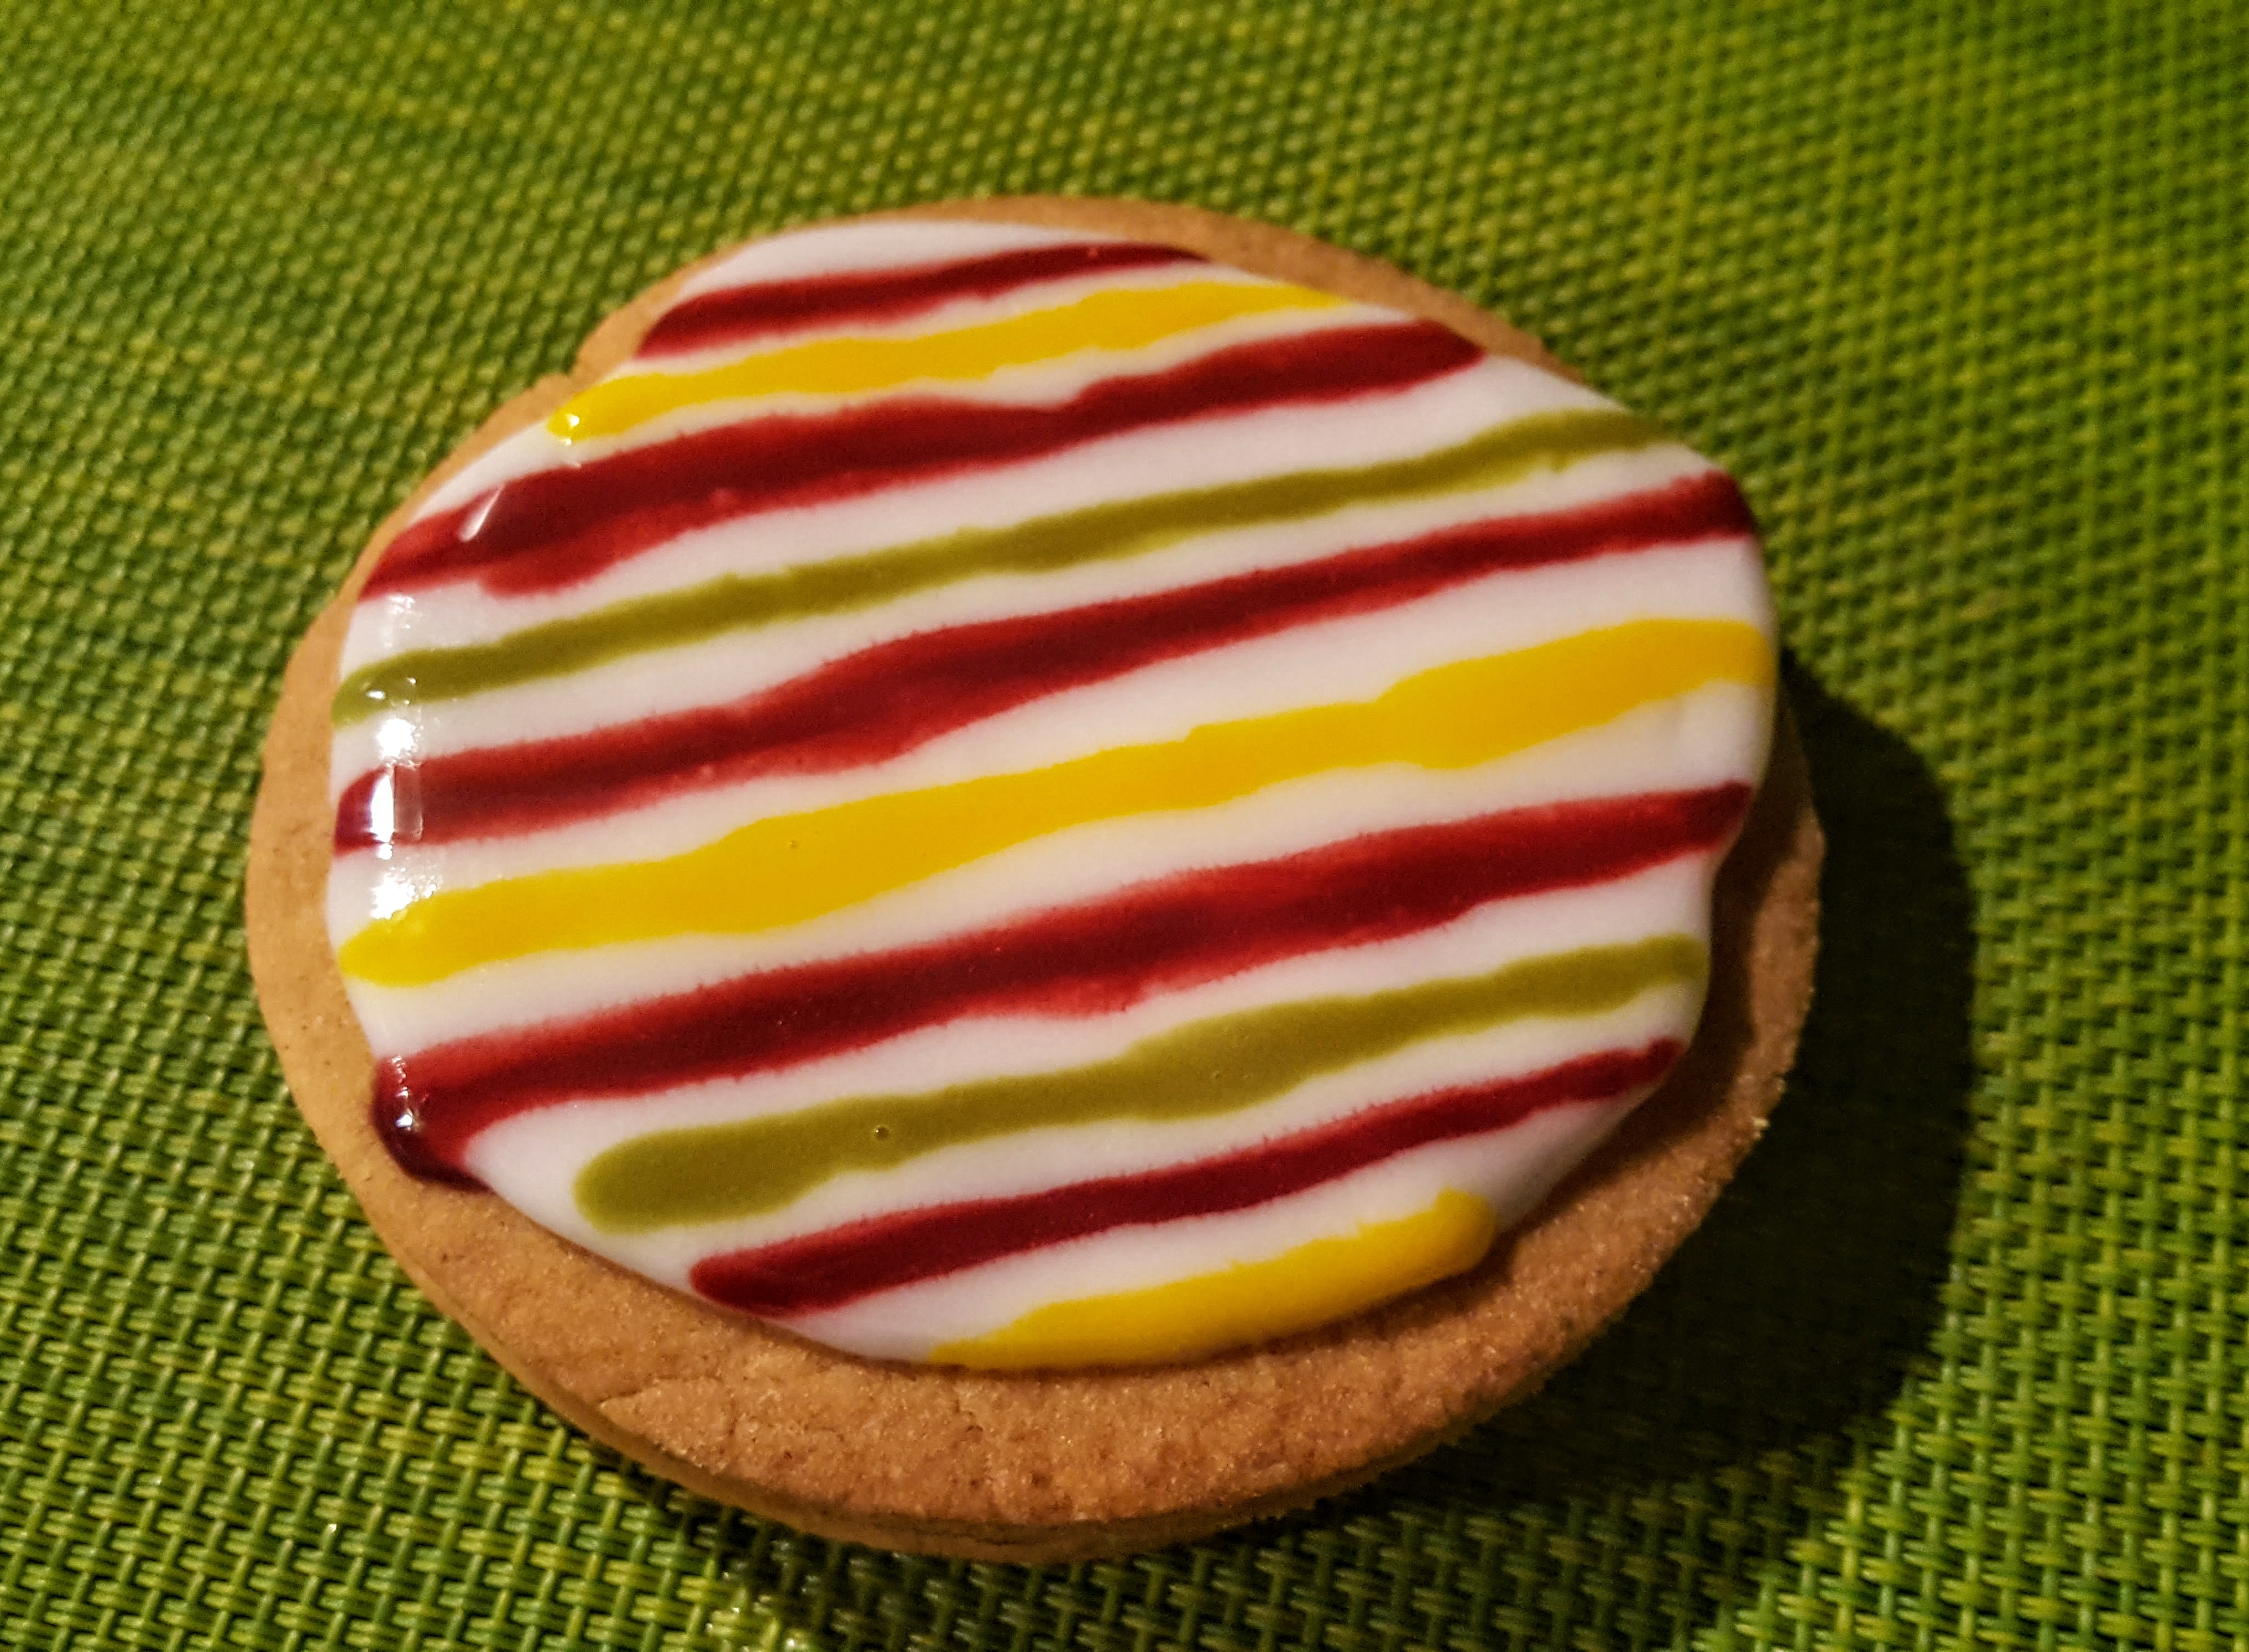
This is the first time I have tried a swiss roll ad thought I would challenge myself. Christmas is coming so I wanted to do something different, so why not play with stripes?
I have to admit I found this rather easy to do.
Makes 1 roll (avg 10 slices)
2 eggs, 3 egg yolks
100 grams caster sugar
1 teaspoon vanilla extract
30 grams sifted self raising flour
3 egg whites
1 tablespoon sugar
Colouring. Green & Red.
Whipping cream with 1 tsp vanilla ext.
Raspberry jam


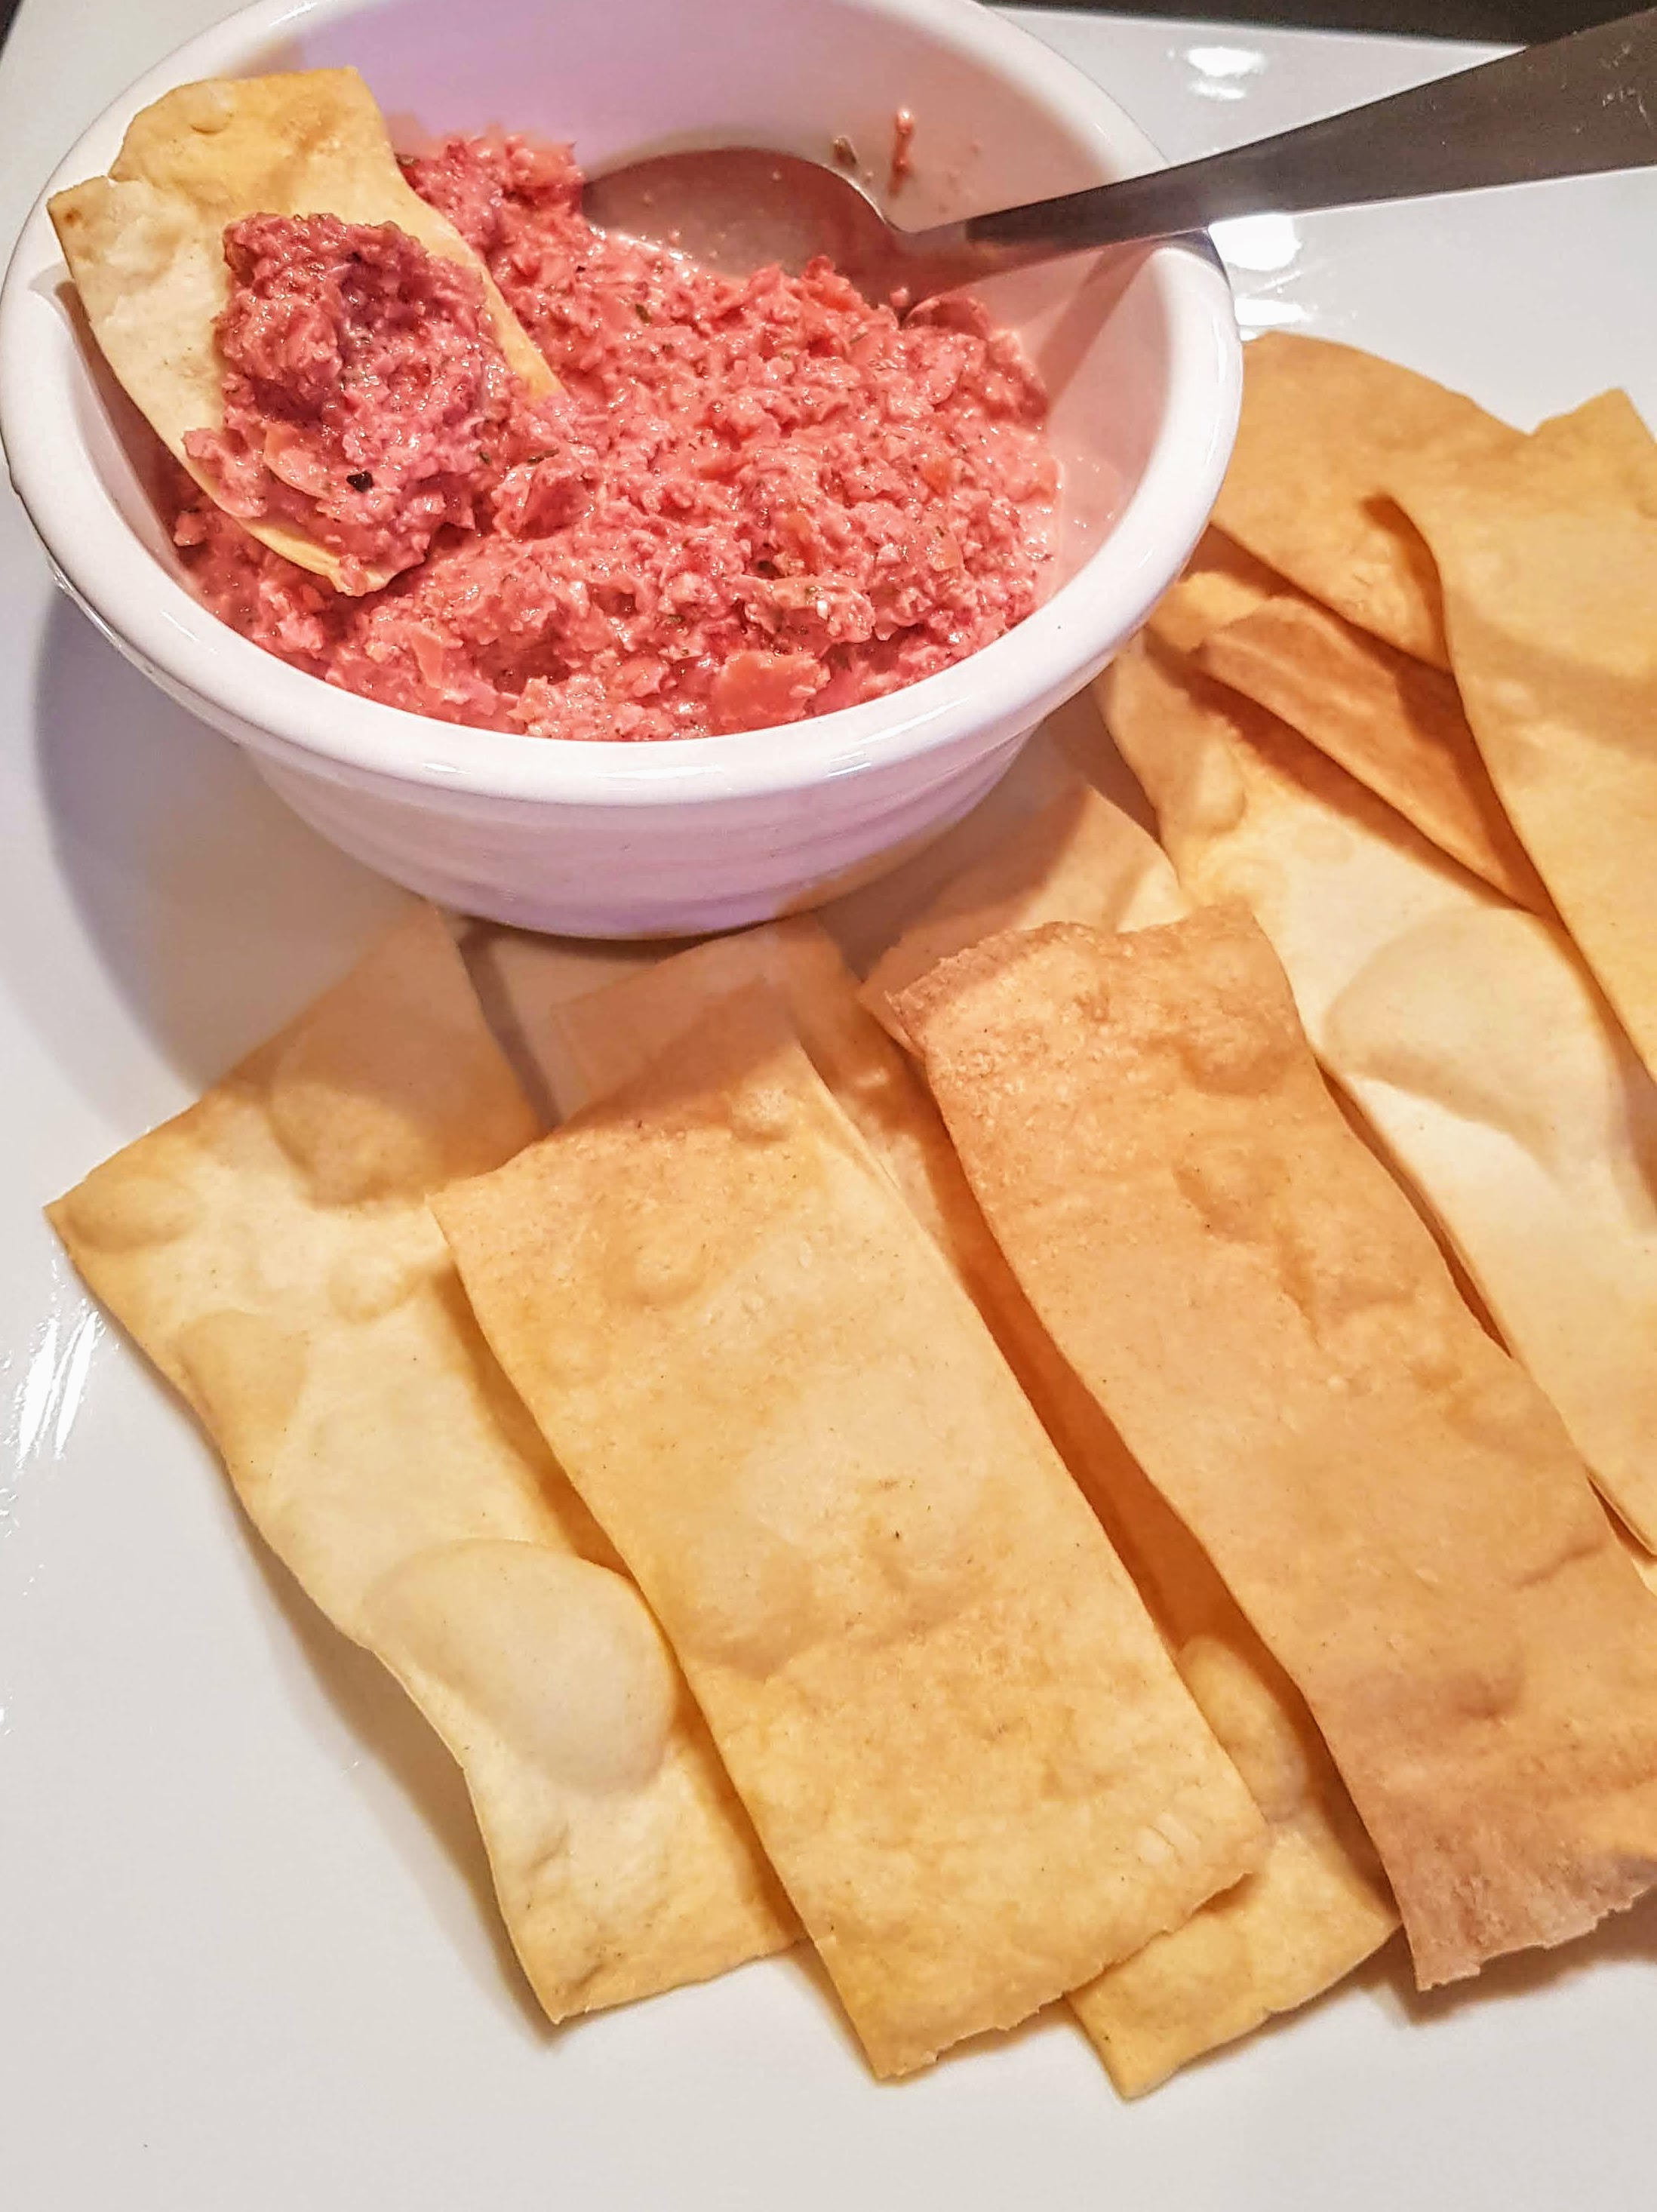
These are so easy to make and perfect for parties and get together’s. With a lovely dip of your choice they are perfect little nibbles.
Makes about 60 crackers
125g Plain Flour
125g Strong White Flour
15g Lard – melted
7g dried yeast
150ml warm water
Pinch of salt
Olive oil


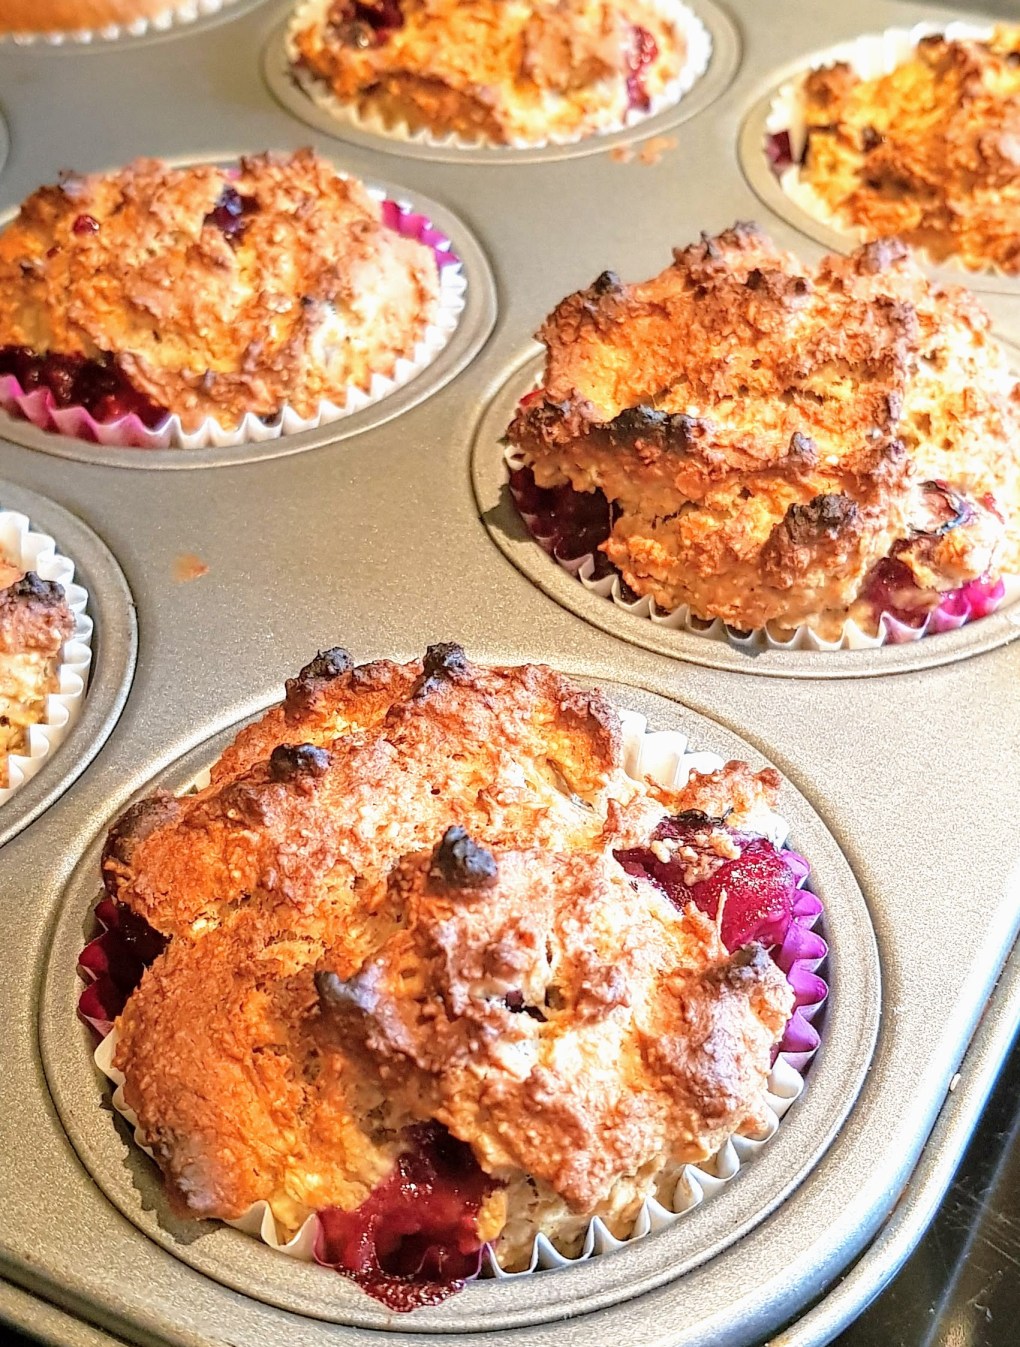


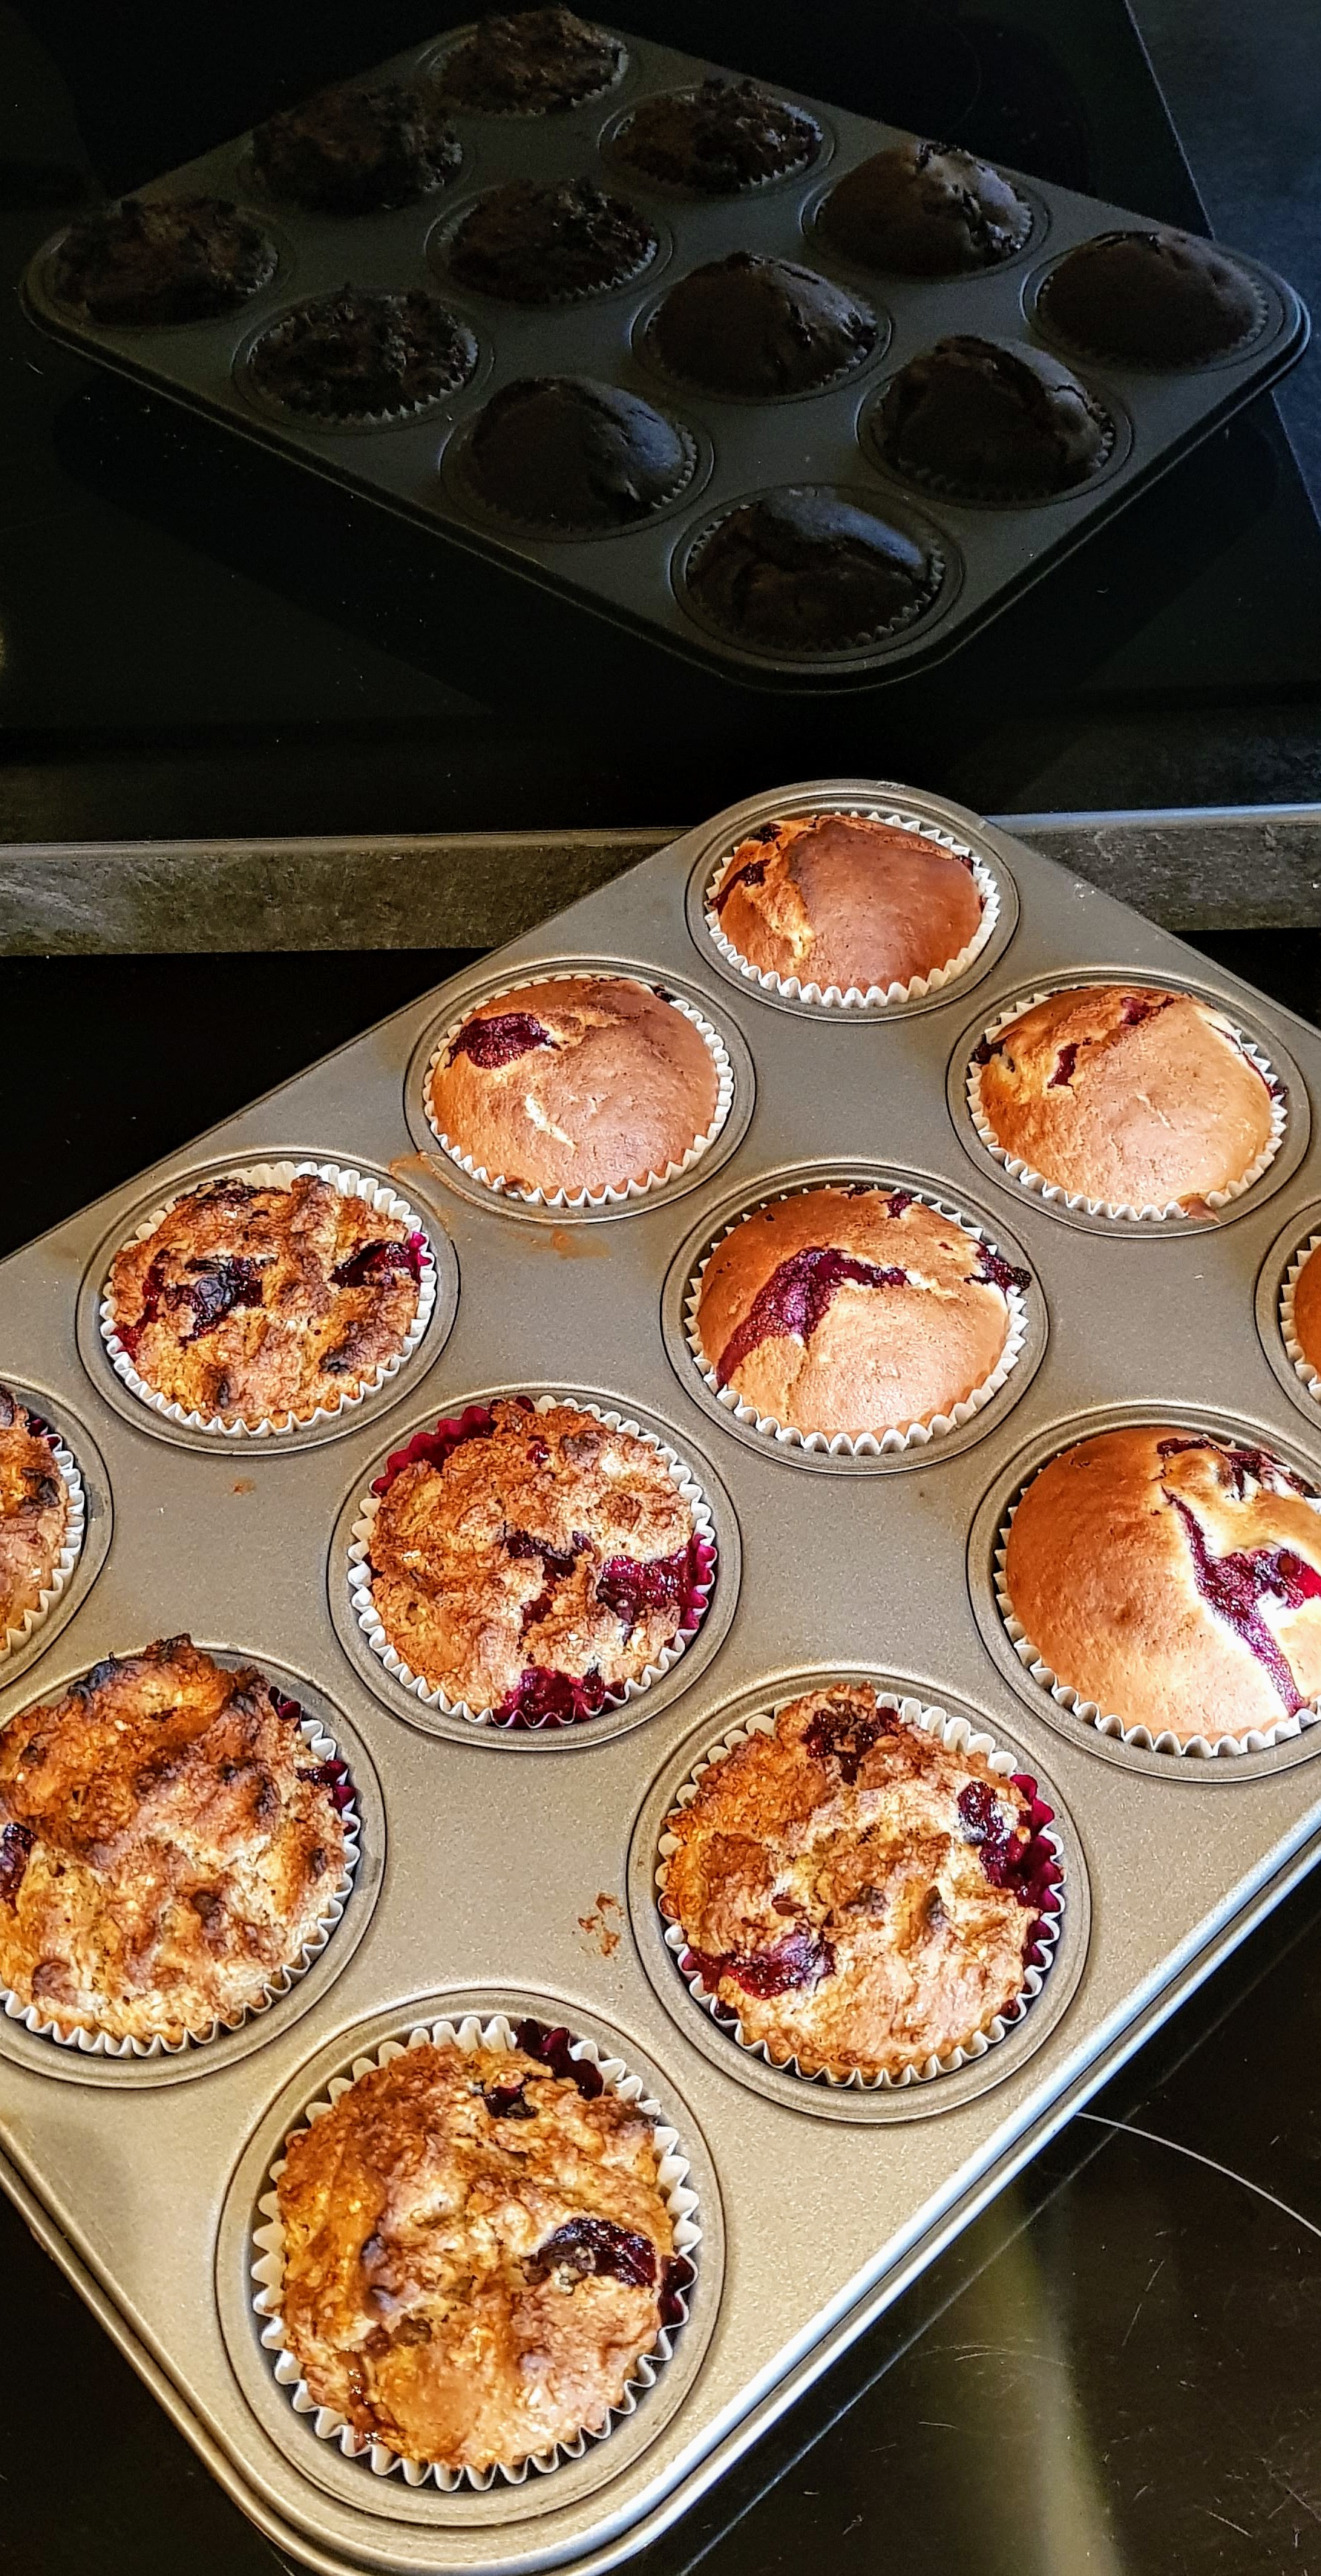
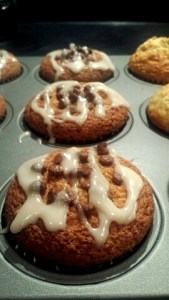
After making my Blueberry Muffins from a recipe book, I decided to try and make them a bit healthier. OMG! these were lovely and sweet still and with a little crunch, so delicious and only 120 calories per muffin.
Makes 6
150g Rye Wholemeal Flour
25g Caster Sugar
1 ripe banana – mashed
50g Scottish rolled oats
1 large egg
1 tsp vanilla
75g blueberries
pinch salt
1 tsp baking powder
25g butter – melted


Devour!


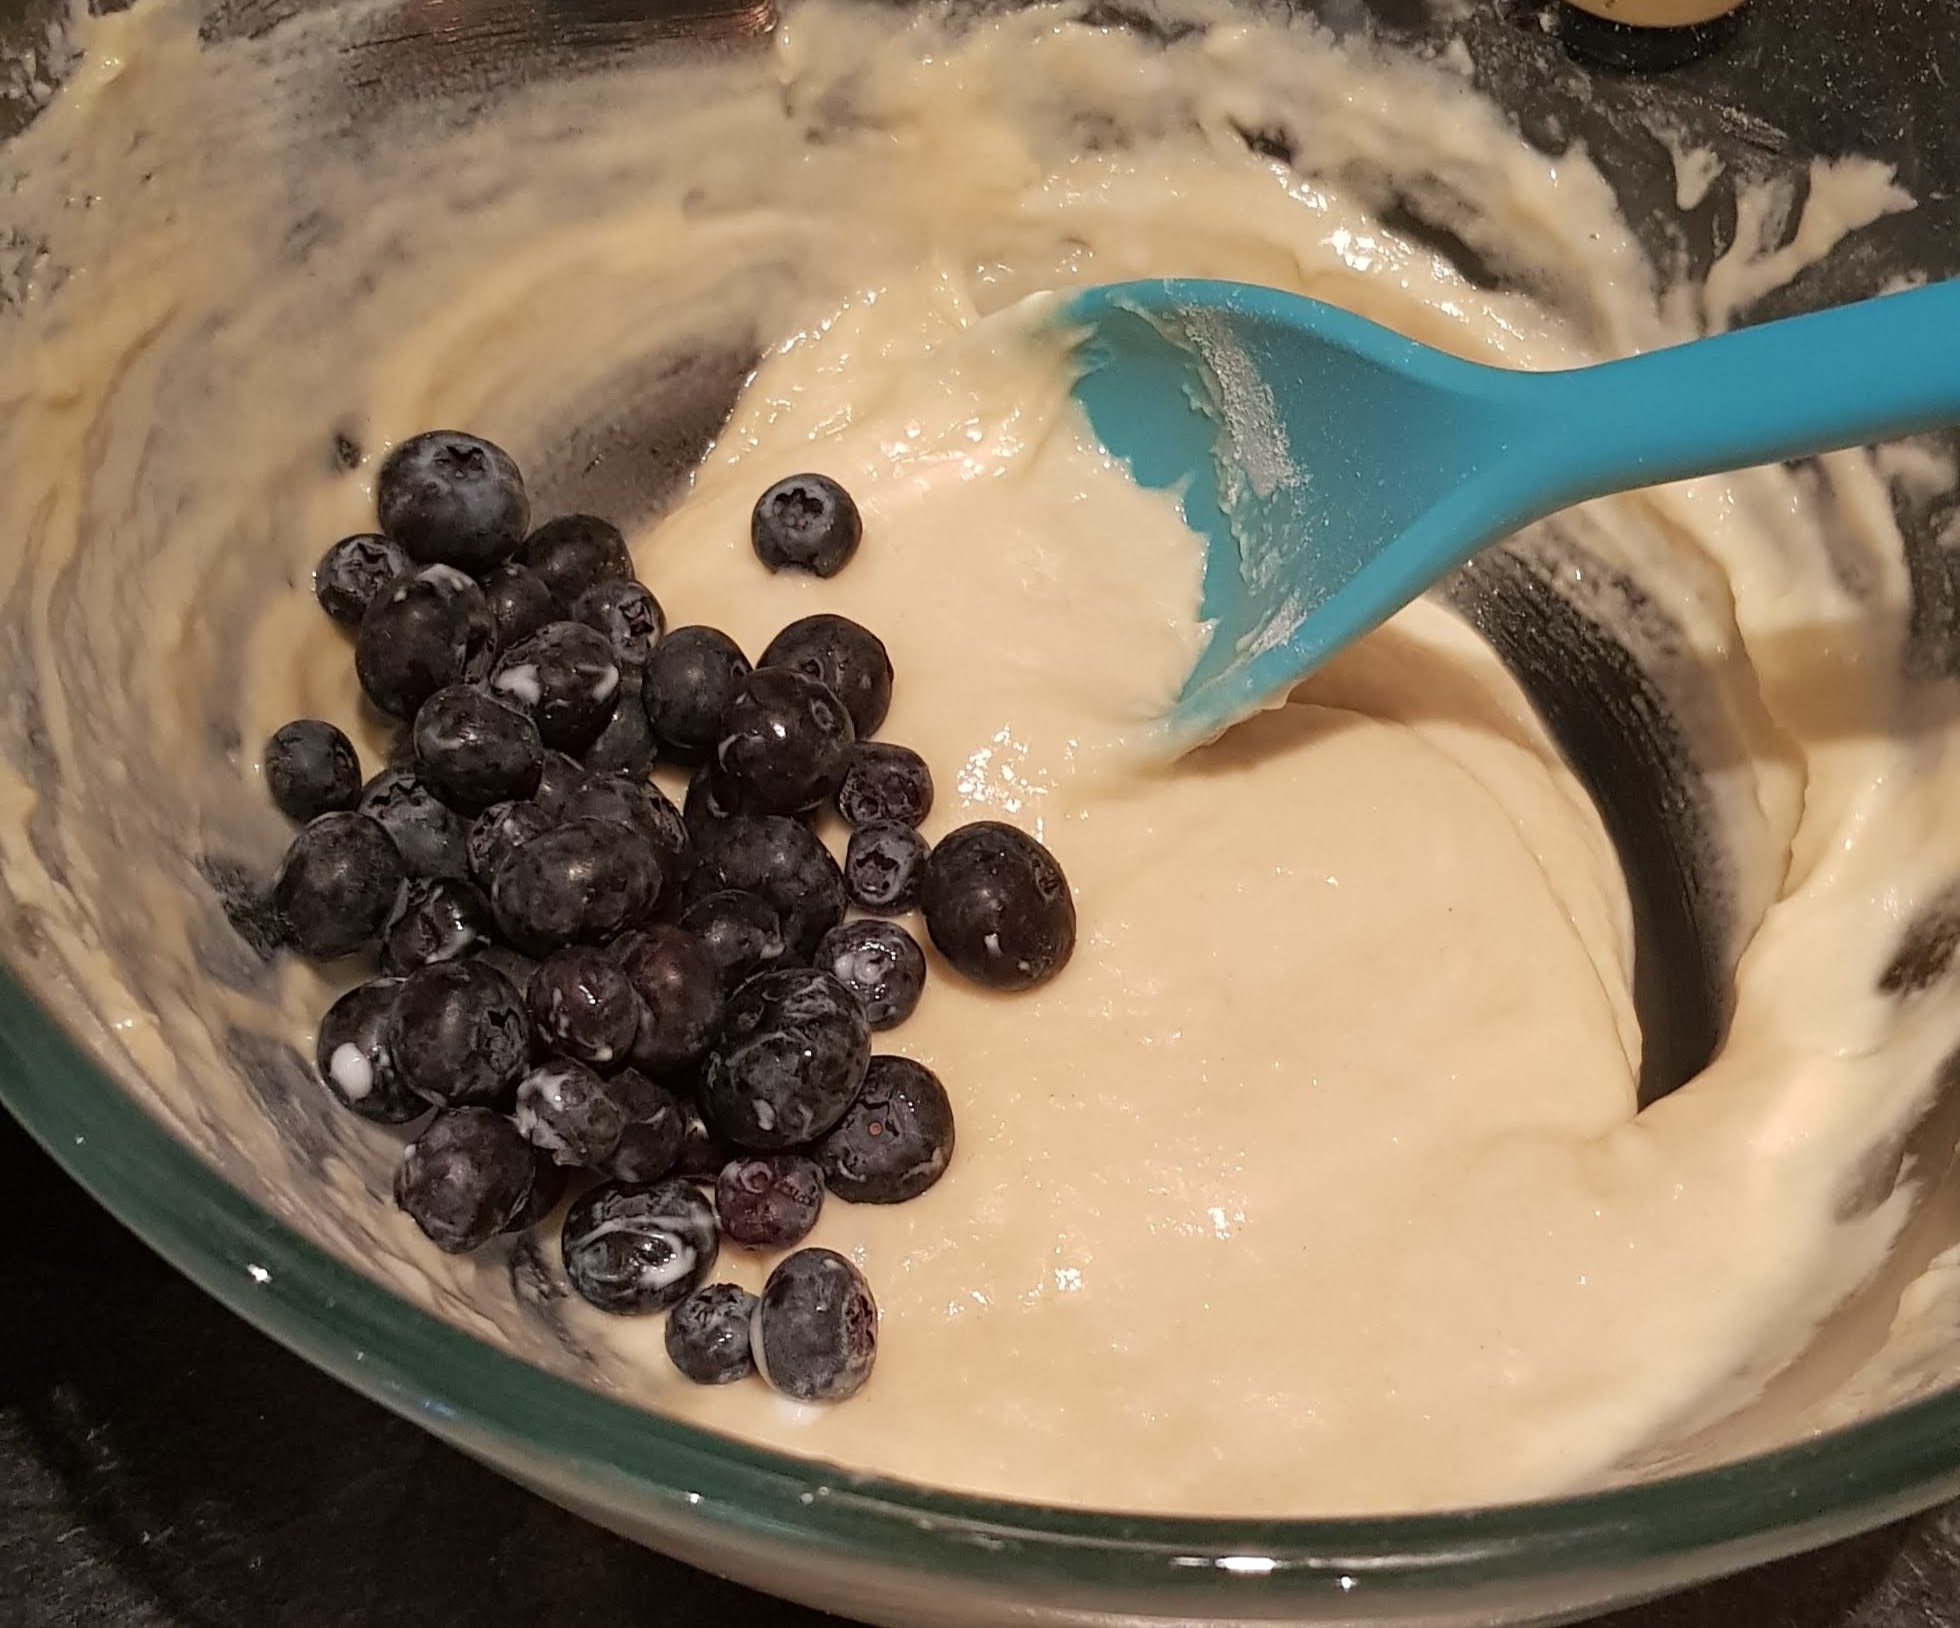
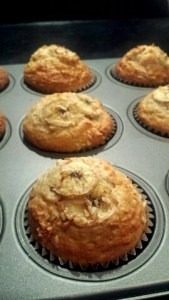
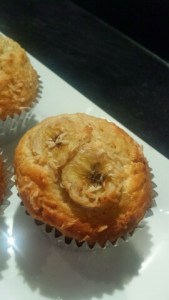
Today I was off work and decided to have a chillout day……….well, that was before I started looking through all my recipe books. I came across a baking book that I hadn’t used for a while. Looking through I spied Blueberry muffins and thought that would be a nice wee treat with my afternoon coffee…….so off I went into my Kitchen.
They were absolutely delicious. I also made a healthier version too, check them out here.
Makes 6
150g Plain Flour
75 g Caster Sugar
Pinch Salt
1 tsp baking powder
75g Blueberries
25g Butter – melted
1 large egg
40ml natural yoghurt
1 tsp vanilla extract


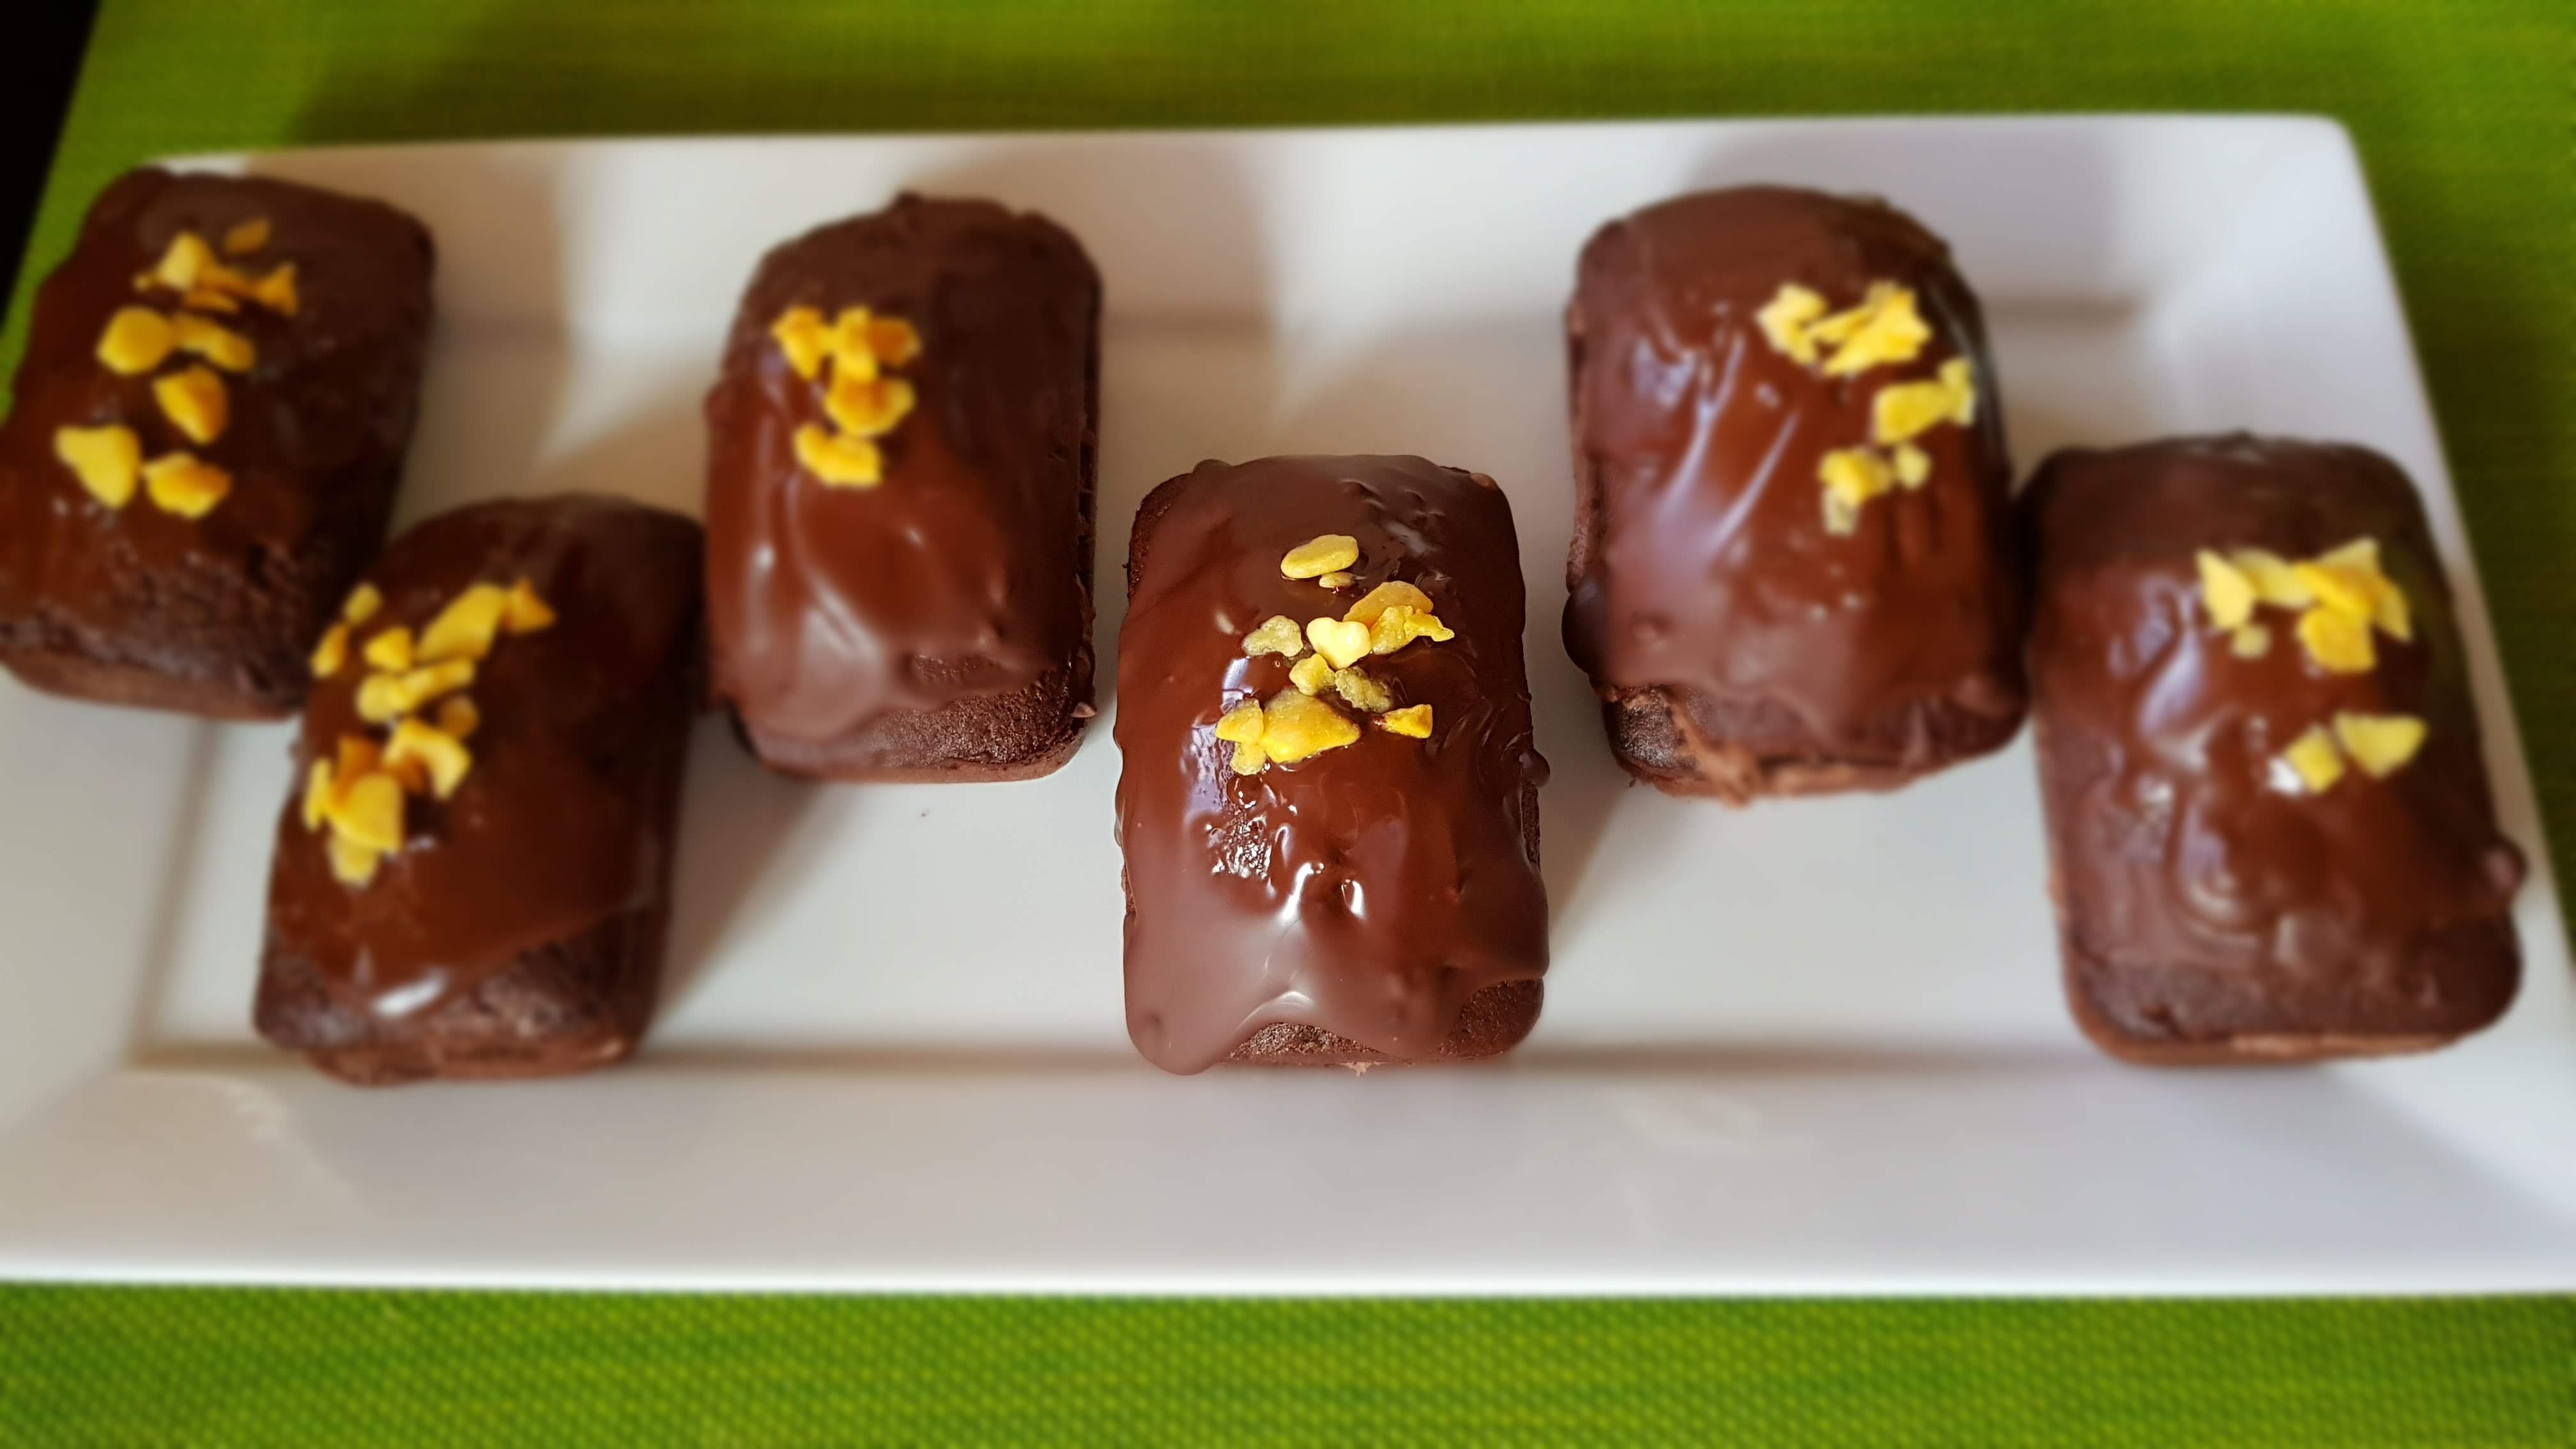
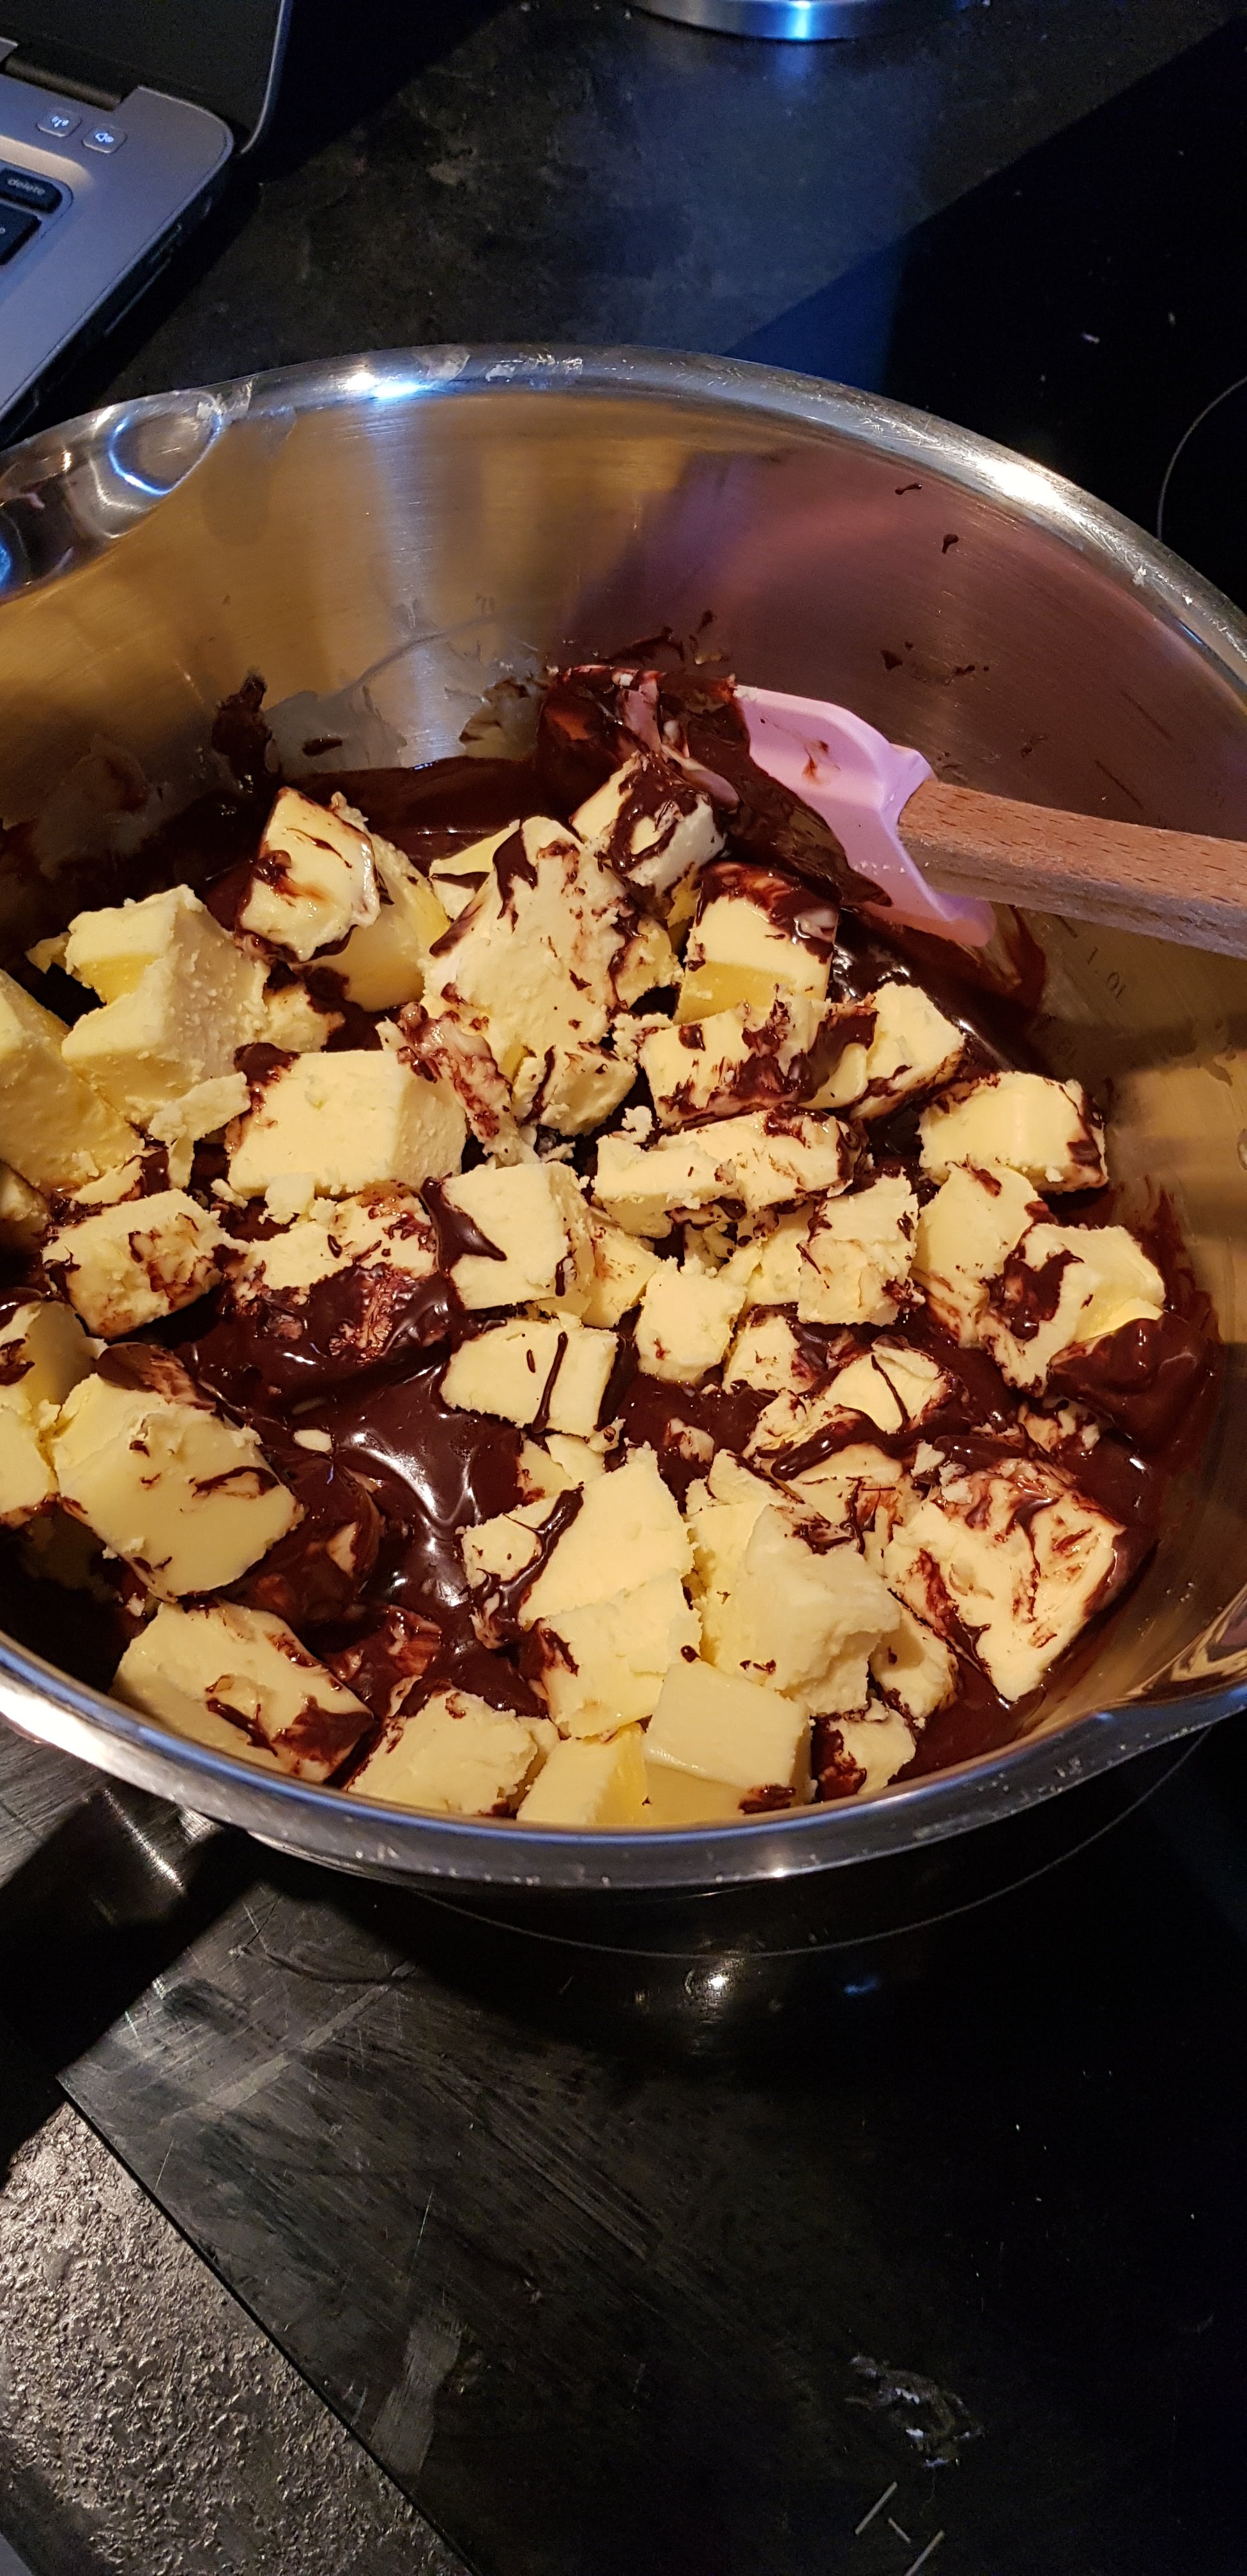
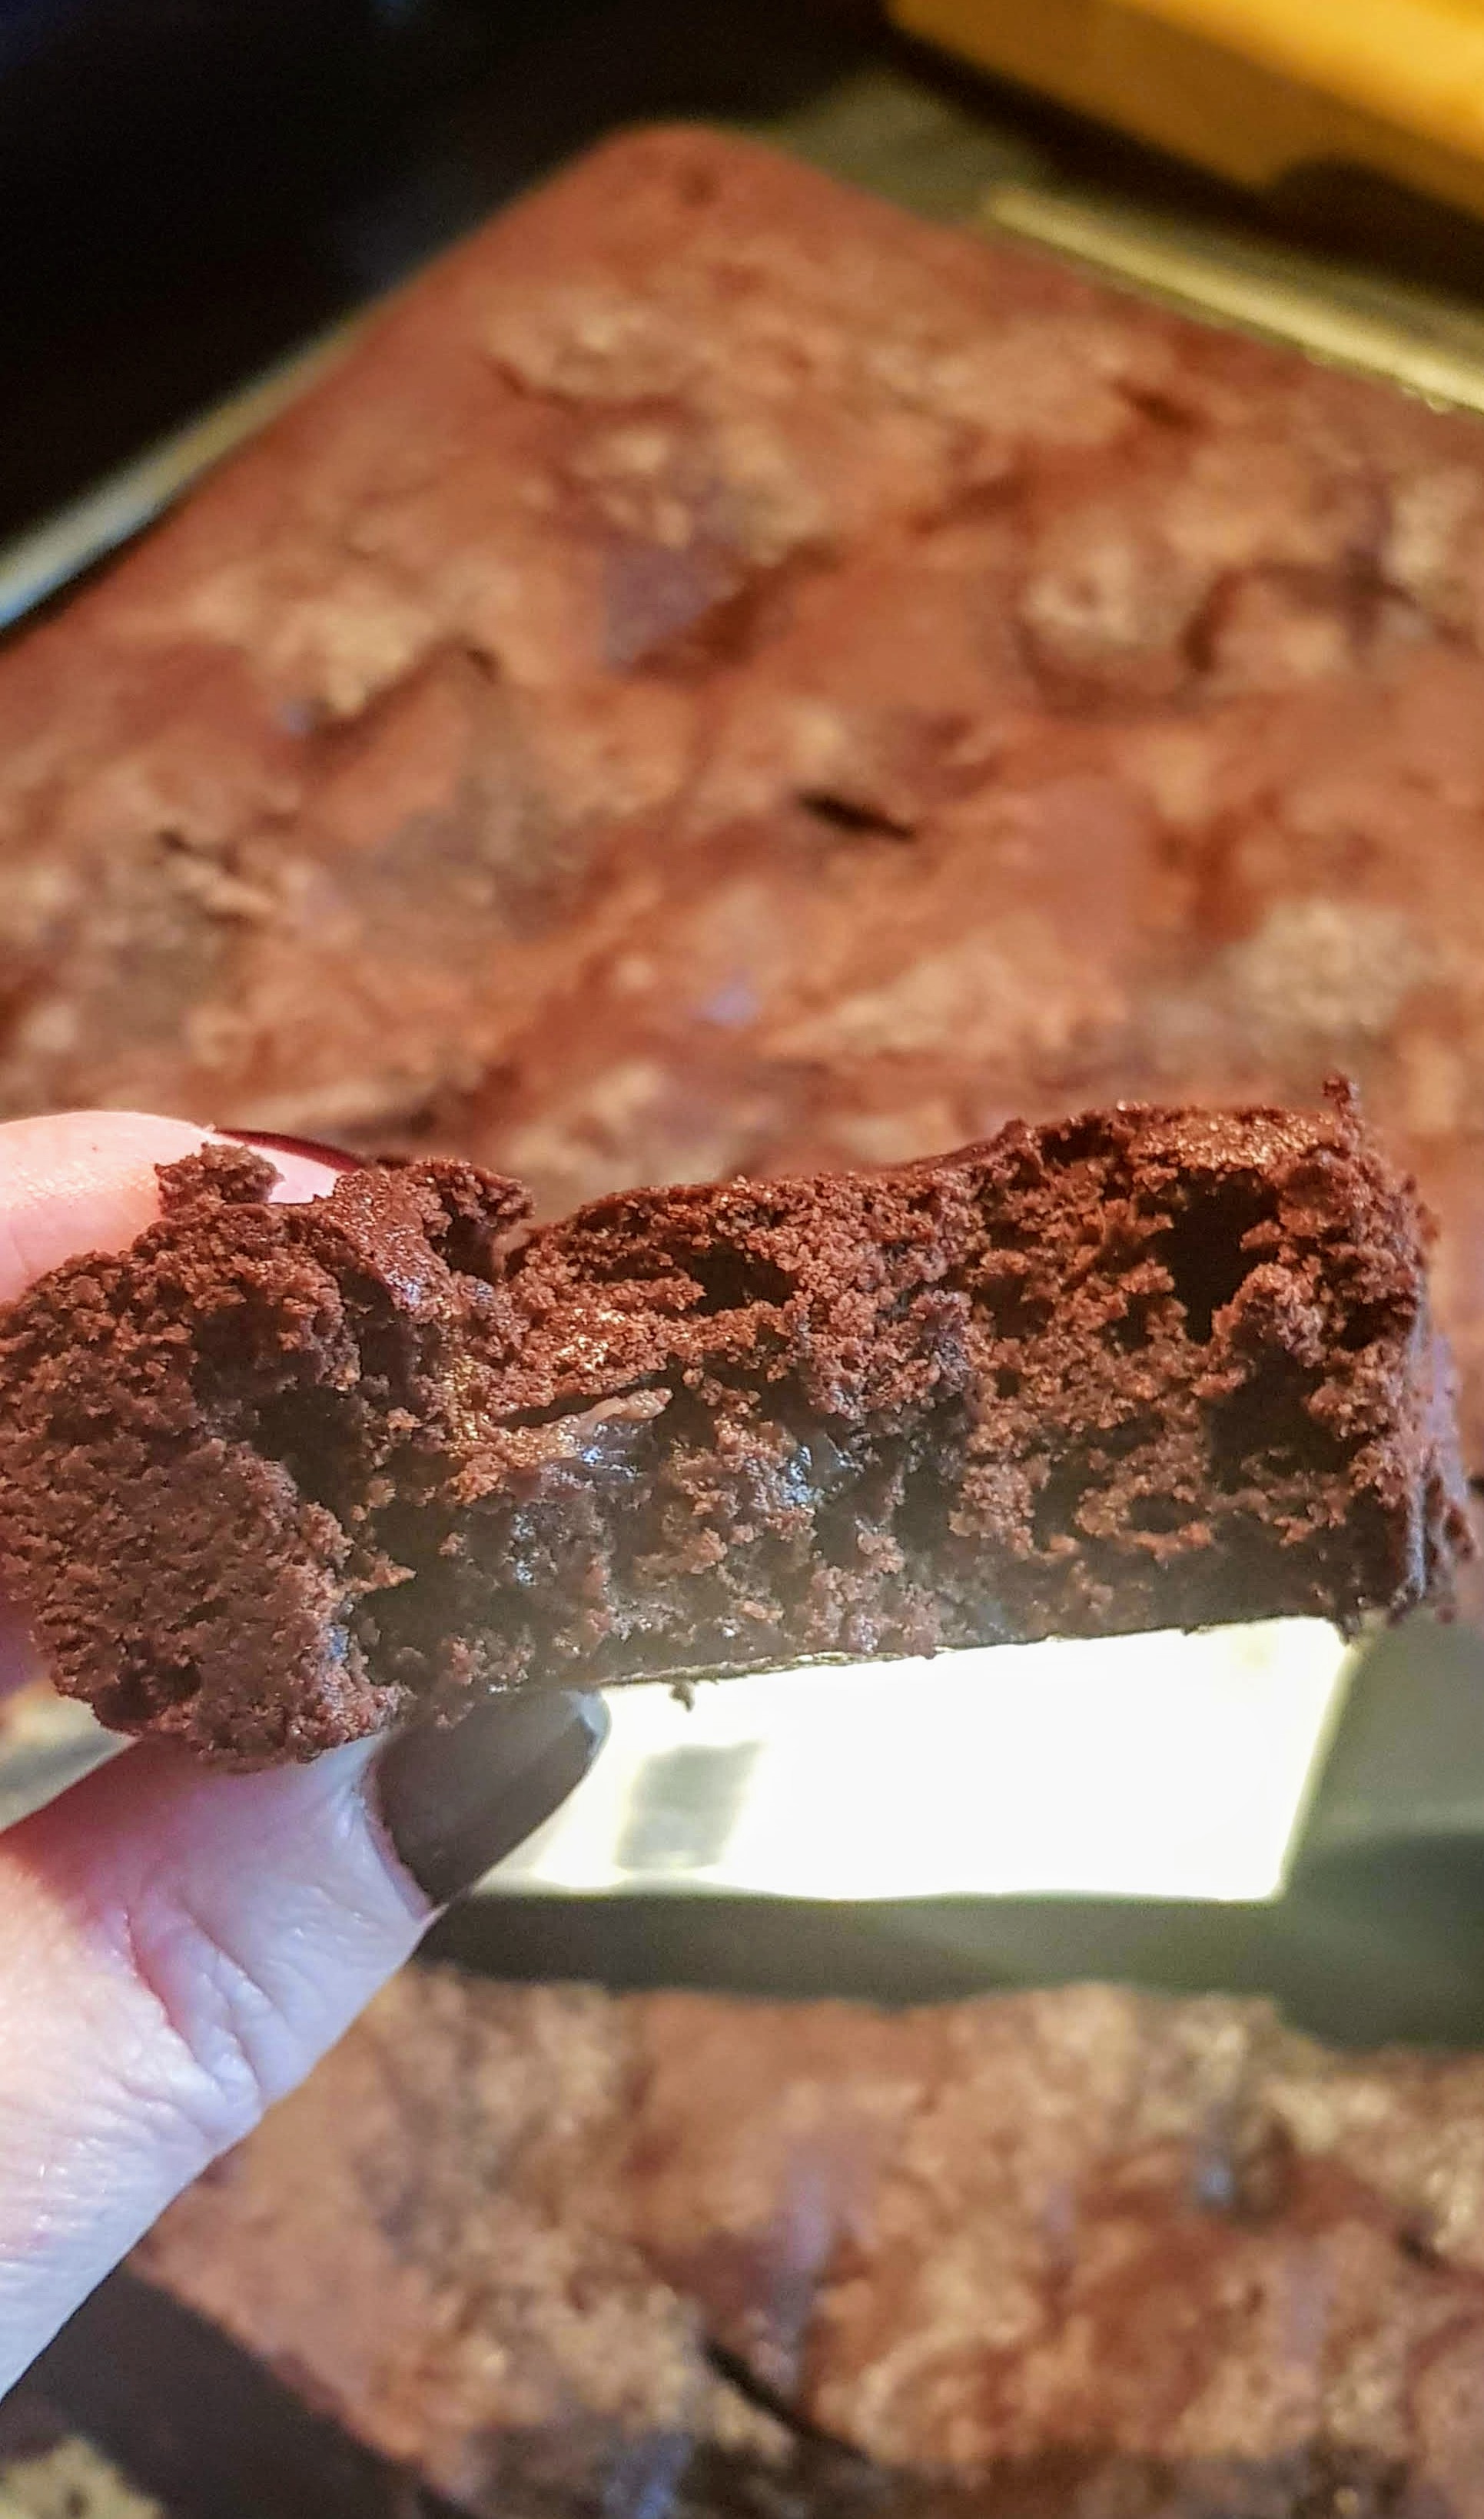
These were lovely, it was a recipe I was testing, now I’m not much of a chocolate or brownie fan but I have to say I did have more than 1…..lol!
Makes 18
375g cubed unsalted butter
300g Dark Chocolate, I used 70%
375g Caster Sugar
75g cocoa powder
6 large eggs
100 g plain flour
200g cherries in kirsch, drained, chopped
Cherry Syrup from jar (8-10 tbsps)
Icing sugar to decorate and finish


O.M.G! What can I say…..super tasty and fluffy!
I attended a Doughnut Master class recently and thoroughly enjoyed it, so this weekend was the time to put my new found skills to the test and it was a success. I was so pleased with myself, although I am a perfectionist so I’ll give these 9/10, always room for improvement…..lol!
The flavour ideas going through my head just now are buzzing, so look forward to experimenting in the future.
Makes 18
For the Doughnuts:-
500g Strong White Flour
60g Caster Sugar (plus 60g for finish)
10g dried yeast
10g salt
4 Whole eggs
180g cold water
125g unsalted butter


For the Creme de patisserie:-
6 egg yolks
80g strong bread flour or plain
125g caster sugar


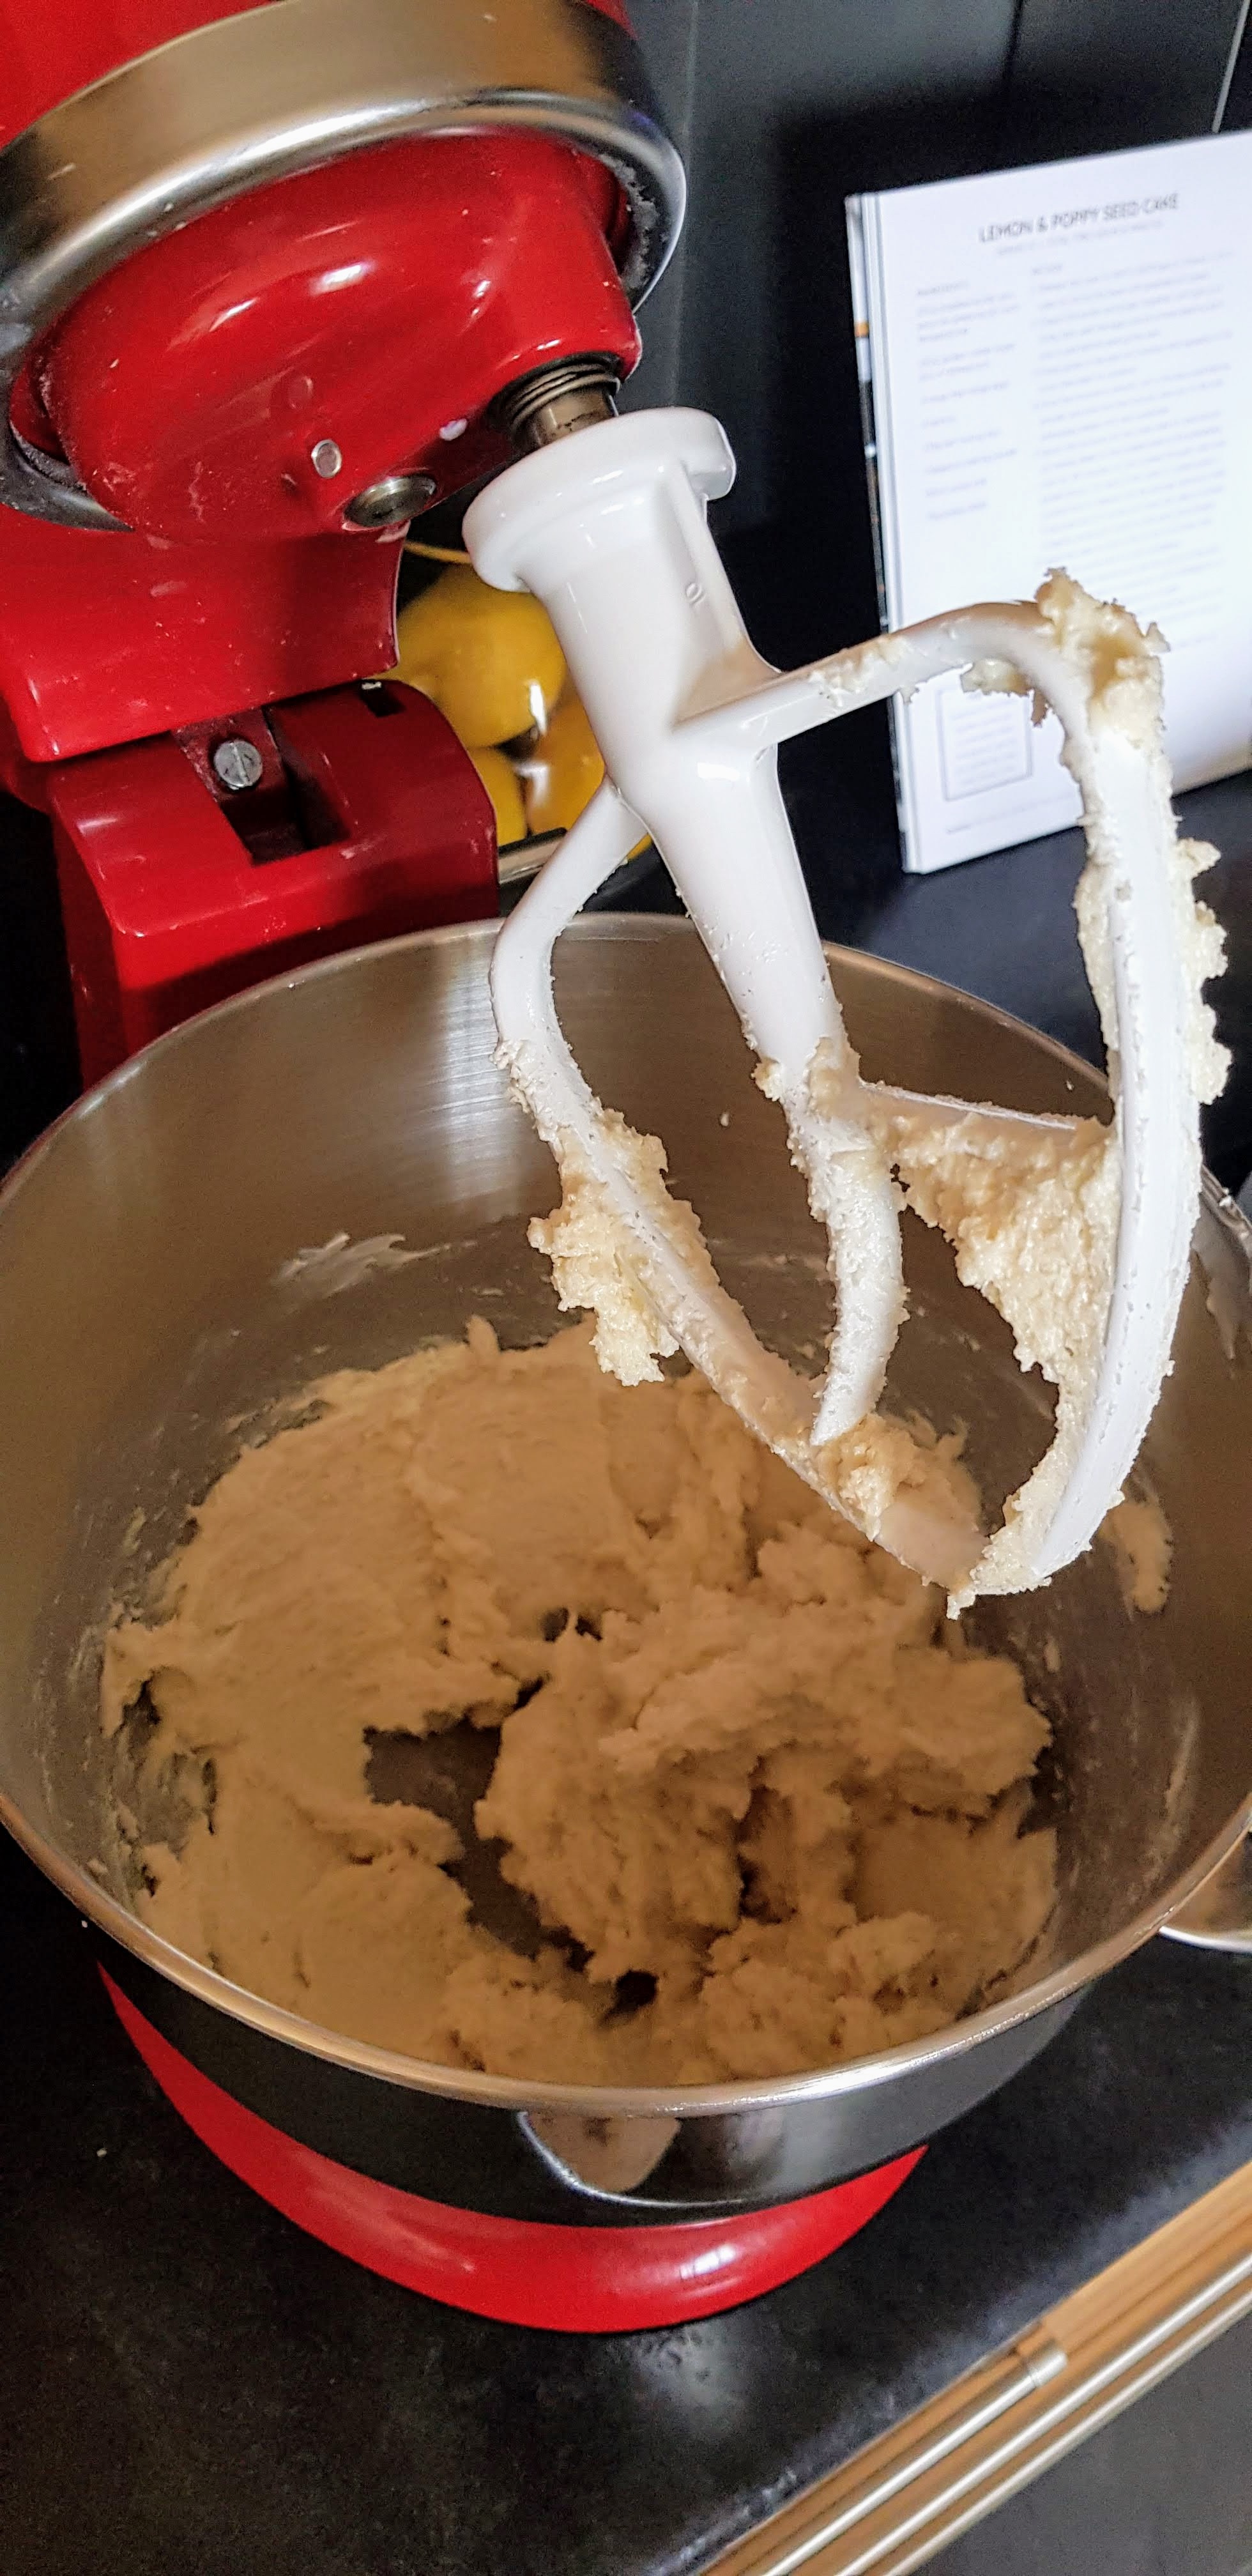
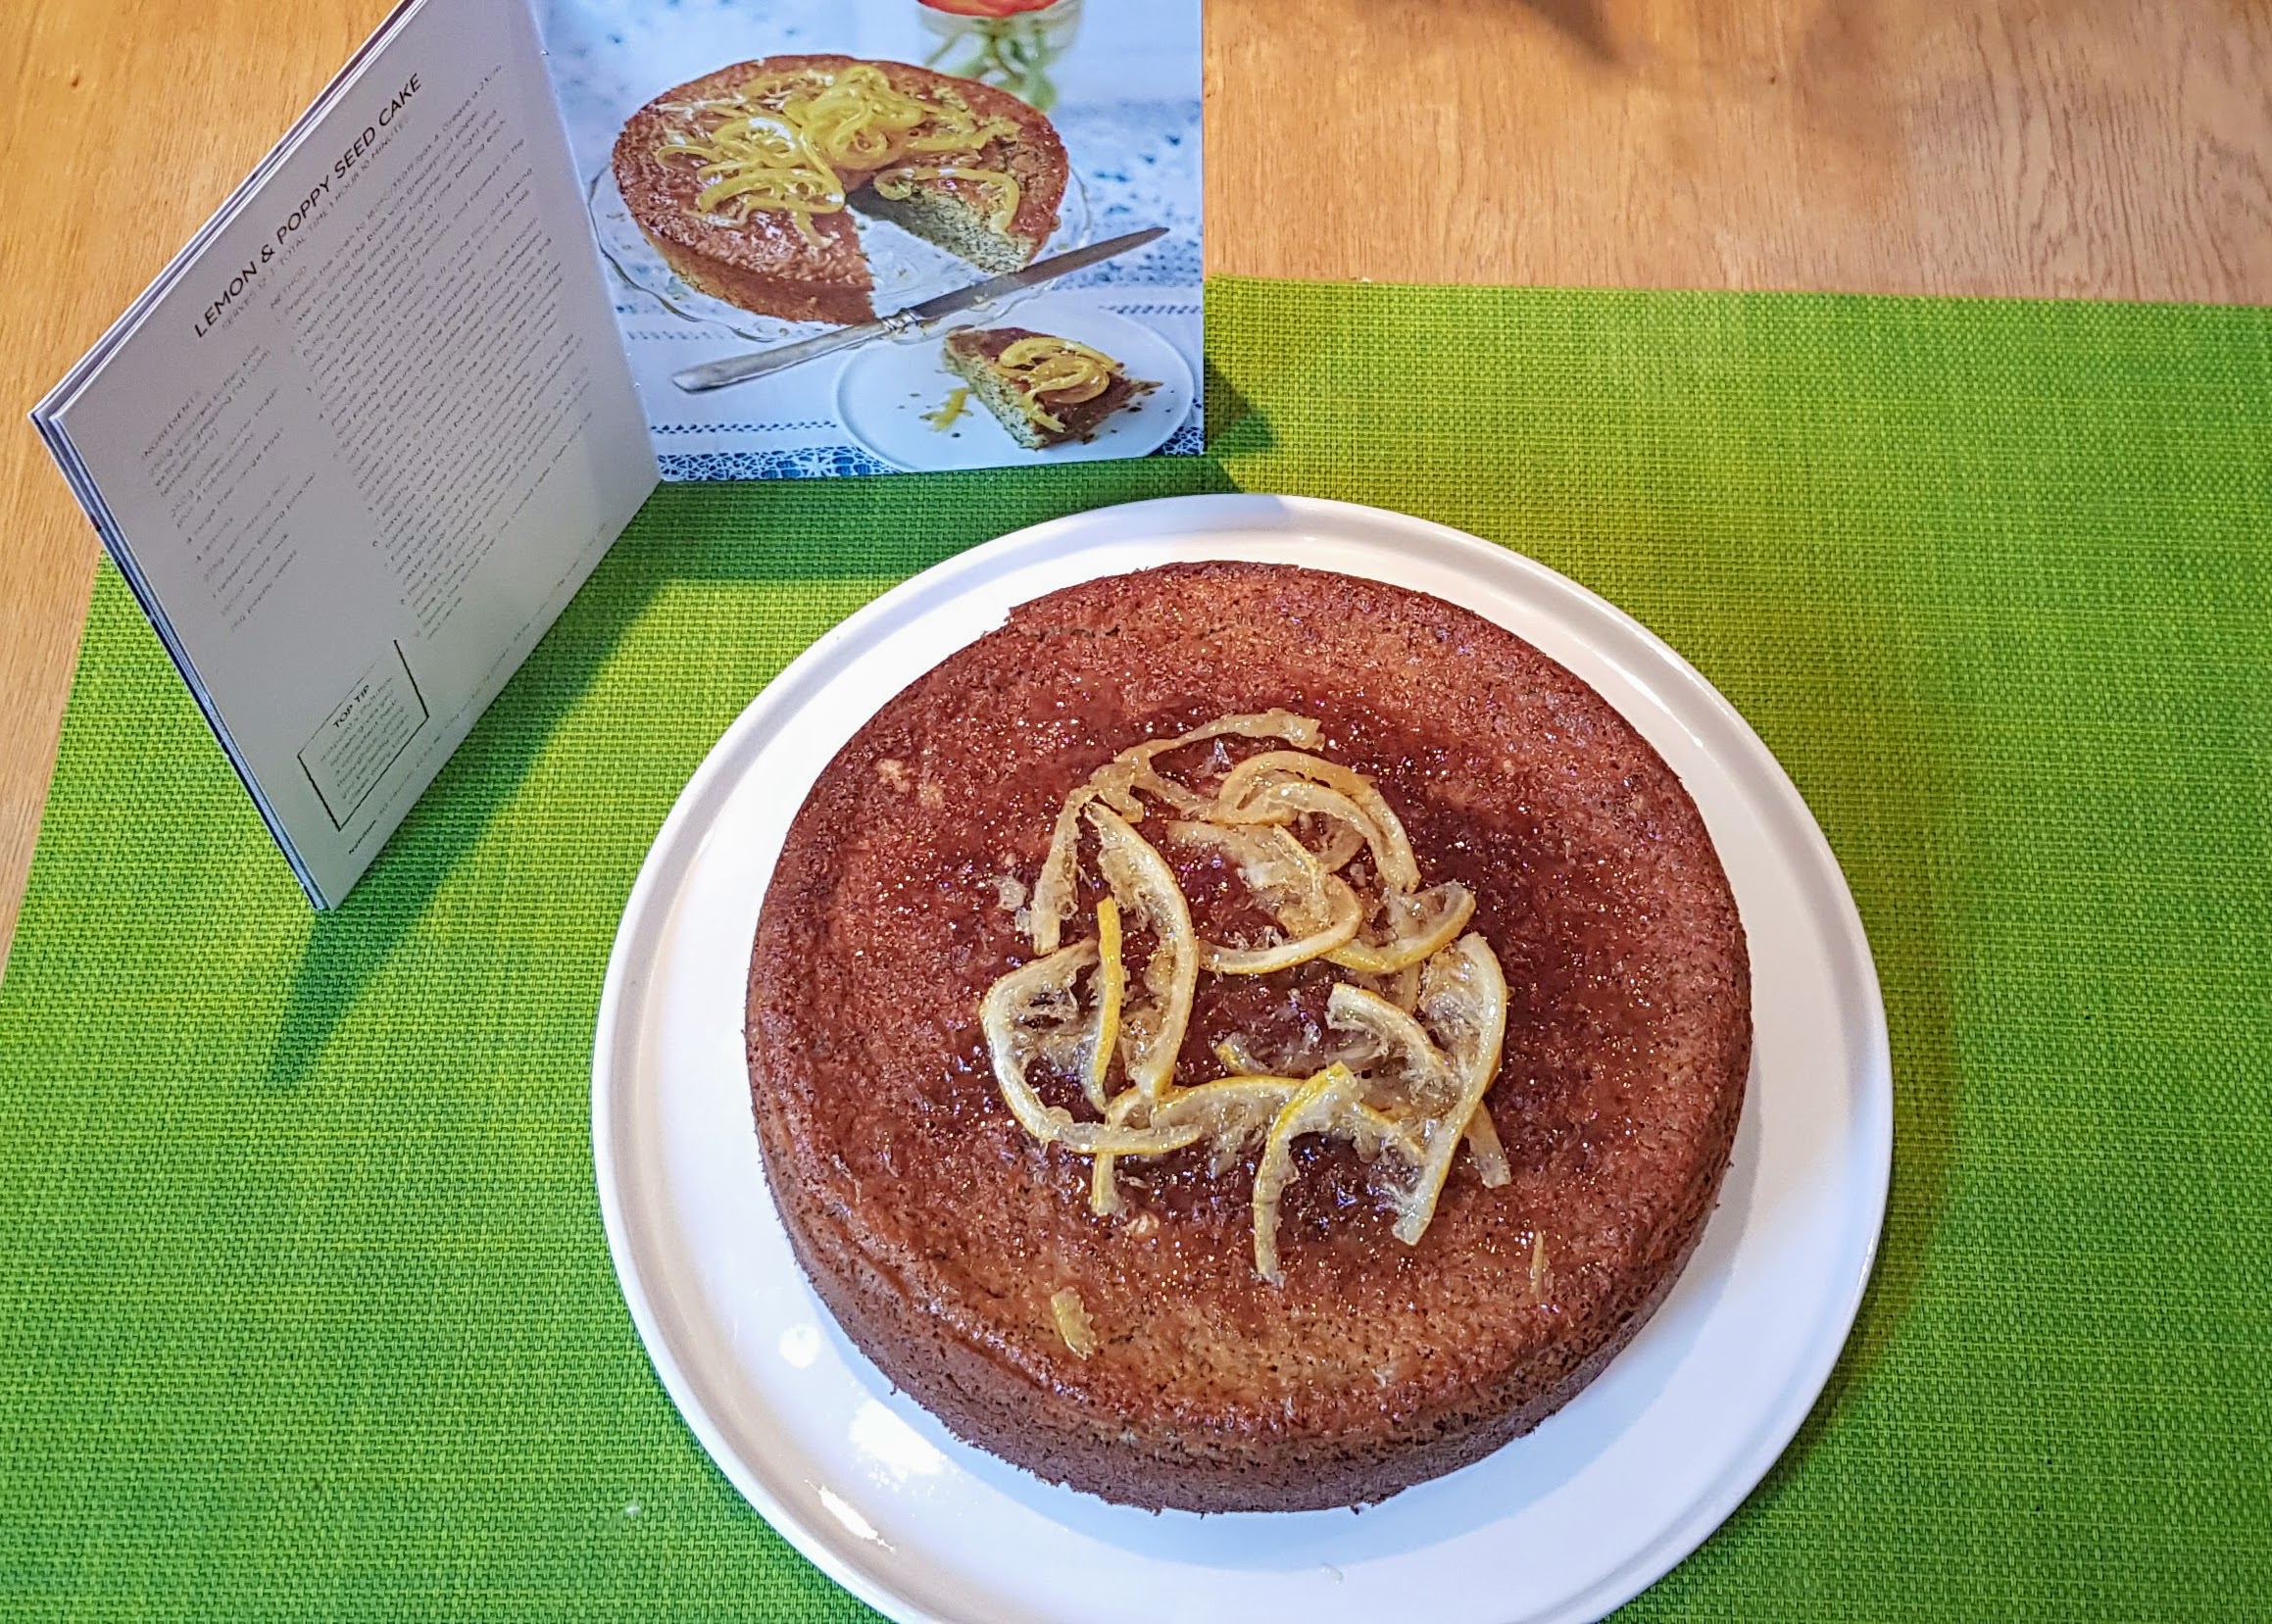
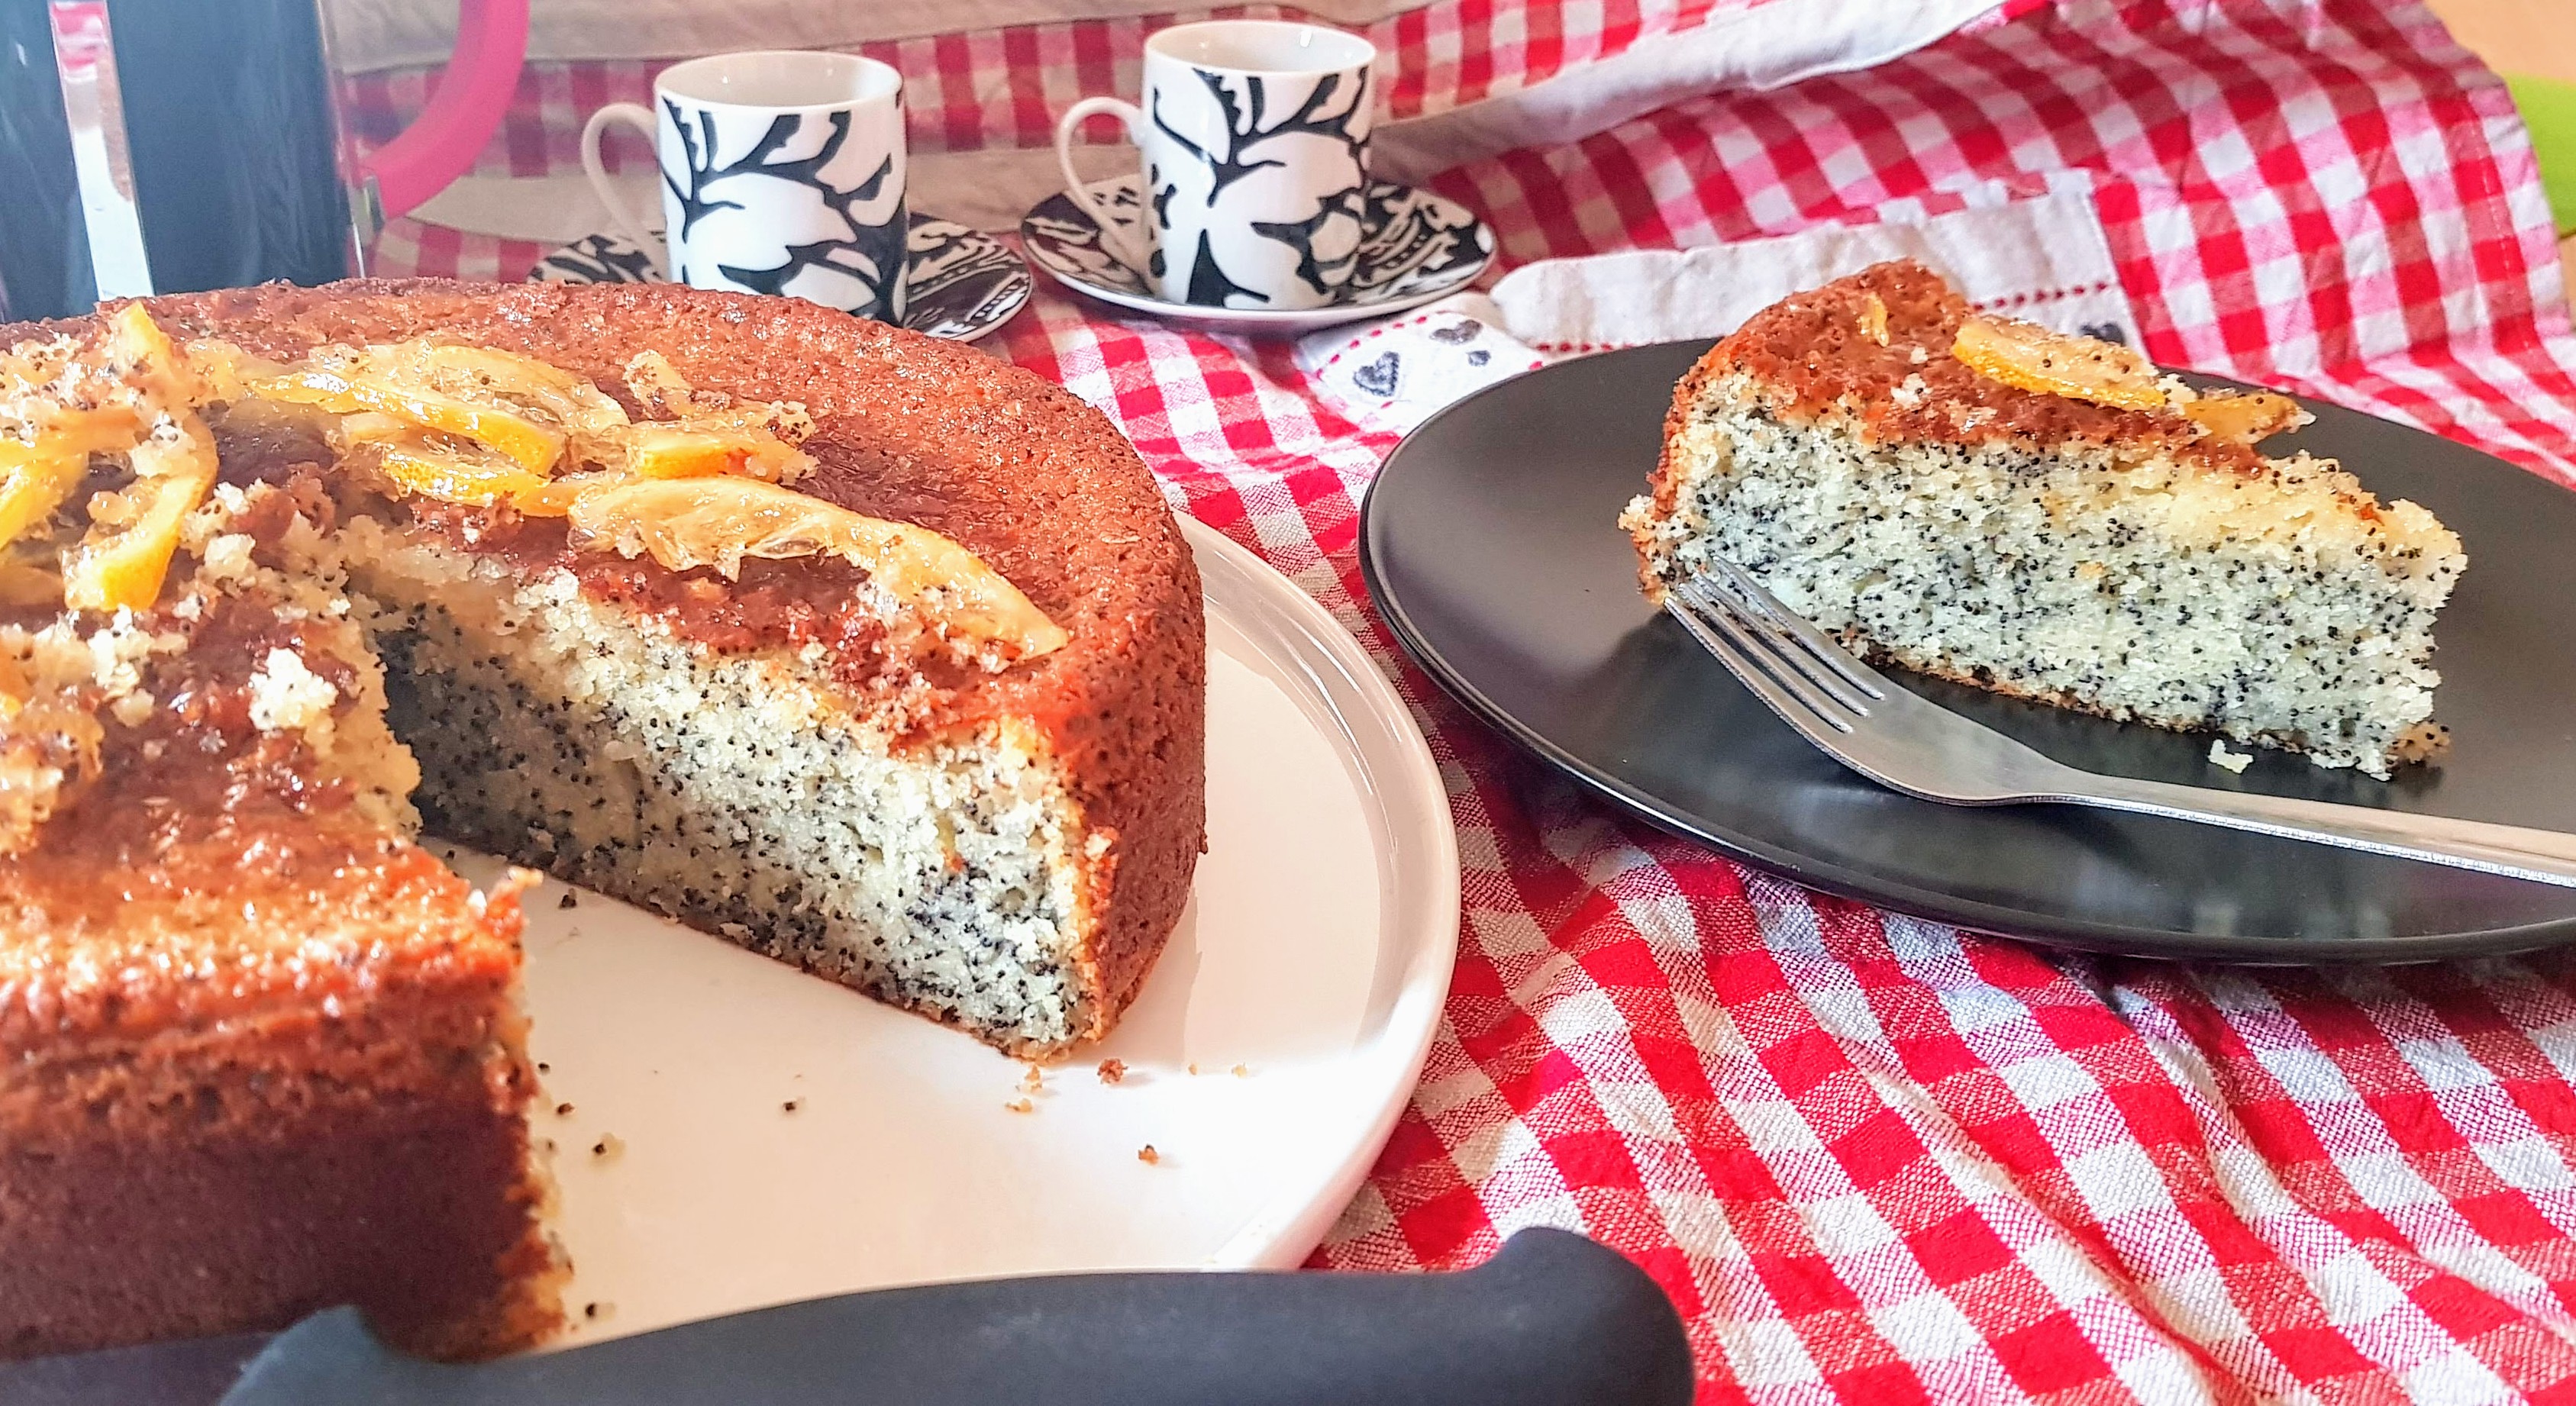
We have had a rather wet weekend here in Cumbernauld, Glasgow, so nothing better than getting in the kitchen and baking! Wanting to carry on with the summer, I decided that we were going to have an indoors picnic. I’ve been wanting to try this recipe from Jamie Oliver for a while now so today was that day. It was absolutely delicious, so refreshing and light, perfect for my picnic.

Serves 10-12
250g unsalted butter at room temperature
250g Golden caster sugar + 4 tbsp for syrup
4 large eggs
4 lemons
275g self raising flour
1 tsp baking powder
150ml milk
50g poppy seeds


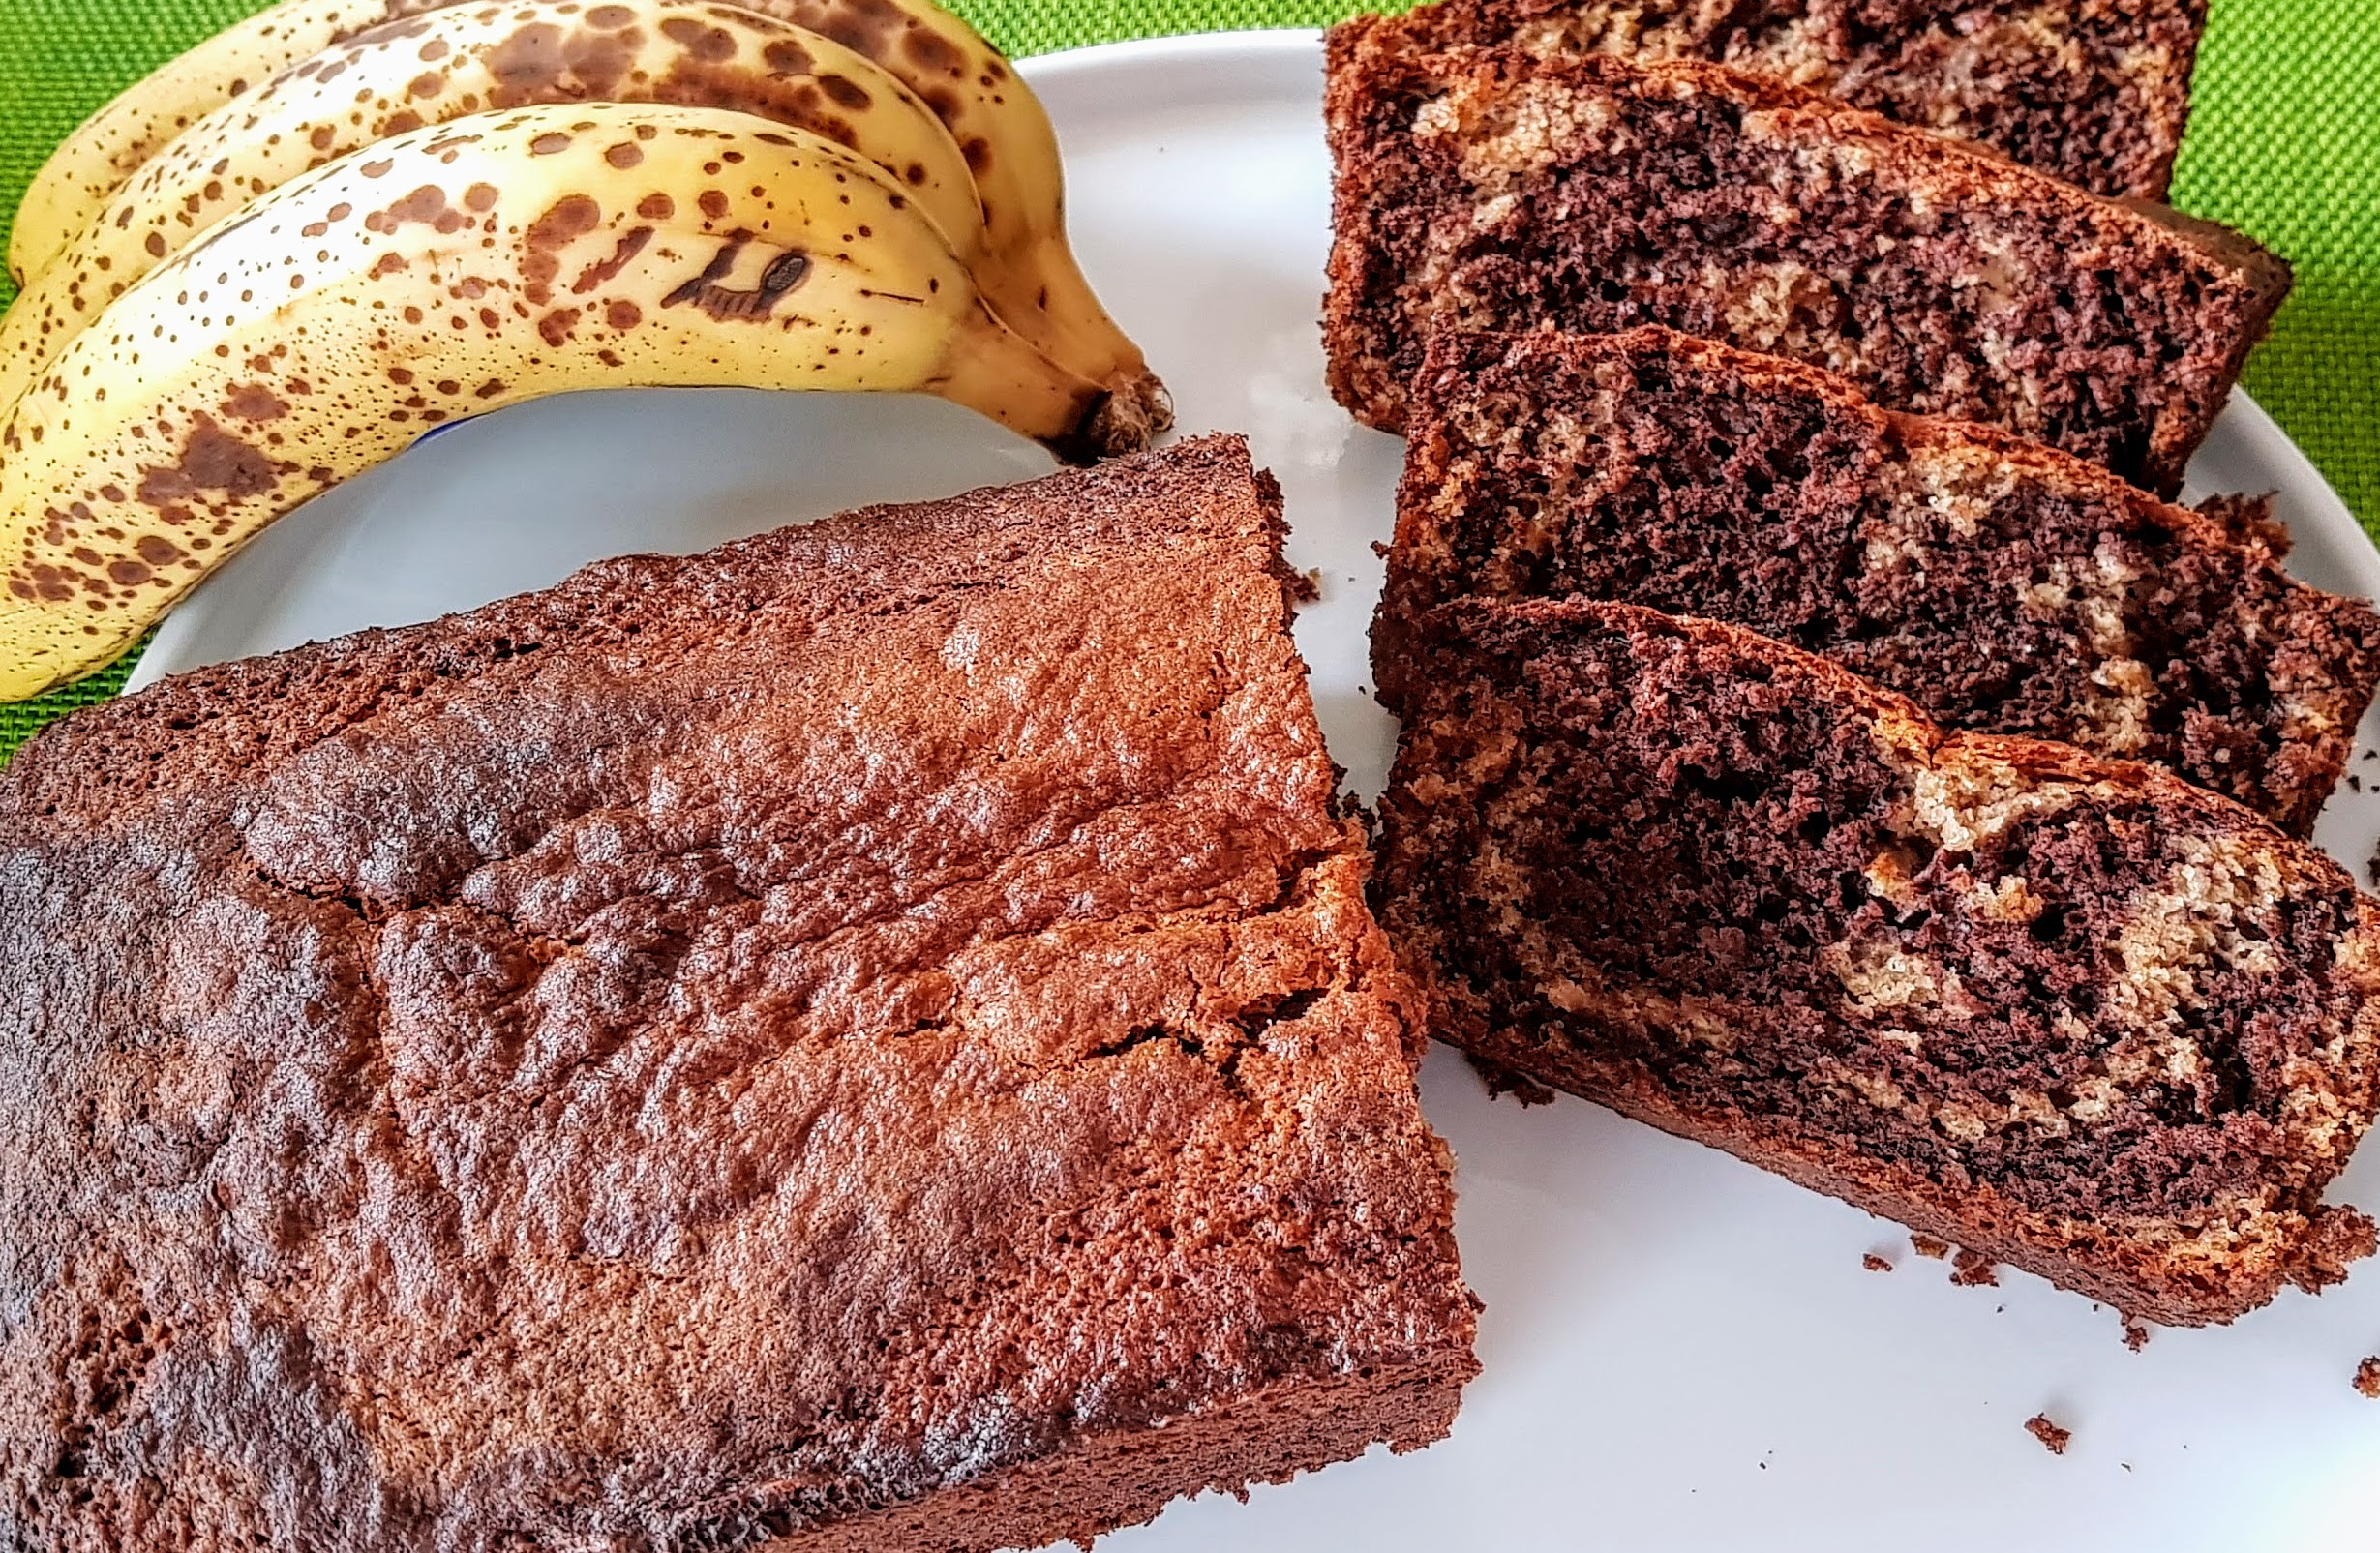
Having loads of bananas left, I decided on my favourite Banana Bread Recipe . This time I tried my Automatic settings on my oven, and it baked perfectly. I do love new technology.


These Automatic Recipes are a full proof way of cooking if your not sure, I love them and I’ve learned to experiment with recipes I might not have done before.
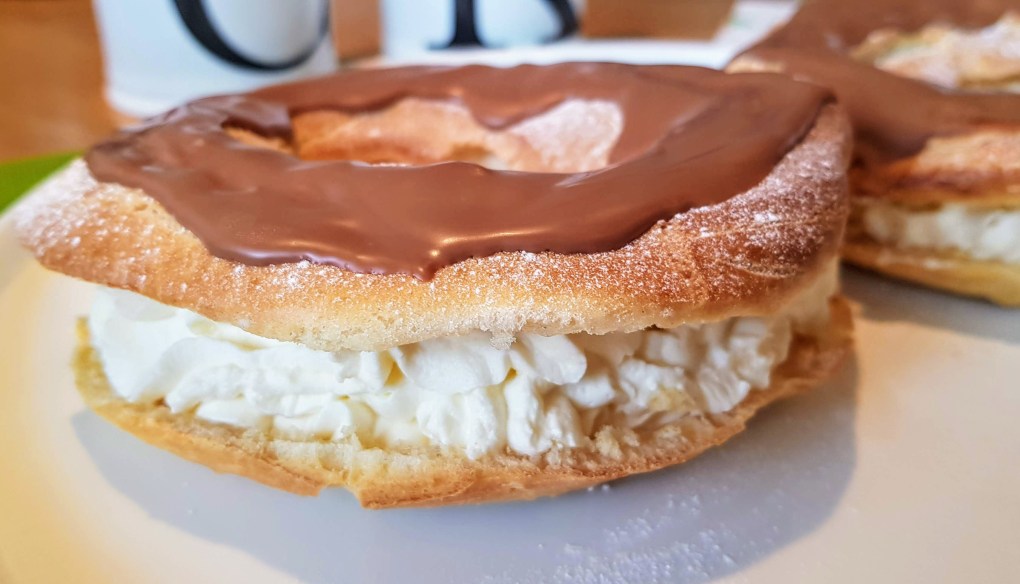


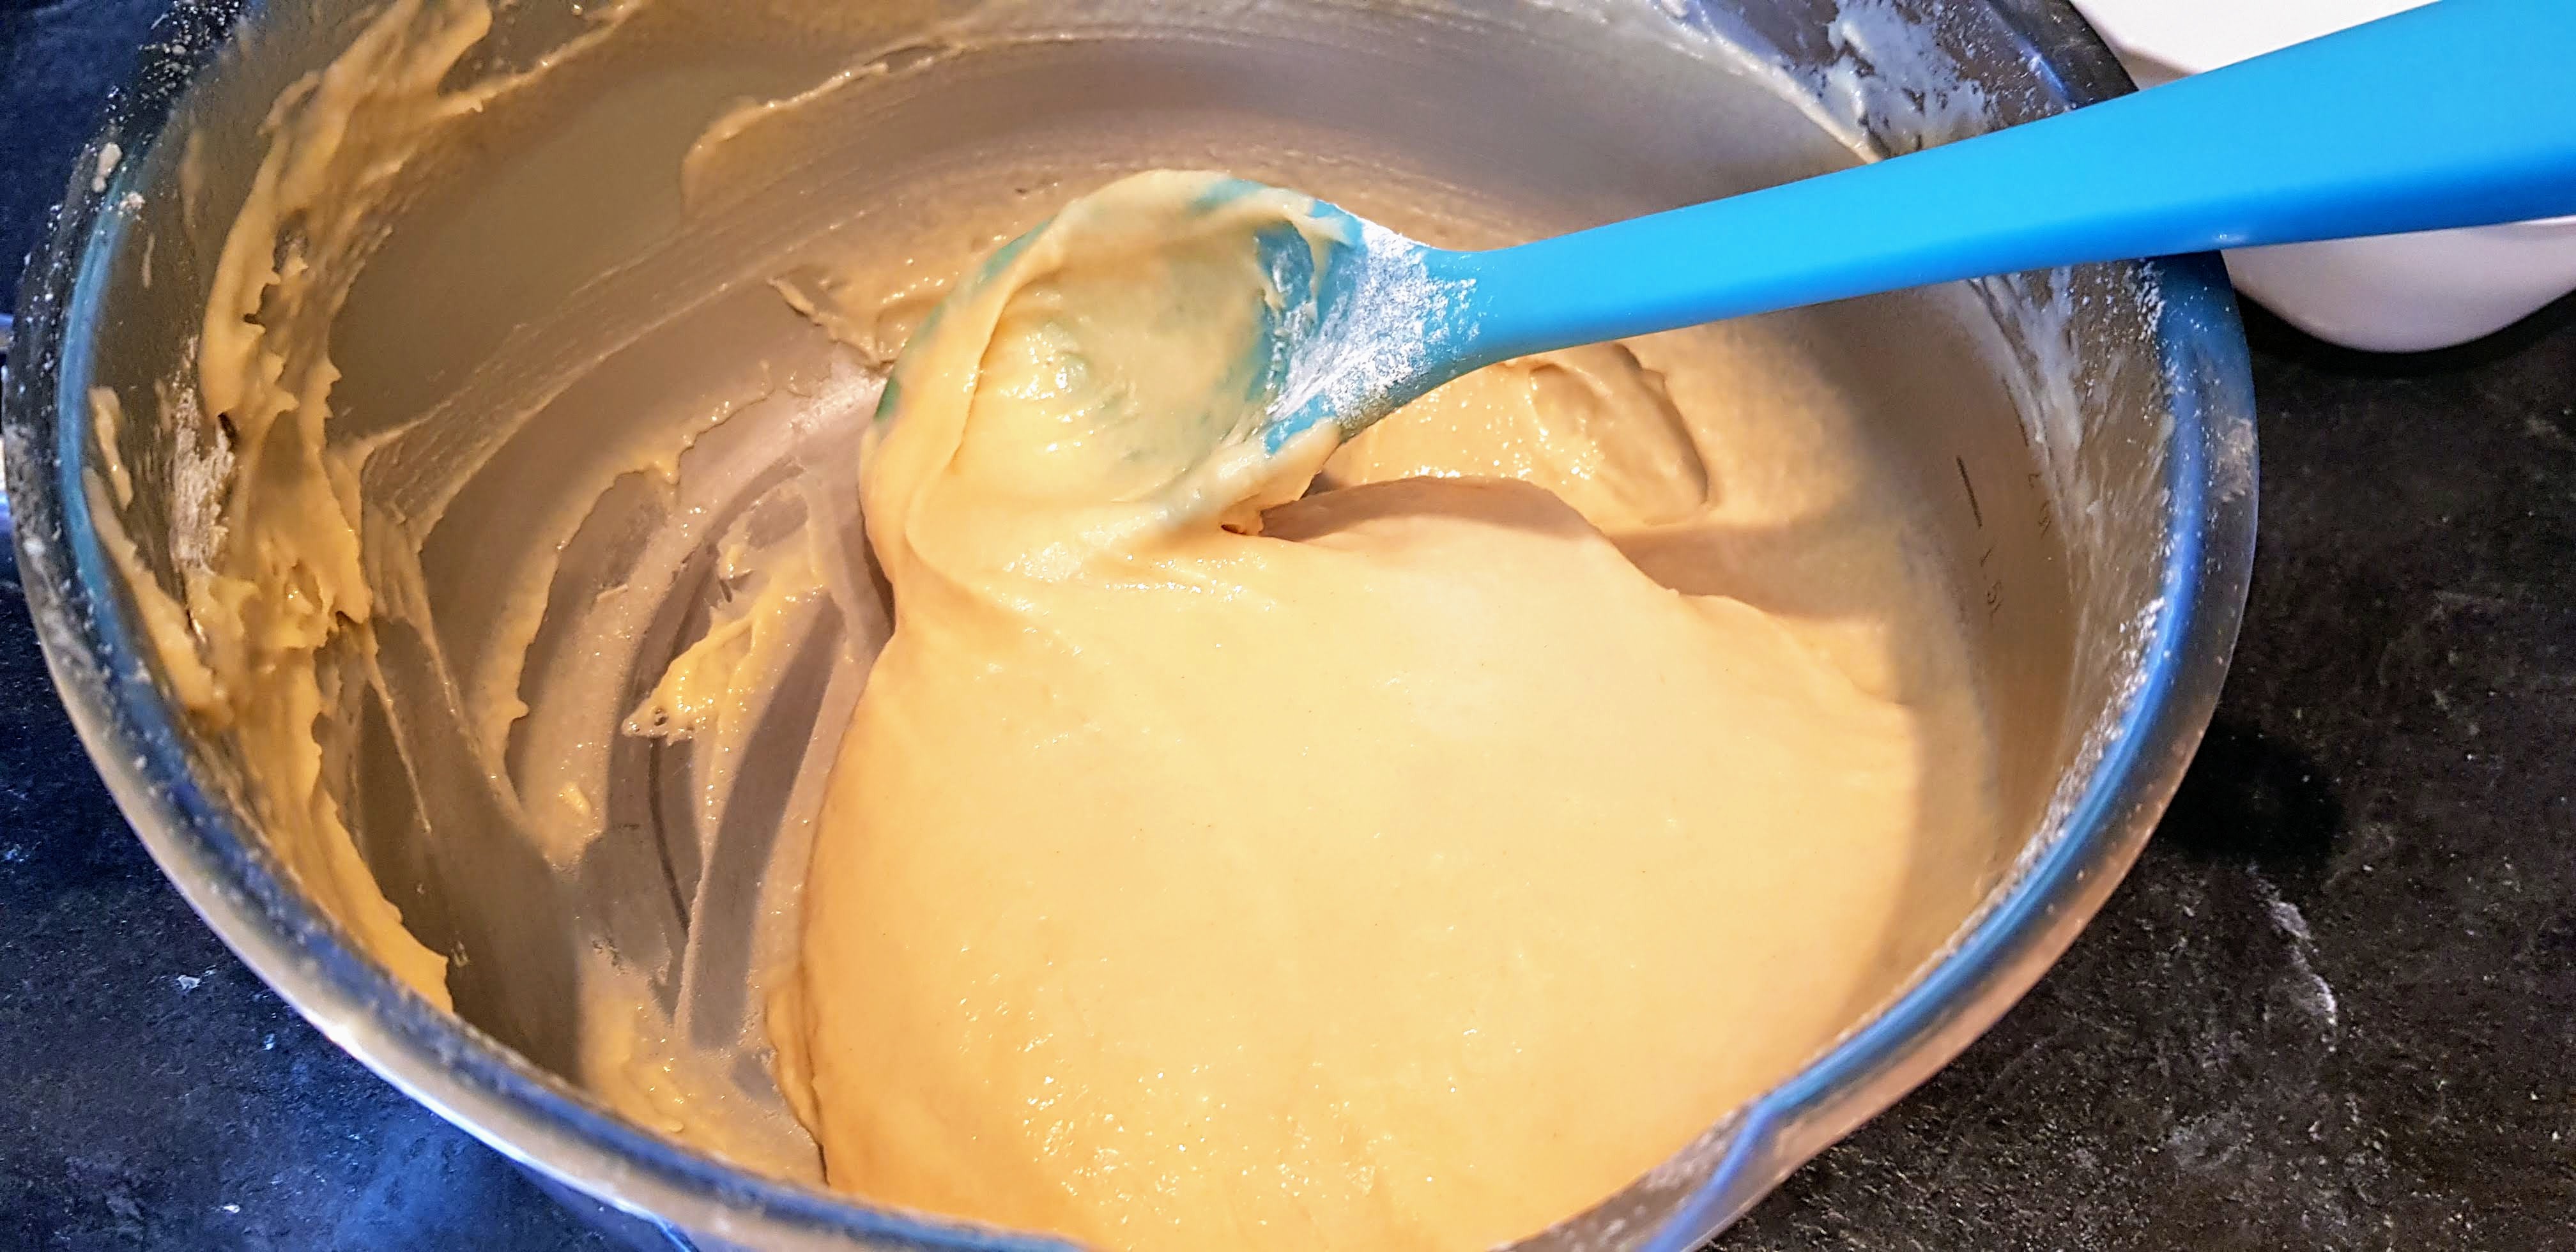
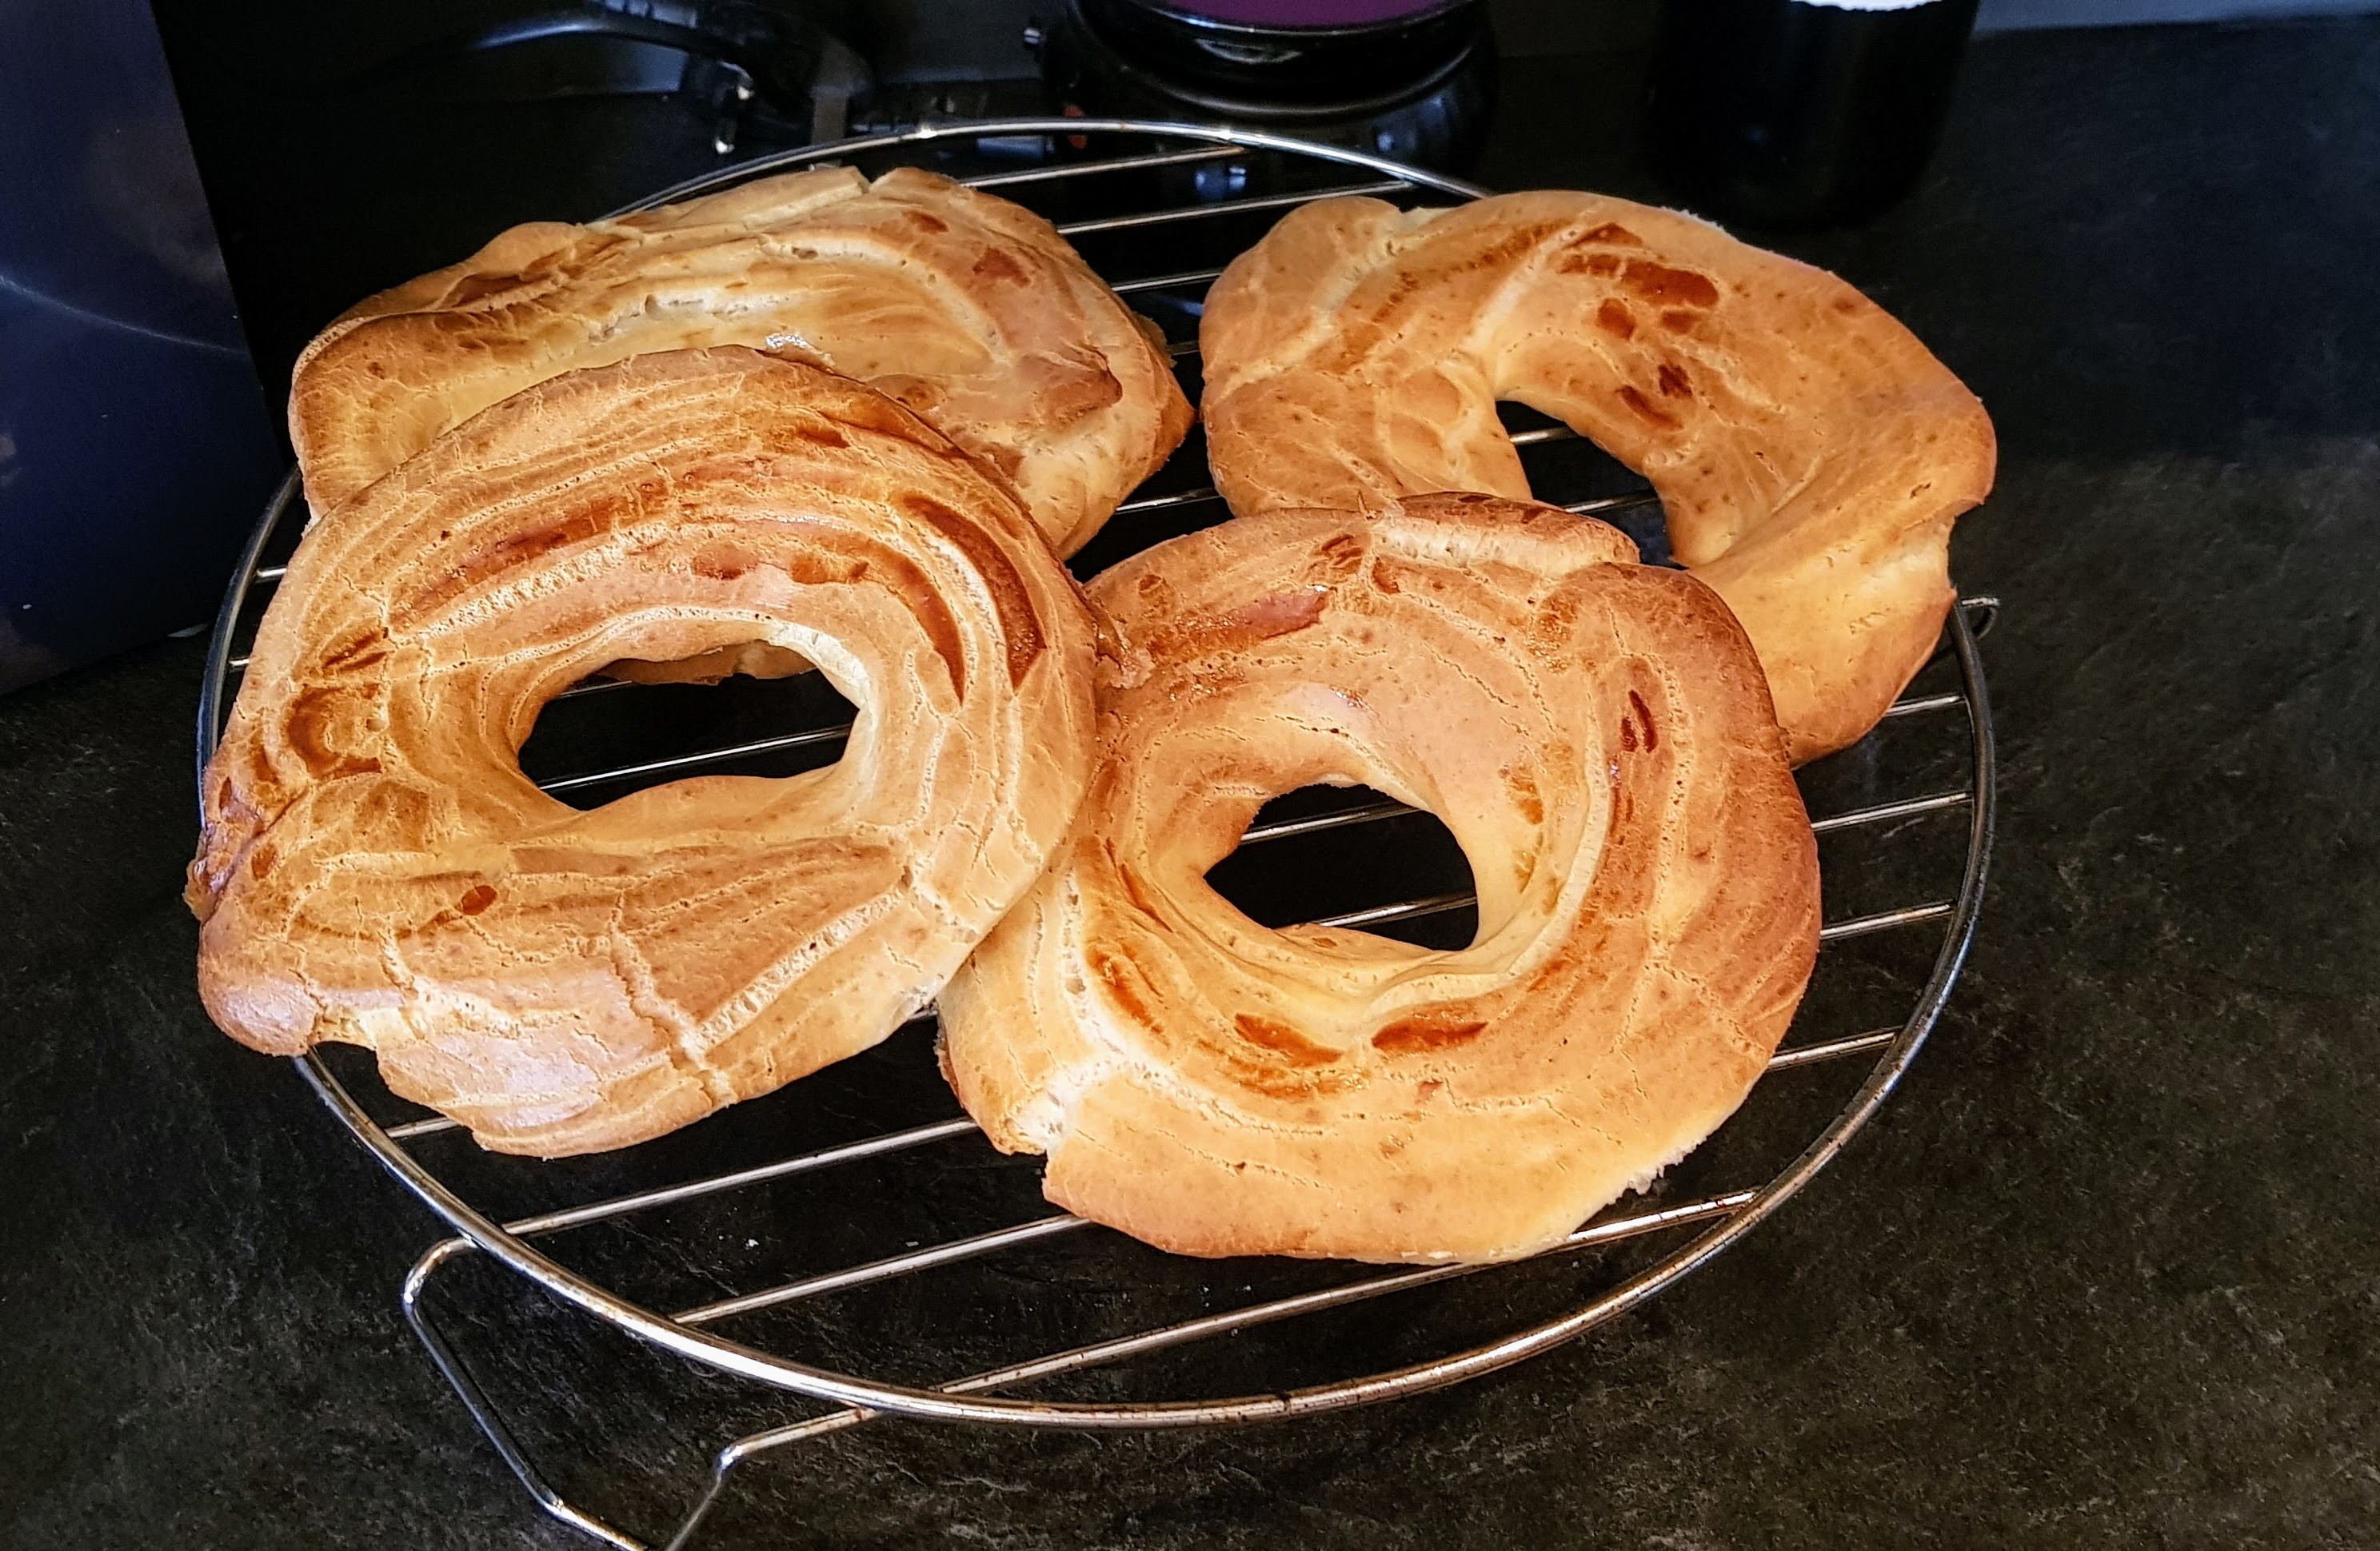
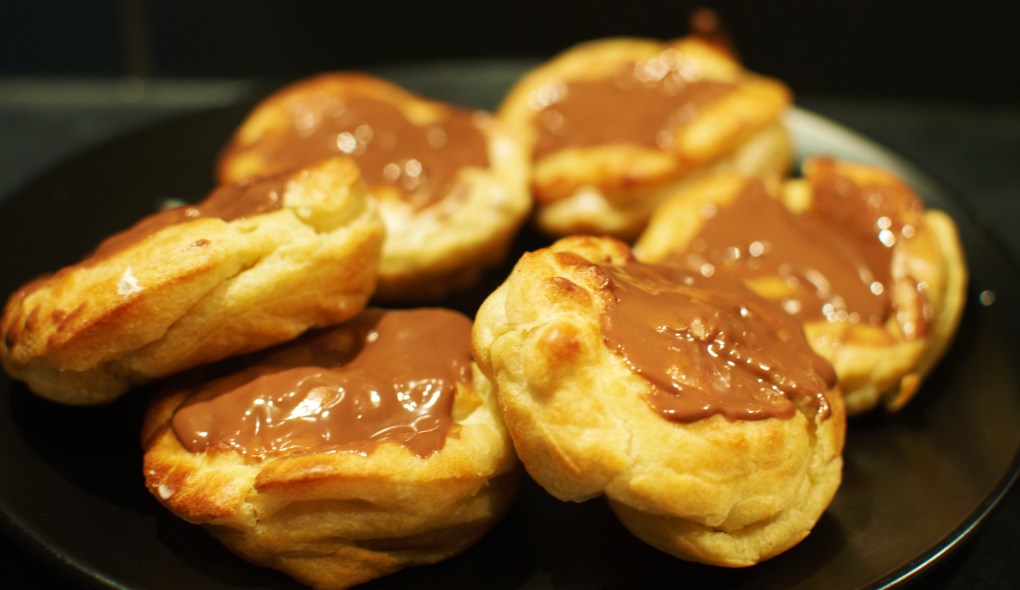
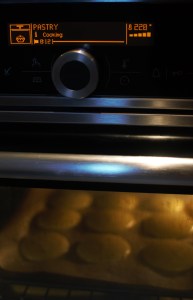
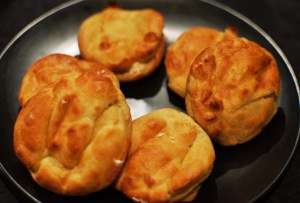
Looking for something nice to have with a coffee this afternoon, I decided to have a go at Choux Pastry again. The first time I tried they didn’t puff up, so I was so pleased when these came out lovely and airy. Thought I would try doughnut shape instead of the traditional way. Very tricky to eat this way but then again I did make extra large man size ones……lol! They were absolutely delicious. Perfect for our afternoon coffee.
Makes 4
115g Strong Flour
4 tbsp milk
80ml water
Pinch of salt
Pinch of caster sugar
55g unsalted butter
3 medium eggs
Filling
300ml double cream
100g icing sugar
1 tsp vanilla extract (or any other flavouring you wish)
100g Chocolate (if using on top)


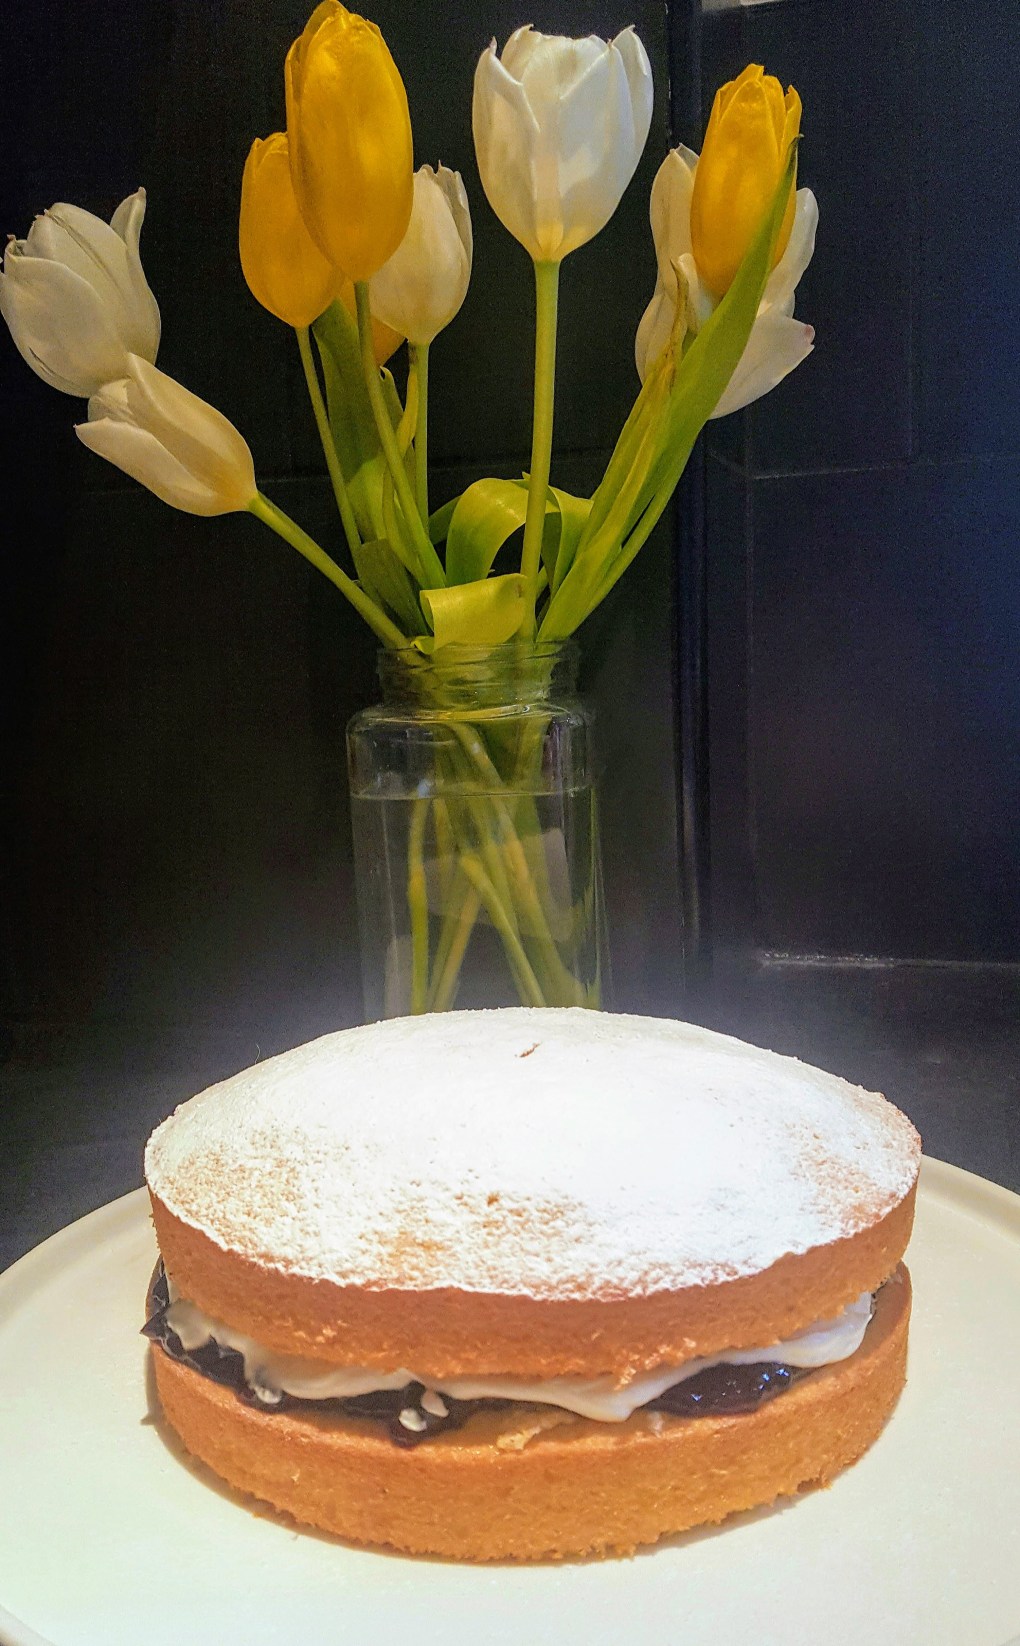

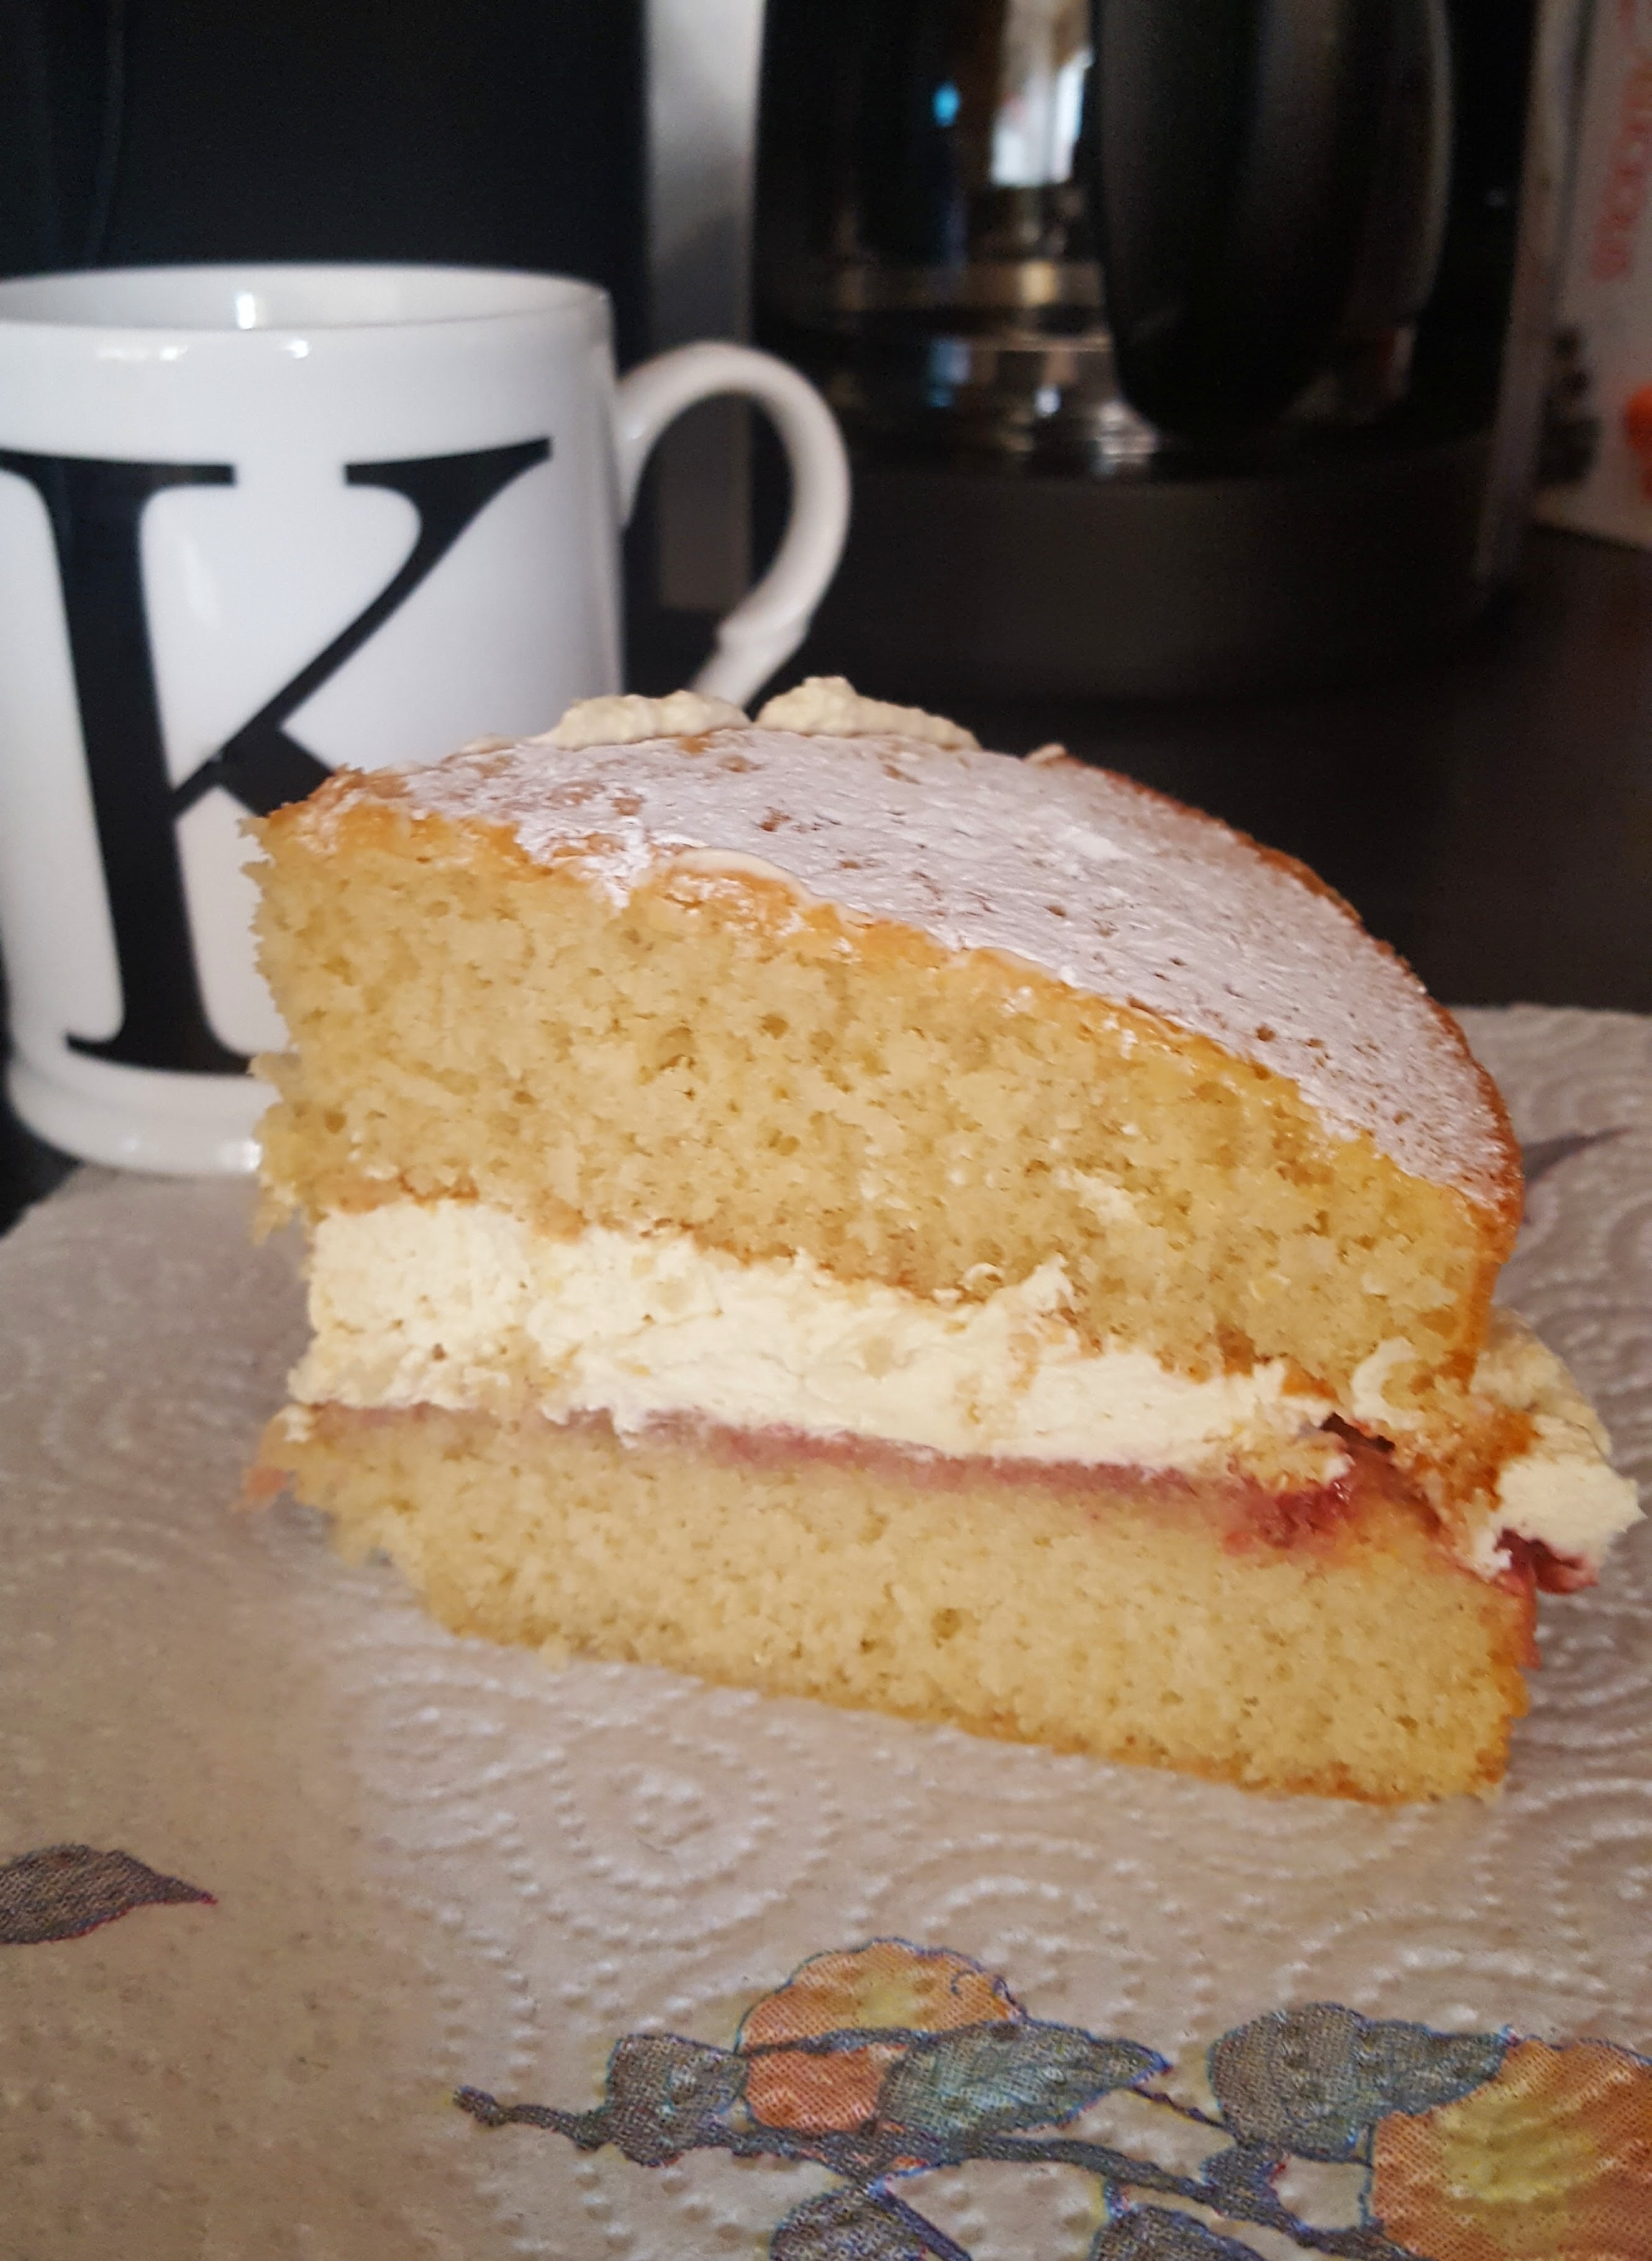
I found this lovely little pot of Tutti Frutti Jam from The Artisan kitchen recently, so nothing better on a bank holiday weekend than to make a Victoria Sponge for afternoon coffee. The Flavours of this jam were absolutely delightful, APPLES, STRAWBERRIES, RASPBERRIES, BLACKCURRANTS, LEMON JUICE and ORANGE OIL………so fruity!
Basic Victoria Sponge:-
200g unsalted butter, softened
200g golden caster sugar
4 medium eggs
200g self raising flour
1 tsp vanilla extract
For cream:-
250ml double cream, whipped
1 vanilla pod


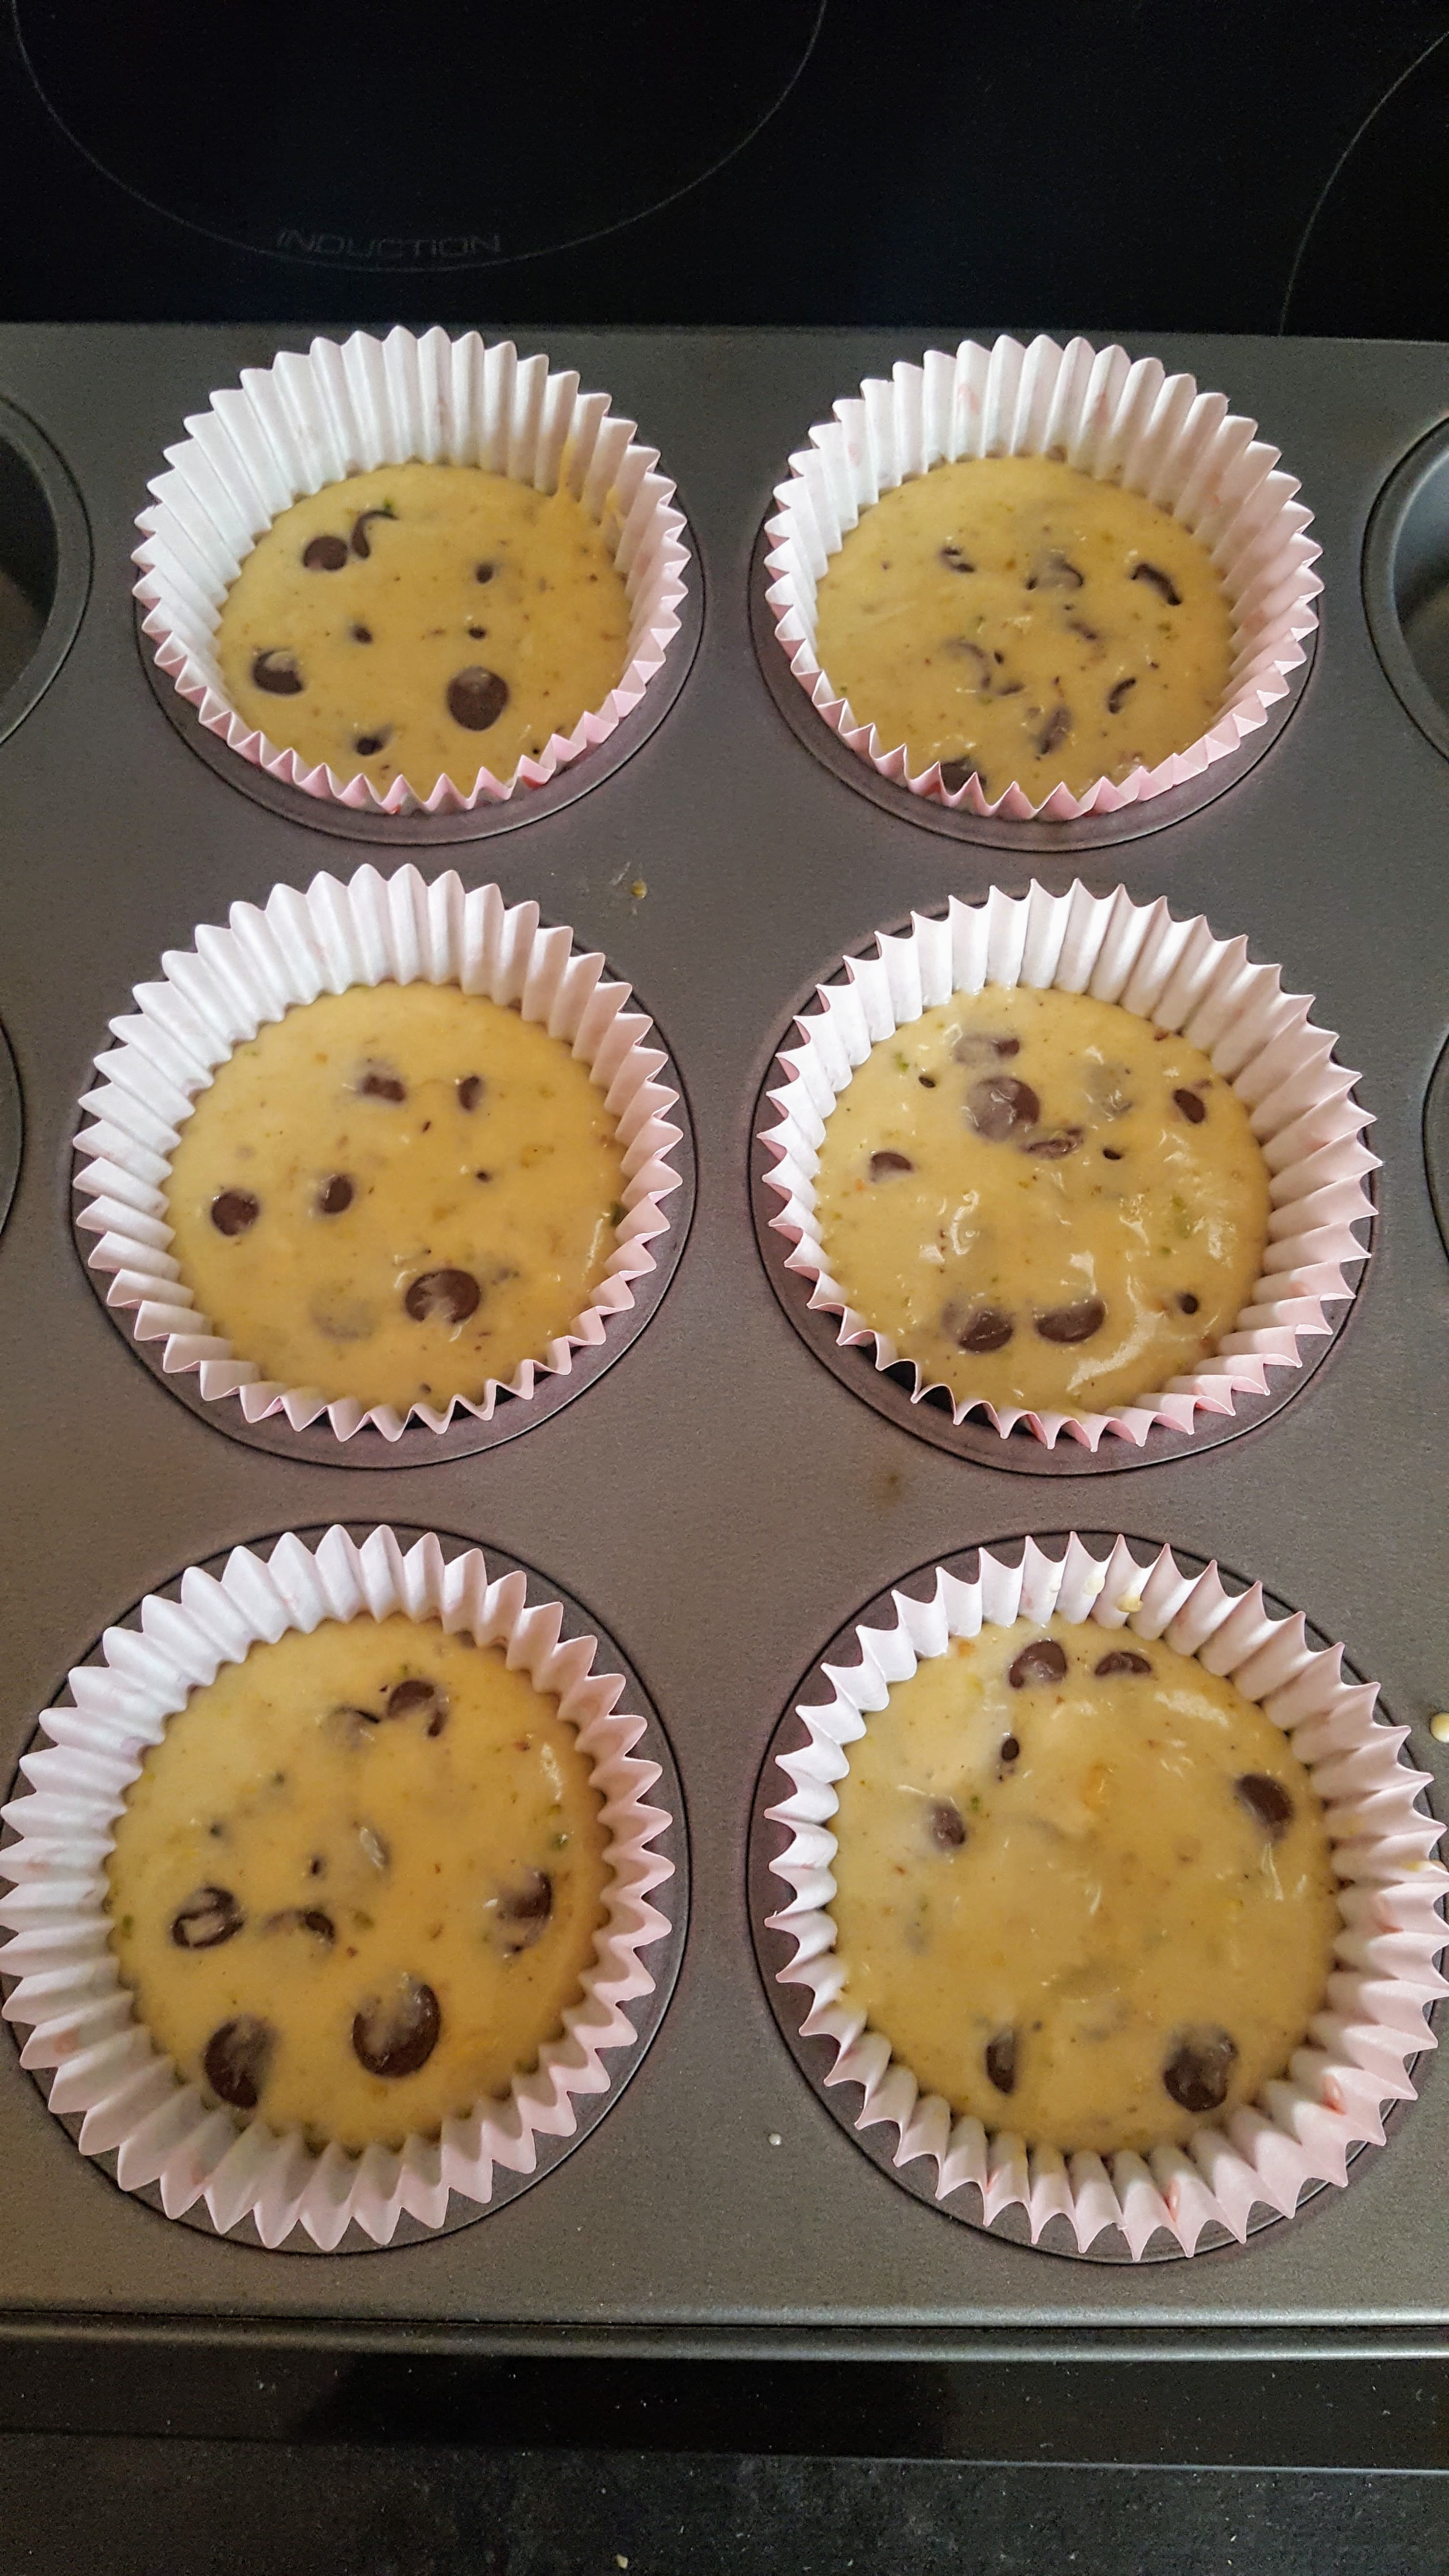
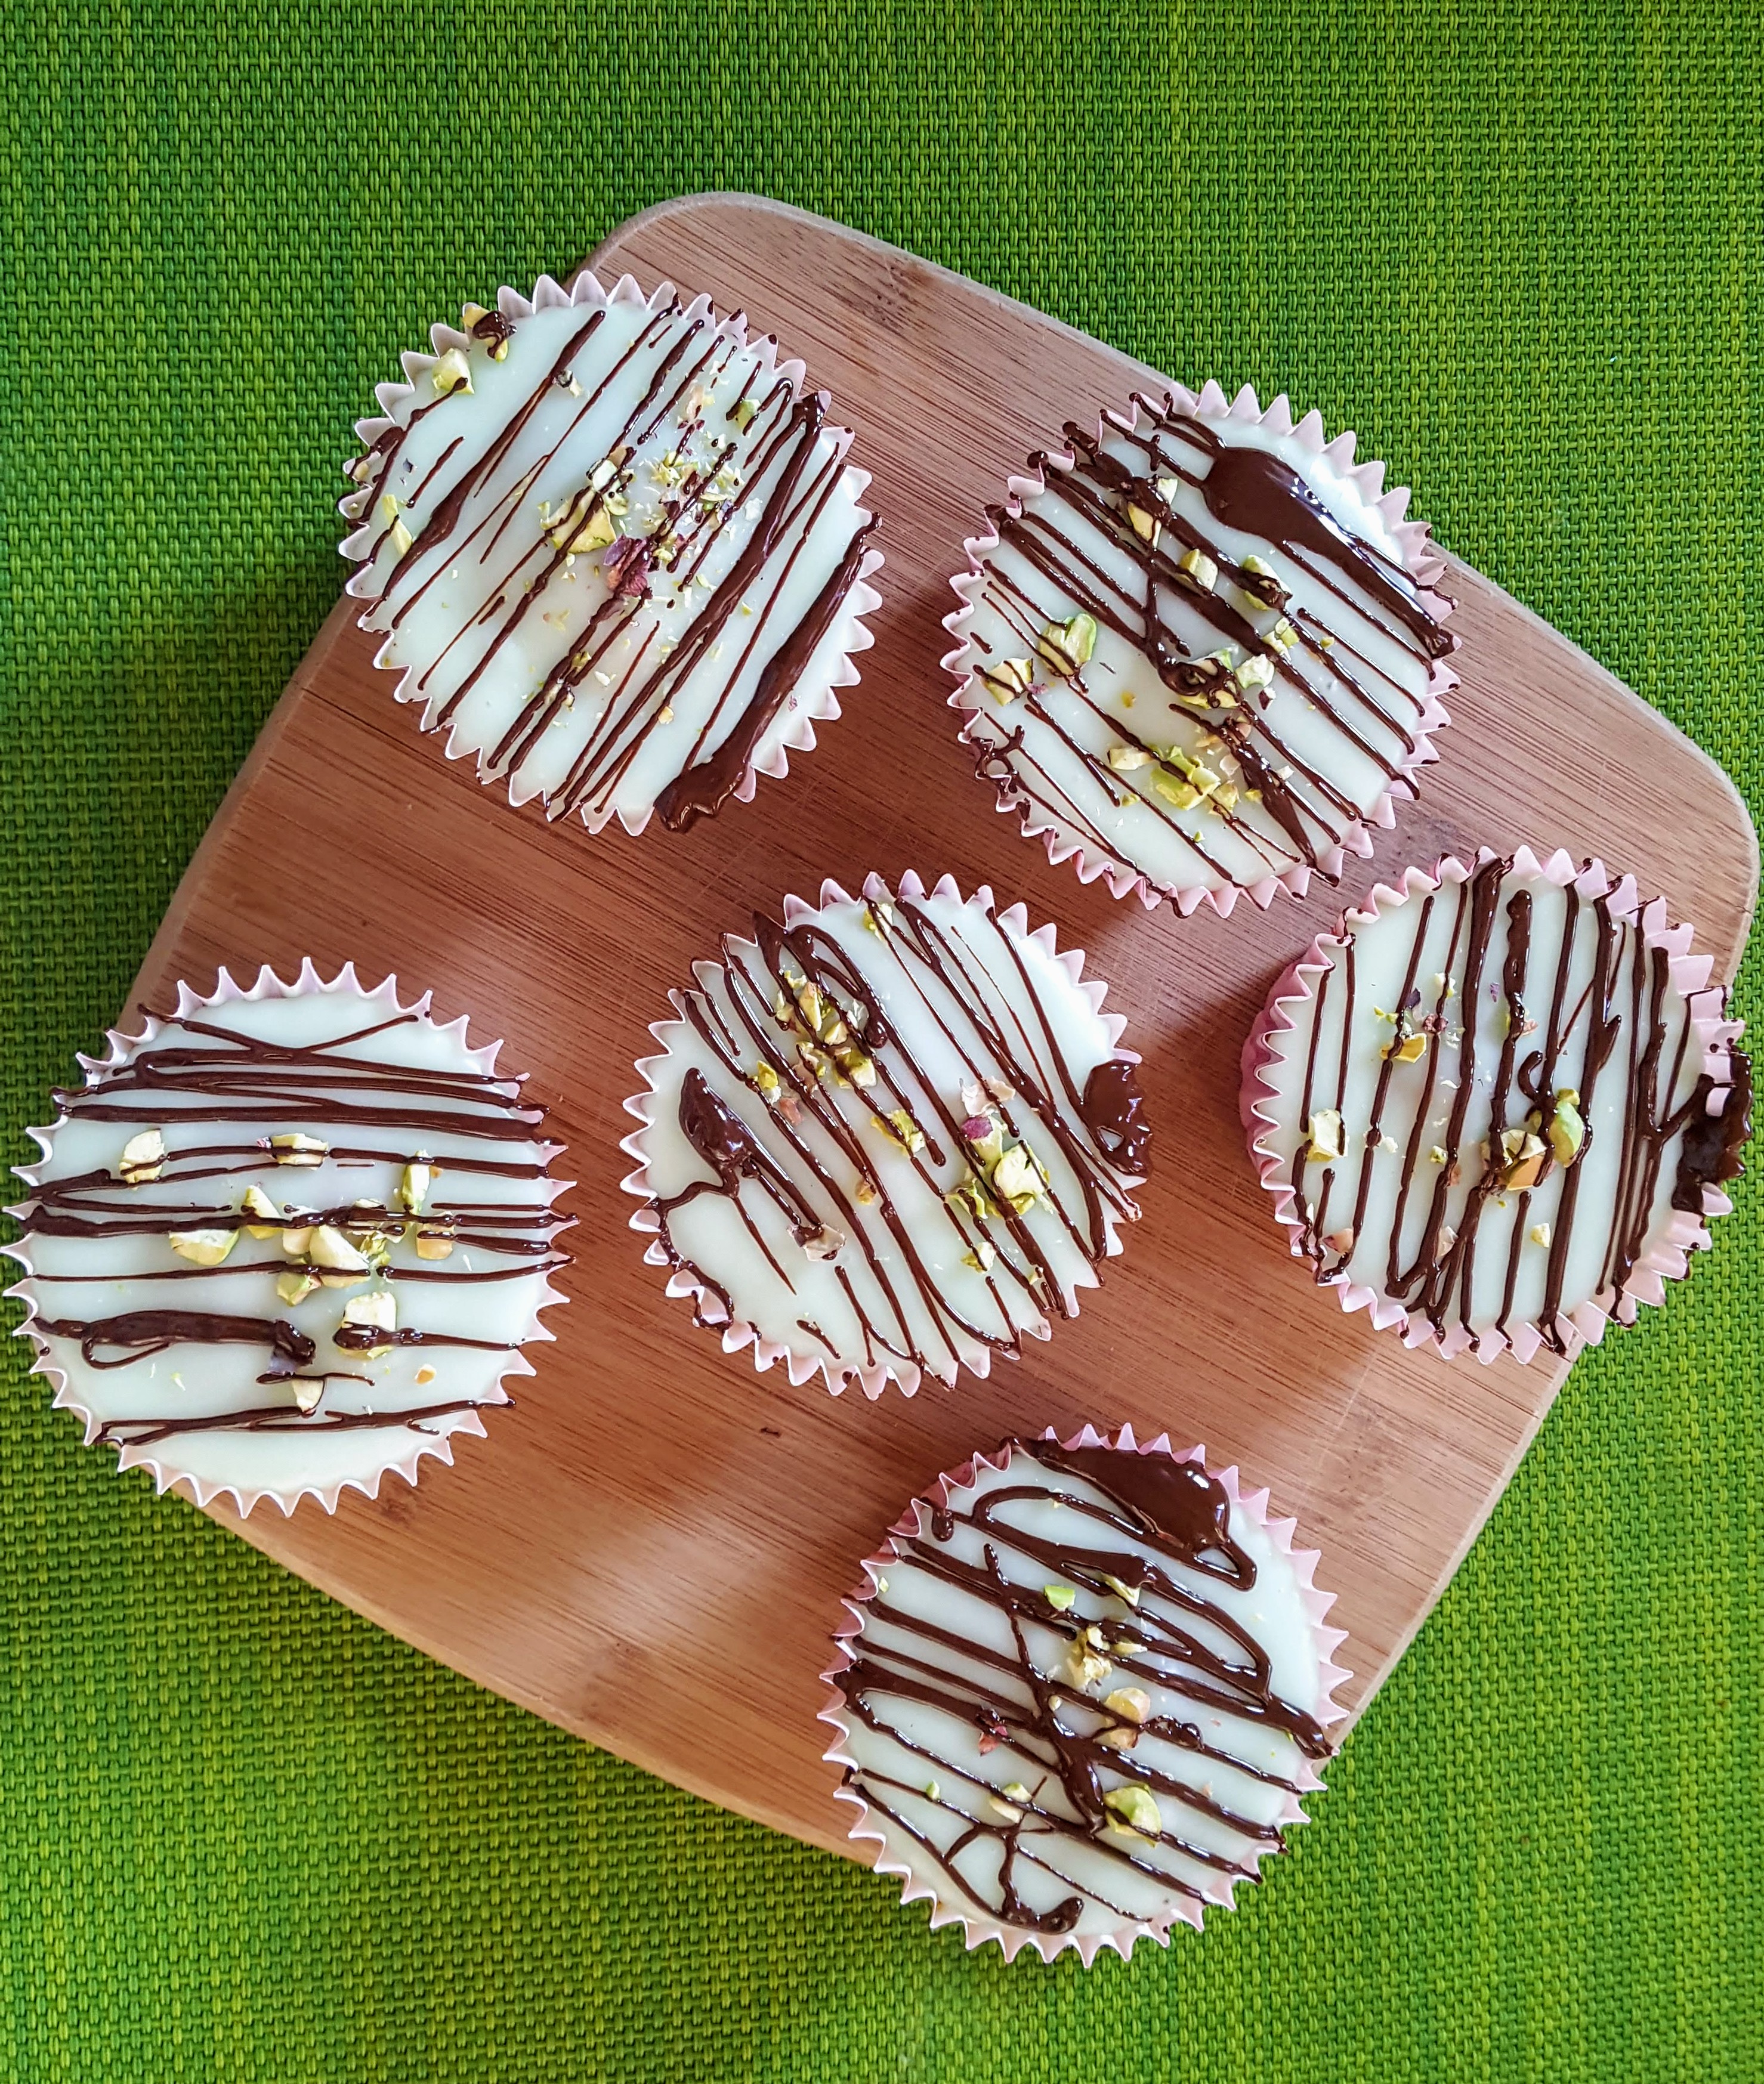
When life gives you snowy days…………..JUST BAKE!……….Coffee and Cake can never go wrong in my house, especially on a snowy day. I used my sponge recipe from my pistachio cupcakes, and I just omitted the pistachios. I baked half with chocolate chips inside and the other half I used some Unicorn Chips (coloured white chocolate chips). I then decided to use what I had in my cupboards with regards to decoration and went a bit creative……lol! Think the boredom was getting to me……lol.
This is definitely my best cupcake mixture to date, always light and fluffy and full of flavour.

O.M.G!! What can I say………….this little creation is my best yet……absolutely delicious! 10/10 my boyfriend said….lol!
I just love a relaxing saturday afternoon baking, while my boyfriend was watching the Rugby I was listening to my favourite tunes by Imagine Dragons and creating some little afternoon delights.
Makes 12
70g pistachios
140g Golden Caster Sugar
140g Self Raising Flour
140g butter
2 eggs
5 tbsp milk
100g milk or dark chocolate drops (whichever you prefer)
1 tsp vanilla essence
1 tsp almond extract
250g icing sugar
Green food colouring


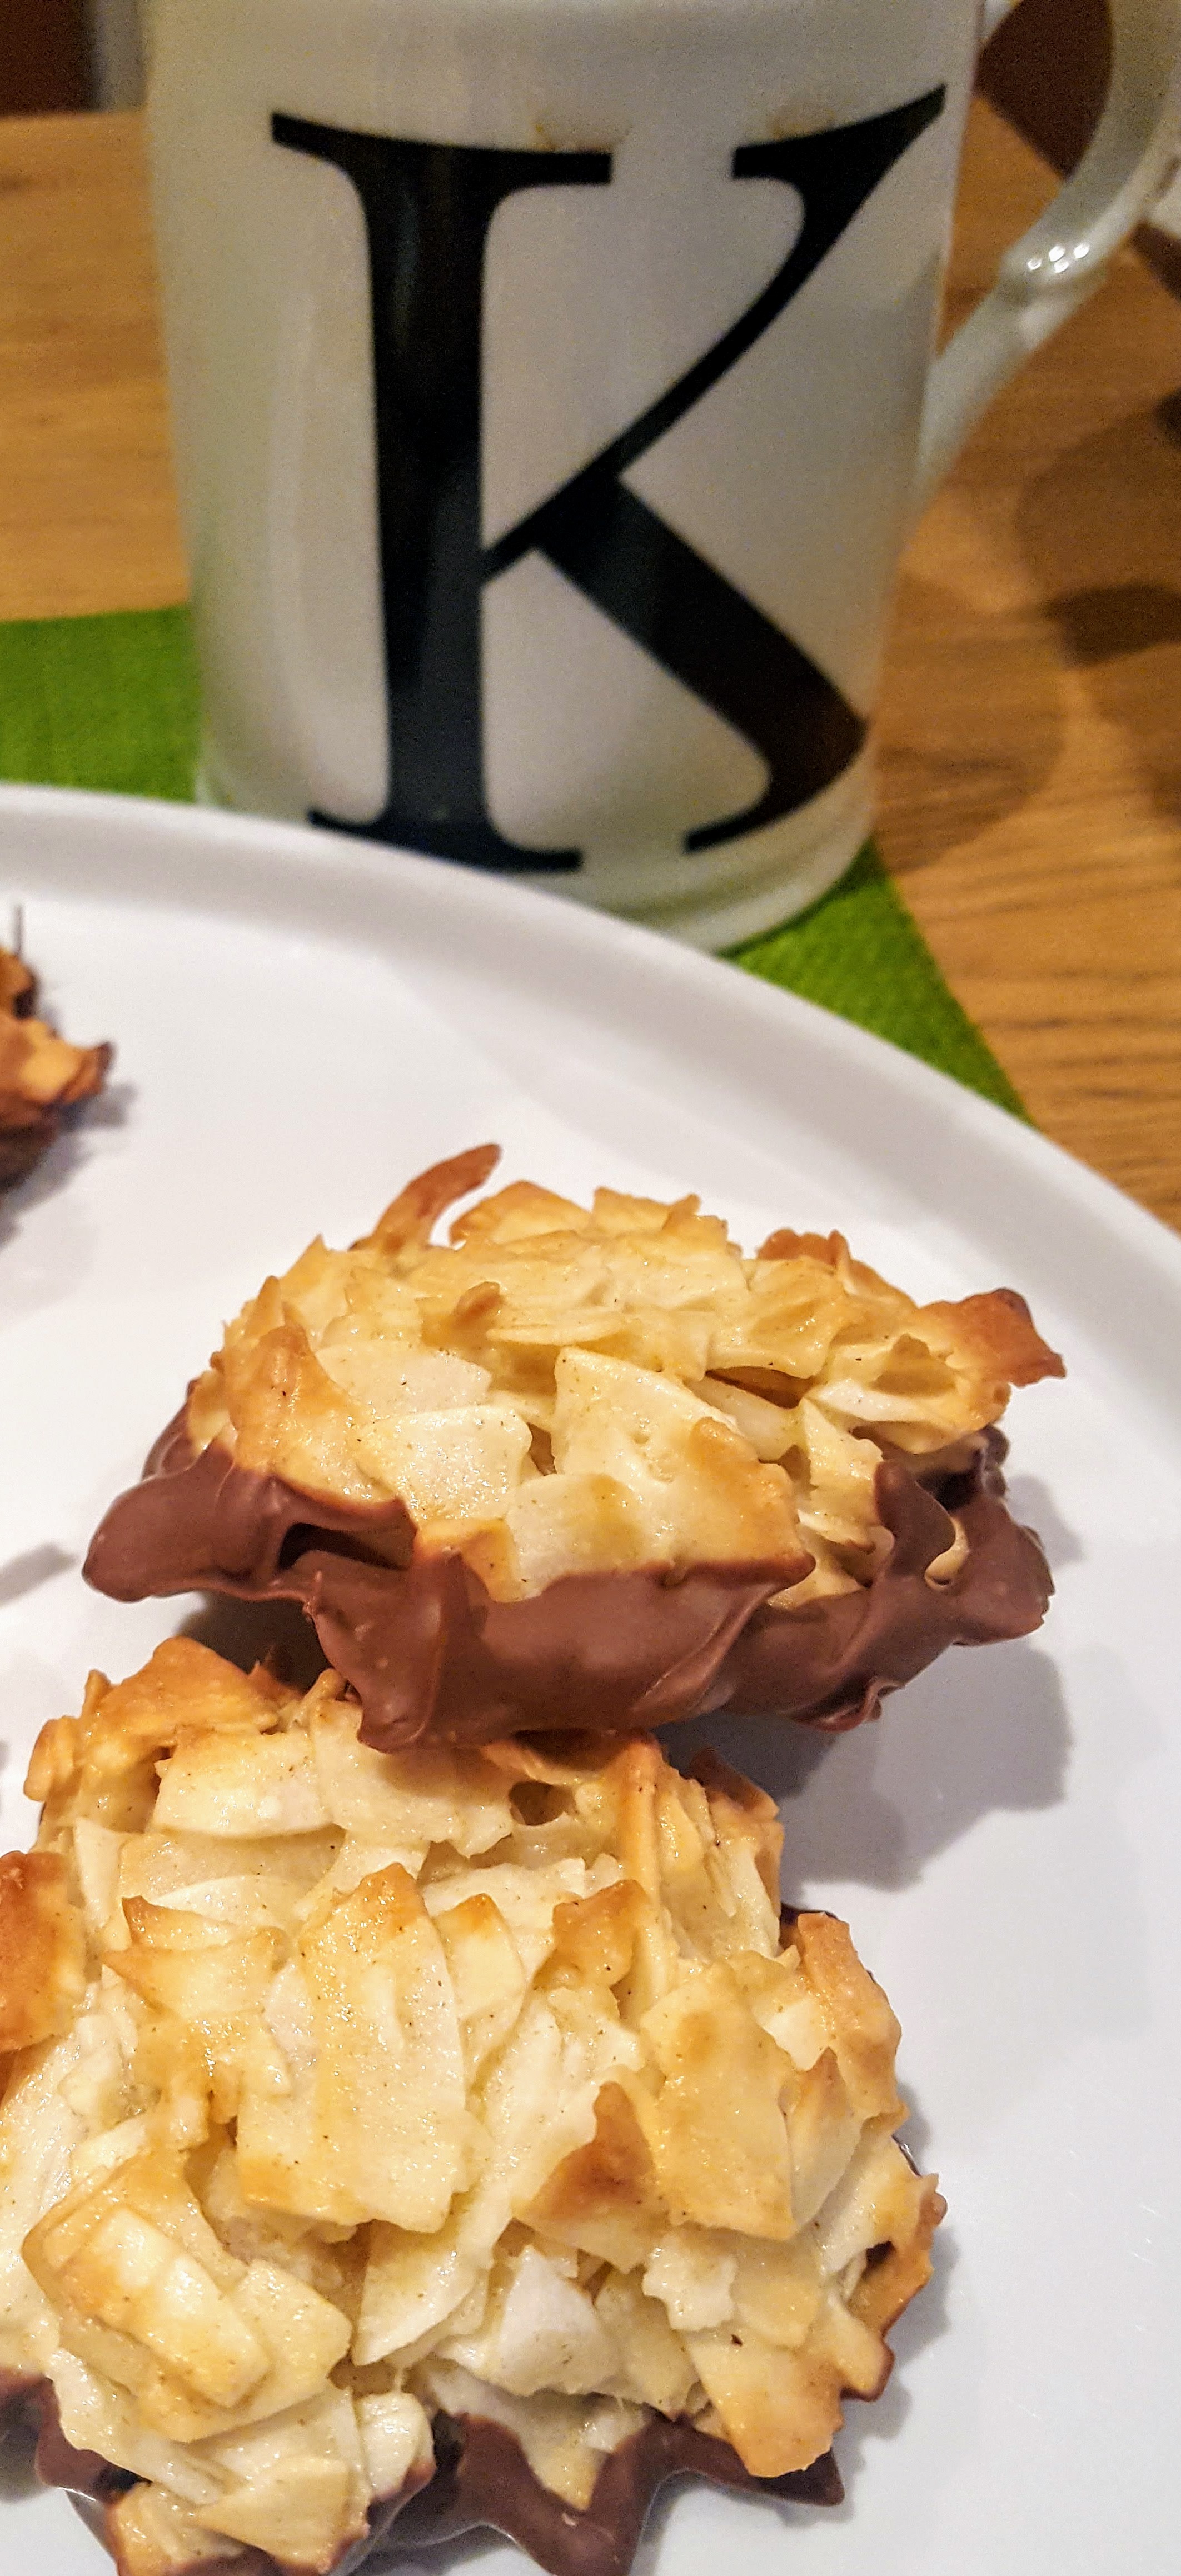
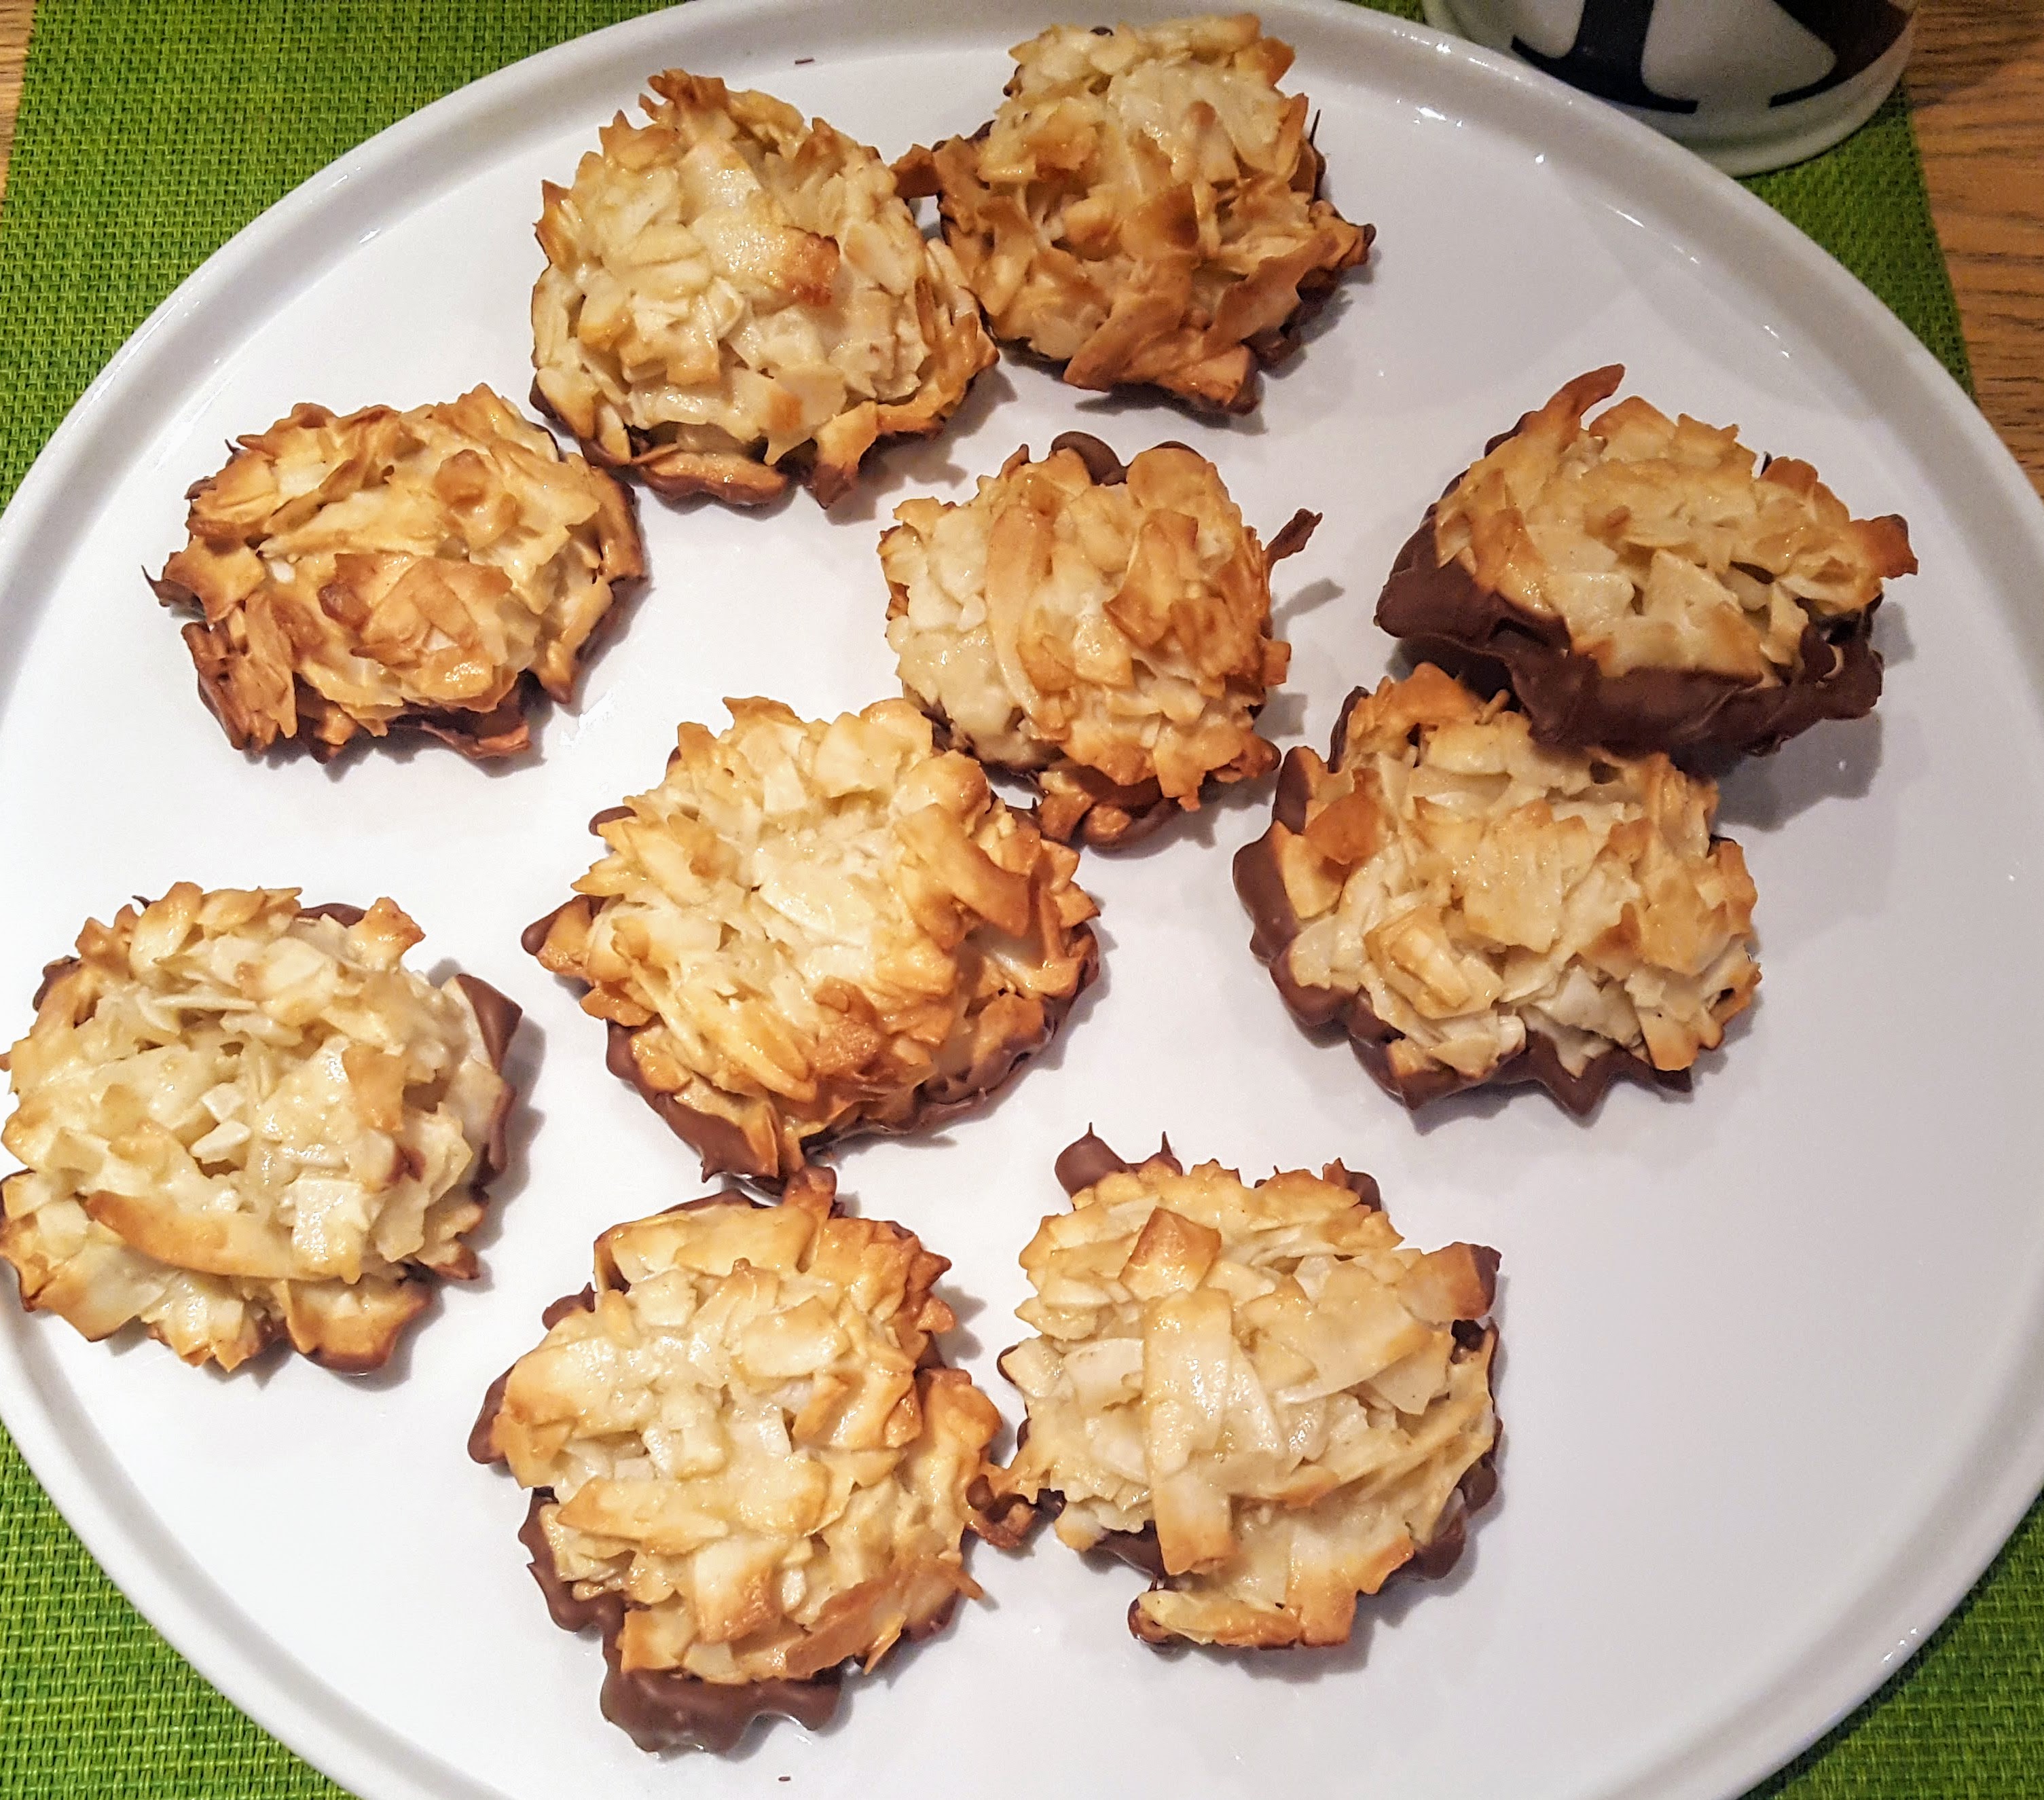
I first saw this recipe on Pumpernickelandrye, they looked far too good not to give them a try…………………oh and how I was right, they were delicious, light and very moreish. A very simple recipe that packs flavour and satisfaction. Perfect with a cuppa. (or as my boyfriend says ‘perfect on their own too!’ lol!)
They are more like a biscuit or cookie with a little crunch.
Makes 12
80g Granulated Sugar
3 tbsp plain flour
1/4 tsp salt
200g shredded coconut
3 egg whites
1 tsp almond extract
100g chocolate chips


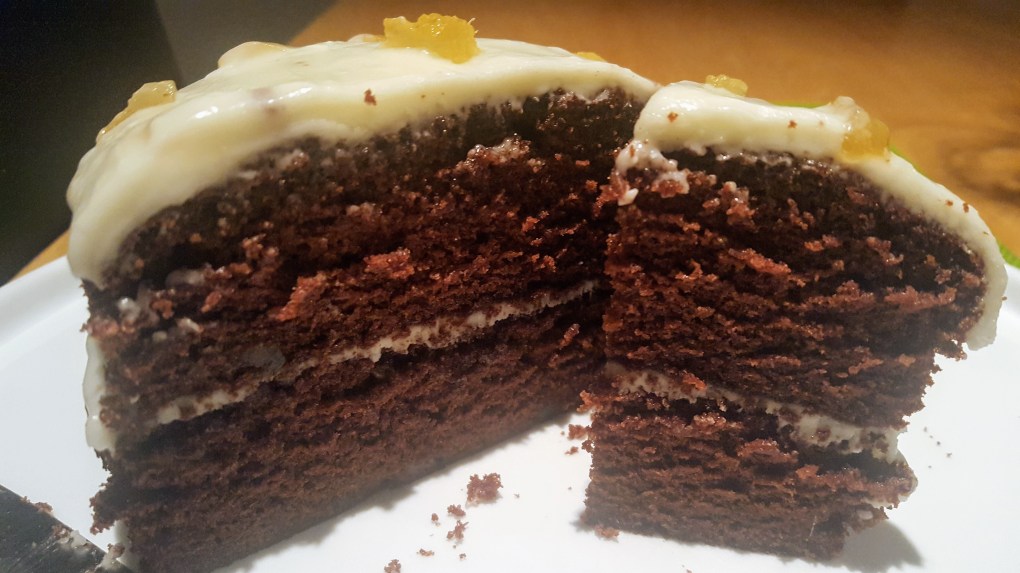

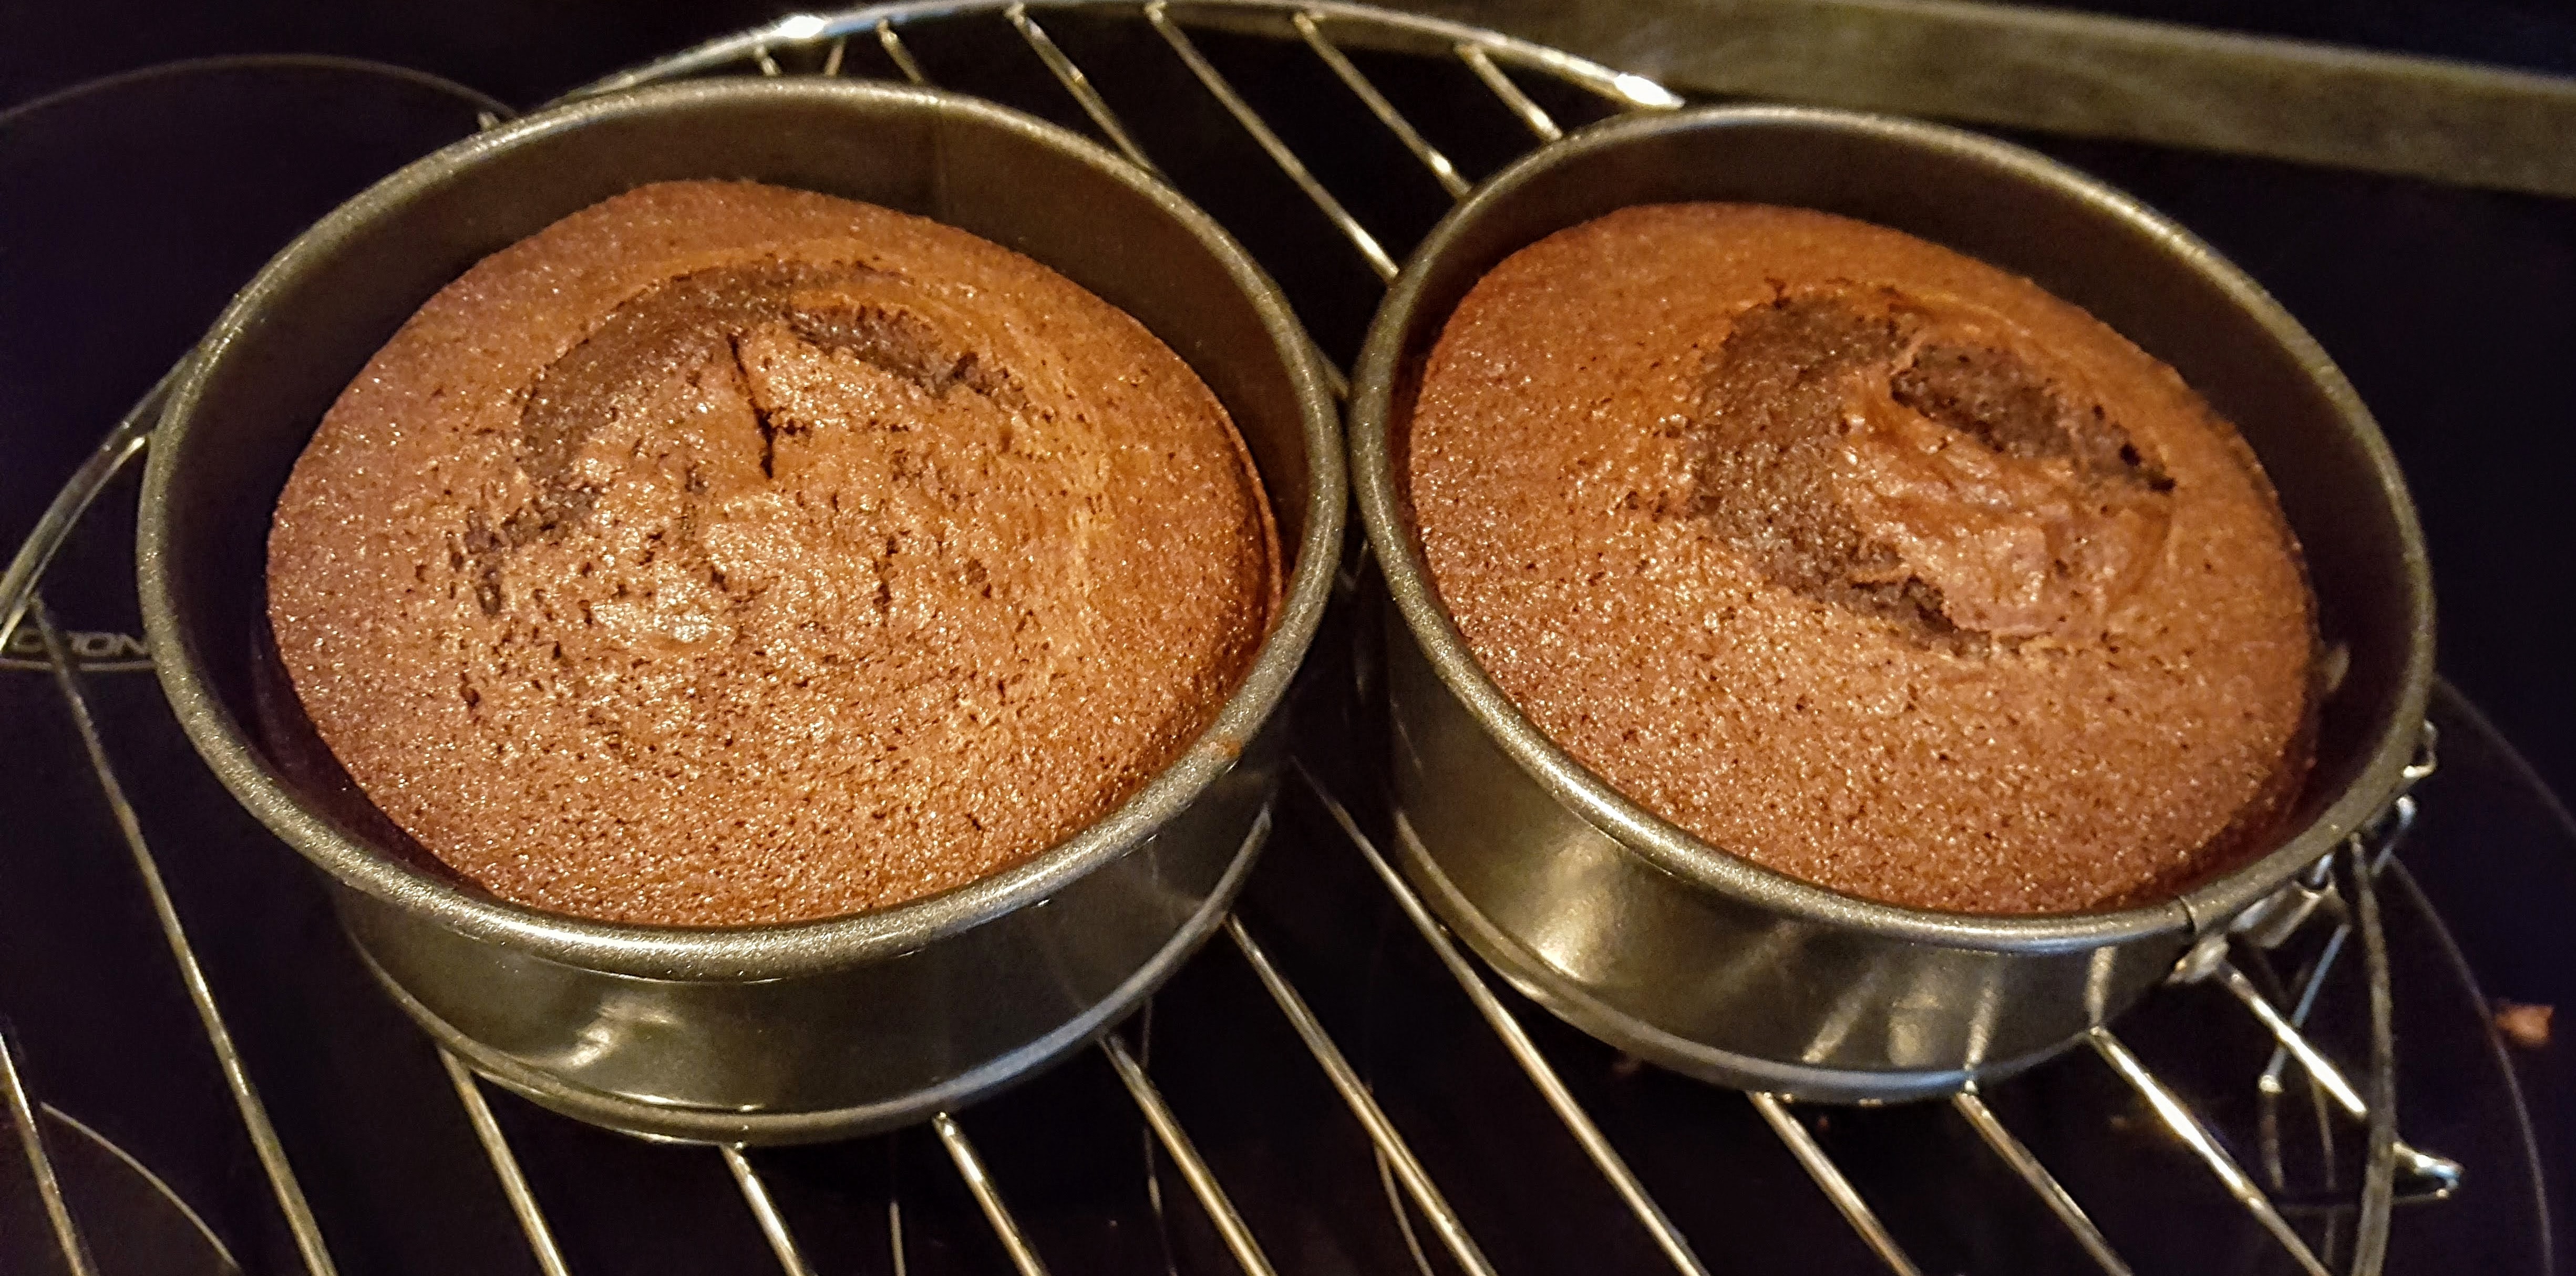
I wanted to make a ginger cake but came across this recipe from Mary Berry that added cocoa powder, so I decided to give it a try. As there was only 2 of us I made a mini version. The combination of Chocolate and Ginger is just so moreish!
Serves 4 (double quantities for a 20″ size cake)
100g butter at room temperature
25g Cocoa powder
2 tbsp semi skimmed milk
2 medium eggs
90g self raising flour
1 tsp baking powder
1 tsp ground ginger
125 g caster sugar
1 tsp stem ginger
For the topping and filling:-
115g icing sugar
60g butter at room temperature
1 tbsp of stem ginger syrup
1 tsp semi skimmed milk
1 tsp of Stem ginger bits for topping.


I know right!….low calorie doughnuts! O.M.G! Who knew? These are inspired by Tom Kerridge, I just needed to give these a go after seeing him bake these on TV, I have to say they are amazing, the flavour is fabulous and they are extremely light and fluffy too. At ONLY 120 CALORIES per Doughnut……..why would you not?? I have to say I was in heaven this afternoon……my fav Sunday afternoon treat….Fresh Coffee & Doughnuts! (no guilt)
Makes 6
250g Self Raising flour
180ml milk – semi-skimmed
25g butter
2 tbsp sugar
1 tsp baking powder
1/2 tsp cinnamon
1/2 tsp chinese five spice
1/2 tsp dried yeast
1 egg beaten
1 tsp vanilla extract


Then………devour………..and don’t feel guilty about it! Happy Days!


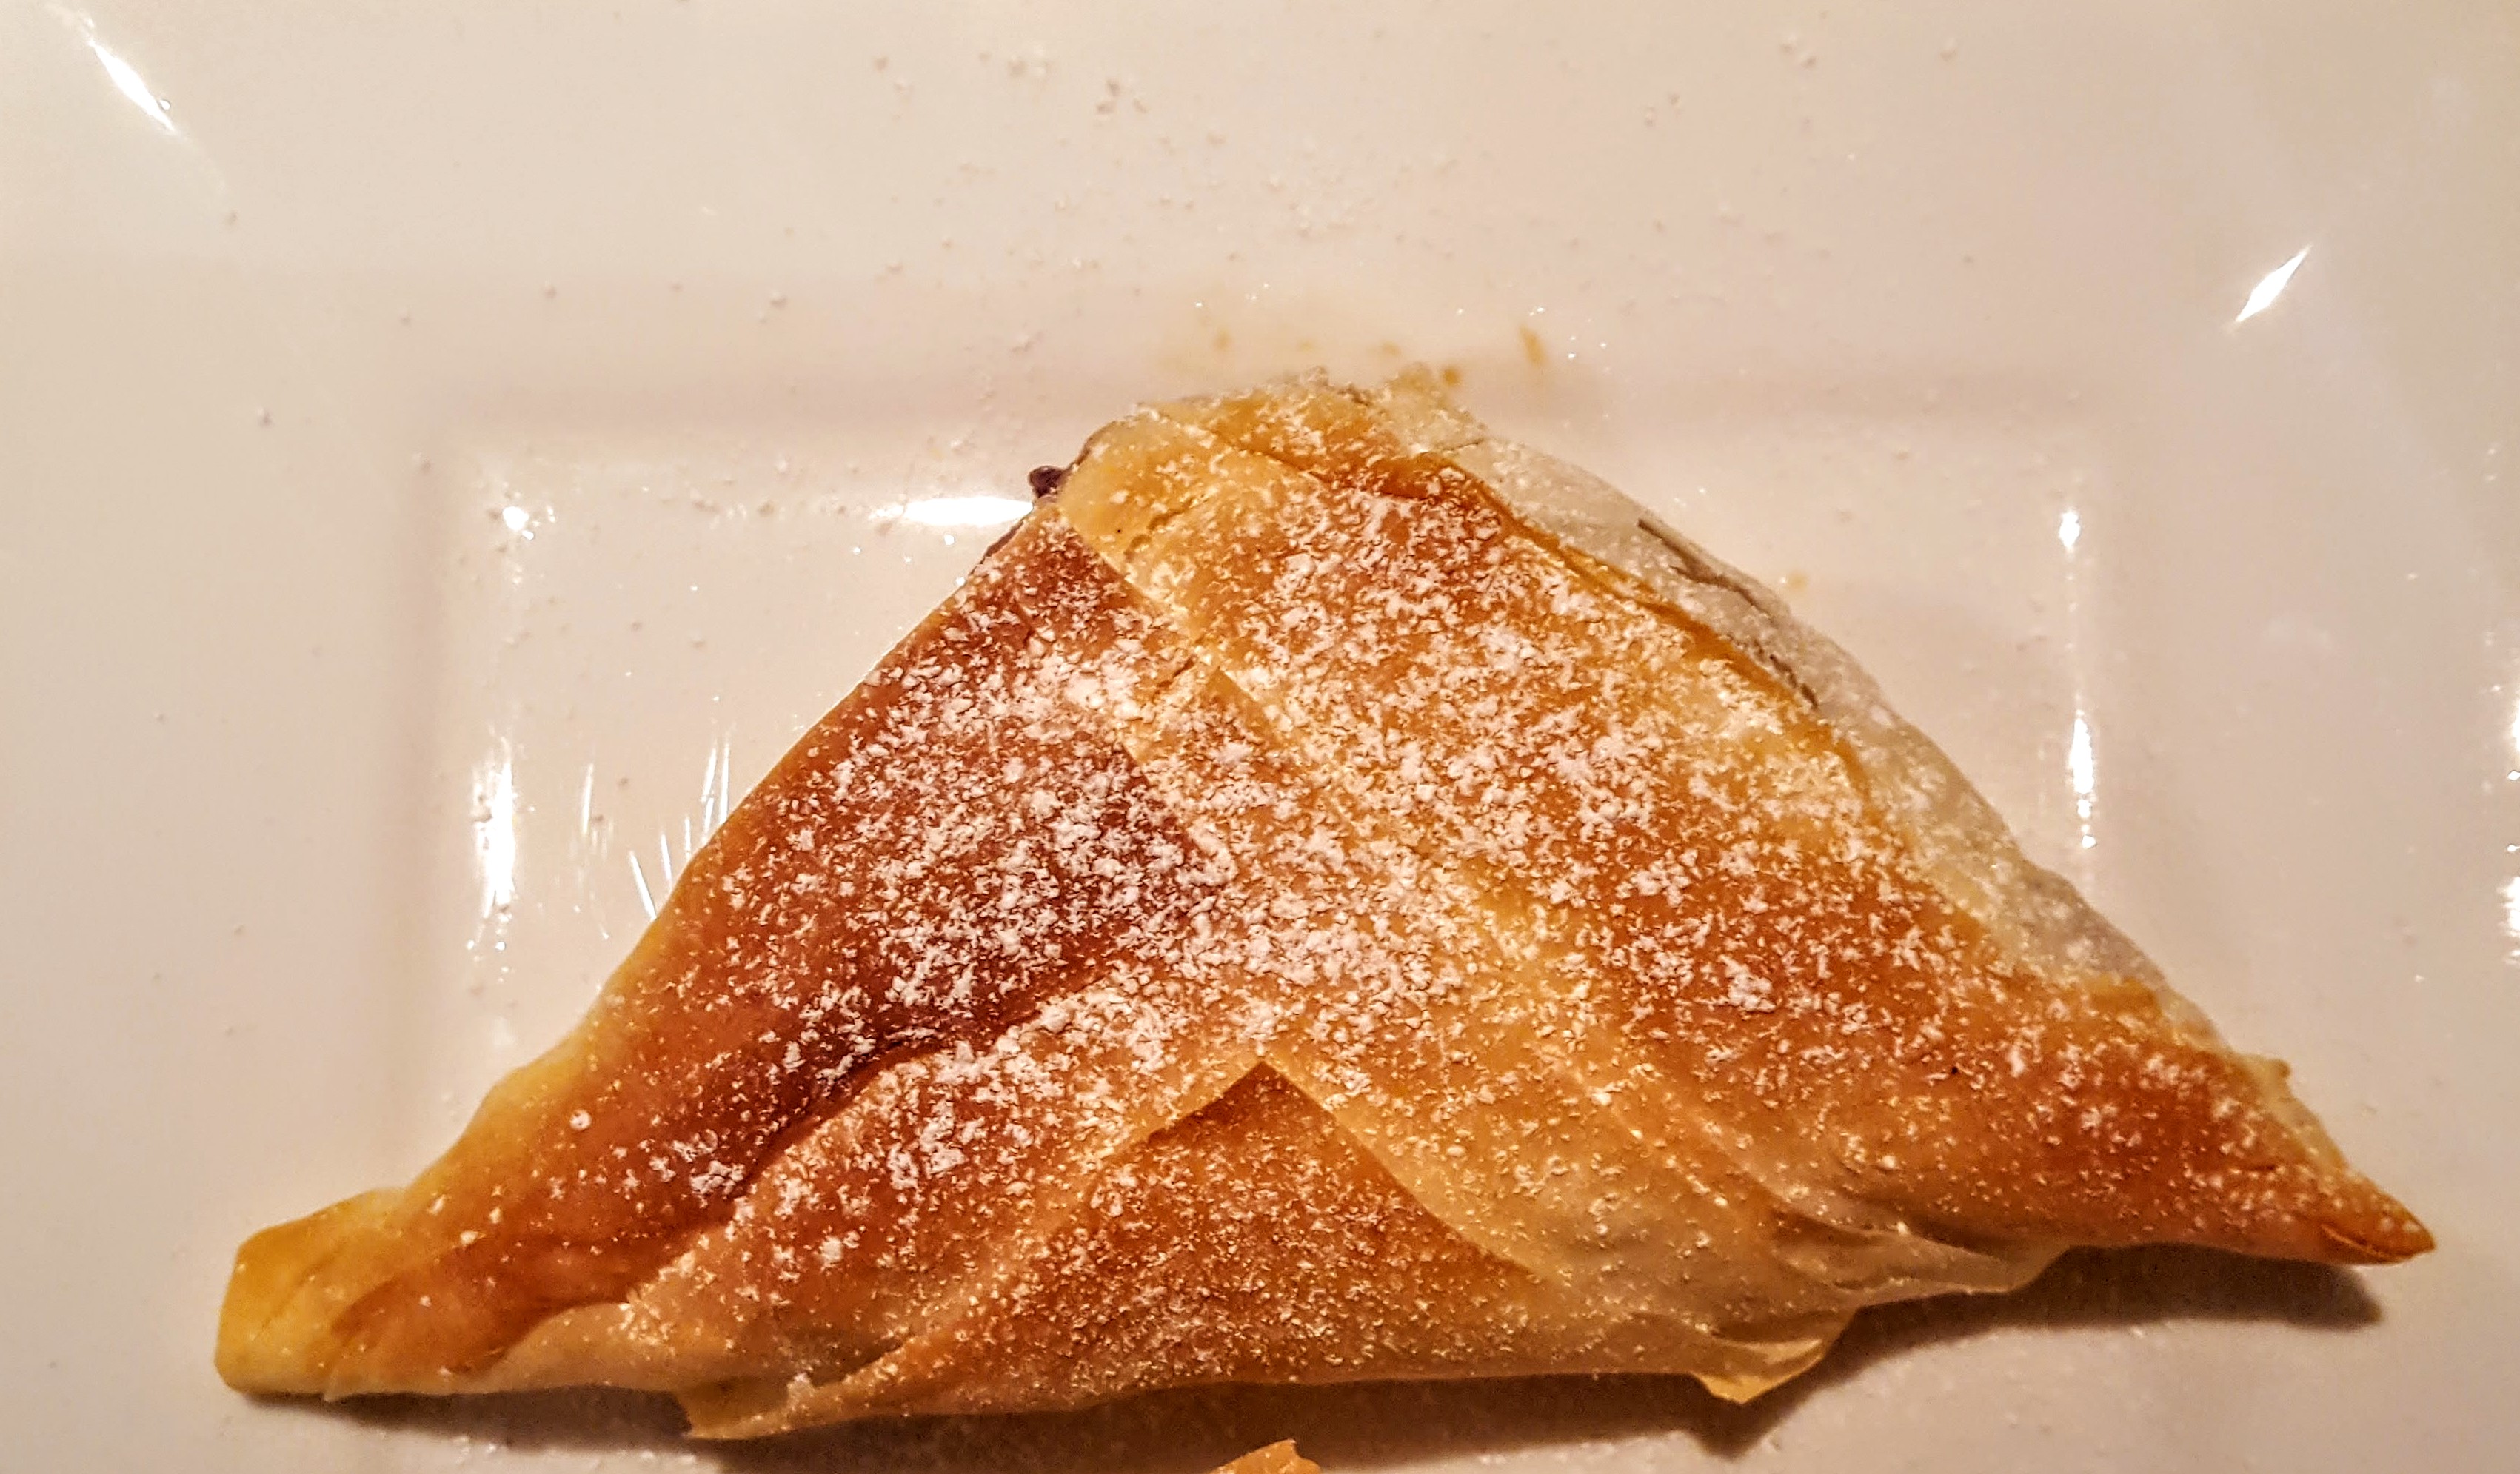
I had some left over apples and filo in my kitchen so it was obvious it had to be little apple parcels. These were so tasty and so quick to cook using my little crisper plate……..oh did I tell you how much I love this little crisper? lol!
Makes 4
2 Granny smith apples – chopped into small chunks
3 sheets of filo pastry
1 beaten egg for wash
small handful of raisins
70g light brown caster sugar
2 tsp ground cinnamon
Fry oil – light
2 tbsps Icing sugar to finish


You can of course bake these in a 190 deg oven for about 20 minutes.


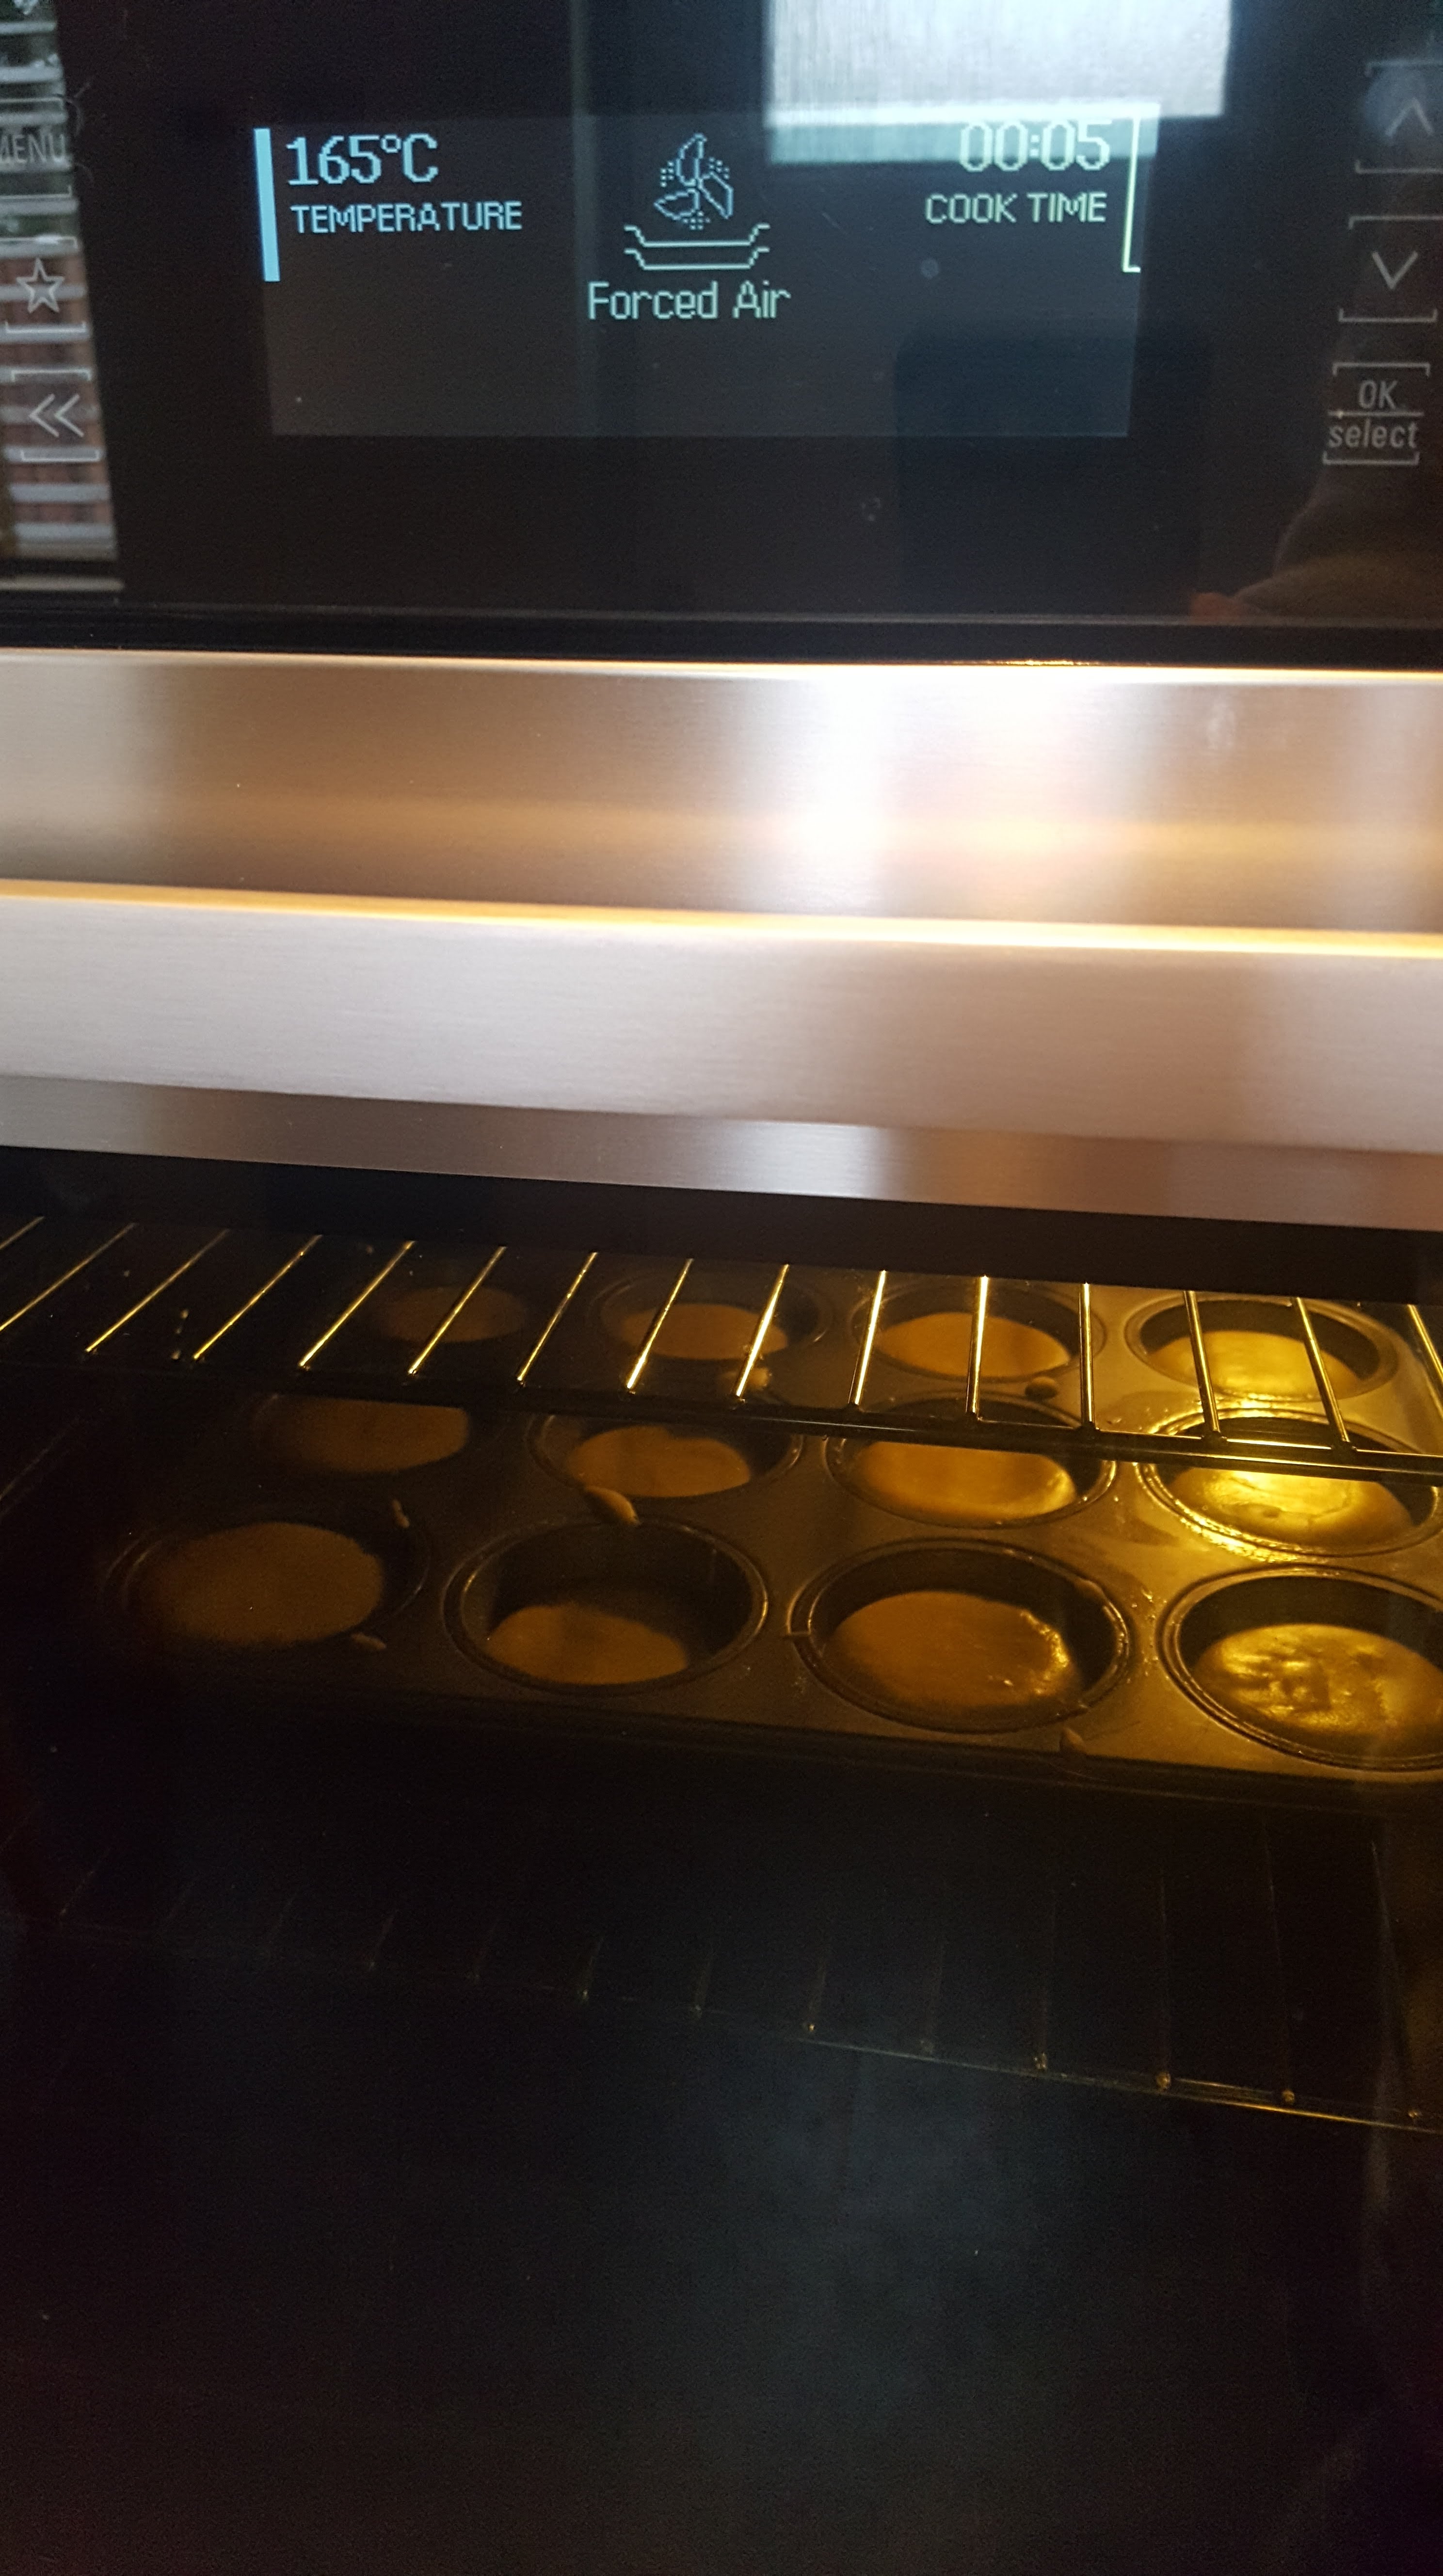
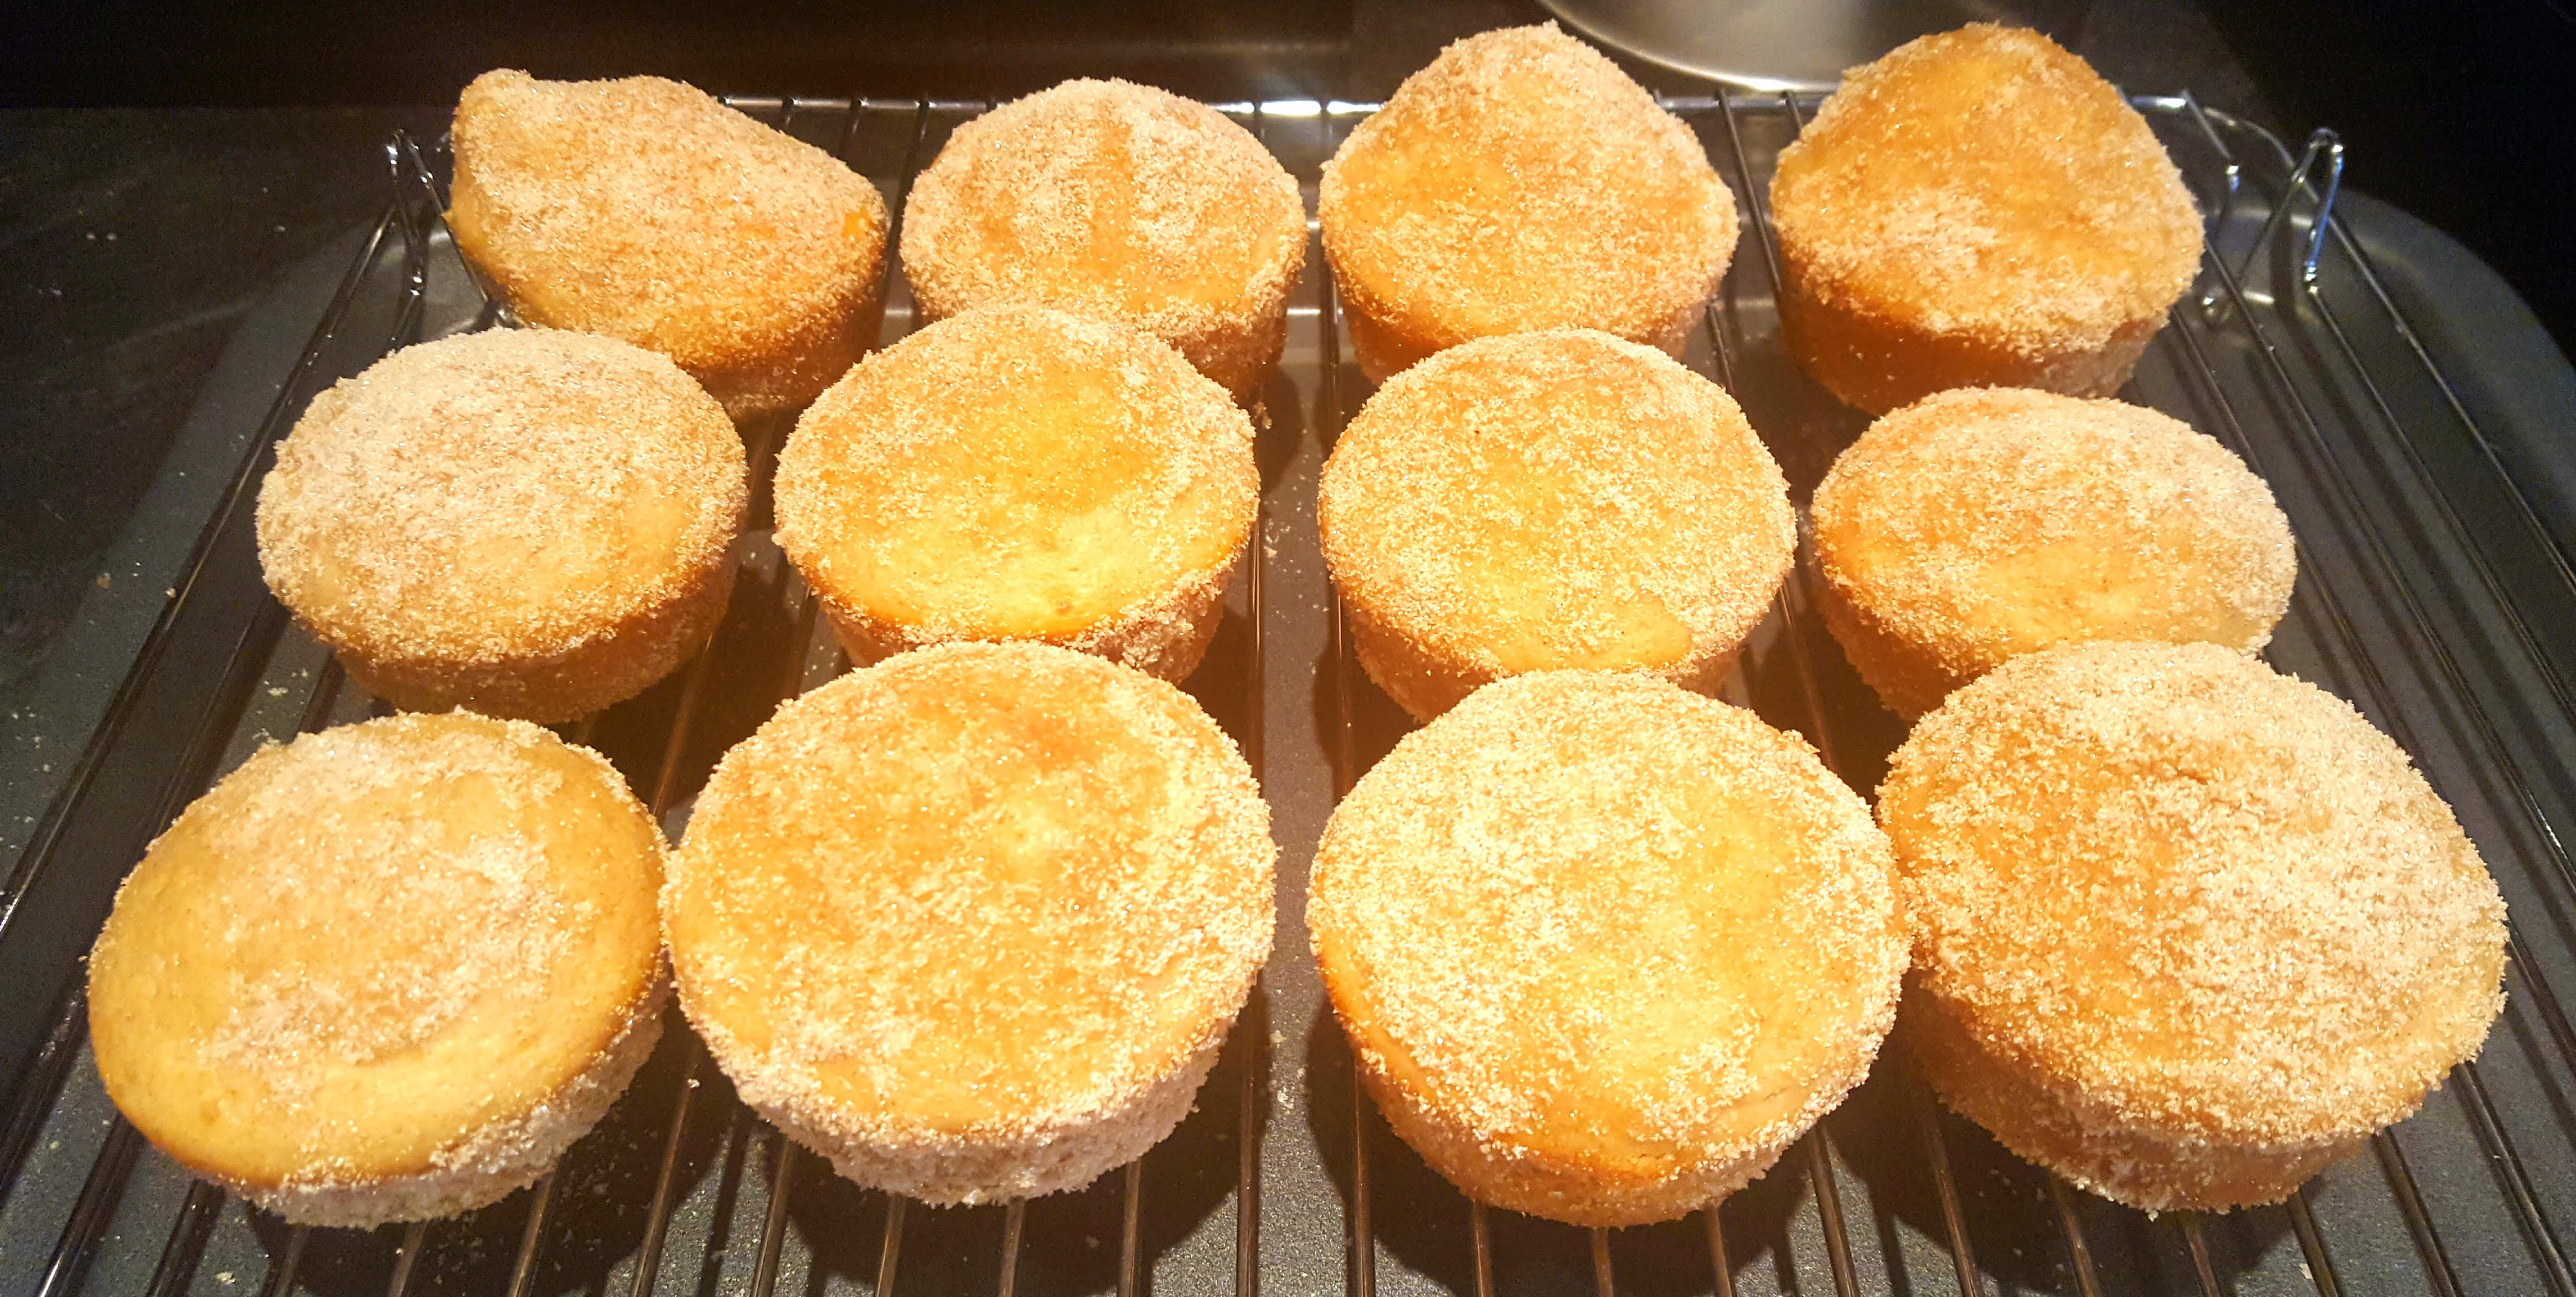
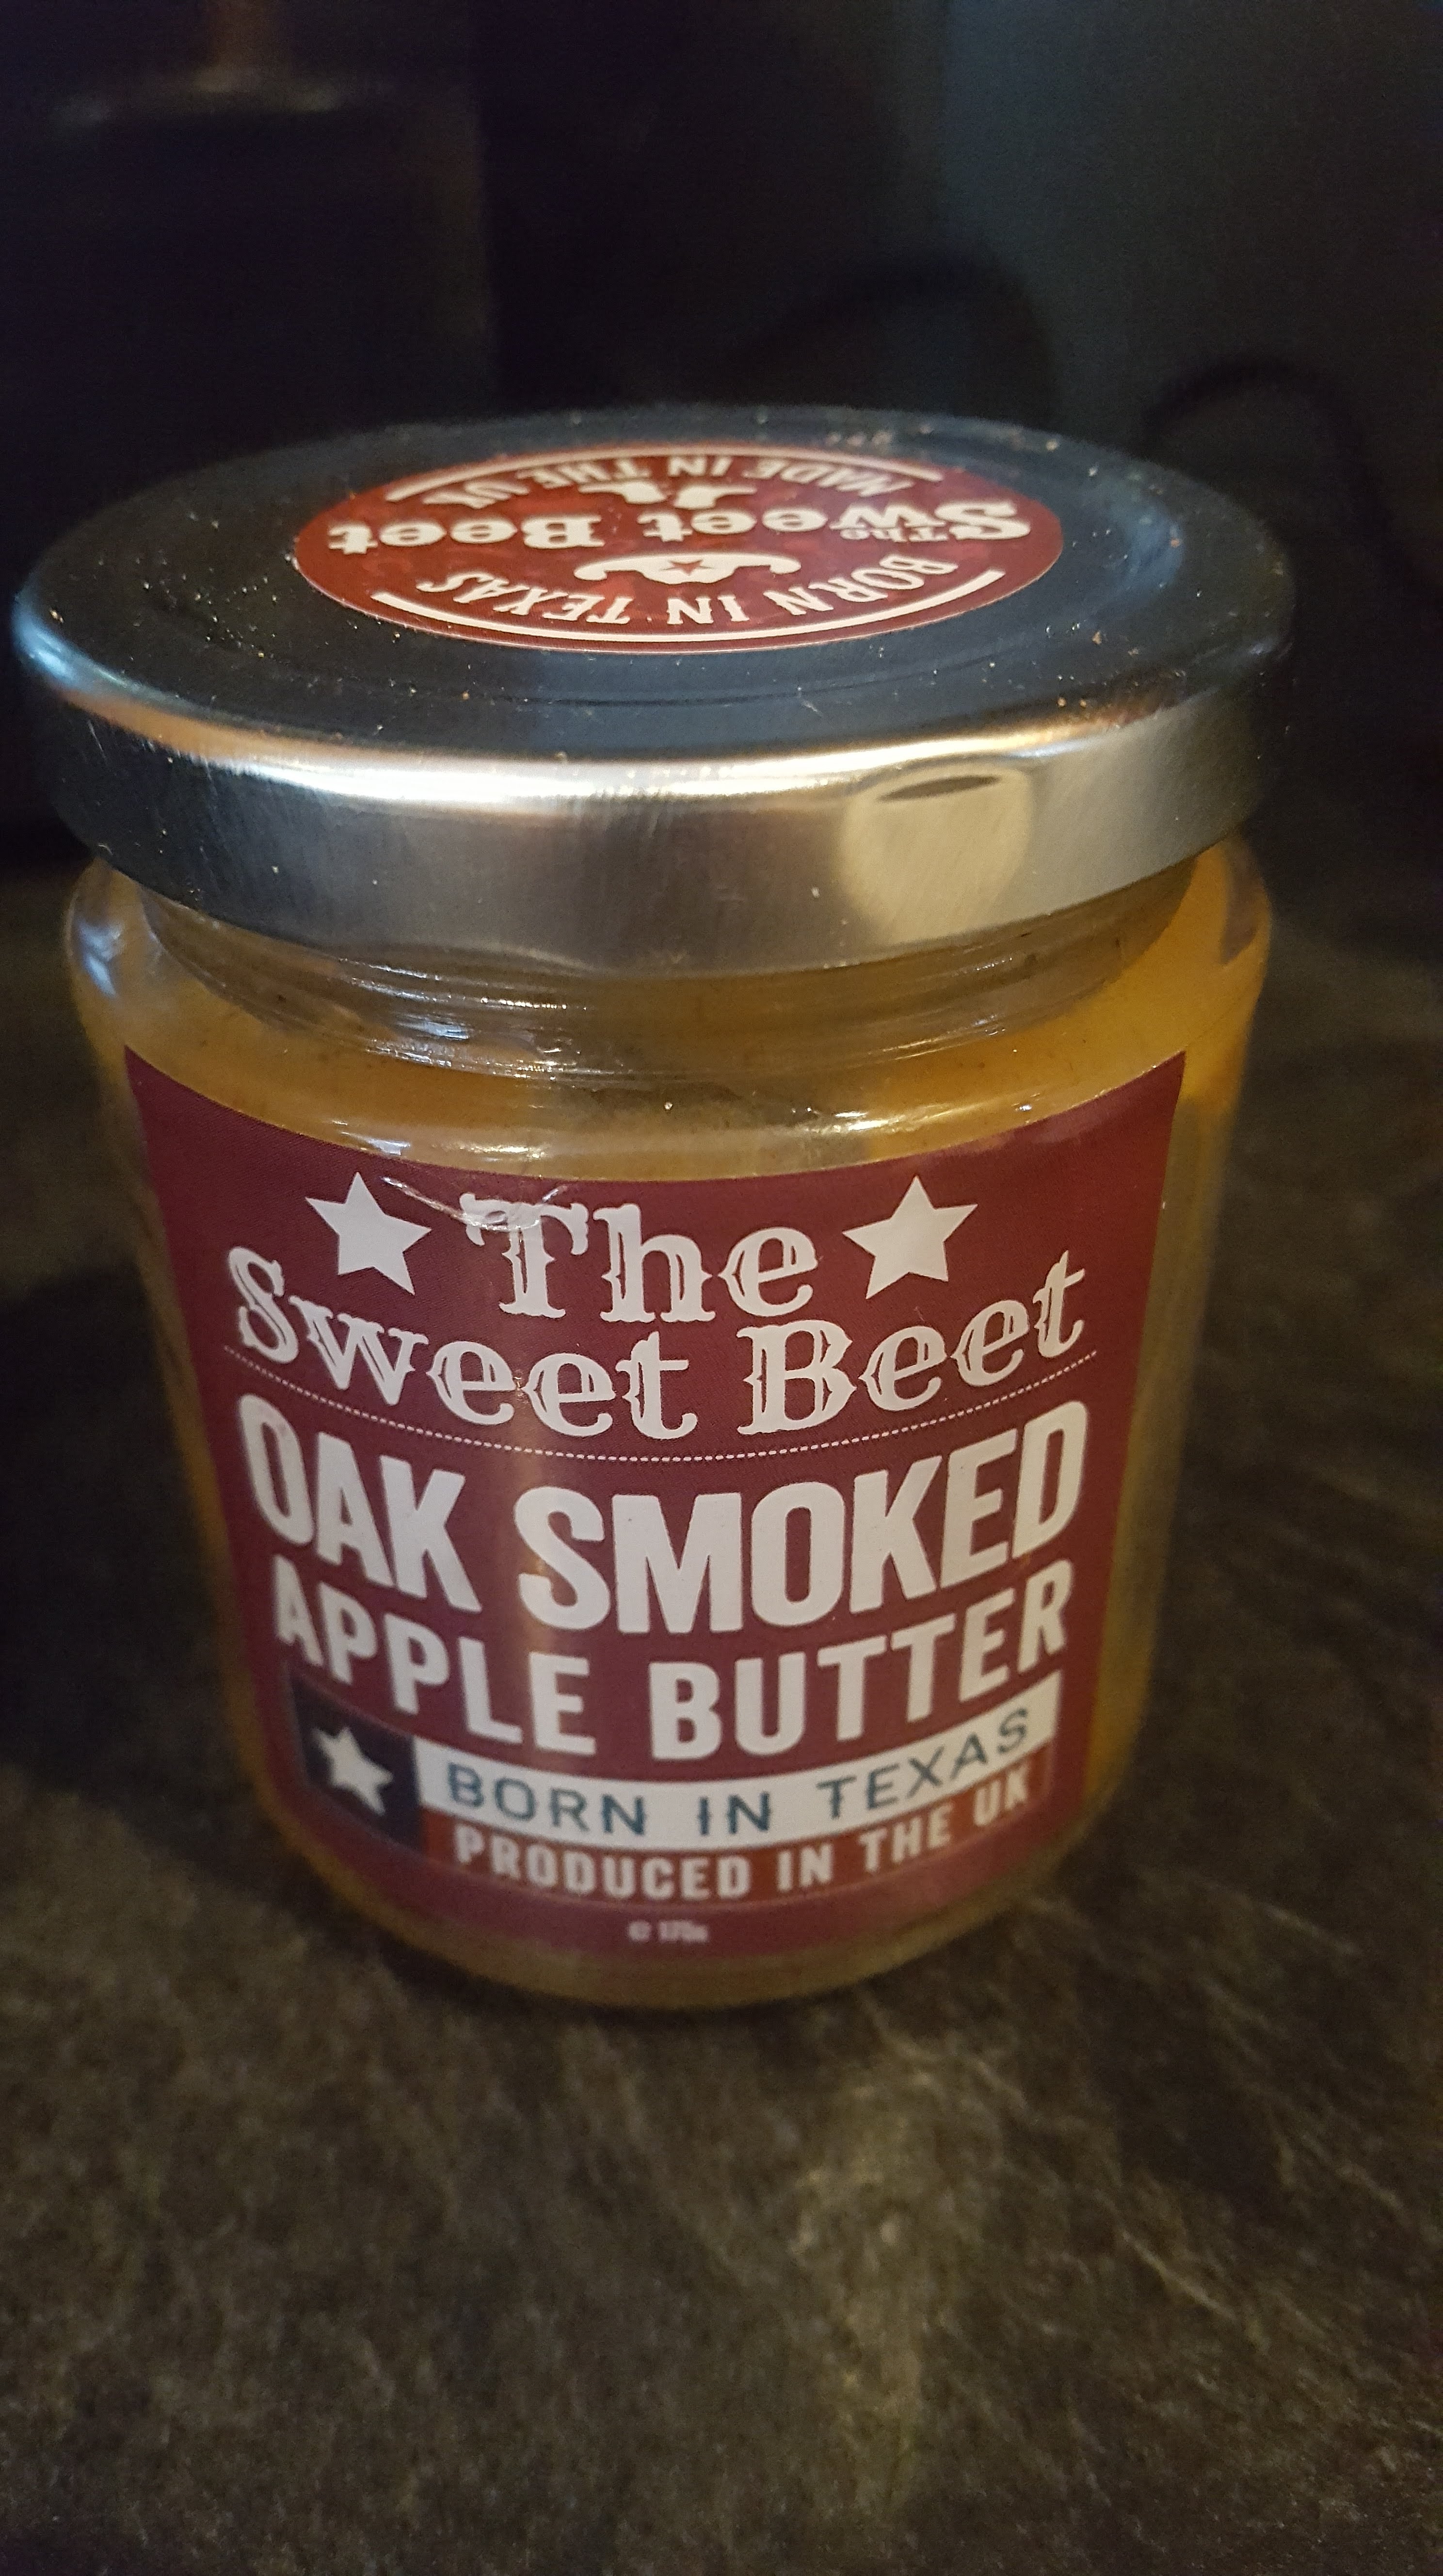
I recently bought this little jar of Oak Smoked Apple Butter from The Sweet Beet Company, I decided to give doughnut muffins a go……..oh WOW! So tasty and different, another great food find for my recipe book.
Makes 12
For the Muffins
260g plain flour
32g Caster Sugar
2 tsp baking powder
1 tsp salt
4 tbsp oak smoked apple butter
1 tsp cinnamon
2 eggs beaten
100ml milk
1 tsp vanilla extract
1 tbsp melted butter
For the Topping
1/4 cup of caster sugar
1/4 cup light brown sugar
1 tbsp cinnamon
1 egg beaten for wash


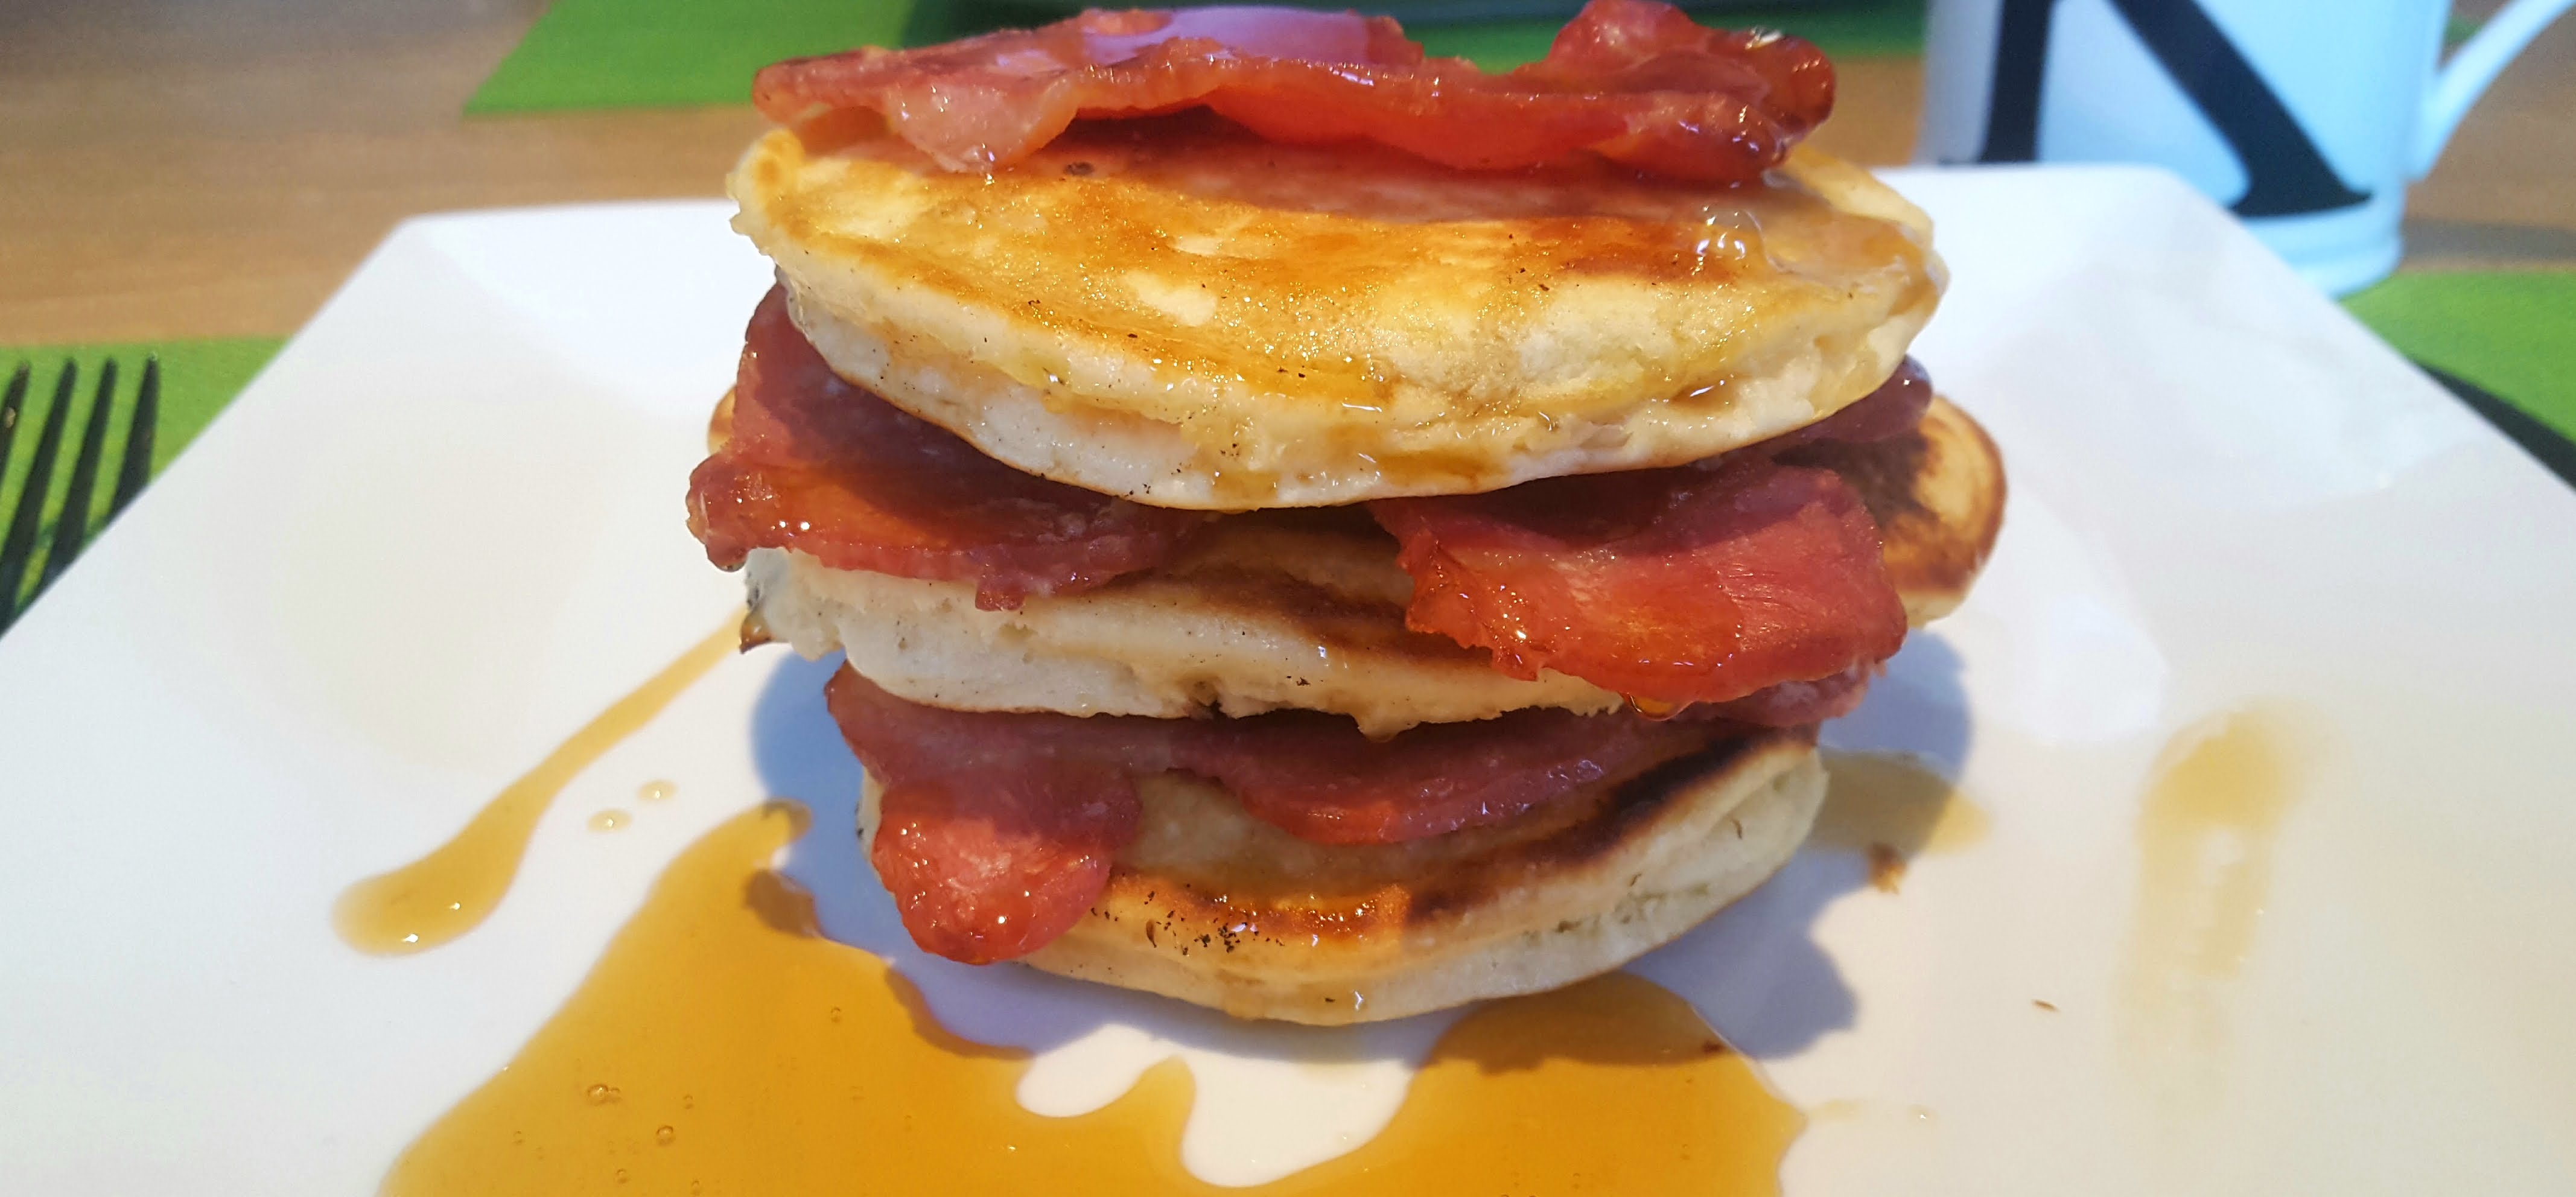
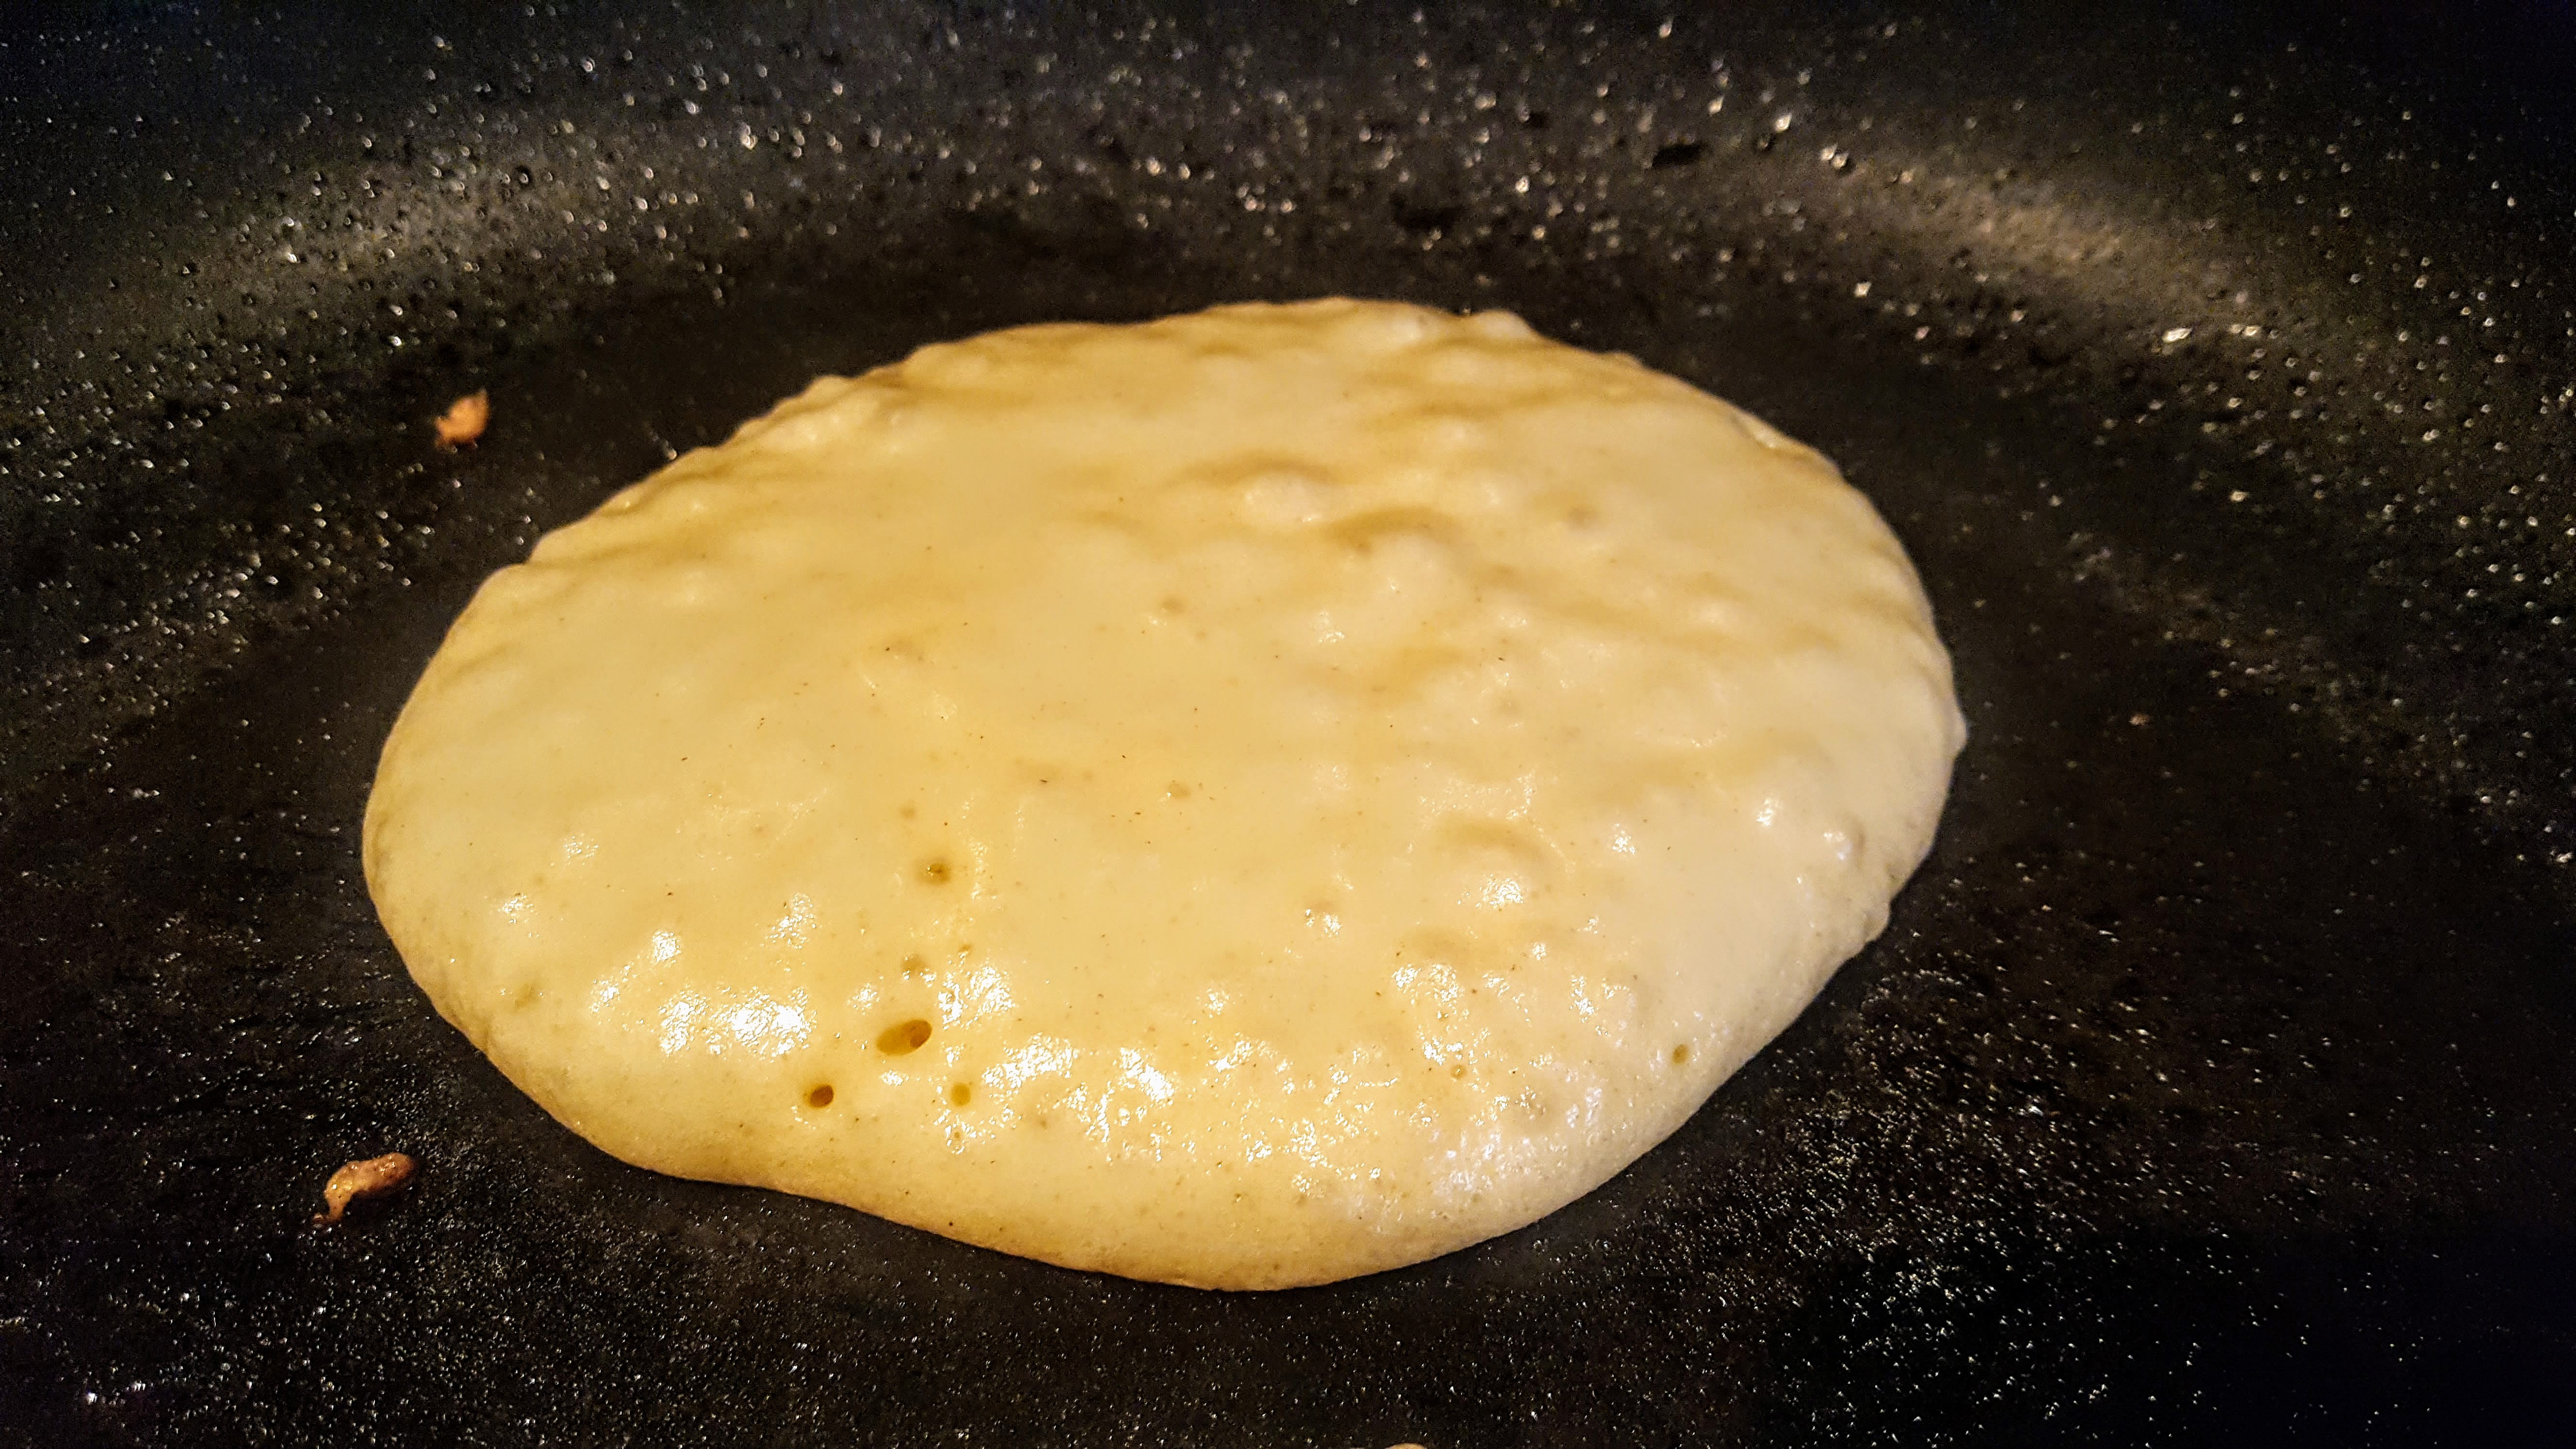
In our house Sunday is always Brunch as we do like a lay in! So today was Pancakes, Bacon and Maple Syrup…..oh so yummy! If I do say so myself, these are the best and most fluffiest pancakes I’ve ever cooked……a full proof recipe that always works.
Makes 8
250g Self Raising Flour
125g Caster Sugar
2 Beaten eggs
Pinch of salt
Milk to mix – about 50ml


I made this for my mum coming round for dinner this weekend, was looking for something light and refreshing, it totally hit the spot. I served it with cream but you could also serve custard which I think would be nice.
The orange rind gives this cake a fragrant hint of citrus while the almond flour makes it moist and dense, so its virtually melt in the mouth. Perfect with an afternoon cuppa.
Used a 20cm cake tin.
220g icing sugar (leave a little for decoration at end)
90g plain flour
90g Almond flour
Salt to taste
1/2 tsp baking powder
6 egg whites
115 g soft butter
Rind of 1 orange


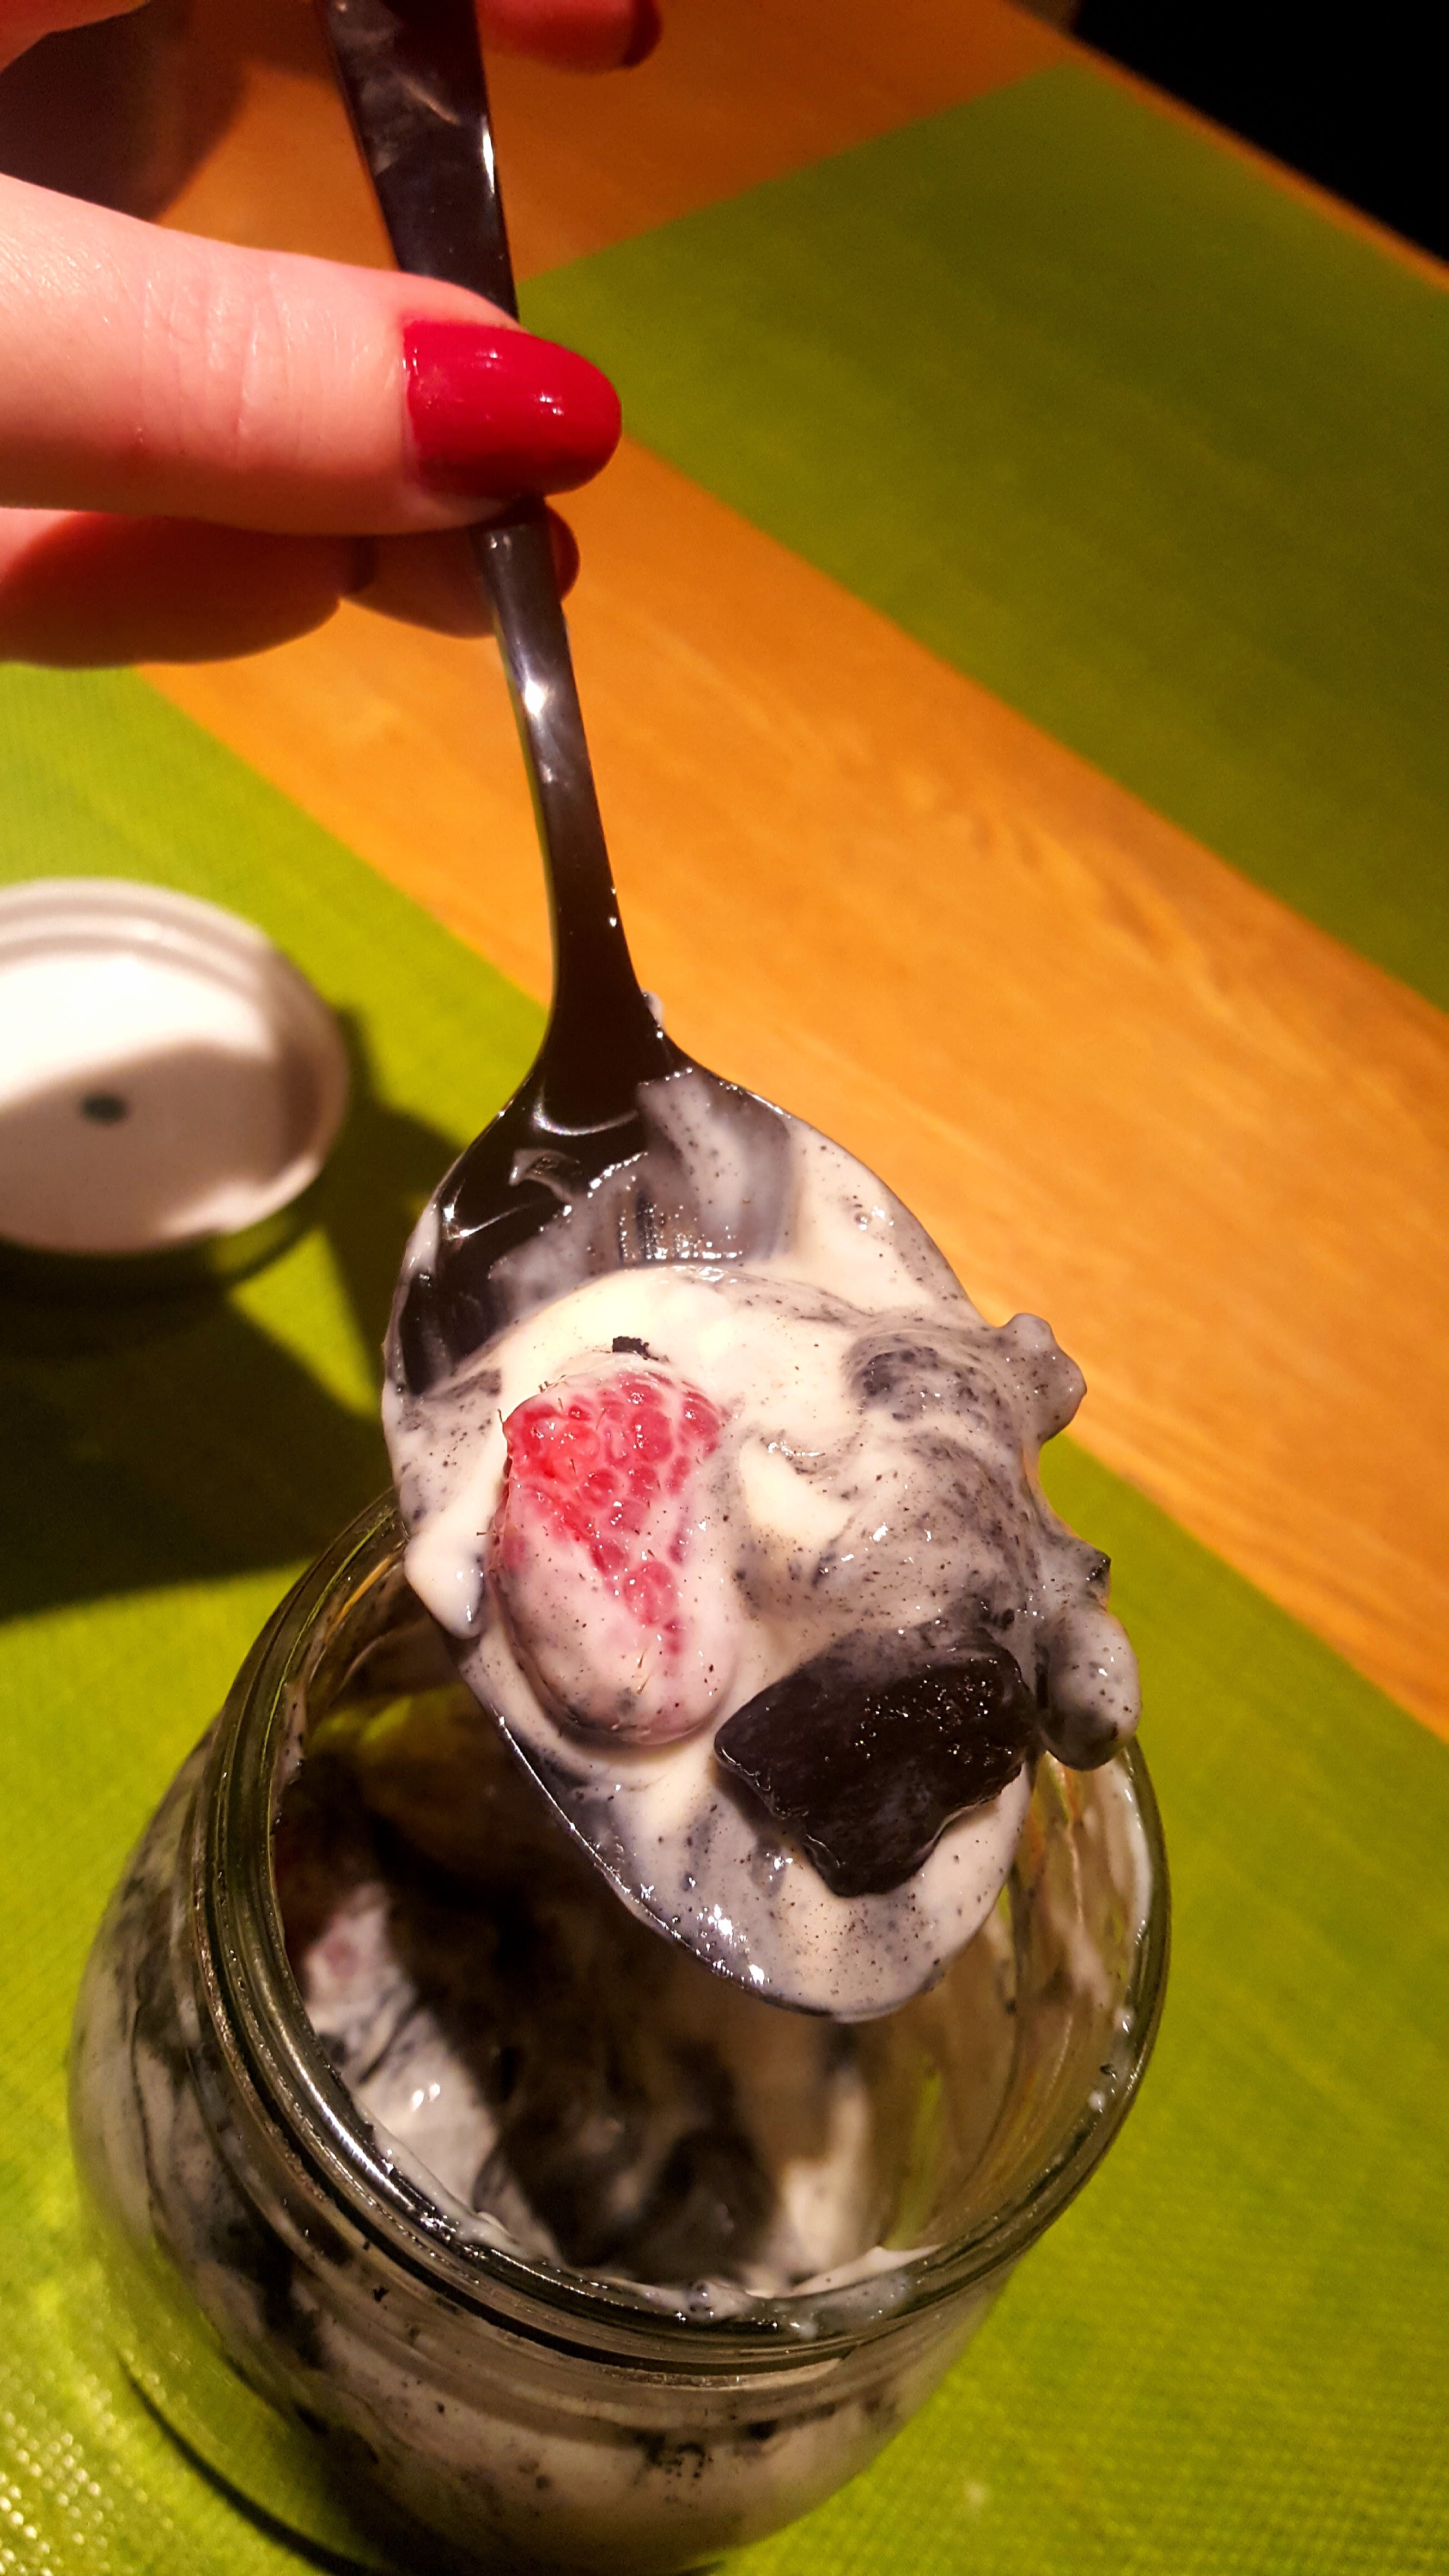
So….my planning for New Year starts now….this year we have hired a lovely big house where all the family will gather. We always have a theme and this year it’s Gothic Style.
So my experimenting has started, firstly with meringues…..oh they look amazing. I purchased some Activated Black Charcoal Powder to experiment with, brilliant stuff.
I used my Meringues recipe, which has always worked, and I added about 4 heaped tsp of charcoal powder to get a really dark colour.
I crushed meringues up once baked then 1 layer in jar of meringue and fresh raspberries then spoon some vanilla yoghurt in, then a second layer of meringue and raspberries then yoghurt then top with a final layer of meringue and raspberry. Finish off with some raspberry sauce. Oh so yummy!


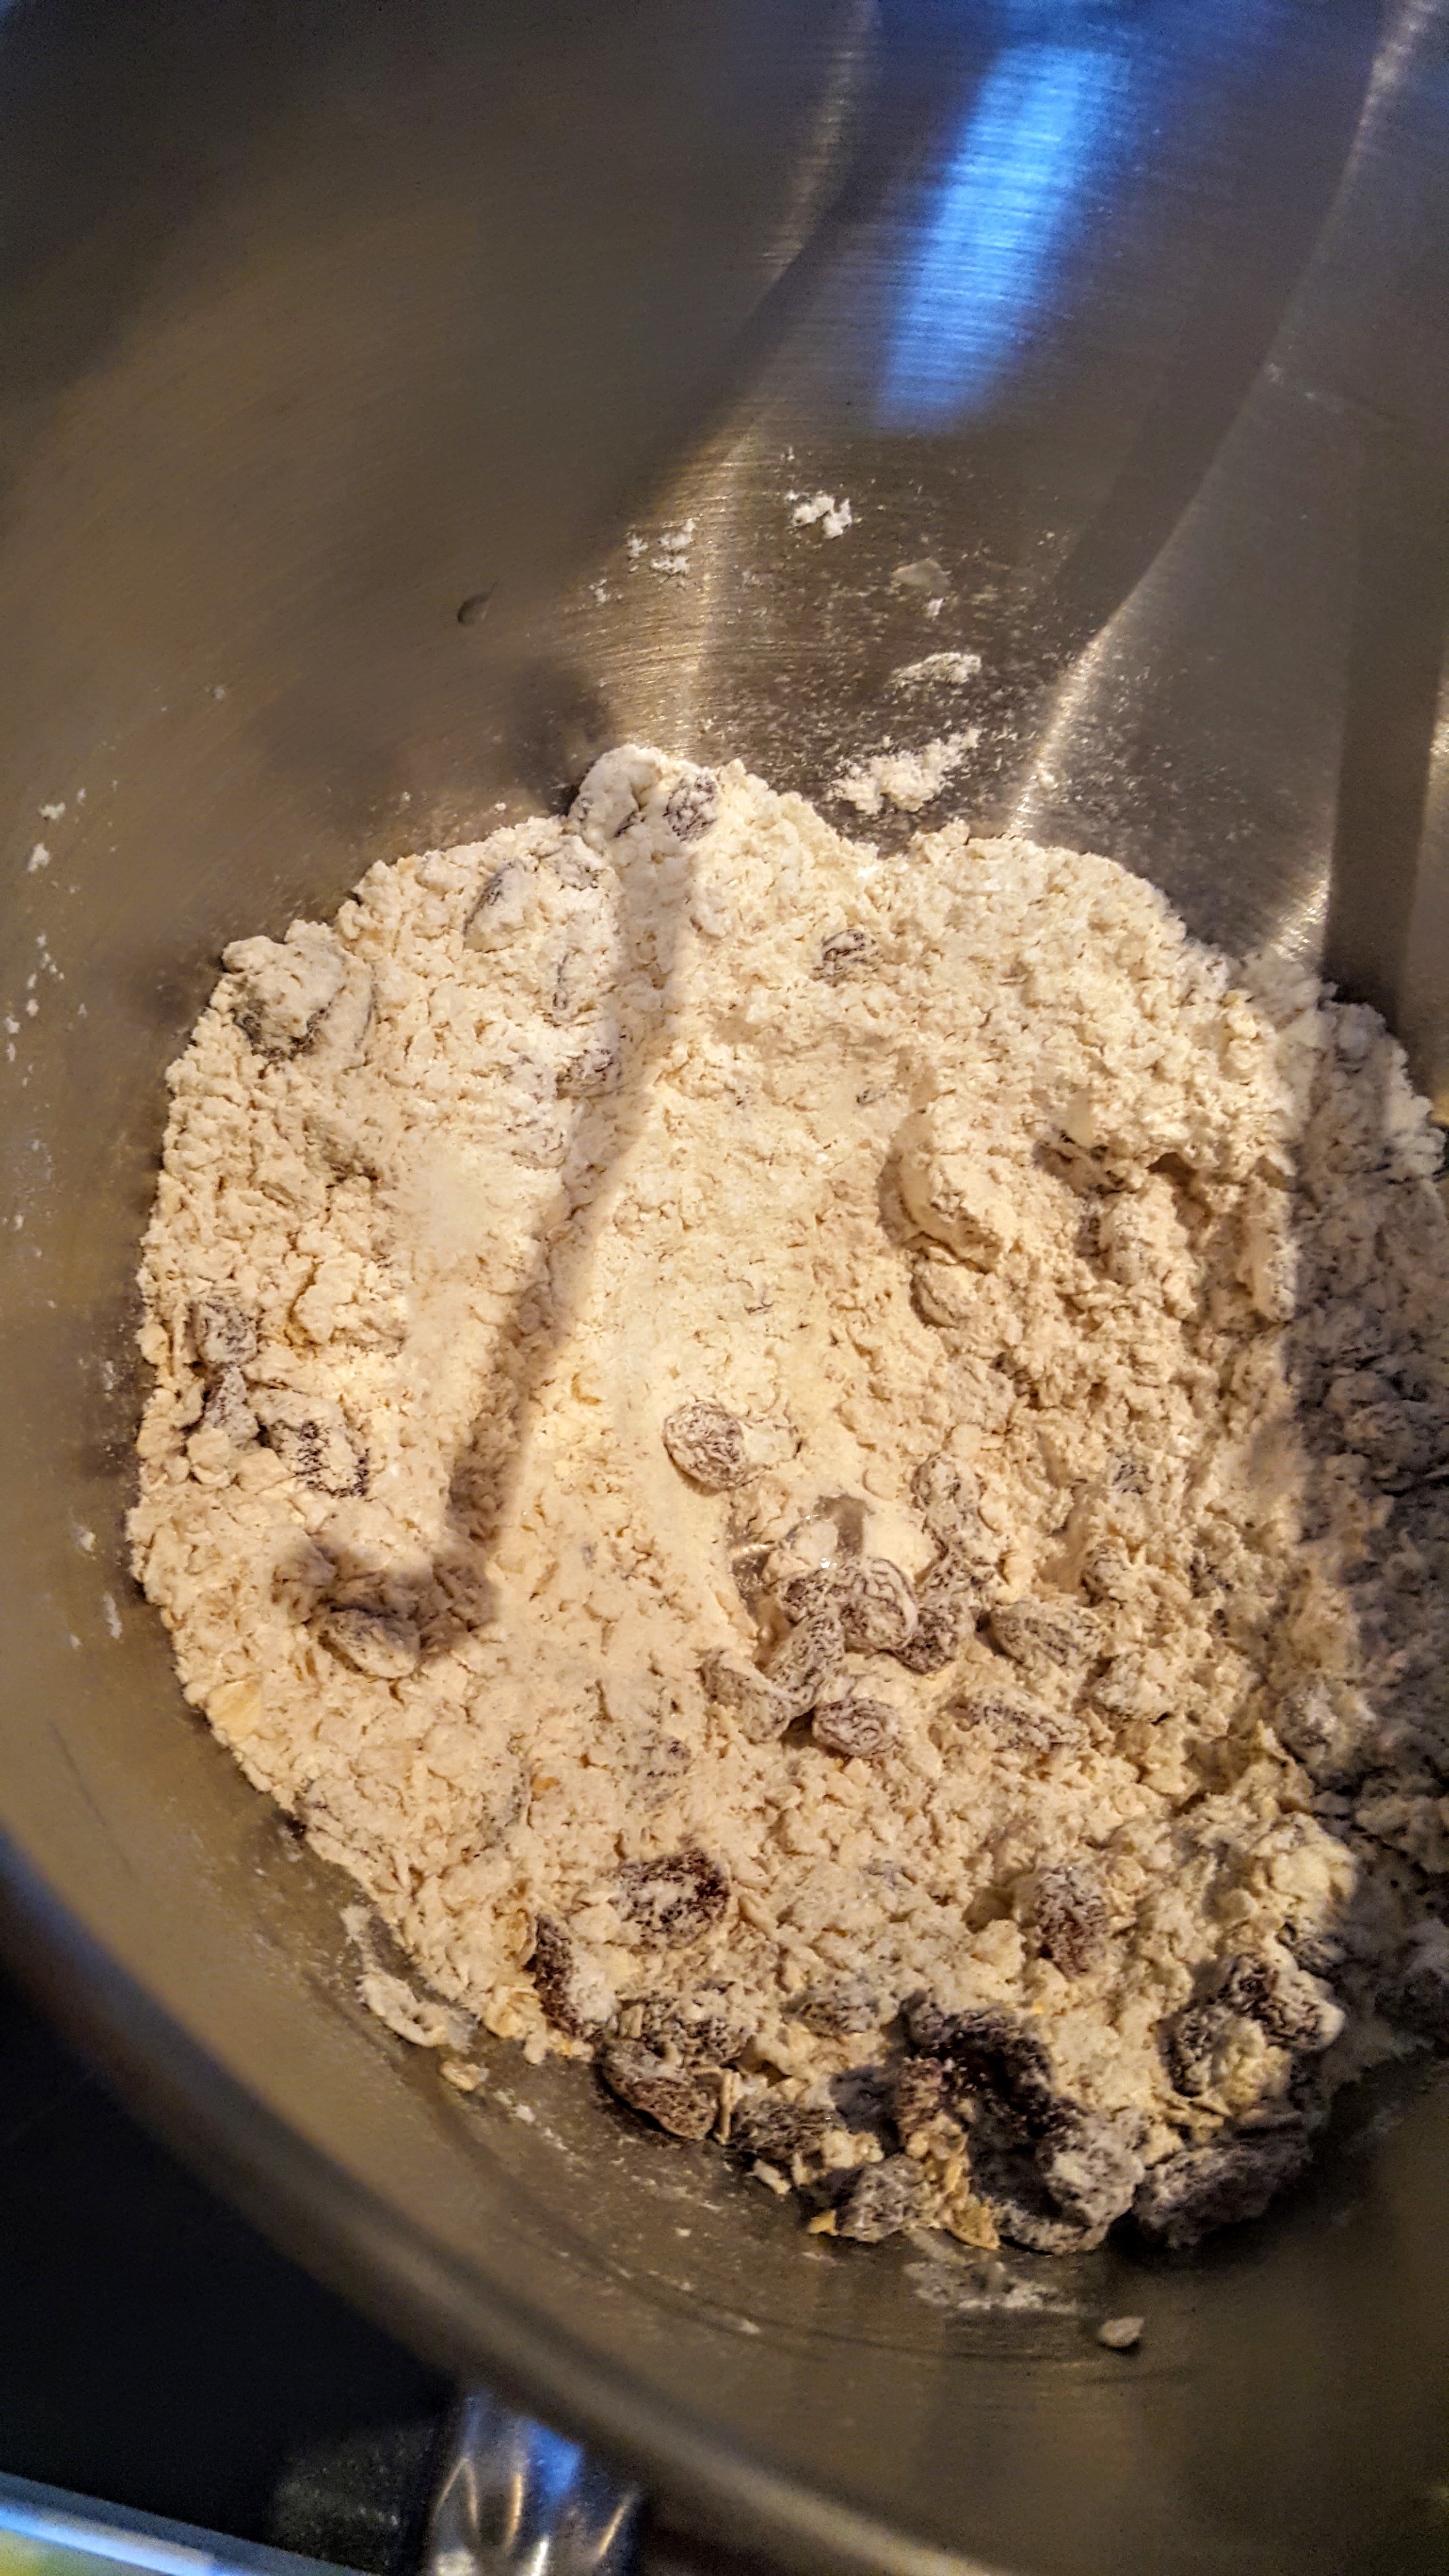
Oh I do love the Autumn food, warm, comforting, delicious and homemade of course! You will love these traditional Scottish Scones as they come with history:-
Scones originated in Scotland, and Scottish scone recipes are the best in the world. (in my opinion…lol)
The correct Scottish pronunciation is ‘skon’ which rhymes with ‘gone’, and NOT ‘skoan’ which is the English adaptation of the word.
Originally a type of flat ‘cake’, made from oats or barley meal and cooked on an open griddle or in the oven, scones have been popular in Scotland for centuries.
Typically you just have them with butter, and loads of…yummy! However, should you wish to indulge you can of course have your favourite flavour of jam too. My preference is butter, always!

Makes 8 individual scones
120g of Self Raising Flour
60g Melted Butter
60g Rolled Oats – (Scotts of course)
40g Caster Sugar
2 tsp baking powder
1/2 tsp salt
50g sultanas
1 egg beaten
50ml milk


Oh yes, its that time of year when the apple, cinnamon and warm comfort food come out. Thought I’d try a warming pastry using my little crisper, amazing, this would normally take about 40 minutes in an traditional oven, but on the crisper……just 16 minutes…YES! 16 minutes. Amazing.
Makes 6-8 servings
1 pre rolled puff pastry (all butter)
3-4 apples
1 orange (peel only)
50g walnuts – chopped
50g pine nuts – chopped
1 tsp cinnamon powder
50g sultanas
50ml dark rum
50g light brown sugar
100g breadcrumbs
1 egg and 50ml milk for brushing
Icing sugar for decoration


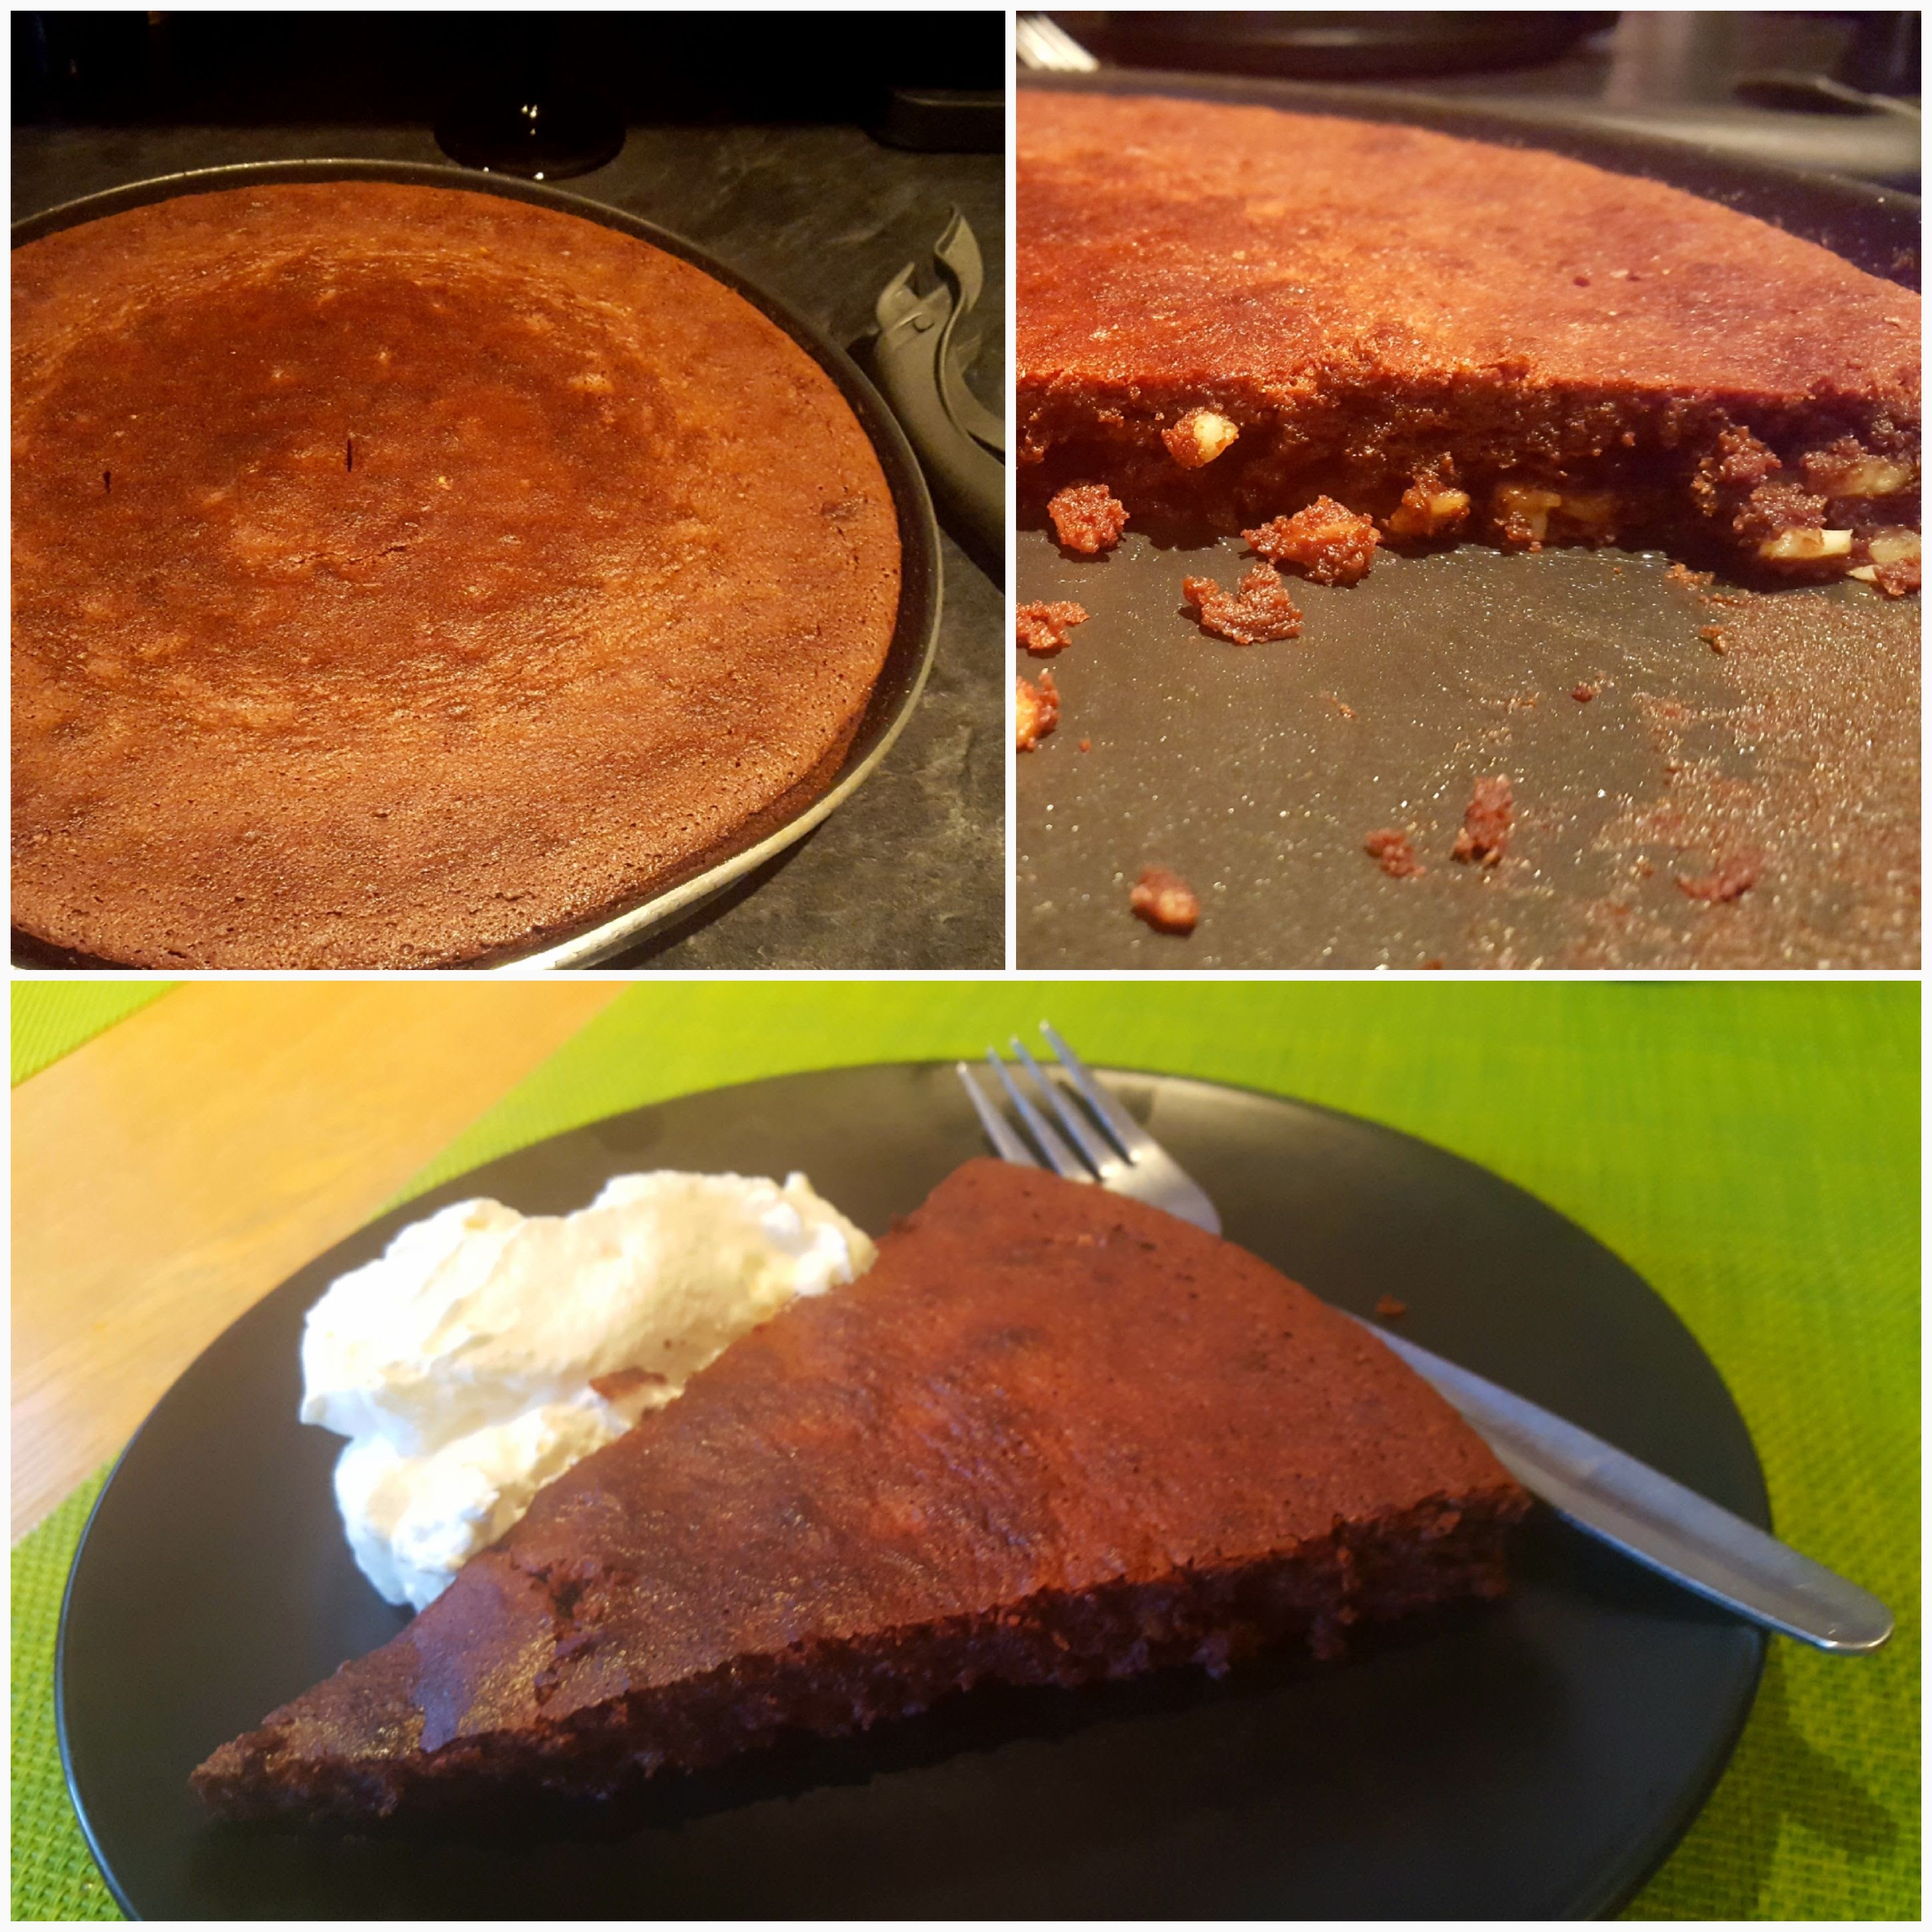
On deciding what to do next using my crisper plate, I thought I’ve not really tried a cake?? Would it work?? Only 1 way to find out………………………..results were fab, tasty and baked in 10 minutes…….revelation!
Serves 12-16
200g Dark Chocolate – Melted (I used 70% cocoa)
240g butter
45g Walnuts
45g Hazelnuts
45g Almonds
170g golden caster sugar
1 tbsp flour
4 eggs
1 tsp vanilla extract
pinch salt


I started watching Jamie Oliver’s new 5 Ingredient TV Show and liked the sound of the Almond Puff Pastry. Using my little magic Crisper Plate, thought I would give this a go.
All butter puff pastry
100g ground almonds or whole and blitz
Icing Sugar
2 eggs (1 for wash)
1 tbsp double cream

I visited the Loch Lomond Food Festival recently and purchased this amazing flavour pot from SA Sauces , not sure what to do with it, I visited their website and found this amazing idea. It was absolutely delicious and an excellent twist to the traditional victoria sponge.
Makes 1 cake


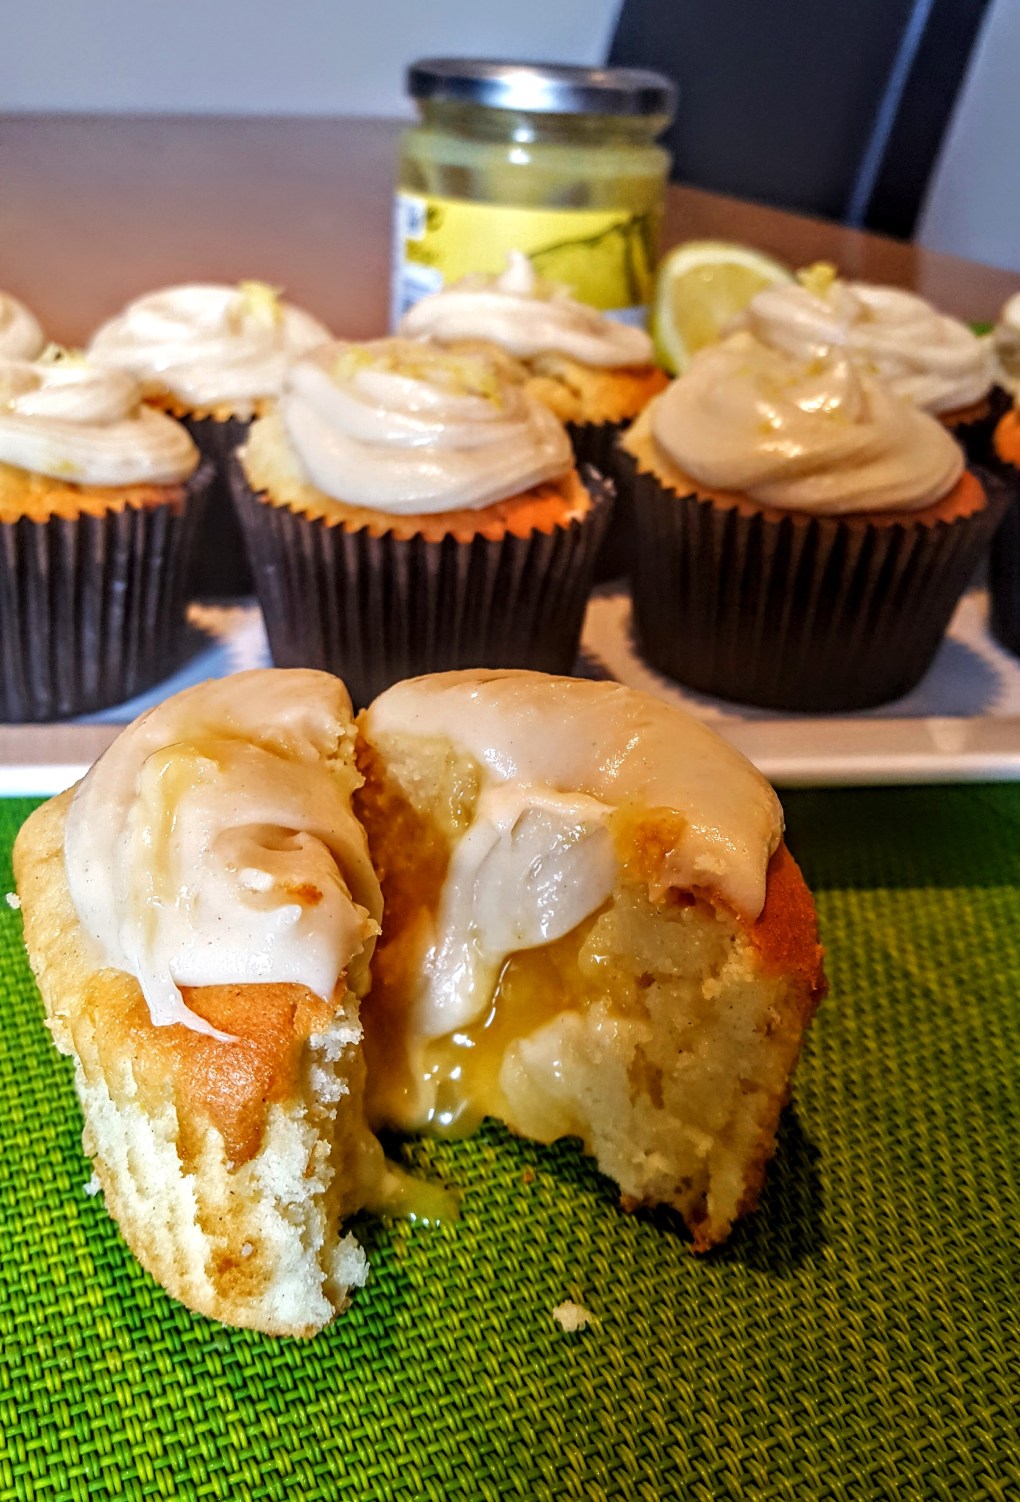

Oh WOW…….these are amazing, if you like all things lemony and fresh then this is the little cupcake for you.
I had a jar of Sicilian Lemon Curd to be used up so thought I;d try some little cupcakes. Yummy….Yummy! Perfect with an afternoon cuppa.
Makes 12
1 Cup of Cream – I used the double light cream (healthier option…lol)
1 cup of caster sugar
2 eggs – beaten
1 1/2 cup of self raising flour
1 Lemon – grated rind and juice
250g cream cheese
125g salted butter
grated rind and juice of 1/2 lemon
250g Icing Sugar – you may need more or less.


6. Allow cupcakes to cool slightly. Then taking a small teaspoon or knife dig some holes into the centre, not too big or too small. Then gently fill the holes with the lemon curd.
7. To make the buttercream:- Add the cream cheese, icing sugar, butter, rind and juice of 1/2 lemon into your mixing bowl and whisk until light and airy.
8. Add into a piping bag and pipe on top of your cupcakes covering the hole. To finish sprinkle some lemon rind on top.
Enjoy!


oh Yummy…..yummy……yummy!
First Recipe trying out my new oven. Baked perfectly and tasted even better….lol!
225g Black Treacle
255g Soft Light Brown Sugar
255g Butter
2 eggs, beaten
350g plain flour
2 tsp ground cinnamon
1 tbsp ground ginger
pinch salt
1 tsp bicarbonate of soda
250ml warm milk (I used semi-skimmed)
Method:-


First try at marbling, I’ve seen it loads of times in magazines but never tried it, who knew it would be that simple!
125g butter
150g light brown sugar
2 eggs
2 ripe bananas
1 tsp vanilla essence
200 g self raising flour
2 tbsp. baking powder
1/2 tsp bicarb soda
pinch of salt
2 tsp cinnamon
2 tbsp. cocoa powder
1. Preheat oven to 170 deg.
2. Line a baking tin with greaseproof paper
3. Place butter and sugar in a large bowl and mix together until smooth and fluffy
4. Add the eggs, one at a time, whisking well.
5. Mash the banana and add with the vanilla essence and mix
6. In a separate bowl sift the flour, baking powder, bicarb soda, salt and cinnamon together, fold into the wet mixture until combined.
7. Pour half the mixture into another bowl and mix through the cocoa powder
8. Spoon both mixtures into the baking tin alternating between each so you have layers.
9. Drag a knife through the mixture a few times to marble then bake for approx. 1 hr or until knife comes out clean. Leave to cool on a wire rack.


Oh we do love a good cupcake for afternoon coffee break. We bought some new coffee beans to try but then realised we didn’t have any cake to go with it…..so off I went to the kitchen to see what I had. Bananas from last week that were perfect for cake making, so that made my decision, banana cupcakes it was. So yummy! My decoration is in need of some practise though…lol!
Makes 6
80g self raising flour
120g light brown sugar (or you can use caster sugar)
20g cocoa powder
1 egg
1 tsp vanilla essence
1/2 tsp salt
30ml milk
1/2 tsp baking soda
1/2 tsp baking powder
1 medium ripe banana – mashed


I made some plain chocolate ones too, follow everything above but just take out the banana.


I just love my Empire Biscuits, I do have to say they are rather tasty. Having the afternoon to myself I fancied getting my creativity on this afternoon and trying some new techniques. I thoroughly enjoyed my creating and so glad they turned out…..I don’t have the steadiest of hands…lol. Although my love hearts could do with more practise…lol!
For the Empire Biscuits:-
Makes approx 12 – Empire Biscuits
Designs:-
I used 1 spoonful of the icing in each tub and added food colouring. 
I used a skewer that I had in my kitchen drawer, but anything with a pen like nib would do.
Once you have put your white icing onto your biscuit you then choose your design colours. 
I started off with roses. Put the nib of the skewer into the red colouring and place a small dot onto the icing and start to rock and circle the skewer to make your design. Clean nib then dip into the yellow and add a dot in the middle. Clean nib then dip into the green and draw small leaf shapes at the bottom. Finish design with small dots of colour randomly.


I done the same thing but on a bigger scale for me single rose.

Then using each colour draw lines on your biscuit.
Then drag the tip of your skewer firstly down the way then up the way to create the design.

Happy Baking!

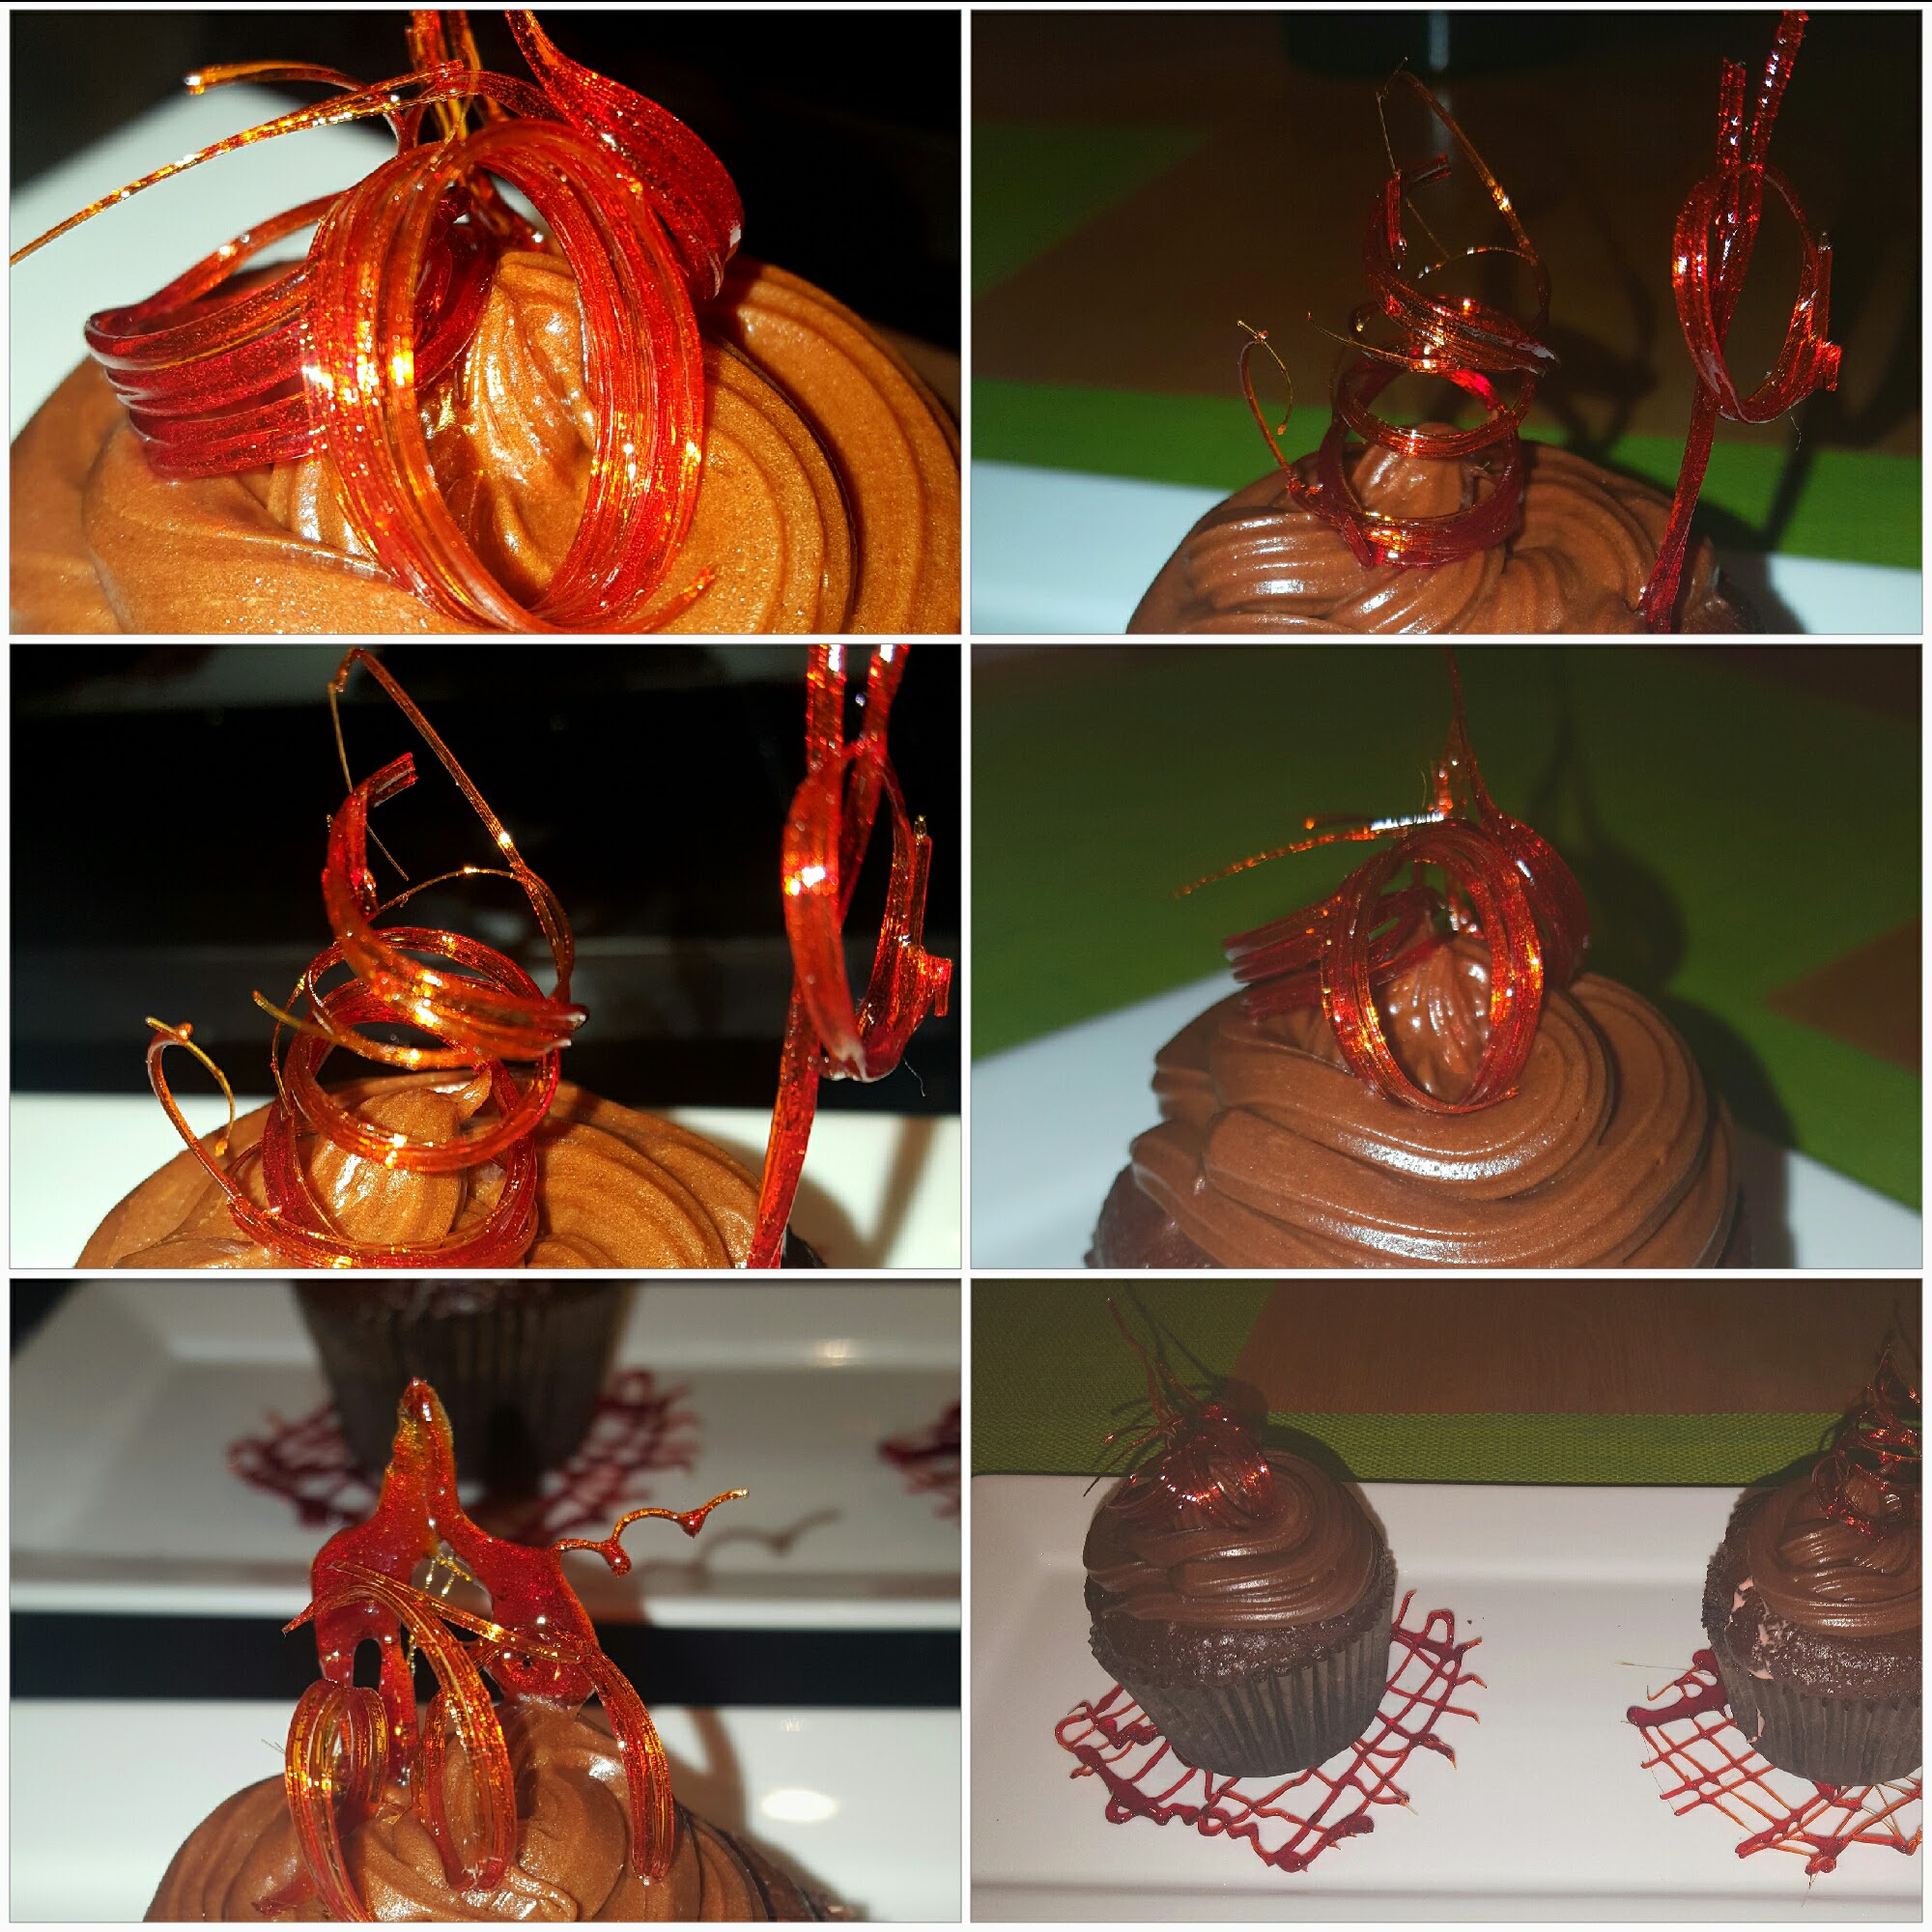
I have been dying to try this for ages now and decided 2017 is going to be the year of experimenting. I have to say it looks easy but it wasn’t, a few more practises I think before I master it….lol! But I have to say not bad for a first time.
To make the candy:-
1. Put about 3 cups of sugar with 1 tbsp of water in a flat based pan (depending on how much you want to make)
2. Gently heat the sugar until it starts to bubble 
3. It will start to go brown in colour and may lump, please do not be worried at this point this is normal. Using a wooden spoon move it around a little just to combine. You do not want to stir constantly and this will ruin it, try to leave it as much as you can. 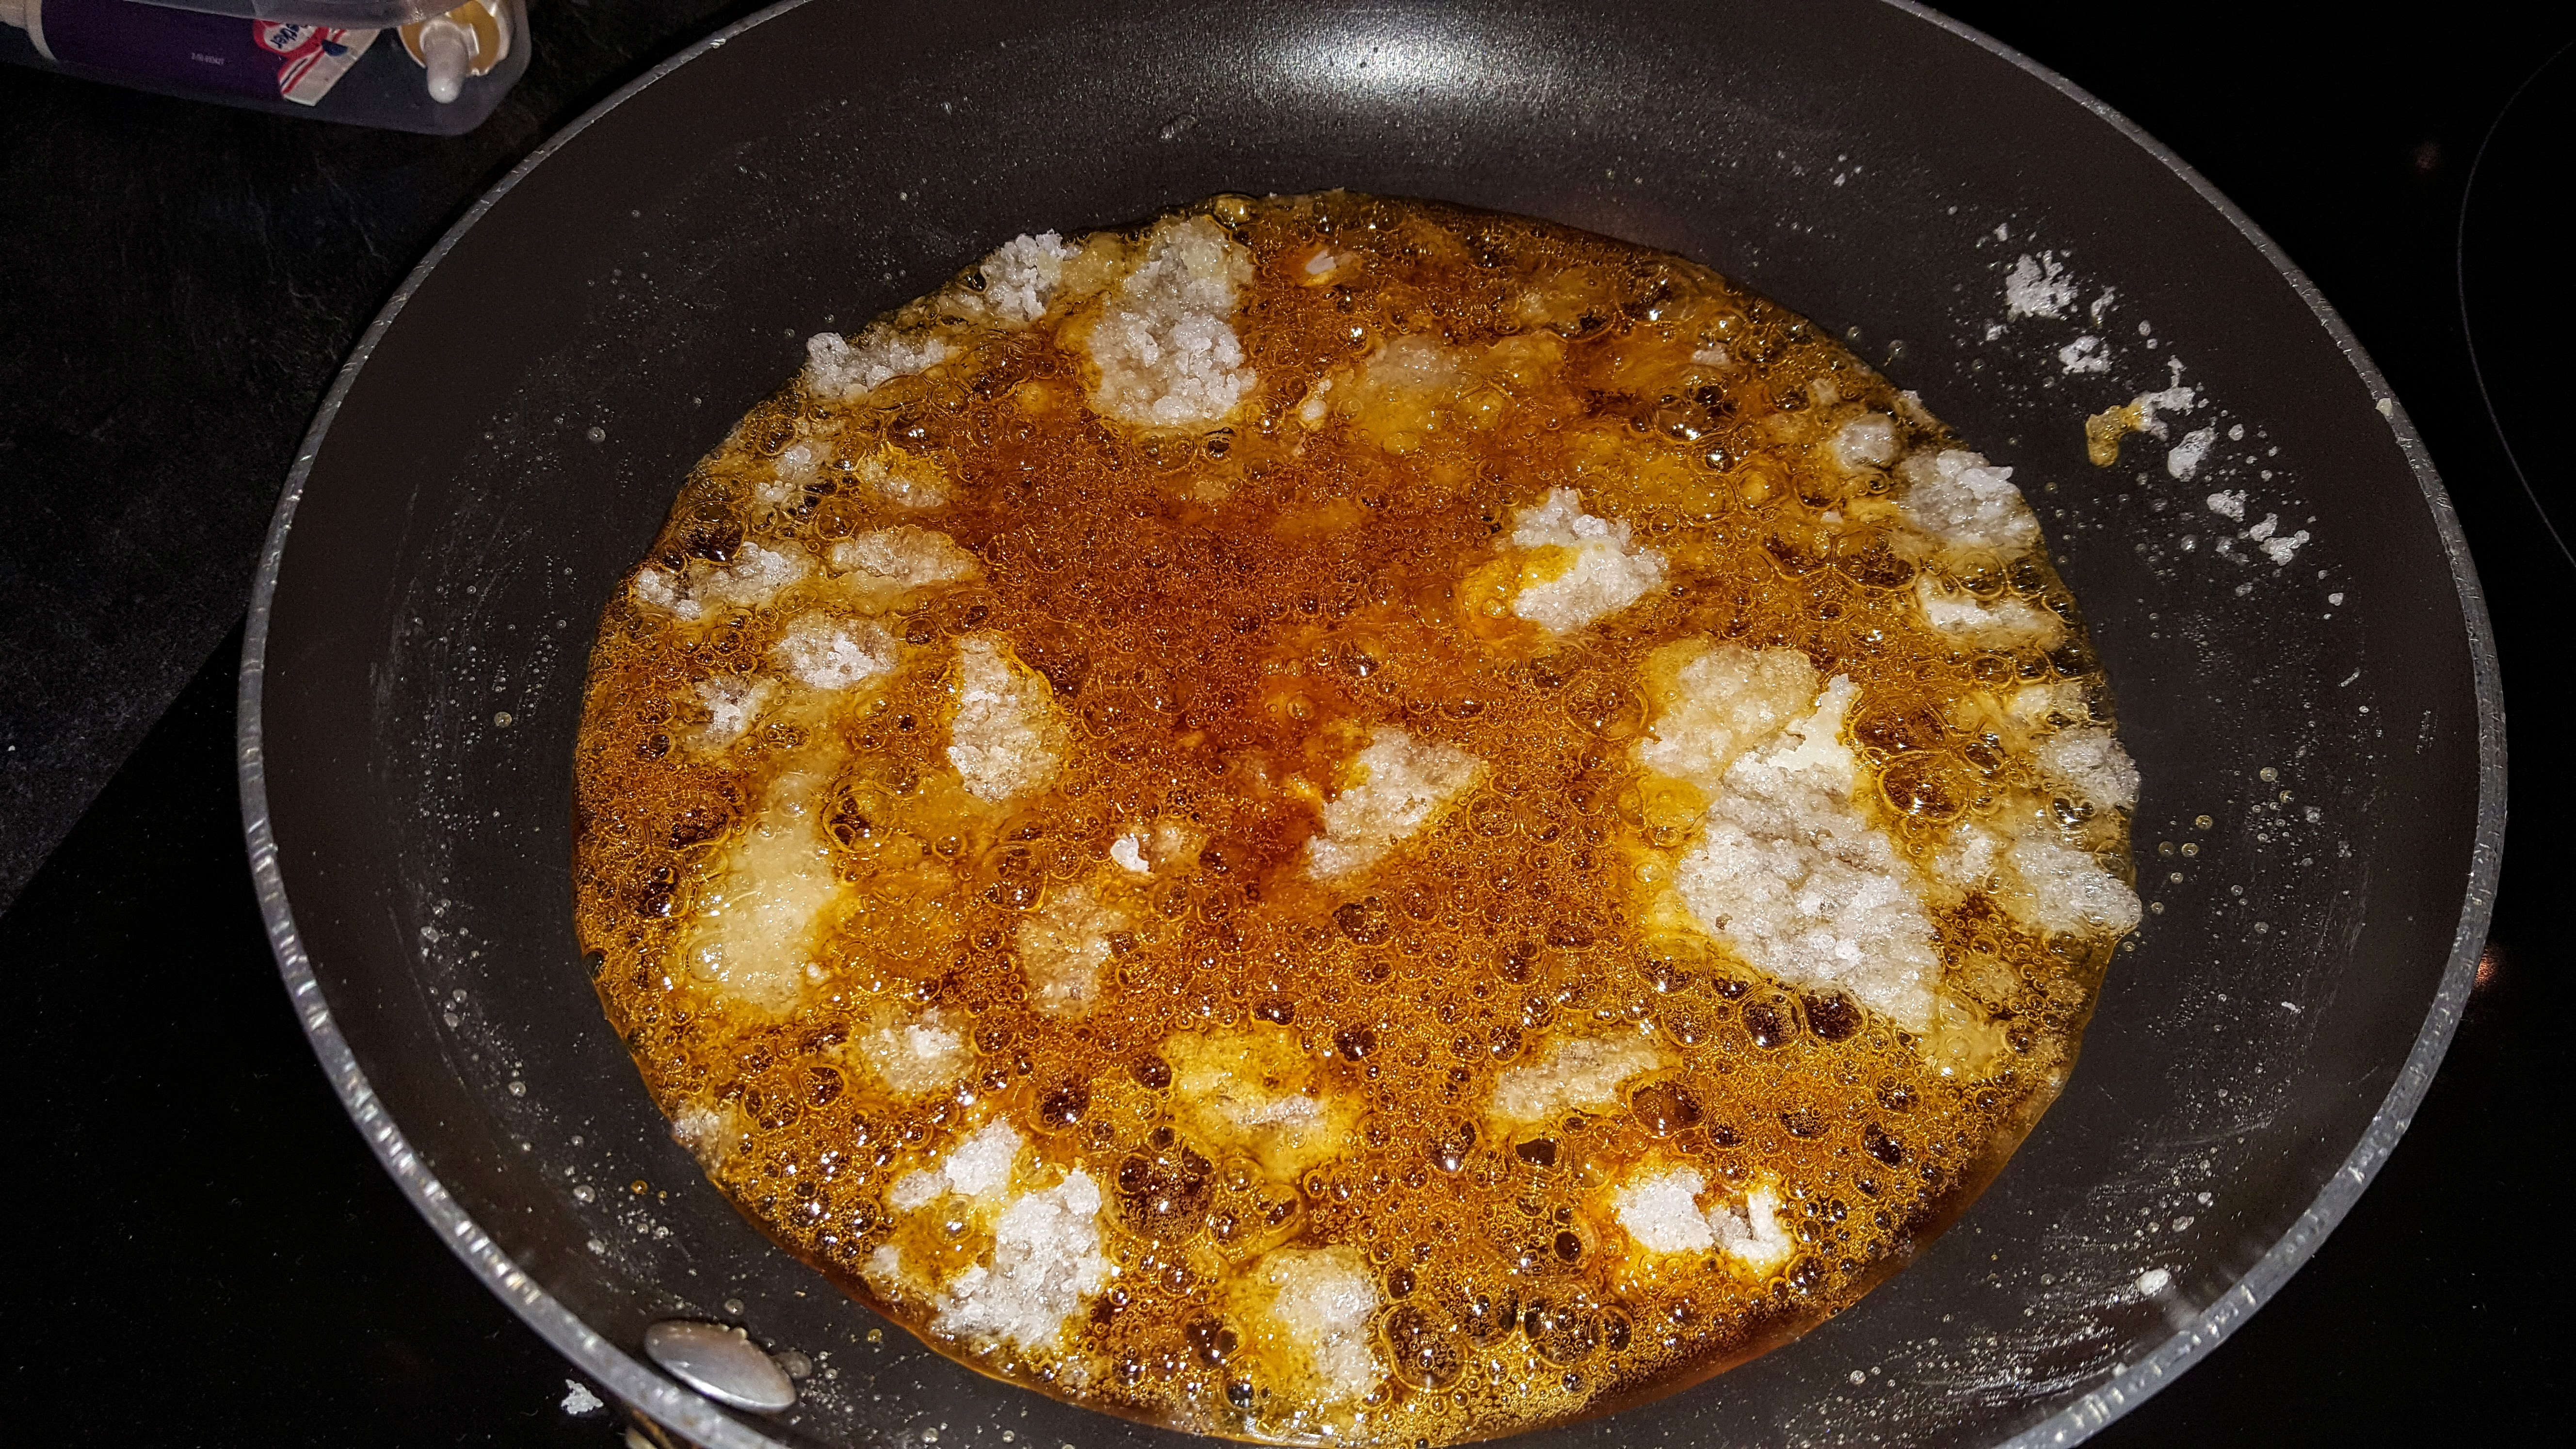
4. If you want you can at this stage add food colouring, I added red to mine. 
5. Keep moving it around until it goes quick thick but not too thick, you want to be able to lift it up and for it to drop slowly back to the pan but still thin not thick, almost just coating the back of the spoon.
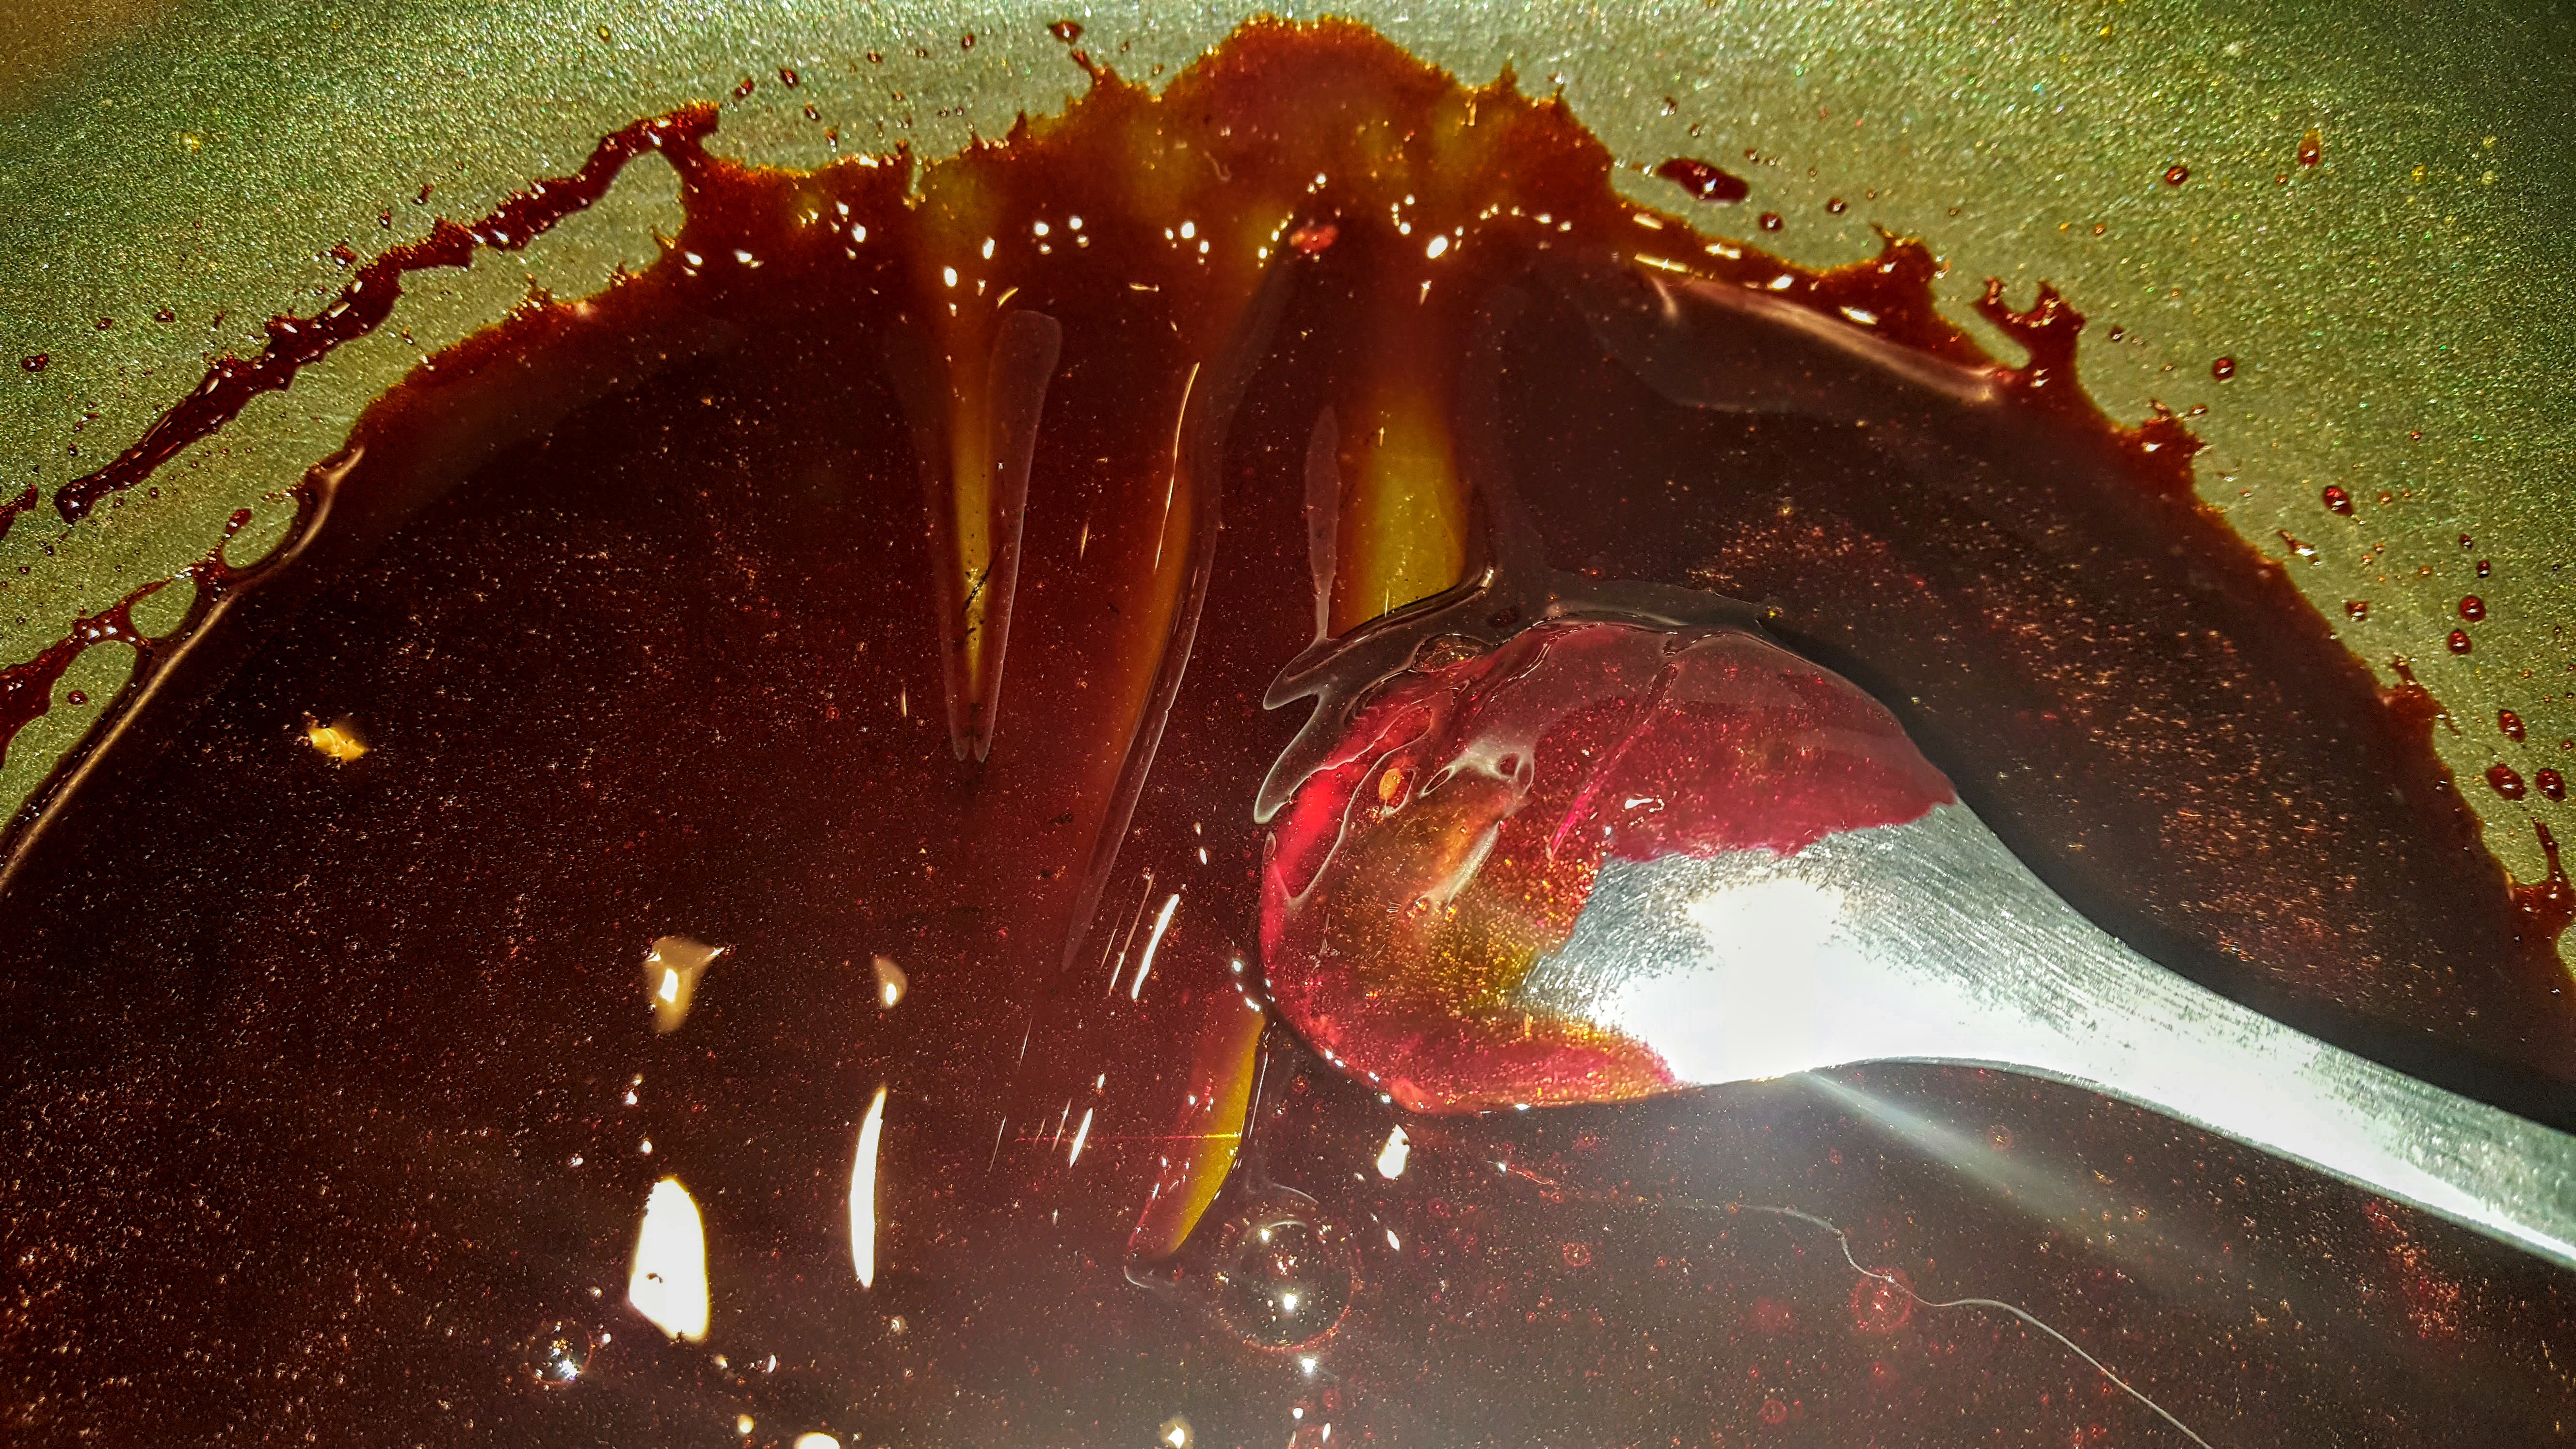
6. Using anything you have in your kitchen drawers that are metal like a ladle, pizza cutter, spoon etc, it is best if you chill the metal in the fridge first. Do not use wood, I tried my wooden spoon and it stuck, it has to be metal and cold. You can then drape, twist or simply squiggle onto greaseproof paper to make your designs. ( This is the fun bit but also the frustrating bit..lol) It should harden within seconds.


Here are some of my best and worst ones……lol!

Then imply decorate your cakes. Enjoy!


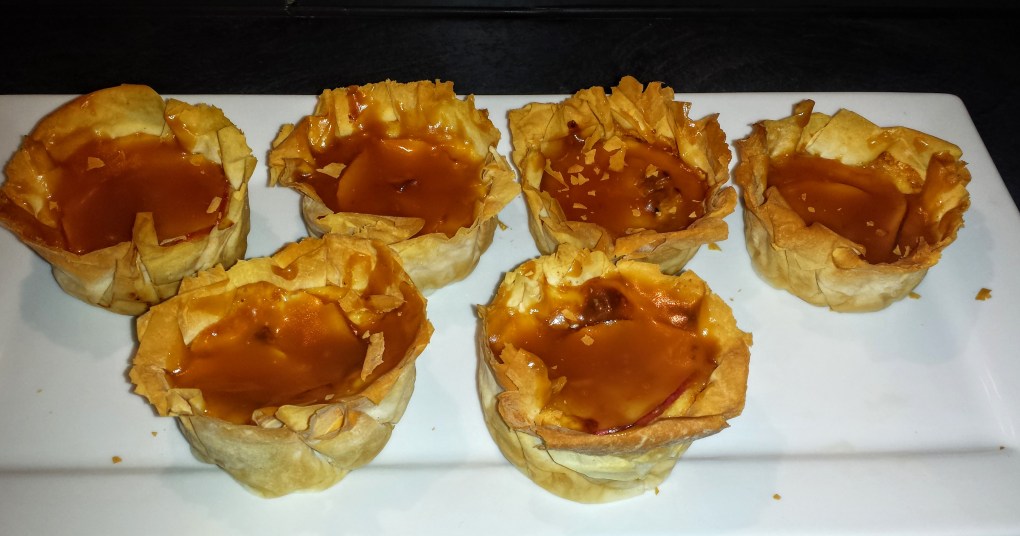
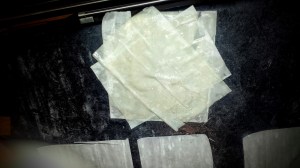
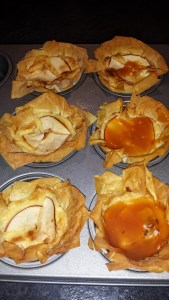
Oh well, what can I say, these are simply delicious! Initially I was just going to make some cupcakes but decided to try the gooey centre and also tackle my first time at sugar work, which is something I’ve always wanted to try. The sugar work is definitely work in progress…lol!
For the Cupcakes:- Makes 8-10
1 Cup all purpose flour (about 100g)
1 cup caster sugar
1/2 cup good cocoa powder
1 tsp baking powder
1/2 tsp baking soda
1/2 tsp salt
1/2 cup milk
1/4 cup vegetable oil or rapseed oil
1 egg
1 tsp vanilla essence

For the Gooey Centre:- I decided to go with caramel but you can choose anything you like, I also cheated and just melted some caramel instead of making the real thing.


2. Once melted, I wanted it a bit thicker so whisked it up a bit until thick and creamy.
3. Once the cupcakes are cool, using a spoon, spoon out some of the centre of the cupcake. 
4. Then using a tsp, spoon some of the caramel mixture into the holes. 
Finishing off:-
Again I cheated slightly and used shop bought frosting but you can of course make your own if you have more time.

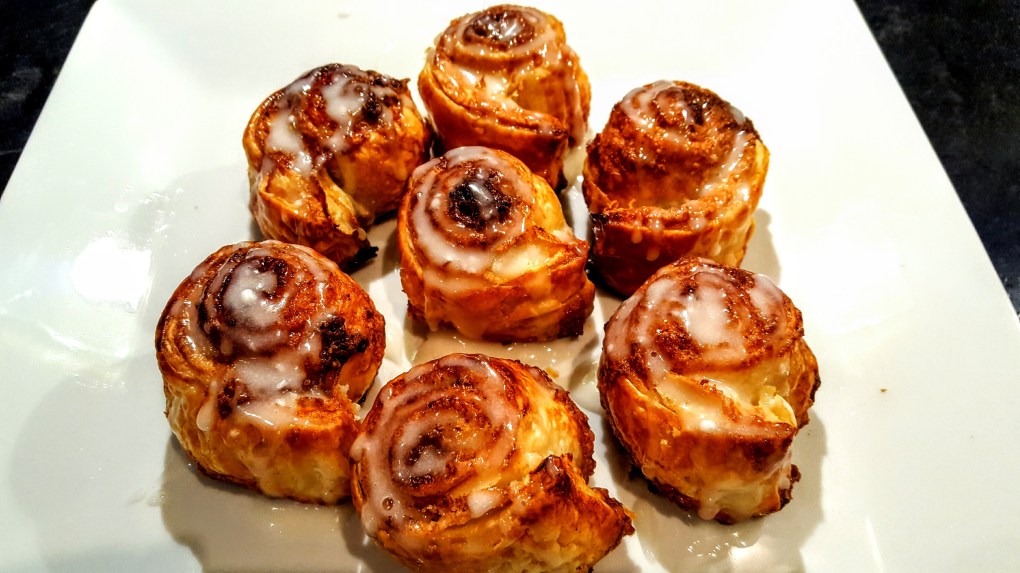

Oh it’s that time of the year where cinnamon is a staple ingredient in your household and no better way to use it than to make cinnamon glazed swirls……oh so yummy!
For the swirls:-
1 puff pastry sheet
spoonful of butter melted
3 tbsp caster sugar
3 tbsp brown sugar
1 tbsp cinnamon
For the Glaze:-
1/2 cup icing sugar
1/2 tsp vanilla essence
10ml milk


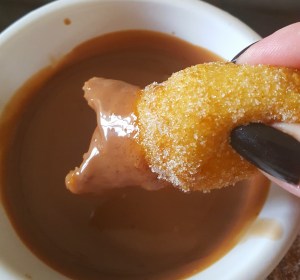
I have seen various different versions of this recipe and always wanted to try, so today was the day that I would have a go at these delicious little Churros. A Churro is a fried-dough pastry snack. Churros are popular in Spain, Portugal, France, the Philippines, Ibero-America and the Southwestern United States. In Spain, churros can either be thin or long and thick, basically you can have them anyway you choose.
As you can see I didn’t have the iconic star shape nozzle for my piping bag, so mine are smooth unlike most images you see online, such as below. Yes I know…..they do look better…..I will definitely be going to get one.
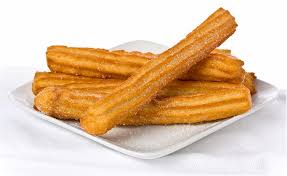
This recipe makes approx 8
150g Plain Flour
1 tbsp Baking powder
1 tbsp olive oil
pinch salt
1 cup of boiling water
Oil for frying I love crisp n dry.
100g chocolate chips
120ml double cream
1/2 cup of caster sugar
1 tbsp ground cinnamon
 wrong batch
  very thick batter


A wee afternoon treat to myself, I love Amaretto and I love coffee, no better way than to combine them. I had some Amaretto flavoured coffee left over so decided to try that instead of the liqueur in the biscuits (as I had none) and it so worked.
Makes 12 biscuits
200g all purpose flour
100g sugar
80g butter
1 egg
1 tsp baking powder
3 tbsp amaretto coffee, my fav from the Edinburgh Tea & coffee Company
1 tbsp orange flavouring
50g cocoa powder


I love to dunk mine into fresh coffee……oh so yummy! 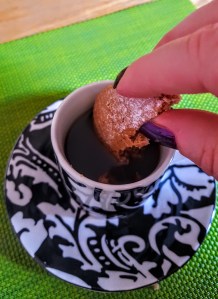


OMG….can a Sunday really get any better! I picked up some Chocolate Mint Leaves at the Glasgow Food Assembly on Monday https://thefoodassembly.com/en/assemblies/7907 , thanks to Rhone Cottage http://www.rhonecottage.co.uk/ , not really knowing what I was going to do with them, but one thing for sure I had to try them. I knew they had a delightful minty chocolate flavour to them so it had to be a dessert of some sort, these were just the ticket…….absolutely amazing flavours and so fresh tasting.
Makes 12
Cupcakes:-


 Just starting out……..
  after 5 minutes…….still no where near stiff………sip…..sip……sip……
 Whoohoooo….we’re there….several sips of wine later!
Decorate your cupcakes anyway you choose and enjoy!


This was a recipe I picked up from fellow blogger https://greencookingblog.wordpress.com/ , I just loved the sound of it as I love Banoffee…my ultimate fav! They turned out very tasty indeed, although I think I’ll get deeper trays the next time as I would have loved them to be bigger…lol! I wasn’t sure what to serve with it, I had some cream and toffee left so……yep…voila…toffee cream….and it just went so well.
Makes 12
 This was after about 8 mins.
 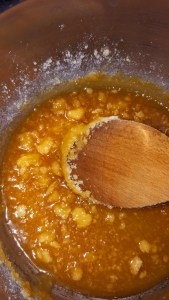 Then 10 mins….
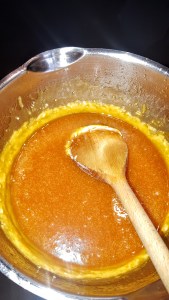


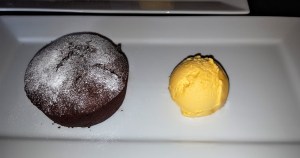
Oh WOW…..oh WOW…..oh WOW! That’s all I can say about this………super tasty! My boyfriend said to me I could go a snickers bar…..so off I went into my creating area (my kitchen) and looking around my cupboards I had all the ingredients to mimic the flavours, so off I went and made an absolute master piece….so moreish!
Makes 2
100 g Dark Chocolate 70% Cocoa (I used Lindt, which is the best….in my opinion)
50g Butter
1 medium egg
1 medium egg yolk
40g light brown sugar
20g Self Raising Flour
2 tbps Peanut Butter
Cocoa powder for sprinkling
Icing Sugar to decorate


I was inspired to try these by a local baker I met this week, I have to say I didn’t quite get the custard as I would have liked but they did taste absolutely divine.
Makes 6-8
For the filling:
3 large free range eggs, plus 2 large free range egg yolks, lightly beaten
1 pint of single cream (2 cups)
2 ounces caster sugar (a scant 1/4 cup)
1/2 tsp vanilla extract
1 1/2 whole nutmegs, grated
1 tsp of softened butter
For the toffee sauce:
150g caster sugar
75ml pot double cream
25g butter
Base:-
3-4 sheets Filo Pastry
1/2 Lady Red Apple – sliced very thinly


I was inspired to try Choux Pastry by a chef called Vivan in Italy, I was on a training course with Kitchen Aid and he demonstrated Choux Pastry in one of their ovens which was amazing. My boyfriend loves Profiteroles so I thought I’d spend an afternoon in the kitchen today as it was rainy outside. My results were pretty good, considering it was my first time but definitely room for improvement.!
Makes 8
FOR THE CHOUX PASTRY
200ml cold water
100g Butter
130g Plain Flour
4 eggs
1 tsp Sugar
FOR THE CREAM FILLING
100ml double cream
1 tsp vanilla essence
20 g icing sugar
FOR THE TOPPING
100g Milk or Dark Chocolate


I had some puff pastry left in the fridge and some cream, so, yep you guessed it…..cream puffs! Add a hint of lemon for an Easter flavour and voila……..Lemon Puffs were born! So Tasty, so easy, so happy!
1/2 sheet of ready made Puff Pastry
100ml double cream
25g icing
1 tsp vanilla essence
Juice of 1 lemon and Zest


Yummy!!


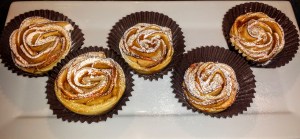
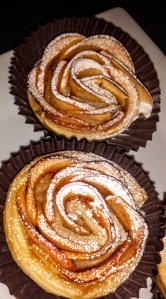
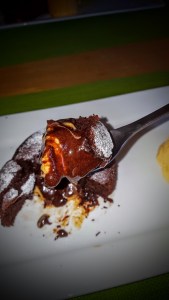
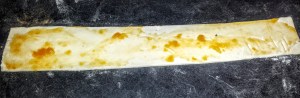
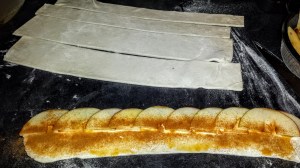
I made these for my mum as she loves apple and cinnamon and a wee treat now and then. I first saw these on Pinterest and just had to give them a try. Not only do they look amazingly good they taste fantastic. Would be lovely served with some ice cream or cream.
Makes 6
Ready rolled Puff Pastry
2 tbsp Apricot Jam
2 Pink Lady Apples
Flour for rolling pastry
Juice from 1/2 lemon
Cinnamon Powder
little icing sugar to decorate
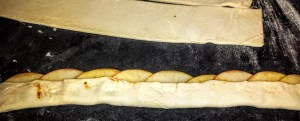
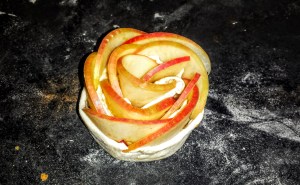


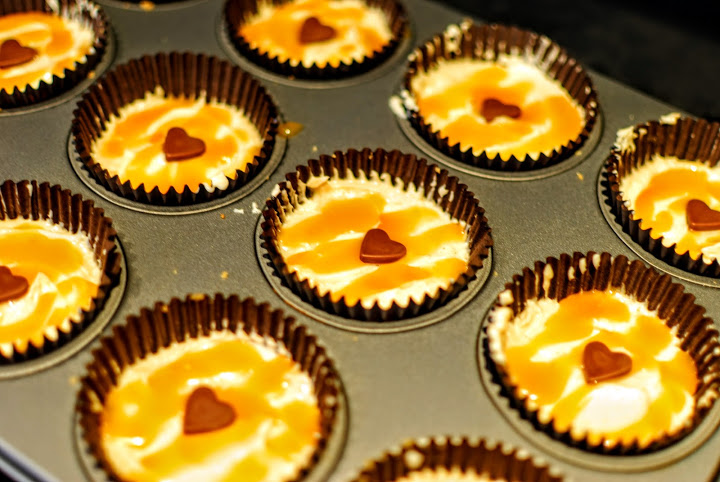
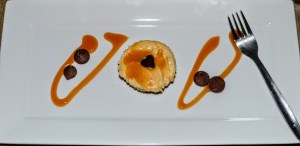
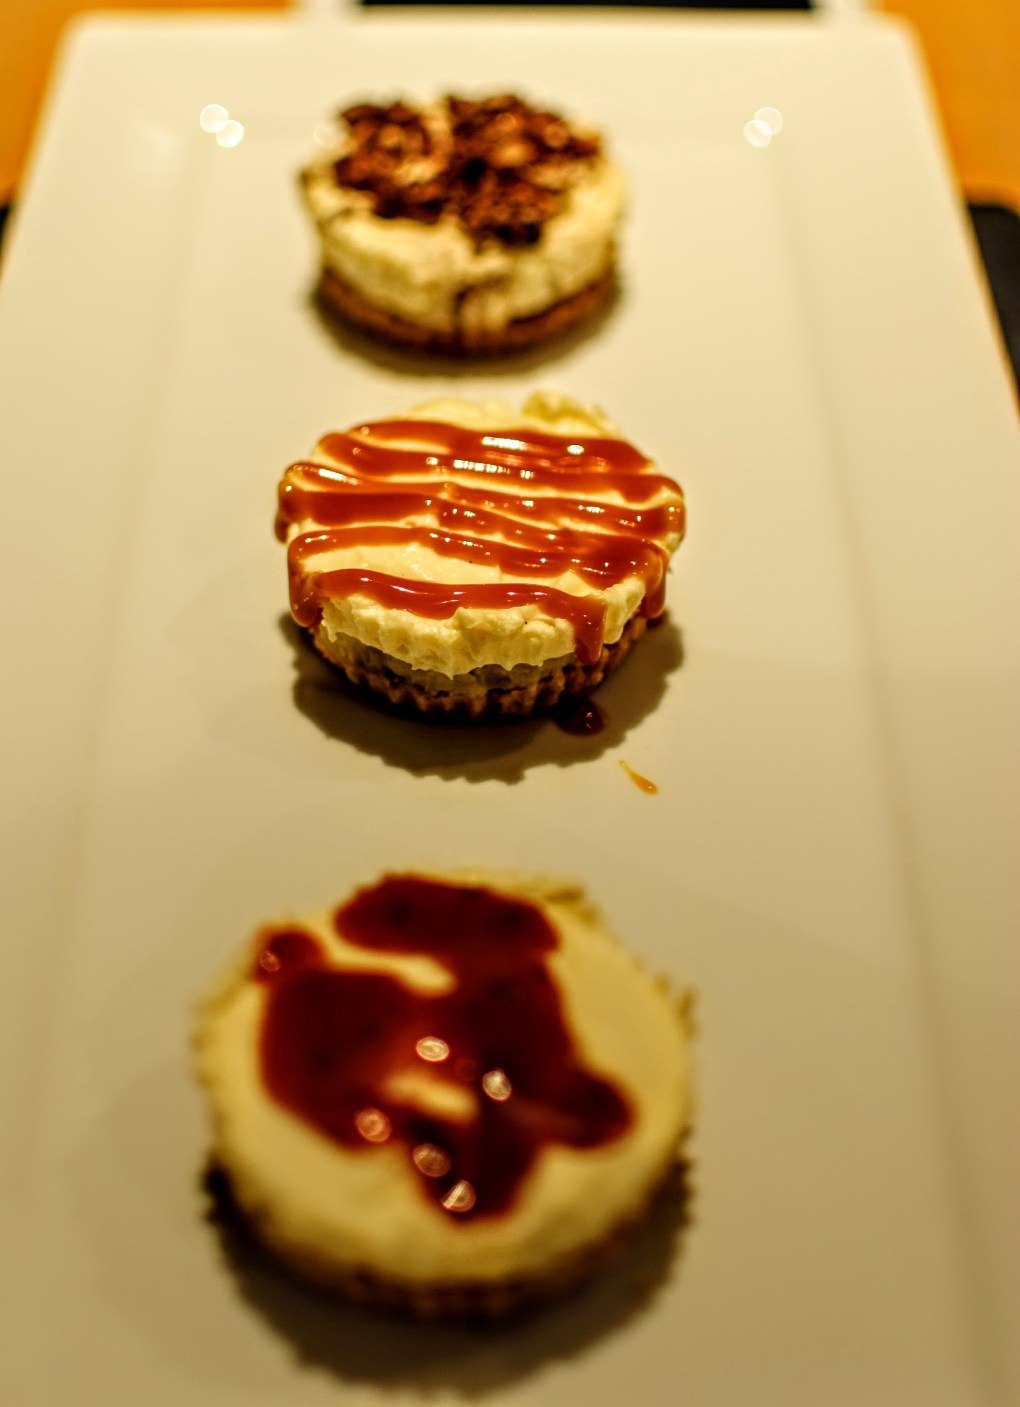
Valentines Day was slowly arriving and I wanted to treat my other half with something different but something I know he would enjoy…his favourite flavours for desserts are peanut butter, chocolate and toffee, so I decided to make some cheesecakes combining all the flavours. It was absolutely delicious!
Makes 12 Mini Cheesecakes
180g Cream cheese
100ml double cream
1 tablespoon of peanut butter smooth
60g Icing Sugar
1 tsp vanilla essence
13 Digestive Biscuits
50ml butter melted
Toffee Sauce of your choice – loads of squeezes
12 chocolate buttons or shapes of your choice


Servings Per Recipe: 12
Amount Per Serving
Calories: 134


Looking for a snack I thought I’d try my hand at a little mini puff! Made 2 versions, both very nice!
Makes as many as you want.
1 x roll of ready rolled puff pastry – I used the light version from Sainsburys to save on calories (still tastes good)
1 x Portion of Brie (I found a lovely creamy one from my local deli, made in the Scottish Highlands) 
2 small Piccolo tomatoes – halved
Jar of Caramelised onion (I cheated, you could make your own)


Yummy……little wee snacks.
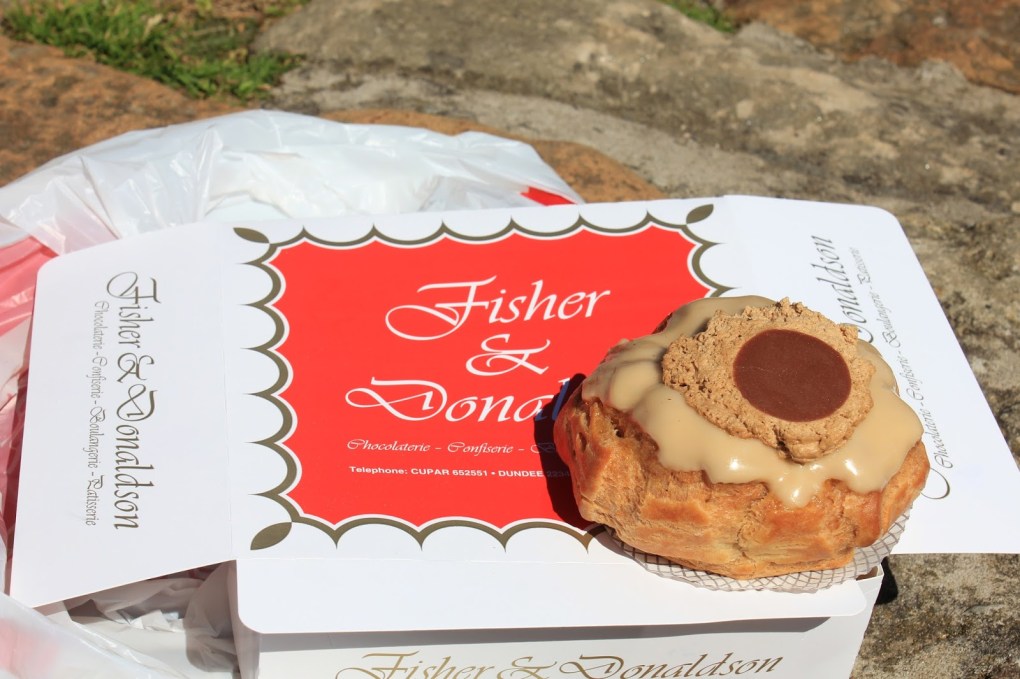

I was on my way to see one of my customers in Dundee today and after calling ahead, the designers asked if I would bring them in a Coffee Tower from Fisher & Donaldson Baker, so being the kind person I am and I was also intrigued as to what a Coffee Tower was! I thought I would treat them in the hope I would get a coffee after a long drive.
I decided to stop in at the Perth Rd, Bakers Shop at 9am this morning, walking through the door your are hit with the amazing smell of sweet and savoury that instantly makes you hungry. I was welcomed with a warm hello from the girl behind the counter, who was also very chirpy for 9am. (I am not a morning person!lol!) I asked for a Coffee Tower and she presented me with this deliciously looking Choux Bun filled with coffee flavoured cream and coffee glaze topping. Oh my it looked amazing, so I just had to get one for myself……..and oh boy…it was delicious! I had to stop myself going back in to get more……


The variety of cakes and breads they do was just amazing I couldn’t help wandering my eyes over the vast amount of selections they had. Here are a few:-


I would definitely come back here again and again. If you are in any of these areas that they have shops, please go in and try, you won’t be disappointed. Check out their website:- http://fisheranddonaldson.com/
They have stores in Cupar, Dundee and St. Andrews.


This was my 2nd batch of today, after a night out last night we wanted some Home Comfort Food, so off to the kitchen I went and decided on a quick Muffin Recipe. After looking at what I had in cupboards my Maple Syrup and Chocolate combo were just the ticket to tackle our munchie (hungry) feeling!
Makes 6 Muffins
125g Self Raising Flour
50g Softened Butter
1 egg beaten
50g Caster Sugar
40g soft light brown sugar
1 tbsp semi skimmed milk
2 tbsp Maple Syrup
FOR THE TOPPINGS
1 handful (20-30g chocolate drops)
1 Cup (50g Icing Sugar)
1 tbsp Semi Skimmed Milk
1/2 tsp Vanilla Extract


Check out my banana and Coconut Muffins here also.
https://cookingwithluce.wordpress.com/2016/01/24/banana-and-coconut-muffins/
BEWARE!……your kitchen WILL get messy! lol!

Servings Per Recipe: 6
Amount Per Serving
Calories: 257

Today I woke up late after one of my friends 30th Birthday Party last night, surprisingly I felt really good and awake, after a shower and breakfast I suddenly got the urge to bake after my boyfriend saying he had the munchies…lol! So off I went into the kitchen, music on and feeling creative. Looking in my cupboards I came up with 2 different muffin recipes….so here goes the first one:-
Makes 6 muffins
125g Plain Flour
1 tbsp baking powder
1 tsp cinnamon powder
50g caster sugar
40g desiccated coconut
1 really ripe banana
90ml semi skimmed milk
1 egg beaten
50g butter melted
1 tsp vanilla extract

Then eat to your hearts content! YUMMY!
Also check out my other Muffin recipe:- Maple Syrup and Chocolate!
https://cookingwithluce.wordpress.com/2016/01/24/maple-syrup-and-chocolate-muffins/
BEWARE!! your kitchen WILL get messy! lol!
Servings Per Recipe: 6
Amount Per Serving
Calories: 204


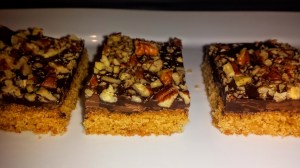
Having my breakfast this morning and sitting looking at the very wet and windy weather through the window, my thoughts were of feeling cosy and warm this afternoon, so I decided I wanted a nice bit of cake to go with my fresh warm coffee. Looking in my cupboards I saw Toffee Sauce and Chocolate and came up with this wee bit of delightful heaven. Cake, Coffee and a Comfy Couch on a rainy day, canny beat it!
Makes 15 squares
110g unsalted butter
105g Soft Brown Sugar
1 tsp Vanilla Essence
130g All purpose Flour
Pinch salt
150g chocolate (dark or milk)
30g Pecans – chopped
1. Preheat oven to 180 deg. 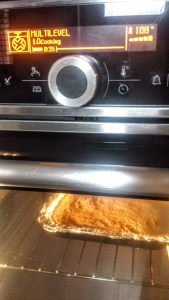
2. Line a 20cm baking tin with foil and grease.
3. Mix with an electric mixer the butter, sugar and vanilla until smooth
4. Then mix in the flour and salt and mix until combined but not too stiff.
5. Pour mixture into the baking tin and with a spatula evenly spread out. 
6. Place on middle shelf in oven for about 20 minutes until golden brown.
7. Meanwhile, chop up chocolate into small bits, and chop pecans too.

8. Once base is ready, pour chocolate bits evenly over and put back into oven for 1-2 mins until melted, remove and spread evenly.

9. Top with the pecans and allow to cool. Once cool put into fridge to set chocolate (approx 1 hour)
10. Cut into small squares and serve. YUMMY!

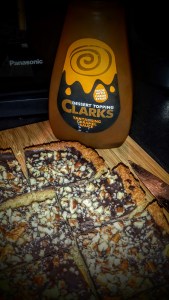
I had some toffee sauce and decided to drizzle over squares which added extra flavour.


I love cheesecake and wanted to try making my own, but I couldn’t decided on the flavour….so I just made all the flavours I like, they turned out amazing…very tasty. My sister and her fiancee came over for dinner and my sister loved them, unfortunately her fiancee didn’t like cheesecake…..to my partners delight…more for him…lol!
There is nothing better than spending an afternoon or night in the kitchen, listening to music and making some amazing food! Oh, and a wee cheeky glass of vino too! 🙂

Makes 20 mini cheesecakes
Basic Cheesecake Base:-
20 Digestive Biscuits – use a mixer to crush them or put in a plastic bag and bash with a rolling pin.
120g butter, melted on hob
1. pour butter into biscuits and mix together until all crumbs are coated.
2. Press into cake cases in a muffin tray and chill in fridge for about 15-20 mins.
Cheesecake mix:-
300g soft cheese, I used Philadelphia (use full fat only, low fat might stop the mixture setting properly)
150ml double cream
85g icing sugar
1 tsp vanilla essence or 1 vanilla pod
Vanilla Cheesecake:-
Spoon mixture into cake cases and chill overnight in fridge – minimum 12 hours. I served these with some raspberry coulis. Yummy!
Hazelnut and Chocolate Cheesecake:-
Crush some ferrero rocher, save some for topping. Mix into the cream cheese mix and spoon into cake cases.
Banoffee Cheesecake:-
1 Banana sliced, fry in a pan with knob of butter until slightly golden in colour then place slices on top of biscuit base in cake cases.
Spoon on top of banana the cream cheese mixture. I then served with some toffee sauce on top. Yummy!
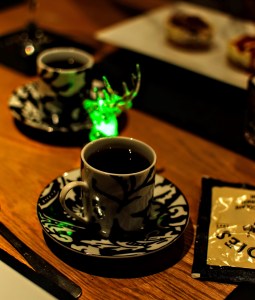
I finished off the meal with a lovely liqueur coffee in my new cups and saucers. I used Disaronno but you can use whatever you like.


Makes 1 x 8 inch cake tin
I cheated slightly with this and used ready made cake mix.
200g Betty Crocker Vanilla Cake Mix
2 eggs
2 tbsp olive oil
1/4 cup sour cream – approx 75ml
1/4 cup water – 75ml
2 large bananas – sliced
100g shredded coconut
1/2 cup brown sugar
2 tbsp butter
1 tbsp lemon juice


One again I had a truly different taste sensation when visiting Florida this year, pancake and Maple Syrup were everywhere….much to my boyfriends delight! You had them for brekkie with Maple Syrup, eggs, bacon etc and then again on the menu for dessert with ice cream and flavoured sauces……oh Yum! Here is my homemade version…inspired by (Denny’s).
Makes about 14 pancakes.
300g Plain White Flour ( to make it a bit healthier, you can use wholewheat instead)
4 tsp Baking Powder
1/2 tsp salt
4 tsp cinnamon
2 tsp caster sugar
2 eggs
300ml milk
2 tsp vanilla essence
100g chocolate – to make sauce
1 jar Maple Syrup (your choice)
3. Sprat a little cooking oil into a frying pan and heat through at high heat. Pour 1/2 a ladle or 1/2 cup of mixture onto the frying pan and even out with back of spoon, cook for approx 1-2 mins, you know it’s ready to turn when you see an even covering of holes.

4. Flip and cook for approx 1 min. Remove and continued to repeat until all done.

5. Keep warm in a warming drawer or in your oven at 70-80 degrees until finished.
6. If using Chocolate Sauce – break bar into chunks and put into a small pan, melt on Induction Hob Number 1 for about 5 mins. If using conventional method, melt in a glass bowl oven boiler water on hob.
6. Serve with Maple Syrup and Hot Chocolate Sauce……Mmmmmmmmmmm!!


Decided to try the famous Cranachan dessert but wanted to change it slightly, turned out amazingly good. My first time at trying a Panna Cotta too.
For Panna Cotta:-
10g toasted oats (lightly toast in dry pan)
50g caster sugar
150ml milk
80g mashed raspberries
2 tbsp honey
250ml double cream
20ml Whisky or whisky essence
3 gelatine leaves, soaked in water
1. Mix milk, raspberries and sugar bring to boil then add in oats, honey and whisky reduce heat slightly
2. Add in gelatine and stir through
3. Add in cream, mix through and set aside to cool for 5 mins.
4. Pour into greased ramekins and chill for at least 2 hours.
For the syrup:-
20ml water
5ml whisky
10g caster sugar
1. Put all ingredients into a pan and bring to boil, boil until syrup consistency (about 2-3 mins)
For the honey cream:-
50ml double cream
5g honey
5g toasted oats
1. Put all ingredients into a bowl and whisk until a stiff consistency (few mins)
To plate up: turn out the Panna Cotta onto a plate, drizzle the syrup over and scoop some of the honey cream to the side with a couple of raspberries.
Oh yum!
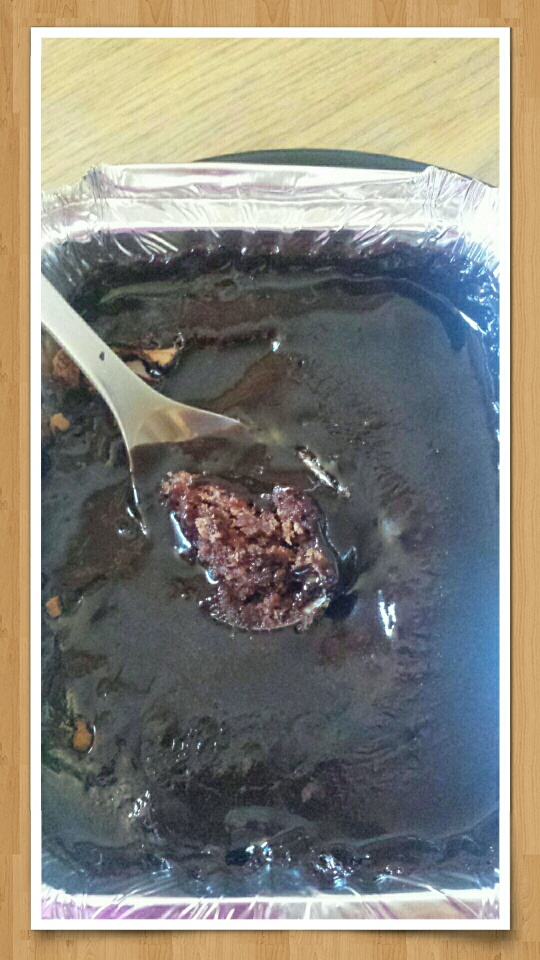
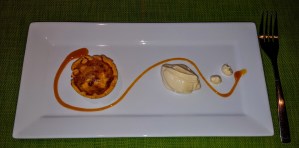
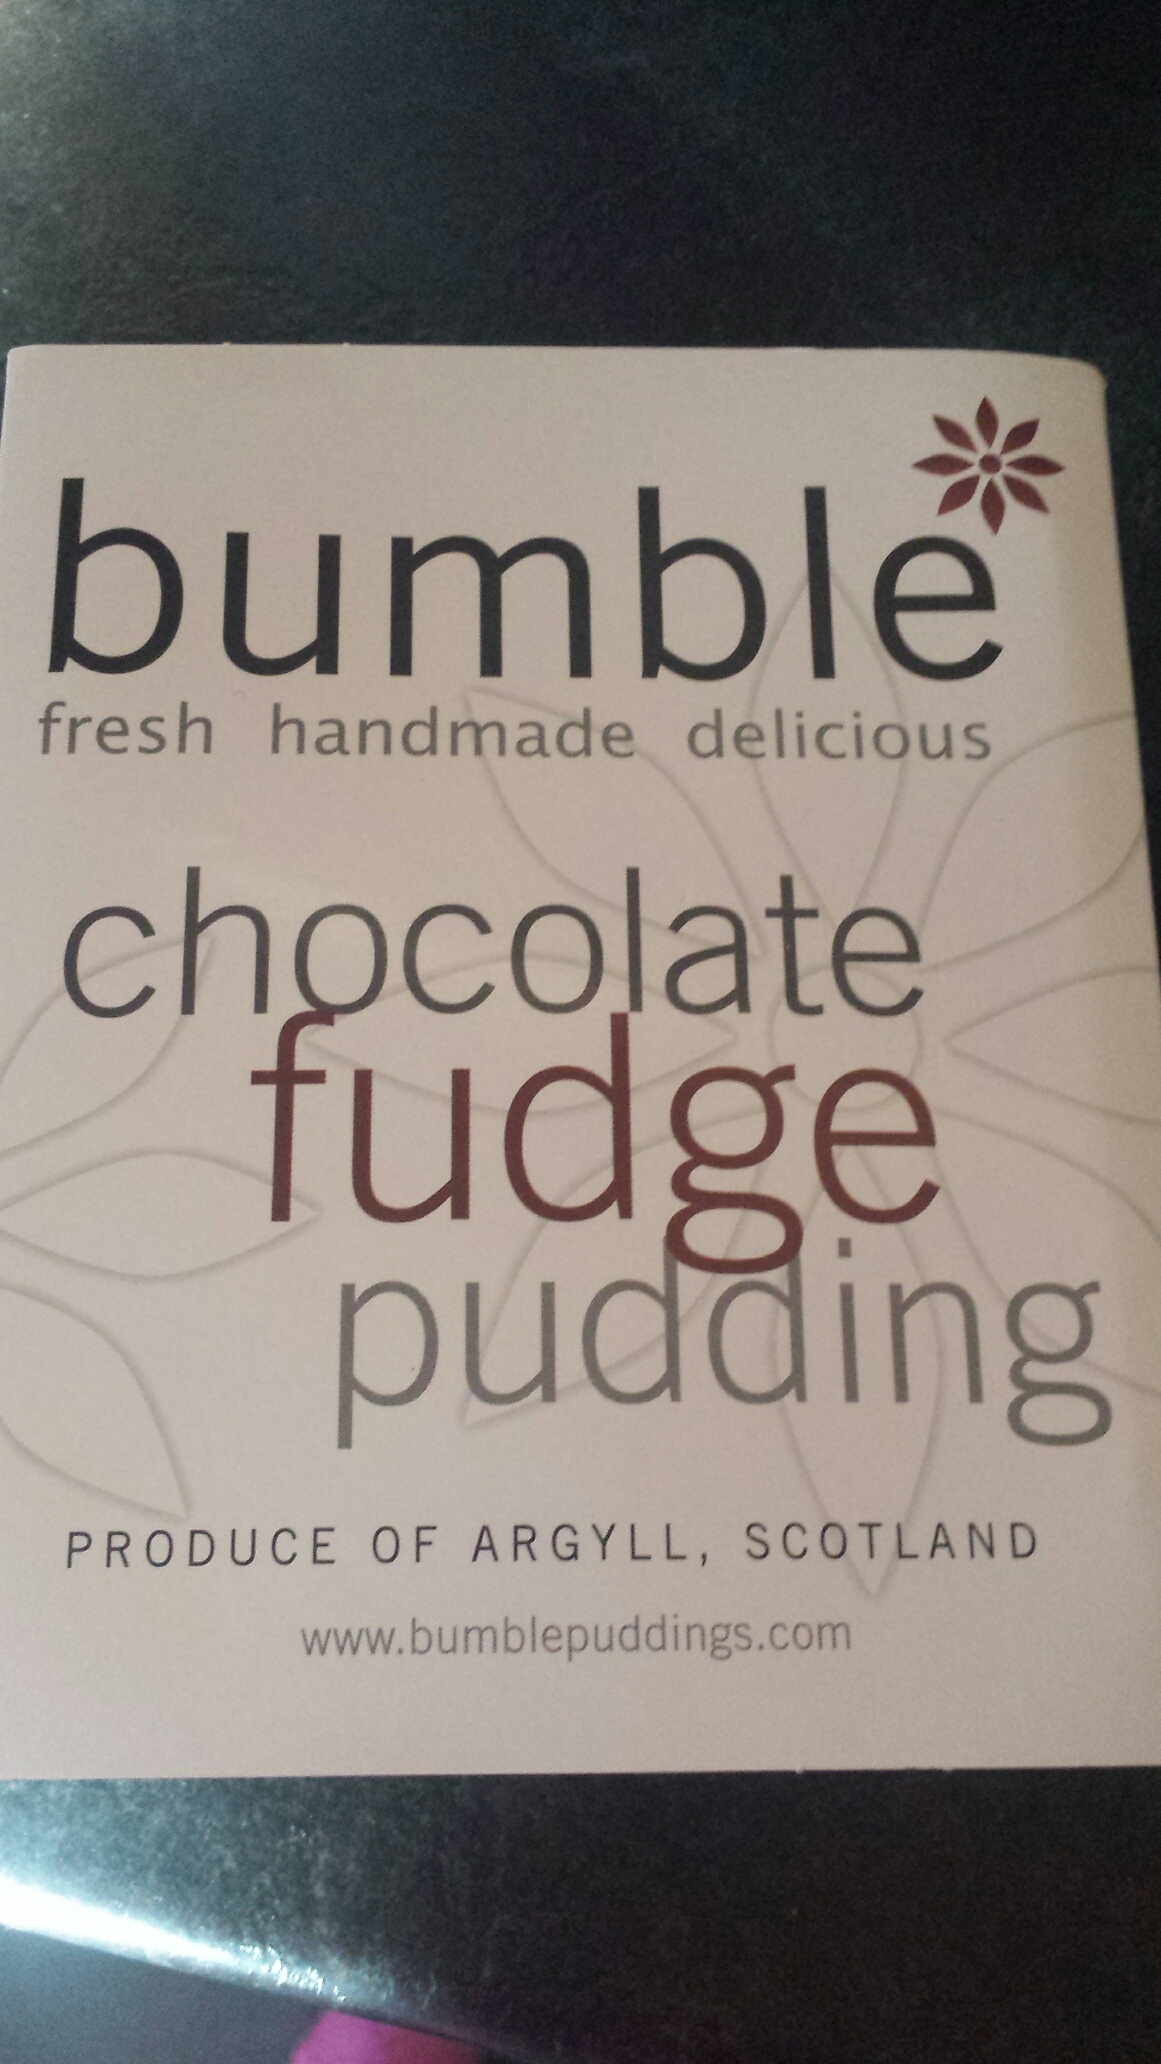
As it is Scotland food and drink year 2015, I have been looking for some new ideas and quality products, and well……I think I have found the most amazing chocolate pudding EVER!
Bumble lovingly produces mouth-watering, delicious puddings, made from fresh, simple ingredients including Scottish butter and cream, in her kitchen in Achnabreck Farm, Argyll, Scotland


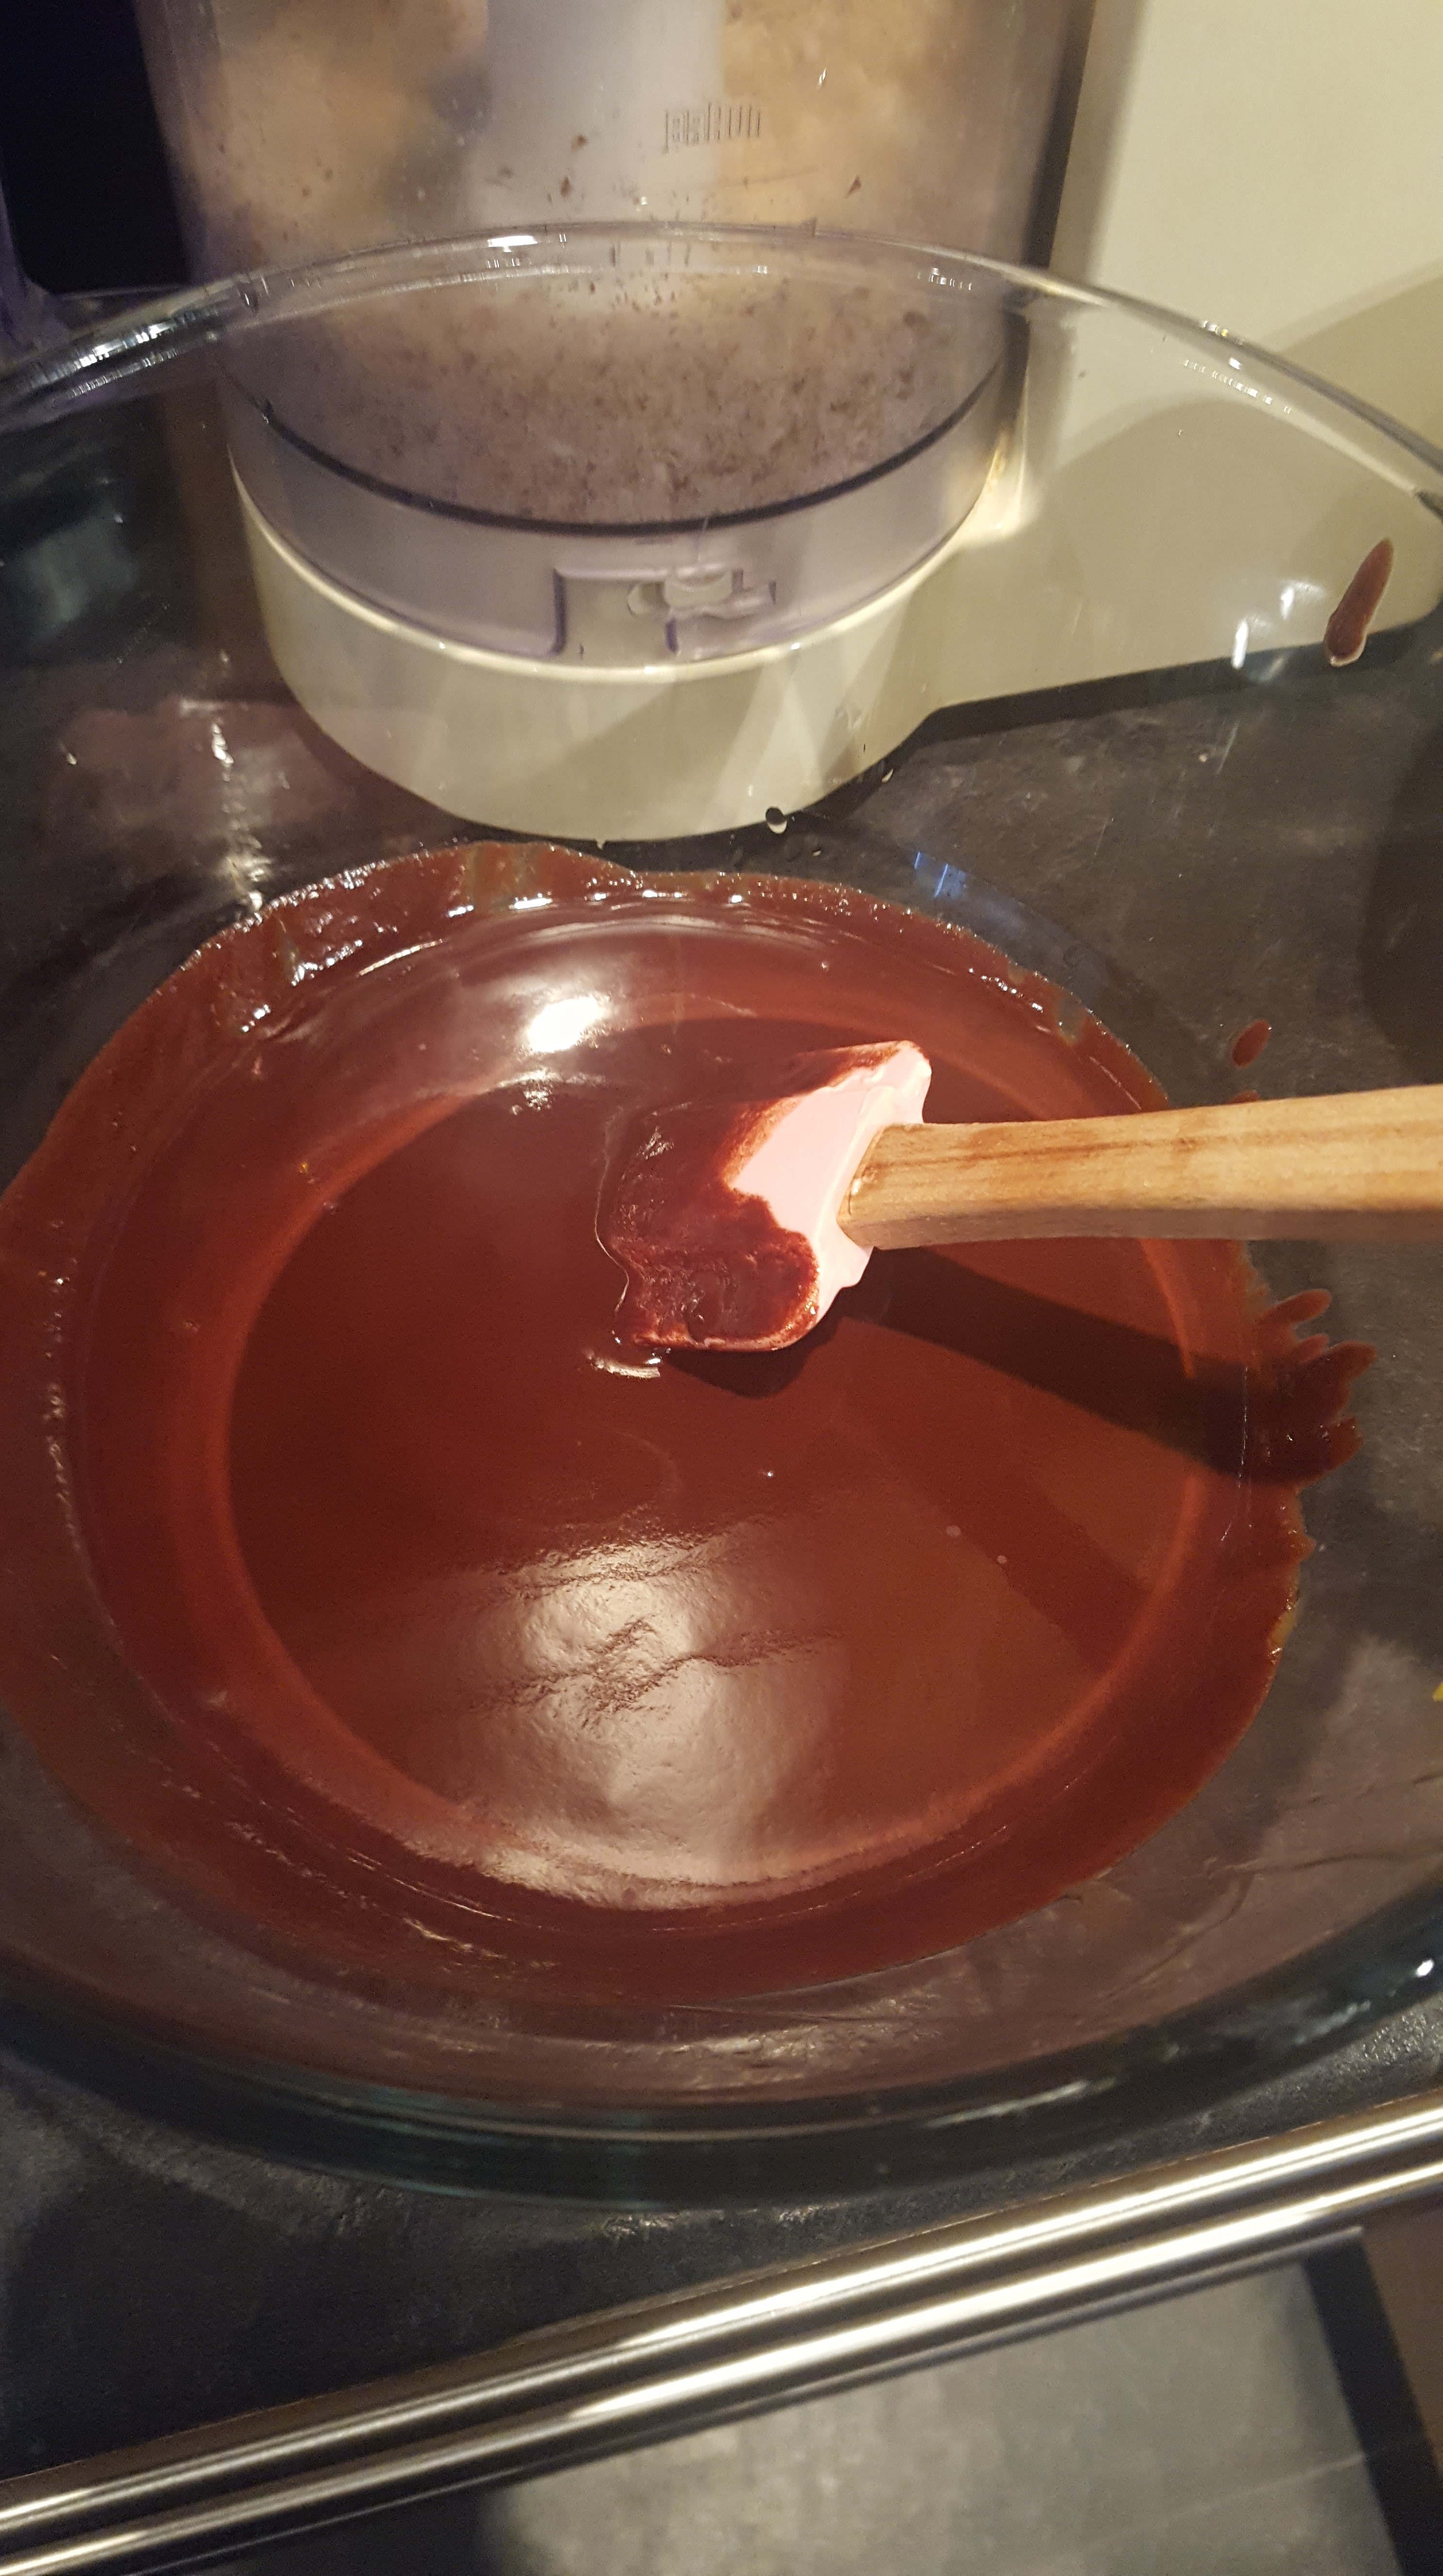
Makes 8 portions
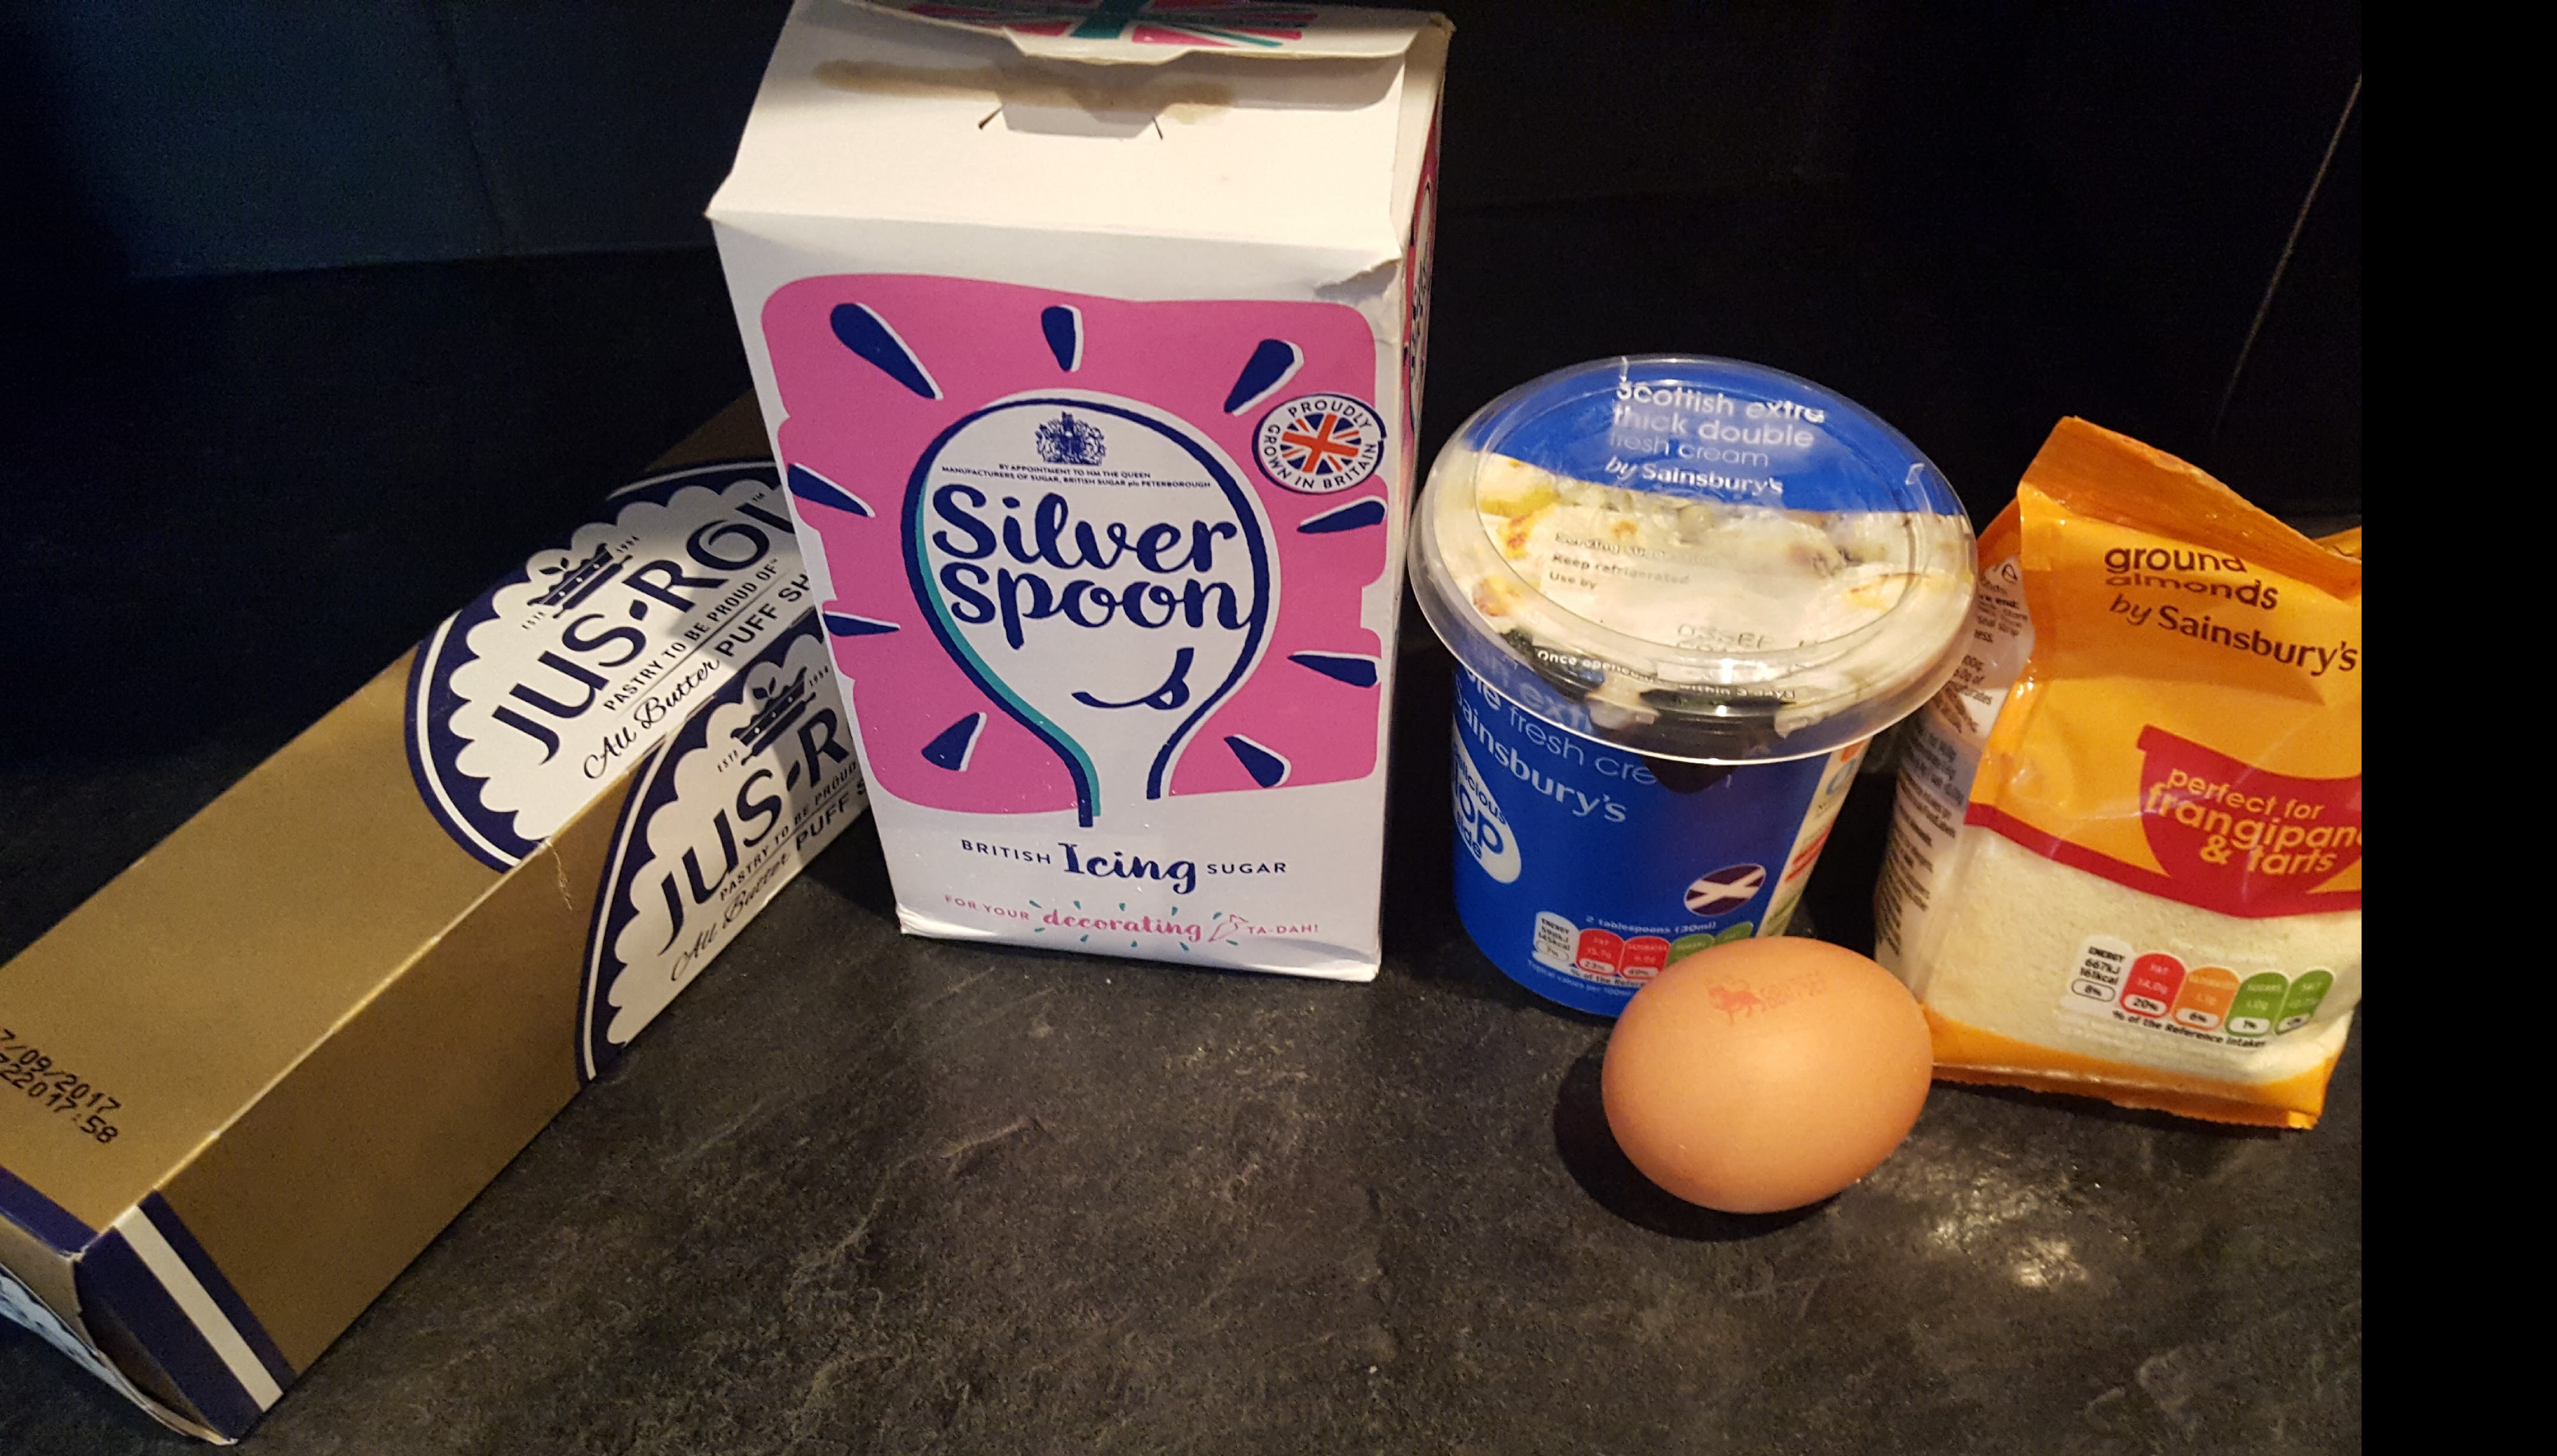
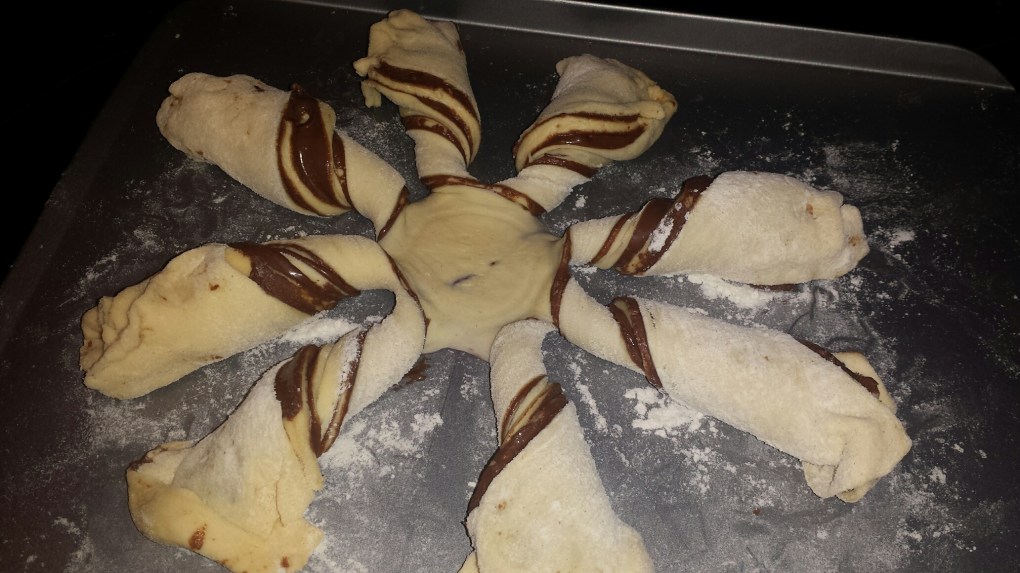
I cheated a bit with this one and bought shop bought pastry. (Jus-~Rol) 1 x box
1 Jar Nutella
1 egg for glazing
a little flour for rolling.
1. Take out pastry from packet and split into 4 or 5 sections, Roll each section out to desired size using a little flour on surface to prevent sticking, you don’t want the pastry too thick or too thin.
2. Take one section of the pastry and spread nutella evenly over top, take next section of pastry and lay on top, then again spread with nutella etc, etc, keep on layering and spreading until you come to your last pastry layer and just lay that on top.
3. Take a large cutter or something circular like a cake tin lid to cut around pastry stack and make nice and neat all the way around.
4. Now come the tricky bit, take a small glass and position in the middle, the cut out your sections evenly.
5. Now take each section pull towards you slightly and twist about 3 times and seal the end.
6. Once all sections have been done, brush with some egg wash for the glaze.
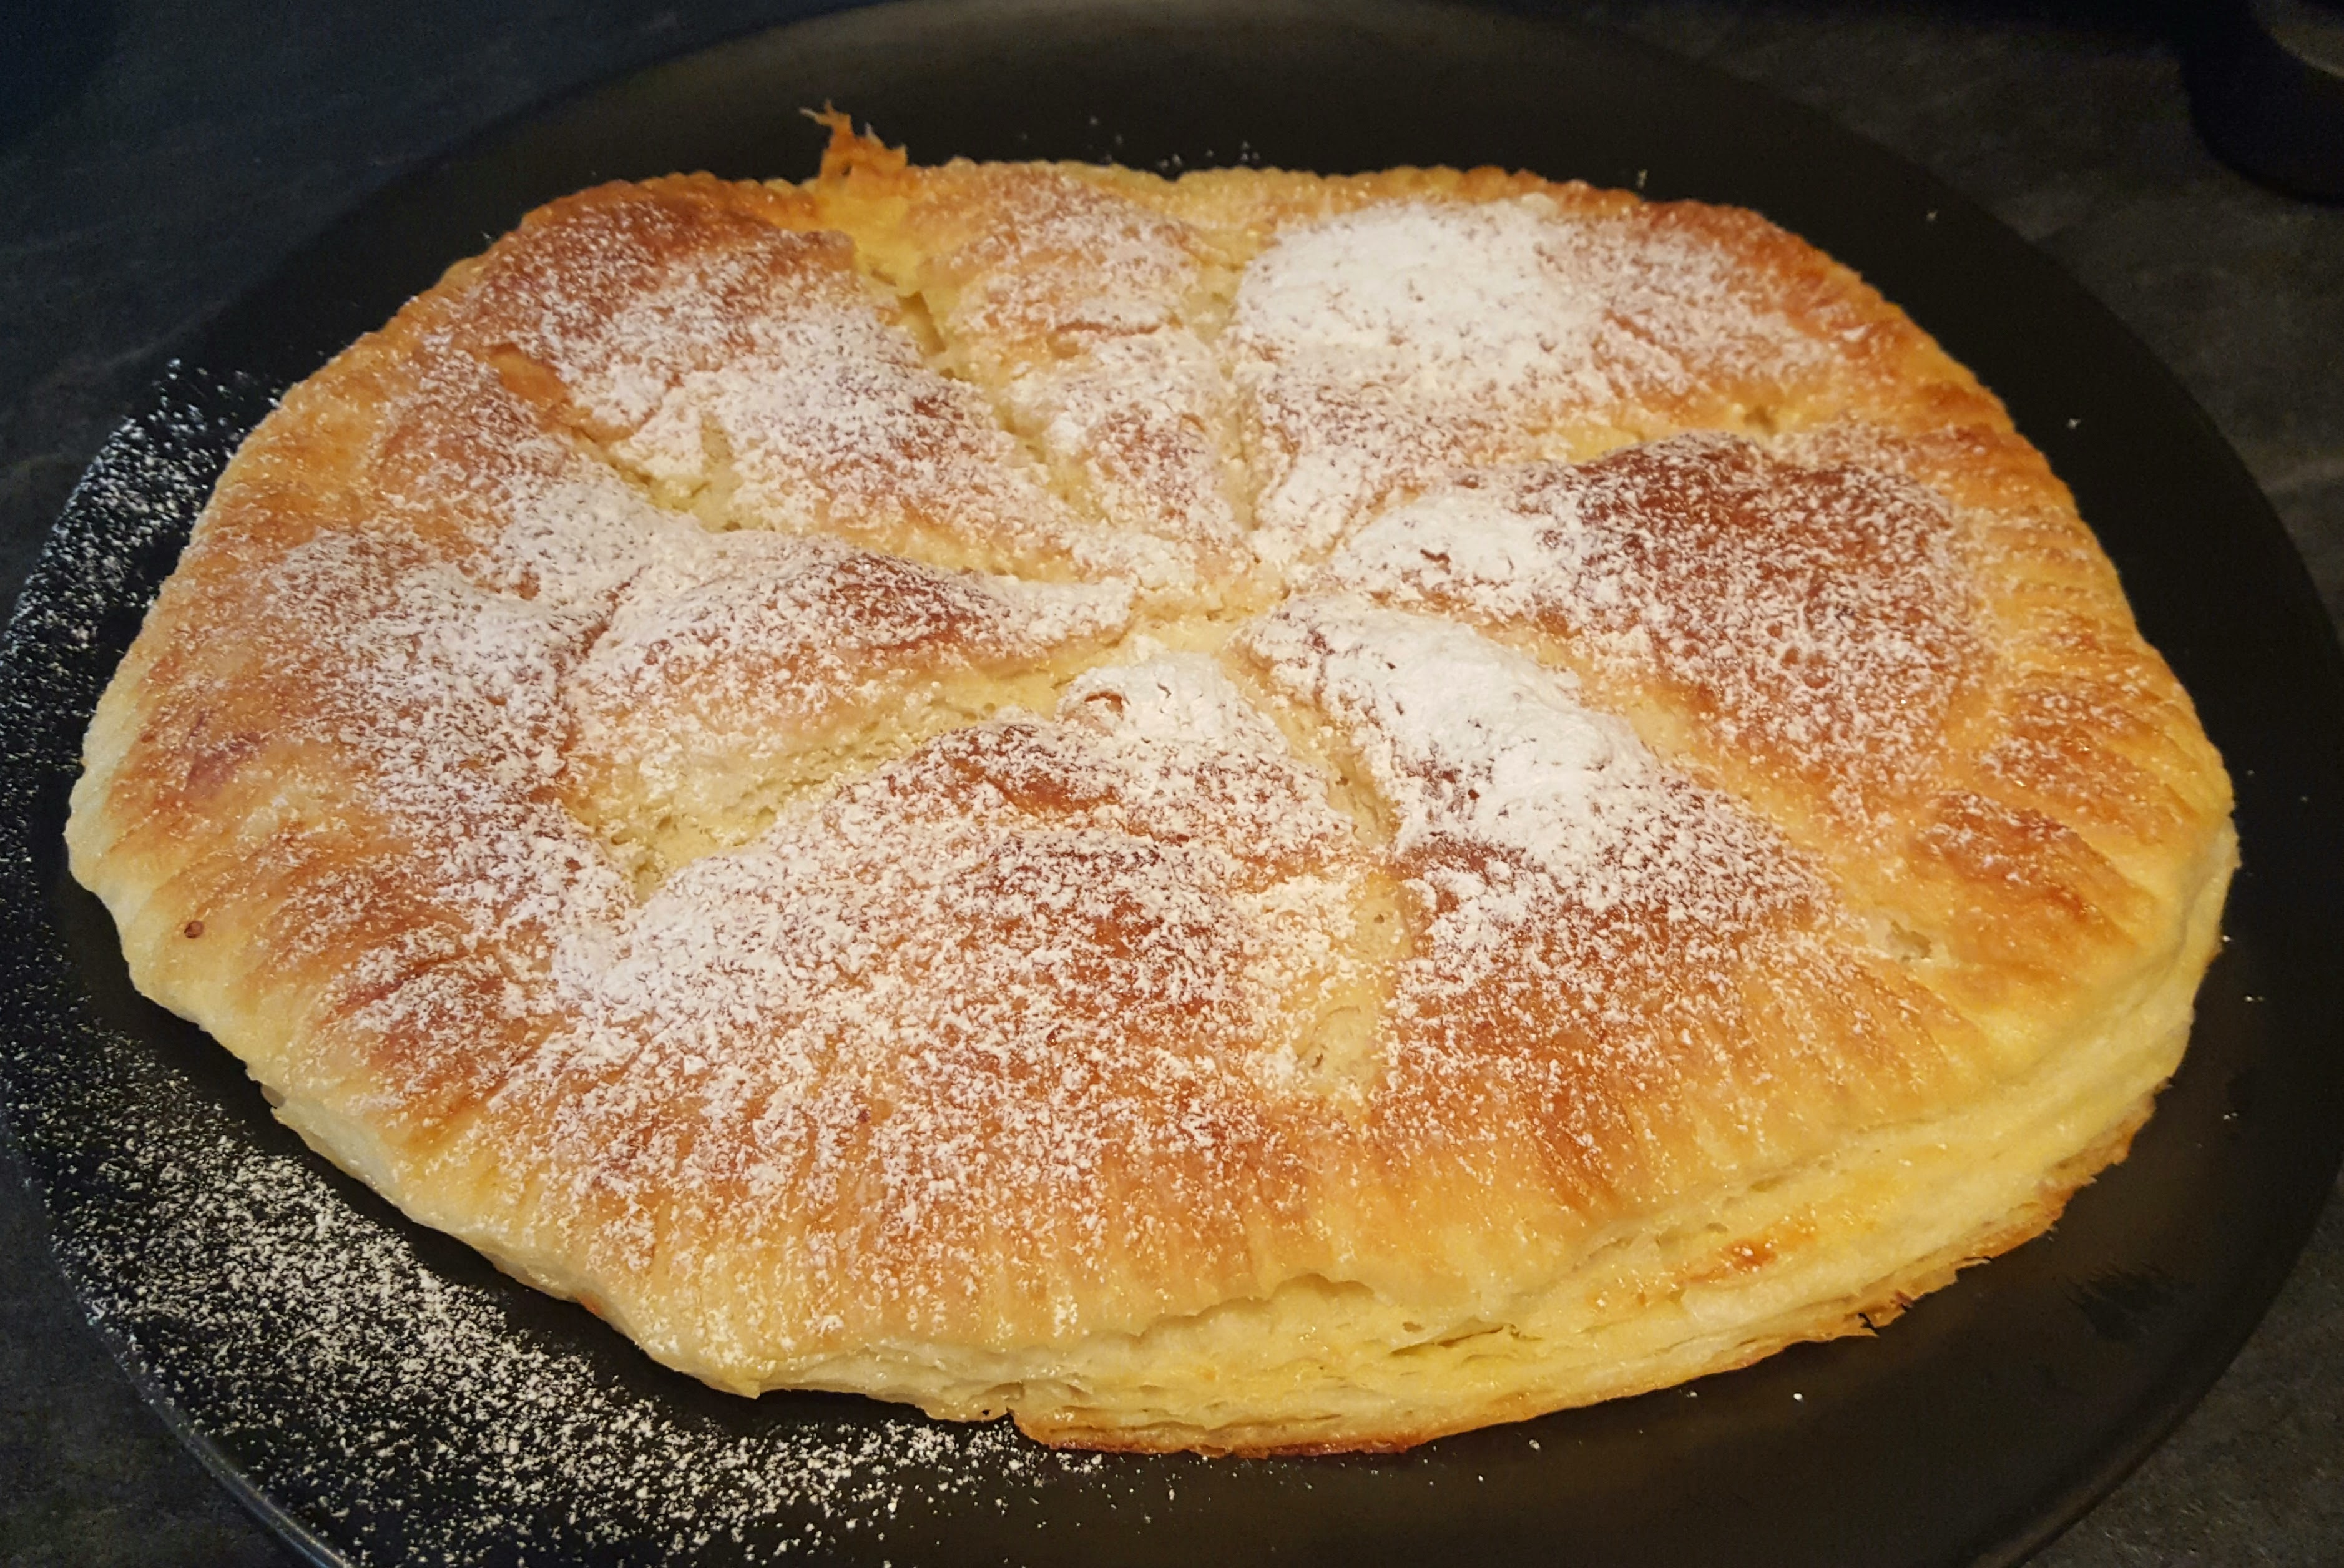
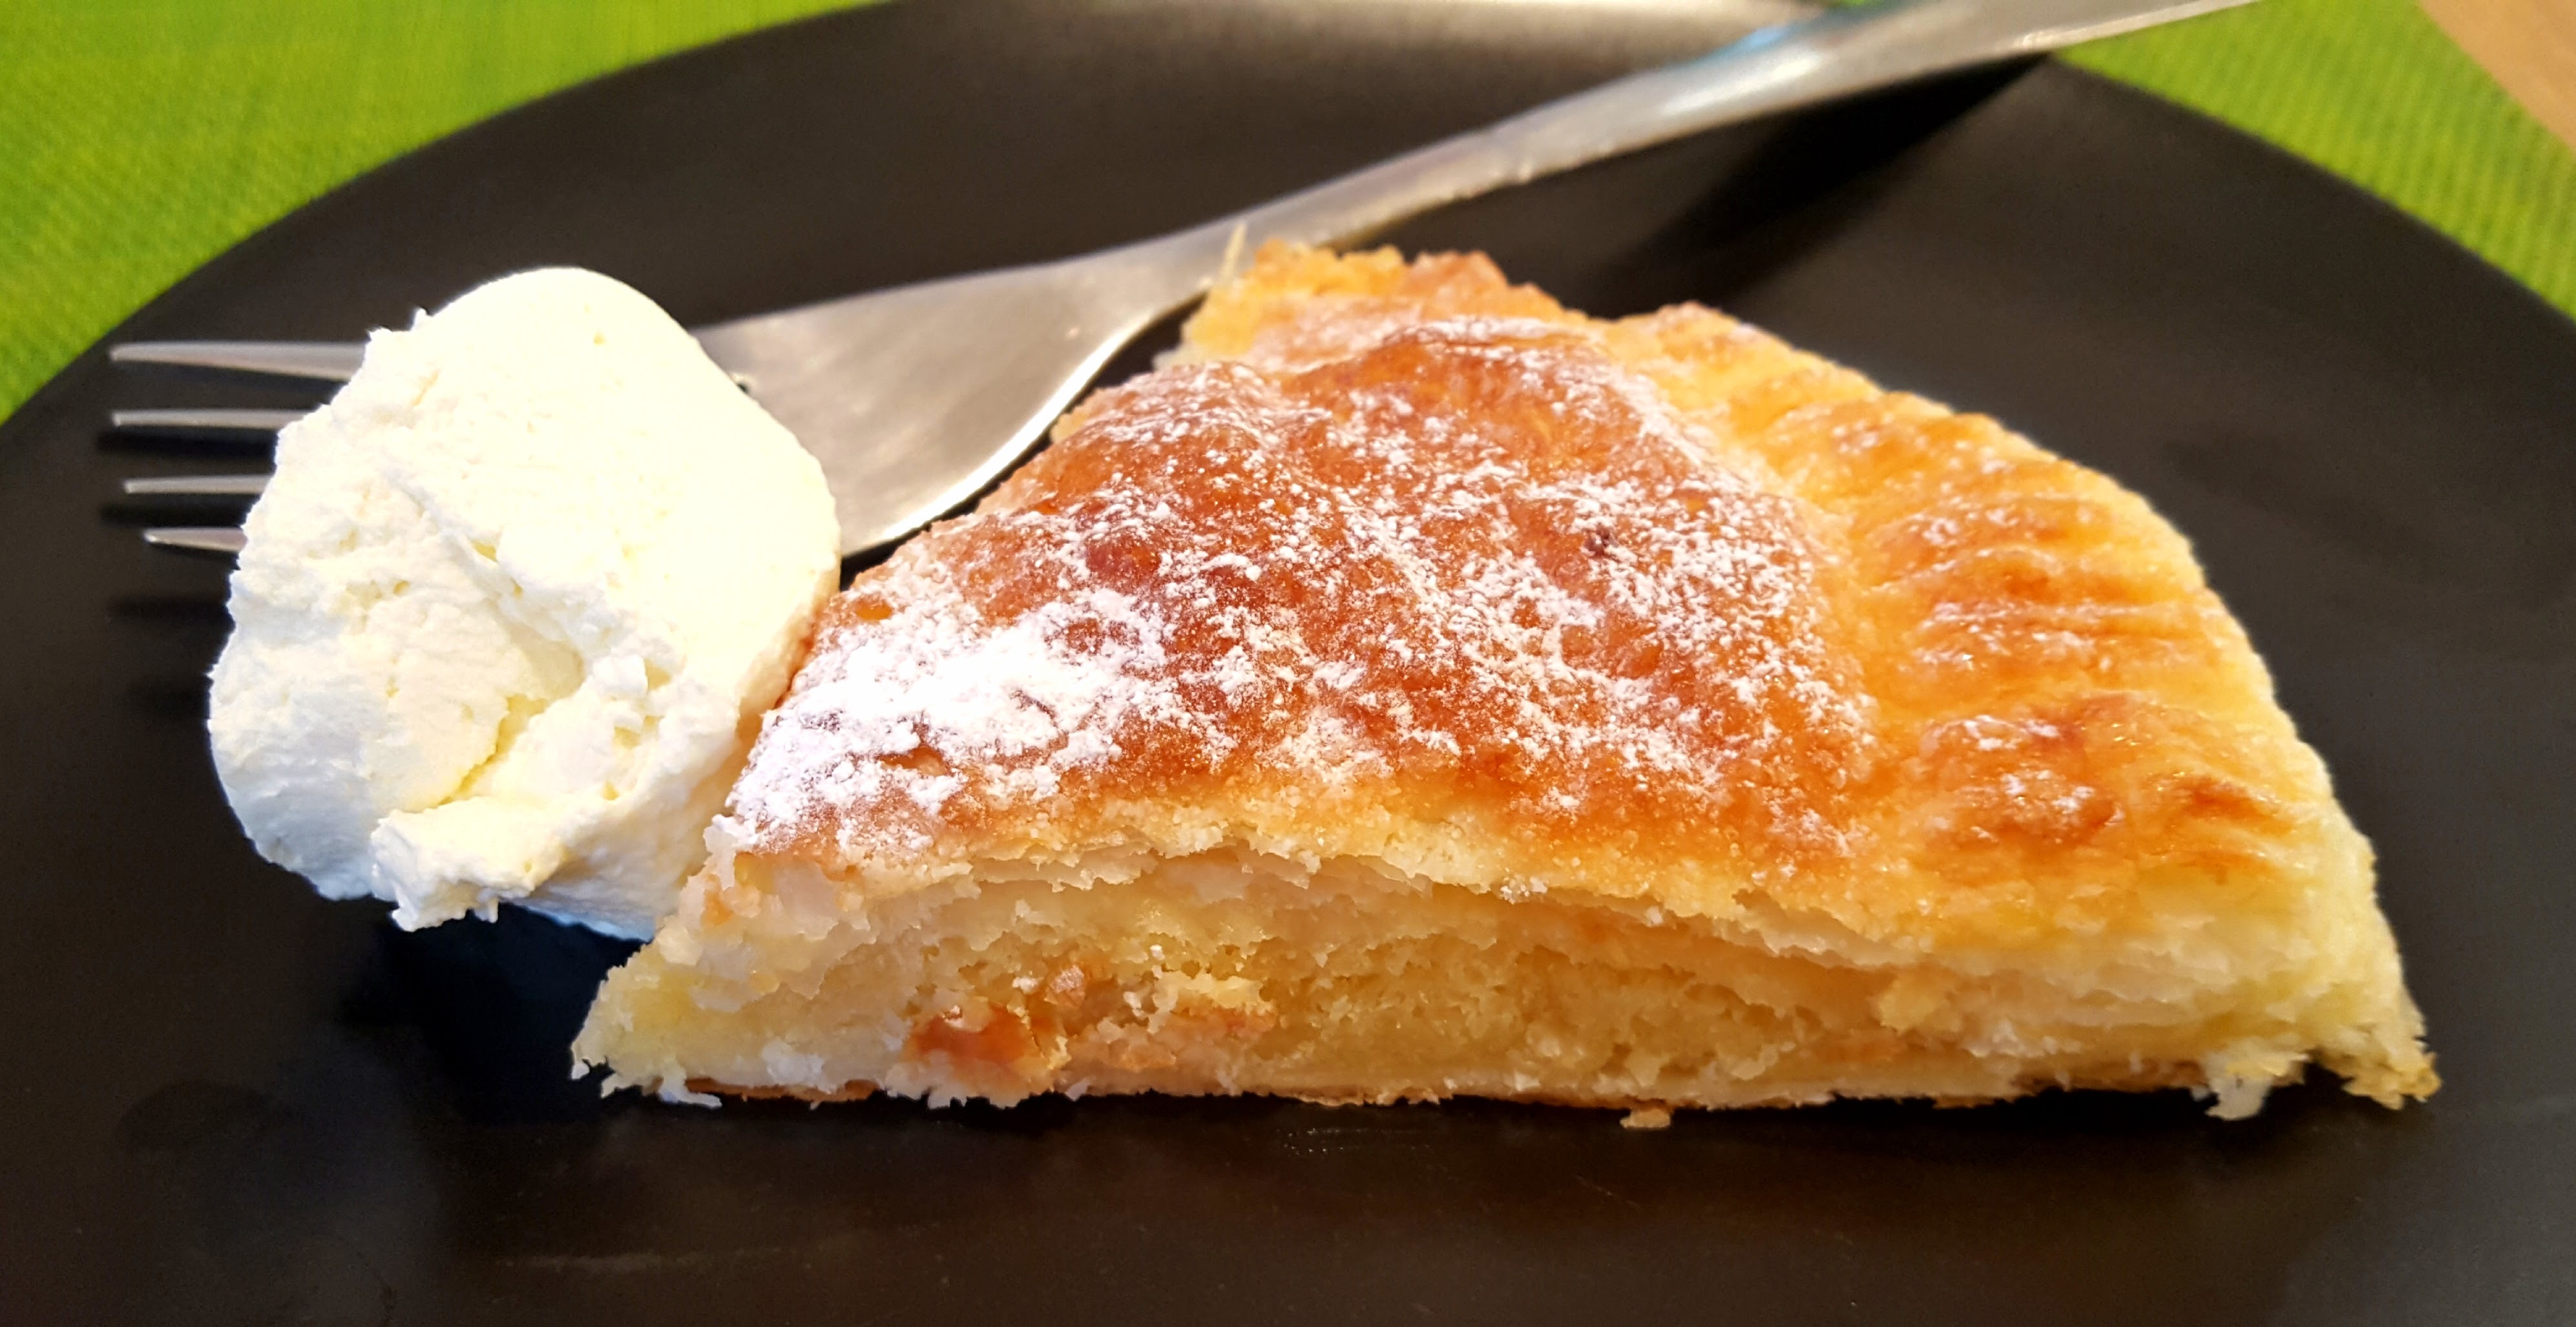
7. Bake in a preheated oven for about 15-20 mins or until golden brown. (or as per packet instructions)
8. Break up sections and serve once cooled….oh so yummy!!!!


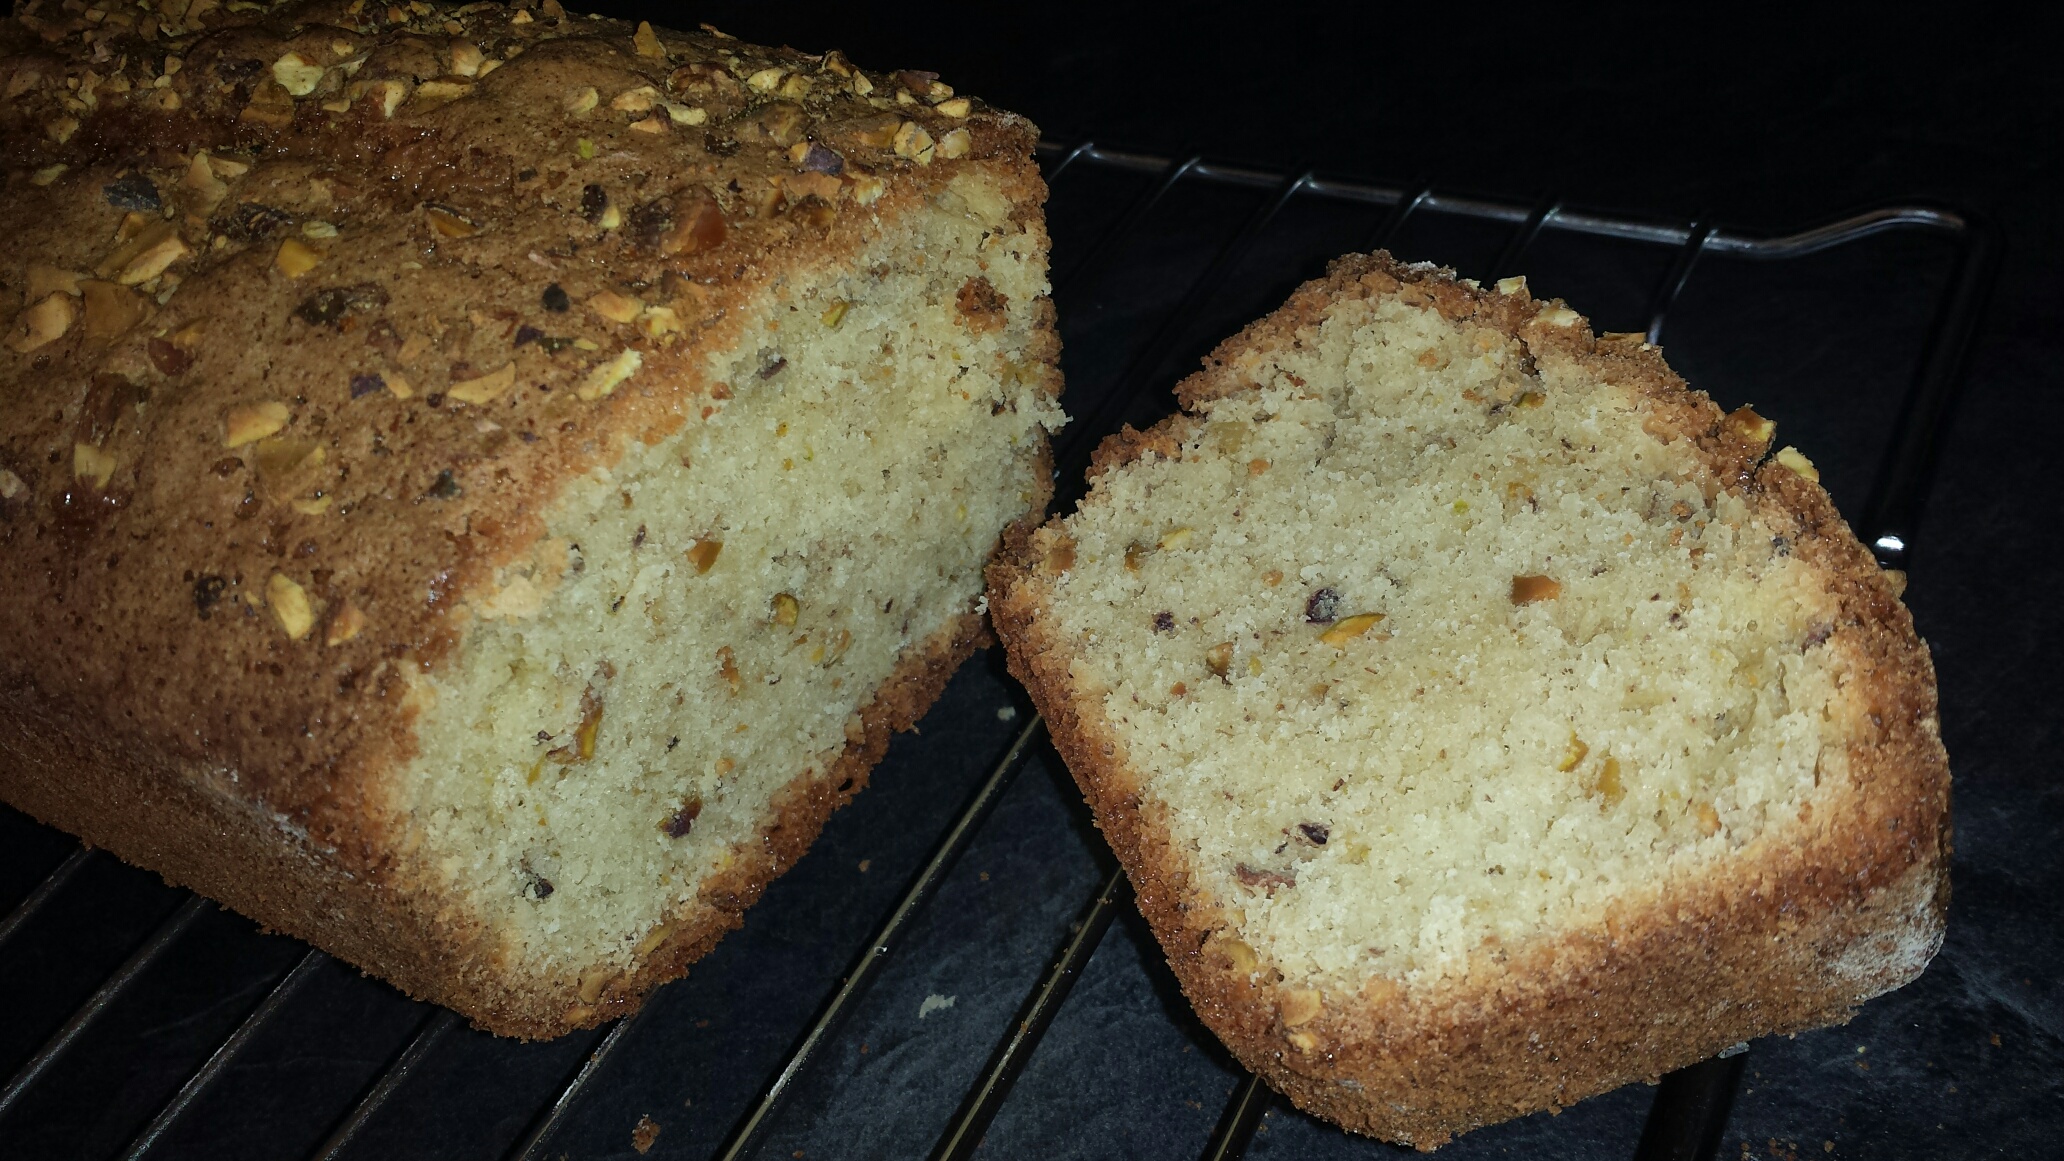

I had some Pistachio’s in the cupboard and didn’t know what to do with them, so I made a cake/Bread! Not sure what to call it, it looks like bread but tastes like a cake…lol!
I still have 50g of pistachios left and will try a topping for chicken through the week for something different. Watch this space.
My Pistachio Afternoon Cake/Bread – Serves approx 10-12
300g Self Raising/All purpose flour
1.5 tsp kosher Salt or table salt if you don’t have.
1 tsp baking powder
100g unsalted butter (room temp)
300g caster sugar
5 large eggs
2 tbsp fresh lemon juice
2 tbsp fresh orange juice
2 tsp grated orange zest
1 tsp grated lime zest
150g un-shelled pistachio’s
1. preheat oven to 160 deg.
2. Flour a baking tin and remove excess. Approx size 9x5x3 inch
3. Mix flour, salt and baking powder in a bowl, set aside.
4. Beat butter with electric mixer until light and fluffy, then add in the sugar and mix until well blended
5. Add in eggs, 1 at a time ensuring well blended, then add remaining juices (ie:lemon,lime,orange)
6. Now add the dry ingredients (flour mix) and mix.
7. Crush pistachio’s in a mixer until coarsely chopped, add in about 3/4 of pistachio’s and mix well in.
8. Pour mixture into baking tin and sprinkle remaining pistachio’s over top.
9. Bake in the oven for approx 1.5 hours or until knife comes out clean.


Amaretti Low Carb Biscuits – Makes approx 16-20 – Per biscuit: 51 calories, 0.5g carbs, 4g fat, 2g protein
150g Almond flour
3 Tbsp Splenda Sugar or alternative (Truvia)
2 Egg Whites
1.5 tbsp Amaretto Disaronno liqueur
1. Pre-heat oven 170 deg
2. Whisk egg whites until stiff
3. Mix flour and sugar together, then add flour mixture to the egg mixture 1 tablespoon at a time mixing in.
4. Add in Disaronno liqueur and mix well.
5. Line baking tray with greaseproof paper and spoon into small round shapes or roll into a small ball in hands and then flatten. Make sure there is at least 2 cm between as they will expand slightly.
6. Bake for 15-20 mins or until golden brown. Let cool and store in an airtight container until desired.
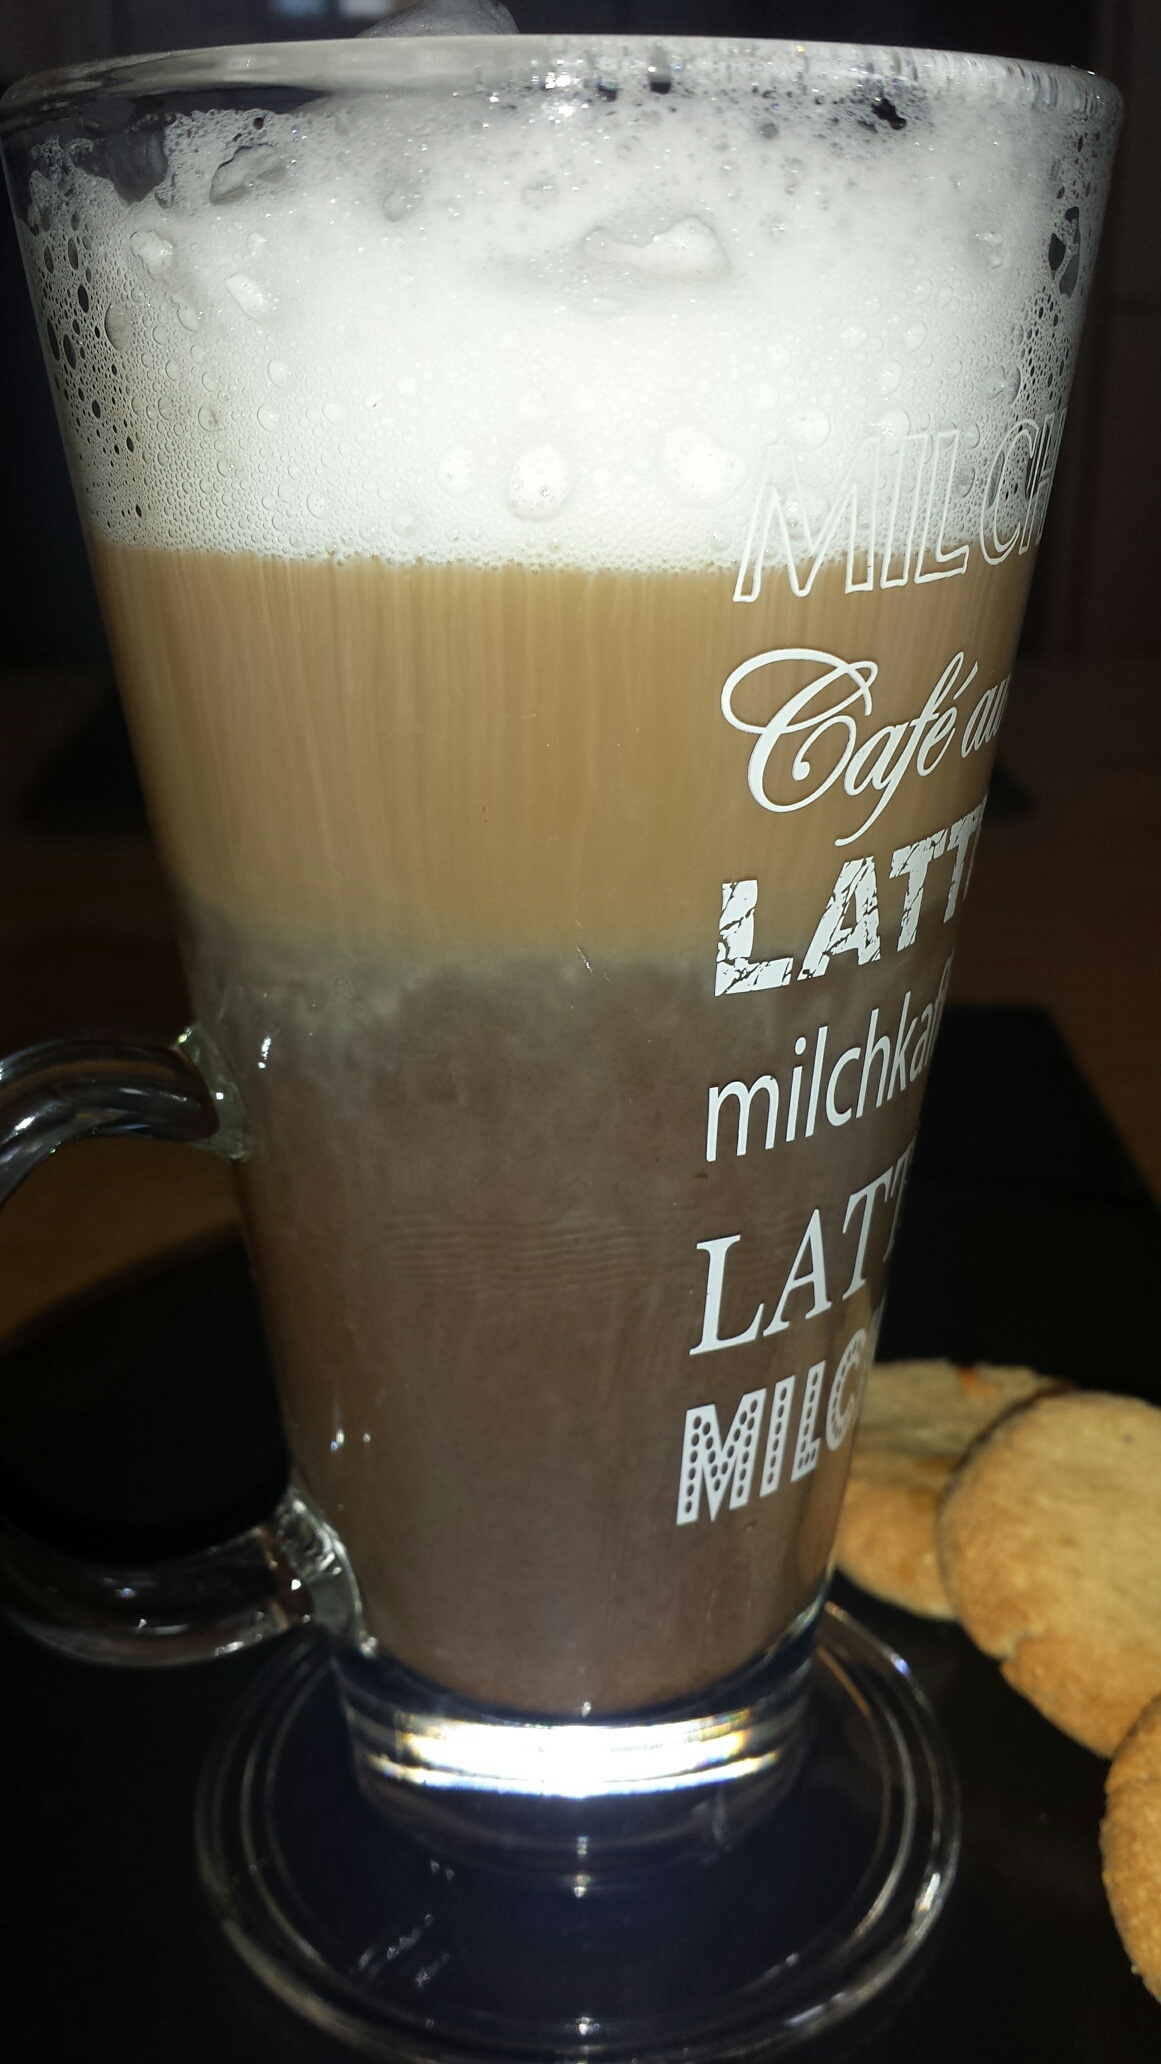
Goes well with a lovely Disaronno Liqueur coffee
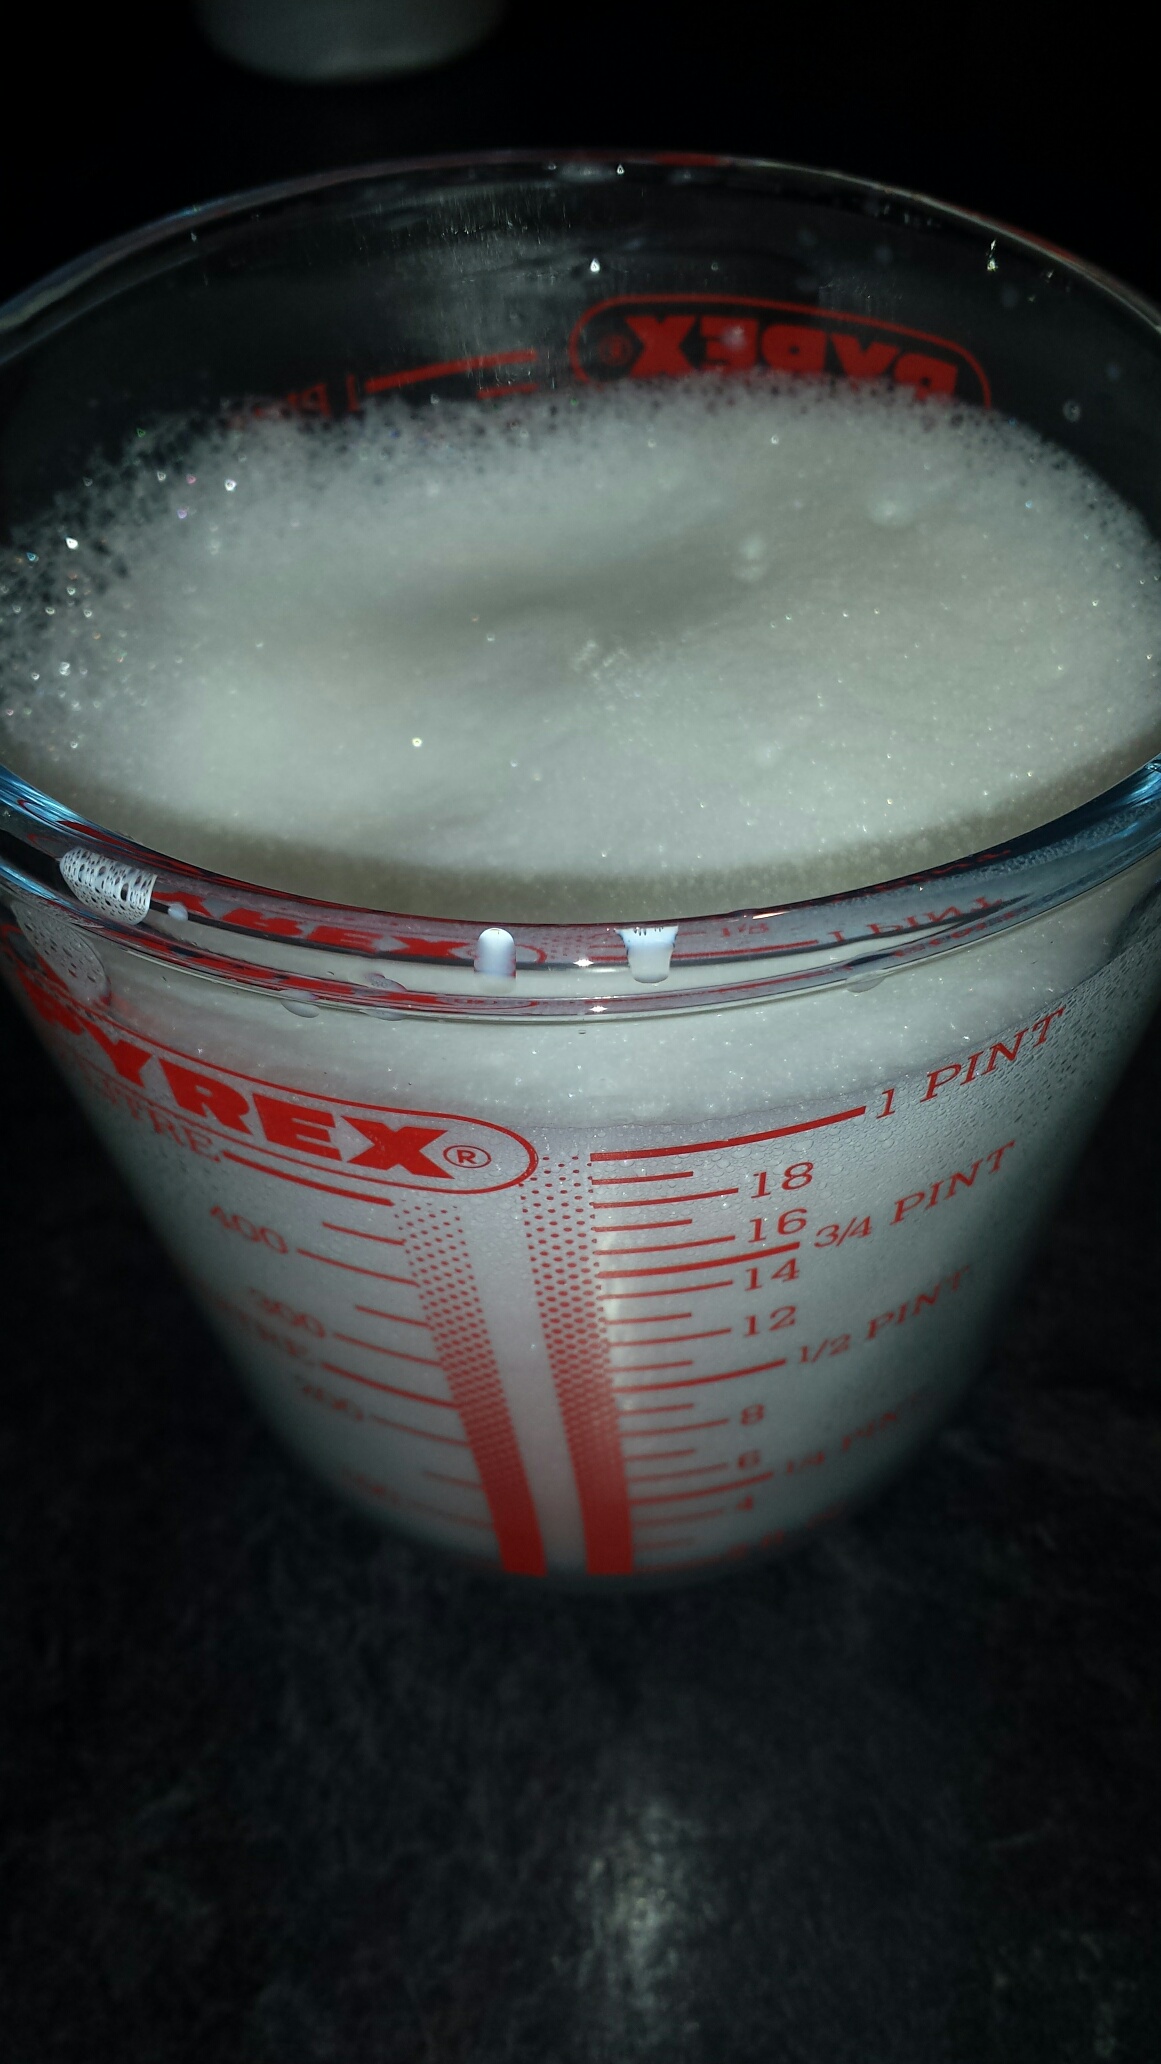
1. Make up some real coffee ie: filtered or beans whichever is your preference.
2. While coffee is filtering, pour some milk approx 100ml into a jug and whisk until frothy, you can also heat milk up first before whisking.
3. Pour approx 25ml of liqueur into a tall latte style mug.
4. Pour coffee slowly in and then top with the frothy milk.
Serve with amaretti biscuits….Yummy afternoon delight!

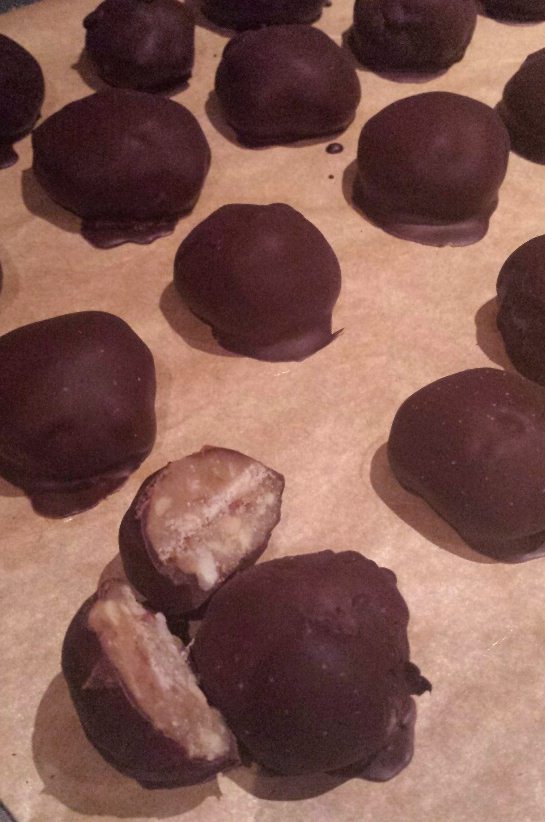
I was looking for a quick pre or post workout snack, so made these for a quick pick me up of energy.
Makes approx 20 balls
200g Peanut Butter (I used Crunchy but you can use smooth)
50g butter
1 tsp vanilla essence
150g Icing Sugar (or substitute)
100g Dark chocolate (I used 85% cocoa)
1. Put peanut butter, butter, vanilla, icing sugar in a pan and heat on a medium heat (No. 5/6 if using Induction), when it starts to bubble, remove and set aside to cool,
2. Once cool make into small balls and place on greaseproof paper on a tray. Place into freezer to harden for approx 1 hour.
3. Break up chocolate and place into a saucepan, heat on No. 1 if using Induction, or alternatively melt chocolate using bowl over pan or in microwave.
4. Remove balls from freezer and using 2 forks cover each one in the melted chocolate then place back onto the greaseproof paper and freezer for approx 30 mins until chocolate hardens.
5. To serve, remove from freezer approx 1o mins before to allow softening……..scoff….yum!
Can be kept in freezer up to 1 month. Yummy protein balls!


Experimenting in the Kitchen again today. These were tasty and healthy, what’s not to like? Result!
A. Carrot and Sesame Cups – (95 calories, 5g fat, 0.6g sat fat, 7g carbs, 4g protein)
Makes 12
250g Cauliflower
500g carrots
50g oat bran
3 eggs
1 tsp sea salt
50g sesame seeds
1 tbsp sesame oil
1 tbsp of chilli flakes for extra spice (this is optional, but tastes great!)
1. Roughly chop cauliflower and carrot and blitz in a food processor until fine pieces, tip into a large bowl.
2. Add the oat bran, eggs, salt and sesame seeds and mix through.
3. Lightly oil a muffin tin and spoon the mixture into the cups and pat down flat, spoon a little on top a mould to make a rounded top.
4. Preheat oven on Multilevel or fan to 180 deg and cook for 20-25 mins, leave to cool slightly (a few mins) and serve with some fresh salad for lunch or some rice for dinner.
B. Bacon and Leek Frittata Cups – (cal 115, fat 8g, sat fat 2.3g, carbs 3g, protein 6.4g)
Serves 12
150g new potatoes (or you can use sweet potato)
1 tbsp olive oil
2 leeks
8 rashers bacon
6 eggs
bunch parsley fresh or dried
salt and pepper
1. Wash potatoes, slice or dice finely and boil for 10 mins
2. Finely slice leeks, chop the bacon ans saute them on the olive oil until soft and browned.
3. If sliced potato, arrange on bottom of mould, if diced, mash roughly and press into bottom of mould, spoon in the leek and bacon mixture.
4. Whisk the eggs with the salt & pepper and pour evenly into each cup to fill. Sprinkle a little parsley in top.
5. Preheat oven on Multilevel to Fan to 180 deg and cook for 25 mins. Leave to cool slightly (a few mins), then serve with some fresh salad or rice.
YUM…YUM..
Both of these can be frozen and reheated in an oven for 10 mins.


Trying my hand at something a wee bit different. Not bad! Tasty too.
Serves 10-12
1/2 cup 60-70% vegetable oil spread
1/4 cup softened butter
2/3 cup sugar or sugar substitute such as Splenda
1 tsp baking powder
1/4 tsp salt
1 egg white
2 cups all purpose flour
1.5 tsp finely grated orange peel
40 dark chocolate stars or alternative
1. Preheat oven to 170 deg.
2. In a large bowl, combine veg oil spread and butter beat with an electric mixer on medium speed, add sugar, baking powder and salt, beat until light and fluffy.
3. Beat in egg white and as much flour as you can with the mixer. Using a wooden spoon stir in remaining flour and orange peel.
4. Shape dough into 1 inch balls, place balls apart onto ungreased cookie sheets and bake for 7-9 mins or until edges are set and bottoms are very lightly browned.
5. Immediately once out of oven press a chocolate star into the centre of each cookie. Transfer cookies to wire rack to cool. YUM!
77 cal each, 9g carb each.

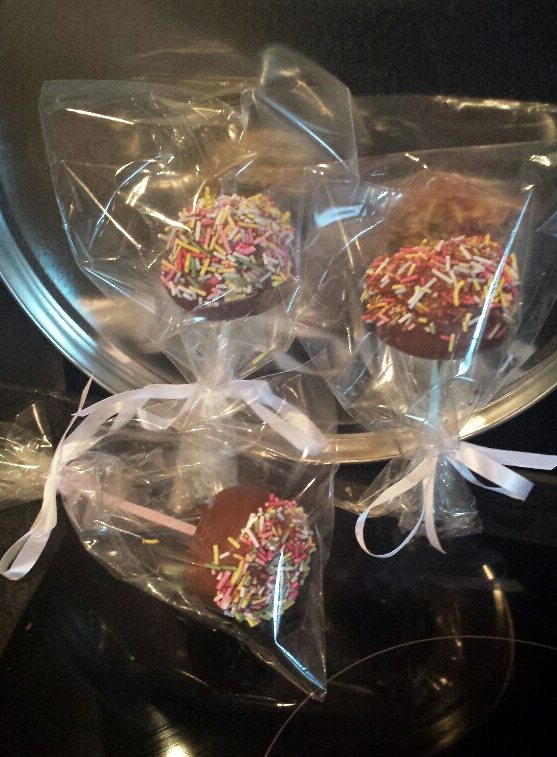

Just had to give these a go. Quite tricky but got there.
OREO CAKE POPS
2 x packets or OREO biscuits
1 tub Nutella Chocolate Spread
Cake pop sticks
500 g bar of chocolate
Sprinkles of choice
1. Put biscuits in a food processor until well mixed and broken into fine pieces
2. Empty into a bowl and add the nutella until well mixed together, it should form a hard sticky ball
3. Once mixed tear off small (approx 1 inch) pieces and roll into balls in palm of hand and place onto oiled baking tray
4. Put into freezer for approx 30 minutes to harden.
5. While cake pops are hardening, melt the chocolate in a heatproof glass dish over a pan of boiling water or on No. 1 on Induction Hob
6. Take Cake pops from freezer, dip the cake pop sticks into chocolate (just about 1cm) and pierce into cake pops, then re-freeze for about 20 minutes.
7. Once ready take out and decorate as desired with melted chocolate and spirnkles etc. Then chill to harden chocolate for about 1 hour.
8. Serve and enjoy. (Pops will last in a tub or cupoard for about 1 week).
**Alternatively you can use a cake mix instead of Oreo’s** – same procedure, bake cake then break up in a food processor, then add frosting instead of nutella.
***To keep round shape use polystyrene block to hold pops***

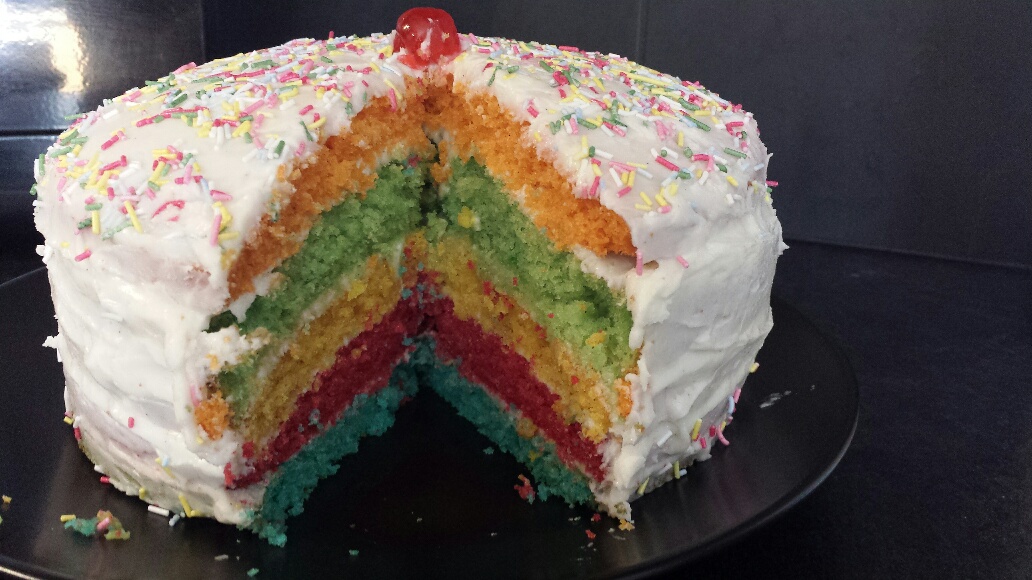


Having Fun in the Kitchen today, have been dying to try this for a while now. Certainly cheered me up.
RAINBOW LAYER CAKE
350g Plain Flour
4 teaspoons baking powder
3/4 teaspoon salt
4 egg whites
300 g caster sugar
170g butter softened
350ml milk
1 teaspoon vanilla paste
food colouring of choice
Icing –
75g butter
500g icing sugar sifted
4-5 tablespoons milk
1 teaspoon vanilla paste/extract
1. Preheat oven to 180 deg on Multilevel mode and grease 5-6 cake tins and line with parchment paper. 18cm tins.
2. Sift the flour, baking powder and salt together and set aside.
3. In separate bowl beat egg whites until foamy, then add 100g of caster sugar gradually, continue beating until soft peaks form
4. Beat butter until smooth in separate bowl, gradually add remaining caster sugar and cream together until fluffy.
5. Add sifted ingredients alternately with milk in a small amount beating until smooth. Add in vanilla. Add in egg whites and fold in gently till no streaks of eggs appear.
6. Divide mixture into separate bowls 5-6, add food colouring to each and mix well.
7. Put into oven on shelf levels 1,3,5 – can fit 2 ins on each level and bake for about 15-20 mins or until skewer runs clear when inserted, then remove and cool in tins.
8. To make the icing, beat butter until fluffy, gradually add half of the icing sugar beating well. Slowly beat in the half of the milk and vanilla. Slowly beat in remaining icing sugar adding milk if needed to desired consistency. I used 5 tablespoons.
9. Once cakes are cooled remove from tins and place first layer on a cake plate, cover top with the icing thinly, add second layer, then add icing layer etc, etc. Finally use remaining icing to cover top and sides of cake and smooth with palette knife or spatula. Decorate to your desire.


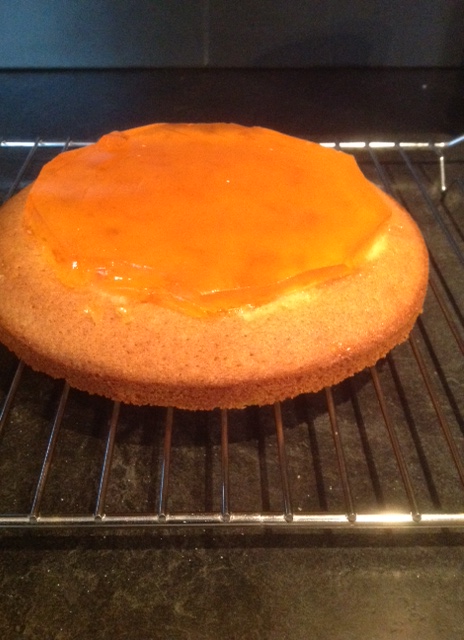
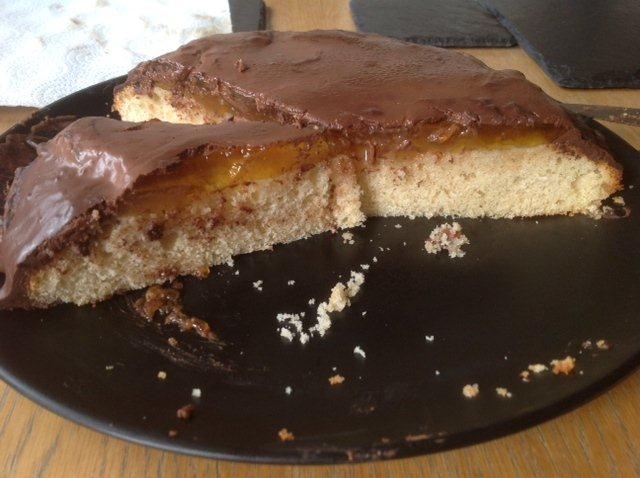

THE BIG JAFFA CAKE
2 eggs
150g Caster Sugar
150g Butter
150g Self Raising Flour
2 teaspoons vanilla paste
1 packet orange jelly
juice of 1 orange/ or 1 tablespoon of orange liqueur (optional)
2 tablespoons orange marmalade
100g dark chocolate
splash of milk
**Night before make Jelly as instructed on packet adding in either the juice of orange or liqueur, leave in fridge overnight. (Tip…put in tin about 1″ diameter smaller than cake tin and lay in cling film before putting jelly mixture in.**
1. Preheat oven using Cake Mode (approx. 10 mins)
2. Grease cake tin – approx. 18-23cm
3. Cream together using a mixer, butter and sugar until pale and fluffy
4. Add eggs one at a time and beat for few minutes, add in vanilla paste and fold in the flour.
5. Pour mixture into cake tin and put in oven for approx 30 mins or until skewer inserted is clear.
6. One cake is cooked leave to completely cool.
7. Once cooled slice a very thin layer off top of cake to level it
8. in microwave for about 30 secs, melt orange marmalade and then brush marmalade onto top of cake (this helps jelly stay on)
9. Finally melt the chocolate either using an induction hob on No. 1 or in bowl over boilng water, add in butter and milk and mix. May need to add more milk to get it more runny.
10. Pour chocolate over cake evenly and leave to set.
Enjoy!

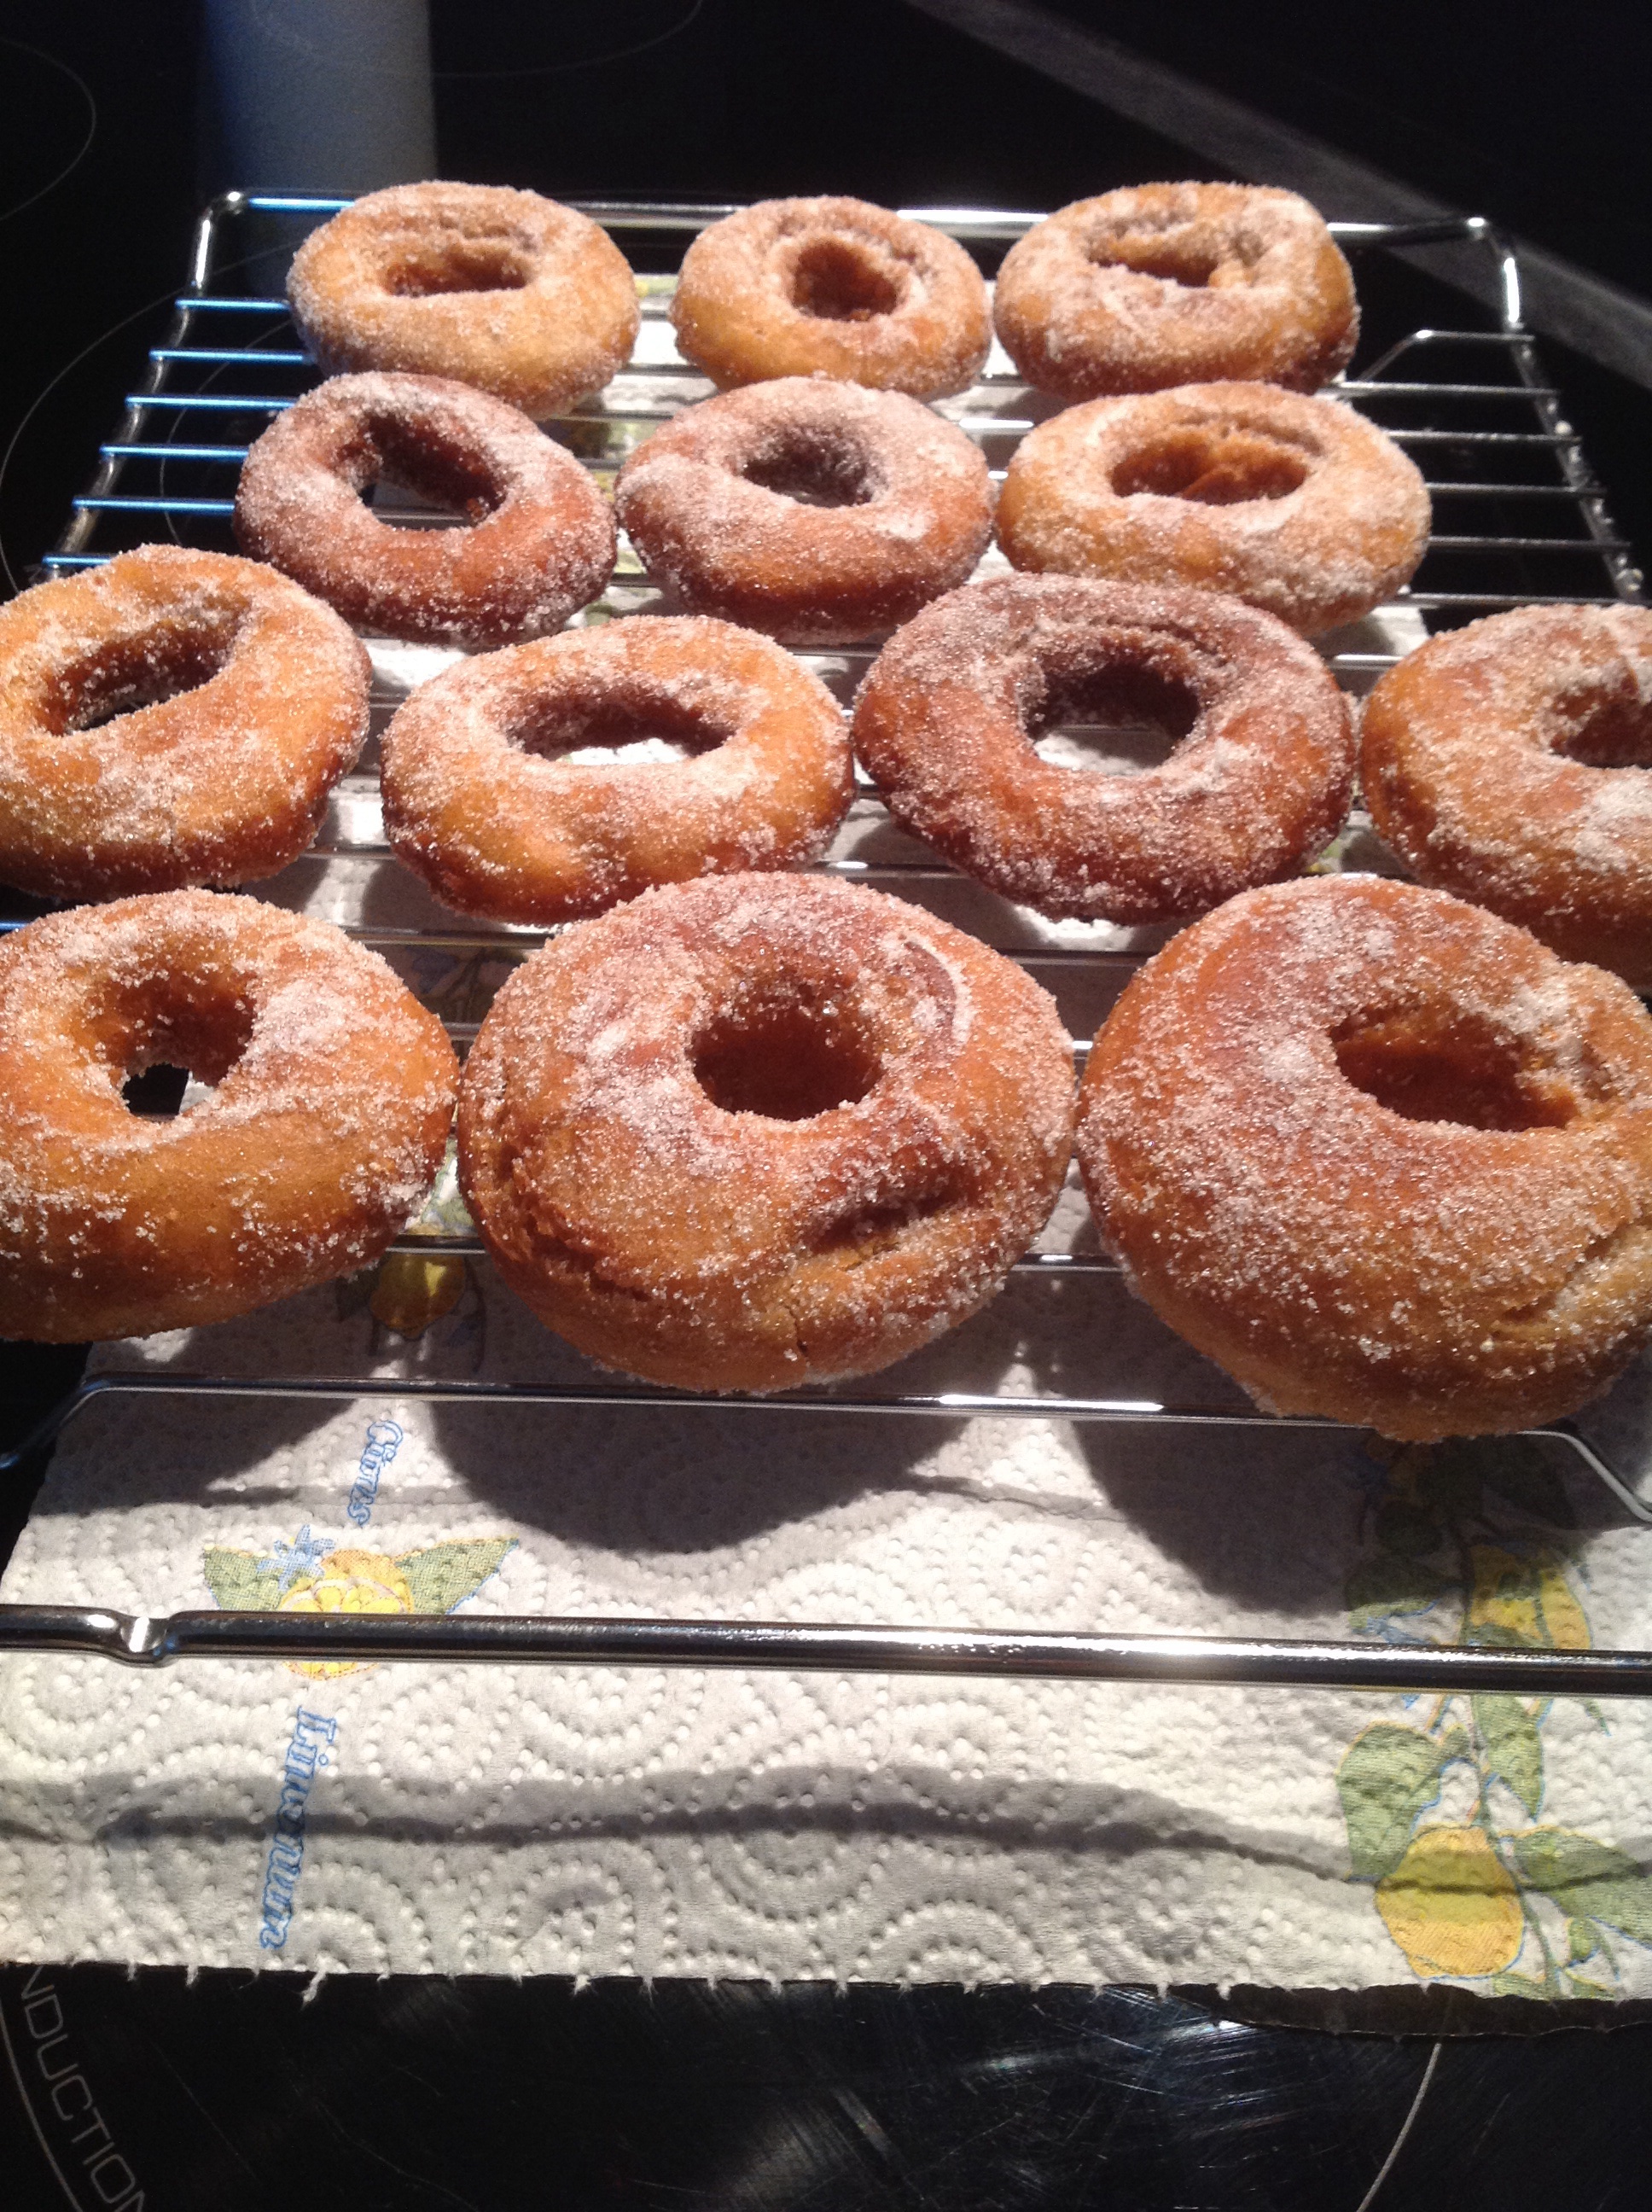

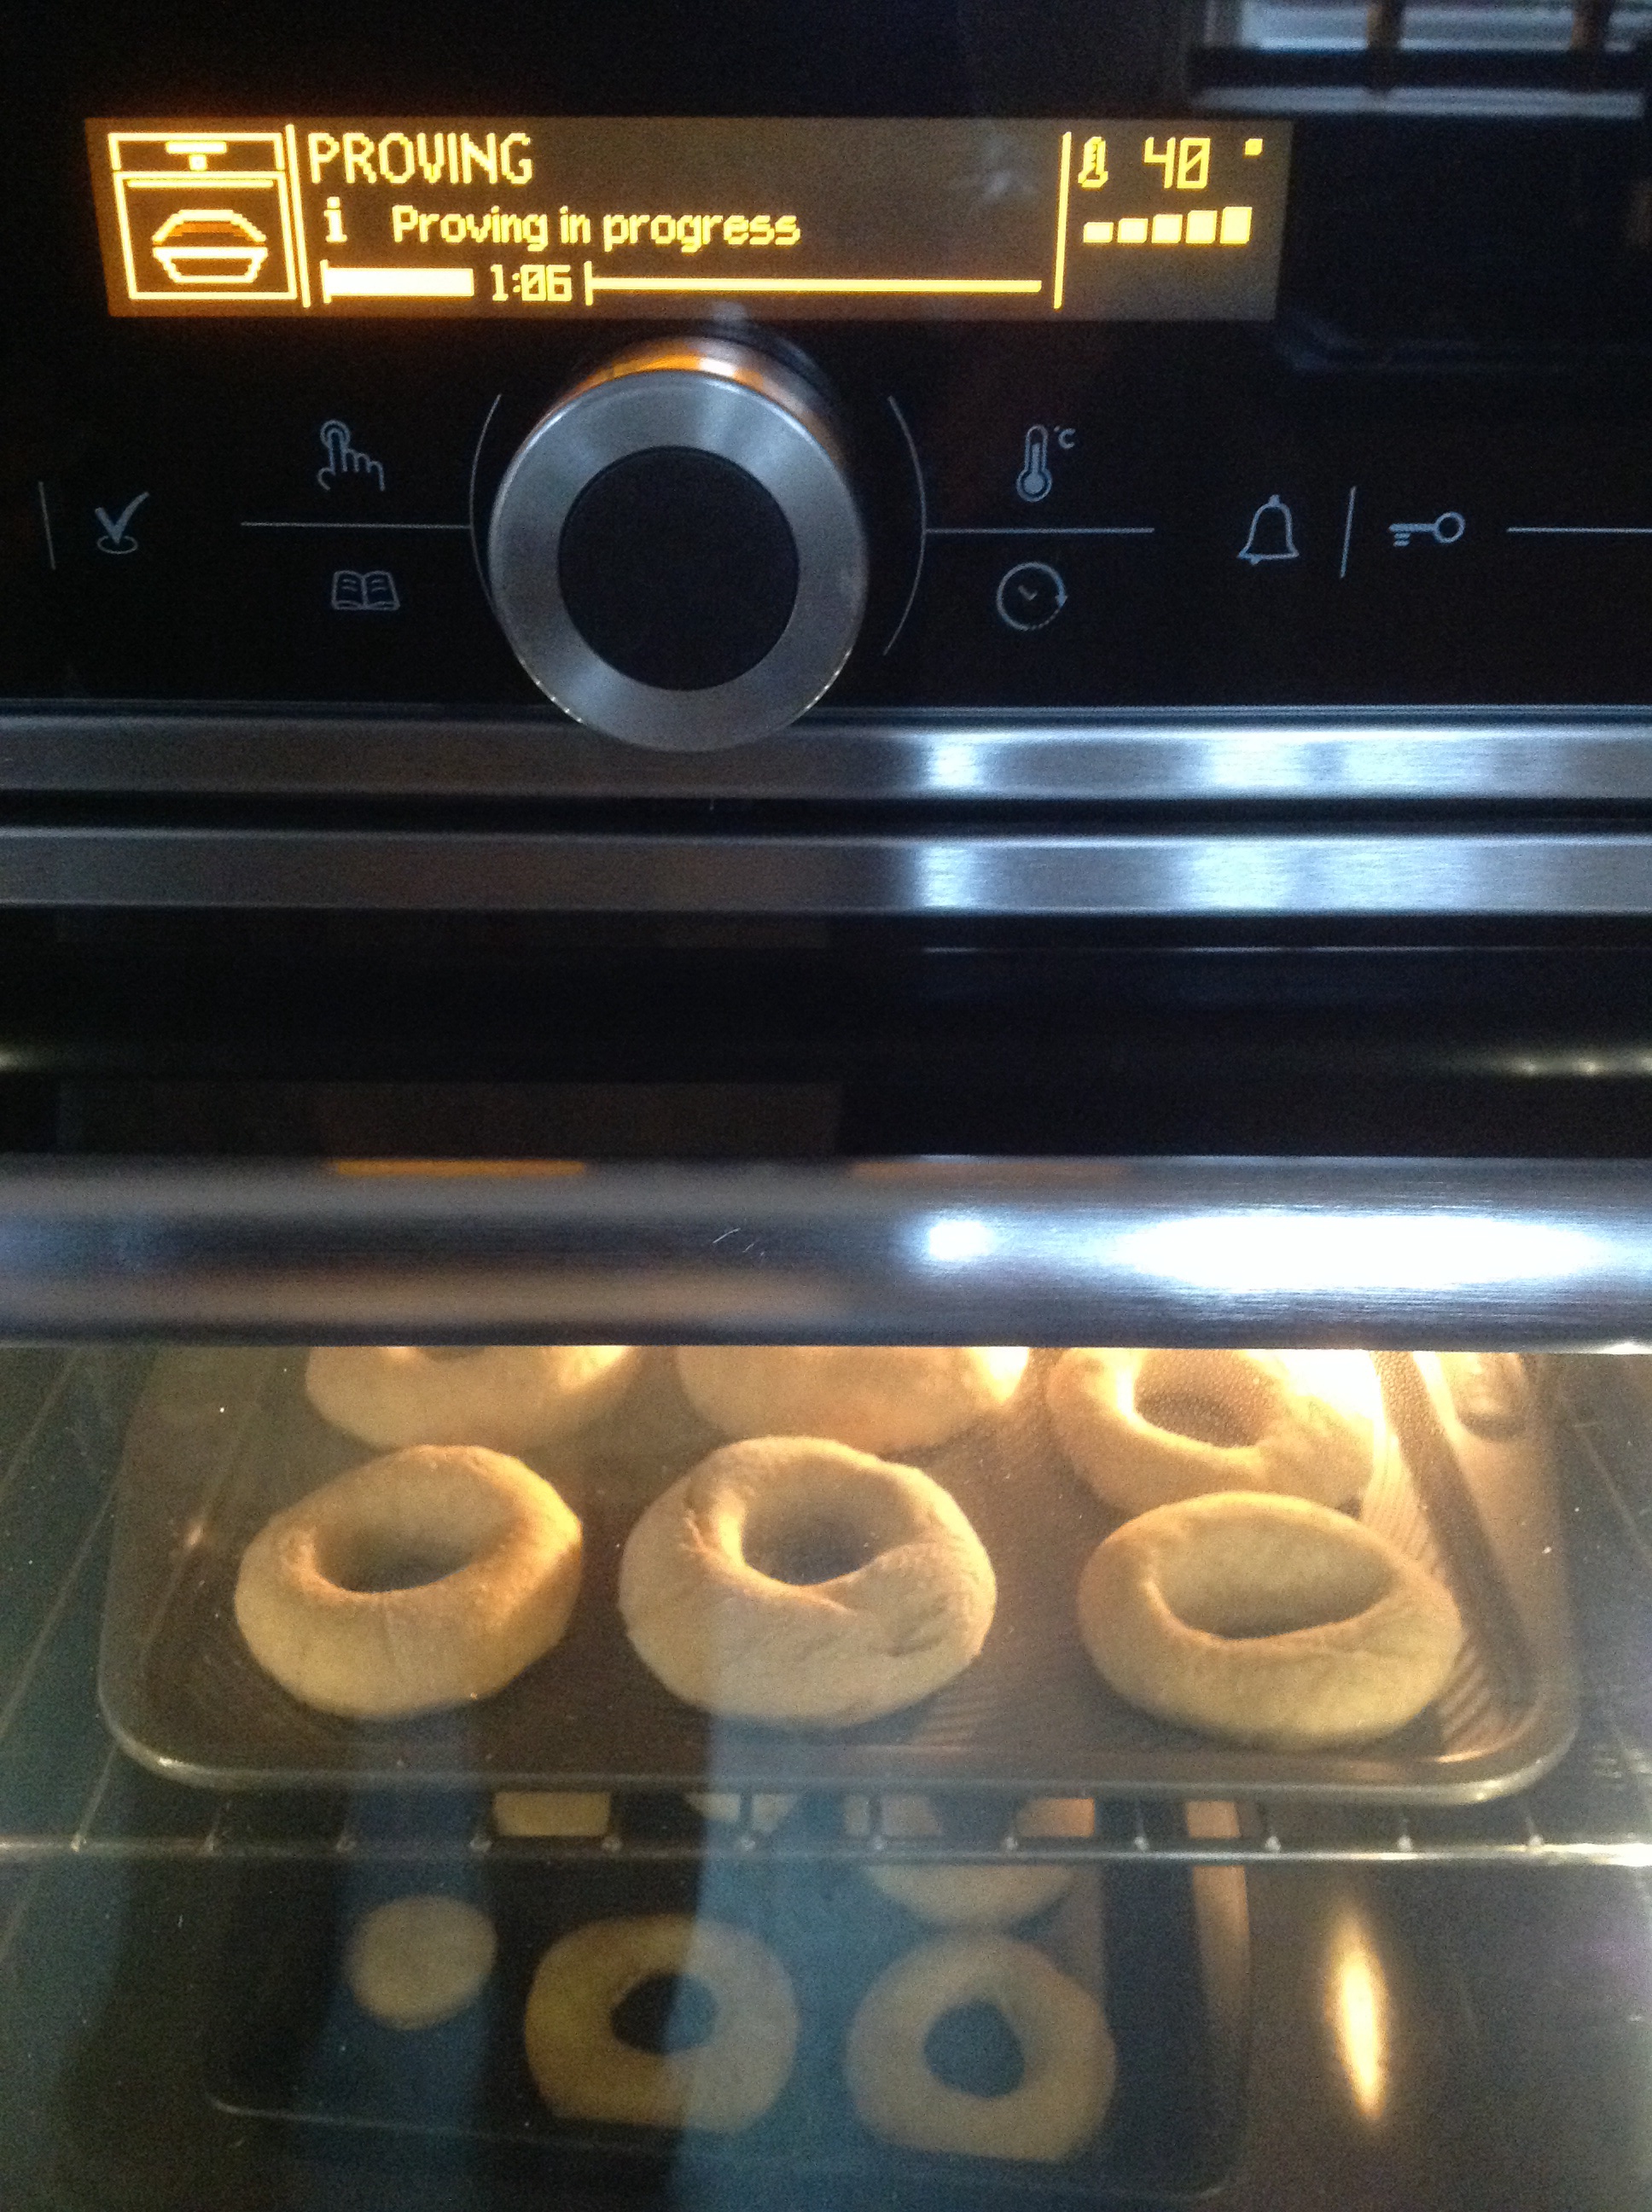
I do love a good Doughnut, it reminds me of being at the Fair or an amusement park. They are definitely best served warm.
Homemade Sugar Ring Doughnuts – makes about 10-12
1 tbsp yeast
4 tbsp caster sugar
150ml warm milk
225g plain flour
Pinch salt
50g butter
1 egg
300ml vegetable oil
Mix yeast, 1/2 tbsp sugar and 2 tbsp of warm milk together and leave in warm place for 15 mins or until frothy
Sift the flour into a bowl add the salt and 1 tbsp of sugar and make a well in the middle
Pour the yeast mixture, with the beaten egg and melted butter into bowl and mix all together until a dough is formed
Knead the dough and leave to rise/prove for about 45 mins or double in size. Select proving on Luce oven or cover with a tea towel and leave in a warm place.
On a floured surface, knead the dough for 5 mins and make into small balls, flatten to approx 2 cm thick and using a cutter make small hole in the middle to form a ring shape
Leave to rise/prove for a further 30 mins or till double in size
Using Induction hob set to power level 6 and heat oil in a wok until it reaches 190 deg (drop a cube of bread in, if it sizzles and turns golden brown in 30 secs, it hot enough)
Drop doughnuts into oil and cook for about 3-5 mins, turning halfway
Remove using slotted spoon and put onto kitchen paper, using the remainder sugar coat doughnut and serve.
Option to have chosen sauce for dipping….ie: melted chocolate……Mmmmmmmm.

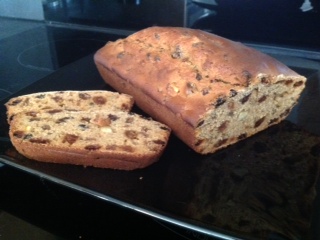
Delicious warm with load of butter!


HOMEMADE TEA LOAF
200g Dried Mixed Fruit
100g Demerara Sugar
220ml Cold Tea
225g Self Raising Flour
1 Large Beaten Egg
50ml Milk
1 teaspoon mixed spice (optional)
1. Mix Dried Fruit and sugar together, then pour over in a bowl the cold tea, cover with cling film and soak overnight.
2. Sift in Flour, Beaten Egg and Milk
3. Mix until it sofly drops of spoon, then pour into lightly greased loaf tin.
4. Select Cake setting and change time to 1hr 10mins and bake. Or Convection Bake Setting.
5. Finally serve warm with lashings of butter….Delicious.
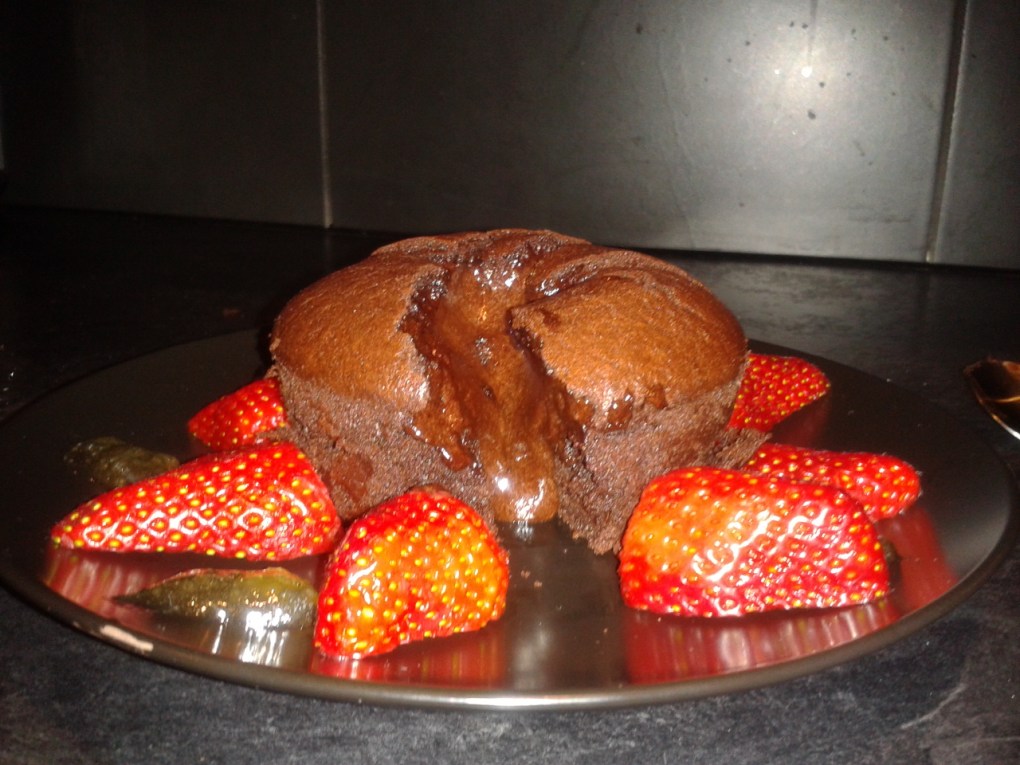
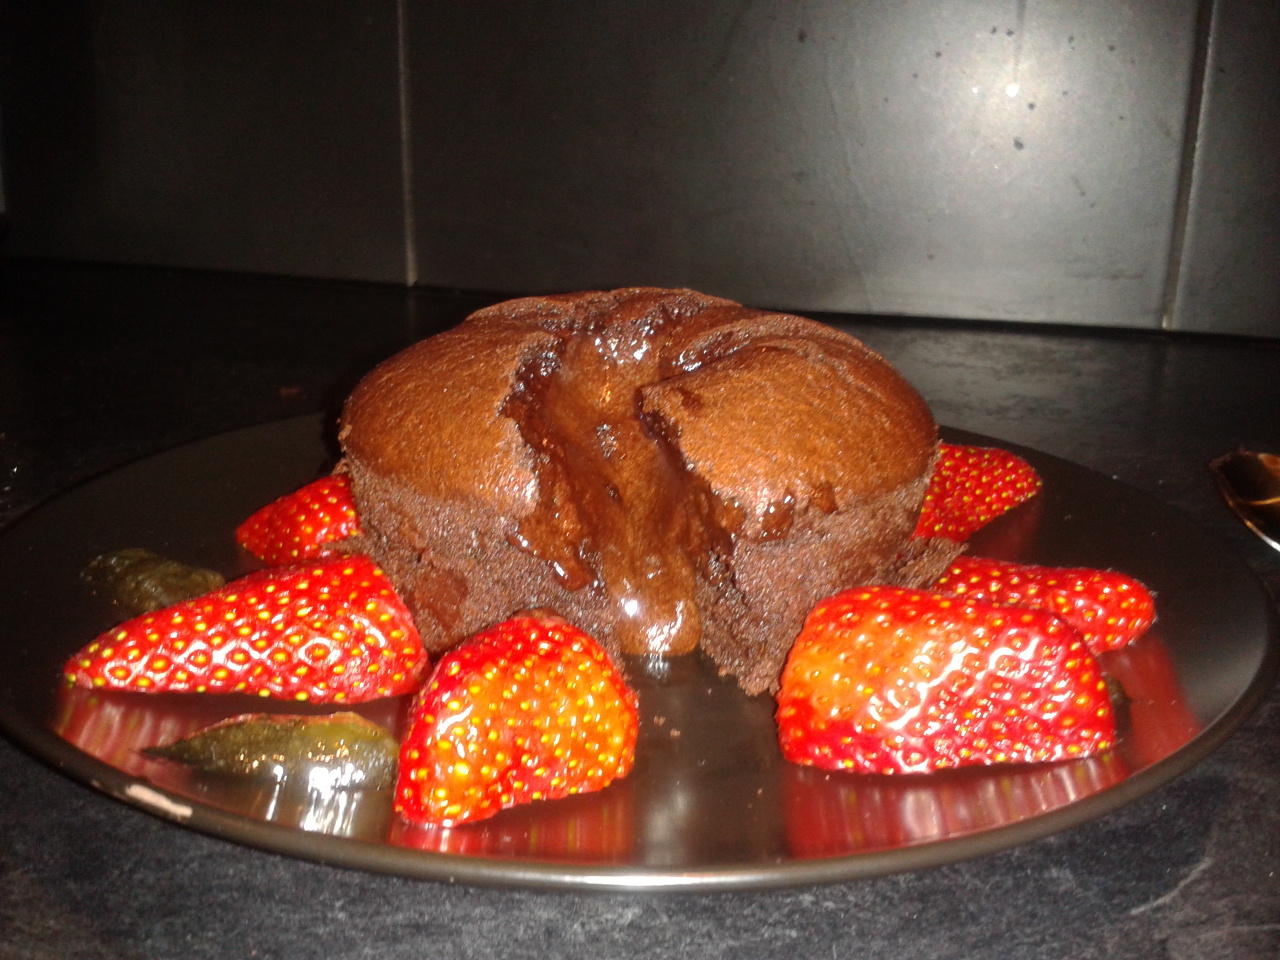
Crisp on the outside, lovely and runny on the inside.
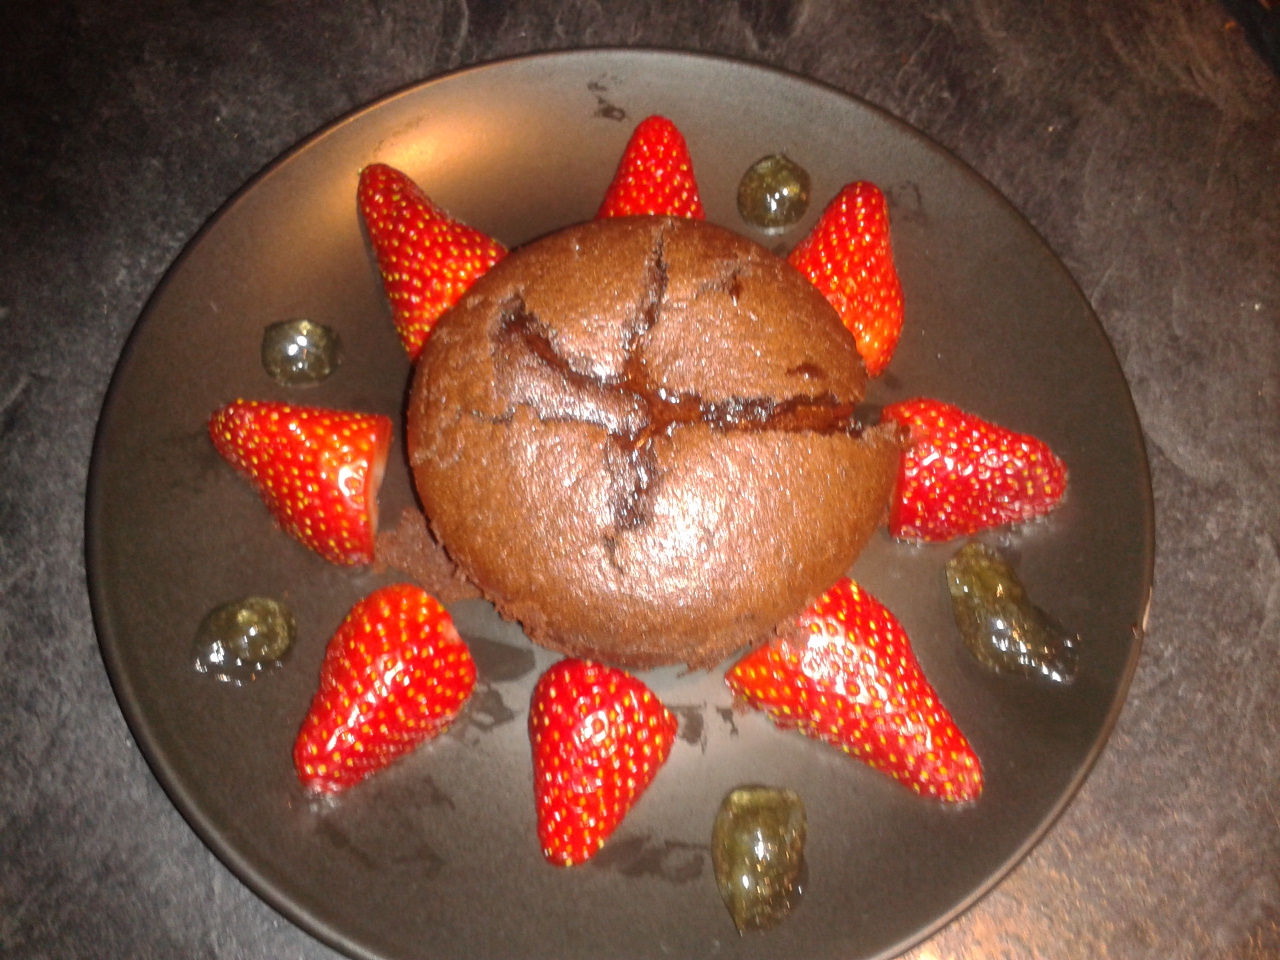
Chocolate Fondant
1 tsp cocoa powder
1 tsp plain flour
150g plain chocolate – minimum 70% cocoa solids
150g butter
3 eggs and 3 egg yolks
50g caster sugar
25g self raising flour
4 x ramekins
*Melt chocolate and butter together (best done on Induction hob at power level 1) if not, melt using glass bowl over boiling water method
*Whisk eggs, egg yolks and caster sugar, mix well until it starts to go thick and you can leave a line trail with whisk. (electric whisk is recommended)
*Gently fold in the melted chocolate mixture into above with a metal spoon until just combined
*Sift in the self raising flour and continue folding until fully combined
*Gently grease with butter the bottom and sides of the ramekins and place a circle of greaseproof paper on bottom
*Mix together cocoa powder and plain flour then sift into ramekins all around base and sides. Remove any excess
*Pour mixture into ramekins then cover with cling film and refrigerate for about 1 hour.
*Place ramekins in oven and select fan programme at 200 deg and bake for 11 minutes.
* Serve with your prefered sauce or garnish or your choice.

You must be logged in to post a comment.