Thai Beef Balls

Thai Beef Balls

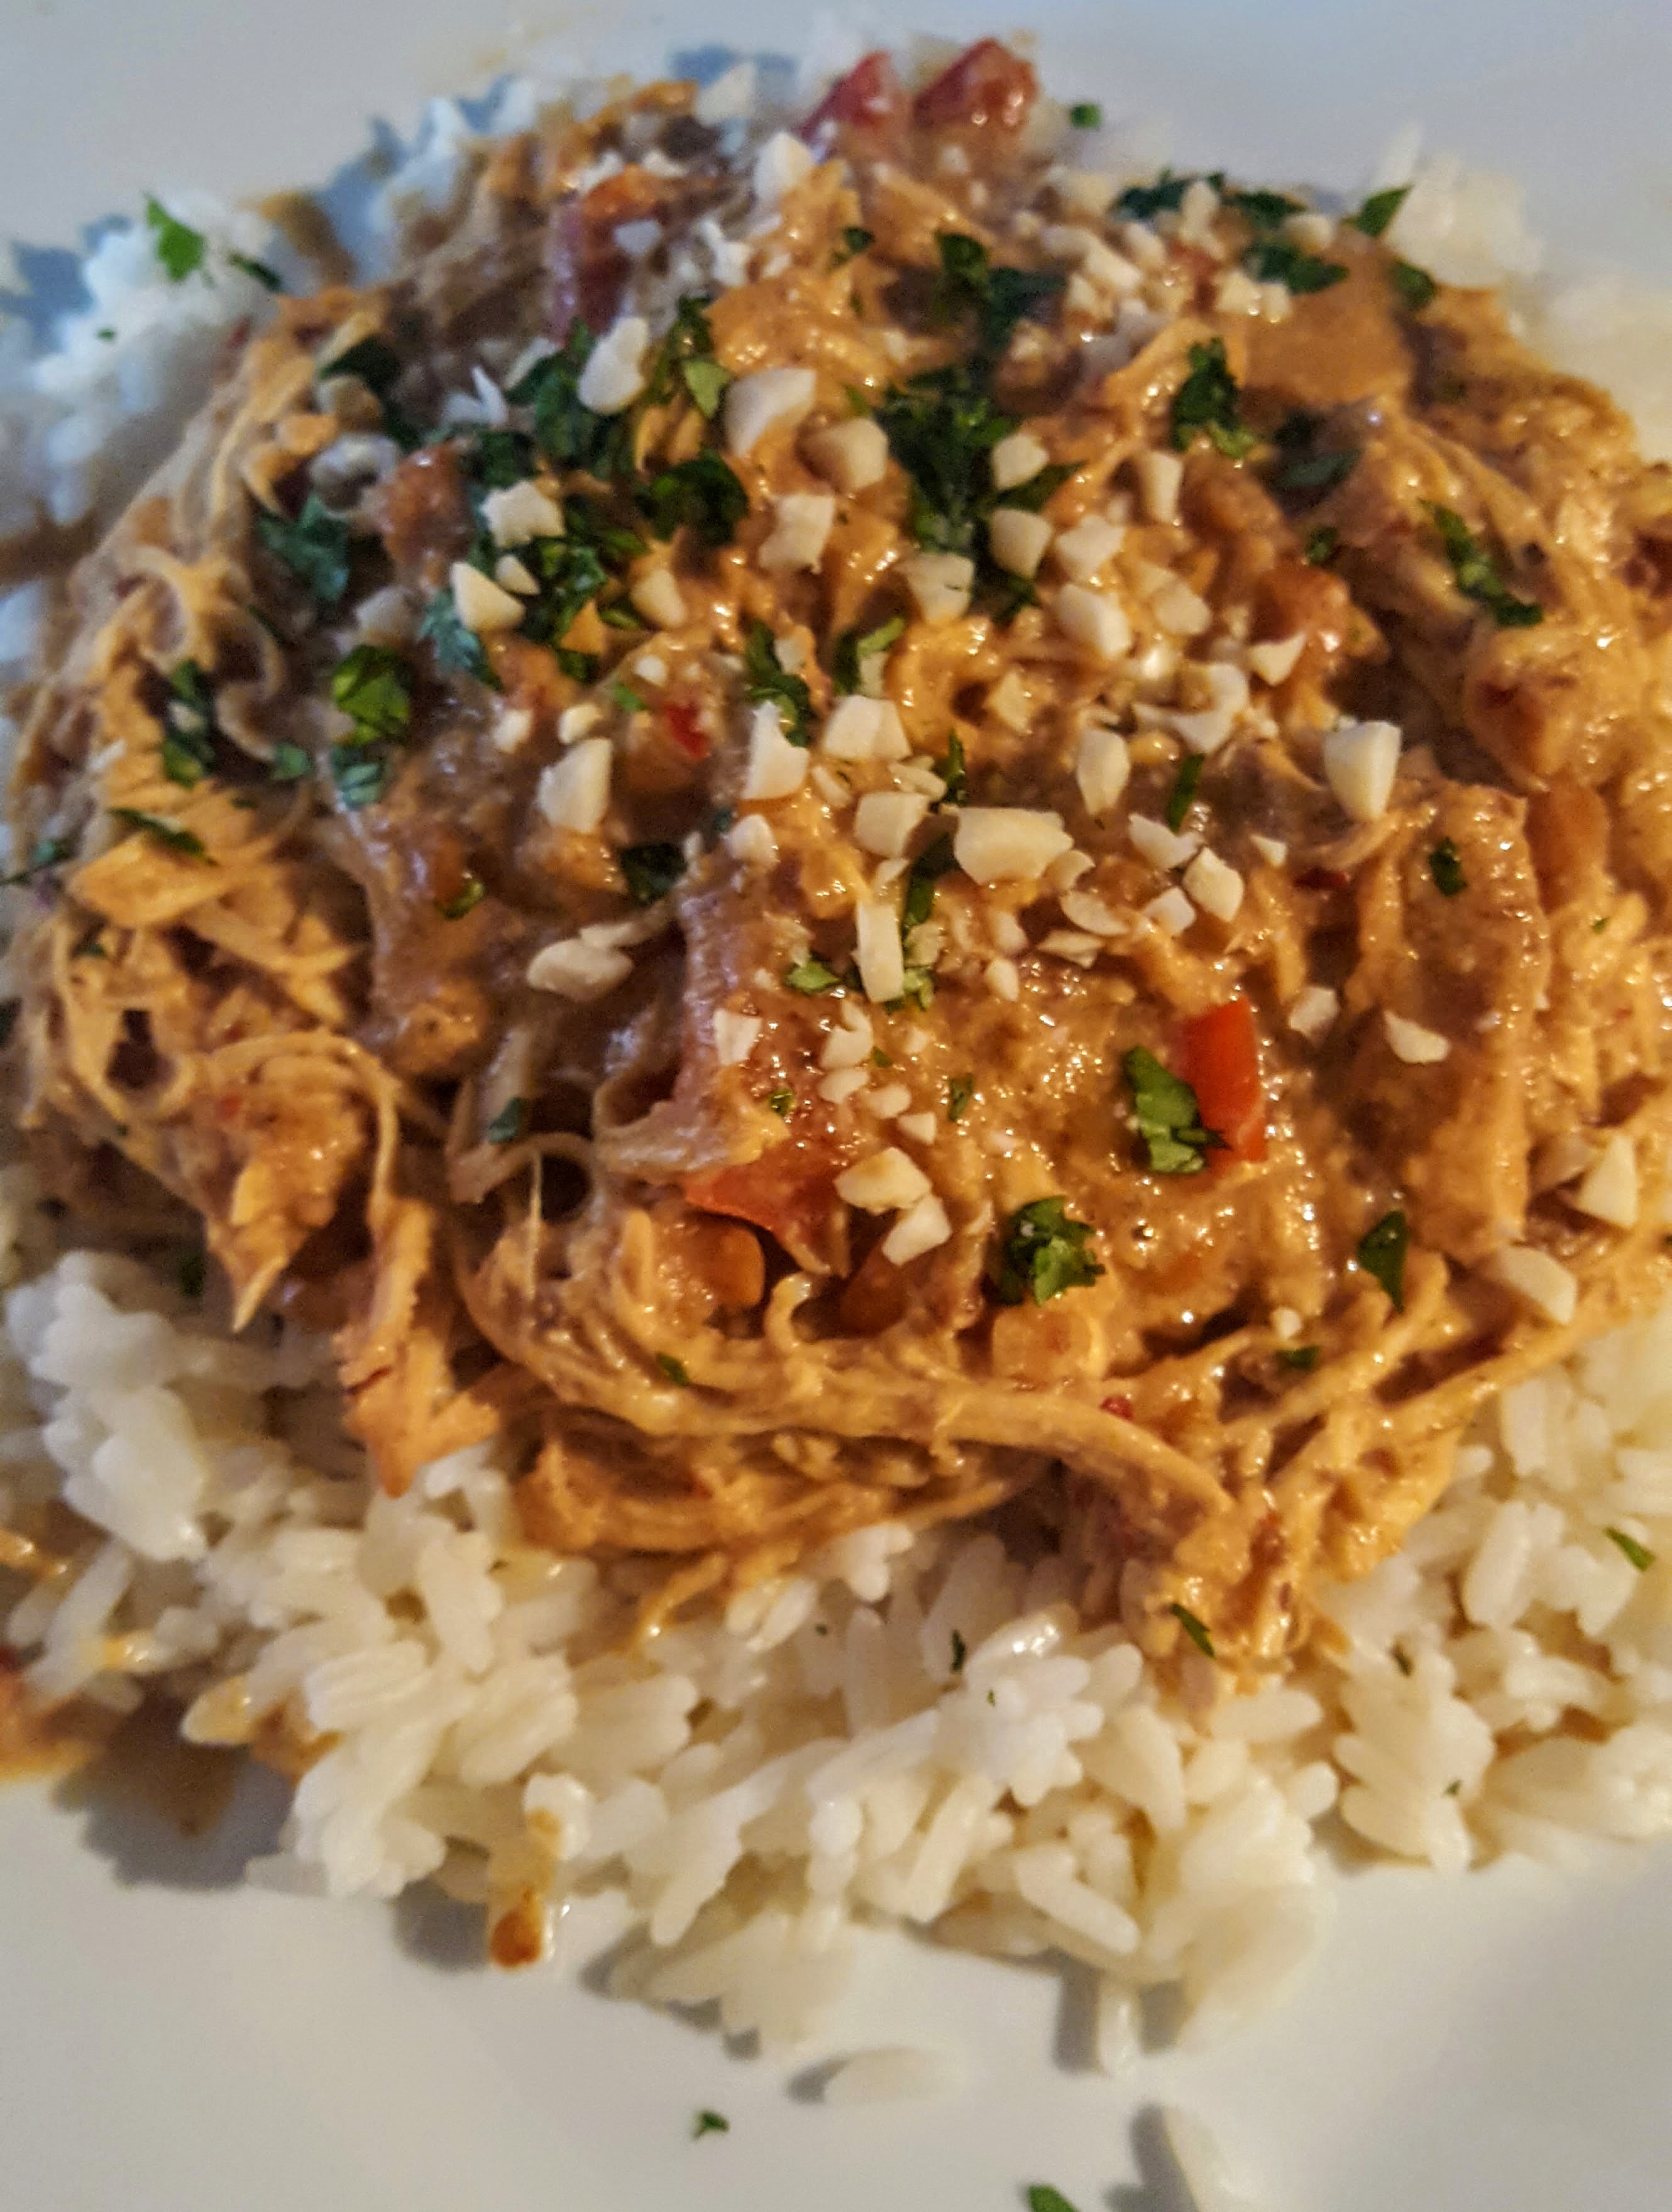
I do love it when an ad hoc recipe comes together. We fancied some Thai tonight but didn’t really have the right ingredients, so I compromised! I am so bad at compromising…..lol….. I am forever adding and changing things to suit what I have in my cupboards…..but that’s where good recipes come from…right?

This was one of them, super tasty and satisfied us for dinner tonight.

Thai Beef Balls & Thai Potato Wedges with Lime & Mayo

Made 18 Bitesize Balls

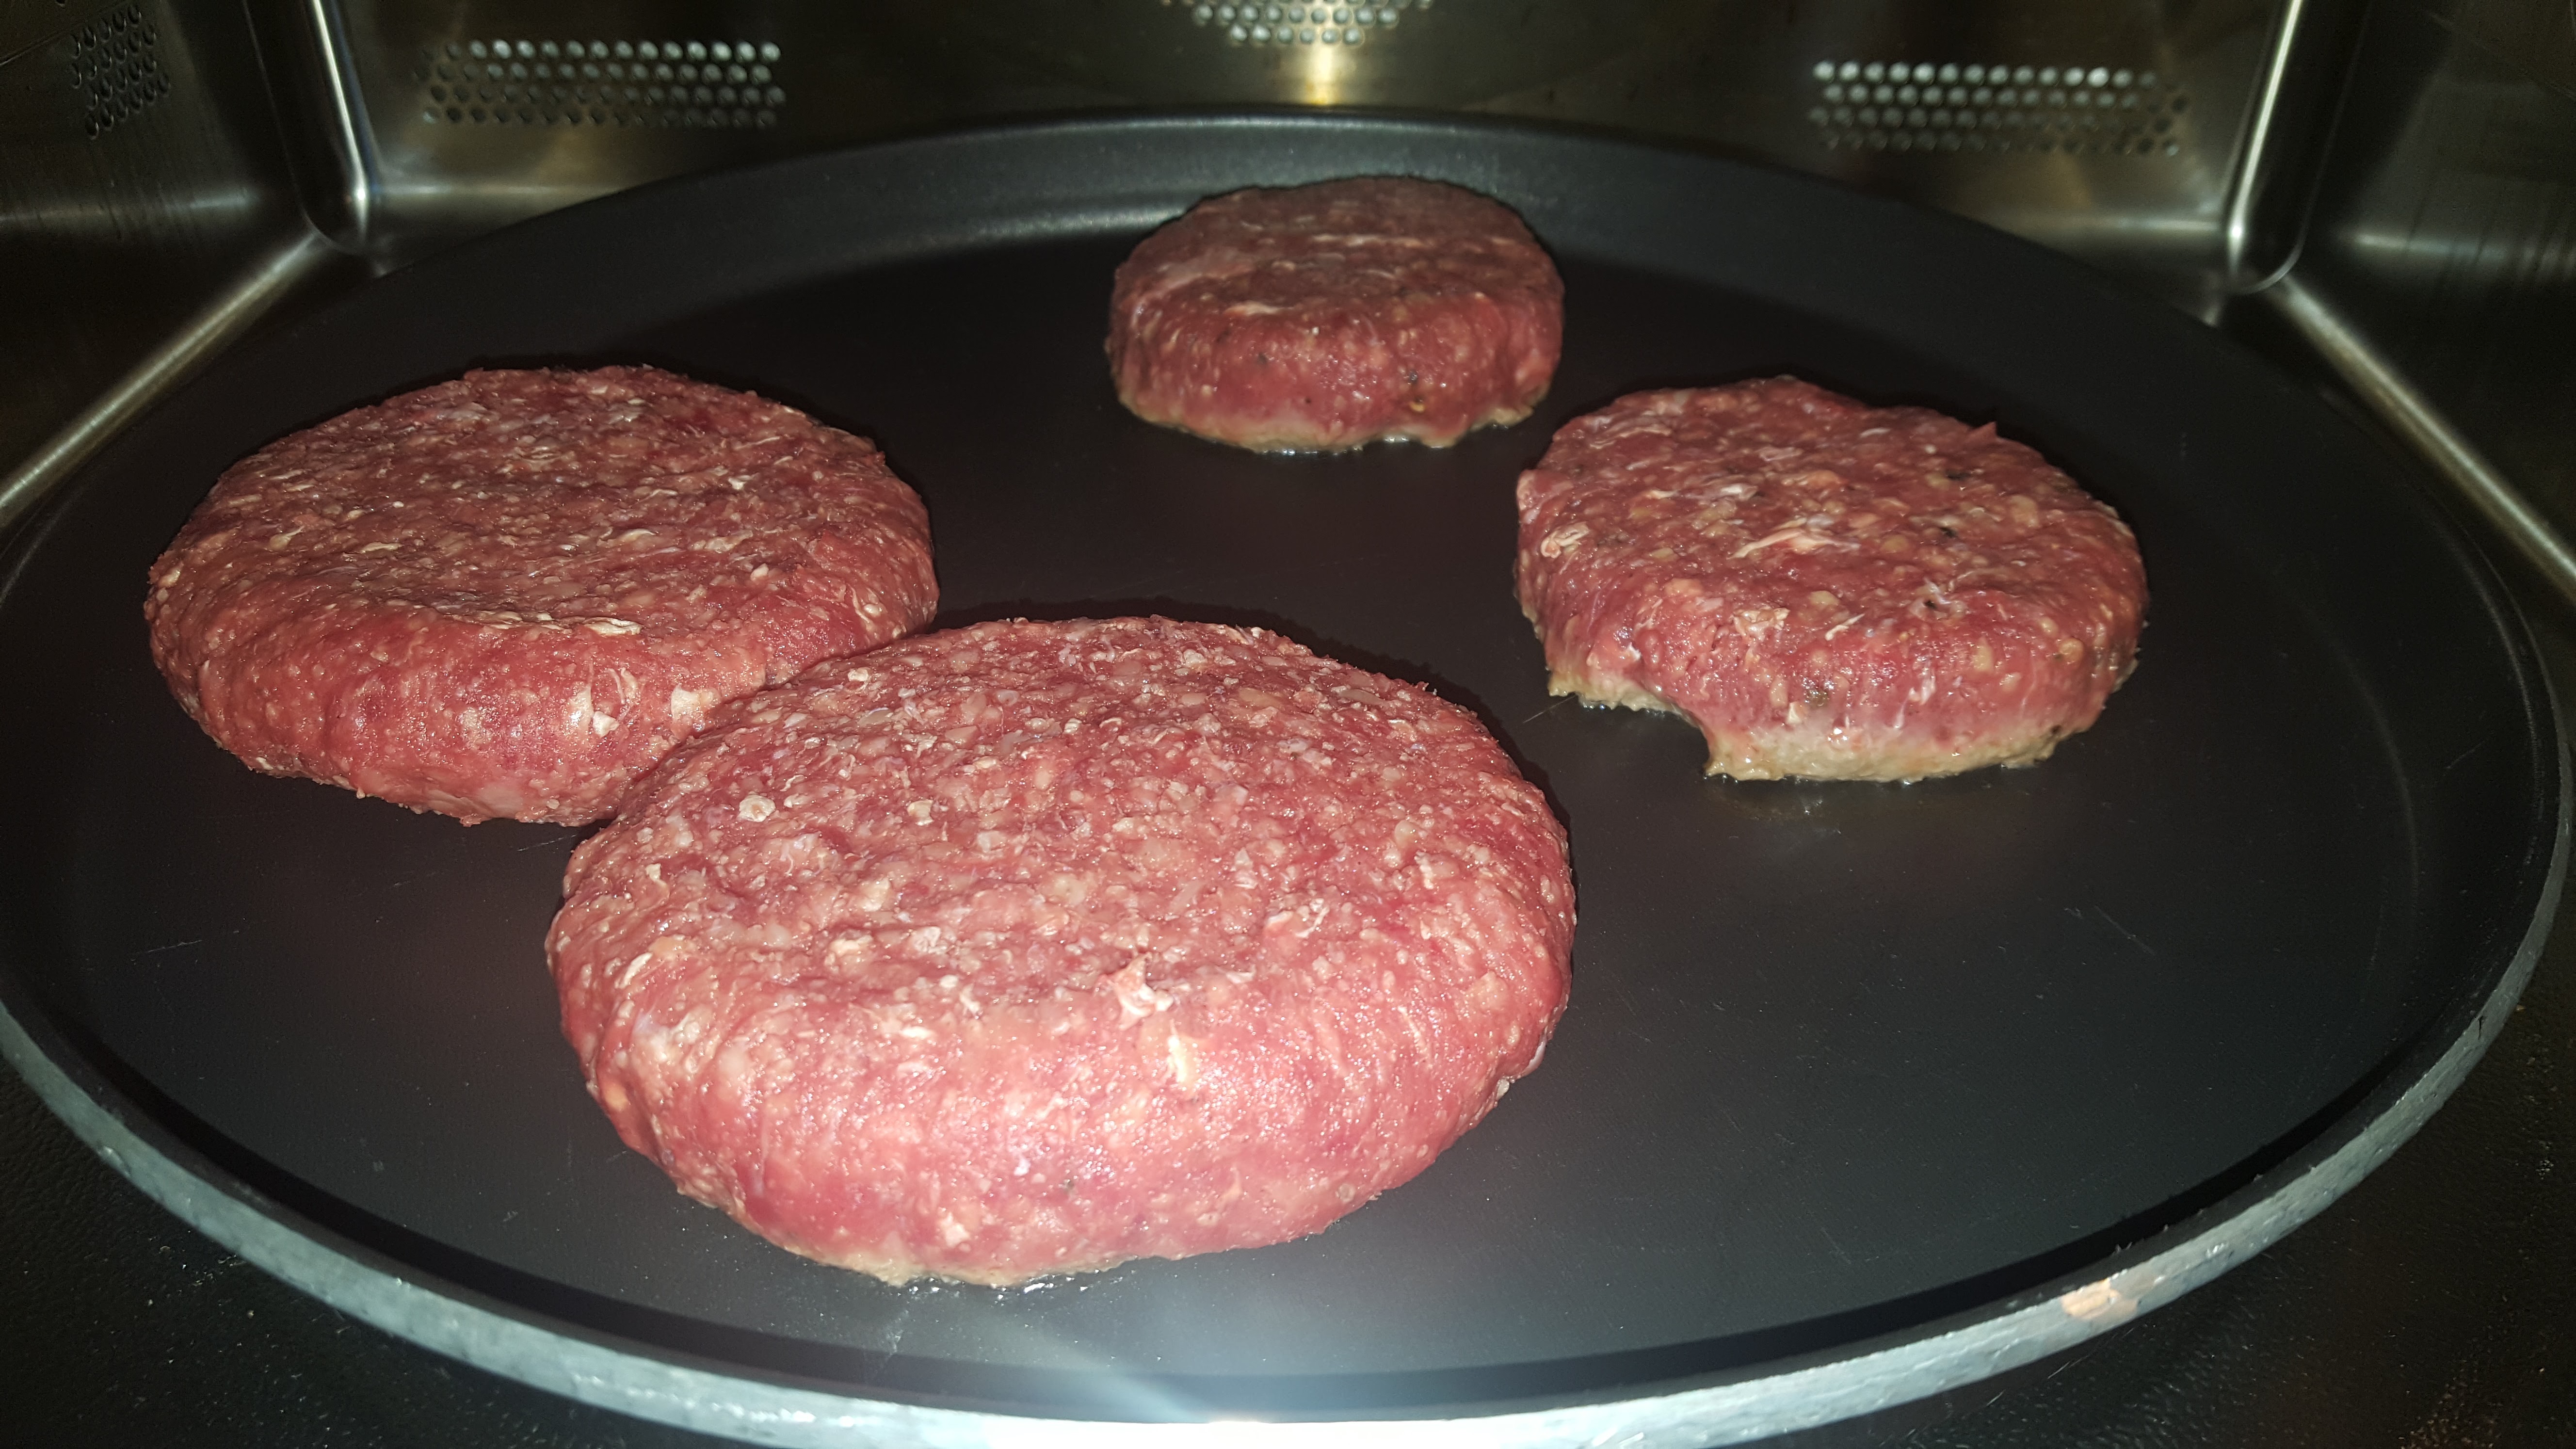
250g Scottish Beef Mince (you could use Chicken or Turkey)

2 tbsps Soy Sauce

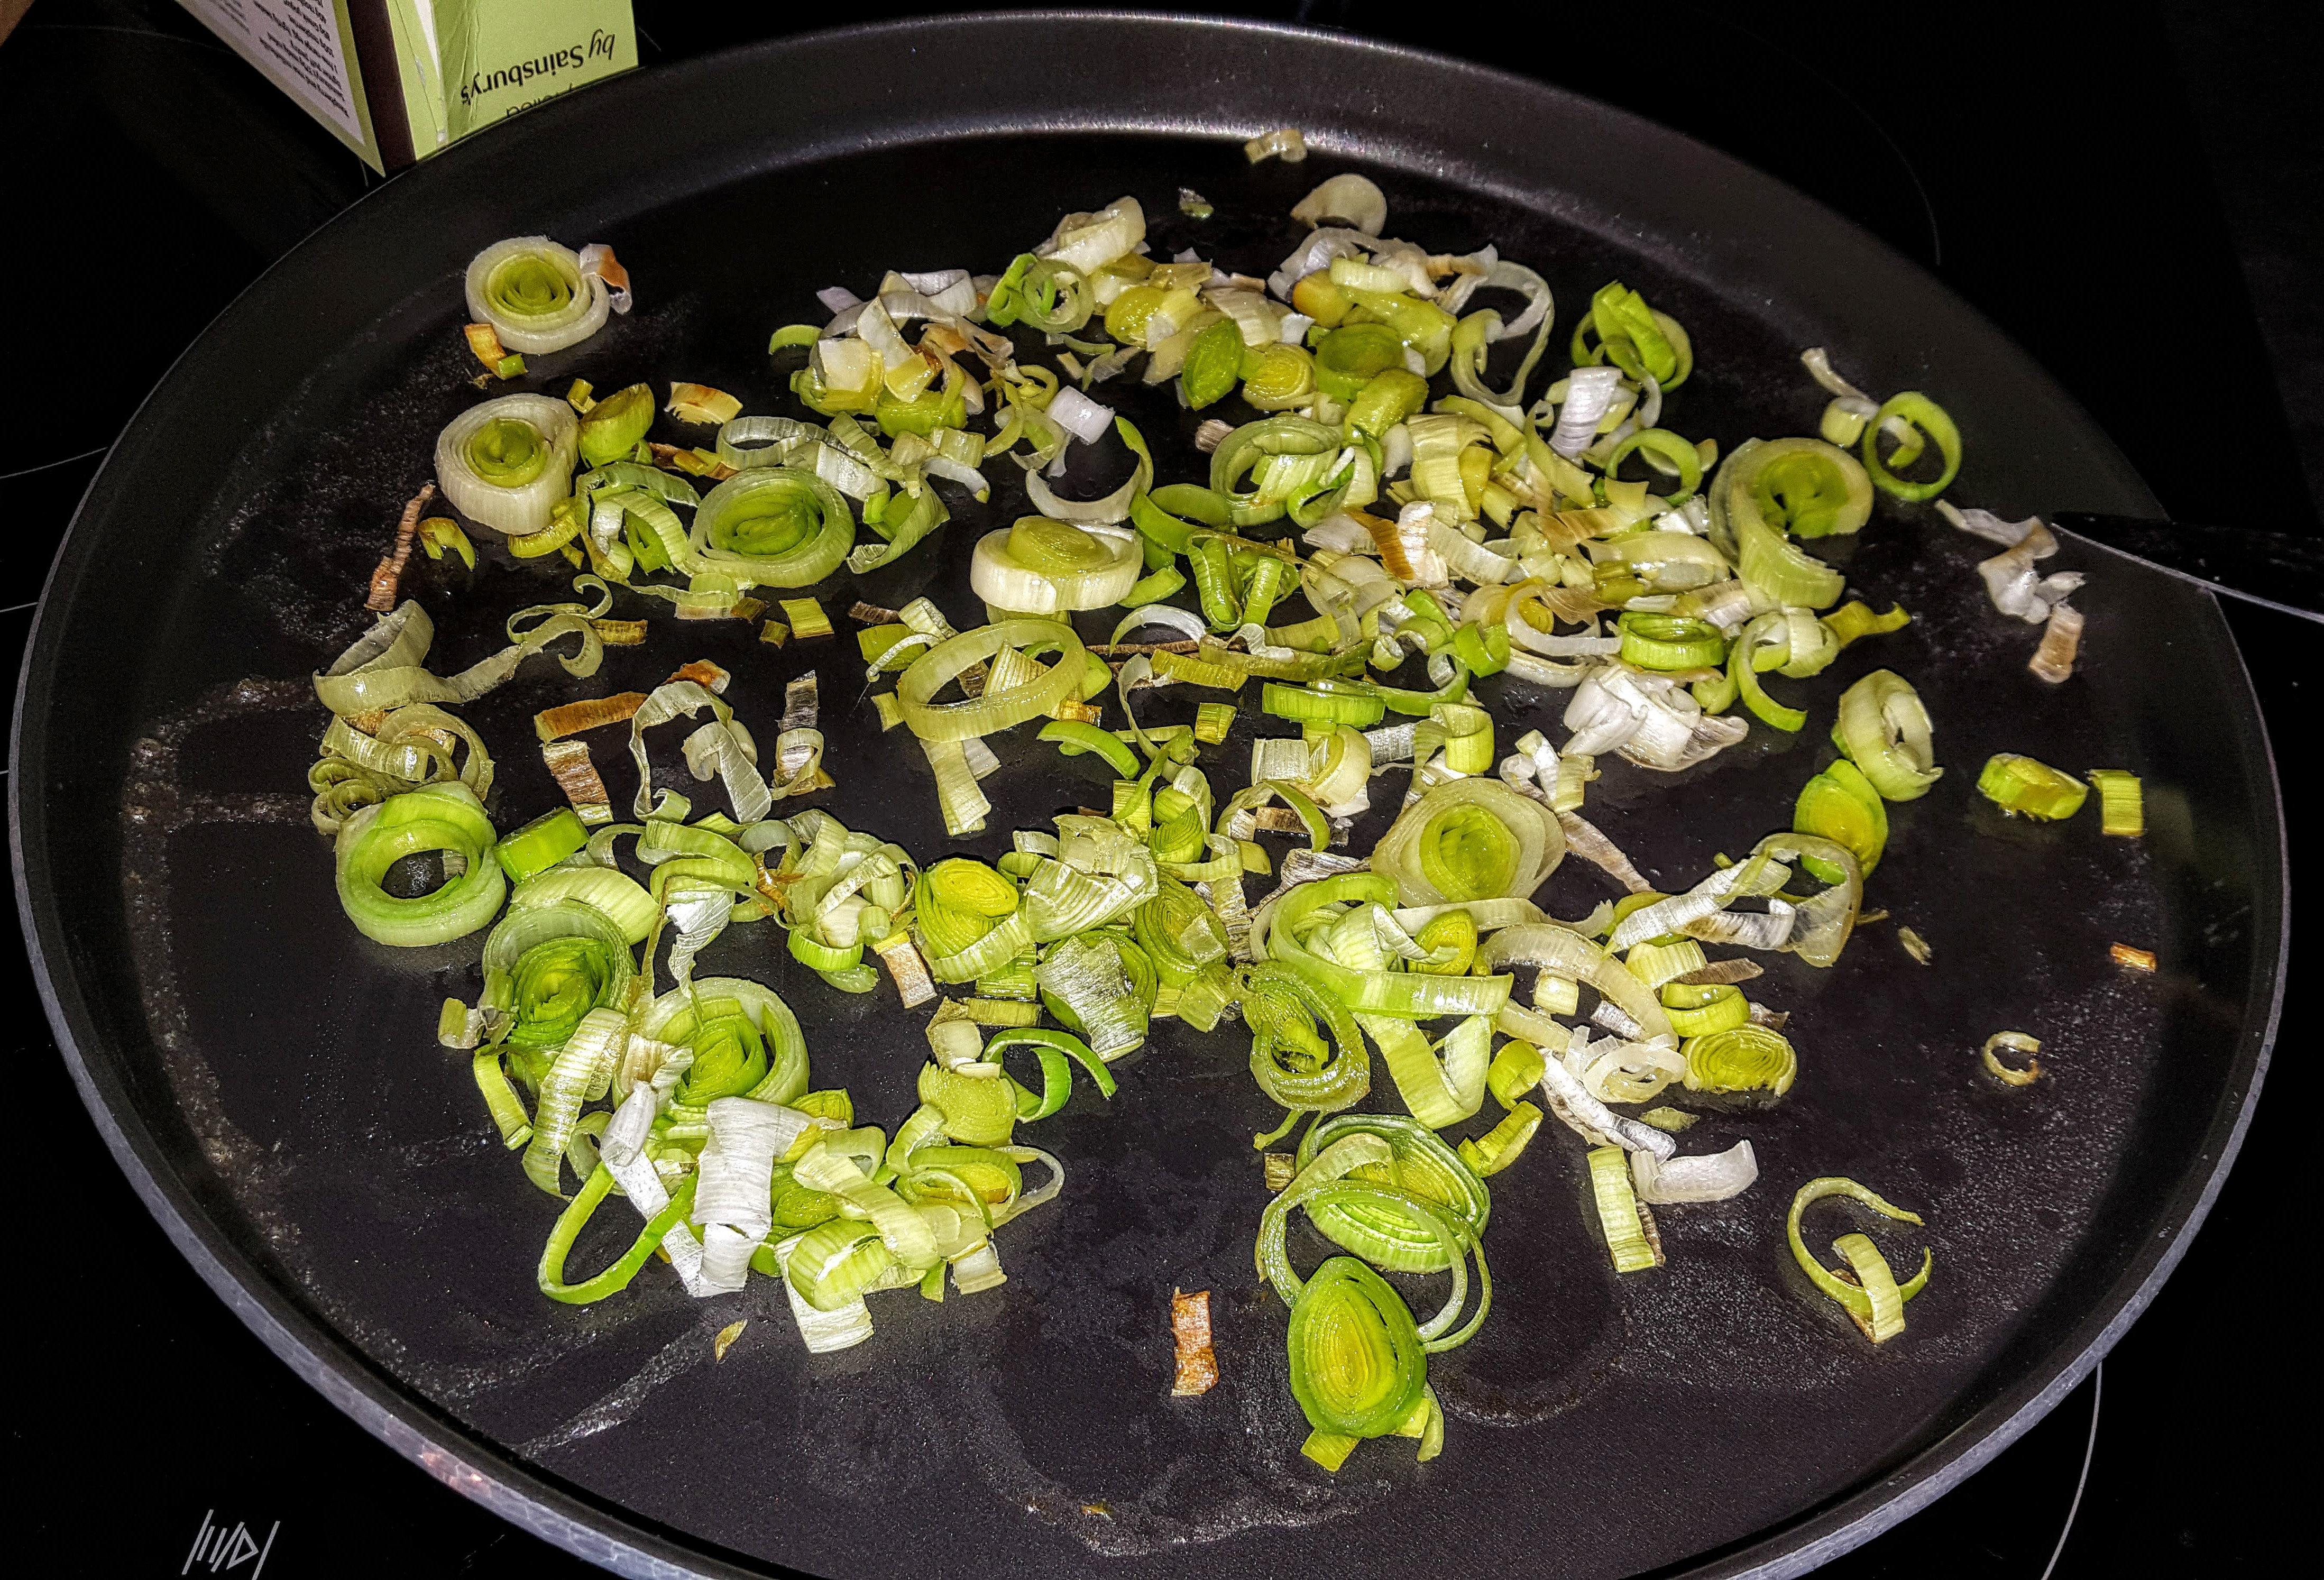
4 Spring Onions – chopped finely

1 tsp Dried garlic granules

1 tsp Dried ginger powder

2 tsps Dried coriander

1 tsp Chilli flakes

Zest of 1 lime (keep lime for juice later)

150g tin Broad Beans (crushed) (Water chestnuts, blitzed in a processor would be nice too)

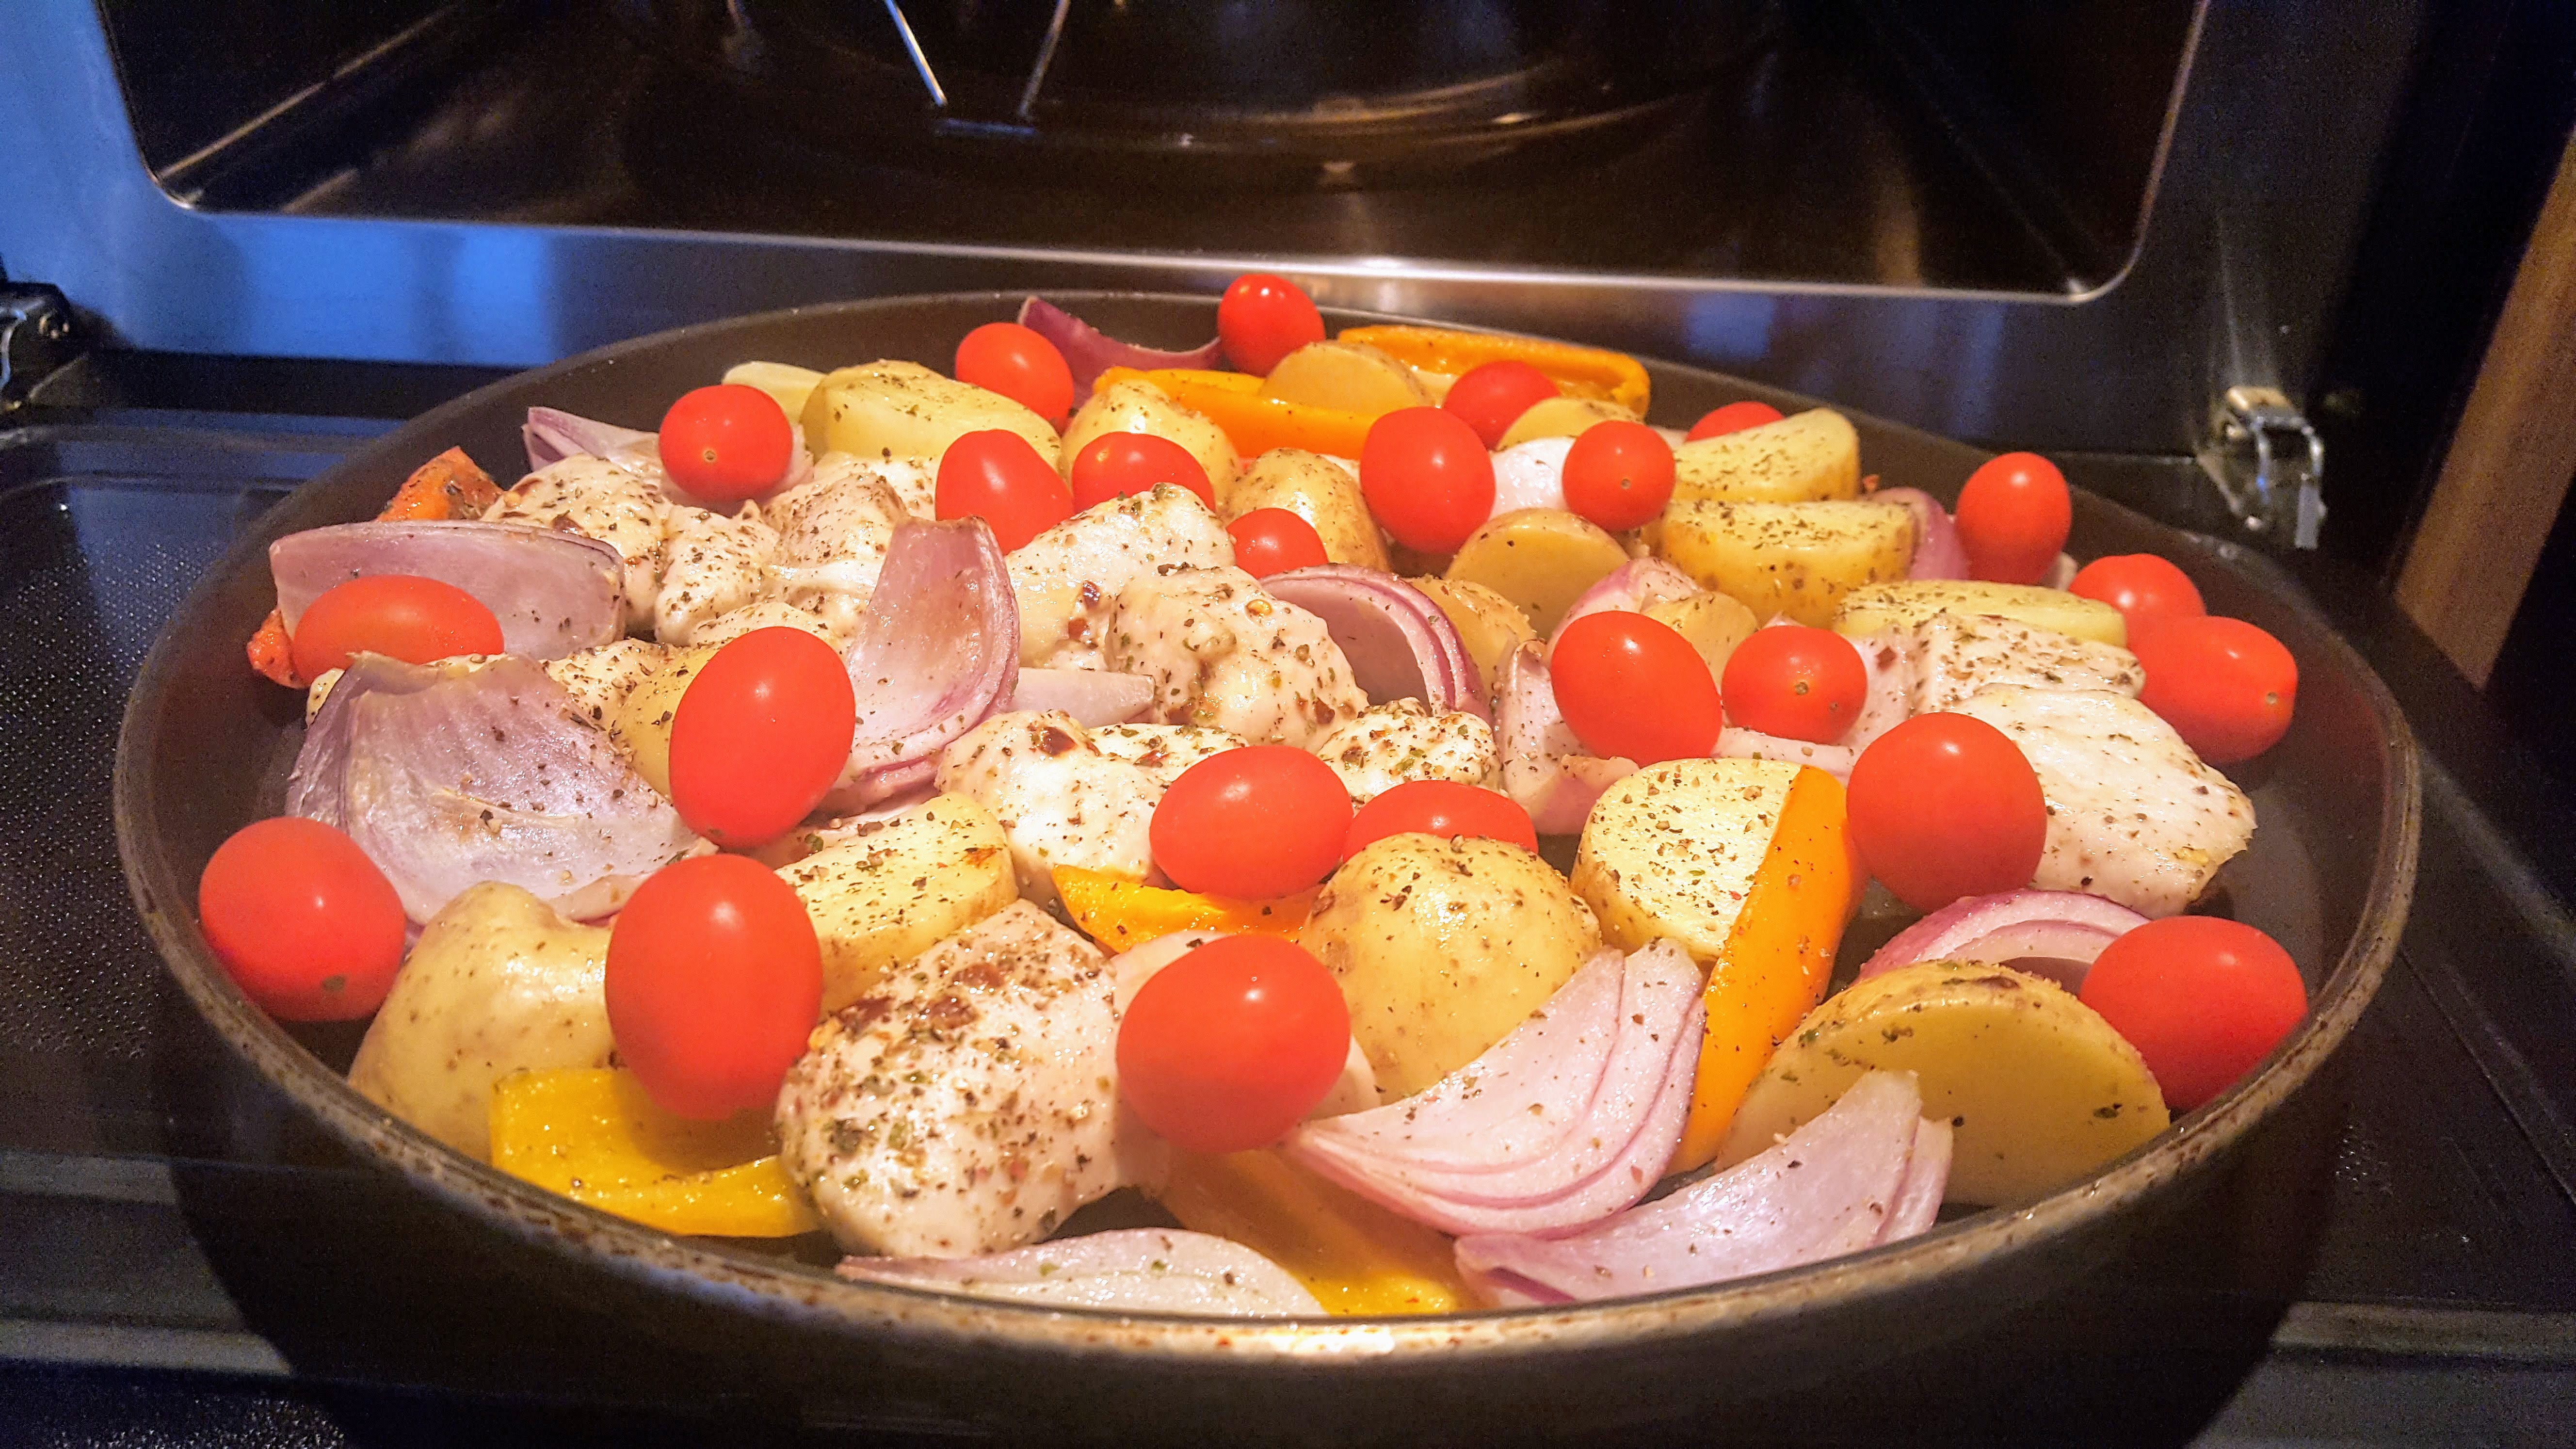
  1. Preheat oven to 180 deg and place greaseproof paper onto a baking tray.
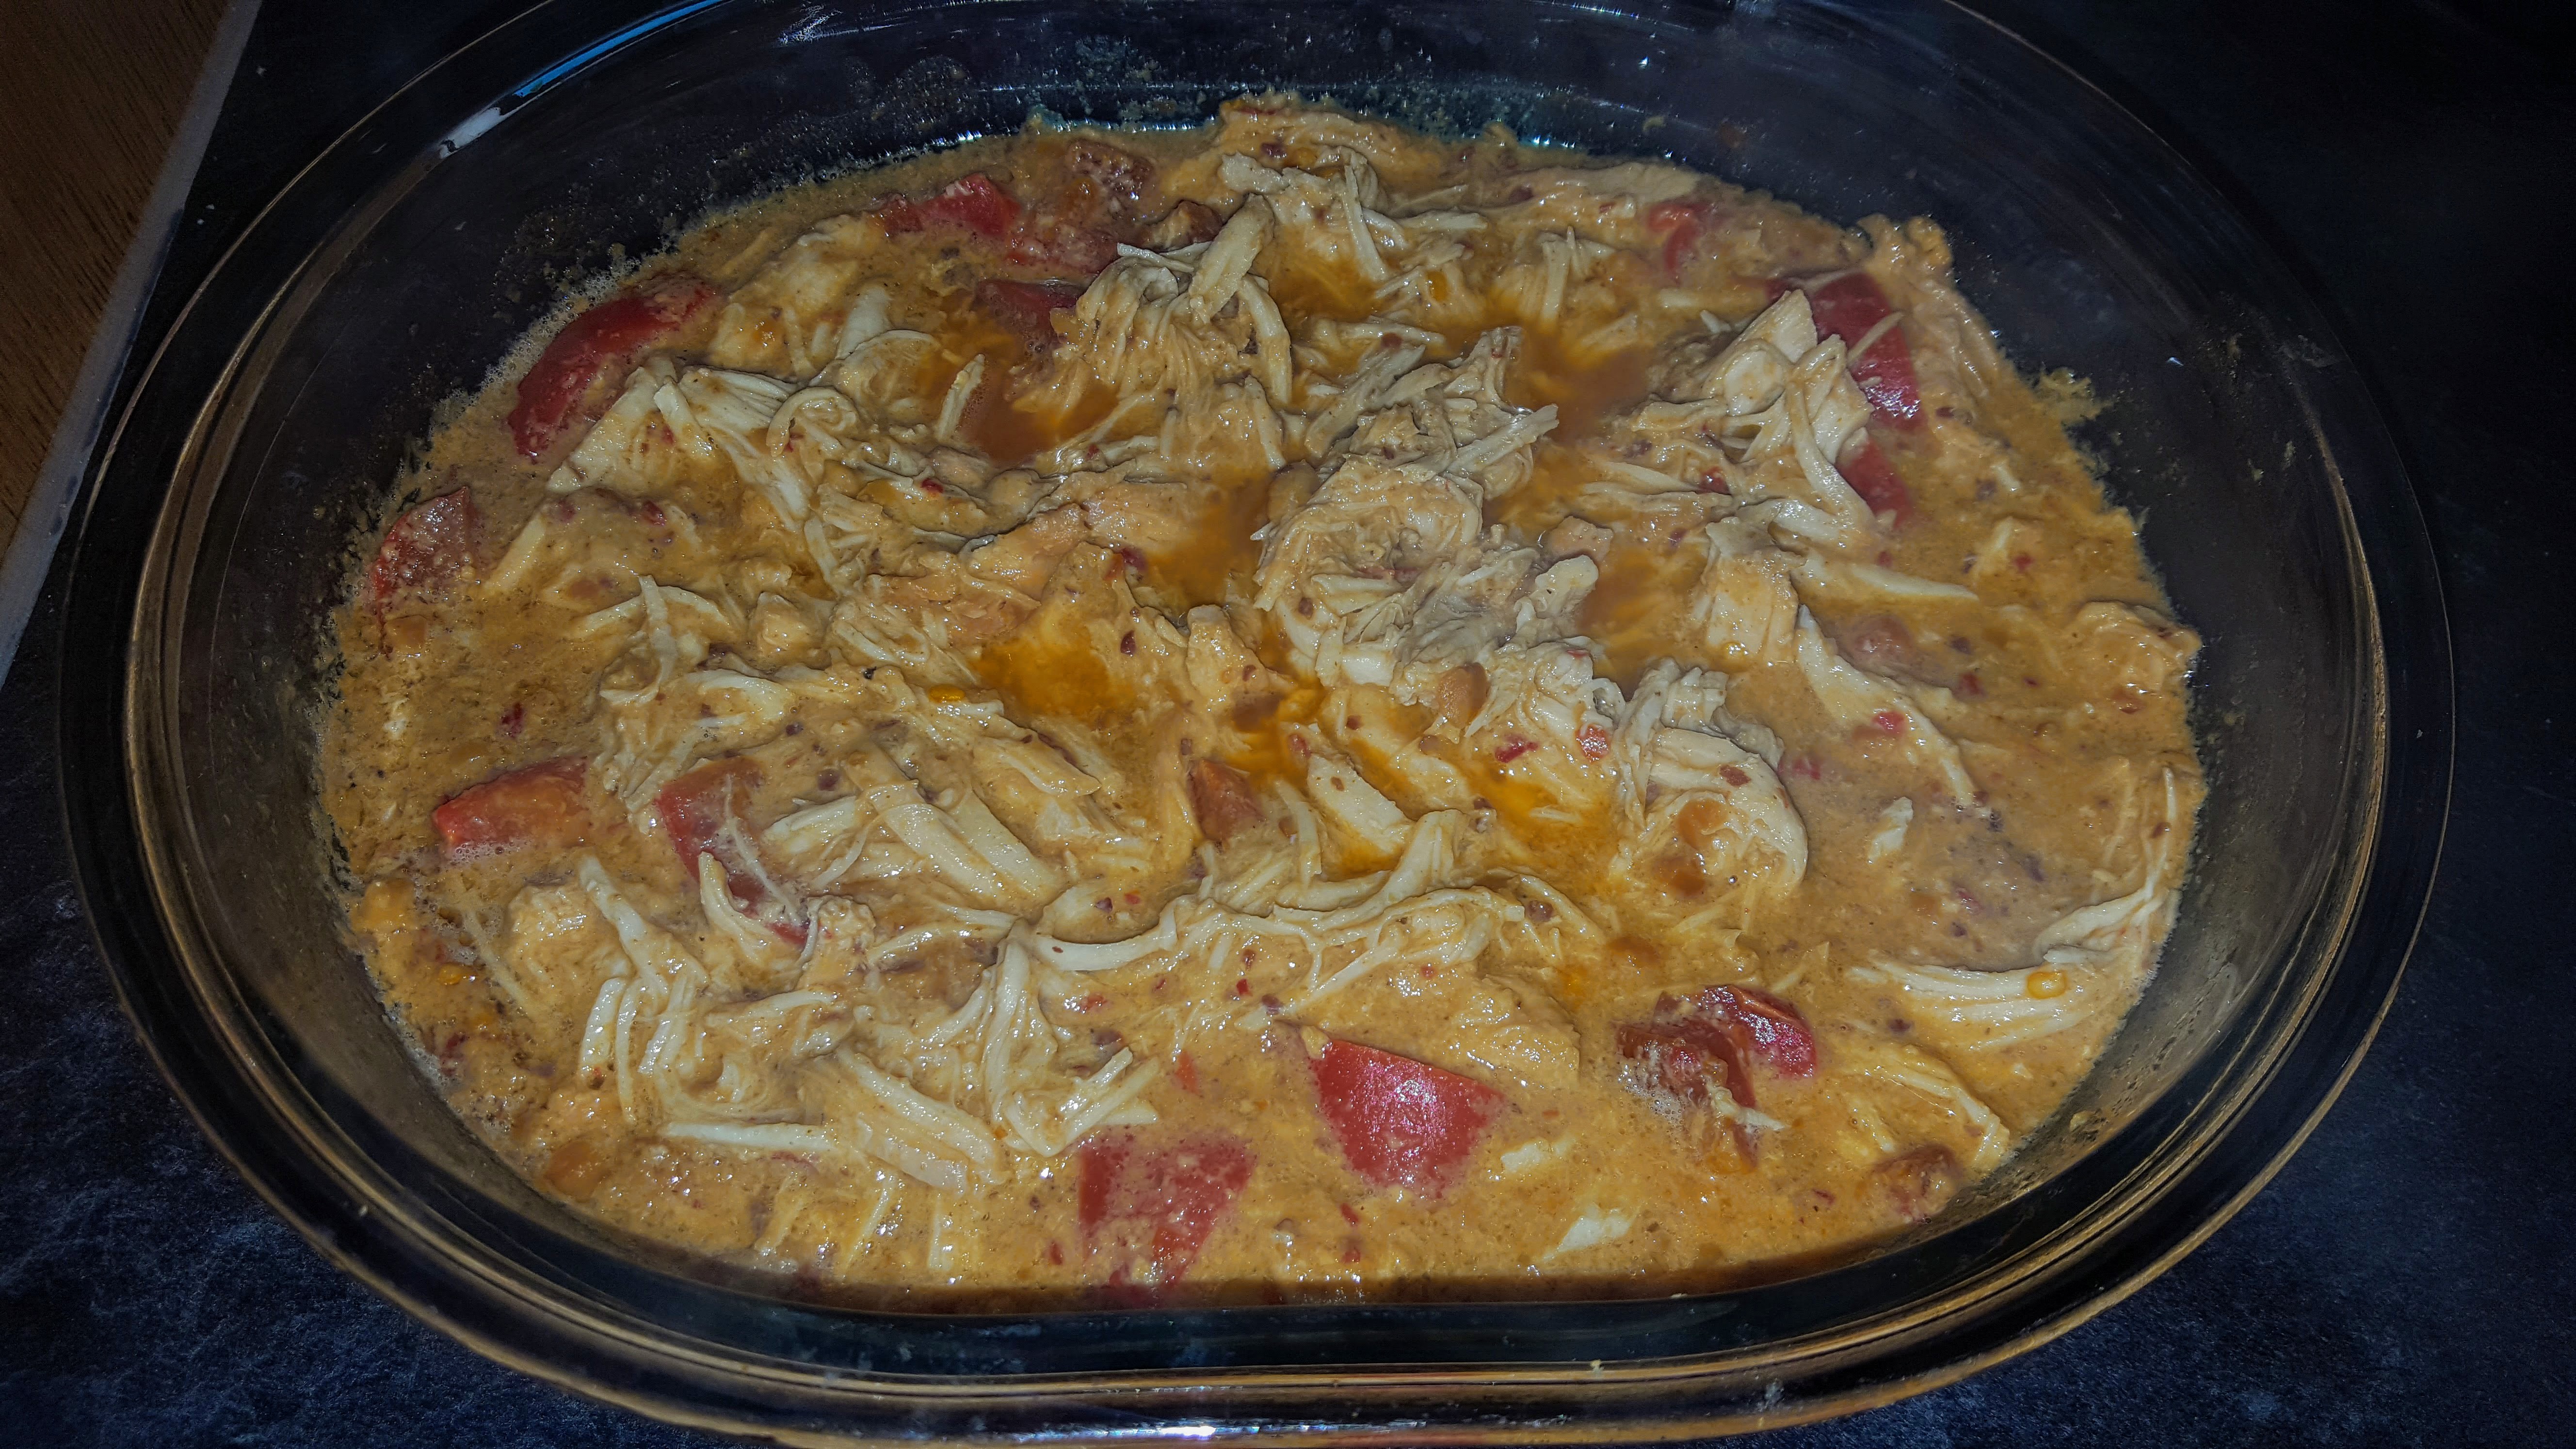
  2. Mix the Soy sauce, ginger, garlic, chilli, lime zest, coriander, spring onions and seasoning in a bowl. Then add mince & broad beans, mix together with hands until it comes together.
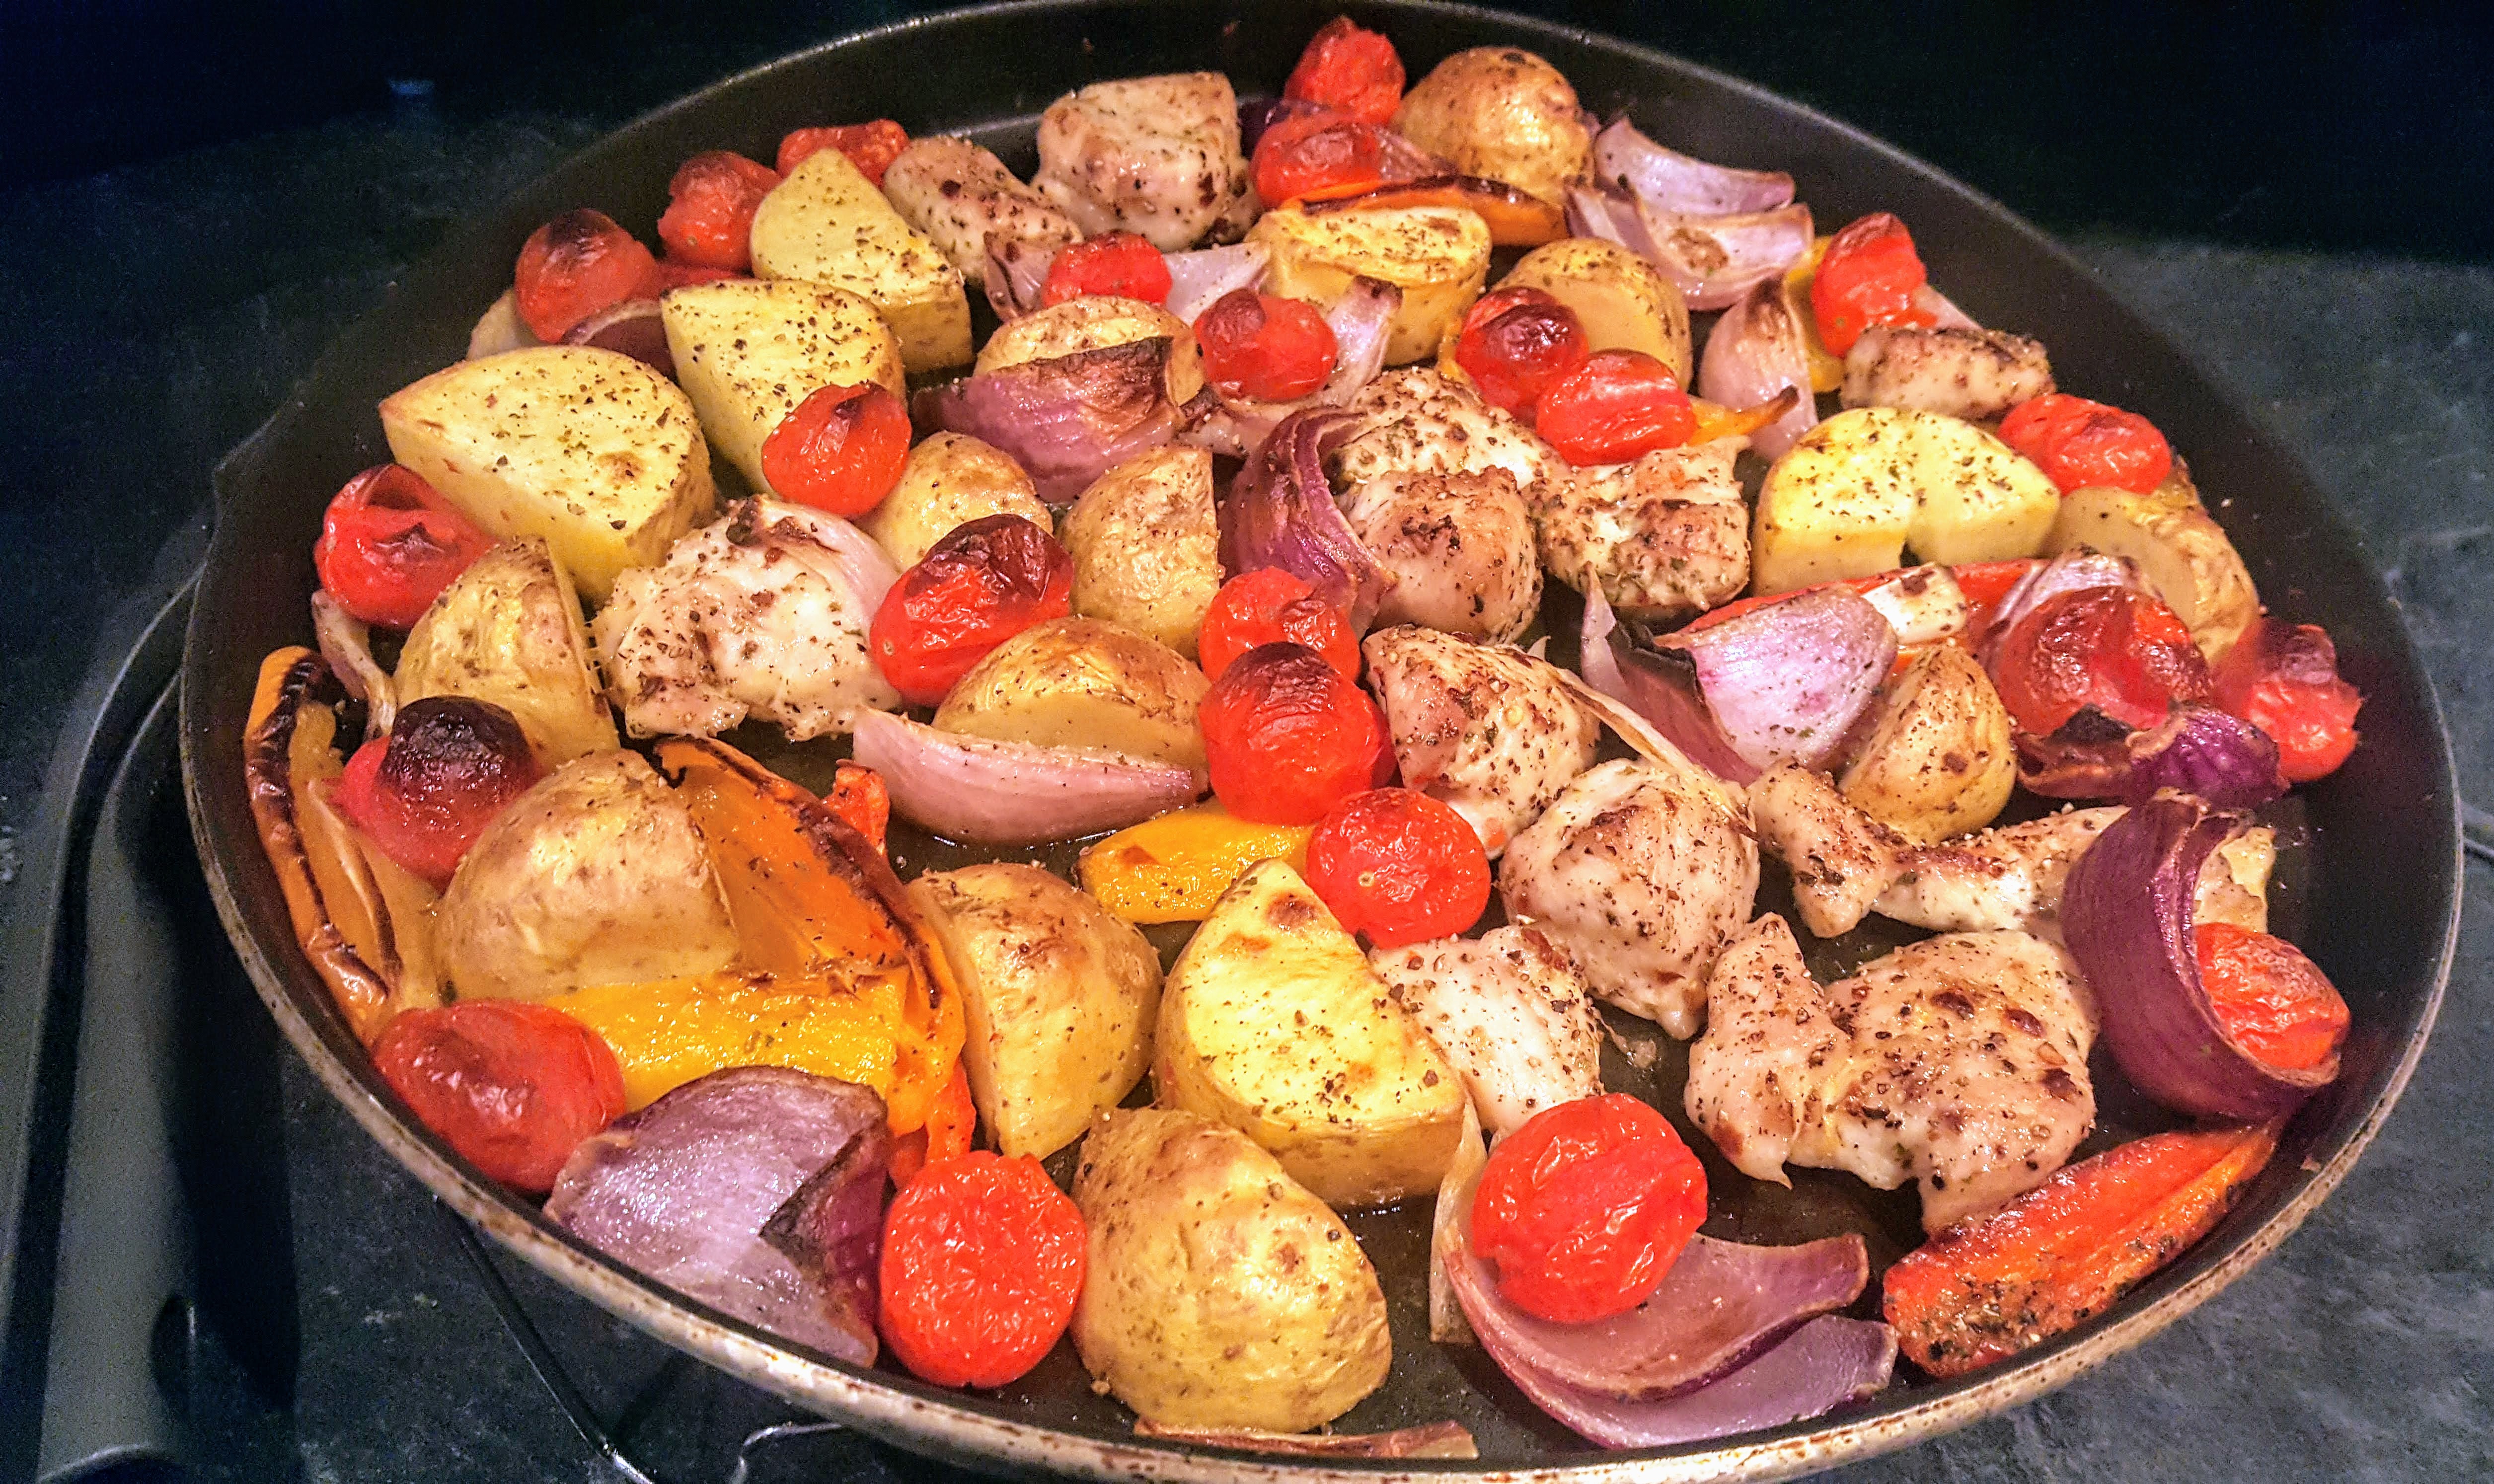
  3. Take a small amount and roll into a ball, put onto baking tray. Bake in oven for 15 minutes. At end of cooking, turn on grill and brown for a few minutes.
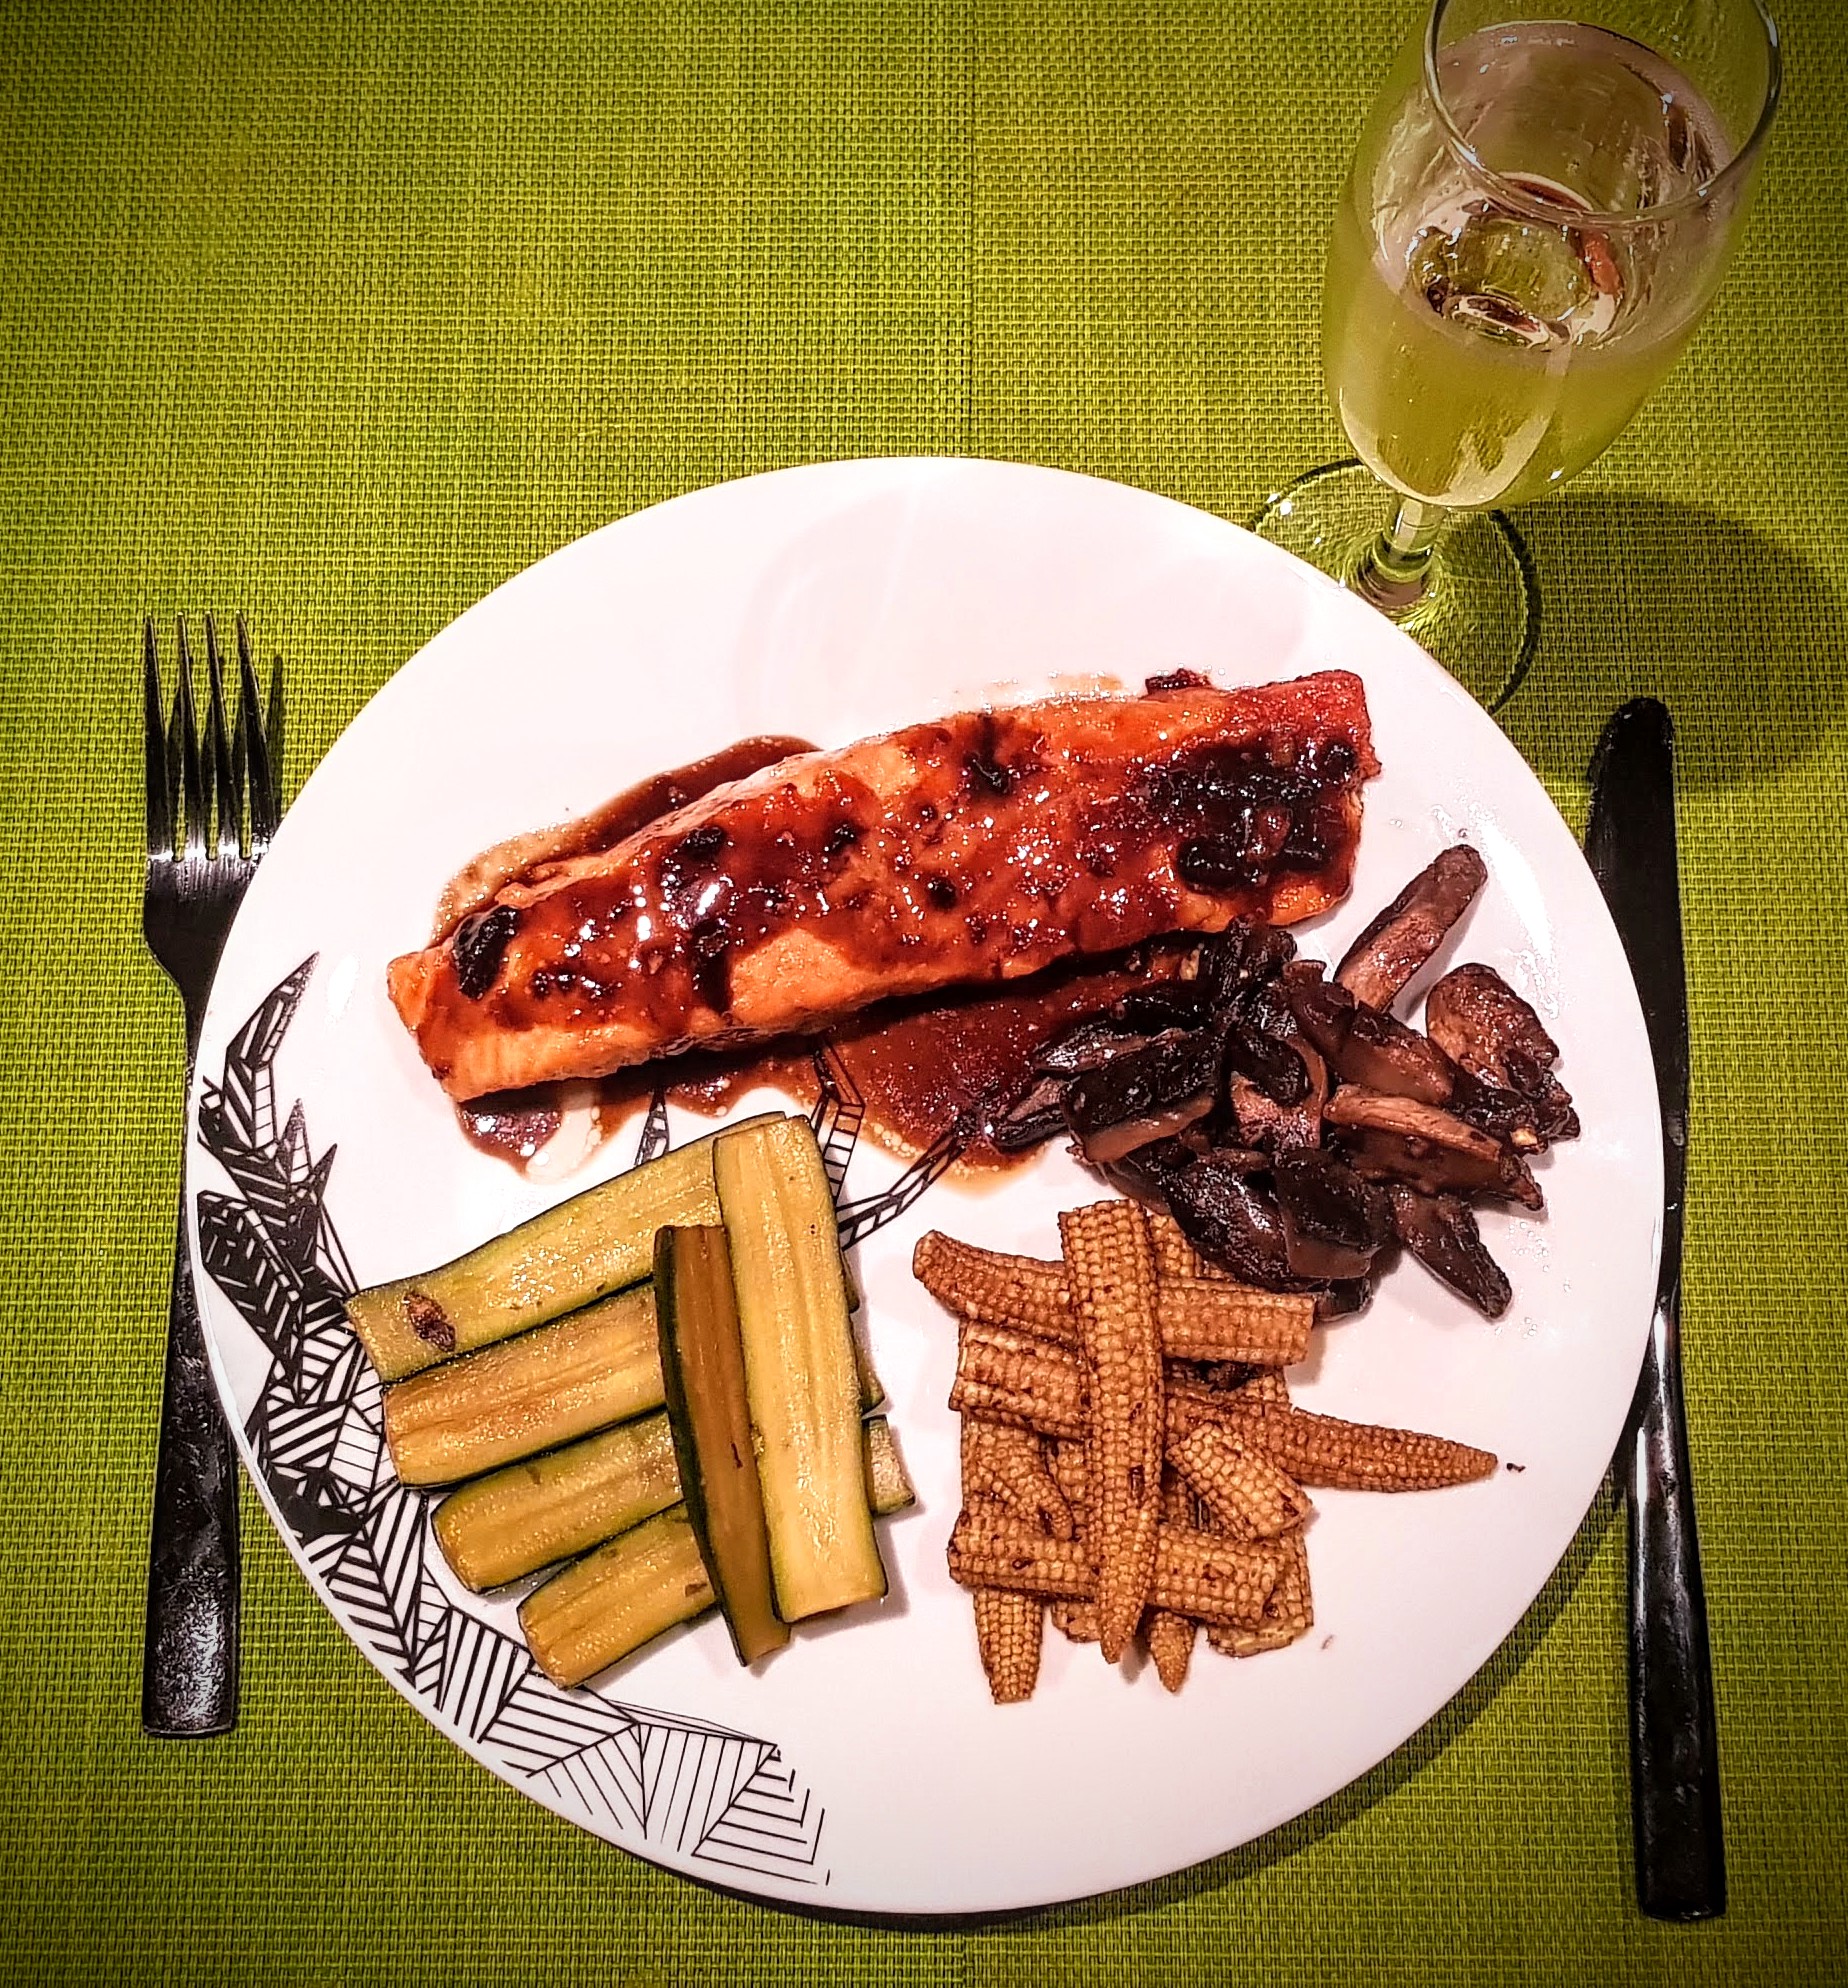
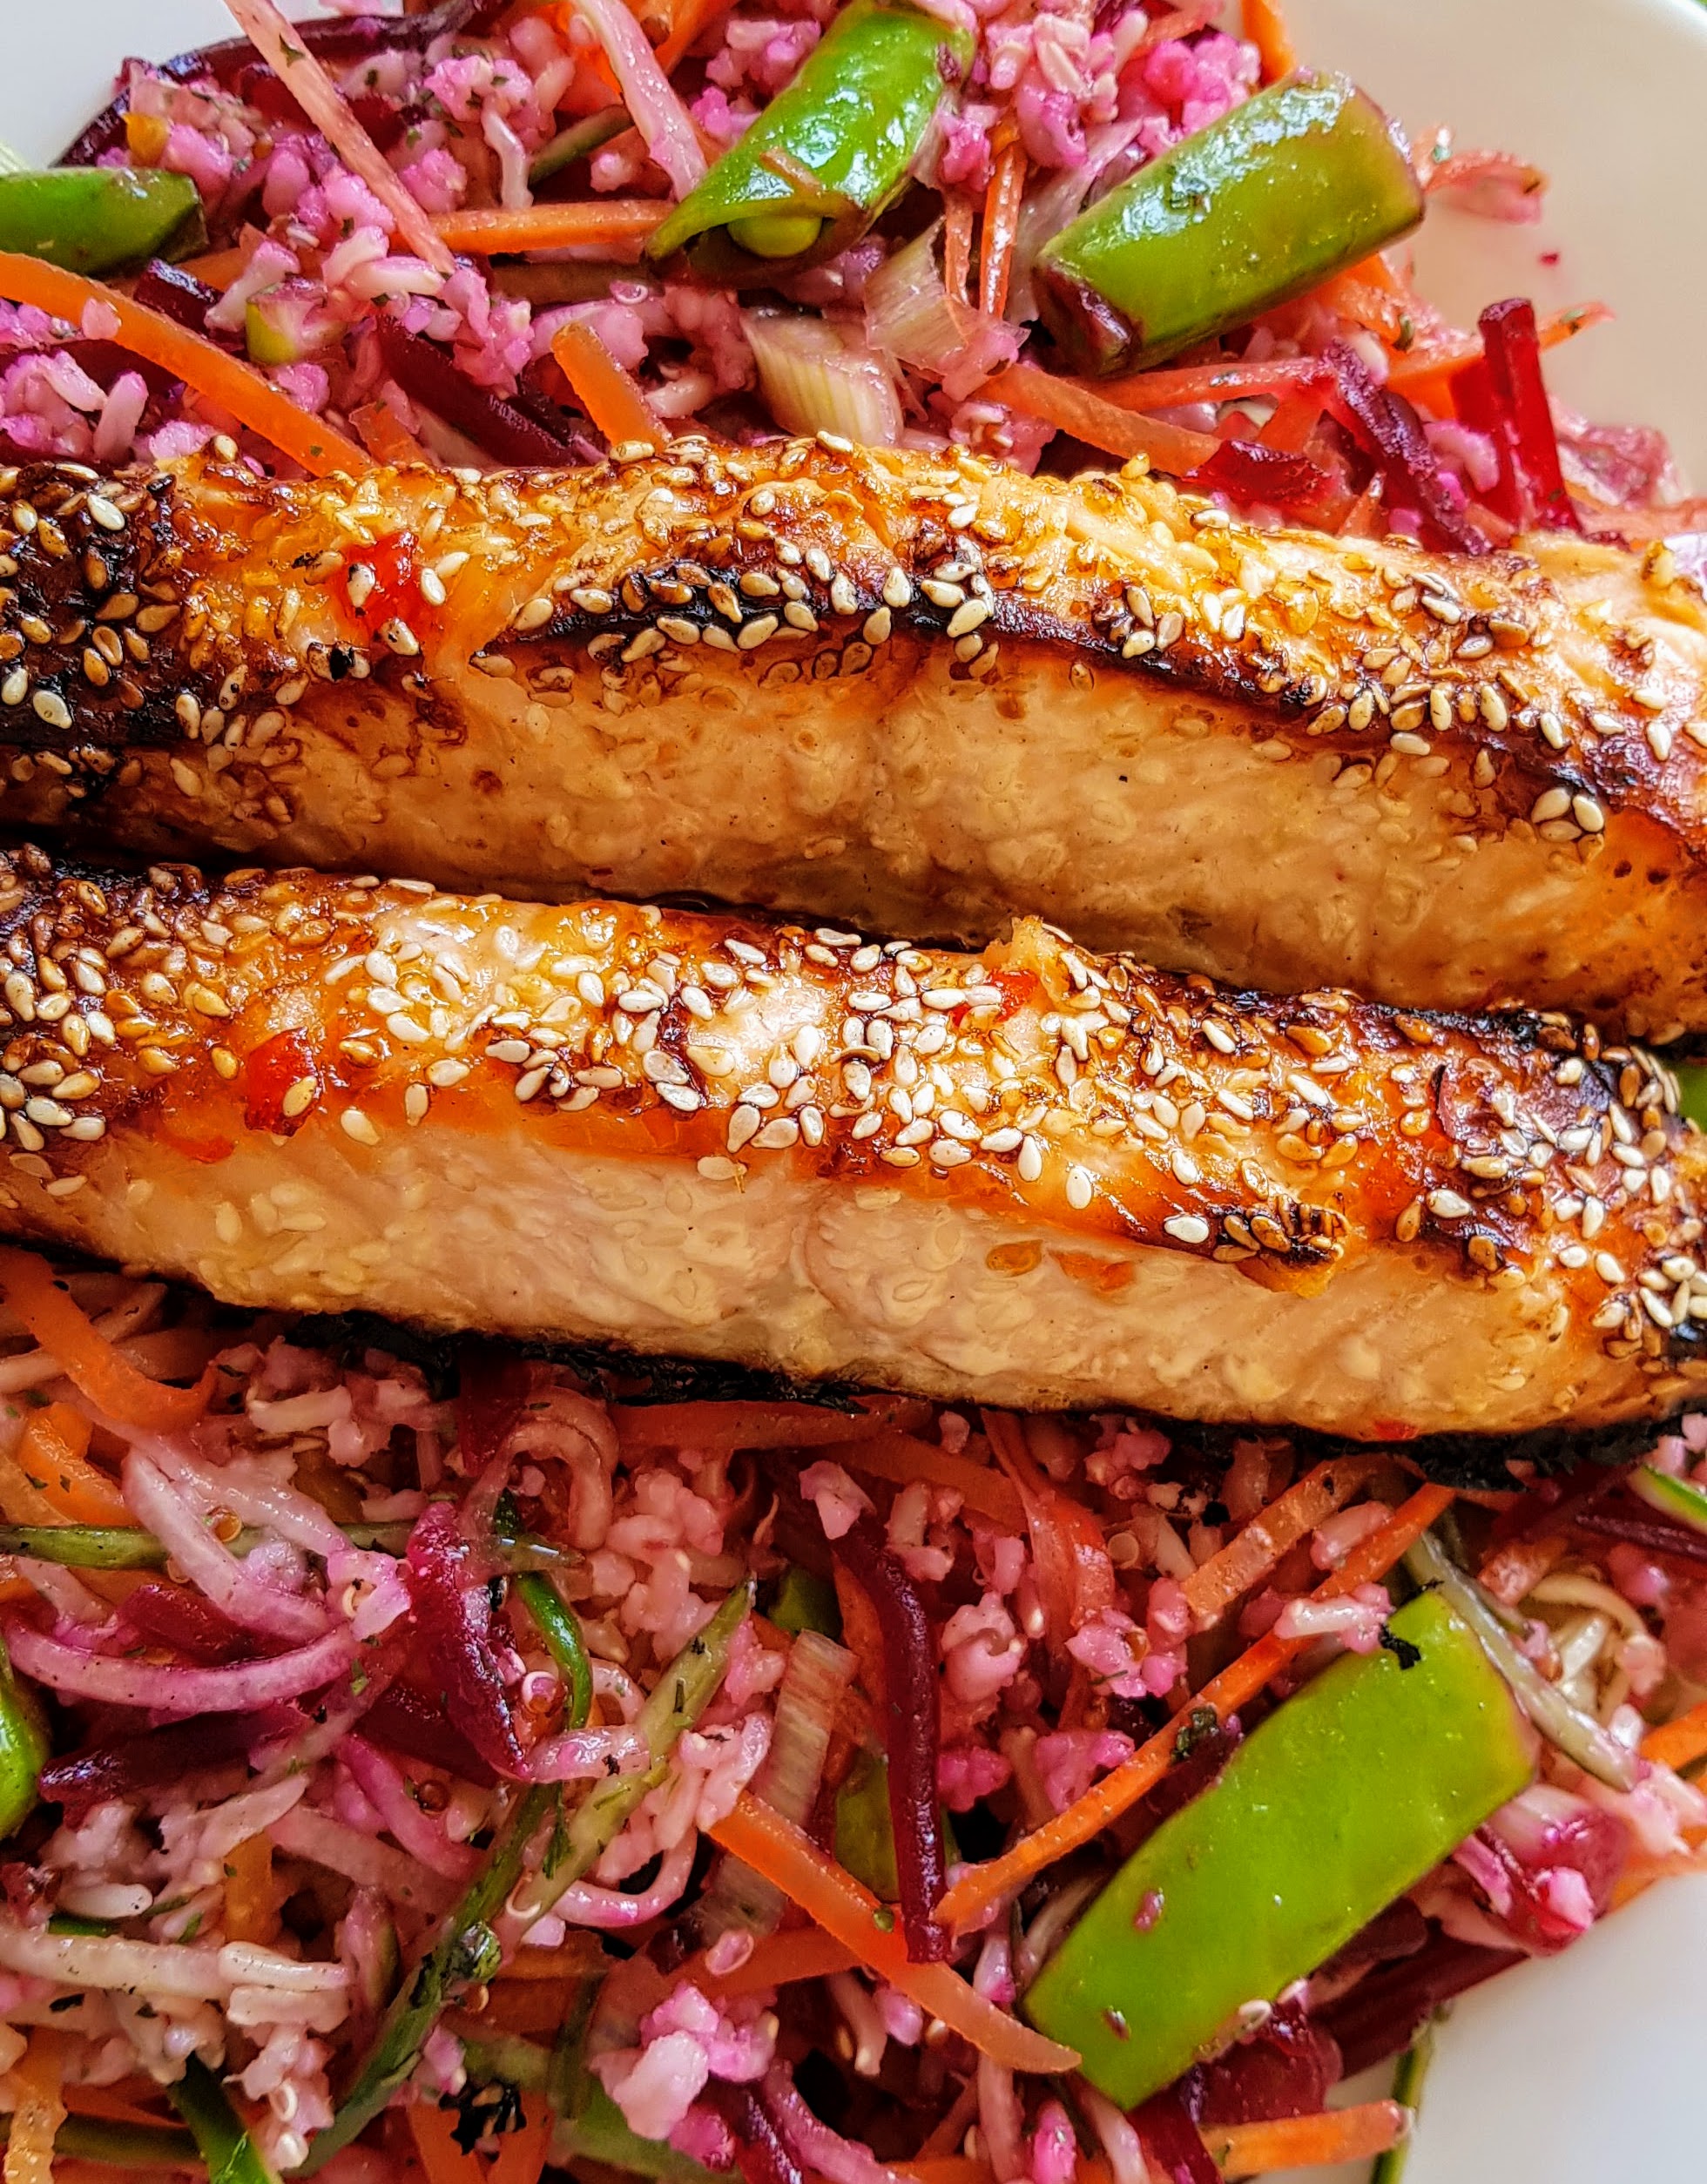
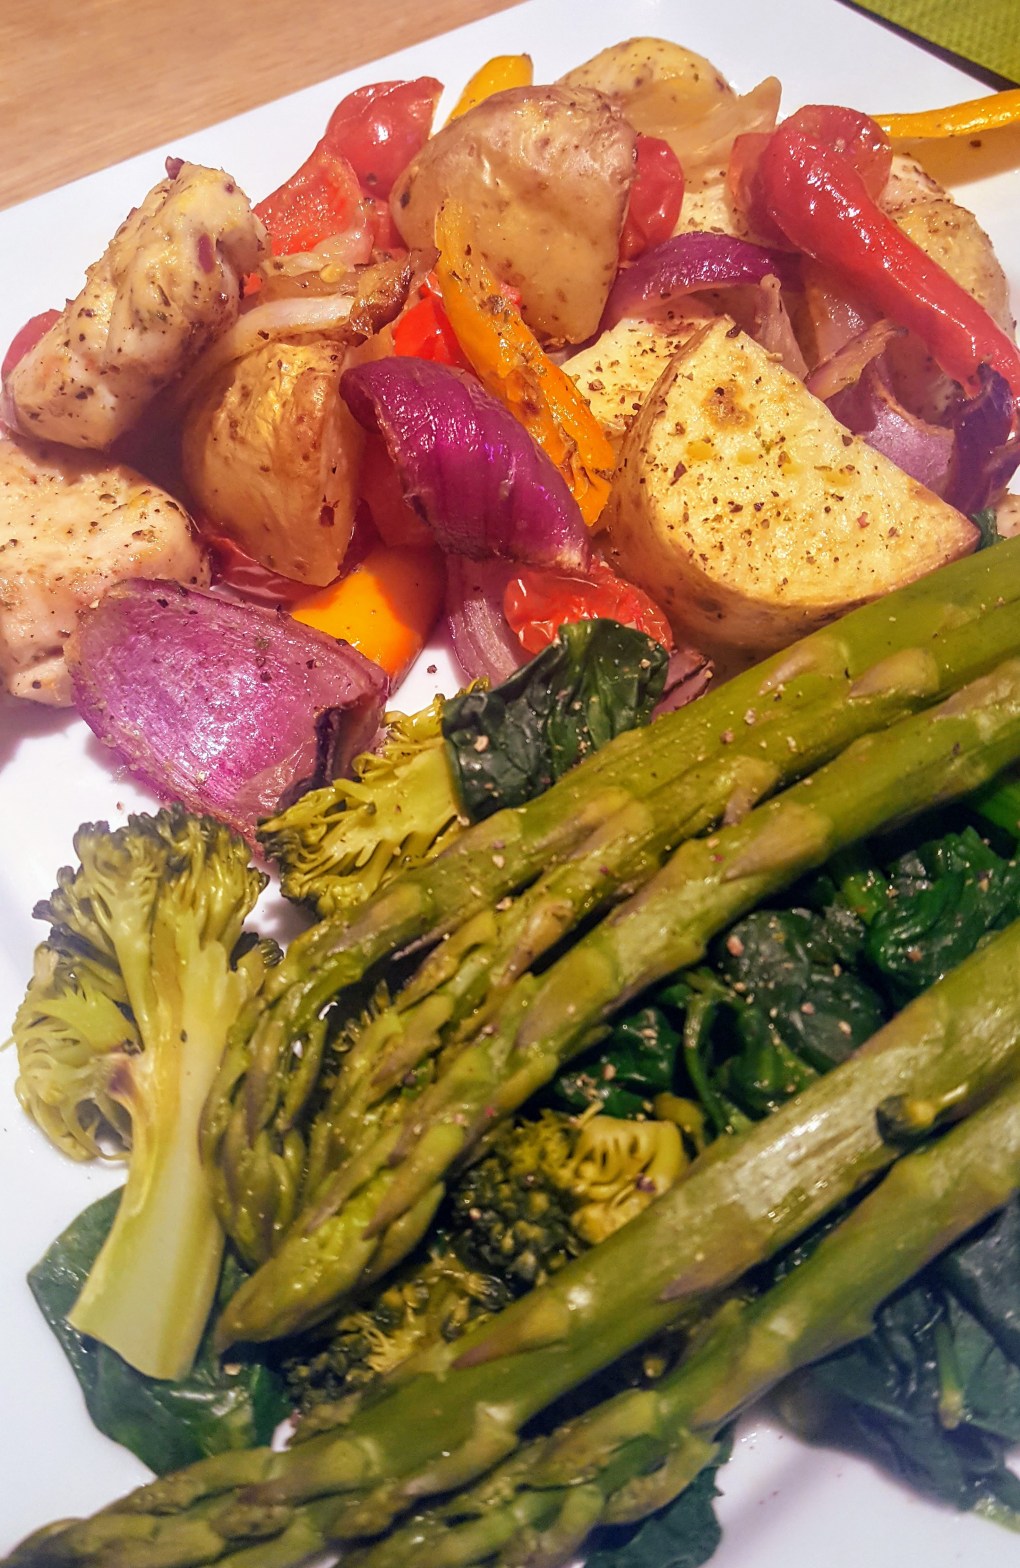
  4. Serve with a Lime Wedge. I also served with Thai Potato Wedges (recipe below) and some Lime & Coriander Mayo.

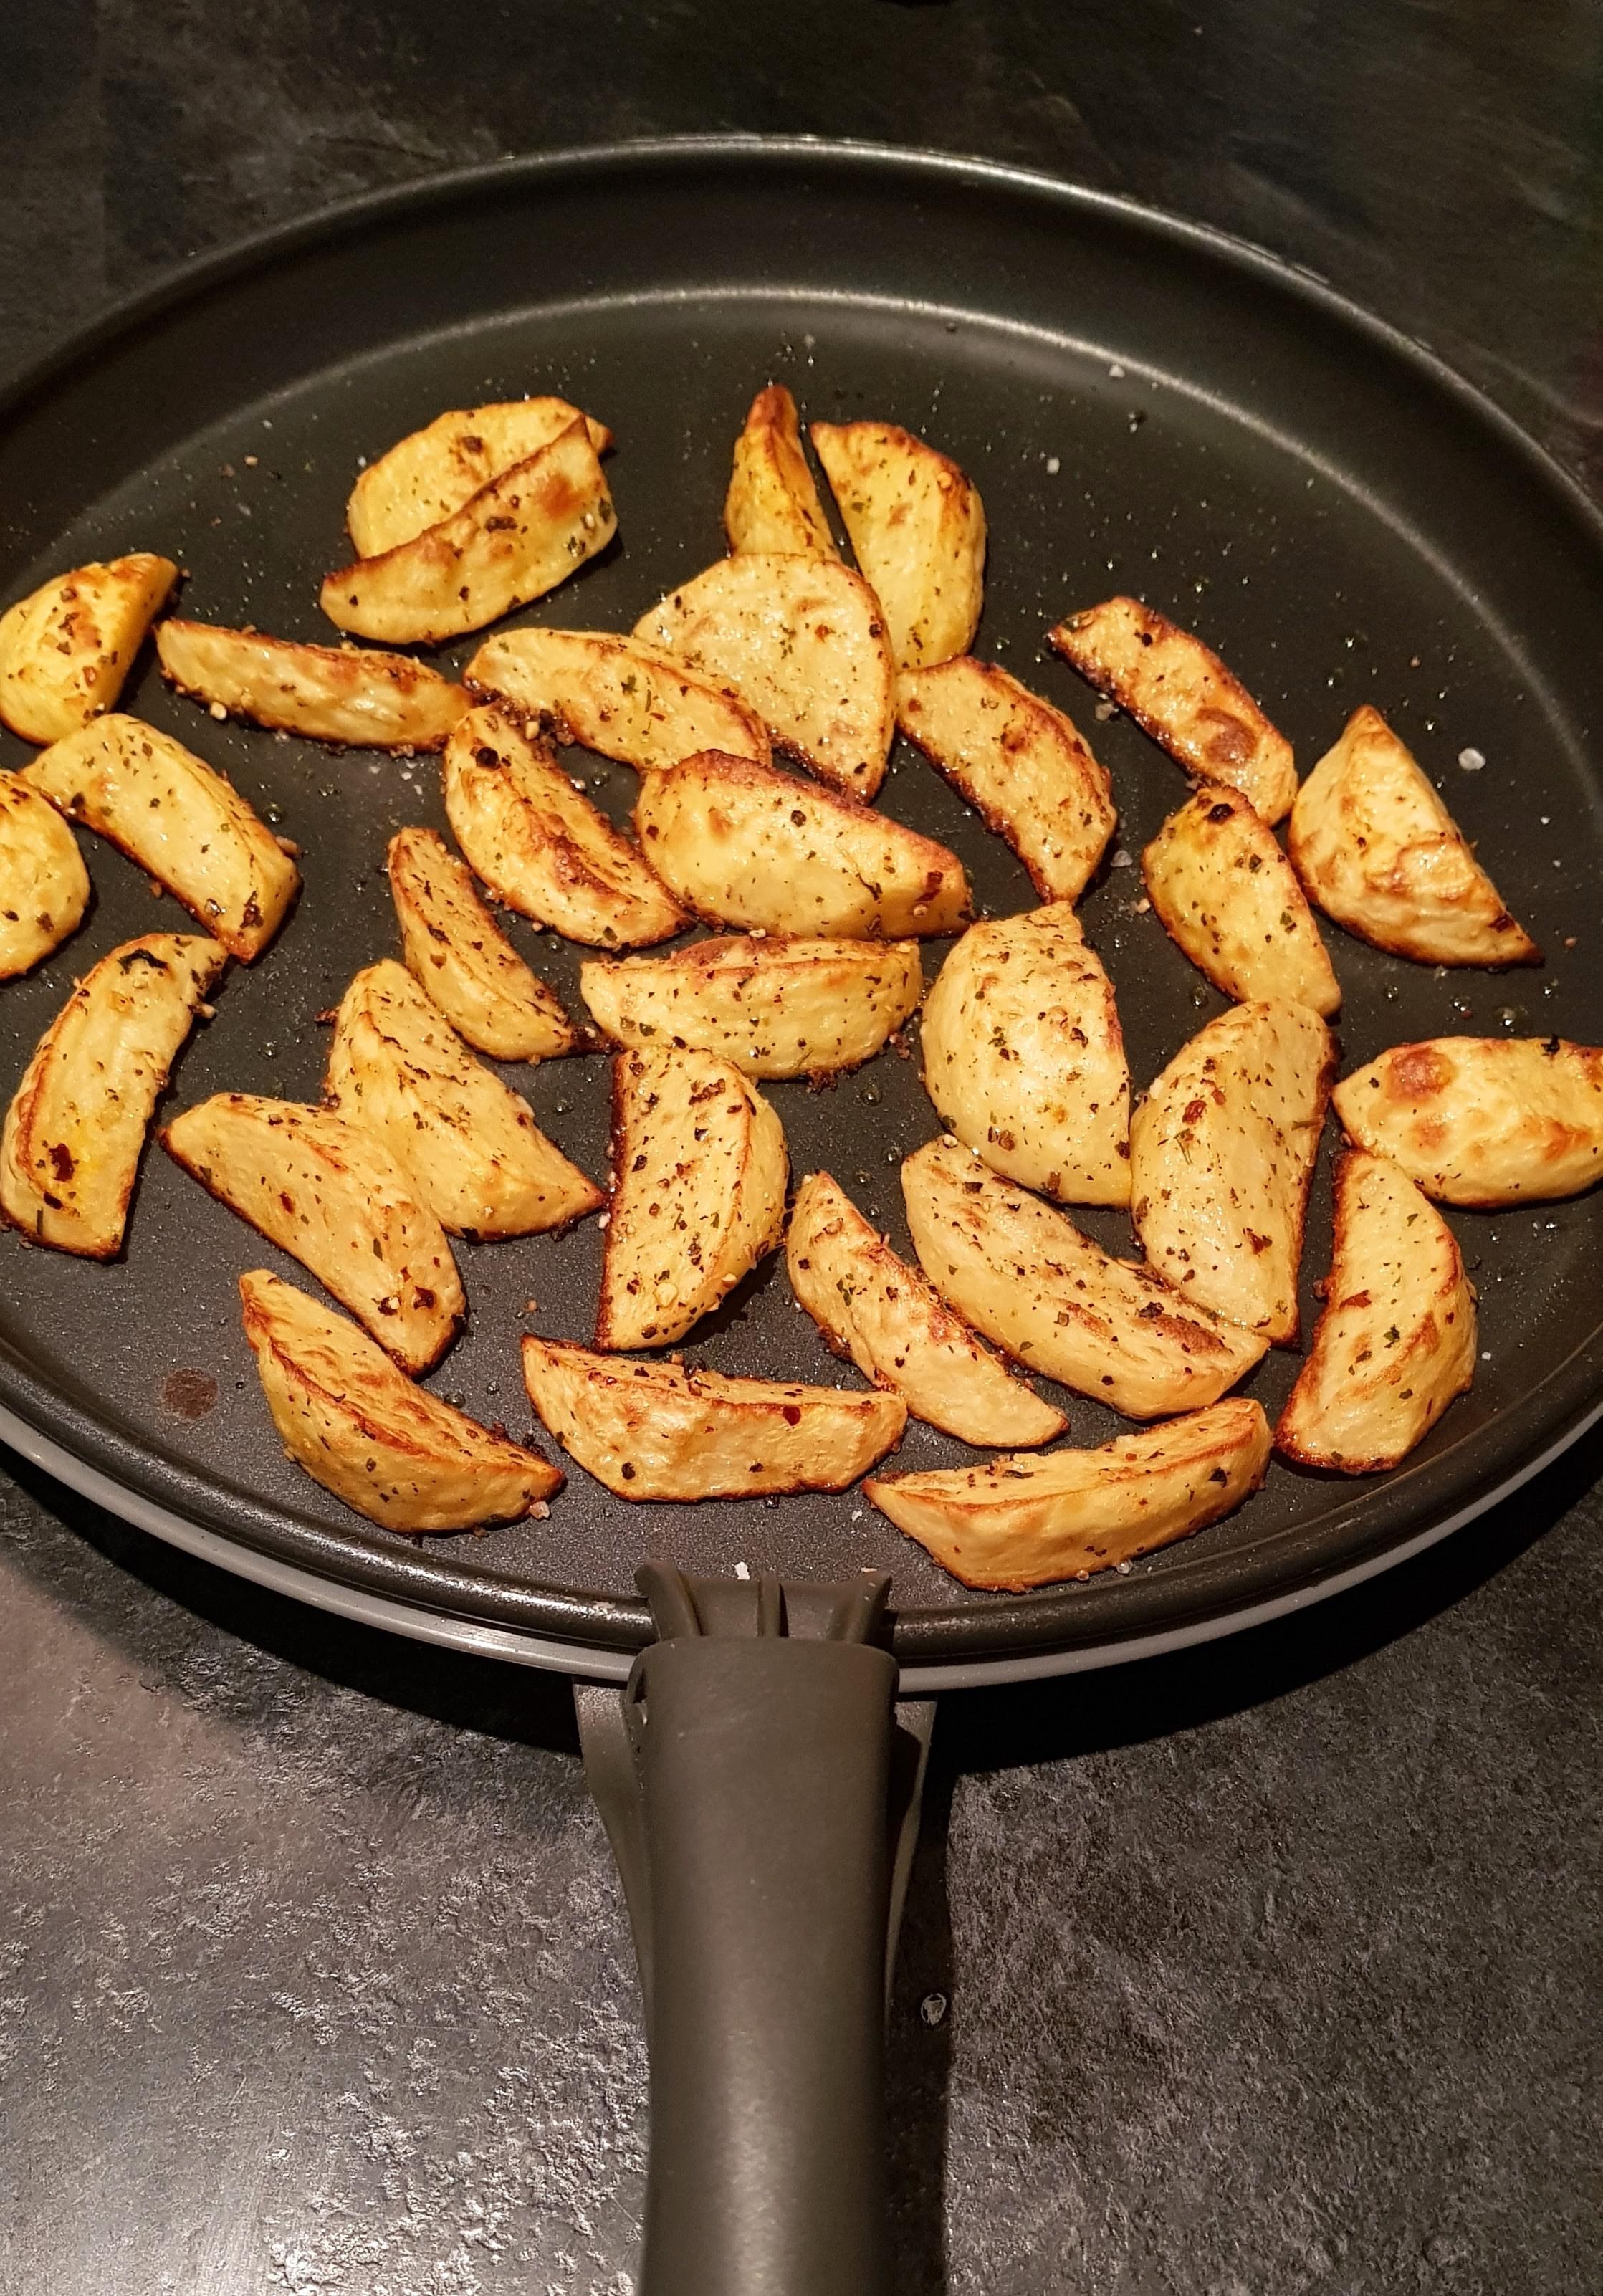
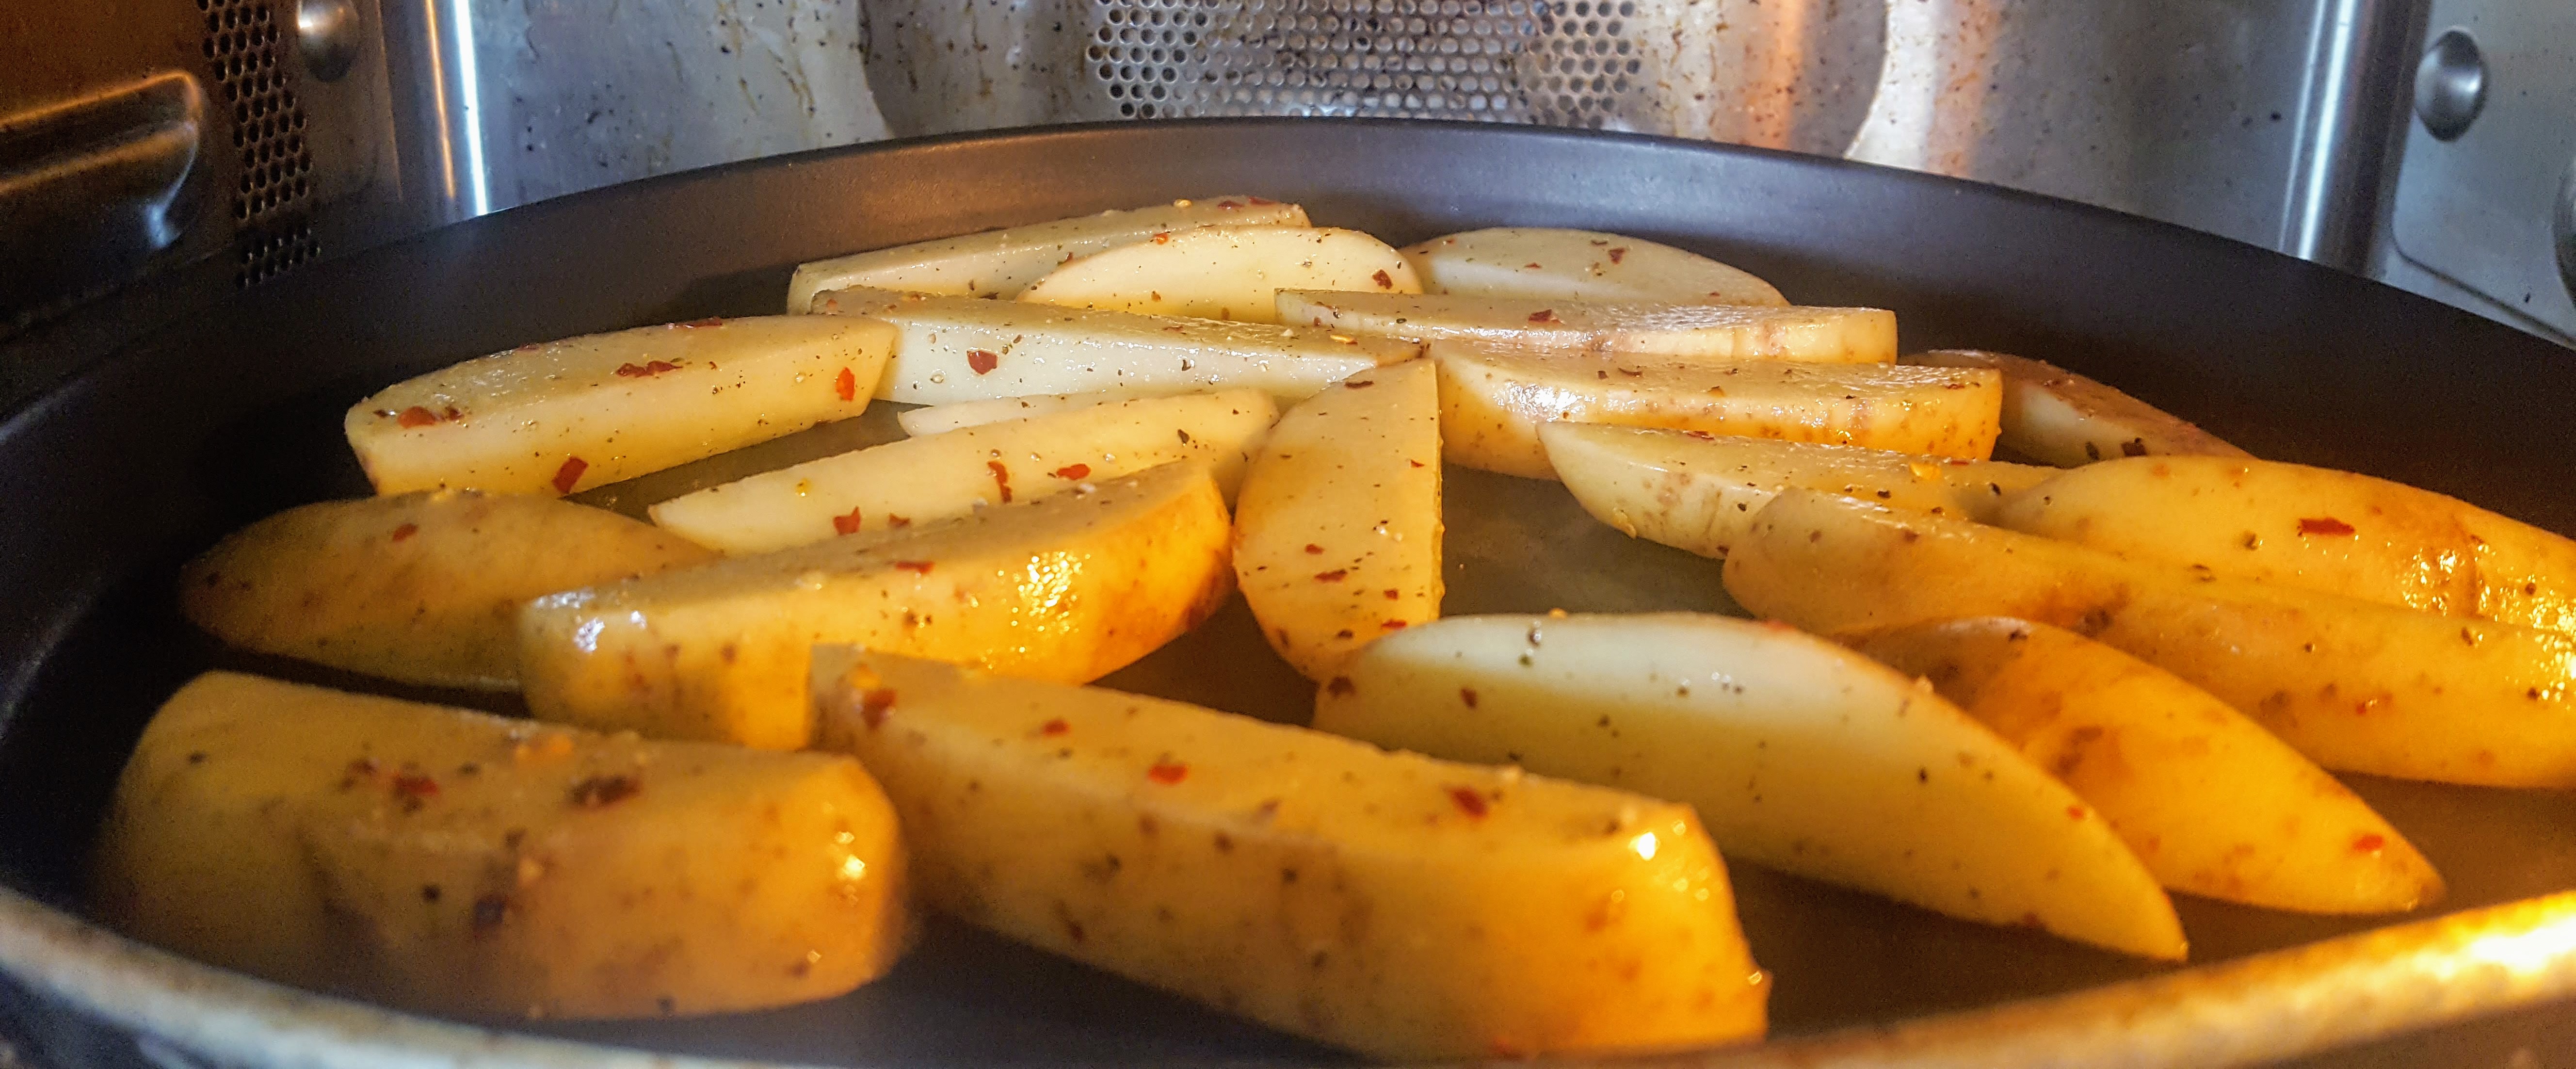
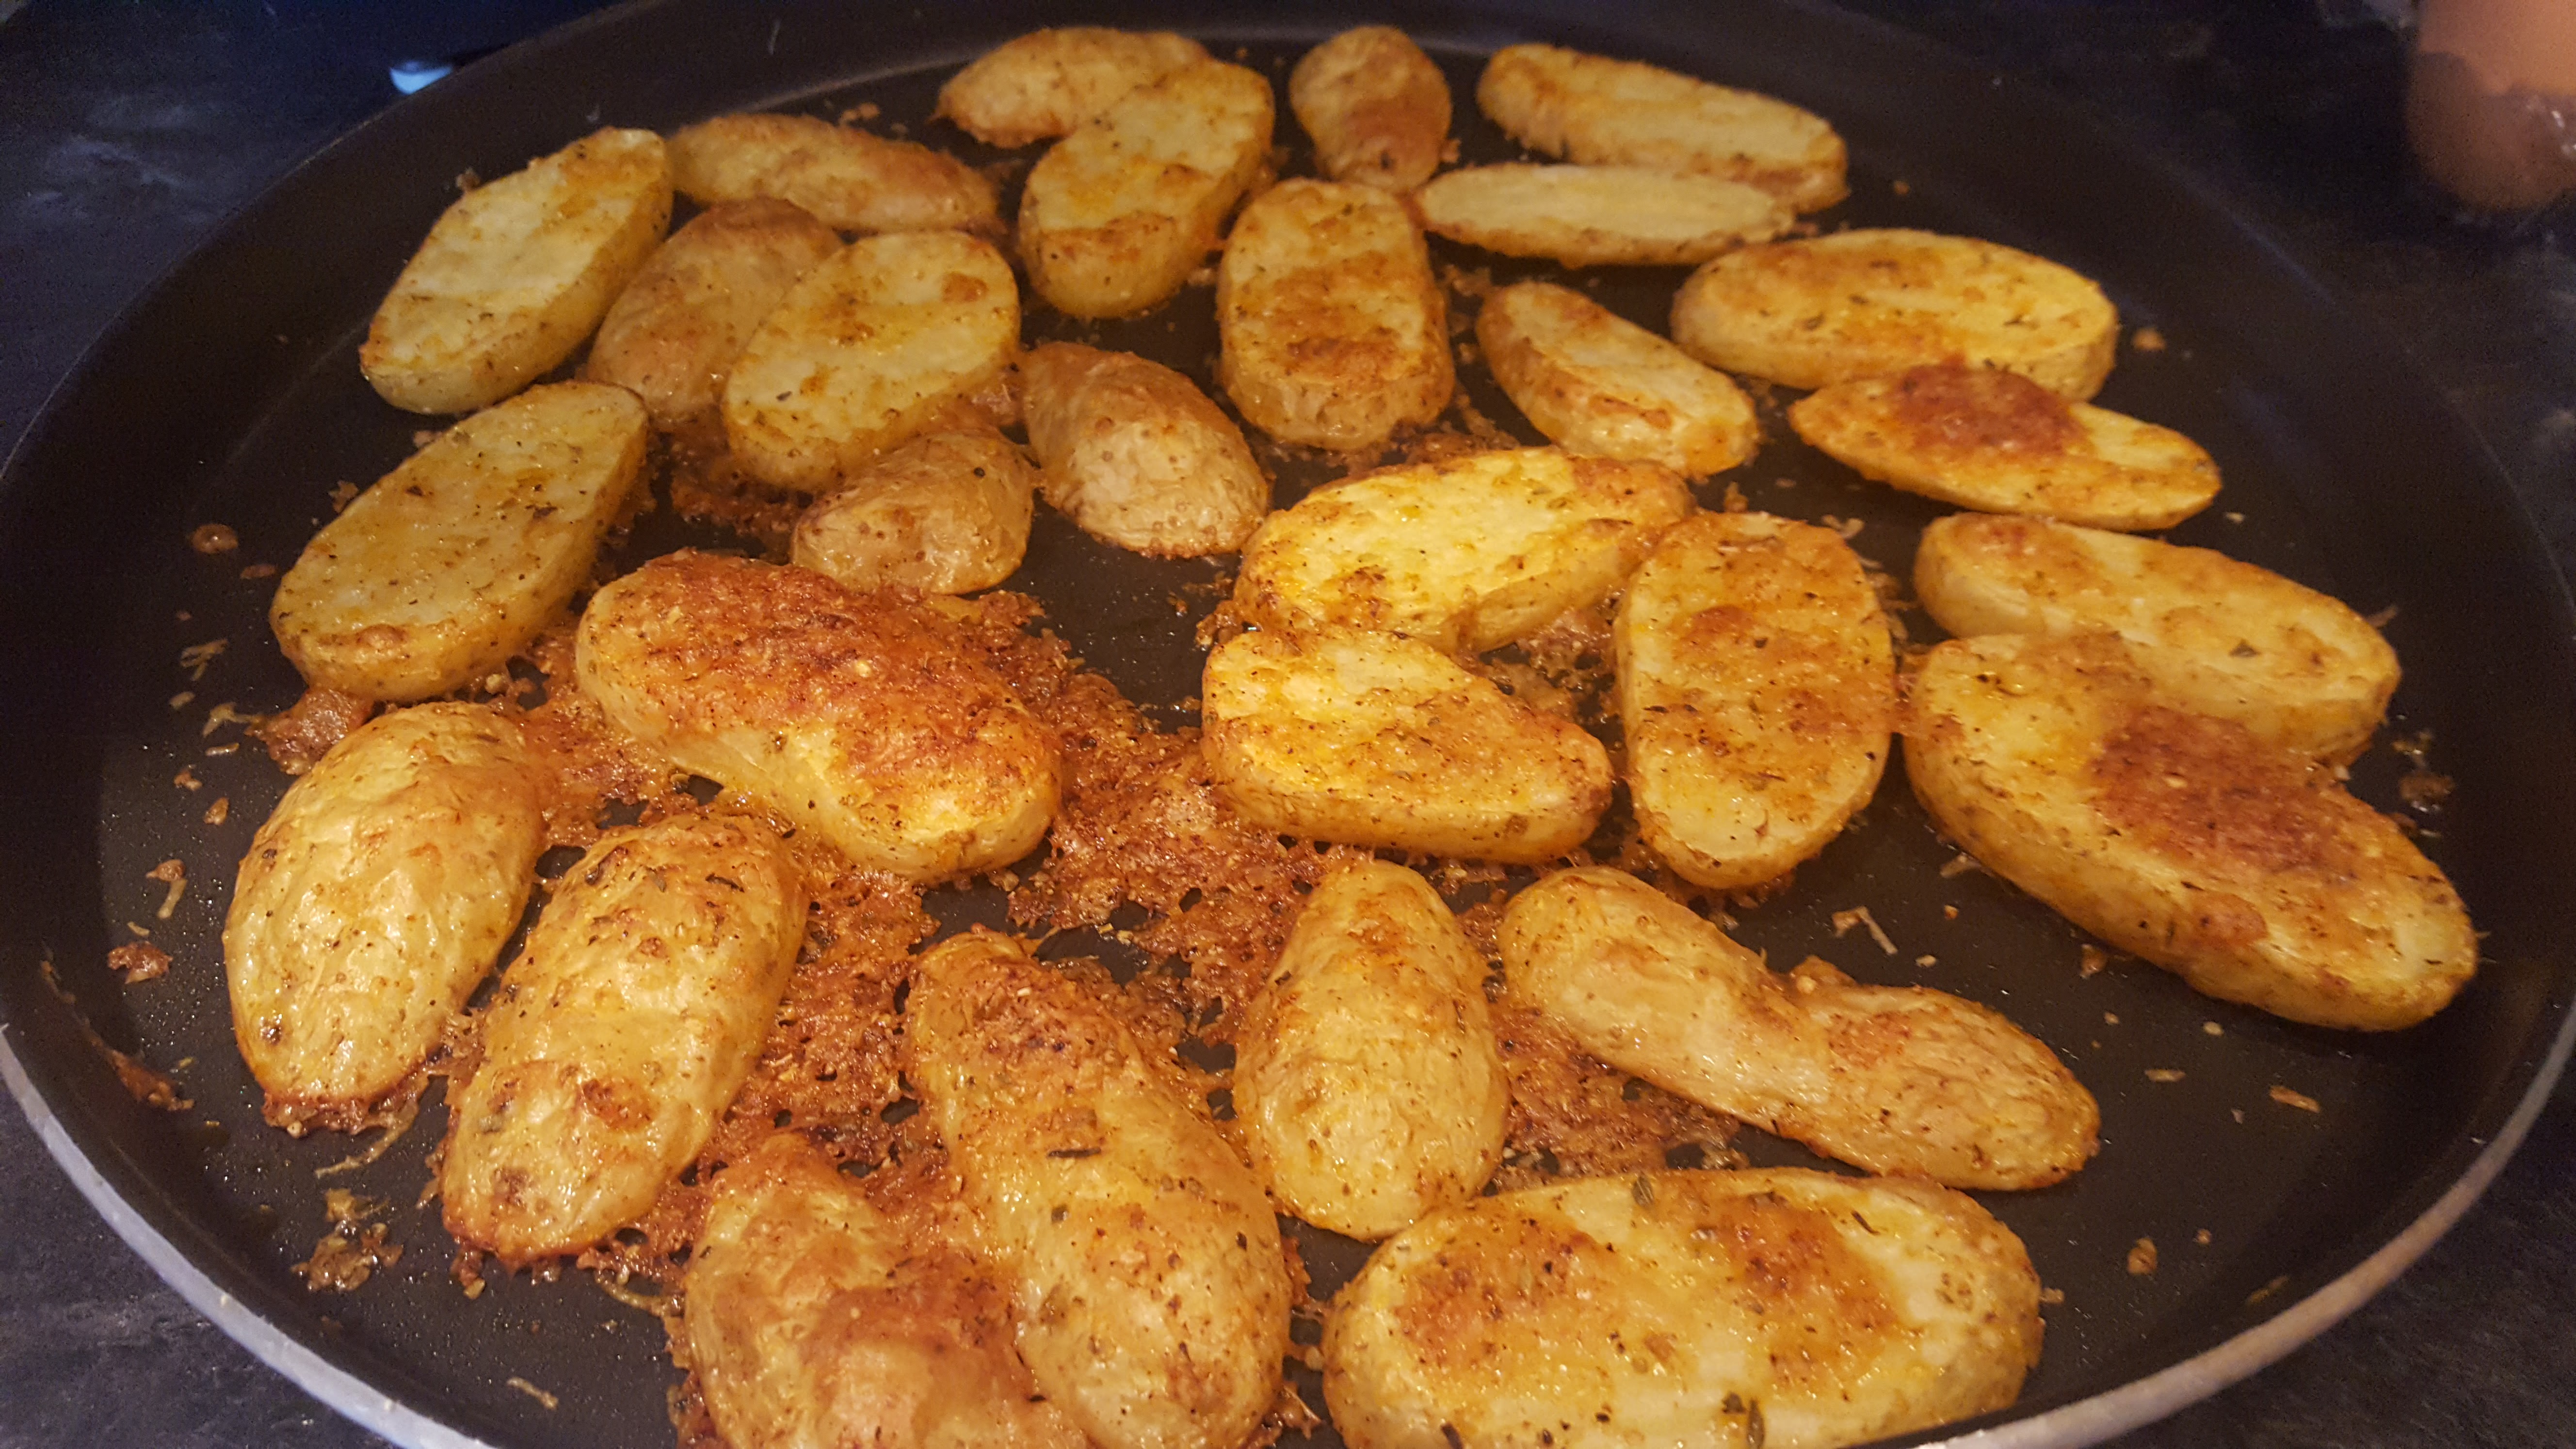
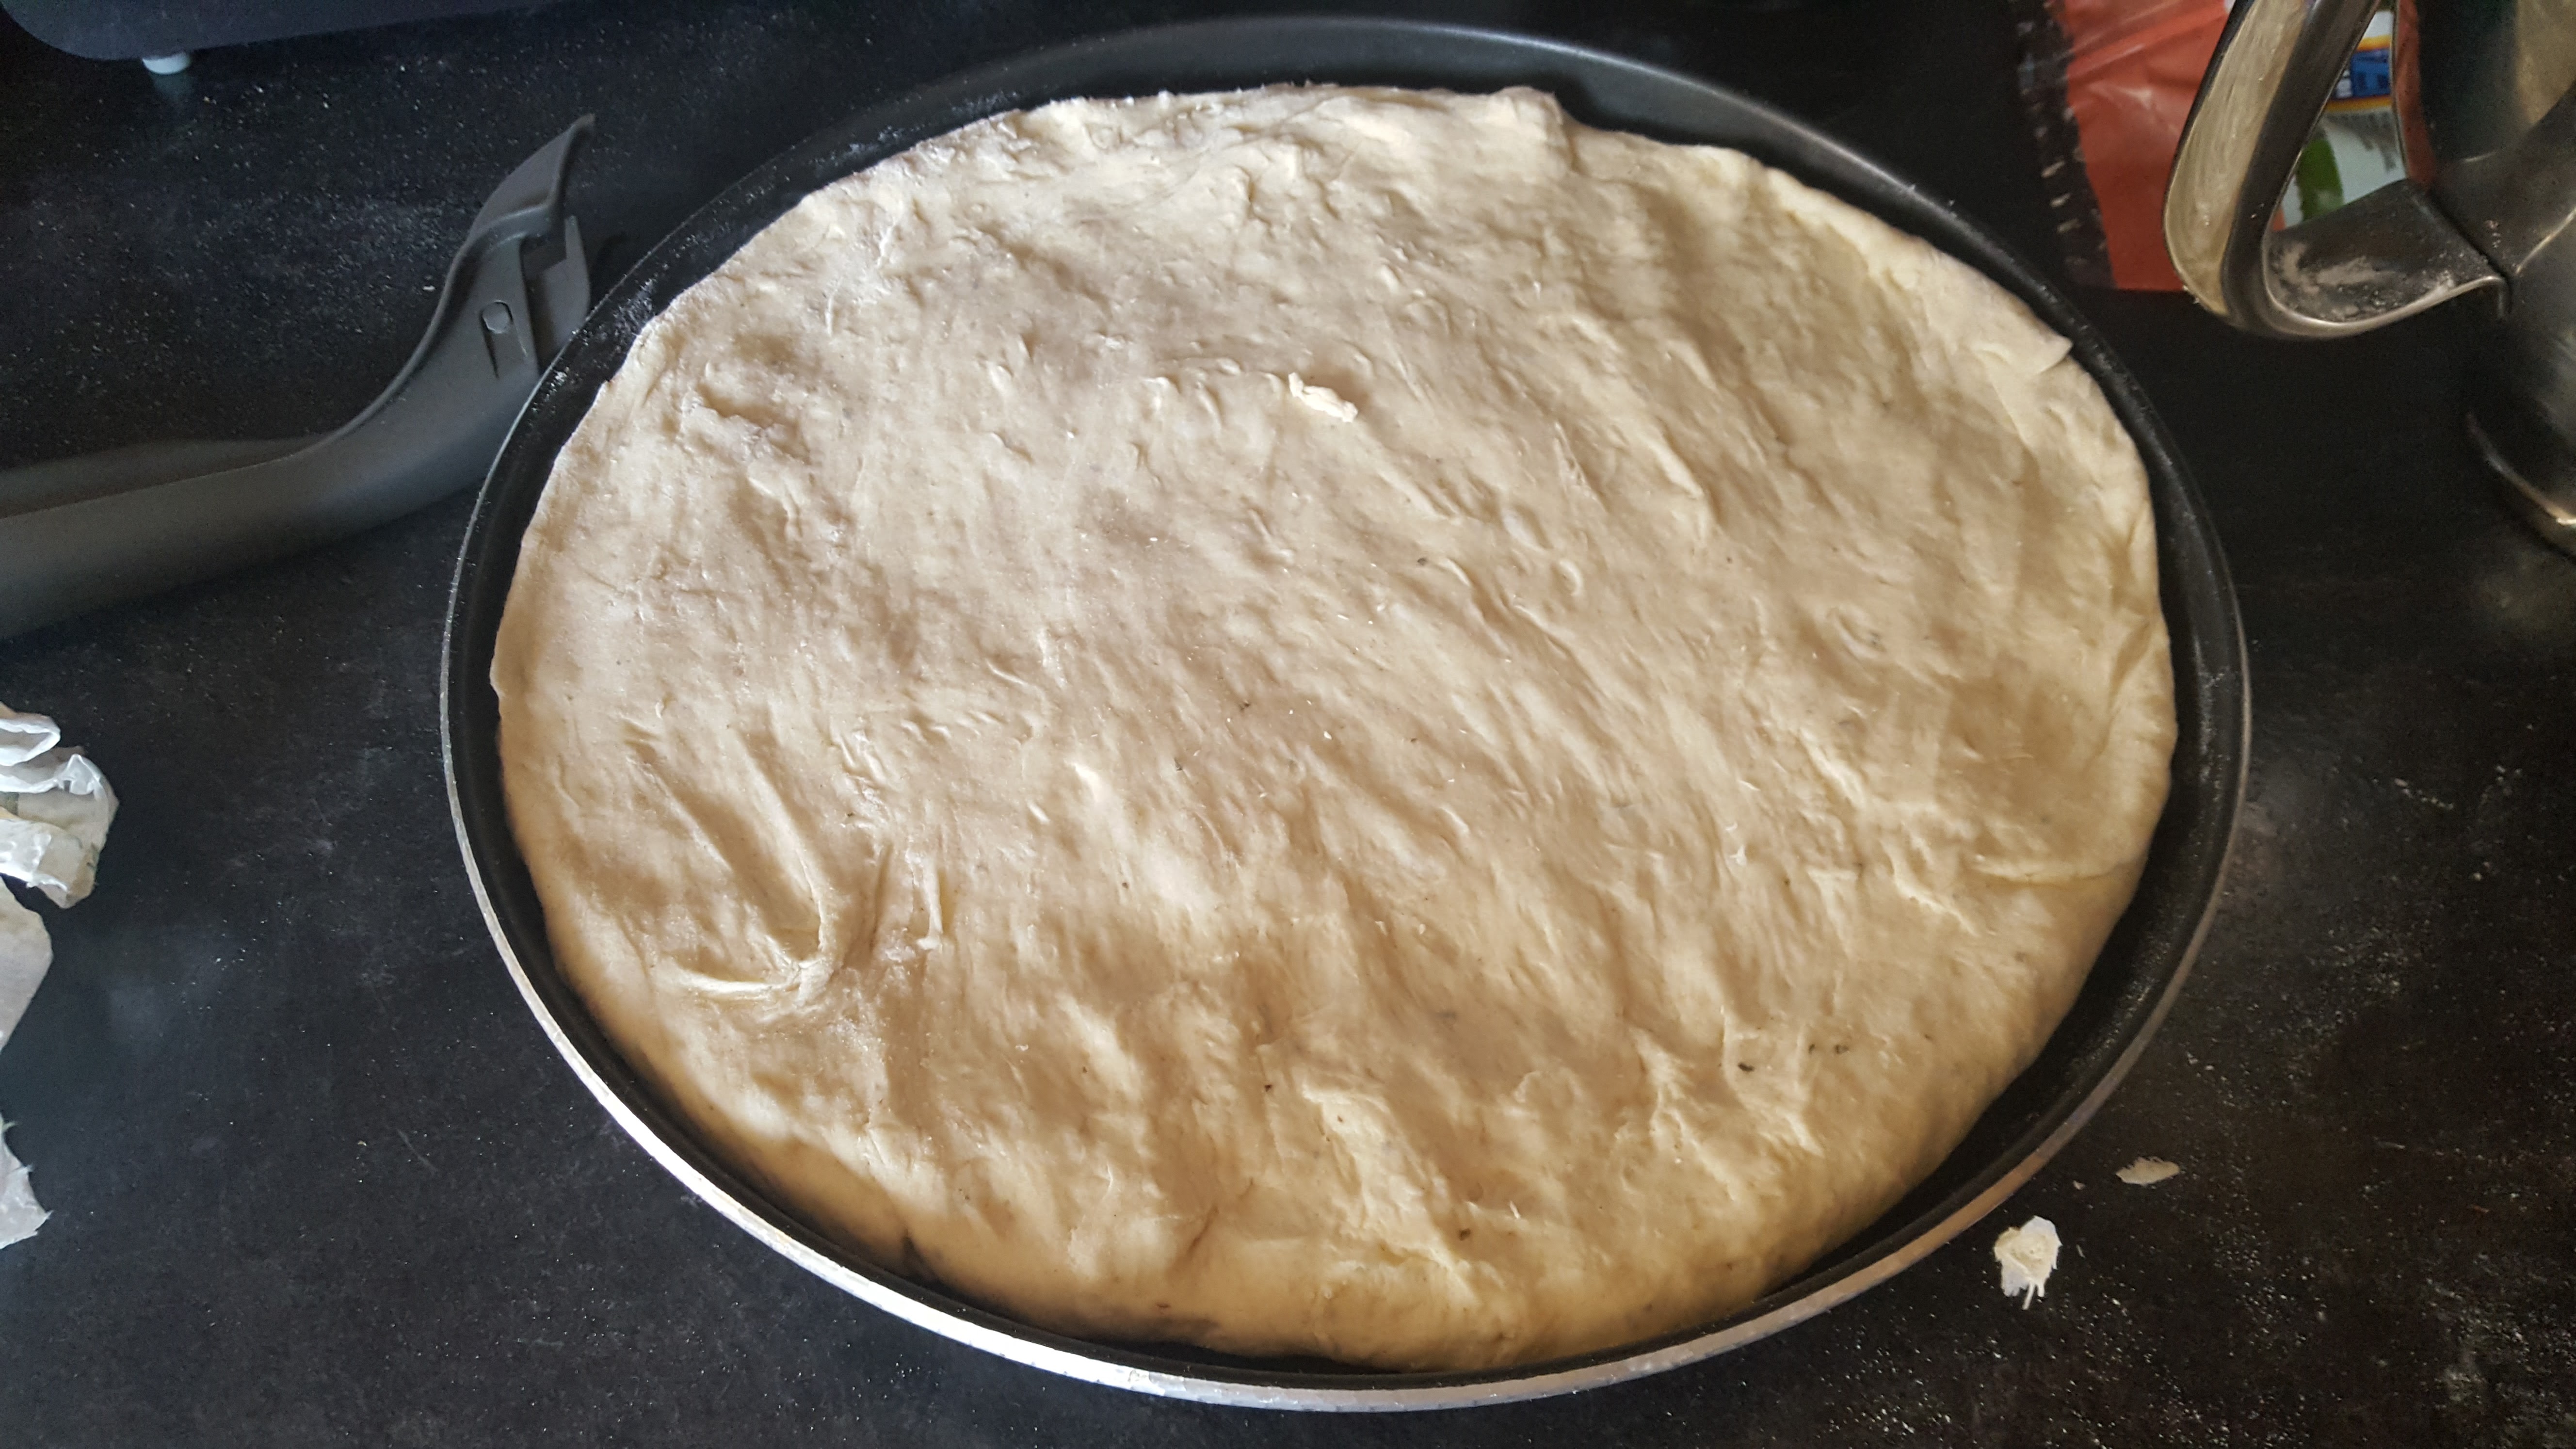
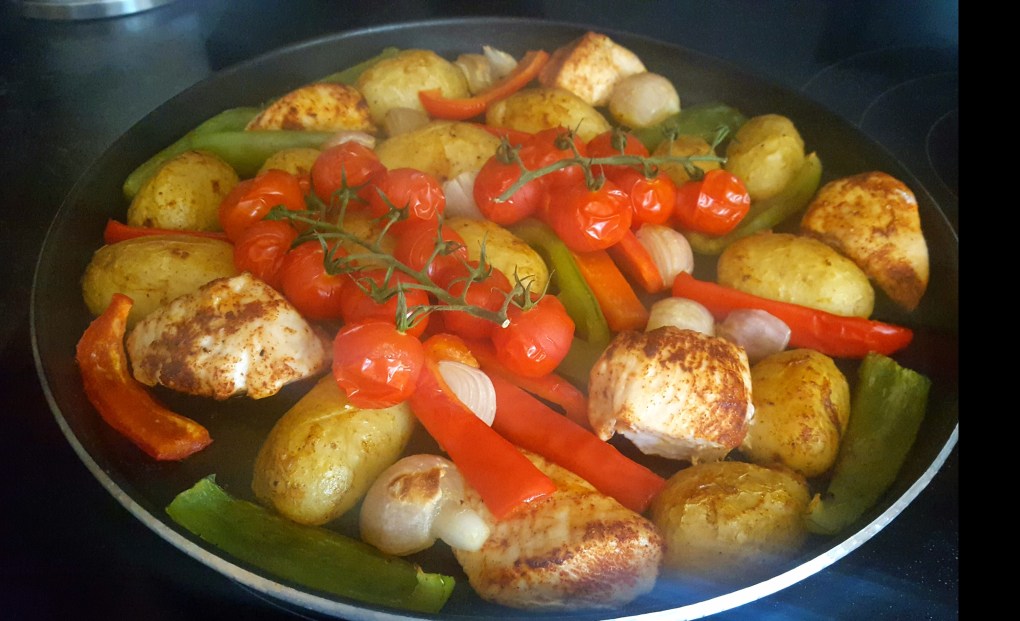
For the Potato Wedges

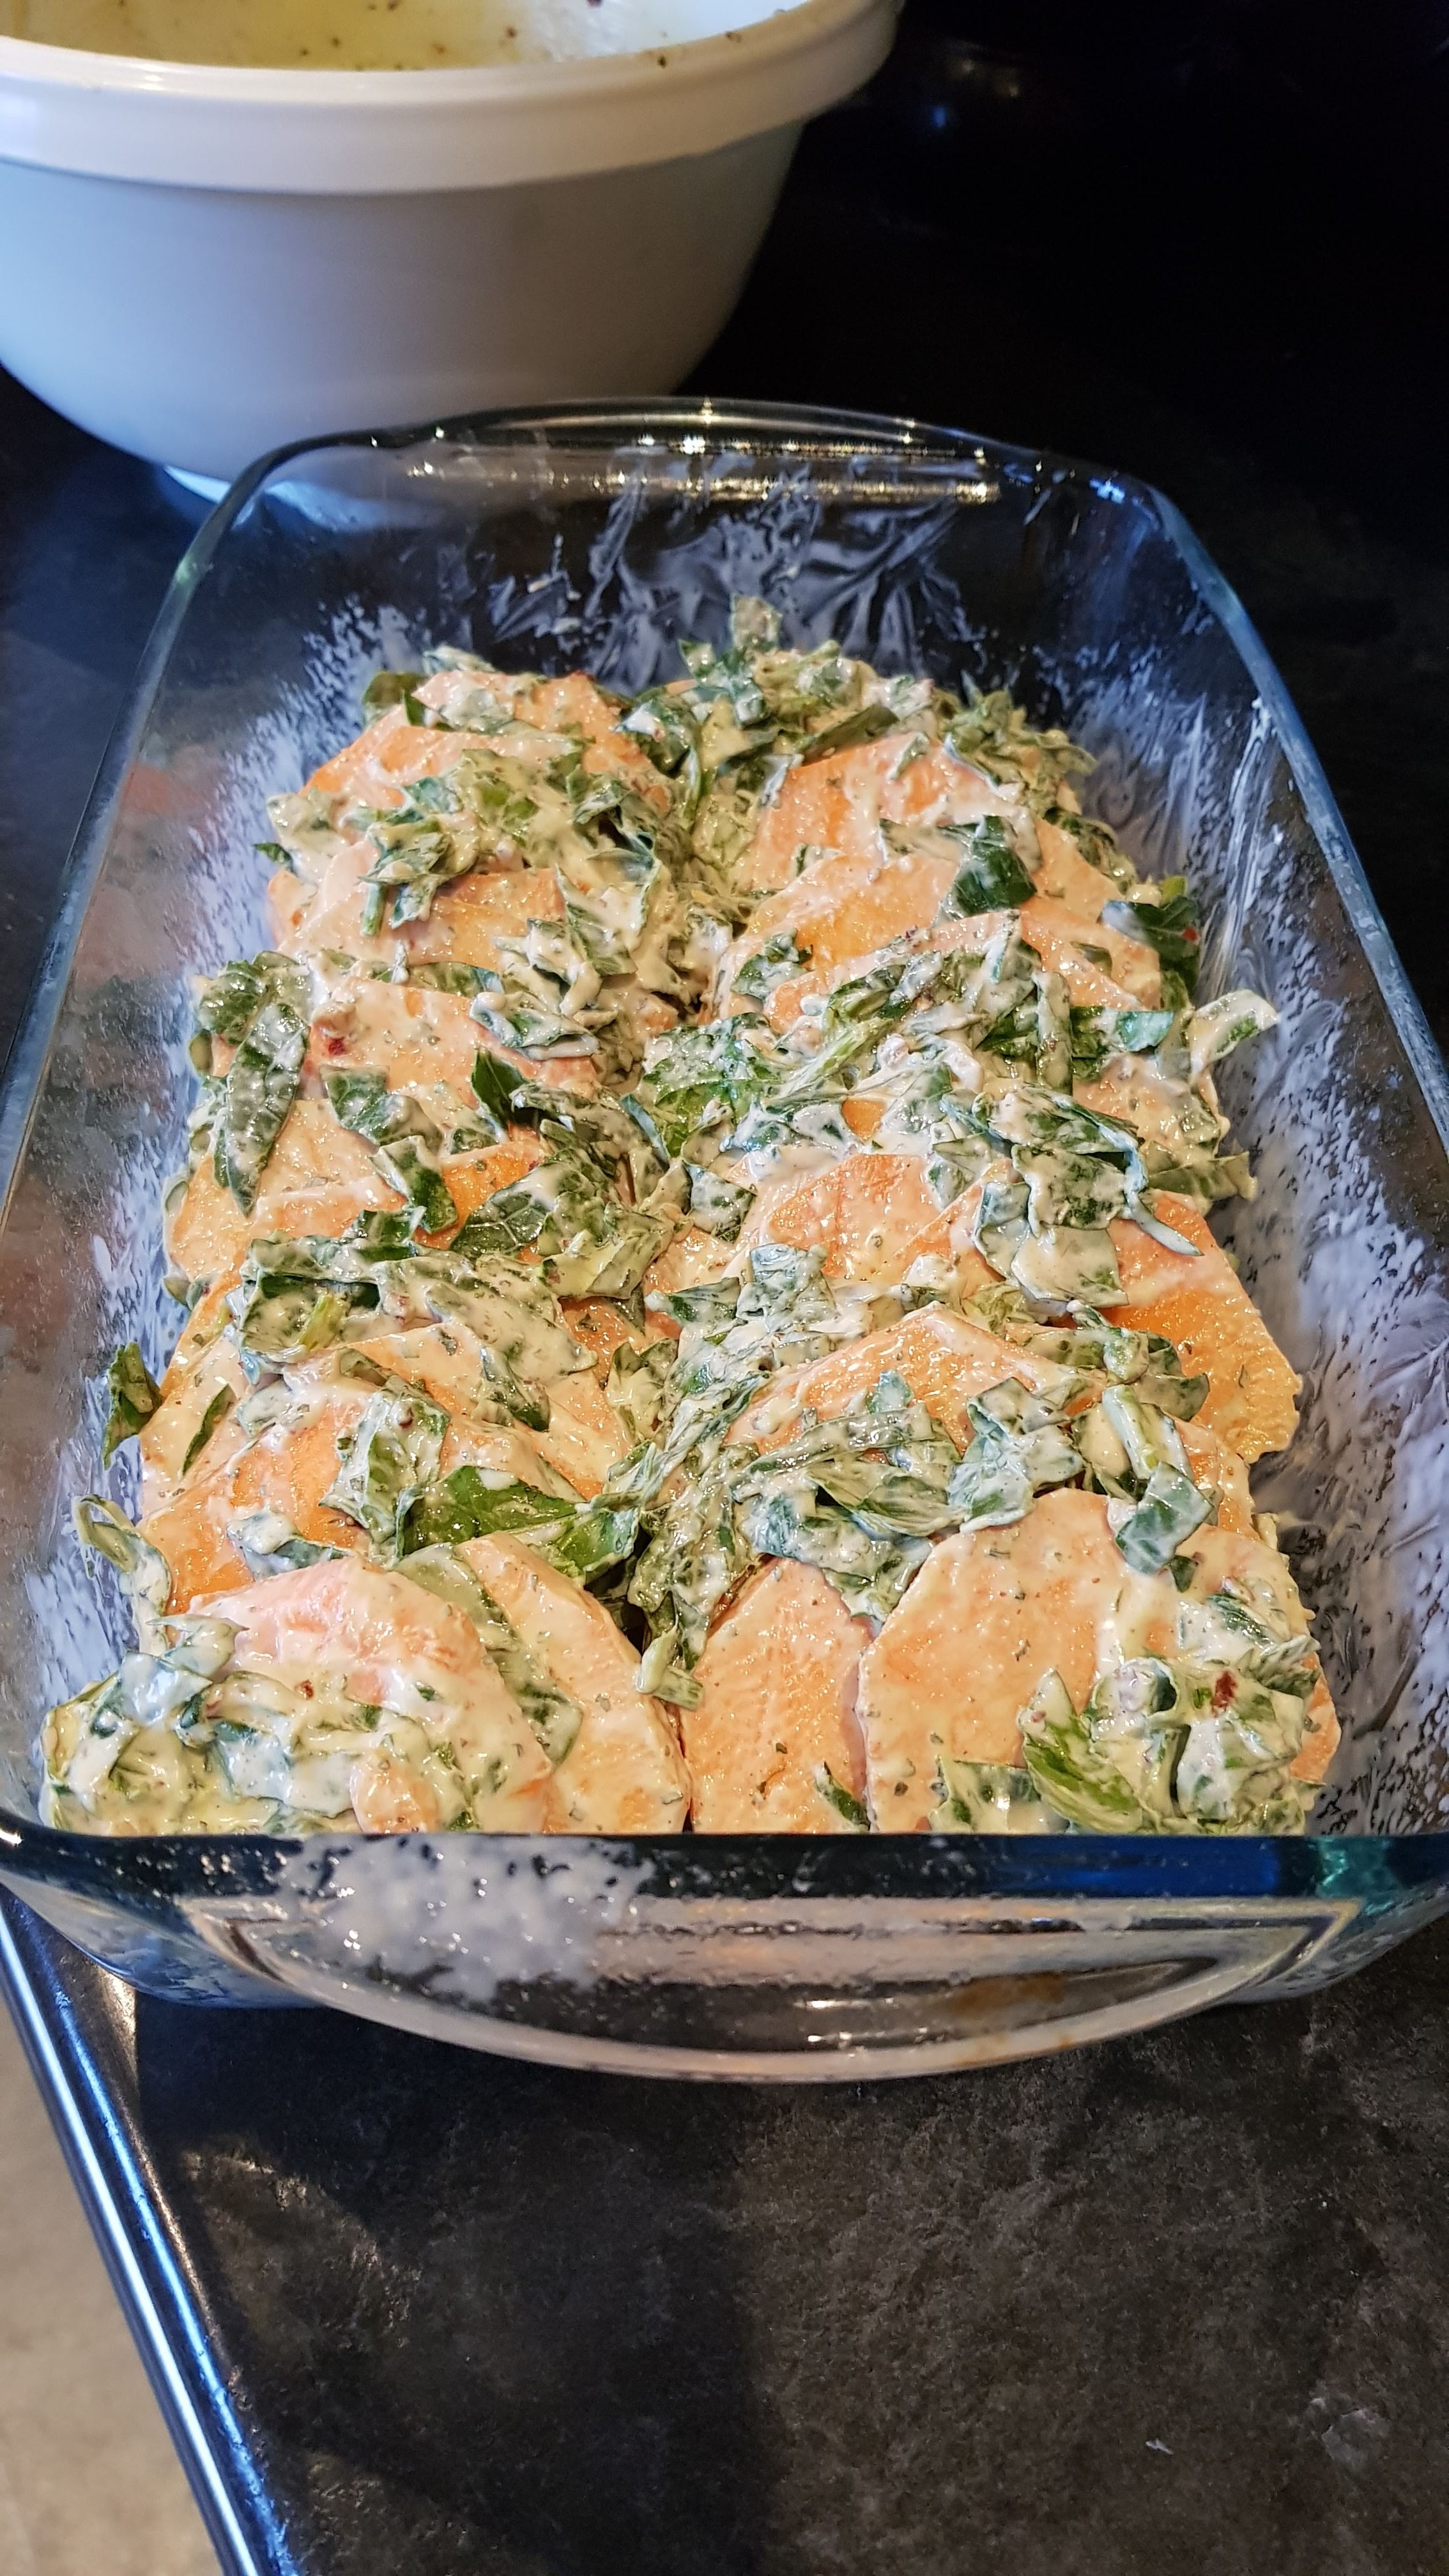
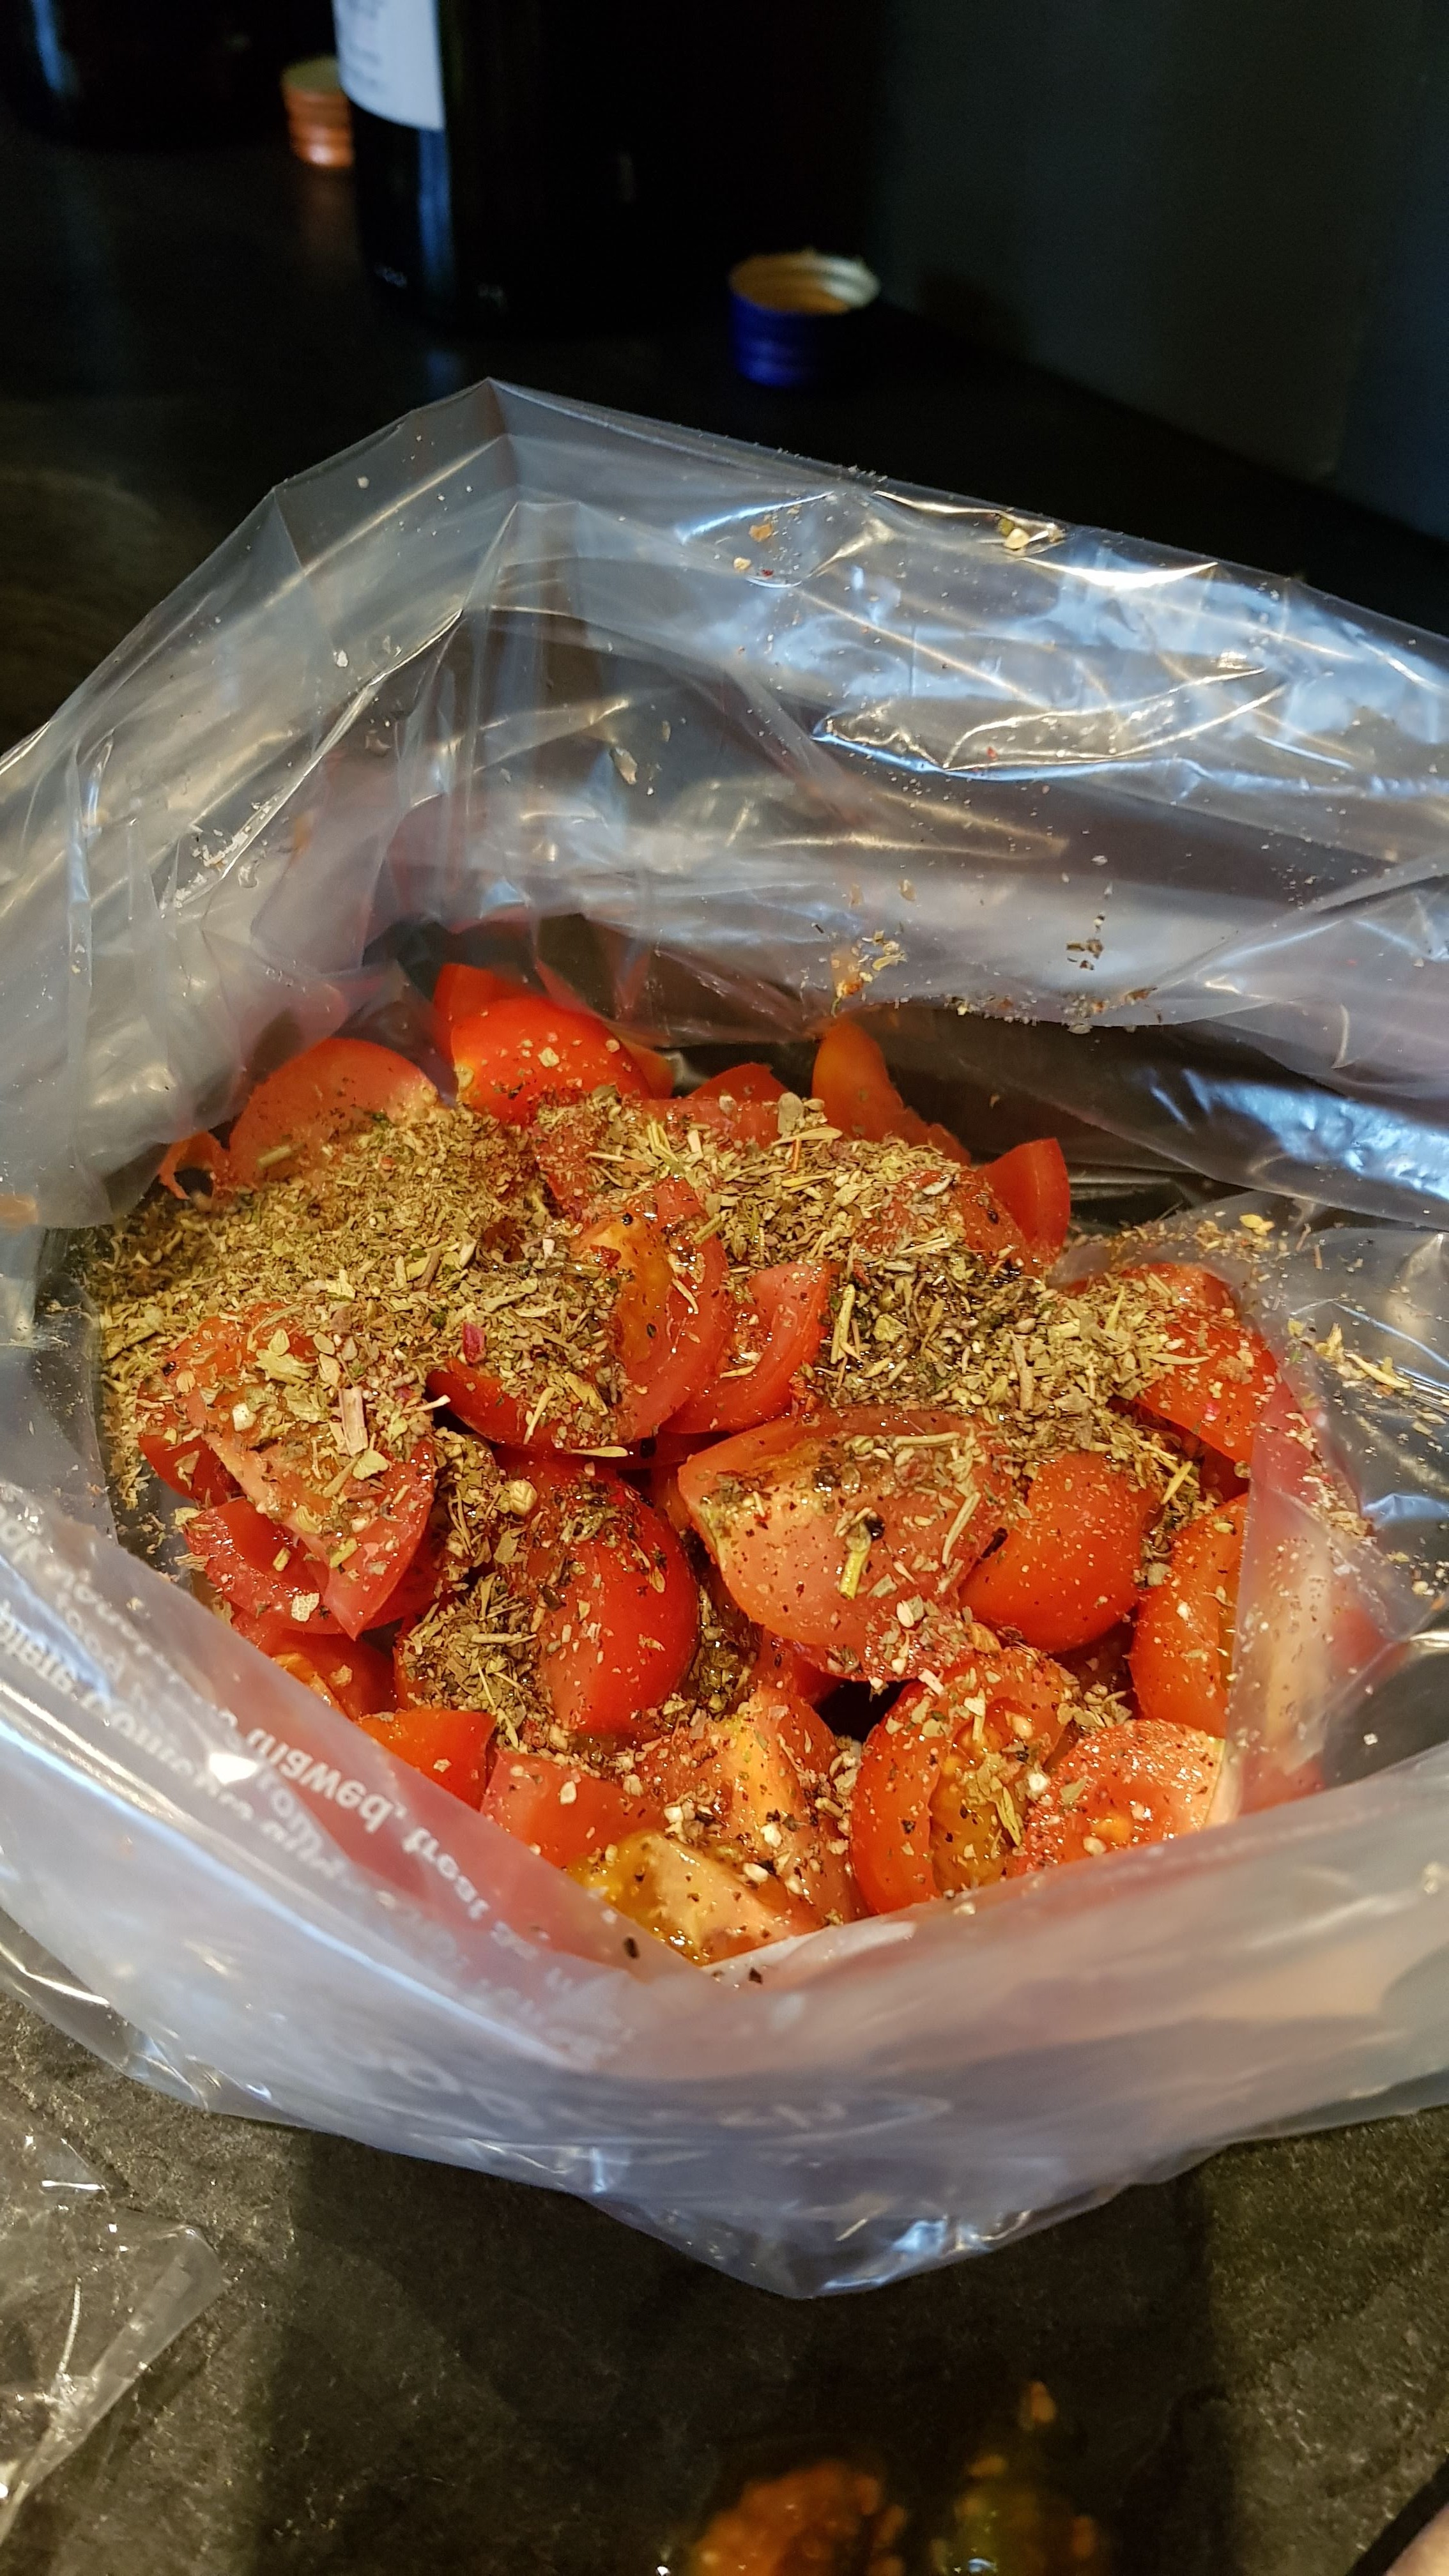
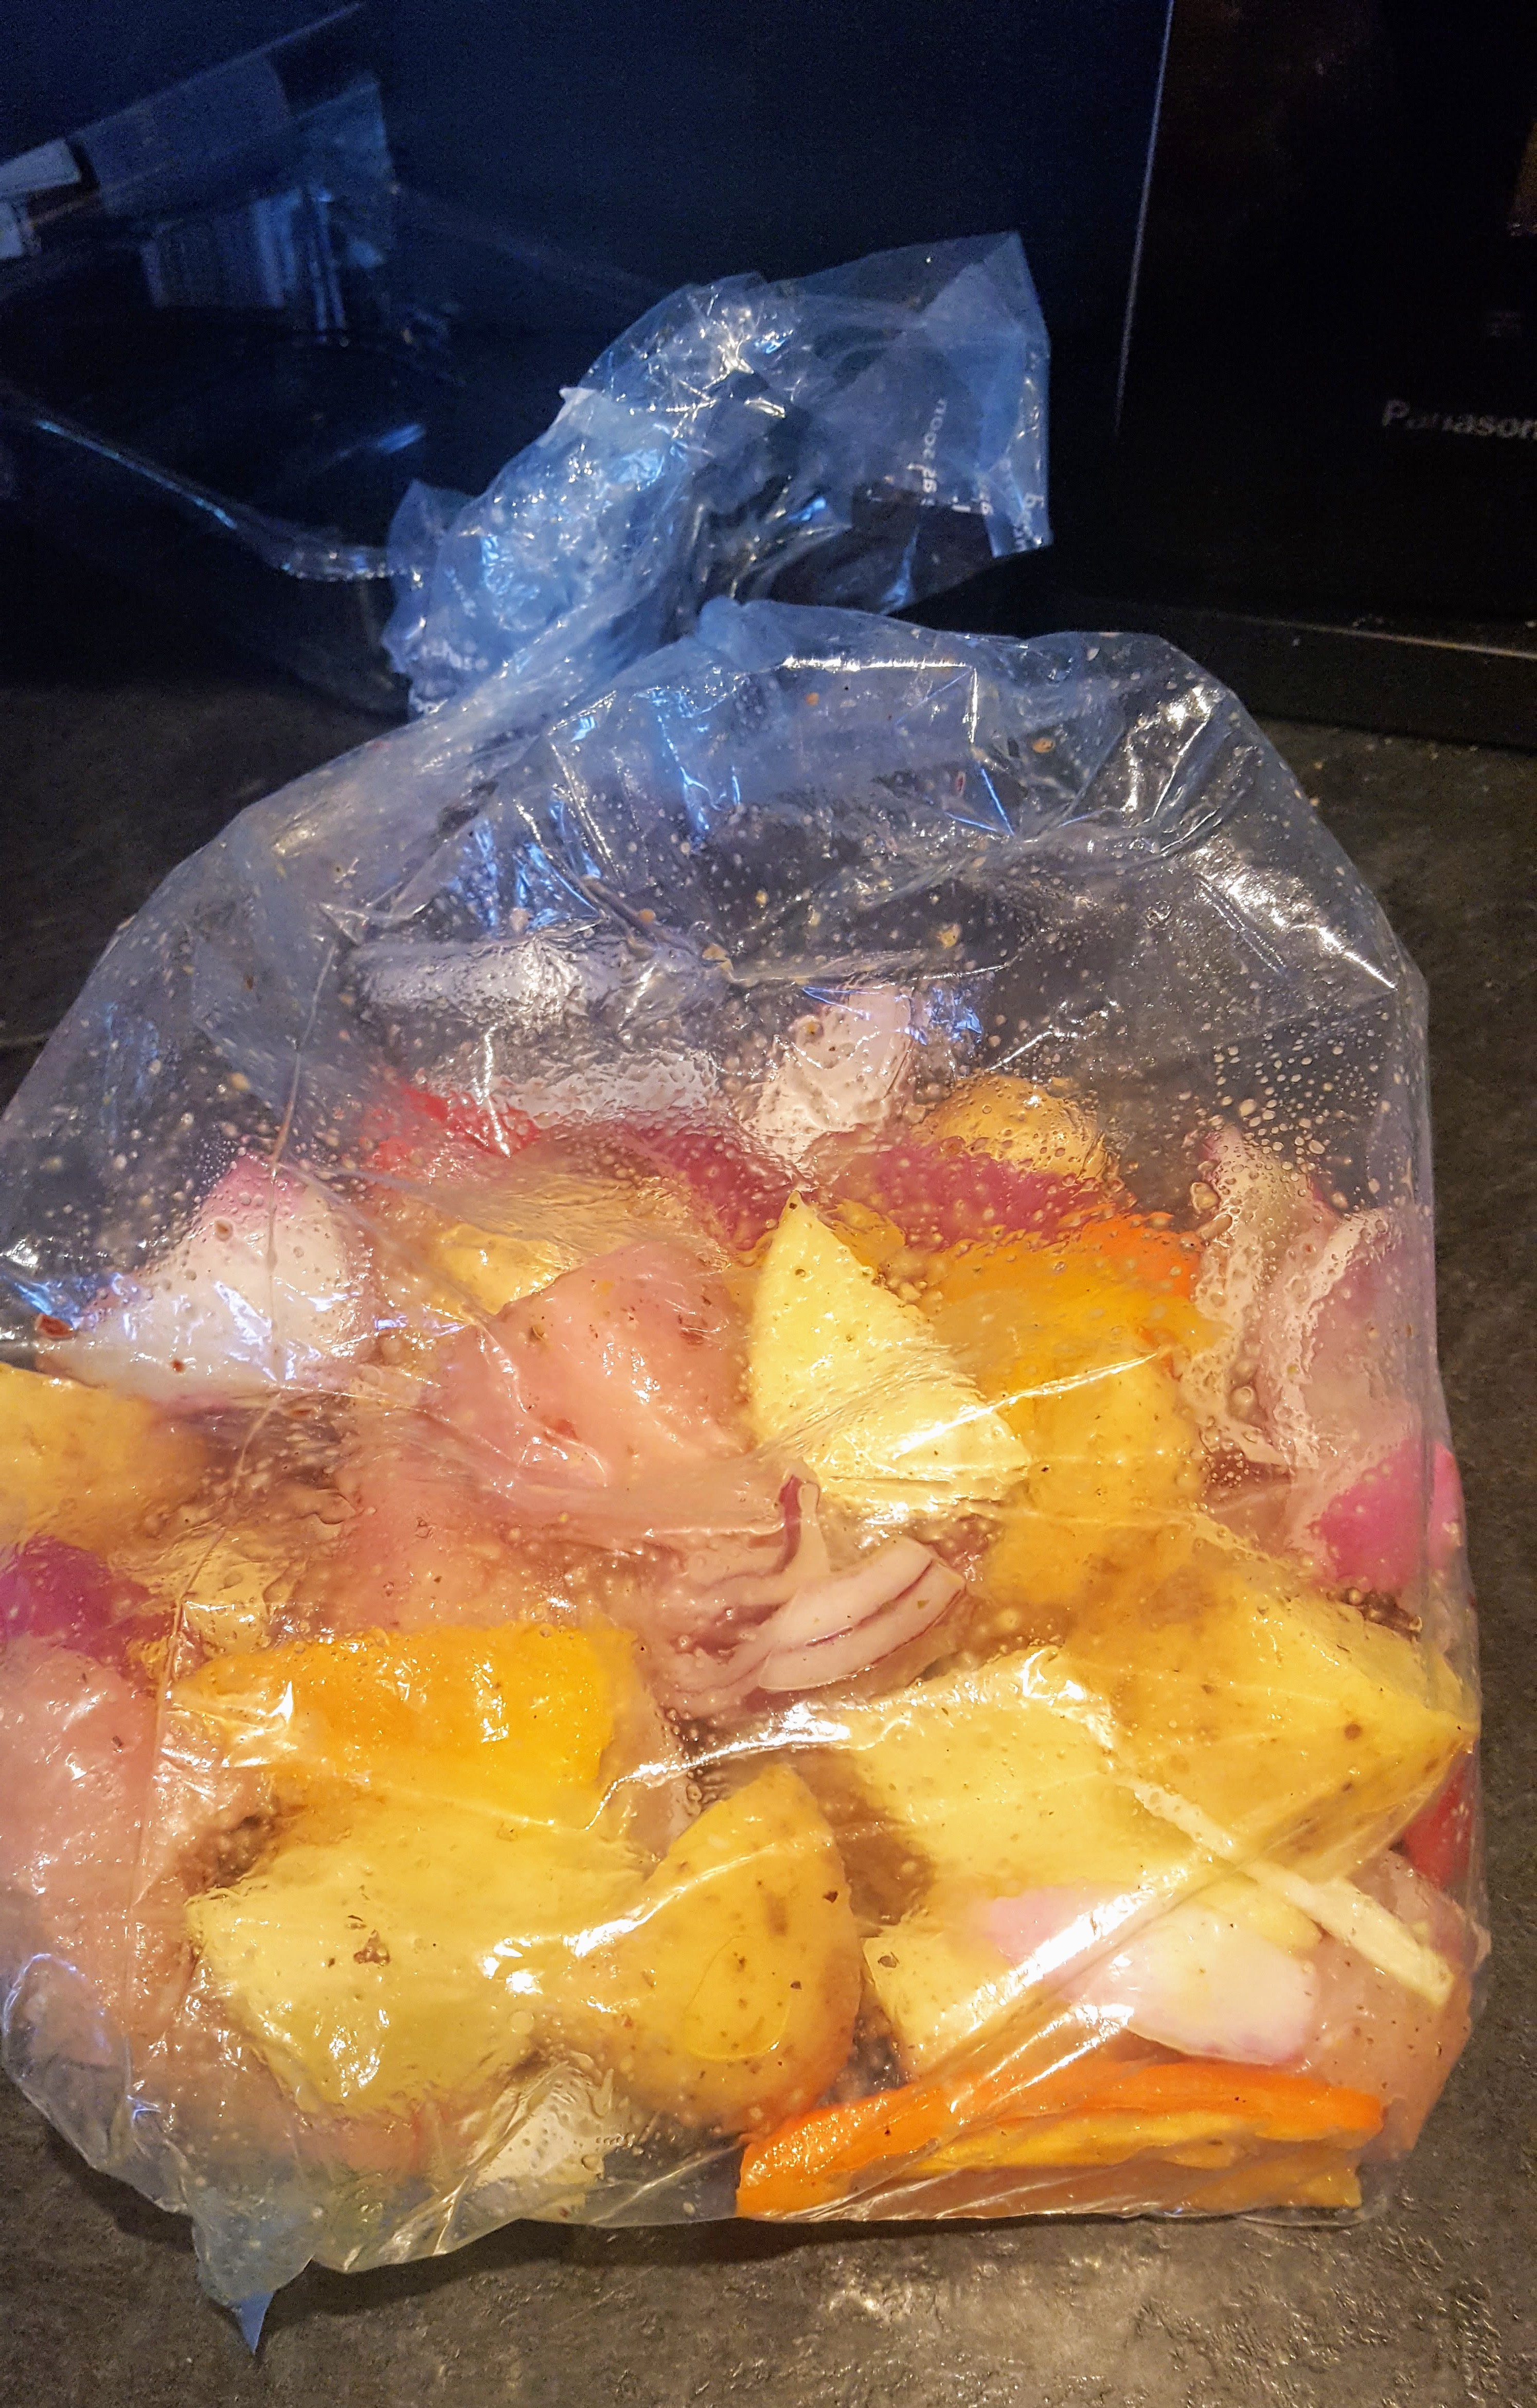
Slice your potatoes into wedges and place in a food bag or bowl.

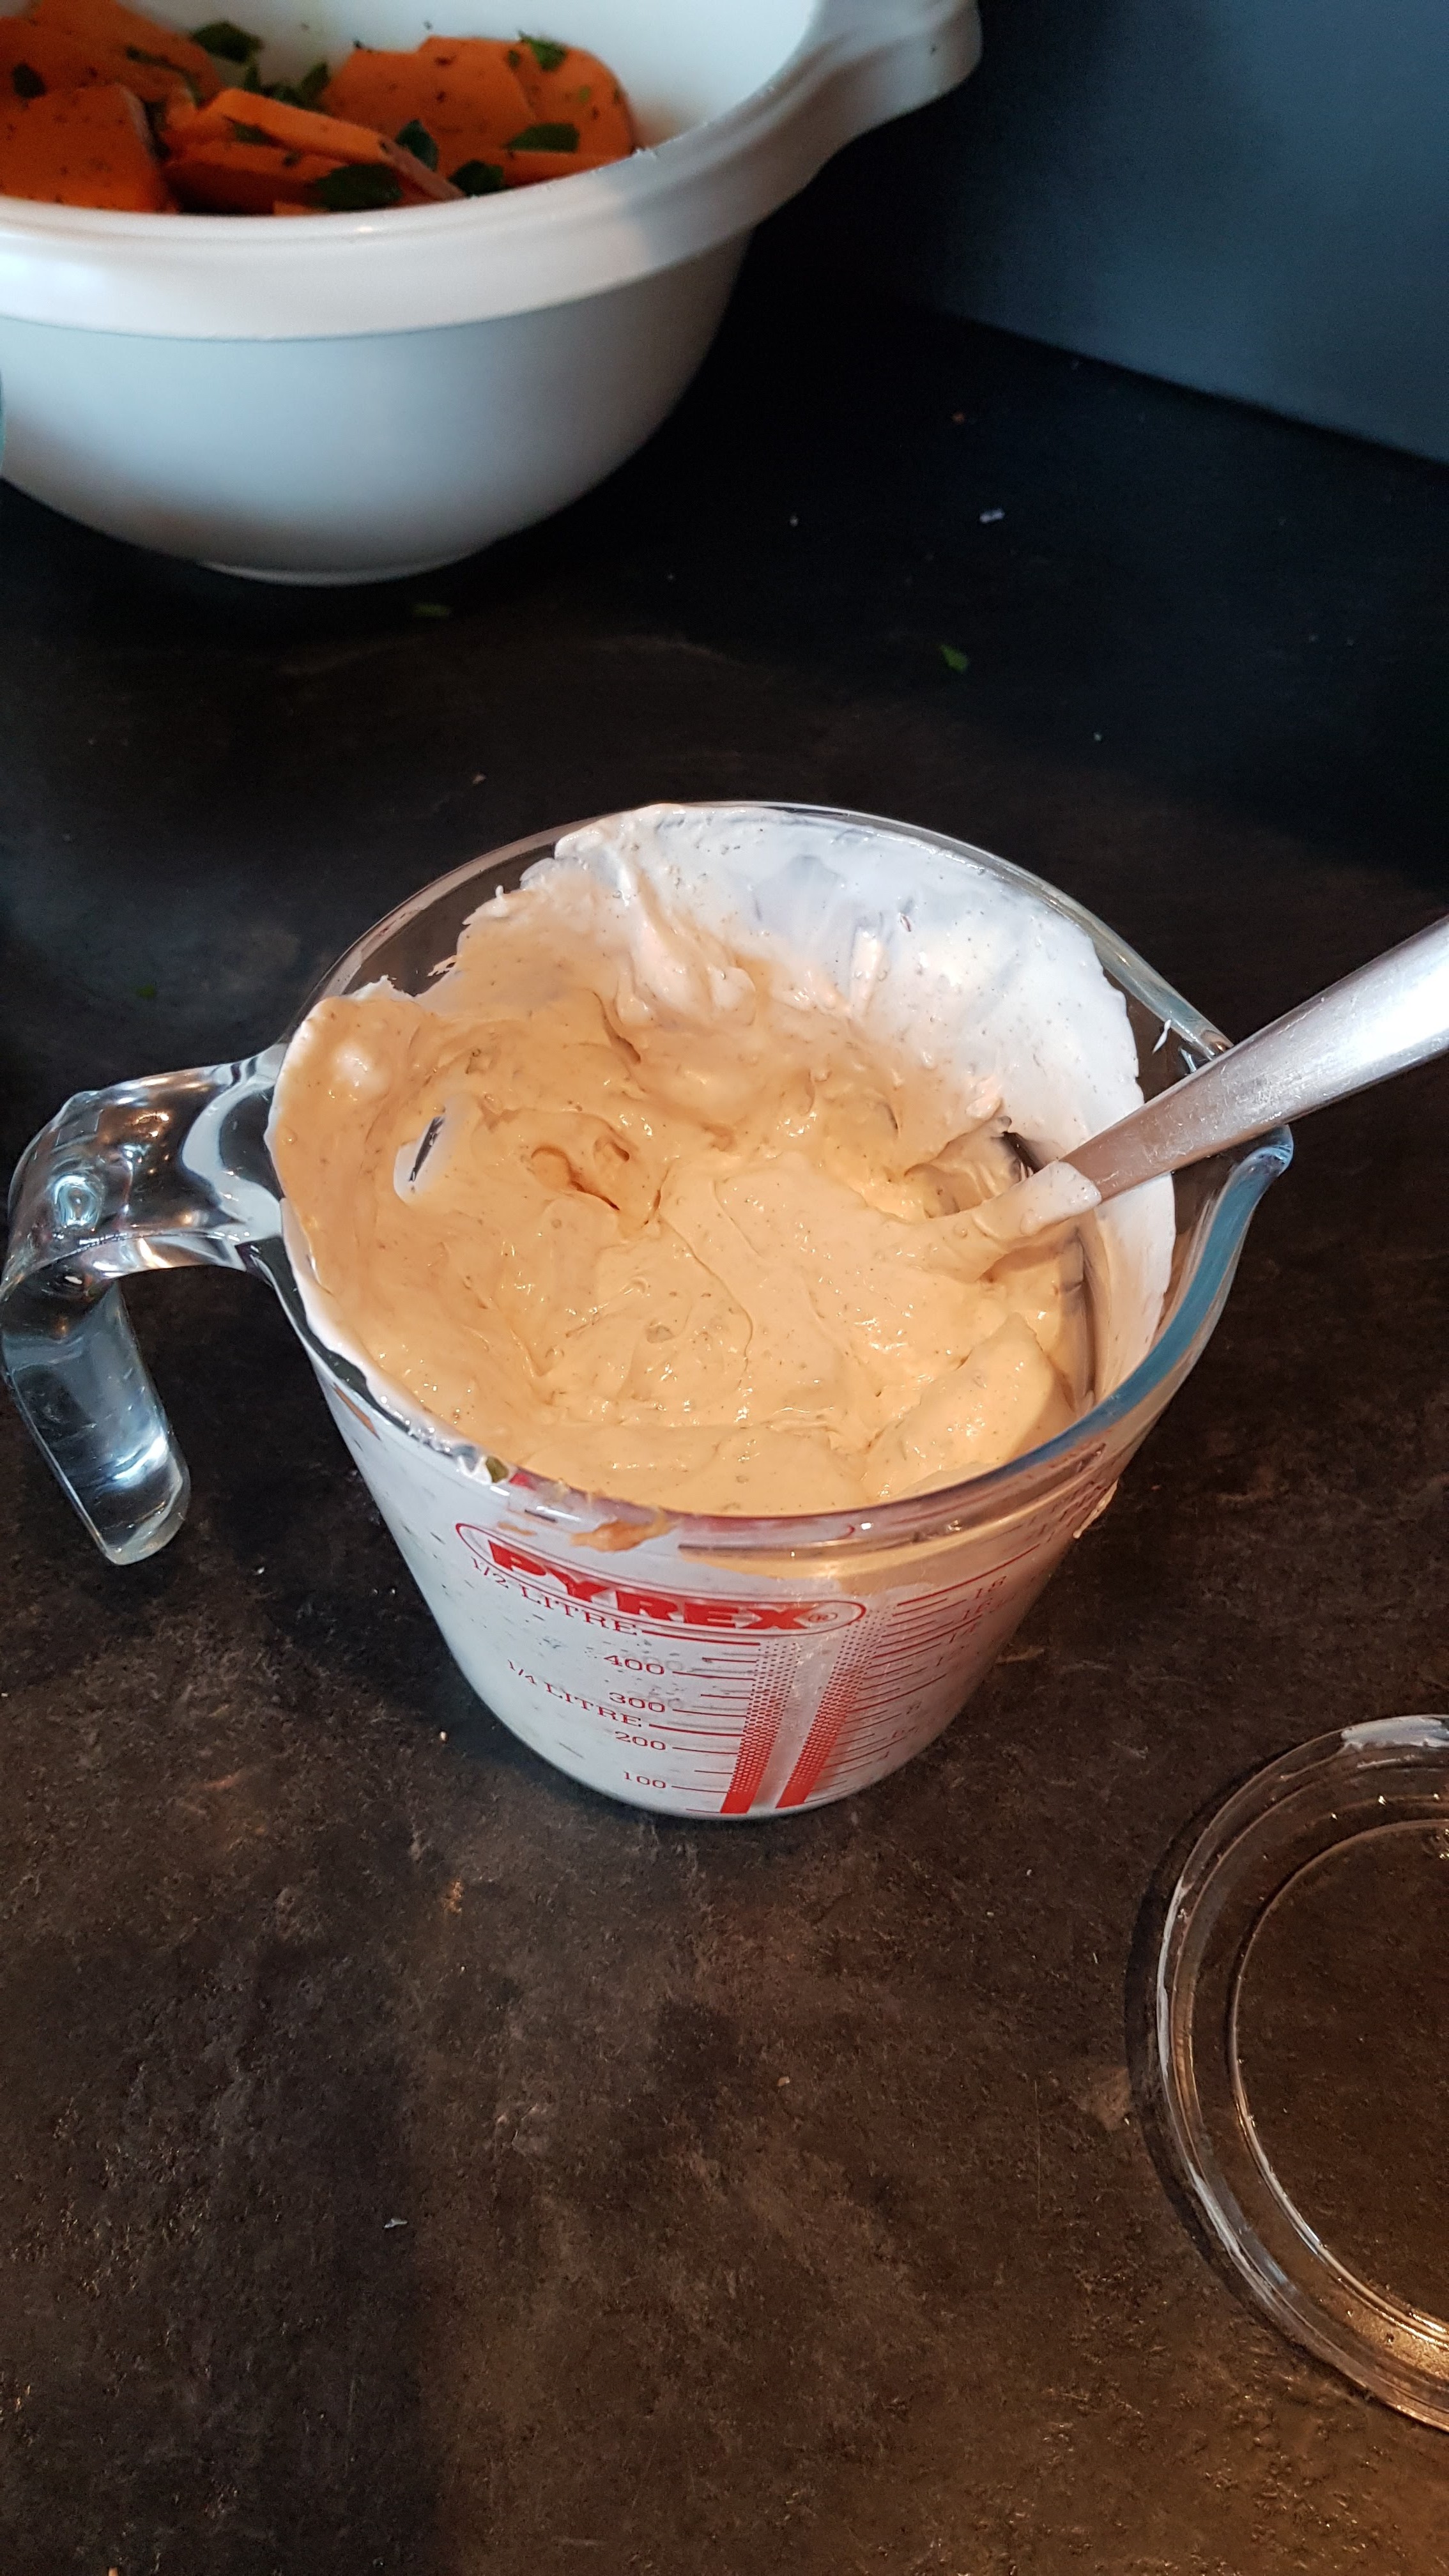
For the coating, mix 3 tbsps olive oil with 1 tsp chilli flakes, 1/2 tsp ginger, 1 tsp garlic and 2 tsps coriander. Season then mix with the wedges and cook as normal. (I use my Crisper plate in my microwave to cook them as it only takes 10 minutes) Check below for info on the Crisperplate. https://www.hotpoint.co.uk/Appliances/Cooking/Microwaves

Thai Potato Wedges

Chicken, Leek & Potato Gratin

20200412_180431

Wanted some home comfort food today and trying to use up leftovers this little dish was perfect, tasty & filling.


Makes 2 servings

1 1/2 chicken breast (large)

1 Green Pepper

1 Large Leek

3 large Potatoes

250ml chicken stock

50ml Cream or milk

1 tsp nutmeg

1 tsp dried garlic granules

Salt & pepper to taste

Grated cheese (I used cheddar but Gruyere is nice if you have it)

Paprika to taste


  1. Pre heat your oven to 180 deg (or if you have a class 9 Hotpoint use the Potato Gratin function)
  2. Heat a little spray oil in a pan and slice the chicken into small strips, season with salt & pepper & nutmeg then brown, remove with a slotted spoon.
  3. Heat a little butter in the pan, slice the leek and gently saute the leeks with the garlic until slightly browned, remove with a slotted spoon.
  4. Add the peppers are cook until slightly softened and browned. Remove.                20200412_164220
  5. Peel and slice thinly the potatoes.
  6. Lightly butter a baking dish and start by layering the potatoes then the chicken mix with vegetables then potatoes then chicken mix then potatoes. Pour in the stock and milk and finally finish off with the grated cheese sprinkled on top. Then sprinkle with the paprika to taste.
  7. Bake for about 50-60 minutes.
  8. Serve…Yummy!


20200412_181226


20200412_17560620200412_165326


Sweet Potato & Peanut Butter Gratin

20200210_135447

Oh Yum, this dish I found on the Whole Earths website, I just love their Peanut Butter especially the crunchy one….yum!  My curiosity got the better of me because I wouldn’t have thought to put sweet potato and peanut butter together but wow, this was so tasty.

I also used my automatic setting on my Hotpoint Class 9 oven, the Potato Gratin setting. This was great as I didn’t need to worry about what temperature or oven function to set for a perfect bake the oven worked it all out for me.

This made 4 small servings (2 bakes in a 19cm x 30cm baking dish)

3 large Sweet Potatoes

2 tsp Crushed Chillies (or 2 chopped chillies)

100g Spinach – Chopped

300g Creme Friache

3 tbsp Peanut Butter, Crunchy

2 tsp dried coriander leaves

Salt & Pepper to taste


  1. If not using automatic programmes, preheat oven on fan to about 200 deg then finish off under the grill to crisp and brown.
  2. Peel & Slice the sweet potatoes to about 1/2 cm thick and place in a bowl, add the chopped spinach, coriander, chillies, salt & pepper.                                              20200210_122807
  3. Mix the creme friache and peanut butter together until smooth ad combined then pour into the sweet potatoes and mix until potatoes are coated.                              20200210_123350
  4. Spray a baking dish with spray oil and then layer the sweet potato in the dish making two rows.                                                                                          20200210_124357
  5. Cover with Tin foil and bake for about 30 minutes, remove the tin foil and continue to bake for the further 30 minutes or until sweet potatoes are softened and slightly browned.
  6. Serve.


20200210_135631


20200210_135447

20200210_183738


20200210_124507


Mini Loaded Potato Jacket Bites

20200208_133613

I do love creating with leftovers, I always amaze myself what you can do with leftovers in your cupboards or fridge.  Today was a quick, tasty & filling lunch. With potatoes to be used up, I decided on mini loaded jackets. Using my Automatic Jacket Potato setting on my Hotpoint  Class 9 Combi Microwave too they were ready in under 16 minutes too!


I made 4 small Jackets

4 medium sized Scottish Maris Piper Potatoes

2 tbsp butter

handful spinach – chopped

20-30g Cheddar Cheese – grated

Cracker Black Pepper

Salt to taste


  1. First wash potatoes and prick with a fork
  2. Place onto the Crisperplate or Microwave dish.
  3. Set to Automatic, Recipes, Vegetarian Dishes, Baked Potatoes, Set weight and Extra Done. Start. Turn half way through.
  4. When ready remove and allow to cool slightly
  5. Cut potatoes in half lengthways and scoop out potato and put into a bowl then mash
  6. Place butter and spinach into potato bowl and mix through & season
  7. Spoon the potato mixture into the Jacket Potato skins and sprinkle with cheese then place under a high grill for a couple of minutes until cheese is melted. Season with some Cracked Black Pepper. Yum!
  8. You could also add in some chilli and paprika for extra flavour & spice. Really anything of your choosing.


Cheesy Tomato Italian Mini Breads

This little recipe was from Hotpoints Website , a great little find, these were super tasty & I do love Italian flavours so was a perfect little lunch today.

I made the dough yesterday and left in fridge overnight so it was ready to use today.


Makes 6

For the Dough:-

400g Bread Flour

7g Dried Yeast

300ml Luke warm water (approx 35-40 deg C)

1 tsp caster sugar

1 tsp salt


  1. Pour the yeast and sugar into the luke warm water and allow to activate, approx 10 minutes or until you see it frothing.                                                                              20200124_165138
  2. Sift flour into a mixer bowl with the salt and make a well in the middle. Pour the yeast into the flour and on a low speed start to bring together the dough. Knead in the mixer on low speed for approx 10-15 minutes until it becomes elastic.
  3. Put into a slightly oiled bowl and place in the oven on rising programme for 2-3 hours. (or leave at room temperature for a few hours or until doubled in size)
  4. Remove from oven and knock back, separate into 2 or 3 batches if not making the full 6. I only made 3 and used 250g of dough which I put back into the oven to prove again for 1 hour. I put the other 2 amounts (approx 200g each) into an airtight bag and froze. You can freeze this dough for up to 3 months and use as pizza dough later.


For the Filling:-

8-10 cherry tomatoes – halved or quarted

Edam cheese – cut into cubes

2 tsps of Mixed Italian Herbs

2 tsps of olive oil

Salt & pepper

  1. Place the tomatoes, oil, S&P & herbs into a bag (or bowl) and coat.                          20200125_120841
  2. Spray a tin with spray oil and roll out the dough, not too thin, and press dough into the tin, allowing enough for the lid.
  3. Spoon the mixture into the dough case and top with the Edam cheese, pull the lid over and seal.
  4. Brush with a little milk and if you have any left over tomatoes press 2 into the top of the dough.
  5. Bake in a preheated oven at 185 deg for approx 25-30 minutes.


Lasagne

20191124_171952

I first saw this recipe on Pinch of Nom site, I got their first book and have preordered their second, its full of healthier option recipes that do not compromise on flavour. This Lasagne was both delicious and lower in calories.


Makes 4 portions

400g Scottish Mince

1 Carrot, chopped

1 Onion, chopped

1 Red Pepper, chopped

2 tbsp Tomato Paste

1 400g tin chopped tomatoes

2 Oxo cubes

1 tbsp Worcestershire Sauce

1 tbsp Mixed Italian Herbs

2 tsp Dried Garlic Granules

For the White Sauce

350g Natural Yoghurt Fat Free

1/2 tsp Mustard

120g Low Fat Cheddar

2 eggs

Lasagne Sheets – I made my own but you can buy ready made


  1. Heat pan with a little low fat spray oil. Fry onion, carrots, pepper and garlic for a few minutes until softened.
  2. Add the mince and brown.
  3. Add the Italian herbs and Worcestershire sauce and stir through
  4. Add in tomato paste, oxo cubes, tin tomatoes and 200ml water and mix through until combined.
  5. Put lid on and simmer for 30 minutes
  6. Spread a layer of the beef mixture into a deep oven dish and then layer the lasagne sheets, then another layer of beef mixture, then layer lasagne sheets until you reach near the top.
  7. To make the sauce, mix yogurt, mustard, eggs & salt to taste with the cheese in a bowl until combined. (leave a little of the cheese to sprinkle on top)                      20191124_162224
  8. Spread the sauce mixture over the lasagne dish and garnish with pepper and leftover cheese.
  9. I baked using my Lasagne setting on my oven, or you can bake in an oven at 190 deg for about 30-35 minutes until browned.

Yummy!

20191124_171952

20191124_163159


Carrot, Cumin & Coriander Soup with Bulgur Wheat

20191118_173330

Its definitely soup season, I woke to -5 deg this morning….very cold.   Using up some leftovers in my fridge, mainly carrot and onion I decided to make a warming soup. This was delicious and hit the spot right. I used my steampot, so steaming the vegetables made this even more nutritious and flavorsome.


Makes 3 Servings

4 large carrots

1 large onion

500ml Vegetable Stock

60g Bulgur Wheat

1 tsp garlic granules

1 1/2 tsp Cumin

1 1/2 tsp dried coriander

Salt & Pepper to taste


  1. Chop up the onion & carrots into chunks and place in the steam pot with 200ml of the vegetable stock and cook on steam setting for 8 minutes.                                  20191118_130805
  2. Remove steam pot lid and add in the rest of the stock then blitz with a hand blender until well blended and smooth.                                                      20191118_132702
  3. Stir in the spices/herbs and bulgur wheat and cook on microwave at 750w for 3 minutes.                                                                                                20191118_133322
  4. Remove and stir. Season and serve.

20191118_173306

20191118_173351

20191118_173356

20191118_134019 you can of course make a big batch and freezer for later.


Maple & Teriyaki Glaze Salmon

20191108_185011

Oh Yum. Eating Healthy is a priority for me, it makes me feel good and keeps me alert. Living in Scotland we have amazing fresh Salmon which is classified as an oily fish, salmon is considered to be healthy due to the fish’s high protein, high omega 3 fatty acids, and high Vitamin D.

I’m always looking for new flavours to try and this has got to be one of my favourites.


1 Serving

2 tbsp Maple Syrup

2 tbsp Teriyaki Sauce

1 tbsp Hot Sauce

1 Clove garlic

Salmon Fillet

Select of vegetables to serve.


  1. I put all the ingredients into a food bag and allowed to marinade for about 1 hour.
  2. Remove food from bag, keeping the marinade.
  3. I used my Crisper plate, place salmon and vegetables on and cook on Crisp function for about 4-5 minutes depending on thickness of Salmon. Alternatively pre-heat oven to 210 deg and place on greaseproof tray and bake for about 10 minutes.
  4. Meanwhile, reduce the marinade sauce using a medium heat so that you have a thick sauce to pour over.


20191108_184119


20191108_185937


20191108_184955


Creamy Pumpkin Soup

20191021_165904

It’s Halloween Season, my favourite time of the year, beautiful crisp air, colourful leaves on the trees, dark cosy nights, everything spooky and weird, and amazing food flavours around. To be honest this is my first time with Pumpkin, I’ve never cooked it before myself, I thought I would try steam cooking it for more flavour and making a creamy soup as it was a really cold day here today. Was delicious.

Makes 1 large portion

250g chopped pumpkin

30g sliced leek

30ml double cream

300ml vegetable stock

30g Bulgur Wheat

Salt & pepper to taste

  1. Place the pumpkin and leeks with 100ml of the stock into the bottom of the steam pot and cook on dynamic steam for 8 minutes. Otherwise, place stock in a pan with pumpkin & leeks, & additional 100ml stock then bring to boil, reduce slightly & cook covered until soft.
  2. Remove lid and pour in the rest of the stock and the cream, season with salt & pepper and blend with a hand blender until smooth.
  3. If using pot its the same method as above.
  4. Add in the Bulgur Wheat to the creamed soup and cook on microwave 900w for 3 minutes.
  5. Or simmer in pan for 5 – 7 minutes.
  6. Remove from microwave/pan and serve with some toasted pumpkin seeds and a drizzle of olive oil.
  7. You can also add in some toasted croutons if you like.

20191021_165922

20191021_165811


Chocolate & Almond Marble Bundt Cake

20190830_210548

Oh yummy! I fancied something a little naughty with my coffee this weekend so thought I’d try out my new Bundt cake tin. It was supposed to be marbled, however, I think I put to much chocolate into the mixture and swirled it too many times…….lol! The flavour was fantastic though.

A Bundt cake  is a cake that is baked in a Bundt pan, shaping it into a distinctive ring shape. The shape is inspired by a traditional European cake known as Kugelhupf, but Bundt cakes are not generally associated with any single recipe. The style of mould in North America was popularised in the 1950s and 1960s, after cookware manufacturer Nordic Ware trademarked the name “Bundt” and began producing Bundt pans from cast aluminium. Publicity from Pillsbury saw the cakes gain widespread popularity.


Ingredients for 1 Bundt tin

180g softened butter

225g caster sugar

3/4 tsp almond extract

2 tsp baking powder

180 g plain flour

75g ground almonds

3 large eggs

2 tbsp milk

3 tbsp cocoa powder with 3 tbsp water – mix to a paste

100g dark chocolate chips

Icing sugar to decorate


  1. Pre heat your oven to 180 deg or if you have a cake setting, set to Marble Cake setting. Brush the Cake tin with melted butter, ensure it is thoroughly covered.
  2. Cream the butter and sugar together until fluffy, stir in the almond extract.  20190830_183238
  3. Mix together the flour, baking powder and ground almonds together. Beat in the eggs one at a time to the butter mixture with 2 tbsp of the flour mixture, repeat until all eggs have been added then fold in the remaining flour mix.
  4. Stir in the milk and mix, then spoon 1/2 of the batter into a separate bowl and mix in the cocoa paste into 1 and the chocolate chips into the other.            20190830_184820
  5. Add spoonfuls of each batter alternately to the cake tin and drag a handle of a spoon through the mixture to create the marble effect, do not over do this.        20190830_185255
  6. Bake in the oven for about 40-50 minutes until a knife comes out clean
  7. Let it cool for about 10 minutes in the tin before turning out. Once cooled, sprinkle with icing sugar and serve. Yummy!

20190830_202433

20190830_202449

20190830_210548


Quick Sweet Potato Fries

20190619_124058

My little Crisperplate from Hotpoint is fantastic, it cooks food so quickly saving time and energy. For more info click see Hotpoint video Crisperplate & Hotpoint website.


1 Sweet Potato (medium size)

1 tbsp olive oil

Salt & pepper to taste

Optional to add any herbs or spices (rosemary goes well as a herb and paprika as a spice)


  1. Cut off skin and slice into strips about 0.5 – 1cm wide
  2. Coat with the oil and season.
  3. Preheat crisperplate on crisp function for 2 minutes and place fries onto plate, bake for 8 minutes.

20190619_123951


Butterfly Chicken Pizza

20181130_182534

Friday night is mostly pizza night in our house, but as I’m on my Detox this week it was finding an alternative for me and why not Butterfly chicken? I have to say this dish was so delicious and very healthy and nutritious too. Win, win for me!


Makes 2

2 x Chicken Breasts

1 onion – chopped

handful of sweet peppers – chopped

1 tbsp olive oil

1 tsp dried chilli flakes

1 tsp Italian herbs

1 tbsp tomato paste

Salt & pepper to taste

30g Goats Cheese


  1. Butterfly your chicken and flatten the thicker part so it will cook evenly. 20181130_171848
  2. Add the chopped onion, peppers, chilli flakes, olive oil and all seasonings into a food bag and make sure all are coated.
  3. Take 1 tsp and spread onto each chicken breast evenly                                        20181130_180704
  4. Next add the onion & pepper mix and spread evenly
  5. Preheat your Crisperplate for 2 minutes on crisp setting then place the chicken breasts on and cook for 5-6 minutes (depending on size of your chicken)                                                                                                      20181130_181046
  6. Remove crisp plate and crumble on the goats cheese evenly, put back into the oven and cook on crisp for a further 3 minutes.                                                      20181130_181803
  7. Serve. Yummy!

(If you don’t have a crisper plate, bake in oven at 200 deg for about 15-20 minutes)

20181130_182553


Stuffed Peppers

20181126_180950

These were delicious and very healthy too. My Hotpoint oven has automatic cooking programmes, so I used the Stuffed Pepper setting and these baked to perfection.


Makes 3-4

2 onions – chopped

6 Sweet Peppers – chopped

1 can chopped tomatoes (400g)

3-4 large peppers – colour to your choosing.

200g kale

1 tsp chilli flakes

1 tbsp olive oil

juice of 1 lemon


  1. Heat oil in a pan
  2. Add all ingredients to the pan except the large peppers and cook for 5 minutes  20181126_154609
  3. Cut the tops off of the large peppers and de-seed. Place in a roasting tin.
  4. Fill the peppers with the mixture and place the tops back on.                          20181126_155213
  5. Select Auto recipes, side dishes then stuffed peppers and bake for approx 35-50 minutes (depends on size of peppers)                                                  20181126_155425
  6. Serve. Yummy!


20181126_180842


Eggy Puff Breakfast Baskets

Another quick yummy breakfast for a sunday morning. I always try to use up leftovers, so having some puff pastry left this is what I decided to do this morning. Again I used my lovely little Crisperplate to cook these. Have I told you how much I love this little bit of Technology?? I do love gadgets that simply work in your favour to help save time in the kitchen. You can get more information here


Makes 6

1 Roll of Puff Pastry

7 eggs (1 for wash)

Grated Cheddar Cheese (I used 1 tbsp per basket)

Salt & pepper

Flavourings as per your choice (I used smoked paprika, but you could use chives, chilli, parsley, the list is endless)


  1. Preheat your Crisperplate for 2 minutes on Crisper setting.
  2. Place a sheet of greaseproof on the plate once heated.
  3. Roll out the pastry and using a round cutter, cut out 6 circles.
  4. Using a smaller circle cutter, gently press into the middle of the circle pastry – dont cut right through. (This makes the outer edge of the basket)
  5. Using a fork, press the centre to prevent it from rising too much. Brush with egg wash.                                                                                                       20181125_101734
  6. Place the pastry onto the crisper plate and cook for 4 minutes.
  7. Remove and gently edge the inner circle using a spoon and press down to make bottom of basket.
  8. Place your cheese into the basket and flatten, crack the egg in, gently using a knife pierce the yolk (this prevents it from popping) and season with your flavourings.
  9. Place back into the Combi Oven and bake for a further 2.5 mins – 3.5 mins, depends how you like your eggs cooked.  Serve. Yummy!


20181125_103223


10 minute pineapple cake

20181117_130947

Oh I know I keep going on about it, but this Crisperplate is just magical, it has saved me so many minutes in my kitchen and has given me perfect cooking results every time. This time it was a little afternoon treat.


Makes a 12″ cake

150 g Caster Sugar
225g Self Raising Flour
100ml milk
110g butter softened
2 eggs
1 tin of pineapple rounds (drained)
1 tsp vanilla extract
Whipping cream to serve
1. Mix everything together (except pineapple) in a mixer until smooth
2. Preheat Crisper for 2 mins, then pour on batter evenly
3. Place pineapple on top
4. Bake on Crisp setting for 10 minutes.
5. Serve with a large dollop of whipped cream.


Steamed Mexican Rice

20181115_180945

You know by now that I love my One Pot meals and this is another that is so easy & so tasty. I decided to use my Steam pot and it cooked perfectly in just 20 minutes. Yummy Spicy flavours and full of nutritious benefits.


Makes 2 large portions or 4 side portions

1 can black beans

1/2 can red kidney beans

1/2 can sweetcorn

1 red onion – finely chopped

150g wholemeal brown long grain rice

300ml veg stock

2 heaped tbsp chopped tomato

1 tsp smoked paprika

1 tsp oregano

1 tsp dried chillies

1 tsp garlic powder

1 tsp cumin

salt to taste


  1. Place everything in the steam pot and mix together. Put lid on.
  2. Place into your combi microwave and select Recipes, Pasta & Rice, Rice then programme 20 minutes.
  3. Perfectly cooked mexican rice dish. You can serve this on its own or with some pitta breads or even in a wrap.


Crisperplate Sweet potato fries

20181113_132521

Oh I do love my little crisper plate from Hotpoint. It just cooks and bakes most things in half the time with the same results as an oven or hob. I wanted something quick for my lunch and needed to use up some veggies, so sweet potato fries it was. Just 10 minutes!


1 sweet potato – cut into fries

1 tsp olive oil

Salt & pepper

1 tsp paprika


  1. Preheat your crisper plate for 2 minutes
  2. Coat the sweet potato fries with oil and season with spices.
  3. Bake for 10 minutes. Yum!

Steamed Wild Rice with Butternut Squash, Chestnuts & Pancetta

20181110_145504

This dish is so yummy with a little kick. Perfect for Christmas dining as you can make as much as you need. I do love 1 pot meals.

Makes about 4 large portions or 8 smaller side portions.

1 x Butternut Squash – cubed

1 tbsp olive oil

1 tsp chilli flakes

100g cooked chestnuts, quartered

½ small pack sage leaves, chopped (or 1 tsp dried)

8 slices of pancetta – chopped

2 shallots, finely chopped

2 garlic cloves, finely chopped

150g basmati & wild rice mix

300ml veg stock

Parmesan to serve

  1. Heat oven to 200 deg.
  2. Toss the squash with 1⁄2 tbsp of oil, chilli flakes and some seasoning on a large roasting tray. Roast for 15 mins, then add the shallots, garlic, chestnuts and nestle the sage and pancetta around the squash so that they touch the baking sheet.
  3. Return to the oven for 10-15 mins until the pancetta and sage are crisp. Remove from the oven and set aside.
  4. In the Steam pot place the Rice with the 300ml stock and steam for 20 mins on rice setting.  Or you can use a pan on the hob, bring to boil the stock , add rice, cover, reduce to a simmer for about 20 minutes or until all the water is absorbed.
  5. Remove steam pot and add the ingredients to rice and mix through to warm through.
  6. Serve with grated parmesan.

20181110_145510


Bacon & Vegetable Quiche

20180819_181857

Sometimes you want home cooked food without the hassle of trying to decided how to cook it and what temperatures etc to use, this was one of those days for me. Sundays are generally my lazy days, a day for recharging the batteries so to speak. I wanted a good home cooked quiche and decided to let my oven do the rest of the work and thinking. Hotpoint have designed a range of ovens with Automatic Recipe settings, the settings are already pre-programmed to control temperature, function and browning control……amazing, I know….right? Oven Range

I used the quiche setting and it was cooked and evenly browned perfectly due to the Multiflow Technology

I also used the Combination Oven with the Crisperplate to cook crispy potato wedges in just 12 minutes, perfect with a tasty quiche.


Makes 1 quiche

1 ready roll puff pastry

200g smoked bacon – diced

1 leek – sliced

handful of asparagus – chopped

200ml milk

200ml single cream

150g grated Gouda cheese

4 eggs

Salt, Pepper & Paprika to season


  1. Grease a quiche tin and lay pastry in covering base and edges.                                  20180819_171101
  2. Gently fry the smoked bacon until slightly browned, remove from pan. Add to the pan the leek and saute for a few minutes.
  3. Meanwhile blanch the asparagus in a pan of salted boiling water.
  4. In a bowl whisk the eggs with the milk and cream.
  5. Start to layer up the bacon and vegetables on pastry, then some of the cheese                   20180819_171204
  6. Then pour in the egg/milk mixture and rest of the cheese to top, generously season with salt, pepper and paprika                                                                 20180819_171534
  7. Place on shelf 3 in oven and select auto recipes, quiche setting. The oven comes up 43 minutes but will sense temerature and auto adjust if necessary.

    8. Serve….Yum!

20180819_182422


Egg, Bacon & Spinach Pastry Bites

20180804_095613


OMG!, these were absolutely delicious. I don’t normally eat pastries but I was trying out some new recipes for an event and my first idea didn’t go to well, so I got my thinking cap on and tried out these instead……oh wow! they were so tasty. I was so naughty though as I couldn’t stop my hand from grabbing one then another then another….lol! But we are allowed on occassions……aren’t we?


Makes 12

1 x ready rolled puff pastry

2 tbsp grated gruyere cheese

1 tbsp creme friache

4-6 smoked bacon rashers – chopped into bite size pieces

100g baby spinach

2 large eggs

Salt & pepper to taste


  1. Heat a little spray oil in a pan and cook bacon until slightly brown, remove with slotted spoon and keep to the side.
  2. Place spinach into the bacon and wilt down (will take a few minutes)   20180804_092158
  3. Meanwhile mix the grated cheese with creme friache
  4. Beat the eggs and season well, pour over the wilted spinach and stir until scrambled in pan, remove from heat.                                                                                             20180804_092417
  5. Cut the pastry into 12 small squares about 4″ x 4″ roughly
  6. Place 1 tsp of the cheese mixture on base, then top with bacon and spinach mix, season well.


  7. Wet your finger in water and run your finger along outer edge of pastry square, carefully lift 1 corner and pull over mixture making a diamond like shape, take the opposite corner and pull over the pastry corner you have just moved and seal. Make sure they are sealed well or they will open when cooking.                                                                               20180804_093424
  8. Refrigerate for about 10 minutes as this will help the pastry puff better.
  9. When ready to cook preheat your crisper plate for 2 minutes on dynamic crisp setting and then bake for 7 minutes or until browned. If you don’t have one of these, then you could cook on baking tray at 200 deg for about 16-18 minutes or until golden.


20180804_094540


Sweet Chilli Salmon with Zingy Basmati, Quinoa and veg salad

20180529_175713

I got this little Jamie Olive cook book recently and have been trying out some recipes, which I have to say have been delicious. Tonight, I thought I would take my inspiration from Mr. JO but put my own twist to this. I have to say it was rather tasty…..Mmmmmm.

Using a combination of my Crisper plate and my steam pot, this little dish was made in under 20 minutes. Quick and easy meals.


Serves 2

80g Basmati & quinoa rice (I used Tilda)

2 x Scottish Salmon Fillets

4 tsp sweet chilli sauce (I always use Blue Dragon, I find they are the best)

2 tbsp sesame seeds

3 spring onions

1 fresh red chilli

60g sugar snap peas

2 carrots

4 springs of fresh coriander

2 tsp toasted sesame oil

1 lime (juice only)

80g smoked beetroot

1/2 cucumber


  1. Place the basmati rice into the steam pot with 200ml water and cover, cook on the Automatic rice setting on microwave for 18 minutes. Remove and keep warm (keep lid on till other food is ready)                                                                                       20180529_175113
  2. Meanwhile, rub the sweet chilli sauce into the salmon then sprinkle the sesame seeds over making sure they stick by pressing slightly.
  3. Finely slice the spring onions, sugar snap peas, chilli then julienne the carrot, cucumber, beetroot using a julienne peeler (if not you can coarsely grate). Place all into a bowl with the coriander.                                                                                     20180529_161951
  4. Place the salmon (skin side down) onto the crisper plate and cook on dynamic crisp setting for 7 minutes or until slightly crispy and cooked.
  5. Pour the basmati rice into the salad bowl and mix through with the toasted sesame oil, lime juice and 2 tsp of sweet chilli sauce.                                                             20180529_175433
  6. Serve up the salad and place the salmon when ready on top. Amazing, Tasty little dish. Yummy!

20180529_175918


20180529_175934


20180529_180444


Rotisserie Beef

20180520_171938.jpg

I do love a good Sunday Roast Dinner. I got a lovely bit of Scotch Beef Topside and decided to cook it Rotisserie Style, O.M.G! it was delicious. Meat was still Juicy on the inside with a lovely crispy outside. If you haven’t tried this cooking method, you are missing out…..seriously this is the only way I will cook this now.

I am lucky as my oven has a built in Rotisserie to it, such a great accessory. Check them out here Hotpoint Rotisserie Oven.


1kg Topside Scotch Beef

Rock Salt, Cracked Black Pepper and a little oil to season.

  1. Rub the seasoning into the meat and leave at room temperature for 15 minutes.
  2. Skewer the meat onto the Metal Skewer and insert into the oven.
  3. Select Turbo Grill and a medium heat. Place a pan of water underneath to catch any fat (which can be used for the gravy).
  4. Cook for about 1 hr 15 minutes for medium.

I also cooked some crispy potatoes using my crisperplate in my Combi Microwave. Perfect match.

20180520_172331


You can of course marinade the beef the night before in any spices you like, but I believe that when you have a really good bit a meat, salt & pepper is all you need.


20180520_173823


Breakfast Tartlets

IMG_20180513_131817_560

This was a quick throw together breakfast this morning. Being out the night before, we woke quite hungry and a simple bowl of cereal or toast was not going to cut it….lol! It’s amazing sometimes what you can put together when you just take 2 minutes to look in your fridge and cupboards! Using my crisper plate these little tartlets baked in just 8 minutes.


Makes 4

1 Roll of Puff Pastry

4 Chipolata Sausages or Wee willy winkies (cocktails sausages!)

4 tsp tomato pasta with Chilli

4 medium eggs

handful of tomatoes (small) halved

8 rashers of smoked bacon

Salt & pepper to season


  1. Preheat the crisper plate for 2 minutes.
  2. Place bacon and sausages onto plate and cook for about 3 minutes                                 20180513_120523
  3. Meanwhile, cut the pastry into squares and with a sharp knife score a 1cm border around the pastry, like a picture frame. Do not cut all the way through.                                                                                                         20180513_121538
  4. Remove the bacon and sausages to a plate and wipe dry the crisper plate
  5. Spoon 1 tsp of tomato paste over the centre of the pastry.                                      20180513_121658
  6. Chop the cooked bacon and sausages into small pieces and place onto the tomato paste, leave room in the middle for the egg later.                                                          20180513_122110
  7. Place onto crisper plate and bake for 6 minutes, the edges will start to puff up.
  8. Remove plate and crack the egg into the middle of the pastry, add the tomatoes and season. Bake for a further 2m 30 secs. or until desired egg setting.                              20180513_123031
  9. Remove and devour! Yummy!

20180513_123505

IMG_20180513_131817_562

IMG_20180513_131817_566


Bacon, Egg & Hashbrown Bake

20180512_093820

I love breakfast time, my favourite meal of the day. I am always looking for new things to try with my Crisperplate and this little recipe was delicious and baked in just 15 minutes too.


Makes 4 servings.

4 Charlotte potatoes – grated with skin on (more flavour in the skin)

8 slices of smoked bacon – back or rashers either is fine

Cheddar cheese – grated (amount to your preference)

6 green spring onions – chopped

6 large eggs

1/2 cup of milk

1 tbsp flour

salt & pepper to season


  1. Grate potatoes and squeeze out excess water, pat dry and sprinkle the flour over to soak up any water.                                                                                                  20180512_090407
  2. Preheat the crisper plate for 2 minutes then evenly lay the grated potatoes onto plate and season. Leave some spaces on the plate as this allows the potatoes to crisp up better. Cook for 6 minutes                                                                                                      20180512_092051
  3. Place the bacon onto the potatoes and cook for 3 minutes or longer if your prefer extra crispy bacon.                                                                                                       20180512_092237
  4. Meanwhile whisk the eggs with the milk and season
  5. Evenly spread the spring onions and cheese onto the bacon and potatoes then pour over the egg mixture and season.                                                                                                                         20180512_093117 20180512_093227
  6. Bake for about 6 minutes or until desired browness.
  7. Serve. Yummy!

20180512_093757

20180512_094833


Red Pepper Chicken with Crispy Potatoes & Steamed Vegetables

20180402_184952

Don’t you just love quick and easy cooking? Sometimes, especially on bank holiday Mondays when your relaxed, you just don’t feel like cooking but still want something healthy, nutritious, flavoursome with hardly any washing up? Oh yes, you’ve guessed it……out comes the little Crisper plate, this little dish is so easy and quick with perfect results. I also used my new Steam pot too for extra nutrition. I just love Gadgets that work for me.


Makes 2 servings.

For the Crisper Plate:-

2 Chicken Breasts – cut into large bite size pieces

2-3 potatoes – cut into bite size chunks (skin on)

2-3 sweet peppers – cut into wedges

1 red onion – cut into wedges

Handful of plum tomatoes

Salt & Pepper

Red Pepper Chilli flakes

Garlic & Parsley seasoning


  1. Pre-heat the Crisper plate for 2 minutes on Dynamic Crisp
  2. Place all above ingredients (except the tomatoes) into a bowl or food bag and drizzle with a little oil, shake to coat chicken, potatoes and veg.                      20180402_181839
  3. Place onto the Crisper plate and cook for 12-15 minutes (depends on thickness of potatoes and chicken or how crispy you like it)
  4. After 6 minutes, add in the plum tomatoes and cook.                                          20180402_183113_001
  5. Serve…..Yummy!

20180402_184529

20180402_185503


For the Steamed Vegetables:-

Your choice of vegetables, I choose broccoli, asparagus and spinach.

Place broccoli and asparagus onto the steam pot grid and fill the pot with 200ml water. Place into the oven and select sensor steam, cook for 5 minutes.

2 minutes before cooking is due to finish, place the spinach in the pot and continue to cook.


20180402_184500

20180402_185010_001


Chilli Chips

20180402_135039

So after my bargain purchase of potatoes, I decided to make some homemade chilli chips using my crisper plate. You know how much I love this little Crisper plate don’t you? lol! You can find more information here:- Crisper Plate Technology


I decided on a bit of spice today, so I seasoned the chips with salt, pepper and chilli flakes…..soooooooo Yummy!


  1. Wash potatoes and cut into desired chip length and width. Approx 1-2 cm cube is perfect.
  2. Pre-heat the Crisper plate for 2 minutes on Dynamic Crisp setting.
  3. Coat chips with a little spray oil and season, then place onto plate & cook for 12 minutes. Perfect little chips.


20180402_133215

20180402_135100


Steamed Chicken Meatballs with Peanuts on Spinach

20180311_143349_001

So delicious! If you love peanut butter, you will love this.

With my new Hotpoint oven came a Steam pot so I’ve been trying to experiment with steam cooking, not only is it more nutritious but also so much more healthier. First, since food is cooked by direct contact between steam as well as the movement of the hot vapor through the food, no fat is needed to conduct the heat.  This makes steaming a lower-calorie, low fat cooking method.  Food stays moist, too, since it is being bathed in water vapor.  Also, since water soluble nutrients (namely Vitamins C and B) don’t leach out into vapor, steaming preserves up to 50% more nutrients than other moist heat cooking methods.

Just because steaming is a healthy way to cook doesn’t mean it has to be bland. There are many ways of adding extra flavor to steamed food during the cooking process. You can bring extra flavor to your food by adding all sorts of complementary herbs and spices to your cooking liquid. Further up the flavor by substituting stock, fruit juice or wine for water. The additional flavors will permeate the food as the steam cooks them.


Makes 9

2 Chicken Breasts

1 shallot

1 tsp garlic granules or 1 garlic clove

1 leek

40g whole peanuts

1 tsp salt & pepper

350ml chicken stock

1 tbsp peanut butter

spinach

1 tsp peanut oil


  1. Slice the Leek, using a bit with the green on
  2. Peel and slice the shallots
  3. Shell and peel peanuts (if not predone), blitz in a blender until fine  20180311_113325
  4. Cut the chicken into small pieces and season
  5. Add chicken, leek, shallots, garlic and seasoning to the peanuts in blender and blitz together.                                                                                                                                                20180311_113736
  6. With your hands roll into meatballs and place on a greased baking tray, then refrigerate for about 1 hour.                                                                             20180311_114223
  7. Pour the chicken stock into the steam pot and then place the meatballs onto the grid and place in pot, cover with lid. Set steam time to 10 minutes.
  8. 2 minutes before ready place the spinach in the pot also.


  9. When ready remove the chicken stock from the pot and place in a pan on hob. Reduce by half and then emulsify 1 tbsp peanut butter and 1 tsp peanut oil until sauce thickens. (about 1-2 minutes)                                                                           20180311_143128
  10. Serve meatballs on the bed a spinach and pour sauce over. Yummy!


20180311_143403

20180311_143846


Spanish Chorizo Tortilla

20180223_184459

Looking in my fridge I had to use up my leftover chorizo, so this was my Friday night quick dinner creation. Very filling, loads of flavour and loads of goodness too. I decided to use my Crisper plate instead of a fry pan then oven and was so glad I did as it only took 15 minutes to cook and more importantly 1 dish to wash up….lol!


Serves 4 (or 2 hungry people)

2 white potatoes

1 sweet potato

Chorizo – I used 1/3 of a 225g ring

1 red onion

6 eggs

1 large handful of kale

1 garlic clove or 2 tsp garlic granules

Salt & ground black pepper to taste


  1. Place a knob of butter on plate and pre heat Crisper Plate on Dynamic crisp setting for 3 minutes.
  2. Slice the potatoes and red onion about 1/2 cm thick 20180223_172351
  3. Slice up the Chorizo not too thick.                                           20180223_181436
  4. Whisk the eggs into a jug/bowl and season.
  5. Place the potatoes onto the crisper plate a start to layer up then season each layer with salt, pepper and garlic.                                                              20180223_182004
  6. Cook on dynamic Crisp setting for 8 minutes
  7. Remove then add on the red onion and chorizo, cook for a further 5 minutes                                                                                       20180223_183050
  8. Remove plate then add on the Kale and pour egg mixture over evenly. Cook for a further 3 minutes.                                                          20180223_183955
  9. Gently remove and serve. Yummy!

20180223_184508_001

20180223_184713

20180223_184839_001


Chicken & Pasta Bake (with a mexican twist)

20180203_173806

Two exciting things happened today, I used my new pasta toy from Kitchenaid and made fresh pasta for the first time, then I created an amazing bake and baked it using my automatic baked pasta setting on my Hotpoint oven……such a great day in my kitchen today. I love it when new Technology just work!


Serves 2 large portions or 4 smaller portions

150g cooked pasta (see my Fresh pasta Recipe)

2 chicken breasts – cut into bite size pieces

1 yellow and 1 red pepper – cut into slices

1 red onion – cut into wedges

200g Quark

120ml Chicken Stock

1 tsp dried garlic granules

1 tsp smoked paprika

1 tsp cumin

1 tsp dried oregano

Salt & pepper to taste

1 tin chopped tomatoes

Grated Cheddar Cheese – quantity to suit your tastes (We love our cheese here…lol!)


  1. Heat a little oil in a pan on the hob, medium to high heat.
  2. Gently brown the vegetables, chicken, spices and season.
  3. Meanwhile cook your pasta.                                           20180203_155437
  4. Spoon about 2-3 tbsps of the tin tomatoes into a baking dish, then start to layer up the bake. I put pasta on next, then chicken, then vegetables, then rest of tomatoes.
  5. Make up the stock and mix the quark in to make a thick sauce, then pour over the bake in the dish.                     20180203_160435
  6. Set your oven (if you have a Hotpoint Class 9) to Baked Pasta and Cannelloni setting. If not, try 180 deg for approx 25-30 minutes.                 20180203_170123
  7. When you have 15 minutes left, sprinkle on the grated cheese and bake until golden and crisp on top.                                      20180203_172013
  8. Serve. Yummy!

20180203_180741

20180203_18071820180203_180646


Apple & Raisin Filo Parcels

20180127_165437_001

I had some left over apples and filo in my kitchen so it was obvious it had to be little apple parcels. These were so tasty and so quick to cook using my little crisper plate……..oh did I tell you how much I love this little crisper? lol!


Makes 4

2 Granny smith apples – chopped into small chunks

3 sheets of filo pastry

1 beaten egg for wash

small handful of raisins

70g light brown caster sugar

2 tsp ground cinnamon

Fry oil – light

2 tbsps Icing sugar to finish


  1. Spray a fry pan with oil on a medium heat
  2. Gently fry the apple, sugar, cinnamon and raisins until just caramalised (about 8-10 mins) Remove and allow to cool.                                                                   20180127_151141
  3. Lay your first sheet of filo on a worktop and brush with the egg wash, then take your 2nd sheet and lay onto, brush with egg wash, and then your 3rd sheet as above.  Then cut vertically into 4 sections.                                                                                               20180127_163457
  4. Preheat your crisper plate for 3 minutes on dynamic crisp setting
  5. Once cooked, remove from plate and allow to cool slightly. Sieve some icing sugar over the parcels and serve. These are lovely with ice cream, whipped cream or even caramel sauce. oh so yummy!

You can of course bake these in a 190 deg oven for about 20 minutes.

20180127_165117

20180127_165428

20180127_165420


Rose Harissa Chicken

20180126_185023

This little dish is now becoming another go to dinner in my house, it so easy to prep, has a lovely taste and using my crisper plate is ready in under 15 minutes. I do love easy cooking sometimes.


Serves 2

2 Chicken Breasts

1 tbsp Rose Harissa

4-6 charlotte potatoes – halved

3-4 sweet peppers

1 red onion – cut into wedges

1 clove garlic – crushed

Salt & pepper to taste

1 tbsp olive oil


  1. Cut chicken into large bite size pieces and place in a bowl with the harissa, mix to coats evenly.
  2. In a separate bowl place the potatoes, onion and peppers with garlic, pour 1 tbsp olive oil then season with salt & pepper.
  3. Preheat your crisper plate for about 2-3 minutes on dynamic crisp setting
  4. Place the chicken and potato mix onto the crisper plate and cook for a further 12-14 minutes on dynamic crisp setting.
  5. Mix and serve. Yummy!


20180126_184756

20180126_185149_001rose-harissa-170g_1


Omelette Pockets

Have I ever told you how much I love this Crisper Plate by Hotpoint, LOL!, and have I ever told you how much I love breakfast time? Well my saturday morning was a case of up and out so I need something quick but filling, this little omelette pocket only took 4 minutes to cook and so tasty and filling. Mission accomplished!

Serves 2

6 eggs

50g Spinach

5-6 slices of smoked cooked ham

handful of grated cheddar cheese

Salt & pepper to season

Chives (optional)


  1. Preheat the crisper plate for 2 minutes
  2. Beat eggs together with seasoning
  3. Pour onto crisper plate, lay evenly the spinach, ham, cheese and season to taste (you can of course use any combination of filling you like)
  4. Cook on dynamic crisp setting for 4 minutes or until eggs have set.
  5. Cut in half and fold over, serve. Yummy!


20180120_085303


My perfect Saturday morning Brekkie…..:)

20180120_085815


Maple Bacon & Spinach Hasselback Chicken with Crisperplate potatoes

20180113_175122

Having some Maple Bacon Jam left after Xmas, I decided to try it with Chicken and it was delicious, perfect combination. I also used my Crisper plate to cook some crispy potatoes, perfect accompaniment.


Serves 2

For the Chicken

2 Chicken Breasts

1/4 jar of Maple Bacon Jam – bought from The SweetBeet Co. Maple Bacon Jam

50g Spinach

Salt & pepper to taste

For the potatoes

6-8 charlotte potatoes – cut into quarters or halves (depending on size)

1 tbsp olive oil

Salt & pepper to taste


  1. Preheat oven to 200 deg
  2. Make openings in the chicken breast 3/4 way down, don’t cut all the way to the bottom                                                                                                                                                20180113_164845
  3.  Wilt the spinach on the hob and mix in a bowl with the maple bacon jam.
  4.  Stuff the mix into the chicken slits and then season the chicken with salt & pepper.
  5. Wrap the chicken losely in tin foil and bake in oven for 30 minutes. The last 5 minutes of cooking, open up the foil to allow to brown slightly.
  6. Meanwhile, preheat your crisperplate for 3 minutes on dynamic crisp setting (hotpoint oven only).

  7. Place uncooked cut potatoes into a food bag and pour olive oil in with plenty seasoning and shake to coat. Pour onto preheat plate and bake for about 12-13 minutes.
  8. Serve both together….yummy!   I used a drizzle of Maple Syrup over my chicken…delicious!

20180113_17522720180113_173922.jpg


Harissa Chicken with Sweet pepper & Potatoes

20171205_181556

I so love this little Gadget that Hotpoint have invented, this little crisper plate is used with the Combi Microwave to cook/bake food in a fraction of the time but with oven ready results. The Chicken is still succulent, vegetables cook perfectly and potatoes nice & soft without par boiling. It is great for quick meals, especially during the week when your busy with work etc.

Come in from work today hungry and couldn’t wait, so this was the outcome tonight & in just 12 minutes………….YES…..just 12 minutes!


2 Chicken Breasts – Cut into 1 inch cubes or you could do strips

2 tsps of Harissa Paste

1 onion – cut into wedges

Selection of mini sweet peppers – cut in half

4 Charlotte potatoes cut into wedges

Salt & pepper to taste


  1. Season the chicken with salt & pepper then spoon the harissa paste into a bowl with the chicken and coat.
  2. Lightly oil the vegetables and potatoes then season
  3. Place everything onto the pre-heated crisper plate and cook for 12 minutes.

20171205_173627


20171205_181528


Hash Browns and baked eggs

20171104_100313_001

Breakfast at the weekends are my favourite……..long lazy mornings, the smell of fresh coffee, listening to some morning relaxing music on the radio, (oh I sound old…I should say Spotify!….lol!) a good homemade filling breakfast that sets you up for the day……sound perfect? It’s even more perfect when you have a gadget that simply works everytime, and only 1 pan to ever wash up….now that sounds perfect….does it not?

I’ve made hash browns before using a fry pan on hob, but thought I’d try on my crisper plate and wow, so easy, cooked to perfection, no oil used so therefore its healthier, no turning over and non stick………I’ve said it before but I love this little plate.

Makes 2

2 Potatoes – I used Maris Pipers with skin on, all the flavour is in the skin – don’t peel

Salt  & pepper

Knob of Butter

Choice of spices or herbs (I used Turmeric for this one, 2 tsp)  I’ve also made it with crushed red peppers for some spice and also a little curried powder.

  1. Wash potatoes then grate using the large holes on a grater
  2. Preheat the crisper plate on dynamic crisp for 3 minutes, remove from oven and put knob of butter in to melt.
  3. Sprinkle the potatoes over the plate, leaving small gaps (like a spiders web), this allows the steam to escape and the potatoes to crisp up nicely  20171104_095913
  4. Season with Salt & pepper & your spices or herbs
  5. Bake on dynamic crisp setting for 6 minutes
  6. Remove from oven and crack 2 eggs on top of potatoes, put back in and bake for 1m30sec for runny and 2m for hard egg.  20171104_095941
  7. When you slide it off of the plate it should all stick together like a web.    20171104_101548
  8. Serve….yummy…yummy!

20171104_100538


Crispy Parmesan Potato Slices with egg


20171030_230157
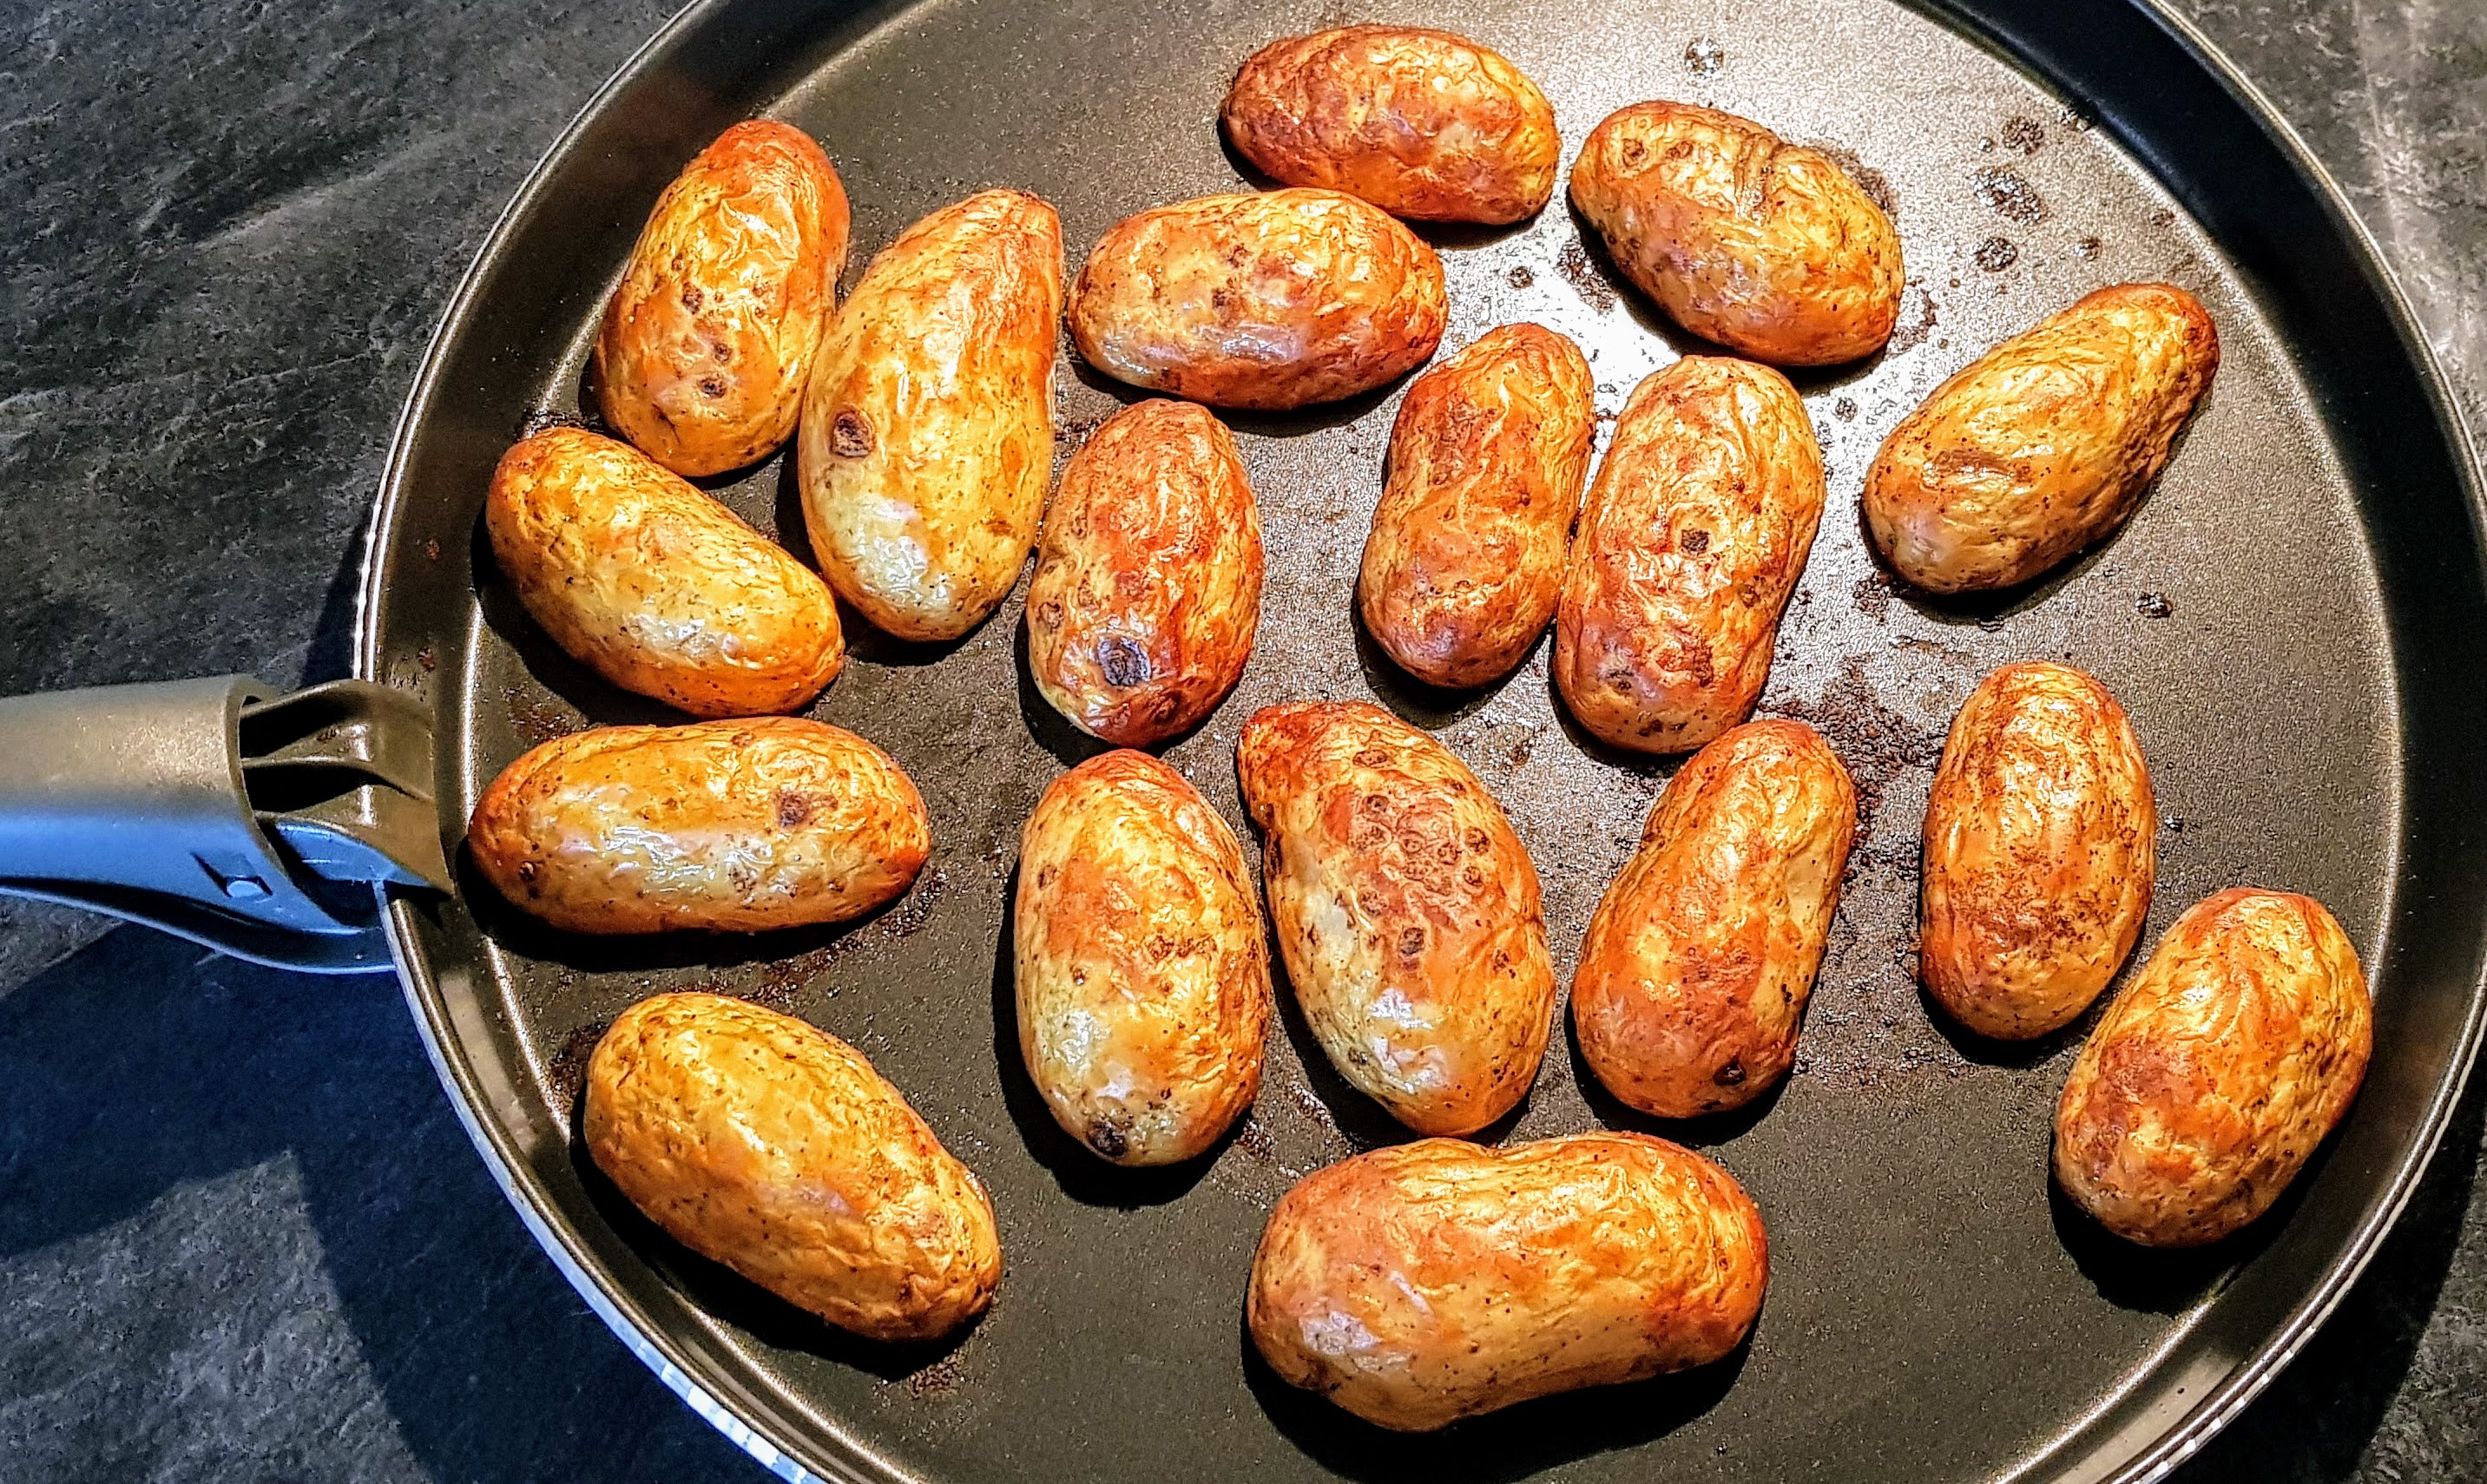
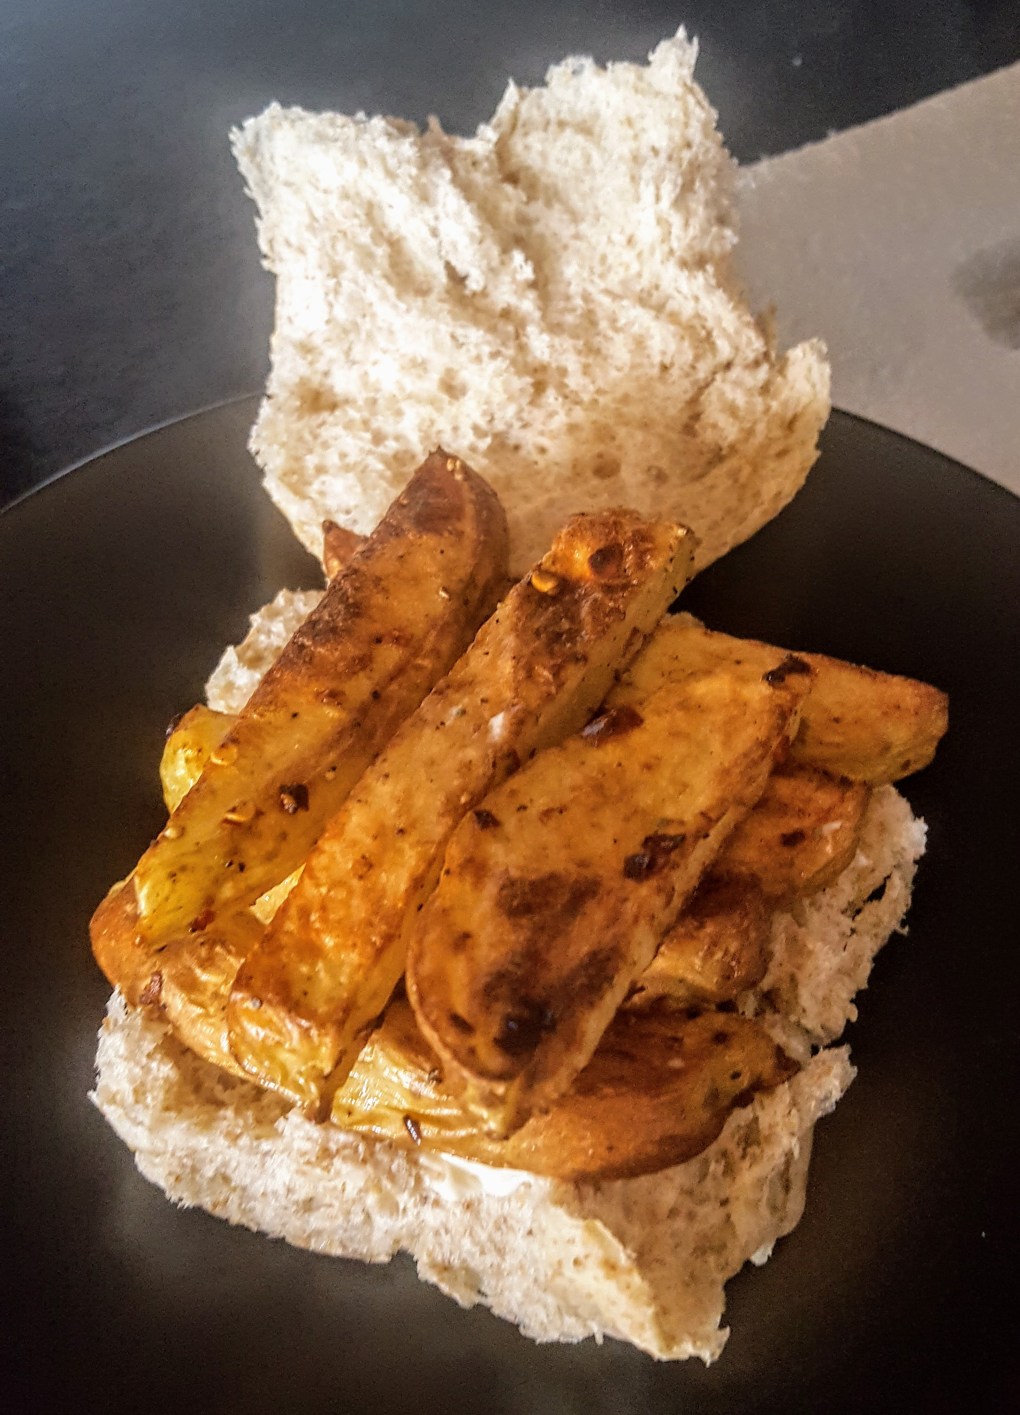
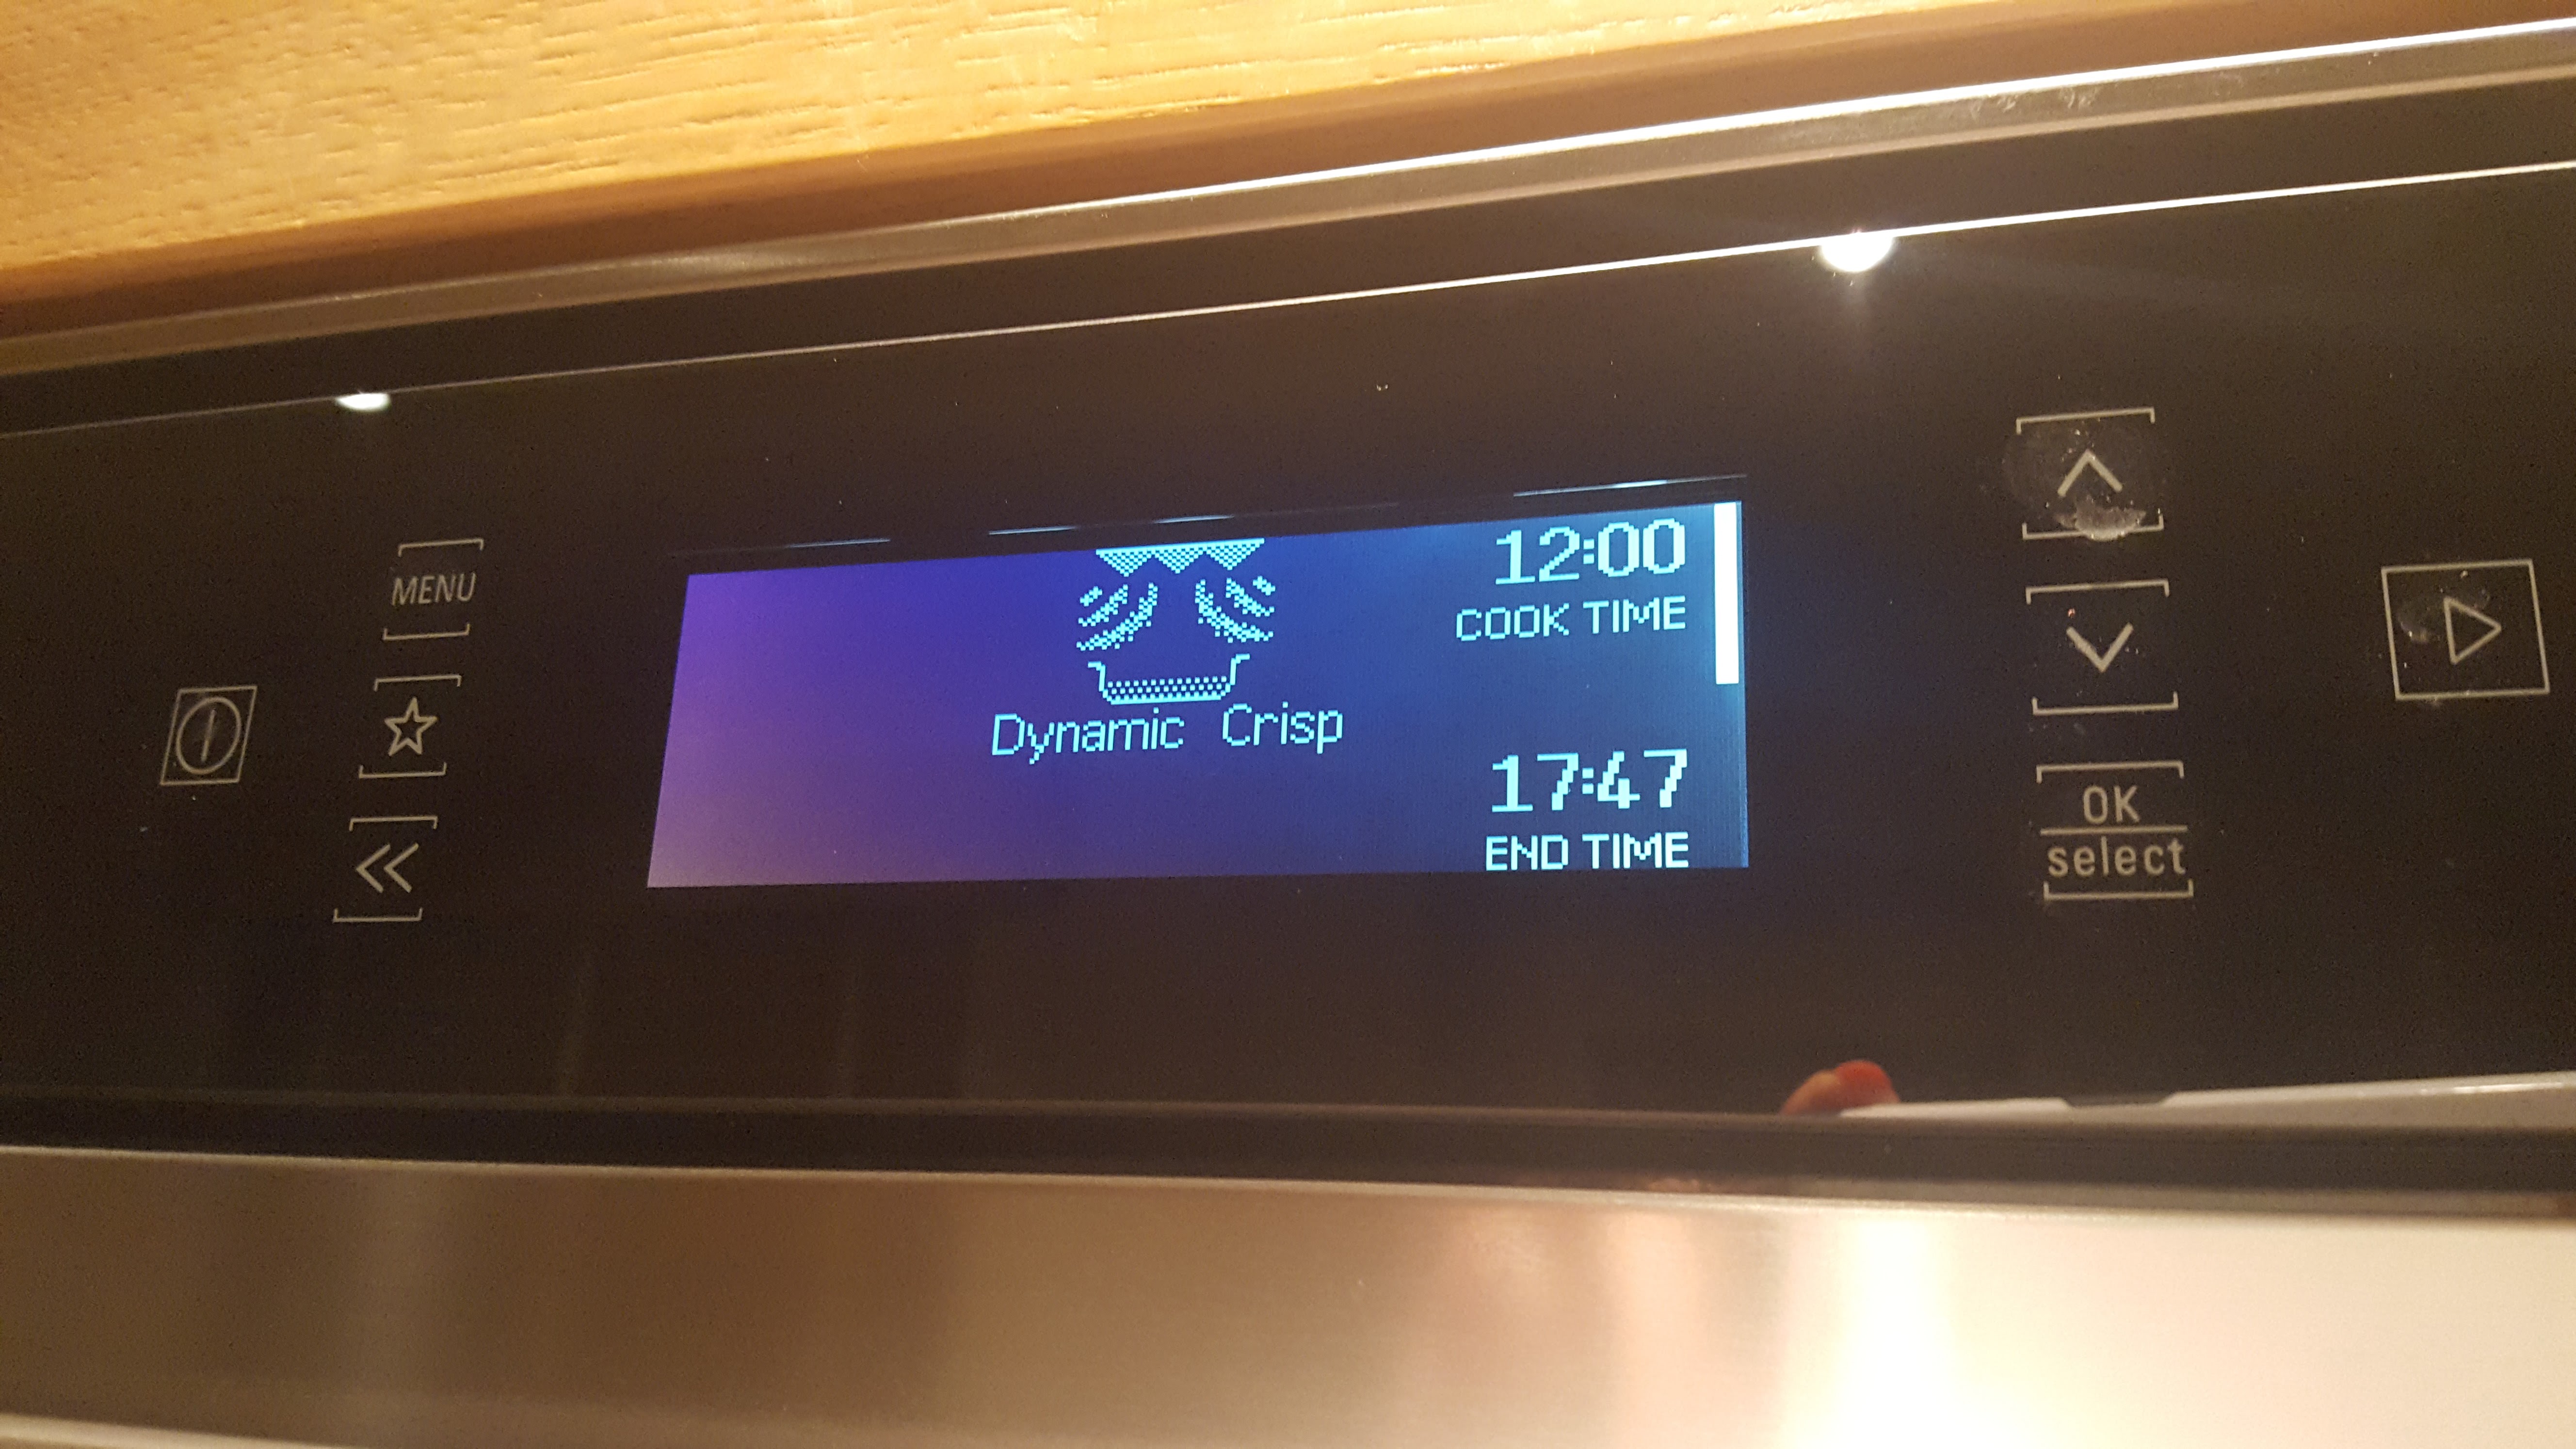
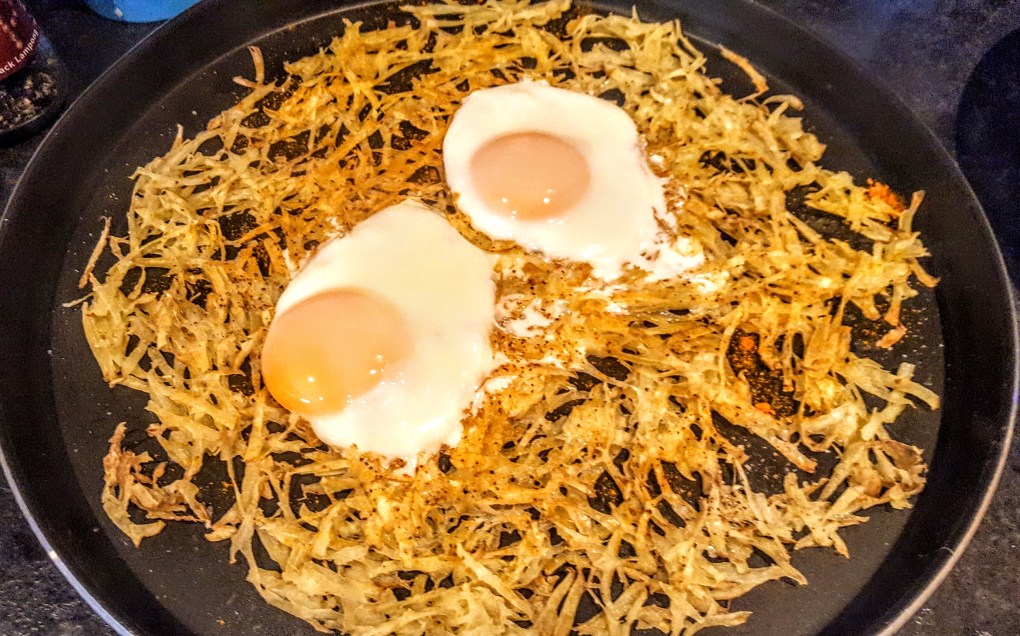
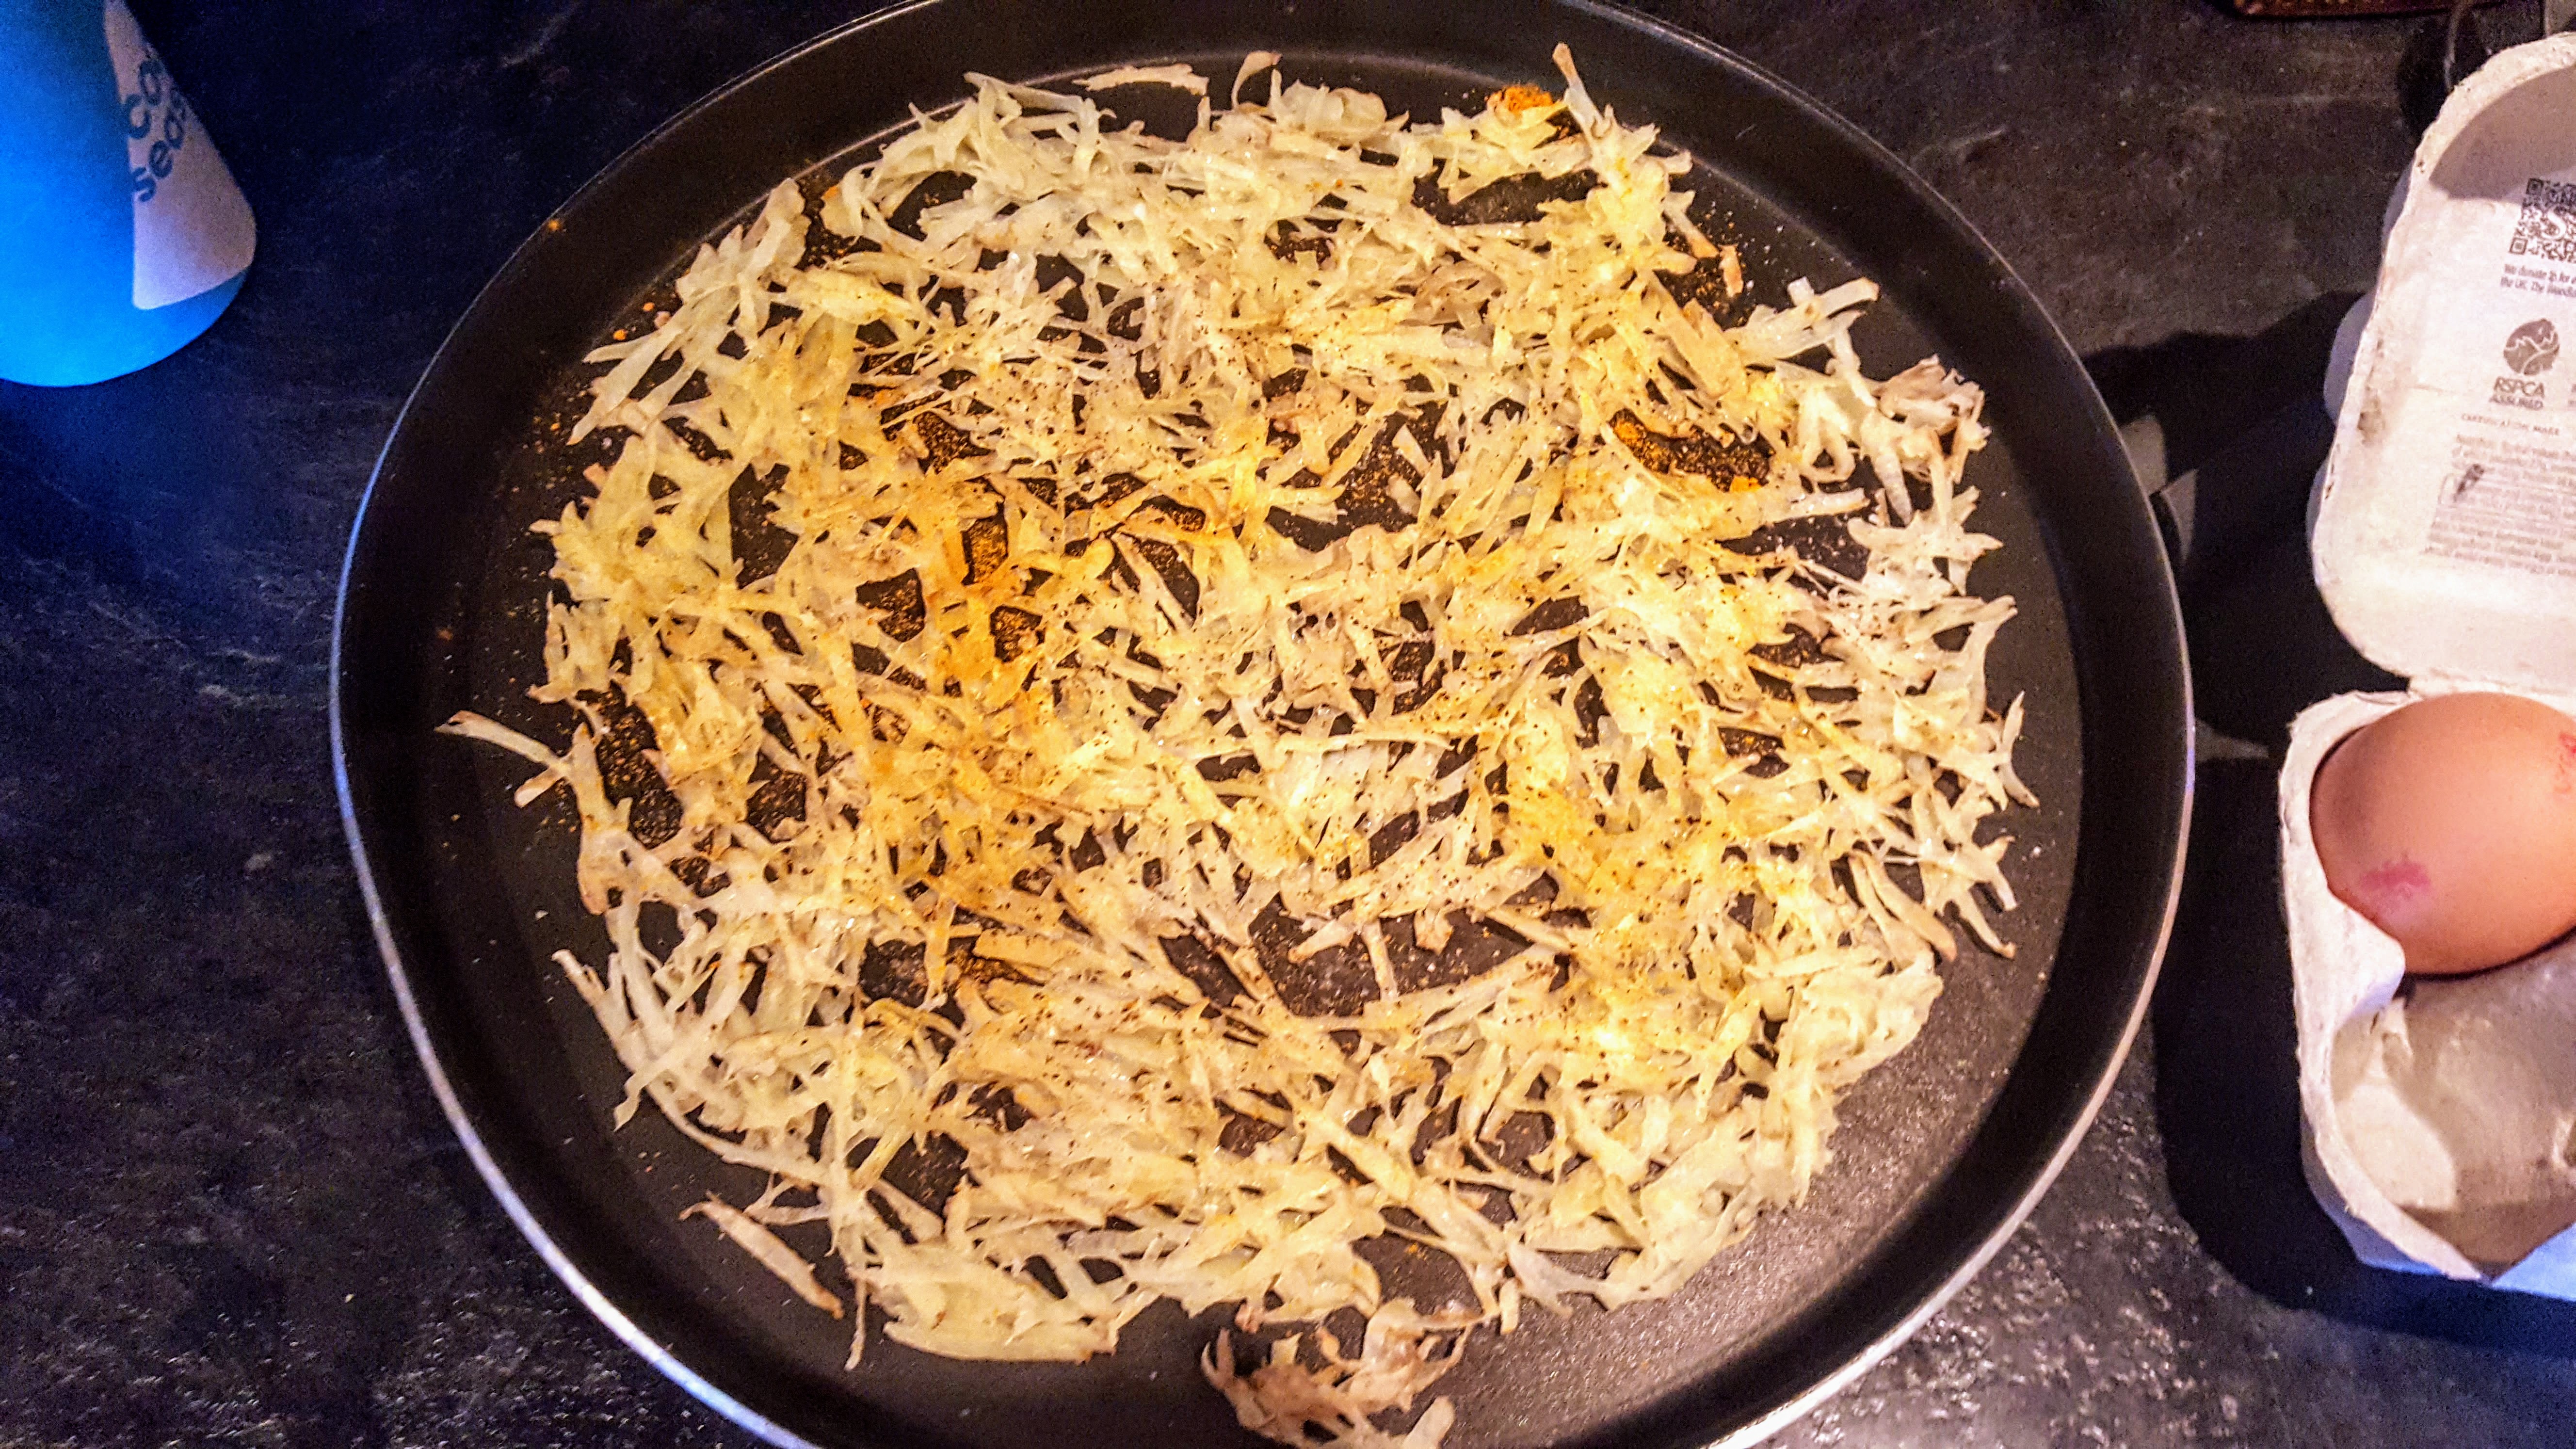
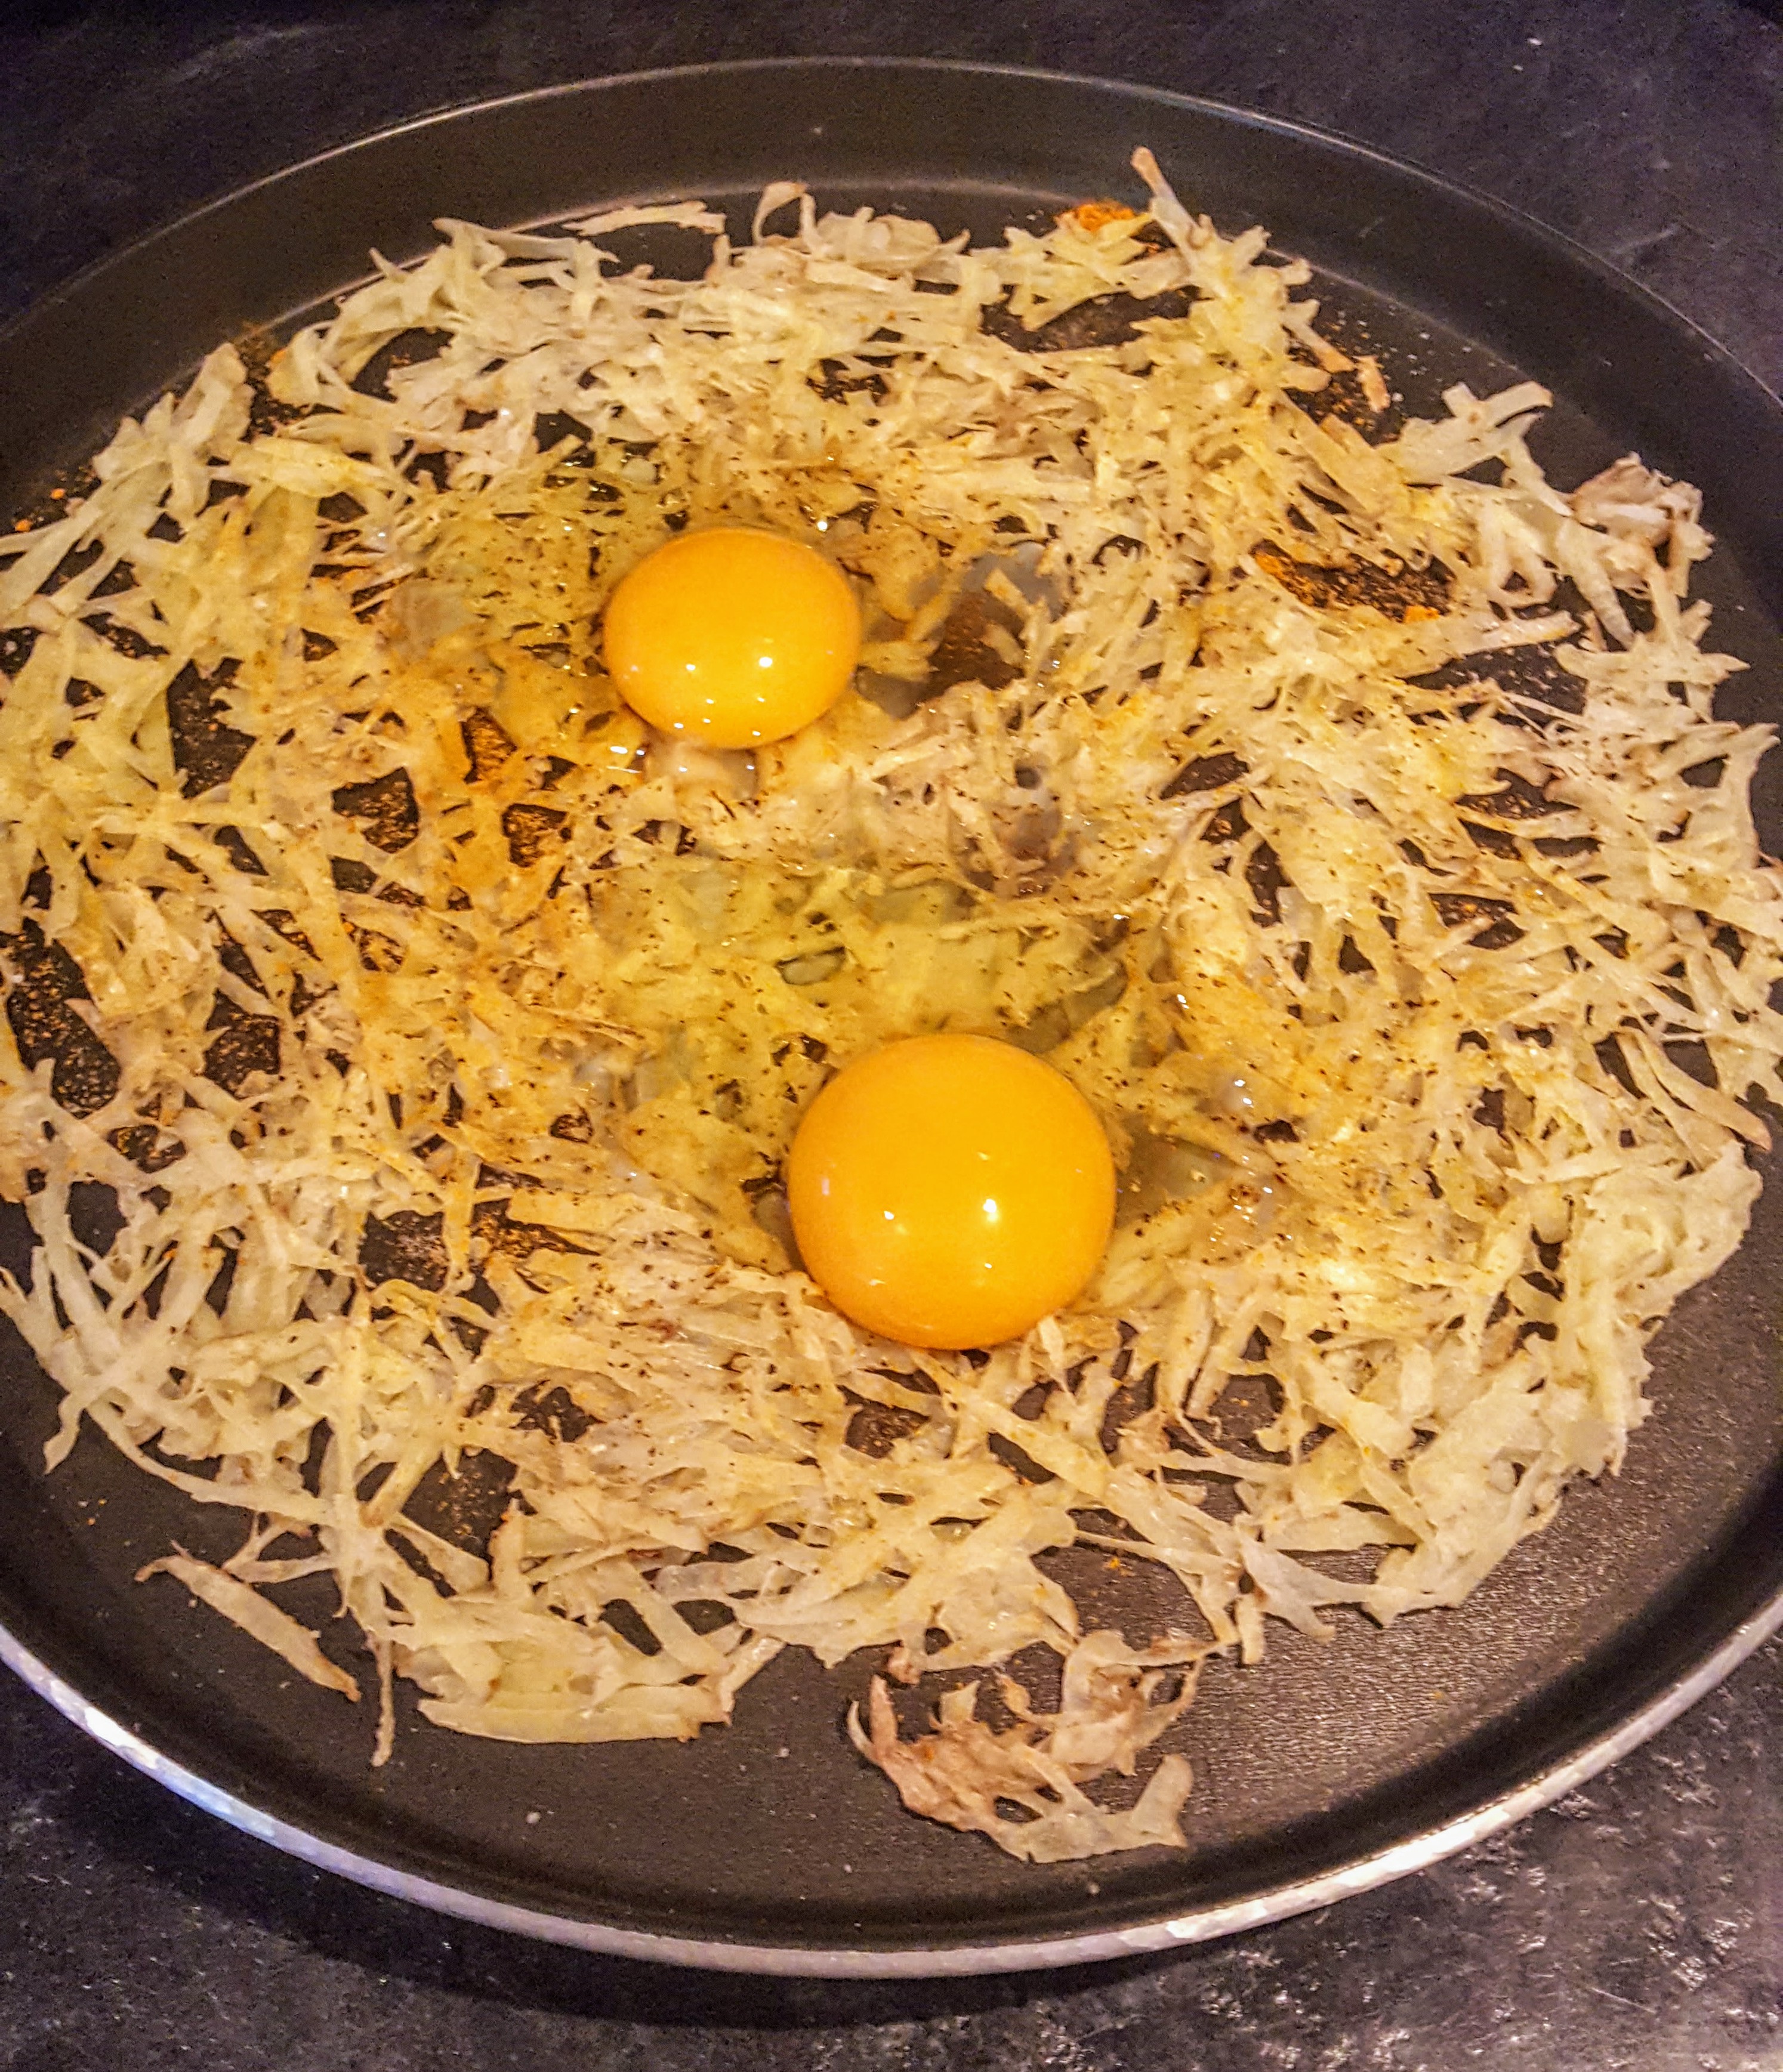
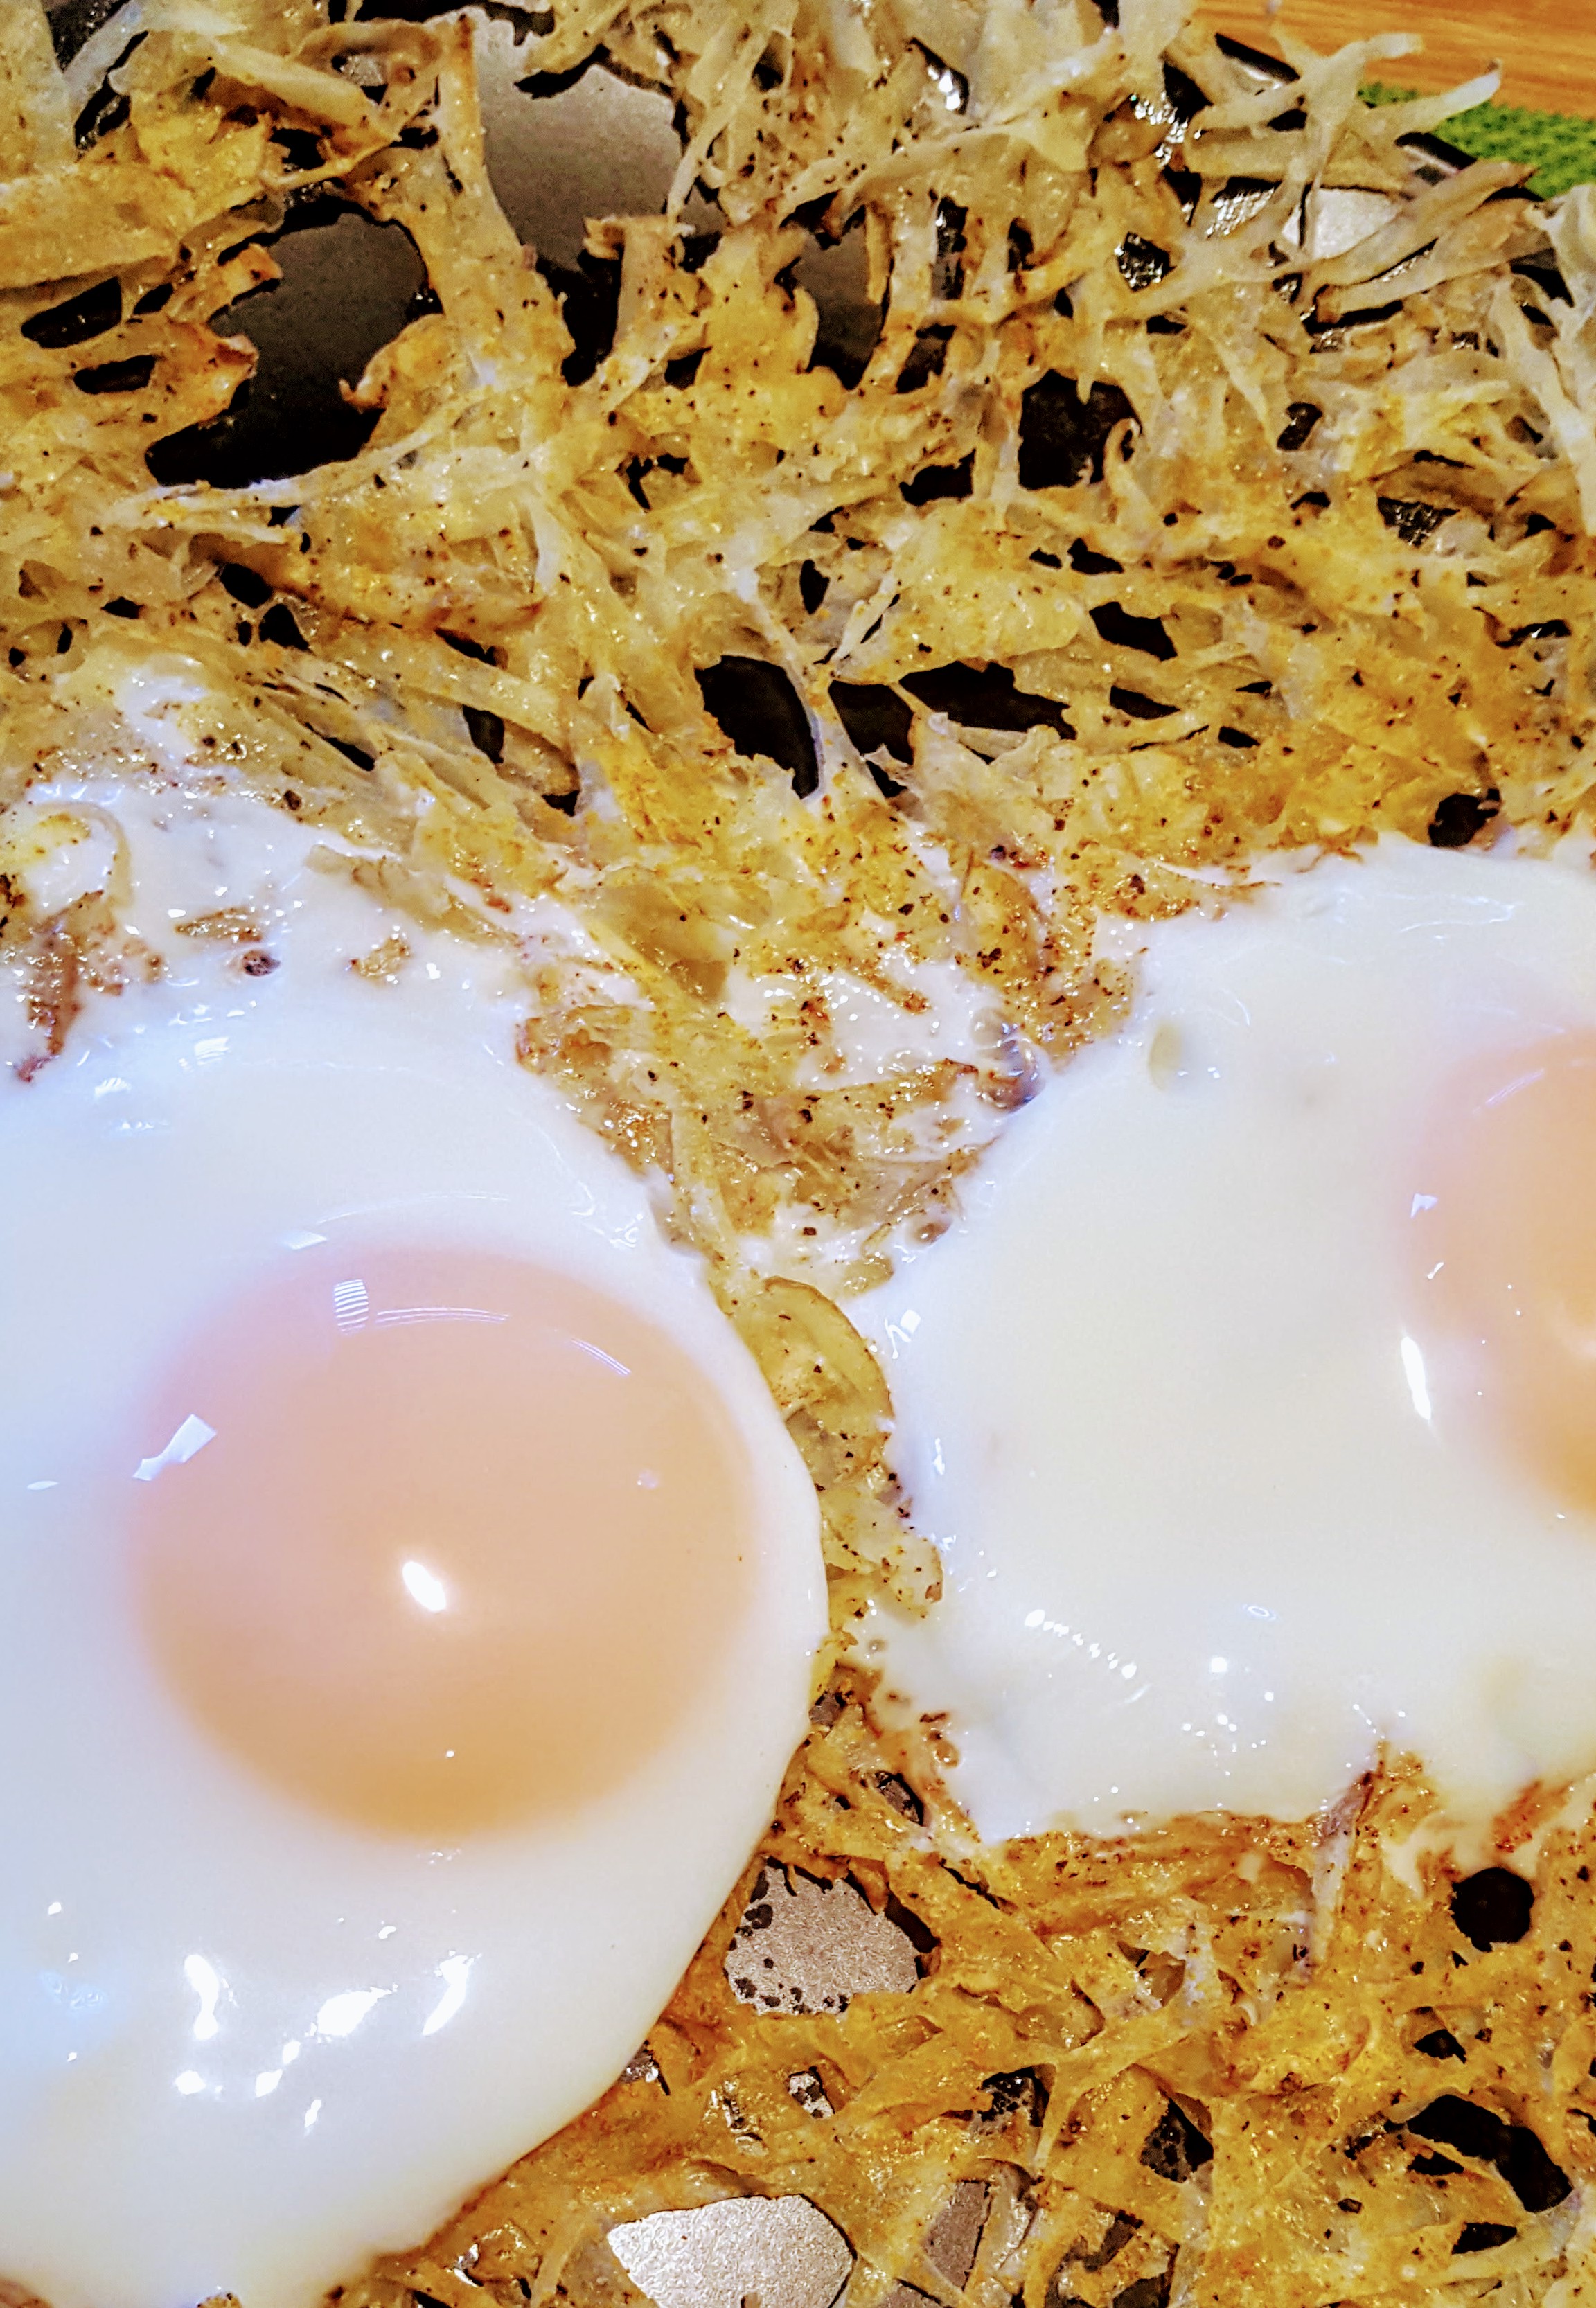
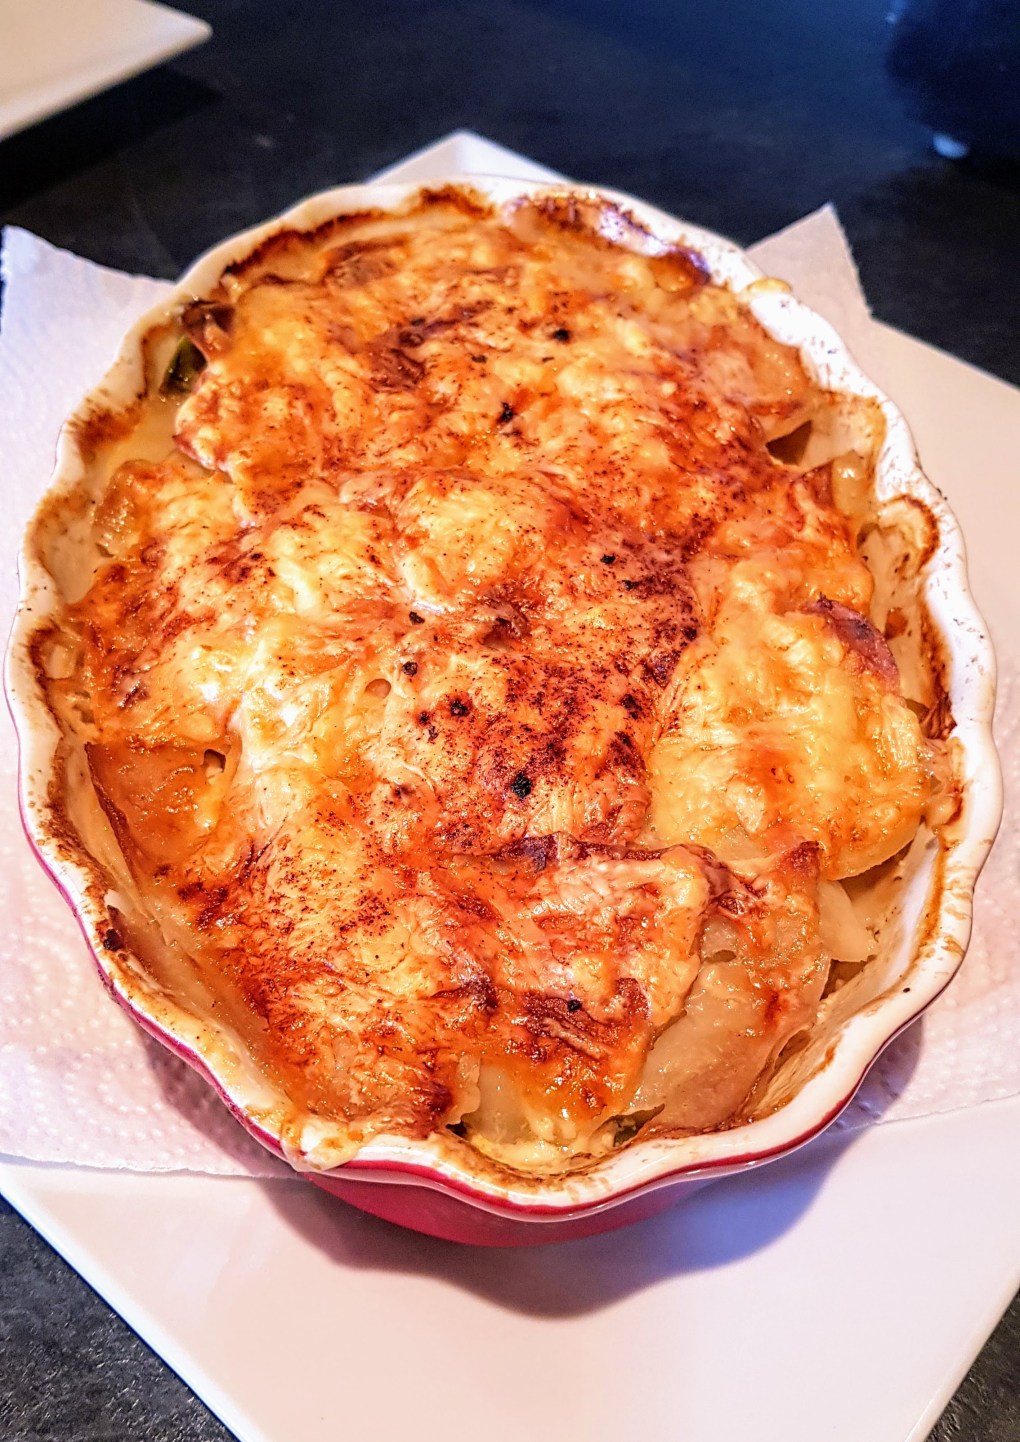
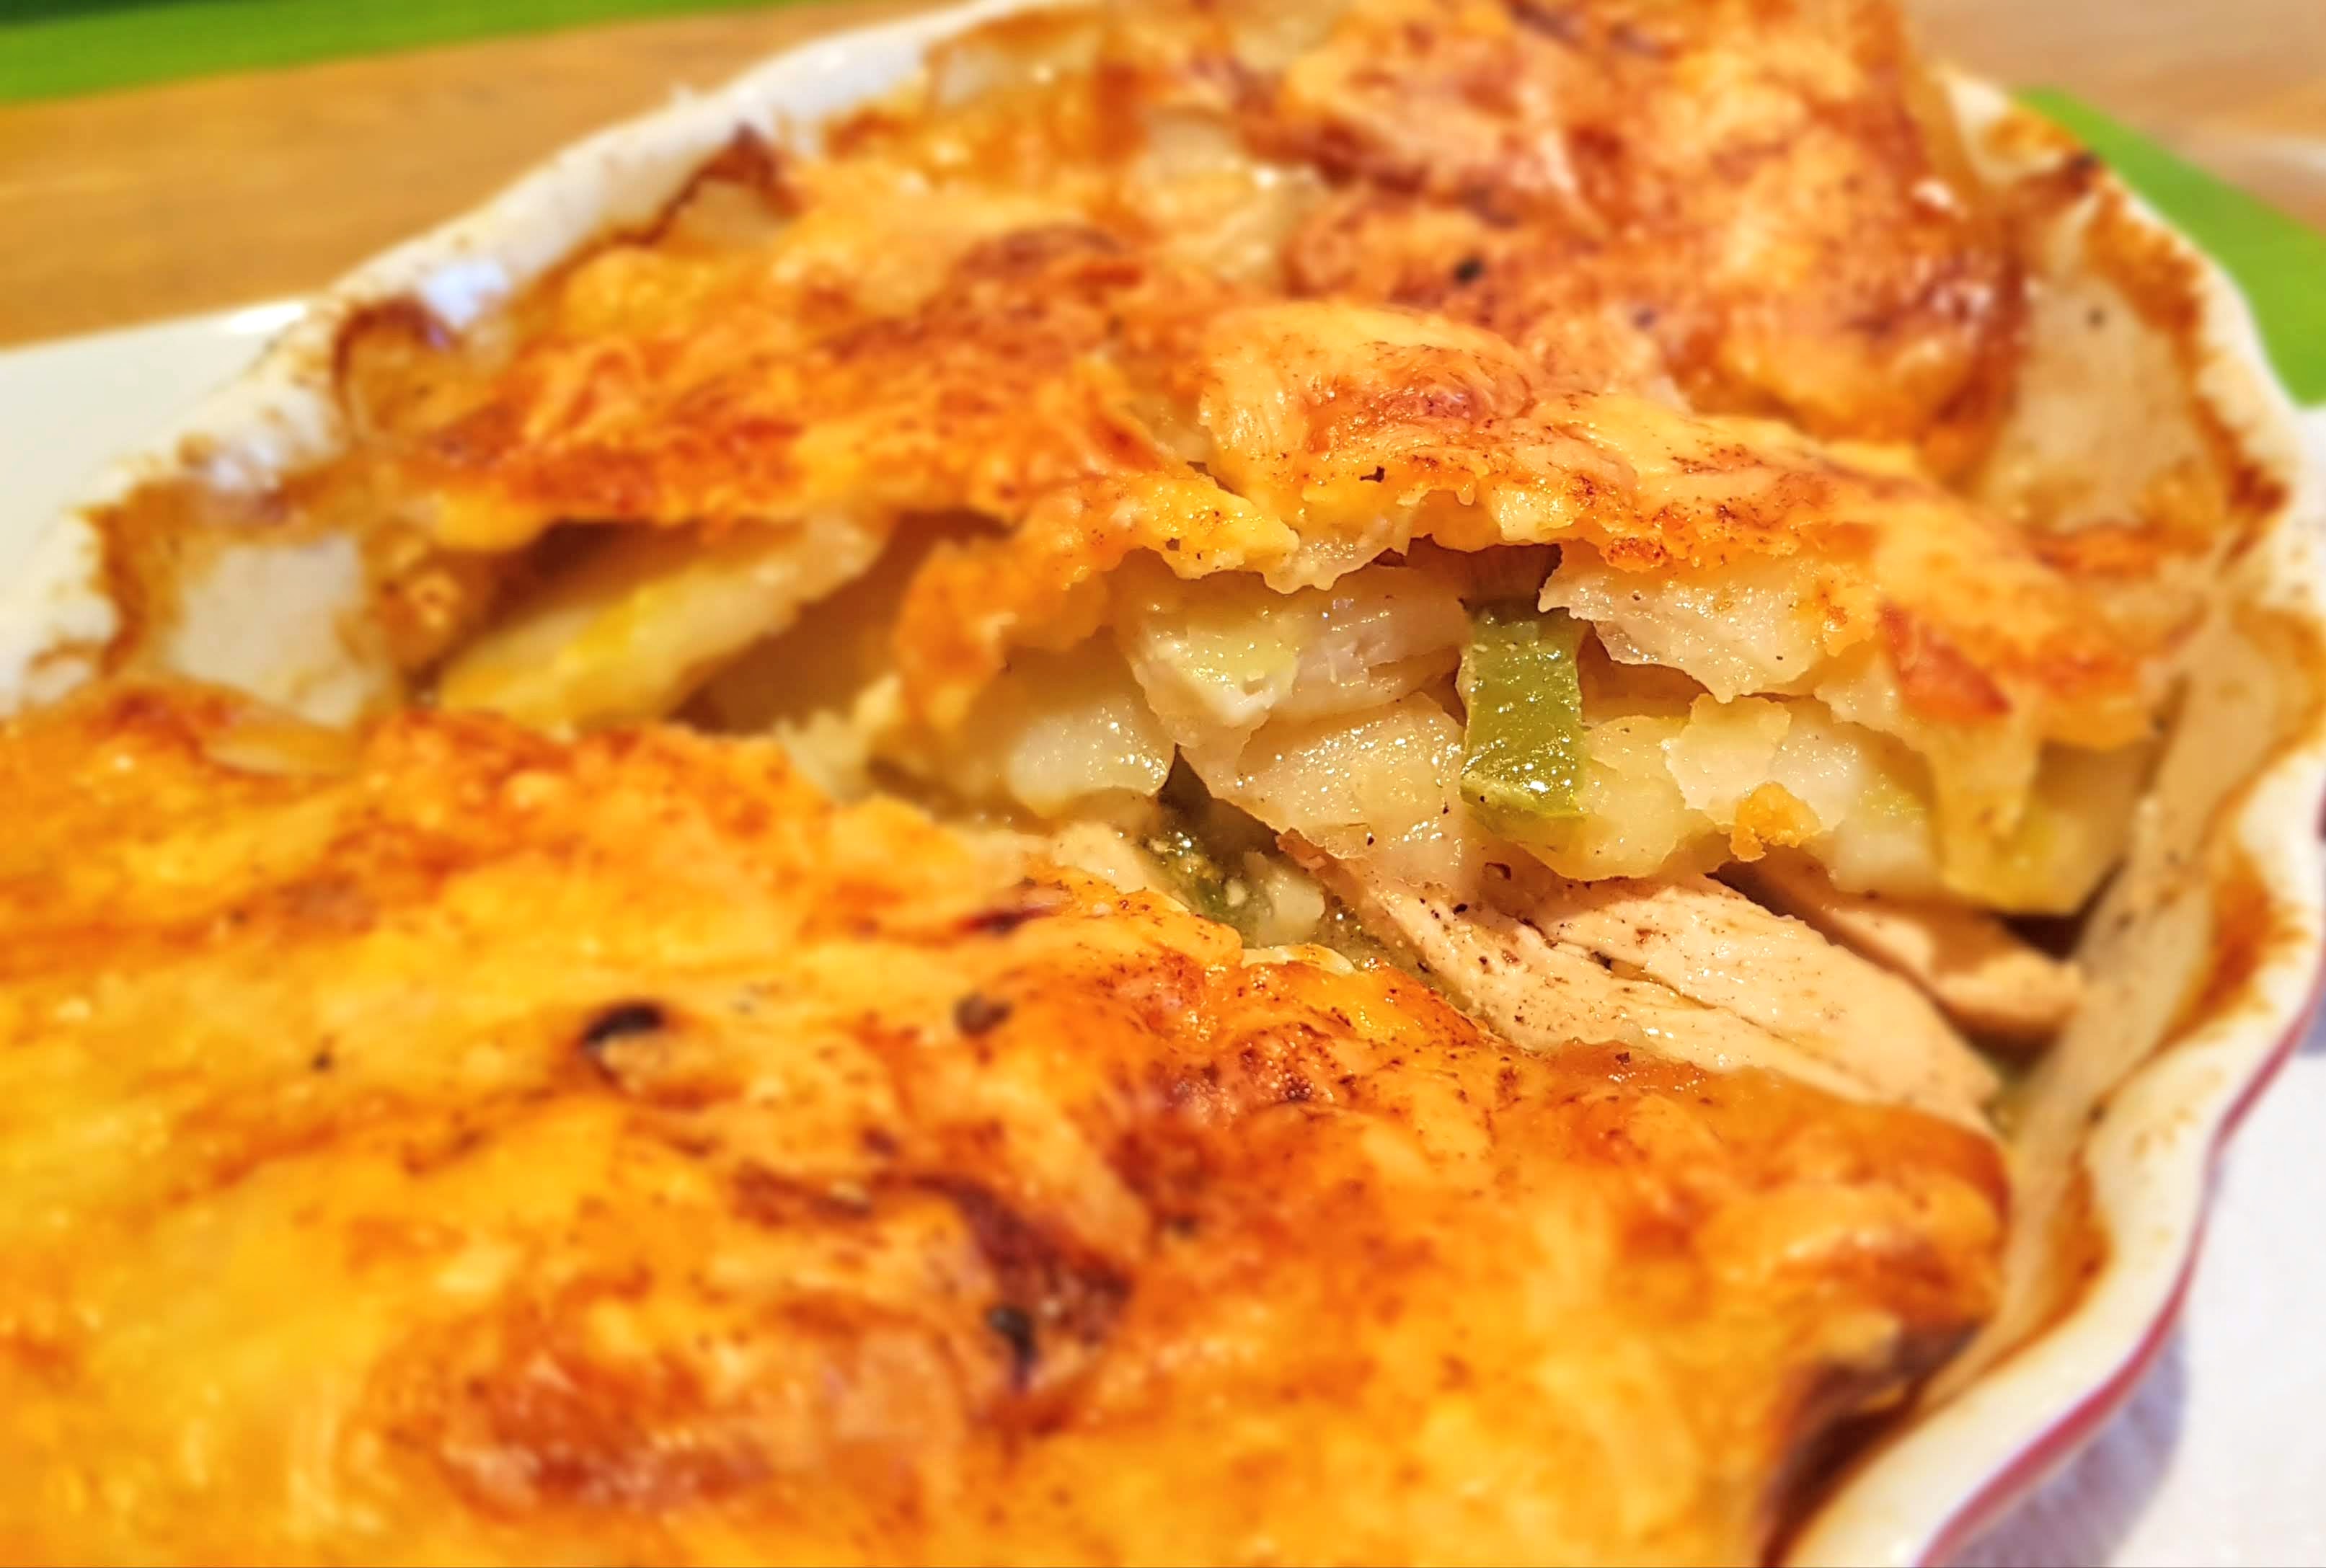
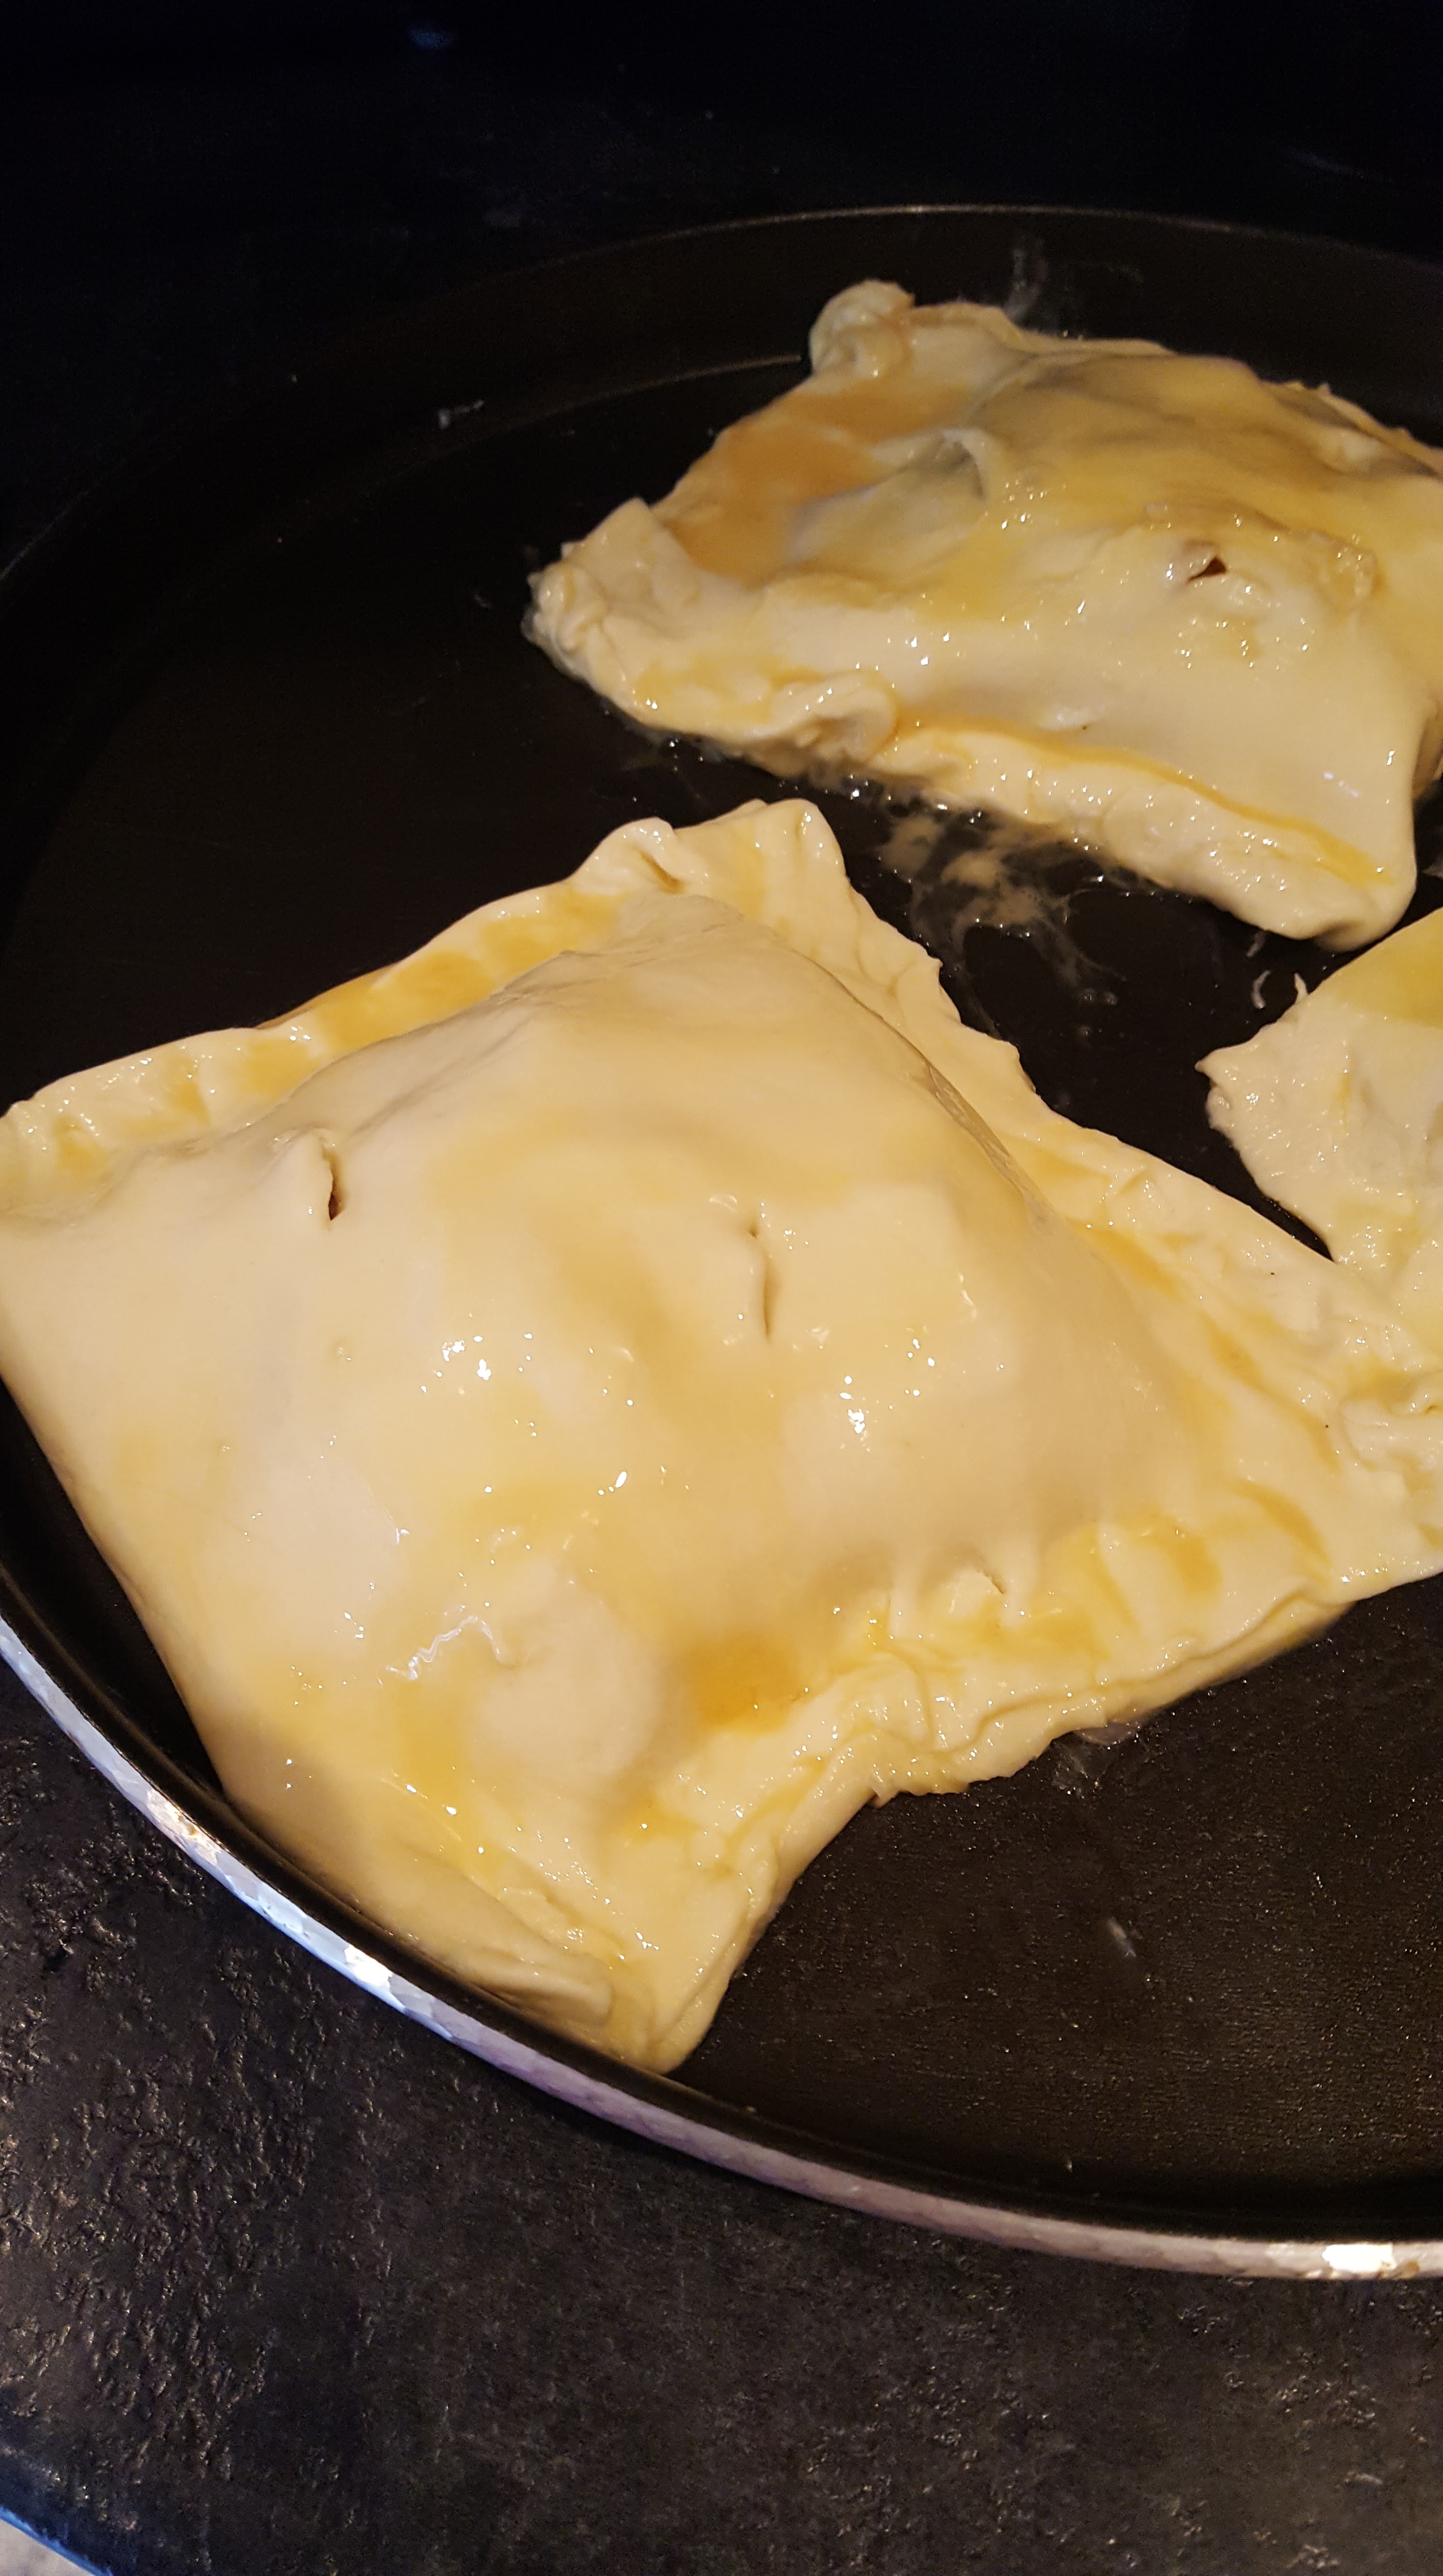
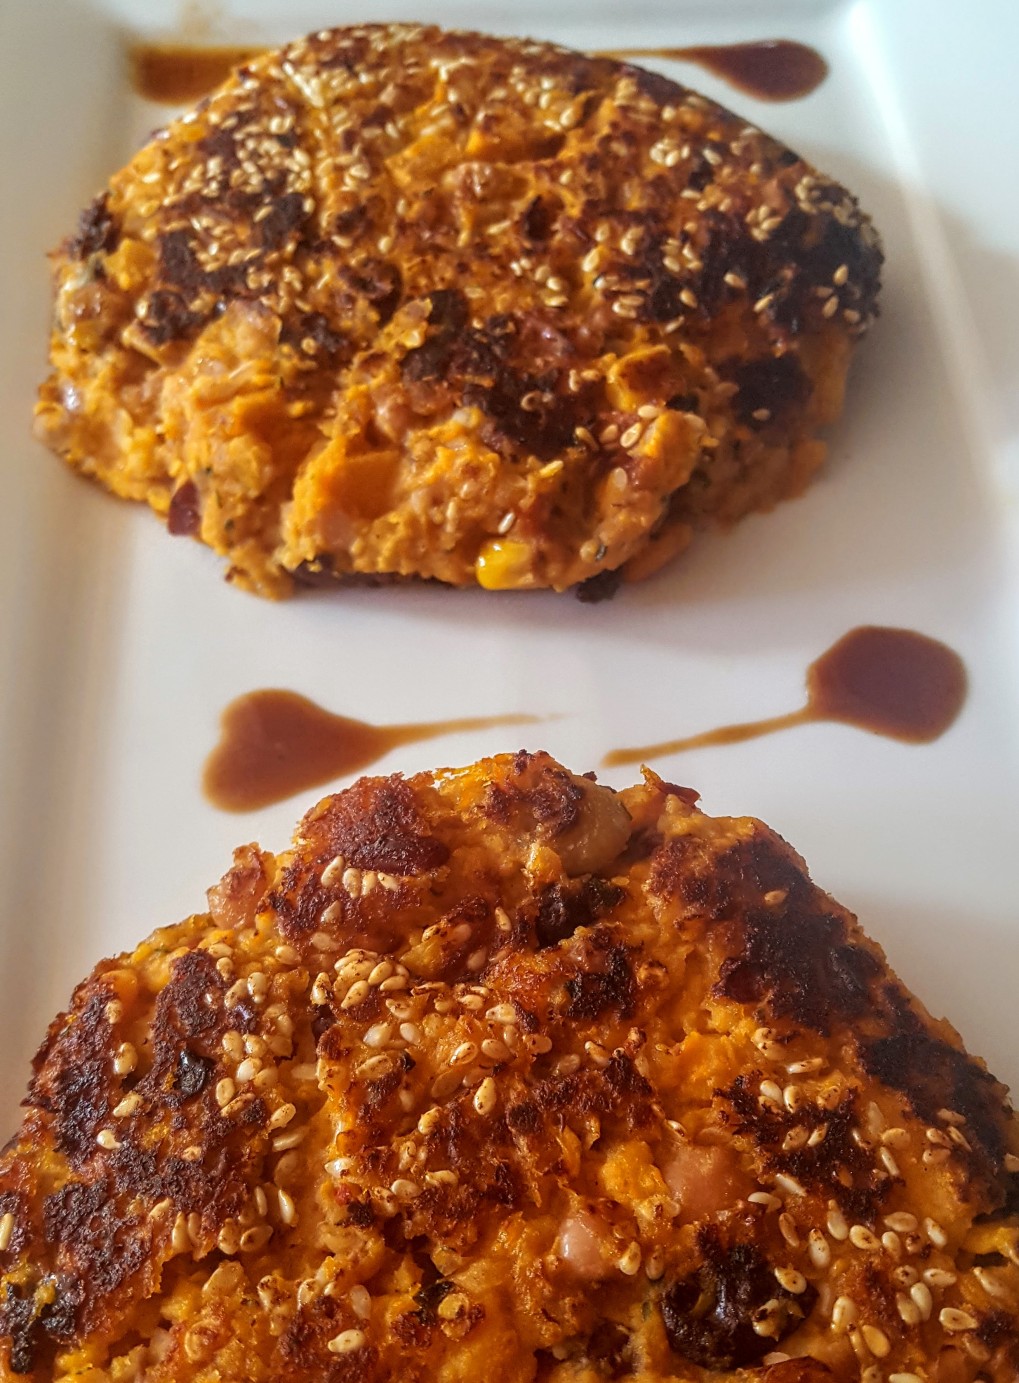
Having some left over potatoes, I wanted something filling for lunch so decided on these little tasty bites. Again using my crisper plate they were ready on only 12 minutes. Quick lunch. Tasty lunch. I added a couple of eggs too for protein.
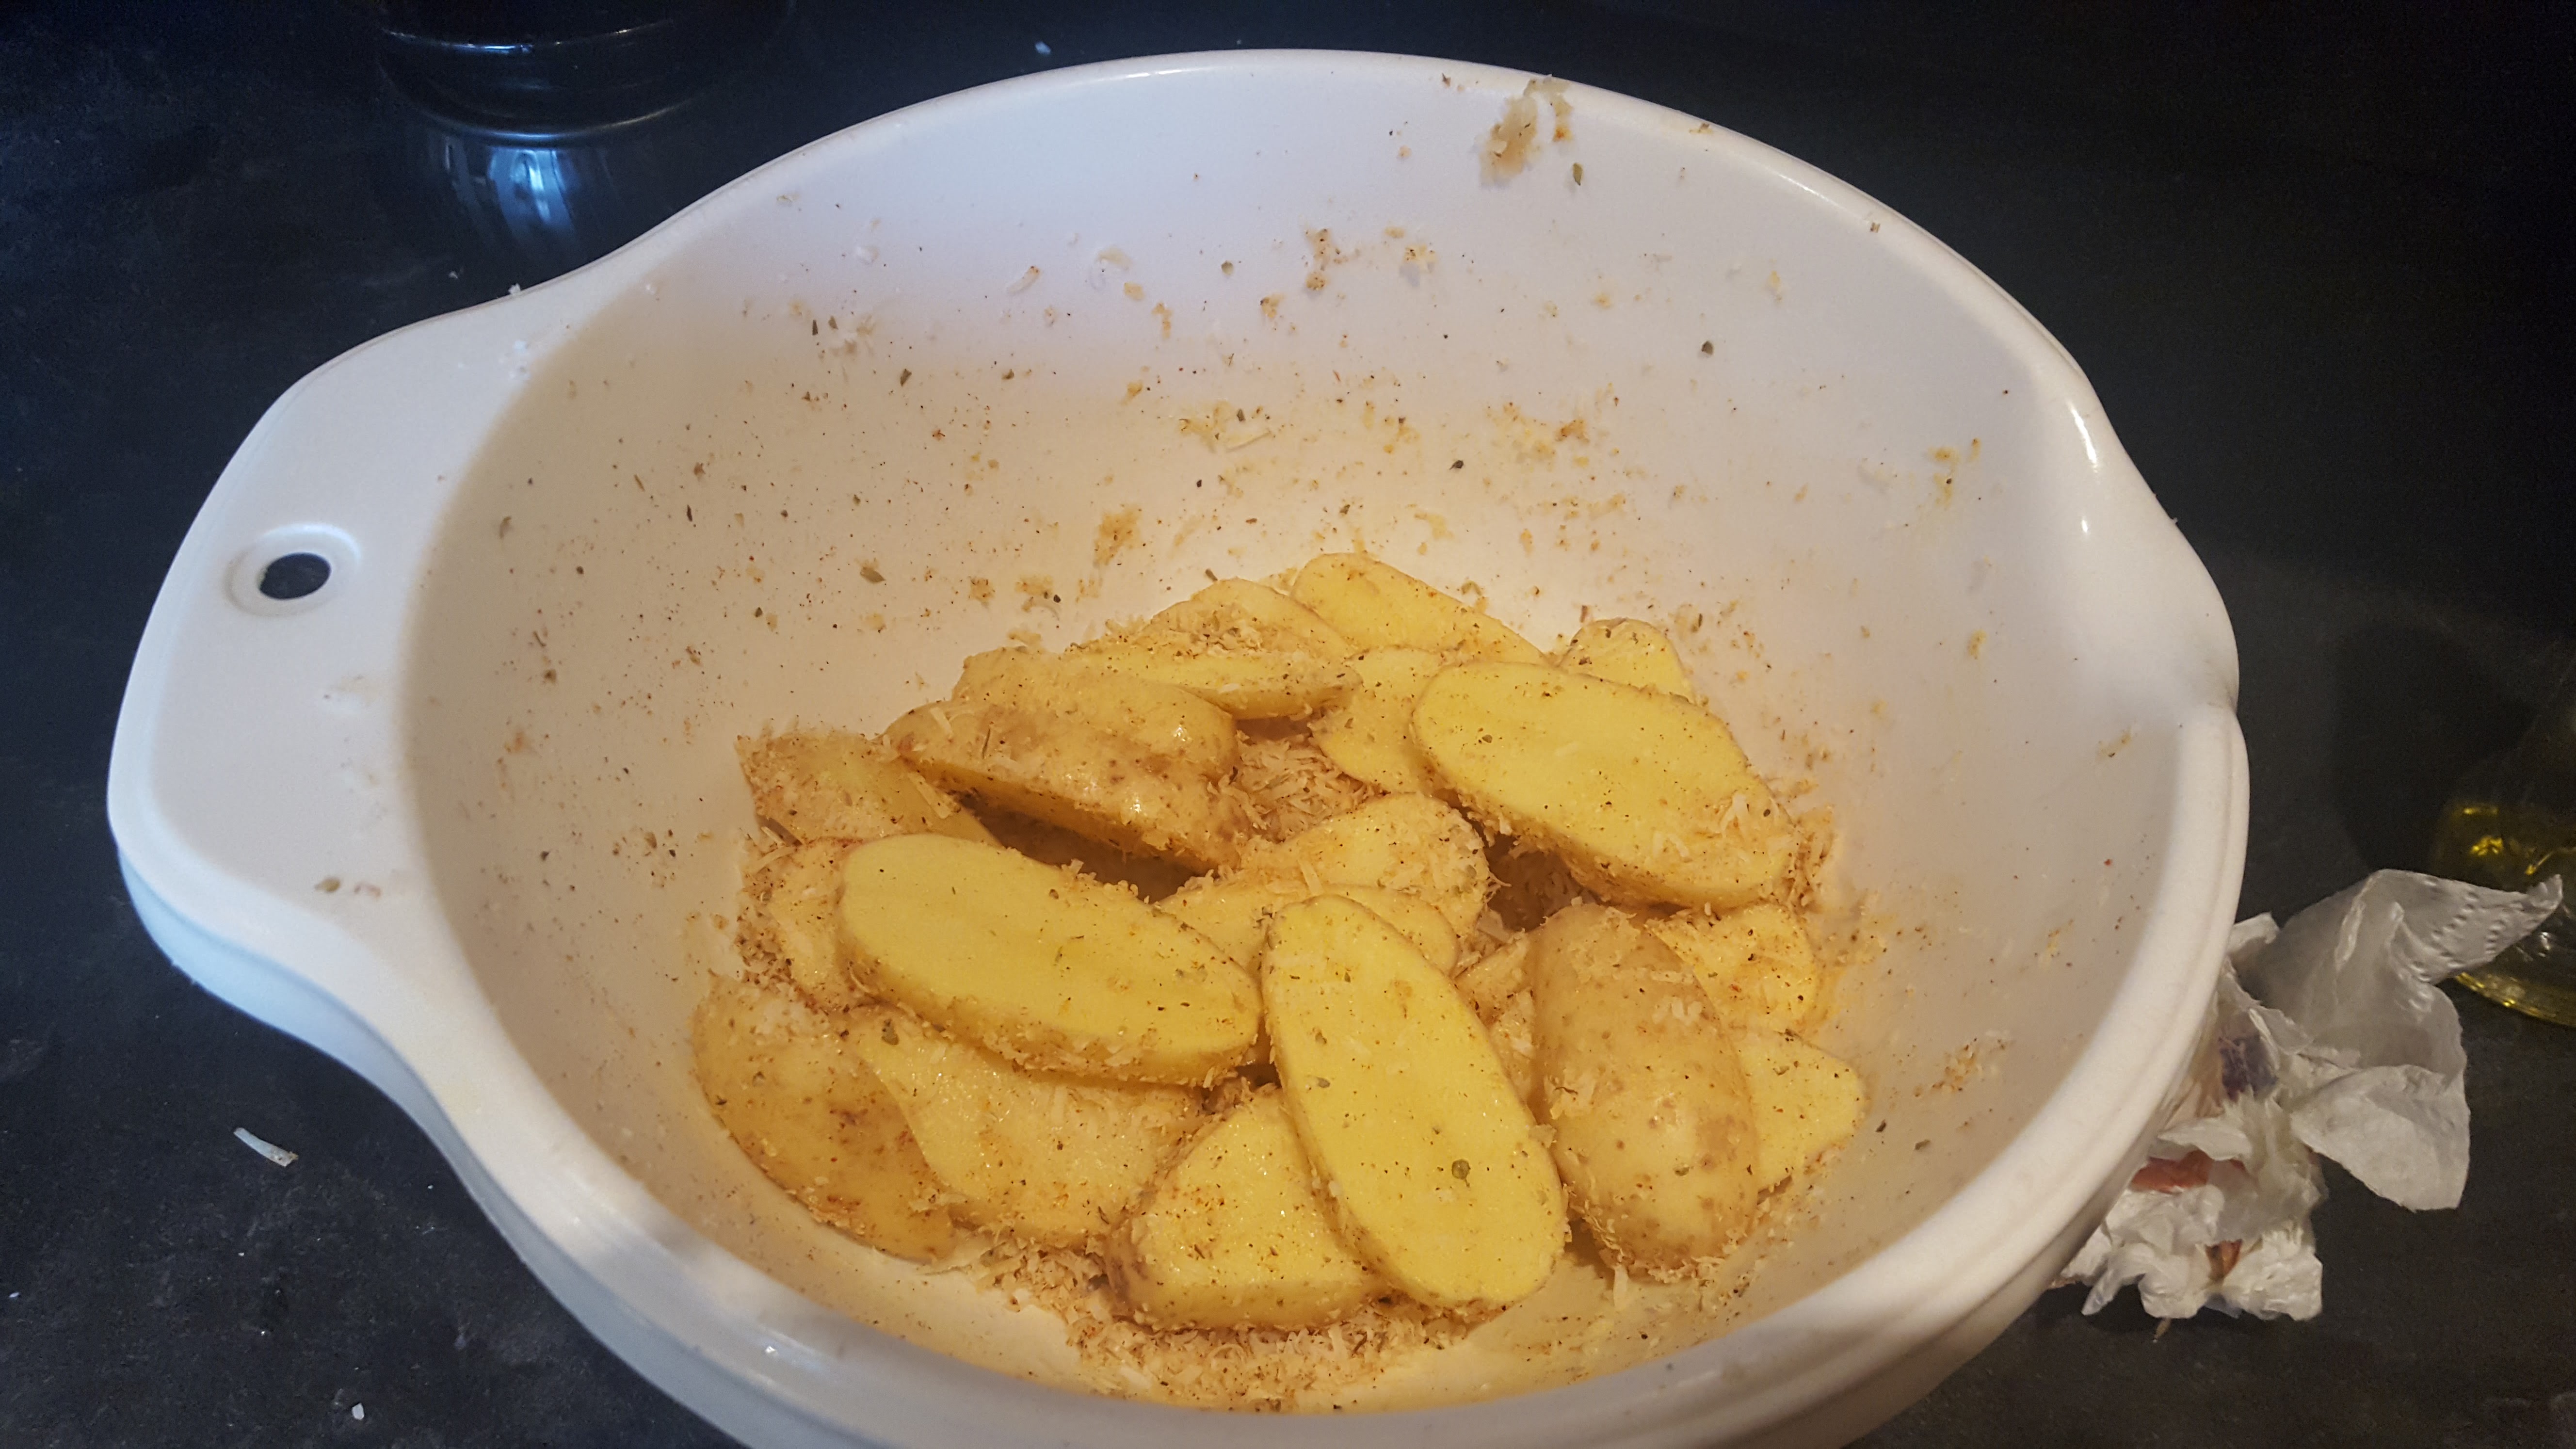
300g charlotte potatoes

50g parmesan cheese – hard

1/2 tsp garlic powder

1/2 tsp oregano dried

1/2 tsp smoked paprika

1/2 tsp salt

1/2 tsp pepper

2 tbsp olive oil


  1. Firstly grated the parmesan into a bowl, add in the oregano, paprika, salt, pepper and garlic powder and mix
  2. Wash and slice the potatoes, I cut approx 1cm thick or just under. Pat dry with kitchen paper and toss in the olive oil to coat.
  3. Put the potatoes into the parmesan mix to thoroughly coat  20171030_123003
  4. Preheat the crisper plate on dynamic crisp setting for 3 minutes, remove and empty the potates onto the plate
  5. Bake on crisper setting for 12 minutes. If adding in the eggs….remove plate with 2 minutes left on clock and crack in the eggs. Cook further. If you like runner eggs, add in at 1.30 mins left.                                            20171030_124326 20171030_230348
  6. Remove and serve…..yummy!

20171030_124257


Apple Strudel on Crisper

images (4)

Oh yes, its that time of year when the apple, cinnamon and warm comfort food come out. Thought I’d try a warming pastry using my little crisper, amazing, this would normally take about 40 minutes in an traditional oven, but on the crisper……just 16 minutes…YES! 16 minutes. Amazing.


Makes 6-8 servings

1 pre rolled puff pastry (all butter)

3-4 apples

1 orange (peel only)

50g walnuts – chopped

50g pine nuts – chopped

1 tsp cinnamon powder

50g sultanas

50ml dark rum

50g light brown sugar

100g breadcrumbs

1 egg and 50ml milk for brushing

Icing sugar for decoration


  1. Soak the sultanas in the rum (preferably overnight or at least 4 hours)
  2. Peel and slice the apple, then mix them with the walnuts, pine nuts, sugar, cinnamon and orange peel, mix well.
  3. Add in the sultanas and breadcrumbs to the apple mixture and mix
  4. Roll out the pastry
  5. Pour the apple mixture onto the pastry then roll up lengthwise. Seal with egg and milk and press with either finger or fork to seal. 20170923_162050
  6. Preheat the Crisper Plate for 3 minutes on Dynamic Crisp setting, remove from oven and gently place the apple roll onto he plate. Brush the roll with Egg wash mixture and make a few small cuts on top of pastry to allow steam out.   20170923_163127_001
  7. Bake on the Crisper setting for about 16 mins, if you feel it is browning too quickly cover the top with some baking sheet.

20170923_164831.jpg


Italian Sausage Dinner on Crisper

20170924_191625

I can’t tell you how this little crisper has changed my cooking methods and even given me quicker cooking times too.  It is used in my Combination oven by Hotpoint, the microwave heats up the crisper plate and maintains the heat to cook and crisp from the bottom while the grill comes on to cook and crisp from the top……genius.

Serves 2

4 Italian Sausages (of course you can use any sausage flavour) – cut into thirds

6-8 charlotte potatoes – cut in half

1 red onion – cut into wedges

1 yellow and red pepper – sliced

1 clove garlic

Seasoning:- Pepper, Salt and rosemary


  1. Preheat crisper plate using dynamic crisp setting for 3 minutes
  2. Put all ingredients onto the plate and season
  3. Cook using the metal round stand for about 10 minutes then remove, shake (ensuring sausages are getting browned all round) and put back in for another 10 minutes.
  4. Remove and serve, if you like your sausages well cooked then put back in for another 5 minutes.
  5. Just keep your eye on them.

Yummy quick dinner, NO pans, NO baking trays….simple cleaning up too!

20170924_183841


One Pot Chicken & Chorizo Paella

20171007_195245

I love one pot meals, easy and hardly no washing up, if your sink looks like this after making a meal, then you need this in your life.                                                                                download (7)

Sometimes I just want something quick and this little Steampot s-l1000that came with my  Hotpoint  Combi oven is great for this, you just put everything in and cook.


Serves 2

150g Long grain and wild rice (you can just use long grain)

2 Chicken Breasts – cubed

300ml Chicken Stock

2 tbsp Smoked paprika

1 tbsp dried chillies

1 tin of garden peas (drained)

1 red pepper – chopped

1 white onion – sliced

Chopped Chorizo (my favourite is Picante)

Pinch of Saffron


  1. Coat Chicken in the paprika
  2. Place everything into the steam pot and place lid on
  3. Cook on the Automatic Rice Setting for 18 minutes. 20171007_195049
  4. Perfectly cooked paella, the rice is amazing.

20171007_195123

20171007_195213


Chocolate Nut Cake

20170917_190334


On deciding what to do next using my crisper plate, I thought I’ve not really tried a cake?? Would it work?? Only 1 way to find out………………………..results were fab, tasty and baked in 10 minutes…….revelation!


Serves 12-16

200g Dark Chocolate – Melted (I used 70% cocoa)

240g butter

45g Walnuts

45g Hazelnuts

45g Almonds

170g golden caster sugar

1 tbsp flour

4 eggs

1 tsp vanilla extract

pinch salt


  1. If you have an Induction hob, melt chocolate in a pan on No. 1, if not melt using a glass bowl over boiling water. Once nearly melted add in butter and melt through, stirring a couple of times. Remove from heat and allow to cool.  20170917_181232
  2. Chop nuts into very small pieces or use a processor and pulse but make sure not to make into crumbs.
  3. Separate egg yolks from egg whites
  4. One at a time add egg yolks to the chocolate and butter mix, stirring continuously.
  5. Then stir in vanilla, sugar, nuts & flour
  6. Whisk the egg whites together until stiff peaks, then gently fold into your chocolate mixture.                                                             20170917_181713
  7. Pour the mixture onto the crisper plate and cook on dynamic crisp setting for 10 minutes.
  8. Remove from oven and allow to cool. Once cooled remove from plate, slice and serve with some lovely whipped cream or ice cream if you prefer. YUMMY!!!!


20170917_190334


Steamed Chinese Chicken & Rice

20170915_185811


I got a Steam Pot with my Hotpoint Combi oven, so I decided to try something different to the normal fish and vegetables. Steam cooking is such a healthy way to cook as it keeps all the nutrients, moisture and structure in the food.


For the Chicken:-

2 Chicken Breasts – season with salt & pepper & crushed spiced red pepper (or chilli)

  1. Place 200ml of water into the steam pot and place the grid in the pot.
  2. Place the chicken breasts onto the grid plate and put on the lid.
  3. Select Steam Cooking and steam for 10 minutes.

Result:- perfect succulent juicy chicken


For the Rice:-

150g of Long grain and wild rice (approx 75g per person)

300ml of Chicken Stock

  1. Place the rice into the steam pot (remove the grid)
  2. Pour the stock into the rice and cover with the lid
  3. Cook on the rice setting for 18 minutes

Result:- perfectly cooked rice


I slightly cheated and bought some ready made Chow mein sauce which I heated up in a pan for a few minutes and poured over chicken and rice…..so yummy!

Serve with a Fortune Cookie! (For a bit of fun!)


Black Pudding, Haggis & Apple pastry Rolls

20170910_134208

Inspired by Scottish Foods and a visit to a food festival recently I decided to try these little rolls myself.  So yummy!


Makes about 10 mini rolls

200g Stornoway Black Pudding

200g Haggis

2 x Granny Smith apples

1 shop bought ready rolled puff pastry (saves so much time)

Tomato or Brown sauce (whichever is your preference)

1 egg for wash

Salt & pepper to taste


  1. Cook the black pudding and haggis as per instructions, about 4 minutes on each side.                                                                                                  20170910_120656
  2. Meanwhile peel off skin from apple and core, chop into small chunks. Caramelise the apple in a fry pan for about 15-20 mins.            20170910_121201
  3. Roll out pastry and cut length ways once
  4. Once haggis and pudding are cooked, place in a bowl and mash up with apple and seasoning                                                                         20170910_121957_001
  5. Spread the pastry with your choice of sauce about 3 tbsp each length then fill the centre of each length with the pudding mixture                                                  20170910_122554
  6. Brush the egg wash around the edges of the pastry then roll up the pastry and seal the edges. Use a knife of fork to seal gently.                                                  20170910_123713
  7. You can now cut into the size you desire                                                                   20170910_124019
  8. I used my magic little Crisper plate to bake these but you can of course bake in a preheat oven of 190 deg for about 20 minutes. Using the crisper, preheat for 2 minutes on dynamic crisp setting. Bake on crisper for 8 minutes.
  9. Serve….yummy!

20170910_134235


Homemade Chips on the Crisper Plate

20170909_192713

Perfectly cooked homemade Rustic Chips in just 12 minutes.

I love this little Crisper Plate from Hotpoint, it cooks most things in a fraction of the time and due to its non stick coating, you don’t need oil therefore its also healthier.

10 charlotte potatoes

1 tsp salt

1 tsp pepper

1 tsp olive oil


  1. Wash and cut in half potatoes with skin on
  2. Place in a bowl or bag and season, mix to coat evenly
  3. Preheat the Crisper Plate on Dynamic Crisp for 2 minutes, place potatoes skin side up onto crisper and cook for 12 minutes on Dynamic Crisp setting.


Focaccia on Crisper Setting

20170909_152642

Saturday lunch in my house today was Focaccia, although it turned out to much more like a pizza….lol…..I couldn’t decide on my toppings so just put it all in. Was absolutely delicious. (although note to self…….less toppings next time!)

I decided to try it using my crisper tray and it didn’t fail me, results were amazing in just 15 mins.


400g White bread flour

300ml warm milk

1 sachet 7g yeast

salt

1 tsp of dried Italian herbs (or you can use a mix of garlic, oregano, thyme, basil and black pepper)

1 tbsp olive oil

Toppings of your choice………I used Mixed Piccolo tomatoes (halved), sliced roasted peppers, sauteed red onion, black olives, fresh basil leaves.

Salt & pepper to season


  1. Mix the yeast with the warm milk and leave for about 10 mins until it starts to froth.
  2. Mix the Flour, salt & herbs in a large mixing bowl
  3. Pour the milk into the flour and mix well. Knead dough for about 10 mins by hand or using a mixer for a few minutes until blended together into a dough.   20170909_132701
  4. Let dough rise for about 1 hour. Use rising setting on Hotpoint oven.       20170909_132721
  5. Preheat crisper plate for 2 minutes on Dynamic Crisp setting.
  6. Once dough has risen, place directly onto crisper plate and spread it out evenly to cover crisper plate.                                                                                                  20170909_144123
  7. Place your toppings into the dough evenly and drizzle with a little oil
  8. Cook on dynamic crisp setting for 15 mins. (Or oven at 220deg for 20 mins)


Fish Puff Parcels

20170814_185826

These little fish puff parcels are just so yummy and a great quick snack.

I was trying out my little cooking gadgets that I got with my Hotpoint oven and I am amazed everytime I do, another quick tasty meal.


1 roll puff pastry

Fresh cod – approx 250g

Scottish Fresh salmon – approx 250g

50g goats cheese

1 rind lemon and 1 rind lime

spring onions – finely chopped

pepper to taste

egg for wash


  1. First using the steam pot, place cod and salmon into pot and steam cook for 6 minutes
  2. Pre heat the crisper plate
  3. Cut the pastry into long rectangles
  4. Place the citrus rind and spring onions into the middle of the pastry, then the cheese then place small pieces of cod and salmon. season with pepper
  5. Using egg wash brush the edges of the pastry and fold the pastry over to make a parcel then seal the edges with a fork.
  6. Finally egg wash the parcels and place a small hole in the middle for steam to escape
  7. Cook on dynamic crisp setting for 8 minutes.
  8. Serve with some balsamic tomatoes….yummy!

20170814_182017


20170814_183336


Slow Cook Peanut Butter Chicken

20170813_232025

O.M.G……if you love peanut butter and chicken you will love this…….even more so when the chicken just tears apart after being slow cooked……..melt in your mouth heaven.


Makes 2 servings

2 chicken breasts

2 tbsp peanut butter (smooth or crunchy…your choice)

1 tsp honey

1 tbsp soy sauce

1 clove garlic, minced

1 tbsp chilli paste

1/2 cup almond milk

1 red pepper – chopped

Salt & pepper to season

handful of coriander finely chopped for garnish

2 tbsp chopped peanuts for garnish


  1. Add peanut butter, honey, soy sauce, garlic, chilli paste and almond milk to an ovenproof dish or slow cooker and whisk until sauce is well combined.
  2. Place seasoned chicken breasts and peppers into dish and cover with the sauce. Cook on Slow Cooker setting for about 7.5 hours.
  3. Remove from oven and shred chicken with 2 forks, then return to the oven for a further 1/2 hour.
  4. Serve with your favourite rice and garnish with coriander and peanuts. YUMMY!

20170813_085535

20170813_184731


Vegetable Quiche

20170812_165229

I love quiche and with this little magic crisper plate of mine I just had to give it a try. Amazing results in just 16 minutes with a lovely crusty bottom. I also got my creativity on and designed little patterns with the vegetables…….I just love playing around with food…lol!

1 x roll of puff pastry  (shop bought)

2 eggs

2 large spoonfuls of ricotta cheese

1 large spoonful of parmesan cheese

1 tsp nutmeg

pinch salt

handful of grated Mozzarella cheese

1 tsp oregano

1 courgette

1 red pepper, green pepper

1 carrot

1 red onion

tsp olive oil


  1. Roll out pastry and place onto preheated crisper plate. (or tart tin)
  2. Mix together, eggs, all cheeses, nutmeg, salt, oregano in a bowl
  3. Slice courgette and carrot lengthways and wide, slice onion finely and peppers into circle shapes.
  4. Spoon cheese mixture into the pastry tin or plate evenly
  5. Sprinkle the red onion evenly over, place the pepper circles into mix.
  6. Roll up your courgettes and carrots and place into the cheese mix to decorate evenly.
  7. Glaze with olive oil on top of vegetables
  8.  Cook on Dynamic Crisp setting for 16 minutes or in an oven at 190 deg for 45 minutes
  9. Serve…..yummy!


20170812_165307


Homemade Burgers with Chilli Bacon Jam

20170811_193243


I picked up a little deli delight recently……..a wee jar of Chilli Bacon Relish from eat 17, intrigued to taste I spooned a tbsp onto some crusty bread….yum……but then a thought popped into my head….oh yes this would be perfect with burgers…..and I was right…..a perfect match, was just heavenly.


Makes 4 burgers

400g Aberdeen Angus Steak mince – or a good quality one.

1 egg

4 sprigs or flat leaf parsley – finely chopped

1 tsp garlic

Salt & cracked black pepper to season/taste

1 tsp dijon mustard (optional)

1 slice bread crumbled to bind


  1. Mix everything together in a bowl and shape into 4 burgers, making sure they are the same thickness.
  2. Refrigerate for about an hour
  3. Now for the best bit…….MY MAGIC CRISPER PLATE…..since I got my new Hotpoint ovens, I haven’t stop using this, it cooks everything in a fraction of the time and no oil is needed making everything healthier. You preheat the plate for about 2-3mins, place the burgers onto the plate and cook for about 12 mins using the crisper setting. You don’t need to turn over, just pop in and cook. It crisps and cooks the underside while cooking from the top……magic!
  4. If you don’t have the crisper plate, to cook burgers I would heat a little oil on a griddle plate or fry pan on the hob to a  medium to high heat and cook for about 6-8 minutes on each side or until cooked through.
  5. Warm up your bread rolls in an oven for a few minutes, place burgers onto the rolls, place a few slices of cheddar, place under the grill until slightly melted then scoop a tsp of the chilli and bacon relish on top……serve. OH YUMMY!


Before:-

20170811_182012

12 minutes later….no oil…no turning:-

20170811_192434

20170811_183259

20170811_192715

20170811_192623


Sweet Potato & Mixed Bean Burgers


Tonight I was using up leftovers, I hate seeing any food go to waste….lol!

With a sweet potato and 1/2 can of mixed beans, I decided on a burgers, my first time at a sweet potato burger too. It was absolutely delicious.

Makes 2

1 sweet potato

1/2 can of mixed beans ( I used five bean salad)

1/2 garlic clove

1 tbsp olive oil

1/2 tsp chilli flakes

1/2 tsp ground smoked paprika

1/2 tsp ground coriander

1/2 tsp salt

black pepper and nutmeg to taste

1 tsp maple syrup

2 tbsp flour to help bind

1 tsp sesame seeds


  1. Cook the sweet potato, you can roast in an oven or boil them, I preferred to steam cook them as it keeps more of the flavour in. I used my fabulous Steam Accessory I got with my new Hotpoint oven. Only took 4 minutes. 20170724_182611
  2. Meanwhile, empty the beans and all the spices into a bowl and mix.  20170724_183501_001
  3. Then add the cooked potato to the bowl – please allow the potato to cool first. Take a masher and mash up.                   20170724_183936
  4. Preheat the oil in a pan to medium heat.
  5. If the mixture is too wet, add in a little flour to help bind. Take handful of mixture and make into a burger like shape.
  6. Top with sesame seeds then cook for about 5 minutes on each.
  7. Serve. Yummy!


Omelette in minutes on Crisperplate


Oh yes……my magic little crisper plate performs again with excellent results.

Thought I would try an omelette this time as it is a 50/50 chance I get the flip right in a pan……lol!

This crisper plate cooks right through without flipping in just 2 minutes…..oh yes just 2 minutes!


Makes 1 large omelette – 2 people or 1 if your hungry…lol!

5 eggs

Cooked smoked ham pieces

Grated cheese

Salt & pepper to taste


  1. Preheat crisper plate on crisp setting for 3 minutes
  2. Whisk together eggs and seasoning, pour onto crisper plate
  3. Add on your fillings, for me this time it was ham and cheese. (spinach is another fav of mine)
  4. Cook on dynamic crisp setting for 2 minutes. Yummy! NO FLIPPING! Perfect omelette.
  5. Serve.


One pan dinner in 12 minutes using Crisperplate

20170705_190151


When I got my new Hotpoint Combi Oven with this Crisper Plate, I didn’t realise just how much I would use it, I call it my magic plate as it cooks everything in a fraction of the time with tasty results.

We all want healthy meals in minutes these days and this little plate does it all. This was one of the first recipes I had seen and used, so tasty and in 12 minutes.


Serves 2 people.

1 large chicken breast – cut into large chunks

6 Salad potatoes of your choice – sliced in half

1 red & green pepper – sliced

1 red onion – wedges

1 garlic clove – sliced

Tomatoes on the vine – I used Piccolo (my fav)

1 tsp olive oil

Salt & pepper


  1. I sprinkled my chicken pieces with some smoked paprika for extra flavour – you can of course use anything. I’ve also used rosemary.
  2. Preheat the crisper plate on the crisper setting for 3 minutes
  3. Place the potatoes, onion, garlic and peppers in a food bag and drizzle a teaspoon of olive oil in with salt & pepper and shake to coat.
  4. Place all ingredients onto the crisper plate and cook for 12 mins on the crisper setting.
  5. Its as easy as that………healthy quick meal in minutes.
  6. The tomatoes turn very juicy while cooking for that length of time which gives you your juice for the meal, if you don’t like it too juicy, add the tomatoes after 6 minutes.


Crisperplate Cheese & Bacon Quiche

20170528_195545

I’m just loving my new oven from Hotpoint, it comes with a crisper plate which you preheat then cook directly on, great for crisping up food but also great for those crispy bottoms…..which means….no soggy bottoms!! lol!

I decided to try a quiche, normally you have to preheat your oven then blind bake your pastry, this little crisper plate eliminated all of that……..and in just 14 mins my quiche was baked to perfection with a crispy bottom. The plate is 12.5″ in diameter, so perfect family size too.


Makes 8 slices.

1 roll approx 250 g puff pastry
2-3 leeks – finely sliced
300 ml double cream
4 eggs
300 g grated Gouda cheese
8 slices of smoked bacon – chopped
Salt & pepper
1. Preheat  your crisper plate (2mins) or your oven to 180 deg.
2. Fry the bacon on crisper plate for 3 mins (no oil required) OR in a fry pan with a little oil until browned.
3. Remove then lightly fry the leeks on the crisper plate with a knob of butter for 4 mins OR in a fry pan until browned slightly. Remove and put to side with bacon.  20170528_184009
4. Beat together the cream and eggs then add in the cheese and mix
5. Lay the pastry over the crisper tray or basking dish if using the oven. (Blind bake pastry for about 10mins if using the oven)

6. Lay in the bacon and leeks evenly then pour in the cheese mixture evenly. Season with salt & pepper.

7. Trim off any ends for an even finish.
8. Cook on Dynamic Crisp setting for 14 mins. OR bake in oven for about 25-30 mins.
9. Serve….Yummy!
20170528_192409

Sticky Ginger Cake

oh Yummy…..yummy……yummy!

First Recipe trying out my new oven. Baked perfectly and tasted even better….lol!


225g Black Treacle

255g Soft Light Brown Sugar

255g Butter

2 eggs, beaten

350g plain flour

2 tsp ground cinnamon

1 tbsp ground ginger

pinch salt

1 tsp bicarbonate of soda

250ml warm milk (I used semi-skimmed)


Method:-

  1. Melt together Treacle, sugar and butter, mixing all the time
  2. Remove from heat and mix in the eggs                                        Add in egg to melted mix
  3. Sieve flour into a large bowl, add the salt, cinnamon and ginger and mix together until combined                                                                               Add in dry ingredients to melted mix
  4. Mix bicarbonate soda to warm milk then slowly add to the mixture and mix well
  5. Line a 10″ square baking tin and grease                   Pour mixture in tin
  6. Pour mixture into tin and bake in the oven. I used my new Cake function, if you don’t have this then bake 140 deg for about 1-1.5hrs. Test with a knife, if it comes out clean its ready.
  7. Serve with some warm custard or ice cream.

So Excited – New Oven!

I was so excited yesterday, got my new Hotpoint oven and Combi microwave fitted. It looks absolutely brilliant, the new black glass design is very stylish and minimalistic looking, perfect in my kitchen. Hotpoint Award winning oven range

You guessed it………I got to work straight away on baking a cake, the oven has automatic recipe settings where you select the type of food and the oven works out the time, temperature and cooking method by sensing……….genius.  My cake came out perfect……check out my recipe here. Sticky Ginger Cake