Curried Butternut Squash, Red Lentils & Spinach

20181128_174039

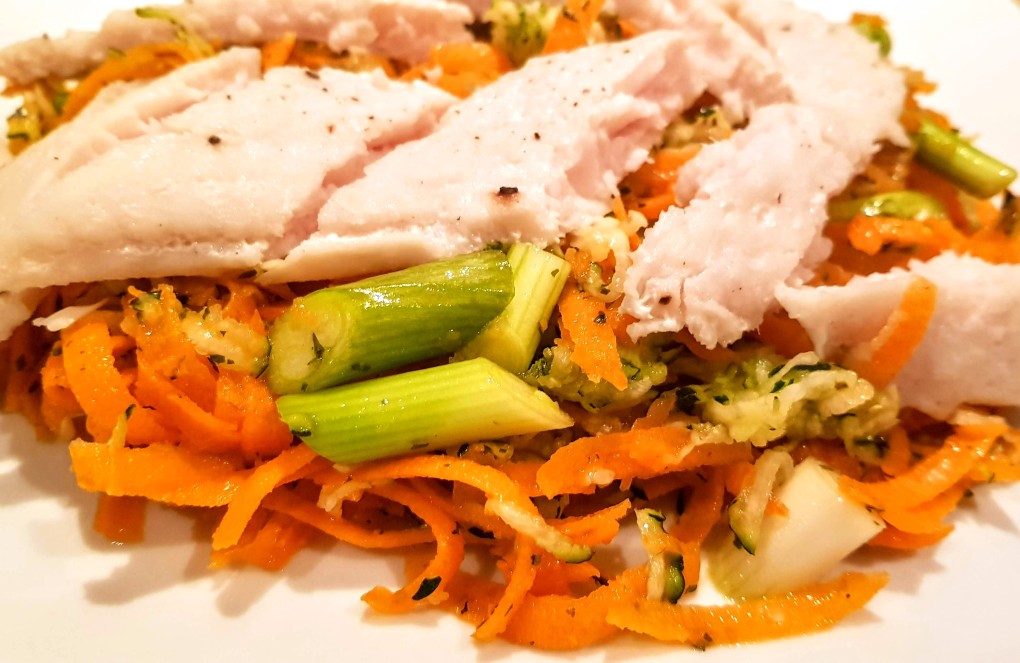
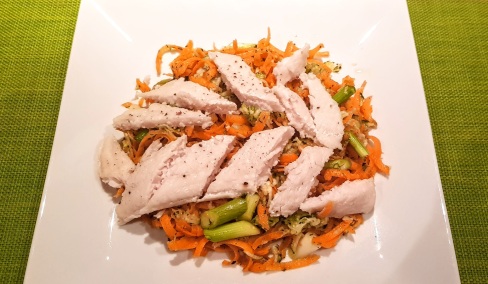
This was so delicious and filling. Best of all very healthy & nutritious.

I think I am starting to enjoy this Detox week….lol!


Makes enough for 4 portions.

1 onion

200ml vegetable stock

2 tsp dried garlic

1 tsp dried chilli

1 tbsp ginger

1 tsp ground cumin

1/2 tsp cinnamon

1 tsp sea salt

1/2 tsp coriander

1 tsp turmeric

1 tbsp olive oil

1 can chopped tomatoes 400g

300-400g butternut squash – peeled and chopped into chunks

200g Red lentils – cooked

200g Spinach


  1. Blend onion, veg stock, garlic, chilli, ginger, tomatoes, cumin, cinnamon, turmeric and coriander into a paste.                                                          20181126_141731
  2. Heat the oil in a pan and cook the paste for about 5-10 mins.
  3. Add in the butternut squash and cook on a medium heat for 20 mins.          20181126_143545
  4. Meanwhile cook the lentils as per pack instructions.
  5. After 20 mins mix in the lentils and spinach to the squash mix and heat for a further 5 minutes.                                                                                  20181126_145023
  6. Remove and serve. Yummy!

20181126_145631


20181128_174031


Stuffed Peppers

20181126_180950

These were delicious and very healthy too. My Hotpoint oven has automatic cooking programmes, so I used the Stuffed Pepper setting and these baked to perfection.


Makes 3-4

2 onions – chopped

6 Sweet Peppers – chopped

1 can chopped tomatoes (400g)

3-4 large peppers – colour to your choosing.

200g kale

1 tsp chilli flakes

1 tbsp olive oil

juice of 1 lemon


  1. Heat oil in a pan
  2. Add all ingredients to the pan except the large peppers and cook for 5 minutes  20181126_154609
  3. Cut the tops off of the large peppers and de-seed. Place in a roasting tin.
  4. Fill the peppers with the mixture and place the tops back on.                          20181126_155213
  5. Select Auto recipes, side dishes then stuffed peppers and bake for approx 35-50 minutes (depends on size of peppers)                                                  20181126_155425
  6. Serve. Yummy!


20181126_180842


Parsnip Fries

20181126_140607

A lovely little quick lunch today. Part of my Detox plan.

I used my crisperplate for these and they only took 6 minutes.


3 Parsnips – cut into fries

1 tsp olive oil

Salt & pepper

1 tsp dried Rosemary

1 tsp dried Thyme


  1. Coat the parsnips with olive oil and season with herbs.
  2. Cook on Crisp setting for 6 minutes.

Quick lunch or quick snack and healthy.


20181126_140605


Banana Omelette

20181126_113543

I am starting my Detox Plan for the week and this was my breakfast, I have to say it was absolutely delicious.


Makes 1

3 eggs – whisked

1 banana – sliced

1 tsp olive oil

1 tsp cinnamon

Salt & pepper to season


  1. Heat the oil in a pan on medium heat
  2. Place the sliced banana in the pan and cook for a couple of mins until soft.      20181126_112352
  3. Pour in the egg mixture and season, cook until coming together, sprinkle with the cinnamon and flip over.
  4. Cook for a further minute and serve.

Yummy!


20181126_113543


Eggy Puff Breakfast Baskets

Another quick yummy breakfast for a sunday morning. I always try to use up leftovers, so having some puff pastry left this is what I decided to do this morning. Again I used my lovely little Crisperplate to cook these. Have I told you how much I love this little bit of Technology?? I do love gadgets that simply work in your favour to help save time in the kitchen. You can get more information here


Makes 6

1 Roll of Puff Pastry

7 eggs (1 for wash)

Grated Cheddar Cheese (I used 1 tbsp per basket)

Salt & pepper

Flavourings as per your choice (I used smoked paprika, but you could use chives, chilli, parsley, the list is endless)


  1. Preheat your Crisperplate for 2 minutes on Crisper setting.
  2. Place a sheet of greaseproof on the plate once heated.
  3. Roll out the pastry and using a round cutter, cut out 6 circles.
  4. Using a smaller circle cutter, gently press into the middle of the circle pastry – dont cut right through. (This makes the outer edge of the basket)
  5. Using a fork, press the centre to prevent it from rising too much. Brush with egg wash.                                                                                                       20181125_101734
  6. Place the pastry onto the crisper plate and cook for 4 minutes.
  7. Remove and gently edge the inner circle using a spoon and press down to make bottom of basket.
  8. Place your cheese into the basket and flatten, crack the egg in, gently using a knife pierce the yolk (this prevents it from popping) and season with your flavourings.
  9. Place back into the Combi Oven and bake for a further 2.5 mins – 3.5 mins, depends how you like your eggs cooked.  Serve. Yummy!


20181125_103223


Puff Pizza

20181117_154838

I know, I’m going to tell you all about my Crisperplate again….lol! Just 7 minutes bake time for these quick and easy puff pastry pizzas, compared to an oven bake (20 mins), the Crisper does it in more than half the time with the same results.

One my own this afternoon I just wanted a quick lunch, so this was perfect. I decided to use up things in my fridge, so I went for this combo, but you can make any combination you like. (times may vary)


Makes 2

1 roll puff pastry (use half if making 2) – cut in half or quarter if making 4

2 tbsp tomato paste

Seasoning

Grated Mozzarella

Mushrooms – I used Chestnut

Little olive oil


  1. Pre heat your crisper plate for 2 minutes
  2. Roll out pastry and with each half, score a 1cm border all the way around.
  3. Score a couple of diagonal lines in the middle (do not go right through) then place onto crisper plate.
  4. Place grated mozzarella into the middle, evenly but not too thick. Season.
  5. Then place the mushrooms in a layer evenly and drizzle a little oil over. Season
  6. Cook on Crisper setting for 7-8 minutes or until your desired brownness level.
  7. Yummy!


10 minute pineapple cake

20181117_130947

Oh I know I keep going on about it, but this Crisperplate is just magical, it has saved me so many minutes in my kitchen and has given me perfect cooking results every time. This time it was a little afternoon treat.


Makes a 12″ cake

150 g Caster Sugar
225g Self Raising Flour
100ml milk
110g butter softened
2 eggs
1 tin of pineapple rounds (drained)
1 tsp vanilla extract
Whipping cream to serve
1. Mix everything together (except pineapple) in a mixer until smooth
2. Preheat Crisper for 2 mins, then pour on batter evenly
3. Place pineapple on top
4. Bake on Crisp setting for 10 minutes.
5. Serve with a large dollop of whipped cream.


Parmesan & Tomato Stars

20181117_145039

OMG! These are so delicious and perfect for the party season. Little bite size pieces of deliciousness.


Makes about 12

8-10 Vittoria Tomatoes
Dried Thyme
150g plain flour
75 g soft butter salted
40 g grated parmesan
1 egg
250g mozzarella
Green pesto
Paprika & poppy seeds

1. Pre heat oven to Fan 160 deg, Line a baking sheet with greaseproof paper.
2. Sift the flour into a mixing bowl, add the butter and parmesan, add in half the whisked egg, slow speed on mixer mix together.
3. Tip onto a non stick surface and bring together with your hands until you have a dough, flatten slightly. Wrap in clingfilm and chill for 30 minutes.
4. Meanwhile, heat crisper plate and cut tomatoes in half, sprinkle with salt & thyme and cook for 2 minutes. Remove and allow to cool slightly.                                                    20181117_143712
5. Take a small 3cm star cutter and cut the mozzarella into thin stars.
6. Remove the dough and roll out and cut with a 5-6cm star cutter, place on baking sheet and bake for about 10-12 mins or until slightly browned.                                      20181117_143313
7. To serve, once stars are cooled, spread a little pesto on star then place mozzarella star, a little more pesto then the tomato half.
8. Yum!  Gorgeous with some prosecco.

20181117_145017

20181117_144956


Mini Christmas No Bake Puddings

20181116_135130

These are perfect for a little bite size treat at Christmas and they look the part too. I first saw this recipe from Madaboutmacarons and just had to try.

I added a little orange liquor for a different flavour and they were delicious. (optional)


Makes about 12

50g raisins
40g dried apricots, finely chopped
40g dates, finely chopped
5 tbsps orange juice (or 2 tbsp orange liquor and 3 tbsp orange juice)
60g desiccated/shredded coconut
60g caster sugar
40g Scottish oats
40g candied orange peel, finely chopped
2 tbsp unsweetened cocoa powder

50g coconut oil – melted if solid

2 tsp Christmas Spice – See below for recipe mix.

(Spice Mix:- 2tbsp ground cinnamon, 2 tbsp ground ginger, 2 tbsp ground all spice, 1 tbsp nutmeg, 1/2 tbsp ground cloves, pinch black pepper) This can be stored in an airtight container.

50g White Chocolate – melted.


  1. Put all dried ingredients into a large mixing bowl, then add in the coconut oil and orange juice and mix to combine.
  2. Taking small amounts roll into a ball and place on greaseproof paper on a baking tray and refrigerate.
  3. Melt 50g of white chocolate in a microwave for about 1.5 mins and drizzle over the puddings. To decorate add a cranberry and edible holly decorations. (or you can cut some icing or marzipan for this)

Yummy!


Steamed Mexican Rice

20181115_180945

You know by now that I love my One Pot meals and this is another that is so easy & so tasty. I decided to use my Steam pot and it cooked perfectly in just 20 minutes. Yummy Spicy flavours and full of nutritious benefits.


Makes 2 large portions or 4 side portions

1 can black beans

1/2 can red kidney beans

1/2 can sweetcorn

1 red onion – finely chopped

150g wholemeal brown long grain rice

300ml veg stock

2 heaped tbsp chopped tomato

1 tsp smoked paprika

1 tsp oregano

1 tsp dried chillies

1 tsp garlic powder

1 tsp cumin

salt to taste


  1. Place everything in the steam pot and mix together. Put lid on.
  2. Place into your combi microwave and select Recipes, Pasta & Rice, Rice then programme 20 minutes.
  3. Perfectly cooked mexican rice dish. You can serve this on its own or with some pitta breads or even in a wrap.


Crisperplate Sweet potato fries

20181113_132521

Oh I do love my little crisper plate from Hotpoint. It just cooks and bakes most things in half the time with the same results as an oven or hob. I wanted something quick for my lunch and needed to use up some veggies, so sweet potato fries it was. Just 10 minutes!


1 sweet potato – cut into fries

1 tsp olive oil

Salt & pepper

1 tsp paprika


  1. Preheat your crisper plate for 2 minutes
  2. Coat the sweet potato fries with oil and season with spices.
  3. Bake for 10 minutes. Yum!

Steamed Wild Rice with Butternut Squash, Chestnuts & Pancetta

20181110_145504

This dish is so yummy with a little kick. Perfect for Christmas dining as you can make as much as you need. I do love 1 pot meals.

Makes about 4 large portions or 8 smaller side portions.

1 x Butternut Squash – cubed

1 tbsp olive oil

1 tsp chilli flakes

100g cooked chestnuts, quartered

½ small pack sage leaves, chopped (or 1 tsp dried)

8 slices of pancetta – chopped

2 shallots, finely chopped

2 garlic cloves, finely chopped

150g basmati & wild rice mix

300ml veg stock

Parmesan to serve

  1. Heat oven to 200 deg.
  2. Toss the squash with 1⁄2 tbsp of oil, chilli flakes and some seasoning on a large roasting tray. Roast for 15 mins, then add the shallots, garlic, chestnuts and nestle the sage and pancetta around the squash so that they touch the baking sheet.
  3. Return to the oven for 10-15 mins until the pancetta and sage are crisp. Remove from the oven and set aside.
  4. In the Steam pot place the Rice with the 300ml stock and steam for 20 mins on rice setting.  Or you can use a pan on the hob, bring to boil the stock , add rice, cover, reduce to a simmer for about 20 minutes or until all the water is absorbed.
  5. Remove steam pot and add the ingredients to rice and mix through to warm through.
  6. Serve with grated parmesan.

20181110_145510


Scottish Snowballs

20181110_182722

These are a traditional little treat in Scotland, you can have them 2 ways:- 1 with marshmallow in the middle or as I’ve baked with jam. Either way they are lovely. These are perfect for Christmas time and they keep for up to 4 days in an air tight container.


Makes about 8-12

50g  unsalted butter

50g caster sugar

pinch of salt

225g self raising flour, sifted

1 egg

1 tbsp milk

Good raspberry jam (I like Mackay’s)

confectioner’s (powdered) sugar (icing sugar)

unsweetened shredded coconut (do not use sweetened)


  1. Pre heat oven to 200 deg
  2. Cream the butter and sugar with the pinch of salt. Add the egg with the flour and mix well.
  3. Stir in the milk and rest of flour to make a stiff dough
  4. Divide into 16 equal pieces and roll into balls. Place on parchment or silicone sheet lined cookie trays, leaving a bit of space for them to grow. Press down a little. If you’d like smaller snowballs, divide into 24 pieces.
  5. Bake for 8-10 minutes until very lightly golden brown.
  6. Remove and cool
  7. Sandwich each cookie together with raspberry jam (not too much)
  8. Leave for half an hour for jam to set.
  9. Combine about 1-2 cups of icing sugar with enough water or milk to make a runny glaze in which to dip the snowballs. Have a bowl of shredded coconut ready. Dip the snowballs in the glaze and allow extra glaze to drip off.
  10. Next dip in the coconut and ensure fully covered, set aside.
  11. Great holiday recipe as these will last 4-5 days.

Orange & Ginger Shortbreads (with stainglass)

20181113_184626

I have been dying to try this stain glass design for a while, so why not just in time for Christmas. Very simple to create too.


Makes about 16 biscuits

175g Plain Flour

2 tsps ginger, ground

Zest 2 oranges

100g butter, chunks

50g golden caster sugar

1-2 tbsp milk

1 tbsp oil for greaseproof paper. (to prevent sweets from sticking)


  1. Heat oven to 160C fan. Grease 2 large non-stick baking sheets with oil.
  2. Whizz the flour, ginger, zest and butter with 1⁄2 tsp salt to fine crumbs in a food processor. Pulse in the sugar and milk, then turn out and knead briefly on a floured surface until smooth. Wrap in cling film, then chill for about 30 mins.
  3. Flour the work surface again, then roll out the dough to the thickness of a £1 coin. Use cutters to shape. (see below for centres)
  4. Bake for 15-20 mins until golden brown
  5. Transfer to a rack to cool.

Decorate any way you like.


For Glass like Baubles:-

12 fruit flavoured boiled sweets

Place 1 sweet or ½ of sweet into the centre of the biscuits, sweets should be level with the biscuit once melted. (Should melt in the oven ok.) Allow to fully cool and harden before transferring to a rack. – Sprinkle icing if you wish or decorate.

20181113_153152

Just be aware that if eating these the candy is very hard. (Watch your teeth)

If using for decoration on your tree, pierce a hole at the top of the cookies and thread some ribbon through and tie.


Chocolate & Orange Biscuits

20181113_160307

Keen to get a good biscuit, you can’t go wrong with these flavours. So yummy!


Makes about 15 biscuits

125g Butter – unsalted

175g Golden Caster Sugar

225g Plain Flour

2 tsp baking powder

75g Chocolate 70% – chopped small

Zest of 2 oranges

1-2 tbsp orange juice


  1. Start by beating the butter and sugar together in mixer until they’re combined.
  2. Then sift the flour and baking powder straight into the mixture. Add the rest of the ingredients, and work the mixture together until you get a fairly stiff paste.
  3. Now flour a working surface and a rolling pin and roll the paste out to about 1cm thick. Then, using a cutter (5cm), cut out the biscuits and place them on the baking sheets and bake one sheet at a time near the centre of the oven. Bake them for about 20 minutes, or until the biscuits are a nice golden colour.
  4. Take them out of the oven and leave them to cool on the baking sheets for 5 minutes, then transfer to a wire cooling tray, and finally sprinkle with a dusting of golden caster sugar or icing sugar or decorate – whichever.

Christmas theme Swiss Roll


This is the first time I have tried a swiss roll ad thought I would challenge myself. Christmas is coming so I wanted to do something different, so why not play with stripes?

I have to admit I found this rather easy to do.


Makes 1 roll (avg 10 slices)

2 eggs,    3 egg yolks

100 grams caster sugar

1 teaspoon vanilla extract

30 grams sifted self raising flour

3 egg whites

1 tablespoon sugar

Colouring. Green & Red.

Whipping cream with 1 tsp vanilla ext.

Raspberry jam


  1. Heat the oven to 200C on fan.
  2. Line a sheet pan. Set aside.
  3. In a mixing bowl add the 2 eggs, 3 egg yolks and caster sugar. With the paddle attachment on, beat on medium to high speed around 5 minutes until pale in colour and thickened. Add the vanilla extract and beat few more seconds.
  4. Sift the flour over the egg yolks mixture and with a spatula gently fold it in.
  5. In a separate grease-free bowl, add the 2 egg whites and 1 tablespoon of sugar. With a whisk, whip until firm peaks form.
  6. With the spatula, fold the whipped egg whites into the egg yolks mixture.
  7. Pour the cake batter into 3 separate bowls and add the colouring. DON’T OVERMIX. Put into piping bags and pipe each colour by one onto backing sheet. Bake for about 10 mins or until springy.
  8. As soon as you remove the cake from the oven turn onto a sheet of greaseproof paper. Remove the parchment paper from the cake slowly. Then turn over onto a clean Tea towel and roll up. Allow to cool completely.          20181111_1659491
  9. Whisk the Whipped cream and vanilla in a bowl until thick.
  10. Spread the rasperberry jam onto the cake and then the cream and roll. Roll up with cling film and chill for 30 mins -1 hour – makes it easier to cut.

Carrot, Courgette & Ginger Seabass Salad.

20181107_181608

Oh yummy! Nice little healthy quick mid week meal.

I do love a good gadgets, and I used my Kitchen Aid Mixer with Grater attachment and also my Steam Pot for steam cooking in my microwave combi oven.


Serves 2

250g SeaBass

1 Carrot

1 Courgette

6 Spring onions, sliced diagonally

small piece of ginger, grated

Small bunch or fresh coriander, chopped

1 juice of Lime

3 tbsp olive oil

Salt & pepper to taste


  1. Season the seabass and place into the steampot and cook on Sensor steam for 8 minutes.
  2. Meanwhile, place the attachment onto your mixer (if you have a spiralizer that would work too) and shred the carrot & courgette into a bowl.
  3. Slice the spring onions diagonally into small pieces and place into bowl with the grated ginger, coriander, lime juice and 3tbsp olive oil. Mix together.
  4. Slice the sea bass and allow to cool then mix through the vegetable mix. Serve.

20181107_181600