
This was my first go at coloured pasta, I’ve seen loads of posts on instagram showing beautiful colour pasta shapes and needed to give it a go. It was a lot easier that I originally thought, although my filling shape needs to be improved. lol! Practise makes perfect as they say….lol.
I use my Kitchen Aid pasta roller for this but any handheld pasta roller or even a rolling pin will do.
The general rule of thumb when making pasta is:-
100g ‘OO’ Flour, 1 egg, pinch salt. (makes enough for 2 small portions)
If you need more simply double everything ie: 200g flour, 2 eggs etc, 400g flour, 4 eggs etc.
For the basic past dough:-
100g ‘OO’ Flour
1 egg
Pinch of salt
For the Colouring:-
1 tsp Beetroot Powder (Red)
1 tsp Blue Pea Powder (Blue/Purple)
1 tsp Spinach Powder (Green)
You can of course use any colour you wish.
Extras:-
Semolina
Baking Sheet
Pastry Cutter
Filling:-
60g Ricotta
60g Marscapone
1 tsp nutmeg
handful chopped Dill or Spinach
40g Parmesan grated
- Make a well in the middle of your flour on a flat surface.
- Crack the egg into a jug, add the tsp of colouring and salt and whisk until blended, pour into the well of flour.


- Gently with a fork mix a little of the flour into the egg, once it starts to come together use your hands to bring together into a dough. If it is too dry just dip your fingers into water and add. You want the dough to be like a child’s play dough type texture.

- Once in a ball wrap in cling film and leave to rest for 30 minutes.


- Using the pasta roller, roll through on 1 twice, then fold the edges in, this is to try and keep the pasta sheet shape, then roll through on 1 again twice then 2,3,4,5 twice then a final roll on 6 then 7 just once. Sprinkle some semolina on a baking sheet and lay pasta down, this is to try and stop it from drying and sticking too much.


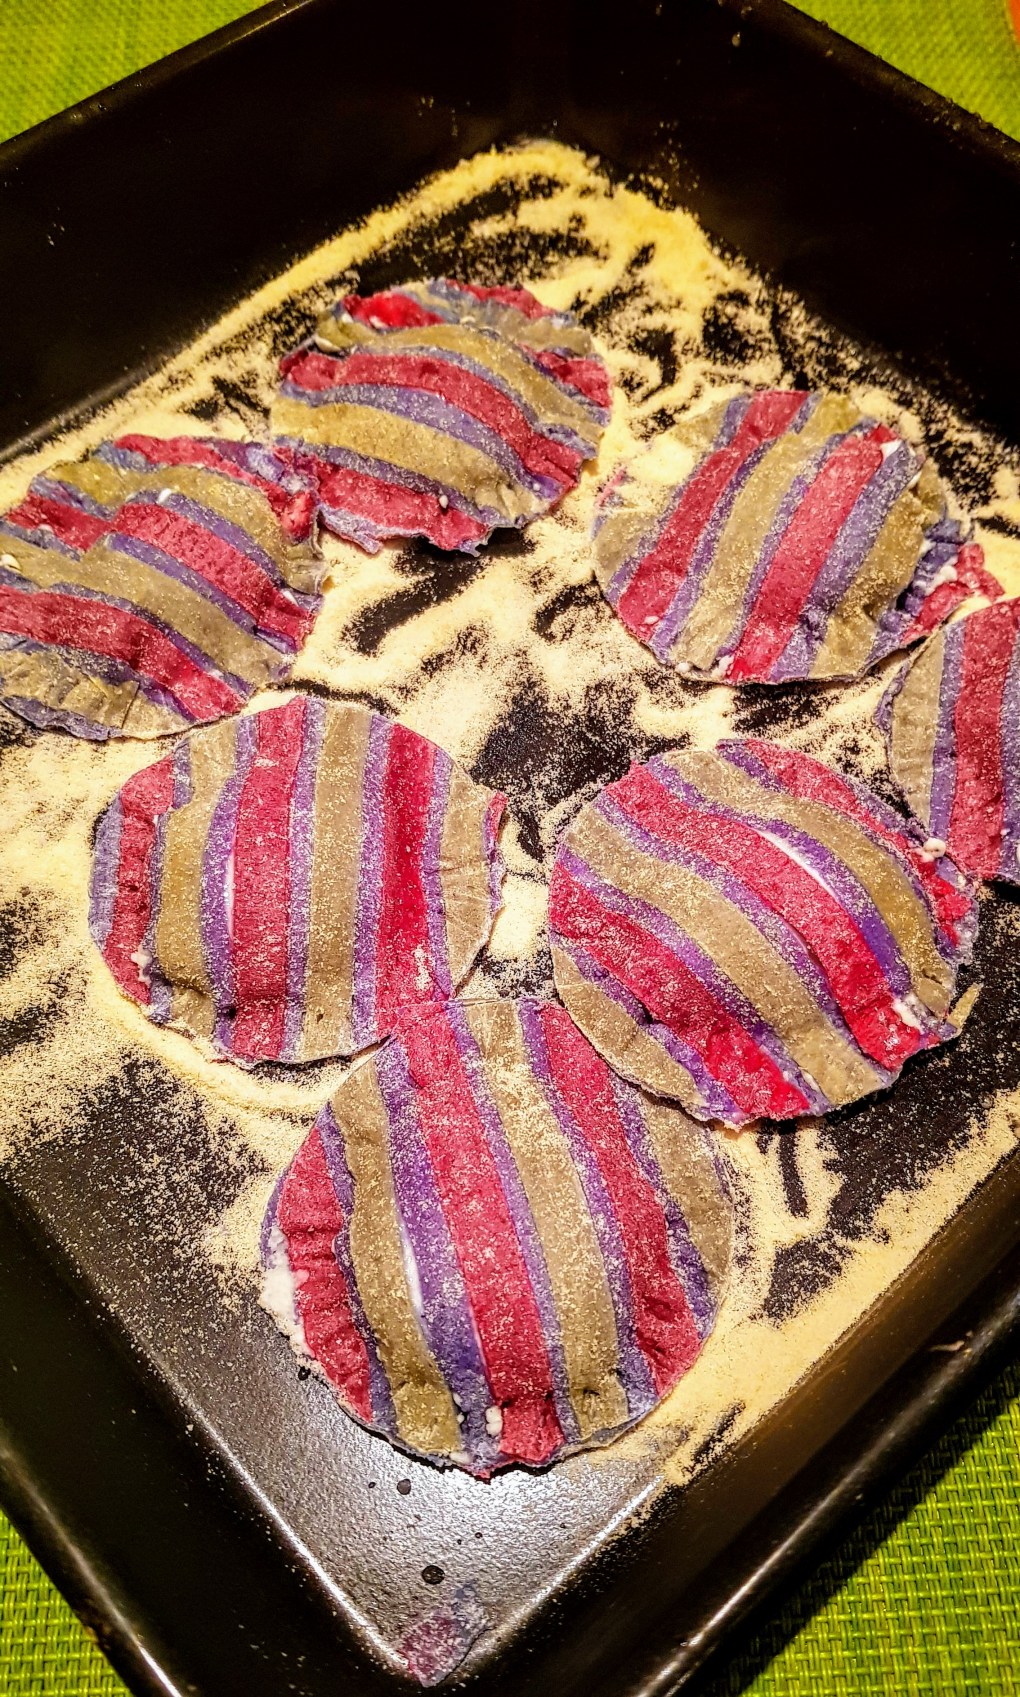
- Once all your sheets are ready, change cutter to tagliatelle. Choosing just 2 of the colours, pass through the cutter, then coat the strips in semolina to stop sticking together.


- Take each strip of colour and lay onto the final colour past sheet and press down, then put through the pasta roller to combine on setting 4, then 6 then 7 just once.


- Now you can decide on your shape, cut using pasta cutter.
- If filling, turn upside down 1 sheet and add dollops of your filling leaving enough space between, using a little water to edge the pasta (this allows the seal). Take the other pasta sheet and place on top and press around filling to seal ensuring no air bubbles. Freeze the filled pasta and then cook from frozen when required. (By freezing you ensure that the filling doesn’t leak when cooking)


I had some tagliatelle left over, so I just cooked in a little salt water for 2 minutes using my steam pot on my pasta setting, drained and mixed with the left over cheese mixture (quick little snack)


If you have any excess, allow to completely dry out by hanging (48 hours) then just bag or jar (ensuring covered with semolina to stop sticking).
Enjoy.

You must be logged in to post a comment.