I love Koftas, usually with Lamb but I decided to try chickpeas instead in my bid to eat more healthier and plant based. These were just as good if not better in my eyes, delicious and nutritious and full of texture. Really simple to make too.
Place chickpeas, carrot, kofta seasoning and coriander in a bowl and mix together using your hands to mash the chickpeas together. Shape into 4 -6 into a rugby ball shape roughly of equal quantities.
Heat a little oil in a fry pan and cook for a few minutes each side until browned, place koftas onto an oven-proof tray, drizzle each one with a tablespoon of the pomegranate molasses an bake in an oven 200 deg for about 5 minutes.
Meanwhile, mix the cacik paste with the yoghurt and chopped cucumber, set aside.
To serve, place koftas on a toasted flatbread or serve with a side salad and drizzle the yoghurt dressing over.
This little dish was super tasty and nutritious too, Sweet Potatoes are an excellent source of vitamins A and C, and a good source of fiber, vitamin B-6 and potassium. And like all vegetables, they’re relatively low in calories — one-half of a large sweet potato has just 81 calories.
Peanuts, they’re an excellent plant-based source of protein and high in various vitamins, minerals, and plant compounds. They can be useful as a part of a weight loss diet and may reduce your risk of both heart disease.
INGREDIENTS
500g Sweet Potato – Peeled and sliced
3 Large Tbsps of Crunchy Peanut Butter
2 Tbsps Sunflower Oil
2 Clove Garlic, chopped or crushed
2 Chillies, chopped finely
150ml Double Cream
1 Lime & Lime Zest
Salt & Pepper
METHOD
Mix the sweet potato, chillies, garlic and 1 tbsp of oil in a large bowl until coated
Pour in the double cream and season with salt & pepper, mix well.
Beat together the peanut butter and 1 tbsp oil with the lime juice and zest
In an oven proof dish, lay 1 layer of the sweet potato mix, then dollop on top evenly the peanut butter mix.
Finish with a final layer of the sweet potato mix and pour over the remaining cream, season to taste.
Bake covered with foil in a fan oven at 190 deg for 20 minutes, remove foil and continue to bake for about 30 minutes until nice and browned on top.
Oh you are going to love this one! A cheeky little casserole dish that is full of flavour and great for the whole family. This is definitely a dish for my comfort food list.
Serves 4
500g Minced Scottish beef
1 Yellow onion, finely chopped
1 Tsp minced garlic
1/2 Tsp Cayenne pepper
Salt & Black pepper
2 Tsp flour
100ml Beef stock
150g Grated cheese
Handful of Frozen peas
4 Slices of smoked bacon, cut into bite size pieces
10-12 Small Hash Brown Waffles cut in half or quartered
Preheat oven to 210 deg.
In a fry pan add a little oil and fry the onions & bacon with the garlic, add the beef, season with salt & pepper and cook through until browned, add in the cayenne pepper and flour and stir then pour in the beef stock, bring to the boil and simmer for 2 minutes.
Fold in the peas and half of the grated cheese, transfer to an oven proof dish then top with the remaining cheese and hash browns. Bake in the oven for about 25-30 minutes until golden brown. Enjoy!
Simple Meal that combines 2 family favourites, Pizza & Cheeseburgers! What is not to love about this one? Simple & quick to make, full of flavours and textures and fully satisfying & filling. Great for a quick family midweek meal or a weekend dish.
Serves 4
500g Minced Scottish beef
2 Tsp Tomato ketchup
1 Tsp Worcestershire sauce
2 Tsp Whole grain mustard
Salt & Black pepper
4 Flatbreads (pita breads)
6 Tbsp of tomato passata or pizza Sauce
Chopped small red onion
1 Pepper, chopped into bite size pieces
Small Handful of cherry or grape tomatoes, halved
80-100g Cheddar cheese, grated
Preheat your oven to 230 deg.
Heat a little oil in a fry pan and fry the minced beef until browned and cook through. Add to the the pan the ketchup, Worcestershire sauce, mustard and pepper, mix.
Place the Flatbreads (Pitas) onto a baking tray and top each bread with about 1 tbsp of passata sauce leaving approx 1/2 inch border then top with the minced beef, onion, pepper, grated cheese and tomatoes, season then bake in the oven for about 8-10 minutes until crisp. Enjoy!
This is a super simple dish that’s full of flavour. Great for the whole family, simply make the meatballs and the carrot slaw and let the family dive in and fill their pits as much as they like. Yum!
Serves 4
500g Minced Scottish Beef
2 Tsp Paprika
1 Tsp Ground Coriander
2 Tsp Harissa Paste (I use the Rose Harissa)
150g Natural Greek Yogurt
Salt & Pepper to taste
2-3 Large carrots – peeled and cut into thin strips or grated
1/2 Tsp fresh ginger
Handful Fresh coriander, chopped
4 Pitas, halved
In a bowl combine the minced beef, paprika, ground coriander, salt & pepper and roll into small 1″ balls. Heat a little oil in a fry pan and cook the meatballs until browned and cooked through, about 8-10 minutes.
Combine the yogurt and harissa in a bowl and set aside
Heat a little oil in a separate pan, fry on medium heat the carrots and ginger until carrots are slightly crispy, may need to do this in batches. Once crispy add in the chopped fresh coriander and mix
Warm up your pitas then stuff them with the meatballs then the harissa sauce and top with the carrot slaw. Enjoy!
My lovely neighbour handed over some more Neeps (Turnips) the other day, this time instead of the normal Haggis, Neeps ‘n’ Tatties, I decided to make a cake! Well after all you get carrot cake & courgette cakes so why not a Neep cake? This is one of those recipes that doesn’t sound inviting but once you try it, it’s delicious and not what you were expecting. The little bit of Nutmeg through gives a lovely soft spice and the brown butter frosting giving that nutty sweetness. You have to give this a try if you have leftover Neeps (Turnips).
Makes 12 Cakes
250g Plain Flour
150g Grated Raw Neep (Turnip)
3 Eggs
175g Light Brown Sugar
2 Tsp Vanilla Extract
100 ml Milk
2 Tsp Baking Powder
1/2 Tsp Baking Soda
2 Tsp Ground Nutmeg
1/2 Tsp Salt
For the Brown Butter Frosting
400g Icing Sugar
2 Tsp Vanilla Extract
3 Tbsp Milk
115g Unsalted Butter at room temperature
Handful of chopped walnuts or hazelnuts to top
Preheat oven to 180 deg & line a 9 x 9 inch Baking tin with paper and grease.
In a bowl beat the eggs, sugar, extract & milk until combined.
Sift in the flour and add the baking powder & baking soda with salt & the nutmeg, stir to combine and pour into the lined tin, bake for about 25-30 minutes or until a knife comes out clean. Remove and allow to cool in the tin for 10 mins then remove the paper and place on a wire rack to completely cool.
Meanwhile to make the frosting, place icing sugar, extract & milk into a bowl and set aside.
In a pan on low heat add the butter and gently melt, once melted turn up heat slightly to a medium heat (do not boil) then stir until the butter becomes brown in colour & smells nutty (this will take about 8-10 mins). Remove from heat immediately, allow to cool slightly and add to the icing sugar mix, whip up until you have a smooth thick frosting.
Slice your cake into 12 squares and place frosting into a piping bag, pipe frosting on top of each slice and sprinkle with some walnuts or hazelnuts. Serve with a lovely cuppa! Enjoy.
Brown ButterNeep Cake with Brown Butter FrostingNeep Cake with Brown Butter FrostingNeep Cake with Brown Butter FrostingNeep Cake with Brown Butter Frosting
My lovely neighbour came across with some fresh Kale the other day from her garden, so I decided to give a Chicken & Kale Lasagne a go, and this was delicious, full of flavour, nutritious and filling all at the same time. Another great wee recipe that the family can share.
Kale contains fiber, antioxidants, calcium, vitamins C and K, iron, and a wide range of other nutrients that can help prevent various health problems. Antioxidants help the body remove unwanted toxins that result from natural processes and environmental pressures. It’s low in calories, low in fat, high on protein and potassium too, so a good all rounder vegetable to add to you diet.
Recipe makes 2 portions
For the Filling:-
2 Chicken Breasts
1 Bunch of kale
1 Carrot, grated
1 Leek, thinly sliced
1 Clove garlic, crushed
1/4 Tsp Nutmeg
1/2 Tsp Smoked Paprika
200g Chicken Stock
Salt & Pepper to season
Lasagne Sheets
For the Sauce (or you can use a Bechamel instead if you prefer):-
300ml Creme Fraiche
150g Grated Cheese (of your choice, I used a mild cheddar) plus 50g optional for topping
Season chicken breasts and place in a pan with the chicken stock, bring to the boil then simmer for about 45 mins – 1 hour, then shred with 2 forks. Most of the stock should have evaporated.
Pre-heat your oven to 180 deg.
Blanch the kale in boiling water for about 1 minute, drain and slice into fine pieces.
Add to the pan the leeks, kale & carrot along with seasoning, garlic & nutmeg, stir through until mixed and warmed, a few minutes.
Meanwhile, in a separate pan mix on a low heat the creme fraiche & cheese to make a smooth sauce. Do not allow to boil or the creme fraiche will curdle.
In an oven proof dish, layer your lasagne, chicken filling first then lasagne sheets, then more filling, then lasagne sheets. Pour over your sauce mix evenly and finish with extra cheese and little sprinkle of smoked paprika. Bake in an oven for 45 minutes or until topping is browned and bubbling.
Who wants a pudding for breakfast? Oh yes….this little 2 minute pudding is perfect, nutritious, filling, tasty & quick to make, whats not to love!
I love my porridge in the morning as you may know, especially in the winter months. I love experimenting with different techniques & flavours and I just had to try this, the great thing is that you can add any flavour you like, making it your own.
Oats are gluten free and whole oats are rich in antioxidants making them great for you. A great source of fibre & good carbs too.
Makes 1 Cup
40g Porridge Oats
1 Medium Egg
120ml Yoghurt (whichever flavour you prefer, I used Raspberry)
1 Tbsp of raisins & dried Goji berries
1/2 Tsp Vanilla essence (or you could use cinnamon or any flavouring of your choice)
1 Tbsp of Chopped walnuts & seeds for topping (or you could use banana or blueberries etc)
1 Tbsp Yoghurt for topping
Place oats, egg, 120ml yoghurt, raisins & berries along with essence into a mug and mix through until combined.
Cook at 800w power in a microwave for 2 minutes, ensuring it doesn’t spill over, remove, loosen the edges with a spatula or knife and tip onto a plate
Finish off with some yoghurt, nuts & seeds and enjoy!
The Noble Haggis is a traditional Scottish dish, it is positively celebrated especially on 25th January each year, the birthday of Robert (Robbie/Rabbie) Burns whose 18th century poem ‘Address to a Haggis’ was instrumental in ensuring the Haggis’s place in the nations hearts.
Haggis is made from the meat & insides of sheep consisting of the heart, liver and lungs then combined with onions, oatmeal, suet, seasoning & spices. The mix is then stuffed into the sheep’s lining of the stomach and boiled. Haggis, Neeps & Tatties is the most common dish but I have been experimenting with what more we can do with this traditional food. This dish is definitely now on my Top list of comfort dishes, so filling, so satisfying & full of flavour.
Serves 2 large/ 4 small portions
450g Haggis, chopped into bite size pieces
300ml Creme Fraiche
150g Tangy White Cheese, grated
1 Leek, sliced
150g Cooked Beetroot (not pickled) – (dry with kitchen paper and using a kitchen glove, grate it coarsely)
Lasagne Pasta Sheets
Cracked Black/ Rainbow Pepper
Pre-heat the oven to 180 deg c.
Combine the creme fraiche and half the cheese, warm through in a pan on low heat to form a smooth sauce (do not boil as it will cause the creme fraiche to curdle), set aside.
Put a little spray oil in a pan and gently fry the leeks until softened. Add in the haggis and beetroot, mix through until combined and warmed through.
Pile half the haggis mixture into an ovenproof dish, arrange the pasta sheets on top, then the remaining haggis onto the pasta sheets and then another layer of pasta sheets. Cover the top with the white sauce, season with pepper and sprinkle over the remaining cheese. Bake for about 35 minutes until bubbling and golden. Remove & Enjoy.
Oh Yum! Do you have a sweet tooth? Do you love Chocolate? Do you love Salted Caramel? Well, you will love these delicious biscuit creams. Perfect with a warm cuppa in the morning, afternoon or evening!
I do love experimenting, I was initially going to try espresso chocolate but decided that might be too many flavours and I’m glad I didn’t as these turned out so delicious. Want the recipe? Here you go. If you try, let me know what you think.
Makes about 8 Biscuits
For the biscuits:-
120g Plain flour
35g Cocoa Powder
35g Powdered Sugar
100g Butter
1 Tsp Vanilla Extract
For the Cream Filling:-
75g Butter
65g Powdered Sugar
1 Tsp Salted Caramel Flavouring
1 Tsp Pink Pitaya Powder
Preheat your oven to 175 deg c. Line a baking tray with baking sheet.
In a mixer, combine all the biscuit ingredients until it starts to come together as a dough (couple of minutes)
Roll out the dough to about 5 mm thick and using a cookie cutter, cut out circles until you’ve used up all the dough. Lay onto the baking sheet and place in the fridge for about 30 minutes.
Meanwhile, to make the cream, place butter into the stand mixer and on medium speed whip for about 1-2 minutes. Then add in the sugar, flavouring and pink Pitaya powder, mix on low speed until all combined. You will need to scrape the sides of the bowl to ensure mixture is all incorporated. Decant the cream mixture into a piping bag.
Bake the biscuits in the oven for 15 minutes, remove and allow to cool on a wire rack. Once cooled, pipe the cream filling onto half of the biscuits and top with the remaining half. Enjoy!
I used my skull & bat embossed rolling pins from https://pastrymade.com/ , they have so many designs, you’ll be stuck for choice.
This is definitely one for my Top 10 home comfort food dishes.
Love it or loathe it, haggis is firmly established as Scotland’s national dish – to the extent that it has become an indelible part of the nation’s cultural identity, along with whisky, bagpipes and shortbread.
The savoury meat pudding – consisting of sheep’s offal (most commonly lungs) mixed with suet, oatmeal, onion and spices, then boiled in a bag.
“Gie her a Haggis” – Robert Burns helped popularise haggis in Scotland
The Burns connection goes back to his 1786 poem ‘Address to a Haggis’, in which he immortalised the dish as the “great chieftain o the puddin’-race”.
In the 232 years since Burns committed his love of haggis to poetry, the dish has become a symbol of Scottishness, and is traditionally served with neeps and tatties (turnip & mashed potato) – along with a dram of Scotch of course.
My local butcher Forbes Raeburn in Huntly makes amazing Haggis & inspired by a chef in Dumfries from the Caven’s Arms, I just had to give this dish a try. Their Haggis, Leek & Cheese Melt is so tasty. I am now curious as to what other flavours compliment Haggis so watch this space.
Serves 4
600g Haggis
4 Leeks, sliced
4-5 Large Floury Potatoes, peeled and chopped into chunks. I used Scotty Brand (you could also use King Edward or Maris Piper)
100g Grated Cheese, I use Cambus O’May Cheese as it has a creamy texture and strong flavour, perfect for Haggis (any good Cheddar would also work)
3 Tbsp Butter
Salt & pepper to taste
Cook the Haggis as per packet instructions.
Melt 1 tbsp of butter in a pan on medium heat and saute the leeks until soft.
Place potatoes in a pan of water, bring to the boil then simmer until soft. Mash with 1 Tbsp of butter. Season.
Pre heat your oven to 180 deg.
Spread the cooked haggis into a casserole dish, then layer the leeks and mix, fork the potatoes over the haggis mixture and sprinkle over the grated cheese. Season with some cracked pepper then place into the oven and cook for about 20-25 minutes until the cheesy potato topping is slightly browned and crispy.
Serve with some fresh vegetables for a nutritious and filling meal.
I had the pleasure of attending a live cooking session with Chef Ann Nolan (training chef with Whirlpool Cooperation) recently, the session was very informative and I learned a few tricks that I never knew! ‘Everyday is a school day as they say’, One of the recipes was this delicious Vegetable Quinoa Bowl and I just had to share with all of you as it was absolutely mouthwatering, so refreshing on the palate. The great thing about this recipe is that it is simple to make and if you don’t like an ingredient it is easily changeable to something you do. We all love the simple things in life, do we not?
Quinoa is higher in nutrients than most grains with protein & fibre being the highest and only contains 2g of fat per 100g, so very nutritious and not fatty at all. Quinoa is a good source of several minerals, including manganese, phosphorus, copper, iron, magnesium, and zinc. Quinoa may reduce blood cholesterol, blood sugar, and triglycerides. It’s weight loss friendly, gluten-free, and has been shown to increase the nutrient and antioxidant value of gluten-free diets.
Serves 4
For the Quinoa:-
125g Raw Quinoa
350ml Vegetable Stock
1/4 Tsp Salt
1/4 Tsp Black Pepper
1 Tsp Olive Oil
For the Coriander Lime Dressing:-
Handful of coriander, washed, keep stem
6 Spring Onions, roots removed, washed & cut into thirds (use the white part)
1/2 Large Avocado, peeled and diced
3 Limes, squeezed for juice only
1 Tsp Kosher Salt
60 ml Olive Oil
For the Vegetable Toppings:-
1 Red Onion, cut unto 1/4″ slices
2 Red Peppers, cut into 1/4″ slices
400g Tin of Black beans or Red Kidney Beans (you could also use chickpeas)
8-10 Cherry Tomatoes, quartered
1/2 Avocado, diced
4 Eggs (1 egg per portion)
Spray Oil
Salt & Pepper to taste
Place the quinoa into a saucepan with the vegetable stock, seasoning & oil, bring to the boil then reduce to a simmer, cover with a lid and simmer for about 15-20 mins until quinoa has absorbed the stock, take off the heat and let sit for 5 minutes. Do not stir while simmering, just leave it, fluff up with a fork after the 5 minutes resting time.
Meanwhile, lets make the dressing…..place all of the ingredients (except the oil) into a food processor and blend together, then slowly drizzle in the oil scraping down the sides as you go along. Keep adding oil until you get the consistency you like, whether that be thick or thin, it’s up to you. Move to the side for later.
Heat a little spray oil in a saute/ fry pan on medium to high heat, add the red onions & red peppers with seasoning and cook until slightly softened and browned, leave in pan.
Heat the beans in a small pan on medium heat, 4-5 mins until warmed through.
In a non stick fry pan (with lid) spray a little oil and bring to a medium heat, crack the eggs into the pan & season, let the egg become opaque then add about 4 tablespoons water, put the lid on and steam cook the eggs, no need to turn. Check after about 1-2 minutes, when the egg is white it’s ready, take pan of heat until ready to serve.
To plate, distribute evenly the quinoa, then peppers and onion, sliced avocado and then the beans and tomatoes, drizzle over your dressing then add the egg to the top….ENJOY!
Alternative options to try:-
*Roasted mushrooms, cauliflower, broccoli, spinach, spring onions, garlic dressing
This recipe is so easy to make and is packed full of flavour, great one for the whole family, especially as you can adjust your own Chilli portions. I made it a lighter option too with the lower fat Philadelphia and it tasted delicious, you would never know it wasn’t full fat.
Serves 2
2 Chicken Breasts, diced into bite size pieces
100g Wholegrain Pasta
1 White onion, diced finely
1 400g Tin Tomatoes
1 Red pepper, diced
150g Philadelphia Cream Cheese
1 Tsp crushed red chilli flakes
1 Tsp of Italian Seasoning
Handful fresh Basil to serve.
Bring a pan of water to the boil and cook your pasta until soft (about 8-10 minutes)
Meanwhile, in a fry pan on medium heat, season with salt & pepper the chicken and brown, add in the onions and peppers & cook until softened (few minutes). Next add in the chilli and mix.
Pour in the tin tomatoes and Italian seasoning and mix though, reduce to a simmer and cook for about 5 minutes.
Next add in the cream cheese and mix through until melted, then when pasta is ready, drain and add to the pan, mix through until coated and simmer for a few minutes.
I do love Bruschetta, in fact anything Italian, it has to be my 2nd favourite cuisine, next to Scottish Cooking, of course!
This is a classic recipe that never fails to satisfy the taste buds. Bruschetta is an antipasto starter consisting of toasted bread with oil and garlic, topped with tomatoes & basil. It’s light & refreshing, a perfect snack, starter or party food dish.
Serves 10-12
1 Baguette or any crusty bread- sliced diagonally (try Tiger bread, its delicious too)
250g Cherry Tomatoes – sliced into quarters
1-2 Garlic Cloves – crushed
Fresh Basil leaves – chopped or 2 tsp dried basil
30ml Balsamic Vinegar (use a good quality one – you’ll taste the difference)
60ml Extra Virgin Olive Oil (use a good quality one)
1/2 Small red onion – chopped finely
1 Tsp Sea salt
1 Tsp Cracked Rainbow Pepper
Place the diced tomatoes, red onion, garlic, basil, balsamic vinegar & olive oil into a bowl & mix through. Season with salt & pepper. Cover & refrigerate for 1 hour to allow flavours to infuse.
When ready to serve, brush the bread with a little olive oil & garlic, grill lightly under a medium grill heat until lightly toasted.
Spoon mixture onto the bread, sprinkle a little basil & serve. Enjoy!
I am always looking for healthier options but without compromise on flavour and enjoy sourcing locally. I started growing my own vegetables last year too and plan to grow more next year, so this recipe uses up homegrown tatties, onions and carrots from my garden (my swede are not quite ready yet).
My local butcher Forbes Raeburn in Huntly provided me with some delicious diced beef this weekend, my initial plan was to make a steak pie for Sundays dinner but having vegetables to use up, this little recipe was the outcome and definitely one I will make over and over again. End of summer is fast approaching and the colder days to set in soon, this recipe is a sure winner for all the family to warm you up from the inside. Very nutritional too as it’s high in protein, low in saturated fat and packs in your vegetable count.
Serves 4
For the Stew
1 Medium Potato, diced small
2 Celery Sticks, chopped small
2 Garlic Cloves, crushed
750g Diced Beef
1 Beef Stock Cube
1 Large Onion (or 2 medium)
1 Carrott, diced small
1 Tsp Dried Thyme
1 Tbsp Tomato Puree
2 Tsps Brown Sauce
2 Tbsp Worcestershire Sauce
Salt & Black Pepper to taste
For the Mash
1 Large Potato, chopped & peeled
1 Small Swede, chopped and peeled
3 Large Carrotts, chopped & peeled
Pepper to taste
Preheat your oven to Fan 160 deg.
Spray a casserole pan with low calorie oil on medium heat, add the celery, garlic and 3/4 onions and fry for about 10 minutes or until slightly caramelised. Meanwhile in a fry pan heat spray oil on medium heat, season the beef cubes and fry until browned.
Remove the casserole pan with the veg and add in thyme, tomato puree, brown sauce, Worcestershire sauce, beef stock cube with 700ml boiling water. Puree using a stick blender then add to the casserole pan the beef, potato chunks, chopped carrot and rest of the onion, bring to the boil then cover and transfer to the oven to cook for about 1.5-2 hrs until tender, stirring occasionally.
Meanwhile make the mash, put the potato, swede & carrot into a pan of water and bring to the boil, reduce to simmer and cook for about 45 minutes until tender. Drain and mash then season with pepper.
A Healthier Twist to your normal Nacho dish. I had some Bagels left and decided to give this a shot, it worked perfectly adding that little bit of crunch to the bake. Easy to make to & just 30 minutes to bake in total which makes this dish a great quick family meal. I served it with a refreshing homemade spicy salsa which was a great accompaniment.
Serves 4
2 Large Chicken Breasts, cut into bite size pieces
2 Bagels, cut into bite sized pieces
Small head of Broccoli, cut into small pieces
400g Tin of mixed beans (or baked beans)
200g Tin of tinned tomatoes
2 Tsp Smoked Paprika
2 Fresh Tomatoes, diced
1/2 Red Onion, diced
Small handful or chopped coriander
1 Chilli, diced
1 Tbsp balsamic vinegar
1 Lime
1 Avocado, diced
100g Mature Cheddar (lighter option to make it healthier)
2 Tbsp Oil or spray oil
Preheat your oven to 190 deg. Drizzle the bagel pieces with 1 tbsp oil and place on a baking tray lined with baking paper and bake for 15 minutes tossing halfway to brown. Remove from oven.
Meanwhile, spray a fry pan with oil and heat to a medium heat, season the chicken and coat in the paprika then add to warm pan to brown, 10 minutes. Add in the broccoli and mix through for a few minutes. Next add in the beans and tin tomatoes, stir through. Transfer to a baking dish.
Top the chicken mixture with the baked bagels then top with the grated cheese. Place into the oven and bake for about 10 minutes until cheese is melted.
Meanwhile to make the salsa, put the diced tomatoes, chilli, onion, avocado, coriander into a bowl and mix, pour 1 tbsp balsamic vinegar along with half juice of lime and mix through.
I was inspired to make this by a recipe posted to Instagram from @theweelarder https://www.instagram.com/theweelarder/?hl=en. As I didn’t have the Tomato Chutney, I decided to use caramelised red onions as I just made a batch from my garden, this dish was so delicious and the sweet flavour from the onions went perfectly with the salmon.
This dish is perfect for these long summer days especially when served with a fresh salad. Can be eaten warm or cold.
Serves 4-6
For the Pastry:-
250g Plain Flour
Pinch Salt
100g Cold Butter
2Tbsps water
For the Filling:-
2 pieces of Fresh Salmon or 250g Pre-packed Smoked Salmon, flaked
1 large Cooked Beetroot, chopped into small bite size pieces
Handful of finely chopped Spinach (uncooked)
4 Large Eggs
80ml of Single Cream
100ml Milk
2 Tbsp Chopped Dill
Seasoning, Salt & Pepper
To make the Pastry, Sift the plain flour into a bowl and add the butter cubes and salt, with your fingers rub butter into flour to form breadcrumbs. Add 2 tbsp water and bring to together to make a stiff dough. Cover in cling film and refrigerate for at least 1 hour, or overnight.
Once pastry is ready, bring to room temperature and roll out onto a floured surface and lay over your quiche tin pressing the pastry to the sides, trim off any excess. Place a piece of greaseproof paper over the pastry and pour in some baking beads to weigh down.
Preheat your oven to 180 deg fan and place pastry in oven for about 15 minutes. Remove the beads and paper, brush the pastry with some egg wash then return the pastry to the oven and bake for a further 5 minutes. Remove and allow to cool.
Whisk up the eggs with the cream & the milk.
Sprinkle some flaked salmon into your pastry case then some spinach then another layer of salmon then spinach and finally the caramelised onion, pour over the egg mixture evenly, season with salt, pepper & dill then dot pieces of the beetroot over.
Place into a preheated oven at 170 deg fan for 30 minutes.
With successfully grown my own red onions this year, I decided to jar up some homemade caramelised red onion. Also a good way to get ahead when preparing some dishes or snacks as this recipe can be made in bulk and then frozen or kept in an air tight container for about 1 week.
These are wonderful with goats cheese on a pizza or in a quiche or simply used to top burgers, whichever way you decided to use them they will add so much flavour to an array of dishes.
Serves 4
1 Tbsp Olive Oil
2 Large Red Onions, finely sliced
1 Tbsp Soft Brown Sugar
4 Tbsp Balsamic Vinegar
1/2 tsp dried chilli (optional)
1 Tsp Mixed Herbs (optional)
Heat the oil in a fry pan on medium heat and add the onions and herbs & chilli if using. Cover and cook for around 15-20 minutes, stirring occasionally until soft.
Remove the lid, reduce heat to a low heat and stir through the sugar and salt. Add the balsamic vinegar and 2 tbsp water then cook for a further 5-10 minutes until the liquid has almost disappeared.
Set aside to cool, then place in a container or sealed bags to freeze or store. If freezing, defrost overnight in the fridge then heat through in a pan for a few minutes. (add a splash of water if needed)
This is a great dish that can be enjoy all year round, as a main meal or a side salad dish. Now that the weather is changing and we will soon be entering the Autumnal period we often crave more substantial dishes & this is one of those dishes. Healthy, filling and very satisfying.
I grow my own potatoes and beetroot, nothing more enjoyable than harvesting your own vegetables and preparing a delicious meal for you & your family. I live in Scotland (as you know) and of course my smoked haddock is fresh from the north sea, I get a door stop delivery every week from my local fishmonger who always has the best to offer.
Takes about 10 minutes to prepare and only 20 minutes to cook. A good quick meal.
Makes 2 Servings
2 Pieces of Smoked Haddock
2 Medium/Large fresh Beetroot (or you can buy the vacuum packed cooked beetroot in supermarkets)
250g Potatoes (I used charlotte)
1 Tbsp of low fat mayonnaise or natural yoghurt (I’m definitely a mayo person, but yoghurt will work too)
Wash potatoes and place in a pan of water, bring to the boil and simmer for 20 minutes until softened. If using peas add to pan 4-5 minutes before ready.
If you have a steamer, steam cook the haddock for about 6-7 minutes, otherwise poach in a pan of milk, bring milk to a simmer, place fish in skin side down and simmer for 7-8 minutes. Remove with slotted spoon. Once cooked break into bite size pieces.
When potatoes are cooked, cut into bite size pieces and place in a bowl with peas, add in chopped beetroot then add in 1 tbsp mayonnaise with salt & pepper to taste, using a spoon mix together to coat. Mix in the smoked haddock and dill.
I saw this recipe on https://www.christinascucina.com/, with the weather being very warm and sunny recently this was ideal for a refreshing pre dinner or post dinner drink, or even a wee afternoon tipple…lol!
I first tasted Limoncello when I visit Italy about 10 years ago and automatically fell in love. Limoncello is an Italian lemon liqueur mainly produced in Southern Italy, especially in the region around the Gulf of Naples, the Sorrento peninsula and the coast of Amalfi, and islands of Procida, Ischia, and Capri. Limoncello is a smooth drink with an intense lemon flavour. It can be sipped on it’s own, used in cocktails or served with a little sparkling water.
You must try this little refreshing delight if you love Lemons. Perfect for the summer season. Light & refreshing.
Makes 1 Cocktail
Crushed Ice
2 Shot Glasses of Limoncello
2 Shot Glasses of Prosecco (if using a larger glass change to 4 Shots)
1 Shot Glass of Sparkling Water or Lemonade if you prefer (if using a larger glass change to 2 shots)
Strawberries & Mint leaves to garnish
First place the crushed ice into a glass. (I used a martini glass but you can use any type of glass really, I found that chilling the glass before hand also helps)
Pour in the Limoncello
Next pour in the Prosecco
Pour in the sparkling water or lemonade, slow stir and serve with mint leaves & strawberry. DELICIOUS!
This quick and hearty brunch or lunch brings the best out of a good Scottish Tattie (potato). Fluffy potatoes are only made better by the perfectly poached egg sitting on top. Sometimes I like to keep things simple and with this dish I didn’t add too many flavours as a good Scottish Tattie is flavoursome in it’s own right. With the warming flavour of cayenne pepper and a dash of Tabasco sauce, this is sure to keep you satisfied all day.
Cayenne Pepper is also said to be medicinal as capsaicin, the active ingredient in cayenne peppers, is what gives them their medicinal properties. These peppers boast an impressive nutrition profile, which includes a variety of antioxidants that are beneficial for your health.
One tablespoon (5 grams) of cayenne pepper contains the following:
Calories: 17
Fat: 1 gram
Carbs: 3 grams
Fiber: 1.4 grams
Protein: 0.6 grams
Vitamin A: 44% of the RDI
Vitamin E: 8% of the RDI
Vitamin C: 7% of the RDI
Vitamin B6: 6% of the RDI
Vitamin K: 5% of the RDI
Manganese: 5% of the RDI
Potassium: 3% of the RDI
Riboflavin: 3% of the RDI
It also gives them their hot taste. In fact, how hot a cayenne pepper is depends on its capsaicin content. The more capsaicin it contains, the hotter it is.
Serves 2
4 Medium Potatoes, (peeled or unpeeled it’s up to you) diced into bite size pieces
1 Large or 2 Medium Onions, sliced into wedges
1 Tsp Cayenne Pepper
Salt to taste
1 Tbsp Olive Oil or Spray Oil
2 Large Eggs
Tabasco to taste
In a fry pan heat the oil, medium to high heat, add in the onions and cook for a couple of minutes to soften.
Add in the diced potatoes, season with salt & cayenne pepper, mix and place a lid over pan reduce to a low heat and cook for about 30 minutes until potatoes are softened. Give the potatoes a stir every 10 minutes.
5 minutes before potatoes are ready, bring a pan of water to the boil then reduce to a medium heat, crack in the eggs and poach through.
Serve potatoes and onions onto a plate, place the poached egg on top and sprinkle a few dashes of tabasco sauce over, season if required. Enjoy!
If you prefer a bit more flavour, below are a few choices that I have tried.
Smoked:- Add chopped spring onions and some smoked back bacon.
Mediterranean:- Add some spinach, handful tomatoes with 1 tsp all spice, 1 tsp dried oregano, 1 tsp smoked paprika, 1 tsp dried coriander.
Spanish: Chopped chorizo, sweet potatoes, 1 tsp cumin, spring onions.
Do you like Biscoff? Do you love Lime? If the answer is yes, you will absolutely love this.
With the weather being so warm and lovely lately, there is nothing more refreshing than a cool tangy cheesecake! This one, I wanted it to be a mix of tangy and refreshing but light and creamy too and I am happy to write that it was just that. I was so impressed with how this turned out.
The cheesecake is firm enough to hold its shape, but still super creamy and melt-in-your-mouth velvety. The tanginess of the lime and cheese coupled with the delicate sweetness of the white chocolate complement each other so well. The Biscoff crust adds a good crunch to the experience in your mouth. This is now on my favourite dessert list.
For the Crust
1 packet of Biscoff Biscuits (250g) – (If you don’t like Biscoff, you can use Digestives)
2 Tbsp Butter , melted
For the Lime Layer
1 packet of Lime Jelly (I used Hartley’s – my personal favourite)
100ml Boiling water
1 small tub Greek Yoghurt (80-100g)
200ml Whipping Cream
For the Cheesecake Layer
80g Unsalted Butter
120g Icing Sugar
200g Cream Cheese (I use Philadelphia – no other compares for me)
100ml Whipping Cream
1 tsp Vanilla Essence
Juice of 1 Lime
For the Topping:-
Zest of 1 Lime
100-200g White Chocolate Shavings (as much as you want really)
Method:-
Blitz the biscuits in a processor, so they resemble fine crumbs. Tip into a bowl and pour over the melted butter and mix through until all moist. Press into a 9 x 13 x 2″ springform tin and place in the freezer while you make the next layer.
In a large bowl dissolve the Jelly with the boiling water, allow to cool slightly.
Whisk up the whipping cream until light and fluffy. Whisk into the Jelly the Greek Yoghurt and fold in your whipped cream. Pour on top of the biscuit layer and place in the freezer to set. (about 45-60 mins)
Meanwhile, make your cheesecake topping, Beat together the butter, icing sugar, cream cheese, lime juice, 1/2 the lime zest and vanilla essence. Whip up your cream and fold into mixture.
Smooth over the Jelly layer once set and place back in the freezer for a further 30 mins to firm. Transfer to the fridge and allow to fully set overnight.
Before serving, sprinkle the white chocolate shavings over the top and the lime zest to finish.
I love Strawberry season, big juicy fresh strawberries that just melt in your mouth….delicious!
Traditionally, the Scottish strawberry season only lasted about six weeks in summer, from June to July, however now we can get homegrownstrawberries almost eight months of the year thanks to advancements in polytunnel technology.
Scottish Strawberries are famously some of the best in the world, but why? The temperate climate in Scotland allows the berries to have longer daylight hours but without the same levels of heat. This allows the berries to ripen slower so they produce more sugar and you get a sweeter berry.
Scottish Strawberries
Strawberries are one of the most versatile ingredients available to us, whether we eat them as they are, put them in desserts, muffins, a salad or even as a puree or compote to accompany a steak, there are so many ways we can eat them. But for this post, I am going to show you how to make a super delicious and creamy cheesecake. Yum!
Everything you need for a perfect summer dessert.
For the Crust
1 packet of Biscuits – (Digestives, Biscoff even Oreo’s if you like – whichever you prefer)
2 Tbsp Butter , melted
For the Strawberry Layer
1 packet of Strawberry Jelly (I used Hartley’s – my personal favourite)
100ml Boiling water
1 Small Tub Strawberry Greek Yoghurt (80-100g)
200ml Whipping Cream
150g Diced Fresh Strawberries
For the Cheesecake Layer
80g Unsalted Butter
120g Icing Sugar
200g Cream Cheese (I use Philadelphia – no other compares for me)
100ml Whipping Cream
1 tsp Vanilla Essence
For the Topping:-
Handful of Sliced Strawberries
100-200g White Chocolate Shavings (as much as you want really)
Method:-
Blitz the biscuits in a processor, so they resemble fine crumbs. Tip into a bowl and pour over the melted butter and mix through until all moist. Press into a 9 x 13 x 2″ springform tin and place in the freezer while you make the next layer.
In a large bowl dissolve the Jelly with the boiling water, allow to cool slightly.
Whisk up the whipping cream until light and fluffy. Whisk into the Jelly the Greek Yoghurt and fold in your whipped cream and diced strawberries. Pour on top of the biscuit layer and place in the freezer to set. (about 45-60 mins)
Meanwhile, make your cheesecake topping, Beat together the butter, icing sugar, cream cheese and vanilla essence. Whip up your cream and fold into mixture.
Smooth over the Jelly layer once set and place back in the freezer for a further 30 mins to firm. Transfer to the fridge and allow to fully set overnight.
Before serving, sprinkle the white chocolate shavings over the top and place the sliced strawberries around the edge to finish.
See below for a preview of what you can look forward too.
Enjoy your Summer & make lots of lovely memories. Thank you again for your support.
You might think ‘Salad Recipes‘ are just boring veggies…..well, think again!
This wee collection from my favourites are anything but. A healthier lifestyle means turning those ‘dull’ foods into delicious meals that you’ll crave all summer long.
Did I say SUMMER! Yes it is coming back to us, so get ready & nourish yourself.
Watch your inbox this week for your FREE eBook!
Not joined Theweecaledoniancook tribe yet? Sign up now to enjoy free recipes straight to your inbox!
I just had to try this, I love pakora, I love chicken & I love pakora so it was a must. Simple to make and very tasty. I didn’t quite have all the ingredients so here is my version. We enjoyed these pakora bites with sweet chilli dip rather than pakora sauce and was delicious. You have to give these a go.
Makes enough for 4 portions or 2 very large portions
2-3 Chicken Breasts – cut into strips
1 Tbsp Garlic & Ginger Paste
Juice of 1/2 a Lemon
Salt & Pepper to taste
1 Tbsp Fenugreek Powder
1 Tsp Paprika Powder
200g Rice Flour (or gram flour)
1/2 Tsp Biacarbonate of Soda
1 Tsp Chilli Powder
1 Tsp Cumin Powder
1 Tsp Garam Masala
1 Tsp Coriander Powder
3 Tbsp Rapeseed Oil (or vegetable oil)
200ml Irn-Bru
100ml Water
First heat up your oil in a pan or fryer if you have one. (I use Rapeseed oil and heat to about 180-200 deg)
Place the Chicken strips in a bowl, add in the garlic & ginger paste, along with paprika, lemon juice, salt & pepper, mix together and allow to sit and marinade for a few minutes.
Add in the cumin, coriander, garam masala, fenugreek powder, biacarbonate soda, rice flour, oil, water and Irn-Bru, give it a good mix together.
Drop the chicken strips into your hot fryer and cook until browned and crispy (about 8-10 minutes), remove with a slotted spoon or tongs and place onto some kitchen paper to drain the oil.
OMG! What can I say, these are super tasty and very moreish. I do love a good scone, especially with butter & jam but I wanted to try something a bit different, we were having some pakora for dinner (Irn-Bru Chicken pakora recipe here https://cookingwithluce.wordpress.com/2021/05/16/irn-bru-chicken-pakora/) so decided to try an Indian inspired flavour to go with. The curry powder lends that nice warmth of Indian spices to the cheese without being overbearing.
These scones are simple and quick to make, you can also change up the spices to suit your own palette.
Makes 12
400g Self Raising Flour
100g Butter, softened
4 Tsp Baking Powder
3 Tsp Curry Powder
1.5 Tsp Smoked Paprika
1.5 Tsp Turmeric (or Mustard Powder)
200g Grated Cheese (I used a good Scottish Mature Cheddar)
2 Eggs
Milk to Bind
Preheat your oven to 180 deg. Line a baking tray with baking paper.
Place flour, baking powder, smoked paprika, turmeric & curry powder into a bowl and mix. Next rub the butter into the dry ingredients until it resembles crumbs then add in the grated cheese. (keep a little grated cheese back to top the scones before baking)
Crack in the eggs and add a little milk at a time to bind to a soft dough. You don’t want the dough too sticky.
Roll out to about 1″ thick, using a cutter cut into 12 rounds. Place onto your backing tray, brush with a little milk and top with some grated cheese.
Bake in the oven for about 15-20 minutes until lightly golden and risen.
Remove and allow to cool. Serve with butter, chutney or anything you fancy really.
I am so lucky, I recently moved home and now live in an area where you can get some of the freshest fish delivered straight to your door! I am an absolutely lover of all things seafood, well, who wouldn’t living in Scotland! We have 12,000km of coastline with cold clear waters, which has a rich range of over 60 different species, landed from Scottish waters. Scotland has a global reputation for the quality and range of its seafood.
I have a local fish van that delivers straight to my door every week, so this week he had some lovely fresh Smoked Haddock which I just had to get. Initially, I bought it to make my favourite Cullen Skink Soup but we then decided we fancied trying something different. So after scanning my cupboards for ideas, this little Indian spiced fishcake was the outcome. Super tasty and a perfect combo with the smoked haddock. The spices enhanced the flavour of the haddock, a blend of cumin, coriander, garam masala and turmeric works wonders on these fishcakes!
Makes 6 Large ones or 10-12 smaller cakes
600g Smoked Haddock
550g Potatoes (I used Highland Baby potatoes from Scotty Brand, but Maris Pipers are good too)
6-7 Spring Onions – chopped
2 Tbsps Butter
1 Tbsp of Curried Spices (made up from 1/2 tsp ground cumin, ground coriander, garam masala, 1/4 tsp Turmeric)
Salt & Pepper to taste
50g Golden Breadcrumbs
50g Scottish Oats – toast the oats (gently toast in a hot pan, few minutes only, allow to cool)
1 Tbsp Oil
2 Tbsp Flour
1 Egg, whisked
Cook the potatoes until soft, so that you can mash. Best to boil them for about 20 minutes on hob or if you have a steam pot, then Steam cook for about 10 minutes. (I kept the skin on as I feel there is more flavour). Once cooked set aside to cool.
Cook the smoked haddock, I steam cooked mine for about 7 minutes, if you don’t have a steamer then place fish in a pan of milk and cook gently covered for about 8 minutes or until fish is cooked through. (remove liquid and set aside to cool)
Put a tbsp of butter into a pan and saute the spring onions until soft, just a few minutes.
Mash up the potatoes and place in a mixing bowl. Using 2 forks, shred up the cooked fish and place into the bowl with the potatoes, add the spring onions, next add in all your spices and season generously. Get in there with your clean hands and mix through until combined.
Shape the cakes into balls and place on a sheet of baking paper on an ovenproof tray and gently flatten into cakes. (I made mine about 1″ thick) Put into the fridge for about 20-30 minutes.
In separate bowls have your flour, egg & oat/breadcrumb mixture ready. Dip the cake into the flour then into the egg then roll in the oat crumb mixture ensuring fully coated.
Heat a little oil in a fry pan and cook the cakes each side for 2 minutes to seal to oat crumb. Place back onto the baking tray.
Preheat your oven to 200 deg and bake for about 20-25 minutes. Serve with some cool mayo or tomato relish.
These can be frozen and kept up to 3 months too, so great for batch cooking.
I was looking for something refreshing to go with my Salmon for dinner and looking around my kitchen, the little avocado sitting in my fruit bowl was just screaming out to me….eat me!….eat me! & there you have it, Avocado Salsa!
An 80g portion of avocado counts towards your 5 a day and contains vitamins, minerals and fiber. Fiber is good for your heart & gut health. These little fruits are a nutrient powerhouse, they contain nearly 20 different vitamins, minerals, and nutrients. The type of fat in an avocado is mainly unsaturated (specifically, monounsaturated), which, when eaten in place of high-saturated-fat foods, can help maintain healthy cholesterol levels. Olive and rapeseed oil are other well-known sources of monounsaturated fats.
The creamy taste and texture that avocados have means they can feel indulgent to eat, and they are good substitutes for high-saturated-fat options that you might add to a salad or a sandwich, like cheese or butter. When you see or hear avocado being used it’s usually on a piece of toast for breakfast, or in a guacamole for a side dish, but the combination of avocado & cucumber is a sure fire winner in my books and served alongside a piece of fresh Salmon, well, what’s not to like!
Serves 4
1 Large Avocado, skin & stone removed then diced
1/2 Cucumber, diced
Juice of 1 lime
1 Tbsp Mayonnaise (Light, to keep it healthier)
Pinch of Salt
Cracked Rainbow Pepper to taste.
Handful of fresh coriander, chopped finely.
(Optional, sprinkle of dried chilli flakes)
Place everything in a bowl a mix trough to combine. Serve.
Tip!
If making the salad a few hours ahead, combine all ingredients into a bowl (except the salt!). Squeeze lime juice directly over avocados and toss gently to combine.
Cover tightly with cling film, placing it directly over the surface of the salad to keep the air out. Oxygen is what causes avocados to brown.
Add salt just before serving to keep the cucumbers from wilting and becoming overly juicy.
Your FREE Springtime Easter Bakes Recipe Cards are now available to download.
Are you planning a family feast?
A Simple Afternoon Tea?
Or maybe your like me & just love everything naughty but nice!
These free downloadable recipe cards can be downloaded now, just in time for Easter Weekend. These are some of my all time favourite bakes and I’m sure you and your family will love them too.
A great way to use up left over chicken after your Sunday Roast. This dish is very easy to bake and healthy too.
This simple and tasty bake will keep you full as it has protein (chicken), fiber (veggies), and fat (cheese). The chicken is smothered with cherry tomatoes, onion and peppers keeping the chicken moist. I used Italian herbs and chilli spice for a wee kick. Delicious!
Prep time is only 10 minutes and 40 minutes in total to cook, so a quick meal to bake. Gluten free too.
Serves 3-4
2 Large Chicken Breasts, cooked & shredded
1 Onion, chopped
1 Red Pepper, chopped
1 Garlic Clove, chopped
Spray Oil
2 Tsp Italian Herb Mix
1 x 400g Tin Chopped Tomatoes
10-12 Cherry Tomatoes, halved
1 Tbsp Sugar
1 Tbsp Balsamic Vinegar
1 Tsp Dried Chilli Flakes
125g Mozzarella, grated or sliced
Small handful basil leaves to serve
Salt & Pepper to taste
Preheat oven to 200 deg fan.
In a pan heat the spray oil and fry the onions, pepper and garlic for a few minutes to soften.
Add in the Italian herbs, chilli, tin tomatoes, cherry tomatoes, balsamic vinegar, sugar and season, then simmer for about 20 minutes until sauce has thickened slightly. Stir in the cooked chicken then transfer to a baking dish.
Tear or grate over the mozzarella evenly and bake in the oven for 20 minutes or until the topping is golden and bubbling. Serve with some chopped basil leaves. Plate up with a side of cooked rice, pasta or potatoes.
I’ve a wee treat for you all, I’m going to give away some free Easter Bakes Recipe Cards.
Are you planning a family feast?
A Simple Afternoon Tea?
Or maybe your like me & just love everything naughty but nice!
I am going to put up some free downloadable recipe cards that you can download just in time for Easter Weekend. These are some of my all time favourite bakes and I’m sure you and your family will love them too.
Watch this space! I’ll drop them into your Inbox in the next few days.
Not a follower of The Wee Caledonian Cook? Don’t worry, sign up now to get your free recipe cards.
This was wonderfully flavourful and so easy to make. I do love it when last minute decisions go well. I was planning a completely different dish for my dinner at the weekend and realised I forgot some of the ingredients, so as you do, you make the most of what you have in your cupboards. This was simple to make and using mostly store cupboard ingredients too it was super tasty.
I mean who doesn’t like Fried Rice? At the moment as our favourite restaurant’s are not open due to the pandemic, this is great dish to create your own Chinese takeout food at home. A great dish on its own or as a side dish.
Serves 4
3 Chicken Breasts (skinless)
120ml Teriyaki Sauce
1 Onion, diced
2 Tsp Diced Garlic
3 Tbsp Toasted Sesame Oil
150-200g Rice (I used wholegrain but you can use long grain white or Jasmine which works well)
200g Frozen Peas and Diced Carrots
2 Large Eggs
4 Tbsp Soy Sauce
Salt & Pepper to taste
4-6 Spring Onions for topping, chopped
Heat the sesame oil in a deep pot/pan on medium to high heat and season & brown the chicken breasts.
Add to the pot the garlic & onions and cook for a couple of minutes until softened.
Pour in Teriyaki Sauce, put lid on pan and cook on a very low heat for about 3 hours.
While the chicken is cooking, cook the rice as per instructions and put to the side and allow to cool. TIP: The rice is much better when cooked, cooled and left for a couple of hours.
After 3 hours, slice chicken into smaller pieces (it should flake apart nicely). Add to the pot, the rice, peas, carrots and soy sauce. Stir through and place lid back on pot.
In a fry pan, add a little oil and scramble the eggs, add to the pan when ready, mix & serve with a sprinkle of spring onions on top. Yummy!
In today’s hectic lifestyle and especially in the wintery months, it can feel impossible to achieve those recommended eight hours of sleep. Sleep deprivation catches up to us all, however, and it can be difficult to find energy-granting options that are healthy as well. Luckily, many foods boost energy naturally, offering a mid-day pick-me-up that will not derail a healthy diet.
I have put together a small collection of delicious Breakfast Recipes that I enjoy, these tasty morning starters will help get your energy set for the day ahead.
I was inspired a few years ago when I decided to look more into nutrition, it was really interesting learning about micronutrients and the true benefits of all those minerals & vitamins. I completed a health & nutrition course with BNF (British Nutrition Foundation) https://www.nutrition.training/ & learned how to use foods to our advantage to better our diets & lifestyle.
Simple to make dishes that the whole family will enjoy.
The eBook only costs £1.99 and this is just to cover my expense of running this blog and designing the book. I hope that you see the value in this and that you enjoy.
I had seen this ages ago but never got round to trying it, this weekend was that time. After all it is Scotland’s favourite fizzy drink! Iron Bru is quite a sweet flavour which is hard to describe & I wasn’t sure just how sweet this dish would turn out but I was pleasantly surprised, it was really delicious and definitely would make again. I used the Iron Bru Extra which has 0g sugars so helped make this dish not overly sweet.
Iron Bru
Iron Bru was launched in Scotland in 1901 and is still a closely guarded family secret recipe with 32 flavours.
It was back in 1901 in Glasgow that steel workers who were working on rebuilding Central Station in Glasgow were drinking too much beer! Yes too much beer! This is when local soft drinks experts AG Barr introduced them to the caffeinated drink to help get them through the night, and ‘Iron Bru’ was born! One of the most memorable adverts on TV ran for over 20 years with the slogan ‘Made in Scotland – from girders’ & the slogan stuck!
Go on, you know you want to….give it a try, trust me, you’ll love it!
Serves 2
2 Chicken Breasts, chopped into bite size pieces
1 Onion, finely chopped
1 Garlic Clove, finely chopped
15ml Worcester Sauce
1 Tbsp Tomato Puree
1 Tsp Smoked Paprika
300ml Iron Bru
1 Tbsp olive oil
Salt & Pepper to taste
1 Tbsp Corn Flour (to thicken sauce after)
100-125g Cooked Rice to serve.
Heat the oil in a pan on medium to high heat and season chicken and add to the pan to brown for a few minutes. Remove, add the onion & garlic to the pan and saute for a few minutes until softened.
Add the chicken back to the pan along with paprika, tomato puree, worcester sauce & Iron Bru, bring to a low simmer, cover with lid and cook on low heat for 4 hours.
Remove chicken from pan to a plate, if sauce is too thin, add the cornflour mixed with a little water and stir through to thicken up the sauce, pour over chicken and serve with some cooked rice of your choice.
This is proper home comfort food and a dish that we love. Using simple ingredients, you’ll love the richness taste of this and with the sweet potato and carrot mash on top it is just packed with flavour! A great family dish that is simple to make that everyone can enjoy. Sometimes I love going back to basics, our ancestors would have cooked this all in one pot as back then there were no fancy cook tops with loads of rings.
We are lucky that we have access to a wide range of different foods and spices these days, so although sometimes it’s great to make classics, it’s also great to try out new flavours and ideas with them. This recipe surely does work with that little change.
If you make it, let me know what you think?
Makes 2-3 servings
250g Scottish Beef Mince (good quality is key)
2 Medium sized Sweet Potatoes, cut into small chunks
1 Red Onion, diced
1 Carrots, diced & 2 Carrots for mash (chopped)
1 Tbsp Balsamic Vinegar
50ml Red Wine (I used Merlot)
1 Tbsp Worcestershire Sauce
2 Handfuls of Frozen Garden Peas
300ml Beef Stock with 2 stock cubes
1 Tsp Mixed Herbs
1/2 Tsp Turmeric
Salt & Pepper to taste
1 Tbsp oil
1-2 Tbsp Beef Gravy Granules to thicken sauce
Pre heat oven to 180 deg fan. Place sweet potatoes and carrot into a large pan of slightly salted water and bring to the boil, reduce to a gentle boil and cook for 20 minutes until softened.
Meanwhile, heat a little oil in a pan and cook the onions until softened. Add the mince to the pan and cook until browned. Add in the balsamic vinegar, Worcestershire sauce, red wine, herbs, seasoning and beef stock, bring to the boil and reduce to a simmer for about 10-15 minutes, liquid should reduce by half.
Stir in the peas and cook for a further 5 minutes.
Add in the Gravy granules and stir to thicken.
Mash the sweet potatoes and carrot with 1 tsp turmeric
Place the mince mixture in a casserole dish, season with black pepper and top with the mash mix, cover with tin foil. Bake in oven for about 30 minutes.
After 30 minutes, remove foil and bake for a further 20 minutes or until golden brown.
I am always looking to experiment in the kitchen and today was no different. Green Lentil Curry was on the menu but rather than serving rice or naan bread, I thought I’d try my hand at Tortilla Bowls. I’ve seen these on numerous posts & feeds and they look really good.
Green lentils, unlike their yellow and brown counterparts, hold on to their shape while cooking. I infused them with garlic, ginger, coriander, and cumin, for a dish that’s a perfect weekend meal. I love lentils, they are such a great source of protein and filling too.
Serves 2
For the Green Lentil Curry:
125g Green Lentils – Presoaked overnight
1 Tsp Garlic Paste
1 Tsp Ginger
2 Tsp Ground Coriander
1 Tsp Ground Cumin
1 Tsp Turmeric
1 Tbsp Olive Oil
1 Onion, diced
1 Tbsp Tomato Paste
1 Carrot, diced
500ml Water
Salt & Pepper to taste
Handful Chopped Fresh Coriander to serve
1 Tbsp Creme Fraiche to serve
For the Tortillas:
4 Tortilla Wraps (I used Corn Wraps)
Tin Foil & 4 Ramekins (or something similar)
Add a little oil to a pan and add the ginger, garlic, ground coriander & cumin, mix. Then add the onion and cook until softened. Stir in the tomato paste and cook for 1 minute.
Add the lentils, turmeric and 500ml water, bring to the boil then cover and simmer for about 20 minutes, add the carrot and season, continue cooking for about 15 minutes.
Meanwhile for the Tortillas, pre heat the oven to 180 deg. Warm the tortillas in a microwave for 90 seconds, lightly grease the ramekins on the outside, turn upside down. Place the wrap over the ramekin and mould to the shape, secure with the tin foil and fold into the ramekin. Place upside down into the oven and bake for 15 minutes.
Remove ramekins from oven and gently remove the foil and tortilla bowl from the ramekin, it should hold it’s shape. If you are struggling to remove, use a blunt knife to prize the tortilla away from the ramekin. Place the tortilla bowls back into the oven turned the right way and bake for a further 8-10 minutes until slightly browned.
Serve the green lentil curry into the bowls and serve with the creme fraiche and fresh coriander.
Inspired by North Africa, this quick and easy one pan meal draws the warmth of cumin and rich depth of smoked paprika to beautifully layer with the peppery flavour of the lentils. Lentils are an excellent source of B vitamins, iron, magnesium, potassium and zinc. They’re also a great source of plant-based protein and fiber. To make this dish vegetarian, just omit the chicken and replace with you favourite vegetables.
Another great one pot meal that is not only quick but simple to make too. Very nutritious and filling.
Serves 2
2 Chicken Breasts, cut into large pieces (or you can use thighs)
4 Rashers of Smoked Bacon, chopped small
1 Onion, diced
2 Stalks of Celery, diced
100g Green Lentils (or Red if you prefer)
1 Garlic Clove, diced
1 Tbsp Cumin
1 Tbsp Smoked Paprika
8-10 Whole Cherry Tomatoes
300ml Chicken Stock
1 Tsp Chilli Flakes
Salt & Pepper to taste
1 Tbsp Olive Oil
Small Handful of Chopped Fresh Parsley to serve.
Pre heat your oven to 200 deg Fan.
Add the oil to a fry pan on medium to high heat. Dry the chicken pieces with a piece of kitchen paper and season. Add to the pan and brown all over to seal. Remove with a slotted spoon.
If needed add a little more oil to the pan. Cook the bacon, onions, celery, garlic, cumin & paprika for 3 minutes. Add back the chicken, add the lentils and sprinkle the chill flakes, mix through.
Decant into an oven proof dish, add in the stock and tomatoes, bake in the oven for 25 minutes.
Turn on your grill at the end of cooking for a few minutes to brown the tomatoes.
Remove from oven, sprinkle with parsley and Serve. Yum!
This is a great mid week dinner when you are short for time, easy to prepare and quick to bake. You can also make ahead and pop in fridge until ready or if you have a delay timer on your oven, pop it in the oven in morning and time for when you are due home. One of my favourite features on my oven is the 24hr programmable timer, I use it all time, I organise myself in the morning then I don’t have to worry about remembering to switch oven on later.
Oven Timer
This dish is healthy and packed with protein and vitamins, it also provides a richness with the Gruyere cheese, what’s not to like?
Serves 3-4
300-400g Broccoli Florets (you can use frozen or fresh)
40g Butter
1 Large White Onion, sliced
350-400g Chicken Breasts, cut into bite sized pieces
100g Creme Fraiche (use light for a healthier option)
200ml Chicken Stock
30g Breadcrumbs (about 2-3 slices)
50g Gruyere Cheese, grated
1 Tsp Dried Chilli Flakes
1 Tsp Dried Mixed Herbs (or any herb of your choice)
Salt & Pepper to taste
Preheat oven to 200deg. Bring a Saucepan of water to the boil and cook the broccoli for 5 minutes, Drain.
Melt the butter in a fry pan on medium to high heat and cook the onions until soft, remove with a slotted spoon.
Season the chicken and add to the pan and brown all over, about 3-5 minutes, set aside.
Add some butter to the fry pan and cook the breadcrumbs until slightly browned. Remove.
Layer up the chicken, broccoli and onions in an oven proof dish, season well. Pour over the chicken stock and creme fraiche, sprinkle the chilli flakes and herbs.
Sprinkle on top the breadcrumbs and finish with the grated cheese.
Bake in the oven for about 35 minutes until golden brown on top. Serve.
OMG! Well, what can I say here…..but, these were absolutely delicious!
We were watching a film the other night and the little boy in the film asked for crazy custard pancakes, I had never heard of this before and my curiosity got the better of me……so off I went google search in motion and I found this recipe from Simon Hopkinson (http://www.simonhopkinson.tv/recipe/5/custard-pancakes.aspx). I changed it slightly and cheated with my custard to make it easier to make.
BEWARE! ever so moreish!
You have to try these, especially if you love custard and have a sweet tooth.
This recipe made 6 pancakes
For the Pancakes:
100g Plain Flour
3 Large Eggs (1 for wash)
Pinch Salt
1 Tbsp Olive Oil
100ml Milk
For the Custard:
2 Tbsp Custard Powder
2 Tbsp Caster Sugar
450ml Milk
1 Tbsp Vanilla Extract
1 Tbsp Lemon Juice
For assembling:
1 Tbsp butter
2 Tbsp Sugar
A Little Rum (about 50ml)
To make the batter:- Sift flour into a bowl and make a well in the middle, crack 2 eggs in and add pinch of salt. Whisk together until it becomes stiff, then start slowly adding the milk and whisk through until well combined and runny consistancey. Set aside for at least 30 minutes.
To make the Custard:- Put the custard powder and sugar in a pan along with 1 Tbsp of milk, 1 Tbsp lemon juice and vanilla extract, mix to a paste. Slowly add the milk little at a time and bring to a gentle boil. Make sure you continue whisking until the custard starts to thicken, this should take about 4-5 minutes. You want it quite thick.
Remove custard from heat and allow to cool. Place a piece of cling film over the custard, pressing down on the custard to prevent a skin from forming. Refrigerate for at least 3-4 hours.
To assemble:- When ready, heat a little oil in a non stick fry pan about 20cm diameter on medium to high heat, pour a little of the pancake batter into the pan and swirl around to just a thin covering, cook for a minute or 2 then flip over and cook for a further minute, set aside, and repeat with remaining mixture.
Add 1 Tbsp of butter to the pan, place 1-2 Tbsp of custard in the middle of a pancake, brush edges with a little egg wash. Roll up the pancake half way to cover it, not too tight, then tuck in the sides and finish rolling up to seal, it will resemble a spring roll. Place the pancakes in the fry pan sealed side down and cook for a minute or 2, sprinkle some sugar over and turn, so you are cooking all round.
Once pancake rolls are slightly browned, add in the rum and let bubble and glaze all over.
Remove & Serve. We added some maple syrup to serve and it was delicious! (optional)
This is not a recipe post! I’ve been thinking lately of how food has made not only an impact in the world but to us as human beings, food has the power to completely transport us to another time or another place. For example, a good plate of Mince ‘n’ Tatties (potatoes) takes me back to my childhood days and visits with my Gran and Auntie’s and a bowl of Spaghetti Bolognese reminds me of a happy time with my partner. Both of these emotions make me happy and I feel relaxed and content.
Is it possible to harness that power to help our wellbeing?
Mind Journey with Food
Different Types of food can also have an effect on our emotional thinking, some foods can help decrease stress and low mood, for example fatty fish, blueberries, broccoli, shellfish & eggs to name a few. Then on the other hand foods like processed meats, sweets, pastries or high fat diary products can also increase anxiety and fatigue.
So how can focusing on food help our wellbeing?
Here are some Top Tips:-
Make & Eat a meal that made you happy. Maybe a dish that you loved on a holiday trip or something from your wedding day that everyone enjoyed, it brings back that happy, feel good emotion.
What was your favourite meal from your childhood? Re-create it, go buy it from the shops, it will give you that feeling of love, warmth and feeling cared for.
Prepare something that you have homegrown. Last year I started my first vegetable boxes and the satisfaction and achievement it gave me was a wonderful feeling. Whether it be herbs from your window sill or potatoes from your garden, there is nothing better than preparing a meal from something you have hand grown, it gives you a feeling of reward to yourself.
Try something new. We have all heard it before, variety is the spice of life! Bored of the same old meals? I know I do (as you can probably tell from all the different recipes I try…..lol!) This is a great way to expand your horizons and take yourself on a journey of discovery, you’ll be amazed at what you can achieve.
Surprise your Family, Husband, Wife, Lover, Friends etc. There is no greater satisfaction than preparing a meal for someone you care about and them absolutely loving it! We use food all the time to express love and when it is well received it gives you that happy, loved feeling. Especially if you have dietary restrictions, making something that you’ve taken the time to think over and shop for is special and will be well appreciated.
Share your Favourite Recipes. It is just like sharing a good book, film or music, it connects us to those around who share the same passions and feelings. I personally have loved documenting all my foodie discoveries and recipes and when someone says to me, ‘I tried your recipe and it was delicious’, or ‘I love your blog as I’m rubbish at new ideas for dinners, so you’ve taken the hard work away for me’, this just gives me a warm satisfaction that I am helping those that need it. Sharing is caring!
Although I maybe working from home during this pandemic, somehow I still don’t find the time to be preparing and making mid week dinners, so this recipe is a great quick throw together meal that is massively flavorful and satisfying. Only takes 20 minutes. I served it with some Egg Fried Rice. I do have a confession to make, it was microwaveable Egg Fried Rice, after all it only takes 2 minutes and to be honest is a great alternative when you don’t have time to make the real thing. Most brands now offer these ready packets such as Uncle Bens, Tilda, Blue Dragon and even supermarket own brands, they are are a great store cupboard essential or at least they have been during this pandemic lockdown period. Well, we all like to cheat sometimes, don’t we?
If you like it a little sweeter, you can add 1 tbsp of honey to the recipe. I use Heather honey which is a darker semi-sweet honey and delicious, it is made with the nectar collected from the tiny purple bell-shaped flower of the common Scottish Heather plant.
Serves 2
1 Packet 250g Microwave Egg Fried Rice
2 Chicken Breasts, diced into bite sized pieces
1 Tsp Minced Garlic
1 Tsp Oil
1 White Onion, diced
1 Tbsp Cornflour
150ml Good Quality Teriyaki Sauce
2 Tsp Sesame Seeds
1 Handful Garden Peas (I used frozen)
1 Tbsp Honey (Optional)
Salt & Pepper to taste
Heat the oil in a pan on medium to high heat and fry the garlic & onions until softened.
Season the chicken, add to the pan and cook until slightly brown all over.
Add in the garden peas along with 150ml of teriyaki sauce & honey (if using) and about 100ml water, place lid on pan and reduce to a simmer for about 15-20 minutes until chicken is cooked through. If the sauce is too thin, mix the cornflour with a tbsp of water and add to pan stir through to thicken the sauce.
Serve with some cooked rice (of your choice) and sprinkle over some sesame seeds for that extra crunch and nutrition. Yum! Enjoy!
Yes, I know what you are thinking, this isn’t chicken? It looks like Beef? That’s because of the soy Sauce and dark honey in the recipe marinating into the chicken.
One pot meals are always my go to when I am working, simply because they are easy and less washing up to do. I used some Scottish Heather Honey for this recipe and oh my……..this was a super tasty meal that I am so proud of. I had 2 recipes in mind to cook tonight, 1 was Honey and Garlic roasted Chicken and the other was a Soy Glazed Chicken, yes, you guessed it, I went for it and mixed it all up. I do love it when you change your mind last minute and get a successful NEW recipe!
Known as the ‘Champagne’ of all honeys, expertly gathered by bees that visit the legendary flower of Scotland, Heather. Scottish Heather Honey is dark and semi-set. A highly intense, distinctive, warm, woody and floral aroma reminiscent of the Scottish Highlands. I use honey from Heather Hills Farm, they are a family run business based in Blairgowrie, Perthshire since 1945. Click to their website for more details :- http://www.heatherhills.co.uk/.
Pure honey is full of natural antibacterial and antimicrobial goodness. As well as the high antioxidant qualities, manganese plays a role in helping to make and activate enzymes in the body involved in protecting tissues from damage and in the metabolism of nutrients. It also helps maintain healthy bones.
Serves 4
3-4 Large Chicken Breasts, cut into large chunks
1 Red Pepper, diced
1 Yellow Pepper, diced
2 White Onions, cut into wedges
4 Tbsps of Heather Honey (you can use clear honey if you can’t get this)
3 Tbsps of Dark Soy Sauce
2 Tsps Dried Garlic Granules
1 Tbsp Olive Oil
3 Tsps French Mustard
1 Tsp Curry Powder
Salt & Ground Black Pepper
Heat the oil in a pan, season the chicken, add to pan and brown.
Add in the garlic, peppers and onion and cook for a few minutes.
Mix in a jug or bowl the soy sauce, honey, curry powder and mustard. Season.
Pour the sauce mixture over the chicken and vegetables, add 100ml water and stir to combine.
Cover and cook on a low heat for about 2 hours.
Remove lid season if need and cook for a further 20 minutes.
Serve with some boiled potatoes or mash or anything you like. Enjoy!
Where I am living at the moment there is 12 inches of snow and still falling down! Winter is definitely the season for SOUP! Do you get bored with the same flavours? Can’t think of what to make next? Let me help you, these recipes are not only simple to make but very nutritious too and very filling.
Whether it’s after a long day at work or out battling the cold weather, there’s nothing that quite compares to tucking in to a warm bowl of soup, it’s soul-food at its very best. Whether you’re a culinary extraordinaire and want to try out some fabulously unique soup flavours, or you’re looking to make a quick midweek dinner for the whole family, my wee winter warmer soup EBook is for you.
Looking for Vegetarian options? Low calorie options? Or simply just flavoursome?
Look no more, download my Top 10 Soups that warm your Soul and fill your belly with satisfaction. Coming Soon!
Keep Checking your Inbox if you are a subscriber, not a subscriber yet, sign up and receive the latest recipes and books to your inbox.
In our house a Sunday is the only day we have a pudding after dinner and as we were having a filling stew today, I opted for something a little lighter. This was not only super tasty but really light and lower in calories as I used low fat versions. If you love banana’s and custard you will like this. It is also so quick to make, just 10 minutes to prepare with 30 minutes chilling time.
Serves 4
2 Bananas (keep a few slices to serve)
1 x 400g Tin of Low Fat Custard
1 x 150ml Double Light Cream
1 Tsp Vanilla Essence
2 Flake’s
Empty custard into a large mixing bowl and chill in the fridge for 30 minutes.
Mash the bananas with a fork and add to the custard, crumble in 1 1/2 of flake and mix through to combine
Add 1 tsp vanilla essence to the cream and whisk up until thick, gently fold cream into the custard mix.
Spoon custard into serving dishes and top with a couple slices of banana and crumbled flake.
Serve immediately.
Note: If you have custard powder, put 2 tbsp of powder and 2 tbsp of caster sugar into a pan, add a little milk and stir to a paste, add the remaining milk (about 400ml) and bring to a gentle boil, stir continually until custard thickens. Remove from heat, place a piece of cling film over custard to prevent a skin forming and allow to cool then proceed as above.
It is Winter Season here in Scotland and is -4 deg today and very snowy. There is nothing better that a big pot of homemade soup to warm you up on days like this. I had a big pack of lentils in the cupboard and was going to make a traditional carrot & lentil soup but then I discovered some Green Thai paste hiding behind my tin of custard & yes you’ve guessed it Green Thai Lentil Soup it was. Just the ticket too, with the spice it really warmed us up lovely and was very satisfying and filling. Another great recipe to add to the collection.
Makes enough for 4 servings
150g Green Lentils, pre-soaked and rinsed ready to cook
1 Large Sweet Potato, chopped into cubes
1 Tbsp Olive Oil
2 Garlic Cloves, crushed
1 Piece Fresh Ginger, grated (about 2cm)
50g Thai Green Curry Paste, (I used the Blue Dragon one)
1 400g Can Coconut Milk
1 Tbsp Dried Coriander & small handful chopped fresh to serve
1/2 litre Vegetable Stock
Juice of 1 Lemon (about 1 Tbsp)
In a large pan, heat the oil and cook the garlic and ginger for a few minutes then add in the Thai Green Paste and mix through for a further 3-4 minutes.
Add in the chopped sweet potato, lentils, vegetable stock, coconut milk and lemon juice, bring to the boil then simmer covered for about 30 minutes.
Remove lid and sprinkle in the dried coriander and mix through, stirring for a minute or 2.
Remove from the heat and using a hand blender, blend the soup until you reach a smooth and thick consistancey.
Serve with some fresh coriander on top.
This recipe is also good for batch cooking, freezing and keeping for later.
Due to the Covid 19 Restrictions most of us aren’t able to go visit our favourite restaurants to enjoy our best bites to eat or even get takeaways, so if you fancy a wee curry then this is for you. This 15 minute dish is quick and easy to make, and using staple ingredients that most of us have in our kitchen cupboards, its quicker than phoning a takeaway and can be made more healthier too by adding in your favourite vegetables.
This was a full flavour curry with loads of sauce, great for scooping up the rice. The flavours were so good that my other half said I needed to make this sauce again for his chips….lol! Yes, curry chips is his thing! If you make, let me know what you think.
Serves 4
2 Large Chicken Breasts, cut into bite size pieces
2 White Onions, cut into wedges
Handful of Frozen Garden Peas (optional)
2 Tbsp oil
1 Tsp Soy Sauce
2 Tsp Cornflour
350ml Chicken Stock
4 Tsps Curry Powder
1 Tsp Turmeric
1/2 Tsp Ground Ginger
1/2 Tsp Brown Sugar
Salt & Pepper to taste
50g per person of Cooked Rice (of your choosing) to serve.
Heat 1Tbsp oil in a pan or wok on high heat. Mix together the soy sauce and 1Tbsp oil in a bowl add in the chicken pieces and coat, sprinkle 1 Tsp of cornflour over to coat, season, then add to the hot pan and brown all over, remove with a slotted spoon.
Add the onions to the hot pan and stir fry until softened and slightly brown, about 3-4 minutes.
Add to the pan the Frozen Peas, Curry Powder, Turmeric, Ginger & Sugar, mix through for about 1 minute to release flavours.
Pour in the stock and bring to the boil, mix 1 Tsp cornflour with a little water and slowly pour little at a time into the sauce mix until it starts to thicken slightly. Add back to the pan the cooked chicken and mix through and simmer gently for about 5 minutes.
With the weather being very dreich (dull & gloomy) recently, we wanted to transport ourselves to a warm sunny place & with that not being possible in these unprecedented times I turned to my Kitchen Cupboards to see what I could make for dinner. Having some tinned pineapple, beans and rice in the cupboard we decided on visiting the Caribbean. This dish has a great blend of popular Caribbean spices, such as ginger, paprika and allspice which transports you right onto the Islands.
Also a great dish for batch cooking as you could quite easily make a big pot and freeze for later. A very nutritious dish with the beans high in fiber and the chicken giving you a good intake of protein. A good filling meal for any family table.
Serves 4
2 Chicken Breasts – cut into bite size pieces
1 Red Pepper, diced
1 White Onion, diced
4-6 Spring Onions, diced (for serving)
1 Tbsp Oil for cooking
1 Tbsp Curry Powder
1 Tbsp Smoked Sweet Paprika
1/2 Tsp of AllSpice
1/2 Tsp of Ginger
200g Cooked Wholemeal Rice (about 50g per person)
Juice of 1 Lime
1 Tbsp Brown Sugar
1 Tsp Dried Chilli Flakes
1 Tin Pineapple Chunks
1 400g can of Black Beans, drained
Handful of Garden Peas
20-30g Cashews, chopped (for serving)
Salt & Pepper to taste
Heat the oil in a pan on medium to high heat, season the chicken and brown all over.
Add the peppers and onion to the pan and cook for about 3 minutes until softened.
Add to the pan the paprika, curry powder, ginger, allspice, brown sugar and chillies, mix through for about 1 minute to coat, then add the black beans, peas, cooked rice, pineapple and lime juice, mix through to combine.
If too dry, add 1-2 Tbsp of water and stir, put lid on pan and heat through for about 5 minutes. To serve sprinkle the spring onion and cashews. Enjoy!
Healthier Eating is always at the fore front of my mind and especially this time of year, your body needs those extra nutrients & vitamins to function well and fight of those colds & flu’s. I know a salad doesn’t sound ideal when it’s minus degrees outside but trust me your body will thank you for it. I normally have a warm bowl of porridge in the morning, not only does that heat you up it also keeps you full for longer.
Choosing foods for your lunch or dinner that are rich in vitamin C, such foods like sweet potatoes, tomatoes, red peppers and citrus fruits, try adding these to your meals as vitamin C plays an important role in the immune system and energy levels, especially important if you regularly exercise.
During the winter months, we can come into contact with viruses that can cause colds or flu. So, it’s important that our immune system functions normally and zinc contributes to this. Foods such as shellfish, spinach and lentils are good sources of zinc.
Fish such as salmon, tuna & cod as well as milk, eggs and cheese, are a great source of vitamin B12. Vitamin B12 contributes to the normal functioning of the immune system and also contributes to a reduction in tiredness and fatigue.
Spices like chilli’s are a good source of antioxidants and rich in vitamin A, as well as minerals such as iron and potassium.
This Superfood Salad bowl I have for my lunch, which gives me a good boost for afternoon working. It is rich in nutrients, flavour and vitamins so a good all rounder for the whole family. Serve with some wholewheat crackers for a more filling dish or serve as a side with some fish for dinner.
Serves 4 portions
1 x 400g Tin Mixed Beans
200g Baby Spinach – chopped
2 x Tins of Tuna (or fresh if you can)
100g Cherry Tomatoes, sliced into quarters
1 x Cucumber sliced into quarters
Handful of chopped mix nuts & seeds
3 Tbsps of Sweet Chilli Sauce (more if you want it sweeter)
2 Chillies, Chopped finely (optional)
Chopped fresh Parsley (Optional)
Drain the tin of mixed beans and decant into a large bowl, add the spinach, tomatoes, cucumber, tuna, chilli’s (if using) and mix through
Pour in the chilli sauce and mix ensuring everything is coated.
Sprinkle Nuts & Seeds (of your choice) and chopped parsley (if using) on top and serve into bowls.
This time of year (January) it is very cold, wet, windy and snowy, so your immune system can take a bit of a battering. We tend to reach for medications such a cold & flu capsules, ibuprofen etc, which can help, however, I am a great believer that you can repair your body and fight infections from within and eating right does play a big part on that.
This recipe contains the following, so it is the ultimate winter fighter food.
Chillies contain Capsaicin which helps clear mucus. Ginger contains natural antibodies & anti-inflammatory agents & the ability to clear congestion. Garlic has antiviral & antibacterial properties. Butternut squash & wholemeal rice is good for boosting Vitamin C for your immune system. Cashew nuts are good source of fibre & magnesium both good for bone health & energy boosting.
This is also a great dish for batch cooking. It really is a win win all round.
Serves 4
2 Large Chicken Breasts – cut into chunks
2 Tbsp Thai Green Curry Paste (1 used the Blue Dragon Paste, but feel free to make your own)
1 Tbsp Coconut Oil or Olive Oil for cooking
1 400g Tin Coconut Milk
1 Vegetable Stock Cube
1 Tsp Turmeric
300g Butternut Squash, cut into chunks
200g Cauliflower, cut into small pieces
150g Baby Spinach
1 Tbsp Soy Sauce
Salt & Pepper
Juice of 1 Lime
30g Chopped Cashews (to garnish)
Handful chopped Spring Onion (to garnish)
50g Wholemeal Rice per person, cooked as per pack instructions.
Heat the oil in a pan on medium to high heat, brown the chicken and remove with slotted spoon.
If needed, put a little more oil in. Stir fry the curry paste for about 2 minutes to heat through and release the flavours.
Crumble the vegetable stock cube into the coconut milk and stir, pour into the pan with the curry paste and mix through. Add 1 Tsp of Turmeric.
Add back to the pan the chicken, butternut squash and cauliflower, mix and reduce to a simmer for 30 minutes, covered.
5 minutes before curry is ready, add in 1 Tbsp Soy Sauce, Juice of Lime and Spinach, mix through continue to cook for 5 minutes.
Serve with some wholemeal rice, spring onion and cashew nuts.
My meal plan somehow didn’t go to plan this week as I seemed to run out of store cupboard essentials like tin chopped tomatoes etc. This dish was the result of that, having looked a what I had and what needed to be used up I decided on a simple, quick and one pot dish. This turned out so delicious that I am sharing it with you, not only is it an easy to make dish but one that could be made ahead of time and frozen for later. The flavours in this dish can be enjoyed with the whole family. The good thing about this dish is that you can add whatever vegetables you like, to be honest anything goes here.
Serves2 – 3
250g Scottish Beef Mince (you could also use minced lamb)
1 Onion, chopped
1 tsp Ground Garlic Granules or 2 Garlic Cloves
100g Frozen Garden Peas
120g Pasta (I used fusilli but penne will do too)
400ml Beef Stock
2 Tbsp Tomato Paste
1 Tsp Dried Chilli Flakes
1 Tsp Smoked Paprika
Salt & Pepper to taste
1 Tbsp oil
100g Grated Cheddar Cheese
Handful of Chopped Parsley
Heat the oil in a pan on medium to high heat and fry the onions until softened and slightly browned
Add in the beef mince, season with salt & pepper & brown.
Add in the tomato paste, garlic, paprika, chilli flakes and frozen peas, mix through. Add in the pasta and beef stock, bring to the boil, reduce to a simmer and cook covered until pasta is cooked through, about 12-15 minutes.
Remove lid and sprinkle over the cheddar cheese and parsley, put lid back on, turn off heat and leave for 5 minutes. The heat in the pan will gently melt the cheese. Serve and Enjoy.
The steak pie became the national New Year’s dinner dish in Scotland because New Year’s Day was not traditionally taken as a holiday, (Western society has only been celebrating New Year for the past 400 years.) Families were too busy to cook and bought big steak pies from their local butcher instead. It was in 1871 that Scotland declared January 1st as a national holiday and then wasn’t until 1971 that Scotland got January 2 as another bank holiday.
Butcher-bought steak pie remains popular today, I suspect partly because most Scots are too hung-over to think about cooking on New Year’s Day. Hogmanay & New Years Day is about more than seeing in the bells with a dram of whisky and the best New Year street party in the world, the traditional celebrations continue well into the next day. In fact, it’s probably partly due to the over indulgence of alcohol that the ritual Ne’erday dinner continues to be such a vital part of New Year for so many Scots. The Traditional Steak Pie is round or oval in shape, which symbolises the end of one year with the seamless beginning of the next.
I do like to make my own steak pie and this recipe dates back to my Grannies and Aunties recipes. They key to a good steak pie is the meat, good quality Scottish Beef is key and it’s important to slow cook until it falls apart. I always make the night before too, this allows the gravy/juices to soak into the meat for an amazing flavour.
Serves 2-3
500g Braising or Stewing Steak (rump steak is also good)
1 Large Onion, Chopped
1 Carrot, Peeled & Sliced
400ml Beef Stock
1-2 Tbsp Beef Gravy Granules
2 Tbsp Olive Oil
Salt & Black Pepper
2 Tbsp Cornflour
1 egg beaten for wash
1 Ready to Roll Puff Pastry
Heat 1 Tbsp oil in a large pan on medium to high heat. Pat dry the meat and coat with the cornflour and season. Brown the meat in the pan, remove with a slotted spoon.
Add 1 Tbsp oil to the pan and add in the onions, cook for a few minutes to soften and brown. Add back to the pan the meat and the carrots along with the beef stock, bring to the boil and reduce to a gentle simmer (very low heat), cover with a lid and slow cook for about 2 hours.
With a slotted spoon carefully remove the meat & vegetables and decant into an oven proof pie dish, with the gravy still in the pan add the gravy granules and mix through on medium heat to thicken up the gravy slightly. (You don’t want it too thick as it will thicken overnight) Pour the gravy over the meat in the oven dish, allow to cool, cover with foil and refrigerate overnight.
When ready to bake, roll your pastry out and using a pastry brush, brush egg wash around the edge of your pie dish, take the pastry and lay over the dish, pressing the edges to seal. Trim any excess pastry. (which you could use for a wee design) Using a knife, make a small hole in the middle to allow the steam to escape. Brush the pastry with the remaining egg wash and bake in a pre heated oven at 200 deg C for about 25-30 minutes or until the pastry is golden brown and cooked.
I do love shortbread, I think it’s mainly because I grew up with it, we would visit my Gran’s house and get shortbread for a snack but more so every New Year as this is the tradition in Scotland.
Through the ‘Taste of Scotland’ scheme that promotes authentic and innovative Scottish cooking, Scottish cuisine has enjoying a renaissance and now many believe that the best food in Britain is to be found north of the Border. The story of shortbread begins with the medieval “biscuit bread”. Any leftover dough from bread making was dried out in a low oven until it hardened into a type of rusk: the word “biscuit” means “twice cooked”. Gradually the yeast in the bread was replaced by butter, and biscuit bread developed into shortbread.
Shortbread was an expensive luxury and for ordinary people, shortbread was a special treat reserved just for special occasions such as weddings, Christmas and New Year. In Shetland it was traditional to break a decorated shortbread cake over the head of a new bride on the threshold of her new home. The custom of eating shortbread at New Year has its origins in the ancient pagan Yule Cakes which symbolised the sun. In Scotland it is still traditionally offered to “first footers” at New Year.
Shortbread is traditionally formed into one of three shapes: one large circle divided into segments (“Petticoat Tails”); individual round biscuits (“Shortbread Rounds”), or a thick rectangular slab cut into “fingers.” However, these days as we see some amazing cookie cutter shapes, they can be cut into whatever you like. As it is the Winter Season here just now, I decided to go for some lovely Snowflake Designs.
From memory when my Gran’s used to make Shortbread, the rule of thumb is always 3,2,1, 3 parts Flour to 2 parts Butter to 1 part sugar. Stick with this and you can’t go wrong.
Makes about 10-12 Shortbreads
115g Plain Flour
55g Rice Flour
115g Butter
55g Sugar (Caster or Icing) – (Extra Sugar to finish)
Pre heat your oven to 150 deg C Fan.
In a mixing bowl cream together the butter and sugar, sift in the flours.
Mix until it resembles bread crumbs, then tip onto a floured surface and work by hand to bring the dough together.
Gently roll out to about 1/2 inch thickness, if using a cutter, cut into your designs and lay onto a greaseproof baking tray. If creating petticoats, press into a round baking tin, or fingers, press into a rectangle baking tin. Now refrigerate for about 20 minutes, this helps the biscuits to stop spreading when being baked. Prick the shortbread with a fork and bake for about 20-25 minutes until golden brown.
Remove from oven and while still hot sprinkle with some sugar to finish. Allow to cool.
I am very lucky to live in a Country with an amazing Food Larder and 1 type of Food that Scotland is known for is it’s Fresh Fish, the Scottish Fishing Industry is currently worth around £316 million to Scotland, unfortunately that number has went down recently due to Covid, but at the height back in 2015 it was worth nearly £437 million. Most of its catch comes in from Aberdeen, then some from central and southern areas. Some of the most popular seafood caught in Scotland are mainly shellfish such as Mussels, Shrimp & Crab but also Salmon, Cod, Haddock & Mackerel.
My local Fishmonger Ryan Black, is from a nearby Town called Kirkcaldy which is in the Fife region, they provide a fantastic service and deliver straight to your door, straight from the shore. There is nothing better than getting the freshest fish delivered the same day. I got some lovely pieces of Cod for dinner.
Having some Pistachios in my cupboard to be used, I decided to try my Pistachio Crust recipe with the Cod and it worked a treat….super delicious, healthy and quick mid week meal.
Serves 2
2 Cod Fillets
25g Pistachio’s
20g Scottish Oats
1 Tbsp Mustard Powder or 2 Tsp Dijon Mustard
1 Tbsp Lemon Juice
Salt & Pepper to taste
1 Tsp Dried Parsley or small handful of fresh
Line a baking Tray with greaseproof paper and preheat your oven to fan 210 deg C
Using a processor, blitz the pistachios and oats together with the parsley until roughly chopped
If using mustard powder, take 1 tbsp into a bowl and squeeze 1 tbsp lemon juice in and mix into a paste, leave to sit for 10 minutes to allow flavour to develop.
Lay cod onto baking sheet and spoon the mustard over the fish, season with salt and pepper, then place the pistachio crust mix over the top covering the fish, press down to secure. Bake in the oven for 12-15 minutes until opaque.
It’s coming up to the Festive time of year when we start planning our Christmas dinner get together. Roast Potatoes are probably one of the most popular side dishes on the table for most households. We all hope for those crispy skins and fluffy insides for our Roasties but sometimes that just doesn’t happen for whatever reason, so this is my foolproof recipe for the most amazing Crispy Roast Potatoes every time . Great for the festive dinner table but also great throughout the year for the perfect accompaniment to a good Sunday Roast dinner. Enjoy.
Serves 4
1kg Maris Piper Potatoes (these are the best kind)
100g Goose Fat (I used high grade Goose Fat from my local Butchers, S.Collins & Son) (you can also use a good Duck Fat too)
2 Tsp Cornflour
Sea Salt Flakes to taste
Rainbow Peppercorns to taste
First place a Baking Tray in an oven and pre heat to Fan 220 deg C.
Peel and cut the potatoes into quarters (or which ever size you prefer), place into a pan of cold water and season with salt. Bring to the boil and reduce to a medium simmer, covered for about 10 minutes.
Meanwhile, spoon the Goose Fat onto the hot baking tray (be careful) and put back into the oven to heat the fat up, about 10 minutes until the fat is smoking slightly.
Drain the water from the potatoes, give the pan a good shake to fluff up the potatoes, sprinkle the cornflour in and give it another shake, keeping the lid on let the potatoes sit for about 10-15 minutes so that the steam can air dry the potatoes. (the Drier the crisper they’ll be)
Carefully with a pair of tongs, place the potatoes onto the baking tray ensuring they are coated with the Goose Fat. Bake in the oven for 15 minutes, then turn the potatoes over and bake for a further 15 minutes, turn again and bake for another 15-20 minutes or until all golden brown and crisp.
Serve immediately with a sprinkling of sea salt & some pepper.
Some people add garlic and herbs like rosemary etc, which is fine, but I love my traditional recipes to be traditional, if you get a good potato there is no need for extra flavouring, the duck fat & salt are simply perfect for a roastie.
I do Love Pizza! Pizza originated from Italy and is usually a round or flattened wheat base with cheese and tomatoes. Through the years pizza has had many a different toppings, such as onions, olives, mushrooms, meat and dare I say Pineapple even! Pineapple in our house is very debatable whether it is a good topping or not what’s your take on it? Lol!
I just found out that the term PIZZA was first recorded in the 10th Century in a Latin manuscript from the Italian town of Gaeta, Lazio. Pizza has became one of the most popular foods in the world, especially in Europe and North America. The Baking/Cooking of Pizza varies around the world, with the most popular being a wood fired oven. Unfortunately, I don’t have one of these….yet! lol! I did invest in a Pizza Stone which to me is the next best thing for that perfect crusty base.
Although I am a fan of Traditional Foods, I also do like to experiment and decided to take a look at how I could make Pizza a bit different. Taking the traditional shape dough and filling only the middle then bringing up the sides and over like a calzone almost, this was my creation…..a Braided Style Pizza Wrap.
To be honest this is entirely up to your own tastes, this is what I used:-
1 Ball Mozzarella, sliced
100g Grated Cheddar Cheese
Mushrooms, washed, sliced
125g Sliced Hungarian Smoked Sausage (or any smoked sausage) I love the Gyulai Kolbasz as it has a lovely smoked paprika flavour. I recently purchased from the Transylvania Shop in Glasgow, they have amazing foodie finds. https://www.transylvaniashopandcoffee.co.uk/
To prepare the dough, sift flour into a mixer bowl with sugar and salt. Put the lukewarm water into a measuring jug and add the dried yeast, allow the yeast to start to bubble and react, approx 5-10 minutes.
Make a well in the center of the flour mix and add in the olive oil and the yeast mixture and slowly using a dough hook bring the dough together and knead for about 10 minutes or until the dough bounces back when pressed. (alternatively use your hands in a bowl and knead on a floured work surface) Allow to rise at room temperature or in your oven and 40 deg C until it doubles in size, approx 1-2 hours. Once doubled in size, punch back air and shape.
If you have a pizza stone, place on the oven rack and preheat your oven to its highest temperature, usually 250deg C. If not, preheat a baking tray or pizza tray in oven at 220 deg C.
To make the sauce put everything into a pot and heat through for about 5 minutes, using a blender blitz into a smooth sauce.
Meanwhile prepare your pizza wrap. Roll out the dough into a rough rectangle shape.
Spoon some of the pizza sauce down the middle, I measured dough into 3 equal sections. Then add your toppings onto the sauce, starting with the mozzarella first, then the rest.
With a sharp knife make horizontal cuts at either side in the pastry, then one by one and alternating each side, wrap up the pizza, securing the ends.
Reduce your oven temperature to 220 deg C before putting pizza in, slide onto pizza stone or tray and bake for about 15-20 minutes or until golden brown.
Remove and serve. This is also a good sharing idea as you can cut each section into pieces for everyone, great for parties.
This North African dish is named after the earthenware pot it is traditionally cooked in. I have used Chicken which is simmered with the traditional flavours of sweet spices and vegetables. A Typical Moroccan style dish would use beef which has always been their staple diet with sweet spices & dried fruit. I used my heavy Cast Iron Pot for this, which is great for slow cooking and low temperatures.
If you have read through some of my other recipes, you’ll see that I love One Pot Cooking, it is simple and good for batch cooking if you prepare meals ahead of the week. It also means less dishes to wash…lol!
Serves 2
2 Chicken Breasts – but into big chunks
6 Shallots
2 Carrots – chopped
30g Butter
1 Tsp Saffron
1/2 Tsp Ground Ginger
1 Tbsp Smoked Paprika
1/4 Tsp Ground Cinnamon
200g Tin Broad Beans or Butter Beans (you can even use Chickpeas)
50g Dates (Optional)
Salt & Pepper to taste
Fresh Coriander – Chopped
Fresh Parsley – Chopped
Preheat a little oil in the pot on medium to high heat and brown the chicken.
Peel and chop 3 shallots into rings and 3 into quarters. Add into the pan with the carrots, butter and brown gently.
Pour in 400ml of cold water, just enough to cover the chicken, bring to the boil slowly and reduce to a gentle simmer for about 30 minutes.
Add in the saffron, ginger, paprika, dates(if using) and beans to the chicken pot, stir and put the lid back on, continue to simmer for a further 30 minutes. Season with Salt & Pepper.
Serve and garnish with some chopped coriander and parsley. For a more filling dish you can also serve with some couscous.
Oh yum…..these were so tasty. I do love experimenting with flavours and using up what I have in my cupboards, sometimes my best recipes come from emptying my cupboards and using whatever is in there and trying things out…lol!
As it is coming up to the festive season I wanted to try some festive flavours and of course gingerbread is almost one of the all time favourites. With the coconut I wanted to create a snowy feel/look. I call them kisses because of the Jam, when you bite in you get the lovely gingerbread flavour and then the Jam gently kisses the back of your throat….yum! Baked in under 15 minutes these are a perfect quick snack with a cuppa. Will be best up to 3 days stored in an air tight container.
Makes about 20-24
200g Self Raising Flour
100g Rice Flour
1/2 tsp Baking Powder
Pinch Salt
2 Tbsp Olive Oil
40g Softened Butter
100g Dark Brown Sugar
1 Egg
2 Tbsp Honey
Finely Grated Zest of 1 Orange
For the Spice: 1 Tbsp Ground Cinnamon, 1 1/2 Tsp Ground Ginger, 1/2 tsp Ground Cloves
100g Desiccated Coconut
Rasperberry (or any flavour) Jam
2 Tbsp Icing Sugar for decoration.
Preheat oven to 175 deg C Fan. Line Baking Trays with Greaseproof paper
In a bowl beat together the butter, dark sugar, honey, oil, egg and citrus zest until blended.
In a separate bowl mix together flours, salt, spice mix and baking powder. Spoon half of the flour into the wet mixture and bring together, add in the remaining flour mixture and mix until you have a soft dough. It will be slightly sticky, this is o.k., but if too sticky just add a little more flour. Let stand for a few minutes.
Take about 1 Tbsp of the dough and roll into small balls. Place coconut into a bowl and roll each ball into the coconut to cover. Place onto the baking tray and press down with your thumb or finger to make a well in the centre.
Place about 1/2 – 1 Tsp of Jam into the well and bake in the oven for approx 12 – 15 minutes until set. Remove and allow to cool for a few minutes then transfer to a wire rack.
Finish off with a light dusting of Icing Sugar. Serve. Yum!
OMG! Well what can I say, if you love Peanut Butter like me these are delicious. They are also very light and cut up into small squares they are only about 70 calories per square, so in my book that’s a guilt free treat with my cup of coffee.
We always have a little treat on a Sunday, it’s something to look forward to while we relax and chill after our working week. Peanut butter is a good source of protein, fiber, folate, phosphorus, potassium & magnesium. And yes, peanut butter does have fat, but the fat is monounsaturated, which is more cholesterol-friendly.
I first saw this recipe from a Diabetic Website https://diabeticgourmet.com/ when my mum was a Diabetic, unfortunately I never got round to making them for her. This recipe I change a little to suit our sweet tastes….lol!
Makes 16 small squares
60g Butter
120g Caster Sugar (Splenda if diabetic)
40g Light Brown Sugar
100ml skimmed or semi skimmed milk
60g Peanut Butter
1 tsp vanilla extract
1 egg
120g Self Raising Flour
90g Rolled Oats
1/2 tsp baking powder
Pinch salt
120g Chocolate Chips
1. Beat the butter, caster Sugar and brown sugar until well combined.
2. Stir in milk, peanut butter, egg and vanilla until blended. Gradually mix in combined flour, oats, baking powder and salt until blended. Stir in chocolate chips.
3. Spread mixture evenly into a 9 x 9-inch baking pan covered with greaseproof paper. Bake in preheated 170 deg oven for 25 minutes or until a knife inserted near center comes out clean. Leave to cool on wire rack. Cut into squares.
4. Store in airtight container at room temperature, will be best for up to 3 days.
I was lucky recently to have meet Duncan Smith from Duncans Caviar https://www.instagram.com/duncanscaviar/ , who is the Exclusive Scottish Distributor for Royal Belgian Caviar https://royalbelgiancaviar.be/en/caviar. The Royal Belgian Caviar are based in Belgium and home farm their sturgeon for the best quality product. It is a firm favourite with all the Top Chefs. Click link for more information.
I used the Beluga Caviar which leaves a lovely after taste with its rich, Buttery and Creamy notes. Holiday season is fast approaching, so why not treat yourself and indulge, you only live once!
Makes 4
1 Ripe Avocado, peeled and mashed
1 small Red Onion, minced finely
2 tbsp lemon juice
Salt & Pepper to taste
100g Crabmeat
2 tsp Caviar
Mix together the crab meat, seasoning and 1 tbsp lemon juice, set aside
In a separate bowl mix the mashed avocado with the red onion, 1 tbsp lemon juice and seasoning.
For each serving take 1 tbsp of the avocado mix and fill a 1.5″ cookie round, then top with 1 tbsp of the crabmeat mixture, smoothing the surface as you go. Ensure your plate has been refrigerated before hand. Put back into the fridge for 10 minutes, this makes it easier to remove the cutter and stay in tact when removed.
When ready to serve, remove the cutter and finish off with a little Caviar.
These little bitesize timbales are great for a party or get together, the avocado and crabmeat give the creamy base some texture and the delicate topping of the Caviar makes these super decadent. Serve with a glass of Champagne for ultimate taste sensation.
In Scotland, before the 19th century, bannocks were cooked on a bannock stane (Scots for stone), a large, flat, rounded piece of sandstone, placed directly onto a fire, used as a cooking surface. Most modern bannocks are cooked in a pan or skillet and made with baking powder as a leavening agent, giving them a light and airy texture. Bannocks were known as flat cakes or bread baked from grains, although if you visit the town of Selkirk in the Scottish Borders their Bannocks are more like fruit loaves.
120g of Scottish Oats – I blitz Scottish Porridge Oats into a fine flour.
80g Plain Flour
2 tsps Baking Powder
Pinch Salt
150ml Buttermilk
In a bowl or mixer combine the flour, oats, salt and baking powder
Slowly mix in the Buttermilk, little at a time until the flour has combined, lay on a floured surface and shape the dough to about 1″ thick and about the same circular diameter as your pan. Indent the dough about 0.5 – 1cm in, as if you were cutting a pizza shape.
Heat a little oil in a pan or skillet on medium heat (you don’t want it too hot or it won’t cook through properly), place dough into pan and cook gently for about 15 minutes on 1 side then flip over and cook for a further 10-15 minutes until golden brown and cooked through.
Remove and place on a bread board, allow to cool for a few minutes then serve.
Step by step of Bannock Bread
I usually have this bread with Soup but you could also spread a little butter or Jam and would be just as nice.
Cullen Skink is an authentic Scottish Thick Soup from Cullen, North East Scotland. It’s main ingredients are Smoked Haddock, Potatoes and Onion, which makes a lovely home comforting dish that lasts through the years. It’s one of our most popular dishes in my household, especially in the Autumn/Winter Seasons. Traditionally it is served with bread.
Initially, Cullen Skink referred to a type of broth made with the scrapings of beef from the front legs of cattle, hence ‘Skink’ as this means shin. Hard times in the early 1890s left the Northern people unable to buy this product. By this time, Cullen Harbour (completed in 1819) had become the thriving centre of herring fishing and the village also specialised in the production of smoked haddock. With many families in the local villages having a fishing background, they turned to smoked haddock which was in plentiful supply. By using smoked haddock and various other products all put together, a distinctive delicious soup was made.
Makes 2 large bowls
2 Smoked Haddock Fillets
1 White Onion, Diced
1/2 Leek, sliced, white part only
350g White Potatoes, peeled and diced
300ml Milk
100ml Single Cream or Creme Friache
1 Bay Leaf
40g Butter
Salt & Pepper to taste
Handful of Chopped Parsley
Melt the butter in a pan and add the onion & leeks, cook for a few minutes then add the potatoes and continue to cook for a few minutes.
Add the milk, bay leaf & season. Bring to the boil then reduce to a simmer. Gently add the haddock to the pot and simmer gently for about 15 minutes.
Using a slotted spoon remove the haddock,from the pan place onto a chopping board and remove the skin, break into chunks, add back to the pan along with the cream and mix through, heat through gently for a few minutes.
Remove the Bay leaf and sprinkle over the parsley then serve into bowls.
I received the Osietra and Beluga Caviar and so excited to try. The Royal Belgian Caviar are based in Belgium and home farm their sturgeon for the best quality product. Click above link for more information.
Duncan Smith is the Exclusive Scottish Distributor for this excellent product, check out his Instagram above for more information.
I was looking for something a bit more sophisticated for my afternoon tea, so something in a cocktail glass sounded good. This little dish is great for the party season coming up or if you just fancy treating yourself like we did.
The Beluga Caviar leaves a lovely after taste with its rich, Buttery and Creamy notes.
Caviar
Makes 4 Glasses
4-6 tbsps of Sour Cream or Creme Fraiche (both work well)
1 Medium Avocado
2 tbsp Minced Red Onion
2 tbsp Lemon Juice
1 tsp Chopped Fresh Dill
1 Small Plum Tomato – chopped finely
1 Boiled Egg, peeled and chopped finely
Salt & Pepper to taste
1 tsp Caviar (do not use metal spoon as it can effect the taste)
Spoon the creme fraiche or sour cream into the glass.
Mash the avocado with a fork and mix in the onion, lemon juice, dill and seasoning. Put 1-2 tbsps into the glass on top of the cream.
Sprinkle some of the chopped egg and tomato on top then finish with a small spoonful of caviar an sprig of dill.
It is definitely soup season, nights are getting darker, air is getting colder and a bowl of warm soup is the perfect recipe after a long days work. If you are looking for a really tasty soup that is simple to make with simple store cupboard ingredients then this is for you. The things I love about soup is that you can make a huge pot and freezer it for later. Tasty cooking can not get any simpler than this.
I harvested some of my Carrots and Parsnips at the weekend, so this was what I had decided upon. With some good quality crusty bread on the side this is perfect for lunch or dinner. The bright orange colour also brightens up your dinner table.
Full of nutrition too, with Carrots & Parsnips both being full of good Vitamin C this can help boost your immune system at this time of year and very low in calories too. Lets not forget the spices, with cumin being a great aid for the digestive system and also full or iron. Garlic, with its active compounds which can help reduce blood pressure and also combat sickness including the common cold. Turmeric is an anti-inflammatory and a powerful antioxidant, was classed as a Superfood too. It’s a win, win soup for me this season.
Vegetable Harvest, Carrots & Parsnips
Serves 4
8 Medium Size Carrots, Chopped (I keep the skin on but you can peel if you prefer)
6 Medium Size Parsnips, Peeled & Chopped
3 Celery Stalks, Chopped
1 White Onion, Chopped
1 tbsp Olive Oil
1 tsp Ginger Granules or 1 tbsp freshly grated Ginger
1 tsp Garlic Powder or 2 garlic cloves – minced
1 tsp Cumin
1 tsp Ground Coriander
1 tsp Turmeric
1.5 litres good Vegetable Stock
Salt & Pepper to taste
A Little Swirl of Cream to serve and a sprinkling of pumpkin or sunflower seeds (Optional)
Crusty Bread to serve (Optional)
Pre heat the oil in a large pot on medium to high heat, add the onions and celery and cook until onions are translucent.
Add in the spices (cumin, garlic, coriander, turmeric, ginger) and mix through until coated.
Add in the parsnips, carrots and vegetable stock, season & bring to the boil then reduce and simmer for 25-30 minutes.
Take off the heat and using a hand blender, blend the vegetables to make a smooth thick consistancey.
Serve into bowl and finish with a swirl of cream and sprinkle of seeds.
You can keep soup in a fridge for about 3 days and freezer for up to 3 months.
I recently visited Transylvania Shop & Coffee in Glasgow, https://www.transylvaniashopandcoffee.co.uk/, the shop opened this year and they are so passionate about their home produce and Country. Everything that you could wish for from Transylvania, Romania, they have it. Their selection is vast and all excellent quality produce, from grocery store to a cake store to even coffee, yes they have it all. If you are a foodie and love seeking out new products then this shop is for you. If you are a massive Dracula fan, like me, and just love everything Transylvanian then you must visit this shop, you will not be disappointed.
Transylvania Shop & Coffee
Transylvania Shop & Coffee
On my visit I decided to try out some Romanian Meats, Cheeses, Coffee and of course their awesome selection of cakes, honestly, I have never seen anything like it……mouth watering flavours and designs that just take your breath away.
Coming soon is a season of get togethers and this gives us the opportunity to share all things food. I believe food brings people together, whether it’s just around the table in your home or different families & friends coming together for a celebration, there is always food around. With the recent Lockdown situations this year it has definitely given people more time to spend at home and to find their new love of food, be it baking with the kids or experimenting on using up store cupboard essentials to create new recipes, we have all tried something new. I would like to help with this journey and give you some new ideas. Please have a look around my blog, hopefully you will find your inner chef too!
This recipe brings both of the above together, I used a fabulous Romania Goats Cheese from the Transylvania shop and harvested some Beetroot from my garden to make these little bites, they are perfect for that get together event, or even just a simple snack for something different with the family in your home.
Romanian Goats Cheese
Beetroot Harvest
Makes about 20
About 4 Medium Sized Beetroots – Pre cooked
100g Goats Cheese (preferably the LaColline)
Handful of Pistachio’s or Walnuts, chopped
Cocktails sticks to hold together and a choice of your cutter shape (I used a star from my cookie cutter selection)
Using a cutter, cut out the beetroot and goats cheese into your desired shape. Make sure the Beetroot is slightly bigger than the goats cheese. Stack the goats cheese on top of the beetroot, sprinkle your choice of nuts/seeds and secure with a cocktail stick. Refrigerate until ready to serve.
I do love Autumn Time it has to be one of my favourite seasons, the crisp air, the colours on the trees, the celebrations and more. It is also my favourite season for food and drink, warming bowls of soup, seasonal vegetables like beetroot, carrots, squash and not forgetting pumpkin. I have put together some of my favourite Autumnal recipes for you. Click below to sign up if you haven’t already & I’ll send straight to your inbox to download.
This quick and easy vegetarian meal is perfect for those Autumn and Wintry Days, a warming bowl of goodness in your tummy. Full or nutrition and good vitamins, with only around 300 calories per bowl is a great healthy option to a takeaway Curry. This is also a good recipe to batch cook with. You can serve with a toasted naan on the side for a more filling meal.
Serves 4
300g Sweet Potato – chopped and diced into 2cm cubes
300g Butternut Squash – chopped and diced into 2cm cubes
2 White Onions, diced
2 tbsps Mild Curry Powder
2 tbsps Garam Masala Powder
1 x 400g Tin Chopped Tomatoes
1 x 400g Tin Coconut Milk
1 x 400g Tin Green Lentils
200g Spinach – chopped
Sunflower & Pumpkin Seeds to garnish (yoghurt optional)
Steam cook the Sweet Potato & Butternut Squash, place in a microwaveable bowl with 2 tbsps water and cover, cook on medium level for 10 minutes. (you could always roast in oven for about 35 mins too)
While cooking add a little oil to a pan and cook the onions until softened, add the curry powder, garam masala powder and mix through. Add the tin tomatoes and coconut milk, bring to a simmer and cook for about 10 minutes to allow sauce to thicken slightly.
To the sauce add the sweet potato and butternut squash along with the lentils and spinach, season and mix through, allow to simmer for a few minutes.
Serve into bowls and garnish with a sprinkle of seeds.
I am always looking for new ideas to be healthier in my Dinner choices, I used to think healthy meant you’d always be hungry after….lol. In this dish it is the complete opposite, with the addition of the rice & beans it was very filling and kept me satisfied all night, and with only 400 calories & 29g protein per serving, it was super healthy too.
You can always add some flaked Salmon for that extra nutrition.
Serves 2-3
Handful of Asparagus, trimmed & chopped
Handful of Green Beans, timmed & chopped
Handful of Peas
150g Wholegrain Rice (or for quickness, you could use prepacked rice)
100g Baby Spinach, chopped
1 x 400g Tin of Mixed Salad Beans (or any beans that you prefer, just not Baked!)
Zest & Juice of 1 Lemon
2 tsp Dijon Mustard
1 tbsp Olive Oil
Pinch Sugar
Handful freshly Chopped Coriander
Rainbow Pepper or Black Pepper
Cook the asparagus, green beans and peas in a pan of boiling water for 2-3 mins until tender. Drain.
Cook the Rice as per packet instructions and drain.
Heat the mixed salad beans in a pan for 4-5 minutes.
In a large bowl, put the rice, asparagus, green beans, peas, mixed salad beans & spinach, mix through until combined.
In a small bowl, mix together, olive oil, dijon mustard, lemon juice & zest and pinch sugar, pour over the rice bowl and mix through. Sprinkle over some fresh coriander and pepper then serve.
Oh yum, this was delicious, chipotle is a smoky & spicy flavour from Mexico. A chipotle pepper is a dry, smoked jalapeno pepper. They are most commonly made from red jalapenos. However, you can also use ripe green jalapenos as well. Chipotle peppers are added to any dish that could use a smoky flavor with a little heat. For this recipe I used a Chipotle paste. A quick and easy full of flavour dinner.
Serves 2
2 Chicken Breasts
1 tbsp oil
1 Medium White Onion, diced
1 tsp Smoked Paprika
1 tsp Cumin
1 tbsp of Chipotle Paste
1 tbsp Balsamic Vinegar
100ml Passata
1 tbsp Brown Sugar
4 slices of Sourdough Bread or you can serve with Tortilla’s
For the Salsa:-
8-10 Cherry tomatoes – quartered
1 tbsp balsamic vinegar
1 tsp chipotle paste
1/2 red onion – finely diced
chopped coriander
Freshly squeezed Lime & Lemon Juice
Seasoning to taste.
Using a Blender/Food processor, whiz up the chicken breast into a mince like consistancey
Heat the oil in a fry pan and brown the onion and minced chicken, breaking up the chicken as you cook
Add in the cumin, paprika, chipotle paste, vinegar, passata and sugar and mix through until chicken is coated.
Cook for about 10-15 minutes
To make the salsa, place everything in a bowl and mix together, set aside.
Toast your Sourdough bread, remove chicken from heat and serve on top of bread. Serve with Salsa.
One cannot think well, love well, sleep well, if not has not dined well.
Virginia Woolf
If you are looking for some new ideas to share with yourself and your family, look no further. I am going to be sharing some of my favourite recipes with you. Every month I will launch my E Book that you can download, print and keep forever or feel free to share with your family & friends. My E Books will be easy to follow with simple recipes that you and your whole family can enjoy.
Jump in and discover your Inner chef. Subscribe to the E Book updates.
These little Cheesy Potato Stacks are so tasty and so easy to make, a great little lunchtime snack or side dish for the whole family. You can also make it to suit your tastes, I used paprika spice and herbs but you could try Rosemary, Thyme or even Chilli. Great thing with these is you can freeze them and used them later in the week. Great snack box bites too.
Makes 12
3-4 Large Potatoes – I used King Edwards but Russet works well too.
1 Cup Shredded Cheddar Cheese (choose a quality melting cheese)
Butter for Muffin Tin
Rainbow Peppercorns & Salt to season
1 tsp Smoked Paprika (or any other spice)
2 tsp Dried Mixed Herbs (or any other herbs)
Preheat your oven to 200 deg C fan (400 F)
In a bowl mix the grated cheese with salt, pepper & mixed herbs
Grease your muffin tin with a little butter
Wash & dry your potatoes thoroughly, keeping the skin on, thinly slice the potatoes, using a mandoline or slicer attachment is best. Pat dry the slices of potatoes, you don’t want them too moist or they won’t crisp up in oven.
Take about 2 slices and lay in bottom of muffin tin, next sprinkle over some of the cheese mix, then another layer of 2 slices of potato and so on, until the stack is just above the muffin tin, (I had about 6 layers), finishing with a sprinkle of cheese mix. (the potatoes will shrink when cooked)
Sprinkle on top a little pinch of paprika spice and cover loosely with kitchen tin foil and bake in the oven for 15 minutes.
Remove foil and continue to bake for a further 25-30 minutes or until the potatoes are soft and crisp.
Remove from oven and allow to cool in the muffin tin, this will make it easier to remove and hold their shape. Serve. Yum!
My Favourite Past times, Cooking, Creating & Photography
Hello & Welcome, grab a drink, take 5 minutes and lets have a chat.
With thanks to Chef Julie @ https://noshwithchefjulie.com/, for taking some time to chat with me. First time, I have taken some time out to actually think about my Blog, normally I go into autopilot, so was lovely to do this.
Take a little visit to Julie’s Blog, it’s wonderful and full of great ideas. While you are there have a wee read of my interview and get to know me. Once again thank you for visiting.
A Moroccan inspired recipe and perfect for coming into the Winter months, it’s hearty, filling and warming. It is also a great batch cook recipe, make the soup up to 3 days ahead, cover and keep in the fridge. Freeze portions in food bags for up to 3 months. Add a splash of water when reheating.
Serves 4
300g Scottish Steak Mince (or any good quality beef mince)
1 Red Onion – chopped
1 Garlic Clove – crushed
400g Tin Tomatoes
1 tbsp Gram Masala
2 tsps Harissa Paste
1 litre Beef Stock
250g Puy Lentils (I used the pre cooked ones from Merchant Gourmet, my fav)
1 tbsp Dried Coriander
150g Spinach, chopped
1 tbsp Olive Oil
Salt & Pepper
Heat a little oil in a casserole dish on medium to high heat, add the mince with seasoning and brown, about 6-8 minutes, remove with a slotted spoon.
Add the onion and garlic and cook for a few minutes until softened. Add in the Gram Masala, Harissa Paste and stir, next add the tin tomatoes and cook for about 5 minutes to reduce down slightly.
Return the mince to the pot with the beef stock, bring to the boil then simmer and cook covered for about 30 minutes.
Add the lentils, spinach and coriander to the pot and cook uncovered for 10 minutes.
Black Pudding, Beetroot Salad & Goats Cheese Salad
I’ve loads of Beetroot growing in my garden just now and perfect season for it too, so decided on a little treat for lunch today. Certainly beats the Ryvita’s….lol.
Beetroot is packed with essential nutrients, beetroots are a great source of fiber, folate (vitamin B9), manganese, potassium, iron, and vitamin C. Beetroots and beetroot juice have been associated with numerous health benefits, including improved blood flow, lower blood pressure, and increased exercise performance.
Perfect pairing with Beetroot for me is definitely Stornoway Black Pudding & Goats Cheese, just so yummy! I served with some Homegrown Spinach too.
Serves 2
4 large Beetroots – Cooked and Sliced into bite size chunks
60g Goats Cheese
4 Slices of Black pudding
1 tbsp Balsamic Vinegar
Pinch salt
1 tsp Mixed Herbs
Handful of Spinach – chopped
Sunflower & Pumpkin Seeds to top
Place Beetroot into a bowl, add balsamic vinegar, salt & mixed herbs and mix through.
Cook Black Pudding in a pan on medium to high heat for about 3-4 minutes each side with a little oil. Remove and pat dry, break up into bite size pieces and add to beetroot and mix through.
Chop up the spinach and lay on a plate, top with the beetroot and black pudding then tear the goats cheese over and serve with pumpkin & sunflower seeds.
Pasta is such a staple food in most households and I think one of the easiest fast foods around. It can be made healthier by using the Wholewheat variety. When eaten in moderation, pasta can be part of a healthy diet. Wholewheat pasta may be a better choice for many, as it is lower in calories and carbs but higher in fiber and nutrients. However, in addition to the type of pasta you pick, what you top it with is just as important.
This dish uses Scottish Smoked Haddock, fresh from my favourite fishmongers in Pittenweem, Ryan Black, they deliver straight from the Shore to your door.
It also uses some of my fresh vegetables from my garden….yum!
I used my Steam pot for my Combi Microwave for this recipe, but if you don’t have Steamer just cook your pasta as per packet instructions. In a pan, bring some water to the boil add your vegetables and simmer for 4 minutes until softened. (you could use frozen vegetables or tinned vegetables for this too). Bring a large pan of water to the boil, bring to a simmer and add in your fish, cook for about 10 minutes.
If you have a Steam pot, add the pasta with 300ml water to the base, then your fish and vegetables onto the grid and cook on Pasta Setting for 7 minutes.
Meanwhile, make your sauce as per above recipe.
Remove fish and place onto a chopping board and remove the skin, break up into bite size pieces.
Drain your pasta and vegetables. Add the vegetables to the pasta then pour over the sauce mixture and mix through, add in the fish, mix and serve.
A Simple basic recipe for White Cheese Sauce that can be used for Pasta Dishes, Fish Dishes, Vegetable Gratin dishes and so much more. The great thing is that it just takes 5 minutes to make, super simple and super quick.
Makes enough for 4 portions
500ml Milk
4 tbsp Plain Flour
70g Butter
150g Mature Cheddar Cheese (almost any grated cheese works like Gruyere to Emmental)
Rainbow pepper to taste
Place milk, butter and flour into a large pan and heat on medium to heat. Start to Whisk and continue to whisk fast until the sauce starts to bubble and thicken, continue to whisk for a few minutes until your desired consistency (I like it quite thick so about 3 mins).
Add the grated cheese to the mixture and whisk through until the cheese melts.
It is my favourite time of the year, Autumn, the colours on the trees, the fresh crisp air, walks in the park, comfy jumpers and warming food. What’s not to like? After harvesting some of my vegetables from the garden today I decided to use them in this warming Hotpot. Nothing says home comfort food that a big pot a deliciousness & straight from the garden too.
The good thing with this recipe is that you can use just about any root vegetable and it will work just as good.
Some of my winter harvest this morning. Parsnips, Carrots & Potatoes
Makes enough for 2 large portions
4 Large Potatoes, cut into bite size pieces
2 Large carrots, cut into bite size pieces
2 Parsnips, peeled and cut into bite size pieces
1 Onion, sliced into wedges
6-8 Rashers of Smoked Bacon, sliced
2 Chicken Breasts, cut into chunks
500ml Chicken Stock
1 tsp oil
1 tsp Nutmeg
1 garlic clove, crushed
Salt & Pepper to taste
Cornflour to thicken sauce if needed.
1 tbsp flour
First coat the chicken with seasoning and the flour, heat the oil in a large pot or casserole dish then brown the chicken and remove.
Add in the garlic & nutmeg along with the onion and fry until softened then add the bacon and fry until cooked slightly, few minutes.
Add to the pan the potatoes, carrots, parsnips and mix, then add in the chicken stock & bring to the boil.
Reduce to a low simmer and cook covered for about 2 hours. Alternatively you can cook in the oven at 140 deg for about 2 hours.
Remove lid and if you like a thick sauce like me just add a little cornflour and stir through. 1 tsp mixed with water should be enough.
Serve with some lovely fresh crusty bread. Or if you are Scottish it has to be Plain Bread!
Oh yum! Today was absolutely stoating it down (heavy rain) and very Dreich (dull, moody) weather, so it was a warming pasta bake for dinner. Not only is pasta filling but this dish is simple and easy to make, great for a family meal or just when you are looking for something comforting to warm you up. The recipe uses a lot of store cupboard essentials so easy to put together.
Dish of Chicken & Chorizo Pasta Bake
Serves 2 large portions (or 4 small)
100g Wholewheat Pasta (again your choice, I used Fusilli)
2 Chicken Breasts
1 onion – chopped
1 red pepper – chopped
Olive oil
1 Garlic clove – crushed or 1 tsp ground granules
1 tsp dried Italian herbs or Oregano
200g Chopped tomatoes
200ml Chicken Stock
100ml Milk (or cream)
Handful of Spinach leaves, chopped
Handful of frozen peas
100g Grated Cheese (I used cheddar)
1 tsp Chilli flakes (optional, if you like it spicy)
1 tsp Paprika (for sprinkling on top)
80g Chopped Chorizo
Salt & Pepper
Heat a little oil in a fry pan and preheat your oven to 190 deg fan.
Brown the onions & red pepper with the garlic in the fry pan until softened, add in the chorizo and cook for a few minutes then add the chicken, season & brown chicken on all sides for a few minutes.
Once browned, add in the chopped tomatoes, chicken stock, milk, herbs and chilli (if using) to the pan and mix through, bring to the boil and reduce to a low simmer, cover and cook for at least an 1 hr.
Meanwhile cook your pasta as per packet instructions.
Using 2 forks, remove the lid from the pan and shred your chicken breasts (if you prefer chunks, that’s fine but I like it shredded)
Add in the frozen peas and Spinach and cook for a further few minutes.
Drain your pasta and add to the pan and mix through.
Now decant the pasta chicken into an ovenproof dish and grate the cheese on top with a sprinkle of paprika and salt & pepper to season.
Bake on middle shelf for about 25 minutes. Serve. Yum!
Mince ‘n’ Tatties (Mince & Potatoes) is a traditional Scottish dish and one that will never go away. Historically it was popular in school canteens because it was easy to make batches and feed lots of children. I grew up with mince ‘n’ tatties, at least once a week we would have this dish, whether it be at home, my grannies house or my Auntie’s it was a household meal that satisfied everyone every time.
There is no wrong or right way to make this, but does need to include minced beef and root vegetables such as onions & carrots. Here is my version and always a winner in my house. The only debate we always have is Brown Sauce or Tomato Sauce? Maybe you’ll make it and let me know…lol!
Best served with a buttered Scottish plain outsider slice too…….oh….this is a must! Or even a Scottish plain mince ‘n’ tattie piece (Sandwich)! Haven’t tried it….go on I dare you….you won’t look back…trust me!
Scottish Plain Bread
Serves 2
For the Mince
250g Scottish Steak Mince
1 onion – chopped
1 Carrot – chopped
Handful of garden peas (frozen is fine)
200ml Beef Stock
1 tbsp Beef Gravy granules
Salt & Black pepper
Splash of Worcestershire Sauce (optional)
For the Tatties
400g Potatoes (ones good for mash)
2 tbsp butter
Heat a little oil in a pan on medium heat and brown the onions, then add the mince, season with plenty black pepper and salt to taste and brown.
Add into the pot the carrots, peas and beef stock, mix and bring to the boil, then simmer gently for about 30 minutes.
Next stir through the gravy granules to thicken the sauce, cook for a further 5 minutes. At this stage if using worcestershire sauce, then stir through.
Meanwhile, cook potatoes in slightly salted water until soft, drain and mash with the butter.
Serve.
Mince n Tatties
Go on, go back to your school days and use an ice cream scoop for yer tatties! In our households as kids and still to this day, we wouldn’t eat it like this…..oh no…..we would mix the tatties with the mince on the plate then cover in sauce….this is where the debate of Brown or Tomato sauce comes in…lol! Sometimes too we would make a piece with scottish plain bread and the mix of M&T’s in the middle…oh yum! You gotta try this. Proper home comfort food.
Who doesn’t love a Curry? Especially when it’s a healthier version. This Curry came about when I was trying to use up leftover Almond Milk, nutritionally, store-bought almond milk (like Alpro or Almond Breeze) is a low-calorie product with about 56 calories per 100ml. It’s typically low in fat, with just 1.5g per 100g – all of which is largely unsaturated fat.
This Curry is a great family curry as its low in spice but with great flavour. It’s also great if you love batch cooking as you can make a hug pot and freeze into portions.
Chicken Curry with Almond Milk
Serves 2
2 Chicken Breasts – cut into chunks
1 tbsp olive oil
Salt & Pepper
1 tbsp Tomato Paste
300ml Almond Milk
1/2 tsp ground cinnamon
1 tsp Chilli powder
Handful of Cauliflower Florets (I used frozen)
Handful of Peas (I used frozen)
Curry Paste (see below)
Curry Paste:
1 Onion
1 tsp garlic granules
1 tsp ground ginger
1/2 tsp ground turmeric
1 tsp gram masala
Sea salt
Mix all the Curry Paste ingredients into a blender and mix until you get a smooth paste.
Heat a little oil in a pan on medium to high heat, add chicken, season and brown.
Add the Curry paste to the pan and heat through for about 2 minutes.
Next add the tomato paste, almond milk, cinnamon and chilli powder and mix through.
Reduce the heat, cover and simmer on low for about 1 hour. 15 minutes before serving add in the cauliflower & peas, mix through and cook for remaining time.
I am always looking for healthier options but without compromise on flavour so I decided to try Chickpea flour to make my Chapati’s. This recipe was so much better than my traditional one, so much more flavour and healthier too. These Chapati’s are much lighter on the tummy too. Chickpea Flour or known as Gram Flour or Besan is low in Saturated Fat, and very low in Cholesterol and Sodium. It is also a good source of Dietary Fiber & Magnesium.
Makes 4-6
100g Gram Flour
100g Plain Flour
1 tsp salt
100ml Milk
1 tsp olive oil
Mix the flours & salt together, then slowly add in the milk then the olive oil and bring together to a soft dough. Wrap in cling film and allow to rest at room temperature for about 30 minutes.
To bake, heat a little olive oil in a hot pan. Cut the dough into six equal sections and roll out with a rolling pin. Place into the pan a cook until you see the bubbles appear then flip over to the other side and cook for a further minute. If you are like my other half and like it a bit well done, keep your pan on a very high heat. (Beware the smokey room…lol!)
The weather was turning a bit colder this weekend & there is no better dish than a warm chilli to heat your soul. I decided to slow cook this time and it definitely paid off as the flavours were more intense and the sauce lovely and thick. Chilli is always good the second day too, so this can be made in advance. Some cooks swear by lots of different spices from mustard powder to even cinnamon & I’ve even heard of chocolate in chilli…..(not sure about than one…lol), this combination I found works for me.
Heat the oil in a casserole dish or large pan on medium to high heat & fry the onions with the garlic until softened. Add in the Red pepper and cook for a further few minutes until softened.
Add in the Beef mince, season and brown.
Add in the tomato puree, spices & mix through.
To the pot add the kidney beans and tin tomatoes & mix. Sprinkle over the beef oxo cube & the herbs, add in the water, bring to the boil, cover and simmer on a low heat for about 2-3 hours. If the sauce hasn’t thickened, remove lid and cook uncovered for about 10-15 minutes to help thicken sauce.
I Served with Taco’s, Grated Cheese and sprinkled some fresh spring onions on top…yum! Also nice served with rice and soured cream.
These little cakes are so easy to make and quick too, a great mid week dinner or even a quick lunch bite. What’s even better is that they are healthy, low in fat & low in calories at just 150 per cake.
Makes 8
2 Chicken Breasts
4 Spring Onions – chopped finely
1 tsp garlic granules or 2 garlic cloves, crushed
1/2 tsp ginger or 1″ fresh ginger chopped finely
1 tbsp dried coriander
2 tsps Soy Sauce
Zest & Juice of 1 lime
Salt & Pepper
1 tin of Chickpeas drained (400g)
1 tsp dried chilli flakes
Sweet Chilli Sauce to serve.
Preheat oven to 180 deg and line a baking tray with greaseproof paper.
Using of food processor blitz the chickpeas and chicken until minced.
In a bowl mix everything together with your hands and form 8 small cakes about 1cm thick, place onto baking paper and bake in the oven for 15 minutes.
Conic Hill is in the Loch Lomond & The Trossachs National Park, it rises above Balmaha on the East side of Loch Lomond. The Hill is 361m high, so not a high mountain but none the less can be quite challenging at points. It has a clear path up, mostly steps then a gravel path, there is a bit of a scramble at the top.
Start of Conic Hill through Forest
You first start out at the far side of the Main Car Park in Balmaha. Walking through the forest firstly until you come to a gate which then opens up the route to a gravel path. Once you get to the top of the first section, the views are simply stunning, you can see some of the Islands on Loch Lomond and there is also a nice place to sit & get your breath back while absorbing the glorious views.
Continuing onto the next section the stone steps continue but with the views that open up more. The good thing about this walk is that you don’t need to go to the top to take in the views, half way up there is an opening that allows you to do exactly that.
Once you get to the top, there is a bit of a scramble but for only a minute or 2. It really is worth going to the top, keep to the left hand side path this will take you around to the top. There is a path to the right that makes you think that’s the top but don’t take this.
Once you get to the top, just sit and admire the views of Loch Lomond and its surroundings. Take a picnic if it’s a nice day.
As always, before you go, please ensure proper footwear and clothing as Scotlands weather can change in a second. Please Respect the Mountains & Park area & Stay safe.
It was National Cheesecake Day on July 30th, 3 days after my partners birthday & he wanted Cheesecake for his dessert. We must have went through every flavour on the planet until he decided that it was Crunchie he was going to settled for. To be honest I was glad as I do love a Crunchie Bar, it’s just that lovely melt in the mouth honeycomb that I like. This was delicious!
Fork full of Crunchie No Bake Cheesecake
Makes a Deep fill 9″ Cake
300g Cream Cheese (I use Philadelphia & full fat, it dosen’t work with the lighter one)
150ml Double Cream
80g Icing Sugar
3 Cadburys Crunchie Bars – Blitzed in a processor
1 tsp vanilla essence
13 Digestive Biscuits – Blitzed in a processor
50g Melted Butter
Milk Chocolate shavings for the topping
Grease and line the bottom of a springform tin with greaseproof paper, set aside
Mix the melted butter with the crushed Digestives and spoon into the tin, pressing down with the back of a spoon until compact and smooth. Chill in the Fridge for about 1 hour
Meanwhile, mix the cream cheese, crushed crunchie bars and Icing Sugar together in a bowl with a hand mixer.
In a separate bowl whisk the double cream and vanilla essence until soft peaks form.
Fold the whipped cream into the cream cheese mix, don’t over mix as you want to leave as much air in as possible. Once your biscuit base has set, gently smooth the cream cheese filling on top, return to the fridge and allow to fully set for at least 12 hours or preferably overnight.
Remove from fridge about 10-15 minutes before you are ready to serve and shave some milk chocolate over the top, or you could grate or break up another crunchie bar for extra flavour. Yum! Remove from Cake tin and slice.
This can be kept in the fridge for about 2-3 days.
As you may know I started my very first Raised Vegetable Beds this year, it’s something I’ve been wanting to do for a while but as the story goes, we work & we work and never seem to find time to start anything. This was the year that I was finally going to put a plan of action together, ordered my raised beds, got them all painted and treated, filled them up, planted the seeds and waited. I can’t tell you how exciting it was to see my first little green shoot pop up.
I love Beetroot, so that was the first seed planted and I am now starting to harvest them. Oh my, freshness, freshness, freshness…..there is nothing better that eating straight from your garden, I harvested some yesterday and decided on a lovely refreshing salad today for my lunch.
Fresh Beetroot from my garden
How to Roast Beetroot
First wash all the mud etc off of the beets and trim of the stalks & leaves, but keep the leaves aside for later. If not using straight away, store in a perforated plastic bag in the salad bins in your fridge, these will keep for about 2 weeks.
Beetroot & Beetroot Leaves Storage in Fridge
Using Tin foil, place the Beets (with the skin on) on and sprinkle a little olive oil & salt, wrap up into a parcel, not too tightly as you want the steam to help cook the beets, then bake on a tray in centre of your oven at 200 deg for about 45 minutes.
Remove and allow steam to escape from parcel then allow to cool slightly. At this stage, I advise to wear gloves, you WILL get Beetroot stained if you don’t…lol! With gloves on gently rub the skin and you’ll notice it comes away very easily, remove all the skin and slice into wedges or bite sized pieces. Yum!
Removing Skin from Roasted Beetroot
Using the saved leaves, these can be cooked just like Kale. Bring a pan of water to the boil add a little salt and blanch for a few minutes, remove and drain excess water through a colander/sieve. I love the colour of the water here too.
Place leaves in a bowl with beetroot, squeeze some lemon juice and 1 tbsp balsamic vinegar over and mix. Sprinkle over some Goats cheese or Feta cheese and chopped walnuts to serve.
You could also cook some couscous or bulgur wheat to add to make it a more filling bowl.
A Bowl of Roasted Beetroot, Beetroot Leaves, Goats Cheese, Walnuts
I do love it when an ad hoc recipe comes together. We fancied some Thai tonight but didn’t really have the right ingredients, so I compromised! I am so bad at compromising…..lol….. I am forever adding and changing things to suit what I have in my cupboards…..but that’s where good recipes come from…right?
This was one of them, super tasty and satisfied us for dinner tonight.
Thai Beef Balls & Thai Potato Wedges with Lime & Mayo
Made 18 Bitesize Balls
250g Scottish Beef Mince (you could use Chicken or Turkey)
2 tbsps Soy Sauce
4 Spring Onions – chopped finely
1 tsp Dried garlic granules
1 tsp Dried ginger powder
2 tsps Dried coriander
1 tsp Chilli flakes
Zest of 1 lime (keep lime for juice later)
150g tin Broad Beans (crushed) (Water chestnuts, blitzed in a processor would be nice too)
Preheat oven to 180 deg and place greaseproof paper onto a baking tray.
Mix the Soy sauce, ginger, garlic, chilli, lime zest, coriander, spring onions and seasoning in a bowl. Then add mince & broad beans, mix together with hands until it comes together.
Take a small amount and roll into a ball, put onto baking tray. Bake in oven for 15 minutes. At end of cooking, turn on grill and brown for a few minutes.
Serve with a Lime Wedge. I also served with Thai Potato Wedges (recipe below) and some Lime & Coriander Mayo.
Thai Beef Balls on Baking Tray with Potato Wedges
For the Potato Wedges
Slice your potatoes into wedges and place in a food bag or bowl.
For the coating, mix 3 tbsps olive oil with 1 tsp chilli flakes, 1/2 tsp ginger, 1 tsp garlic and 2 tsps coriander. Season then mix with the wedges and cook as normal. (I use my Crisper plate in my microwave to cook them as it only takes 10 minutes) Check below for info on the Crisperplate. https://www.hotpoint.co.uk/Appliances/Cooking/Microwaves
Sunday for me is a chillout day and normally a baking day, so today I decided to give these a go for our Sunday Brunch picnic at home. Sugar & Spice & all things nice……so yummy!
Makes 4
150g Strong White Bread Flour
1 packet 7g Dried Yeast
15g Caster Sugar (plus 40g for Topping)
1/2 tsp Salt
2 tbsp Bicarbonate Soda
1 tsp Ground Cinnamon
100ml Milk
40g Butter (plus 30g melted for coating)
50g Chocolate (if using a dip)
Chocolate Dip for Pretzels
Melt butter and milk in pan on low heat, do not boil, needs to be lukewarm about 40 deg.
Place strong white flour, yeast, salt and sugar in a bowl and mix. Make a well and pour in the melted butter and milk mixture.
Mix everything together until a soft dough forms and knead either using a stand mixer with dough hook or on a work surface with your hands for about 8-10 minutes. Grease a bowl and place the dough in, leave to rise for about 90 minutes or until doubled in size.
Knock back the dough and cut into 4 equal sections. Roll each section into a long rope approx 50cm long.
To make the Pretzel shape, curve the rope into an upside down U Shape, then twist the ends together twice, each time left over right. Bring the ends of the rope up to the top of the curve (loop) and press down to secure.
Preheat your oven to 200 deg and line a baking tray with greaseproof paper.
Bring a pan of water to the boil. Place 1/2 tsp of Bicarbonate Soda into the pan of water for each Pretzel, 1 at a time using a slotted spoon, slowly lower the pretzel into the water on the slotted spoon, leave for about 10 secs, lift out the spoon & drain the water then place onto the baking tray. Bake for about 10-12 minutes or until golden brown.
Meanwhile mix the caster sugar & cinnamon together in a bowl.
As soon as the Pretzels come out of the oven, brush with the melted butter and leave to cool for a few minutes. Once cooled toss in the sugar mix and serve straight away.
Melt chocolate with a little milk to serve. (if desired)
When I think of Caribbean Food, I think beans, rice, peppers, sweet potato & tomatoes to name a few. This dish is a mix of all my favourites and I was using up leftovers too. I hope you enjoy. This dish would be lovely with Lamb too.
Serves 2
300g Scottish Beef Mince
150g Diced Butternut squash (or sweet potatoes)
1 onion, chopped
1 Red Pepper, chopped
1 garlic clove, finely chopped
1 cm fresh ginger, finely chopped
1 tbsp sweet hot paprika
120ml Beef Stock
200g chopped tin tomatoes
200g Black Eyed beans
Handful of peas
Salt & Pepper to taste
Heat some oil in a large pan and brown the mince.
Add in the butternut squash, onion, red pepper, garlic, ginger, paprika and mix through, cook for 1 minute then add in the stock, tomatoes, peas and beans, bring to the boil then simmer covered for about 30 minutes. Season.
If using Lamb I would slow cook this so the Lamb in tender.
I am now back to work after a long furlough period due to this Covid19 pandemic. Being back at work means that I prefer quick and easy cooking meals for mid week dining. Last thing I want is to finish a long work day and stand cooking for an hour, who’s with me?
This dish takes just 15 minutes, so its a quick throw together in one pan kinda dish, but packs flavour and spice. Good on its own or can serve with some rice. I also used freshly picked Spinach from my new veggie beds (furlough project).
Homegrown spinach
Serves 2
200g chickpeas
200g chopped tomatoes
80g chorizo – sliced or cut into bite size pieces
1 brown onion – chopped
1 yellow pepper – chopped
Handful of Spinach – chopped
1 tsp chilli flakes
1 tsp garlic granules
1 tsp basil flakes or fresh leaves to serve if you have
Salt & pepper to taste
100g Wholemeal or Basmati Rice if serving. (cooked as per packet instructions)
Spray a pan with oil and heat on a medium to high heat
Brown onions in pan for a few minutes
Add in the pepper and chorizo with garlic and chilli flakes and cook for a few minutes
Add in the tin tomatoes and chickpeas, mix through, bring to the boil then cover and simmer for 10 minutes.
1 minute before serving, add in the spinach and basil flakes, mix through. Season
I recently harvested my first sweet potatoes, so decided to have a little quick potato lunch today. If you love sweetness, you will love this. I served with some crushed goats cheese for that extra creamy texture.
Serves 2
2 medium sweet potatoes – sliced into 1″ thick slices
1 tbsp butter
1 tbsp brown sugar
1/2 lemon juice
1/2 tsp cinnamon
Pinch Salt
Preheat oven to 160 deg and grease a baking tin.
Mix the Lemon juice with melted butter, sugar, salt and cinnamon
Places the sweet potato slices in baking tin and pour over the mixture, cover with tin foil and bake for about 40-45 minutes.
The last 5 minutes, remove the tin foil to allow glaze to thicken and brown in oven. Remove and sprinkle some goats cheese. Serve.
sweet potatoes, lemon and glaze
Sweet potatoes ready for oven
Lemon Glazed Sweet potatoes
Lemon glaze sweet potatoes served with goats cheese
For a while now I have been trying to perfect my Empire Recipe, and finally I have found a ratio of ingredients and cooking times that work perfectly. (please bare in mind that not all ovens are the same, so you timings may vary slightly). The traditional Scottish way is to decorate with a Jube Jube (they are like big jelly tots), although most people tend to put a cherry on top. To be honest it’s whatever you like, there is no right or wrong. I have even experimented with alternative decorated toppings.
A bit like Shortbread quantities my Empire quantities are similar, if you start with the flour then butter then sugar and just half quantities as you go, you won’t go wrong.
Empire Biscuit Recipe – this makes 12 biscuits (24 individual biscuits)
450g Plain Flour with an additional 50g being Custard Powder to make 500g
Mix everything in a mixer until just coming together, remove from bowl onto a floured work surface and bring together with your hands.
Using a floured rolling pin, roll out to about 1cm or just under. Using your chosen cutter shape cut out your biscuits and place on a baking tray with greaseproof/baking paper.
Preheat your oven to 180 deg and bake for about 10 minutes. You do not want these biscuits to brown, they should be pale in colour. Remove and allow to cool on a wire rack.
Once cooled, you can now spread 12 with the scottish raspberry jam and sandwich together. Make your icing and spread on top of biscuit then finish by adding your Jujube. (or cherry)
This was such a great discovery today, this Waterfall is only 3 miles from where I live. I have lived here for over 30 years and only just knew about this beautiful spot. If I haven’t told you yet, I am an admirer of Waterfalls, I love the way they move, sound and look. Sitting by them makes me feel so relaxed and they are also great to photograph. Some say that because of the negative ions released by a waterfall, you can’t help but feeling happy when you’re near one. The “science” says that when the negative ions go into our bloodstream, it increases the production of serotonin, which is the happy chemical.
Black & White Waterfall
If you fancy a little wonder, this is quite easy to get to and from the near roadside just a short walk. If coming by car, you can either park in Abronhill or Wardpark area near Forest Road.
We walked along the roadside from Wardpark and over the railway bridge, about 100 yards after the railway bridge there is a gap in the trees, walk up and you will see a fence with a wooden step over, climb over into the field.
Once in the field you want to head to the Walton Burn that runs through, this you will need to cross. My advice is wear wellies or waterproof walking boots as your feet will get wet. Some bits of the burn are quite shallow. If it has been raining (which it does a lot in Scotland) the ground (field) will be very muddy too.
Once across the burn you want to walk to your left through the field with the burn on your left until you see the brick wall and tree line. When you reach this you are at the top of the waterfall, which is on your left.
You should see a mud path in front of you, from here head down towards the bottom of the waterfall. Please take care here as it can be slippery under foot when wet.
As the Covid19 Lockdown is slowly and gently easing, we are now allowed to travel to the mountains again. We have longed to get back outdoors and into the picturesque landscape we call home. The Scottish Mountains are my headspace, a place where I grow, think, be at peace, laugh and get fitter…lol! To read more about the Scottish Munros, Corbetts, Grahams etc, head over to my travel post https://atomic-temporary-46532287.wpcomstaging.com/2020/07/08/a-list-of-scotlands-mountains/.
Anyway, back to food, my first passion. To walk or climb the Scottish Mountains you need energy firstly (then waterproofs…lol), so I made these to pack and take with us for a wee boost when needed. Great for a pre workout snack too & also Gluten Free.
Nutty Energy Balls
Makes about 16
For the Balls:-
4 heaped tbsp of Crunchy Peanut Butter (good quality, I use Whole Earth)
200g chopped mixed nuts & raisins (I used a food processor to chop finely)
2 tbsp Icing sugar
Coating/Topping:-
Choice 1:-
Dark or Milk Chocolate, 1 tbsp Butter – Melted together
Place all ball ingredients into a bowl and mix together until combined. You may find it best to us clean hands for this. Take a tsp size and roll into a ball.
Dip the rolled balls into your wet mixture of choice and then roll into the coconut or pistachio toppings to coat. Place onto a greaseproof lined baking tray and refrigerate to harden.
These can be stored for up to 2 weeks in an airtight container. Enjoy!
Of course you can use any coating or topping you like.
The great bulk of Ben Nevis, UK’s highest mountain at 4413 feet, towers above Fort William in Lochaber. Click the Image to find out more.
There are 5 different Mountain heights in Scotland, each are categorised as follows:-
Munros:- These being the highest ranges, anything over 3,000ft is classed as a Munro. There are 282 in the current list.
Corbetts:- These are 2,500ft – 3,000ft ranges. There are currently 222 Corbetts in the list.
Grahams:- They are 2,000ft – 2,500 ft ranges with a drop of 150m on all sides. Currently there are 219 on the list in Scotland.
Donalds:- Generally found in the lowlands of Scotland, as they are 2,000ft at least with a drop of 100m on all sides. There are currently 89 in the list.
Marilyns:- Are anything below 2,000ft, and currently there are around 1219 in Scotland.
Mountains can also be categorised as areas, such as Highlands & Islands, Southern Lowlands etc, here are some:-
The Cairngorms
The Grampian Mountains
Cuillin Hills
Southern Uplands
Ochil Hills
Campsie Fells
Sidlaws
Northwest Highlands
Galloway Hills
Cheviot Hills
Arrochar Alps
Lomond Hills
Glencoe Area
Lochaber Hills
Pentland Hills
There are so many beautiful areas to explore here, I am still working my way around my homeland and hope to bring you more information as I go along.
Some of my favourites are the Cairngorms, The Cuillins & Glencoe.
I was looking through all my recipes the other day and came across this one from my Gran’s old Cookbooks, one I hadn’t tried before. So with the wet weather to day was that day I was going to try these. Back in the day my gran always used margarine for baking, personally I think butter is a much better flavour so this was the 1 thing that I changed & I added in some pistachios to the base to give it a bit more crunch.
Mint Square
Makes about 16-20 squares (depends on how big a slice you want…lol!)
For the Base:-
200g Digestives, crushed
120g Butter
50g Light Brown Sugar
1 heaped tbsp Cocoa Powder
1 tsp vanilla extract
2 heaped tbsp desiccated coconut
40g Chopped Pistachios
1 egg beaten
For the Peppermint Centre:-
50g Butter
3 tbsp milk
1/2 tsp peppermint extract
230g Icing Sugar
Green Food Colouring
For the Chocolate:-
140g Milk Chocolate (55% cocoa) I use Lindt, definitely my favourite.
40g Dark Chocolate (70% cocoa)
1 tbsp butter
Use a 9″ square baking tin and line with baking paper or foil
In a saucepan over a low heat melt the butter, stir in sugar & cocoa powder, bring off the heat and whisk in the beaten egg, return to heat and whisk until thickened, this only take a minute or 2. Remove from heat, stir in the vanilla extract, digestives, pistachios and coconut, mix together so everything is coated well. Using a spoon, spread the biscuit base mixture into you baking tin and smooth. Refrigerate for about 1 hour until hardened.
Using a mixer, stand or hand whichever you have, beat the butter until smooth. Add the icing sugar, milk, peppermint essence and food colouring and mix until blended. Smooth this mixture over the top of your biscuit base and return to the fridge to set for about 30 minutes.
Meanwhile, melt your chocolate with the butter in a glass bowl over a pot of simmering water and allow to cool slightly. (about 5-10 minutes)
Pour chocolate over the buttercream and smooth, return to the fridge to allow chocolate to harden. (about 30 minutes).
Once chocolate has hardened you can now decorate (if you wish), I just drizzled some green icing over the top and returned to fridge to set.
To prevent the chocolate from breaking when cutting into slices, remove from fridge and bring to room temperature. I made that mistake of slicing too soon and my chocolate cracked.
Another great recipe from PON book, we are loving our curries at the moment, must be all this rainy weather we are getting thats putting us in the mood…lol! After all, who doesn’t love a good curry?
There is nothing better than a homemade Curry, fresh ingredients, good scottish beef and making from scratch you can save on those extra calories to make it a guilt free Curry. This little Curry is only 200 calories per serving. (add on 50g cooked brown rice to serve, still brings it to under 500 calories) Yummy!
Beef kofta Curry Serving
Serves 2
1 Red onion, diced
1 tsp garlic granules (or 1 clove peeled and diced)
1 tbsp Curry Powder
1 tbsp Tomato Puree
400ml Beef Stock
230g Butternut Squash, diced
300g Scottish Beef Mince
Fresh Coriander, chopped
Salt & Pepper to taste
Lightly oil a saucepan and add the onion, cook until browned. Add in the garlic and curry powder and stir, add in the tomato puree, stir then add in the stock. Add the butternut squash and bring to the boil then simmer for about 20 minutes until squash has softened.
To make the meatballs, put the mince & coriander in a bowl then season with salt & pepper, mix together and then divide and roll into small balls. I got 10 out of mine.
Spray a pan with a little oil and brown the meatballs. Set aside.
Once butternut squash is ready, blitz with a hand blender to make a smooth sauce. Place the meatballs into the sauce and warm through for a few minutes. Remove and serve with a sprinkle of fresh coriander. Yum!
Oh WOW! This dish is super tasty, if you love Pies and you love Curries, you will absolutely love this. This came from my PON Everyday light Cookbook, so lower in calories too at just 400 per serving. The Sweet Potato Topping adds that extra flavour for perfection. This would be a good batch cook meal too.
Place the potatoes into a pan of water and bring to boil, then simmer for 20 minutes until tender.
Meanwhile, spray some oil in a pan and brown the mince. Add the onion, pepper, carrot and cook for a few minutes. Add in the ginger, garlic, curry powder & tomato puree and mix. Then add the stock and bring to the boil, then reduce to a simmer and cook uncovered for about 15-20 minutes until sauce has thickened.
Once potatoes are cooked, drain and mash with the turmeric and season.
Once mince has cooked stir through the frozen peas and place into an ovenproof dish, allow to cool slightly. Once cooled spread the mash potatoes on top and fluff up with a fork. Bake in the oven for about 30 minutes. If you have a browning setting on your oven, place under grill and brown for a couple of minutes. (add that extra crunch)
Since watching James Martin on his Saturday morning show making his own butter, I have longed to try this. Just like JM himself I am a fan of butter, loads of it too. It looked easy enough to do and it was, I urge you if you have ever fancied trying this, you must do. My next batch I will add some flavours to try, thinking herbs & chilli.
Step by Step process:-
1 x 500ml double cream – good quality (makes 250g Butter)
General rule is whatever quantity of cream, you get 1/2 amount butter.
In a Mixer pour the double cream & whisk on medium to high speed until it resembles a whipped cream.
Step 1 – Whipped Cream
2. Keeping whisking, it will look like you’ve over whipped, but keep going……..
Over whipped cream
3. & keep whisking, soon enough you will see the butterfat start to separate from the butter milk. (sorry forgot to mention, cover top of your bowl with a splash guard or if you don’t have one a Tea Towel, as you can see if tends to splash everywhere)
Buttermilk being separated
4. Now that it has separated, drain the buttermilk through a sieve and keep to use later in another recipe.
Draining buttermilk
5. Return the butter back to the bowl and you want to add about 200ml ice cold water and mix for about 20 secs, then drain again. This is to ensure to rinse away any buttermilk. Do this process 2 or 3 times until water becomes clear.
Rinsing Buttermilk from butter
6. Using a spatula remove the butter from the whisk and put into a muslin or clean tea towel and squeeze, just to make sure you have removed all liquid. Place onto a sheet of greaseproof (baking) paper and using the paper as a guide roll up into a stick of butter…..yay! You’ve made butter! You can now store in your fridge. This will keep for up to 3 days. If you add salt, it will keep a little longer, about 2 weeks in fridge.
I am craving home cooked comfort foods these days, maybe it’s because we are all out of routine in life at the moment.
A traditional Highland Hotpot is normally made out of a Brace of Grouse (a brace is one male & one female grouse) and rabbit, however, my partner is not a big fan of these meats so I decided to make my version with free range chicken. This is a great slow cook one pot meal. Easy to make and delicious.
Hot pot meal
Makes enough for 2
2 chicken breasts – cut into cubes
1 tbsp flour
Salt & black pepper seasoning
1 white onion – cut into wedges
2 sticks celery – sliced
Cabbage – shredded
4-6 rashers of smoked bacon – chopped
spray oil
1 tsp white pepper
1 tsp All Spice (cinnamon, nutmeg & cloves)
1 pint of vegetable stock
2 medium potatoes – cubed
Preheat your oven to 160 deg on fan.
In an oven proof dish with lid, heat spray oil on hob at medium to high heat. Coat the chicken with seasoning and flour then brown in the pan, remove with a slotted spoon.
In the same pan fry the onion and brown the bacon rashers for a few minutes.
Add the potatoes & celery & mix through for a few minutes.
Add back to the pan the chicken and add all spice & white pepper along with the stock, mix & bring to the boil. Then add the shredded cabbage mix, put lid on pot and transfer to the oven and cook for about 2 1/2 hours.
The stock should have absorbed into the meat & veg. Serve. Yummy!
This is my best homemade curry yet! (as said by my partner) I have to admit this was very delicious. I do surprise myself sometimes with my combinations out of a hat…lol! We had just come back from a mini hike nearby so we were pretty hungry, the weather was scorching (now scorching in Scotland is about 21 deg of sunshine…lol!), we fancied something light and refreshing. Looking in my cupboards & fridge, I had coconut milk, chicken and spinach to use up, so a wee light curry it was. Perfect with a light beer too!
Beer & Curry
Serves 2
2 small or 1.5 large chicken breasts – chopped into bitesize pieces
1 jar roasted red peppers
1 can coconut milk (full fat for more flavour)
1 tbsp harissa paste
Spray oil
1 red onion chopped
1 tsp curry powder
100g Spinach – I chopped finely
Seasoning (salt & pepper)
Using a food processor, blend the roasted red peppers with the harissa paste and coconut milk until smooth.
Sauce blend in KitchenAid processor
2. In a pan heat a little oil, season the chicken and fry until browned. Then add the onion and cook for about 3-4 minutes. Add the curry powder and mix.
3. Pour in the Sauce mix and cook for about 10 minutes on a medium to high heat.
4. Add in the chopped spinach and mix through cooking for about 2 minutes.
5. If the sauce is still to thin, bring heat up to a slight boil to help thicken the sauce.
6. Serve with some brown rice or naan bread. I cooked some rice and added it to the pan mixture and mixed though.
This dish could be made vegan and gluten free by adding chickpeas instead of chicken and serving on its own.
This just reminds me of Home. I love this Cookbook for everything traditionally Scottish (sometimes with a wee twist). Maw Broon is the indomitable matriarch of the Broons family and the original domestic goddess. In between cooking, cleaning, and setting the world tae rights over a braw cup of tea, she has also found time tae become the bestselling author of many Cookbooks.
The Broons is a comic strip in Scots published in the weekly Scottish newspaper The Sunday Post. It features the Brown family, who live in a tenement flat at 10 Glebe Street in the fictional Scottish town of Auchentogle or Auchenshoogle. Its something I grew up with, every year we would get the annual for Christmas and laugh loudly. The Broons started in 1936 and the annuals go back to 1939.
Makes 4 Large Burgers
500g Scottish Beef Mince
Handful of Breadcrumbs
1 Red Onion – chopped and fried
1 large egg
1/2 tsp black pepper
1/2 tsp white pepper
1/2 tsp cumin
1 tbsp tomato sauce
a dash worcestershire sauce
1/2 tsp salt
1/2 tsp dry mustard powder
Method:-
Firstly, heat a little oil in a pan a fry the onion until cooked, allow to cool.
Put all the ingredients into a bowl, add the onion and combine together with hands.
Cut into 4 sections or 6 if you prefer thinner burgers and shape into your burgers. Mine where about 1″ thick and approx 31/2″ diameter. Place on a tray a refrigerate for about 30 minutes. (helps it keep together when cooking)
Heat a little spray oil in a griddle pan and cook burgers for about 10-15 minutes, depending on how thick they are.
Serve on a good Scottish Morning Roll & garnish as you like. Mine is always melted cheese. I think that putting lettuce and tomato on a burger, its just wrong!…lol!
Happy National Egg Day! (well in the U.S it is on 3rd June). I am helping them celebrate today my making myself eggs for lunch and a stripey omelette at that & why not! I do love experimenting with food…lol!
Eggs are so nutritious and filling, stored with lots of protein, about 13g in a large egg size. Eggs are also low in calories and full of vitamin D & B, so a good all rounder for any meal. I love eggs, you can scramble, poach, fry, bake, boil they are very versatile. Want to know even more, check out egg info here….https://en.wikipedia.org/wiki/Egg_as_food
I get my eggs delivered straight to my door from McQueens Dairies. This omelette made from Scottish eggs from Beaton Farms in Inverurie, Scotland.
3 Eggs – Large
Spray oil
Seasoning
Start by separating the yolks from whites. Mix the yolks.
Heat a little spray oil in a pan on a low heat and pour in the yolks only, cook gently for a few minutes until cooked.
Using a knife gently & I say very gently as you don’t want to damage your pan, then slice into strips about 1-1.5cm thick and remove every 2nd one. (you can use the spare strips for another omelette or create a lattice design).
4. Then pour in the egg whites and cook gently on a low heat until the egg whites start to bubble.
5. At this stage if you are using a filling, lay it onto omelette and start to roll up in pan then decant onto a plate.
Having some Chickpeas to use up, I decided to spice them up with some Middle Eastern Spices. This dish was delicious & my partner agreed…..happy days!
I also love this dish as its a one pot cooking meal which means less washing up….lol!
Serves 2
250g Scottish Beef Mince
200g Tinned Chickpeas
400g Tinned tomatoes
200g Red Kidney beans or you can use Black beans
250ml Beef Stock
70g Rice (Basmati is good, but I had some Red and wild rice left)
1 tsp Dried garlic granules
1 tsp Cumin
1 tsp Ground Coriander
1/2 tsp Turmeric
1 tsp Dried coriander leaf (fresh if you have it)
1 tsp Dried parsley (fresh if you have it)
Spray oil
Salt & Pepper
Heat a little spray oil in a pan and brown the mince, remove with a slotted spoon, set aside.
Put Rice, Garlic, Ground coriander, Cumin & Turmeric into pan and coat the rice. Add the Beef stock, bring to the boil then simmer for about 15-20 minutes until rice is softened.
Add back to the pan the mince along with the chickpeas, tin tomatoes & kidney beans, mix through. Heat through uncovered for about 5 minutes.
Add the parsley & coriander if fresh to serve. If using dried, add with the beans etc.
Since in Lockdown I’ve had the chance to build & plant my first proper Vegetable Beds and today was my first harvest of my Radishes….yummy! There is nothing better than homegrown fresh food. The obvious choice is a salad as radishes are just so refreshing and add that bit of crunch. Did you know you can eat the leaves also? Chop them up add to potatoes or pasta or make a pesto!
Left Over Radish leaves – 2 handfuls approx
1 Garlic Clove
1 tbsp pistachios
30g Grated Cheese (Parmesan)
2 tbsp olive oil – good quality one for best flavour
2 tbsp creme fraiche
Salt & pepper
Thoroughly wash the green leaves and put into a blender or food processor along with the rest of the ingredients and blitz until smooth, if too thick add a little more olive oil.
I used mine to make a lovely radish & avocado salad for lunch. I will probably use the rest for some pasta later on in week. Cover and store in fridge for max 3 days.
My taste buds were swaying towards a Chilli tonight, but fed up with the same old serving of Chilli mince on top of a bed of Rice, I decided to try something a bit different. It worked a treat, a mix between meatballs and chilli….Yum! At under 500 calories per portion too this dinner is perfect and nutritious.
Serves 2 portions
For the Balls
300g Lean Scottish Mine Beef
40g Basmati & Wild Rice Mix (you can just use Basmati Long grain if you wish) Cooked
1 tsp dried Garlic Granules
1 tsp Cumin
1 tsp Dried Coriander
For the Chilli Sauce
200ml Beef Stock
1 Red onion – diced
1 tsp dried chilli flakes
200g Tinned tomatoes
200g Red Kidney Beans, chopped
Salt & Pepper
Few dashes of Tabasco Sauce
Cook your rice as per packet instructions and ensure it is very soft, once cooked allow to completely cool before added to your bowl of mince.
In a bowl, add Mince, Garlic, Cumin, Coriander and season with salt & pepper. Once Rice has cooled add to bowl and mix through.
Heat a little oil in a pan. With wet hands take small amounts of the meat mixture and roll into balls (you should get about 12 balls), place into your pan and brown all over. Remove.
Add the onions to the pan and fry until browned, then add the tinned tomatoes, chilli flakes, kidney beans and beef stock then season with salt & pepper. Bring to the boil then reduce and bring to a simmer. At this point add back the meat and rice balls and cook covered for about 15 minutes.
Just before you are ready to serve, add a few splashes of Tabasco sauce for that extra kick! (please take out if you don’t like it spicy hot)
Since we are still in lockdown, we fancied something special for lunch today, sun was shining through the window, temperature was rising, so we thought we’d treat ourselves to this lovely little dish. Oh & of course we had a cheeky glass of wine with our meal too, just to help wash it all down.
Serves 2 portions.
3 medium size potatoes – cut into small cubes
1 red onion – diced
80 g Chorizo – sliced
2 eggs
200g tin tomatoes
50g grated cheddar cheese
1 tsp dried chilli flakes
1 tsp paprika
Salt & pepper to taste
Spray oil
1 tbsp butter
Preheat oven to fan 190 deg.
Place cubed potatoes into a pan of salted water and bring to the boil, simmer for about 5 minutes. Drain.
Meanwhile, in a pan brown and cook the chorizo for a few minutes, remove with a slotted spoon.
Add the onion & chilli flakes to the chorizo pan and fry until browned, then add back to the pan the potatoes with tin tomatoes, butter & paprika, stir until combined and cook for a few minutes.
Place mixture into an oven proof dish, make 2 wells and crack the eggs in, season the eggs then sprinkle grated cheese over.
Bake in oven for 10-15 minutes depending on how you like your eggs.
If you’ve seen my last post on Baked Doughnuts, then you’ll know that I found my Doughnut tin…lol! I decided to jazz up my breakfast into doughnuts instead of muffins, still super tasty, just a different shape.
Makes 6
6 large eggs
Pepper (any colour) chopped finely
Spring onions or small white or red onion – finely chopped
Cooked ham or any cooked meat of your choice – finely chopped
Salt & Pepper to taste
Paprika
Grated Cheese of your choice (I used cheddar)
Grease doughnut tin with some spray oil and preheat oven to 150 deg fan.
Place the pepper, onion and ham evenly into the moulds.
Whisk up the eggs
Pour evenly into moulds, don’t over fill. Season.
Sprinkle with cheese and then sprinkle some paprika on top. Bake for about 20 minutes.
Remove and serve immediately. Yummy!
These can also be kept in the fridge for next morning, then just reheat.
Any doughnuts I’ve made I normally fry but I decided to give the baked kind a go. I bought a doughnut tray ages ago and forgot all about it until I was clearing out my cupboards…lol! Having loads of colours in my baking drawer I went for it and got my creative flare going. I’ve loads more ideas now, so watch this space on my designs coming soon.
Makes 8-10 – Large size doughnuts
90g Butter, Softened
130ml milk at room temperature
1 Dried Yeast Sachet
1 egg
Pinch of salt
40g Sugar
1 tsp vanilla essence
270 plain flour
Melt some butter and glaze the doughnut pan. Preheat oven to 160 deg fan.
Pour milk into a mixing bowl & add the yeast, salt, egg, sugar, vanilla and flour and mix until combined into a smooth dough. Add the butter and mix for 4-5 minutes.
Cover and allow to rest at room temperature for 10-15 minutes.
Using a piping bag, pipe the dough evenly into your moulds, smooth down with a little water on your fingertip. Cover the tray and allow to rise at room temperature for about 45 minutes.
Bake in centre of oven for about 15-20 minutes.
Remove doughnuts carefully from tray and allow to cool on a wire tray.
Meanwhile for the toppings:- Mix some icing sugar together and add your choosen food colouring, Not too thin, you want it quite thick. If using chocolate, melt your chocolate accordingly. (In a microwave for 30 secs, then stir, then 30 secs and stir until melted.)
Once doughnuts have cooled, simply pour over the icing and decorate with any sprinkles, nuts etc if you have them. Allow icing and chocolate to harden before devouring.
I hope everyone is doing o.k. in these unusual times. If you are like me, I get bored very easily and need to be doing something productive with my day, so today I was talking to a friend and saying how we miss our coffee & cake dates at our fav coffee shop, then idea to use up whatever was in my cupboards to bake a cake and have a virtual coffee & cake date. I do love pistachio’s and always have some on hand, so this little cake bite was perfect.
Makes about 16 squares
150g shelled pistachios
200g milk chocolate (I used Dairy Milk bar)
200g golden caster sugar or light brown sugar
200g soft butter
3 eggs
200g Self raising flour
100ml milk
50g butter for chocolate
100g icing sugar
Pinch salt
Preheat oven to 160 deg and line a square tin (approx 20cm) with baking paper
Mix up 125g of pistachios and 75g of the milk chocolate with 100g sugar in a blender until finely chopped.
Tip into a bowl with the remaining sugar, butter, eggs, flour & milk with a pinch of salt and mix thoroughly.
Empty the mixture into your prepared tin and bake for about 40 minutes or until a knife comes out clean. Leave to cool slightly.
Meanwhile, break up the chocolate and place into a microwave bowl with the 50g of butter, microwave for 1 minute, remove and stir together until fully melted. Next pour the icing sugar into the chocolate and beat together until combined and thick.
Pour over the top of the cake and even, using the remaining chopped pistachios, sprinkle over the top and allow to set. Cut into bite slices. Serve with a yummy cuppa!
Wanted some home comfort food today and trying to use up leftovers this little dish was perfect, tasty & filling.
Makes 2 servings
1 1/2 chicken breast (large)
1 Green Pepper
1 Large Leek
3 large Potatoes
250ml chicken stock
50ml Cream or milk
1 tsp nutmeg
1 tsp dried garlic granules
Salt & pepper to taste
Grated cheese (I used cheddar but Gruyere is nice if you have it)
Paprika to taste
Pre heat your oven to 180 deg (or if you have a class 9 Hotpoint use the Potato Gratin function)
Heat a little spray oil in a pan and slice the chicken into small strips, season with salt & pepper & nutmeg then brown, remove with a slotted spoon.
Heat a little butter in the pan, slice the leek and gently saute the leeks with the garlic until slightly browned, remove with a slotted spoon.
Add the peppers are cook until slightly softened and browned. Remove.
Peel and slice thinly the potatoes.
Lightly butter a baking dish and start by layering the potatoes then the chicken mix with vegetables then potatoes then chicken mix then potatoes. Pour in the stock and milk and finally finish off with the grated cheese sprinkled on top. Then sprinkle with the paprika to taste.
Oh Yum, this dish I found on the Whole Earths website, I just love their Peanut Butter especially the crunchy one….yum! My curiosity got the better of me because I wouldn’t have thought to put sweet potato and peanut butter together but wow, this was so tasty.
I also used my automatic setting on my Hotpoint Class 9 oven, the Potato Gratin setting. This was great as I didn’t need to worry about what temperature or oven function to set for a perfect bake the oven worked it all out for me.
This made 4 small servings (2 bakes in a 19cm x 30cm baking dish)
3 large Sweet Potatoes
2 tsp Crushed Chillies (or 2 chopped chillies)
100g Spinach – Chopped
300g Creme Friache
3 tbsp Peanut Butter, Crunchy
2 tsp dried coriander leaves
Salt & Pepper to taste
If not using automatic programmes, preheat oven on fan to about 200 deg then finish off under the grill to crisp and brown.
Peel & Slice the sweet potatoes to about 1/2 cm thick and place in a bowl, add the chopped spinach, coriander, chillies, salt & pepper.
Mix the creme friache and peanut butter together until smooth ad combined then pour into the sweet potatoes and mix until potatoes are coated.
Spray a baking dish with spray oil and then layer the sweet potato in the dish making two rows.
Cover with Tin foil and bake for about 30 minutes, remove the tin foil and continue to bake for the further 30 minutes or until sweet potatoes are softened and slightly browned.
I do hate food going to waste so I used up my leftover apples and made an upside down cake and served with custard……OMG! Yummy! Scrummy!
Classic desserts don’t come much better than this. It was an extremely windy and cold day today so this little warming dessert was just a perfect home comfort Sunday dessert.
Makes 2 small individuals (2 x 4-5″ tin) or 1 large (10″ tin)
For the caramelise apples:-
2 Apples (of your choice)
60g unsalted butter
70g Brown Sugar
1/2 tsp ground cinnamon
*
For the cake:
2 eggs
110g unsalted butter
110g Self raising Flour
110g Caster Sugar
1/2 tsp ground cinnamon
1 tbsp milk
Pre heat oven to 180 deg fan
Melt 60g butter with the 70g brown sugar and cinnamon, stir together and put into the bottom of your tin.
Peel and slice your apples and place on top of the caramel.
Beat the cake ingredients together in a mixer and pour over the apples.
Bake for about 35-40 minutes or until the cake springs back when pressed.
Today was a day of using up leftovers and I had bananas that were crying out to be used. This little recipe is so easy to make and delicious too, you can store for 2-3 days in an airtight container or freeze if you are making a large batch. Gluten Free too.
A great healthier option too with the oats having 4 grams of fiber & 6 grams of protein. In addition to fiber, oats are rich in magnesium, zinc and iron. The bananas which are loaded with fiber, potassium, vitamin B6, vitamin C, and various antioxidants. The Peanut Butter is a good source of magnesium too.
A great grab & go breakfast option or simply a little snack in between meals.
Makes 12
200g Scottish Oats
60g Peanut Butter
2 small bananas, mashed
1 egg
3 tbsp Maple Syrup
120ml milk
1/2 tsp cinnamon
1/4 tsp salt
1 tsp baking powder
1 tsp vanilla extract
3 Dark Chocolate squares, chopped (or you can used choc chips)
Preheat your oven on fan to 175 deg and grease a muffin tin.
Put ALL ingredients into a bowl or mixer bowl and combine together.
Pour into muffin tin, filling approx 3/4 way.
Bake for about 25 minutes or until a knife comes out clean and muffins are set.
Remove and allow to cool for a few minutes. If freezing allow to cool completely.
A bit of Meal prepping today while I have some time. I have been doing this for a few weeks now and have found it to be very beneficial to us. Sometimes I don’t get in till late from work and its always nice to have a healthy dinner ready for you. Also it means the 1/2 hour I save on making dinner means I can get some exercise in…..no excuses now.
Makes 4 Servings
1 tsp Ginger powder or 1″ piece fresh ginger minced
2 garlic gloves – minced
1 yellow onion – diced
2 tbsp Harissa Paste
Florets from 1 Caulifower
2 x 400g Chickpeas, drained
1 x 400g coconut milk
300ml vegetable stock
200g baby spinach
Salt & pepper to taste
Heat a little oil in a large pan, add the garlic, ginger and onions and fry until softened.
Add the Harissa Paste and coat the onions. Add in the Cauliflower and mix until coated.
Pour in chickpeas, vegetable stock & coconut milk with seasoning and mix through, bring to the boil then simmer and cook covered for about 25-30 minutes until cauliflower has softened.
Add the spinach and mix through, cook for a further minute or until spinach is wilted. Remove from heat and either serve or allow to cool before freezing.
Serve with some Bulgur wheat or rice for a filling meal.
I do love creating with leftovers, I always amaze myself what you can do with leftovers in your cupboards or fridge. Today was a quick, tasty & filling lunch. With potatoes to be used up, I decided on mini loaded jackets. Using my Automatic Jacket Potato setting on my Hotpoint Class 9 Combi Microwave too they were ready in under 16 minutes too!
I made 4 small Jackets
4 medium sized Scottish Maris Piper Potatoes
2 tbsp butter
handful spinach – chopped
20-30g Cheddar Cheese – grated
Cracker Black Pepper
Salt to taste
First wash potatoes and prick with a fork
Place onto the Crisperplate or Microwave dish.
Set to Automatic, Recipes, Vegetarian Dishes, Baked Potatoes, Set weight and Extra Done. Start. Turn half way through.
When ready remove and allow to cool slightly
Cut potatoes in half lengthways and scoop out potato and put into a bowl then mash
Place butter and spinach into potato bowl and mix through & season
Spoon the potato mixture into the Jacket Potato skins and sprinkle with cheese then place under a high grill for a couple of minutes until cheese is melted. Season with some Cracked Black Pepper. Yum!
You could also add in some chilli and paprika for extra flavour & spice. Really anything of your choosing.
Oh yum! I still had some pakora batter left so decided to try these little bites….super good and tasty.
Pakora Batter
150g gram flour
200ml water
1/2 tsp chilli
1/2 tsp cumin
1/2 tsp gram masala
1/2 tsp Turmeric
2 cloves garlic or 2 tsp ground garlic
small handful coriander (chopped finely)
Pinch salt
1. Put all dry ingredients into a bowl and mix together, make a well in the middle and gently add water little at a time while stirring, continue to add water until you get a smooth batter, it shouldn’t be too thick or too runny. Set aside.
1 x Cauliflower, cut into small florets.
I steamed my cauliflower using my steam pot for about 6 minutes, but if you don’t have this, you can cook in a pan of salted water on a gentle heat for about 20 minutes then drain.
Dip into the pakora batter and fry gently at 180 deg in rapseed oil for a few minutes until golden. Remove and place onto some kitchen paper to absorb any excess oil.
Oh yum, this was absolutely delish! Another great low calorie option from Pinch of Nom
I don’t know why I don’t have butter beans more often, a meaty & creamy texture and filling too. This is a great healthier option curry for the weekend or mid week.
Serves 4
Low cal cooking spray
1 onion, diced
1 red chilli, diced
3 garlic cloves, minced
1 tsp ginger
2 tsp tomato puree
juice of 1/2 lemon
3 medium sweet potatoes, diced
250ml vegetable stock
1 x 400g tin tomatoes
Salt & pepper
1 x 400g Butter Beans
100g Baby Spinach
For the Spice Mix:
1 tsp paprika
1 tsp gram masala
1 tsp cumin
1 tsp ground coriander
1/4 tsp cinnamon
Spray a large pan with oil, add the chopped onion and chilli and cook over a medium heat for about 5 minutes. Add the garlic, ginger and spice mix and continue to cook for another minute.
Add the tomato puree and lemon juice and mix
Using a food processor or stick blender, blitz the onion mix to a smooth paste and return to the pan. Add the sweet potato and stir until coated.
Add the stock and chopped tomatoes and season. Stir, bring to the boil and then reduce to a simmer for about 20-25 minutes.
Drain the butter beans and add to the pan along with the spinach, stir through and cook for about 3 minutes until beans are heated through and spinach has wilted.
Serve and enjoy! I served with some rice and some chopped fresh coriander.
3 low fat sausages (I sliced them after they were cooked)
Spray a large dish with oil, add the chicken and cook over medium heat to brown.
Then add in the onion, peppers and celery, cook for a few minutes
Add in the garlic, cajun spice, paprika and oregano, stir and cook for a few minutes.
Add the rice, chopped tomatoes, stock & worcestershire sauce. Place the sausages in and bring to the boil then reduce to a low heat and cook covered for about 30 minutes.
Serve, Yum!
This is a great dish that you can batch cook with and freeze.
Oh yum, this little dish was delicious! Looking to be more healthier this year, so I decided on a veggie pie rather than meat. Super delicious and filling too.
Serves 3/4
1 onion, finely chopped
3 carrots, finely chopped
2 celery sticks, finely chopped
2 tsp tomato purée
3 tsp plain flour, 1 tsp thyme
Vegetable stock pot, made up to 200ml
2 x 400g tin kidney beans, drained and rinsed
2 x 400g tin adzuki beans
1kg Potatoes peeled and halved
75ml milk
25g butter
75g mature Cheddar, grated
1 tbsp English mustard
75ml milk
To cook the Soffrito (A soffrito is a flavourful mix of diced onion, carrot and celery gently fried in oil. It forms the basis of many dishes, including soups, stews and sauces. Add chopped garlic or herbs for even more flavour, if you like.) Heat a little oil in a pan and cook the celery, onion & carrot for a few minutes.
Cut a piece of baking paper the same diameter as your pan and lay on top of the veg, cook for a further 10 mins. ( The circle of baking paper helps to keep the vegetables moist and retain their flavour as they cook. It’s also useful when cooking the base of curries, soups and stews, but you can do without if you don’t have baking paper.)
Add the tomato puree and stir through the add the flour and combine.
Pour in the stock, beans & thyme and bring to the boil then reduce and simmer for about 20-25 minutes.
Transfer to an oven proof dish and allow to cool. Preheat your oven to 170deg fan.
Meanwhile, to make the rarebit mash:- Boil the potatoes until tender and mash.
Stir in 75ml milk & 25g butter
In a separate bowl mix the 75g grated cheese and mustard together. Slowly stir in the 75ml milk, until smooth.
Stir in the cheese mixture to your potatoes.
Spoon the mash over the pie mixture evenly. Note: (The bean mixture should have formed a thin skin while cooling. Don’t stir it before adding the mash because this helps keep the layers separate while the pie bakes).
Sprinkle with some thyme and bake for about 30-40 minutes until golden brown. I have a browning setting on my oven and its great for things like this.
Having some pumpkin leftover from my pumpkin soup tonight, I thought I’d try my hand at some pumpkin cupcakes. I so love a little but of pumpkin spices and flavours. The buttercream topping was a hit too with orange colouring.
Makes 12
160g Plain Flour
250g Grated Pumpkin
1 tsp allspice
1 tsp baking powder
1/2 tsp cinnamon
1/2 tsp bicarbonate of soda
1/4 tsp nutmeg
1/4 tsp salt
100g light brown sugar
60g Caster sugar
75ml olive oil
2 large eggs
For the Buttercream
100g softened butter
250g icing sugar
2 tbsp milk
1 tsp vanilla essence
orange food colouring
Preheat your oven on convection bake to 190 deg and line a muffin tin with cupcake holders.
Combine the flour, allspice, baking powder, cinnamon, bicarbonate of soda, nutmeg and salt in a large bowl set aside
In another bowl whisk the grated pumpkin, sugar, olive oil and eggs until combined
Add the wet mixture to the dry mixture and fold in to combine together, spoon the mixture into the cupcakes (about 1.5 dessert spoons in each case)
Bake for 18 minutes, remove and allow to cool
In a separate bowl whisk the softened butter until creamy, add in half the icing sugar and mix, then add the other half with the vanilla essence until combined, add about 1 tbsp of milk and mix until smooth (you may need another tbsp of milk if still to thick. Add the food colouring until you reach your desired colour.
Put buttercream into a piping bag and pipe on top of cooled cupcakes. Devour!
I am always trying to improve my recipes and my icing for my Empire Biscuits just wasn’t right, so I decided it needed to be a bit harder and went for Royal Icing. Turned out this is much better as it goes hard pretty quick. Good if you want to decorate them.
Makes enough for a 20cm Cake or 12 biscuits.
400g Icing Sugar
2 egg whites or egg white powder
1/2 tsp water
Using a whisk, bring the egg whites to a frothy consistency
A little at a time spoon in the icing sugar (& yes it WILL go everywhere, this was my kitchen worktop after….lol)
Add the little water and whisk until you get stiff peaks.
Now you are ready to use. At this point you can use food colouring and colour to decorate your biscuits of cake.
I made some Scottish Empire Biscuits using my trusty Recipe.
This little recipe was from Hotpoints Website , a great little find, these were super tasty & I do love Italian flavours so was a perfect little lunch today.
I made the dough yesterday and left in fridge overnight so it was ready to use today.
Makes 6
For the Dough:-
400g Bread Flour
7g Dried Yeast
300ml Luke warm water (approx 35-40 deg C)
1 tsp caster sugar
1 tsp salt
Pour the yeast and sugar into the luke warm water and allow to activate, approx 10 minutes or until you see it frothing.
Sift flour into a mixer bowl with the salt and make a well in the middle. Pour the yeast into the flour and on a low speed start to bring together the dough. Knead in the mixer on low speed for approx 10-15 minutes until it becomes elastic.
Put into a slightly oiled bowl and place in the oven on rising programme for 2-3 hours. (or leave at room temperature for a few hours or until doubled in size)
Remove from oven and knock back, separate into 2 or 3 batches if not making the full 6. I only made 3 and used 250g of dough which I put back into the oven to prove again for 1 hour. I put the other 2 amounts (approx 200g each) into an airtight bag and froze. You can freeze this dough for up to 3 months and use as pizza dough later.
For the Filling:-
8-10 cherry tomatoes – halved or quarted
Edam cheese – cut into cubes
2 tsps of Mixed Italian Herbs
2 tsps of olive oil
Salt & pepper
Place the tomatoes, oil, S&P & herbs into a bag (or bowl) and coat.
Spray a tin with spray oil and roll out the dough, not too thin, and press dough into the tin, allowing enough for the lid.
Spoon the mixture into the dough case and top with the Edam cheese, pull the lid over and seal.
Brush with a little milk and if you have any left over tomatoes press 2 into the top of the dough.
Bake in a preheated oven at 185 deg for approx 25-30 minutes.
I recently purchased a new cookbook by Pinch of Nom, I loved their last one so had to get their new one. This is a recipe from their Fakeaway options and at under 400 calories per serving it is definitely my new takeaway at home. Super tasty no compromise on flavour at all. I served with a little Basmati and Wild Rice along with my homemade Sweet Potato Roti, a perfect Saturday night home takeaway.
Makes 2 Servings
2 Chicken Breasts – cut into small chunks
1 red onion – diced
1 garlic clove – grated
1 cm piece of ginger – grated
1 tsp chilli flakes or 1 red chilli- diced
1 tsp curry powder**
1 tsp mixed spice**
**(I used this as an alternative to gram masala as I didn’t have any)
1 tsp cumin
1 tsp ground coriander
1 x 400g tin tomatoes
100ml chicken stock – 1 stock cube
1 red pepper – diced
1 tbsp chopped fresh coriander to serve.
Heat a little low fat spray oil in a fry pan on medium heat
Brown the onion, garlic, chilli and ginger together for a few minutes
Add the chicken and brown all over.
Next add in the curry powder, cumin, mixed spice, ground coriander and mix through until coated.
Add in the tin tomatoes, red pepper and stock and bring to the boil then reduce and cook on a low heat for about 15 minutes lid on, then 15 minutes with lid off to help thicken the sauce slightly.
Looking for something a bit more tastier and a healthier more nutritious option to go with my healthier option curry tonight, having a sweet potato left over from last weeks shopping I decided to try this……and well, it turned out amazing, super tasty and the structure held very well too.
Makes 6
1 large Sweet Potato
1 cup of plain flour
1/2 tsp turmeric
1/2 tsp chilli flakes
1/2 tsp cumin
Salt & pepper to taste
Start by steam cooking the sweet potato (I used my steam pot and steamed for 6 minutes by slicing into 1-2cm thick slices), do not roast as this will not give you the same flavour.
Allow potato to cool in a bowl then mash and add the spices and flour. With your hands bring to a dough.
Flour a surface a cut the dough into 6 pieces. Roll out each piece as thin as you can.
Heat a little oil (not too much or it will burn too quickly) in a fry pan on a very high heat and cook until you see the dough start to bubble, then turn over and cook for a further minute, remove & continue with the rest.
If you have any leftovers simply vacuum pack and store either in the fridge for later of you can freeze.
It was Blowin’ a Hoolie here today (very windy) & that just calls for something warm and home comforting. This was a tasty quick option in my kitchen tonight and certainly hit the spot.
Makes 2 portions
150g Butternut Squash – chopped into cubes
150g Sweet Potato – chopped into cubes
1 onion – chopped finely
60g Chorizo – sliced
1 garlic clove – minced
1/2 tsp nutmeg
1/2 tsp dried sage
Salt & pepper to taste
Handful of chopped carrots, sweetcorn and peas (I used frozen)
300ml chicken stock
50ml cream
150g Spinach
Heat some low fat spray oil in a pan and fry the chorizo for a few minutes, remove with a slotted spoon and drain on a kitchen towel.
Add to the pot the onion, garlic, sage & nutmeg and fry until onions are softened.
Add the sweet potato, butternut squash and vegetables and stir until coated.
Add the chicken stock with seasoning and bring to the boil, then simmer for about 15 minutes or until squash and potato are cooked.
Remove lid, add back to the pan the chorizo and spinach and stir in the cream allow spinach to wilt for a few minutes, stir through. Serve.
You could also sprinkle some nuts over for a more nutritious serving.
Oh yummy! Looking for something to go with custard for our Soup & Pudding Sunday, and having some coconut in the cupboard this was the result. Lovely and light too. Will also enjoy a wee slice with afternoon tea.
Makes 1 loaf
50g dessicated coconut
150ml milk
110g butter
110g caster sugar
2 eggs
250g self raising flour
1 pinch salt
For the icing:-
5 tbsp icing sugar
1 tbsp milk
1 tbsp dessicated coconut
Pre heat oven to 150 deg.
Cream together the sugar and butter until light & fluffy
Beat eggs in, 1 at a time.
Add flour, salt, milk and coconut and mix gently until combined
Spoon mixture into bake tin and bake for about 1 hour until a knife comes or clean
Once cool, mix icing sugar, coconut and milk together and spread over top of cake.
Alternatively, you can disregard the icing and serve with custard which is yummy too.
Decided to bake a chocolate cake for our New Years Day dessert, we had the whole family this year so had to do something that fed 11 adults and 1 child. This was perfect and delicious but so rich, so a little bit is all you need.
Serves about 12-14
For the Cake:-
200g unsalted butter
200g Dark Chocolate
300g Light Muscovado Sugar
4 large eggs
175g self raising flour
1 tsp baking powder
For the Glaze:-
300ml double cream
160g dark chocolate
Choice of nuts – I used Hazelnuts
Preheat oven to 180 deg
Melt butter and chocolate together, either in a bowl over a pan of boiling water or in a microwave for about 1 minute. Allow to cool slightly.
Beat Sugar & Eggs together then pour in butter & chocolate mix.
Fold in flour & baking powder until combined.
Pour mixture into a cocoa floured bake tin and bake for about 40 minutes.
Meanwhile make the glaze by heating the cream gently and add the chocolate in, stir to melt. Whisk and pour over cake once cooled from oven. Sprinkle over nuts.
I have seen Pizza Skulls on social media and gave me the idea to make these for my Horror theme Hogmany coming up. I changed it from Pizza filling to a Chilli Con Carne filling. These are amazing and so much fun too. I got my pan from Nordic Ware and opted for Black & Red dough too using Red Malt flour and Activated Charcoal powder.
Makes 6
For the Pizza Dough (I made extra, which I stored for later use)
3 x 350g Wholemeal Bread Flour (you can use strong white too)
3 x 1 tsp salt
3 x 1 tsp caster sugar
3 x 3 tsp baking powder
3 x 170ml warm water
20g Red Malt Flour, plus 1 tsp red food colouring for the Red
3 tbsp charcoal powder plus 1 tsp black food colouring for the Black
Mix everything using a mixer until it come together like dough, wrap in cling film and refrigerate for a couple of hours. Mix 3 lots ie: plain, black & Red
Once ready to use, cut amount you need and store the rest. Place on a floured surface and roll out, not too thing or too thick. It will be stretchy, just keep stretching it until you have the size you need. Approx 7 x 4″
Brush your skull pan with melted butter and lay the dough into each skull pressing gently. Place the filling in and fold over the excess dough, if you have too much just trim.
For the Chilli
350g Scottish Beef Mince
1 Red onion, finely chopped
1 Red pepper, finely chopped
1 tsp garlic granules
1 tsp cumin
1 tsp dried chilli flakes (omit if you don’t like it too hot)
2 tsp chilli powder
200g Tin tomatoes
200g Kidney beans
200ml beef stock
light fry oil
Salt & pepper to taste
Grated Cheese of your choice.
Heat the fry oil on medium to high heat
Fry the onions and pepper with the garlic until softened
Add the beef and brown
Add in chilli powder, cumin, salt & pepper with chilli flakes (if using) mix through to coat
Add in the tin tomatoes, kidney beans and stock, bring to the boil and simmer for 30 minutes cover. The uncovered for 10 minutes to thicken sauce. Allow to cool.
Once skulls are filled, refrigerate for 30 minutes then bake at 200 deg for 25 minutes. Serve.
This is a great mid week dinner, super quick and easy (if you have prepared paste before hand). I had to use up some leftover vegetables in my fridge, and I had stored some coloured pasta I made a few weeks ago. So super easy and super quick.
Serves 2
Pasta of your choice
200g Baby Spinach
150g Cherry tomatoes, chopped
150g Mushrooms, sliced
1 tsp dried garlic (or 2 cloves if you have fresh)
1 tsp smoked paprika
Pinch of chilli flakes
2 tbsp tomato puree
1/2 tsp cayenne pepper
Salt & Pepper to taste
Cook pasta as per packet instructions, or if fresh, 2 minutes in simmering salted water.
Meanwhile, brown the mushrooms then add in the tomatoes, cook until slightly softened.
Add in the garlic, paprika, cayenne, chilli, tomato puree and stir through. Then add in the Spinach and cover to allow to wilt down (about 1 minute).
Drain the pasta and add to the sauce mix and stir until coated. Serve.
I first saw this recipe on Pinch of Nom site, I got their first book and have preordered their second, its full of healthier option recipes that do not compromise on flavour. This Lasagne was both delicious and lower in calories.
Makes 4 portions
400g Scottish Mince
1 Carrot, chopped
1 Onion, chopped
1 Red Pepper, chopped
2 tbsp Tomato Paste
1 400g tin chopped tomatoes
2 Oxo cubes
1 tbsp Worcestershire Sauce
1 tbsp Mixed Italian Herbs
2 tsp Dried Garlic Granules
For the White Sauce
350g Natural Yoghurt Fat Free
1/2 tsp Mustard
120g Low Fat Cheddar
2 eggs
Lasagne Sheets – I made my own but you can buy ready made
Heat pan with a little low fat spray oil. Fry onion, carrots, pepper and garlic for a few minutes until softened.
Add the mince and brown.
Add the Italian herbs and Worcestershire sauce and stir through
Add in tomato paste, oxo cubes, tin tomatoes and 200ml water and mix through until combined.
Put lid on and simmer for 30 minutes
Spread a layer of the beef mixture into a deep oven dish and then layer the lasagne sheets, then another layer of beef mixture, then layer lasagne sheets until you reach near the top.
To make the sauce, mix yogurt, mustard, eggs & salt to taste with the cheese in a bowl until combined. (leave a little of the cheese to sprinkle on top)
Spread the sauce mixture over the lasagne dish and garnish with pepper and leftover cheese.
I baked using my Lasagne setting on my oven, or you can bake in an oven at 190 deg for about 30-35 minutes until browned.
Oh Yum, I love Pistachios and had some in my cupboards to use up, so I though I would give this little delight a go and I wasn’t disappointed.
For the Crust
100g Plain flour
35g Cocoa Powder
70g Chopped Pistachio’s
1/4 tsp salt
70g unsalted butter, room temperature
35g Demerara Sugar
1/2 tsp vanilla extract
For the Pistachio Paste
65g Pistachio’s
35g Demerara Sugar
1/4 tsp salt
1 tbsp olive oil
For the Filling
150g Milk Chocolate
120ml Cream
50ml Milk
1 egg beaten
Pistachio’s chopped to garnish
Grease a 9″ Fluted Tart tin with removal bottom.
Whisk together flour, cocoa powder, chopped pistachios, and 1/4 teaspoon salt. Beat butter on medium speed until fluffy. Add sugar, and beat until pale. Add vanilla, then flour mixture, beat until just combined and dough holds together when pressed between 2 fingers. Press dough into a disk, and wrap in plastic. Refrigerate for 15 – 30 mins.
Roll out dough to an 11-inch round, 1/4 inch thick on a lightly floured surface. Press dough into bottom and up sides of tart pan. Trim excess dough flush with edges of pan using a knife. Refrigerate until firm, at least 1 hour or overnight. Meanwhile, preheat oven to 150 deg C.
Bake until firm, about 30 minutes. Let cool completely.
Make the pistachio paste: Pulse pistachios, sugar, and 1/4 teaspoon salt in a food processor until mixture begins to clump together. Add oil, and pulse until smooth and paste like. Spread evenly into bottom of cooled tart shell, pressing firmly with back of a spoon until flat and smooth.
Make the filling: Place chocolate in a heatproof bowl. Heat cream and milk in a saucepan over medium heat until almost boiling, pour over chocolate. Let stand for 2 minutes. Slowly whisk until smooth. Let cool for 10 minutes. Stir in egg until combined. Pour in filling to tart shell. Bake until just set, 30 to 35 minutes. Let cool. Garnish with finely chopped pistachios.
Its definitely soup season, I woke to -5 deg this morning….very cold. Using up some leftovers in my fridge, mainly carrot and onion I decided to make a warming soup. This was delicious and hit the spot right. I used my steampot, so steaming the vegetables made this even more nutritious and flavorsome.
Makes 3 Servings
4 large carrots
1 large onion
500ml Vegetable Stock
60g Bulgur Wheat
1 tsp garlic granules
1 1/2 tsp Cumin
1 1/2 tsp dried coriander
Salt & Pepper to taste
Chop up the onion & carrots into chunks and place in the steam pot with 200ml of the vegetable stock and cook on steam setting for 8 minutes.
Remove steam pot lid and add in the rest of the stock then blitz with a hand blender until well blended and smooth.
Stir in the spices/herbs and bulgur wheat and cook on microwave at 750w for 3 minutes.
Remove and stir. Season and serve.
you can of course make a big batch and freezer for later.
In a bid to eat a bit healthier, this little dip was perfect as I love Beetroot and always looking for different ways to use it. I saw this from The Veg Space, a great website if you love vegetables, some great ideas too.
The great thing is you can freeze hummus, so I made a big batch and split into smaller portions for later.
Makes approx 600g
3 Large cooked Beetroots, diced
1 can 400g Chickpeas
2 garlic cloves, crushed
Juice & zest of 2 Lemons
4 tbsp tahini
2 tsp smoked paprika
Salt & Pepper
Drain the chickpeas and keep the juice.
Put the chickpeas, beetroot, lemon juice & zest, tahini, paprika, garlic and seasoning into a blender or food processor and blitz to a smooth paste.
Gradually add about 1-2 tbsps of the chickpea juice until you get the consistency you want.
Oh Yum, the flavours from this were amazing. I got this recipe from Scott Baptie’s High Protein Handbook 5, full of goodness too. You can check out his website here.
Serves 2
1 tbsp olive oil
1 red onion, finely chopped
1 clove garlic, finely chopped
300g Scottish steak mince
1 tsp Chilli powder
2 tsp mixed spice
1/2 tsp turmeric
150g Basmati rice
300ml Beef Stock
100g frozen peas
2 handfuls of Spinach
Seasoning (salt & pepper)
Heat oil in a pan on medium to high heat
Brown onion and garlic for a few minutes
Add in the mince with seasoning and brown
Add the spices and cook for a minute, add the rice and mix through until coated.
Pour in the stock and simmer for about 15-20 minutes
Add the peas and spinach and cook for a further 5 minutes or until all liquid has been absorbed.
Oh Yum. Eating Healthy is a priority for me, it makes me feel good and keeps me alert. Living in Scotland we have amazing fresh Salmon which is classified as an oily fish, salmon is considered to be healthy due to the fish’s high protein, high omega 3 fatty acids, and high Vitamin D.
I’m always looking for new flavours to try and this has got to be one of my favourites.
1 Serving
2 tbsp Maple Syrup
2 tbsp Teriyaki Sauce
1 tbsp Hot Sauce
1 Clove garlic
Salmon Fillet
Select of vegetables to serve.
I put all the ingredients into a food bag and allowed to marinade for about 1 hour.
Remove food from bag, keeping the marinade.
I used my Crisper plate, place salmon and vegetables on and cook on Crisp function for about 4-5 minutes depending on thickness of Salmon. Alternatively pre-heat oven to 210 deg and place on greaseproof tray and bake for about 10 minutes.
Meanwhile, reduce the marinade sauce using a medium heat so that you have a thick sauce to pour over.
I do love breakfast time, and one of my favourites is omelettes. They are very nutritious, packed with protein and have over 15 essential vitamins and minerals.
Cook eggs on their own, either scrambled, poached, boiled or fried, or use to make dishes such as omelettes, frittatas, soufflés, pancakes, sauces or cakes, or use to glaze breads and pies. The list is endless, I love it.
Makes 1
3 eggs
30g Gruyere Cheese, grated
30-40g Ham Hock shredded
1 tsp nutmeg
1 handful of spinach
Salt & pepper to taste
Heat some spray oil in a fry pan on medium heat
Whisk together eggs, nutmeg, ham & cheese and pour into pan. Season.
I put the lid on my pan and cook lightly until puffed up, 1 minute before ready lay on your spinach and cover again. (by covering it adds more steam and allows the omelette to puff up more)
The bread is full of flavour, so delicious and easy to bake.
Makes 1 loaf
150g Plain Flour
150g Wholegrain Bread Flour
70g Scottish Oats
100g Dark Brown Sugar
2 tsp baking soda
1 tsp baking powder
1 tsp salt
150ml Guinness
150ml Buttermilk
30g melted butter
Preheat oven to 190 deg on convection bake.
Mix together the dry ingredients in a bowl
Add in the wet ingredients to dry and mix together until combined. If the dough is too sticky and wet just add a little more flour but you don’t want it too dry.
Shape into a circle and place on a floured baking tray, score a cross on top about 1/2″ thick and brush with some buttermilk.
Bake in the oven for about 45-50 minutes until knife comes out clean, allow to cool and serve.
This was my first go at coloured pasta, I’ve seen loads of posts on instagram showing beautiful colour pasta shapes and needed to give it a go. It was a lot easier that I originally thought, although my filling shape needs to be improved. lol! Practise makes perfect as they say….lol.
I use my Kitchen Aid pasta roller for this but any handheld pasta roller or even a rolling pin will do.
The general rule of thumb when making pasta is:-
100g ‘OO’ Flour, 1 egg, pinch salt. (makes enough for 2 small portions)
If you need more simply double everything ie: 200g flour, 2 eggs etc, 400g flour, 4 eggs etc.
For the basic past dough:-
100g ‘OO’ Flour
1 egg
Pinch of salt
For the Colouring:-
1 tsp Beetroot Powder (Red)
1 tsp Blue Pea Powder (Blue/Purple)
1 tsp Spinach Powder (Green)
You can of course use any colour you wish.
Extras:-
Semolina
Baking Sheet
Pastry Cutter
Filling:-
60g Ricotta
60g Marscapone
1 tsp nutmeg
handful chopped Dill or Spinach
40g Parmesan grated
Make a well in the middle of your flour on a flat surface.
Crack the egg into a jug, add the tsp of colouring and salt and whisk until blended, pour into the well of flour.
Gently with a fork mix a little of the flour into the egg, once it starts to come together use your hands to bring together into a dough. If it is too dry just dip your fingers into water and add. You want the dough to be like a child’s play dough type texture.
Once in a ball wrap in cling film and leave to rest for 30 minutes.
Using the pasta roller, roll through on 1 twice, then fold the edges in, this is to try and keep the pasta sheet shape, then roll through on 1 again twice then 2,3,4,5 twice then a final roll on 6 then 7 just once. Sprinkle some semolina on a baking sheet and lay pasta down, this is to try and stop it from drying and sticking too much.
Once all your sheets are ready, change cutter to tagliatelle. Choosing just 2 of the colours, pass through the cutter, then coat the strips in semolina to stop sticking together.
Take each strip of colour and lay onto the final colour past sheet and press down, then put through the pasta roller to combine on setting 4, then 6 then 7 just once.
Now you can decide on your shape, cut using pasta cutter.
If filling, turn upside down 1 sheet and add dollops of your filling leaving enough space between, using a little water to edge the pasta (this allows the seal). Take the other pasta sheet and place on top and press around filling to seal ensuring no air bubbles. Freeze the filled pasta and then cook from frozen when required. (By freezing you ensure that the filling doesn’t leak when cooking)
I had some tagliatelle left over, so I just cooked in a little salt water for 2 minutes using my steam pot on my pasta setting, drained and mixed with the left over cheese mixture (quick little snack)
If you have any excess, allow to completely dry out by hanging (48 hours) then just bag or jar (ensuring covered with semolina to stop sticking).
I had some pumpkin left after making my pumpkin soup recipe tonight so I decided to give pumpkin cupcakes a go. Yummy!
Makes 12
160g Plain Flour
1 teaspoon allspice
1 teaspoon baking powder
1/2 teaspoon cinnamon
1/2 teaspoon bicarbonate of soda
1/4 teaspoon nutmeg
1/4 teaspoon salt
250g grated pumpkin
100g Light Brown sugar
60g caster sugar
75ml olive oil
2 large eggs
For the buttercream icing:
75g of softened butter
250g icing sugar
2 tablespoons milk
1 tsp vanilla essence
Orange food colouring
Preheat oven to 190 deg and line a muffin tin with cupcake cases.
Combine the flour, allspice, baking powder, cinnamon, bicarbonate of soda, nutmeg and salt in a large bowl
Whisk together the grated pumpkin, sugar, olive oil and eggs in another bowl
Pour the whisked mixture over the dry ingredients and stir using a spatula, until fully mixed
Dollop a spoonful of batter evenly into each baking cup in the cupcake tray until the batter runs out. Place the tray into the hot oven and bake for 18 minutes, remove and allow to cool.
Meanwhile make the buttercream, add the butter to a bowl and beat with an electric mixer until light and peaky
Sieve the icing sugar to remove any lumps, then add a little at a time to the butter while whisking continually, until all the icing sugar has been added. If the mixture begins to become too thick, add the milk a teaspoon at a time to loosen it up until the desired texture has been reached, add in the vanilla essence and food colouring and mix until combined.
Decant the buttercream into a piping bag and pipe into the cupcakes once cooled.
I used my original swiss roll recipe for this and just changed the colours and filling.
For the orange and black one I piped circles onto the baking sheet like a chequered board and then dragged a toothpick through the two colours to create the pattern.
The other was just strips of colours.
The chocolate orange filling was chocolate Whipped Cream frosting with orange juice & zest through.
120g whipping cream
100g powdered sugar
75 g cocoa powder
1 tsp vanilla essence
1 orange zested and juiced.
They do create a lovely bright addition to your halloween table.
It’s Halloween Season, my favourite time of the year, beautiful crisp air, colourful leaves on the trees, dark cosy nights, everything spooky and weird, and amazing food flavours around. To be honest this is my first time with Pumpkin, I’ve never cooked it before myself, I thought I would try steam cooking it for more flavour and making a creamy soup as it was a really cold day here today. Was delicious.
Makes 1 large portion
250g chopped pumpkin
30g sliced leek
30ml double cream
300ml vegetable stock
30g Bulgur Wheat
Salt & pepper to taste
Place the pumpkin and leeks with 100ml of the stock into the bottom of the steam pot and cook on dynamic steam for 8 minutes. Otherwise, place stock in a pan with pumpkin & leeks, & additional 100ml stock then bring to boil, reduce slightly & cook covered until soft.
Remove lid and pour in the rest of the stock and the cream, season with salt & pepper and blend with a hand blender until smooth.
If using pot its the same method as above.
Add in the Bulgur Wheat to the creamed soup and cook on microwave 900w for 3 minutes.
Or simmer in pan for 5 – 7 minutes.
Remove from microwave/pan and serve with some toasted pumpkin seeds and a drizzle of olive oil.
You can also add in some toasted croutons if you like.
I recently purchased the new High Protein Handbook No. 5 from Scott Baptie, and this little recipe was my first one I tried, I have to say it was super tasty and very nutritious too.
Serves 2
1 tsp coconut oil
2 Chicken Breasts – chopped into chunks
1 sweet potato – chopped into chunks
1 onion – chopped
1 tsp dried garlic granules
1 tsp ginger
1 red pepper, chopped into chunks
1 tbsp curry powder
1 tsp paprika
1 tbsp fish sauce
200ml coconut milk
1 tsp chilli powder
Salt & pepper to taste
Melt the coconut oil in a pan, season the chicken and add to the pan to brown then removed with a slotted spoon.
Add the onion, pepper, sweet potato, garlic and ginger and brown.
Add the chicken back to the pan and add the fish sauce, paprika, curry powder, chilli and coconut milk, reduce to a low simmer and cook covered for about 1-2 hours.
Remove lid, turn heat up slightly and allow to cook uncovered for about 20-30 minutes or until the sauce thickens.
Serve on its own or with some steamed wholemeal rice.
Oh yummy! We fancied a wee coffee n cake afternoon since we were having a lazy one. I recently visited the Coffee Festival in Edinburgh and discovered loads of amazing coffee roasters and new flavours, one of them was a new Cold Brew infused with CBD made by Hamilton Street Cold Brew, if you want to feel motivated, uplifting but with a little bit of calm in your day then you have to try this. I also picked up some amazing Chocolate by chocolate tree in Edinburgh, Artisan chocolates and organic chocolate are just some of their creations.
Makes 6 Servings
For Cake mix:-
110g unsalted butter, softened
110g self raising flour
110g Caster Sugar
2 eggs
50ml CBD Cold brew (if not using add milk)
50g Cocoa powder
2 tbsp boiling water
For the whipped cream filling:-
100ml whipping cream
50g Icing Sugar
1 tbsp cocoa powder
1 tsp vanilla essence
For the drizzle:-
1/2 bar of Salted Caramel Chocolate – melted
Pre heat oven to 170 deg and grease a cake tin (I used a mini finger loaf tin)
In a bowl combine, butter, flour, sugar, eggs, cocoa powder, cold brew and water and mix until combined together. Divide into cake tin and bake for about 20 minutes.
Meanwhile in a separate bowl beat all the whipped cream ingredients together with an electric mixer on high speed until stiff. (Tip: Chill your bowl in the fridge before hand)
Remove cakes from oven and allow to cool on a wire rack, once cooled slice in half and spread on the whipped cream mixture.
Melt chocolate on lowest setting on Induction hob (or over boiling water in a bowl), and drizzle as much as you like over the cakes. Allow chocolate to harden before serving.
In a bid to get more vegetables into our diet, this little Tagine was simply super tasty and super healthy. One pot cooking too so nice & easy. I do love Moroccan flavours. Idea came from a recipe from PON and as usual I added and took out bits to suit my own tastes. Delicious!!!
Serves 4
Low calorie spray
1 Large carrot, cut into chunks
200g Turnip (swede), peeled and cut into chunks
2 large parsnips, peeled and cut into chunks
6 shallots – peeled and cut into wedges
1 red pepper, cut into wedges
200g peeled and deseeded butternut squash, cut into chunks
This is a classic dish in the U.K, good British pub food, I was keen to give it a go. Easy One pot cooking and can be slow cooked too. Traditionally its served with roast potatoes, however, having loads of rice to use up in my cupboard this was my preferred choice.
Serves 4
For the Chicken
4 Chicken Breasts
4 Bacon slices (smoked)
3 shallots, diced
2 tsp garlic granules or 2 cloves
1 400g tin chopped tomatoes
1 tbsp tomato puree
juice of 1/2 lemon
1 tsp smoked paprika
1/2 tsp crushed chilli flakes
1 tbsp balsamic vinegar
2 tbsp Worcestershire sauce
2 tbsp white wine vinegar
1 tbsp hot sauce
1 tsp mustard powder
1 tsp sugar
80g reduced fat cheddar (healthier option)
For the Rice
150g Wholemeal Log Grain Rice
1 x 400g tin of mixed beans
Pinch of Saffron
300ml Vegetable Stock
75-100g chopped Chorizo
Preheat oven to 180 deg.
Wrap each chicken breast with the bacon slice and secure with a cocktail stick
Put all of the other ingredients for the chicken into an ovenproof casserole dish with a tight lid.
Place the chicken on top of the ingredients, put lid on and cook for about 1-2 hours.
Remove from the oven and remove chicken breasts from the dish, set aside. Using a blender blitz the sauce until smooth.
Place chicken into a dish, cover with the sauce and sprinkle the cheese over the top, place under a hot grill to melt the cheese.
Place the rice, beans, chorizo, stock & saffron into the steam pot and cook on Steam setting for 20 minutes.
Oh yummy! I fancied something a little naughty with my coffee this weekend so thought I’d try out my new Bundt cake tin. It was supposed to be marbled, however, I think I put to much chocolate into the mixture and swirled it too many times…….lol! The flavour was fantastic though.
A Bundt cake is a cake that is baked in a Bundt pan, shaping it into a distinctive ring shape. The shape is inspired by a traditional European cake known as Kugelhupf, but Bundt cakes are not generally associated with any single recipe. The style of mould in North America was popularised in the 1950s and 1960s, after cookware manufacturer Nordic Ware trademarked the name “Bundt” and began producing Bundt pans from cast aluminium. Publicity from Pillsbury saw the cakes gain widespread popularity.
Ingredients for 1 Bundt tin
180g softened butter
225g caster sugar
3/4 tsp almond extract
2 tsp baking powder
180 g plain flour
75g ground almonds
3 large eggs
2 tbsp milk
3 tbsp cocoa powder with 3 tbsp water – mix to a paste
100g dark chocolate chips
Icing sugar to decorate
Pre heat your oven to 180 deg or if you have a cake setting, set to Marble Cake setting. Brush the Cake tin with melted butter, ensure it is thoroughly covered.
Cream the butter and sugar together until fluffy, stir in the almond extract.
Mix together the flour, baking powder and ground almonds together. Beat in the eggs one at a time to the butter mixture with 2 tbsp of the flour mixture, repeat until all eggs have been added then fold in the remaining flour mix.
Stir in the milk and mix, then spoon 1/2 of the batter into a separate bowl and mix in the cocoa paste into 1 and the chocolate chips into the other.
Add spoonfuls of each batter alternately to the cake tin and drag a handle of a spoon through the mixture to create the marble effect, do not over do this.
Bake in the oven for about 40-50 minutes until a knife comes out clean
Let it cool for about 10 minutes in the tin before turning out. Once cooled, sprinkle with icing sugar and serve. Yummy!
I do love my salmon. This was a last minute little dish as I was going to have steamed teriyaki salmon and sweet potato fries tonight for dinner, but changed my mind as I fancied a warming soup type dish. It was delicious and with the lemon zest added that extra bit of flavour.
Makes 2 portions
2 Salmon Fillets – cut into chunks
1 large sweet potato – cut in 1 cm chunks
1 cup sweetcorn (I used frozen)
1 cup baby carrots ( I used frozen)
1 cup garden peas (I used frozen)
1 onion – chopped finely
1 tbsp butter
1 tsp dried dill
Salt & Pepper
200ml water
2 tbsp flour
150ml Milk
Grated Lemon zest and juice of 1 lemon
In a large pot, melt the butter and saute the onion.
Add in the sweet potato, sweetcorn, peas, carrots, dried dill, salt & pepper and mix.
Pour in the water and bring to the boil, reduce and simmer covered for about 10 minutes or until sweet potatoes are tender.
Whisk the flour into the milk and slowly add to the pan while stirring through.
Add in the chunks of Salmon, remove the lid and simmer uncovered for about 5 minutes or until salmon is opaque. Be gentle but stir every now and again but watch not to beak up the salmon pieces.
Squeeze in lemon juice and grated lemon zest. Serve with a turn of rainbow peppercorns.
I have been wanting a Cast Iron Casserole Dish for a while now and my best friend came to the rescue, just out of the blue she gave me this lovely pot, so I just had to come up with a recipe to use it this weekend.
Pre heat your oven to Slow Cook Setting or around 90 deg.
Brown the onions in a little oil, then add the peppers and brown, remove from pan
Add the Beef mince and brown all over, adding salt & pepper to taste
Add back to the pan the onions & peppers along with the sweetcorn, beans, tomatoes, seasoning and stock. Mix through and cook in oven for about 5-6 hours.
Packed with 3 of your 5 a day this tasty meal is super high in vitamins and flavour. Any excuse to get my KitchenAid mini processer out though…lol!
Makes 2 Servings
300 g Potatoes
1 bunch of asparagus
100g fresh peas or canned
1 red chilli
2 handfuls of baby spinach
2 Scottish cod fillets
1 lemon
Wash the potatoes and cut into small chunks, keep skin on as that is where the most flavour is. Place in a pan of slightly salted boiling water and cook for about 10 minutes or until soft.
Add the asparagus and peas to the pan and cook further for 3-4 minutes, drain and put into a food processor.
Add the spinach, lemon zest and seasoning to the processor and pulse until blended together.
Cook your cod to your preferred method. I steam cooked mine but you could pan fry for crispy finish.
Divide up the mash and serve with the cod on top, to finish sprinkle with chilli and lemon juice.
I was watching James Martin on Saturday morning and he made a raspberry chocolate tart, we sat there dying to try a bit. Unfortunately, I didn’t have any raspberries so a hazelnut version it was.
I decided to do a hazelnut nut pastry just to add extra flavour.
For the Pastry:-
125g Plain Flour
50g Icing Sugar
50g Crushed Toasted Hazelnuts (plus 10g for decoration)
Pinch of salt
80g Butter, cold, diced
1 egg yolk
For the Filling:-
300ml Double Cream
125ml Whole Milk
200g Dark Chocolate or Milk Chocolate with at least 40% cocoa solids
2 eggs
50g golden caster sugar
pinch salt
1/2 tsp vanilla extract
To make the pastry, sift the flour and icing sugar into a food processor, add the hazelnuts and blitz together. Add the butter and pulse briefly until mixture looks like breadcrumbs, don’t overmix. Add the egg yolk and pulse until dough comes together. Shape dough into a flat disc, wrap in cling film and chill in the fridge for at least 1 hour.
Roll the dough out onto a floured surface. Using a loose bottomed tart tin, grease tin then line the tart tin with the pastry pressing into all corners. Trim any loose pastry. Chill in the fridge for 30 minutes.
Preheat oven to 160 deg. Prick the bottom of the pastry and line with greaseproof paper and baking beans. Bake for 25 minutes, remove the baking paper and beans and return to the oven for a further 10 minutes.
Remove and trim the edges in line with the tart tin.
Meanwhile, to make the filling, place milk & cream into a pan and bring to just below boiling point, do not boil. Take of heat and stir in the chocolate to melt.
In a large bowl whisk together the eggs, sugar, salt and vanilla. Gradually whisk in the chocolate mix, whisking constantly.
Pour the mixture into the pastry case and bake on a wire rack in the oven for about 25 minutes until the filling has a slight wobble. Remove and sprinkle with chopped hazelnuts. Allow to cool in the tin before removing.
I had some egg white left over from a recipe that only required an egg yolk, so I decided to try patterns on meringues, turned out o.k. I thought. I’m know dying to try more patterns and colours……watch this space.
All I done was draw lines inside a piping bag with orange food colouring and then filled the bag and piped, quite simple actually but creates a great visual pleasure.
This is a very simple and quick satisfying dinner & a healthy nutritious one too. The added crispy onions on top just give it a lovely little crunch. I used Corn Tacos for extra flavour.
Heat a little oil in a fry pan on medium to high heat
Add in the pepper and sweetcorn and cook for about 5 minutes
Add in the black beans, chilli, garlic, onion granules, cumin and pinch of salt, mix through and cook for about 5 minutes
Add in the baby spinach and 2 tbsp water, cover and let spinach wilt for about a minute of 2. Mix through. Finished with 2 tbsp coriander and juice from 1 lime.
To serve, heat up the corn tacos under a grill (or tortillas if using). 2 tbsp of bean mix, top with sour cream, cheese and crispy onions. Yummy!
Oh yum! I wanted to try broccoli rice in my new KitchenAid mini Food Processor and then decided to turn it into little fitters, these were super tasty and so nutritious. These are freezeable so you can make a large batch for later in the week.
Makes 8
200g Broccoli – fresh
1 egg
80g Gram Flour (Chickpea Flour), you can use almond flour or plain flour too.
30g shredded cheese (I used Le Gruyere but parmesan would be nice too)
1 tsp smoked paprika
1/2 tsp salt
1/2 tsp mixed pepper
1 tsp onion granules
1 tsp garlic granules
In a bowl add flour, salt, pepper, paprika, onion and garlic granules, cheese, flour and egg, mix together
Blitz the broccoli in a food processor and add to the mixture, bring together. If its a little too sticky, just add in some extra flour.
Taking a ladle, scoop some mixture and place into a hot pan with a little oil or Crisperplate (if using), cook for about 4 minutes on each side or until slightly browned. You could also bake in an oven at about 200 deg for about 20-30 minutes.
Had some Scottish Salmon for dinner tonight and 1/2 a can of chickpeas to use up, so I thought I’d cook something different. These were really tasty and so quick to cook too using my Crisperplate, just 10 minutes. You can of course gently fry these if you don’t have a Crisperplate.
I also wanted to use my Kitchenaid mini food processor, I got this last week, it’s a brilliant wee machine, so quick and a great size for smaller portions.
Makes 4
1 x 120g Scottish Salmon Fillet (cooked, I steam cooked mine)
200g chickpeas drained
1 tsp garlic granules
2 tbsp dried coriander
1 lime, zested & juice
1 tsp onion granules
1 egg
30g Panko breadcrumbs
Salt & Pepper to taste
Place the chickpeas, garlic, coriander, lime, onion granules, egg, salt & pepper into a food processor and blitz until combined.
Add in the cooked salmon and gently blitz, don’t break up too much.
Add in the panko breadcrumbs and mix together. Mould into 4 cakes about 1 ” thick and place on some greaseproof paper and refrigerate for at least 1 hour.
If using the Crisperplate, preheat for 2 minutes and place onto plate and cook for about 10 minutes. If using fry pan, add a little oil and cook for about 4 minutes each side.
Scotland’s abundant natural larder is amazing, from Stornoway Black Pudding, Aberdeen Angus Beef, Highland Wagu from Perthshire, Arbroath Smokies, Shetland Salmon and of course our delicious rasperberries, all washed down with our amazing Whisky’s.
This trail guide is a perfect guide for foodies, whether its a whisky trail or chocolate trail you will find the best here. Food and drink scotland
You can also check out all our excellence awards here. Excellence awards So don’t just take my word for it, come visit, come eat, come drink, come have some fun!
I wasn’t really sure what to call this as it was a mishmash of 2 cakes….I was going to bake a chocolate tart and realised I didn’t have all the ingredients for the sweet pastry. So I decided to make a biscuit base instead. Then I discovered I didn’t have double/whipping cream but only single cream, so I therefore now had to bake. Despite all my misfortunes, this did actually turn out quite nice.
I was only making a small one for my other halves birthday, he loves chocolate…lol!
Makes a small portion for 1 or 2
For the filling:-
100g Milk Chocolate, minimum 35% cocoa
100ml single cream
50ml whole fat milk
1 egg
For the base:-
4 Digestive biscuits
1 Crunchie chocolate bar
1 tbsp butter – melted
For the toppings:-
small chunks of honeycomb to decorate
small edible spray glitter (optional), it was a birthday after all.
In a food processor put the digestives, crunchie bar and blitz until breadcrumbs, add in the melted butter and bring together.
Line a small springform tin with greaseproof paper. Empty the biscuit mixture into the tin and push/flatten down with your hands evenly. Refrigerate.
Empty the cream and milk into a pan and bring to the boil.
Place the chocolate into bowl in pieces.
Pour the hot cream and milk over the chocolate to melt, stir until blended. Set aside to cool.
Crack the egg into a dish and using a hand mixer, mix until fluffy.
Once chocolate has cooled, pour egg into bowl and mix through.
Remove biscuit base from fridge and pour in the chocolate mix.
Preheat your oven to 130 deg. Gently place the tin in the oven and bake for about 30 minutes. You want it set but with a slight wobble. Remove and allow to cool.
Sprinkle some cocoa powder over top (optional) the sprinkle the honeycomb pieces on top. Serve.
This can be chilled and kept for later. Serve at room temperature.
I’m enjoying my Moroccan spices at the moment, the flavour is fragrant, fiery, sweet, savory, and citrusy, it really gets your senses moving. Normally a traditional Moroccan meal would contain couscous but as I had some Bulgur Wheat to use up I decided on this. Bulgur is also a healthier and lower calorie choice too.
Makes 2 Servings
Spray oil
1 medium red onion, finely chopped
200g Scottish Beef Mince
1 tbsp cumin
1 tsp ground cinnamon
2 tsp turmeric
1 tbsp smoked paprika
1 tsp white pepper
1 tsp ground ginger
250ml vegetable stock
100g Spinach
30g Cashew nuts (slighty toasted and chopped)
80g Bulgur Wheat
Zest of 1 lemon
2 tbsp chopped fresh mint
Salt & pepper to taste
Heat oil in a large fry pan and fry the onions until browned and softened
Add in the beef mince and brown all over. Add in the spice mix and mix thoroughly.
Add in the stock and bring to the boil, then simmer for about 15 minutes or until the stock thickens/evaporates slightly.
Meanwhile, make the Bulgur Wheat as per packet instructions. Once cooked add in the spinach and cover with a lid, allow the residual heat to wilt the spinach down, mix through. Add in the lemon zest and mint and mix.
Season, serve and sprinkle the toasted cashews on top. Yummy!
OMG! I do love Avocado’s & if you do too, you will love this little recipe. A good nutritious and healthy way to start your day. Creamy luxurious texture, full of good vitamins, healthy fatty acids, flavour and fiber, why would you not want to? Good on their own or serve with a poached egg or crispy bacon for a more luxury weekend treat.
Makes 4 large pancakes
1 Large avocado
100g Plain Flour
1 tsp baking powder
1 1/2 tbsp sugar
1/2 tsp salt
1/4 tsp nutmeg
1/2 cup milk
1 egg
1/2 tsp vanilla extract
1 tbsp coconut oil – melted
butter for the pan
Whisk together flour, baking powder, sugar, salt & nutmeg in a bowl
Combine the avocado, milk, egg, coconut oil and vanilla in a food processor until smooth
Mix the avocado into the flour until blended
Melt the butter in a fry pan on medium to high heat, scoop the batter into the pan (whichever size you like) and cook for about 2-3 minutes per each side.
Serve. I put on a bed of Spinach with a poached egg on top, Yummy!
I’ve had an Indian Superfood Cookbook for ages but for some reason never actually attempted to make anything from it. So today was that day it got opened. I wish I had opened it up sooner, this dish was super tasty and full of good antioxidants. I served it with a chickpea chapati, made from my original Chapati recipe, I changed the plain flour for Gram Flour.
Serves 2
2 tbsp olive oil
2 tsp ground cardamom
2 tsp ground cumin
1 tsp salt
1 onion, sliced thinly
1 tsp garlic granules
1 tsp turmeric
1 tsp gram masala
1 400g can chopped tomatoes
1 tbsp grated fresh ginger
2-3 chillies chopped or 1 tsp chilli flakes
250g scottish beef mince
225g can of chickpeas
Small handful of Fresh coriander to serve.
Heat the oil in a large fry pan
Add in the onions with the cardamom, cumin, garlic, ginger, salt, turmeric, gram masala & chillies. Cook until onions are slightly browned and softened.
Add in half of the tin tomatoes and cook for about 10 minutes or until the excess juices have dried off.
Add in the mince, mix well and cook until mince has browned all over, about 5 minutes.
Add in the remaining tomatoes & chickpeas, bring to the boil, cover & simmer for about 30 minutes. If the consistancey is too thick just add a little water.
Oh yum. I’ve not had a scone in a while, so looking in my cupboards I had some Walnuts & Cranberries to use up and decided to give it a try. These were absolutely delicious, served with a good quality butter they were perfect with a cuppa. Lovely little afternoon tea scone.
Makes 6
100g Light Brown Sugar (or white caster sugar) (plus 1 tbsp)
2 tbsp lemon juice
300g Plain Flour
1 tbsp baking powder
Freshly grated lemon zest – 1 lemon
1 tsp salt
75g unsalted butter
50g dried cranberries
50g chopped walnuts
50ml Milk
50ml Double cream
Preheat your oven to 190 deg. Line a baking tray with baking paper.
Mix 1 tbsp sugar & 1 tbsp lemon juice together in a dish and set aside, this will be for the glaze.
Whisk flour, baking powder, lemon zest, salt, and sugar in large bowl. Add chilled butter & using fingertips, rub in until you get breadcrumb like mixture.
Mix in cranberries and walnuts. Then add in the milk & cream and mix through 1 tablespoon of lemon juice. Toss with fork or hands until dough comes together in moist clumps.
Floured a work surface and roll out till about 1 inch thick. Using a cutter (about 7-8cm diameter) cut out 6 servings and place onto your baking sheet. Using the glaze brush lightly over the scones. Bake for about 18 minutes. Or until a knife comes out clean and slightly browned
A Little Afternoon Tea for us today, I had some Rose Water in my cupboard and Pistachio’s to use up so this was the decider. I originally saw a recipe similar on Sous Chef a while ago and was intrigued by the flavour combination, but these were delicious.
Makes 8 Biscuits
65g unsalted butter, softened
40g light brown caster sugar
95g Plain Flour (a little extra for dusting)
35g pistachio kernels, finely chopped
2 tsp Rose Water
50g White Chocolate, melted
Preheat your oven to 170 deg and line a baking tray with baking paper
Beat the butter and sugar together with an electric hand whisker
Fold in the flour, rose water & pistachios (keep about 1 tbsp of pistachios for finishing)
Roll out the mixture onto a floured surface to about 1/2 cm thick.
Using a circle cutter about 6.5mm, cut out your biscuits and place onto your baking sheet. Bake in the oven for about 20 minutes. Remove and allow to cool.
Once completely cooled, dip 1 end of the biscuit into the melted chocolate and place onto a wire rack with a tray underneath, or you can spoon the chocolate on. Sprinkle some pistachios over.
Place in a fridge and allow the chocolate to harden. Serve with a lovely cuppa.
This was my first attempt at sweet pastry, it was actually quite simple and tasted amazing. I was making a bakewell tart. (recipe to follow)
250g plain flour
50g icing sugar
125g unsalted butter, cool
1 tsp vanilla essence
1 large egg
Splash of milk
Sieve the flour and icing sugar into a bowl
Chop the butter into cubes and gently work it through the four mixture so that it resembles breadcrumbs
Beat the egg with the milk and vanilla essence, add to the flour mixture and bring together to create a ball of pastry. Do not over work.
Sprinkle a little flour onto a work surface and flatten pastry to about 2.5cm thick, wrap in cling film and refrigerate for at least 30 minutes.
Using a 25cm spring form tart tin, lightly oil all over.
Dust a work surface with flour and roll out the pastry to about 1/2 cm thick. Using the rolling pin wrap pastry around and unroll over the tart tin. Ease the pastry into the tin pushing to the sides. Trim of any excess pastry.
Prick the base with a fork and put in freezer for 30 minutes.
Remove and line baking paper over the pastry, fill with baking beans and blind bake for 10 minutes at 180 deg. Remove the paper and beans and continue to bake for a further 10 minutes. Remove from oven and allow to fully cool.
Oh yummy, I was going through all my cookbooks and found this dish from Jamie Olivers Superfood Book. Was easy to make, very filling and very delicious. Fresh flavours and so nutritious. Squash is packed with Vitamin A which helps us see in the dark. Laksa originates from Southeast Asia, it is usually a noodle based soup with coconut.
Serves 2
2 sticks of lemongrass
2 cloves garlic
10cm piece of ginger
2 fresh chillies
3 spring onions
1 bunch of fresh coriander
80ml coconut cream
Splash white wine vinegar
Splash of Fish Sauce
Chicken Stock Cube with 700ml water
150g brown rice or wild rice
1 butternut squash
2 chicken breasts (or thighs)
1 tbsp Sesame oil
1 tbsp unsalted peanuts
1 lime.
Preheat your oven to 180 deg.
Bash the lemongrass and remove outer layers, peel the garlic and ginger and chop the spring onions and chillies roughly. Place all in a blender. Add the coriander, (reserving a few leaves for garnish) coconut cream, vinegar and fish sauce, blitz the mixture until smooth. This is your Laksa paste.
Crumble the chicken stock cube into your oven dish and add 700ml boiling water to dissolve. Add in the rice.
Cut up the butternut squash into 4 rounds off the bulbous part, removing the seeds.
Cut the chicken breasts into large bite size pieces. Cover the chicken and butternut squash pieces with the Laksa paste. Place them into the oven dish with the rice & water. Drizzle 1 tbsp sesame oil over the top.
Bake for 1 hour 30 minutes.
Before serving, toast the peanuts and chop into small bits, sprinkle on top with the coriander leaves and squeeze the juice from lime over the top. Serve.
Oh Yummy! Healthier Eating doesn’t get any better, this was delicious. A middle eastern style frittata and so versatile, you can eat it cold or warm, lunch or dinner.
Serves 9
Spray Fry oil or veg oil
1 red onion, sliced finely
200 g curly kale
200g cabbage – cut into ribbons and chopped
2 tsp garlic granules
1 tsp ground fenugreek
1 tsp turmeric
8 large eggs
2 tsp baking powder
2 tbsp plain flour
2 tbsp greek yoghurt, I used low fat
2 small handfuls of cranberries
40g pine nuts
200g feta cheese
Salt & pepper to taste
Heat the oil in a large saucepan over medium heat. Add in the onions and cook until soft.
Increase the heat to medium to high and add in the kale, stir fry for about 4 minutes until wilted. Add in the cabbage and stir fry for about 5 minutes, add in the garlic and spices, season and cook until wilted and cooked through, about another 5 minutes. Remove from heat and allow to cool.
Preheat your oven to 200 deg and line an ovenproof dish with baking paper. I used a tin 24 x 24cm.
Crack the eggs into a mixing bowl and whisk. Add the baking powder, flour, yoghurt and salt, mix well.
Add in the cranberries and pine nuts, stir through.
Once the greens mix is cooled add to the egg mixture little at a time and mix through.
Fold in the feta pieces and pour into your prepared oven dish, evenly spreading the mixture.
Bake for about 30 minutes. Insert a knife and make sure it comes out clean. Allow to cool slightly. Slice and serve.
This will keep in the fridge for 2-3 days and you can also freezer any leftovers.
I served this little dish with my Moroccan Spiced Cauliflower as a tapas style dinner. These were so yummy and the sauce was rich with a little bit of sweetness.
Makes 8 Meatballs
200g scottish beef mince
30g panko breadcrumbs
1 egg
handful chopped coriander
1/2 tsp salt
1/2 tsp pepper
1/2 tsp cinnamon
1/2 tsp cumin
1/2 tsp dried coriander
1/2 tsp minced ginger
225g tin chopped tomatoes
150ml beef stock
1 red onion – finely sliced
Place everything in a bowl and mix. Shape into 1″ balls and chill in the fridge for about 30 minutes.
Heat up a fry pan with spray oil and cook meatballs until browned all over.
Add in the onions a cook until softened and slightly browned.
Add in the tomatoes and beef stock, bring to the boil then simmer medium heat until sauce starts to thicken, about 15-20 minutes. serve.
I got this recipe from one of my colleagues at an event, this is so delicious I just had to try myself at home. It is really easy to make and healthy. I used a steam assisted method to cook so this was lovely and moist.
Served with some Houmous and toasted almonds it was the perfect little dish, either as a snack, tapas style dish or an accompaniment dish.
Serves 3-4
1 whole cauliflower – outer leaves removed
2 tbsp olive oil
1/2 tsp salt
1/2 tsp pepper
2 tsp smoked paprika
1 tsp ground cumin
1 tsp ground turmeric
1 tsp ground coriander
1 clove garlic minced
1 lemon juice & (Zest for serving)
200g Houmous
30-40g Toasted Almond Flakes
1 tbsp fresh chopped mint to serve.
Mix oil, salt, pepper, spices, garlic and lemon juice in a bowl. Rub this mixture into the cauliflower.
Pre heat your oven on fan to 200 deg. Place a deep tray with water on level 2 and place a wire rack over the top, don’t allow the rack to touch the water. (the water is to create steam for more moisture)
Place cauliflower onto the rack and cook for about 45 minutes.
Place the houmous onto a plate, top with toasted almonds, the slice the cauliflower on top and sprinkle with lemon zest and mint. Serve.
Another home comfort food dish, delicious for lunch or dinner, hot or cold.
Serves 4
Butter for greasing tin
1 Roll ready made shortcrust pastry
1 bunch of asparagus spears
250g Spinach leaves
3 large eggs
150ml double cream
1 garlic clove, crushed
10 small cherry tomatoes
handful fresh basil, chopped
40g grated cheddar cheese (or you could use parmesan)
Salt & pepper
Pre heat oven to 190 deg on convection bake setting.
Grease a 10-12 inch tart tin with the butter, roll out the pastry and line the tin, trimming of excess.
Cover the pastry with greaseproof paper and fill with baking beans. Blind bake for about 20 minutes until lightly browned. Remove and allow to cool slightly. Reduce oven to 180 deg.
Meanwhile, bend the asparagus spears until they snap and discard woody bases.
Bring a large pan of slightly salted water to the boil and blanch the asparagus for 1 minute, remove. Using the same water put the spinach in then remove immediately. Drain well and squeeze excess moisture out.
Mix the eggs, cream & garlic together in a bowl and season with salt & pepper.
Lay the spinach into the pastry case, then the asparagus and tomatoes cut side up, sprinkle with the basil. Pour the egg mixture into the case and sprinkle the grated cheese over evenly.
Transfer to the oven and bake for about 35 minutes, remove and leave to cool to room temperature, serve.
Love home comfort food? This is a great little dish that never fails to satisfy. Easy to make, economical and very filling. Using the Gruyere cheese gives it a lovely rich flavour and the panko breadcrumbs give it a lovely bite.
Serve 2
2 Chicken Breasts – cut into bite size pieces
200g broccoli florets – fresh
1 tbsp butter
1 brown onion, sliced thinly
100ml creme fraiche
200ml chicken stock
40g panko breadcrumbs
55g Gruyere Cheese, grated
Salt & pepper to taste
Pre heat your oven to 200 deg.
Bring a saucepan of salted water to the boil and add the broccoli, cook for 5 minutes.
Meanwhile, melt the butter in a pan and cook the onions until browned and softened, about 4 minutes.
Layer the broccoli, onion & chicken in an oven proof dish and season well with salt & pepper.
Pour over the stock and creme fraiche, mix through.
Using the remaining butter in the pan from onions add the breadcrumbs and cheese and mix through, only heat for about 1 minutes until panko crumbs go slightly brown and cheese is combined.
Sprinkle the panko crumbs and cheese over the chicken in the dish and bake for about 25 minutes until golden brown.
I do love Lazy Sunday Mornings. I pulled back the curtains and the sun was shining again, lovely! I opted for a fueling healthy breakfast this morning, first time I’ve tried Spinach Pancakes and they were lovely.
Makes 2 Pancakes
30g Gram Flour (chickpea)
85ml water
Pinch of sea salt
1/2 tsp garlic
2 handfuls of Spinach
2 tbsp olive oil
1 tbsp coconut oil for frying.
Add all the ingredients (except the coconut oil) to a blender and mix until smooth. The batter will be watery.
Heat the coconut oil in a fry pan on medium heat
Pour a thin layer of the batter into the pan and swirl, when you start to see it bubble, flip over and cook. The pancake is very light so I would toss rather than using utensils to flip over as it might tear.
To serve, I chopped some avocado, feta cheese, tomatoes and topped with poached eggs. Yummy!
This was a recipe I put together trying to use up leftovers in my fridge. It was absolutely delicious, if I do say so myself. Next time, I would probably use 2 less filo sheets though and maybe omit the panko breadcrumbs.
Makes 1 roll (about 8 slices)
6-8 filo sheets
1/2 a large white cabbage – finely sliced
1 carrot – shredded
2-3 orange sweet peppers – finely sliced
60g chopped chorizo
small handful of panko breadcrumbs
Salt & rainbow pepper to taste
1 tbsp butter – melted
1 tbsp dried onion granules
Preheat your oven to 190 deg. Line a baking tray with greaseproof paper.
Heat a little spray oil in a pan on medium to high heat and add in the onion granules, cook for about 30 seconds.
Add in the cabbage, peppers and carrot and stir through for about 10 minutes.
Then add in the chorizo and continue to cook for about 5 minutes or until everything is softened and slightly browned. Allow to cool.
Meanwhile, unroll the filo pastry and with the melted butter brush lightly on 1 filo then sprinkle some panko breadcrumbs, then lay another filo sheet onto, then brush with butter, then sprinkle some breadcrumbs over, then another filo sheet on top and so on and on until you have used all the sheets.
Take the cooled cabbage mixture and place in the middle of the sheets, leave about a 2″ border all the way and brush with melted butter.
Take the 2 short ends and fold into the mixture
Then gently roll up the filo pastry, place onto the baking tray and bake for about 30 minutes.
Remove, slice and enjoy. (Beware, it is very crumbly..lol)
I really was looking for something different for breakfasts this week but I’m also in a rush to get out the door in the mornings, so I decided to make some crepe batter the night before and keep in the fridge. Just a quick 1 minute cook in the morning and there you go, super quick breakfast. I decided to have a poached egg this morning, but you could spread with jam or stuff with spinach and ham also.
These ones were savoury, but you can easily change to sweet by adding more sugar.
This mixture made 4
50g Plain Flour
200ml milk – I used skimmed to keep the calories down
1 large egg
Spray light oil
1 tsp sugar for savoury (2 tbsp for sweet)
1 tbsp butter – melted.
pinch salt
Whisk the milk & eggs in a bowl/jug, then melt 1 tbsp of butter and add to milk.
Place the flour, salt & sugar in a bowl and pour 1/2 the milk mixture into the flour and mix, then slowly add in the rest of the milk mixture. Do not over whisk, I used a hand whisk for this.
Leave overnight in a fridge or for at least 30 minutes. Your batter should be watery.
Heat up some spray oil in a small fry pan (about 8″ dia) or brush on some melted butter, turn to a medium to high heat
Stir the batter first then take a soup ladle and pour some of the mixture into the pan off the heat and swirl around, put back on heat and cook for about 30 seconds, when you start to see the edges cook and slightly bubble flip over the other side and cook for a further 30 seconds. Remove to a plate.
OMG…..I saw this recipe from PON and just had to try as it was lower in calories. (I’m always curious how the flavour will be without all the sugar etc…lol). I have to say these were delicious. I did change the recipe slightly, but still low in calories. Just 70 calories a slice.
Makes 15 slices.
100g Self Raising Flour
50g low fat butter (I used lurpak lighter)
4 medium eggs
1 tsp baking powder
1 tsp vanilla extract
4 tsp clear honey
50g White chocolate chips (20g to melt for topping)
4 tbsp light brown sugar (or use sweetener for lower calories)
Preheat your oven to 170 deg and line a square 8″ tin with greaseproof paper
Place all of the ingredients, except 25g of the white chocolate chips.
Pour into the baking tin and sprinkle about 10g of white chocolate chips over the top, bake for about 20 minutes or until a knife comes out clean.
Meanwhile melt about 15g of chocolate chips in a microwave dish for about 1 minute.
Allow the cake to cool at room temperature, once cooled drizzle the melted chocolate over the top and cut into slices.
This little dish is so refreshing. It was a lovely sunny day here this weekend so decided I wanted something cool and refreshing & this done just that job. I served with my pulled peanut butter chicken and was delish.
Makes enough for about 4 people or 8 smaller side portions.
1/2 large white cabbage – sliced finely
100g or more of peanuts – chopped
5 spring onions – chopped
3-4 sweet peppers sliced – various colours
1 large handful of coriander – finely chopped
Salt & pepper to taste
For the dressing:–
2 tbsp Rice vinegar or apple cider vinegar
1 tbsp sweetener (I used a low calorie option)
2 tsp toasted sesame oil
2 tsp soy sauce
2 tsp Hot Sauce (less or more if you like it spicy or not)
3 tbsp toasted peanut oil
In a bowl mix up the dressing thoroughly until combined.
Place all the slaw vegetables in a bowl and season
Pour over the dressing and mix to combine.
Serve immediately or keep in fridge for up to 1 day.
I’ve been dying to try this recipe for a long time & it was just as dreamy as I thought. I love peanut butter, so any recipe with it in I simply have to try.
This was so easy and quick to make, just 3 ingredients.
1 packet of Filo Pastry (I only used 8 sheets)
3 tbsp Peanut Butter (I used crunchy but you could use smooth if preferred)
3 tbsp Nutella (got to be Nutella…lol)
Line a baking tray with baking paper and preheat oven to 220 deg
Place 4 filo sheets onto tray and gently spread nutella chocolate over the sheet, lay another 4 sheets of filo over the chocolate spread and then gently spread the peanut butter over.
Gently roll up the filo (not too tight) and bake in the oven for about 20-30 minutes.
Oh yum. You can make these as an appetizer or as part of a main meal. I served these with my homemade Chow Mein , super tasty. They were sweet and sticky just what I wanted.
Makes 5 Skewers
2 Chicken Breasts – cut into chunks
For the Marinade:-
2 tbsp Balsamic Vinegar – good quality one.
2 tbsp Worcestershire Sauce
2 tsp onion powder
2 tbsp clear honey
1 tsp rainbow peppercorns
1 clove garlic crushed
1 tsp ginger grated
2 tsp sesame seeds – for garnish
Mix up the marinade in a small bowl. With the exception of the sesame seeds
Add in the chicken chunks and make sure they are covered completely with the marinade. Leave to marinade in fridge for about 1-2 hours.
Heat a little oil into a pan on medium to high heat. Skewer the chicken pieces onto a bamboo skewer. About 4 pieces is about right.
Place in pan and turn down heat slightly, cook on each side for about 3-5 minutes until its golden brown and the liquid starts to caramelize.
If you like extra sweetness you can baste a little more honey at this point, then sprinkle over the sesame seeds and serve.
This is really quick and east to pull together and tasty too. Quicker than phoning out for a chinese takeaway…lol.
Serves 2 portions.
100ml oyster sauce
1 tbsp soy sauce
1 clove garlic minced
2 tsp fresh grated ginger
1 tsp of Hot sauce or Sriracha
300g Rice Noodles or any kind of thin noodles
4-5 Spring onions, chopped
2 tbsp olive oil
2 Pak Choi – chopped
200-300g Beansprouts
In a small bowl, whisk together oyster sauce, soy sauce, garlic, ginger and Hot Sauce and set aside.
Heat 1 tablespoon oil in a large wok over medium high heat. Add noodles and cook, stirring constantly, until golden brown and crispy, about 3-4 minutes, set aside.
Heat remaining 1 tablespoon oil in the wok. Stir in pak choi until just wilted, about 1 minute.
Stir in noodles and oyster sauce mixture until well combined, about 2 minutes. Stir in bean sprouts and spring onions.
Yum. Looking in my cupboards tonight I needed to use up an opened carton of tomatoes, packet of broccoli and cauliflower so this is what I came up with. Already planning on having salmon just didn’t know what with, so this was one of those delicious last minute meals. And under 500 calories it was healthier too.
Makes 2 portions
100g Wholemeal Fusilli Pasta (or penne if you prefer)
Boil the pasta as per instructions and add the broccoli and cauliflower 4 minutes before ready.
Meanwhile, to make the béchamel sauce melt 1 tbsp butter in a pan and add the flour, mix, slowly add in the milk, little at a time constantly whisking to prevent lumps. Remove from heat when it starts to thicken up. Then stir in the grated cheese.
Mix the sauce into the pasta and empty into an oven proof dish, add the salmon and tomatoes and mix through. Season. Mix the panko breadcrumbs with the melted butter and sprinkle the panko breadcrumbs over.
My little Crisperplate from Hotpoint is fantastic, it cooks food so quickly saving time and energy. For more info click see Hotpoint video Crisperplate & Hotpoint website.
1 Sweet Potato (medium size)
1 tbsp olive oil
Salt & pepper to taste
Optional to add any herbs or spices (rosemary goes well as a herb and paprika as a spice)
Cut off skin and slice into strips about 0.5 – 1cm wide
Coat with the oil and season.
Preheat crisperplate on crisp function for 2 minutes and place fries onto plate, bake for 8 minutes.
Well what can I say apart from sweet, luxurious and low calorie count! Yes, you heard right, LOW CALORIE Count, this little pudding is just 233 Kcal. Trust me too, you won’t believe it is a slimming version, the taste is so delicious. Another great little find from PON, I adapted slightly to my own tastes.
Makes 4
75g Self Raising Flour
1 tsp baking powder
1 tbsp black treacle
3 tbsp light soft brown sugar
50g reduced fat butter
2 large eggs
1 tbsp honey
1 tbsp maple syrup
Preheat your oven to 180 deg.
Put all of the ingredients into a bowl (except the honey & maple Syrup) and whisk them together until combined. Do not over whisk you want to keep as much air in the mixture as possible.
Evenly distribute the clear honey and maple syrup into ramekins and then top with the cake mixture (about half way, leave room for the cakes to rise)
Bake in the oven for about 20 minutes, remove and allow to cool slightly.
Turn out on serving dishes and serve. I served with some low fat custard. Yum!
This recipe is so easy to make and a great quick and satisfying classic. The word ‘Dirty‘ comes from the fact it looks dirty with the colour of the minced beef. Made with rice and vegetables this is so healthy too, at only approx 300 Kcal per serving.
Serves 4
150g Long Grain Brown Rice (or white if you prefer)
1 Chicken Stock Cube – (300ml water if steaming, using Steam pot)
400g Scottish minced beef
1 red onion – chopped finely
4 bacon medallions – diced
3-4 tsp Cajun seasoning (depending on how spicy you like it)
1 tbsp Worcestershire sauce
1 carrot, diced
1 red pepper, diced
100g gardens peas
200ml beef stock
1 beef stock cube
bunch spring onions, sliced
Cook the rice as per packet instructions. I used my Steam pot, decant rice into pot, add the frozen peas and chicken stock, cover and cook on Auto Rice setting for 18 minutes.
Meanwhile, spray a fry pan with low fat cooking spray, brown the mince, onions and bacon.
Add in the Cajun seasoning, salt & pepper, worcestershire sauce and stir. Then add in the carrot, peppers and beef stock. Simmer for a few minutes until peppers are softened.
Add the cooked rice to the pan and mix through. Finish with the spring onions and serve. We served with some Corn Folded Flatbreads. Yummy!
Yummy little dish, I got this recipe from Pinch of Nom and added my own stamp to it. I do love one pot cooking and especially slow cooking too, it is sometimes so good just to put something in the oven and carry on with your daily tasks. This was slow cooked for 5 hours and was delicious. A really good simple throw together meal.
Makes 2 large servings
300g Scottish beef mince
350g passata
300g tin tomatoes
60g chopped chorizo
1 tbsp tomato puree
1 carrot, diced
1 red onion, diced
1 red pepper, diced
1 stick celery, diced
2 tsp garlic powder
1 tbsp worcestershire sauce
1 beef stock cube crumbled
1 tsp dried oregano
1 tsp dried basil
1/2 tsp dried rosemary
100g dried wholemeal pasta
150ml boiling water
40g low fat cheddar
Salt & pepper
Set your oven to slow cook setting if you have one, if not this can be done in a slow cooker on med-high setting.
Firstly brown the mince in a pan with salt, pepper and garlic then remove and place into an oven proof dish
Next add in all the other ingredients with the exception of the pasta, cheese and boiling water, cover and bake for 4.5 hours
Add in the pasta and boiling water to the dish and mix through, bake for a further 30 minutes or until pasta is cooked through.
10 minutes before ready, sprinkle on the cheese and allow to melt through.
This is a Scottish Traditional Dish, made up of mainly Potatoes, onion & cabbage. I love this dish it is such a warming comfort food dish but healthy and nutritious. It was chilly & wet here today, so this was the perfect dish to go with my chicken tonight.
Serves 2
250g potatoes – skin on and cut into small chunks
200g Turnip – cut into small chunks
1 white onion – finely sliced
1/2 green cabbage – finely sliced
Salt & Rainbow pepper (or black pepper)
1 egg yolk
40g low fat cheddar cheese
Preheat the oven to 200 deg
Place the potatoes and turnip in a large pan salted boiling water and gently boil until slightly softened.
Meanwhile, spray a fry pan with low fat oil and cook the onion & cabbage until softened and slightly browned.
Once potatoes etc have softened, drain and add the the cabbage pan, mix and gently mash, not too much as your still want some chunks.
Decant into an oven proof dish and mix with the egg yolk, season with salt & pepper and sprinkle the cheese evenly over the top.
Bake in the oven for 15-20 minutes.
Serve. Yummy! (A little splash of Worcestershire Sauce with this is amazing also)
Sloppy Joes is a traditional United States Dish and usually served on a Brioche Bun, but as I’m always looking for healthier options, this little alternative was simply superb and still very very tasty without the carb guilt. Thanks to PON again for another fab recipe.
Serves 2-4
1 onion finely chopped
2 garlic cloves finely chopped
1 green pepper, finely chopped
400g 5% fat scotch minced beef
1 tsp mustard powder
3 tbsp worcestershire sauce
3 tbsp tomato puree
1 tbsp red wine vinegar
120ml water
sea salt & rainbow pepper
1 red pepper cut lengthways
1 yellow pepper cut lengthways
40g reduced fat cheddar cheese
Preheat oven to 200 deg.
Spray a fry pan with a little oil and heat to medium heat.
Add the onion, garlic & green pepper and cook until softened, about 5 minutes
Add in the minced beef, turn up heat slightly and cook mince until browned
Then add in the mustard powder, worcestershire sauce, tomato puree, red wine vinegar and water, turn heat down and cook for about 5 minutes, season with salt & pepper
Divide the beef mixture between to pepper halves, scatter the cheese over and bake in oven for about 10 minutes.
Quick & Easy to make, full of flavour, refreshing, light and only 190 Kcal per serving, whats not to like. We had these for lunch with a cheeky wee low cal beer. Yummy!
Serves 2
2 small Fresh cod Fillets cut into strips
1/4 tsp mild chilli powder
1/4 tsp garlic granules
1/4 tsp ground coriander
Salt & rainbow pepper
Handful of mixed leaves (I used watercress, spinach & rocket)
2 spring onions – finely chopped
4 small corn tortillas (or low calorie ones)
2 x Wedges of lime
4 tsp Low fat greek yoghurt
1 tsp chilli flakes
Heat a little oil in a pan on high heat.
Sprinkle Chilli powder, garlic and coriander over the fish slices and add the fish to the pan, cook for about 4 minutes then flip and cook for a further 3-4 minutes until slightly browned & crisp.
Meanwhile, heat your tortillas as per packet instructions and place the green leaves, chopped spring onion and a little coriander onto the tortilla.
Once fish is cooked through, place onto the green leaves, season with salt & pepper, add a dollop of yoghurt, sprinkle with chilli flakes and squeeze lime juice over, Serve. Yum Yum!
Oh yes!……I know your looking at that and thinking jeezo that looks super tasty……and guess what you’d be right. Not only that, its only 492 Kcal per serving…..OMG! Tasty, Healthier, Lower in Calories and easy to make. Win! Win!
Another belter of a recipe from NOM!
Serves 4
3 Chicken Breasts – cut into strips, fat removed
2 yellow or red peppers thinly sliced
2 large onions thinly sliced
1 tbsp ground cumin
1/2 tbsp ground coriander
1 tsp mild chilli powder
1/2 tsp dried chilli flakes
salt & pepper to taste
1 x 500g carton passata
1 x 400g kidney beans
2 x low calorie corn tortillas
70g low fat mozzarella
40g reduced fat cheddar cheese
Preheat your oven to 180 deg fan and line the base of a 24cm springform tin with baking paper
Add the chicken strips to a low-medium heat fry pan and brown.
Add in the peppers and onions and brown, then add in the spices and mix through until coated.
Add in the passata and kidney beans and simmer for about 10-15 mins.
Put a layer of the chicken mix into the springform tin, then layer with 1 of the tortillas, then another layer of chicken mix, then another tortilla then another layer of chicken mix. Top with chunks of mozzarella and sprinkle grated cheese over.
Put into the oven for 25 minutes or until cheese is lovely and browned and bubbling. Serve.
OMG! Super tasty meal, super healthy & low in calories, at only 417 Kcal per portion. Another thanks to PON for this recipe. The meat is so tender due to the slow cook match with cuban spices this is a real treat.
Serves 4
500g stewing scotch beef (fat removed)
Salt & pepper
2 onions sliced
240ml beef stock (2 stock cubes)
1 x 400g tin tomatoes chopped
2 green & red peppers, cut into strips
4 garlic cloves – crushed
2 tbsp tomato puree
1 tsp ground cumin
1 tsp dried oregano
1/2 tsp ground turmeric
1 tbsp fresh coriander
50ml red wine (or you can use a stock pot for less calories)
1 tbsp white wine vinegar
Cooked rice to serve (corn tortilla wraps optional)
Season the meat well and brown over a high heat in a pan, remove with a slotted spoon and set aside.
Add the onions to the pan and saute for about 3-4 mins
Add the remaining ingredients to the pan and the browned meat
Bring to the boil then reduce the heat to a low simmer, cover and cook on low for about 2 hours. (Or in an oven at 140 deg fan for 2.5 hrs)
Pull the meat apart with 2 forks, serve on a bed of rice or with a low calorie corn tortilla.
Oh Yum! This was a recipe from my new fav cookbook by Pinch of nom. Quick & East to make, and vert tasty considering it is only 283 kcal per serving (excluding rice).
Serves 4
For the Meatballs
500g 5% fat minced scotch beef
1 tsp salt
pinch of black pepper
1/2 tsp garlic powder
1/2 tsp dried oregano
1/2 tsp dried mixed herbs
Handful of fresh parsley – finely chopped
70g reduced fat mozzarella – cut into 12 small pieces
For the Sauce
1 x 400g tin tomatoes – chopped
50g tomato paste
1 tbsp dried oregano
1 tsp onion granules
1/2 tsp dried basil
1/2 tsp dried parsley
1 medium carrot, finely chopped
1 tsp red wine vinegar
Salt & pepper to taste
Preheat the oven to 180 fan. Line a baking tray with parchment paper.
Mix all of the meatball ingredients in a bowl until well combined then divide into 12 equal pieces.
Enclose 1 piece of mozzarella in each meat piece and roll into a ball, place meatballs onto the backing tray and bake for about 15 minutes.
While meatballs are cooking, to make the sauce put all of the ingredients in a pan, bring to the boil and cook over a low-med heat for about 20 minutes.
Blitz the sauce with a hand blender until smooth, season to taste and return to the pan, add the meatballs to the pan and stir well.
Sprinkle with chopped parsley and serve. I served on a bed of wholemeal rice with peas. Yummy!
It’s Easter Weekend, and I just had to bake. This is what I made and it was delicious, full of flavour with a crunch and very light! Think of a slightly caramel sponge flavour with a super crunchy smarties frosting. Yummy!
Perfect with a lovely cuppa.
Makes 12 large slices (or 24 smaller ones)
60g Butter, softened
250g Brown Sugar
1 Tbsp Vanilla Essence
3 Eggs, 1 Egg Yolk
250g Self Raising Flour
Pinch of salt
1/2 Tsp Baking Powder
For the Frosting
60g Butter, softened
200g Icing Sugar
1 Tbsp Maple Syrup
1 Tsp Vanilla Essence
1 Tbsp Milk
1 Bag of Smarties Eggs
Preheat your oven to 175 deg fan. Line a 9 x 9 baking tin with baking paper.
Add the butter to a large bowl and add in the brown sugar, mix together with a hand mixer until light & creamy.
Crack in the eggs and vanilla and mix through. Add in the flour, salt & baking powder, gently fold in until everything is combined.
Spread into your baking tin. Bake for about 25 – 30 minutes or until a knife comes out clean.
5. Meanwhile to make the frosting, cream the butter in a bowl and add the icing sugar. Add the milk, maple syrup, vanilla and mix until combined.
7. Using a rolling pin gently break down the smarties eggs until you have small pieces then add to the frosting mix and mix through. Refrigerate until needed, this helps thicken the frosting up
8. Once your cake has COMPLETELY cooled, top with frosting spreading evenly. Slice up & serve. Yummy
(These can be kept up to 4-5 days in fridge or 2 days at room temp in a air tight container.)
Monday morning breakfast was a case of trying to use up leftovers. I had some fresh bread and spinach that needed to be used, so decided on some easy breakfast cups. Quick and easy to make. There are so many flavours you can use for these too.
Made 3 with left overs
1 piece of bread per cup – crustless
Eggs
Baby Spinach
Cheddar Cheese (low fat – optional)
Salt & pepper to season
chilli flakes – optional
1 tsp paprika – optional
1 tbsp butter – melted
Firstly preheat your oven to 180 deg.
Brush your bread with the melted butter both sides and cut diagonally, place the bread into the muffin tin overlapping and making sure the bottom is covered.
Bake the bread in the oven for 5 minutes and remove
Place the spinach & cheese with seasoning and chilli into the cups and then crack the egg into them. Sprinkle with paprika and bake for a further 15 minutes. A bit less if you like your eggs really running.
Oh yum, this little Sunday lunch dish was super tasty and healthy too. Original recipe was adapted from Love & Lemons. I was trying to use up what I had in my fridge so roasted tomato sauce it was to go with. Topped with some fresh scottish mackerel this was so tasty and flavoursome.
For the Flatbreads:-
Serves 2
200g Gram Flour
1 tsp sea salt
1 tsp garlic powder
2 tsp Dried Parsley
2 tsp Dried Coriander
1 tsp Ground cumin
1/2 tsp Chilli powder or crushed chilli
2 tsps Lemon juice
6 tsps extra virgin olive oil
300ml water
In a large bowl, mix everything together, chickpea flour, salt, garlic powder, dried herbs, cumin, lemon juice, olive oil and water. Allow to sit for about 30 minutes.
Preheat a pan on the hob to a high heat with a little oil, pour half the mixture into the pan and cook for a few minutes until you see the mixture starting to rise. Flip over and cook for a further few minutes until slightly browned.
Serve with roasted tomato sauce, top with strips of cucumber and some smoked mackerel. Yummy!
For the Roasted Tomato & Walnut Sauce
12-15 cherry tomatoes – halved
1 tsp ground garlic powder
2 tsps powdered sugar
2 tsps sea salt
1/4 tsp chilli flakes
2 tbsps Walnut Oil
1 tsp balsamic vinegar
Roast the tomatoes under the grill or in a pan until soft and slightly browned.
Place all other ingredients into a food processor, add the roasted tomatoes and blitz until you get a smooth puree.
I got this recipe from Food for Fitness , a great site for everything healthy and fitness. I’m still on my journey to find a better balance of nutrients and this little dish packs loads of protein. At only 500 calories approx per serving it’s perfect for a tasty healthy dinner.
And my favourite part, yes it’s one pot cooking (if you’ve a oven ready hob pot). This is still on my wish list.
Serves 2-3
2 large chicken breasts – chopped into bite size pieces
Easy & Quick Soda Bread. Sometimes you want homemade bread but don’t have time for the proving part, well this is made and baked in just 35 minutes.
Soda bread is risen with bicarbonate of soda, which, mixed with buttermilk, produces a distinctive and delicious flavour.
Makes 1 loaf
150ml White bread flour
150ml Wholemeal bread flour
1/2 tsp sugar
1 tsp bicarbonate of soda
1/2 tsp salt
30g butter
300ml buttermilk
Preheat the oven to 180 deg.
Lightly flour a baking tray.
Place all dry ingredients into a bowl and add the butter, rub to make breadcrumb like mix.
With your mixer on slow setting start to mix and add the buttermilk little at a time until you have a soft dough, you don’t want it too sticky or too moist. Be careful not to over mix though.
Form the dough into a round ball and place onto the baking tray, gently with your hand, press down to flatten slightly and with a sharp knife make a cross shape about 1-2cm thick into the dough.
Bake for about 30 minutes. Remove to a wire rack and allow to cool slightly. Serve.
Oh this was rather tasty too, another recipe spied on the Eating well website. Again I slightly adjusted flavour to my own liking & this was very filling and healthy.
Serves 2
2 Chicken Breasts
1 can 400g cannellini beans – drained
400ml chicken stock
1 white onion – sliced
1 carrot – sliced
1 yellow pepper – sliced
100g kale
1 tsp dried rosemary
1 tsp Italian Herbs mix (thyme, basil, oregano,red bell pepper, marjoram, sage, parsley)
1 tbsp lemon juice
Salt & pepper to taste
Heat a little oil in a large pan and gently fry the onions and pepper
Add the chicken breasts and brown all over for a few minutes.
Add in the beans, chicken stock, seasoning, rosemary, italian herbs and mix, bring to the boil then reduce to a very low simmer. Simmer with lid on for about 4-5 hours.
1/2 hour before serving take 2 forks and shred the chicken, next add in the kale and continue to simmer.
Squeeze fresh lemon juice into pan mix then serve with some lovely fresh bread.
Oh yummy! I’m still trying to look for alternative healthier options to my meals and this recipe I came across on Eating well website. A few tweeks to suit our own tastes and voila it was super tasty and quite filling too.
Serves 2
400 g Scottish Steak (cubed)
1 red onion – cut into wedges
1 clove garlic – minced
400ml Beef Stock
1/2 cup of Red wine
70g sugar snap peas
1 red pepper – sliced about 0.5cm thick
8 cherry tomatoes – halved
Cornflour to thick sauce – I used about 2 tbsps
1 tbsp tomato paste
Salt & pepper to taste
80-100g pasta (I used wholewheat as a healthier option)
Heat a little oil in a large pan, add in the steak and brown, season with salt & pepper. Remove with a slotted spoon once browned all over.
Fry the onions and red peppers with the garlic and tomato paste.
Add back to the pan the steak, red wine & beef stock bring to the boil then reduce to a very low simmer and slow cook with lid on for about 4-5 hours.
Just before serving cook your pasta as per packet instructions, drain then add the the pan along with the sugar snap peas and cherry tomatoes. Cook for a further 5 minutes.
If sauce is still watery, make up your cornflour and stir in until you achieve the desired thickness of sauce.
I told my other half he was getting pizza for his dinner tonight, however, when I went to make the pizza dough I discovered I had no yeast….Aaarrrgghhh!! I can’t even remember using my last sachet! lol!
Frantically thinking how can I get around this, I remembered someone telling me once they using baking powder instead of yeast for a yeast free base. Yes, I could do that, I had baking powder in my cupboards.
I have to say this was so quick to make ( 5 minutes rather than 2 hours!) and it was actually very tasty. Baked well too.
Makes 2
350g White Bread Flour
1 tsp salt
1 tsp caster sugar
1 tbsp olive oil
3 tsp baking powder
170ml warm water
Put everything into a mixer and mix until combined. Knead for about 2-3 minutes until dough is smooth.
Cut into 2 sections and roll out into desired shape and thickness. (the dough is very stretchy and will bounce back so just bare with it and stretch)
Now spread your tomato sauce base and add on your chosen toppings.
Oh yum! These were so tasty and so healthy. Waking up this morning to cold and wet rain outside I fancied something warm for my breakfast, so looking in my cupboards I had some scott porridge oats, a banana left and some Maple Syrup in the fridge………so yes, you guessed it, pancakes it just had to be.
My first time at oat & banana and they were pretty tasty.
Makes 4-6
30ml milk
1 egg separated
1 small banana
30g scotts porridge oats
1 tsp baking powder
1 tsp vanilla extract
Toppings:- I had crushed hazelnuts and Maple Syrup, but you could have yoghurt and fruit which would be nice too.
Put oats, baking powder, milk, egg yolk, vanilla extract and banana into a processor or blender and mix until you get a smooth consistancey.
Whisk the egg white until you get stiff peaks. Gently fold the egg whites into the pancake mixture.
Heat up a non stick fry pan with a tsp oil and drop about 2 tbsps of the mixture into the pan and cook on a medium heat until you start to see the bubbles appearing, then flip and cook for a further minute or 2.
We do love a good stew on a Sunday, this is a little change to the normal traditional stew and super tasty with loads of flavour. All you need is some good fresh bread to douk (dip in) and scoop up the gravy. Yummy!
Makes 2-3 servings
400g good scottish steak (diced)
75g-100g chorizo (diced)
1 x 400g can tin chopped tomatoes
1 x 225g tin chickpeas
1 x 225g tin red kidney beans
300ml beef stock
2 tsp cumin
1 tsp brown sugar
1 tsp cinnamon
1 1/2 tsp smoked paprika
1 clove garlic minced
100ml red wine
1 tbsp worcester sauce
1 tbsp tomato puree
1 red onion – chopped
Coriander – chopped to garnish
Salt & pepper to season
Heat a little oil in a pan and gently fry the steak until browned, then add in the chorizo and onion until softened.
Sprinkle on the cumin, paprika, garlic, sugar, cinnamon and tomato paste and mix through to coat beef. Season well.
Add in the chickpeas, kidney beans, tin tomatoes, stock and worcester sauce, mix and bring to the boil. Add in the red wine.
Reduce to a low simmer place lid on pan and cook slowly for about 2-3 hours or until meat is tender.
I’m not a fan of marshmallows but I was cleaning out my kitchen drawers and came across a bag (not sure why they were in there…lol!), they had to be used up, so Rocky Road was the only thing I could think of where I had all the other ingredients and it was quick and easy to put together. My partner was absolutely delighted, he has a very sweet tooth.
Makes 6
100g milk chocolate chips – melted
30g butter – melted
1 tbsp Maple Syrup
40g mini marshmallows
80g Crunchy Weetabix bran (you can of course use digestive biscuits or other biscuits of your choosing)
Put the crunchy bran or biscuits into a food bag and using a rolling pin, crush till you have a good mix of crumbs and smaller pieces.
Melt the chocolate and butter in a microwaveable bowl for about 50 secs at power 900w. Mix in the crunchy bran biscuits, marshmallows and maple syrup until coated.
Pour into a small tin or a muffin tin and press down. Chill in the fridge for about 2 hours.
These need to be kept in the fridge after as they will melt at room temperature, allow to sit at room temperature for about 1 minute before eating. These will keep for about 1 week in an airtight container.
Oh wow, this little dish was super tasty and lower in calories too at only around 480 per serving. I got this from Food for Fitness High Protein Cookbook, Scotts cookbook is brilliant and loaded with amazing recipes.
You know me….I do love a good one pan meal and this is another for favourites list.
Add the garlic, red pepper, onion and fry for a minute. Then add the beef and fry until browned (few minutes). Add in the seasoning and coat the meat.
Add the rice (uncooked), tin tomatoes and stock bring to the boil then reduce to a low simmer, cover and cook for about 30 minutes until rice is cooked and stock is absorbed.
Top with the grated cheese, allow to melt then sprinkle the coriander and serve.
Oh yummy…….I had some left over Harissa Paste and some veggies in the fridge, and yes, you guessed it……Harissa Tray Bake it was. I have to say this was super tasty and also super healthy…..I even got my boyfriend to eat veggies, which believe me is no mean feat….lol!
Great as a main dish or a side dish. I decided a main dish and served with some of my homemade Chapati’s
Serves 2 (main dishes)
1 large sweet potato – cut into small chunks
1 large red onion – cut into wedges
2 Carrots – cut into small chunks
1 x red & 1 x yellow pepper – sliced thickly
1 Cauliflower – cut into small florets
2 Parsnips – cut into small chunks
4-5 asparagus
1 x 400g tin chickpeas
1 x 200g tin tomatoes
2 large heaped tbsps of Rose Harissa Paste
1 tbsp oil
Coriander
Salt & pepper to season
Place all vegetables into a food bag or bowl, then add the harissa paste and mix thoroughly to coat all the veggies. (this can be stored in fridge for later if need be)
Preheat oven to 200 deg and oil a baking tray.
Empty the vegetables (except asparagus) from the bag onto the baking tray and make sure they are spread evenly. Bake in the oven for 25 minutes.
Now add the chickpeas and the asparagus to the tray and bake for a further 15 minutes or until evenly browned all over.
In a microwave bowl add the chopped tin tomatoes with salt & pepper to season and warm thought for about 1-2 minutes.
Pour tomato sauce into a serving dish, empty the vegetables from the baking tray into the serving dish and mix through.
This little dish was super tasty with a little kick, perfect for a Saturday night dinner. My ultimate favourite is 1 pan cooking (well kinda..lol), don’t you just love throwing everything in to 1 pot, easy cooking, less washing up….lol!
We served this with a glass of Chardonnay and it went perfectly well.
Serves 2
6-8 Beef Meatballs (sliced in half)
150g pasta (I used wholewheat Fusilli)
200g tin tomatoes
75g chopped chorizo (good quality, we love Picante)
1 red onion (chopped)
1 red pepper (chopped)
1 carrot (chopped)
1 garlic clove (crushed)
1 tsp dried thyme
1 tsp dried basil (I would recommend using fresh, but unfortunately I didn’t have any)
1 chopped chilli or 1 tsp dried chillies
1 tbsp tomato paste
1/2 tsp sugar
Salt & Pepper to season
Parmesan to garnish
First bring to the boil a pan of salted water and cook pasta for about 8-10 minutes, Save about 1/2 cup of the pasta water, drain pasta and set aside.
Meanwhile, heat 1 tbsp oil in a pan, add the meatballs & chorizo and brown all over. When browned remove with a slotted spoon and put to the side.
Heat 1 tbsp oil and add the peppers, onions, carrots, garlic and thyme and gently cook until slightly tender.
Return the meatballs and chorizo back to the pan, add the sauce and bring to a simmer for a few minutes until meatballs are cooked through.
Then add the pasta to the pan along with the remaining pasta water and simmer for a further 5 minutes to warm through.
Serve with some grated parmesan and chopped basil. Yummy!
Oh Yummy! I had some left over puff pastry in the fridge, the weather was very rainy and cold outside, so nothing better than throwing together a home comfort bite to eat. I have had this recipe for scottish meat rolls for a while now, so decided to give it a go, thank you to christinas cucina .
Scottish Sausage Rolls are traditionally made with Beef, where as English sausage rolls are made with pork, which is the main difference. Then it’s your choice of spices that make it.
Makes 6-8
1 Roll of puff pastry (about 300g)
500g ground Scottish Beef
a little water
1 tsp sea salt
1/2 tsp black pepper
1 tsp rainbow peppercorns
3/4 tsp dried coriander
1/2 tsp nutmeg
1/2 cup of fine breadcrumbs
1 egg beaten for pastry.
Preheat your oven to 200 deg.
In a large bowl mix the spices, breadcrumbs and seasoning, then add in the meat. Pour in a little water and with your hands mix together, the mixture should hold together when squeezed, not too wet.
Place the puff pastry on a floured surface and cut into 5″ approx rectangles.
Take some of the mixture and roll into a sausage shape, lay onto the puff pastry 3/4 way down. With your finger wet the short edge of the pastry to help seal and roll up. Then with a fork crimp the seal along to seal. Make a few light cuts on top.
Place rolls onto a greaseproof tray and brush with the egg wash.
Bake for about 25 minutes.
Serve with chips & beans…..my personal fav for a proper home comfort meal.
Perfect Little Sauce for my Haggis Scotch Eggs. I always used to buy Whisky sauce ready made, but tonight I decided to give it a try & I’m so glad I did, so easy and so delicious.
Ingredients
1 shallot – finely chopped
1 knob of butter
15ml of Whisky
125ml beef stock
100ml double cream
1 tsp mace
Salt & white pepper to taste
1 tsp parsley to serve (optional)
Melt butter in a pan, medium heat
Add onions and sweat down
Pour in the Whisky then add the beef stock, reduce to a simmer and let the liquid reduce to about 1/3.
Add in the double cream and season with mace, salt & pepper
Well…O.M.G! This little dish is soooooooooo tasty, sooooooooooo moreish, soooooooooo naughty, but it is so good! I’ve been wanting to try this for a while now, so this weekend was that weekend. Happy Sunday morning breakfast. Inspired from Lil luna
Makes enough for about 4 large portions or 6 smaller portions
70g butter melted
140g light brown sugar, 30g from sprinkling
Bread with crusts cut off (I used plain bread)
5 eggs – medium
300ml milk
1 tsp vanilla essence
cinnamon as per your taste
2 tbsp butter (not melted)
Icing sugar for decoration (optional)
Maple Syrup
Add the melted butter and brown sugar together and mix thoroughly
Take a casserole dish approx 8 x 12″ and spread the sugar mix over the base
Add a layer of your bread slices
Whisk eggs, vanilla and milk together in a bowl, pour 1/2 the mixture over the bread.
Sprinkle about 15g of the sugar and some cinnamon over
Add another layer of bread slices and butter the slices.
Pour the remaining egg mixture over and sprinkle with leftover sugar and cinnamon.
Refrigerate overnight
In the morning remove from fridge and bake in a preheated oven at 180 deg for approx 45 minutes.
I popped under grill for a minute to gently crisp up and brown a bit more (optional)
Drizzle a little icing sugar and Maple Syrup all over and devour!
Oh yum. In my aim to be eating a bit healthier this year, I took my hand to these little nutritious burgers, they were so delicious and very filling too.
Makes about 6
200g butternut Squash – sliced
200g Sweet Potato – sliced
1 medium onion – finely chopped
1 clove garlic – crushed
1 tsp dried chilli flakes
1 tsp ground cumin
1 tsp smoked paprika
1 tsp dried coriander
100g Spinach
Salt & Pepper to taste
Cook the butternut Squash and mash up. (I steamed cooked mine using my steam pot for about 6 minutes)
In a bowl mix the butternut squash, wilted spinach, onion, cumin, paprika, coriander, salt & pepper, chilli flakes & garlic.
Place a cutter onto a sheet of greaseproof paper or plate and fill the cutter with the mixture making individual circles. Approx 2 cm thick.
Heat up the Crisperplate for 2 minutes and cook on Crisp setting for 6 minutes, turn then cook for a further 4 minutes (depending on how well you like them cooked, you can cook for a further 2 minutes for extra brownness) Alternatively, fry in a pan for about 6 mins on medium heat each side with a little oil.
Serve. Yummy!
I added some potato wedges to my crisperplate at the same time for a one pan meal.
After my recent visit to Ireland and just had to try a proper Irish Potato Cake. They are also known as Fadge or Farl in Northern Ireland and Tattie Scones (potato scones) in Scotland. These are a traditional breakfast item.
Makes about 8
4 potatoes (preferably a starchy potato, such as russet)
3 tbsps plain flour
1 tsp baking powder
Salt & pepper to taste (I use rainbow peppers, more flavour)
1 tsp onion powder
30g melted irish butter
30g irish butter to cook with
Cook and mash potatoes, leave to cool
In a bowl mix the potatoes, flour, baking powder, onion powder, melted butter, salt & pepper into a soft dough like ball.
Flour a work surface and gently flatten to about 1cm thick
With a 3″ cutter, cut out circles.
Heat up a fry pan with the butter or preheat the crisperplate for 2 minutes then add the butter.
Place the potato cakes onto the plate or pan and cook for 3 minutes each side if using a fry pan, or 3 minutes on crisperplate, turn, then a further 2 minutes.
Serve with breakfast items or with a delicious poached egg on top.
Oh yum! A lovely little healthy warming dish on a very, very cold day today.
Makes 2 servings
2 x cod loins
Salt
Rainbow Pepper
2 tsps Parsley
Butternut Squash – chopped into cubes
1 onion – finely chopped
1 clove garlic – crushed
1 tsp dried chillies (or 1 red chilli chopped)
1 tsp ground cumin
1/2 tsp cinnamon
1 tsp sea salt
1 tsp dried coriander
1 tsp turmeric
1 400g can chopped tomatoes
2 tbsp water
100g spinach
Season the cod loins with salt, pepper & 1 tsp parsley each. Steam cook for 6 minutes in Steam pot or steam oven.
Heat 1 tbsp oil in a pan and fry the onion with the garlic for a few minutes, add in the chilli, cumin, cinnamon, turmeric, coriander, 2 tbsp water & tin tomatoes, bring to a boil then reduce and simmer and cover for 20 minutes or until butternut squash has softened.
Remove lid and place spinach into pan, do this in 2 batches, it will wilt down in a few seconds, simmer on low for a further 5 minutes.
Serve with the steamed cod. Lovely healthy quick mid week meal.
Sous Vide, Sous Vide, Sous Vide……..oh yes, definitely my favourite method of cooking. This Venison was so succulent and juicy, the flavour was absolutely delicious.
Makes 2 servings
2 large venison steaks
Salt & Pepper to taste
For the Sweet Potato:-
1-2 large sweet potatoes
1 tbsp butter
1 tbsp oil
Few sprigs of rosemary
Salt & Pepper
For the Balsamic Jus:-
1 tbsp butter
2 shallots – thinly sliced
1 tbsp balsamic vinegar
125ml Merlot Red wine
Few sprigs of Rosemary
1 heaped tsp redcurrant jelly
Season the Venison Steaks with Salt & pepper. Vacuum pack.
Heat a large pan of water to about 58-60 deg C, immerse venison into the water and cook for about 1 hour.
Meanwhile, slice the sweet potatoes and place into a food bag, coat with 1 tbsp oil, salt & pepper and rosemary, ensure fully coated. Preheat Crisperplate (if you have one, if not roast in oven for about 30-40 minutes depending on thickness.) Place sweet potato onto crisperplate with butter and cook for 8 minutes, remove, turn over and cook for a further 3 minutes (depending on thickness).
Remove Venison from the vacuum bag, heat 1 tbsp oil in a pan on high heat and seal the meat about 1 minutes each side, remove and allow to rest for a few minutes.
Meanwhile, place 1 knob of butter into the same pan you seared the venison and melt, add in the shallots and soften. Add in the redcurrant jelly and rosemary and caramelise, pour in the wine and balsamic vinegar bring to a high boil and reduce for a few minutes until sauce thickens slightly.
Slice up the venison, place on top of the sweet potato and serve with the sauce……Yummy!
I’m really liking experimenting with Sous Vide Cooking, Sous vide meaning under vacuum. There are many benefits to this method, here are some:-
Consistency. Because you cook your food to a precise temperature for a precise amount of time, you can expect very consistent results.
Taste. Food cooks in its juices. This ensures that the food is moist, juicy and tender.
Waste reduction. Traditionally prepared food dries out and results in waste. For example, on average, traditionally cooked steak loses up to 40% of its volume due to drying out. Steak cooked via precision cooking, loses none of its volume.
Flexibility. Traditional cooking can require your constant attention. Precision cooking brings food to an exact temperature and holds it. There is no worry about overcooking.
Serves 2
For the Duck:-
2 x Duck Breasts
Salt & Pepper to taste
1 tbsp oil for searing
For the Vegetables:-
Handful of Cherry tomatoes
Few basil leaves
Couple sprigs of Rosemary
100-150g Mangetout
For the Blue Cheese Sauce:-
100ml Creme Friache
50g Blue Cheese (I used Roquefort)
1 tbsp butter
Season the duck breasts and score the skin. Vacuum pack.
Heat a large pan of water to between 58-60 deg C, place vacuum pack into the pan making sure its full immersed in the water, put on lid and cook for about 2 hours.
Meanwhile vacuum pack all the vegetable ingredients and immerse this in the water at same temperature for about 45 minutes.
Just before serving, melt the butter in a pan on medium heat, reduce to a low heat and gently heat through the creme friache (do not boil), crumble in the blue cheese and mix through until warm.
Remove the duck breast from vacuum bag. Heat a little oil to high in a pan and sear the meat for about 1-2 minutes on skin side or until slightly crispy and 1 minute on other side, remove and allow to rest for a few minutes. Slice and serve on top of the vegetables with the sauce. Yummy!
There is nothing more I like than a lazy sunday morning breakfast (well after my little morning workout to wake me up). Good breakfast, fresh coffee and orange juice, catching up with the world, reading a little, planning my meals.
Today, I was using up leftovers in the fridge so pork sausages it was, with a little bit of cookingwithluce twist. 🙂
Made 2
2 Pork Sausages (meat removed from skin)
1 tbsp scottish oats
1 tbsp chopped chives
1 tsp nutmeg
Salt & pepper
Mix everything in a bowl, take a small handful and flatten to about 1cm thick
I used my Crisperplate to cook these and it took just 6 minutes. (Turned after 4 minutes)
I also added a few cherry tomatoes onto plate.
I then added 1 large egg onto the crisperplate 1 minute before sausages were ready.
O.M.G! This little dish was delicious, rich and very tasty. Saw this on a social media video, my salavating at the video simply meant I had to give it a go. Changed the recipe slightly to suit our tastes.
Makes for 2
2 sirloin steaks – sliced into 1cm strips
2 tbsp plain flour
Salt & pepper to taste
1 large red onion
2 garlic cloves crushed
1 tsp chilli flakes
200ml beef stock
100ml red wine (I used shiraz)
1 tbsp tomato paste
2 large handfuls of grated cheddar
2 large handfuls of french fries
Heat a little oil in a fry pan to a medium to high heat
Place the steak strips into the pan and brown all over, add the flour, salt & pepper until coated and soaked up the juices then remove and set aside.
Place another tbsp of oil in the pan and cook the onion with the garlic until softened.
Add in the tomato paste, chilli flakes, beef stock & red wine, gently bring to boil then reduce to a very low simmer.
Add back to the pan the beef strips and cook slow for about 1 hour (pan covered).
Remove pan lid 10 minutes before serving and bring heat up a little to thicken the sauce if needed.
Meanwhile, cook the french fries as per packet instructions.
Place the fries on a plate, top with the cheese and melt under a hot grill for a few seconds then top with the beef strips….Serve. Oh so yummy!
It definitely makes a difference if you’ve got some good quality meat and cheese.
Its Burns Night tonight (25th January)……..Happy Burns Night Everyone!
To help celebrate we definitely had to have our haggis, neeps (turnip) & tatties (potatoes) dish. However, I fancied doing something different. I have never tried a Scotch egg before so this was what I set out to do. OMG! these were absolutely delicious and very easy to make.
Makes 4
300g Haggis (Good Quality one)
240g Pork Meat
1/2 bunch chopped chives
Sea Salt & black cracked pepper
5 Large eggs – (1 for the dipping)
1/2 cup flour
60g fine breadcrumbs
60g oatmeal (you can blitz scotts porridge oats into fine crumbs for this)
Boil the eggs in a pan for about 6 minutes, then remove and place in an iced water bowl to stop the cooking process. When ready to use, peel shell.
Mix together the Haggis, Pork Meat, Chives & salt & pepper in a bowl until combined.
Get ready your little production line of whisked egg, flour and breadcrumbs/oatmeal mix.
Take a handful of the haggis mixture and mould into your hand like a cup and place 1 egg on top, take another handful of haggis and mould around the egg, doing this very carefully of course. You can use your thumb to help smooth the mixture over the egg.
Then place firstly into the flour, then the egg, then the crumb mixture.
When ready to cook, heat a pan of oil to around 170 deg. Cook for about 7 minutes until golden brown. Remove and pat excess oil off with a tissue.
Serve with neeps & tatties. Or whatever you like. A nice creamy whiskey sauce goes very well with this too. Find a recipe here:- Haggis Sauce
2 shallots
A knob of butter
A splash of oil
15ml of Speyside Whisky (chefs feel that a Speyside Whisky works best to accompany haggis)
125ml of beef stock
100ml of double cream
Mace
Salt and ground white pepper, to taste
Chervil
1. Finely dice the shallots and sweat them in the butter and oil, using a small saucepan.
2. Add the whisky to your pan (watch out, this will produce a flame!)
3. Whilst it’s flaming, add in the beef stock.
4. Set to a good simmer and let the liquid reduce by a third before you add in the cream.
5. Season with ground pepper and a small amount of salt and mace.
6. Finish with some finely chopped chervil. (you can also use parsley or chives)
My healthier eating continues this month. I got some lovely bits of Scottish Salmon recently so came up with this idea of a healthier mash using whatever I had in my fridge. It was delicious. Best bit, it only took 6 minutes to cook and put together.
Makes enough mash for 2-3 people
80g baby spinach
1 avocado
50g garden peas – cooked
juice of 1 lemon
1 tsp Sea Salt
Garlic clove – minced
1 tsp coriander – dried
1 tsp olive oil
(optional if you like spice, add in 1 tsp chilli flakes)
Place everything into a blender and mix until just combined.
Serve. Simple as that!
I steam cooked some salmon that I marinated in Teriyaki Sauce overnight. Yum!
Sous Vide is a method of cooking which food is placed in a plastic pouch (preferably vacuum packed) and immersed in water to cook at about 55-58 deg ideally. This method does take longer but the results are so much better.
Some benefits of Sous Vide Cooking:-
Consistency. Because you cook your food to a precise temperature for a precise amount of time, you can expect very consistent results.
Taste. Food cooks in its juices. This ensures that the food is moist, juicy and tender.
Waste reduction. Traditionally prepared food dries out and results in waste. For example, on average, traditionally cooked steak loses up to 40% of its volume due to drying out. Steak cooked via precision cooking, loses none of its volume.
Flexibility. Traditional cooking can require your constant attention. Precision cooking brings food to an exact temperature and holds it. There is no worry about overcooking.
I seasoned my meat before and vacuum packed. Bring a pan of water to 55 deg temp and place bag inside. Leave a bit of the bag on edge and put a lid on to hold bag in water. Cook for about 1-2 hours. (medium-rare)
When ready remove and heat a little oil in pan on hob, remove the steak and sear on both sides for about 30 secs each side to seal. Place a knob of butter in pan and spoon over meat. Serve.
This will be the juiciest steak you will ever eat.
Well what can I say, I am so excited and in love with my new toy. Yes it’s a vacuum machine! It arrived just after New Year so off I popped to Costco, stocked up on my meats and off I went.
So, Why vacuum pack? What are the benefits?
Vacuum packing is a method in which the air is removed from the packaging prior to sealing. By removing the oxygen it extends the shelf life of your foods but also reduces the volume and allows you to stock or store more as it uses less space. Frozen food that is vacuum sealed lasts an average of 2-3 years, while it will last 6-12 months, on average, stored in other ways. Most vacuum sealed foods will last in the refrigerator for 1-2 weeks, which is much longer than the typical 1-3 days food will last when stored conventionally in a refrigerator.
You can also use to store dry foods such as lentils, beans, coffee, nuts, cheese or cured meats. Also great for vegetables too. The list is pretty much endless.
Other benefits include:-
Stop Freezer Burn:– When foods are frozen without preparation, freezer burn can occur. It happens when the surface of the food is dehydrated, and this leads to a dried and leathery appearance. Freezer burn also ruins the flavor and texture of foods. Vacuum packing reduces freezer burn by preventing the food from exposure to the cold, dry air.
Sous-Vide Cooking:- Vacuum packaging also allows for a special cooking method, sous-vide. Sous-vide, French for under vacuum, involves poaching food that is vacuum sealed in a plastic bag.
Food Structure and Flavour:– You can also season or marinade the food before vacuum sealing this allows the seasoning to penetrate into your foods and gives a greater flavour. With vacuum sealing the meats also have nowhere to go so all the fibres in your meats stay rather than relaxing therefore the structure is perfect once cooked.
Delicious little Saturday night dish (or any night for that matter) I also used corn tortillas and made my own salsa to keep the fat and calories lower. I am on a mission this year to eat a little healthier and try new ideas and flavours. This is packed with flavour and filling too.
You could of course use Tacos instead of wraps.
Makes enough for about 6 wraps
For the chicken:-
2 large chicken breasts
1 tin chopped tomatoes
2 tbsp Taco Seasoning (see below)
For the Salsa:-
2 tomatoes – chopped
1 onion – chopped
1 lime juice of
2 tsp dried coriander
1 tsp sea salt
*
Sour Cream to taste
Taco Seasoning:-
1 tbsp chilli powder
1/4 tsp garlic powder
1/4 tsp onion powder
1/4 tsp crushed red pepper flakes
1/4 tsp dried oregano
1/2 tsp paprika
1 tbsp cumin
1 tsp sea salt
1 tsp black pepper
Add all above to a little jar and mix. Store in cupboard.
Place a little oil in a pan on medium heat
Coat the chicken with the Taco Seasoning about 1 large tbsp per breast and gently colour the chicken in the pan.
Add in the tin tomatoes to the pan with the chicken, cover and slow cook on a low heat for about 4 hours.
Meanwhile make the salsa by adding the chopped tomatoes, chopped onion, salt, coriander and lime juice in a bowl and mix together. Store in fridge until needed.
About 1/2 hour before about to serve, take 2 forks and shred the chicken in the pan. Continue to cook uncovered for about 1/2 hour, this helps thicken the sauce.
Warm up your tortillas as per instructions on packet, place on a plate.
Spread a thin layer of sour cream, place some shredded chicken on top, then some tomato salsa then another little dollop of sour cream, wrap and devour! Yummy!
You could also add in a little avocado or some grated cheese.
This is a tasty little dish and so healthy too. I’m always trying to get more fish into my meals (hard when my partner isn’t a fish fan!), but even he loved this one. Result!
Easy to make and full of protein and iron.
Makes 2 portions
1 tsp oil
1 onion, chopped
2 tbsp curry powder
1 tsp ground mixed spice
2 garlic cloves or 1 tsp dried garlic
1 x 400g chopped tomatoes
1 can chickpeas (optional)
100g Spinach (optional)
1 packet of fresh green peas
2 cod fillets
zest of 1 lemon
handful of chopped coriander to serve
Heat oil in a large pan and cook onion & garlic over a high heat until softened and slightly browned. Stir in the curry powder and mixed spice, mix through.
Add in the tin tomatoes, chickpeas and green peas with seasoning to taste.
Cook for about 10 minutes until sauce starts to thicken slightly.
Add in the cod and cover, continue to cook for another 10 minutes until fish is cooked through.
Squeeze on the lemon zest and coriander then serve. Yummy!
I served with some curry roasted parnsips and carrots.
Friday night is mostly pizza night in our house, but as I’m on my Detox this week it was finding an alternative for me and why not Butterfly chicken? I have to say this dish was so delicious and very healthy and nutritious too. Win, win for me!
Makes 2
2 x Chicken Breasts
1 onion – chopped
handful of sweet peppers – chopped
1 tbsp olive oil
1 tsp dried chilli flakes
1 tsp Italian herbs
1 tbsp tomato paste
Salt & pepper to taste
30g Goats Cheese
Butterfly your chicken and flatten the thicker part so it will cook evenly.
Add the chopped onion, peppers, chilli flakes, olive oil and all seasonings into a food bag and make sure all are coated.
Take 1 tsp and spread onto each chicken breast evenly
Next add the onion & pepper mix and spread evenly
Preheat your Crisperplate for 2 minutes on crisp setting then place the chicken breasts on and cook for 5-6 minutes (depending on size of your chicken)
Remove crisp plate and crumble on the goats cheese evenly, put back into the oven and cook on crisp for a further 3 minutes.
Serve. Yummy!
(If you don’t have a crisper plate, bake in oven at 200 deg for about 15-20 minutes)
These were delicious and very healthy too. My Hotpoint oven has automatic cooking programmes, so I used the Stuffed Pepper setting and these baked to perfection.
Makes 3-4
2 onions – chopped
6 Sweet Peppers – chopped
1 can chopped tomatoes (400g)
3-4 large peppers – colour to your choosing.
200g kale
1 tsp chilli flakes
1 tbsp olive oil
juice of 1 lemon
Heat oil in a pan
Add all ingredients to the pan except the large peppers and cook for 5 minutes
Cut the tops off of the large peppers and de-seed. Place in a roasting tin.
Fill the peppers with the mixture and place the tops back on.
Select Auto recipes, side dishes then stuffed peppers and bake for approx 35-50 minutes (depends on size of peppers)
Another quick yummy breakfast for a sunday morning. I always try to use up leftovers, so having some puff pastry left this is what I decided to do this morning. Again I used my lovely little Crisperplate to cook these. Have I told you how much I love this little bit of Technology?? I do love gadgets that simply work in your favour to help save time in the kitchen. You can get more information here
Makes 6
1 Roll of Puff Pastry
7 eggs (1 for wash)
Grated Cheddar Cheese (I used 1 tbsp per basket)
Salt & pepper
Flavourings as per your choice (I used smoked paprika, but you could use chives, chilli, parsley, the list is endless)
Preheat your Crisperplate for 2 minutes on Crisper setting.
Place a sheet of greaseproof on the plate once heated.
Roll out the pastry and using a round cutter, cut out 6 circles.
Using a smaller circle cutter, gently press into the middle of the circle pastry – dont cut right through. (This makes the outer edge of the basket)
Using a fork, press the centre to prevent it from rising too much. Brush with egg wash.
Place the pastry onto the crisper plate and cook for 4 minutes.
Remove and gently edge the inner circle using a spoon and press down to make bottom of basket.
Place your cheese into the basket and flatten, crack the egg in, gently using a knife pierce the yolk (this prevents it from popping) and season with your flavourings.
Place back into the Combi Oven and bake for a further 2.5 mins – 3.5 mins, depends how you like your eggs cooked. Serve. Yummy!
I know, I’m going to tell you all about my Crisperplate again….lol! Just 7 minutes bake time for these quick and easy puff pastry pizzas, compared to an oven bake (20 mins), the Crisper does it in more than half the time with the same results.
One my own this afternoon I just wanted a quick lunch, so this was perfect. I decided to use up things in my fridge, so I went for this combo, but you can make any combination you like. (times may vary)
Makes 2
1 roll puff pastry (use half if making 2) – cut in half or quarter if making 4
2 tbsp tomato paste
Seasoning
Grated Mozzarella
Mushrooms – I used Chestnut
Little olive oil
Pre heat your crisper plate for 2 minutes
Roll out pastry and with each half, score a 1cm border all the way around.
Score a couple of diagonal lines in the middle (do not go right through) then place onto crisper plate.
Place grated mozzarella into the middle, evenly but not too thick. Season.
Then place the mushrooms in a layer evenly and drizzle a little oil over. Season
Cook on Crisper setting for 7-8 minutes or until your desired brownness level.
Oh I know I keep going on about it, but this Crisperplate is just magical, it has saved me so many minutes in my kitchen and has given me perfect cooking results every time. This time it was a little afternoon treat.
Makes a 12″ cake
150 g Caster Sugar
225g Self Raising Flour
100ml milk
110g butter softened
2 eggs
1 tin of pineapple rounds (drained)
1 tsp vanilla extract
Whipping cream to serve
1. Mix everything together (except pineapple) in a mixer until smooth
2. Preheat Crisper for 2 mins, then pour on batter evenly
3. Place pineapple on top
4. Bake on Crisp setting for 10 minutes.
5. Serve with a large dollop of whipped cream.
OMG! These are so delicious and perfect for the party season. Little bite size pieces of deliciousness.
Makes about 12
8-10 Vittoria Tomatoes
Dried Thyme
150g plain flour
75 g soft butter salted
40 g grated parmesan
1 egg
250g mozzarella
Green pesto
Paprika & poppy seeds
1. Pre heat oven to Fan 160 deg, Line a baking sheet with greaseproof paper.
2. Sift the flour into a mixing bowl, add the butter and parmesan, add in half the whisked egg, slow speed on mixer mix together.
3. Tip onto a non stick surface and bring together with your hands until you have a dough, flatten slightly. Wrap in clingfilm and chill for 30 minutes.
4. Meanwhile, heat crisper plate and cut tomatoes in half, sprinkle with salt & thyme and cook for 2 minutes. Remove and allow to cool slightly.
5. Take a small 3cm star cutter and cut the mozzarella into thin stars.
6. Remove the dough and roll out and cut with a 5-6cm star cutter, place on baking sheet and bake for about 10-12 mins or until slightly browned.
7. To serve, once stars are cooled, spread a little pesto on star then place mozzarella star, a little more pesto then the tomato half.
8. Yum! Gorgeous with some prosecco.
These are perfect for a little bite size treat at Christmas and they look the part too. I first saw this recipe from Madaboutmacarons and just had to try.
I added a little orange liquor for a different flavour and they were delicious. (optional)
(Spice Mix:- 2tbsp ground cinnamon, 2 tbsp ground ginger, 2 tbsp ground all spice, 1 tbsp nutmeg, 1/2 tbsp ground cloves, pinch black pepper) This can be stored in an airtight container.
50g White Chocolate – melted.
Put all dried ingredients into a large mixing bowl, then add in the coconut oil and orange juice and mix to combine.
Taking small amounts roll into a ball and place on greaseproof paper on a baking tray and refrigerate.
Melt 50g of white chocolate in a microwave for about 1.5 mins and drizzle over the puddings. To decorate add a cranberry and edible holly decorations. (or you can cut some icing or marzipan for this)
You know by now that I love my One Pot meals and this is another that is so easy & so tasty. I decided to use my Steam pot and it cooked perfectly in just 20 minutes. Yummy Spicy flavours and full of nutritious benefits.
Makes 2 large portions or 4 side portions
1 can black beans
1/2 can red kidney beans
1/2 can sweetcorn
1 red onion – finely chopped
150g wholemeal brown long grain rice
300ml veg stock
2 heaped tbsp chopped tomato
1 tsp smoked paprika
1 tsp oregano
1 tsp dried chillies
1 tsp garlic powder
1 tsp cumin
salt to taste
Place everything in the steam pot and mix together. Put lid on.
Place into your combi microwave and select Recipes, Pasta & Rice, Rice then programme 20 minutes.
Perfectly cooked mexican rice dish. You can serve this on its own or with some pitta breads or even in a wrap.
Oh I do love my little crisper plate from Hotpoint. It just cooks and bakes most things in half the time with the same results as an oven or hob. I wanted something quick for my lunch and needed to use up some veggies, so sweet potato fries it was. Just 10 minutes!
1 sweet potato – cut into fries
1 tsp olive oil
Salt & pepper
1 tsp paprika
Preheat your crisper plate for 2 minutes
Coat the sweet potato fries with oil and season with spices.
This dish is so yummy with a little kick. Perfect for Christmas dining as you can make as much as you need. I do love 1 pot meals.
Makes about 4 large portions or 8 smaller side portions.
1 x Butternut Squash – cubed
1 tbsp olive oil
1 tsp chilli flakes
100g cooked chestnuts, quartered
½ small pack sage leaves, chopped (or 1 tsp dried)
8 slices of pancetta – chopped
2 shallots, finely chopped
2 garlic cloves, finely chopped
150g basmati & wild rice mix
300ml veg stock
Parmesan to serve
Heat oven to 200 deg.
Toss the squash with 1⁄2 tbsp of oil, chilli flakes and some seasoning on a large roasting tray. Roast for 15 mins, then add the shallots, garlic, chestnuts and nestle the sage and pancetta around the squash so that they touch the baking sheet.
Return to the oven for 10-15 mins until the pancetta and sage are crisp. Remove from the oven and set aside.
In the Steam pot place the Rice with the 300ml stock and steam for 20 mins on rice setting. Or you can use a pan on the hob, bring to boil the stock , add rice, cover, reduce to a simmer for about 20 minutes or until all the water is absorbed.
Remove steam pot and add the ingredients to rice and mix through to warm through.
These are a traditional little treat in Scotland, you can have them 2 ways:- 1 with marshmallow in the middle or as I’ve baked with jam. Either way they are lovely. These are perfect for Christmas time and they keep for up to 4 days in an air tight container.
Makes about 8-12
50g unsalted butter
50g caster sugar
pinch of salt
225g self raising flour, sifted
1 egg
1 tbsp milk
Good raspberry jam (I like Mackay’s)
confectioner’s (powdered) sugar (icing sugar)
unsweetened shredded coconut (do not use sweetened)
Pre heat oven to 200 deg
Cream the butter and sugar with the pinch of salt. Add the egg with the flour and mix well.
Stir in the milk and rest of flour to make a stiff dough
Divide into 16 equal pieces and roll into balls. Place on parchment or silicone sheet lined cookie trays, leaving a bit of space for them to grow. Press down a little. If you’d like smaller snowballs, divide into 24 pieces.
Bake for 8-10 minutes until very lightly golden brown.
Remove and cool
Sandwich each cookie together with raspberry jam (not too much)
Leave for half an hour for jam to set.
Combine about 1-2 cups of icing sugar with enough water or milk to make a runny glaze in which to dip the snowballs. Have a bowl of shredded coconut ready. Dip the snowballs in the glaze and allow extra glaze to drip off.
Next dip in the coconut and ensure fully covered, set aside.
I have been dying to try this stain glass design for a while, so why not just in time for Christmas. Very simple to create too.
Makes about 16 biscuits
175g Plain Flour
2 tsps ginger, ground
Zest 2 oranges
100g butter, chunks
50g golden caster sugar
1-2 tbsp milk
1 tbsp oil for greaseproof paper. (to prevent sweets from sticking)
Heat oven to 160C fan. Grease 2 large non-stick baking sheets with oil.
Whizz the flour, ginger, zest and butter with 1⁄2 tsp salt to fine crumbs in a food processor. Pulse in the sugar and milk, then turn out and knead briefly on a floured surface until smooth. Wrap in cling film, then chill for about 30 mins.
Flour the work surface again, then roll out the dough to the thickness of a £1 coin. Use cutters to shape. (see below for centres)
Bake for 15-20 mins until golden brown
Transfer to a rack to cool.
Decorate any way you like.
For Glass like Baubles:-
12 fruit flavoured boiled sweets
Place 1 sweet or ½ of sweet into the centre of the biscuits, sweets should be level with the biscuit once melted. (Should melt in the oven ok.) Allow to fully cool and harden before transferring to a rack. – Sprinkle icing if you wish or decorate.
Just be aware that if eating these the candy is very hard. (Watch your teeth)
If using for decoration on your tree, pierce a hole at the top of the cookies and thread some ribbon through and tie.
Keen to get a good biscuit, you can’t go wrong with these flavours. So yummy!
Makes about 15 biscuits
125g Butter – unsalted
175g Golden Caster Sugar
225g Plain Flour
2 tsp baking powder
75g Chocolate 70% – chopped small
Zest of 2 oranges
1-2 tbsp orange juice
Start by beating the butter and sugar together in mixer until they’re combined.
Then sift the flour and baking powder straight into the mixture. Add the rest of the ingredients, and work the mixture together until you get a fairly stiff paste.
Now flour a working surface and a rolling pin and roll the paste out to about 1cm thick. Then, using a cutter (5cm), cut out the biscuits and place them on the baking sheets and bake one sheet at a time near the centre of the oven. Bake them for about 20 minutes, or until the biscuits are a nice golden colour.
Take them out of the oven and leave them to cool on the baking sheets for 5 minutes, then transfer to a wire cooling tray, and finally sprinkle with a dusting of golden caster sugar or icing sugar or decorate – whichever.
This is the first time I have tried a swiss roll ad thought I would challenge myself. Christmas is coming so I wanted to do something different, so why not play with stripes?
I have to admit I found this rather easy to do.
Makes 1 roll (avg 10 slices)
2 eggs, 3 egg yolks
100 grams caster sugar
1 teaspoon vanilla extract
30 grams sifted self raising flour
3 egg whites
1 tablespoon sugar
Colouring. Green & Red.
Whipping cream with 1 tsp vanilla ext.
Raspberry jam
Heat the oven to 200C on fan.
Line a sheet pan. Set aside.
In a mixing bowl add the 2 eggs, 3 egg yolks and caster sugar. With the paddle attachment on, beat on medium to high speed around 5 minutes until pale in colour and thickened. Add the vanilla extract and beat few more seconds.
Sift the flour over the egg yolks mixture and with a spatula gently fold it in.
In a separate grease-free bowl, add the 2 egg whites and 1 tablespoon of sugar. With a whisk, whip until firm peaks form.
With the spatula, fold the whipped egg whites into the egg yolks mixture.
Pour the cake batter into 3 separate bowls and add the colouring. DON’T OVERMIX. Put into piping bags and pipe each colour by one onto backing sheet. Bake for about 10 mins or until springy.
As soon as you remove the cake from the oven turn onto a sheet of greaseproof paper. Remove the parchment paper from the cake slowly. Then turn over onto a clean Tea towel and roll up. Allow to cool completely.
Whisk the Whipped cream and vanilla in a bowl until thick.
Spread the rasperberry jam onto the cake and then the cream and roll. Roll up with cling film and chill for 30 mins -1 hour – makes it easier to cut.
Oh yummy! Nice little healthy quick mid week meal.
I do love a good gadgets, and I used my Kitchen Aid Mixer with Grater attachment and also my Steam Pot for steam cooking in my microwave combi oven.
Serves 2
250g SeaBass
1 Carrot
1 Courgette
6 Spring onions, sliced diagonally
small piece of ginger, grated
Small bunch or fresh coriander, chopped
1 juice of Lime
3 tbsp olive oil
Salt & pepper to taste
Season the seabass and place into the steampot and cook on Sensor steam for 8 minutes.
Meanwhile, place the attachment onto your mixer (if you have a spiralizer that would work too) and shred the carrot & courgette into a bowl.
Slice the spring onions diagonally into small pieces and place into bowl with the grated ginger, coriander, lime juice and 3tbsp olive oil. Mix together.
Slice the sea bass and allow to cool then mix through the vegetable mix. Serve.
These are so easy to make and perfect for parties and get together’s. With a lovely dip of your choice they are perfect little nibbles.
Makes about 60 crackers
125g Plain Flour
125g Strong White Flour
15g Lard – melted
7g dried yeast
150ml warm water
Pinch of salt
Olive oil
Mix flours, yeast, water & lard in a mixer bowl then add in the salt and mix until you have a smooth dough.
Allow to rise until doubled in size, about 1.5 hrs – 2 hrs.
Preheat oven to 210 deg on a convection bake setting.
Cut the dough into 3 or 4 pieces and flatten with your hand, using a pasta maker, put through and roll until you have a very thin sheet. I used No. 1, No. 3 then No. 5 setting on my Kitchen Aid mixer pasta roller.
Using a pizza cutter, cut into thin slices about 3″ x 1.5″, mine were all different sizes, so its really whatever size you want, but not too small or too big.
Place onto a baking tray and brush each cracker with the olive oil, then bake for about 5-7 minutes or until bubbled and slightly browned.
Oh yummy. I had some pasta left over and some Italian sausage that I bought recently that needed to be used up, so looking in my cupboards this is what I threw together and it worked an absolute treat. Super tasty and filling.
Makes 2 servings
100g pasta (of your choice)
50g spiced italian sausage (any of your choice)
4/5 mushrooms – sliced
handful of piccolo tomates (or cherry if you have) – sliced in half
Roux (pronounced “roo”) is one of the basic thickening agents in cooking. Used primarily for bulk up sauces and soups but you can also use this for White Sauces, great for pasta’s which is what I made.
You can add in any flavours or extra ingredients you like which makes it a really good base recipe.
It is usually equal amounts of butter and flour by weight.
40g Plain Flour
40g Butter
250ml or about 1/2 pint of milk (for a thick sauce) more if you want thinner
Firstly melt the butter in a pan on a medium to high heat
The sieve the flour into the pan and whisk together until you get a smooth like paste
Cook for about 2 minutes to get the taste of flour away
Gradually add in the milk, little at a time, whisking continuously until you get a thickened sauce with no lumps.
This is your basic white sauce recipe or you can then add your flavours:-
For mine I added, salt, pepper to taste. Then I added 40g of smoked scamorza cheese as I wanted a lovely smokey cheese sauce for my pasta dish. You can of course add in any cheese or any herbs, spices etc.
OMG!…..I got my pasta maker a wee while ago and have been dying to try these.
Originally from Piedmont Italy, agnolotti are said to have been conceived at some point in the 14th century. The dish was so revered that it was named after the chef who created it.
Easier to make than its fiddly relatives ravioli and tortellini, agnolotti are small parcels made by piping dots of filling and folding and pinching it to seal. Normally around 3cm in size, miniature versions are also popular and are known as ‘Agnolotti del plin’, meaning ‘pinched’.
Makes 2-4 portions
To make the Pasta
275g ‘OO’ Pasta Flour
3 eggs
Salt
Sift Flour and make into a ring on your worktop or put into a bowl of a mixer and make a well in the middle. Whisk the eggs and pour into the middle, add salt. Gently mix the flour and eggs together until you get a dough, knead for a few minutes until smooth.
Wrap in cling film and refrigerate for at least 1 hour.
To make the Sausage mixture
1 packet of Italian Sausages or any of your preference. I found these in my local supermarket and they are super tasty.
1 Leek – sliced
Heat a little oil in a non stick pan.
Break up the sausages and lightly fry until browned, remove to the side.
Add a little butter to the pan and fry the leeks until slightly browned.
Add both the sausage and leek to a processor and blitz until small pieces.
To assemble to Agnolotti
Remove pasta from fridge and cut into 4 pieces.
Flatten each pasta piece with you hand and feed through a pasta machine. I used 5 passes on No. 1, 3 passes on No. 3, 2 passes on No. 5, 2 passes on No. 6, 1 pass through on No. 7. You want it so the pasta is about 2mm thick and at least 30cm long.
Take a small tsp of the sausage mixture and place onto the pasta in the middle leaving 1cm in between each spoonful.
Take the bottom end and fold over the mixture to make a tube like shape and press to seal along lengthways. Trim to neaten.
Taking your finger, press in between each section to make the individual parcels. Take the top section lengthways and fold back over the pasta to create a parcel.
Using a cutter slice each section and place onto a tray.
You can now refigerate until you are ready to cook.
When ready, bring a larg pan to boil add some salt, cook for about 3 – 5 minutes until ready.
Meanwhile make the sauce
To make the White wine sauce
1 x 18.7cl bottle of white wine
200g Creme Friache (I used low fat)
75ml Skimmed Milk
Salt & pepper to taste
Fresh Coriander – finely chopped
Squeeze juice of 1/2 lemon
Gently heat a non stick pan and pour the white wine in, bring to a boil and reduce until half.
Add in the creme friache, milk, salt, pepper, lemon juice and coriander and continue to boil for about 5 minutes or until sauce has thickened slightly.
When pasta is ready, drain and put into the pan of sauce and mix together.
I served on a bed a steamed vegetables.
I have a steam pot, so I put some asparagus, spinach and sweet peppers in and steamed for 2 minutes.
If you have some pasta left over, you can wrap in cling film and freezer for up to 1 month.
After making my Blueberry Muffins from a recipe book, I decided to try and make them a bit healthier. OMG! these were lovely and sweet still and with a little crunch, so delicious and only 120 calories per muffin.
Makes 6
150g Rye Wholemeal Flour
25g Caster Sugar
1 ripe banana – mashed
50g Scottish rolled oats
1 large egg
1 tsp vanilla
75g blueberries
pinch salt
1 tsp baking powder
25g butter – melted
Preheat oven to 160 deg fan. Line muffin tin wth cases.
Mix flour, sugar, baking powder, salt and oats in a bowl
In a separate bowl mix egg, banana, vanilla, butter together
Pour wet ingredients into dry ingredients and mix together then add blueberries.
Bake for about 18-20 minutes. Remove and allow to cool.
Today I was off work and decided to have a chillout day……….well, that was before I started looking through all my recipe books. I came across a baking book that I hadn’t used for a while. Looking through I spied Blueberry muffins and thought that would be a nice wee treat with my afternoon coffee…….so off I went into my Kitchen.
They were absolutely delicious. I also made a healthier version too, check them out here.
Makes 6
150g Plain Flour
75 g Caster Sugar
Pinch Salt
1 tsp baking powder
75g Blueberries
25g Butter – melted
1 large egg
40ml natural yoghurt
1 tsp vanilla extract
Preheat oven to fan 160 deg. Case a muffin tin.
Mix the flour, salt, baking powder and sugar in a bowl.
In a separate bowl mix the egg, vanilla, butter, yoghurt together
Add the wet bowl into the dry bowl and mix together, should be slightly thick, if its too thick just add a little milk.
Then add in the blueberries and mix together.
Bake in oven for about 18-20 minutes. Remove and allow to cool.
So having made my square sausages, which were so tasty, I now wanted to try more than just putting it on a morning roll or using in a breakfast. Having some puff pastry in the fridge, little square sausage puffs it was. Super tasty and proper comfort food.
I’ve lived in Scotland most of my years now, I’ve always ate square sausage without actually thinking about what I was eating. Square sausage or (Lorne sausage) is a much loved and favourite breakfast item of the Scots. The most popular way to eat it is in a good Scottish morning roll:-
In the past, Scottish emigrants have taken Lorne sausage with them wherever they go, with Australia’s ‘steakette’ and the North American ‘sausage pattie’ both bearing an uncanny resemblance to the original.
Here is the recipe below which I tried from Maw Broons Cookbook:-
Makes 15 sausages:-
500g at least 20% Fat Scottish Beef Mince
500g at least 20% Fat Pork Mince
1 egg – whisked
100g Rusk (ideally), I didn’t have this so I used twice baked bread (method below)
1 tsp salt
1 tsp nutmeg
1 tsp white pepper (make sure its a level tsp)
1 tsp dried coriander seed
First mix together the pork & beef mince in a bowl, then add the egg and bind together.
Add in the rusk (twice baked bread) and combine together with the white pepper, salt, coriander and nutmeg. It should be slightly firm, if too firm add a little water.
Using your hands make into an oblounge shape and square off. Place on an oiled tray/tin and place in the freezer for about 1/2 hr to slightly firm up (this makes it easier to slice). Do not freeze.
Slice into at least 1cm thickness and place a bit of greaseproof paper in between, then re-freeze if storing or cook if eating…..Yummy!
TWICE BAKED BREAD
Take slices of bread (brown or white its up to you), place in an oven at 90 deg for 1 hour, then turn oven up to 120 deg and bake for a further 30 minutes. Remove and crush up.
I saw this idea on the KitchenAid Recipe FB site and decided to give it a try. Oh my…..it is by far the fluffiest and lightest omelette I’ve ever had. Great idea of using the Mixer and separating the eggs.
Makes 1 omelette
3 eggs
1 tbsp milk
Salt & pepper to taste
Dill or chives (your preference)
Choice of fillings (again your choice) I used sweet peppers and spring onions.
Handful of cherry tomatoes to serve – grown in my own garden.
Seperate the eggs and whisk until fluffy with. Pour the milk into the yolk mixture. I whisked on power 6 for 3 mins, the 4 for 2 mins.
2. Gently fold the yolks into the whites and season.
3. Heat 1 know of butter in a non stick pan. Gently fry off the peppers and spring onions.
4. Once browned pour the egg mixture into the pan and gently cook for a few minutes on eash side.
5. Remove onto a plate, cut in half the tomatoes and gently brown in the pan for a few minutes and serve.
These were lovely, it was a recipe I was testing, now I’m not much of a chocolate or brownie fan but I have to say I did have more than 1…..lol!
Makes 18
375g cubed unsalted butter
300g Dark Chocolate, I used 70%
375g Caster Sugar
75g cocoa powder
6 large eggs
100 g plain flour
200g cherries in kirsch, drained, chopped
Cherry Syrup from jar (8-10 tbsps)
Icing sugar to decorate and finish
Preheat oven to fan 160 deg. Line a baking tin with baking sheet and grease. Approx 33 x 23 x 2cm tin
In a large pan, melt the butter and chocolate over a low heat, stirring occasionally, until smooth. Remove from the heat and leave to cool for 2 minutes. If you have Induction hob, put on at level 1.
Beat the eggs and sugar together until pale.
Slowly pour the melted butter & chocolate into the egg mixture, stiring all the time.
Fold in the flour & cocoa, then add the cherries and 5 tbsps of the cherry syrup.
Pour the mixture into your baking tin and bake for about 35 minutes or until you get a light wobble in the middle.
Remove from oven and drizzle remaining syrup over the brownie and allow to cool for 10 minutes. Then place in a freezer for 1/2 hour to allow to set.
Slice up into squares and sprinkle with icing sugar to finish, then just devour! Yummy!
Oh WOW! That’s all I’m going to say, well apart from, you have to try this. I am always looking for something different and this little recipe came from Kitchen Aid . Usually, I follow a recipe then on my second attempt change it up a little and experiment, but not on this one, it simply is delicious. Especially with some vintage cheddar…Mmmmmm.
450g plain flour
50g Rye flour – I used wholemeal
1 tsp bicarbonate of soda
1 tsp salt
45g melted salted butter
1 tbsp treacle
325ml buttermilk
200g walnut pieces
Pre heat oven to 180 deg. I used the convection bake setting.
Place the flours, bicarbonate of soda and salt into a large bowl and stir together. Make a large hole in the centre of the flour mixture and pour in the melted butter and treacle, walnut pieces plus enough of the buttermilk to make a loose sticky dough.
Tip the dough onto a lightly dusted work surface. The dough will be quite sticky. Shape it into a large ball with a taut top. Place the dough on a floured baking tray and flatten it a bit. Using a knife, score the bread
Dust with flour then bake in the oven for 40 minutes, or until the bread is golden brown and has risen.
Remove from oven and allow to cool on a wire rack. Serve with some lovely cheddar or simply butter.
Sometimes you want home cooked food without the hassle of trying to decided how to cook it and what temperatures etc to use, this was one of those days for me. Sundays are generally my lazy days, a day for recharging the batteries so to speak. I wanted a good home cooked quiche and decided to let my oven do the rest of the work and thinking. Hotpoint have designed a range of ovens with Automatic Recipe settings, the settings are already pre-programmed to control temperature, function and browning control……amazing, I know….right? Oven Range
I used the quiche setting and it was cooked and evenly browned perfectly due to the Multiflow Technology
I also used the Combination Oven with the Crisperplate to cook crispy potato wedges in just 12 minutes, perfect with a tasty quiche.
Makes 1 quiche
1 ready roll puff pastry
200g smoked bacon – diced
1 leek – sliced
handful of asparagus – chopped
200ml milk
200ml single cream
150g grated Gouda cheese
4 eggs
Salt, Pepper & Paprika to season
Grease a quiche tin and lay pastry in covering base and edges.
Gently fry the smoked bacon until slightly browned, remove from pan. Add to the pan the leek and saute for a few minutes.
Meanwhile blanch the asparagus in a pan of salted boiling water.
In a bowl whisk the eggs with the milk and cream.
Start to layer up the bacon and vegetables on pastry, then some of the cheese
Then pour in the egg/milk mixture and rest of the cheese to top, generously season with salt, pepper and paprika
Place on shelf 3 in oven and select auto recipes, quiche setting. The oven comes up 43 minutes but will sense temerature and auto adjust if necessary.
I attended a Doughnut Master class recently and thoroughly enjoyed it, so this weekend was the time to put my new found skills to the test and it was a success. I was so pleased with myself, although I am a perfectionist so I’ll give these 9/10, always room for improvement…..lol!
The flavour ideas going through my head just now are buzzing, so look forward to experimenting in the future.
Makes 18
For the Doughnuts:-
500g Strong White Flour
60g Caster Sugar (plus 60g for finish)
10g dried yeast
10g salt
4 Whole eggs
180g cold water
125g unsalted butter
Add all the dry ingredients to a mixer the add the eggs and water. Mix on low setting for 30 seconds then on high for 5-7 minutes until the dough comes together.
Let the dough rest for a minute, then cut up the butter into cubes and add to the dough. Mix on high for about 5 minutes.
Once mixed transfer the dough to a large bowl and allow to rise/prove until double in size. If you have a setting on your oven great, if not cover with cling film and leave in a warm place.
Once doubled, knock the dough back and allow to rise again in the fridge for a couple of hourse, ideally overnight though. (doing this in the fridge gives a stronger flavour)
Remove dough from fridge, knock back and roll into 55g balls then cover with flour. Lay onto a baking tray, making sure you cover the tray generously with flour or the balls will stick. Allow space in between for them to double in size. Prove the balls until doubled in size.
Preheat some rapessed oil in a pan to between 175-180 deg. Gently place the balls in the oil and fry for about 2 minutes each side. Remove, allow to cool slighty and roll in the sugar. Set aside.
For the Creme de patisserie:-
6 egg yolks
80g strong bread flour or plain
125g caster sugar
Whisk together egg yolks in a bowl then add in flour & sugar, whisk together
Gently heat 500ml milk – do not boil. Warm enough to touch. (60-70deg)
Slowly add the milk to the egg mixture, ensuring you whisk at all times to prevent curdling.
Then add mixture back to the pan and whisk continually on a medium heat until the mixture thickens up (this will take about 10 minutes)
Remove from heat and put into a dish, cover with cling film ensuring film is touching crem pat. This is to prevent a hard crust forming. Allow to cool then chill in fridge for around 2 hours.
Remove and add in your choosen flavours. I used Lemon Curd in 1 and Nutella in the other. Transfer crem pat mixture into a piping bag.
Take the doughnuts and gently push your finger into the side where it is white making space for the filling. Gently push the piping bag in a fill.
Nothing else to do then get the kettle on and devour! Oh so Yummy!
Fresh Pasta is just the best, but I always make far too much, I really need to learn my portion sizes…lol. Today I came across a recipe for balsamic chicken so I decided to try it out but add a little honey to it for the glaze and flavour, it was delicious.
For the pasta: (makes 4 servings)
275g ‘OO’ Grade Pasta Flour
3 large eggs
1 tbsp dried basil
Sift the flour & put basil into the large bowl on Kitchen Aid mixer or work surface.
Make a well in the middle. Crack one egg in and whisk gently.
Gently with your hands start to incorporate the flour starting at the bottom, once it starts to come together crack the 2nd egg, then the 3rd until it becomes sticky.
Using the dough hook on the mixer, knead together until you get a smooth like dough. Remove, cover with cling film and leave for about 1 hour.
Attach the pasta attachment, cut the pasta dough into 4 sections.
Flatten dough with hand then feed through the pasta maker, No. 1 x 5, No. 3 x 2, No. 5/6 x 1
Change attachment to fettuccine and feed through. Hang until ready to cook.
Heat a large pan of slightly salted water and cook for about 3-4 minutes. Strain
For the Balsamic Honey Chicken:-
2 Chicken Breasts (1 per person)
2 tbsp balsamic vinegar
2 tbsp worcestershire sauce
2 tbsp honey
1 tsp rainbow pepper
1 tsp garlic powder
1 tsp ginger powder
1 tbsp olive oil
Place chicken breast in a dish. Combine all the marinade ingredients in a seperate dish then pour over the chicken. Marinade in the fridge for at least 2 hours.
Pre heat your grill to medium heat and gently grill the chicken on the wire shelf for about 16-17 minutes turning halfway through. Tip:- place a tray of cold water underneath to catch any drips but this also adds a little steam to help keep the chicken moist. (I have a chicken breast setting on my oven which I used, this automatically controls the temperature).
Meanwhile cut some baby tomatoes in half (I used vittoria tomatoes), and place in the dish with remaining marinade sauce and mix. Place in the oven with the chicken beasts and next shelf down (underneath).
Remove chicken from grill and slice lengthways, tip into the drained pasta along with the tomatoes and sauce and combine. Serve. Yummy!
I had some pastry left over and decided to give these quick little bites a try, the flavour was amazing so sweet. I drizzled with a little Maple Syrup and I have to say it went really well, but so would chocolate…Mmmmmmm!
I used my little Crisper plate to bake and it only took 5 minutes……..what could be better? 5 minute bites!
1 sheet puff pastry
5 tbsp Golden Caster Sugar
3 tbsp cinnamon
1 egg for wash
Mix the caster sugar & cinnamon together in a bowl (you can use quantities to your own taste)
Lay out the pastry and sprinkle the sugar mix all over, then fold in half lengthways, seal with a little water
Cut the pastry with a sharp knife or pizza cutter into long strips about 1cm wide
Take both ends of strip and slowly start to twist, not too tightly or the pastry won’t puff up.
Then gently wrap around into a swirl shape and seal the end underneath to the centre. Make sure to seal tightly or they will unravel as some of mine did while cooking. Brush with the egg wash and place onto the preheated crisper plate. Cook onto Dynamic crisp for 5-6 minutes or until puffed and golden brown.
OMG!, these were absolutely delicious. I don’t normally eat pastries but I was trying out some new recipes for an event and my first idea didn’t go to well, so I got my thinking cap on and tried out these instead……oh wow! they were so tasty. I was so naughty though as I couldn’t stop my hand from grabbing one then another then another….lol! But we are allowed on occassions……aren’t we?
Makes 12
1 x ready rolled puff pastry
2 tbsp grated gruyere cheese
1 tbsp creme friache
4-6 smoked bacon rashers – chopped into bite size pieces
100g baby spinach
2 large eggs
Salt & pepper to taste
Heat a little spray oil in a pan and cook bacon until slightly brown, remove with slotted spoon and keep to the side.
Place spinach into the bacon and wilt down (will take a few minutes)
Meanwhile mix the grated cheese with creme friache
Beat the eggs and season well, pour over the wilted spinach and stir until scrambled in pan, remove from heat.
Cut the pastry into 12 small squares about 4″ x 4″ roughly
Place 1 tsp of the cheese mixture on base, then top with bacon and spinach mix, season well.
Wet your finger in water and run your finger along outer edge of pastry square, carefully lift 1 corner and pull over mixture making a diamond like shape, take the opposite corner and pull over the pastry corner you have just moved and seal. Make sure they are sealed well or they will open when cooking.
Refrigerate for about 10 minutes as this will help the pastry puff better.
When ready to cook preheat your crisper plate for 2 minutes on dynamic crisp setting and then bake for 7 minutes or until browned. If you don’t have one of these, then you could cook on baking tray at 200 deg for about 16-18 minutes or until golden.
This was originally a slimming world recipe I found but thought it needed more flavour so I added my own spin on it. It was very delicious, if I do say so myself, and very filling.
I made some wholemeal baguettes to go with it too which went perfectly for soaking up the left over sauce on the plate.
Serves 2
6 Chorizo Style Sausages
3 sweet peppers – chopped
1 tsp garlic granules
1 tsp dried chillies
2 tsp smoked paprika
1 tbsp worcestershire sauce
500g passata
150ml chicken stock
250g red kidney beans (or any other bean can be used)
4 spring onions – chopped
150g red lentils
knob of butter
Chopped fresh parsley for garnish
Spray a large pan with little oil on medium to high heat, gently fry the garlic, peppers and onion for a few minutes.
Add in the sausages and brown all over, about 5-10 minutes
Meanwhile put red lentils into a pan and add about 5cm water, bring to the boil, once boiling remove the white foam then add the knob of butter and mix through, remove from heat.
Add into the pan with sausages and vegetables the chilli, paprika, worcestershire sauce, passata, stock, beans and lentils then mix through. Gently bring to boil then reduce to a medium simmer for about 20 minutes.
If sauce is still too runny, bring to boil and boil gently for about 5 minutes until it thickens.
Delicious quick Friday night dish, or any night for that matter. I do love a good stir fry. Good thing with this dish, is that you could add any type of spice and it would work.
Serves 2
400g good quality beef – cut into strips
2 tbsp balsamic vinegar
2 tbsp soy sauce
2 tbsp Worcestershire sauce
3/4 spring onions, chopped
1 bag a pre mixed stir fry vegetables
1 bag a fresh egg noodles
2 tsp dried chillies
Marinade the beef strips in the vinegar, soy sauce & worcestershire sauce for about 1/2 hour.
Heat a tsp oil in a pan, add the beef and brown all over then add in the chillies
Add in the noodles and cook for a few minutes adding in the remaining sauce mix.
Then add in the stir fry vegetables, along with the spring onions, cook through for about 5 minutes. Serve. Yummy!
Oh Yum…yum…this wee dish was so tasty. Using up my home grown potatoes this little throw together dish was perfect and healthy too.
I made some of my homemade Chapati’s , which went perfectly. Oh…and a wee glass of Chardonnay too! lol!
Serves 2
1 can chickpeas
6 charlotte potatoes, cut into cubes
100g baby Spinach
1 can plum tomatoes
1 tsp cumin
1 onion, chopped finely
1 tsp ginger
1 tsp dried garlic
1 tsp chilli seeds
1/2 tsp turmeric
1/2 tsp chilli powder
1/2 tsp gram masala
1 tsp dried coriander
1 tsp olive oil/fry oil
Heat the oil in a saute pan, add the onion and cumin fry until the onion is golden. Add the garlic, ginger, chilli’s, coriander, turmeric, gram masala and chilli powder and cook for five minutes.
Add in the cubed potatoes and fry until potato is slightly browned, season.
Add in the plum tomatoes, chop up and mix thoroughly.
Now add in the chickpeas and mix through, simmer for about 20 minutes.
Throw in the spinach and cover with a lid to help wilt down. (roughly 5 minutes)
As you know I recently harvested my tatties (potatoes), so my brain got working on some tattie (potato) recipes. This one is a classic spanish dish, mostly a tapas type dish. I also recently purchased some new Kitchen Aid Skillets (pans), so I was keen to start using them, I have to say they are fabulous, very robust and non stick so I don’t need any oil when cooking…perfect! This dish was a quick 25 minute dinner. I do love quick and easy meals.
Serves 2
6 charlotte potatoes – cut into small chunks
150g chorizo – cut into 1 cm chunks
1 red onion – diced
1 green pepper – diced
2 tsp dried chilli flakes
1 garlic clove – crushed
100ml red wine (I used cabernet sauvignon)
2 tsp dried parsley (fresh is better, but I didn’t have any)
400g tin plum tomatoes (I find you get better flavour from plum than chopped)
Bring to the boil a pan at slightly salted water and boil the potatoes for about 5-6 minutes. Drain and leave to cool slightly.
Heat the chorizo in the pan on medium to high heat and add in the potatoes, cook until slightly browned all over. Remove with a slotted spoon.
Put the onion, peppers and garlic in the pan and saute. Add the red wine and reduce. Then add in the dried chilli flakes and stir through.
Add in the tin tomatoes, cutting them up, stir and simmer for about 10 minutes.
Add in the potatoes and chorizo, mix through and cook for a further 5 minutes.
I had some lovely fresh cod and wanted a tomtoey sauce for it, so I threw together some ingredients I had in my store cupboard and it worked! Don’t you just love when things come together that are so unplanned and thrown together….lol!
1 packet of pomodoro tomatoes (about 250g)
1 garlic glove crushed
1 tbsp balsamic vinegar
1/2 red onion chopped
1 tbsp caster sugar
1 tsp chilli red pepper flakes
Cut the tomatoes in half
Place everything in a pan and bring to the boil, reduce and cook for about 15 minutes. Stirring every few minutes.
Serve with some lovely cooked cod and vegetables. I used my own home grown potatoes….Yummy! Check out my post here
I have always wanted to grown my own vegetables, but having a concrete and stone garden it was going to prove tough to do…….until I discovered potato grow bags….who knew?? lol!
I planted the potatoes the last week in April and they started to flower about 3 weeks ago, I left them a bit longer and decided this weekend to harvest them. It was so exciting to discover that you have loads of potatoes in the bag, I was so amazed, some small, some large but none the less loads of potatoes (or in Scotland we call them TATTIES!)
I purchased a hessian bag to store them in, but cooked some that night. OMG…so delicious and fresh.
We have had a rather wet weekend here in Cumbernauld, Glasgow, so nothing better than getting in the kitchen and baking! Wanting to carry on with the summer, I decided that we were going to have an indoors picnic. I’ve been wanting to try this recipe from Jamie Oliver for a while now so today was that day. It was absolutely delicious, so refreshing and light, perfect for my picnic.
Serves 10-12
250g unsalted butter at room temperature
250g Golden caster sugar + 4 tbsp for syrup
4 large eggs
4 lemons
275g self raising flour
1 tsp baking powder
150ml milk
50g poppy seeds
Preheat the oven to 180 deg. Grease a 23cm cake tin and line bottom with greaseproof paper.
Cream the butter and sugar together until light and fluffy. Add the eggs in 1 at a time, mixing thoroughly before adding each one.
Grate in the zest of 2 lemons then squeeze in the juice and combine.
Sift in the flour and baking powder and fold gently until combined.
Add in the milk and poppy seeds and mix through.
Pour mixture into the cake tin and bake in the oven for about 45 minutes, or until a knife comes out clean.
Leave in the tin for 5 minutes then remove and place on a wire rack to cool.
Meanwhile, slice very finely the other 2 lemons.
Put 4 tbsps water and 4 tbsp caster sugar into a pan, add the lemons and heat gently on a medium to low heat for about 15 minutes or until the lemons are translucent and you have a lovely syrup.
Spoon the syrup over the top of the cake and serve.
I do love one pot meals, quick and easy cooking, especially on a Friday…..you’ve just finished work, weather is awful outside and you just need some home comforts and home comfort food. This is one of my go to recipes just for that occasion. Serve with a chilled glass of chardonnay and its perfection friday.
Makes 2
100g pasta – I used pasta twists but you can use any type
2 chicken breasts – cut into bite size pieces
200g Smoked Bacon Lardons
100g Spinach
1 white onion – chopped finely
salt & pepper
1 tsp crushed garlic
1 tsp spiced red pepper
low cal spray oil
1 cup milk (about 150ml)
1 large handful of grated cheese (I used cheddar), it is also delicious with parmesan.
Spray a little oil in a pan. Fry off the bacon until slightly crispy, add the onion and fry until golden brown. Remove with a slotted spoon.
Fry the chicken until browned all over.
Add back to the pan the bacon and onion, add the garlic, red pepper, salt & pepper and mix through.
Add in the spinach and mix until slightly wilted
Pour in the milk and bring to the boil, then reduce slightly and simmer until pasta is cooked about 10-12 mins.
Having loads of bananas left, I decided on my favourite Banana Bread Recipe . This time I tried my Automatic settings on my oven, and it baked perfectly. I do love new technology.
These Automatic Recipes are a full proof way of cooking if your not sure, I love them and I’ve learned to experiment with recipes I might not have done before.
I used my Best Pancake recipe for this, it is one recipe that always works. Light Fluffy pancakes guaranteed. This morning was a more healthier option with low fat toffee yoghurt, blueberries and a little Maple Syrup…….oh so yummy!
I love mixing up pancakes, there are so many toppings you can choose. What is your favourite?
Saucermeat or Sasermeat (as its pronounced) is n Iconic traditional dish in Shetland Islands. Mainly beef but sometimes lamb is used. The islanders mix it with a beautiful dry spice mix to give it a unique flavour. Meat can be made into meatballs, burgers, oven dishes it’s really your choice.
I decided to go for the traditional Lorne sausage (square sausage).
Makes about 4 sausages
400g Saucermeat
1 tsp salt
2 tsp spice mix
For the Spice Mix
1 tsp black peppercorns
1 tsp white peppercorns
1 tsp whole allspice
1 tsp whole mace
1 tsp cinnamon
pinch of whole cloves
Mix the dry spice together and then add to the saucermeat, blending well.
Take the meat and shape in a Lorne sausage about 1cm thick, season with salt
I used my crisperplate to cook for about 10 minutes. Alternatively you can grill or shallow fry for the same time.
I got this little Jamie Olive cook book recently and have been trying out some recipes, which I have to say have been delicious. Tonight, I thought I would take my inspiration from Mr. JO but put my own twist to this. I have to say it was rather tasty…..Mmmmmm.
Using a combination of my Crisper plate and my steam pot, this little dish was made in under 20 minutes. Quick and easy meals.
Serves 2
80g Basmati & quinoa rice (I used Tilda)
2 x Scottish Salmon Fillets
4 tsp sweet chilli sauce (I always use Blue Dragon, I find they are the best)
2 tbsp sesame seeds
3 spring onions
1 fresh red chilli
60g sugar snap peas
2 carrots
4 springs of fresh coriander
2 tsp toasted sesame oil
1 lime (juice only)
80g smoked beetroot
1/2 cucumber
Place the basmati rice into the steam pot with 200ml water and cover, cook on the Automatic rice setting on microwave for 18 minutes. Remove and keep warm (keep lid on till other food is ready)
Meanwhile, rub the sweet chilli sauce into the salmon then sprinkle the sesame seeds over making sure they stick by pressing slightly.
Finely slice the spring onions, sugar snap peas, chilli then julienne the carrot, cucumber, beetroot using a julienne peeler (if not you can coarsely grate). Place all into a bowl with the coriander.
Place the salmon (skin side down) onto the crisper plate and cook on dynamic crisp setting for 7 minutes or until slightly crispy and cooked.
Pour the basmati rice into the salad bowl and mix through with the toasted sesame oil, lime juice and 2 tsp of sweet chilli sauce.
Serve up the salad and place the salmon when ready on top. Amazing, Tasty little dish. Yummy!
Oh I do like a nice piece of fish. I picked up some lovely smoked Cod from my fishmonger and decided to do a tray bake with it.
This dish was so delicious and full of flavour. I mixed up the Chimichurri sauce by adding rocket leaves….delicious!
Makes 2-4 portions
4-6 Smoked Cod portions
6 Charlotte potatoes – quartered
1 red pepper – sliced
1 red onion – cut into wedges
100g chorizo – cut into 1cm cubes
Salt & pepper to season
For the herb crumb
2 tbsp dried parsley
1/2 tbsp dried oregano
1 slice of white bread
1 tbsp olive oil
For the Chimichurri dressing
2 tbsp dried parsley
1/2 tbsp dried oregano
1 tbsp dried coriander
1 garlic clove
1 tbsp dried chilli
handful of rocket leaves
Juice of 1.2 lemon
3 tbsp olive oil
4 tbsp water
Preheat the oven to 180ºC fan.
Toss together the potatoes, seasoning and 1 tablespoon of oil in a large roasting tray. Bake for 12 minutes, then add the chorizo, onion and peppers and roast for a further 15 minutes.
Meanwhile, prepare the fish. Blitz together the parsley, oregano, bread and remaining oil to form coarse breadcrumbs. Brush the top of the fish fillets with a little extra oil and press on the breadcrumbs.
Give the roasting tray a good shake, then place the fish and tomatoes on top and roast for a final 15 minutes, until the fish is cooked.
Meanwhile make the chimichurri dressing. Combine all the ingredients in a blender and blitz to combine. Drizzle over the tray bake to serve.
This was Inspired by Jamie Oliver’s 5 Ingredient Programme. It looked and sounded too good not to try. However, I decided to put my own slight twist to it. This dish is so yummy and very filling too.
I think I’m going to try it next with Red pesto and chilli. Mmmmmmmm!
Makes 4
4 Chicken Breasts
1 Roll Puff Pastry
4 tbsp Green Pesto
1 egg for wash
Bag of baby spinach
Sat & pepper to season
Cherry tomatoes or vine.
Preheat oven to 220 deg. Lightly oil a baking sheet.
Firstly flatten out chicken breasts with a rolling pin, just so the fattest part is even with rest of the chicken as you want it to cook evenly through.
Slice each chicken breast horizontally and stuff with some spinach leaves.
Cut the puff pastry lengthways once, then vertically 6 times to make 14 small rectangles.
Spoon 1 tbsp of pesto onto the chicken breast and place onto the backing sheet.
Take the puff pastry strips and wrap around the chicken, overlapping each time. Brush with egg wash.
Place the chicken breasts on the centre shelf (No.3) then place the tomatoes in a pan on shelf level below (No. 1). Bake for about 20 minutes or until golden brown.
Meanwhile steam cook the rest of the spinach. (3 minutes)
Looking for something nice to have with a coffee this afternoon, I decided to have a go at Choux Pastry again. The first time I tried they didn’t puff up, so I was so pleased when these came out lovely and airy. Thought I would try doughnut shape instead of the traditional way. Very tricky to eat this way but then again I did make extra large man size ones……lol! They were absolutely delicious. Perfect for our afternoon coffee.
Makes 4
115g Strong Flour
4 tbsp milk
80ml water
Pinch of salt
Pinch of caster sugar
55g unsalted butter
3 medium eggs
Filling
300ml double cream
100g icing sugar
1 tsp vanilla extract (or any other flavouring you wish)
100g Chocolate (if using on top)
Preheat your oven to 200 deg.
Line a baking tray with parchment paper and flour
Put the water, milk, salt, sugar and butter into a pan and bring to the boil on a medium heat until the butter is melted.
Remove from the heat and sieve in the flour and beat vigorously until it forms a dough then cook on a very low heat for 5 minutes.
Leave to cool slightly. Beat the eggs then add in little at a time beating well between each egg. You want a smooth glossy finished dough.
Spoon the dough into a piping bag with a star nozzle and pipe 4 rings, approx 4 inch diameter onto the baking tray.
Bake for 15 minutes at 200 deg then turn down to 170 deg for 10 minutes or until they have risen well and golden brown. Remove and allow to cool on a wire rack.
Meanwhile, pour the cream and vanilla into a bowl and whisk until just slightly thickened, then add the icing sugar and continue to whisk until desired thickness. Spoon into a piping bag with the star nozzle.
Cut the cooked Choux in half and pipe the cream into the middle then place the top on. Dust with some icing sugar. If using chocolate, melt chocolate in a microwave for 2 minutes then spoon on top and refrigerate to harden (about 10 minutes). Serve.
I do love a good Sunday Roast Dinner. I got a lovely bit of Scotch Beef Topside and decided to cook it Rotisserie Style, O.M.G! it was delicious. Meat was still Juicy on the inside with a lovely crispy outside. If you haven’t tried this cooking method, you are missing out…..seriously this is the only way I will cook this now.
I am lucky as my oven has a built in Rotisserie to it, such a great accessory. Check them out here Hotpoint Rotisserie Oven.
1kg Topside Scotch Beef
Rock Salt, Cracked Black Pepper and a little oil to season.
Rub the seasoning into the meat and leave at room temperature for 15 minutes.
Skewer the meat onto the Metal Skewer and insert into the oven.
Select Turbo Grill and a medium heat. Place a pan of water underneath to catch any fat (which can be used for the gravy).
Cook for about 1 hr 15 minutes for medium.
I also cooked some crispy potatoes using my crisperplate in my Combi Microwave. Perfect match.
You can of course marinade the beef the night before in any spices you like, but I believe that when you have a really good bit a meat, salt & pepper is all you need.
My partner always orders a Dhansak from our local Indian Takeaway, so I thought I would try a homemade version! He thought it was delicious! Result! Not only was it so tasty it was also less calories and more protein. A much healthier version of his favourite takeaway. I made my homemade Chapati’s to serve with it too. Perfect Fakeaway dish.
Makes 2 Servings
1 red onion – chopped
2 garlic cloves – crushed
1 tsp ginger
1 tbsp light brown sugar
1 red chilli – finely diced
1 tsp mustard seeds
4 cardamon pods – crushed
2 tsp mild curry powder
1 tsp turmeric
1 tsp ground cinnamon
100 g red lentils rinsed
2 chicken breasts
4 tomatoes – chopped
1 tsp tomato paste
300ml vegetable stock
Juice 1/2 lemon or lime
fresh coriander to garnish
salt & pepper to season
Heat a little oil in a deep pan, fry the spices, ginger and chillies for a minute or until mustard seeds start to pop.
Lower the heat and add in the onions and garlic, cook for about 5 minutes until soft.
Add the red lentils and mix.
Then add the stock, tomatoes, tomato paste and sugar, bring to the boil. Gently lower the chicken breasts into the sauce. Lower the heat and simmer covered for about 1 hour.
Add the juice of the lemon or lime. Take 2 forks and shred the chicken breasts, stir and cook uncovered on a higher heat for a further few minutes. If the sauce is too runny just bring to the boil to thicken for a few minutes or add cornflour to thicken.
Remove the cardamon pods and serve onto plates. Garnish with coriander. Serve with the Chapati’s.
This recipe also tastes even better the day after. Yummy!
Dhansak is a popular Indian dish, originating among the Parsi Zoroastrian community. It combines elements of Persian and Gujarati cuisine. Dhansak is made by cooking mutton or goat meat traditionally with a mixture of lentils and vegetables.
You could try this recipe also with prawns or lamb. Yummy too!
This was a quick throw together breakfast this morning. Being out the night before, we woke quite hungry and a simple bowl of cereal or toast was not going to cut it….lol! It’s amazing sometimes what you can put together when you just take 2 minutes to look in your fridge and cupboards! Using my crisper plate these little tartlets baked in just 8 minutes.
Makes 4
1 Roll of Puff Pastry
4 Chipolata Sausages or Wee willy winkies (cocktails sausages!)
4 tsp tomato pasta with Chilli
4 medium eggs
handful of tomatoes (small) halved
8 rashers of smoked bacon
Salt & pepper to season
Preheat the crisper plate for 2 minutes.
Place bacon and sausages onto plate and cook for about 3 minutes
Meanwhile, cut the pastry into squares and with a sharp knife score a 1cm border around the pastry, like a picture frame. Do not cut all the way through.
Remove the bacon and sausages to a plate and wipe dry the crisper plate
Spoon 1 tsp of tomato paste over the centre of the pastry.
Chop the cooked bacon and sausages into small pieces and place onto the tomato paste, leave room in the middle for the egg later.
Place onto crisper plate and bake for 6 minutes, the edges will start to puff up.
Remove plate and crack the egg into the middle of the pastry, add the tomatoes and season. Bake for a further 2m 30 secs. or until desired egg setting.
I love breakfast time, my favourite meal of the day. I am always looking for new things to try with my Crisperplate and this little recipe was delicious and baked in just 15 minutes too.
Makes 4 servings.
4 Charlotte potatoes – grated with skin on (more flavour in the skin)
8 slices of smoked bacon – back or rashers either is fine
Cheddar cheese – grated (amount to your preference)
6 green spring onions – chopped
6 large eggs
1/2 cup of milk
1 tbsp flour
salt & pepper to season
Grate potatoes and squeeze out excess water, pat dry and sprinkle the flour over to soak up any water.
Preheat the crisper plate for 2 minutes then evenly lay the grated potatoes onto plate and season. Leave some spaces on the plate as this allows the potatoes to crisp up better. Cook for 6 minutes
Place the bacon onto the potatoes and cook for 3 minutes or longer if your prefer extra crispy bacon.
Meanwhile whisk the eggs with the milk and season
Evenly spread the spring onions and cheese onto the bacon and potatoes then pour over the egg mixture and season.
Bake for about 6 minutes or until desired browness.
This is something I have always wanted to do but never got round to it, so this year I decided to give myself a kick up the ass and get it sorted….lol!
Off to the garden centre I went, so much to choose from but I had to consider our weather climate too, after all I do live in Scotland where we’re not known for our sunny warm weather….lol!
To start me off I went with potatoes in a grow bag and some Tumbling tomatoes in a hanging basket. My garden is small and covered with slabs and stones so this was the easiest option for me.
These grow bags are brilliant idea for potatoes, especially as I’m just starting out. I went with Charlotte potatoes as these are one of my favourites.
Above was mine all finished, just a few months to wait and I hope it ends up looking like this…….
I have to admit, I really hope my tomatoes grow, I decided to go with red and yellow tumbling toms for extra colour in my garden. I also planted some basil with them, perfect partner for tomatoes. I’m so excited about these. Fingers crossed.
Think I’d like to plant some spinach and lettuce leaves next………..oh the list is endless.
I just love my relaxing Sunday mornings, today the sun was out and I felt great, the sun beaming into my kitchen through my living room. It’s amazing how a little bit of sun makes you feel, especially after our really bad and long winter.
Feeling good I decided to experiment, I was sent an idea recently….omelette in bread….brilliant, easy, tasteful, quick and simple cooking. Loved this.
There are so many combinations you can do, I went with cheese and tomato.
Makes 2
2 Slice of Bread – Thick slice is best
2 large eggs – whisked
2 tomatoes – sliced
Gouda cheese – small handful grated
Seasoning
Heat a little oil in a fry pan and gently cook your filling ingredients, in this case I gently fried the tomatoes.
Cut out the centre of the bread and set aside.
Arrange the filling in the pan to the shape of the centre of the bread, then place the outside of the bread in the pan.
Gently pour some of the egg mixture into the centre of the bread covering your filling. Do this slowly so it sets. Then sprinkle the cheese on top
Allow to set slightly, then place the centre of the bread on top and flatten down. Then flip over and cook for 2 minutes.
I first saw this recipe on Food for fitness, Scott Baptie is a Sports nutritionist, Director of Food For Fitness. Online trainer. Speaker. High protein cook. Magazine cover model & fitness writer. He specialises in fat loss, muscle gain and nutrition. His recipes are delicious and so nutritious, so when I seen this recently I had to give it a try. At only 164 calories per portion (without the chicken), who wouldn’t? I used green lentils and added chicken for a more filling meal.
Makes 4 portions
Spray oil with coconut oil
2 onions, diced
10g ginger, crushed
10g garlic, crushed
200g green lentils (or red) rinsed
350ml vegetable stock
1 tsp cumin
1 tsp gram masala
1 tsp dried chillies
400g chopped tomatoes
400g coconut milk – reduced fat
2 chicken breasts
Seasoning
Fresh coriander, chopped
Heat spray oil in a large pan.
Add the diced onions with garlic and ginger and cook until softened. Remove from pan
Add the seasoned chicken to the pan with the gram masala, chillies and cumin and cook until chicken is browned.
Add the onions back to the pan with the lentils, tomatoes, coconut milk and vegetable stock. Bring to a boil then gently simmer with lid for about 30 minutes.
Remove lid and continue to cook for 15-20 minutes or until sauce starts to thicken.
I just love fresh pasta, ever since I got my new pasta attachment for my Kitchen Aid Machine I’ve never bought dried pasta again. Having to use up some pesto I had left, this little dish was the result. The sun dried tomatoes just added that little extra flavour.
Makes 2-4
For the pasta:
275g ‘OO’ Grade Pasta Flour
3 large eggs
Sift the flour into the large bowl on Kitchen Aid mixer or work surface.
Make a well in the middle. Crack one egg in and whisk gently.
Gently with your hands start to incorporate the flour starting at the bottom, once it starts to come together crack the 2nd egg, then the 3rd until it becomes sticky.
Using the dough hook on the mixer, knead together until you get a smooth like dough. Remove, cover with cling film and leave for about 1 hour.
Attach the pasta attachment, cut the pasta dough into 4 sections.
Flatten dough with hand then feed through the pasta maker, No. 1 x 5, No. 3 x 2, No. 5/6 x 1
Change attachment to fettuccine and feed through. Hang until ready to cook.
Heat a large pan of slightly salted water and cook for about 3-4 minutes. Strain
For the toppings:
2 chicken breasts
1/4 jar sundried tomatoes
3 tbsp green pesto
Handfuls of Broccoli & Baby Spinach
I steam cooked my chicken, broccoli and Spinach. (8 minutes for chicken, 3 minutes for veg)
Slice chicken into bite size pieces.
Place pasta into a bowl with chicken, broccoli, spinach and sundried tomatoes, spoon the pest into the bowl and mix through until chicken and pasta is coated.
If you have read my last few posts, you will know I got a massive 2.5kg bag of potatoes for 29p last week……I know right….so cheap! So my task this week was to use them all…lol! Today I had to use up some leftover vegetables so I decided on pesto Potatoes……this was so delicious, nutritious and a filling meal.
Serves 2
4 Maris piper potatoes – cut into bite size pieces (I left skin on, more flavour)
Handful or Broccoli
Baby Spinach
Salt & pepper
Green Pesto – 3 tbsps (see recipe below)
Pesto Recipe
clove of garlic crushed
Fresh Basil – large bunch
handful of pine nuts – about 100g
Parmesan Cheese – grated
Olive oil
Lemon juice
Place garlic and basil leaves in a blender and pulse until chopped
Add in the pine nuts (toasted) and parmesan and pulse to blend
Slowly add in some olive oil, just enough to bring it all together, then squeeze in the lemon juice. Serve.
Potatoes
Cook potatoes through until soft, you can either boil or steam cook, 4 minutes before you think they are ready, pour in some peas to the potatoes and simmer.
Meanwhile, Steam cook your broccoli and spinach for 3 minutes.
Drain potatoes and put into a large bowl, add in the spinach and broccoli
Spoon 3 heaped tbsp of pesto and mix through, season
Serve into a bowl or plate and top with some pine nuts for extra crunch.
Don’t you just love quick and easy cooking? Sometimes, especially on bank holiday Mondays when your relaxed, you just don’t feel like cooking but still want something healthy, nutritious, flavoursome with hardly any washing up? Oh yes, you’ve guessed it……out comes the little Crisper plate, this little dish is so easy and quick with perfect results. I also used my new Steam pot too for extra nutrition. I just love Gadgets that work for me.
Makes 2 servings.
For the Crisper Plate:-
2 Chicken Breasts – cut into large bite size pieces
2-3 potatoes – cut into bite size chunks (skin on)
2-3 sweet peppers – cut into wedges
1 red onion – cut into wedges
Handful of plum tomatoes
Salt & Pepper
Red Pepper Chilli flakes
Garlic & Parsley seasoning
Pre-heat the Crisper plate for 2 minutes on Dynamic Crisp
Place all above ingredients (except the tomatoes) into a bowl or food bag and drizzle with a little oil, shake to coat chicken, potatoes and veg.
Place onto the Crisper plate and cook for 12-15 minutes (depends on thickness of potatoes and chicken or how crispy you like it)
After 6 minutes, add in the plum tomatoes and cook.
Serve…..Yummy!
For the Steamed Vegetables:-
Your choice of vegetables, I choose broccoli, asparagus and spinach.
Place broccoli and asparagus onto the steam pot grid and fill the pot with 200ml water. Place into the oven and select sensor steam, cook for 5 minutes.
2 minutes before cooking is due to finish, place the spinach in the pot and continue to cook.
So after my bargain purchase of potatoes, I decided to make some homemade chilli chips using my crisper plate. You know how much I love this little Crisper plate don’t you? lol! You can find more information here:- Crisper Plate Technology
I decided on a bit of spice today, so I seasoned the chips with salt, pepper and chilli flakes…..soooooooo Yummy!
Wash potatoes and cut into desired chip length and width. Approx 1-2 cm cube is perfect.
Pre-heat the Crisper plate for 2 minutes on Dynamic Crisp setting.
Coat chips with a little spray oil and season, then place onto plate & cook for 12 minutes. Perfect little chips.
This year the awards were held at the Kelvingrove Art Gallery, perfect for some of Scotland’s most influential people and places. Read all about it in the link above.
Why not come visit some of the award winning hotels, bars and restaurants.
I picked up an amazing bargain recently in Aldi’s….29p for 2.5kg bag of Maris Piper potatoes…..Yes I know…..right…..29p!! So after picking up some lovely scottish beef sausages at my local butchers I decided a Stew was the perfect match for these potatoes.
A warm comfort filling dish.
Makes 4 servings.
8 Scottish Beef sausages (or any of your choice)
4 potatoes – washed and cubed (skin on)
1 tin chopped tomatoes
1 tbsp tomato puree
300ml chicken stock
2 garlic clove – crushed
1 tbsp olive oil
2-3 sweet red peppers – sliced
1 red onion – quartered
1 tsp crushed chillies
1 tsp hot smoked paprika
salt & pepper
1 tbsp worcester sauce
1 tbsp mixed herbs
Gently heat up to a medium heat a fry pan with oil.
Gently fry the peppers and onion with the garlic, chillies and paprika until softened, remove from pan with slotted spoon.
Put your sausages into the pan and gently brown on all sides.
Once sausages are browned add back to the pan the pepper mix, tomato paste, tin tomatoes, chicken stock, potatoes, salt & pepper, worcester sauce and mix. Bring to the boil then simmer for approx 25 minutes or until potatoes are soft.
A few minutes before ready add in the mixed herbs, and cut the sausages into 3 sections, then serve. Yummy!
I found this lovely little pot of Tutti Frutti Jam from The Artisan kitchen recently, so nothing better on a bank holiday weekend than to make a Victoria Sponge for afternoon coffee. The Flavours of this jam were absolutely delightful, APPLES, STRAWBERRIES, RASPBERRIES, BLACKCURRANTS, LEMON JUICE and ORANGE OIL………so fruity!
Basic Victoria Sponge:-
200g unsalted butter, softened
200g golden caster sugar
4 medium eggs
200g self raising flour
1 tsp vanilla extract
For cream:-
250ml double cream, whipped
1 vanilla pod
Preheat oven to 170 deg. Grease 2 cake tins approx 20cm each.
Cream the butter, sugar and vanilla together in a mixer
Slowly beat in the eggs, 1 at a time.
Gently fold in the flour, keeping as much air as possible. Don’t over mix.
Divide the mixture between the cake tins evenly and bake for about 20 minutes or until a knife comes out clear. Allow to cool.
Whisk the cream with the vanilla until you get stiff peaks.
Spread the jam on top of one of the cakes then spread over the cream, sandwich with the other cake and sieve some icing sugar over the top. Serve! Yummy!
Sundays are all about Stews……good home cooked food. Sundays are my chillout day and also my home comforts day, so there’s nothing better than a tasty Stew. This one was full of flavour, very spicy and full of protein too. I served it with some homemade crusty baguettes.
Serves 2
6 Sausages (to your own taste. I used Black pepper Beef sausages) you could use low fat sausages to make it even healthier.
1 Cal cooking Spray
1 red romano pepper (the long pointy ones), deseeded and cut into 1cm strips
1 clove garlic crushed
1 tbsp hot chilli powder – less if you don’t like it too spicy
1 tbsp hot smoked paprika
1 tbsp worcestershire sauce
300g passata
100ml chicken stock
200g cannellini beans, drained
200g red kidney beans, drained
6 spring onions, finely chopped
chopped parsley to garnish.
Spray a non stick fry pan and heat on a medium heat.
Gently fry the spring onions, pepper and garlic then add 3 tbsp water and cover. Cook on a simmer for about 5 minutes until soft.
Meanwhile, gently brown sausages in a fry pan with spray oil.
Once browned, remove and cut into 3 diagonally.
Add chilli powder, paprika and worcester sauce into the pepper mix and stir, then add the passata, chicken stock, sausages and beans, bring up to a boil, then simmer for about 10-15 minutes uncovered.
Serve in a soup bowl and garnish with parsley. Serve with some fresh crusty bread. Yummy!
Sometimes you just need to treat yourself with the little things in life that make you happy. This is one of them for me. Having some disaronno left from New Year, I decided to treat myself today, because I deserve it!
Put a pot of fresh coffee on, preferably strong taste.
Pour some Disaronno or any Amaretto into a glass.
Top with freshly brewed coffee.
Froth up some milk or cream with a little frother and spoon on top.
O.M.G. what can I say, another satisfying little dish. Ever since I got my pasta maker I’ve been keen to use it, so this weekend I decided to try something different. So deliciously scrumptious!
Serves 6
For the Ravioli
300g Plain Flour
1 tbsp of cocoa powder
3 eggs
1 tbsp olive oil
1 tbsp of milk
For the Frangipane
100g ground almonds
100g powdered sugar
100g butter
1 egg
1 tbsp flour
1 tbsp dark rum
Others
200g caster sugar
1 vanilla pod
Handful of Black cherries
1 egg for wash
Prepare the dough for the ravioli by mixing all the ingredients together in a mixer. Allow the dough to rest for about 1 hour covered in cling film.
Meanwhile, mix up the frangipane by mixing all ingredients in a mixer until you get a thick mixture. Put into a piping bag and refrigerate until ready to use.
Cut the dough in half and flatten with your hands, then feed through a pasta maker (No. 4 or 5 setting) (or roll out to about 2mm if you don’t have one).
Lay the pasta on a floured surface, with the piping bag place a dollop of frangipane evenly spaced on 1 of the sheets, then place a cherry on top and brush around each one with egg wash.
With the other sheet of pasta lay on top and press down to seal. Cut the ravioli using a cutter and seal the edges with a fork.
Bring about 2 litres of water with the sugar and vanilla to a boil, place the ravioli in the water and cook for about 3-4 minutes. Remove with a slotted spoon.
Meanwhile, heat up some custard.
Serve in soup bowls, pour custard in bowl and add in the ravioli, add in some black cherries and grated some dark chocolate over for extra sweetness. Yummy!
Looking for healthier and more nutritious alternatives are always on my to do list, I came across this recipe from The Kitchn , I changed it up a little to my own flavours but this was truly delicious and filling.
Serves 4
Spray fry oil
1 bag (100g) baby spinach
1 Clove of garlic, finely chopped
1 tsp chilli flakes
pinch salt & pepper
4 large or 8 small tortillas
1 tin (400g) of refried beans (I always use Old el paso…I just love them)
1 Red Pepper, finely chopped
1 small tin of sweetcorn, drained
150g Cheddar Cheese, Grated
Heat the oil in a large fry pan over a medium heat. Add the red pepper and sweetcorn with the garlic and chilli and cook for a few minutes.
The add the spinach and cook until wilted. Season.
Remove from pan. Heat through the refried beans for about 4 minutes then remove from pan, set aside.
Place the tortillas on a flat surface and start to assemble. Spoon the refried beans on covering half of the tortilla, then the cheese, then the spinach mix the fold in half.
Wipe the fry pan with a dry cloth and place each tortilla in pan a cook on each side for about 2-3 minutes until browned and crispy. Repeat until all cooked.
Remove and cut the quesadillas in half and serve. Yummy!
So delicious! If you love peanut butter, you will love this.
With my new Hotpoint oven came a Steam pot so I’ve been trying to experiment with steam cooking, not only is it more nutritious but also so much more healthier. First, since food is cooked by direct contact between steam as well as the movement of the hot vapor through the food, no fat is needed to conduct the heat. This makes steaming a lower-calorie, low fat cooking method. Food stays moist, too, since it is being bathed in water vapor. Also, since water soluble nutrients (namely Vitamins C and B) don’t leach out into vapor, steaming preserves up to 50% more nutrients than other moist heat cooking methods.
Just because steaming is a healthy way to cook doesn’t mean it has to be bland. There are many ways of adding extra flavor to steamed food during the cooking process. You can bring extra flavor to your food by adding all sorts of complementary herbs and spices to your cooking liquid. Further up the flavor by substituting stock, fruit juice or wine for water. The additional flavors will permeate the food as the steam cooks them.
Makes 9
2 Chicken Breasts
1 shallot
1 tsp garlic granules or 1 garlic clove
1 leek
40g whole peanuts
1 tsp salt & pepper
350ml chicken stock
1 tbsp peanut butter
spinach
1 tsp peanut oil
Slice the Leek, using a bit with the green on
Peel and slice the shallots
Shell and peel peanuts (if not predone), blitz in a blender until fine
Cut the chicken into small pieces and season
Add chicken, leek, shallots, garlic and seasoning to the peanuts in blender and blitz together.
With your hands roll into meatballs and place on a greased baking tray, then refrigerate for about 1 hour.
Pour the chicken stock into the steam pot and then place the meatballs onto the grid and place in pot, cover with lid. Set steam time to 10 minutes.
2 minutes before ready place the spinach in the pot also.
When ready remove the chicken stock from the pot and place in a pan on hob. Reduce by half and then emulsify 1 tbsp peanut butter and 1 tsp peanut oil until sauce thickens. (about 1-2 minutes)
Serve meatballs on the bed a spinach and pour sauce over. Yummy!
O.M.G…..I just had to try this. A Glasgow based Chippy called The Kents advertised beer battered square sausage a few weeks ago and it went viral, so yes of course, I had to try my own version. You really don’t get any more Scottish than this. It was surprisingly delicious.
Makes 8
For the Batter:-
125g Plain Flour
1 egg, beaten
1 tsp garlic granules
1/2 tsp ground black pepper
1/2 tsp salt
250ml Beer or Lager (I used Tennents to go all Scottish)
*
Sausages x 4 – preferably from your local butcher
4 tbsp flour to dust
Mix all dry ingredients in a bowl then crack in the egg.
Gently start to whisk together and slowly add in the beer/lager little at a time until you get a nice smooth, lump free batter. It should be runny but not too thin.
Heat some oil in a pan. To tell the right temperature, drop a little of the batter in and if it gently starts to cook and turn brown then its hot enough.
Dust each sausage with a little flour then dip into the batter.
Gently drop the sausage into the oil and cook for about 8 minutes, don’t over cook or it will go rubbery.
When life gives you snowy days…………..JUST BAKE!……….Coffee and Cake can never go wrong in my house, especially on a snowy day. I used my sponge recipe from my pistachio cupcakes, and I just omitted the pistachios. I baked half with chocolate chips inside and the other half I used some Unicorn Chips (coloured white chocolate chips). I then decided to use what I had in my cupboards with regards to decoration and went a bit creative……lol! Think the boredom was getting to me……lol.
This is definitely my best cupcake mixture to date, always light and fluffy and full of flavour.
This week we have had nearly 2 foot of snow fall, so not able to get out for a couple of days, there was no other option than to make some bread as we had just about ran out of food in the house. I have to say this was my best for a while, flavour and structure was perfect.
Makes 2 small (250g) loaves
250g Strong White Flour
250g Strong Wholemeal Flour
1 packet 7g yeast
1 tsp caster sugar
1 tbsp honey
1 tbsp olive oil
1 tsp salt
300ml warm water (not boiling)
Sift flours into mixer bowl, add in the salt and sugar to one side and the yeast to the other. Make a well in the middle.
Pour in the honey and oil and gently start to bring together. (If using a mixer, use the dough hook and mix on level 2)
Gently add in the warm water, little at a time until you get a smooth dough.
If you having a rising setting on your oven, select and prove for 2 hours. Alternatively, place a damp tea towel over bowl and leave in a warm place to prove or until double in size.
Punch down the dough a couple of times, empty onto a floured surface and shape into you bread. I cut dough in half and made 2 small loaves, 1 round and 1 oblong. Trick is when shaping, make sure dough is tight, place hands facing up at the bottom of dough and bring together underneath.
Place onto a well floured tray or bread tin and prove for a further 1 hour.
Preheat your oven to 200 deg, place a tray with cold water on the top shelf (this prevents the crust for over crisping), then bake your bread on 1st or second level of oven for about 30 minutes or until the bottom sounds hollow.
Allow to cool. Serve with plenty butter……….ot whatever you like. Yummy!
I just love Sunday Brunch time, no alarm, lay in, relaxing morning and a fantastic big breakfast that will keep me going until my Sunday dinner. I couldn’t decide between sweet or savoury this morning, so why not both?? This was an absolute treat and so glad I had some fresh tomatoes as this jam just nailed the dish.
Makes 2 portions
For the Jam
10 cherry tomatoes – 1/4
1 tbsp balsamic vinegar
1 tbsp brown sugar
1 tbsp butter
Sprayoil
1 red onion – finely chopped
For the French Toast
2 slices of bread (I used wholemeal)
1 tbsp butter for frying
2 eggs
Salt & pepper to taste
1 large handful of kale – I steamed cooked mine for 4 minutes, perfect.
1/2 Avocado – sliced
To make the jam:- Heat 1 tbsp butter and some spray oil in a fry pan
Saute the onion on medium heat until tender about 5 minutes
Add brown sugar, stir and cook for a further 3 minutes
Add the tomatoes and balsamic vinegar and cook for a further 5 minutes, remove with a slotted spoon and keep warm
To make the French Toast:- Heat 1 tbsp butter in a fry pan.
Whisk the eggs and season with salt & pepper
Place the slices of bread in the egg mixture and allow to soak for a minute, then place into the hot pan and fry on each side for about 3-4 minutes or until golden brown and crispy.
Steam cook your kale.
Place kale onto toast, then avocado slices then top with the jam.
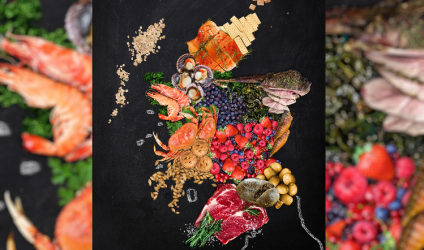


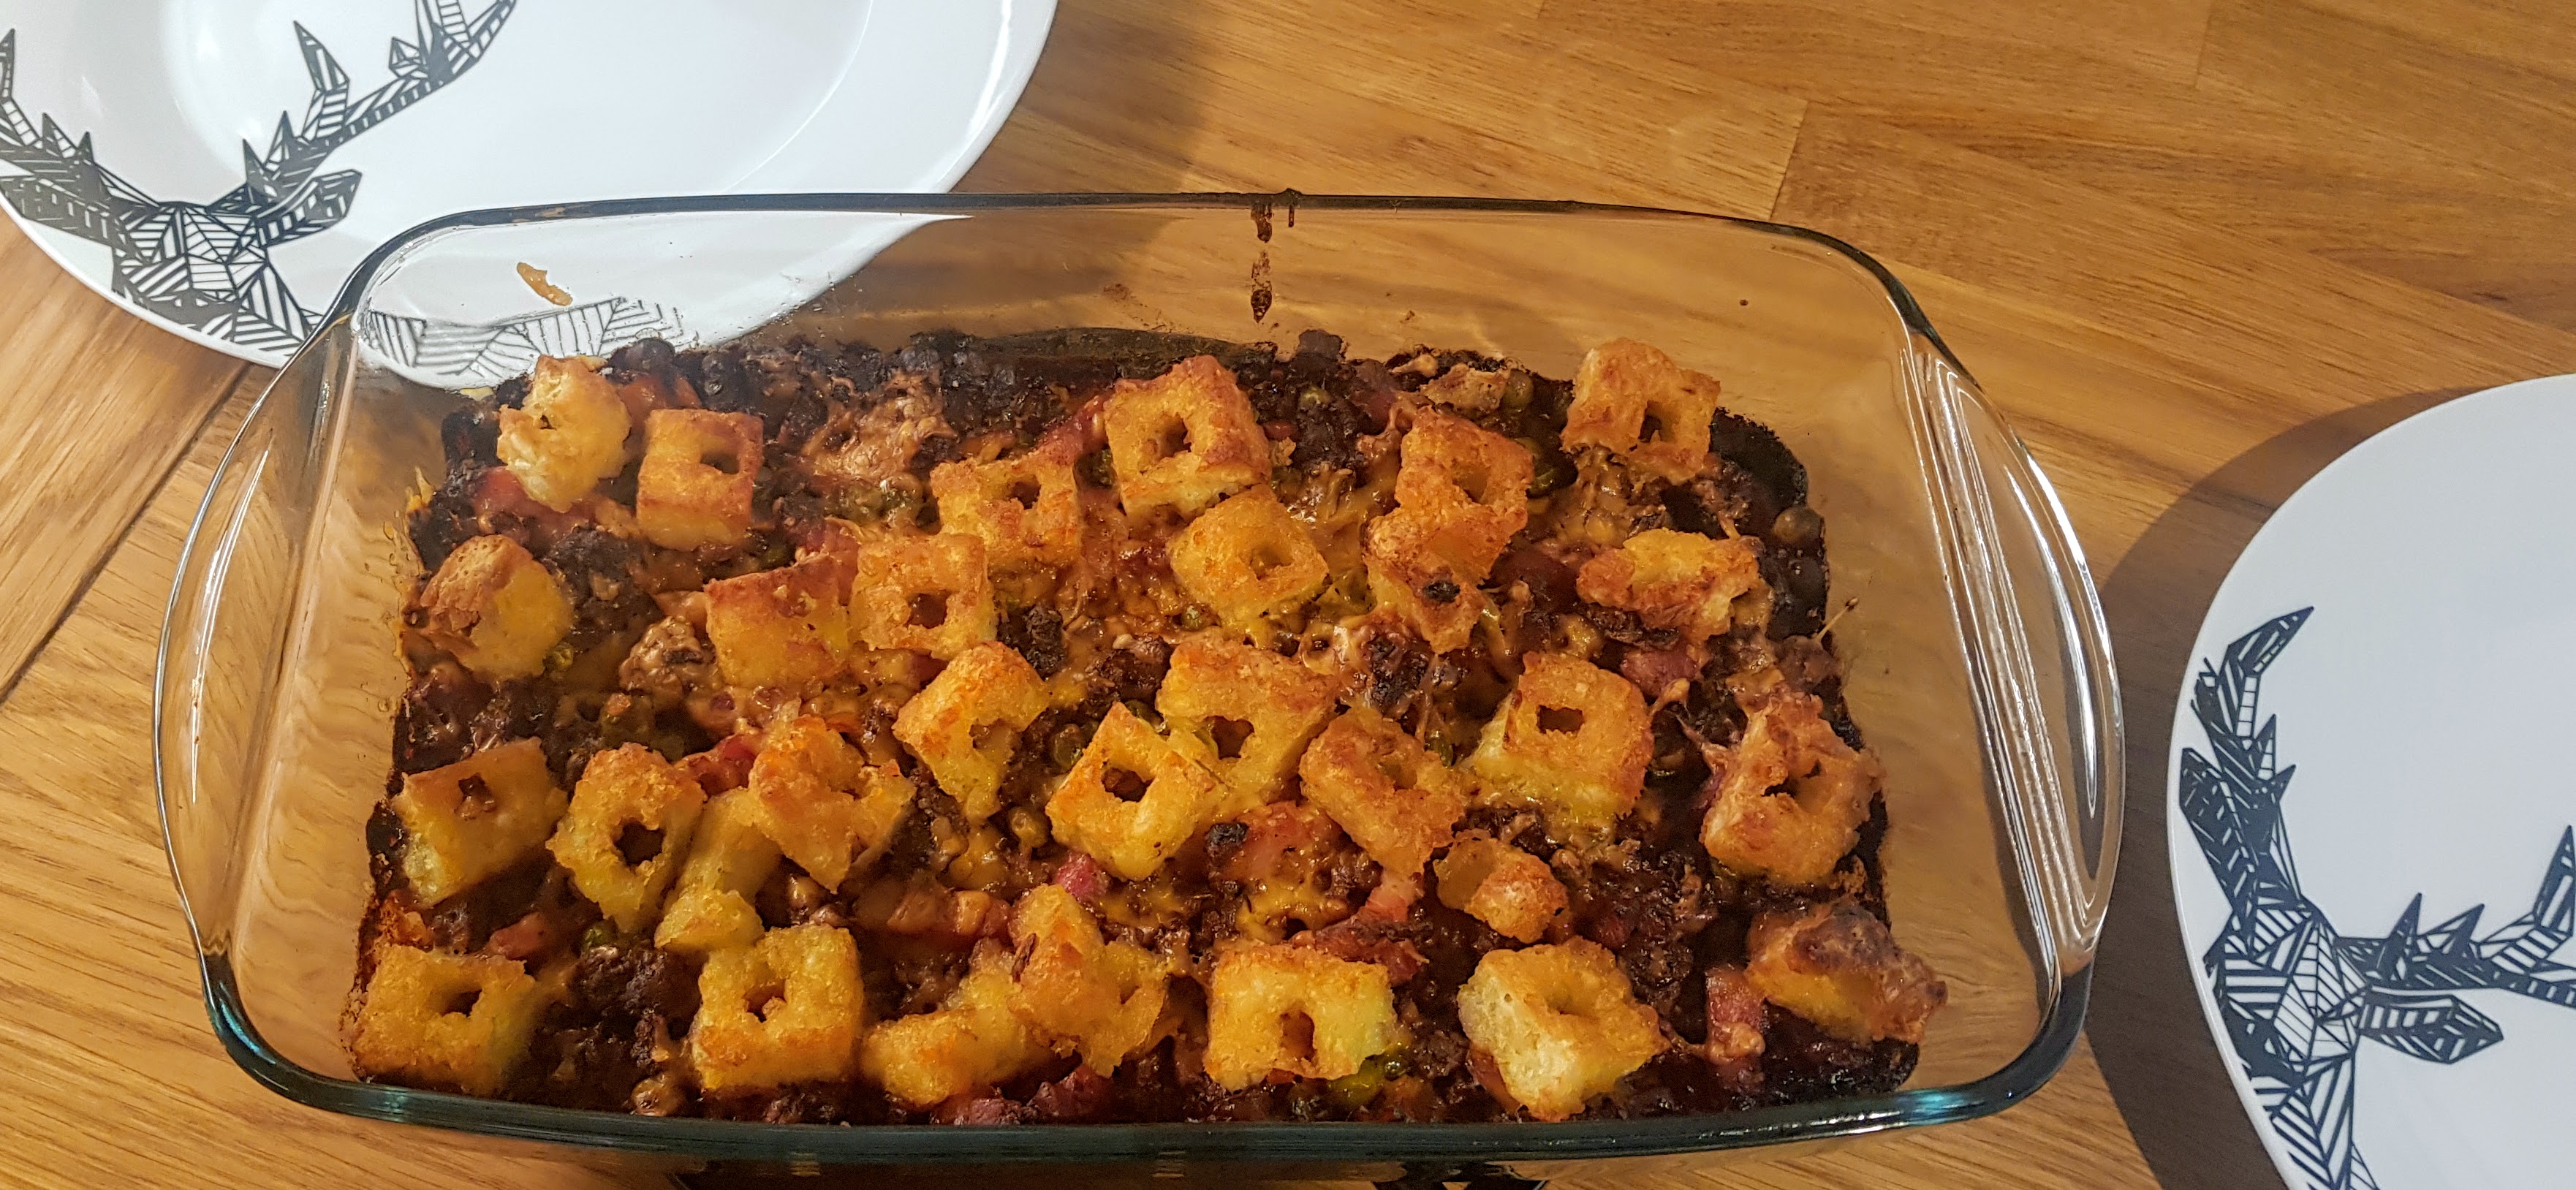


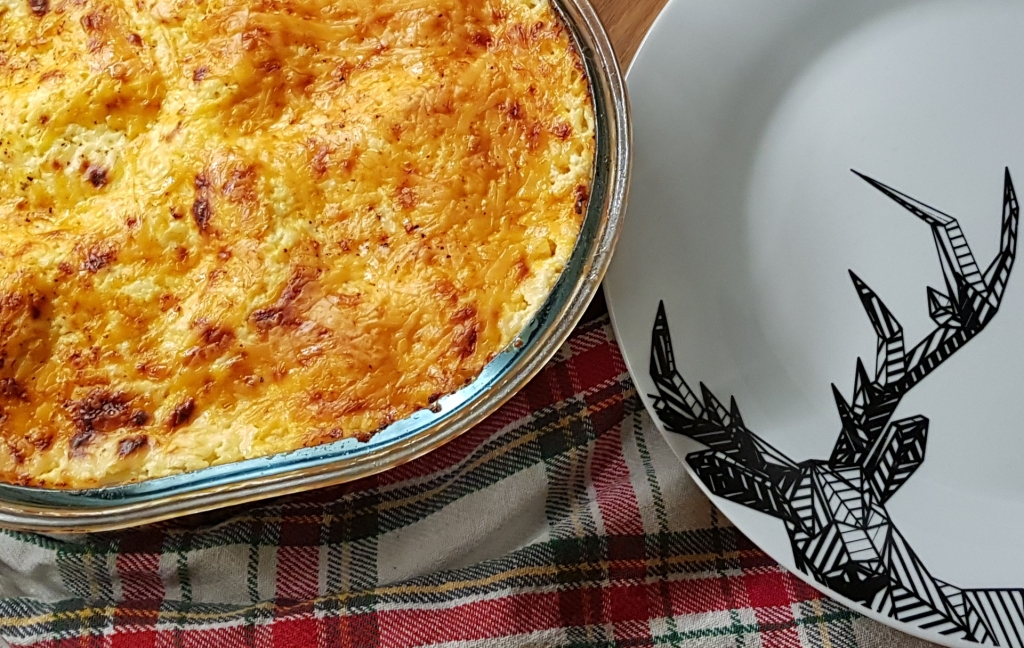


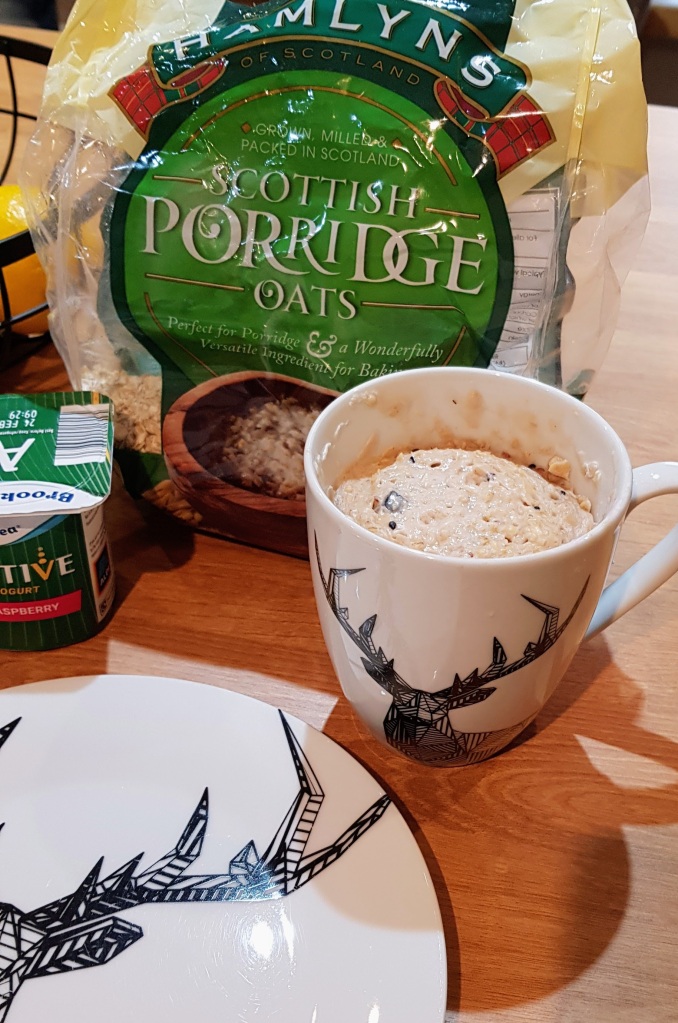


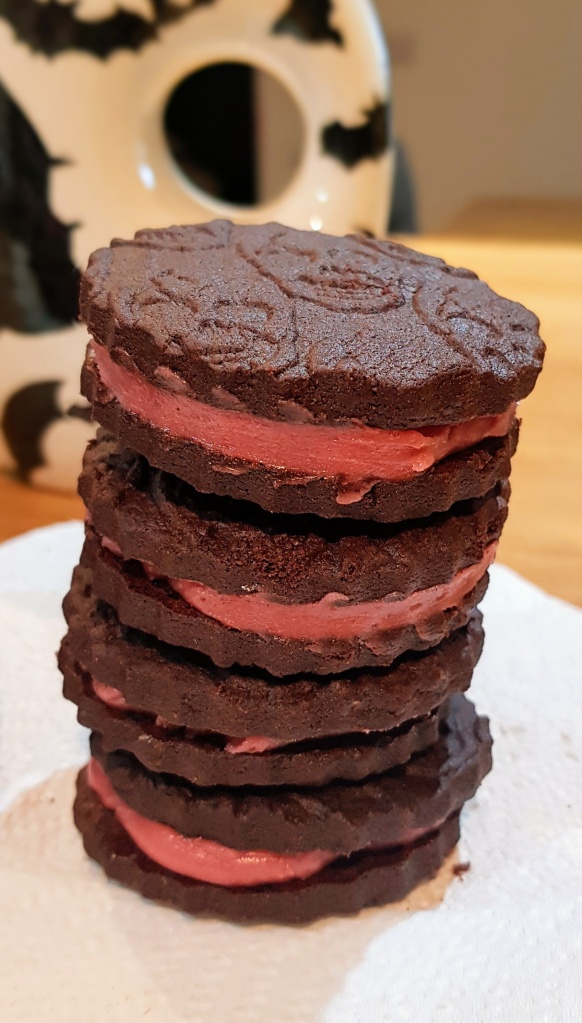


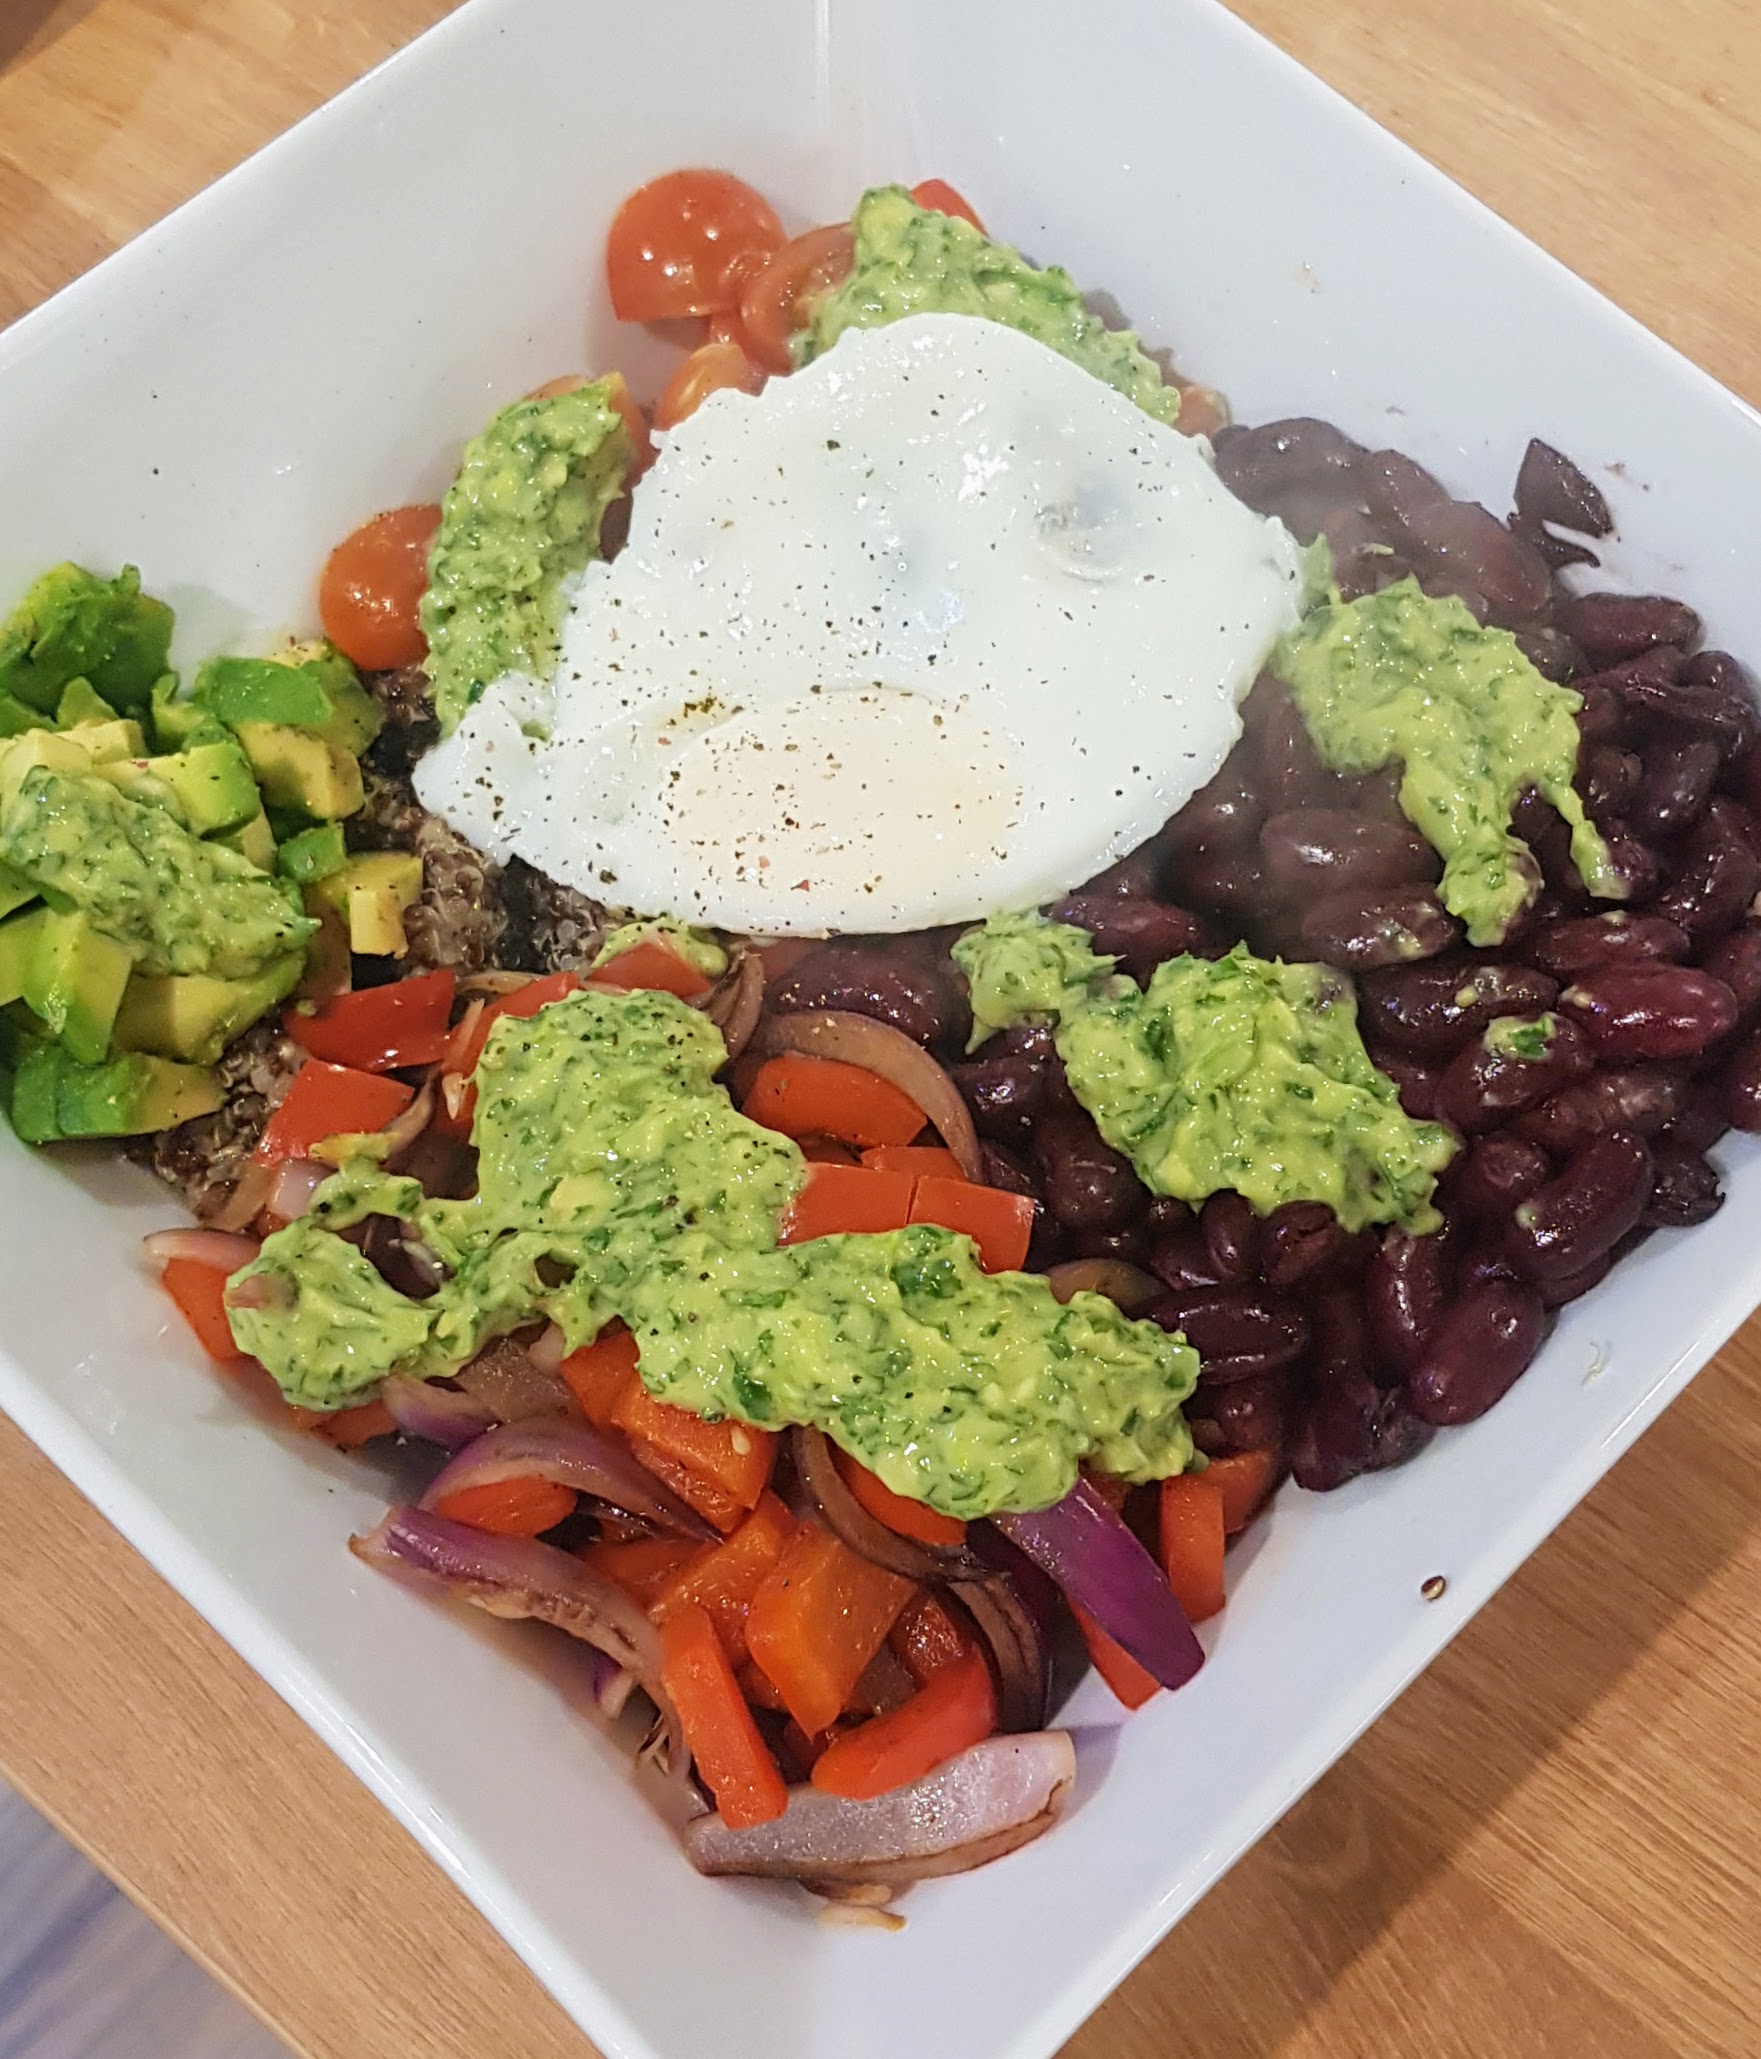


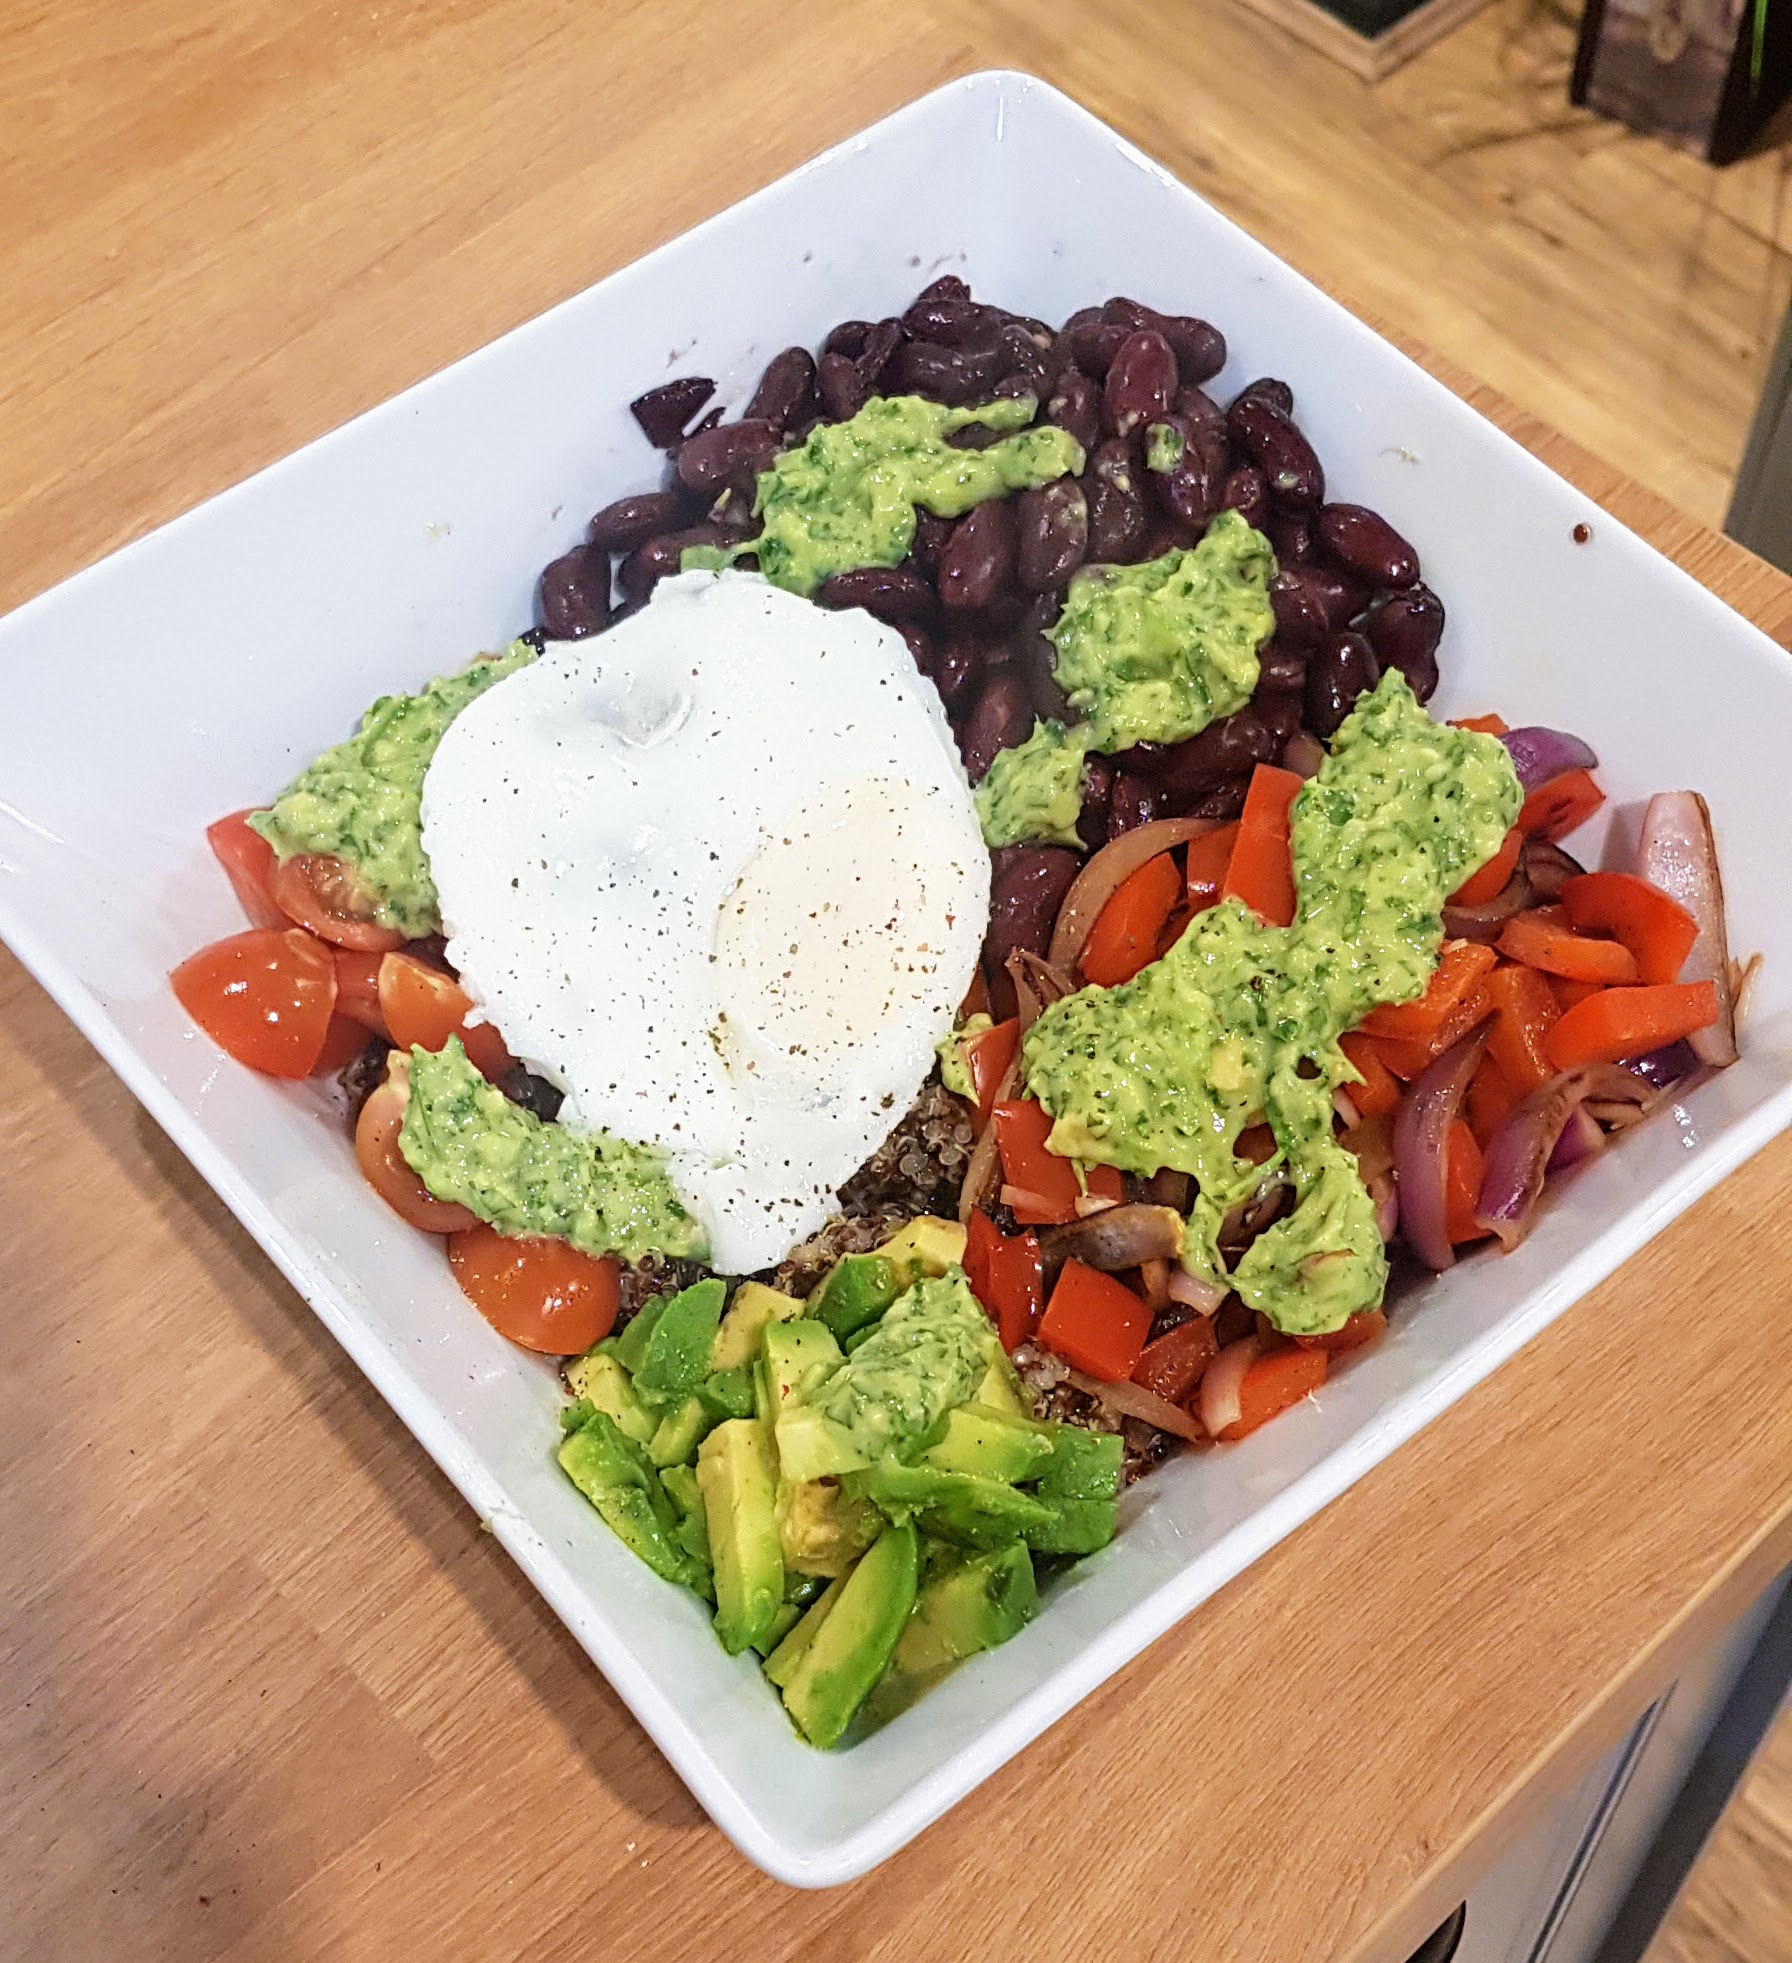


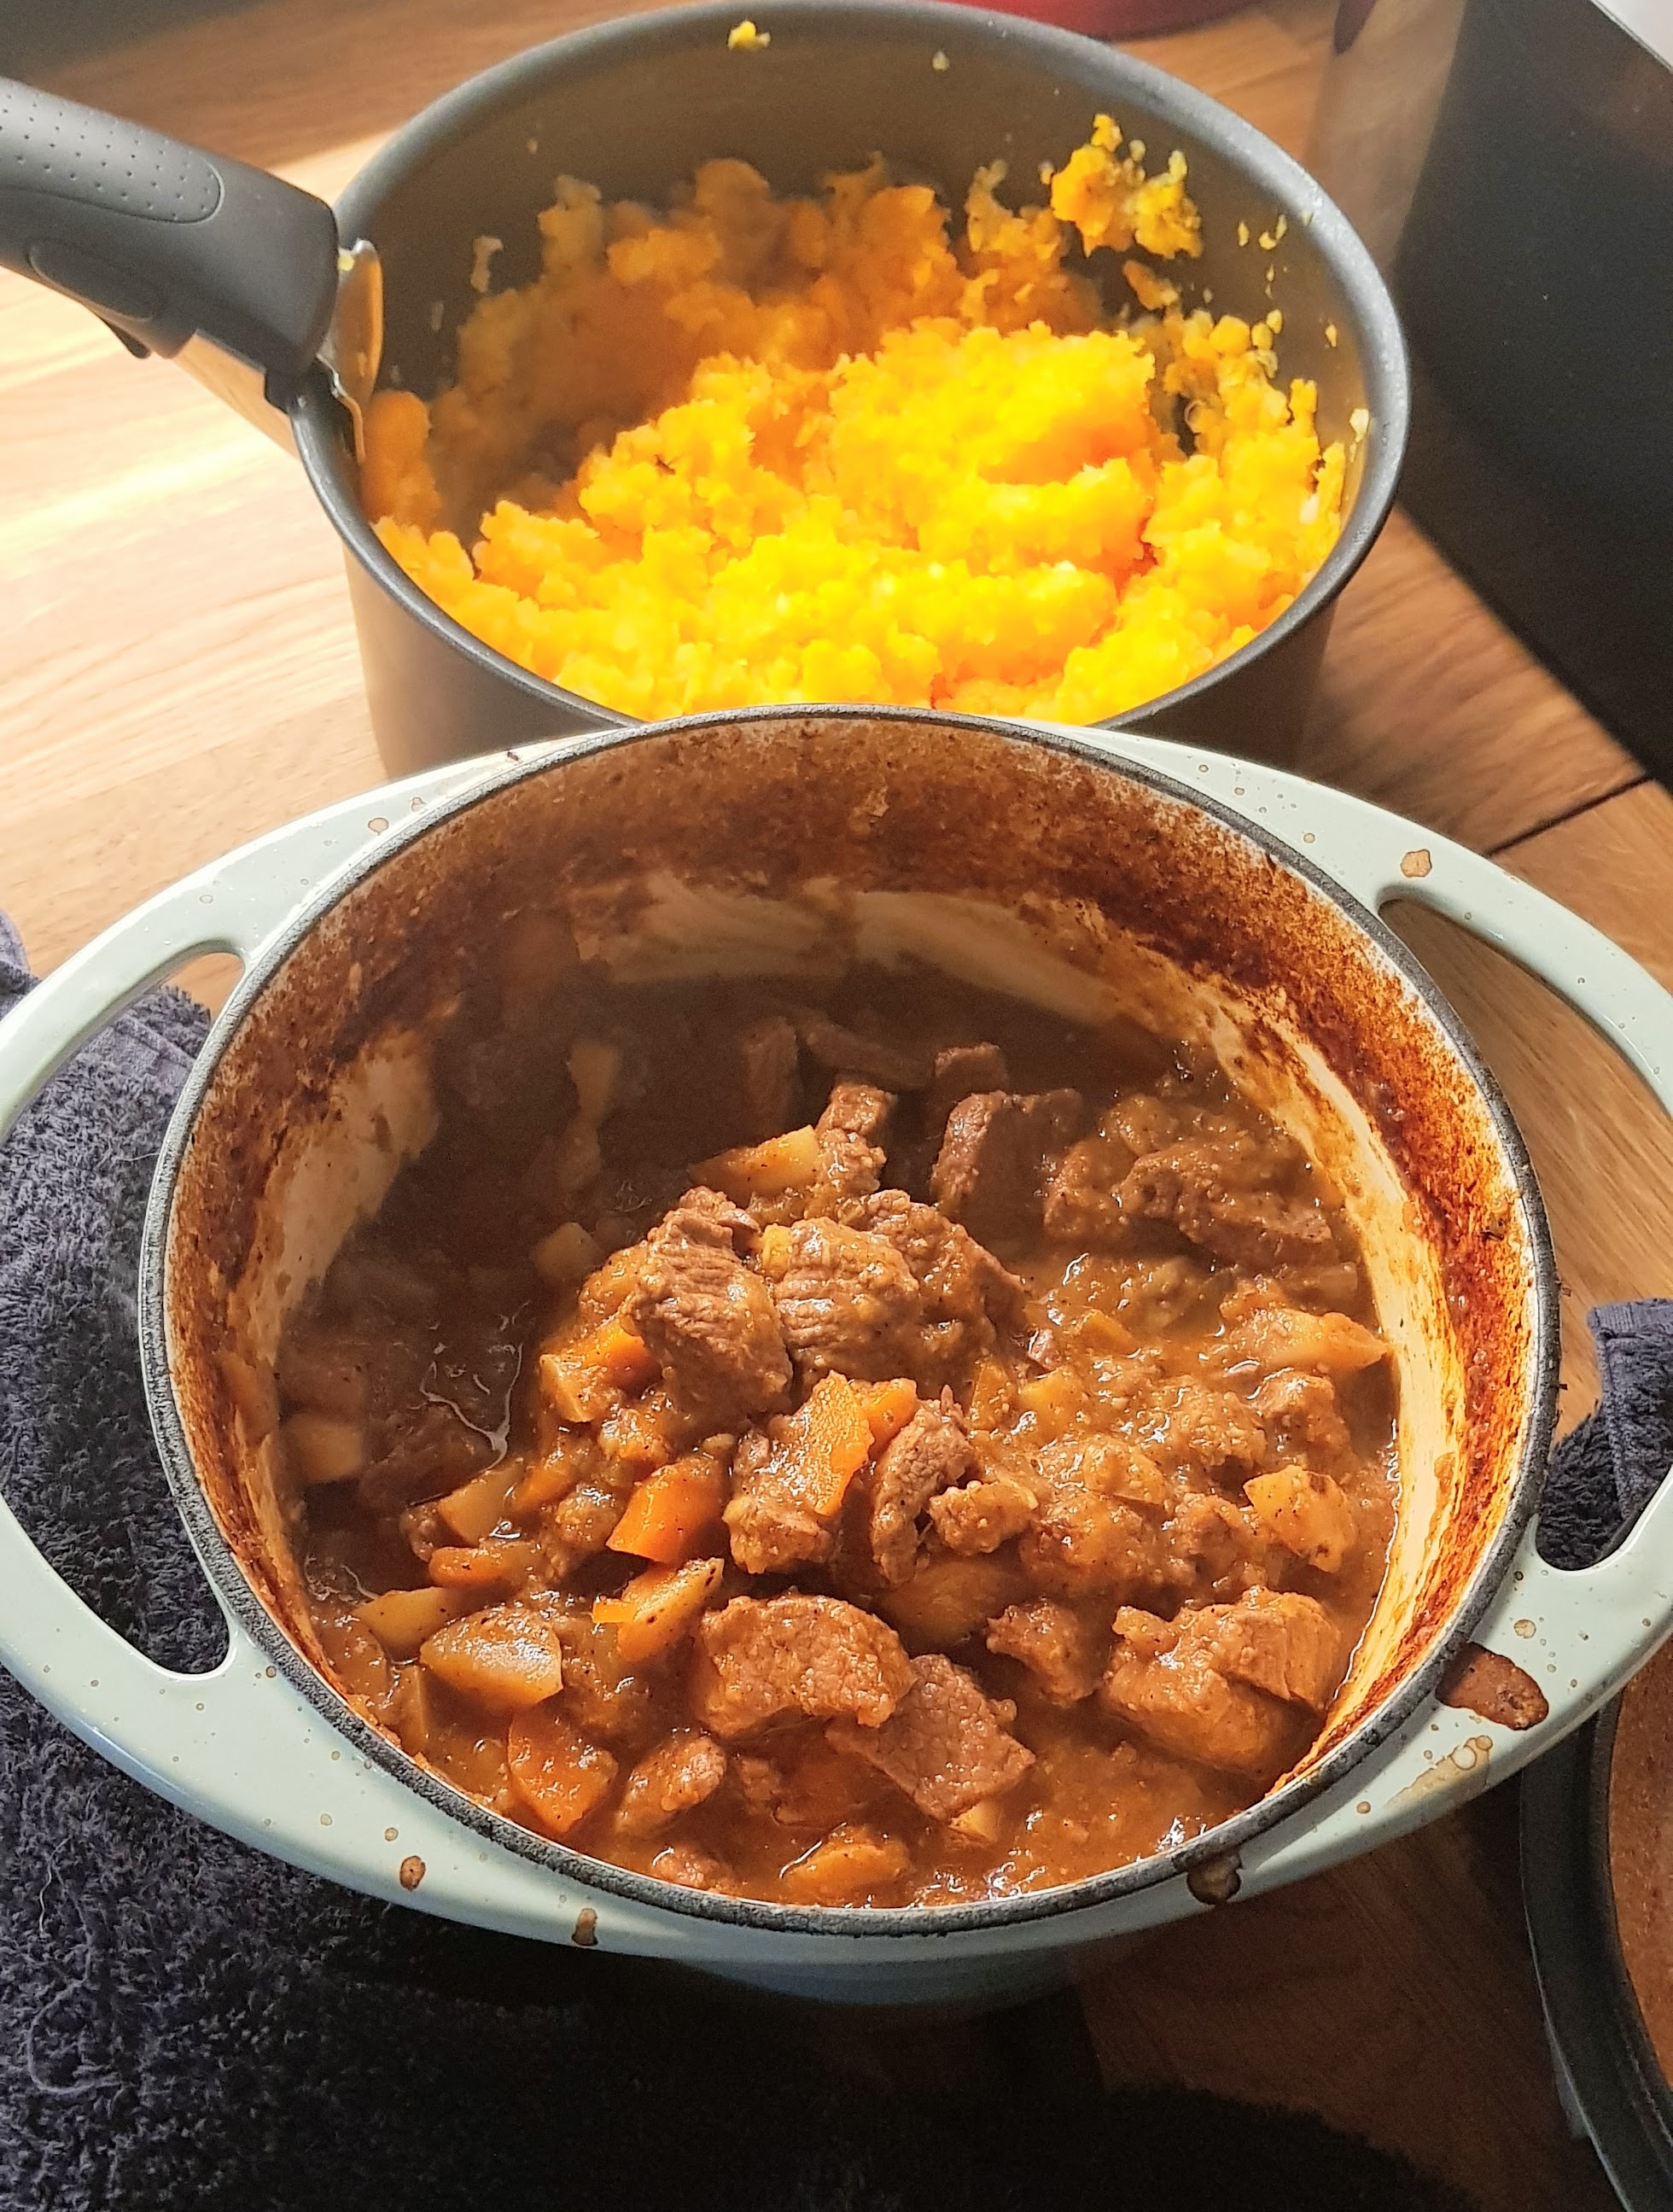

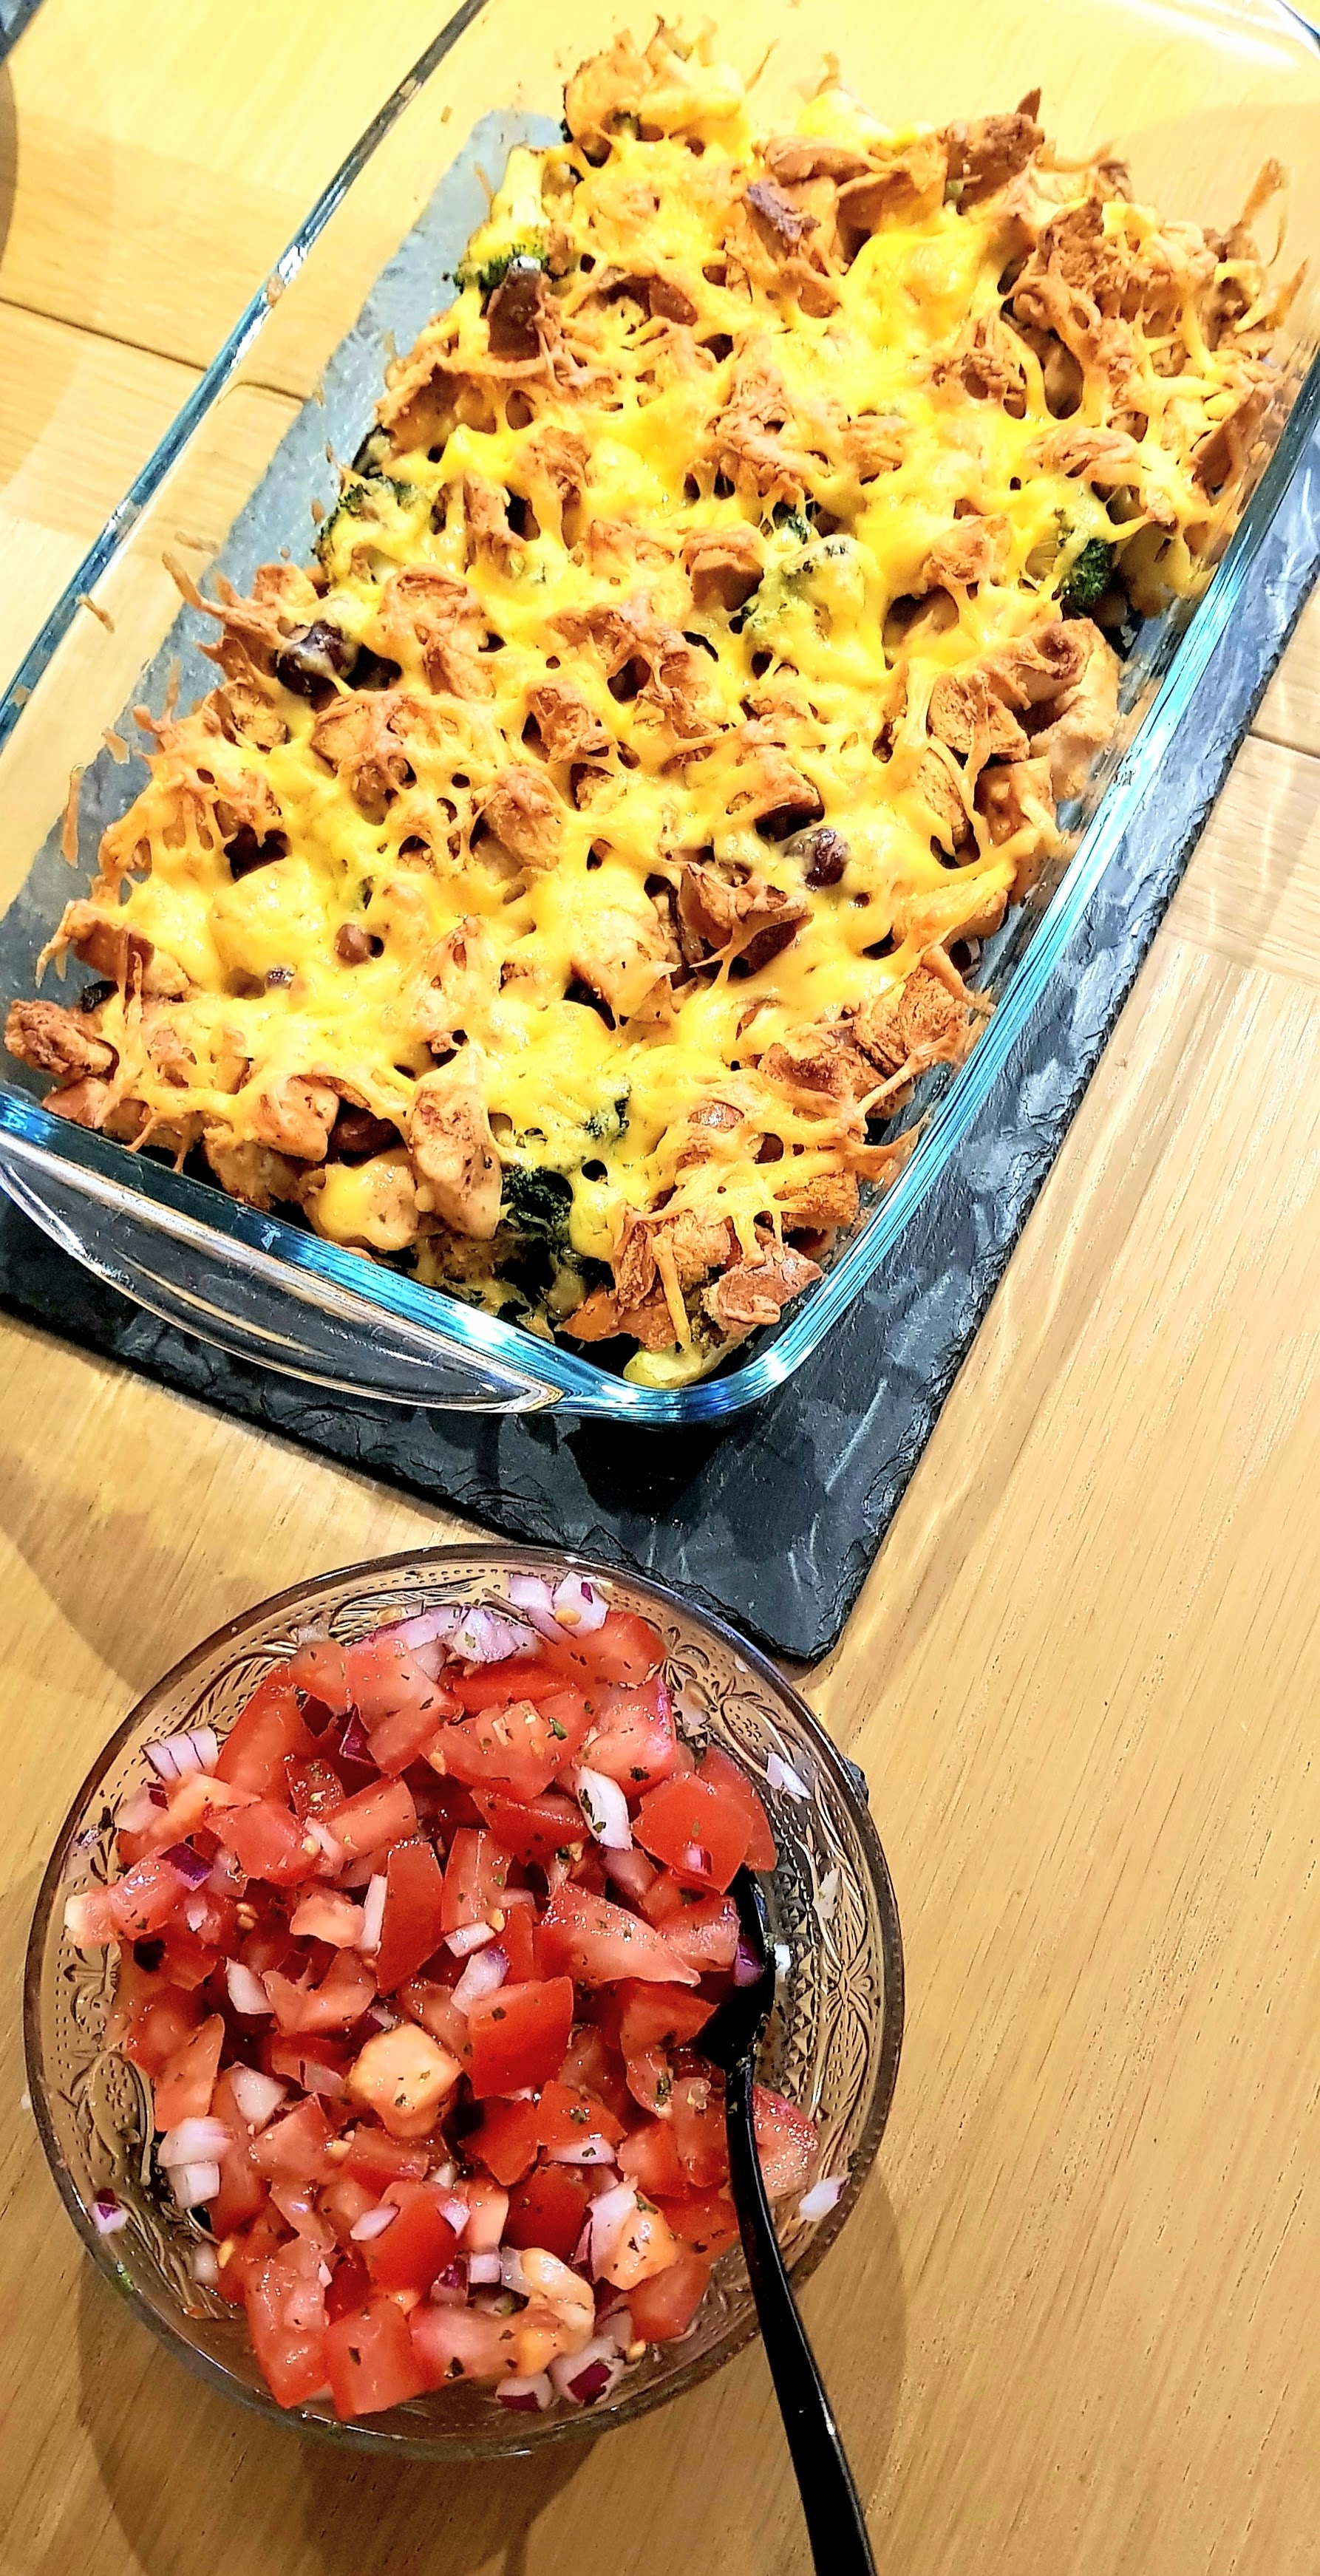


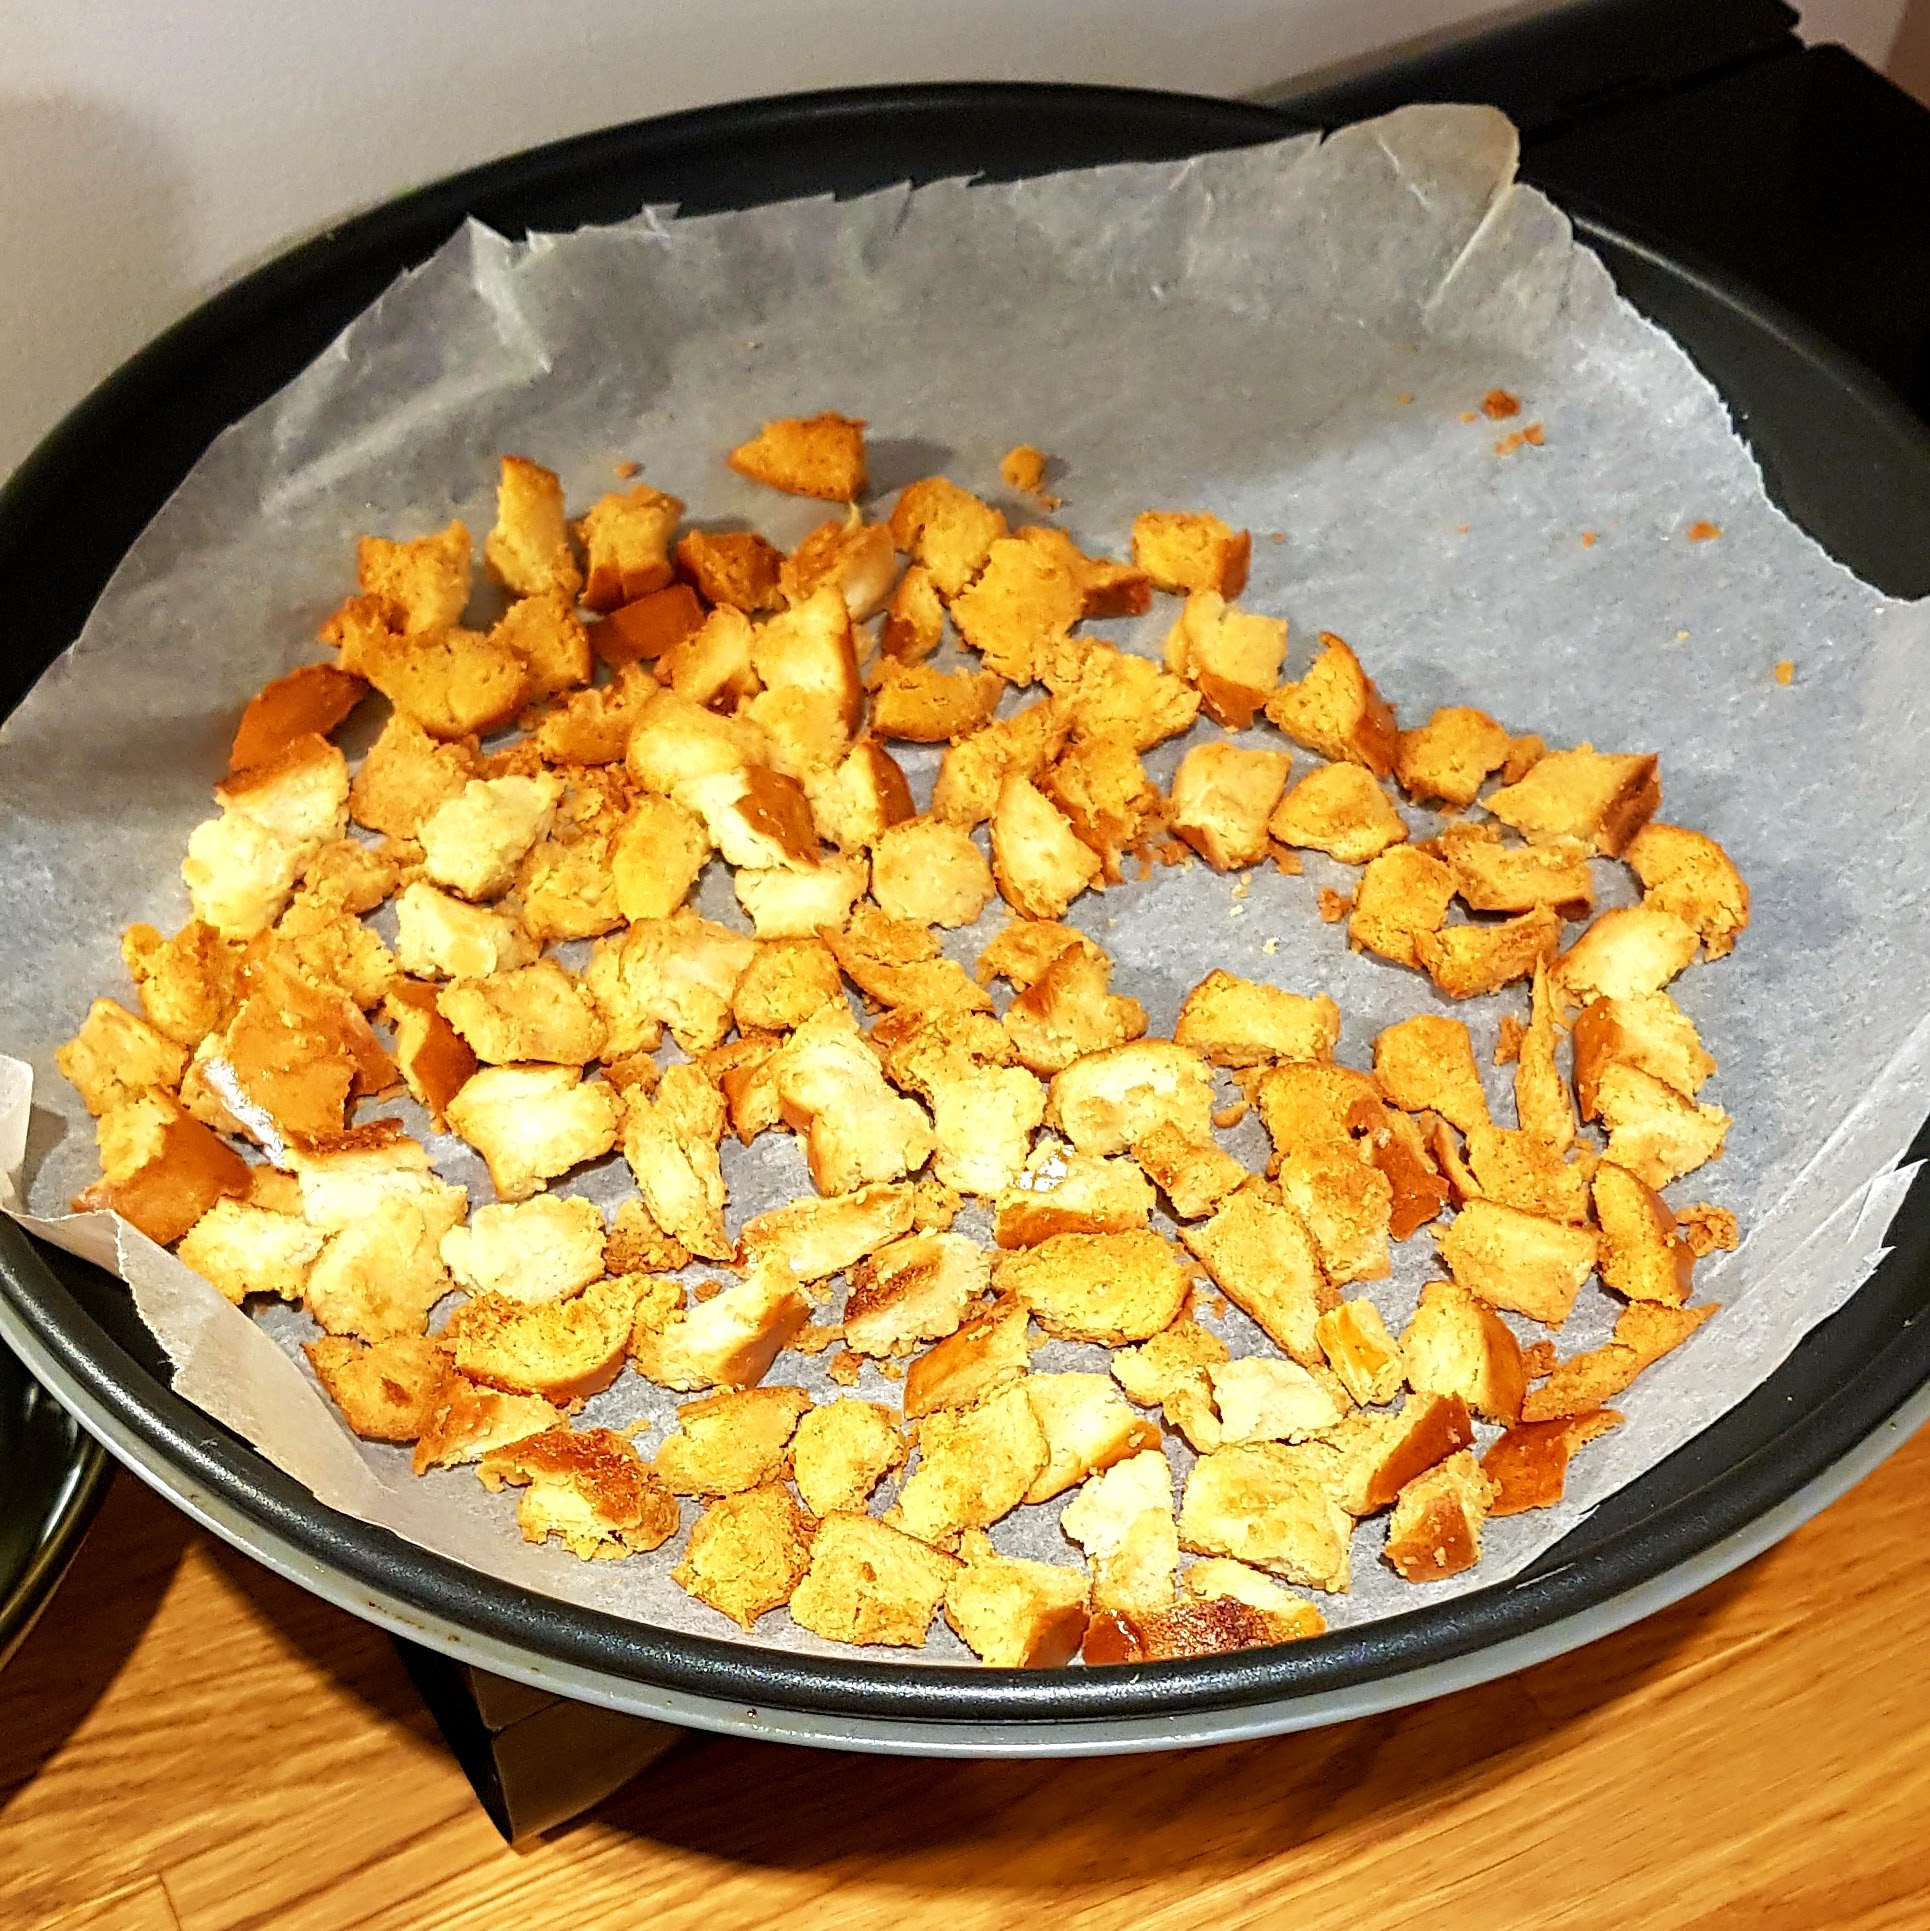


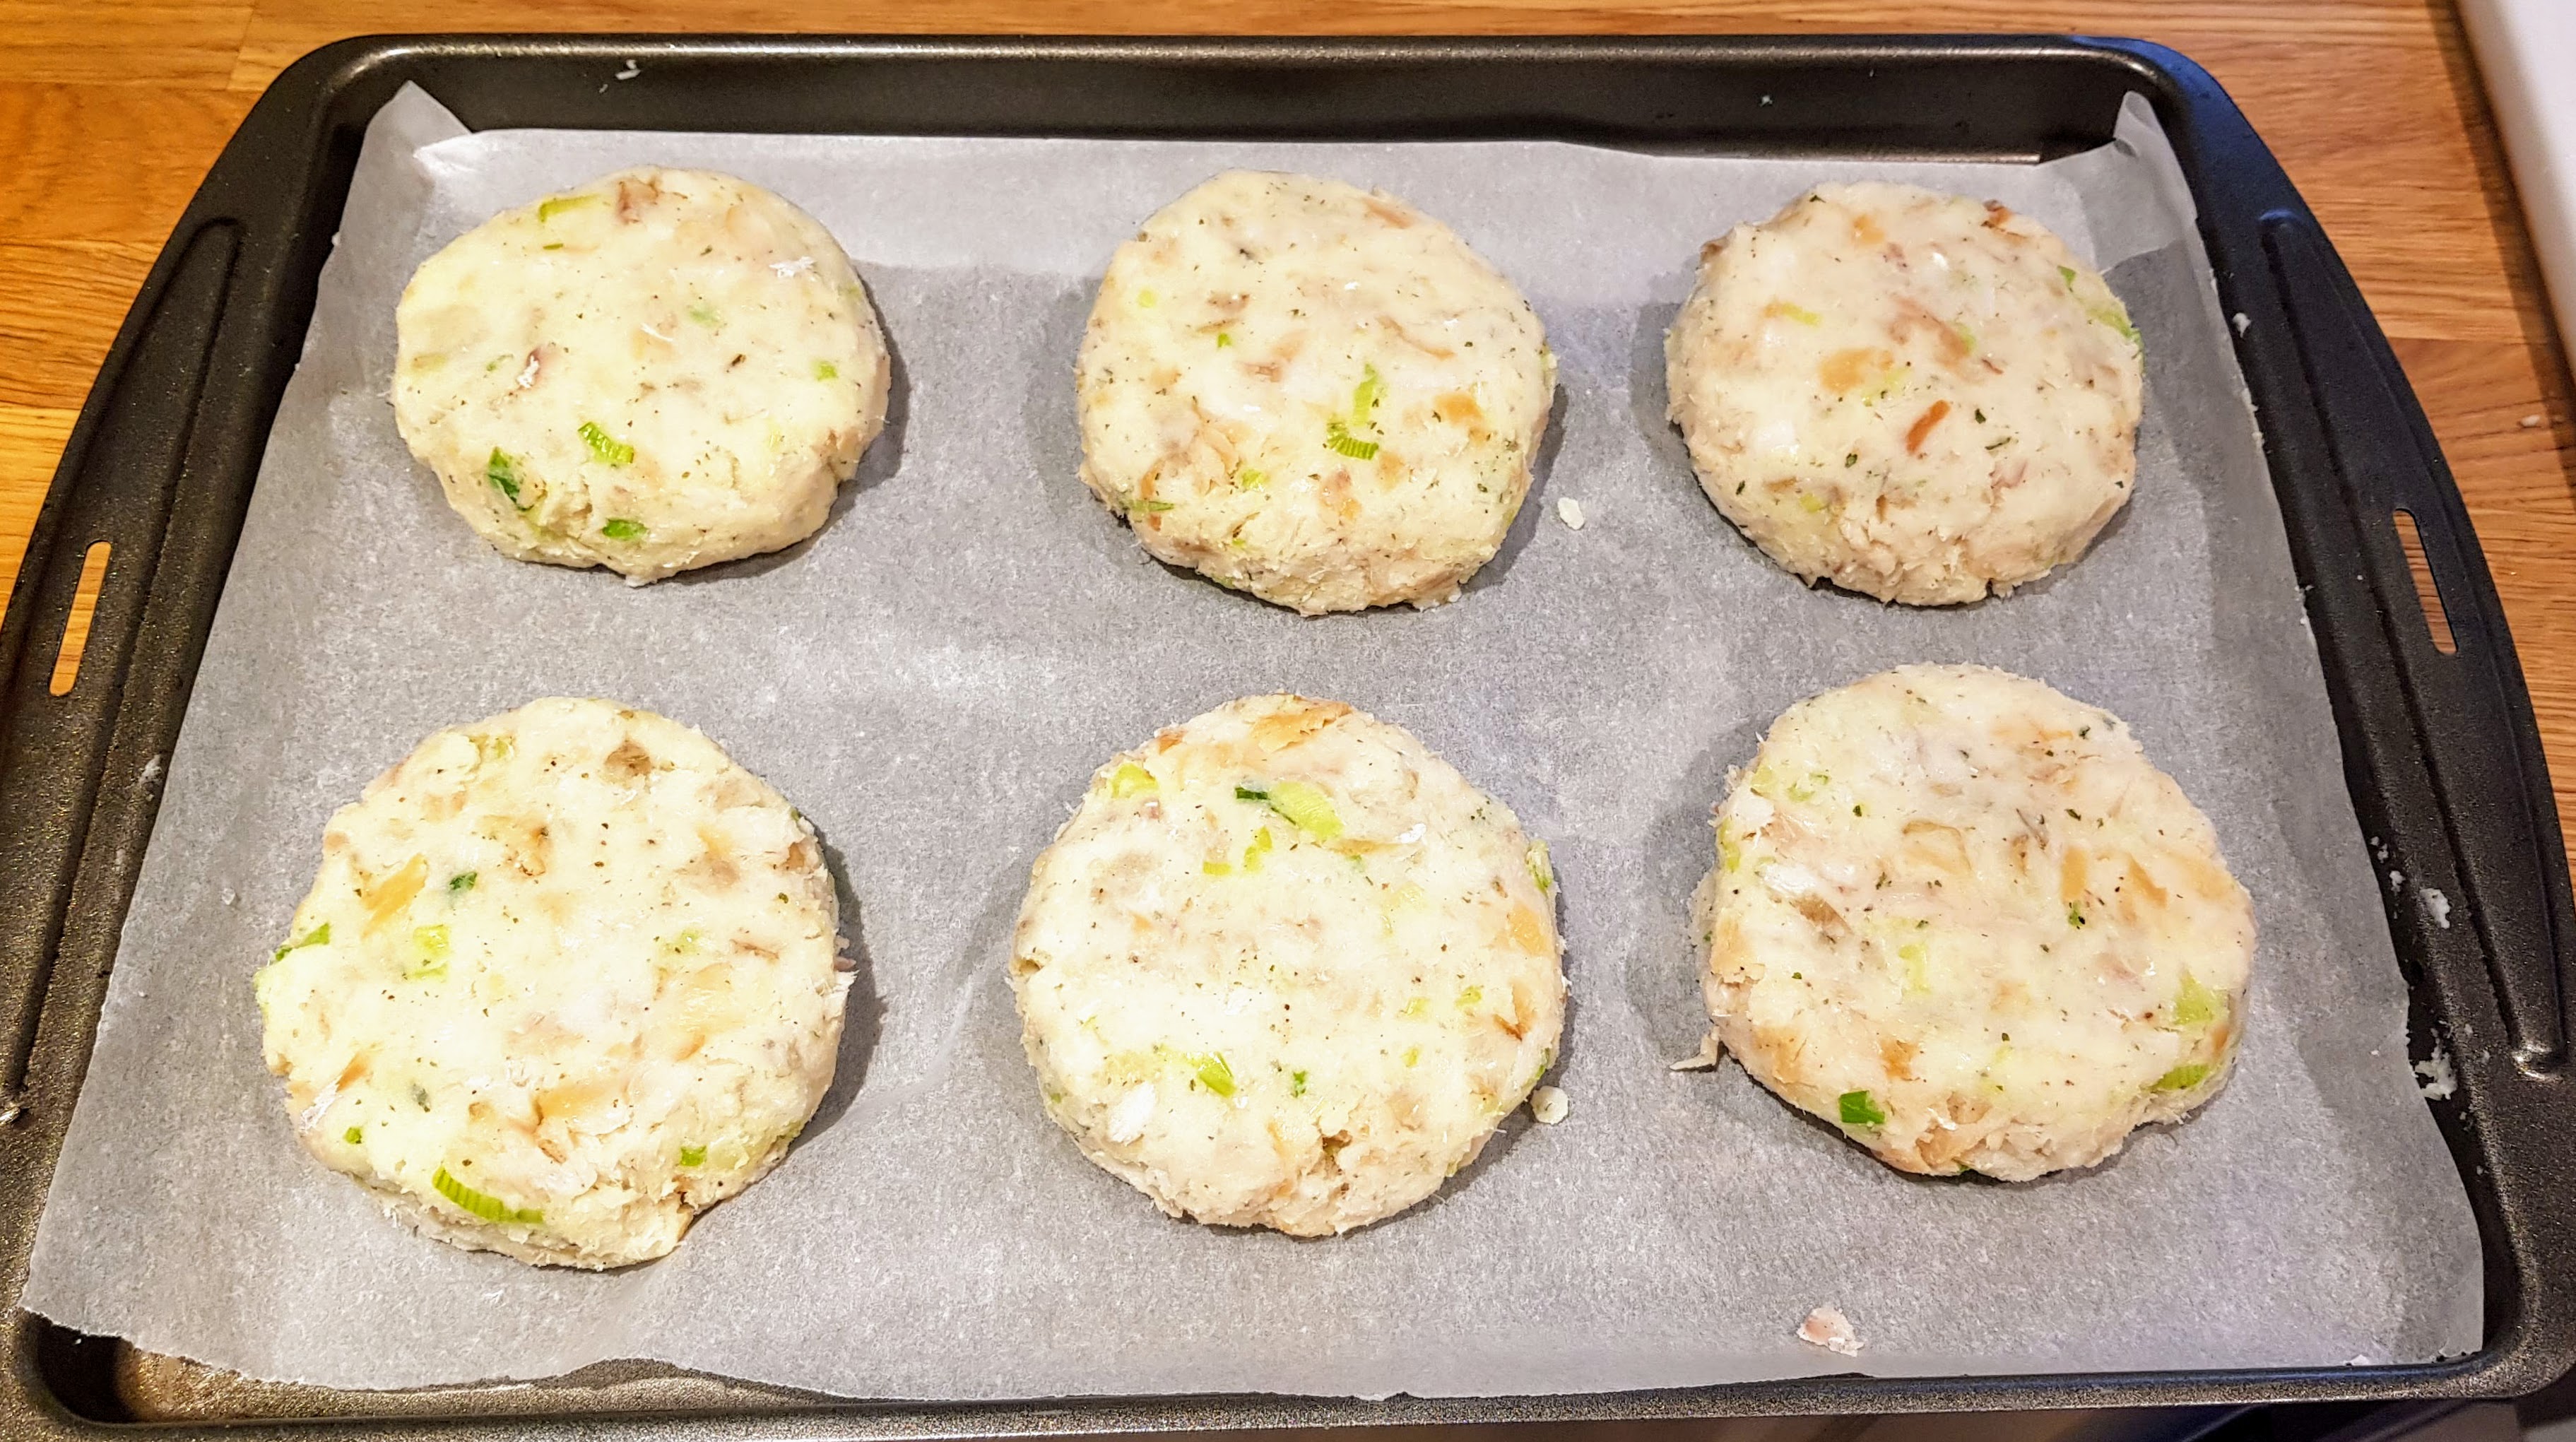


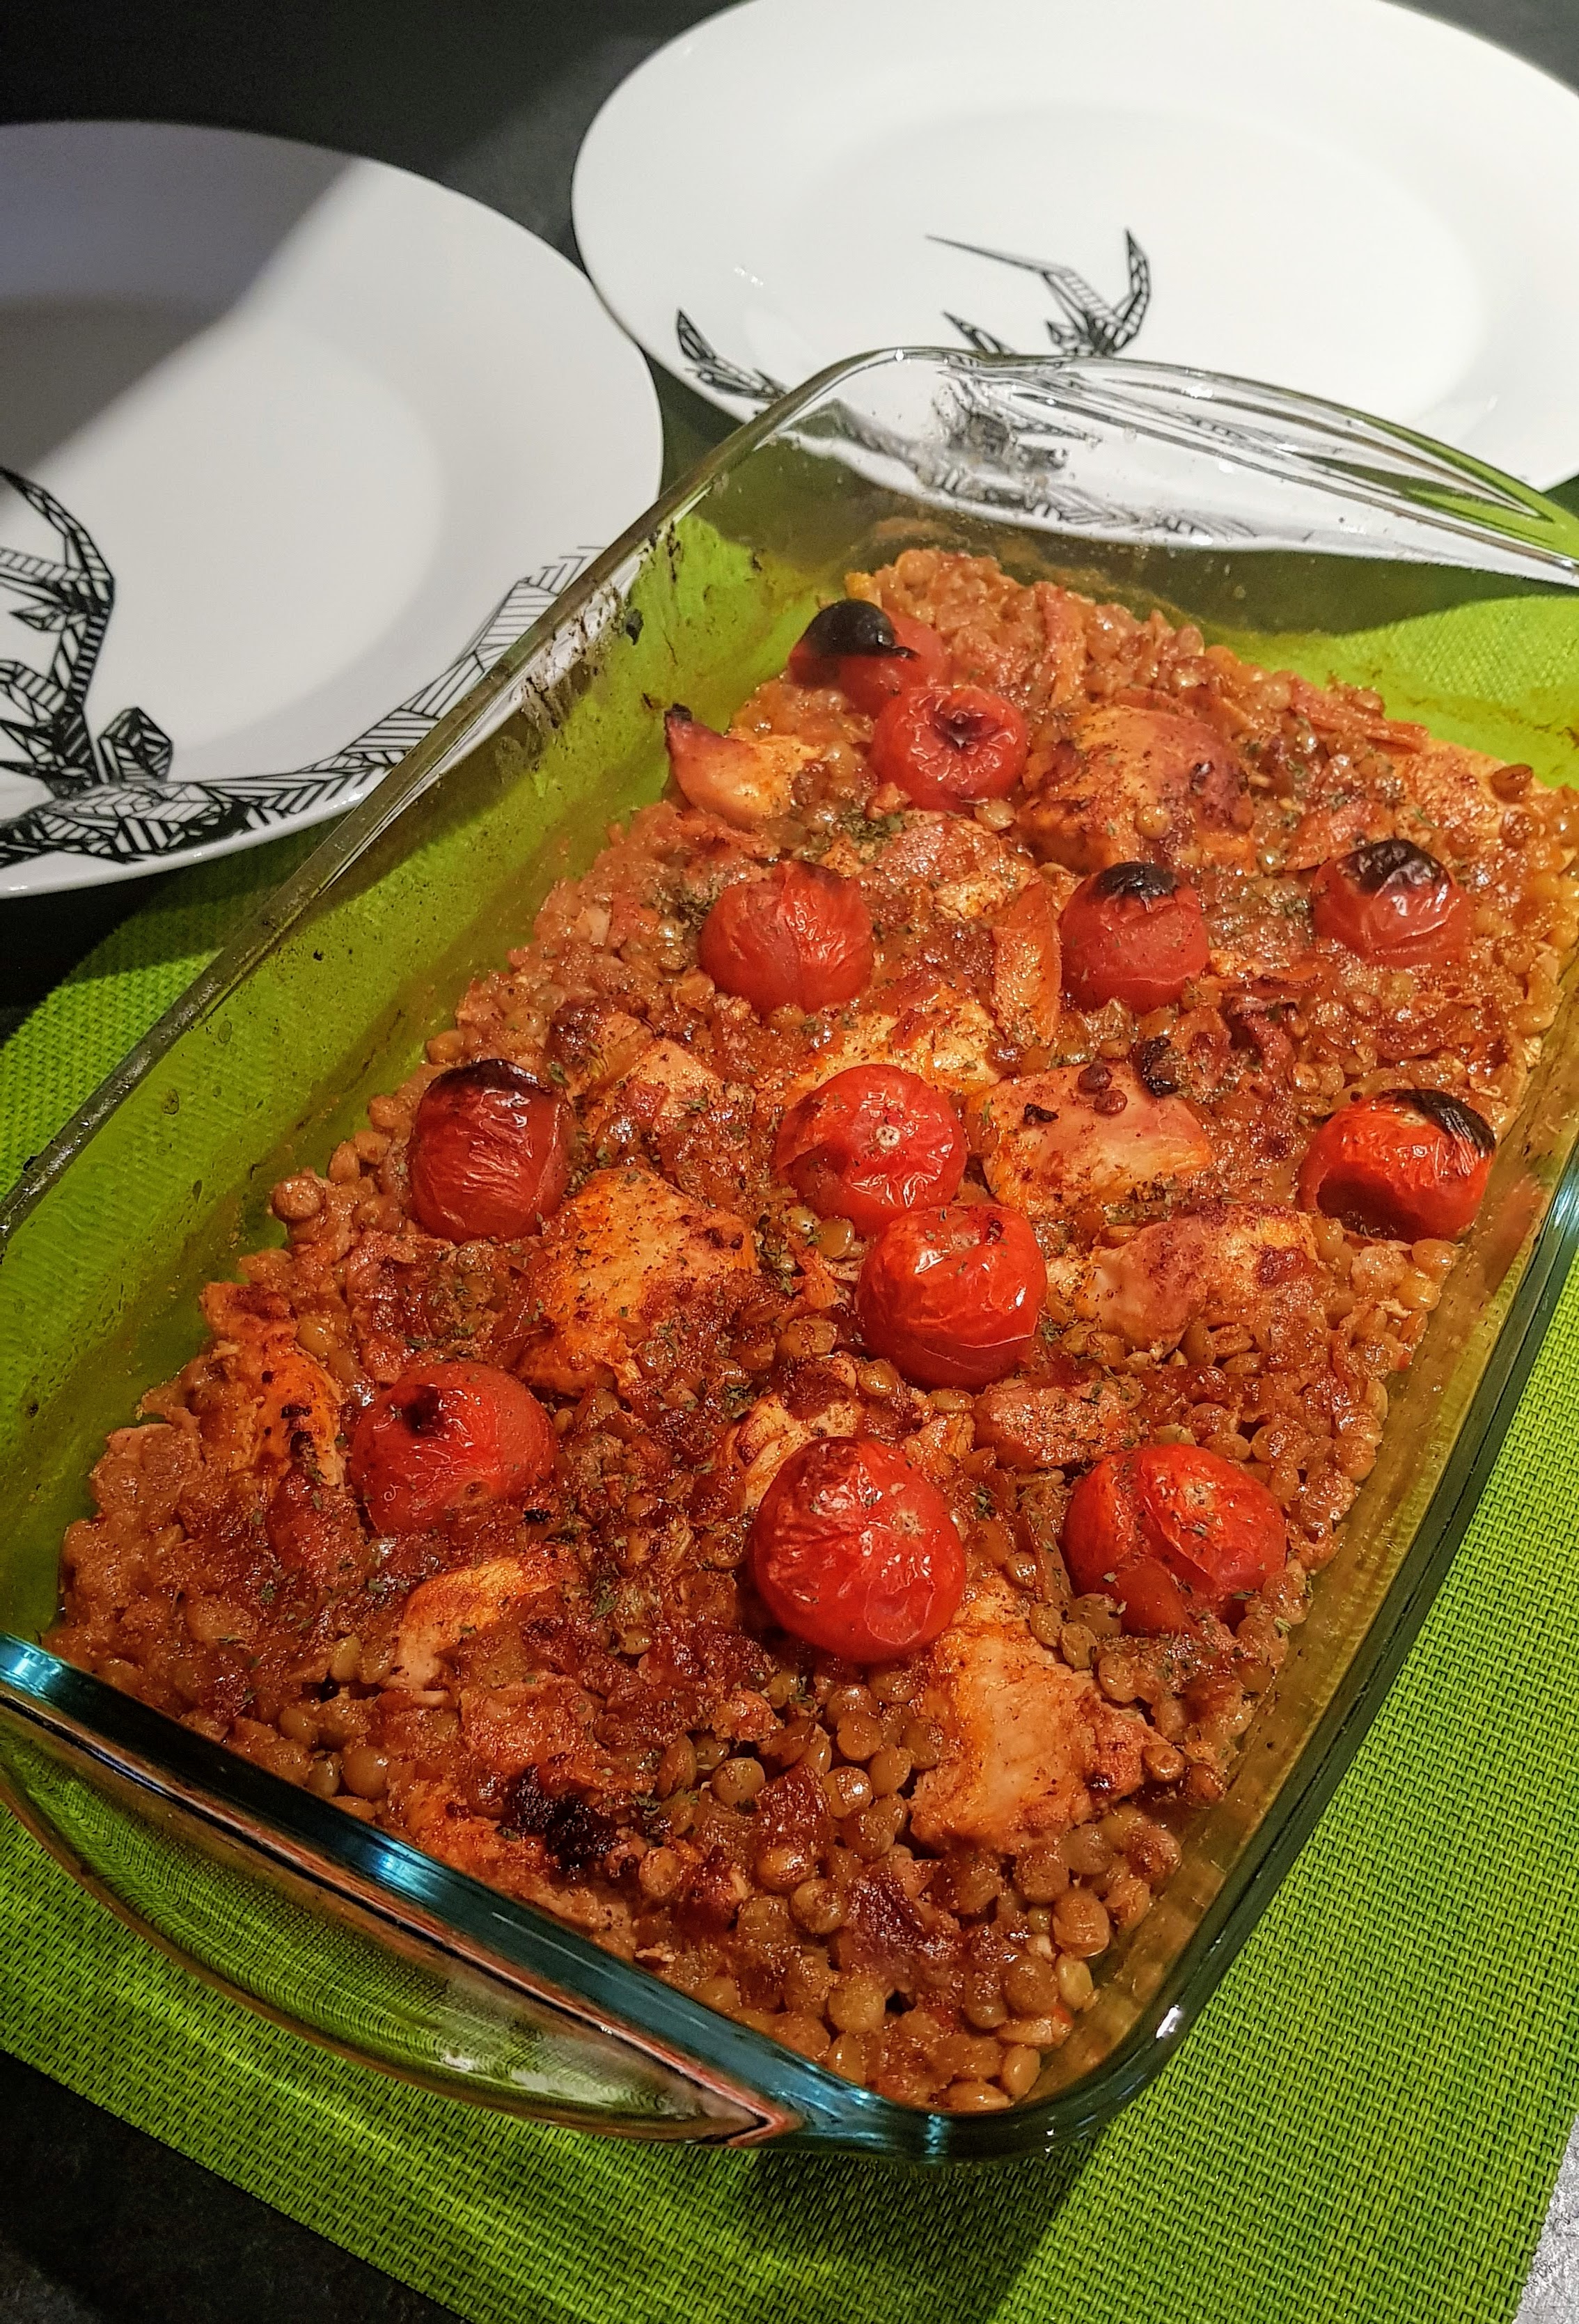

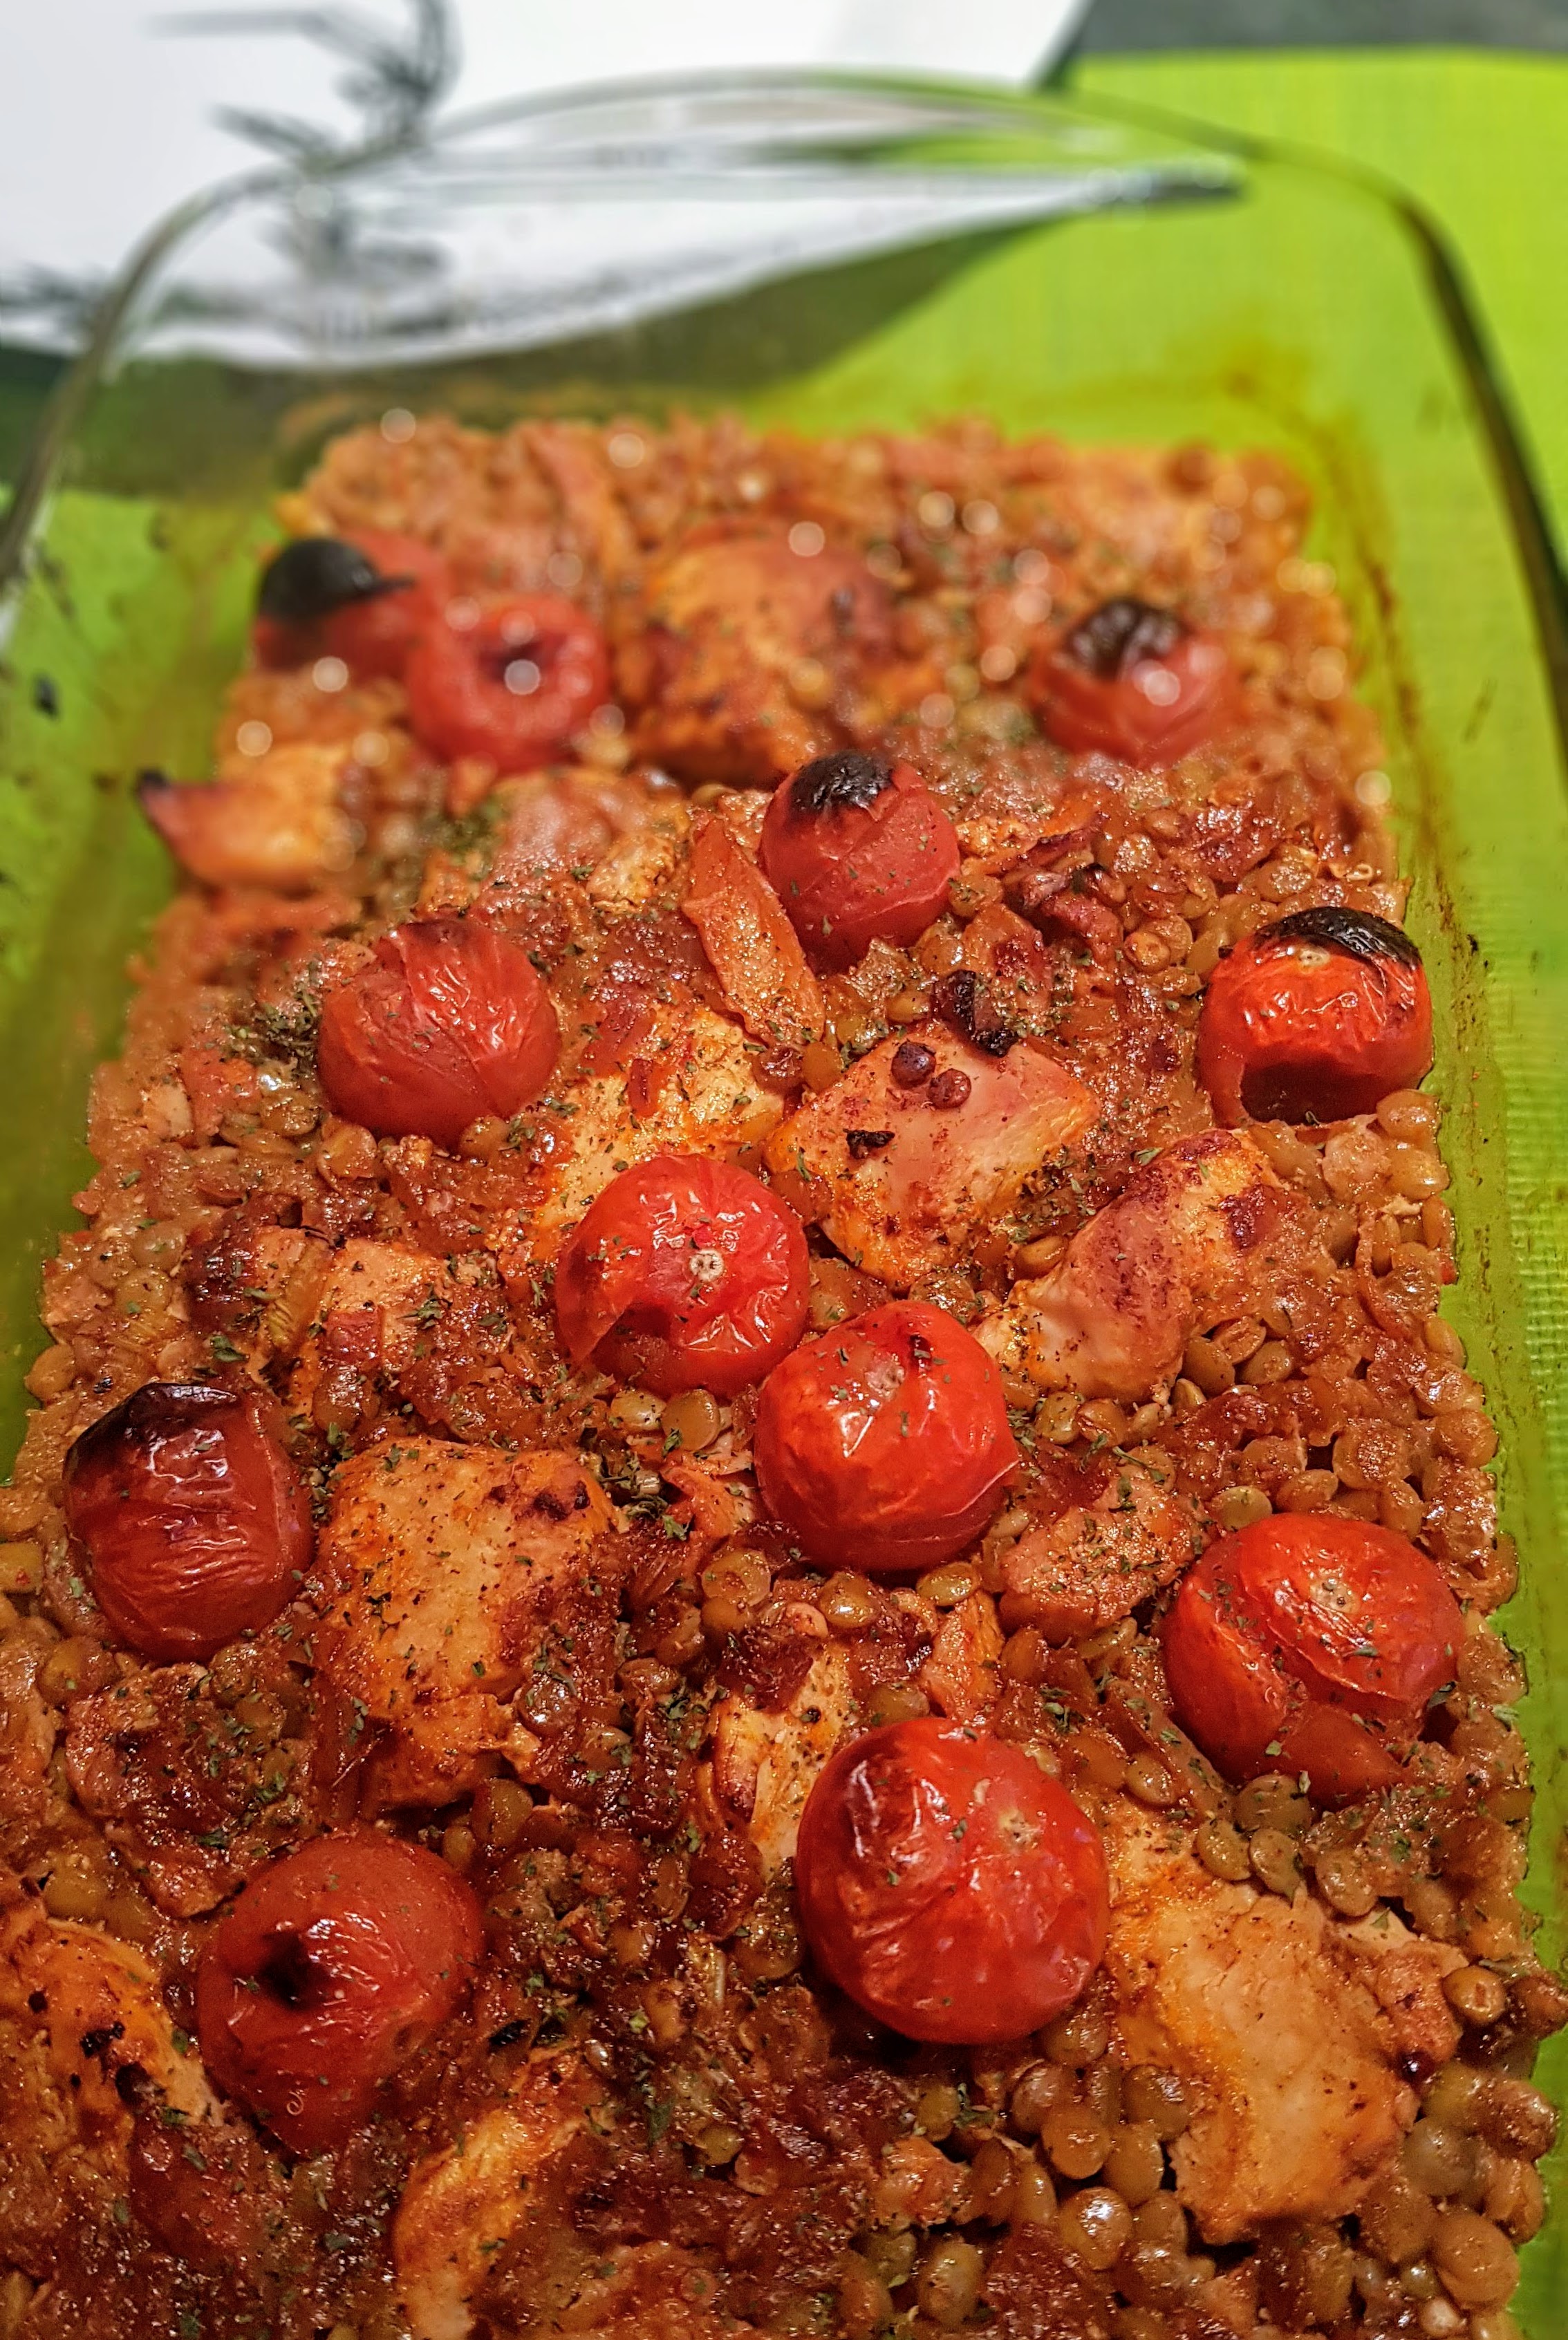


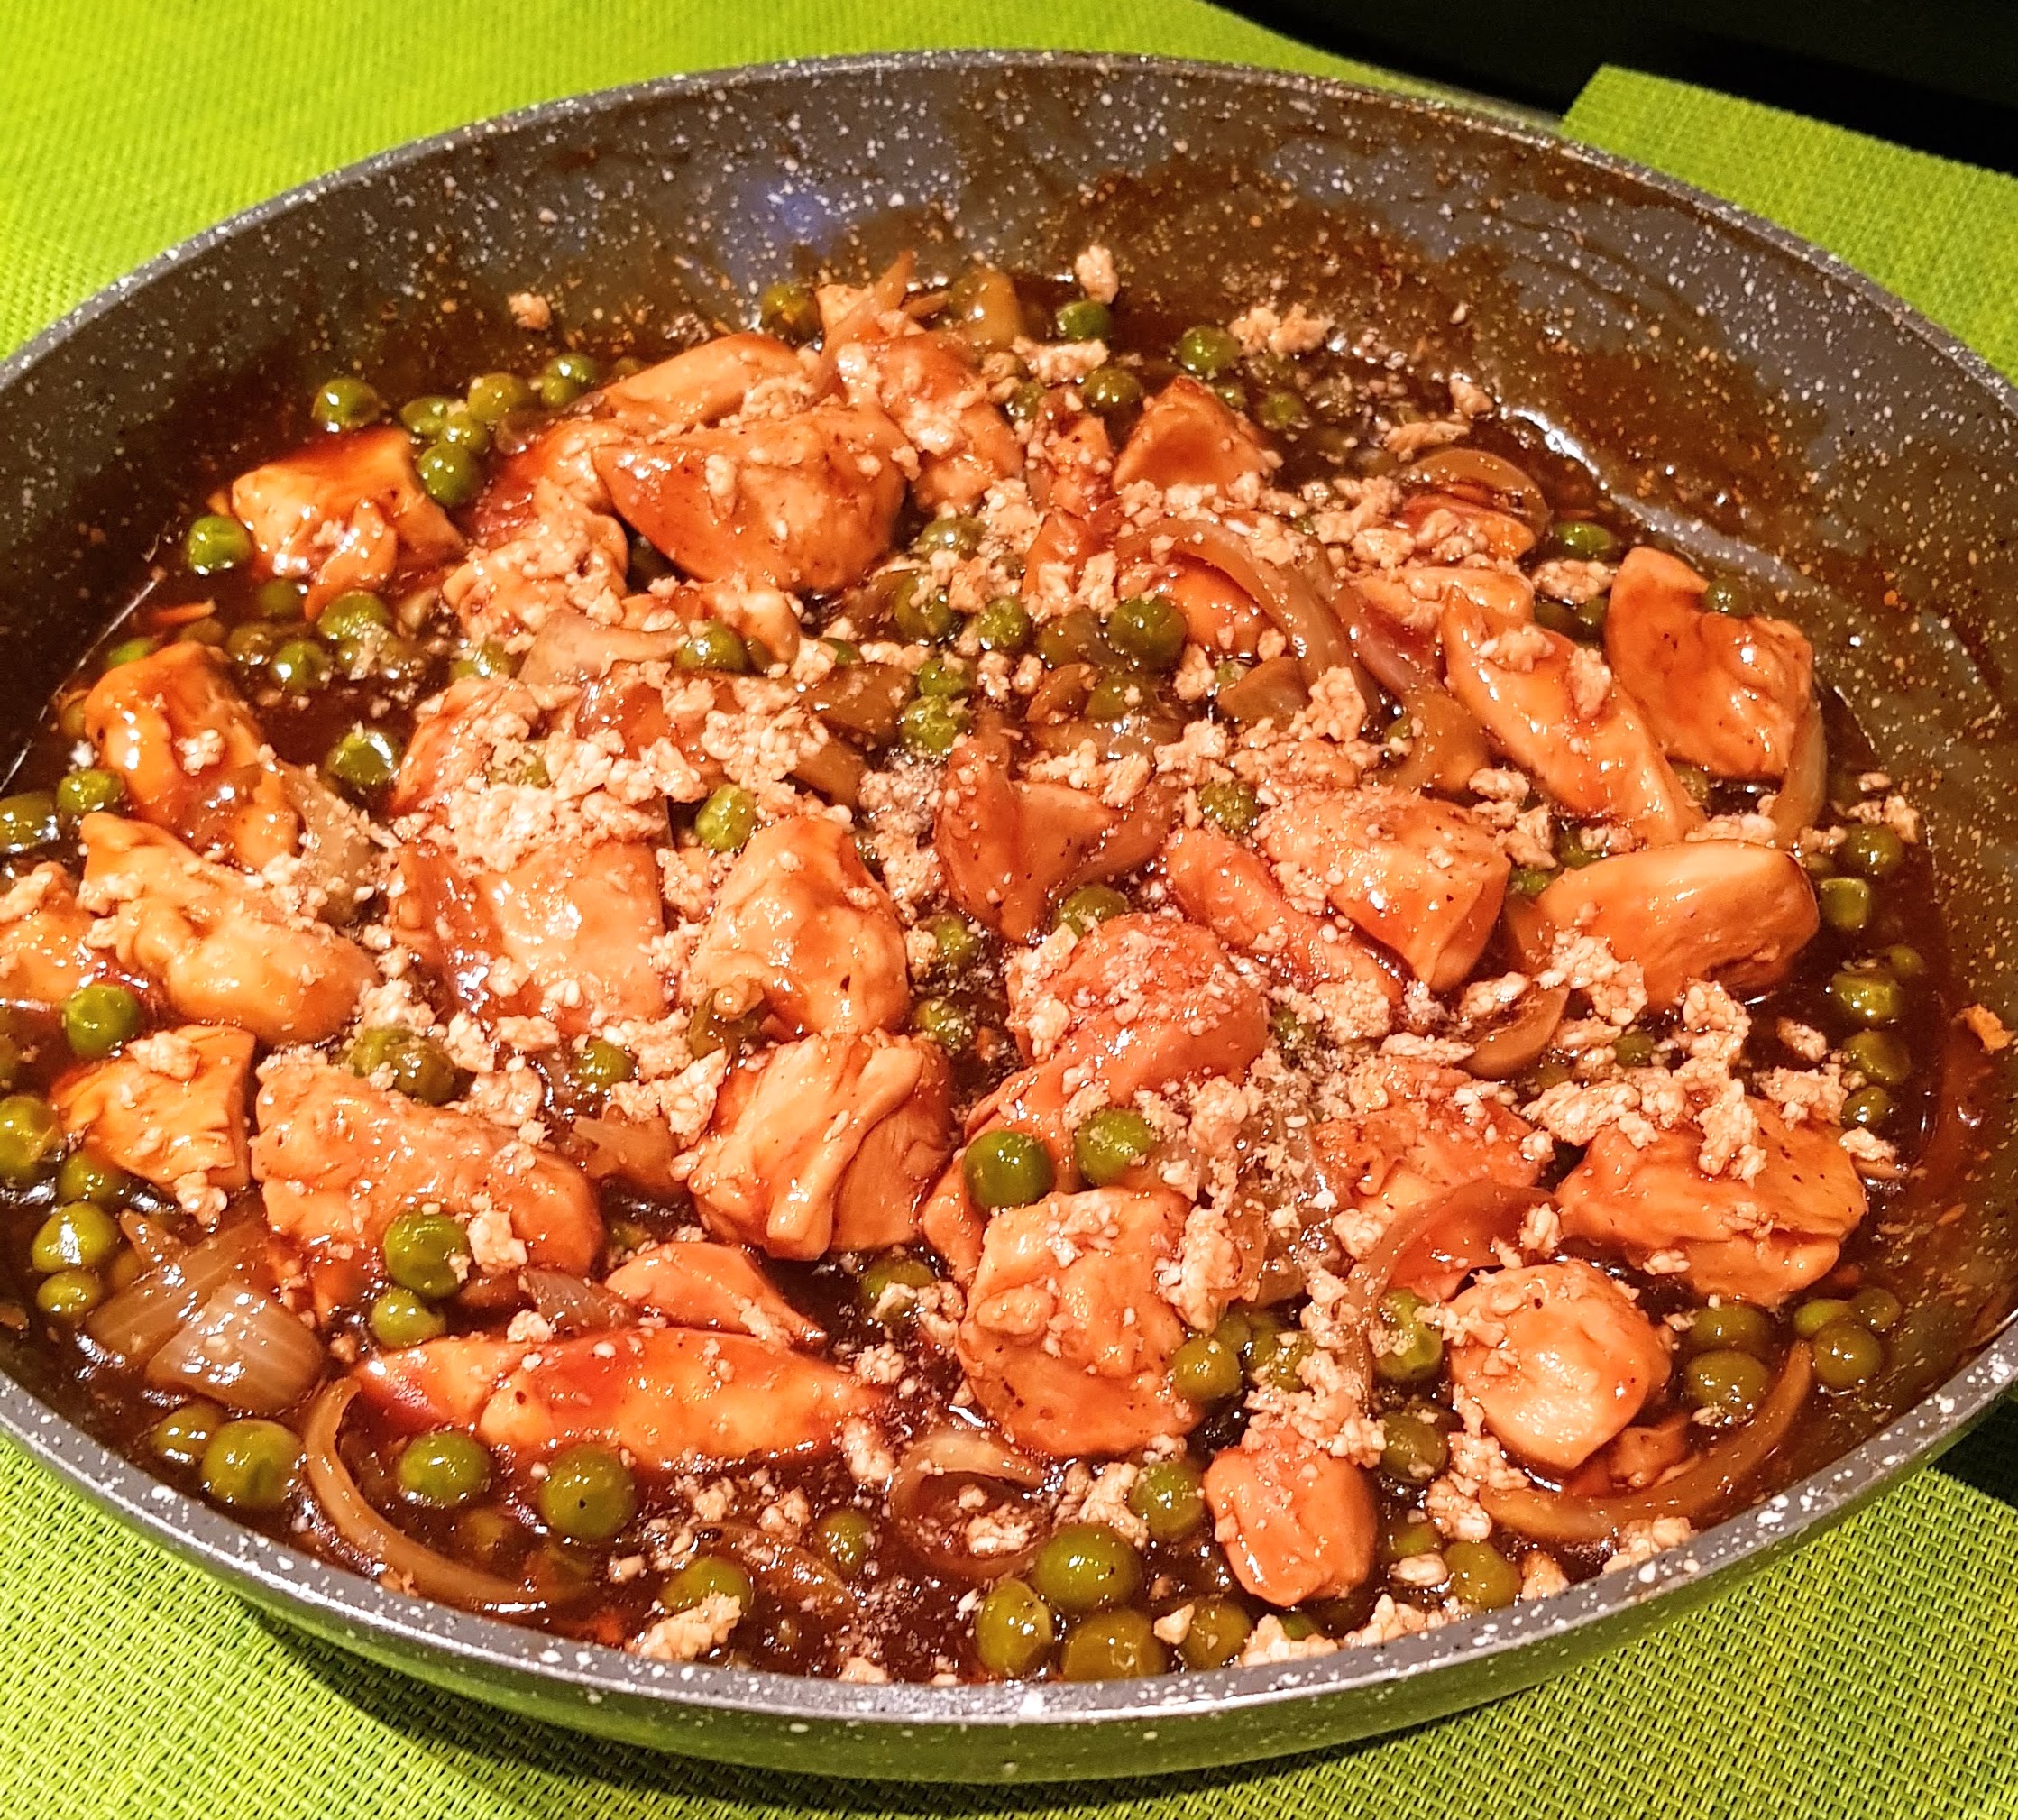


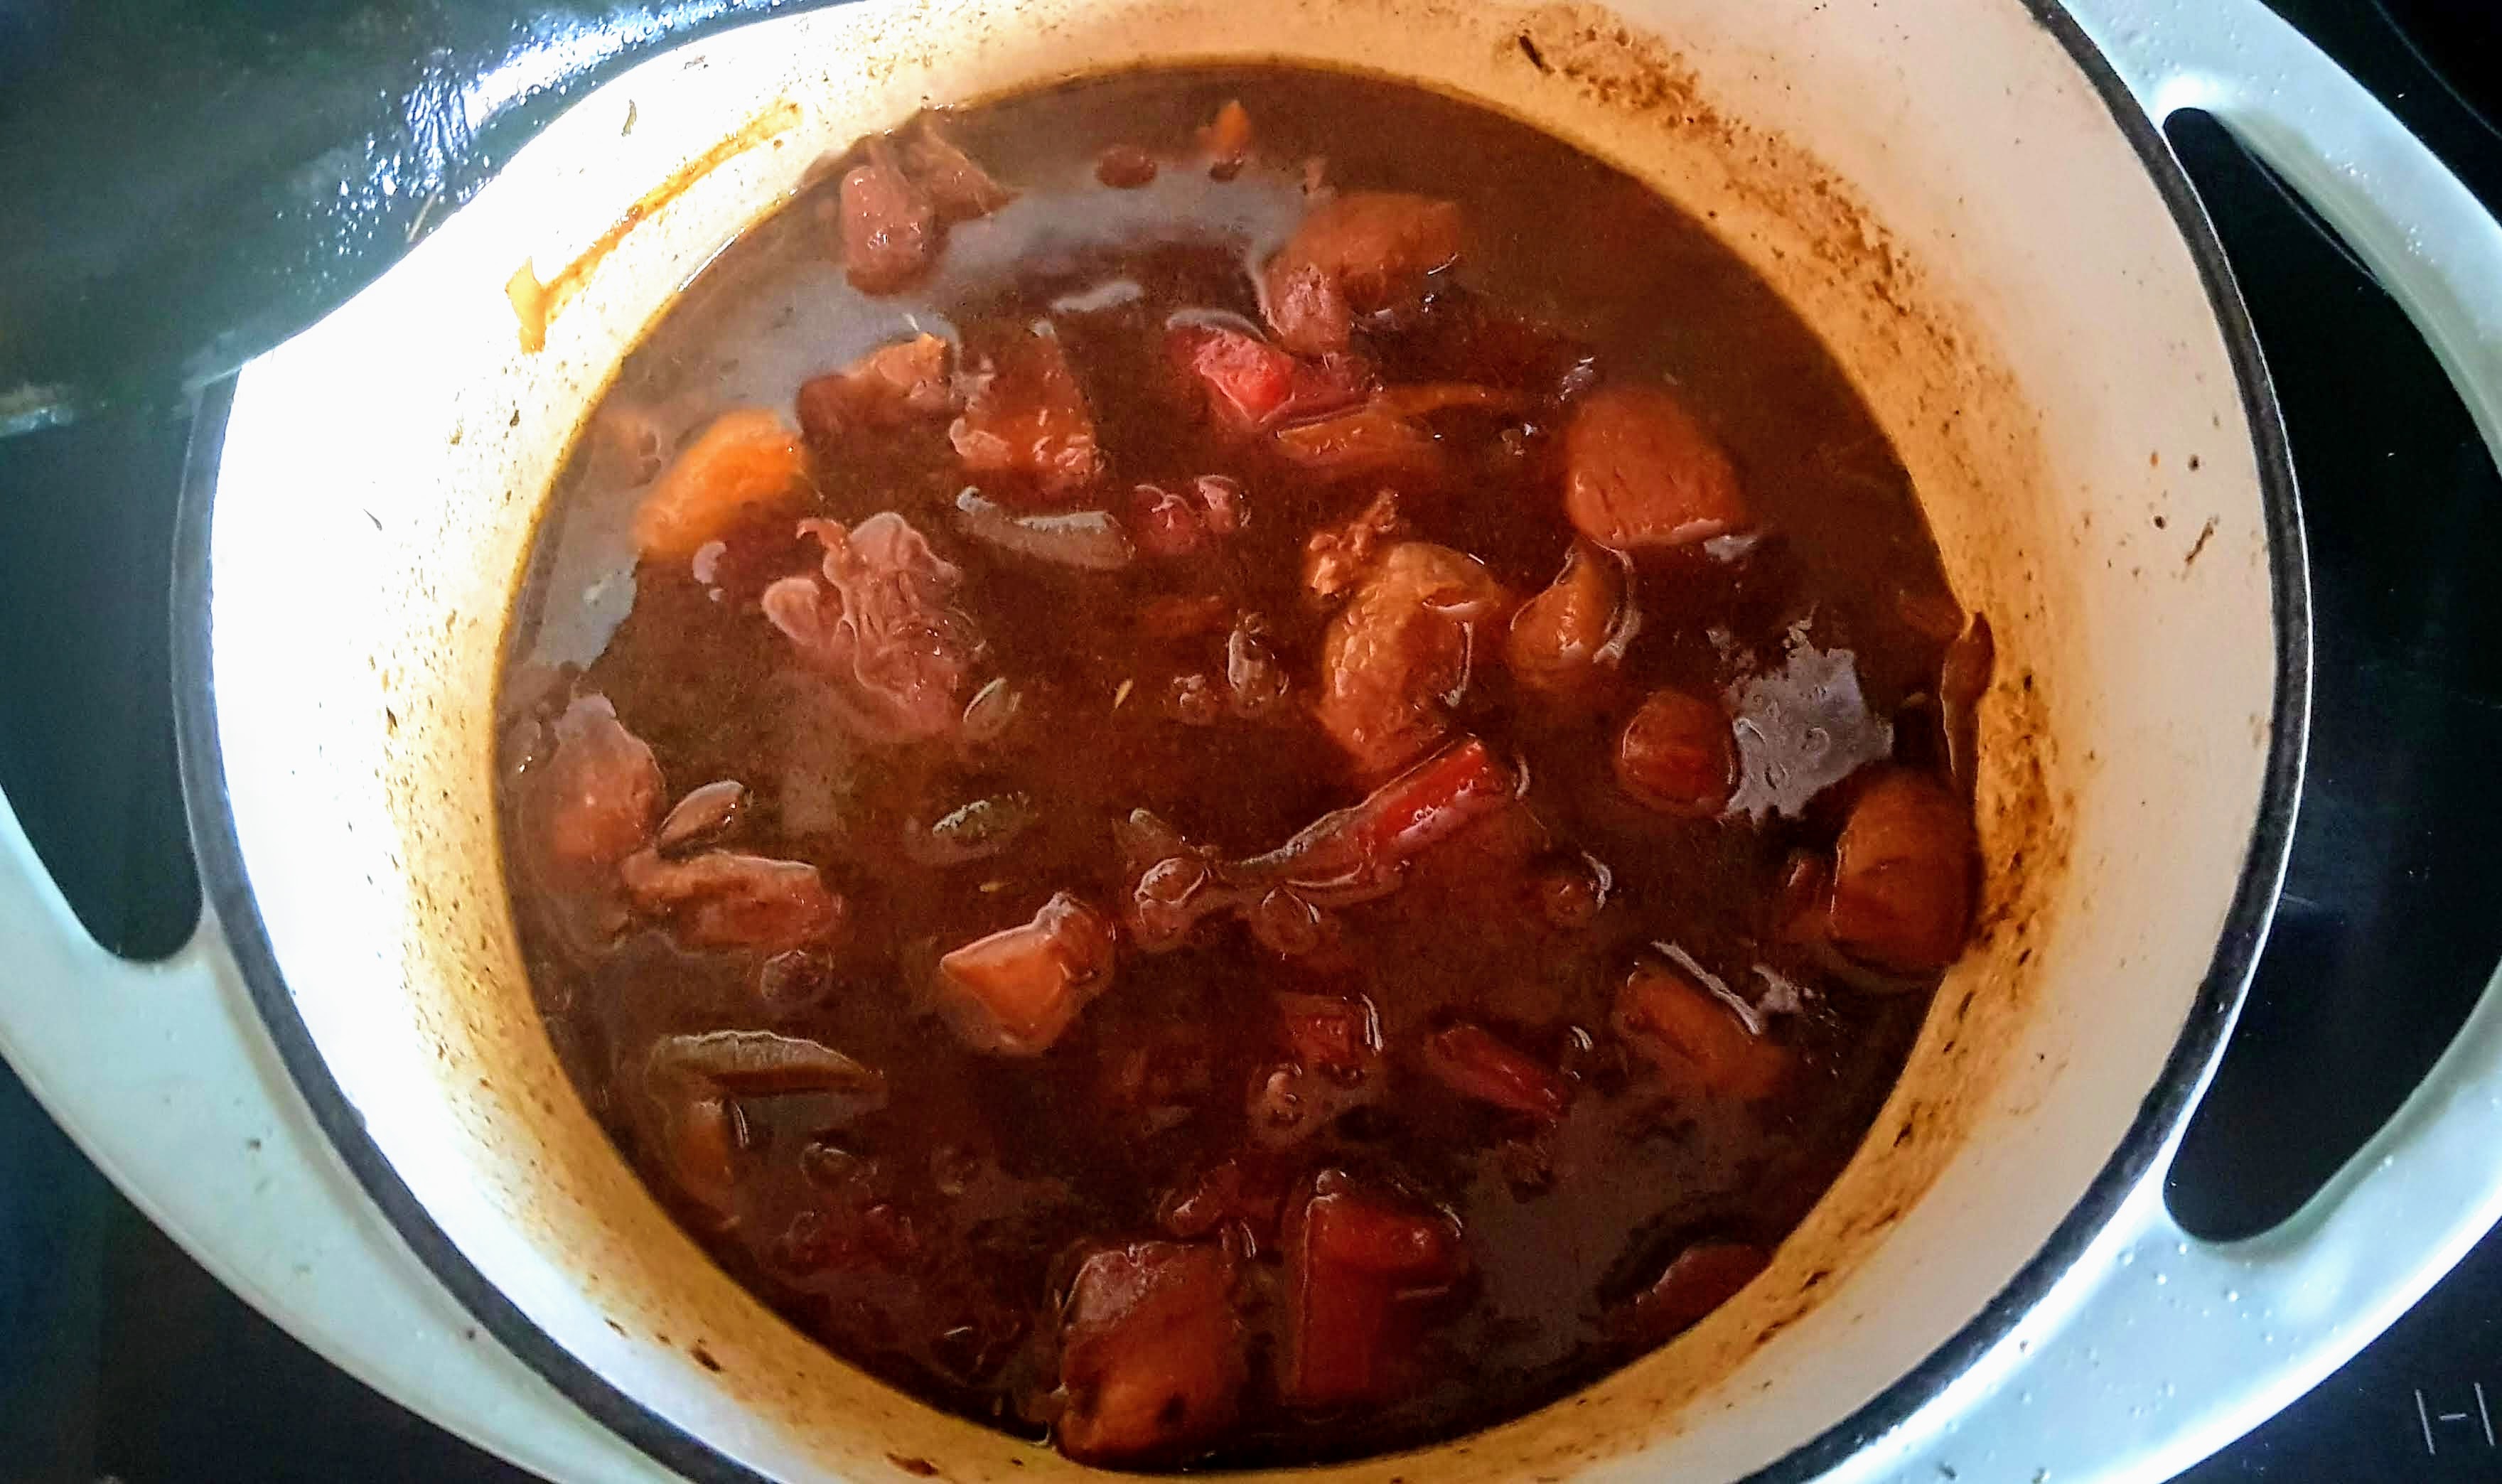
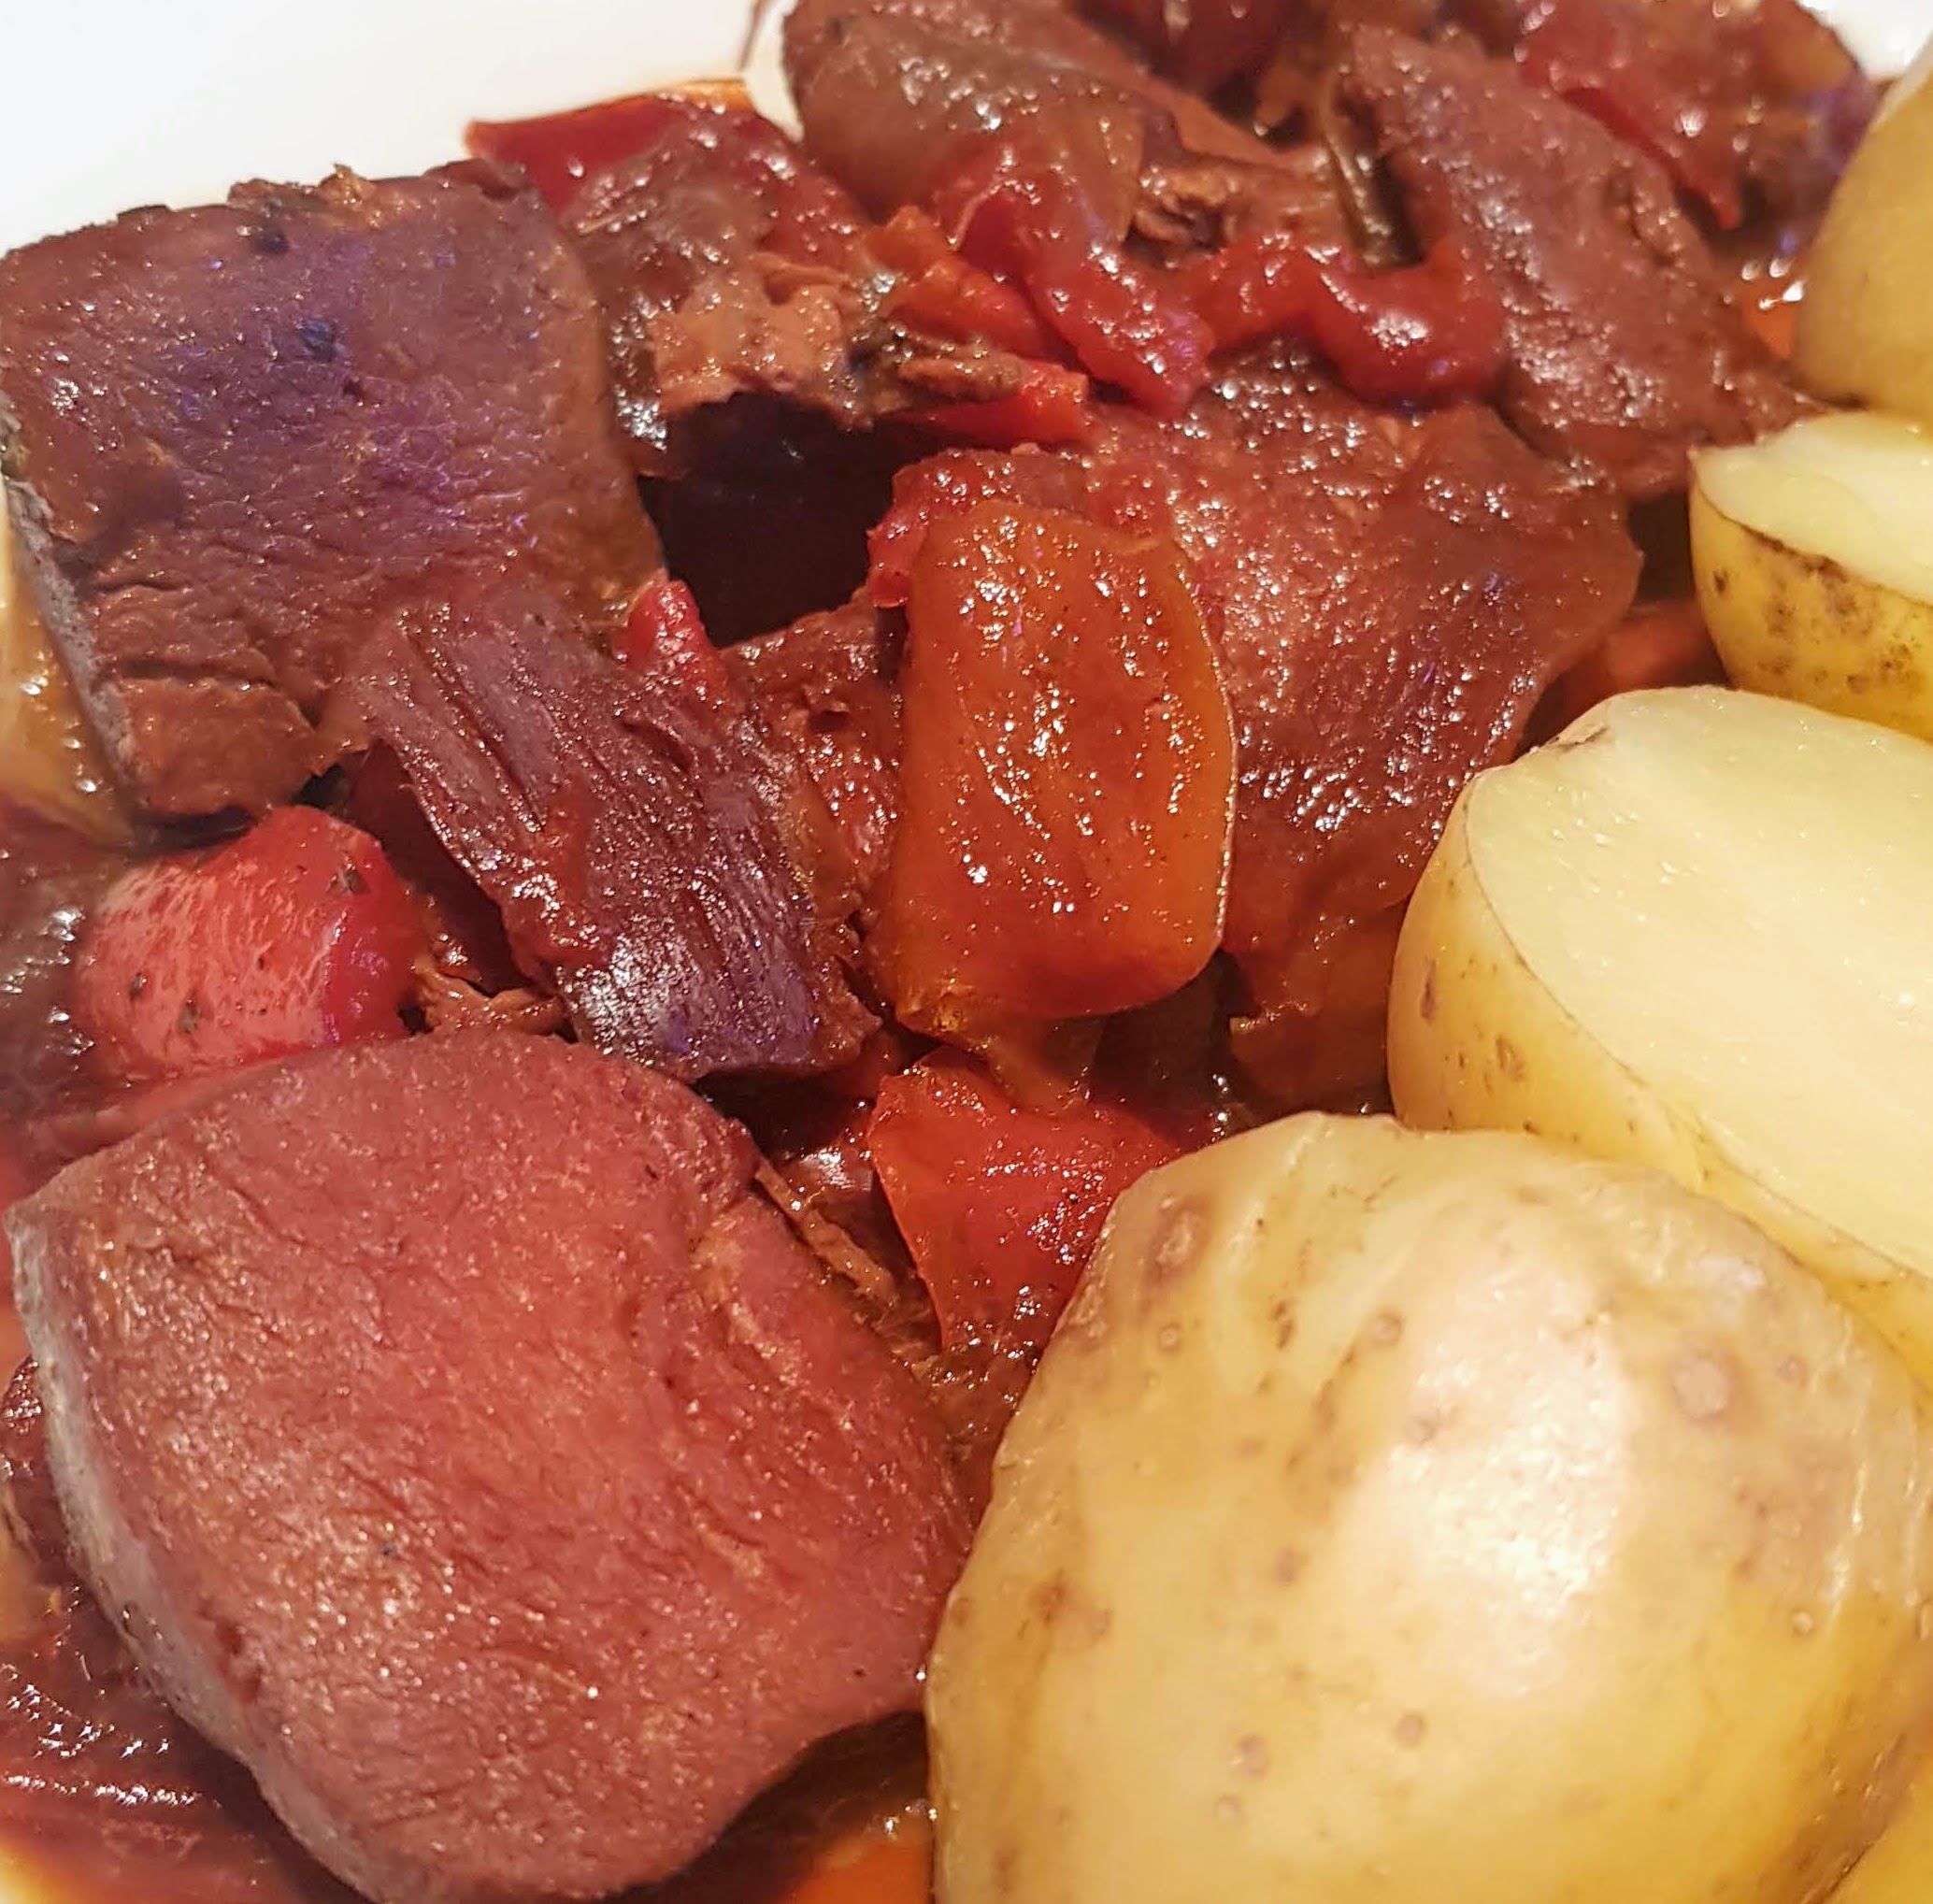


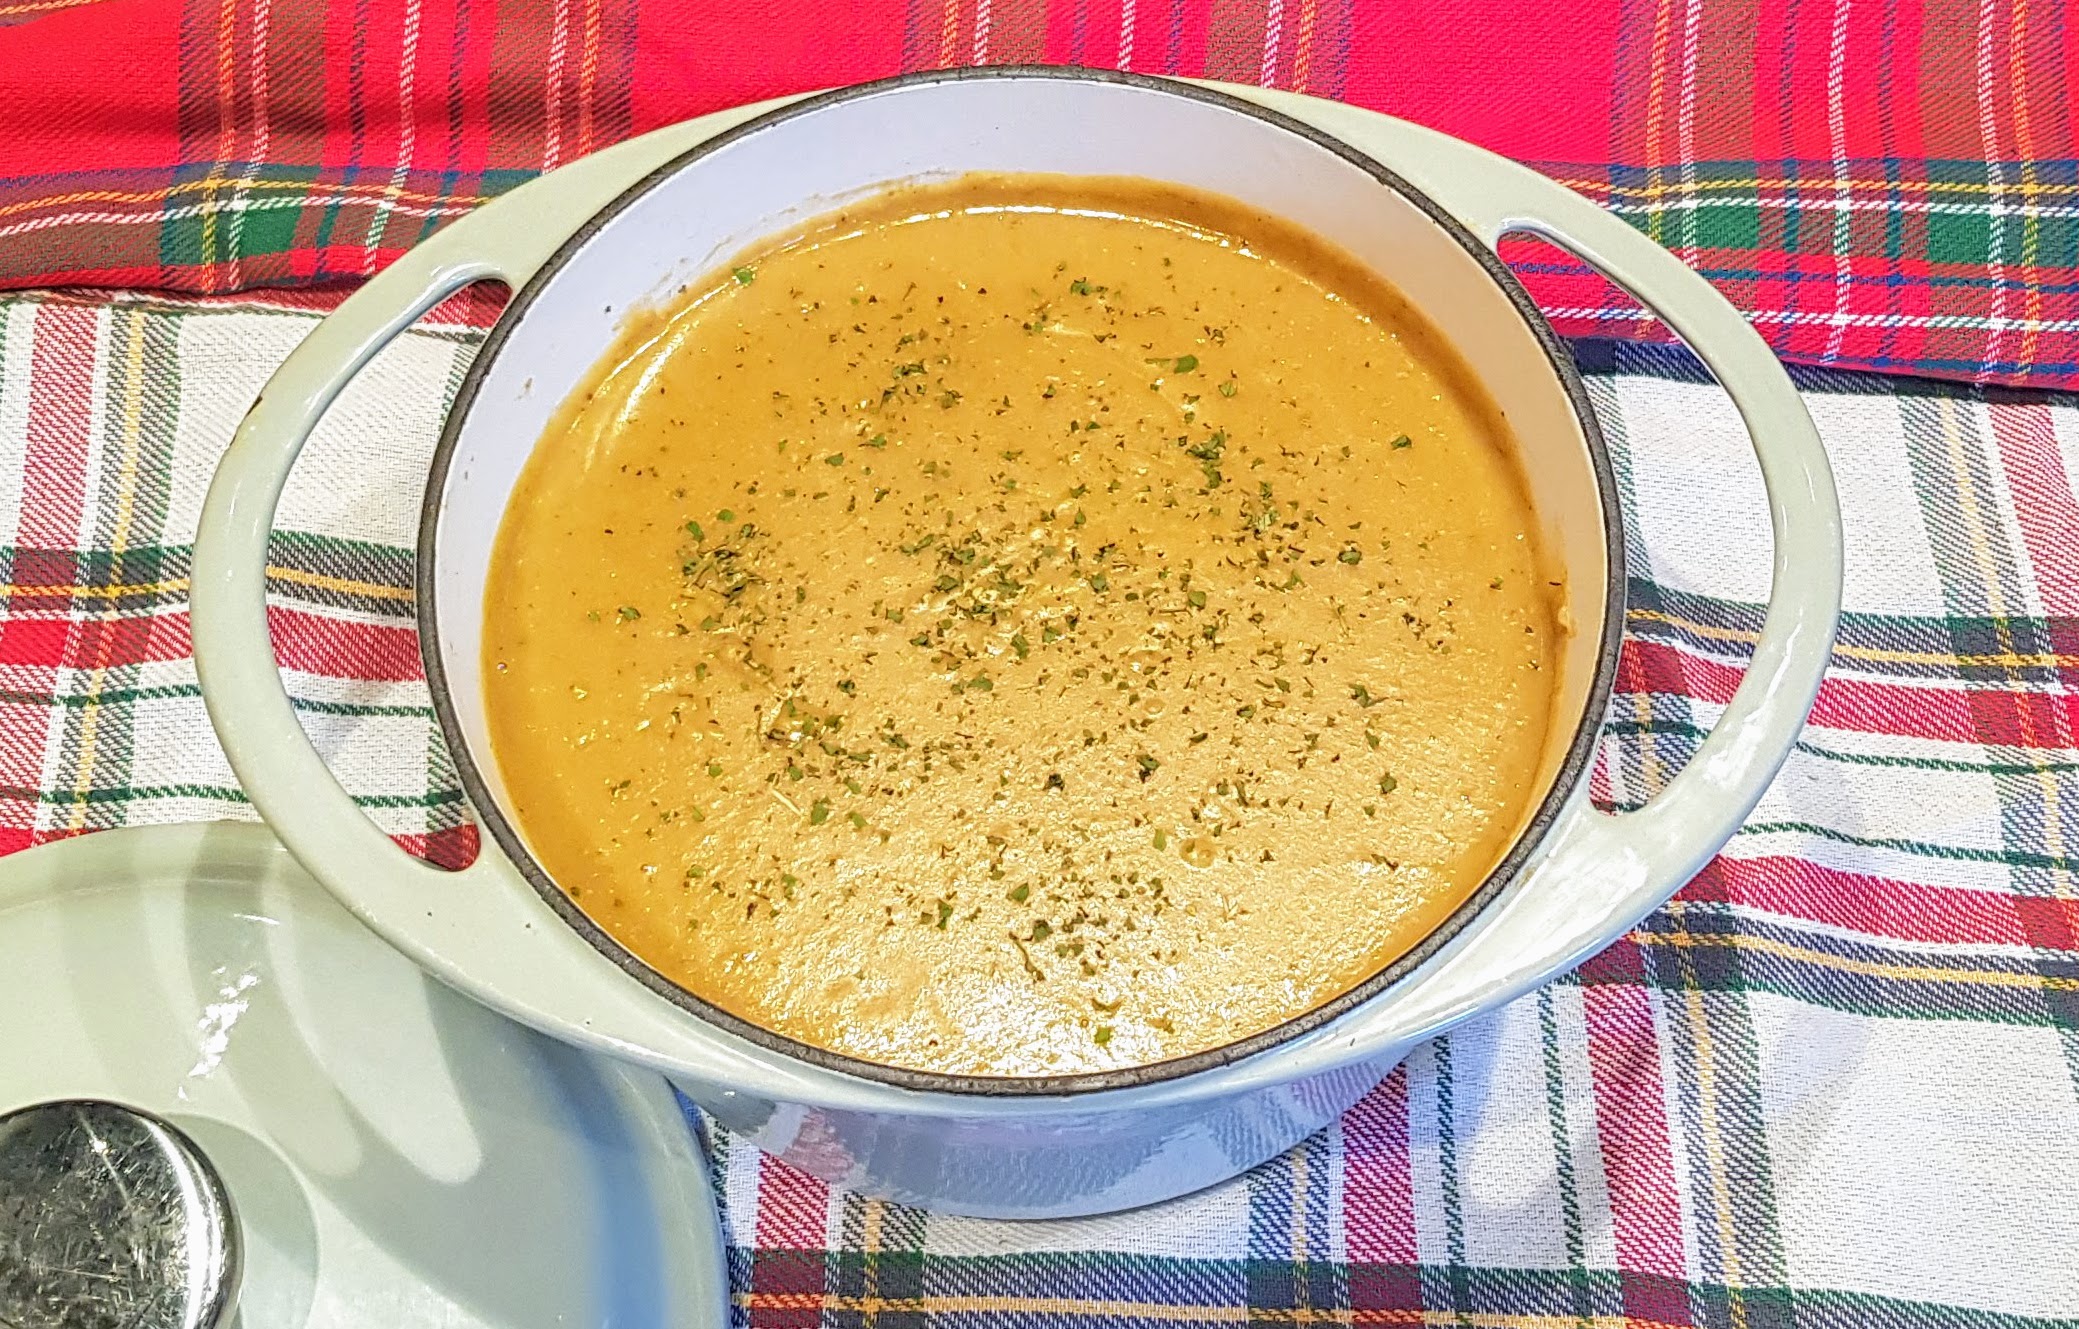


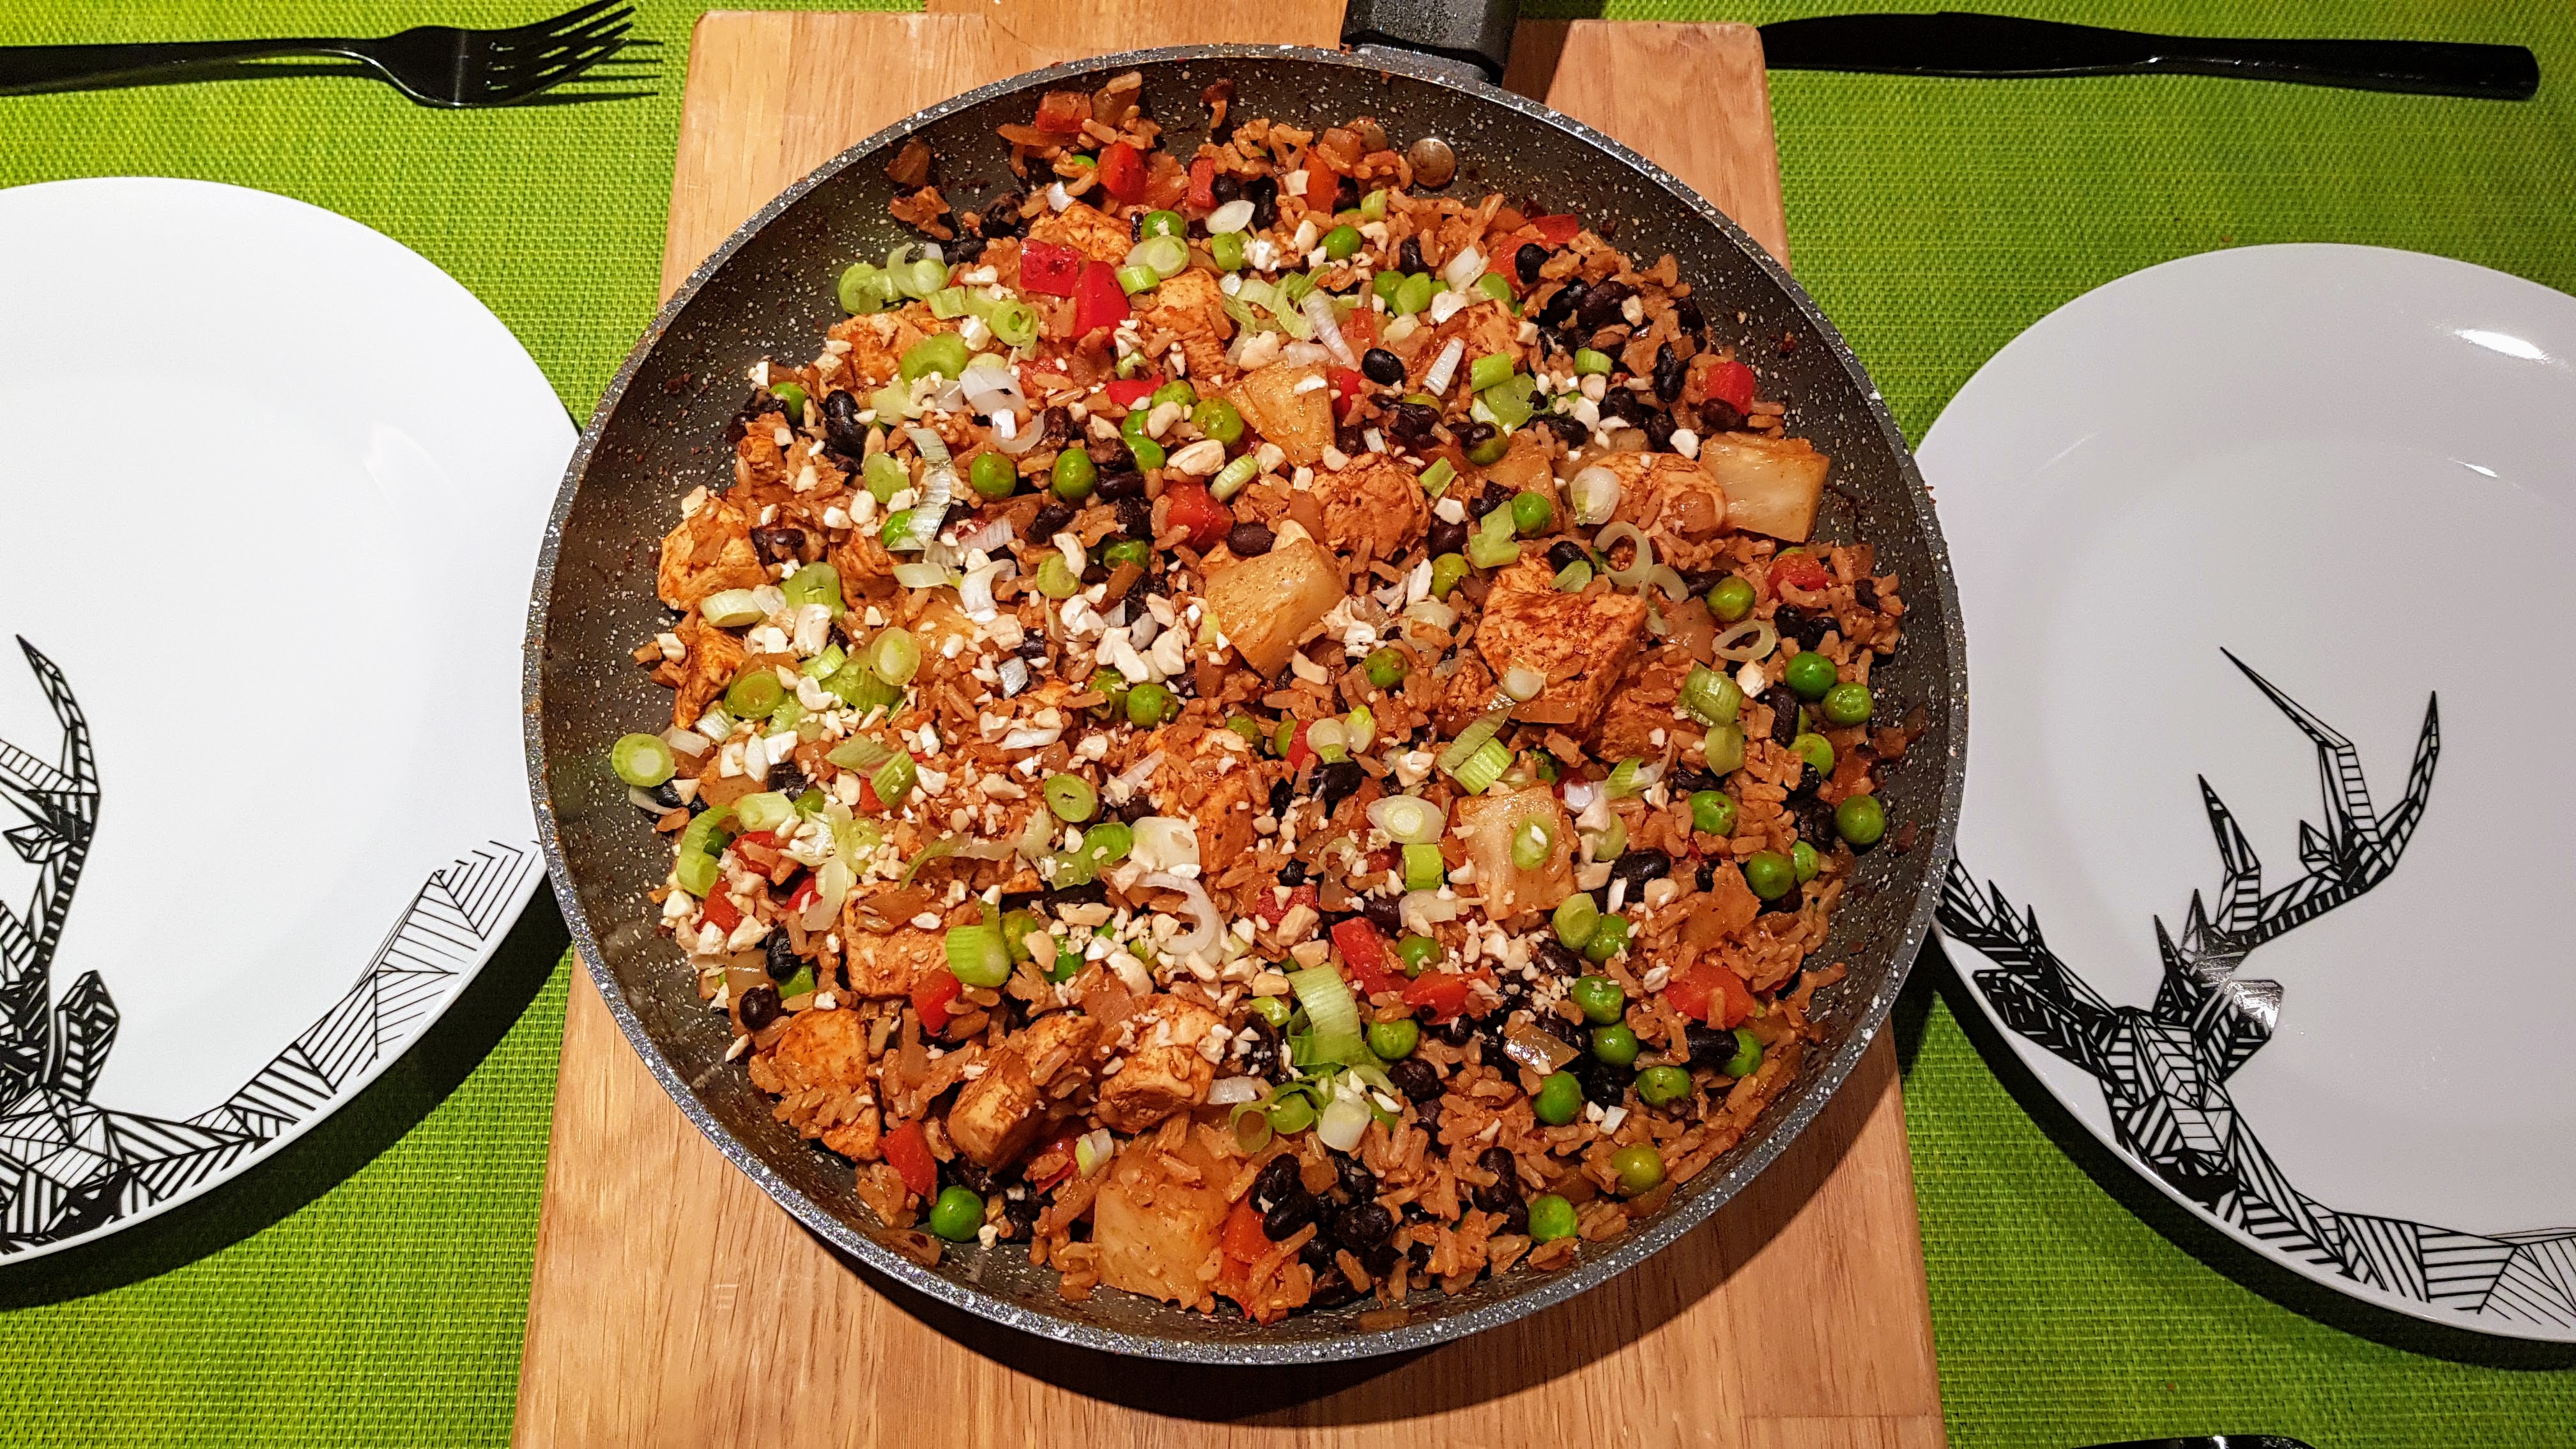


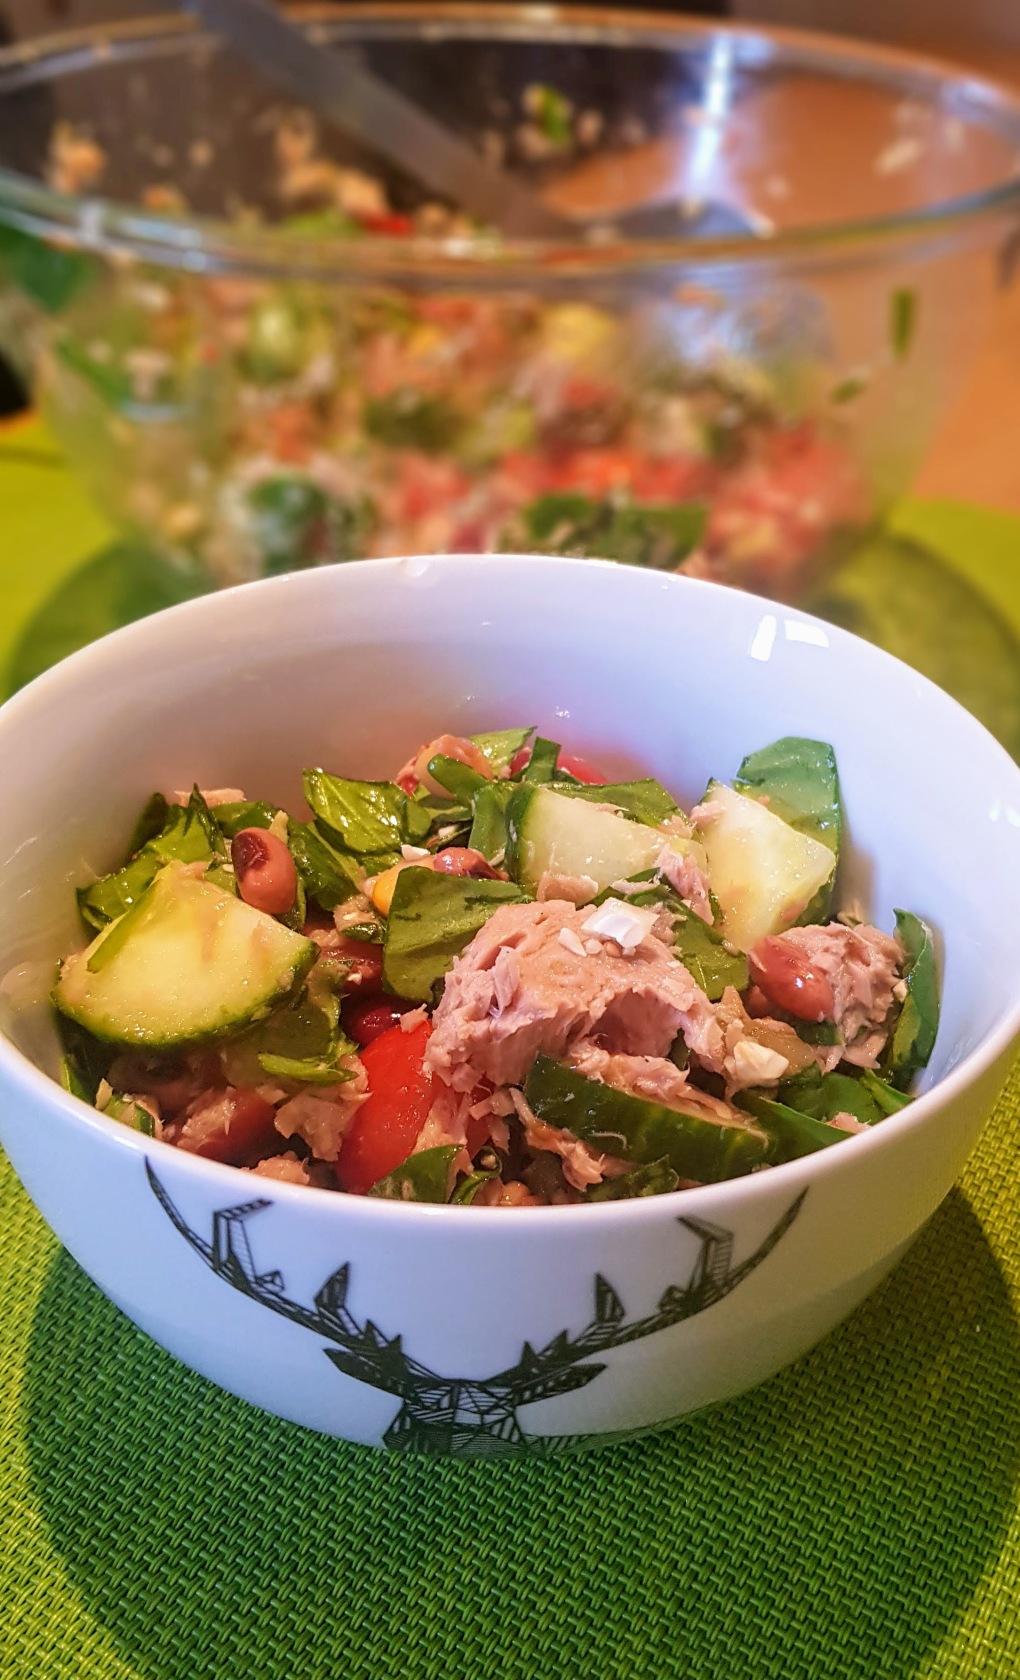


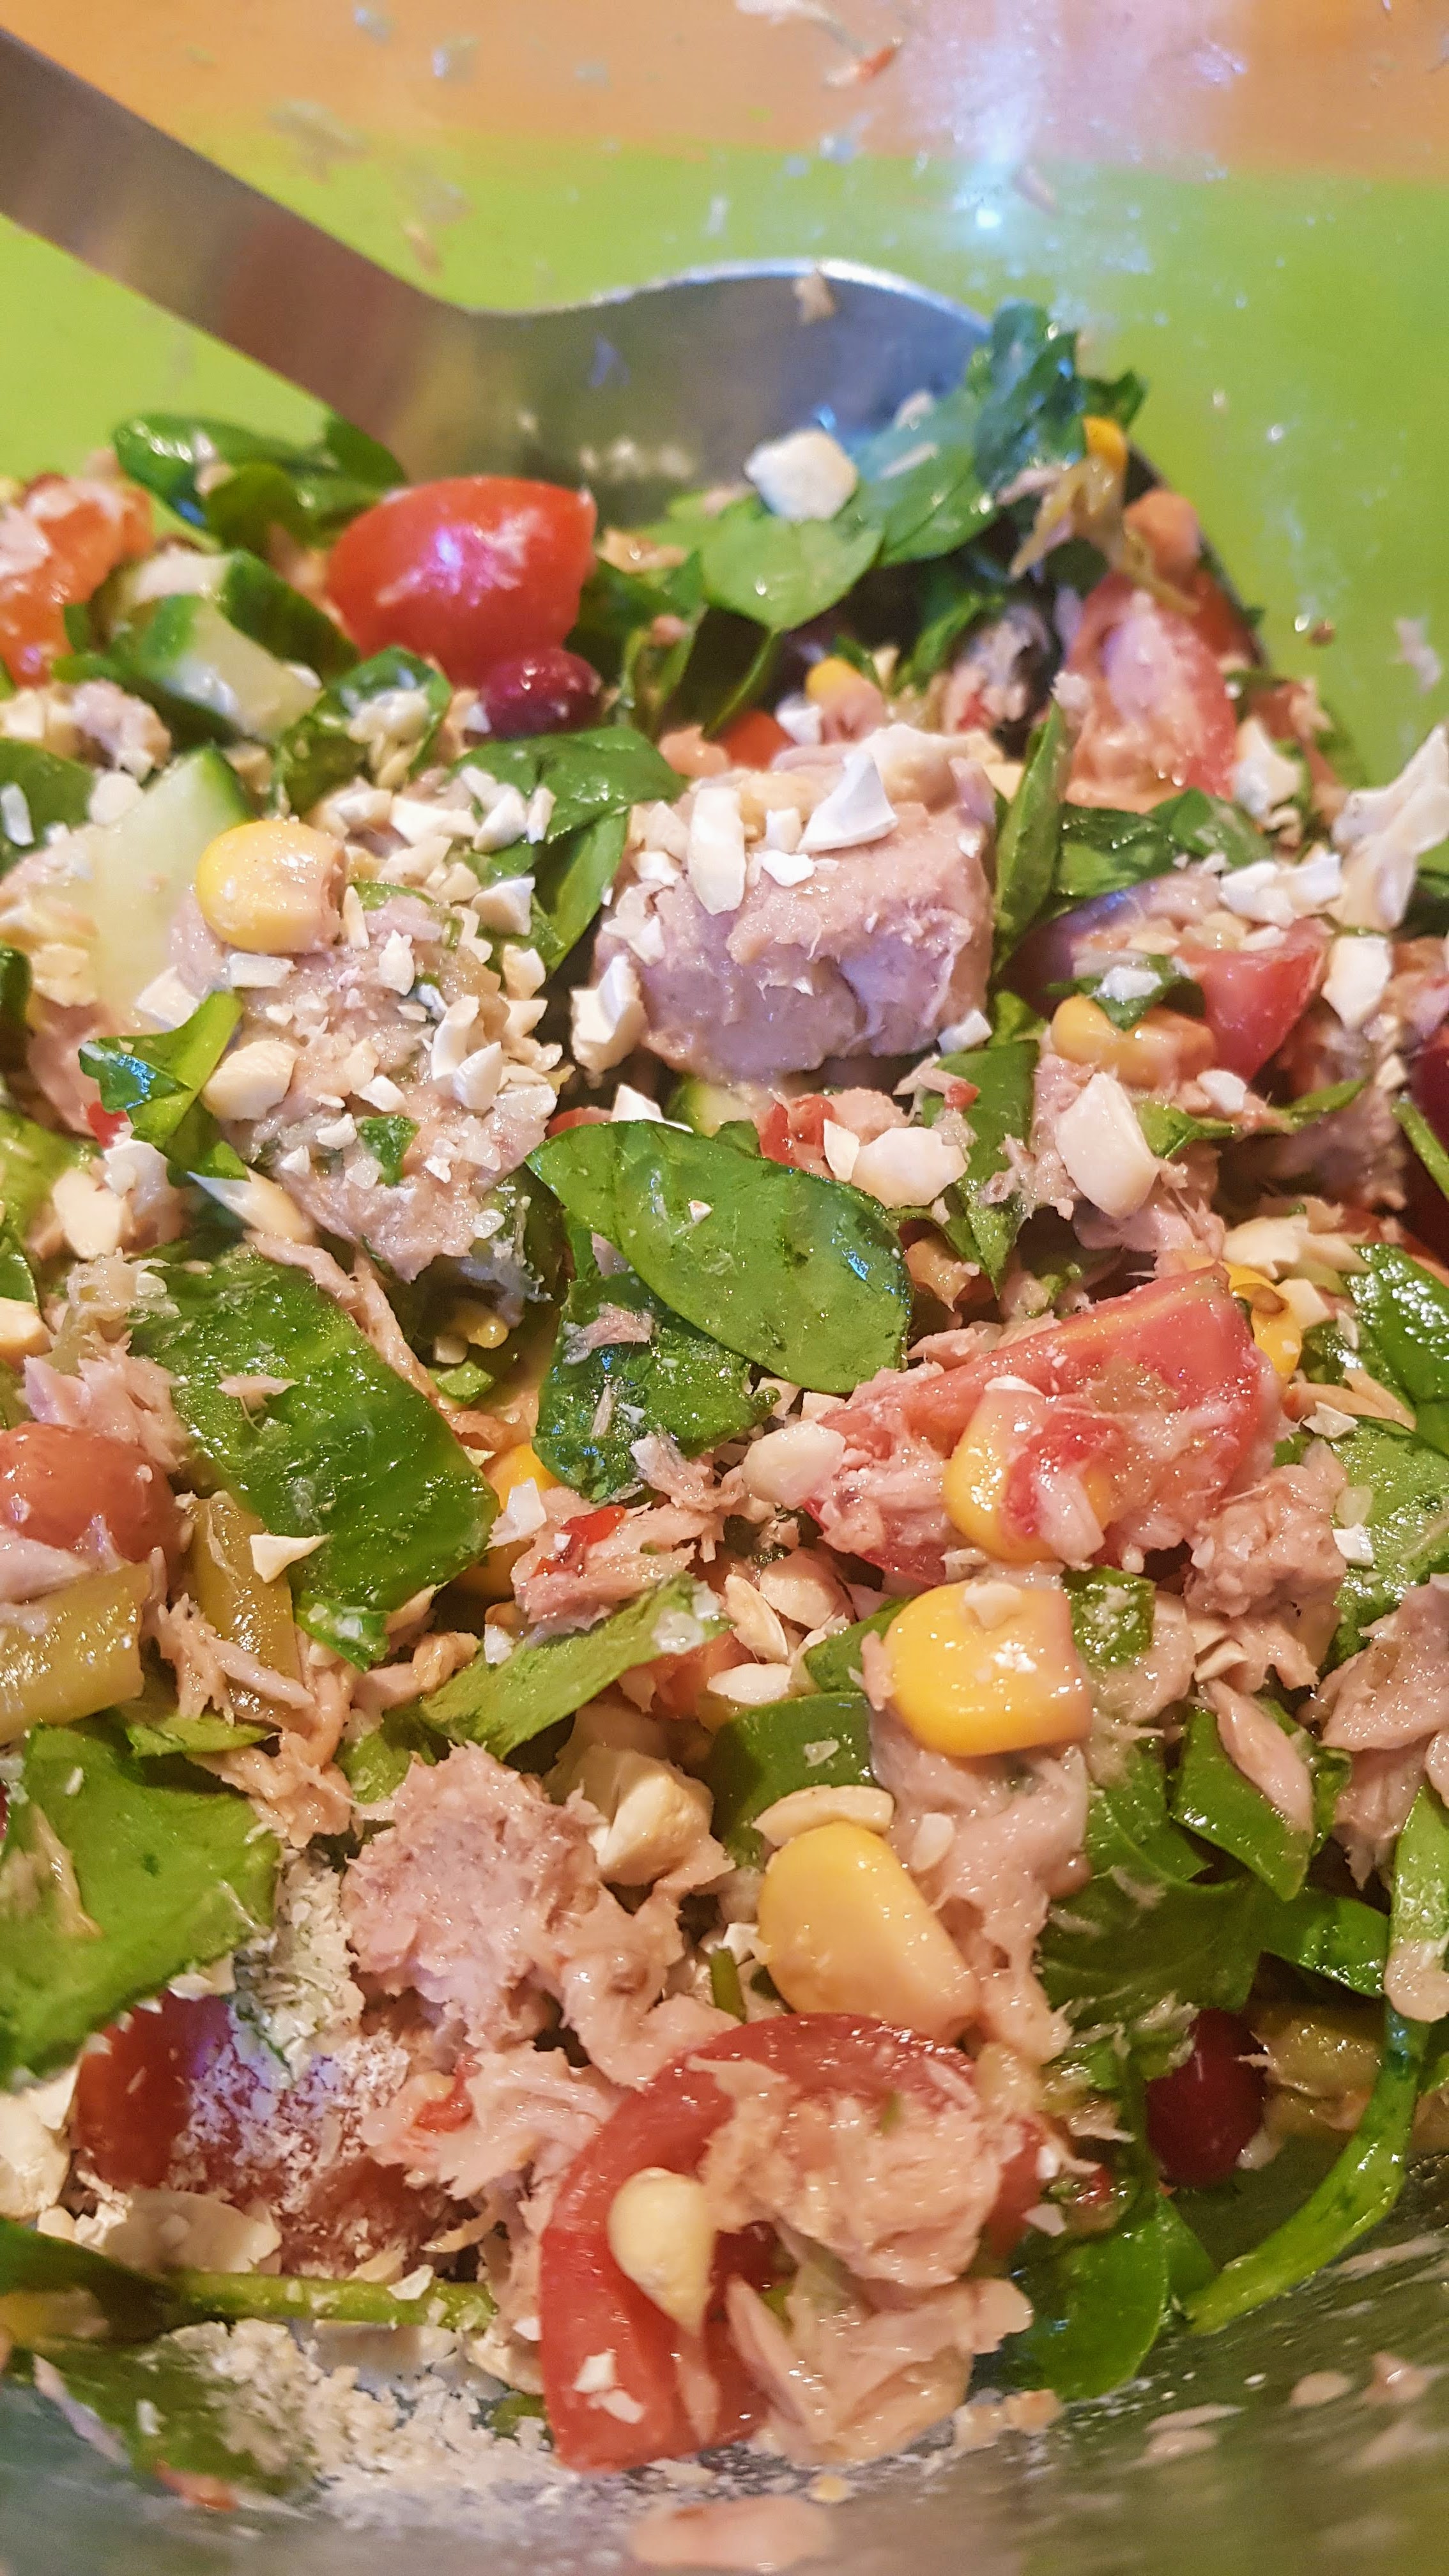


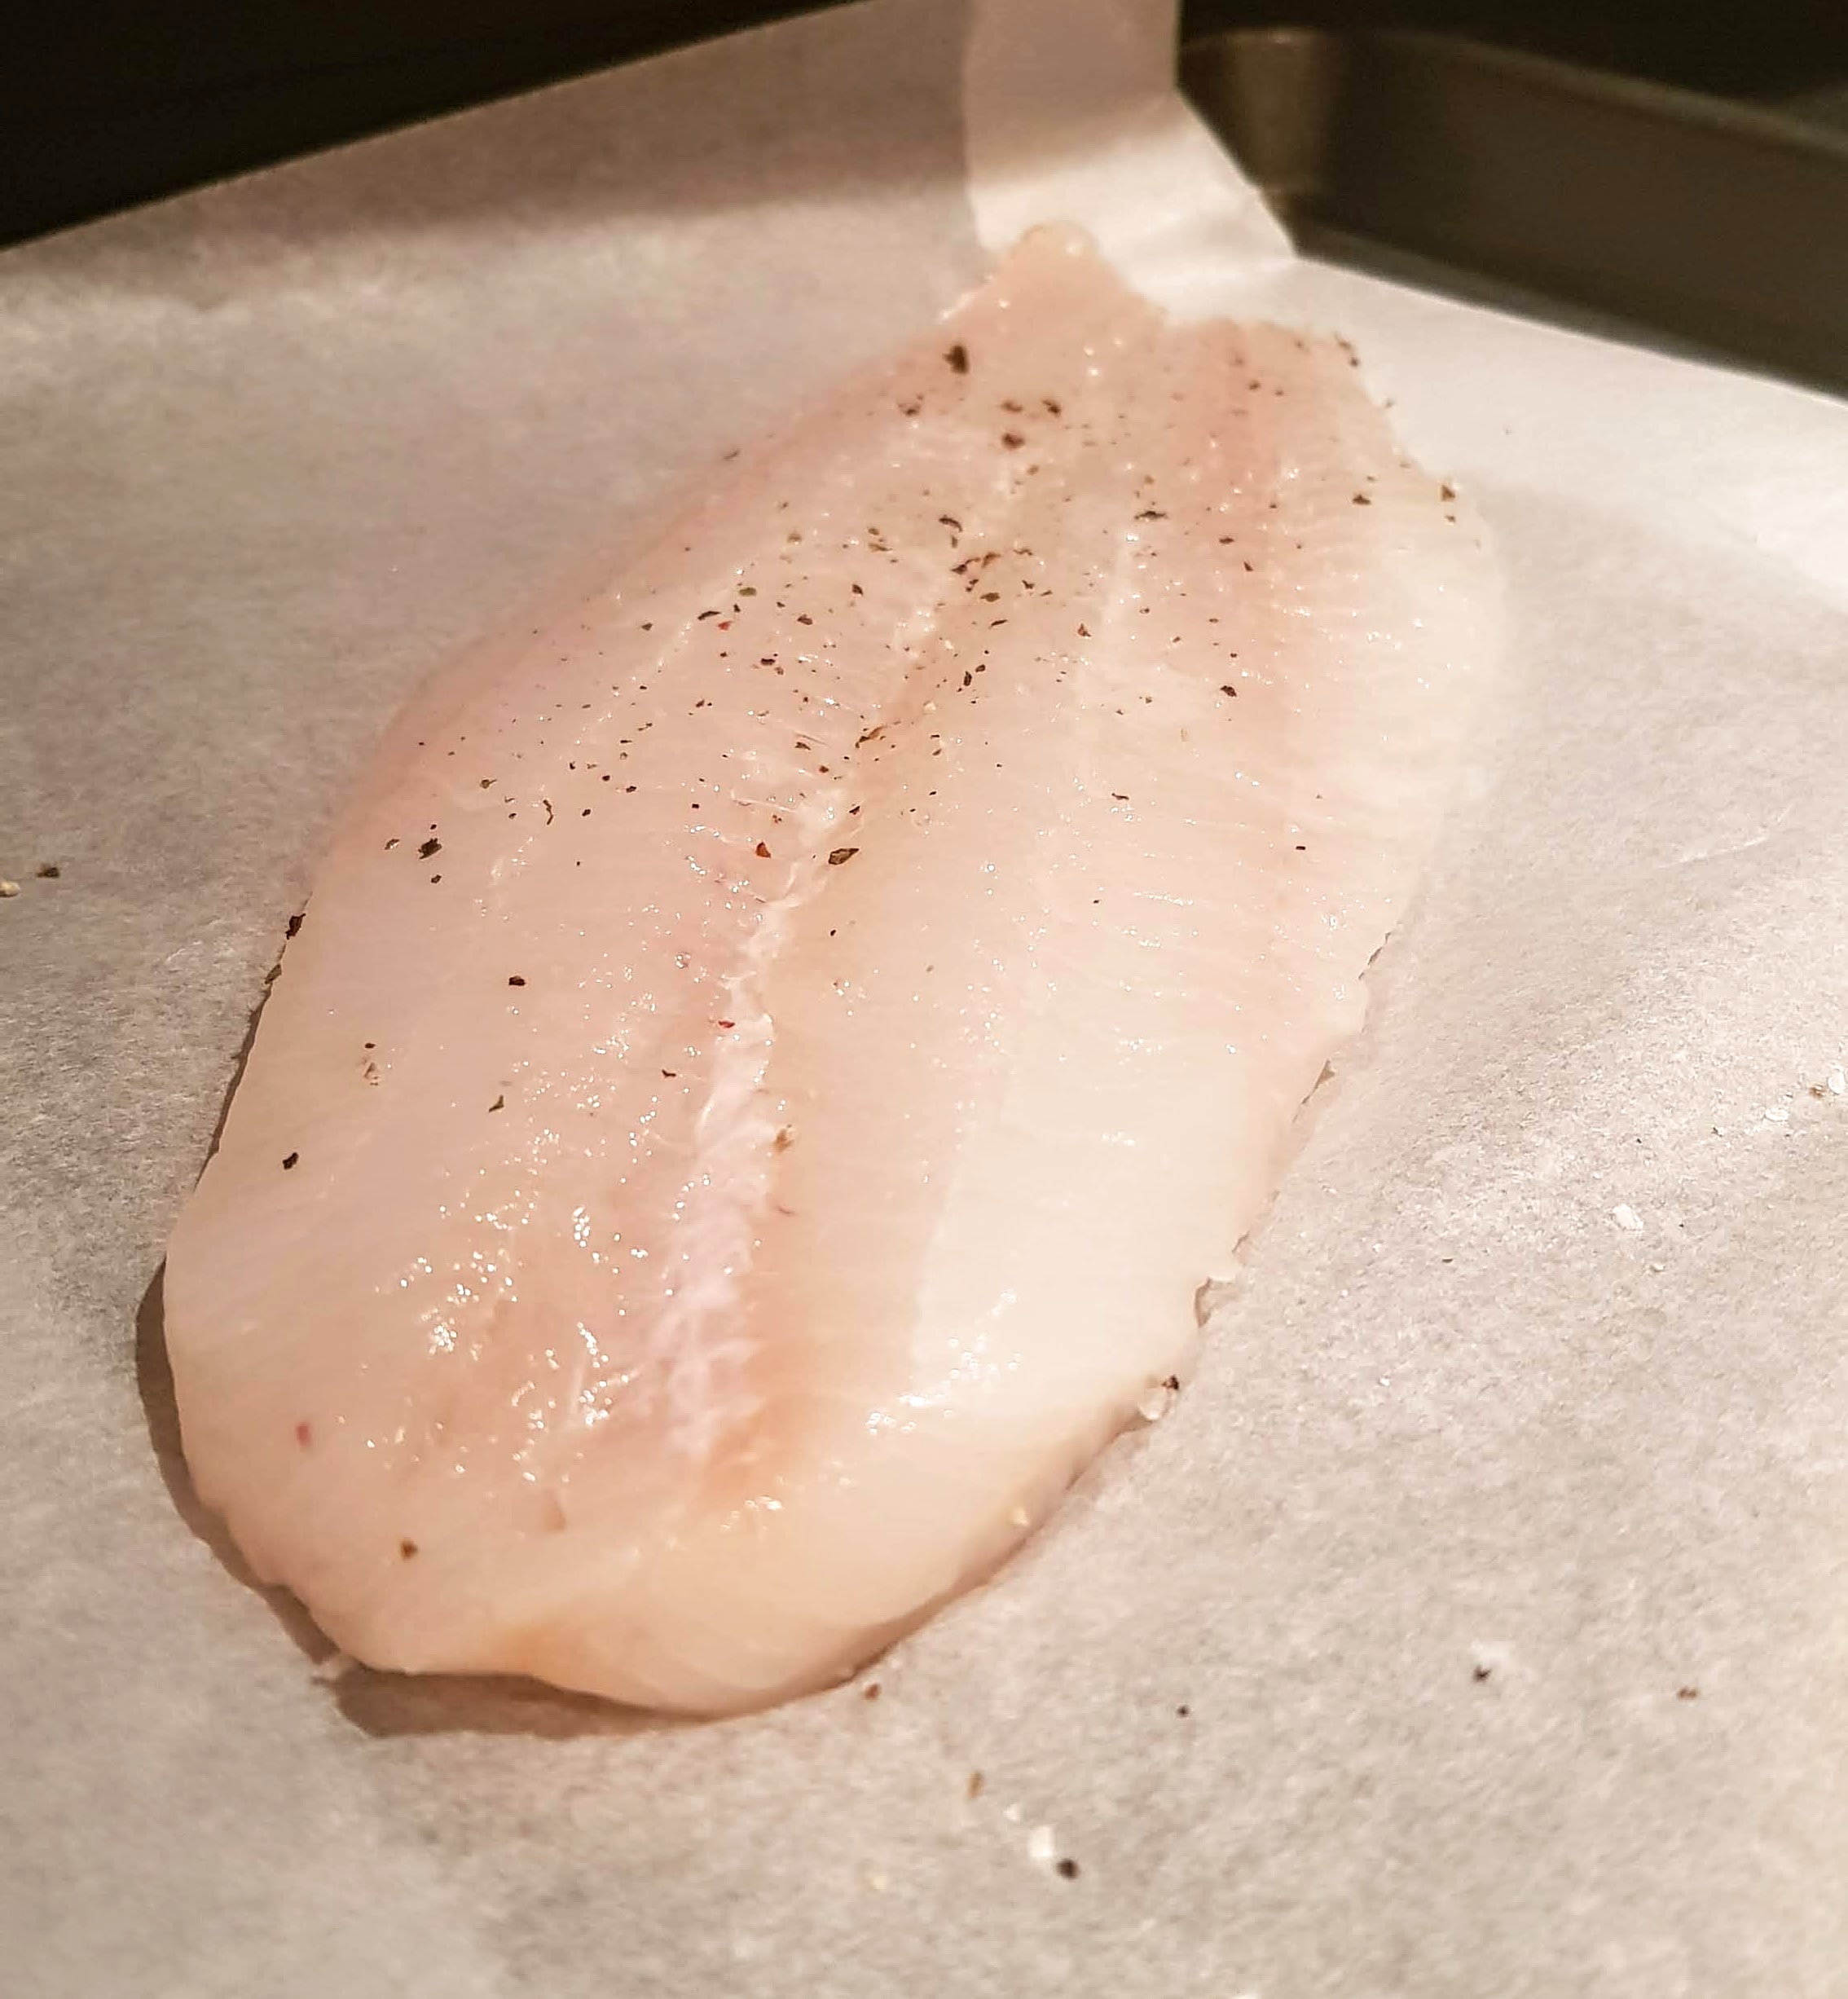


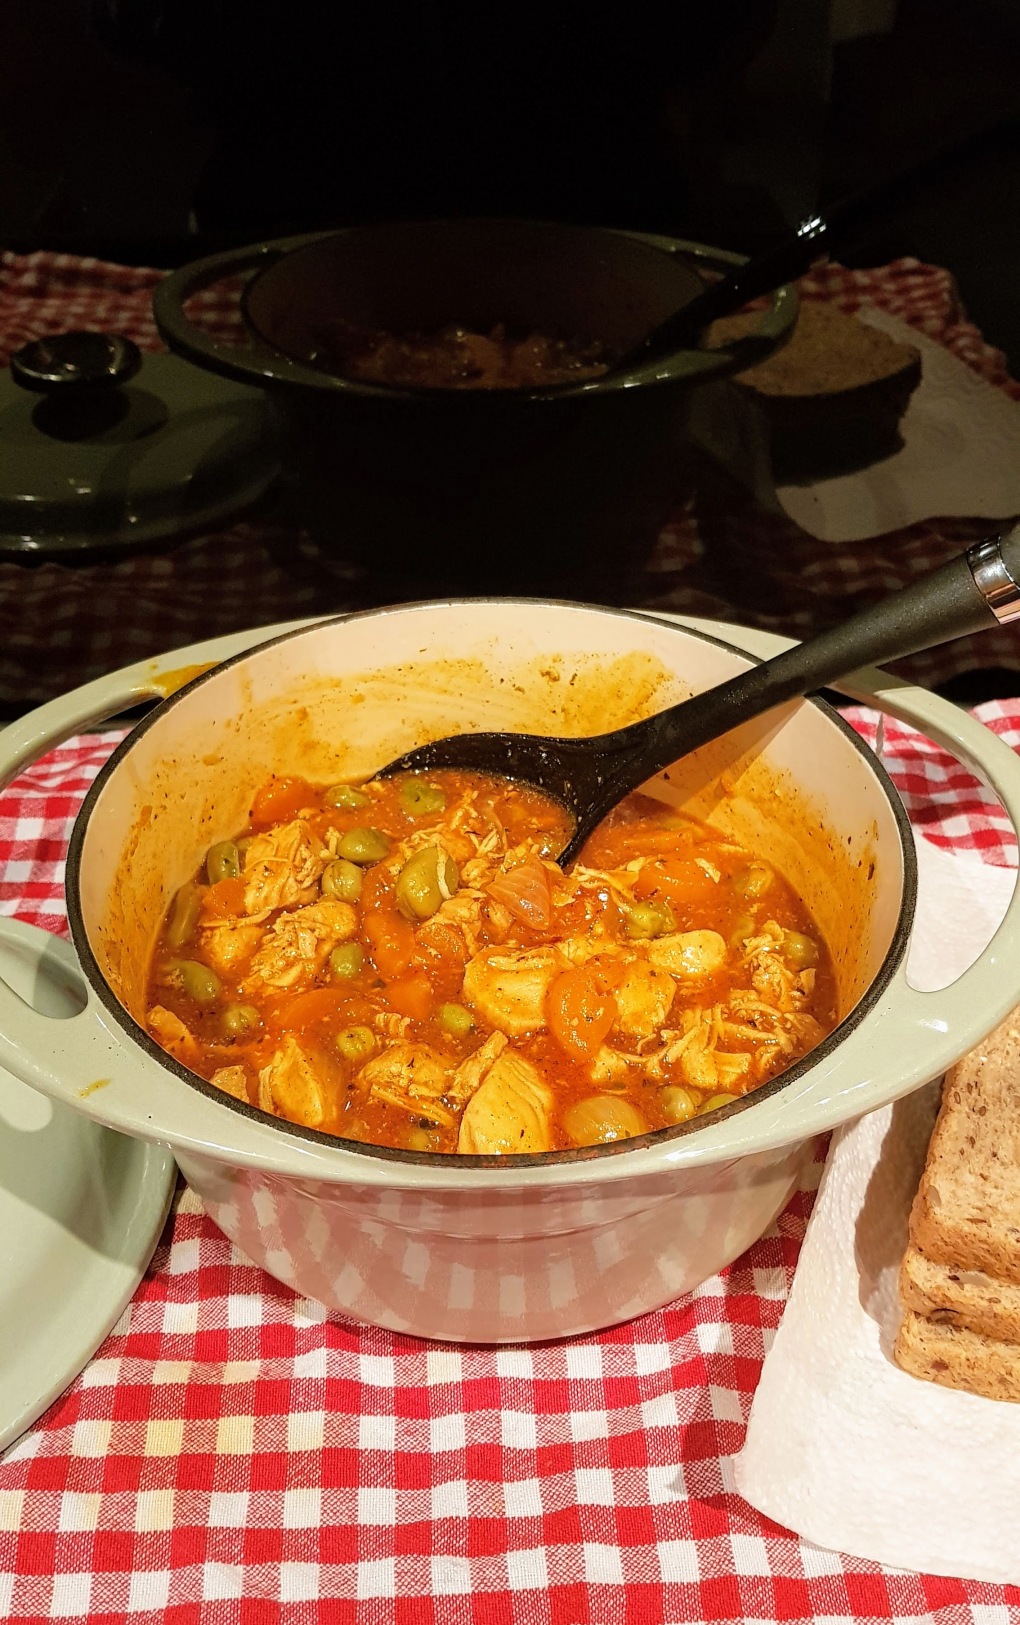


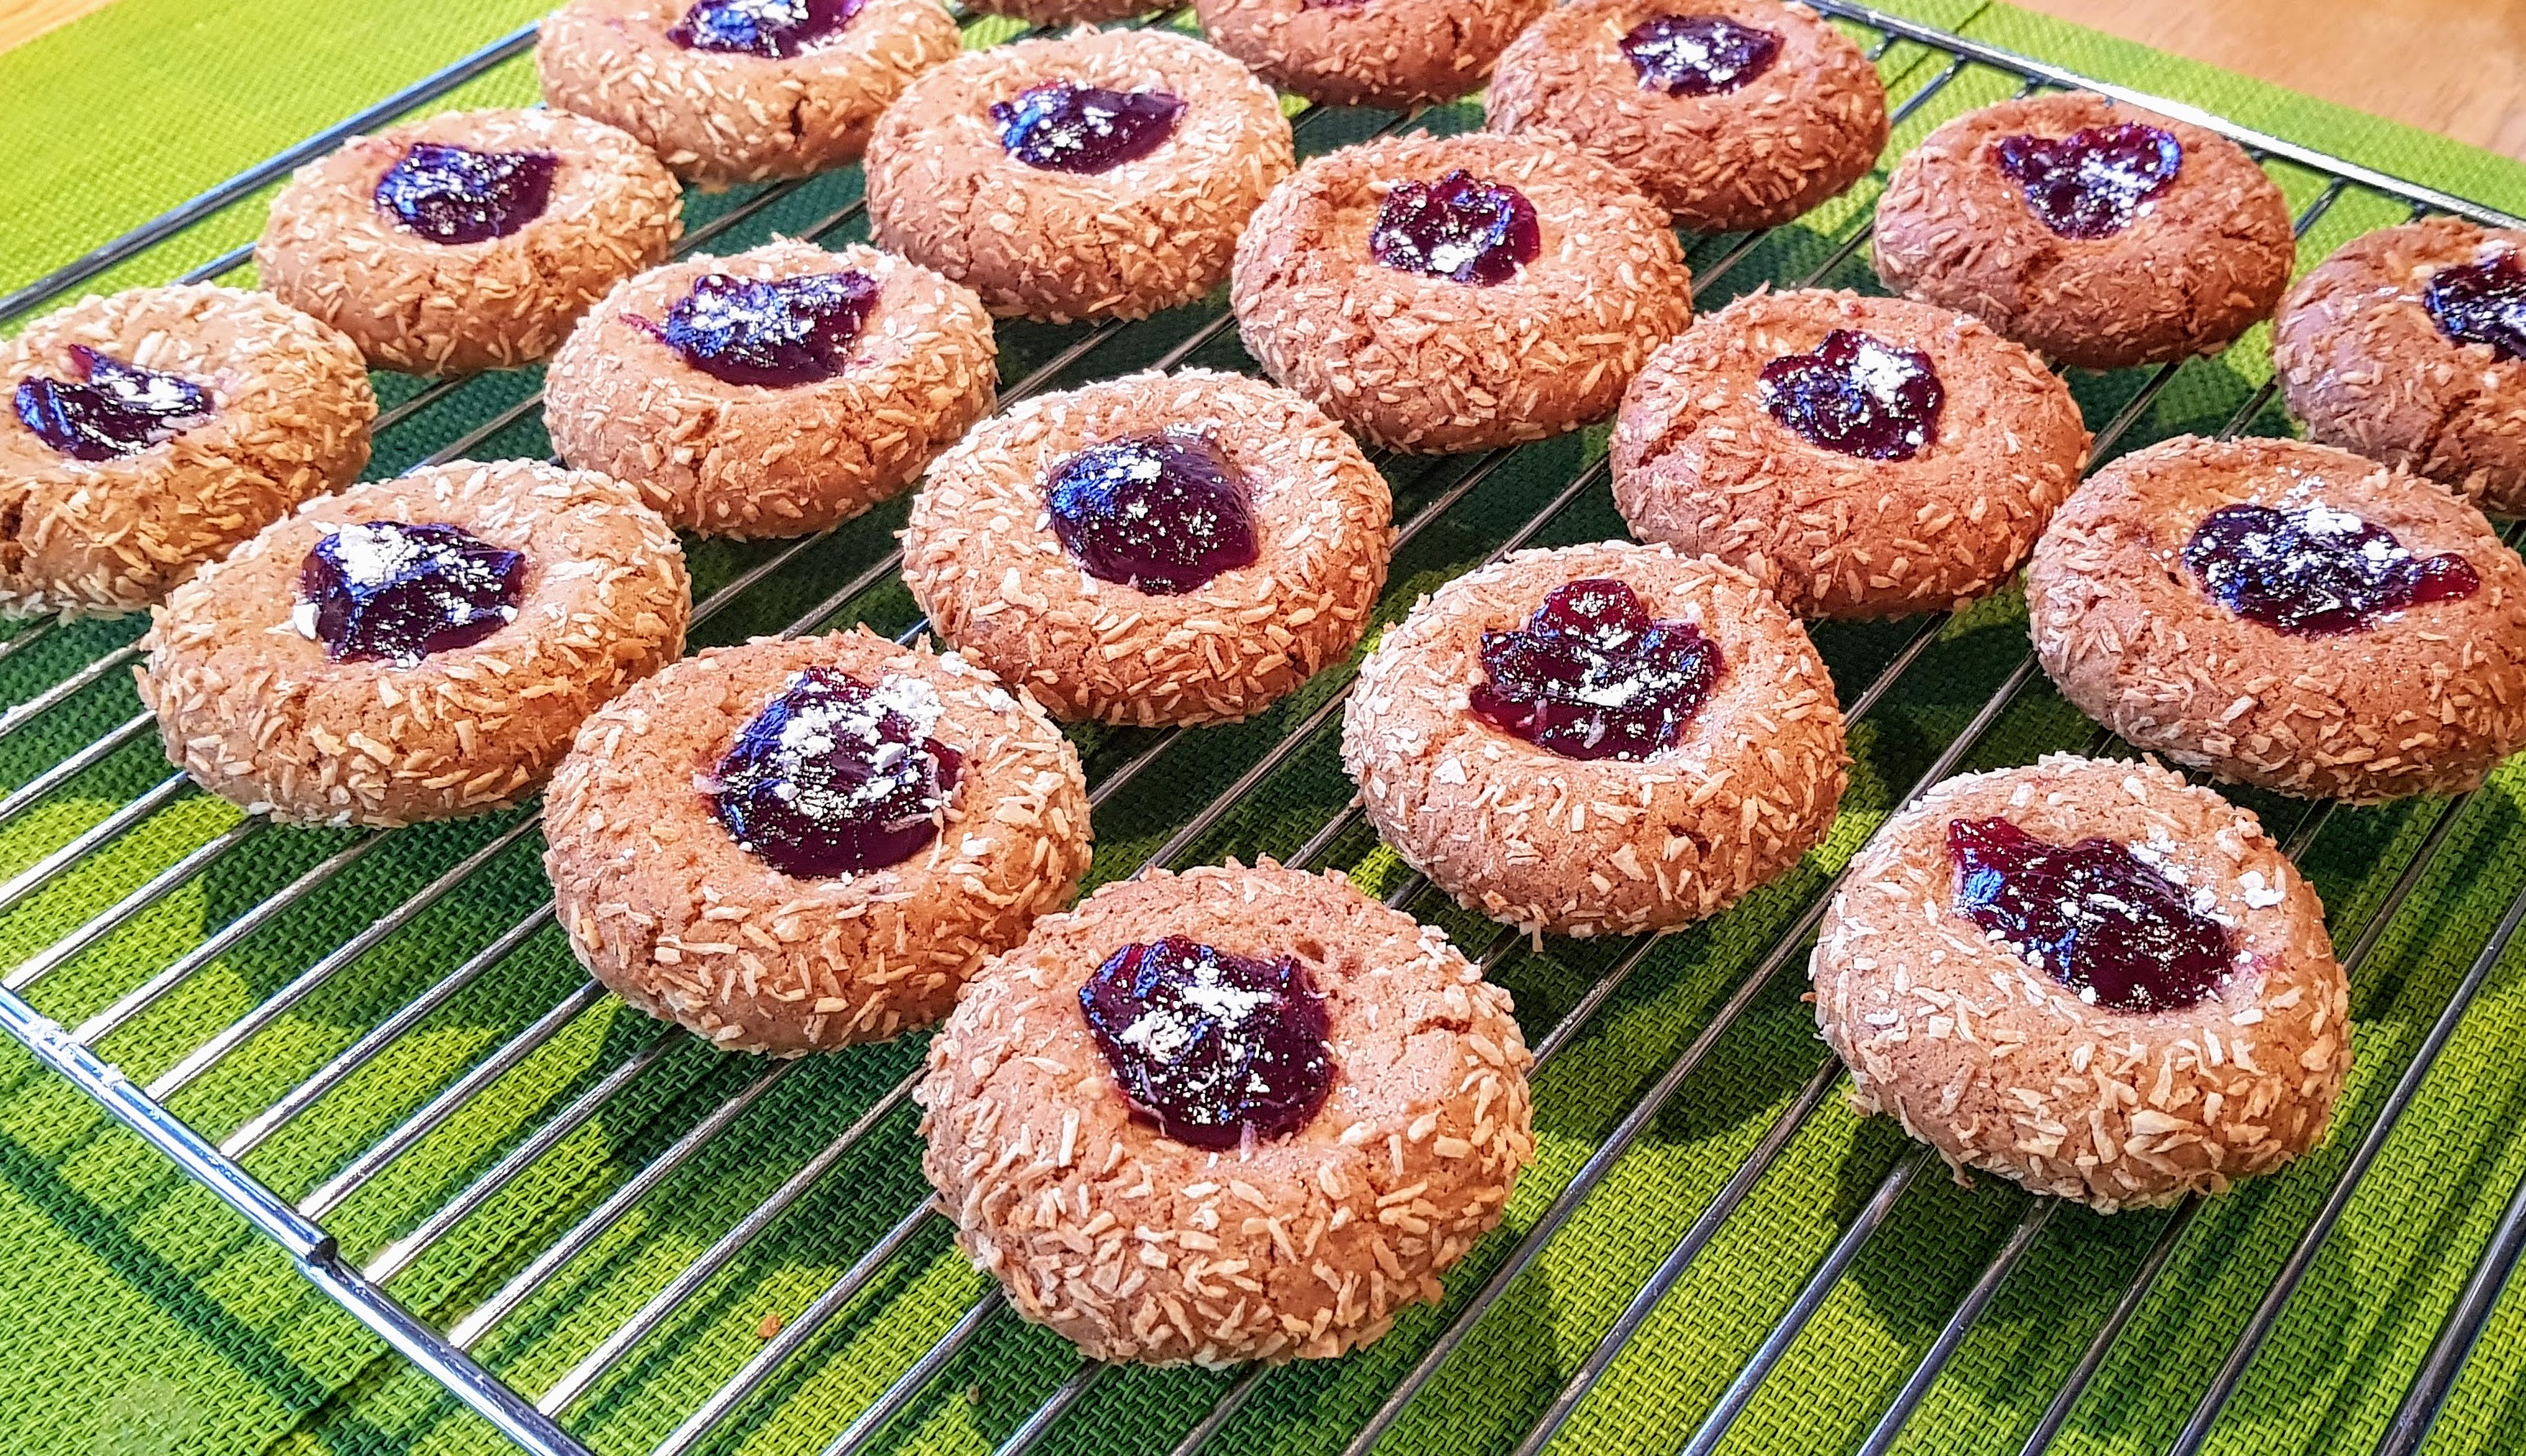


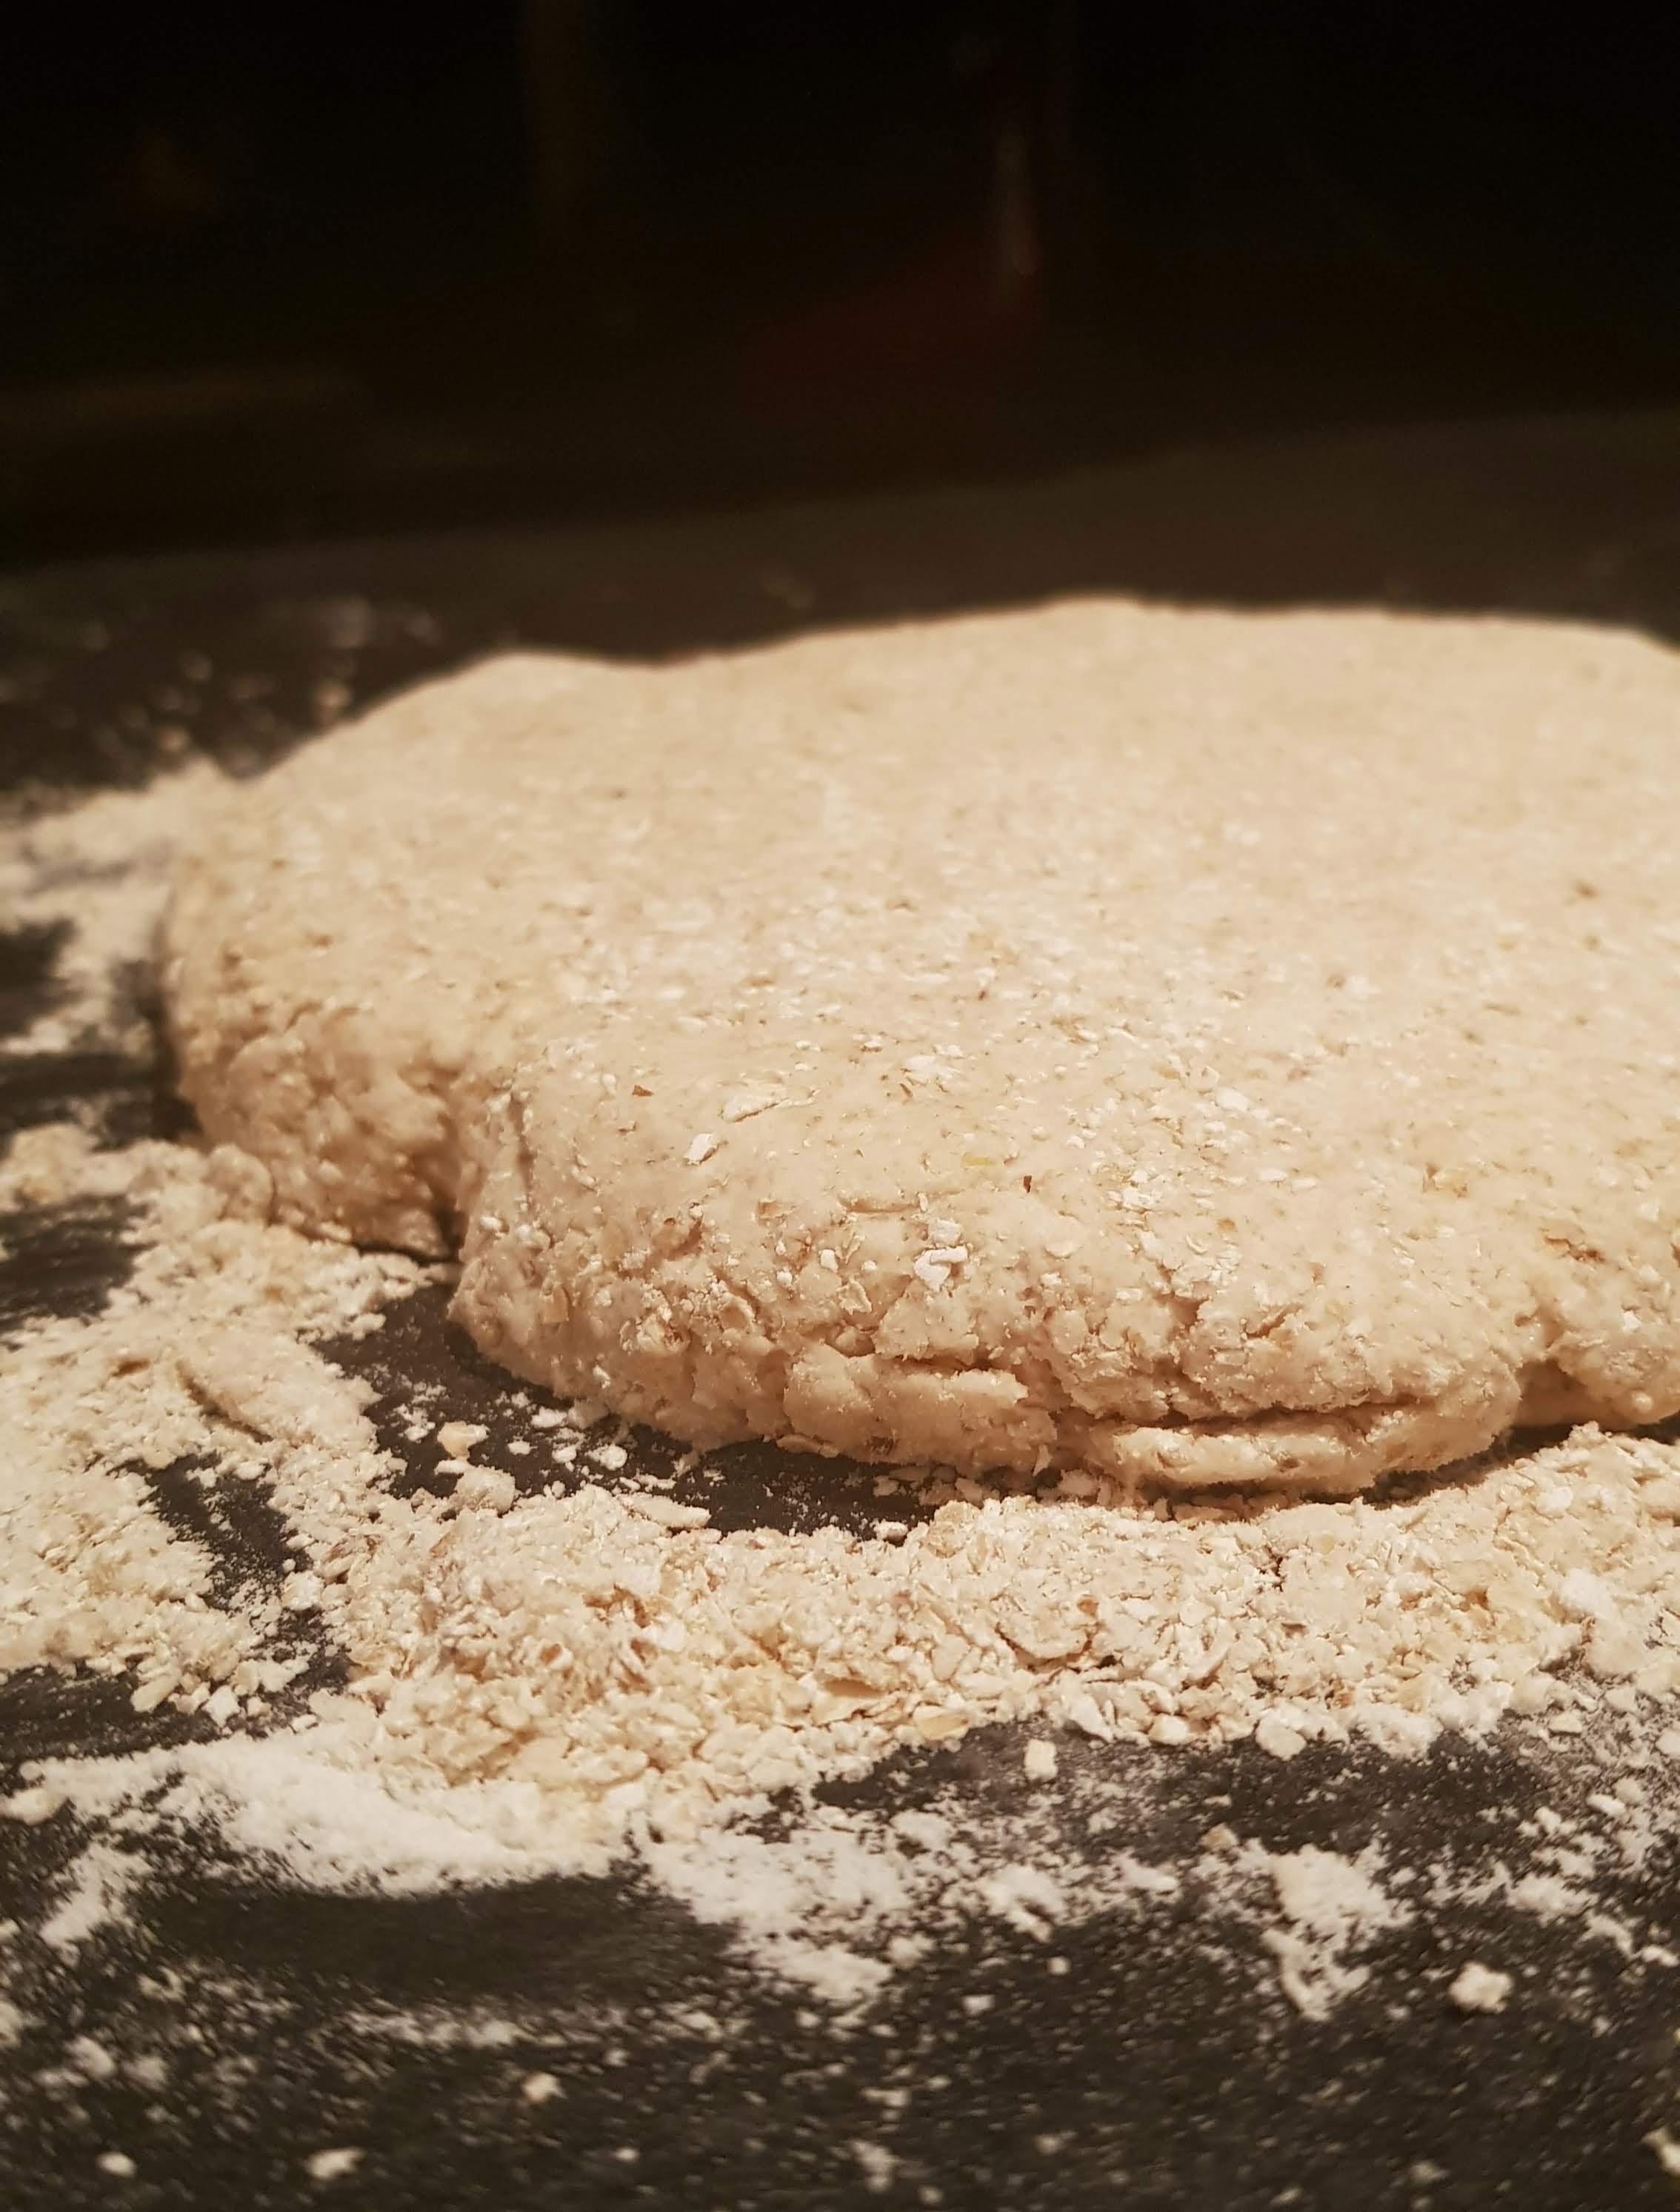


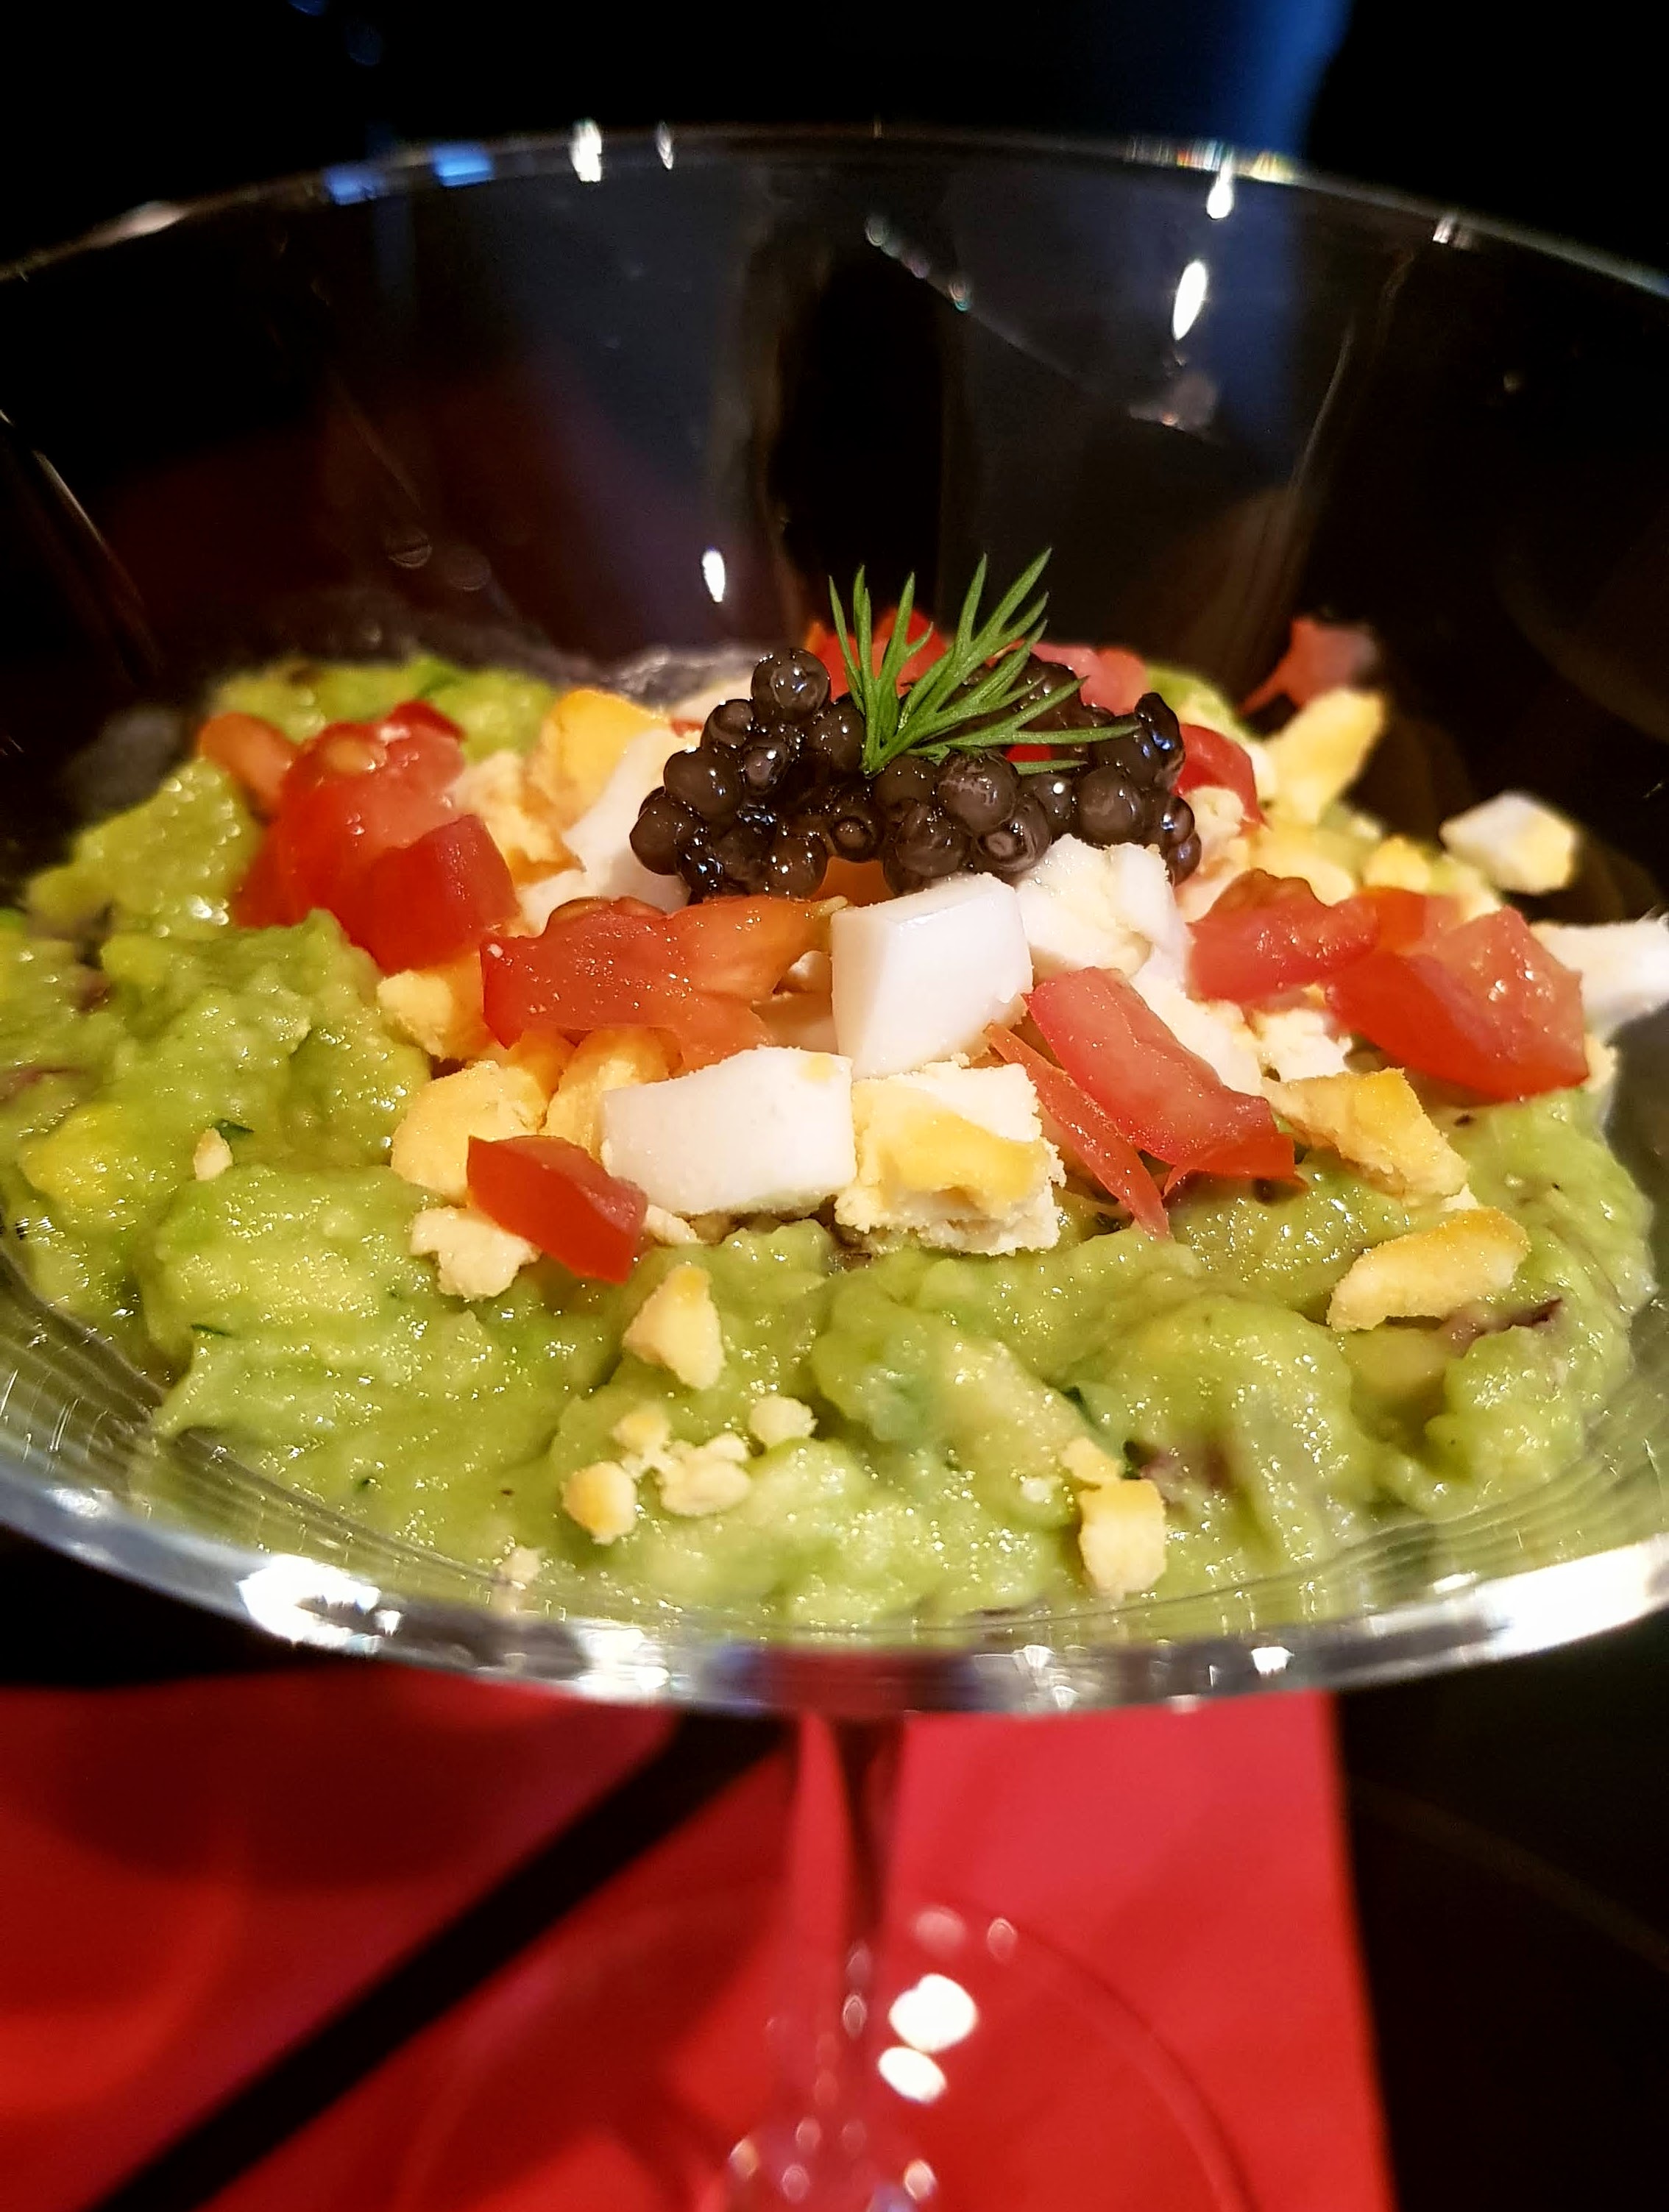

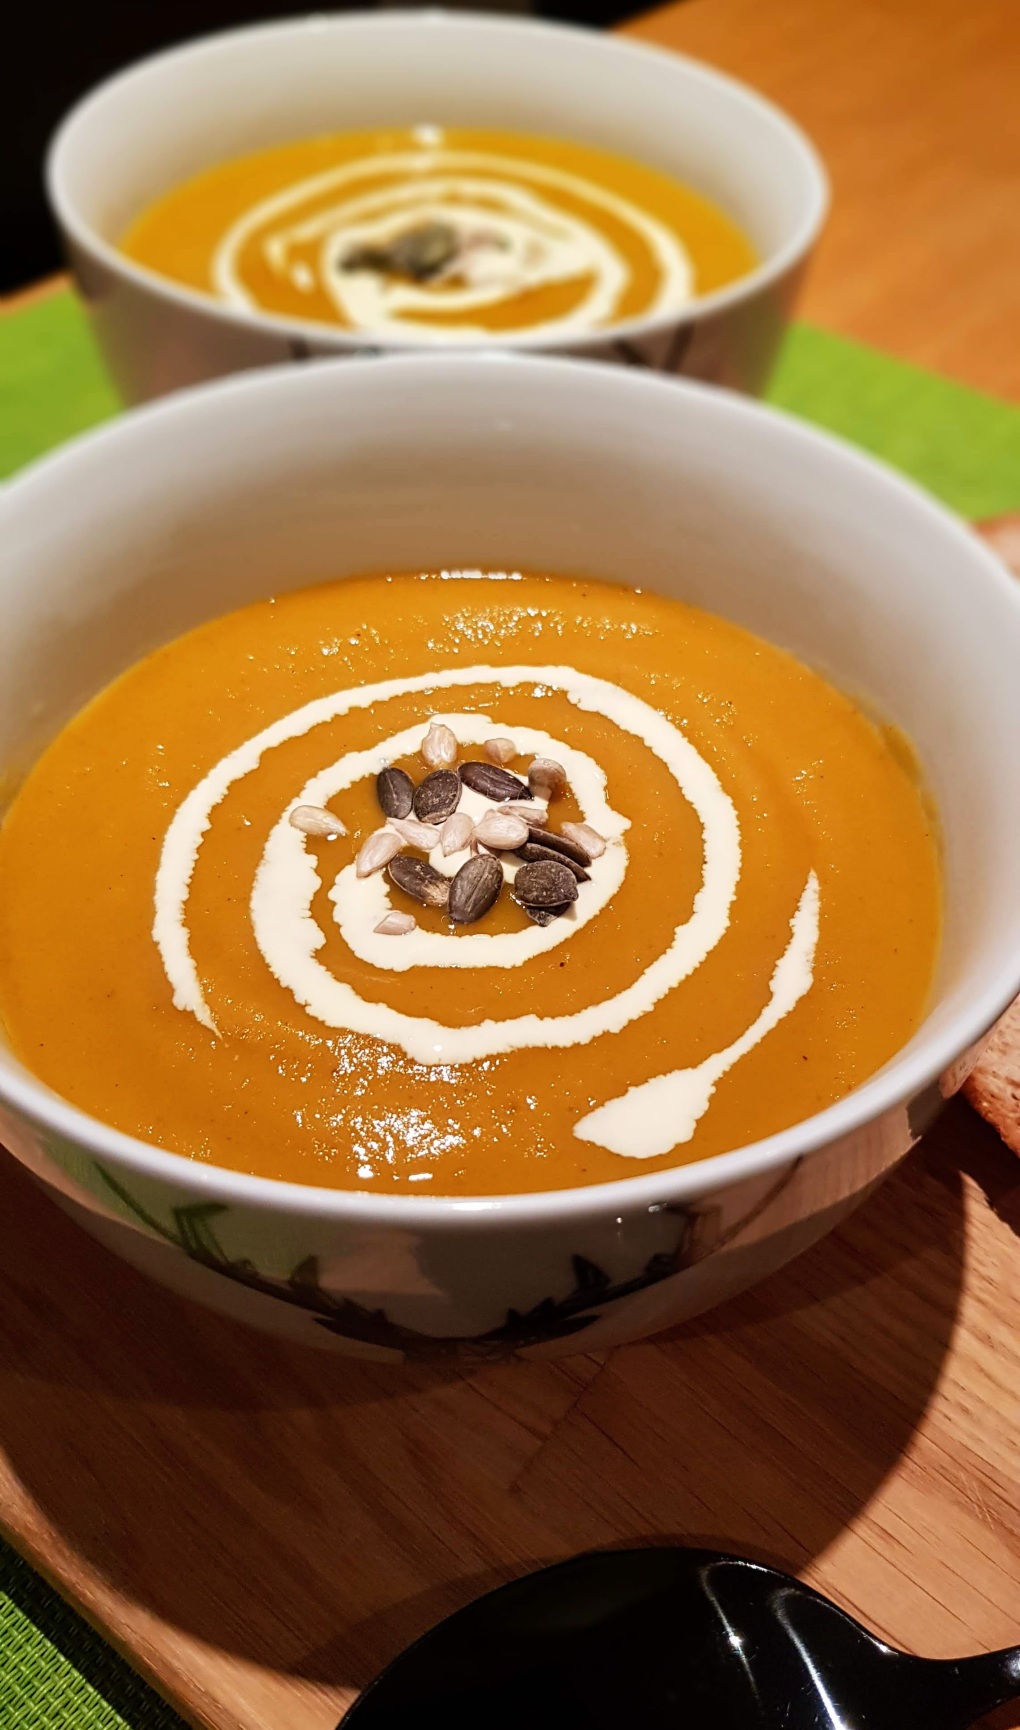


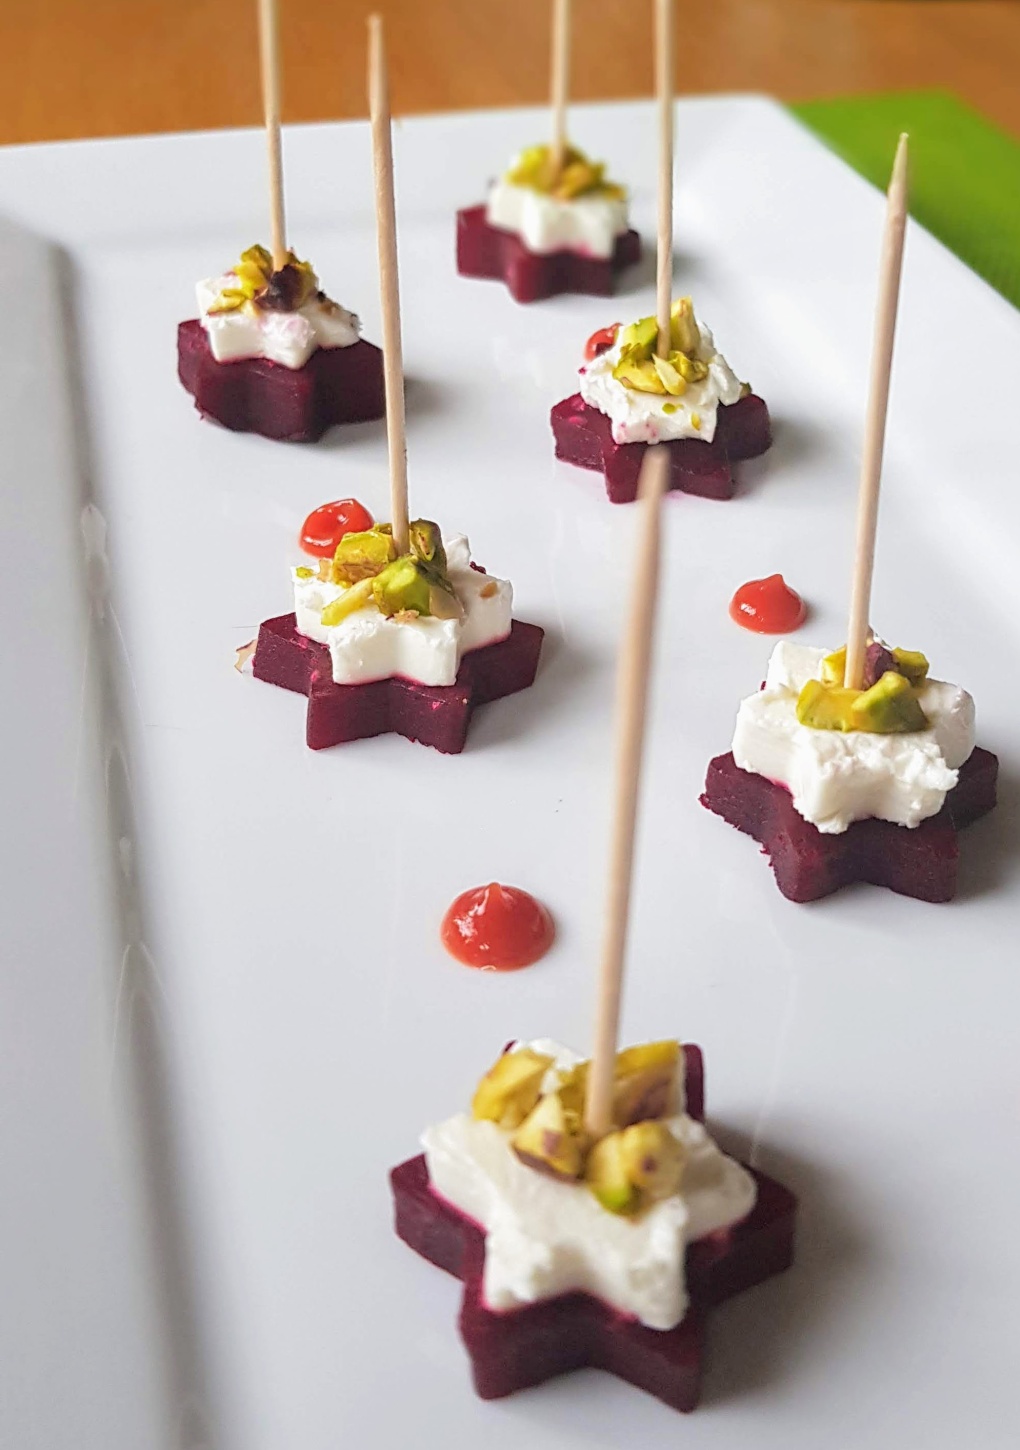


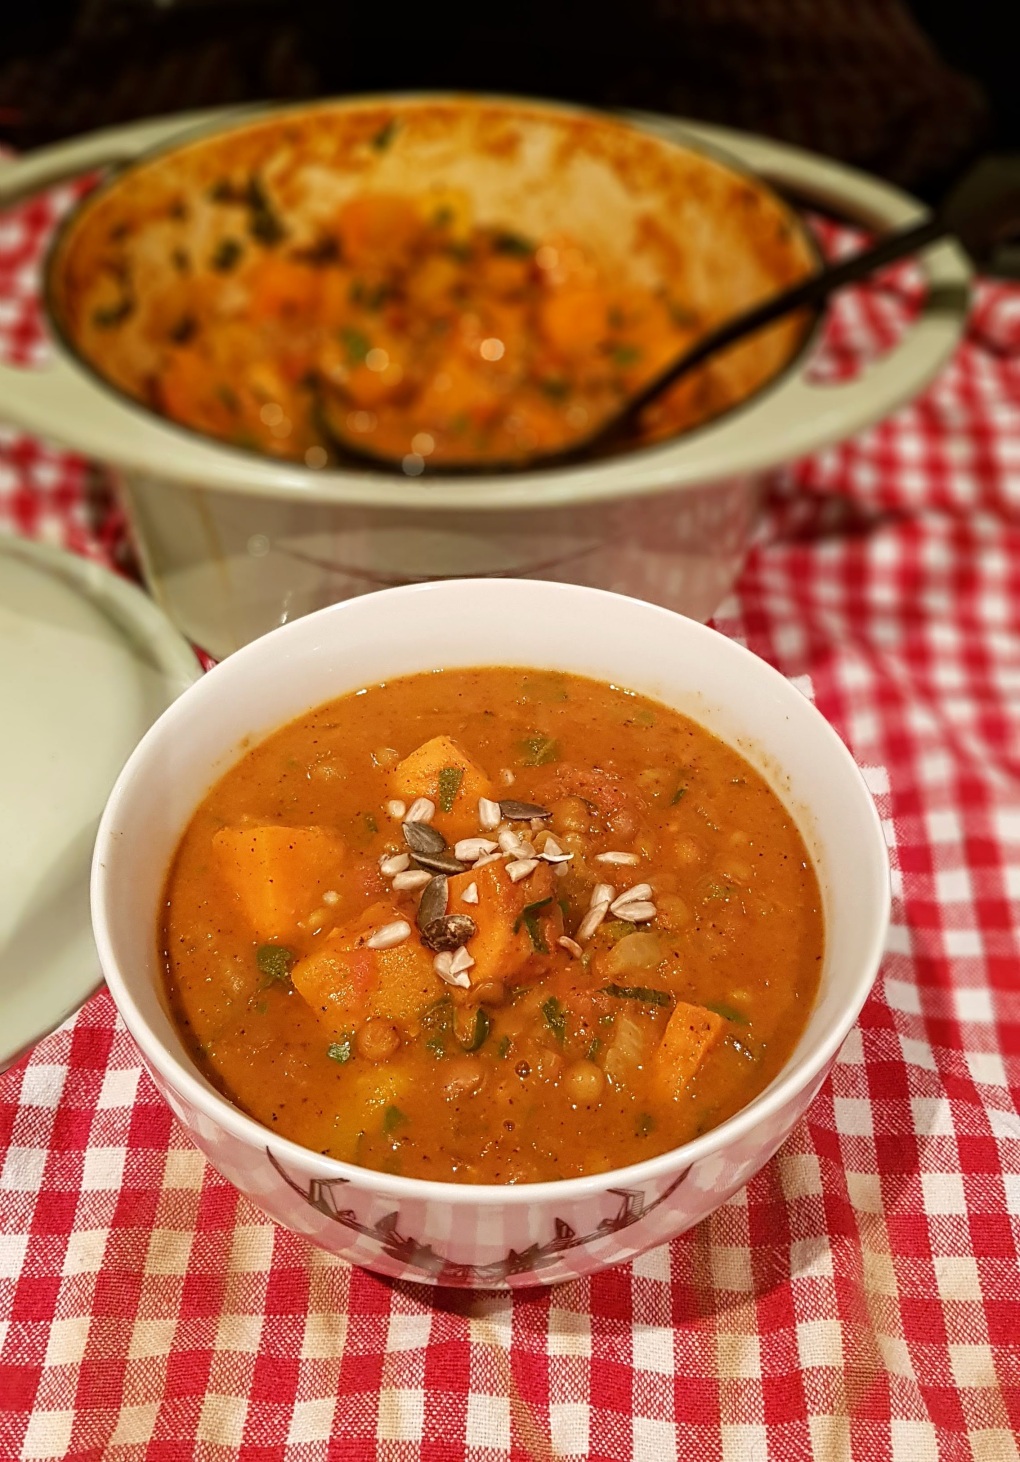


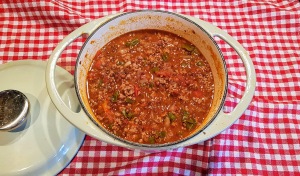


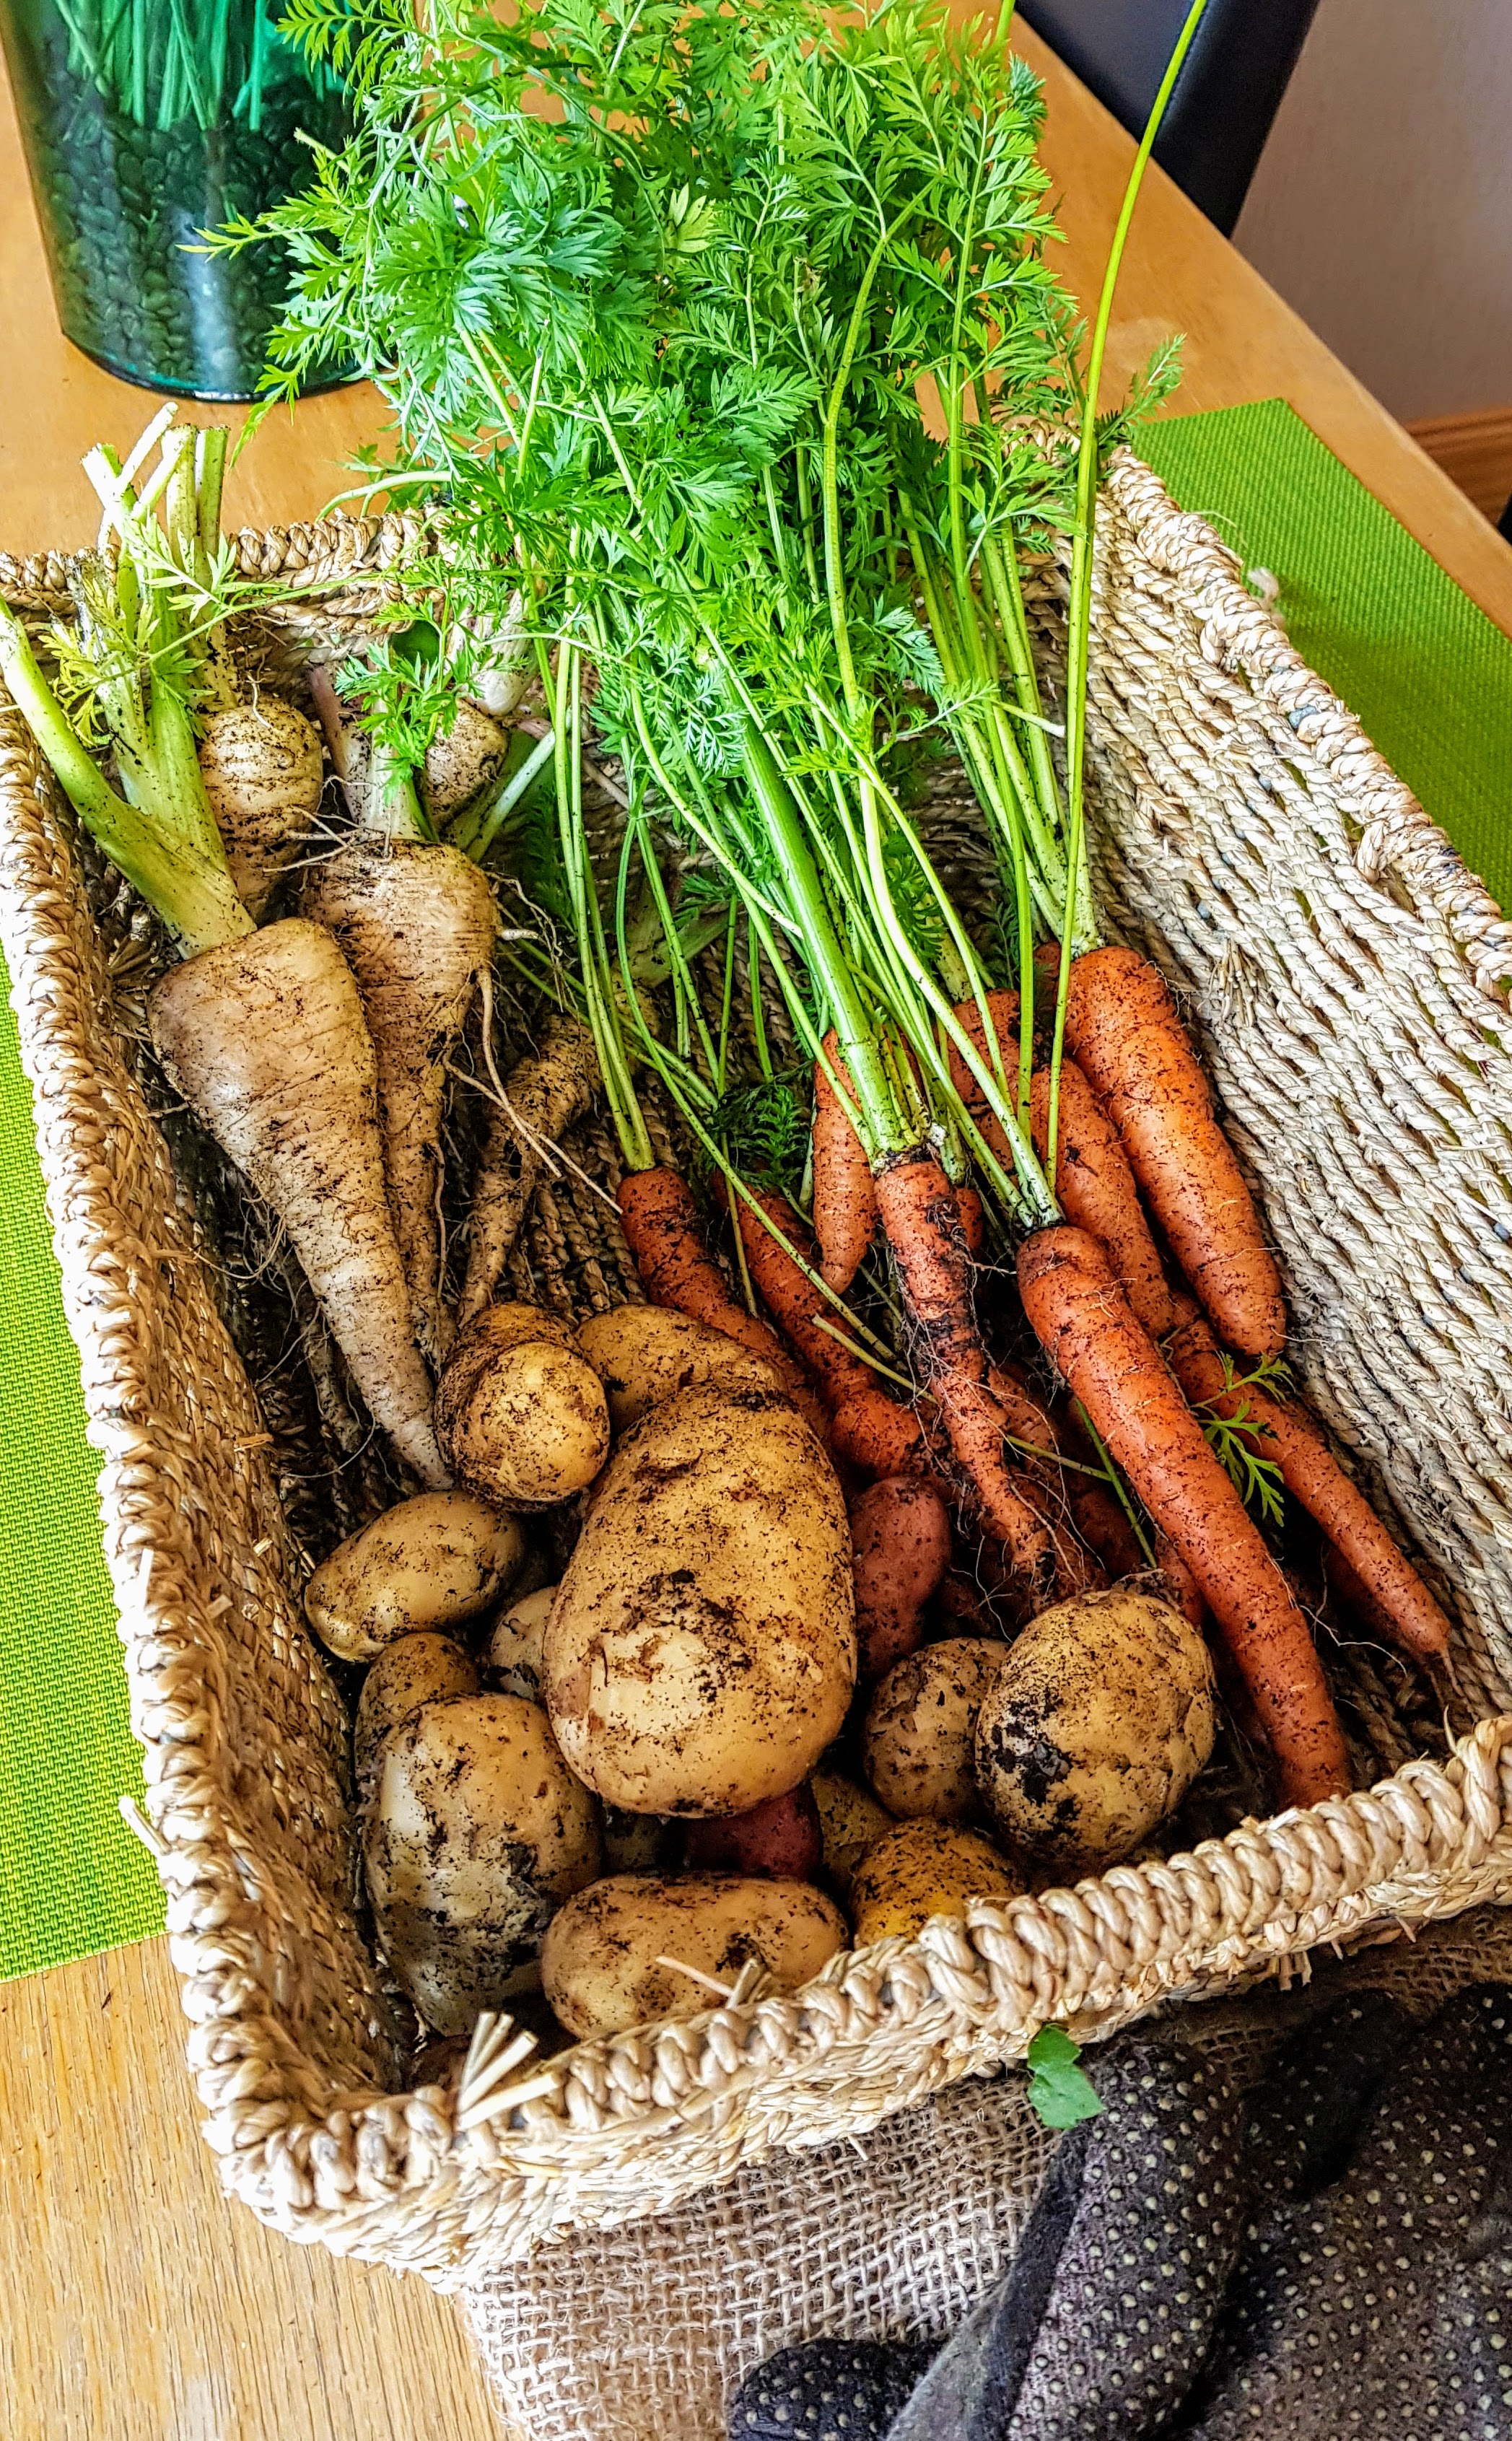
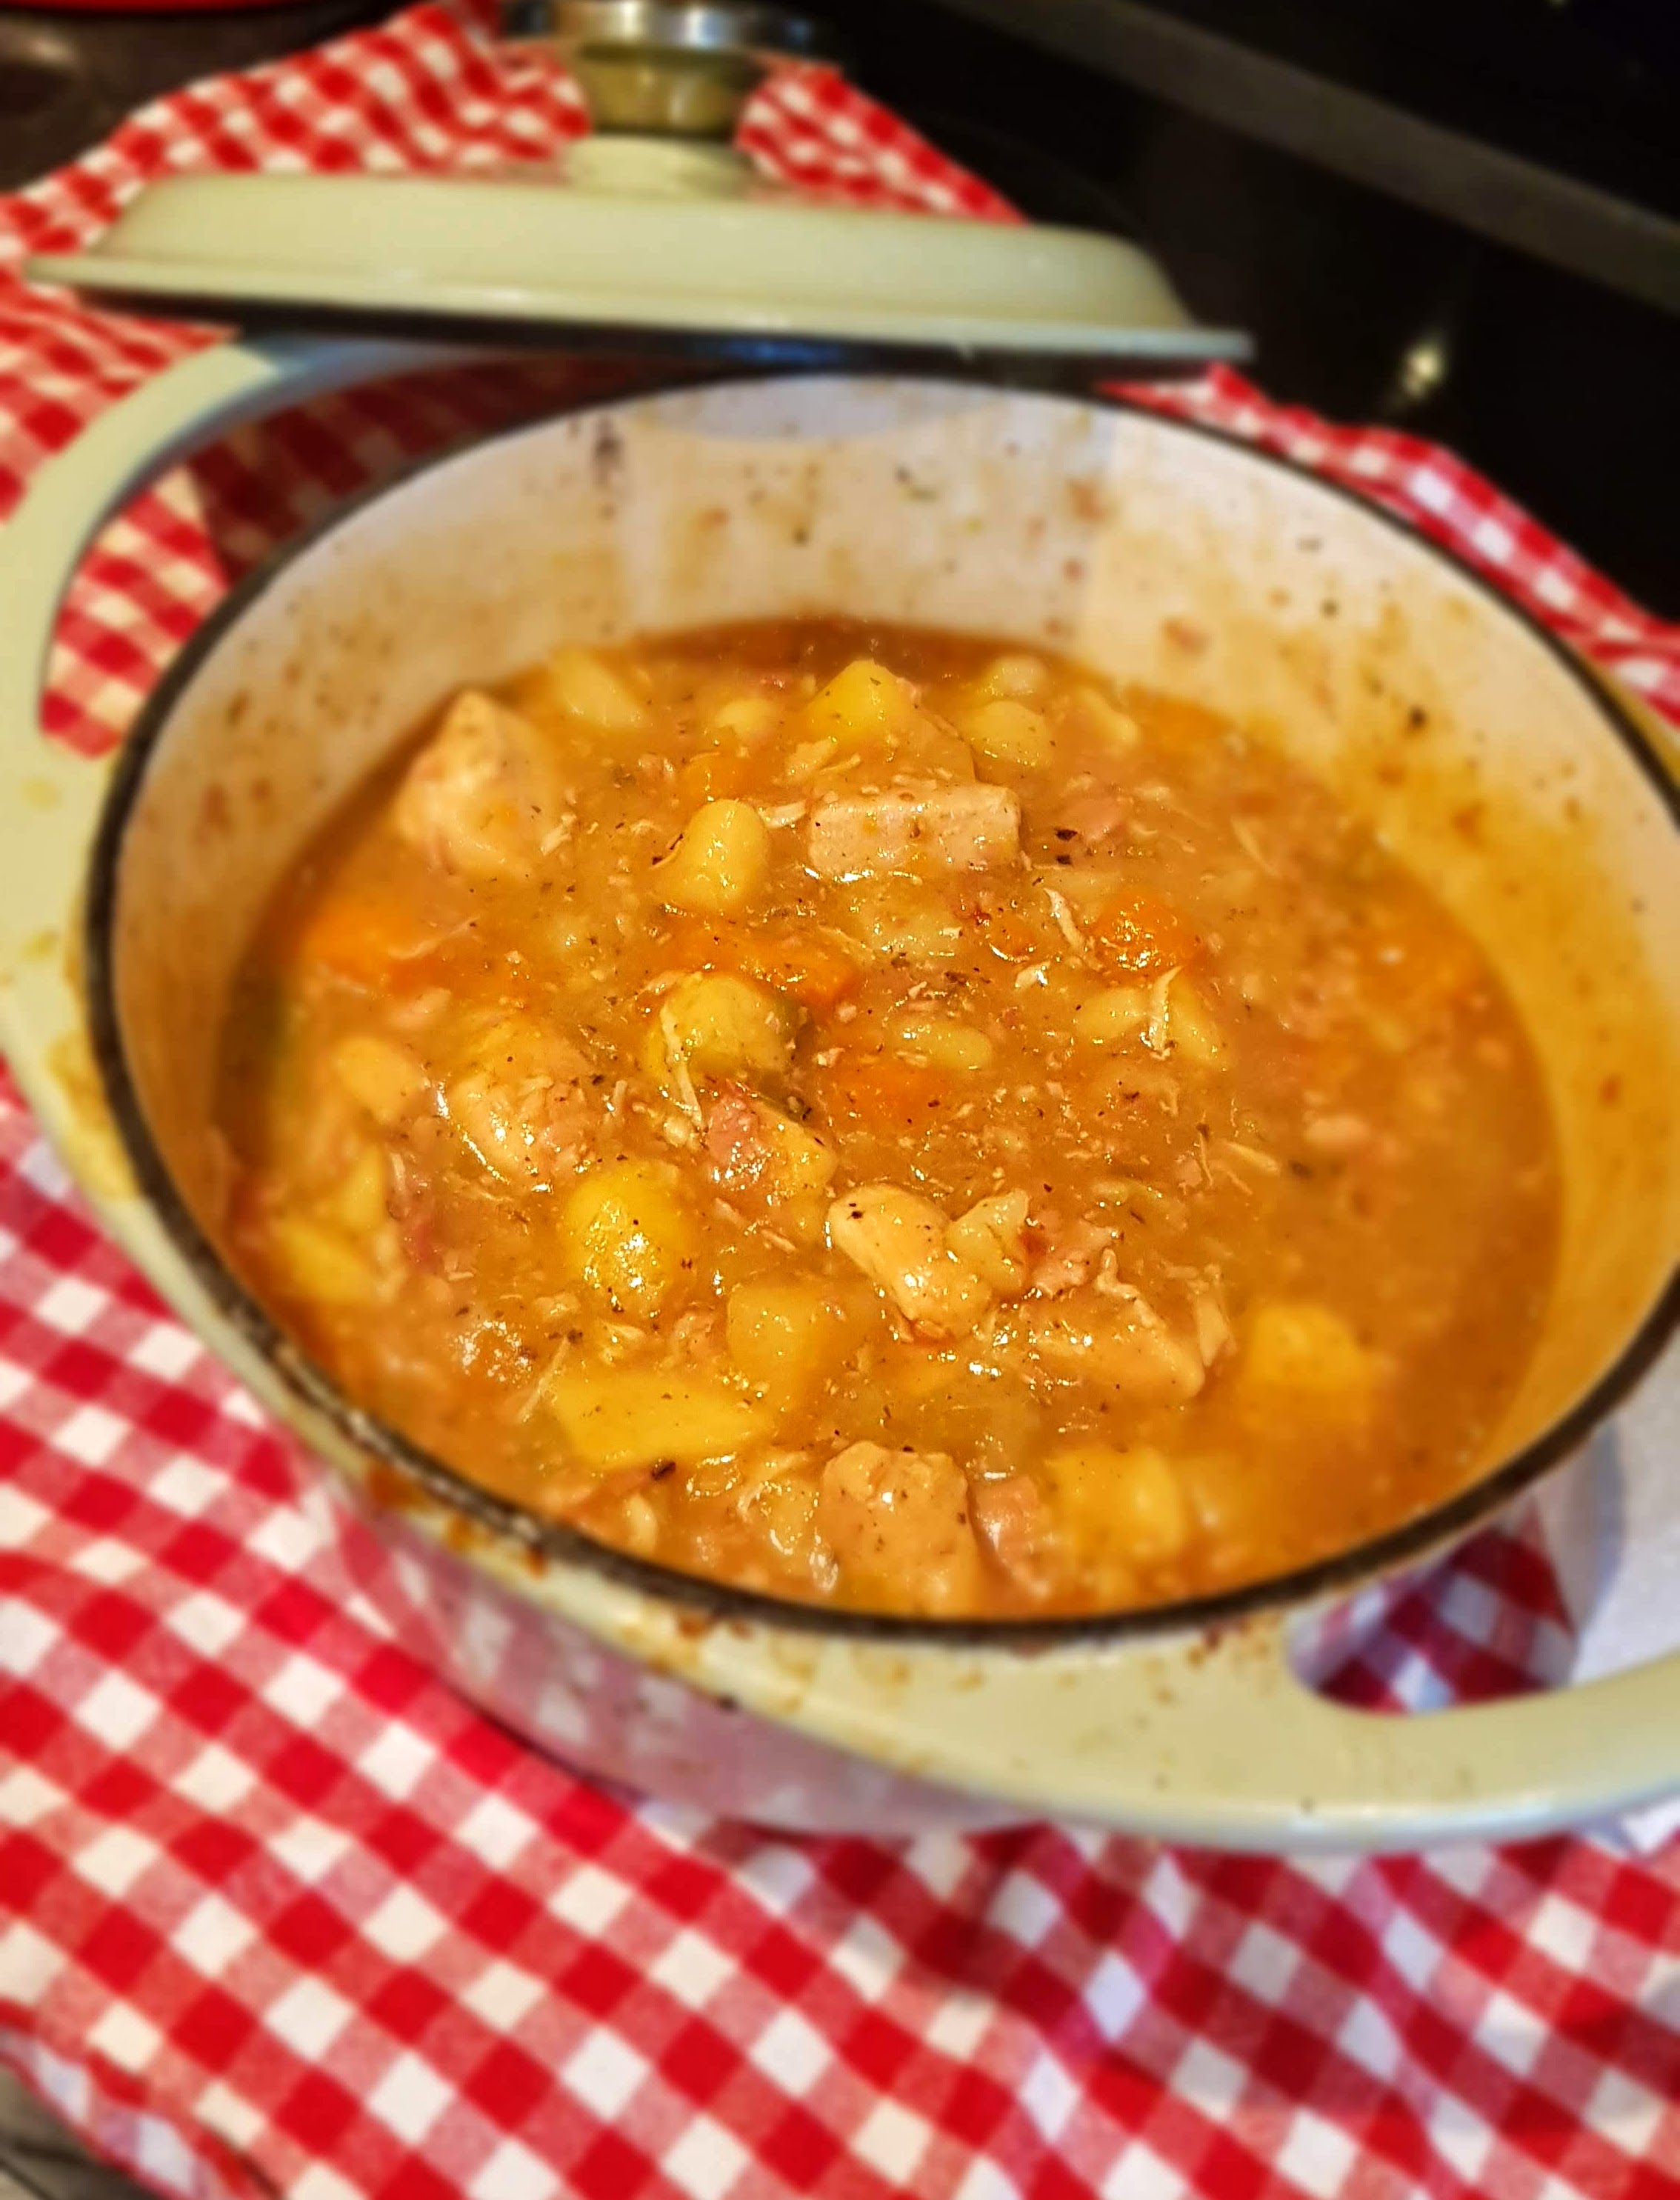


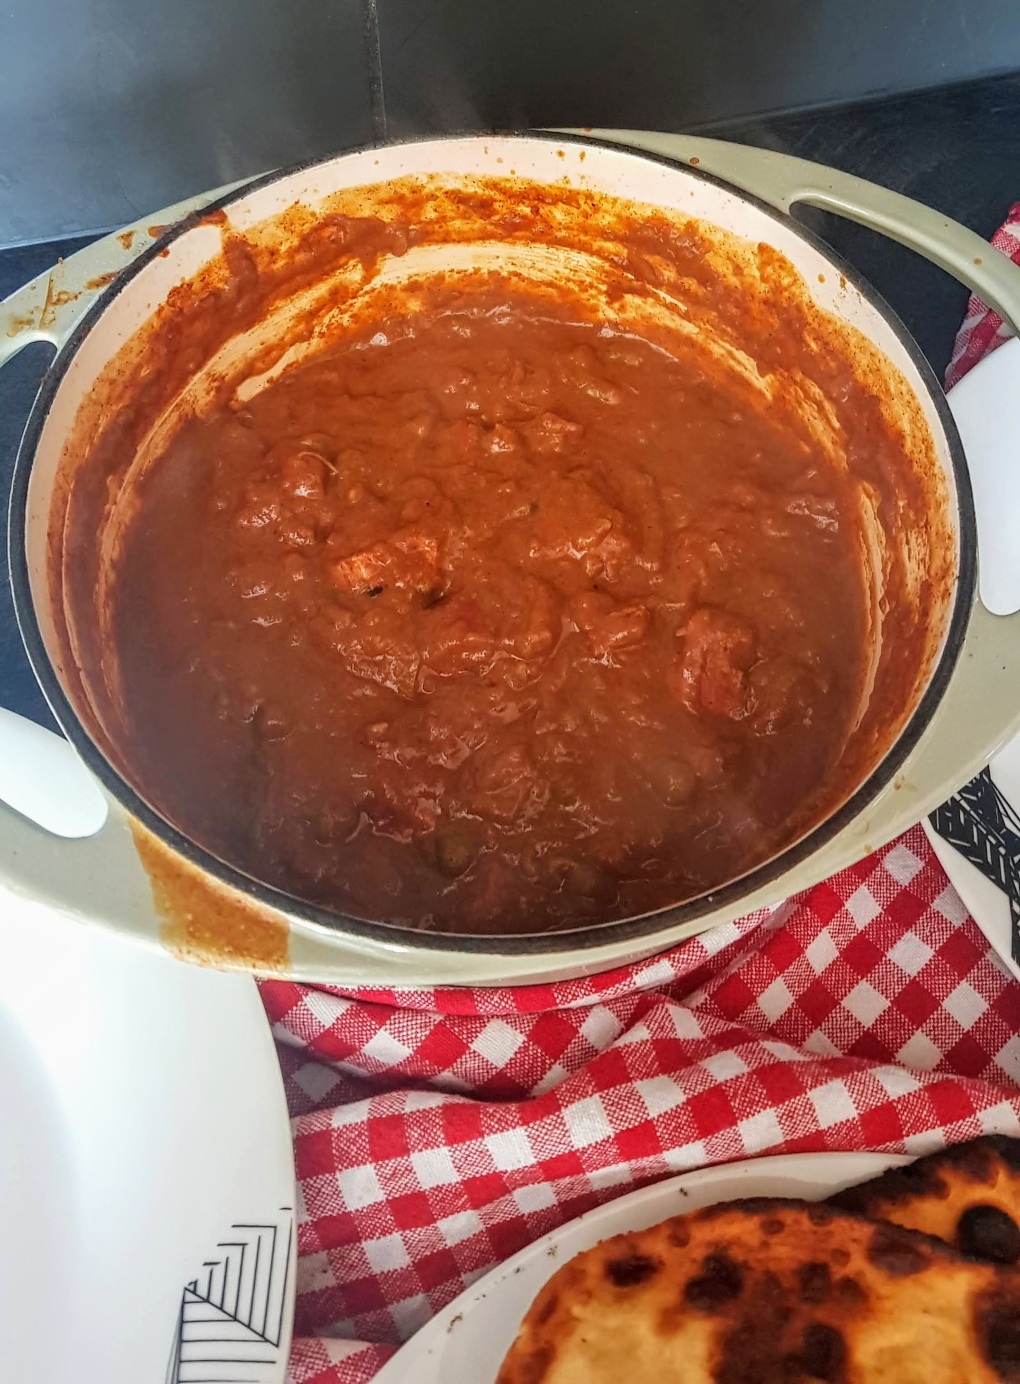

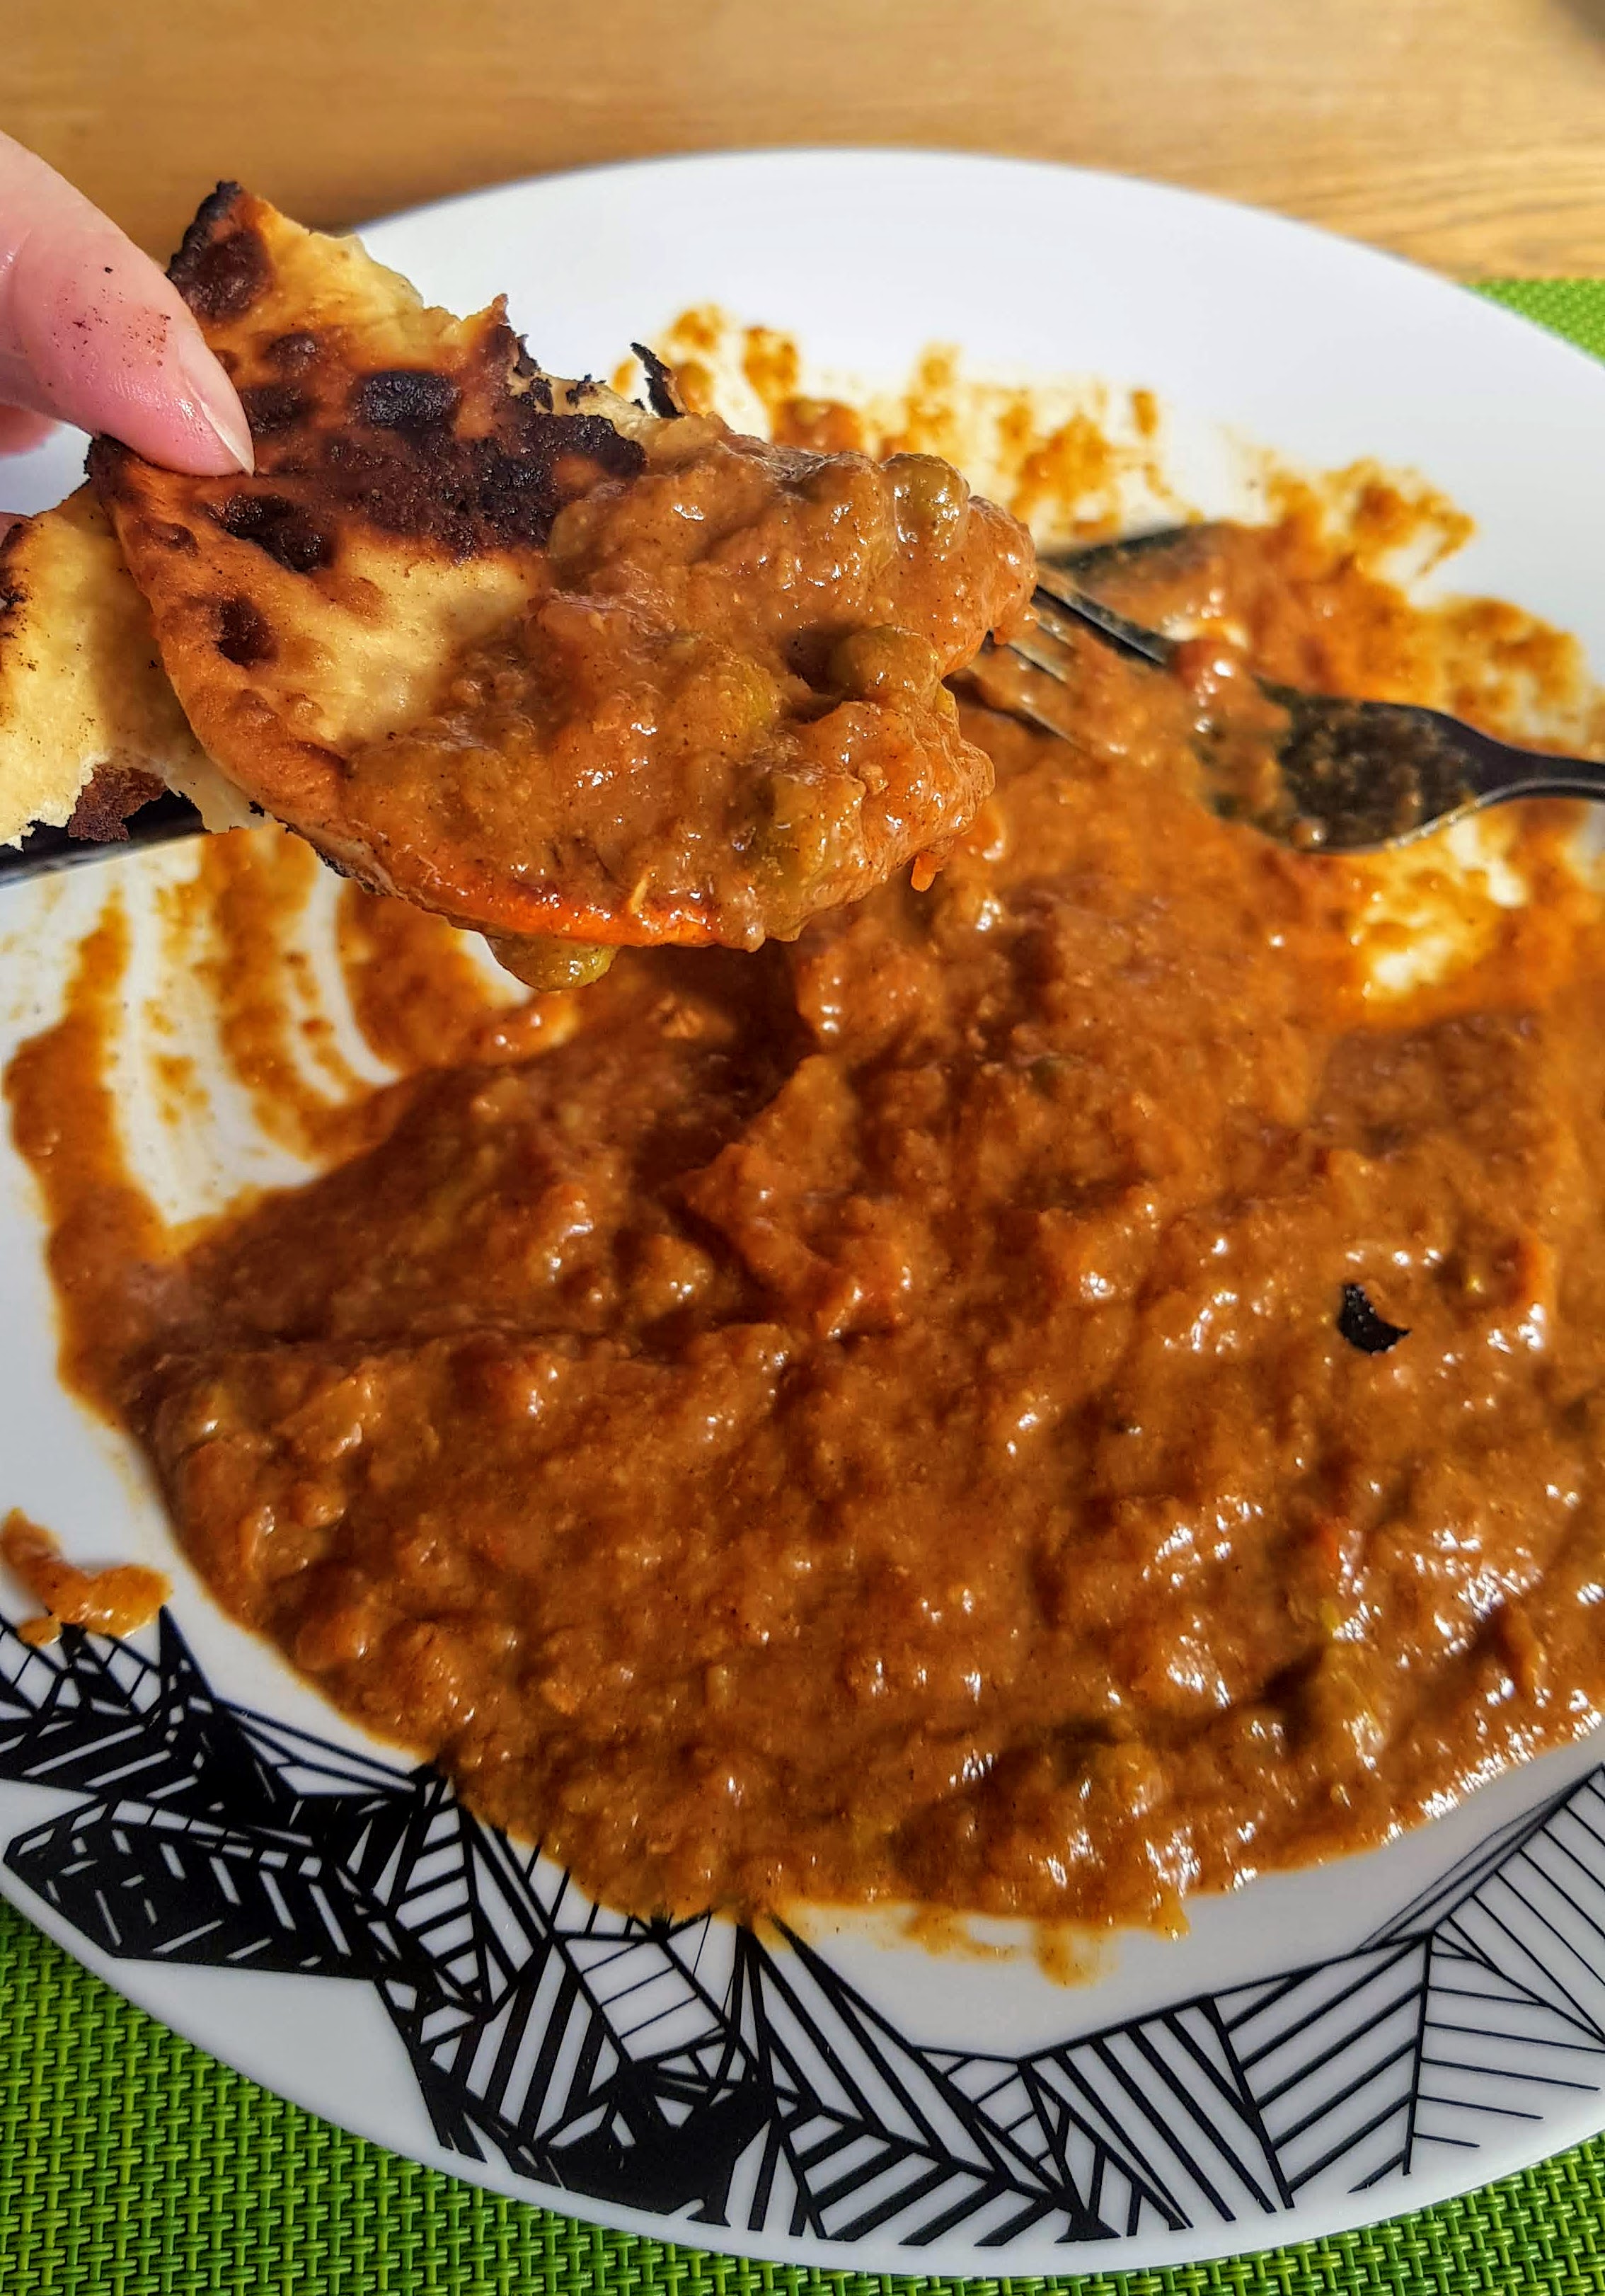


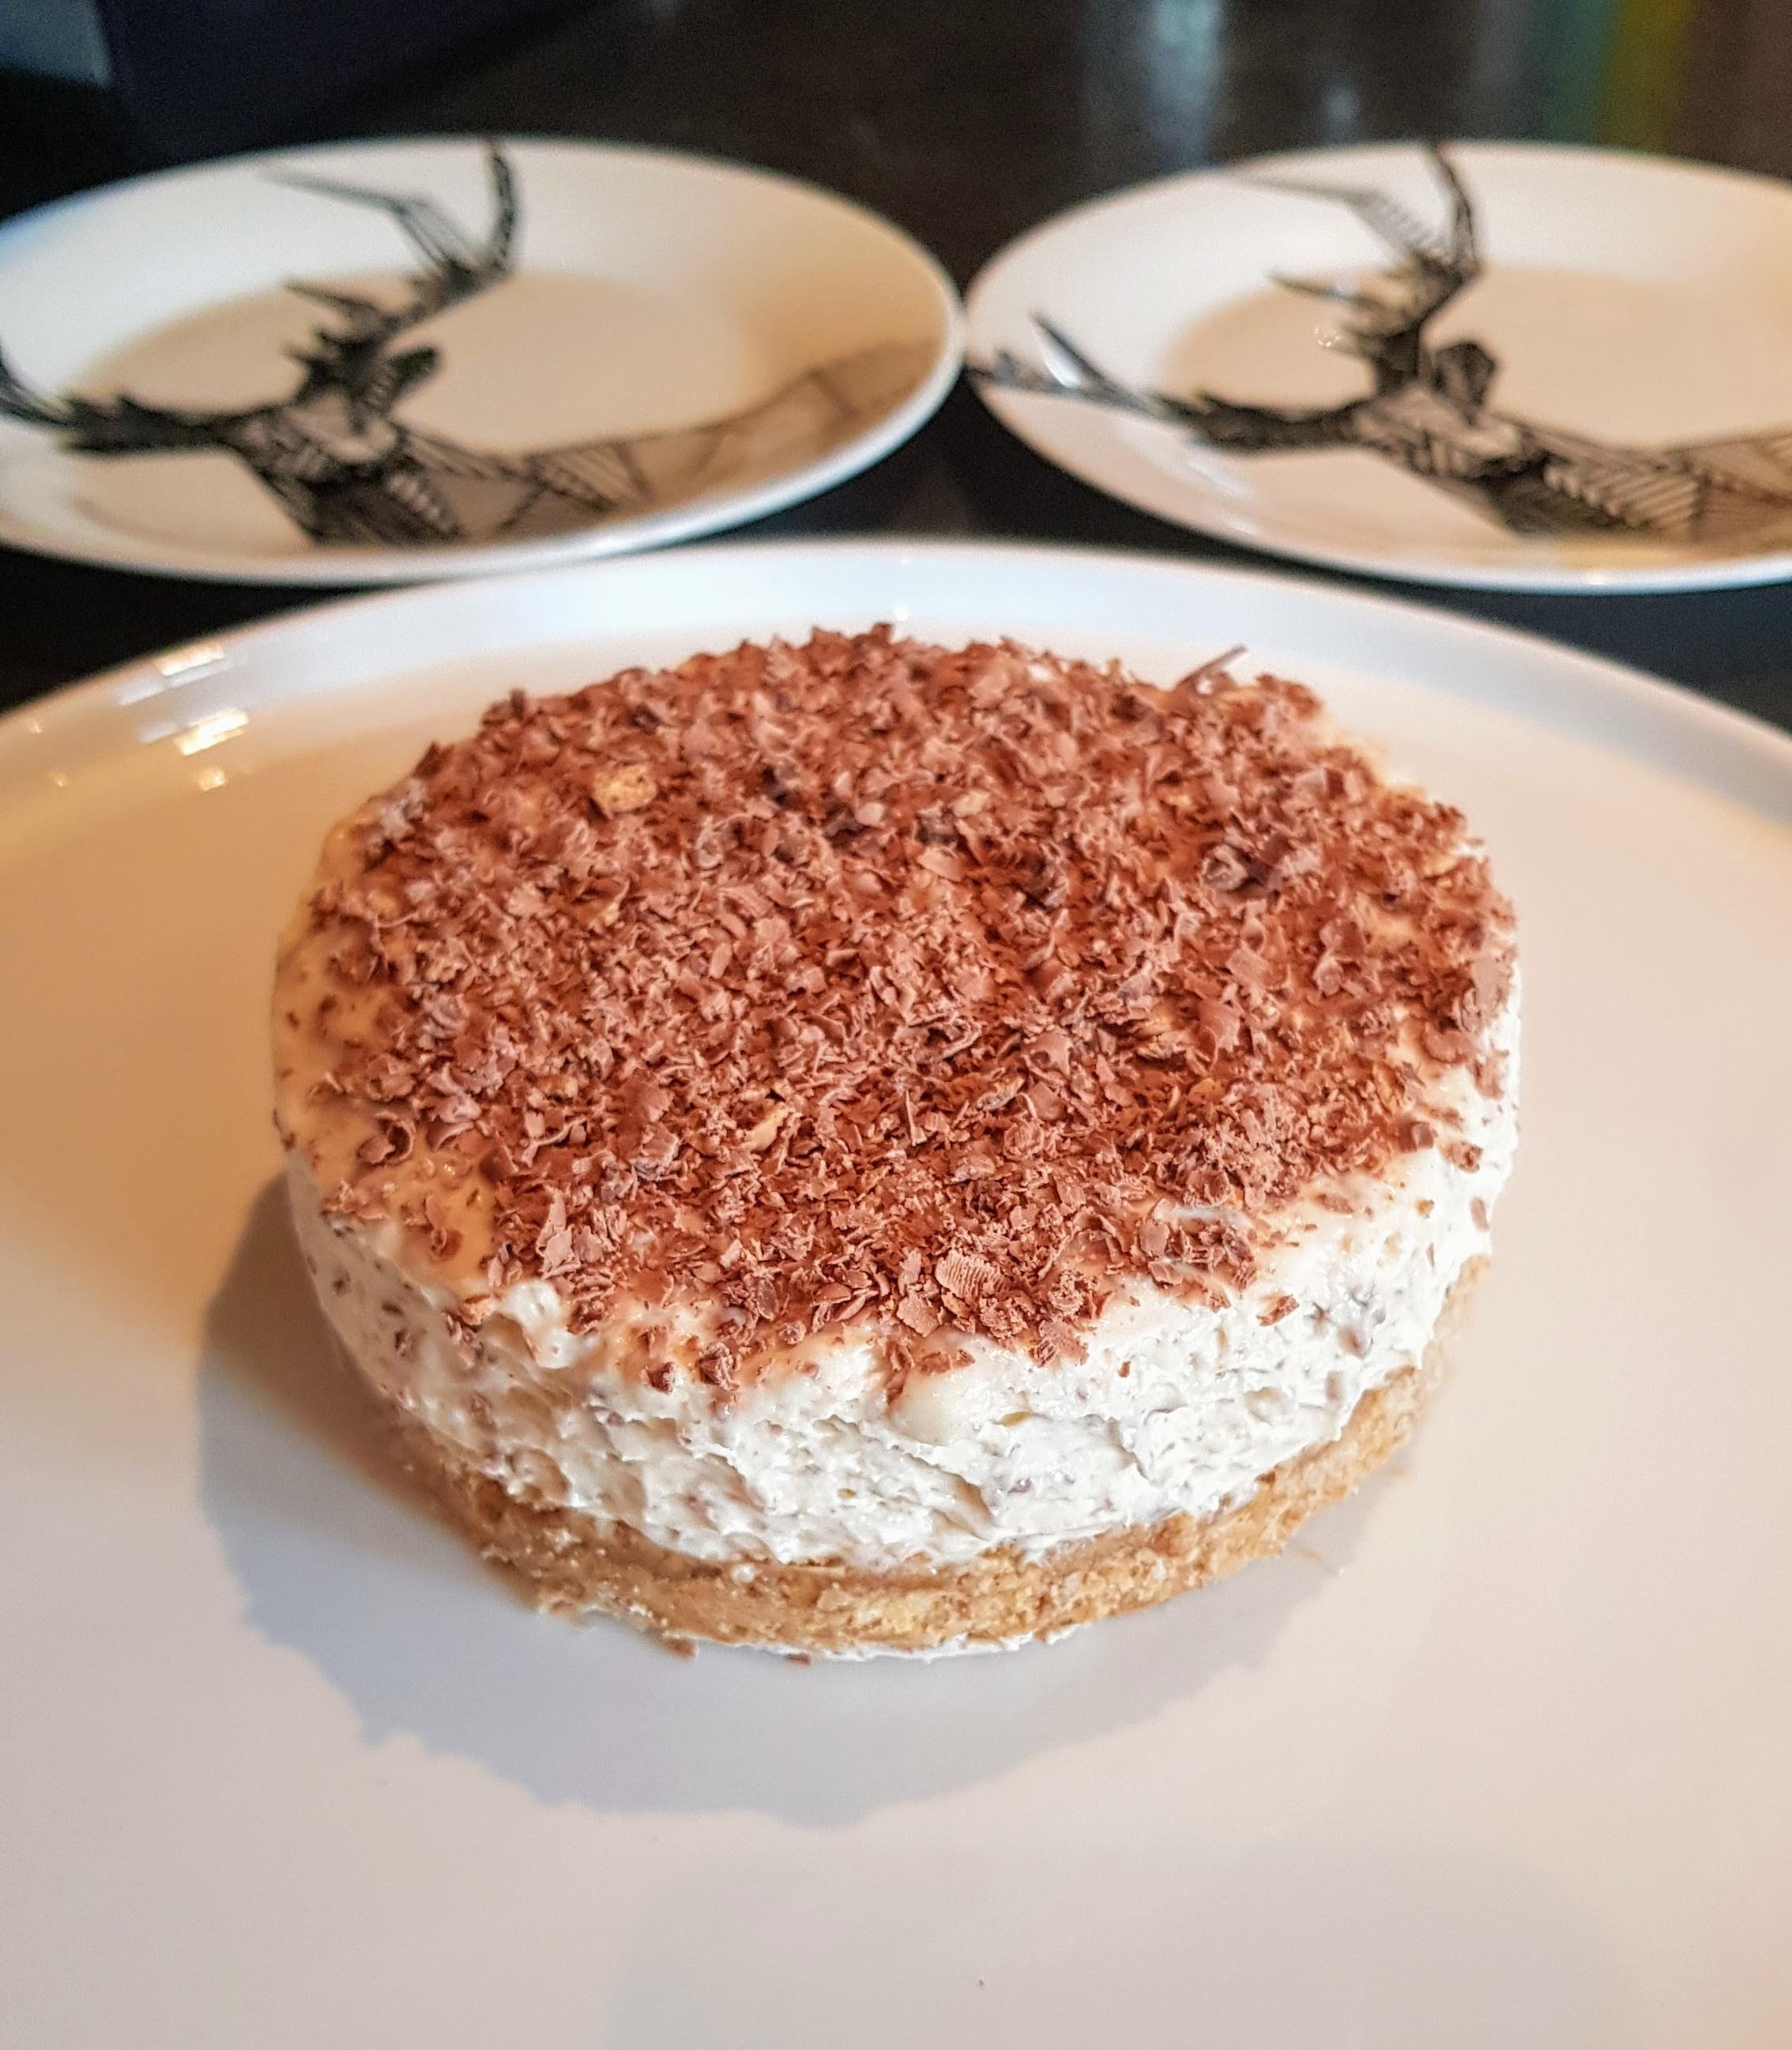


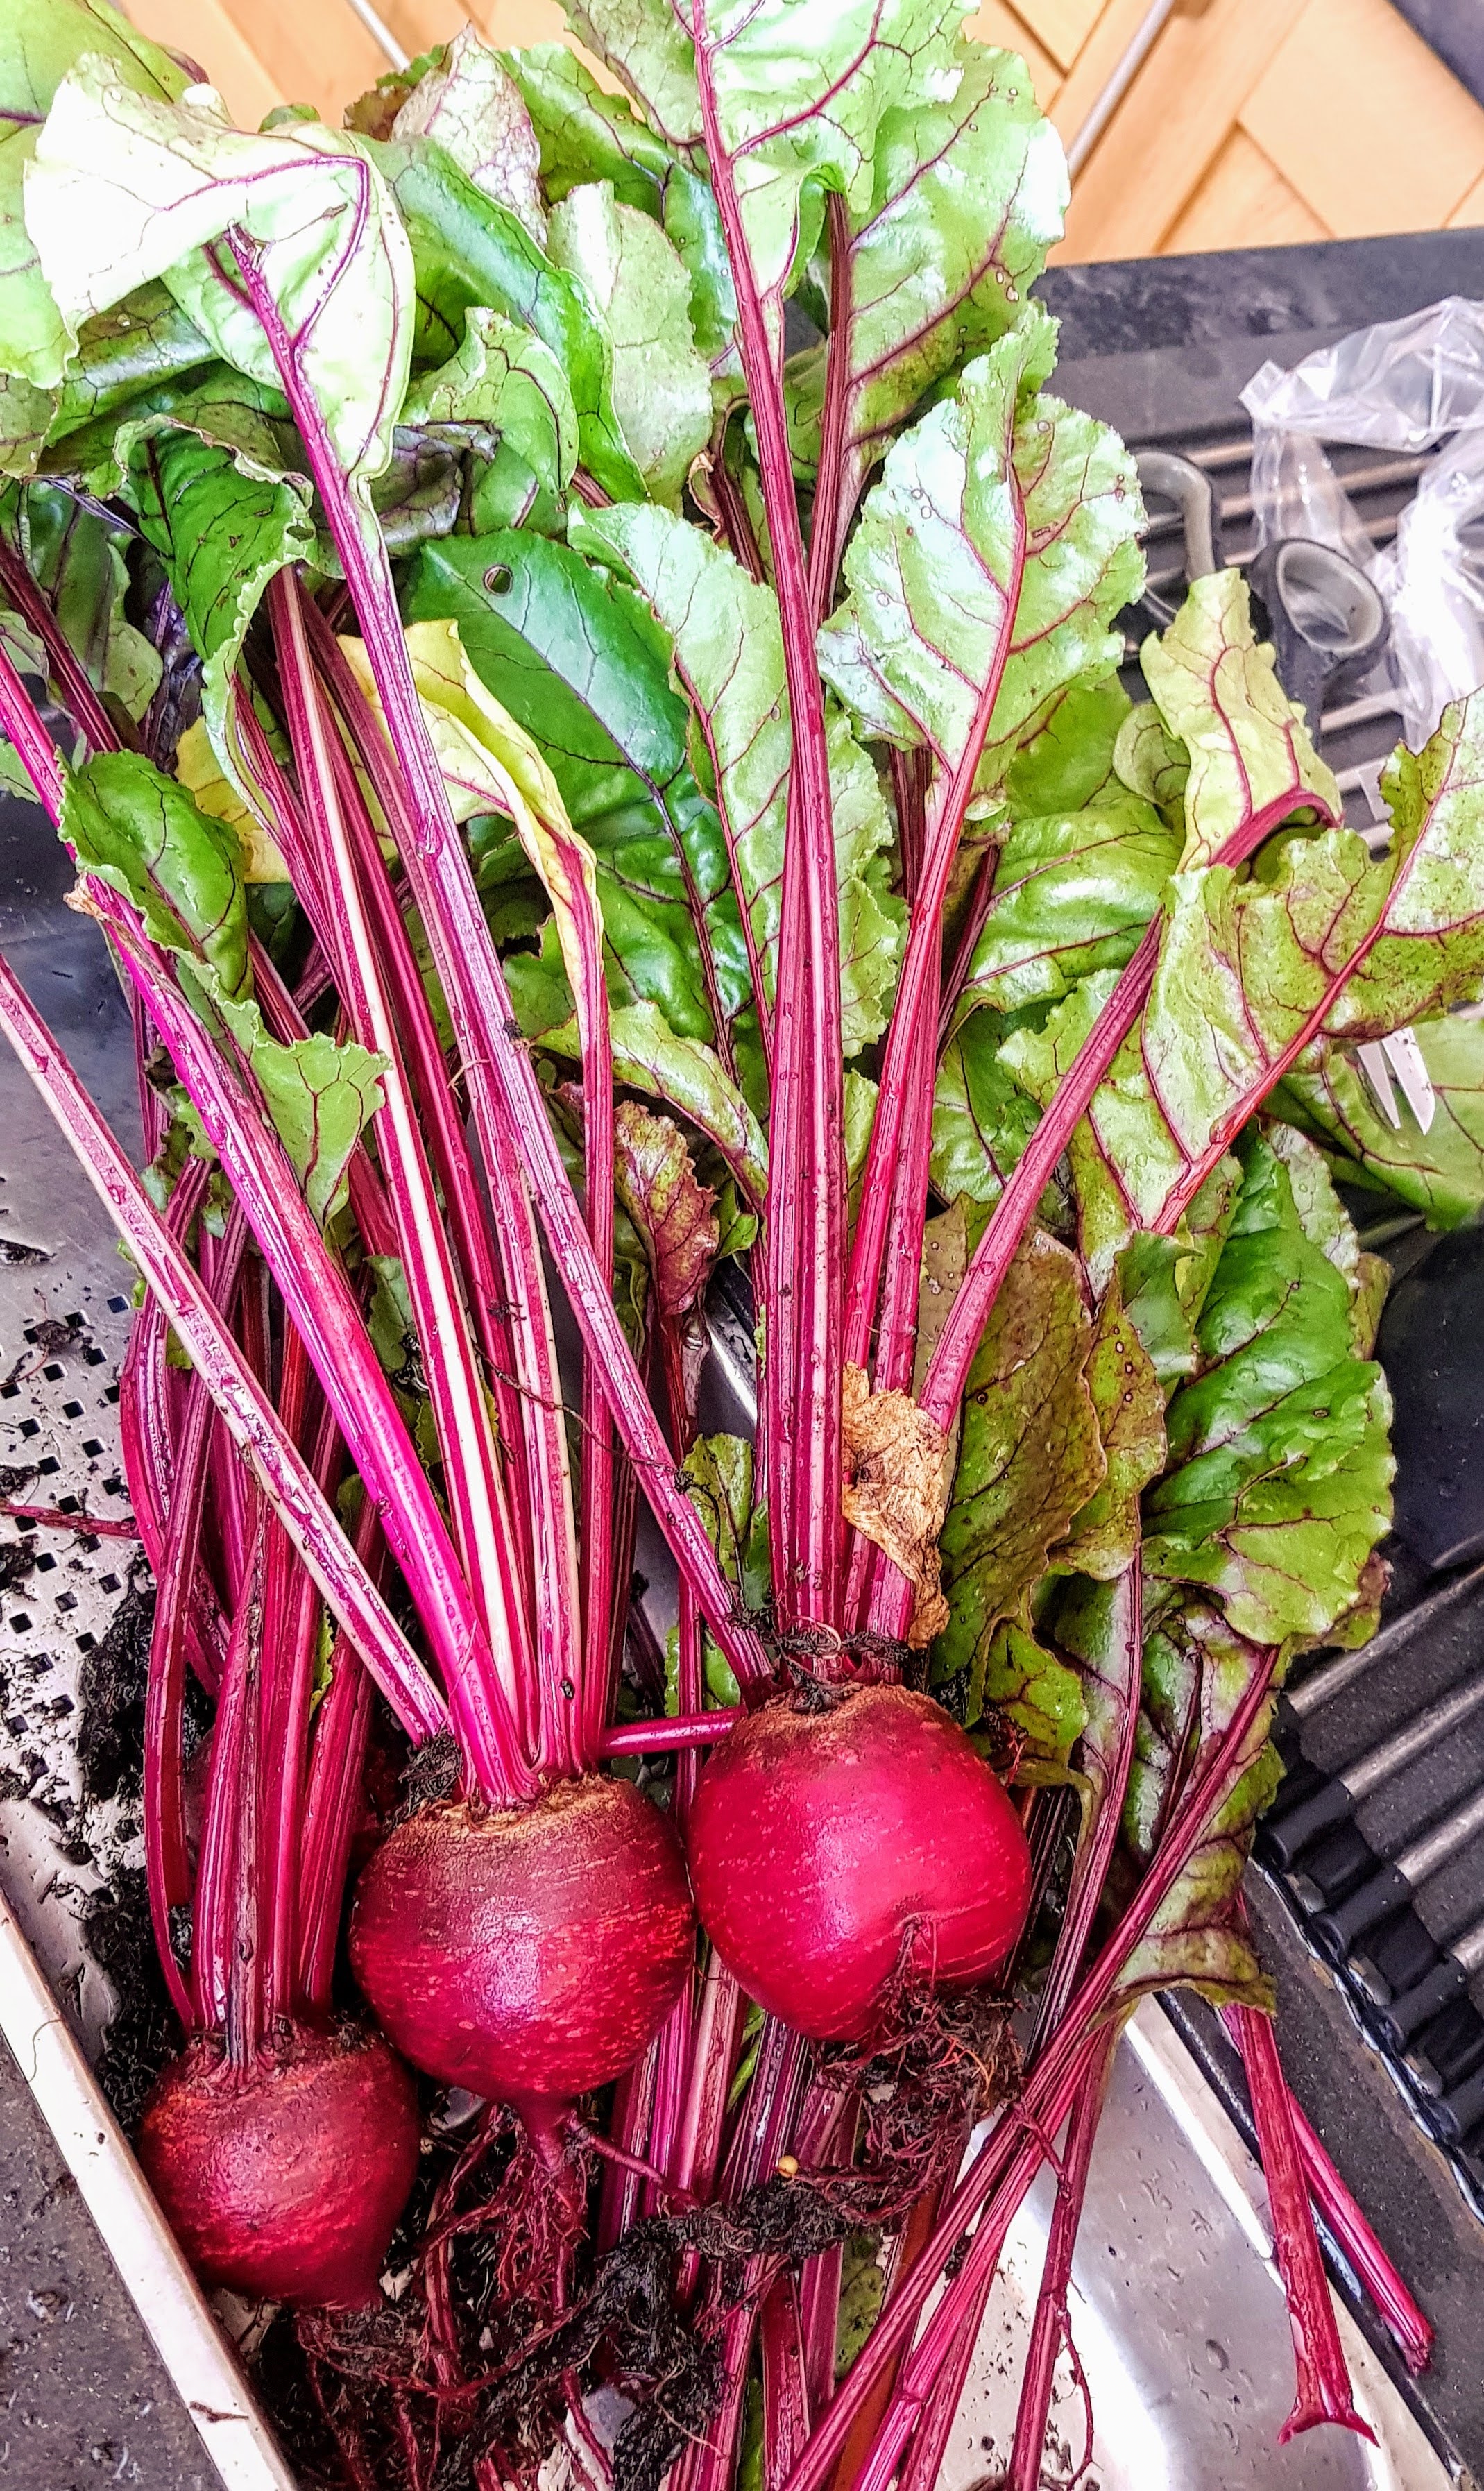


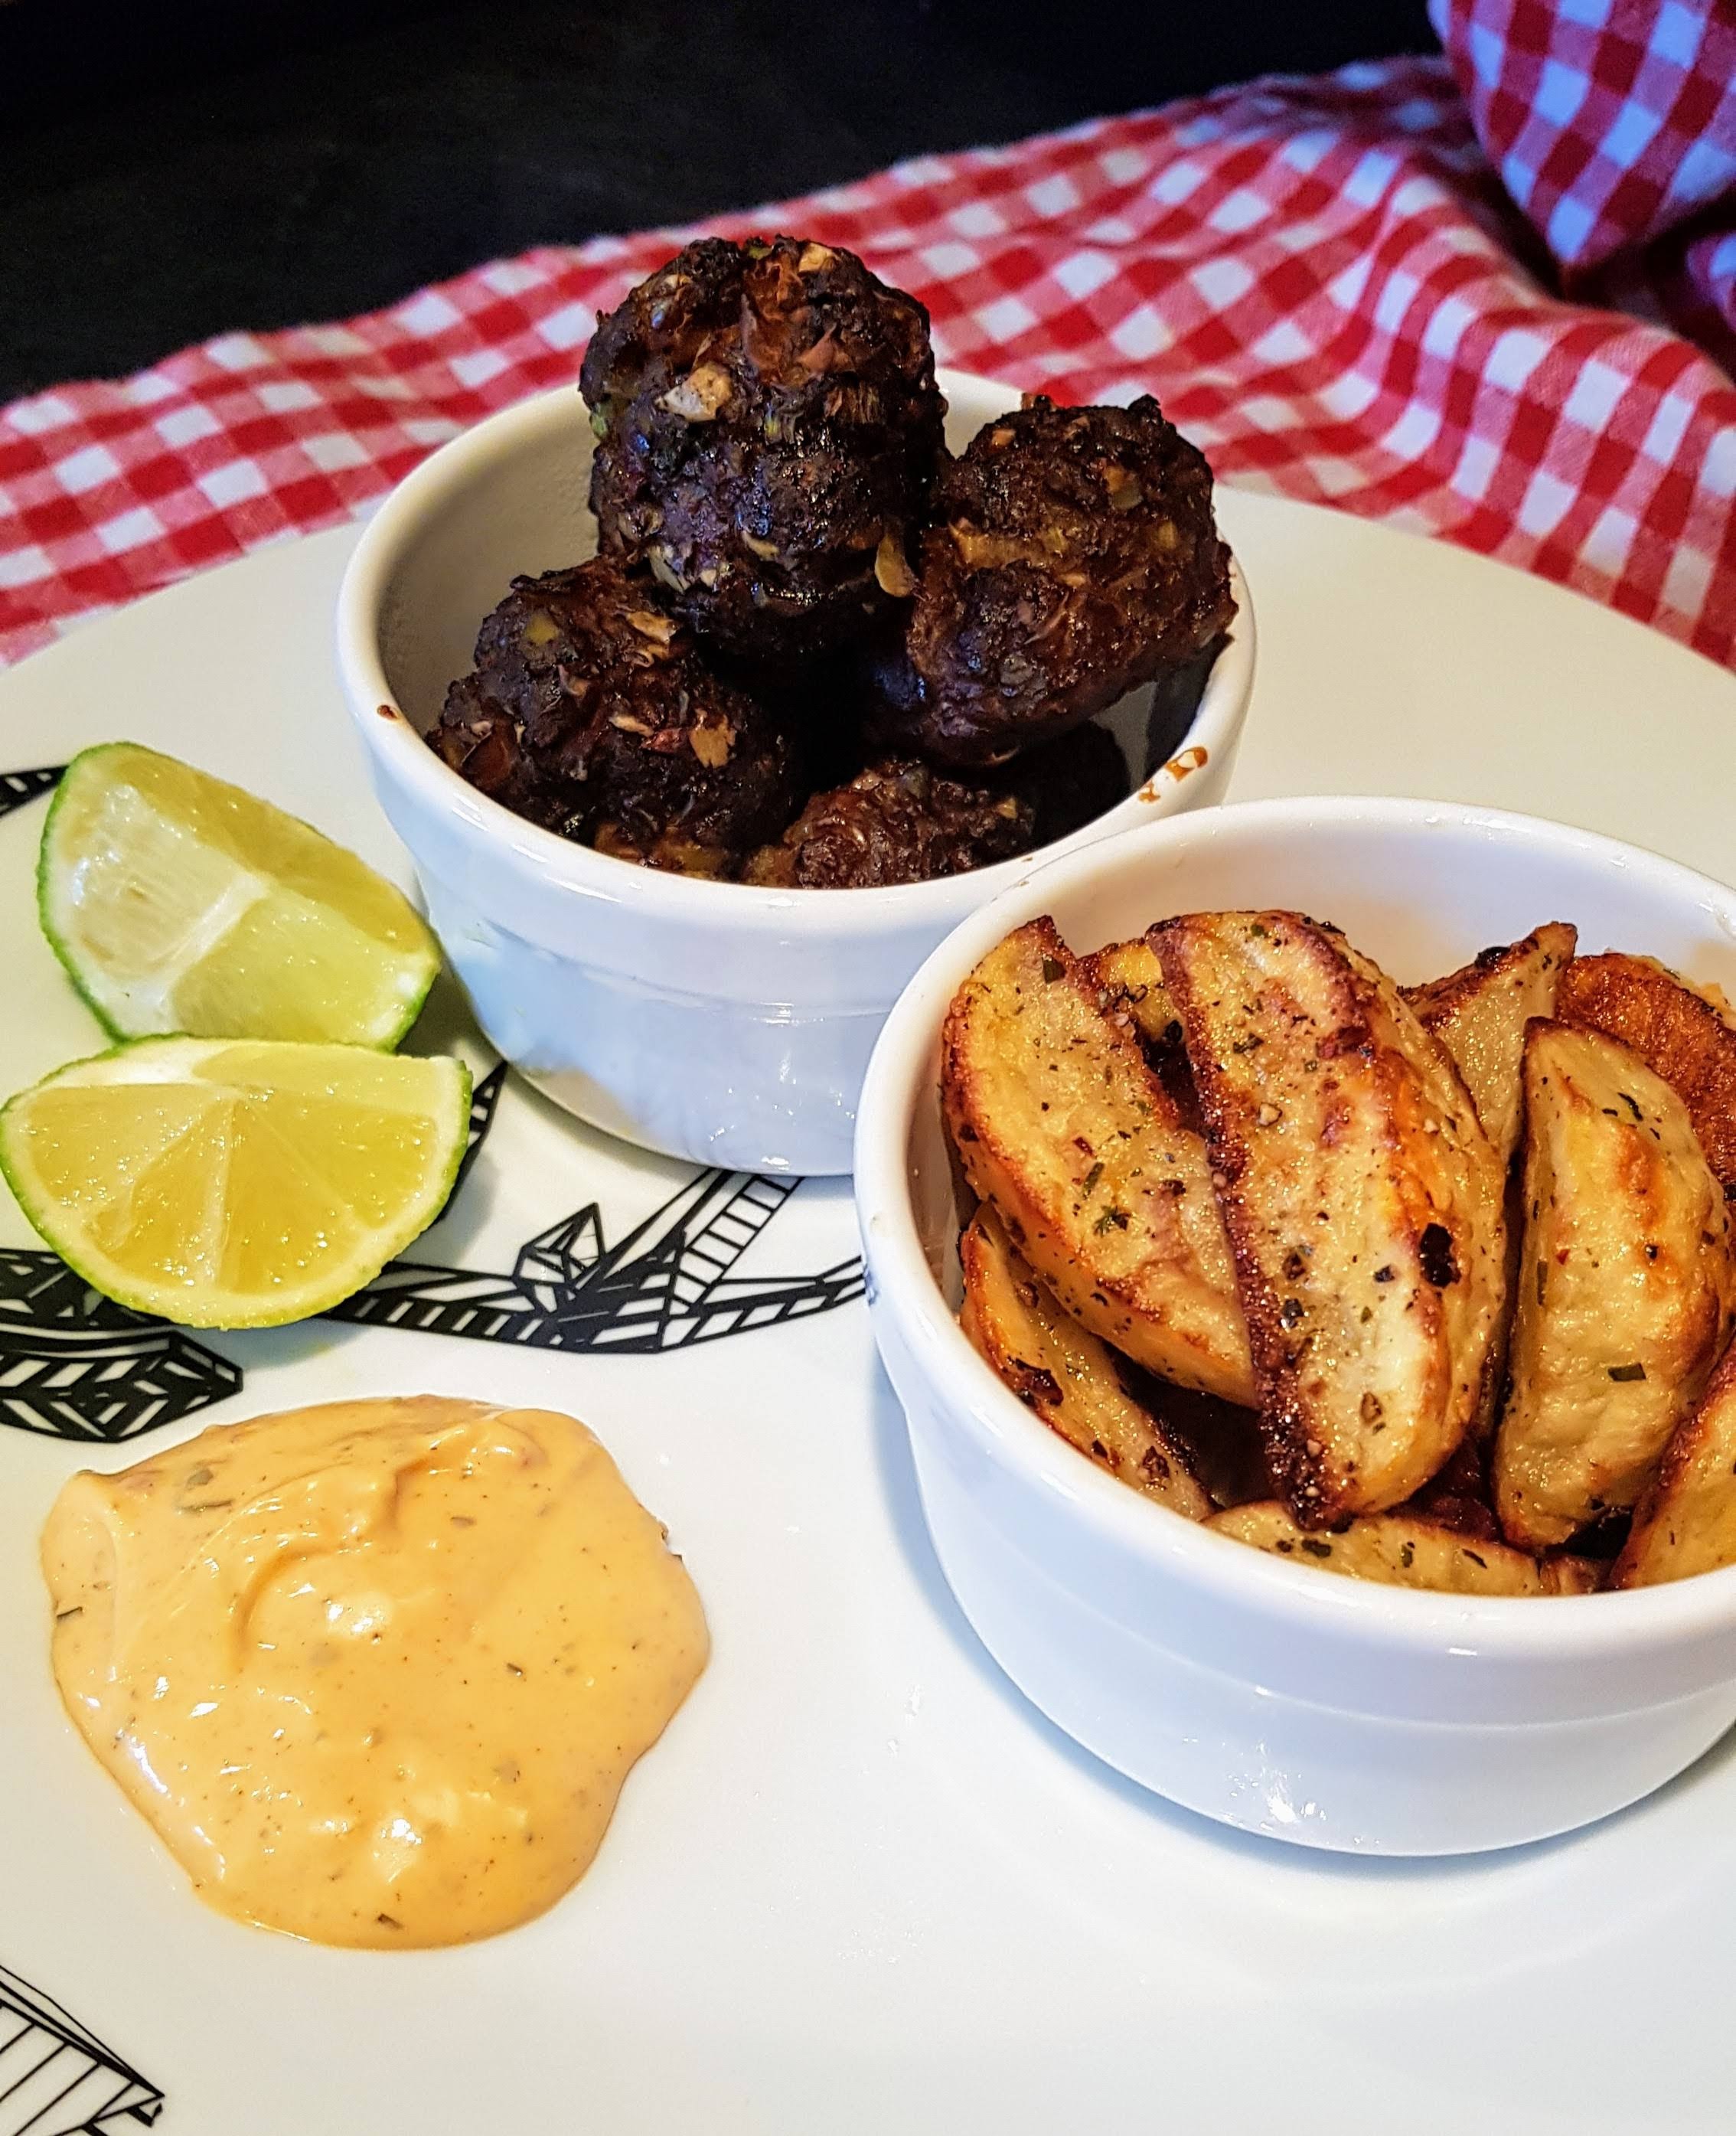
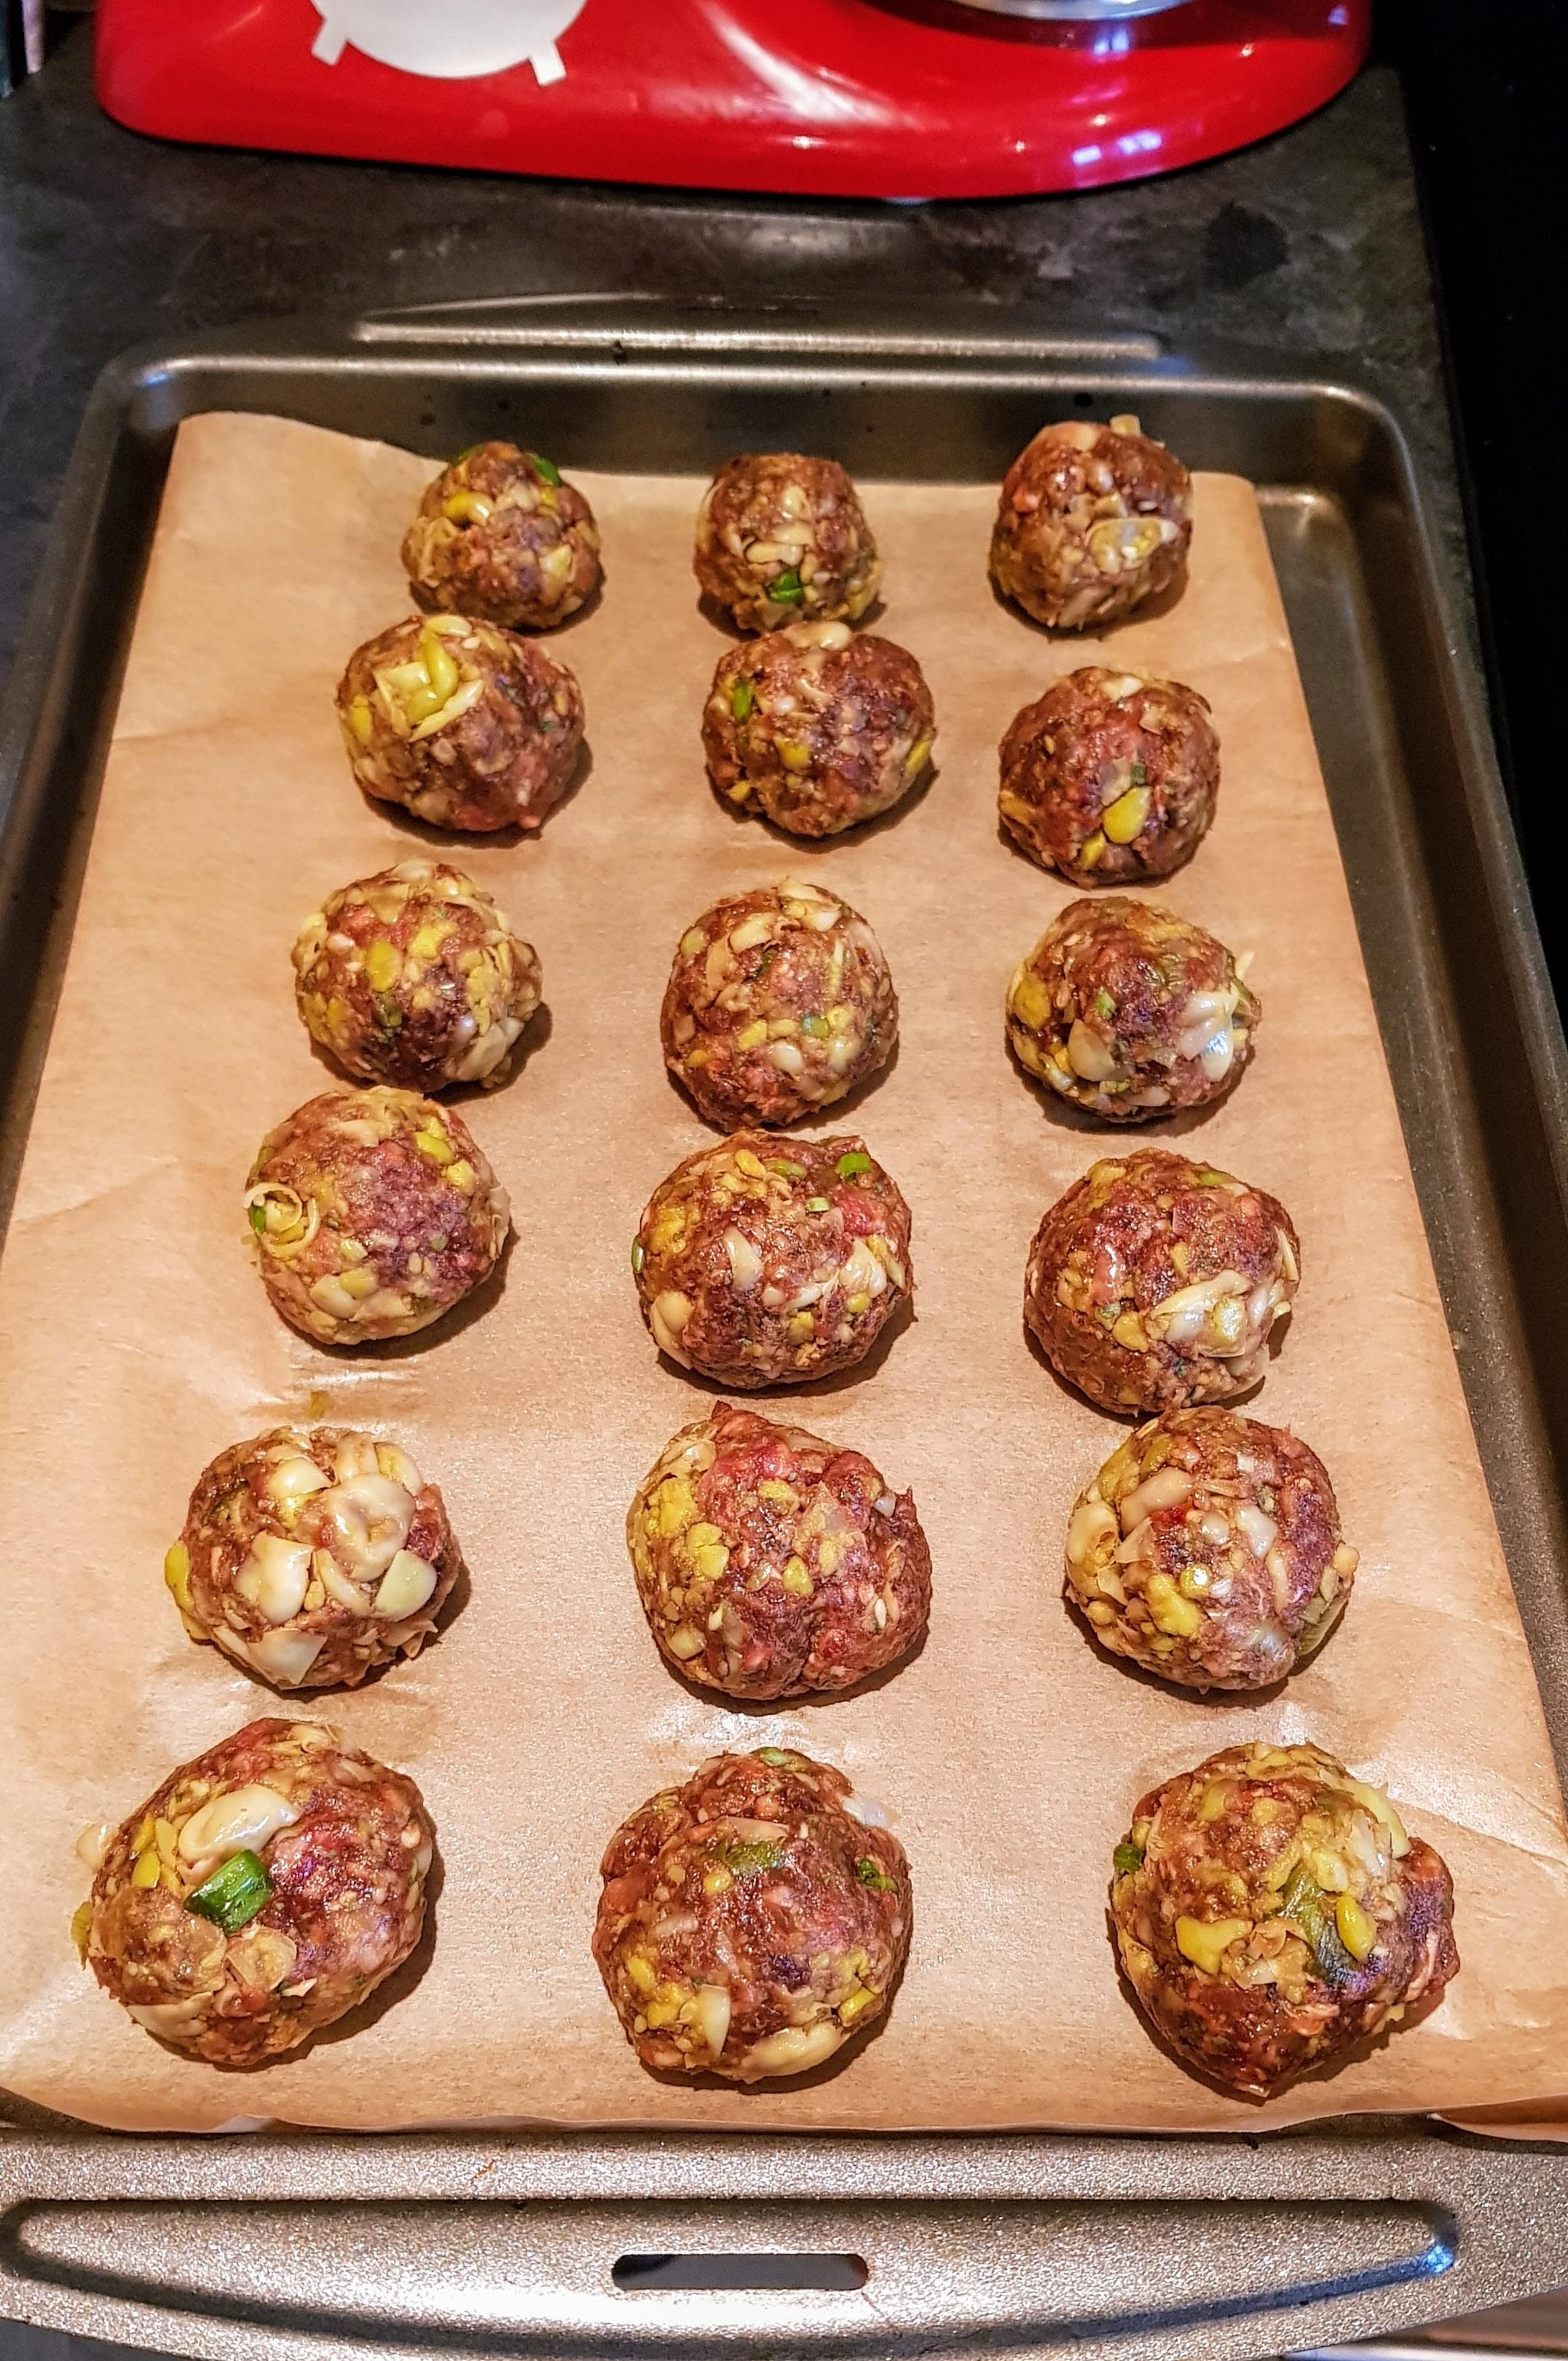


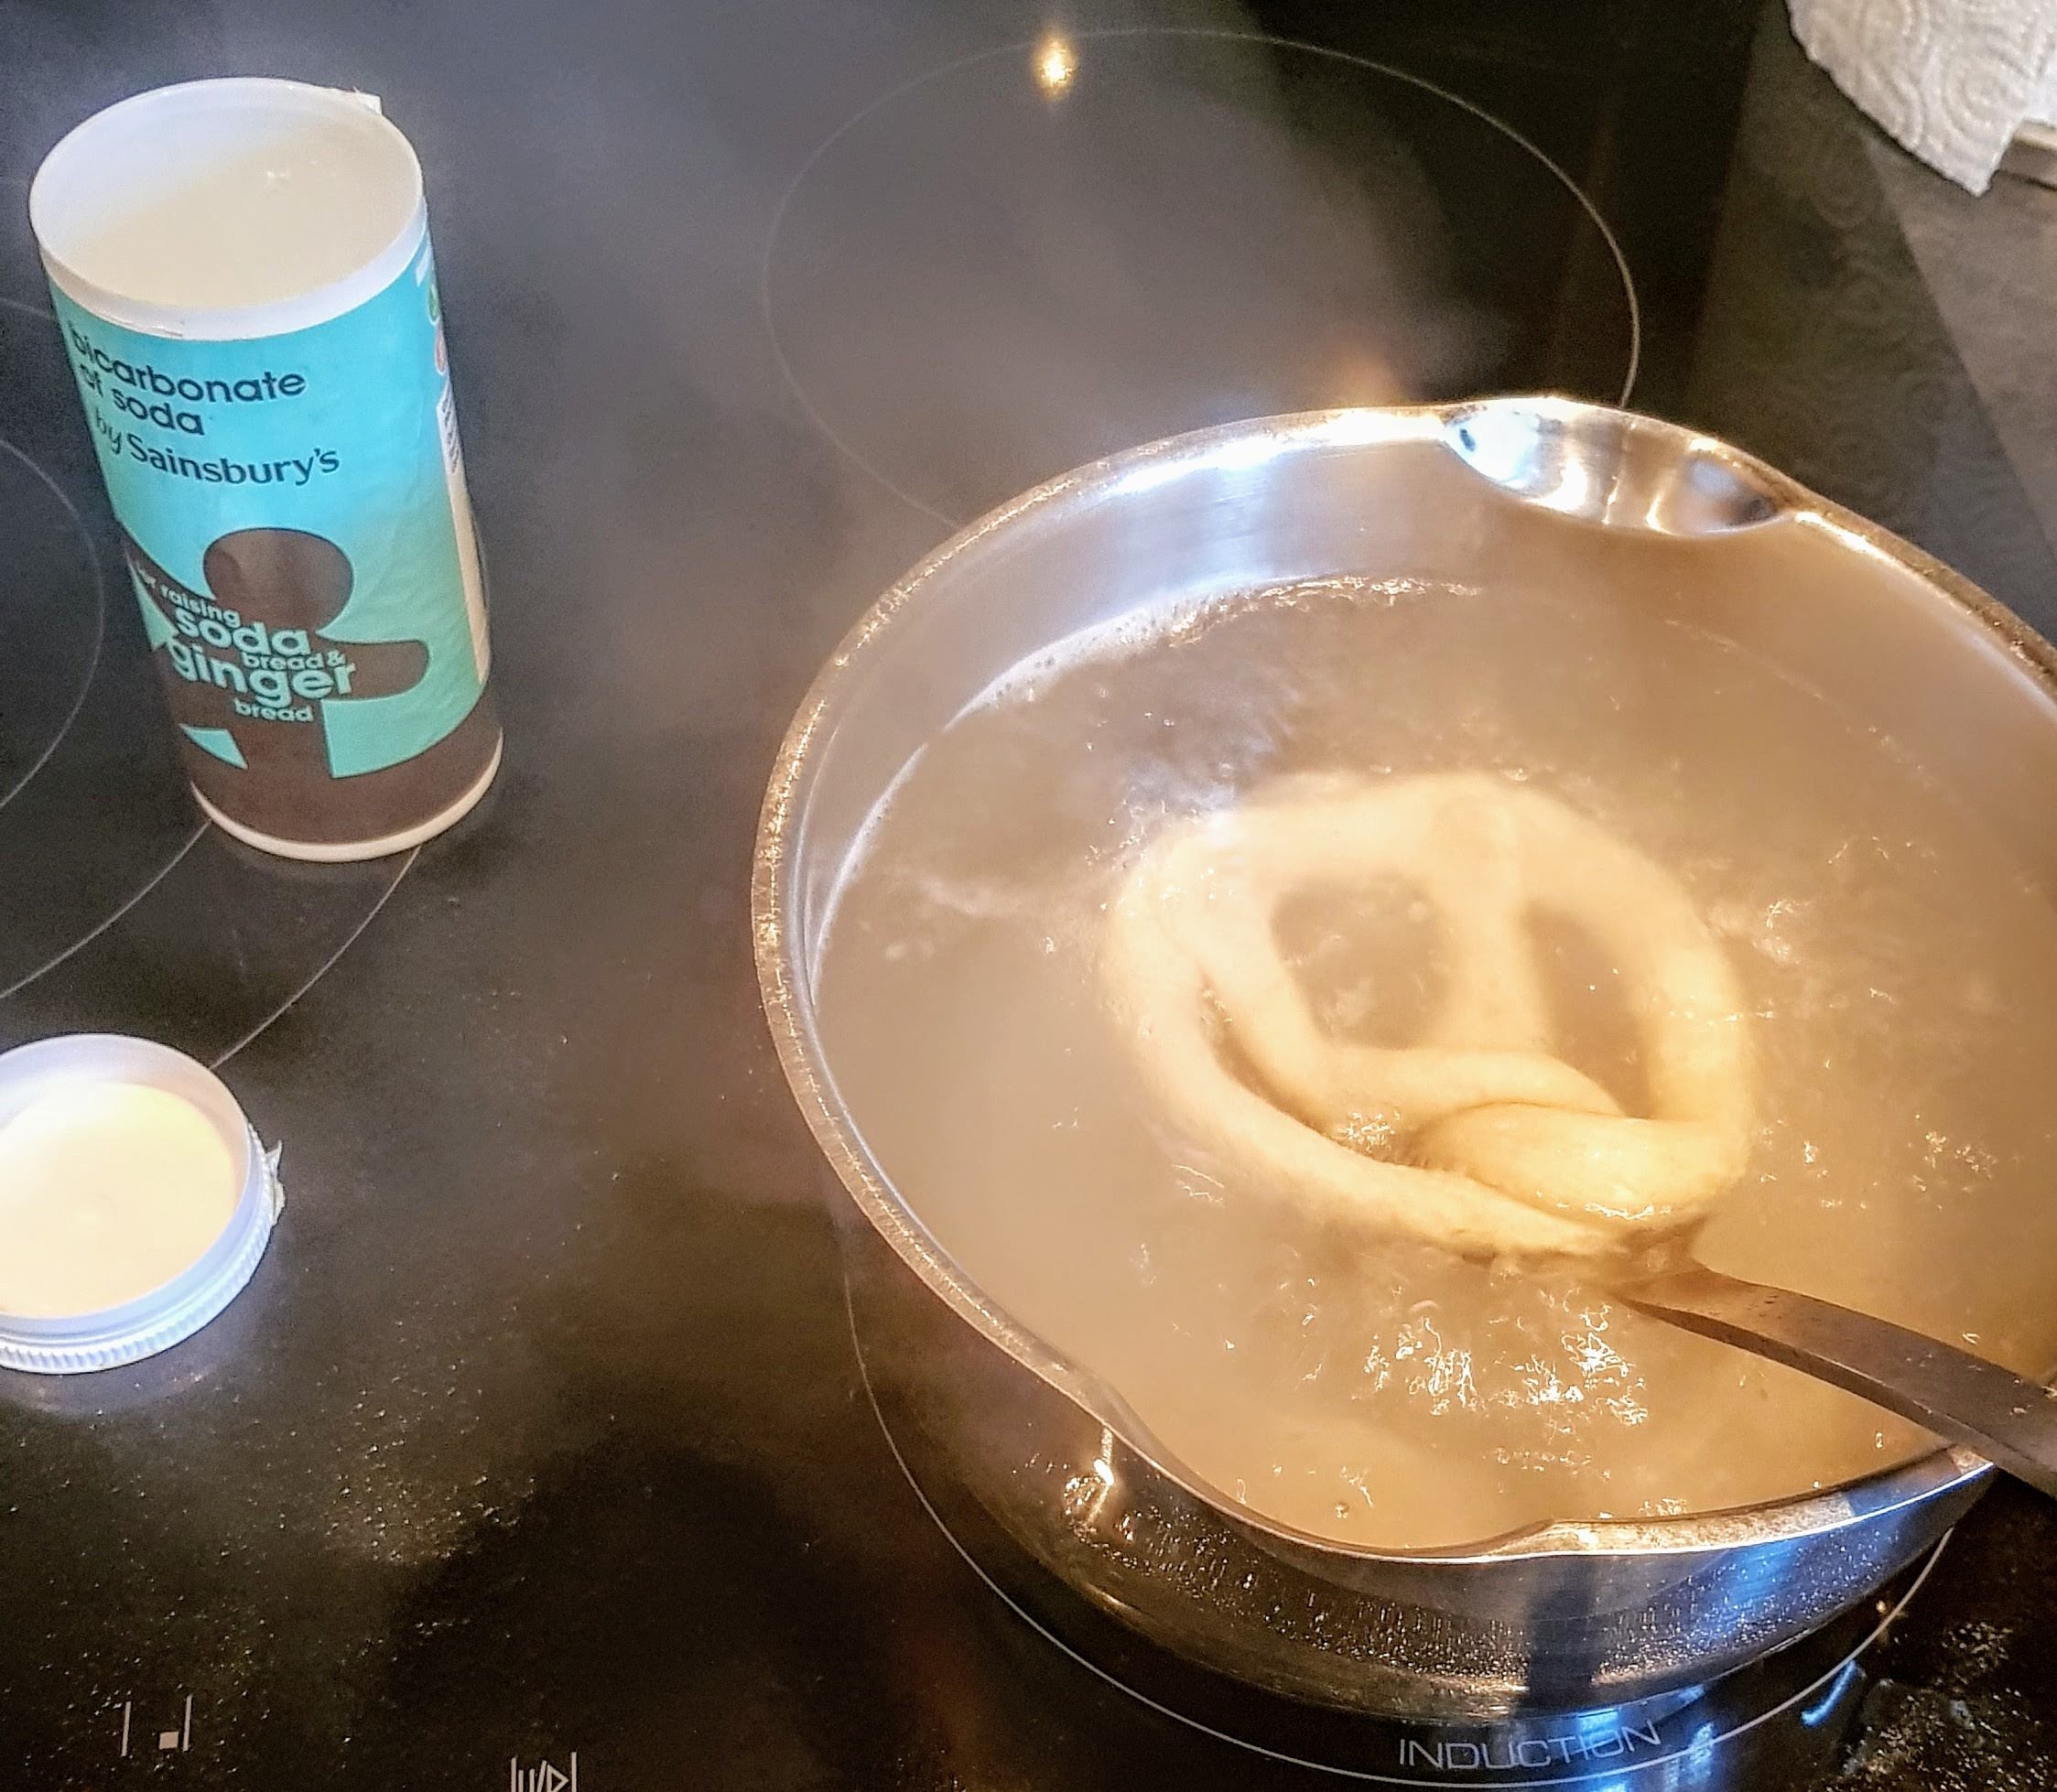


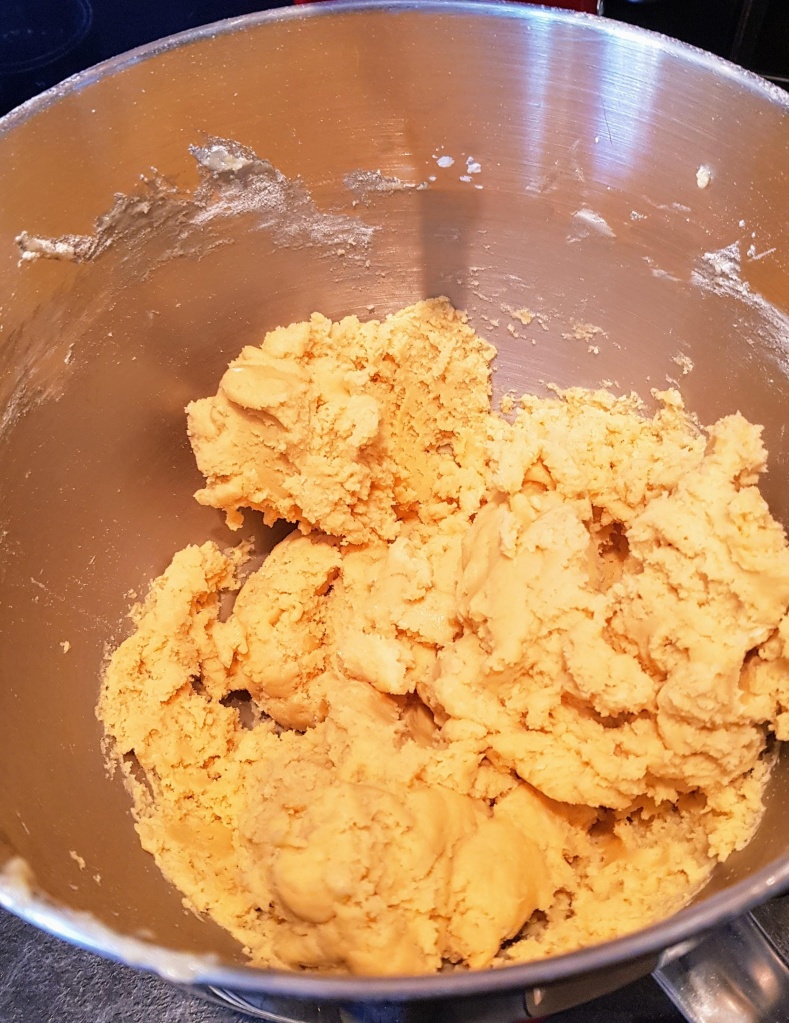
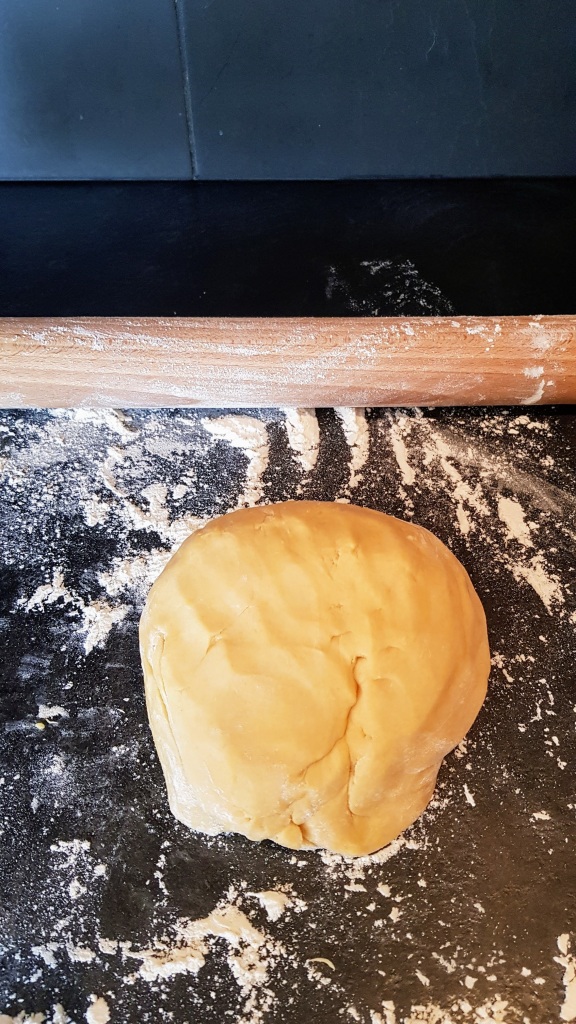


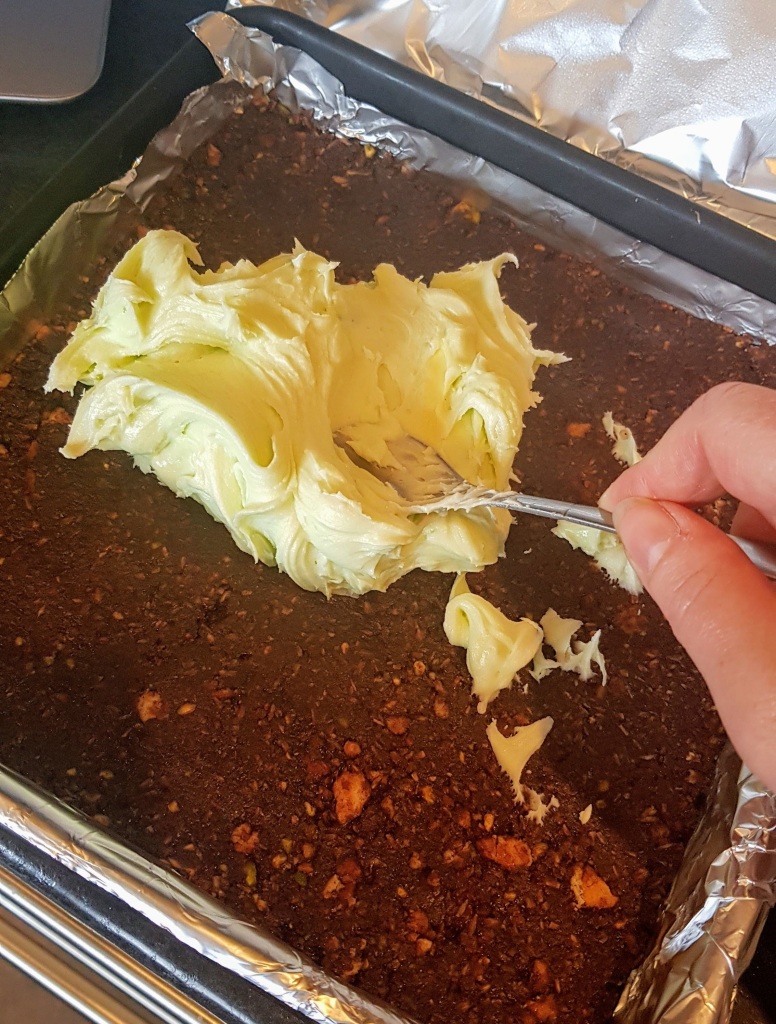

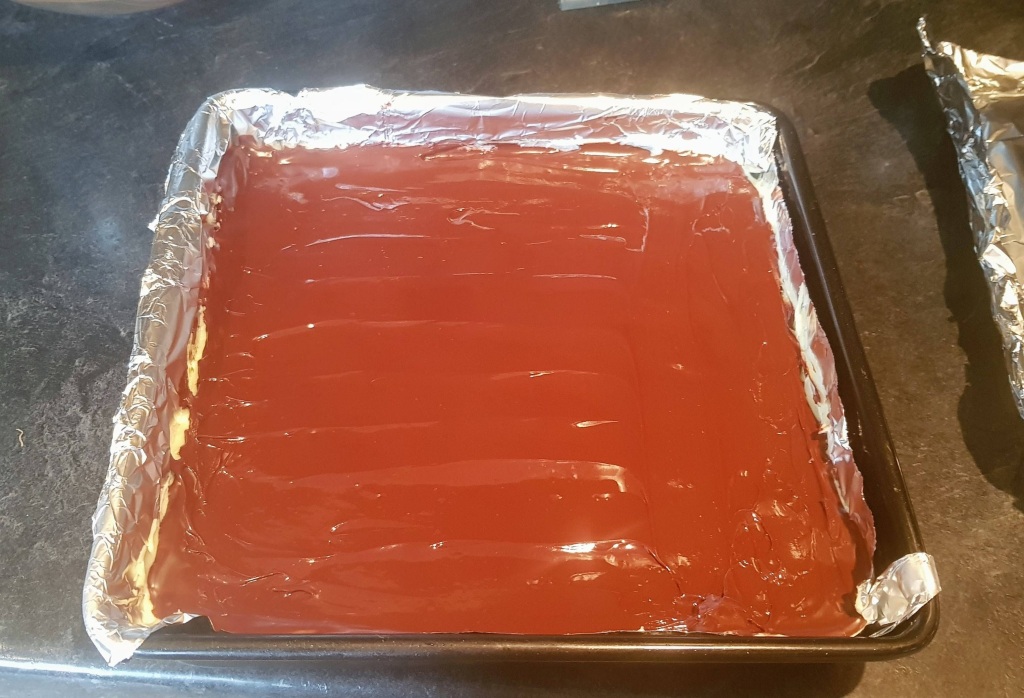

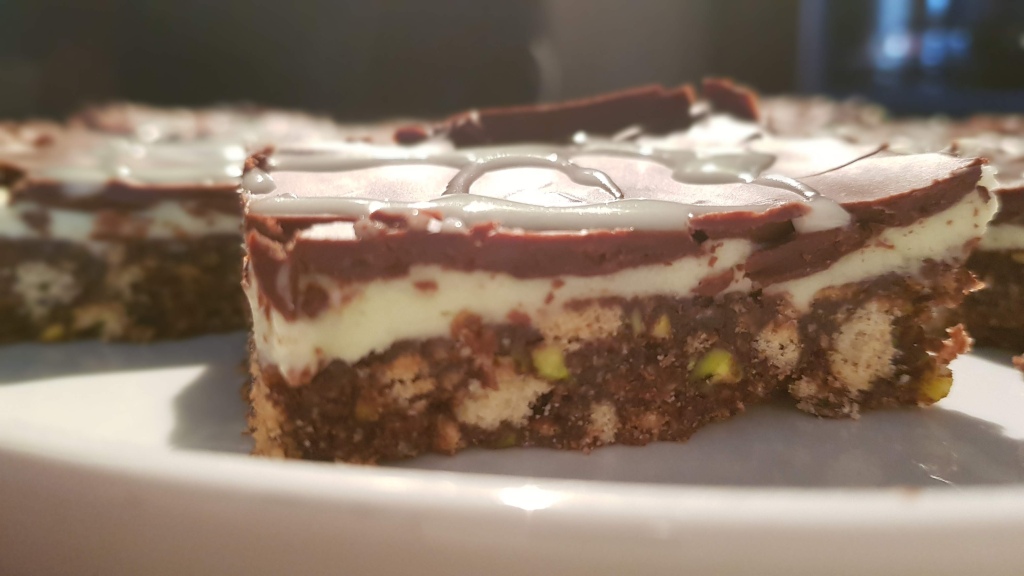


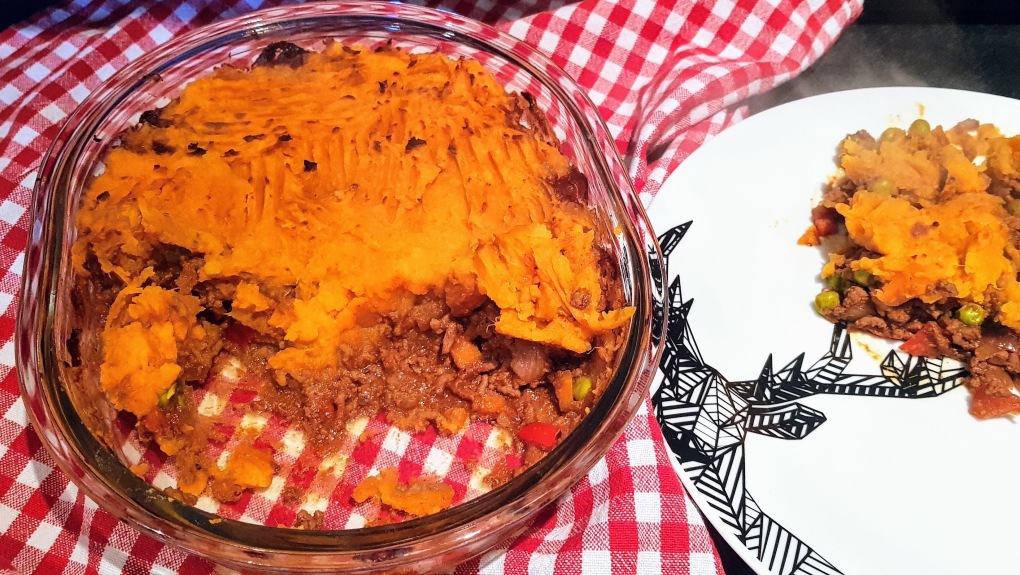


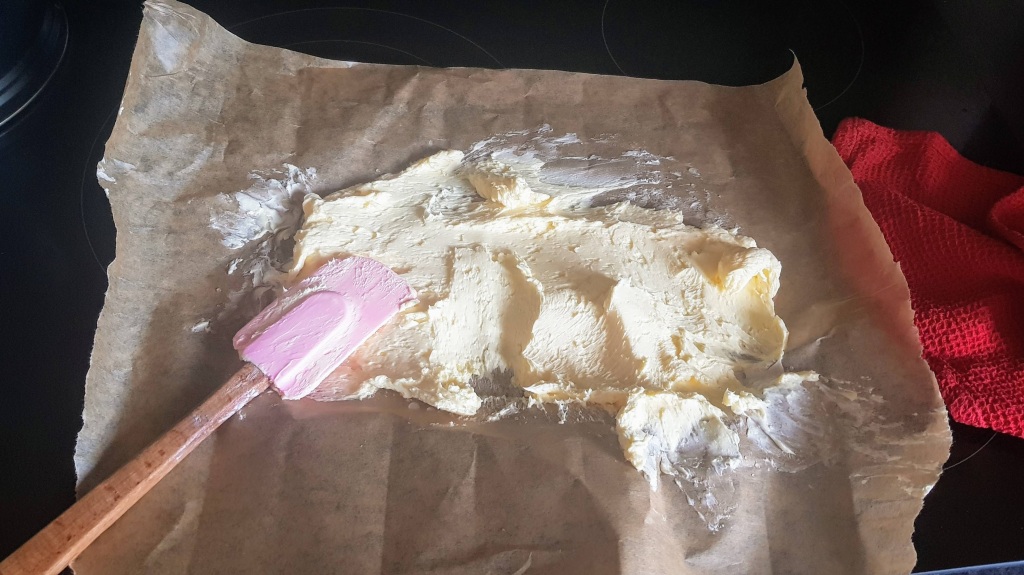


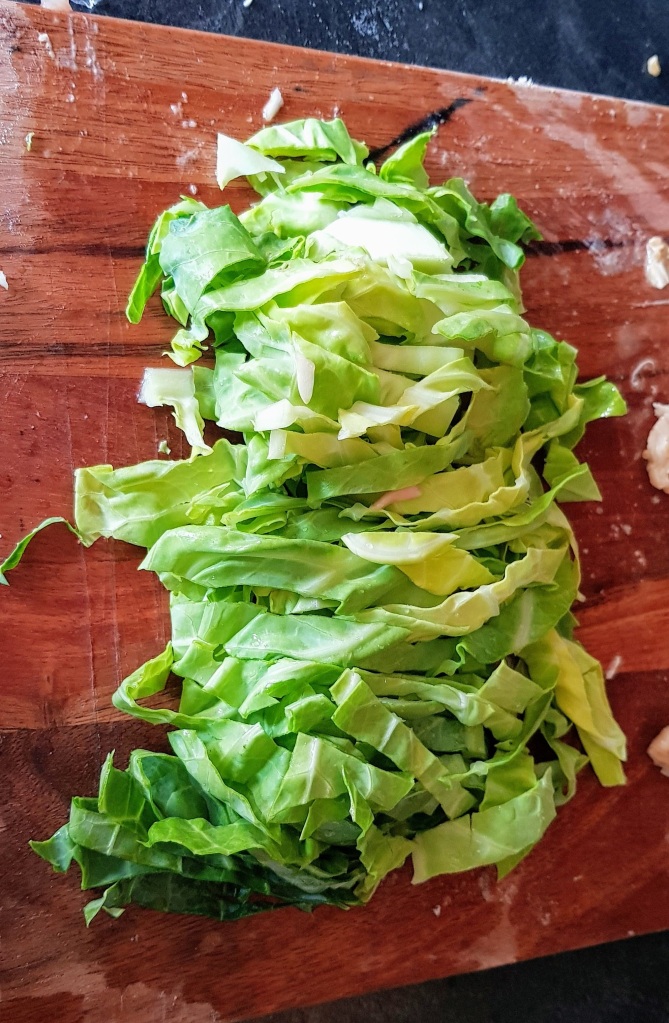


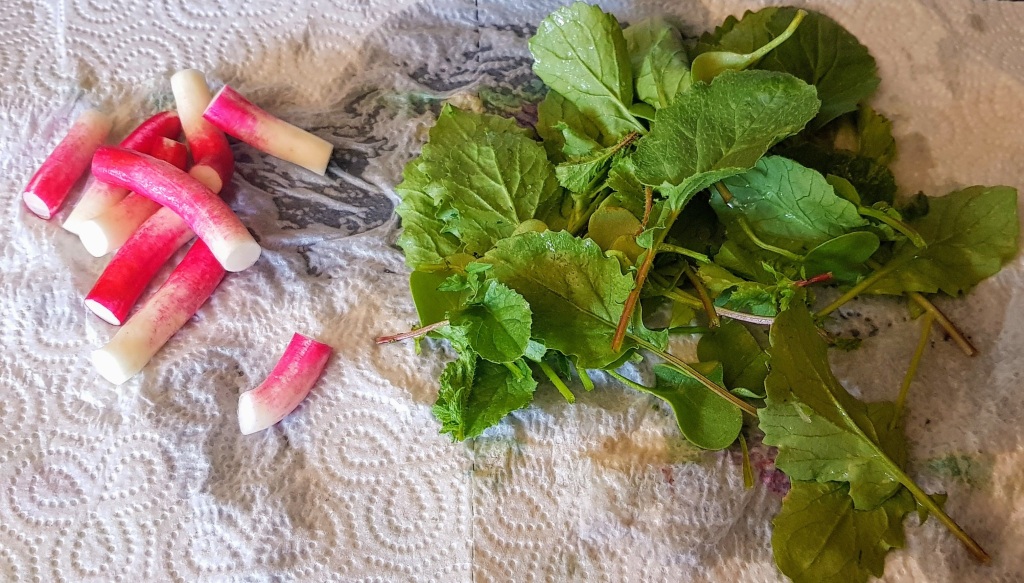


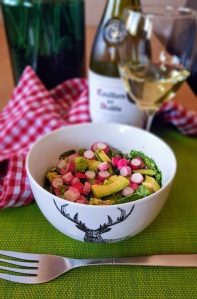


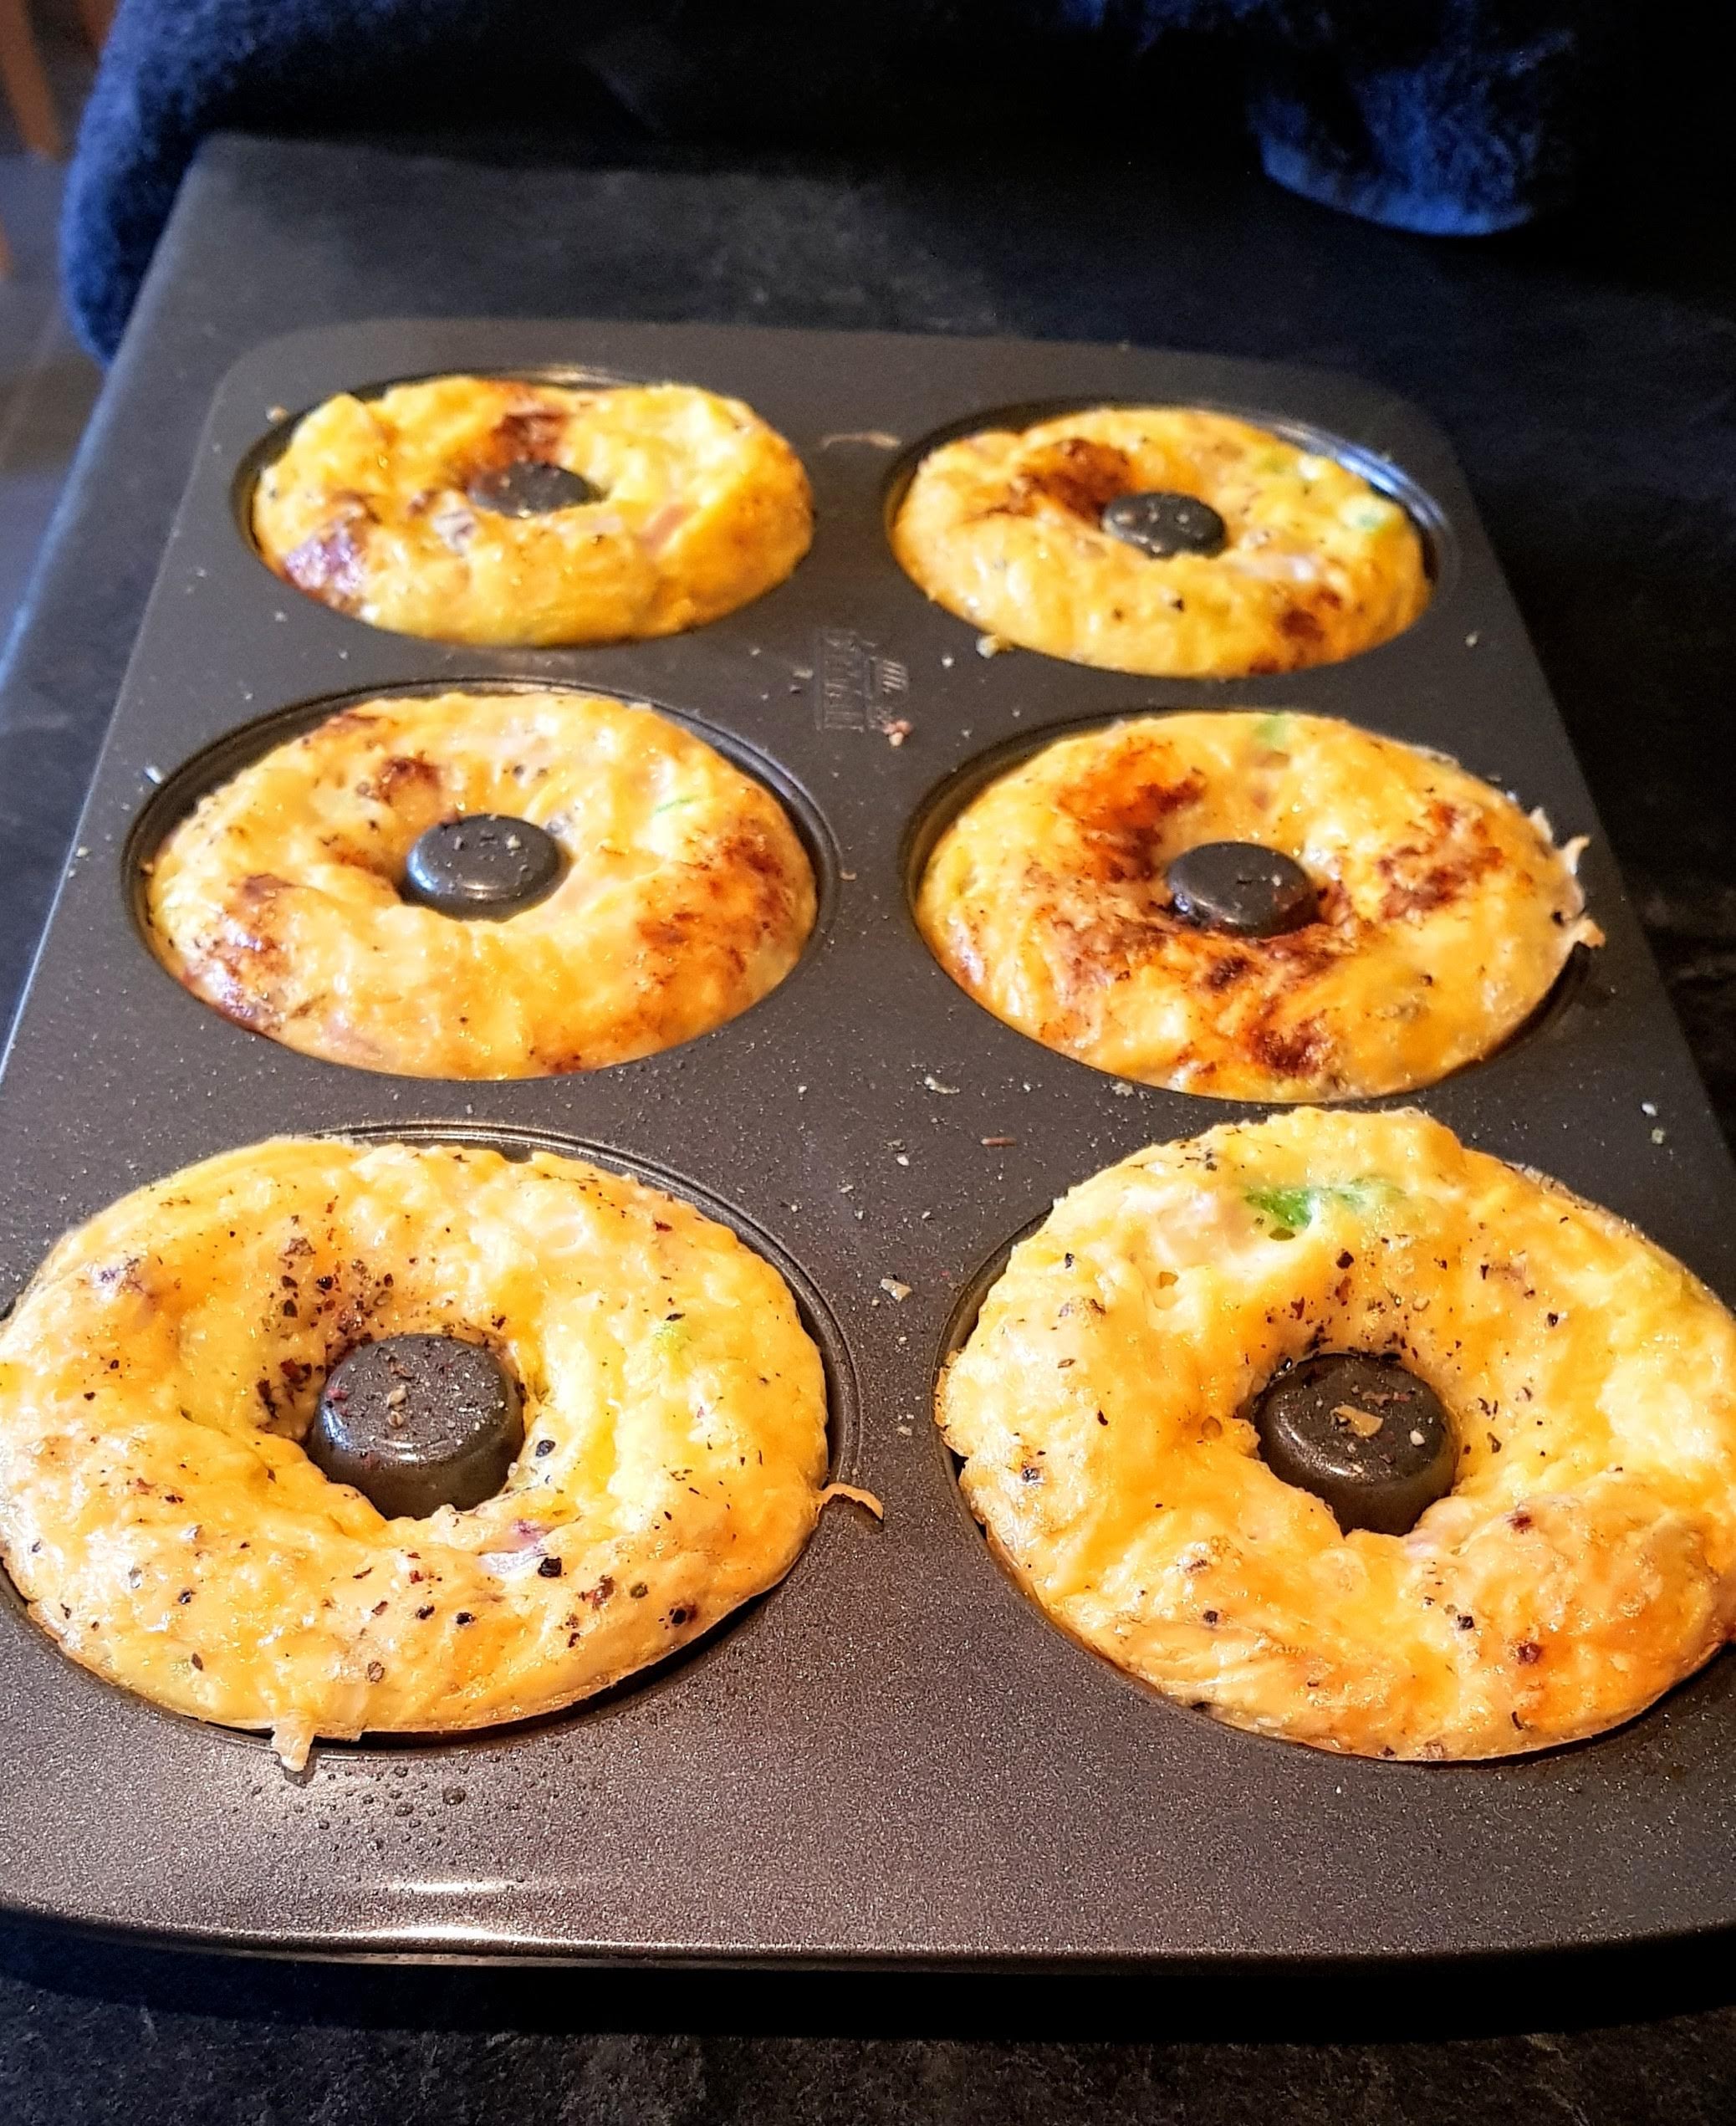


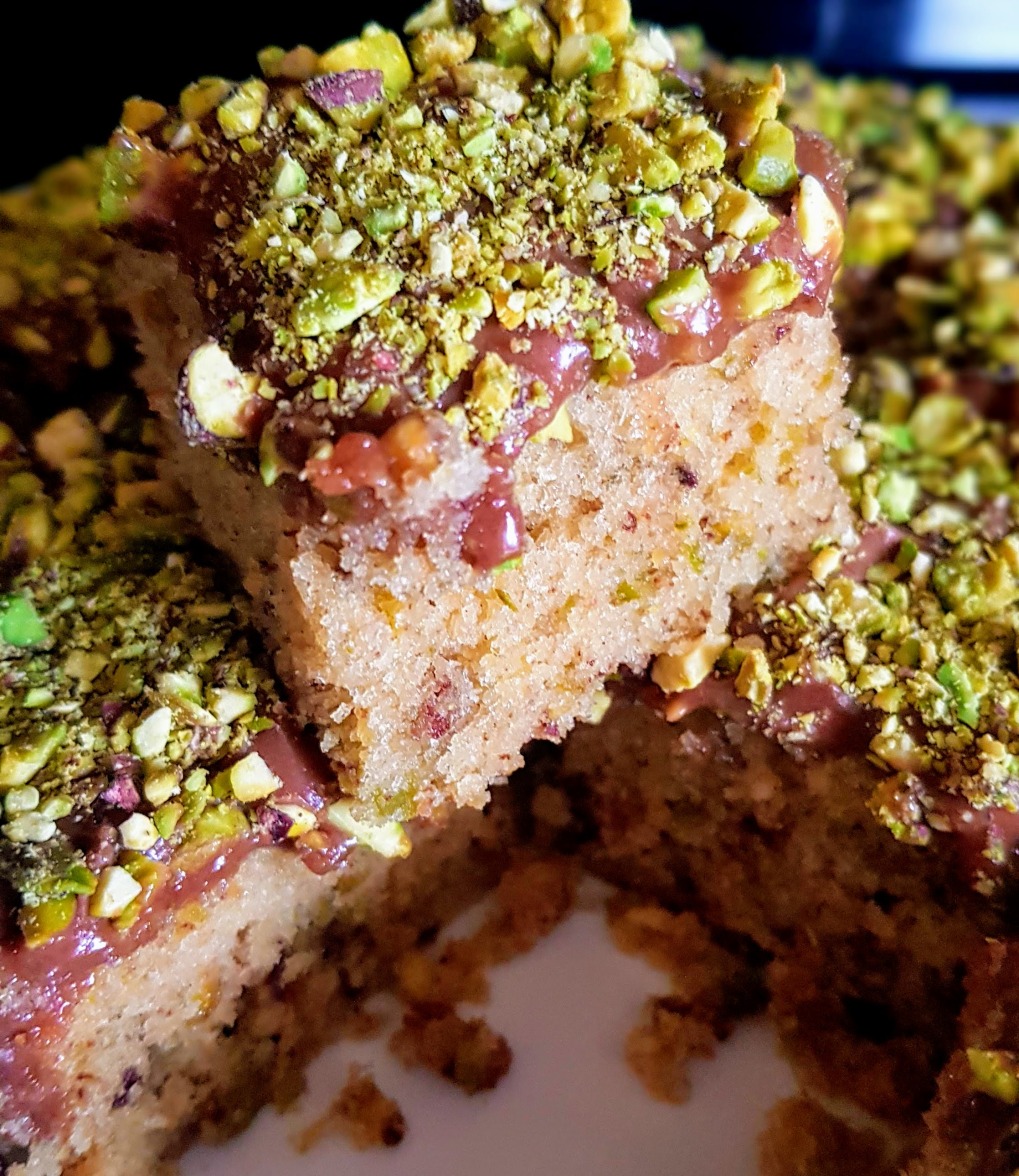


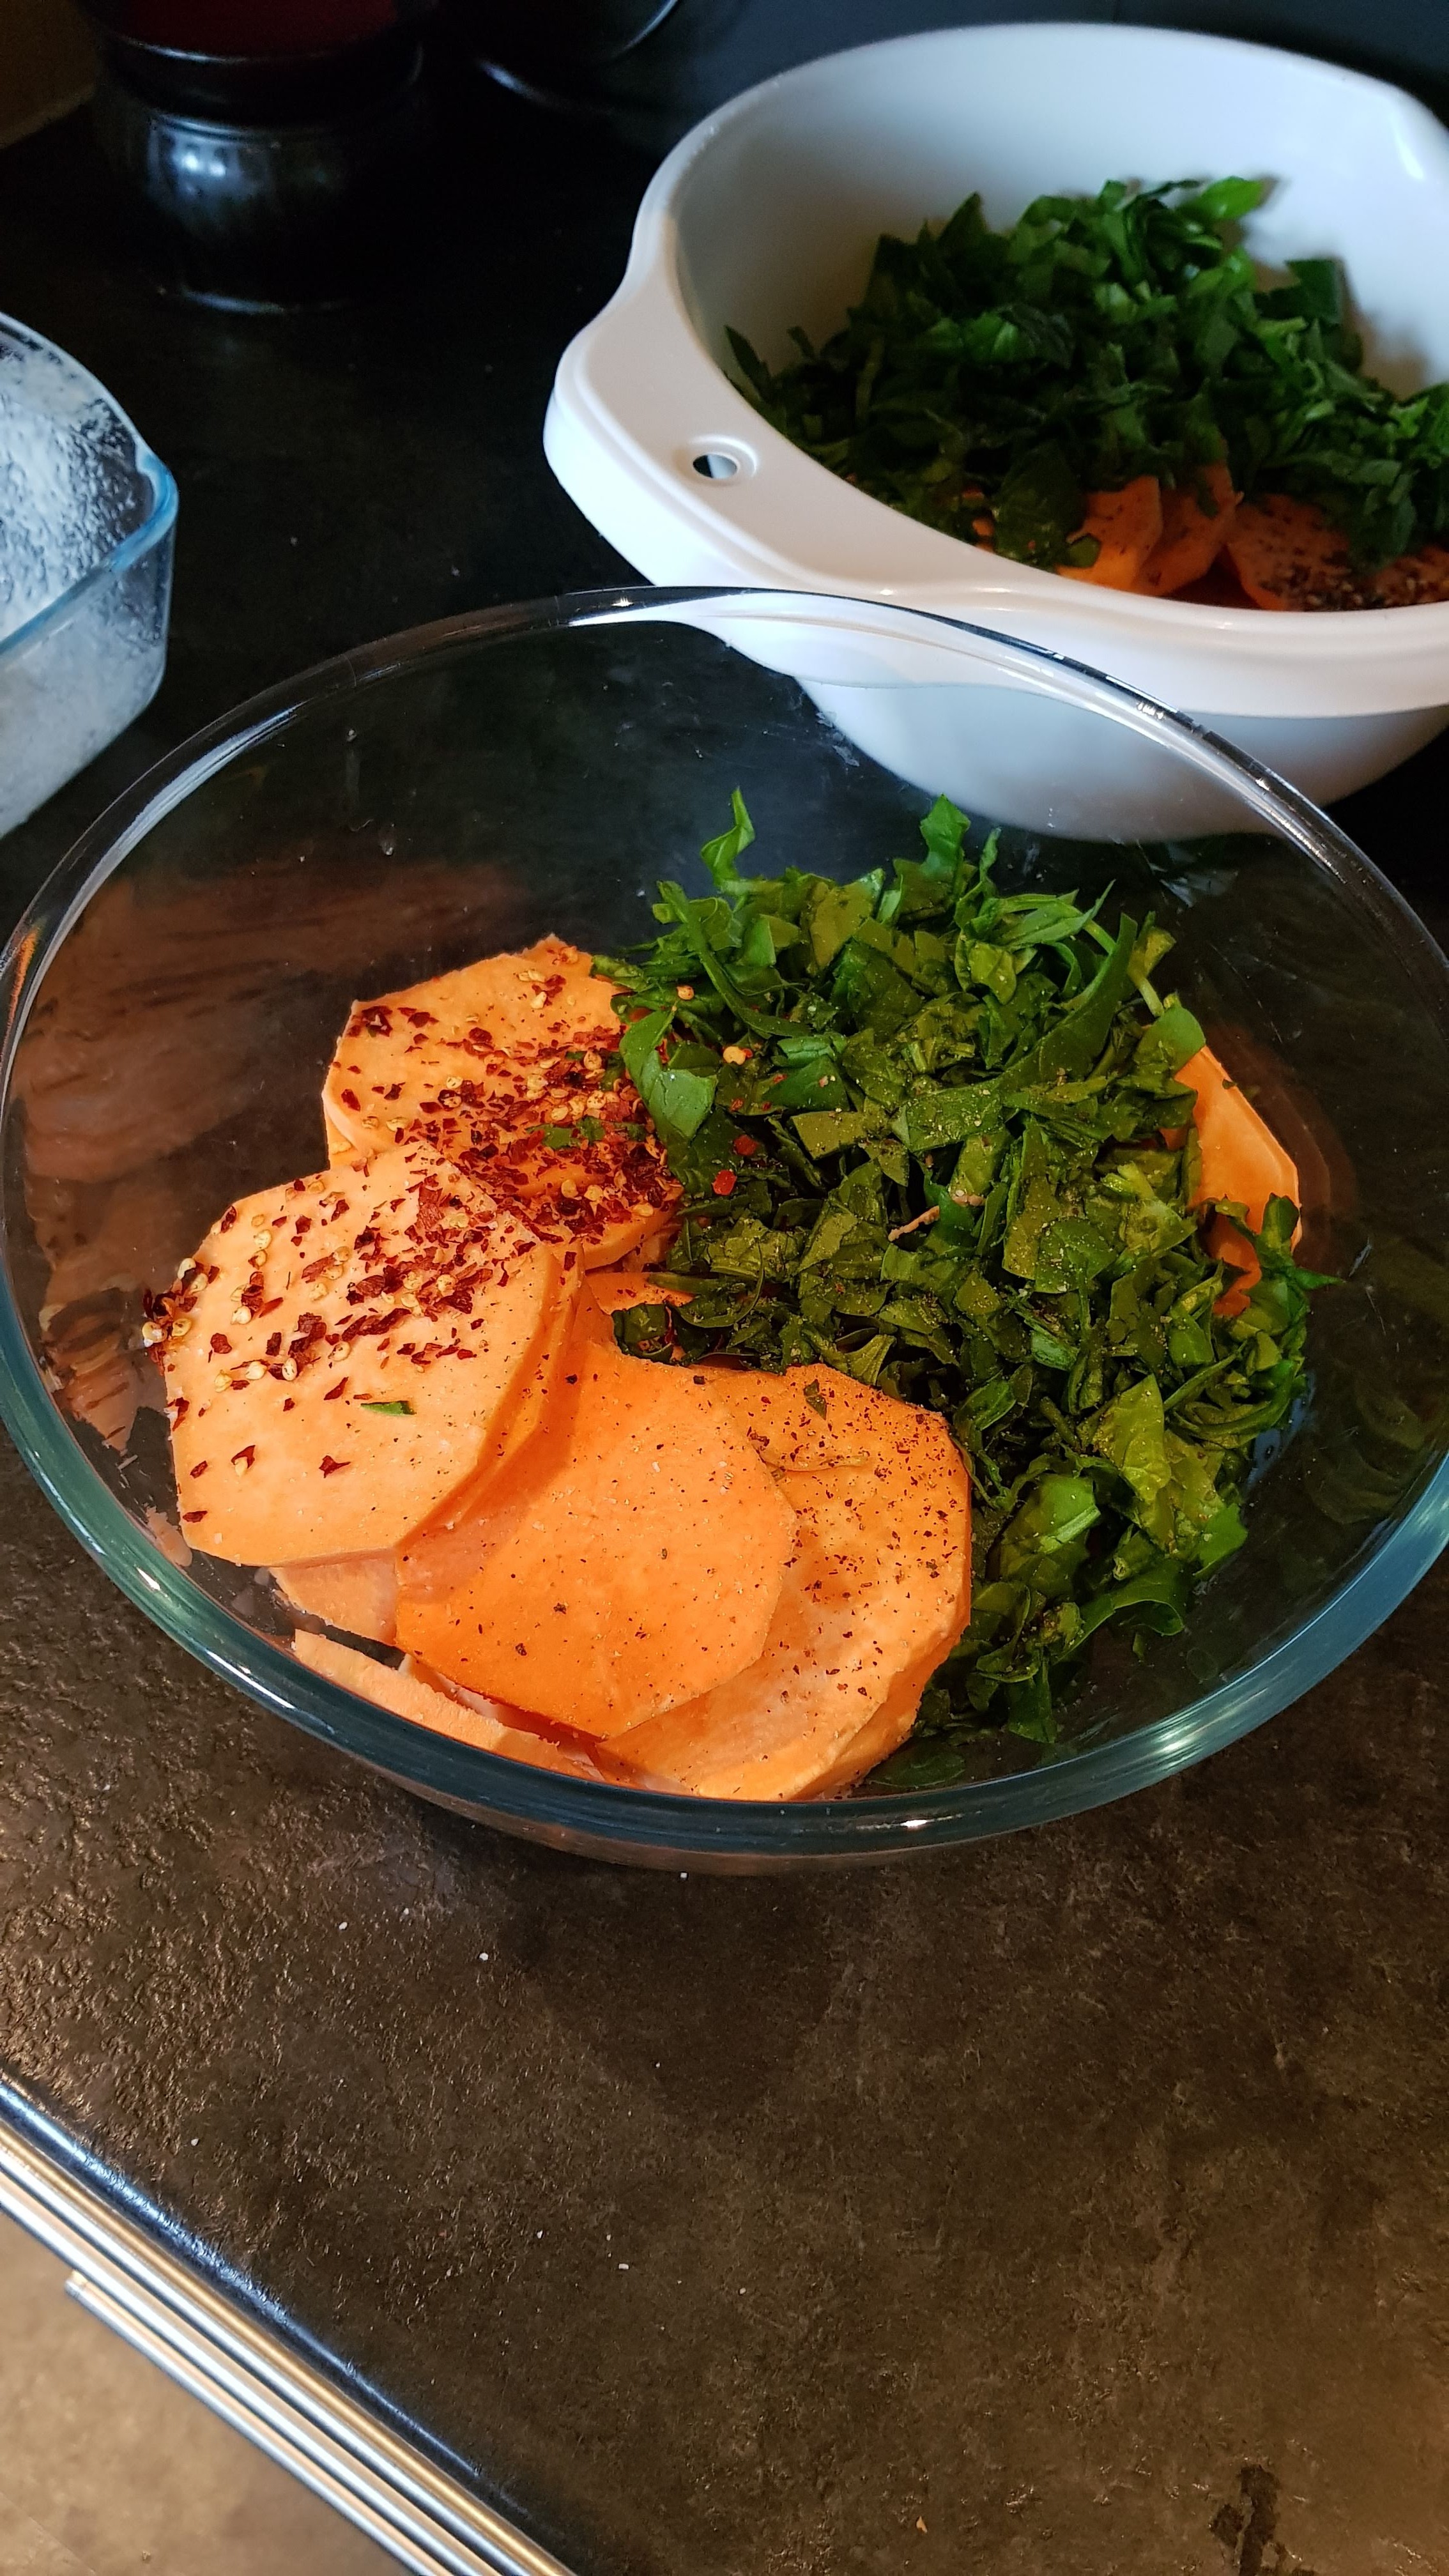


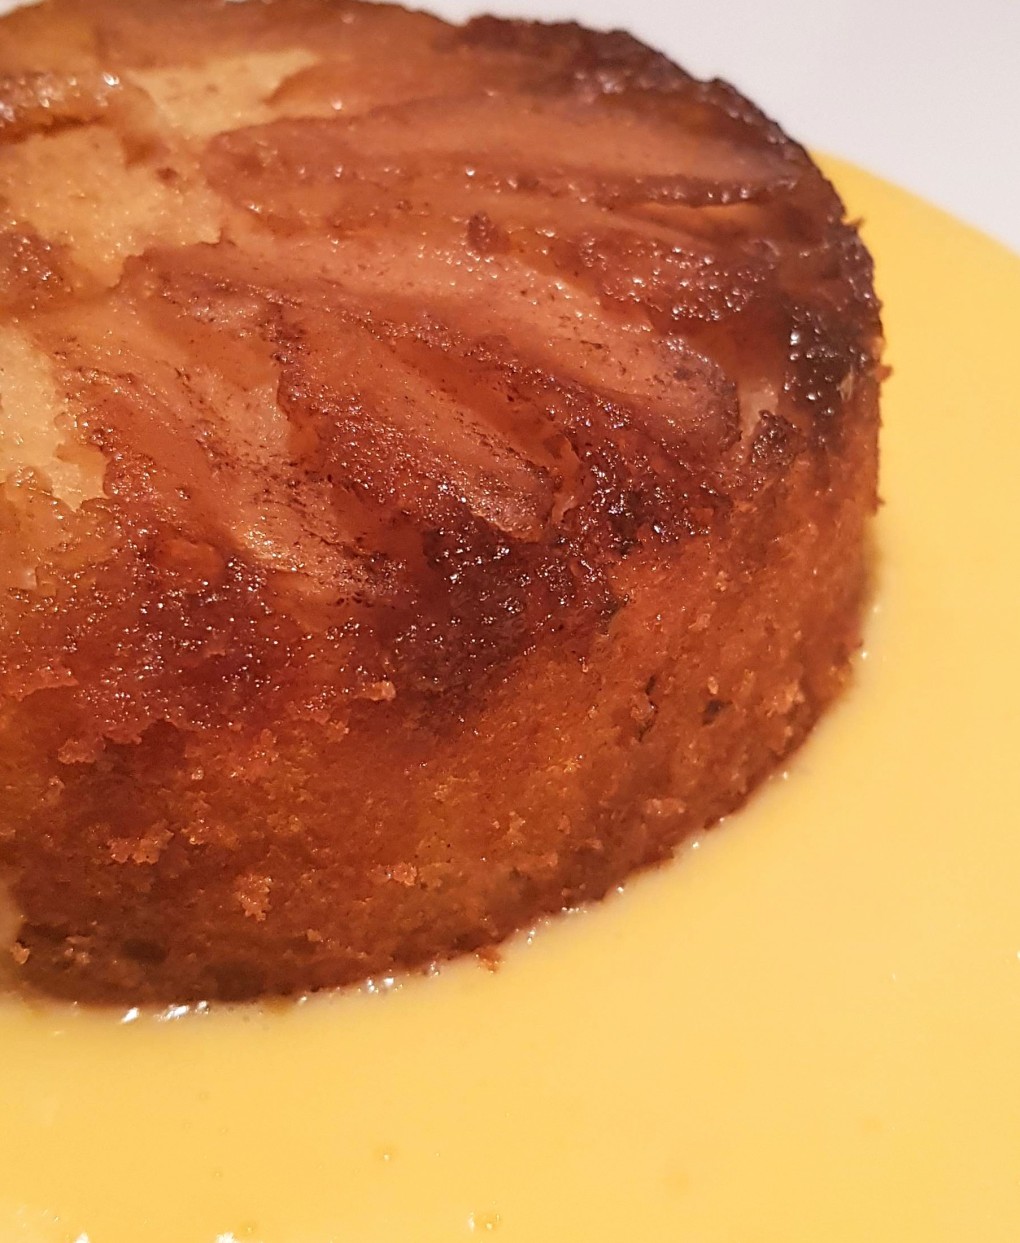

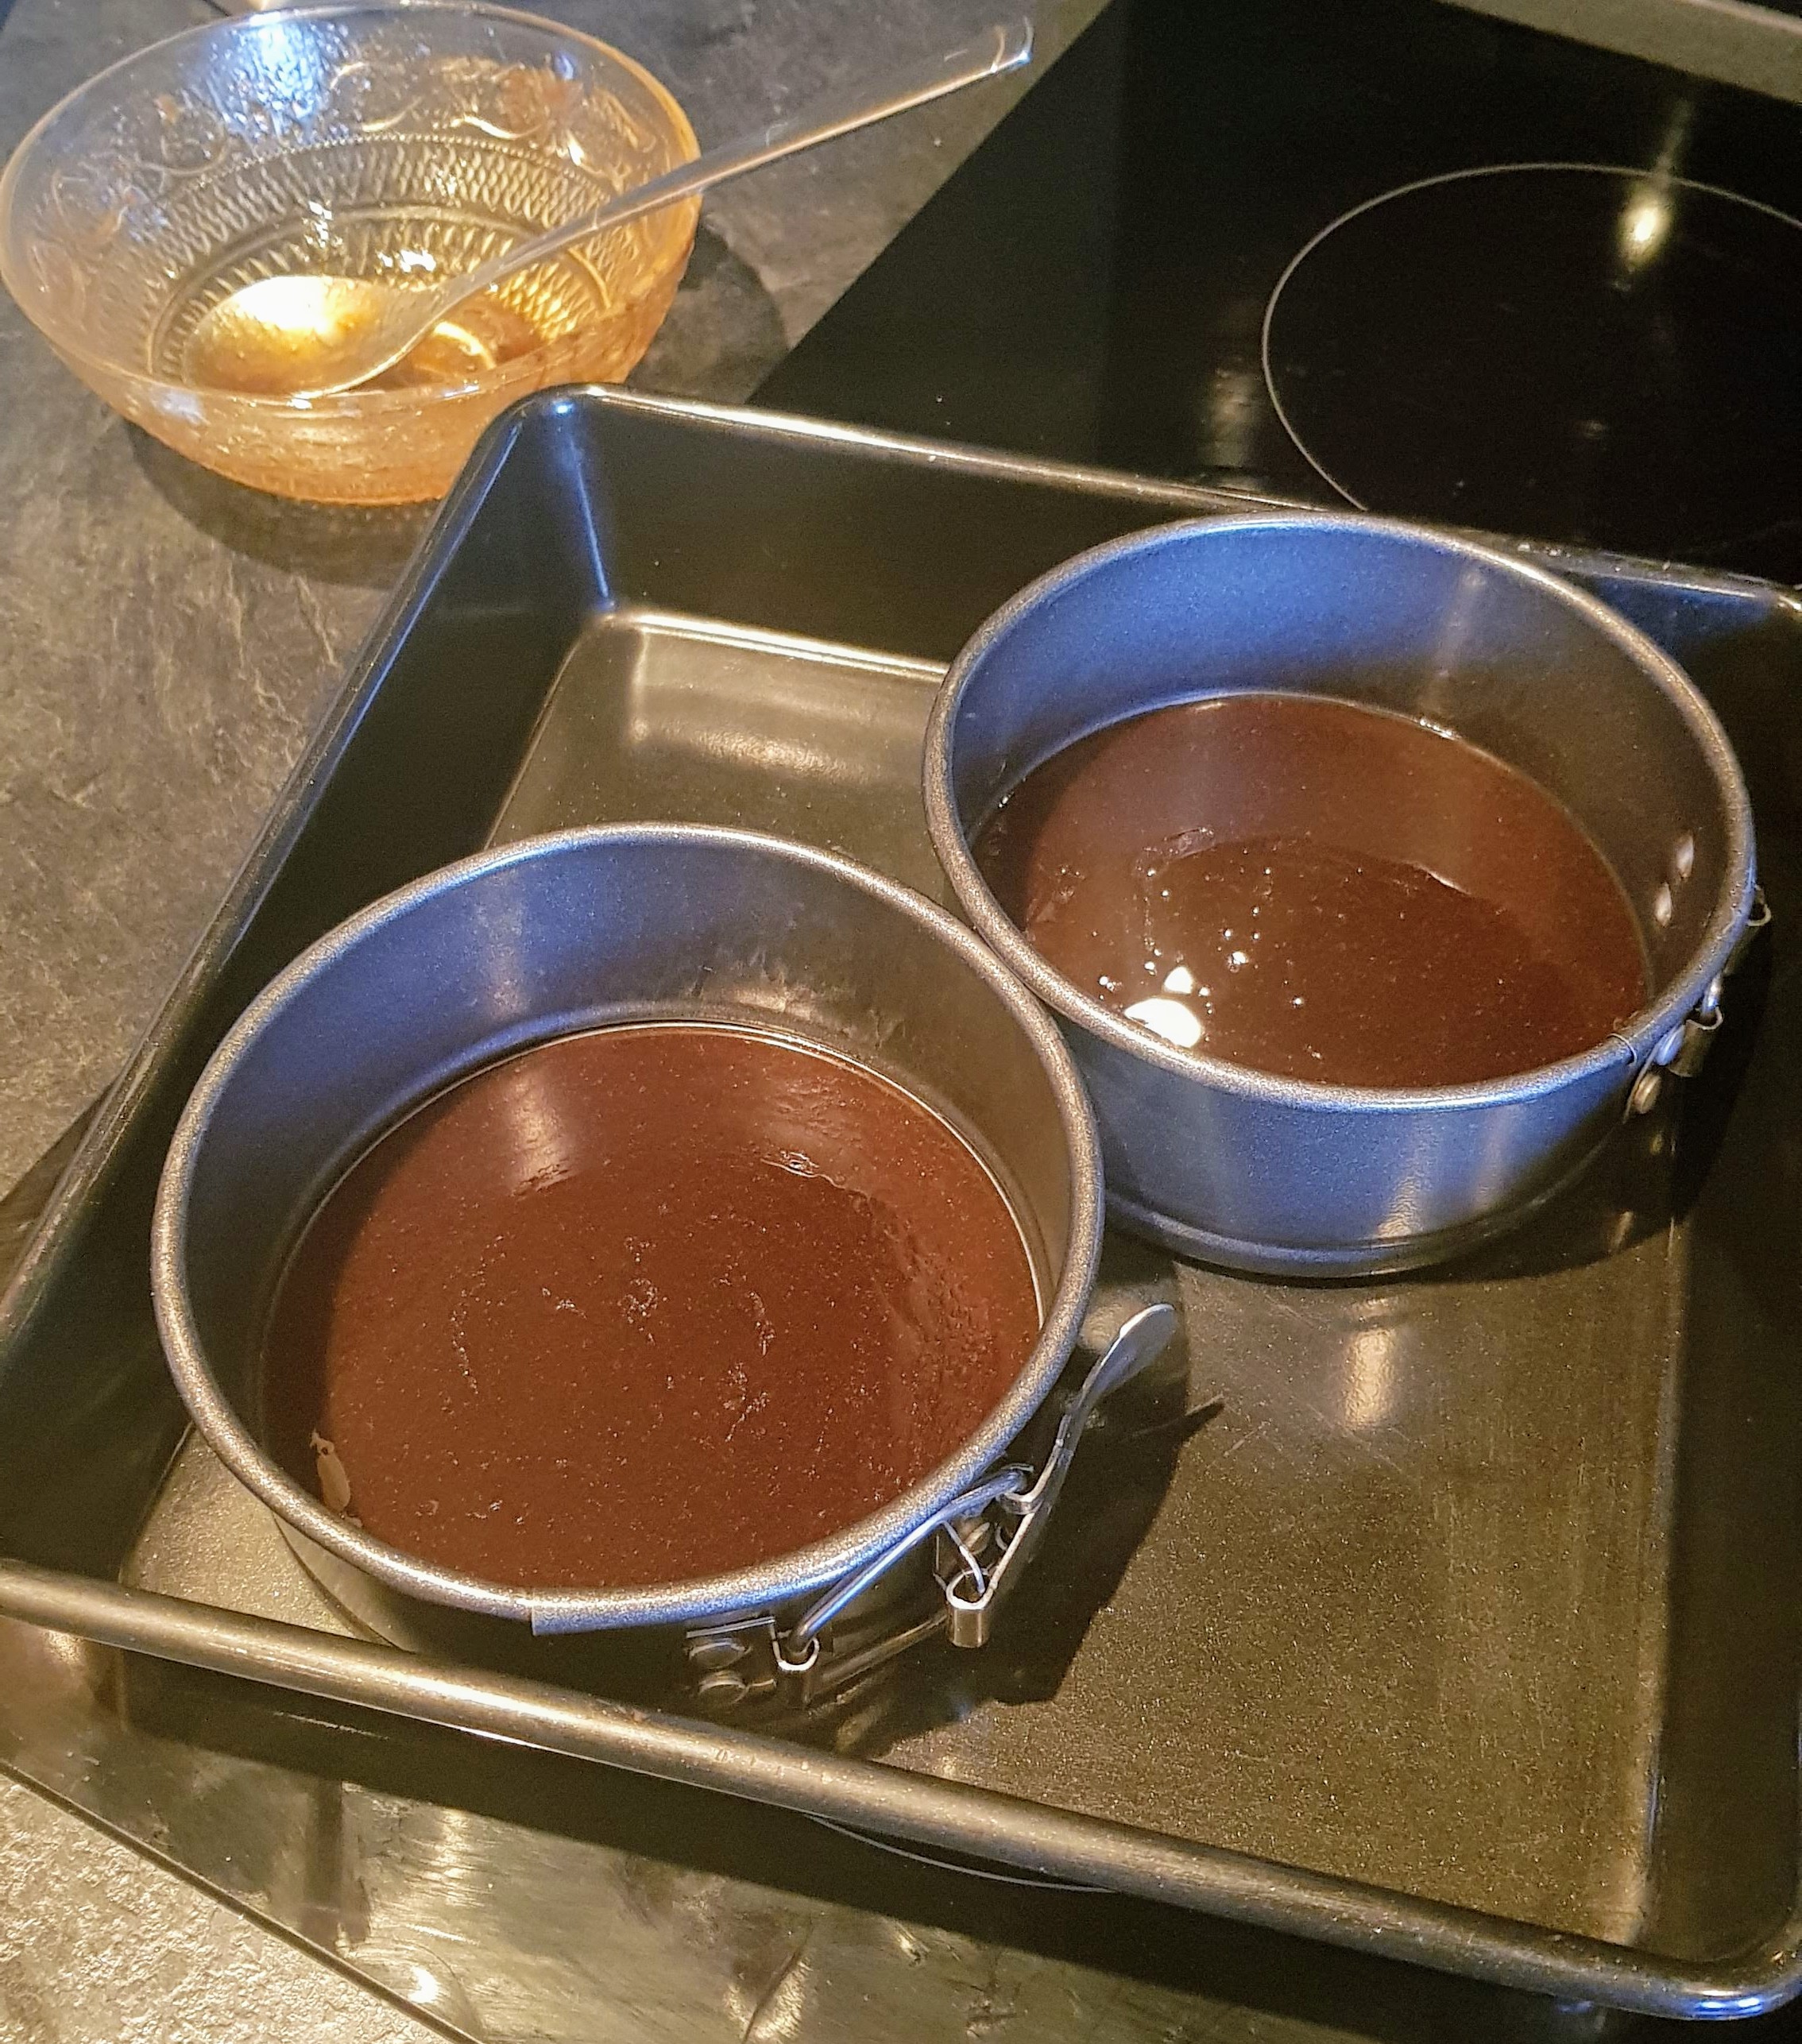
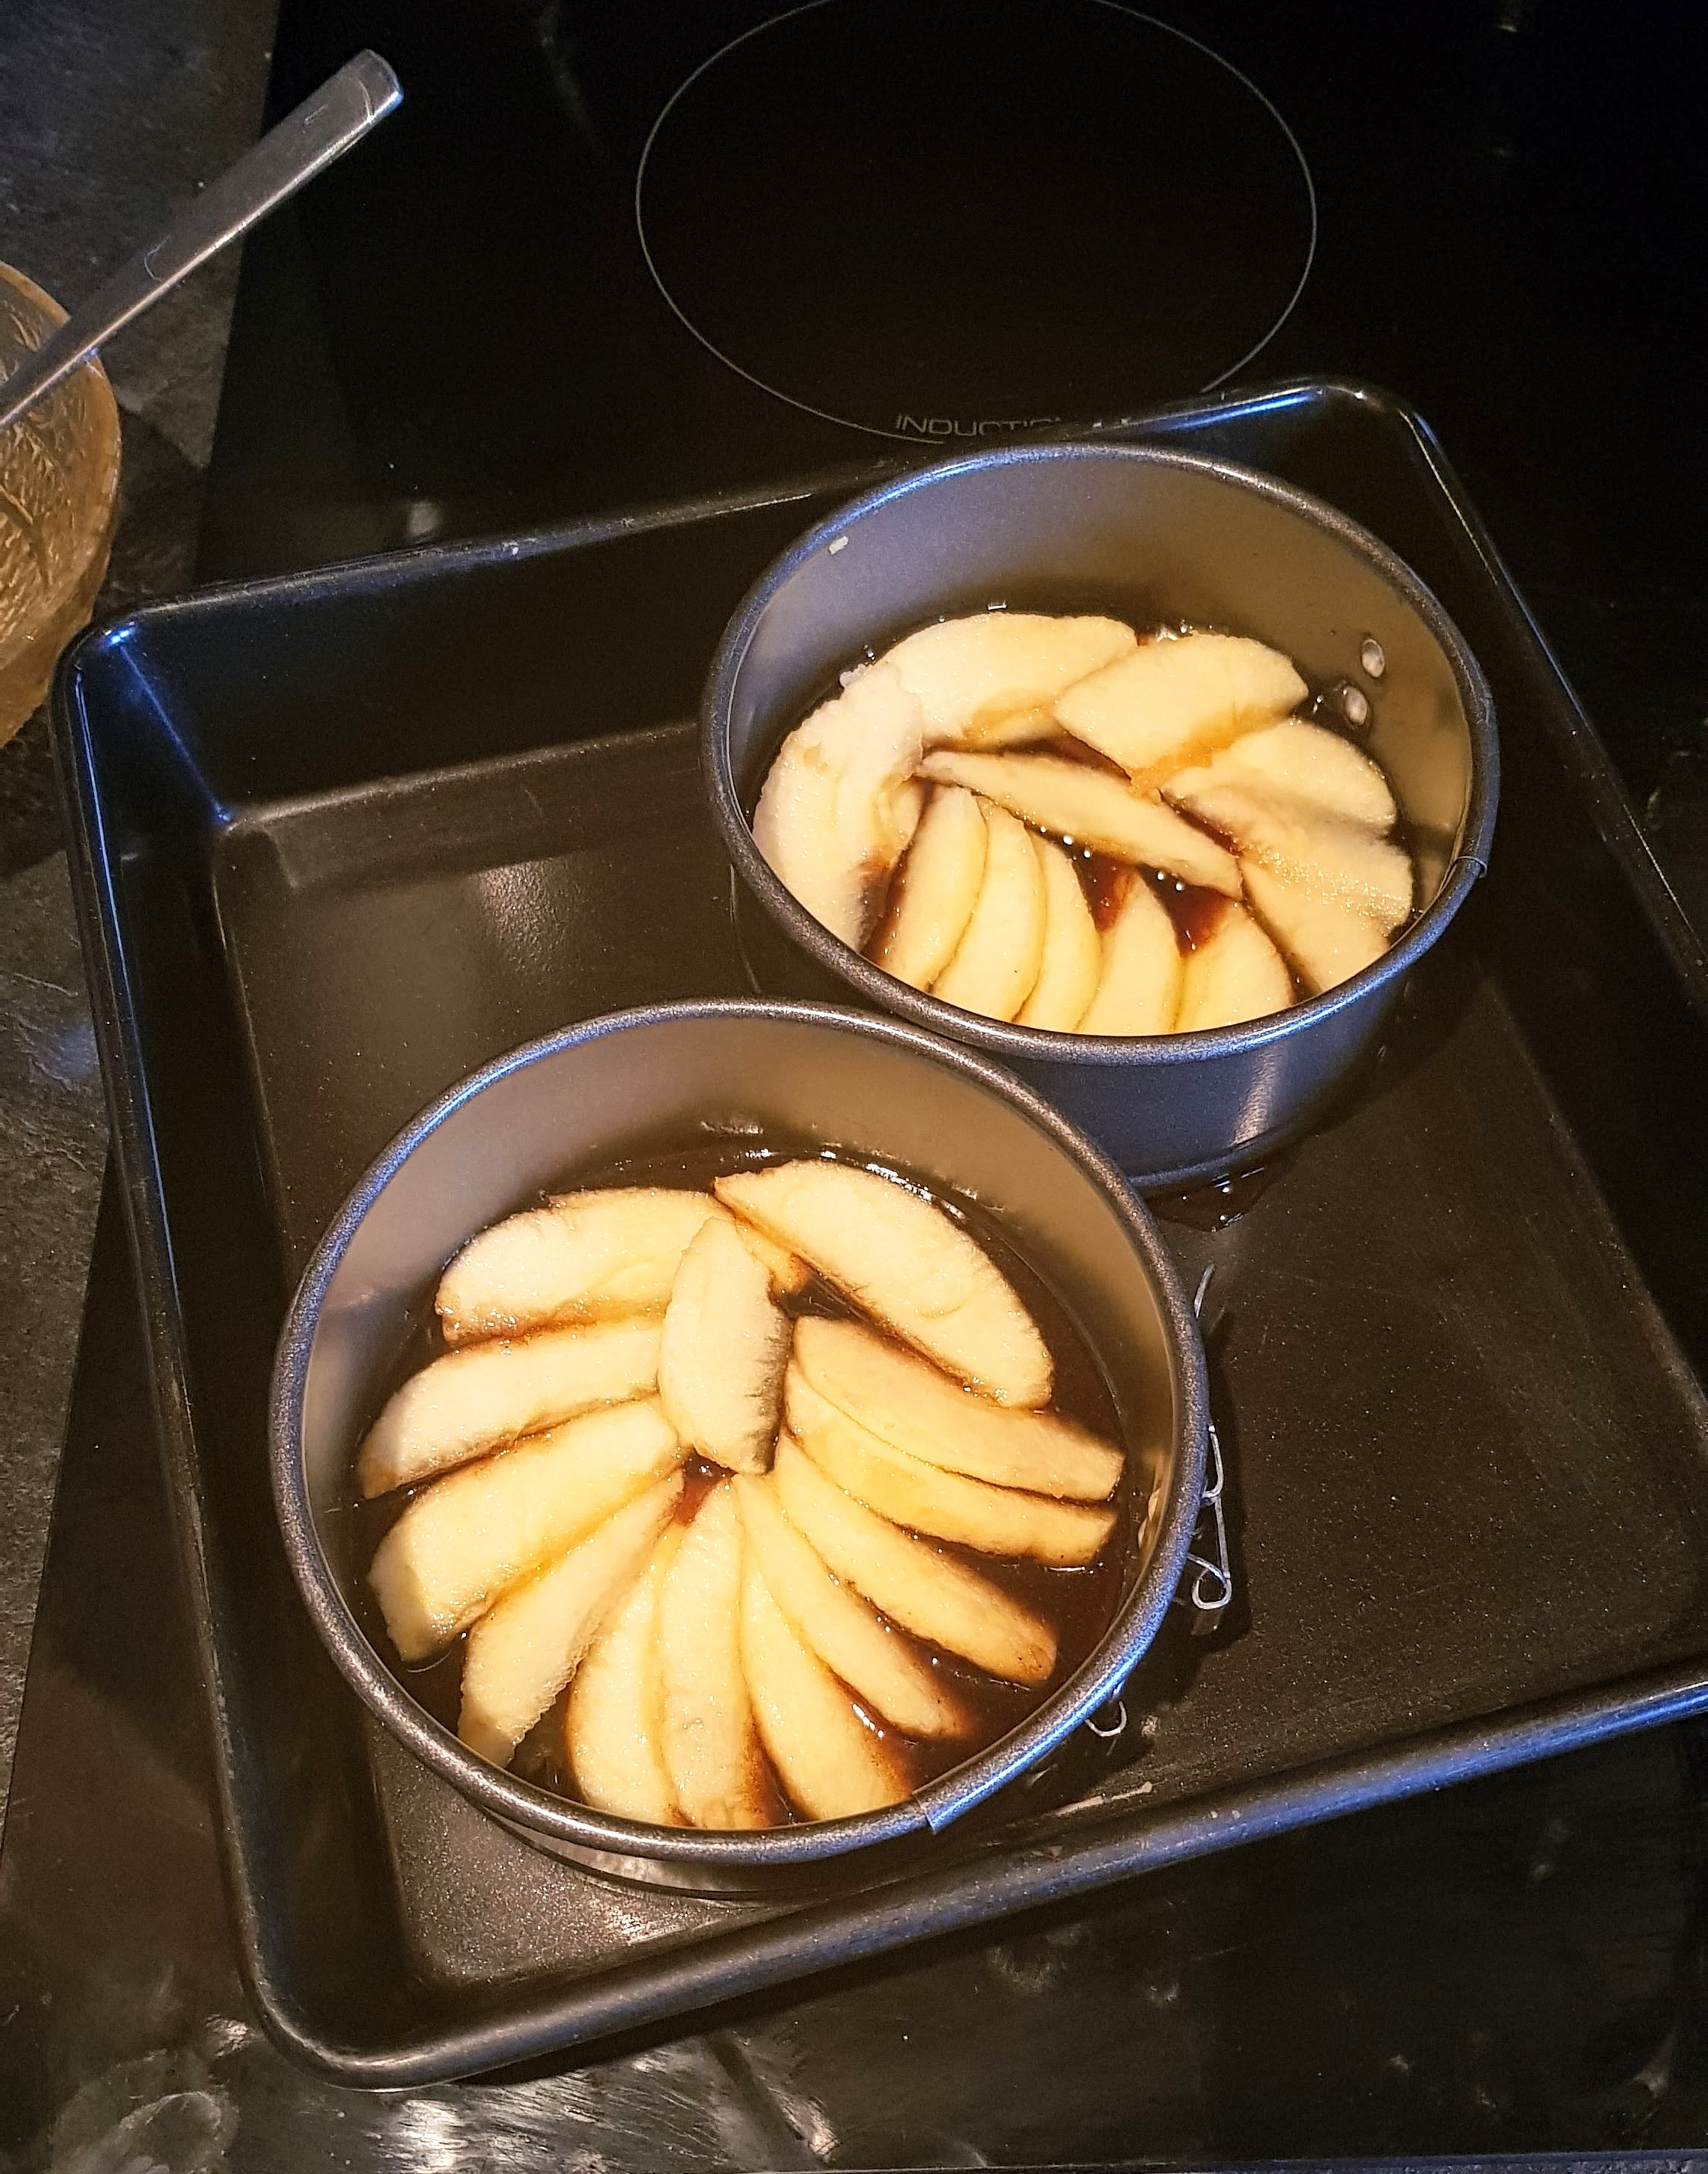


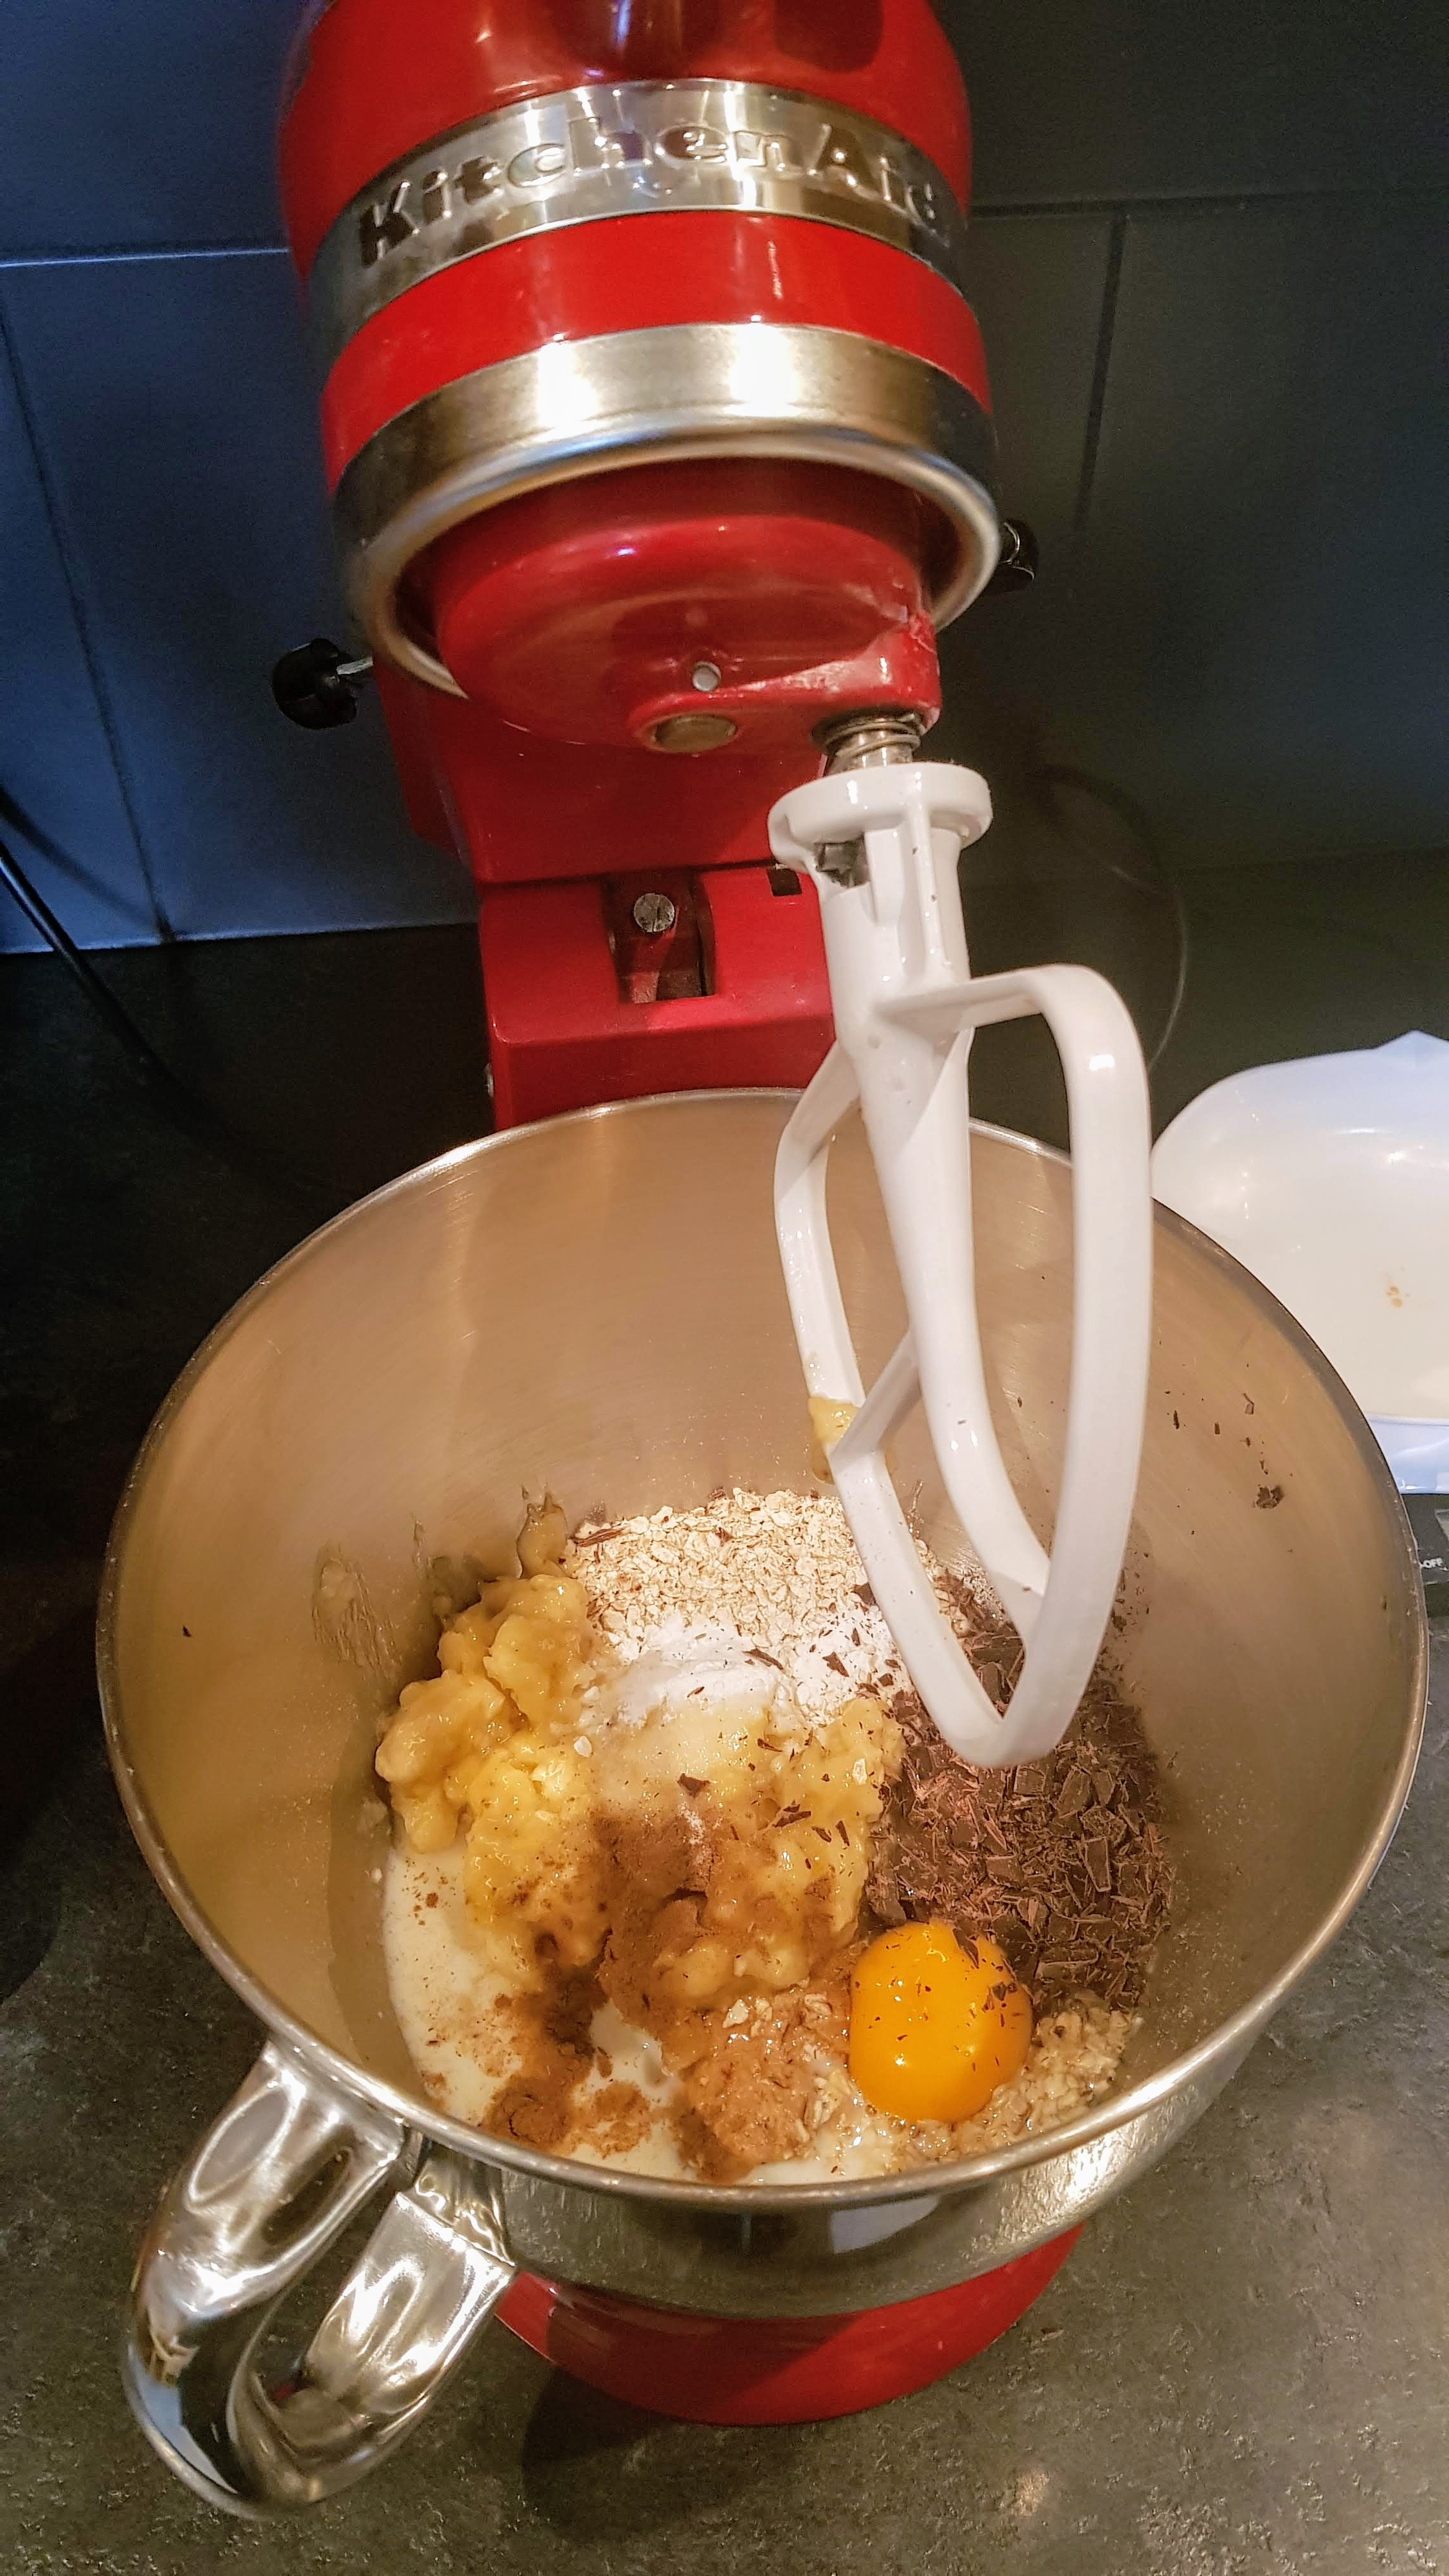


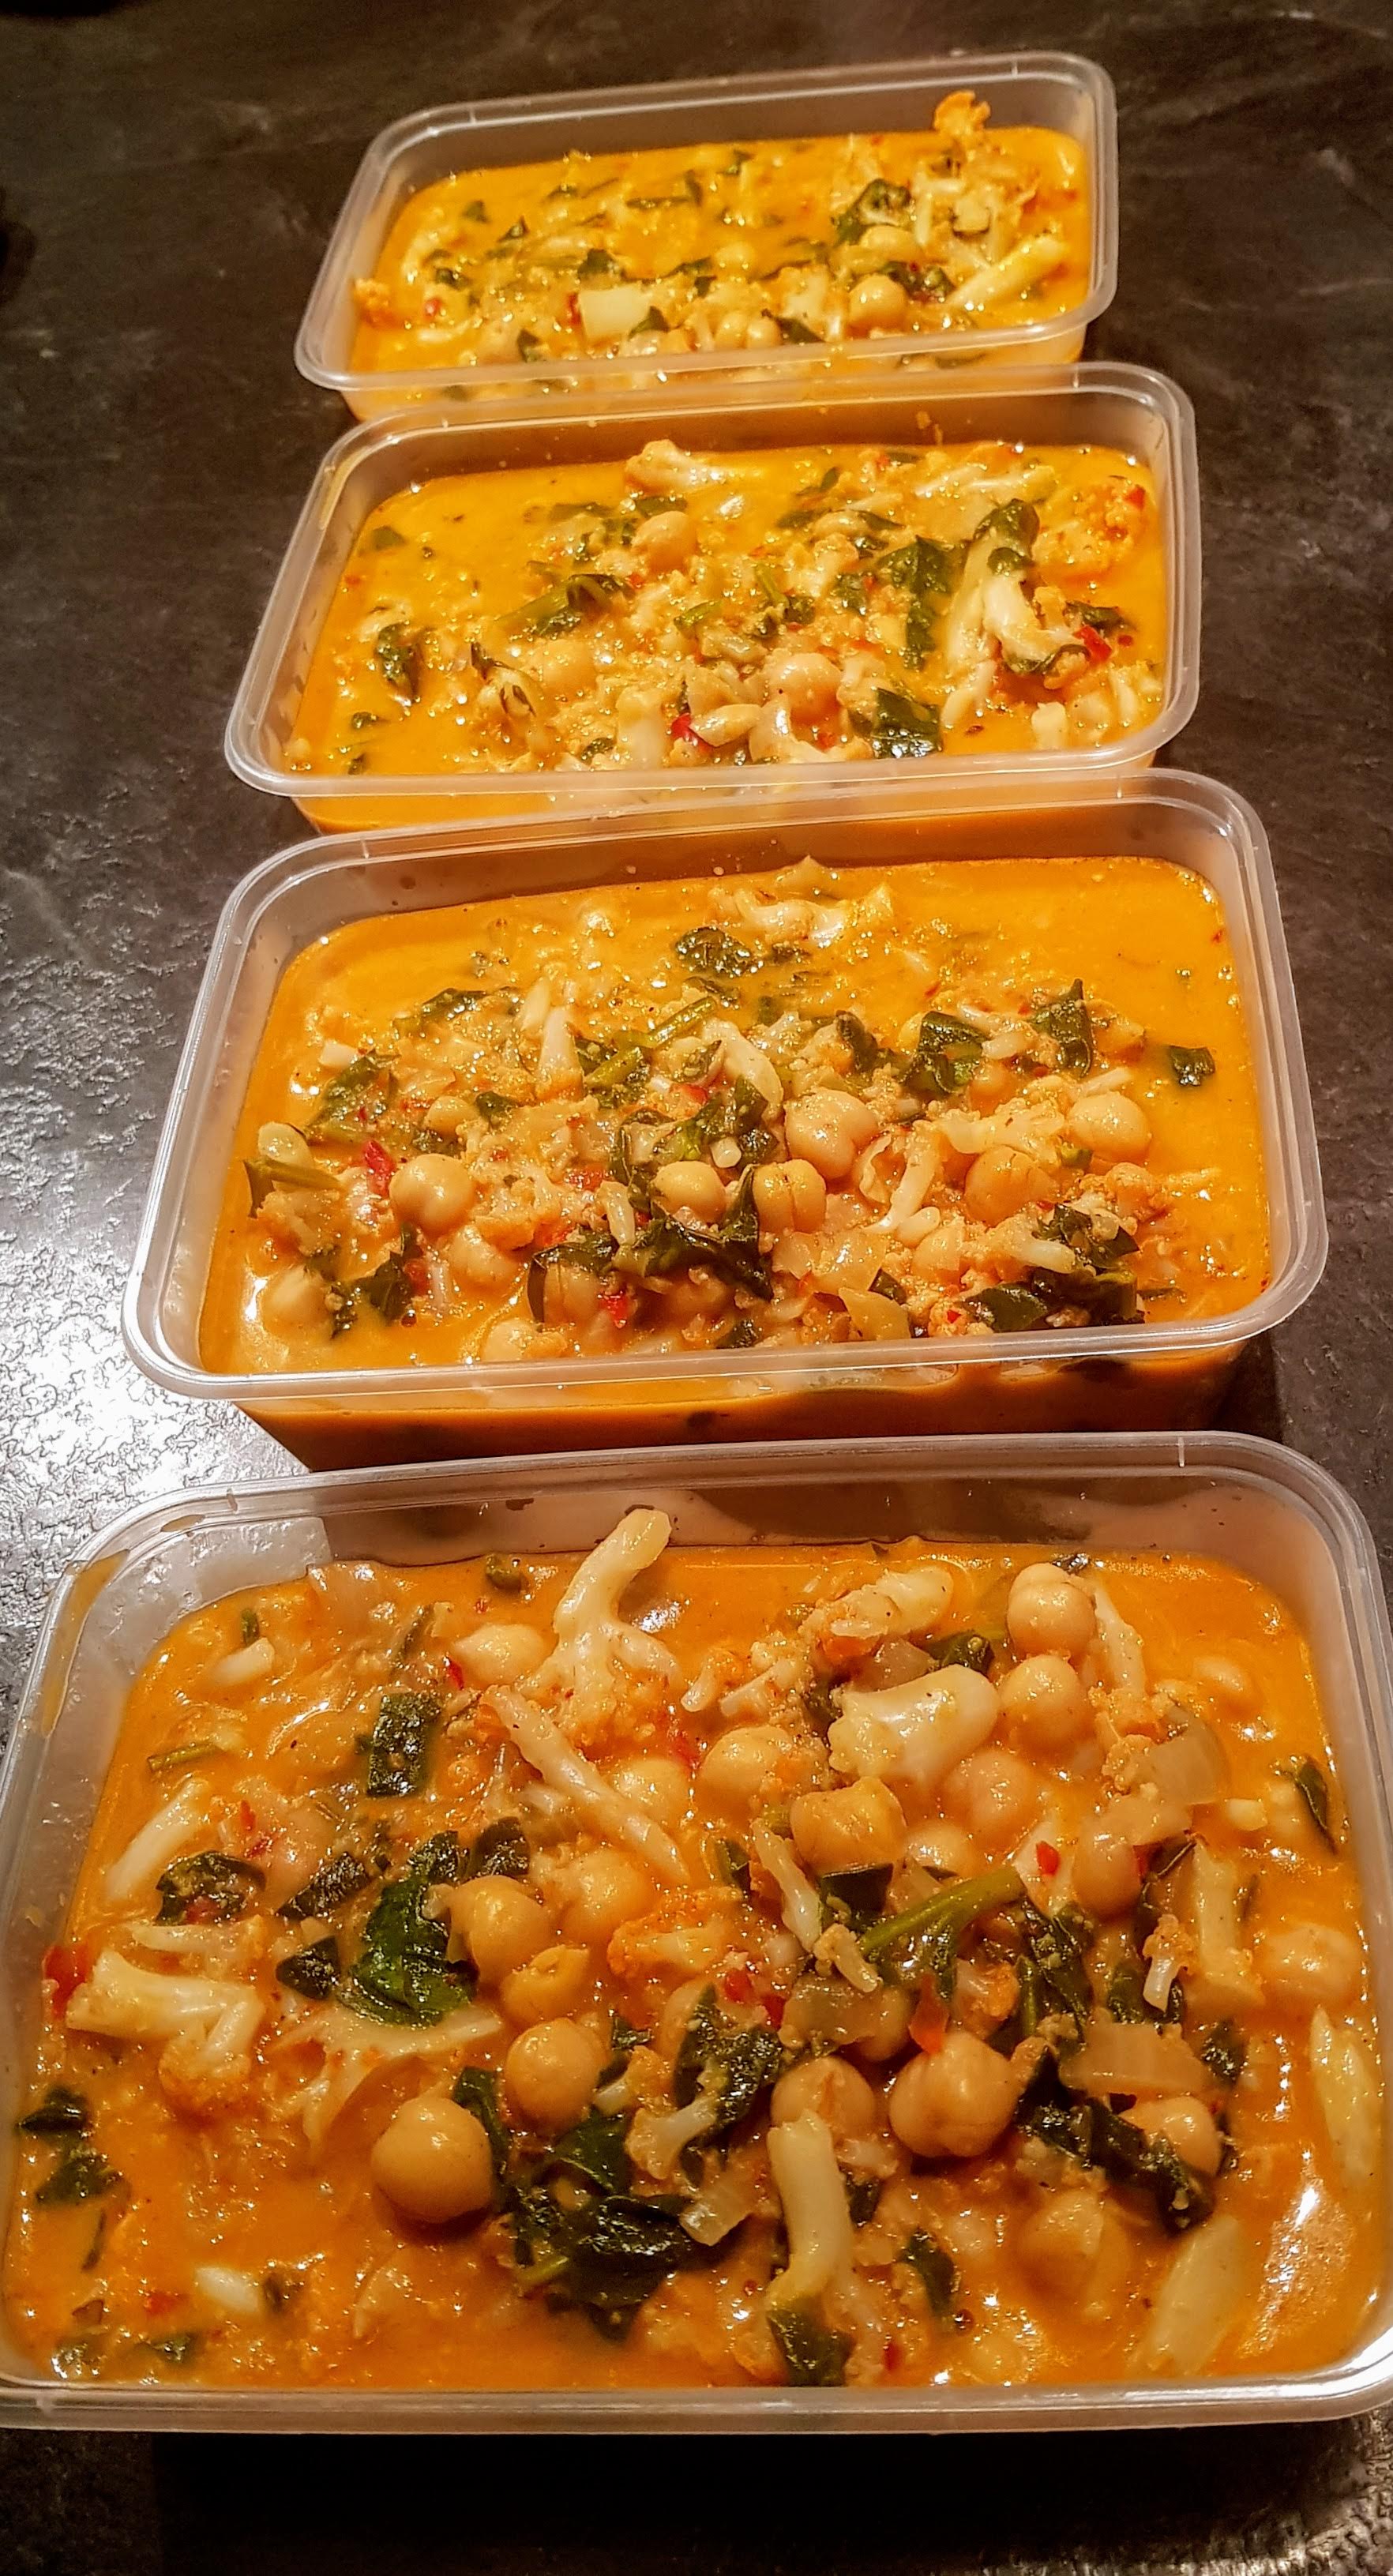


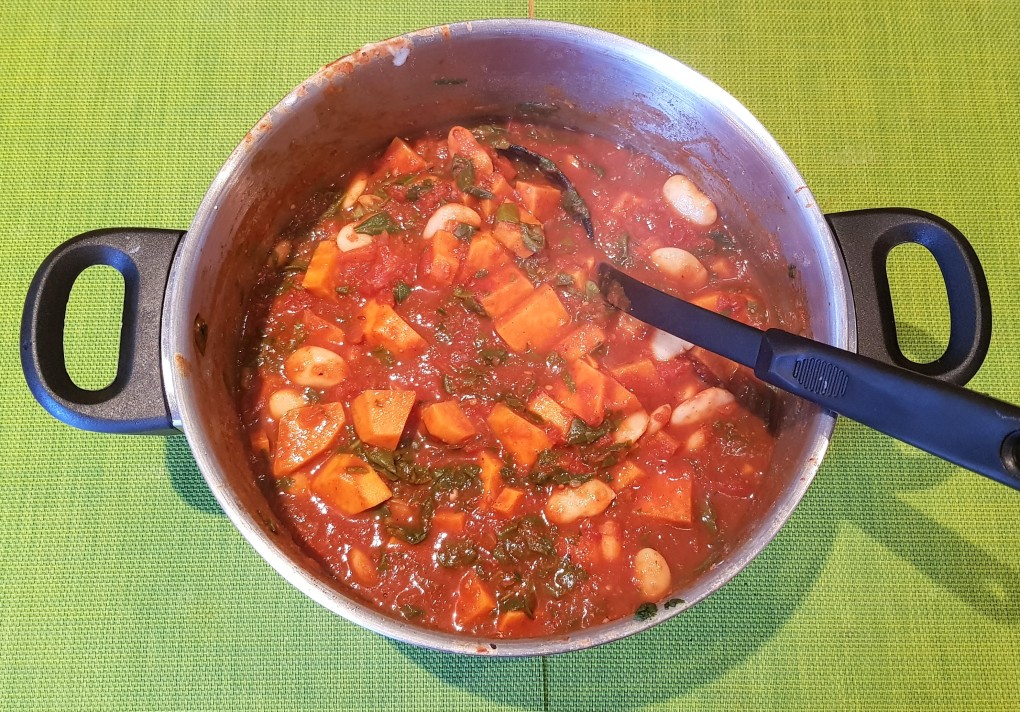


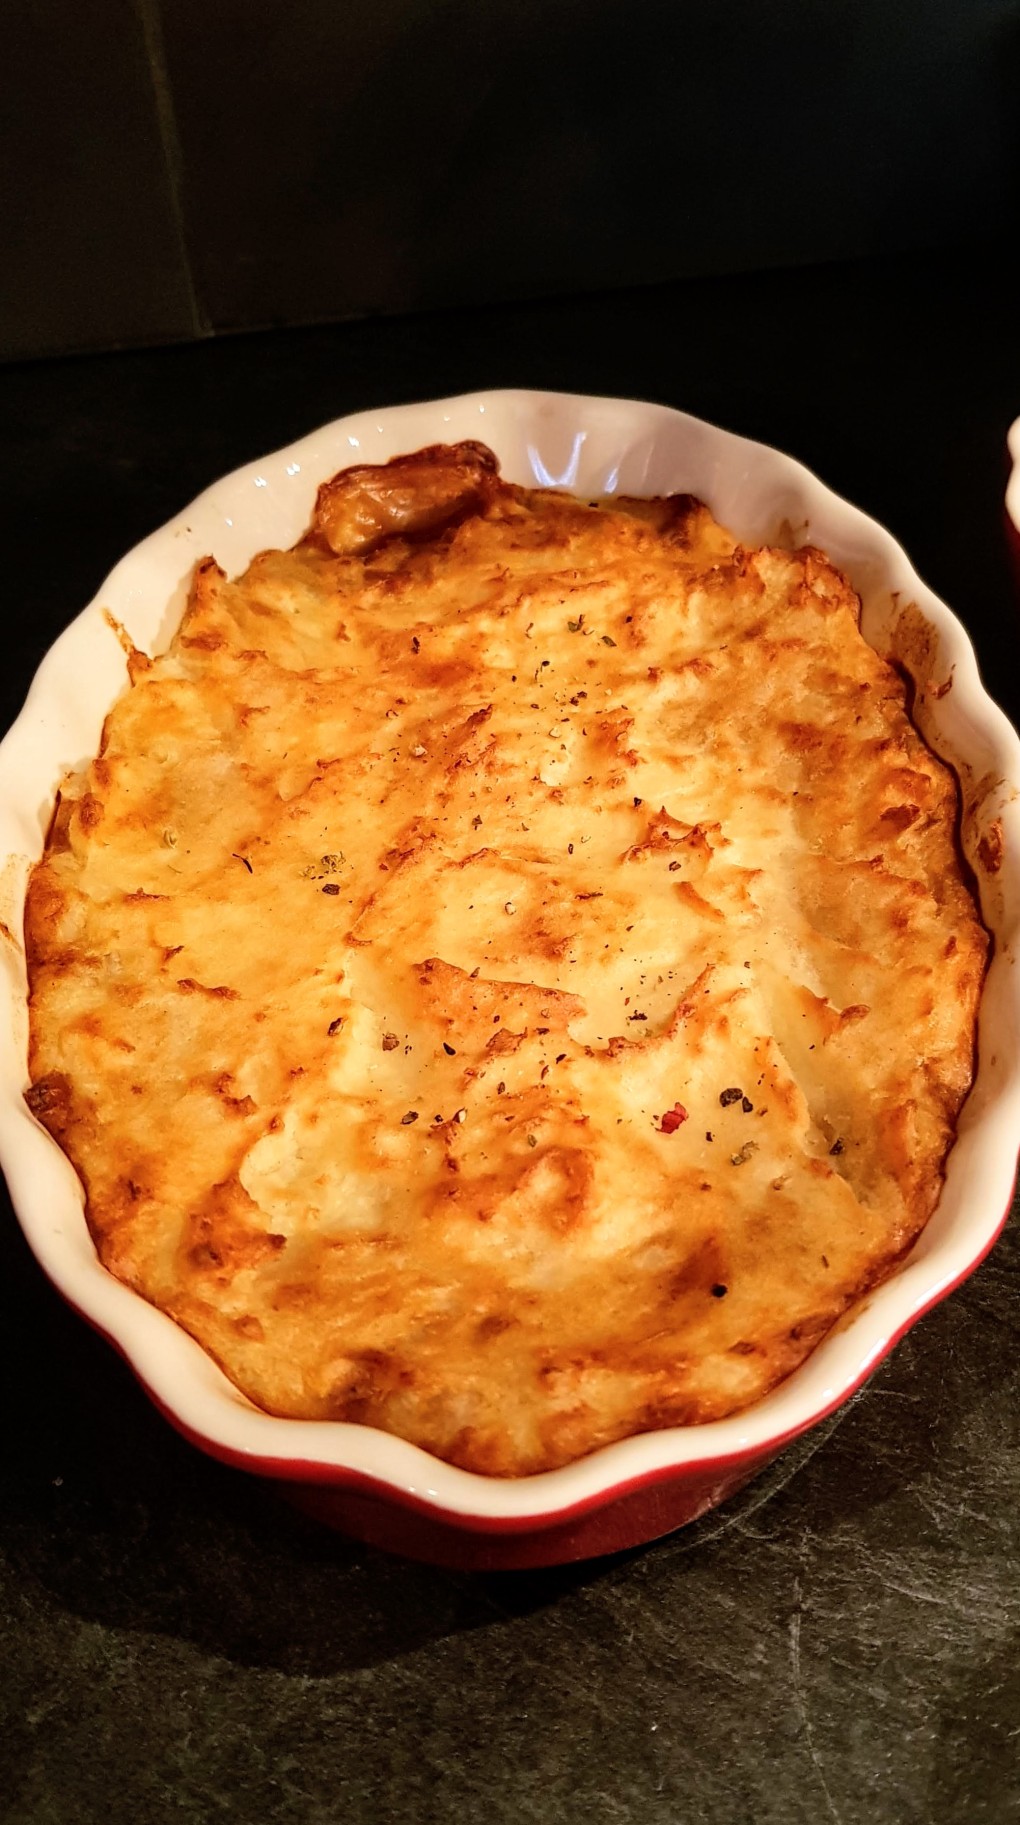


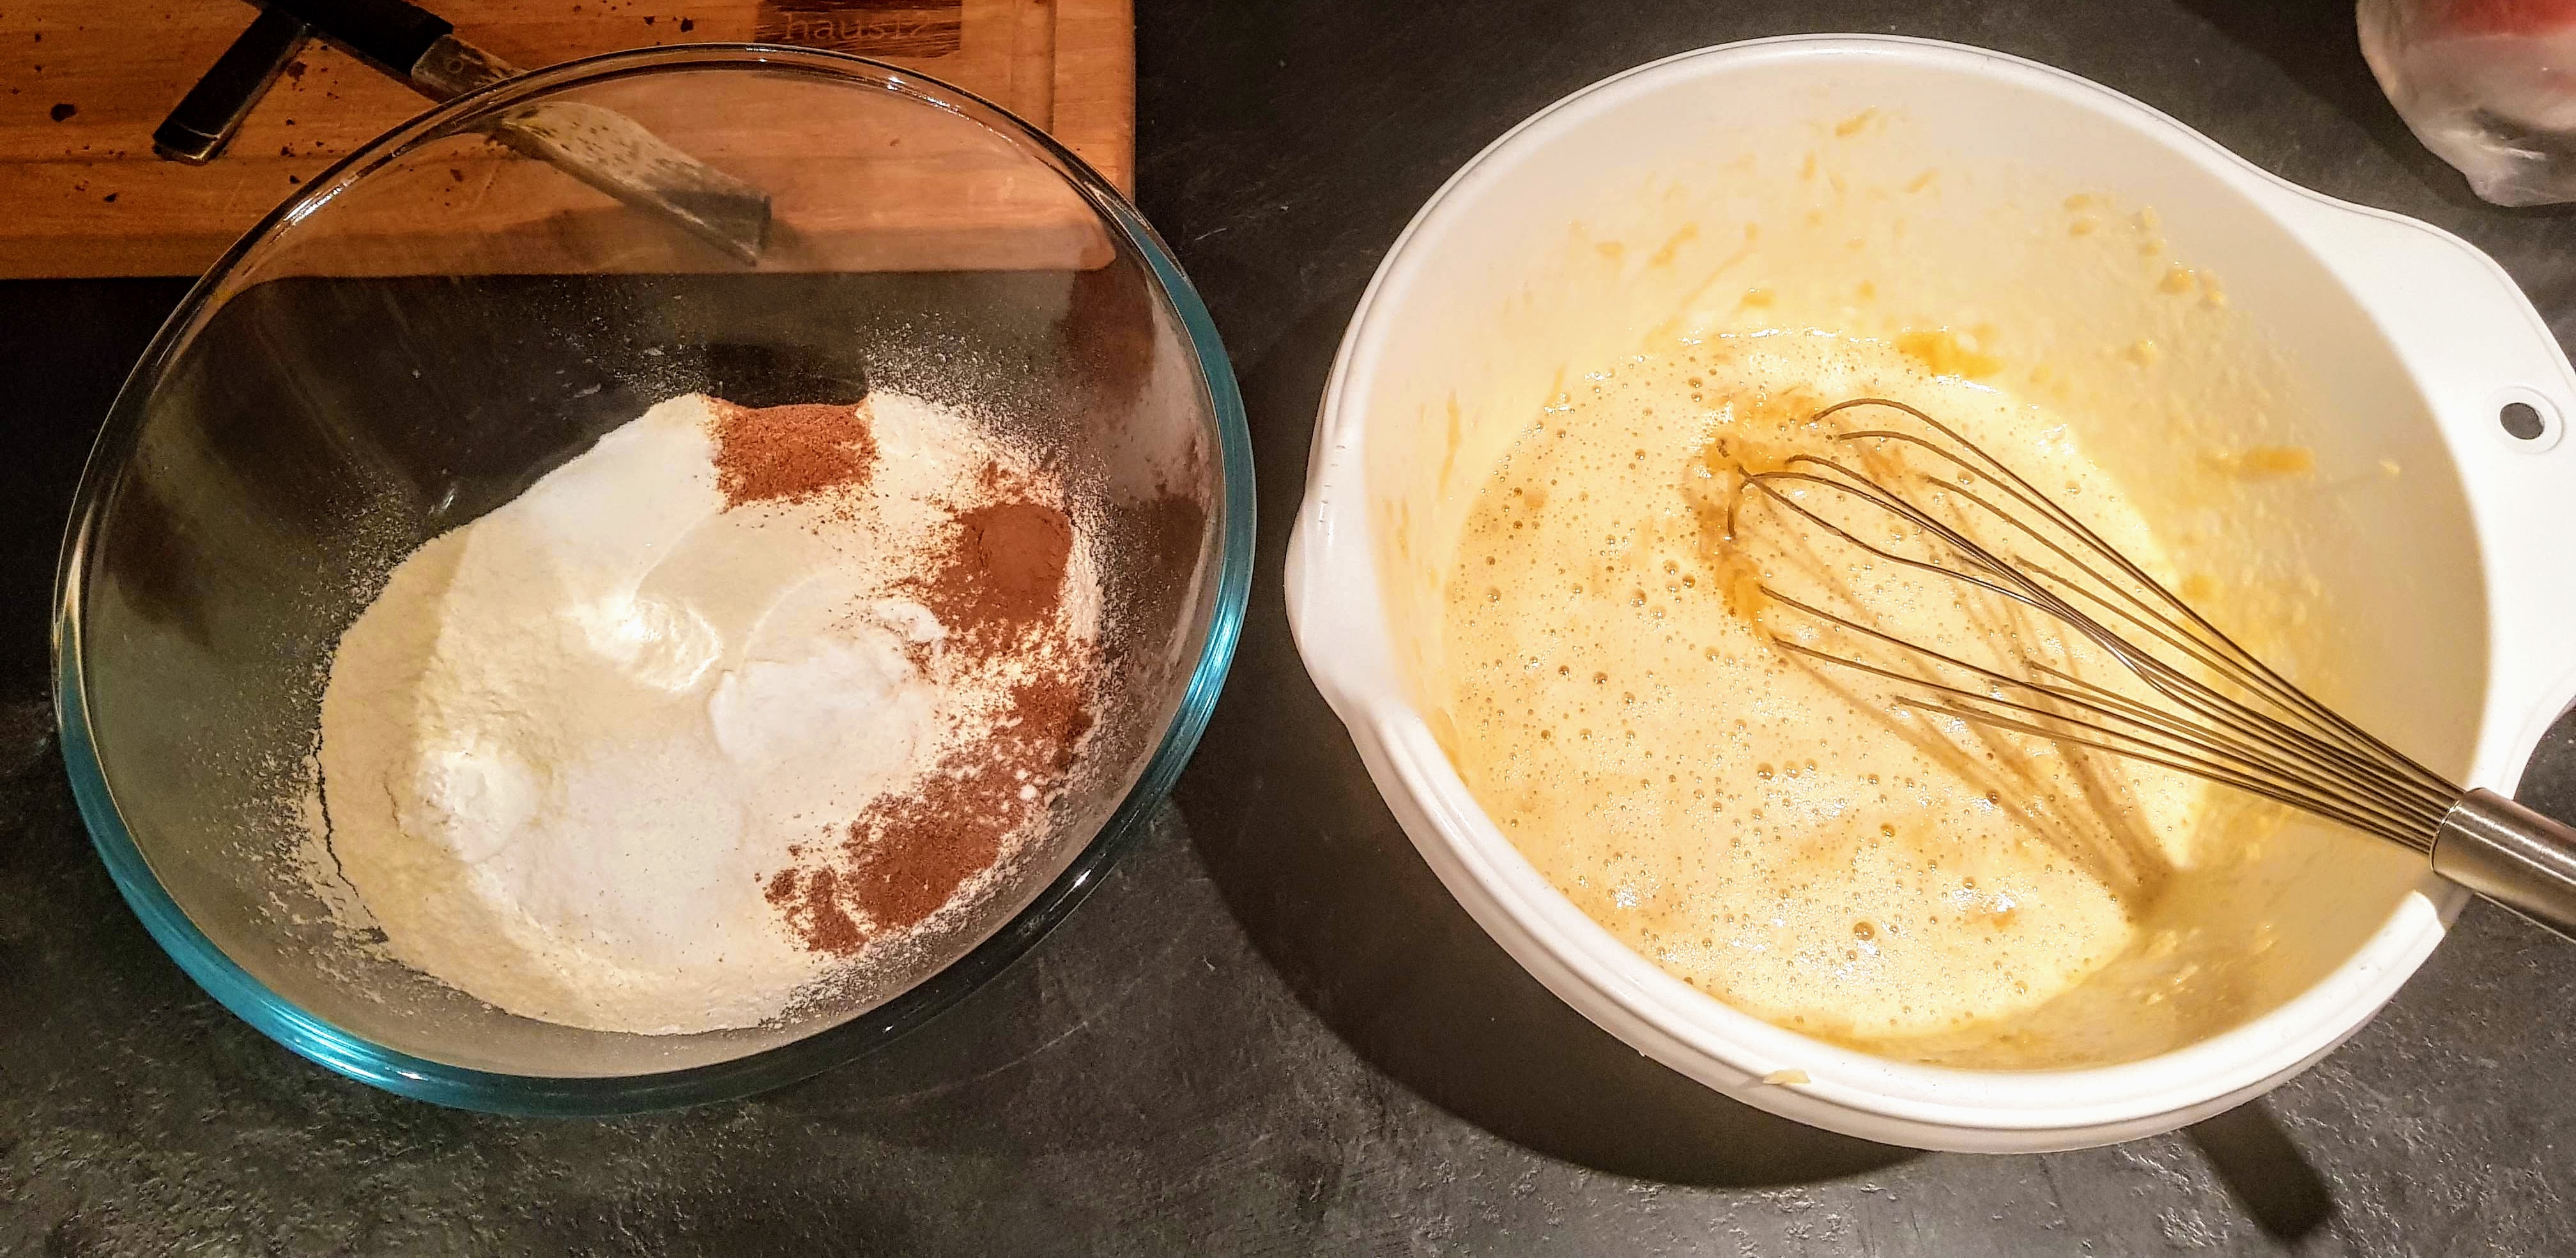


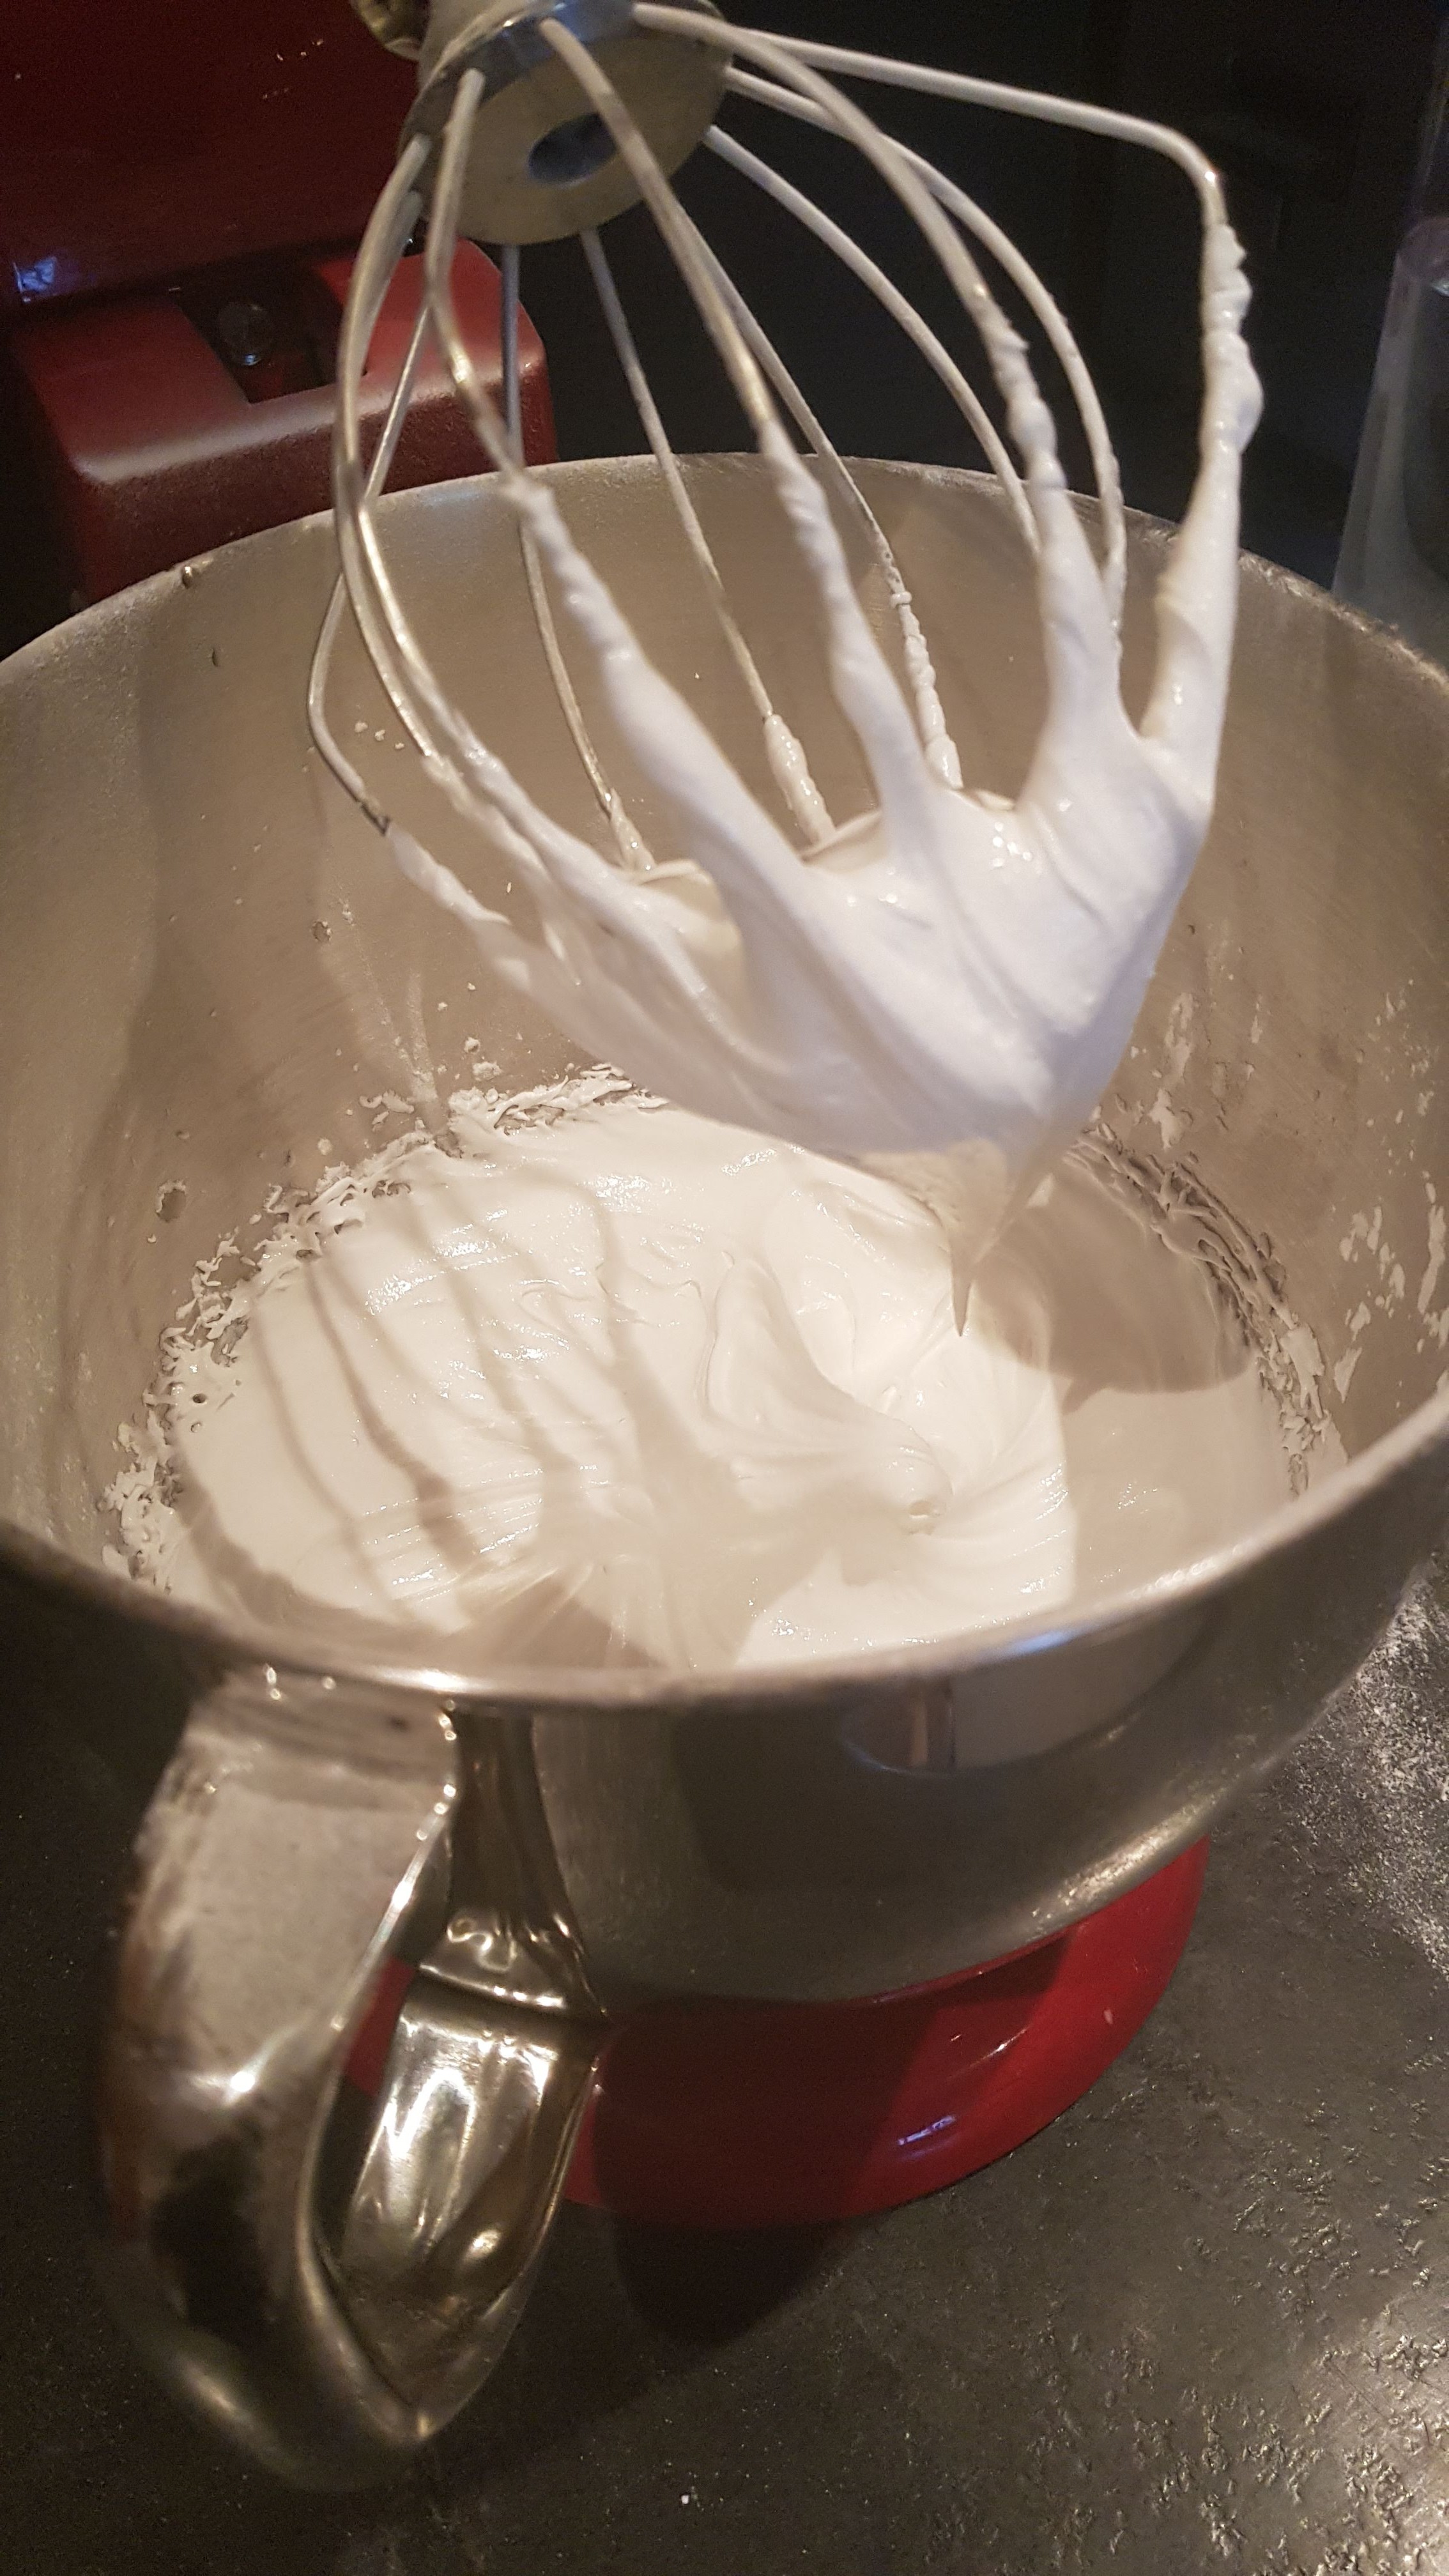


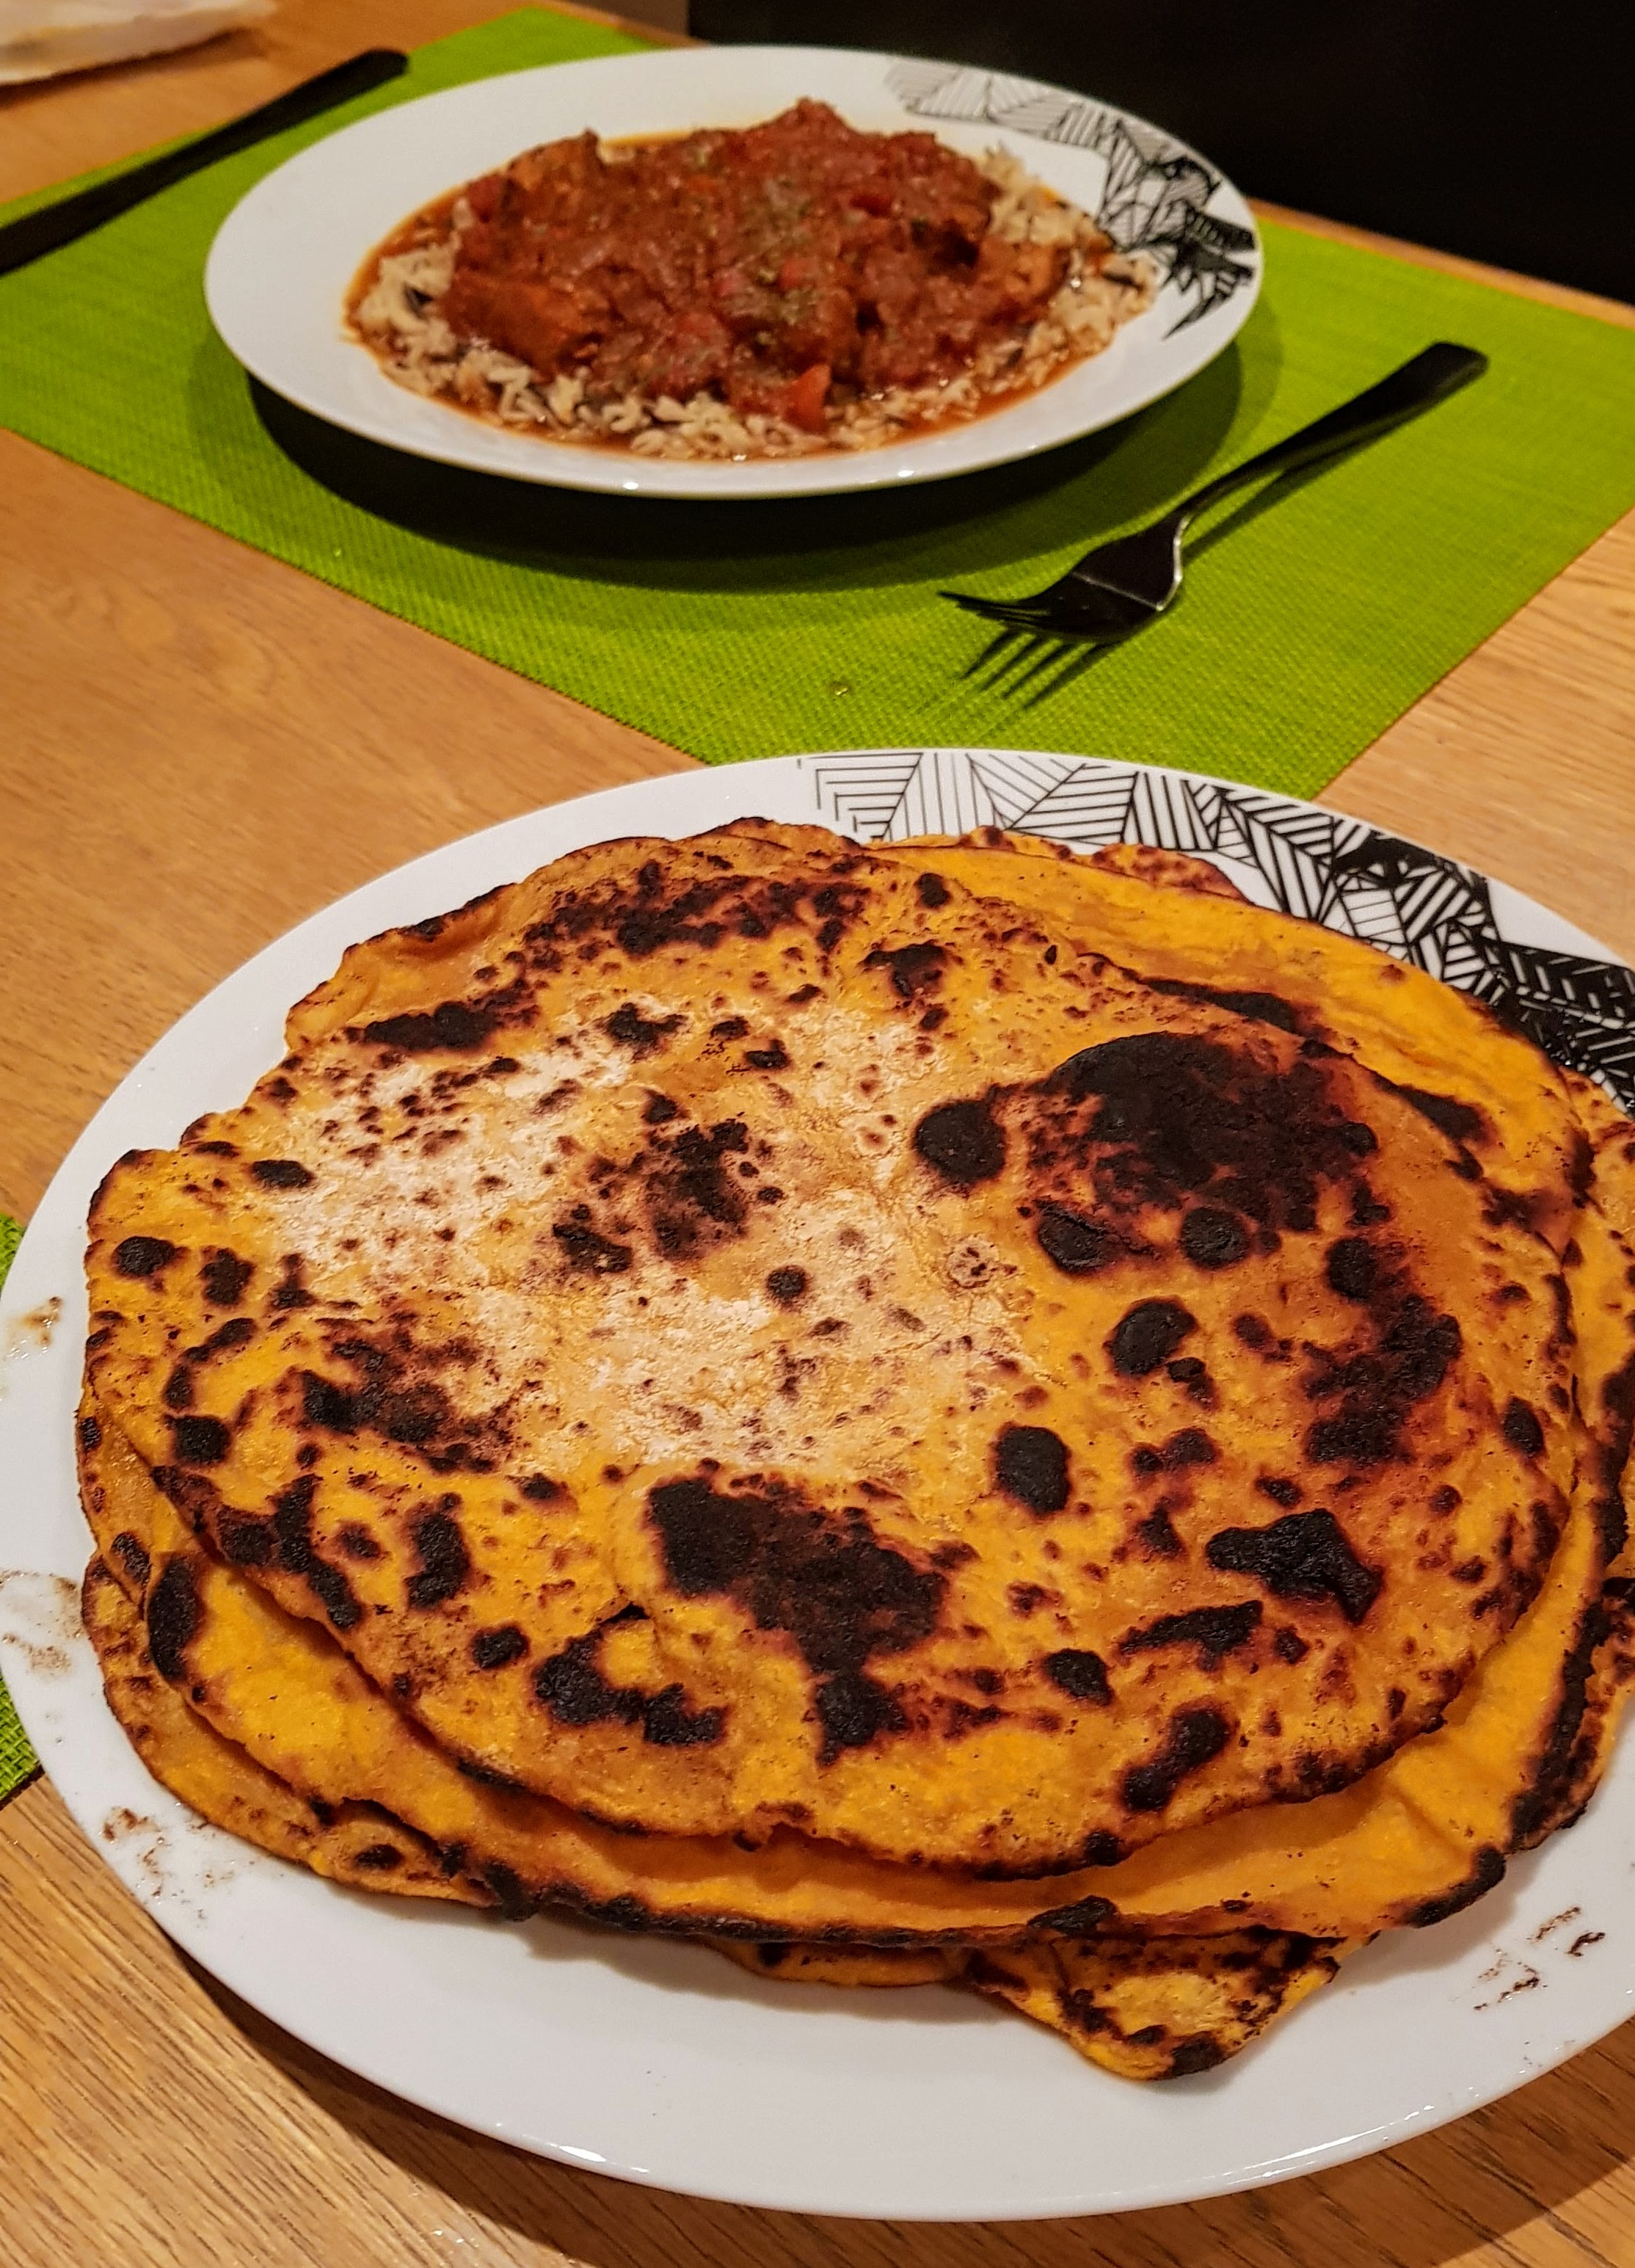


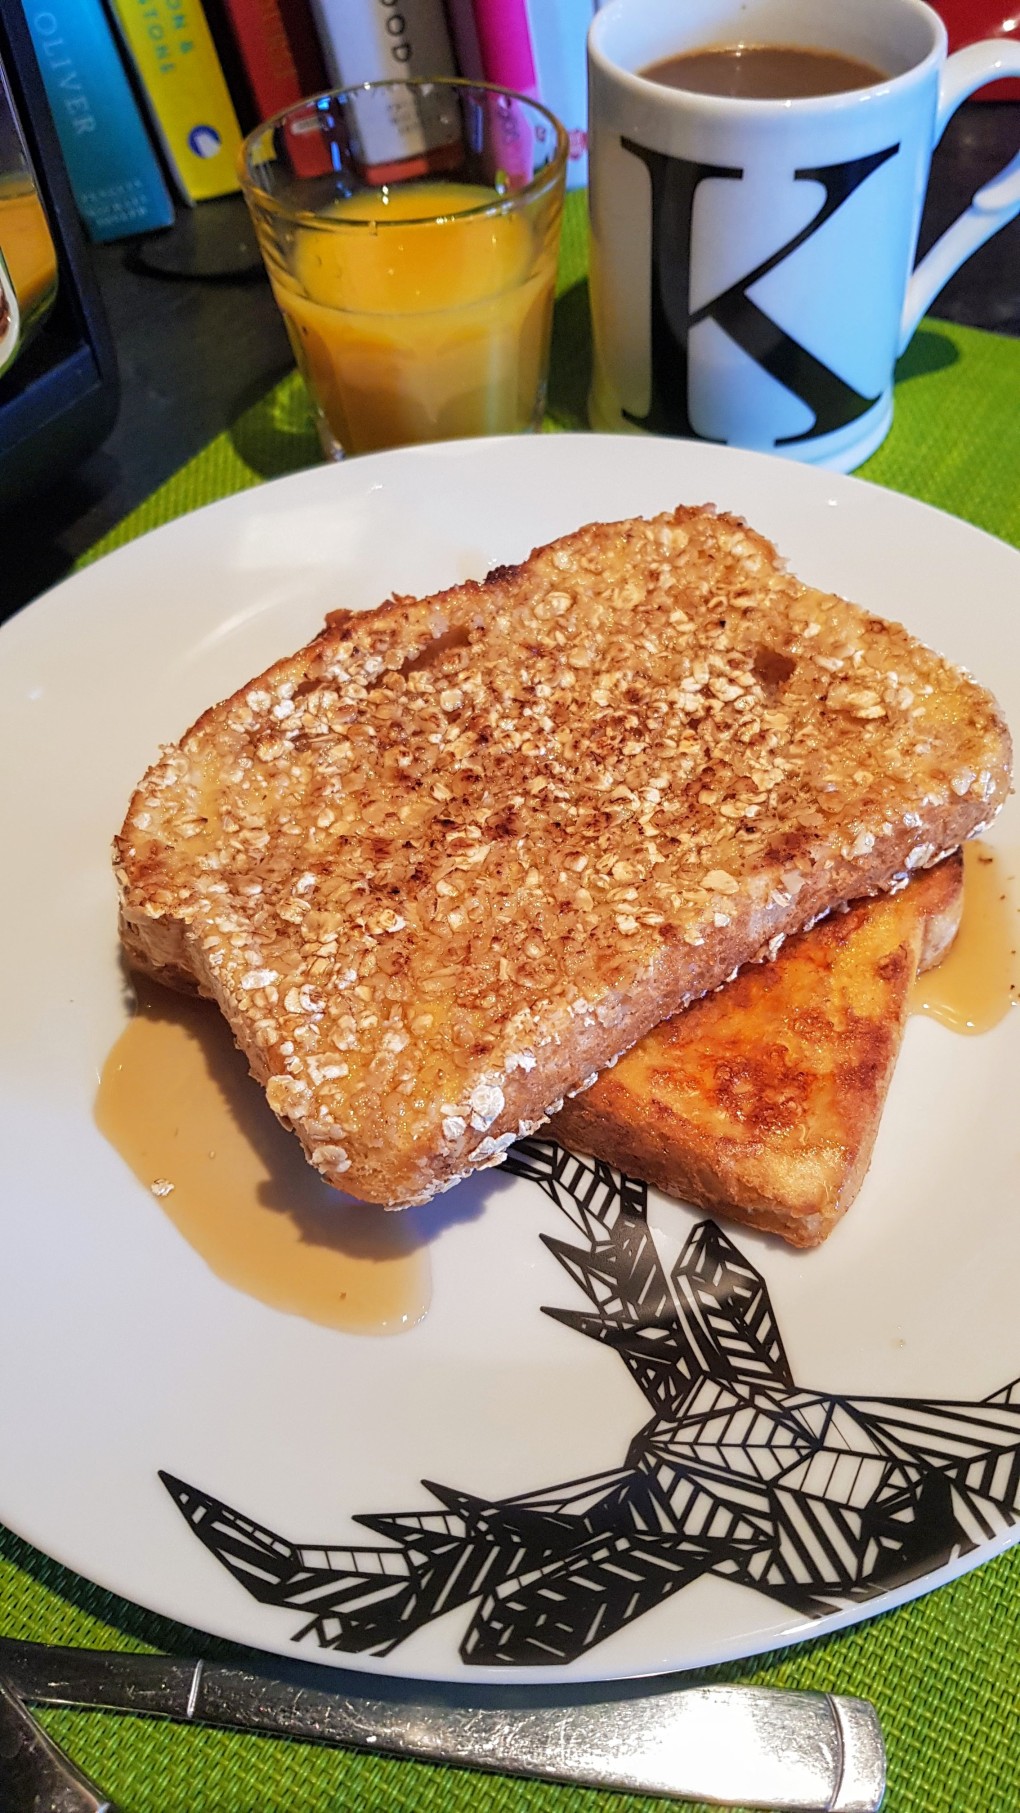


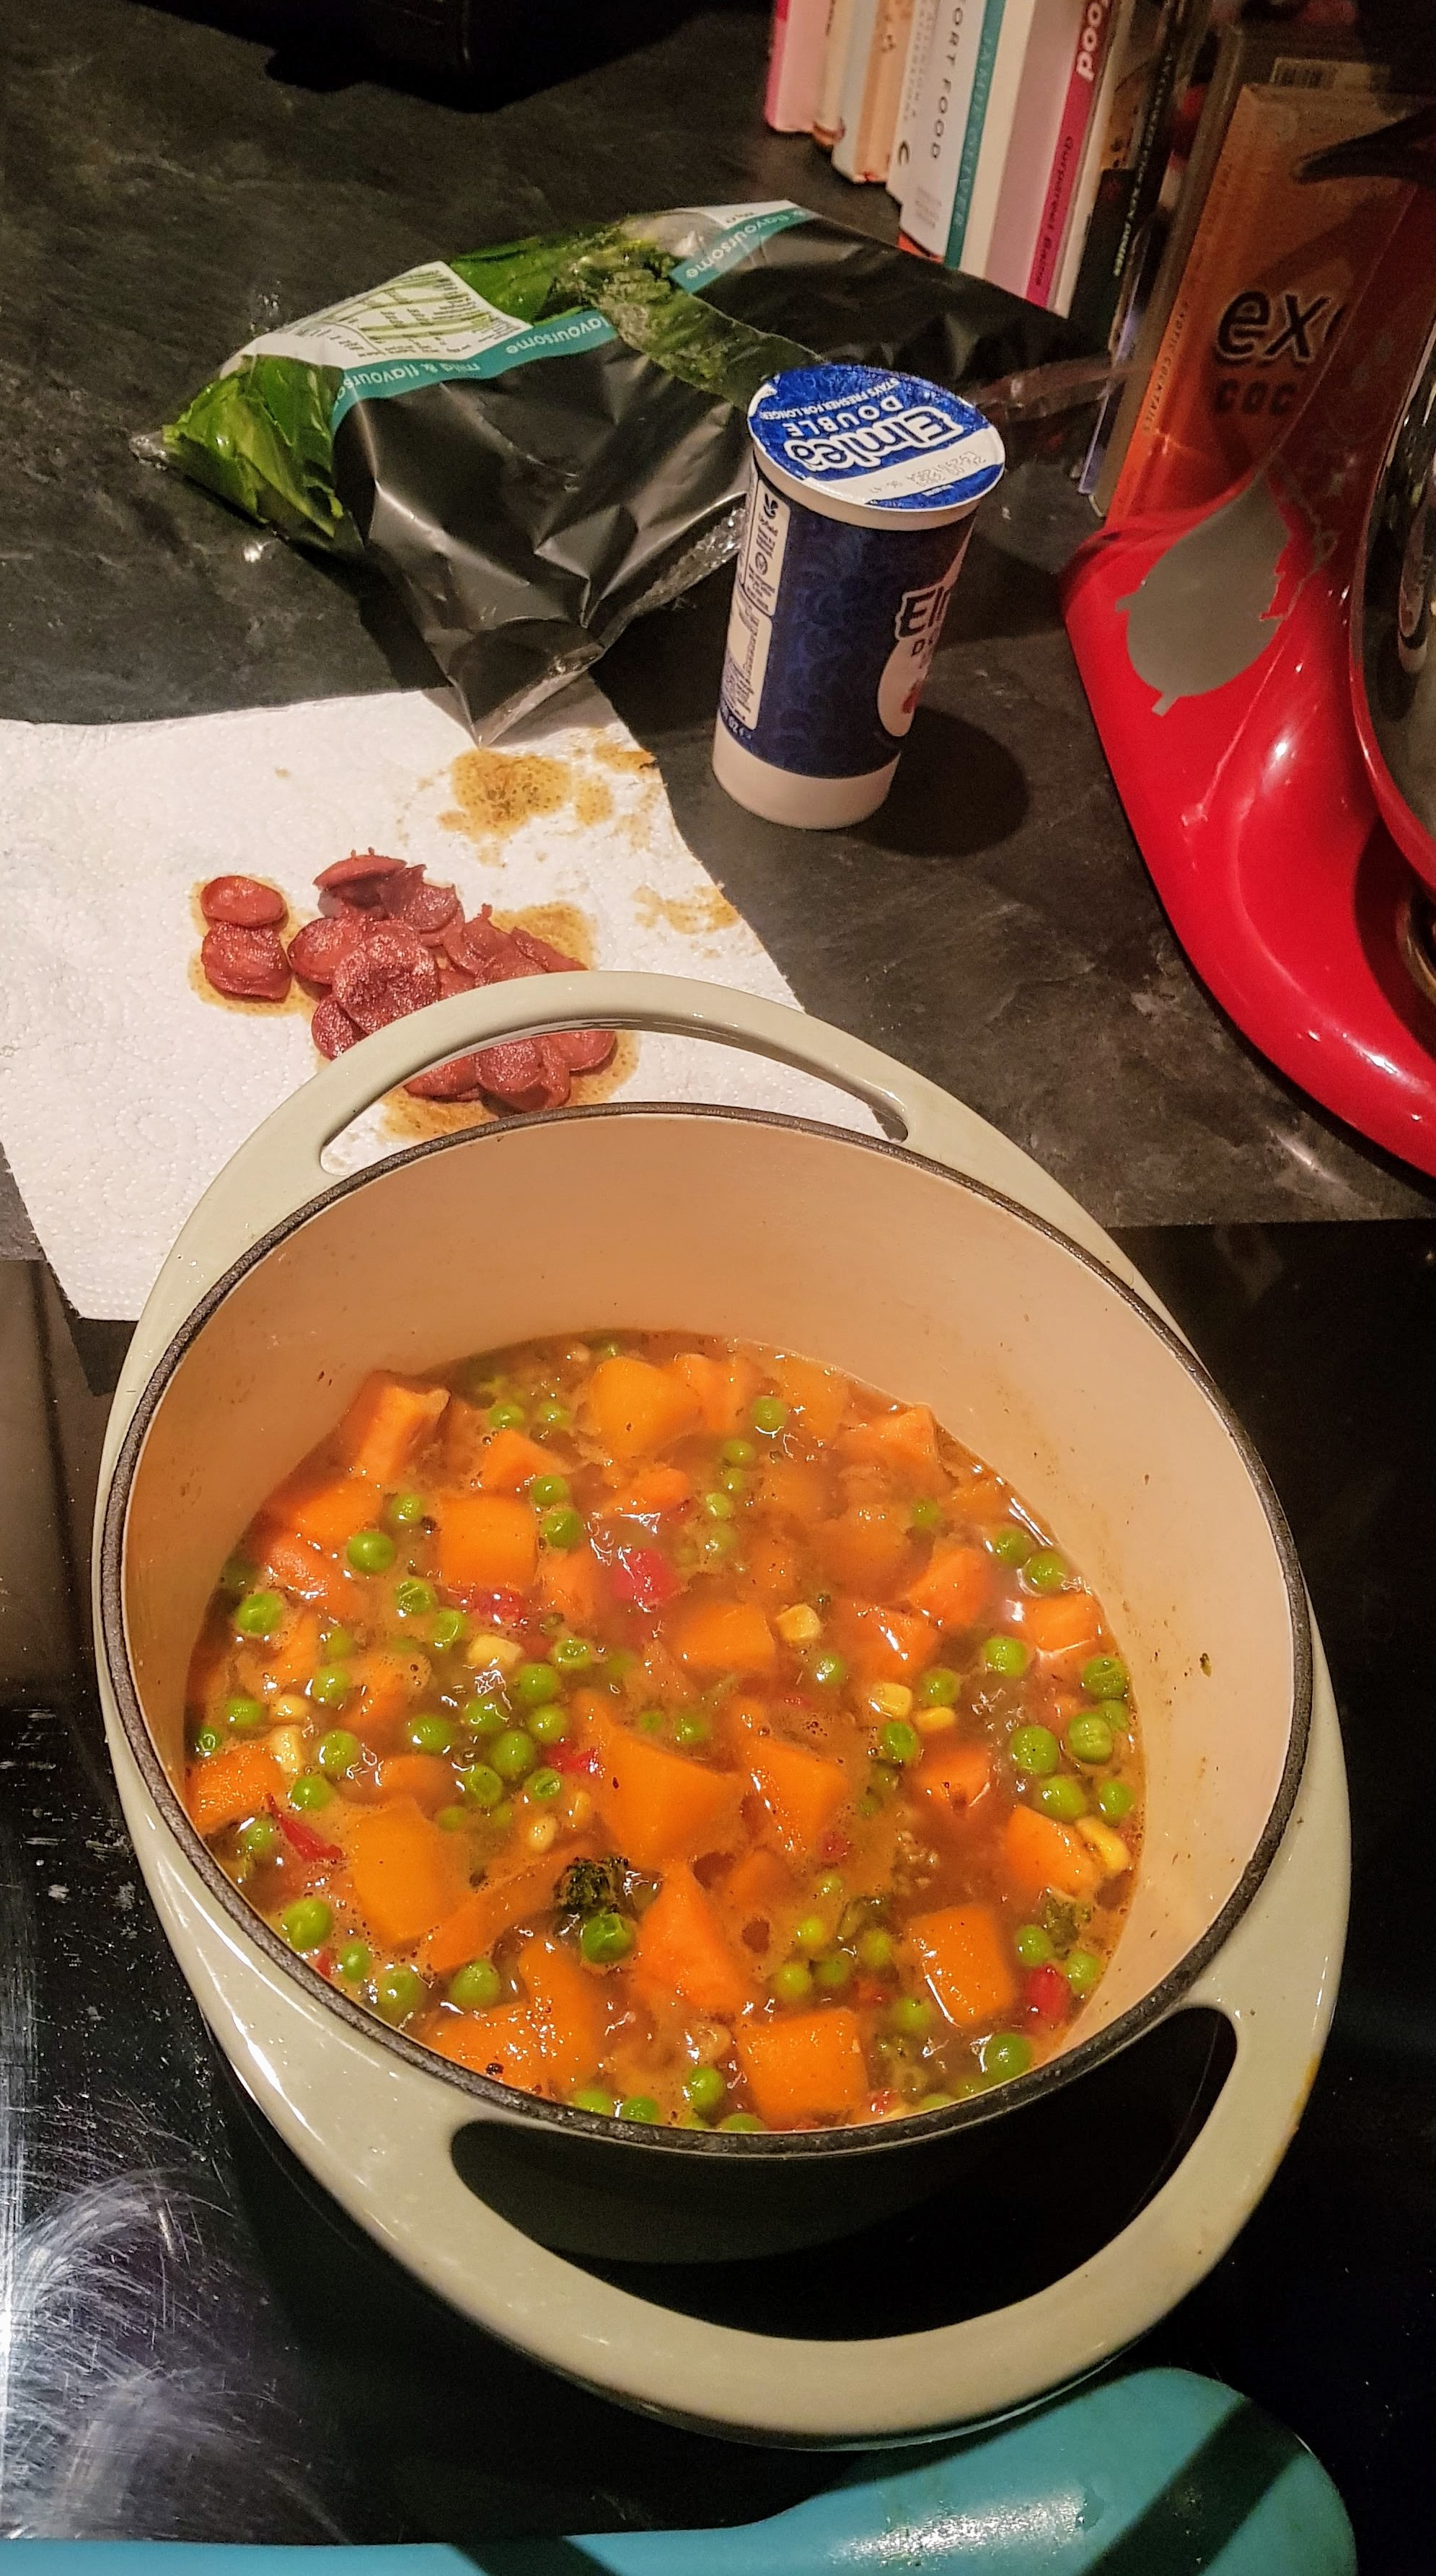


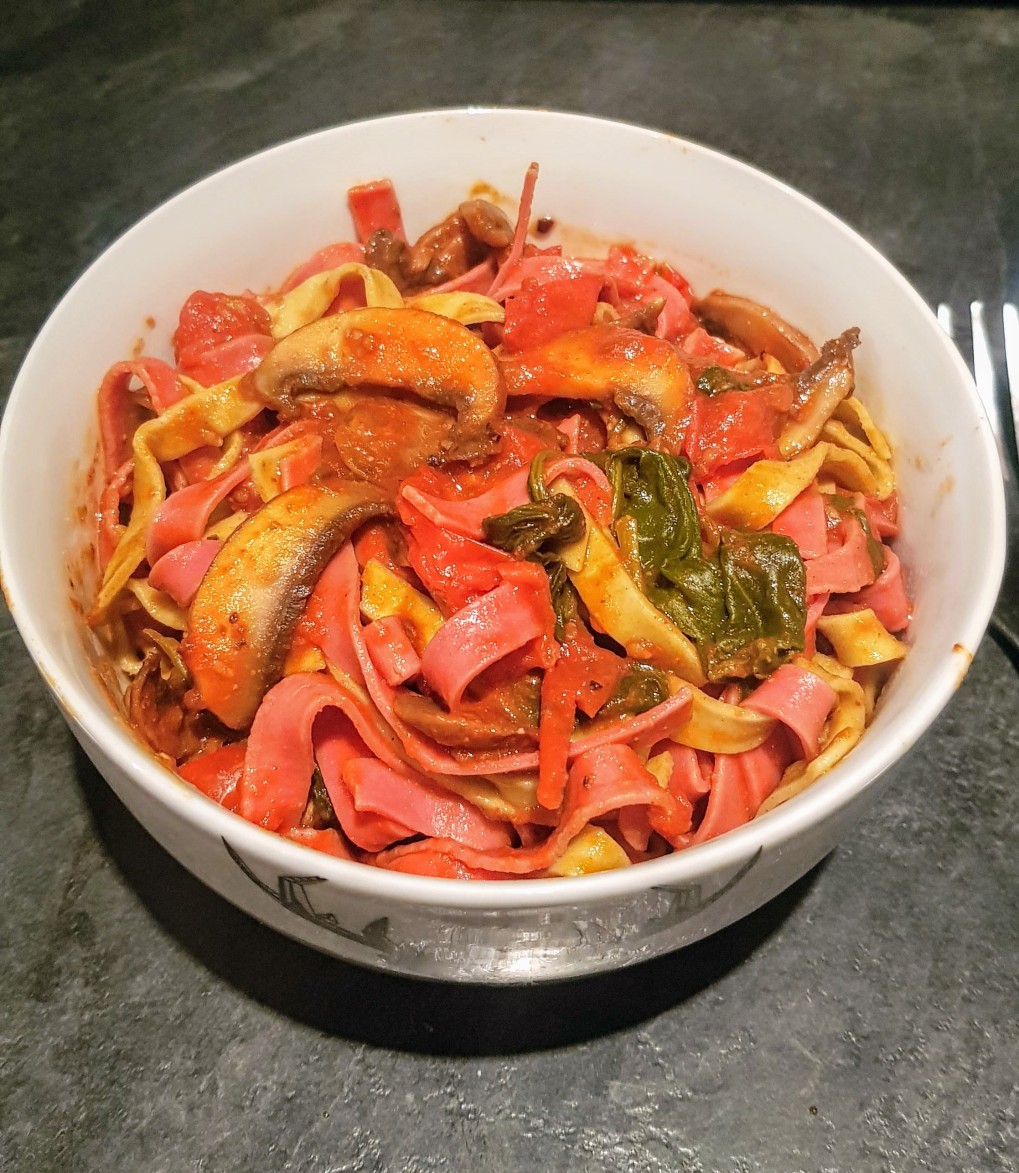


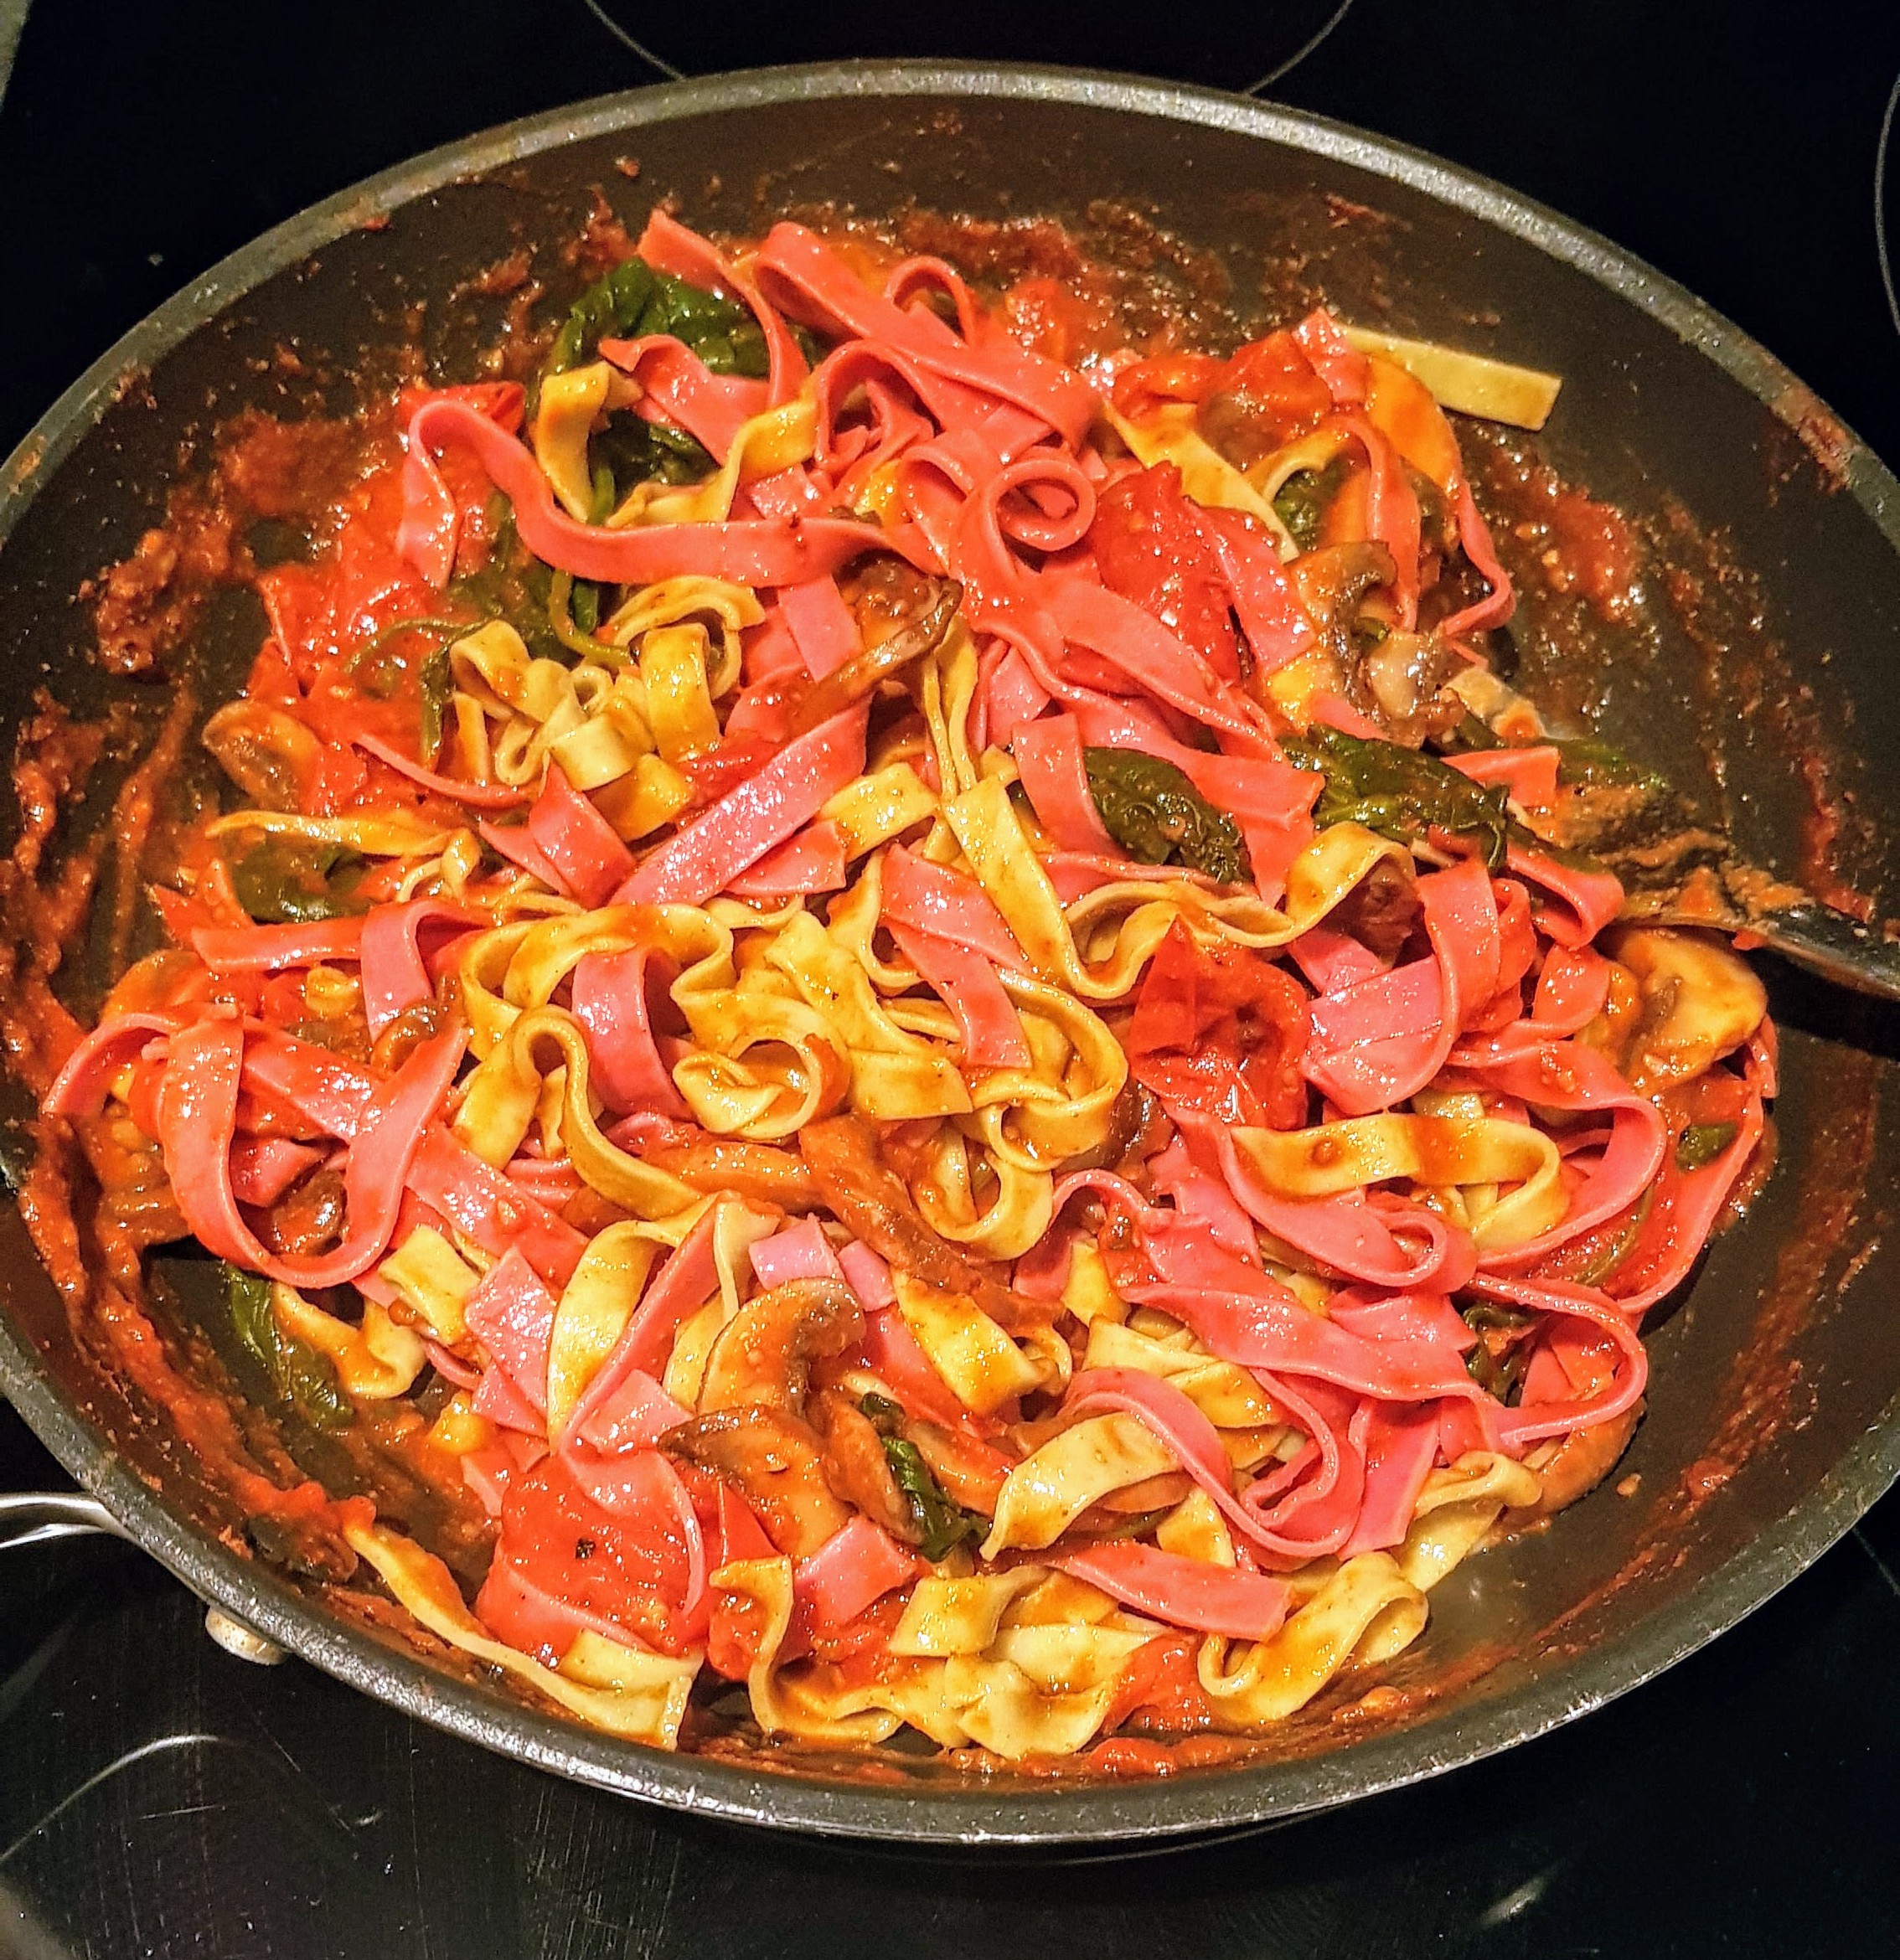


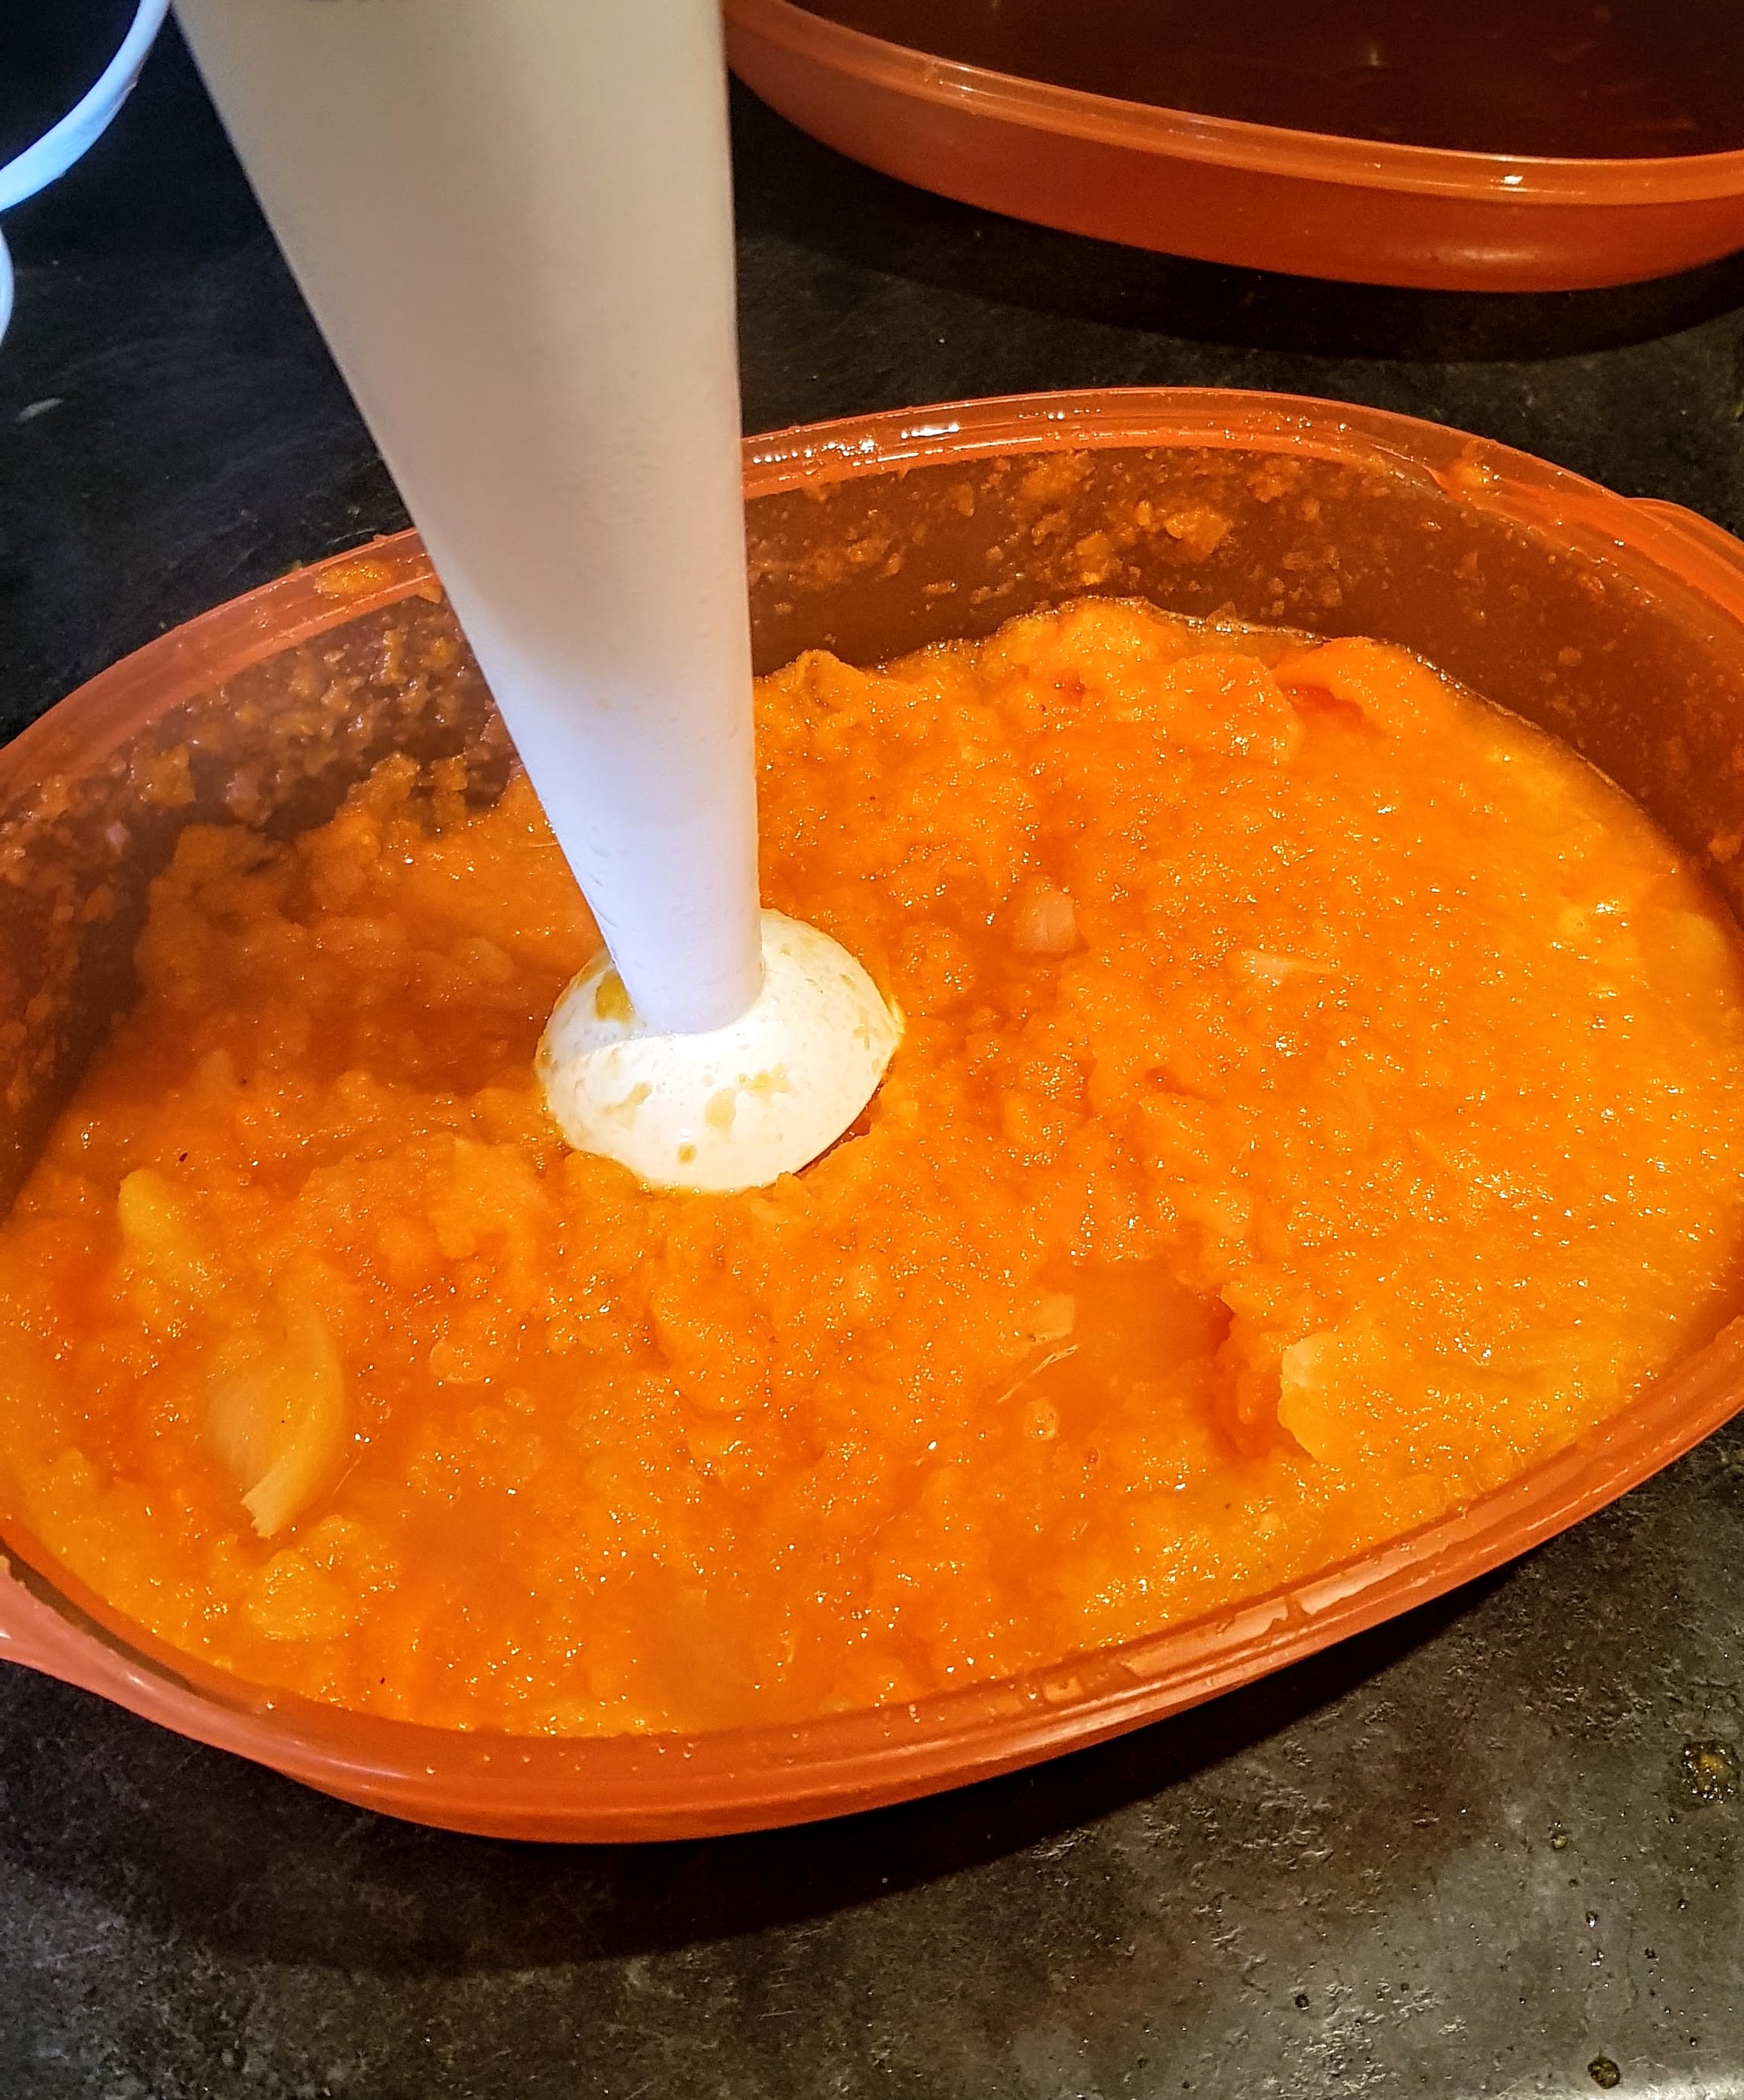


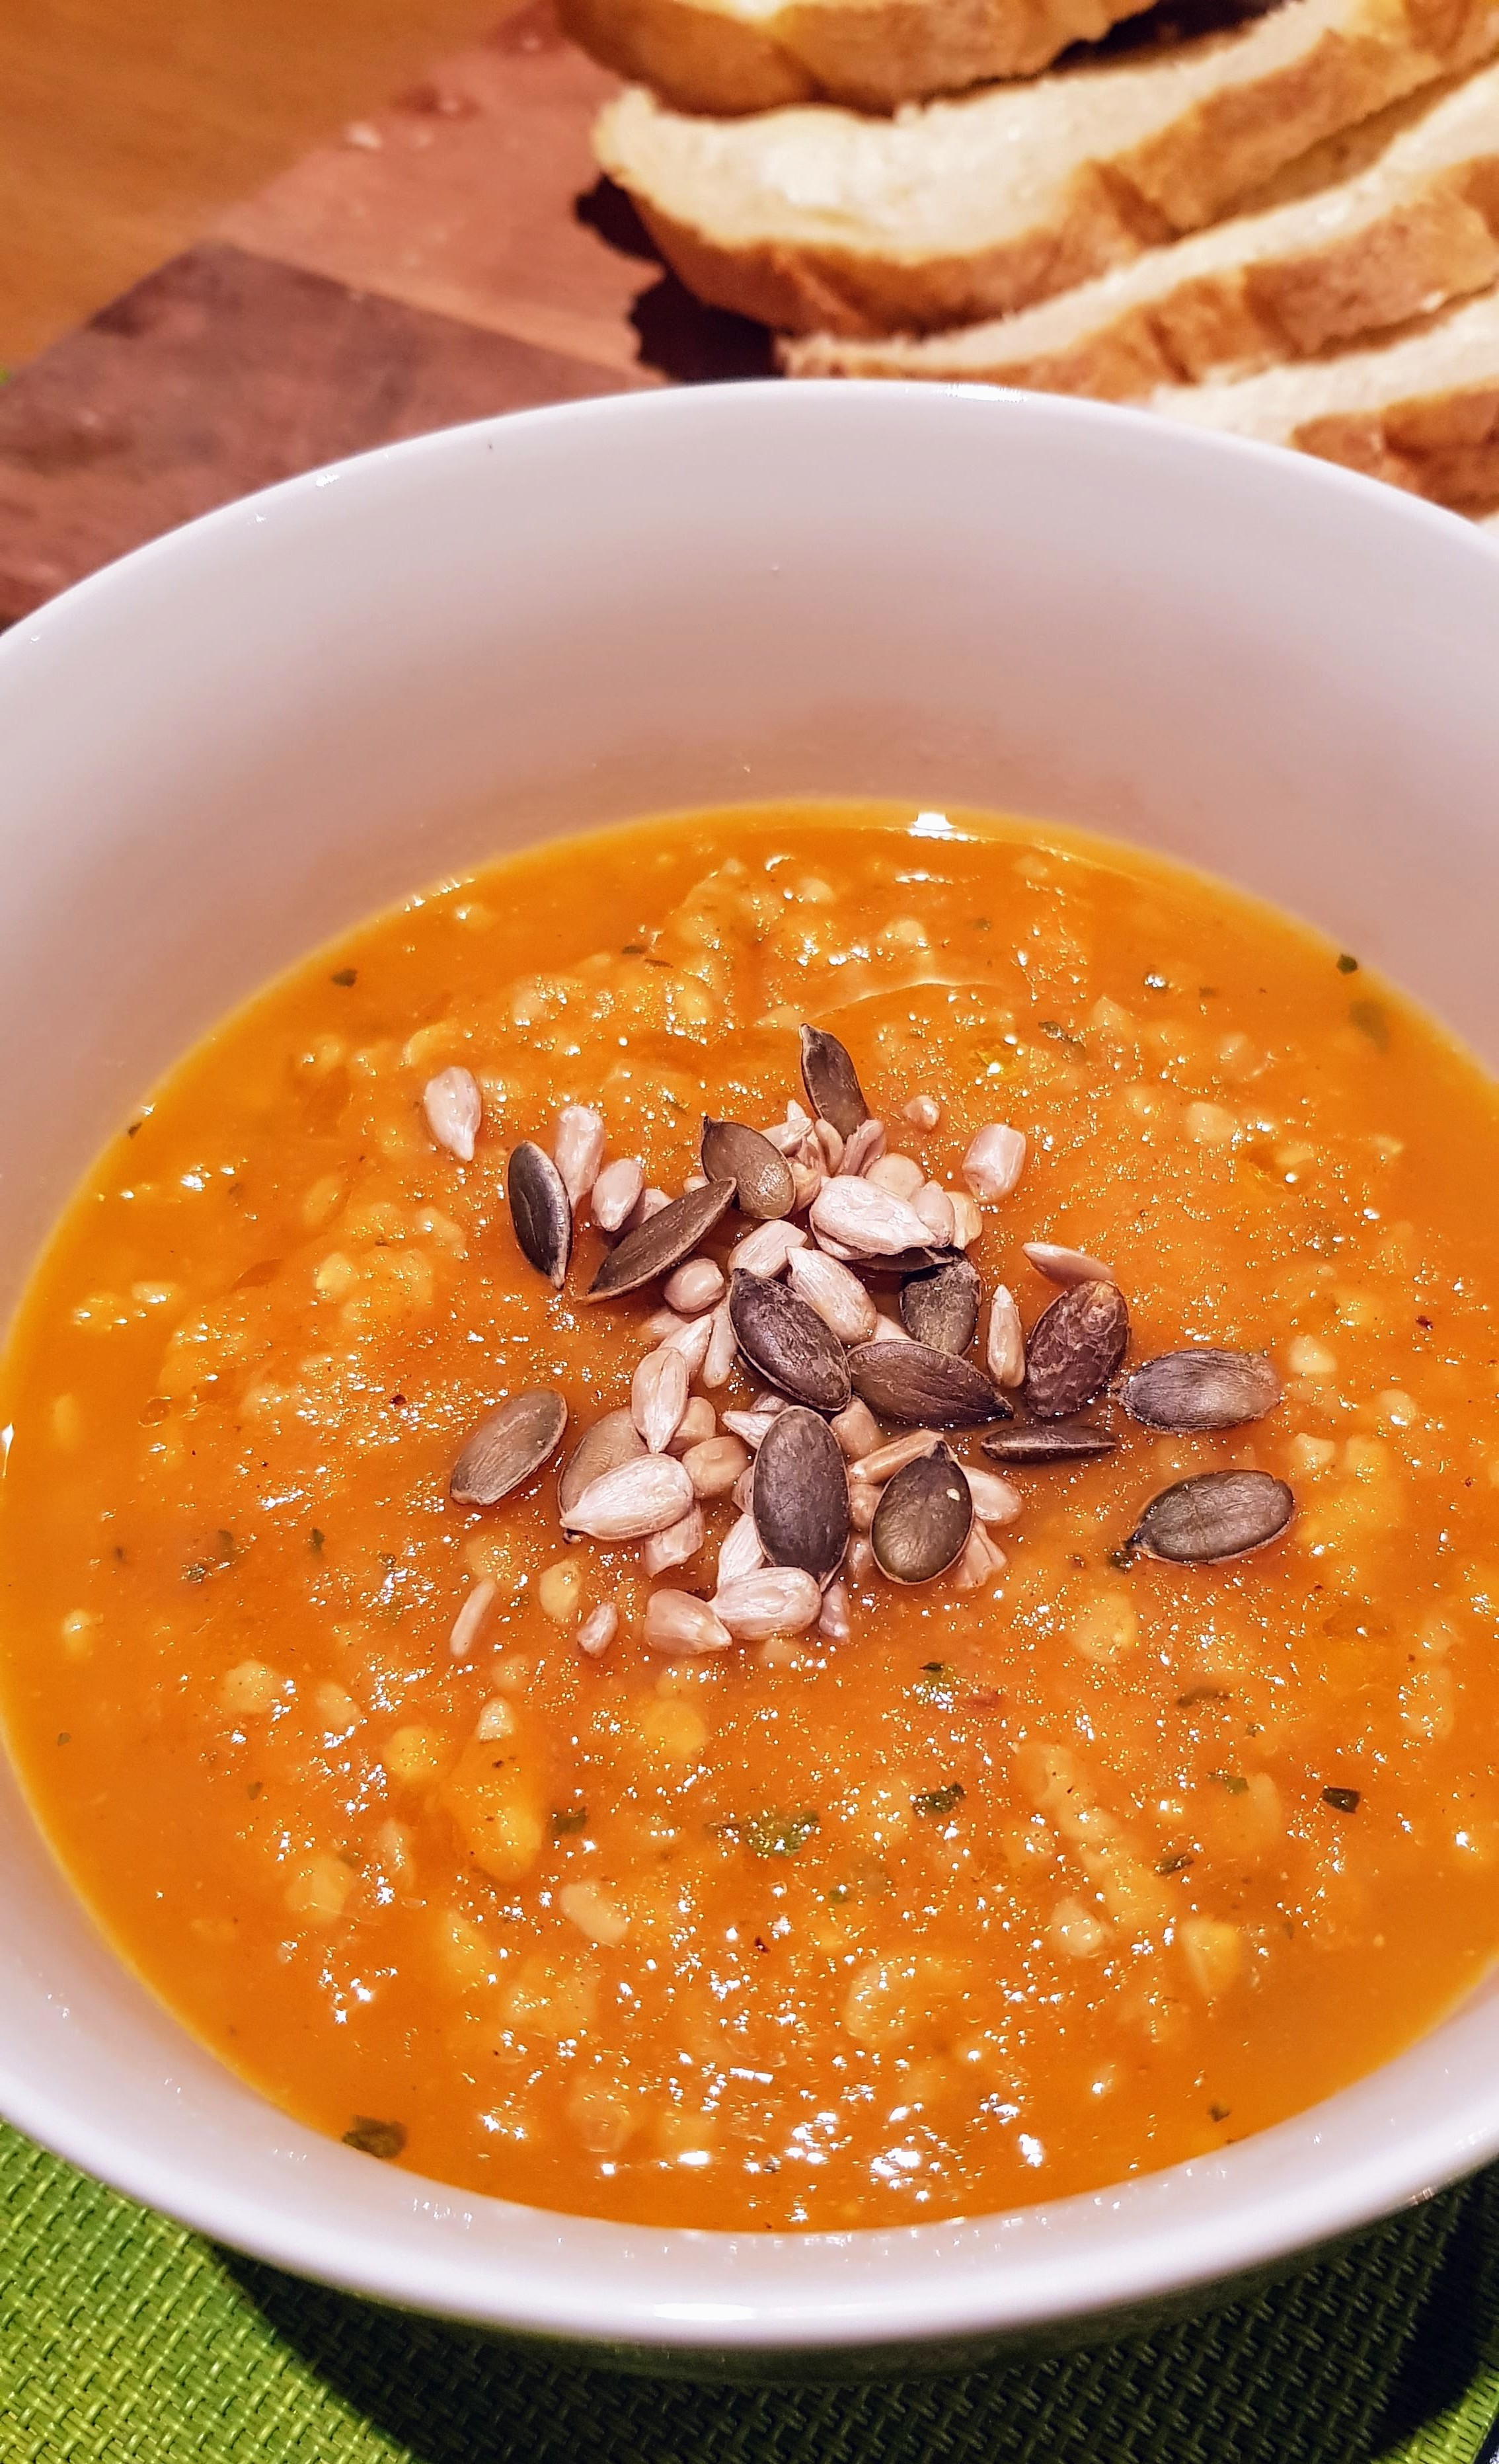
 you can of course make a big batch and freezer for later.

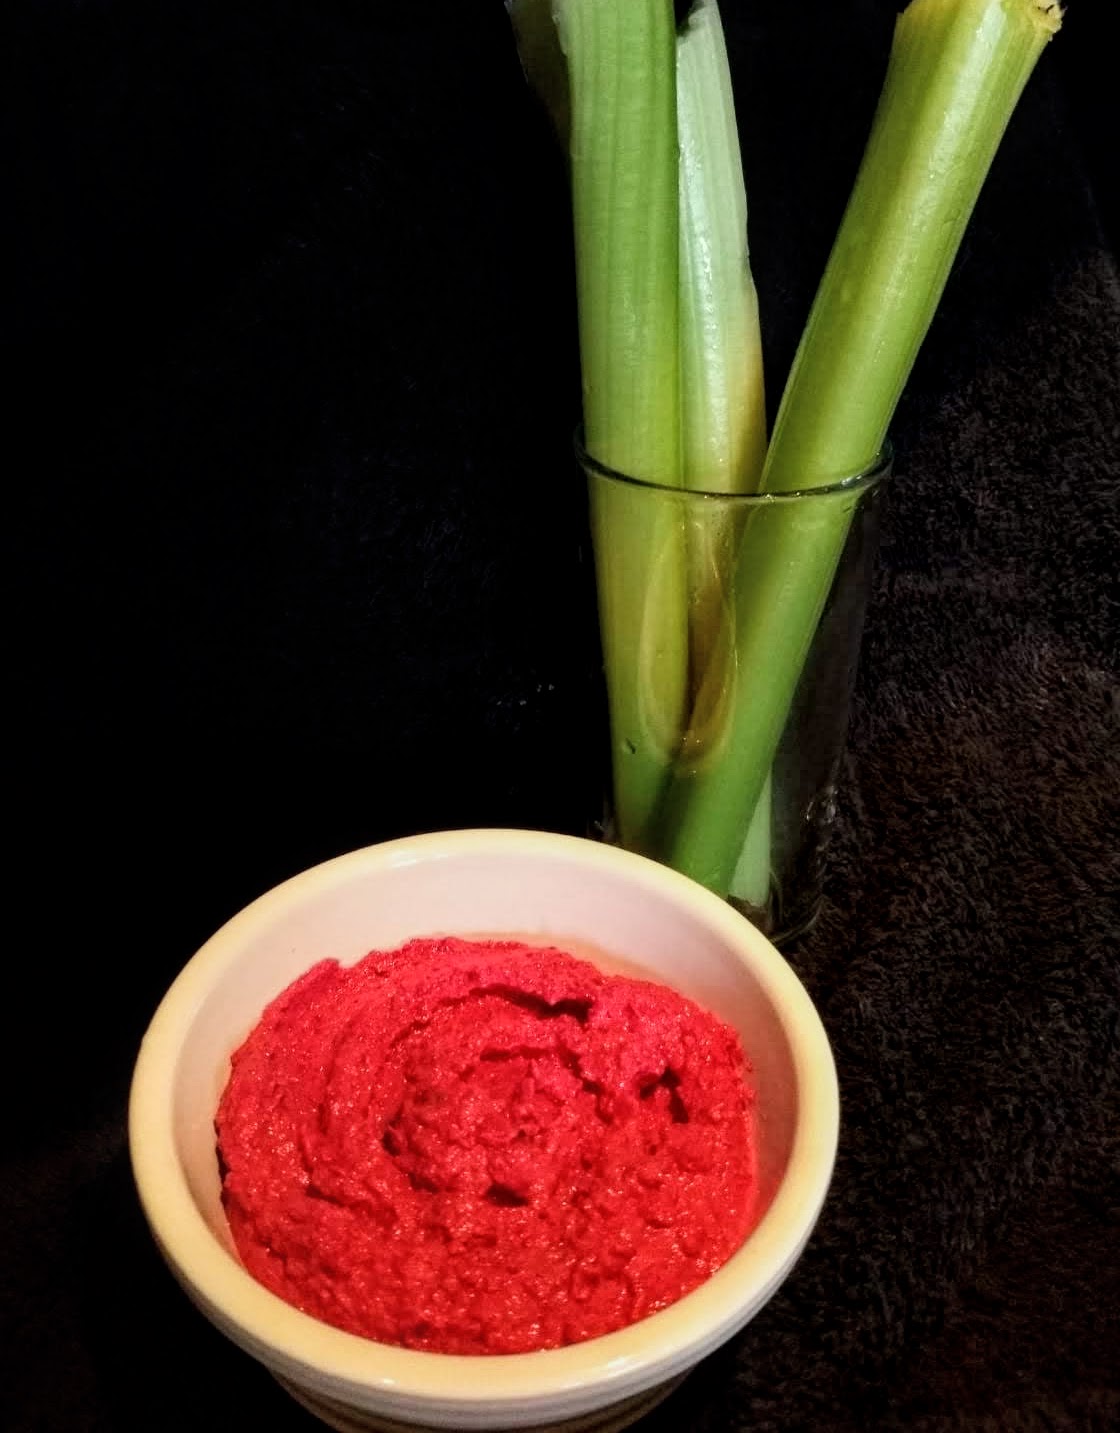


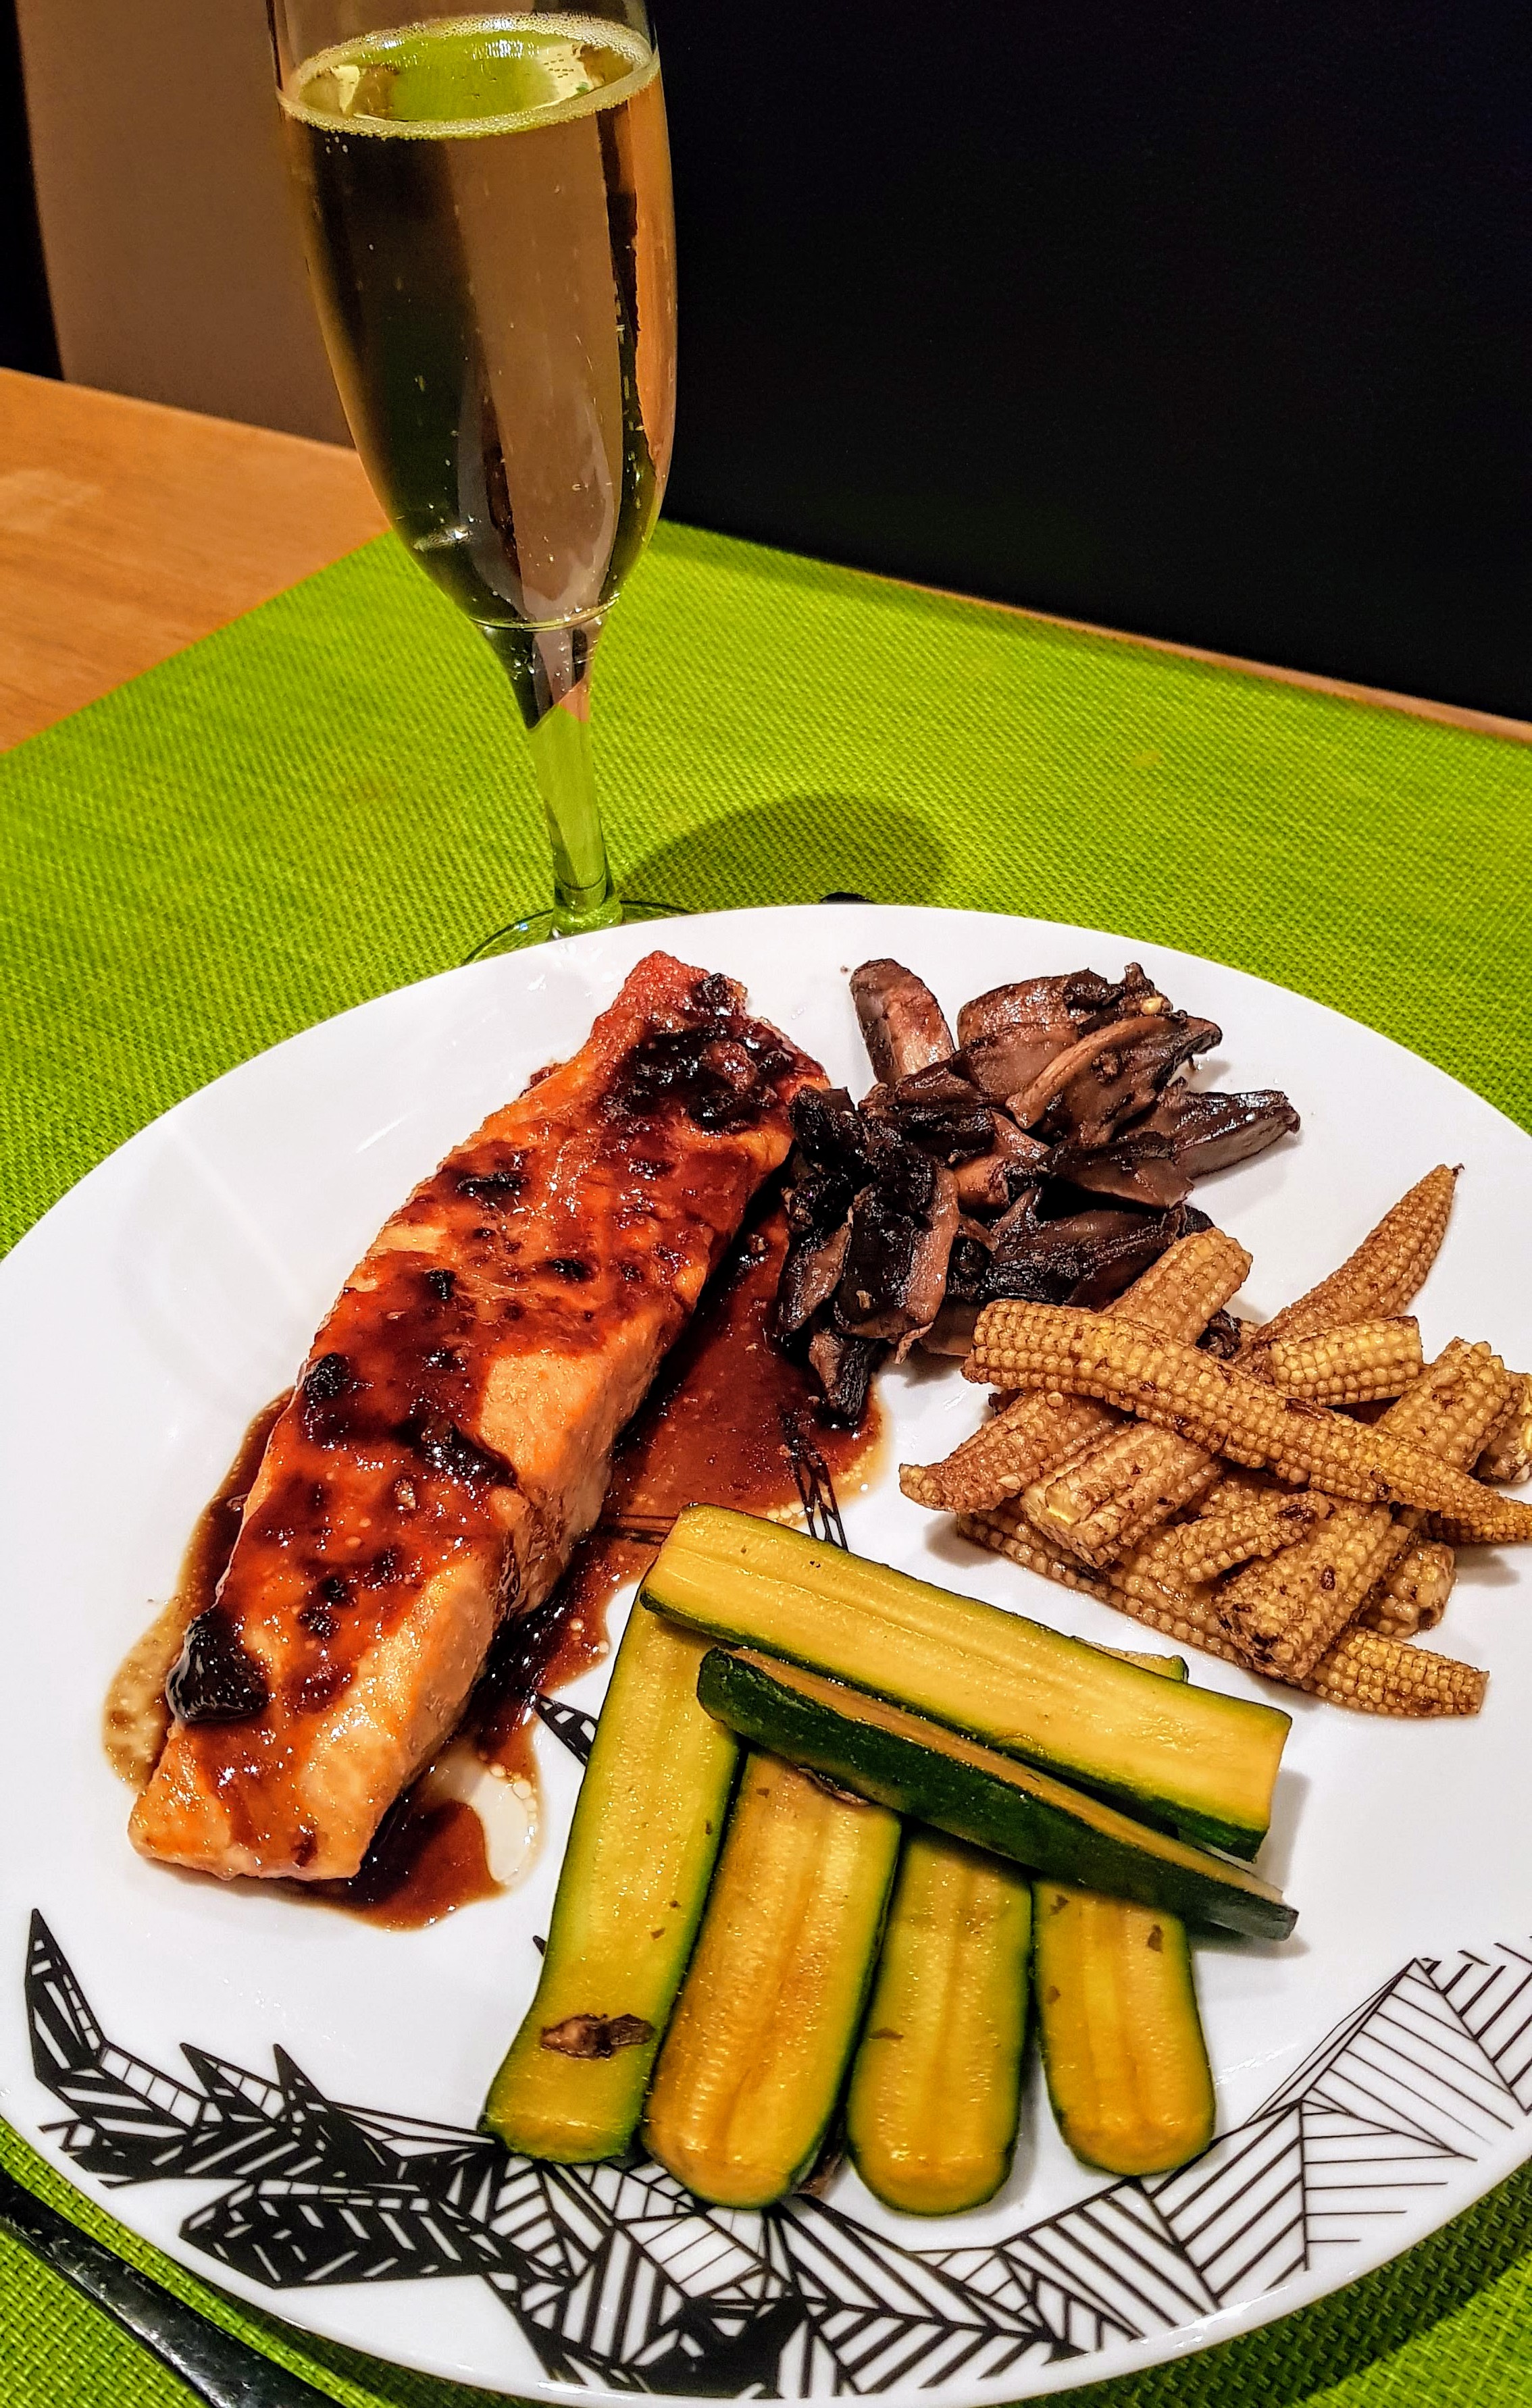


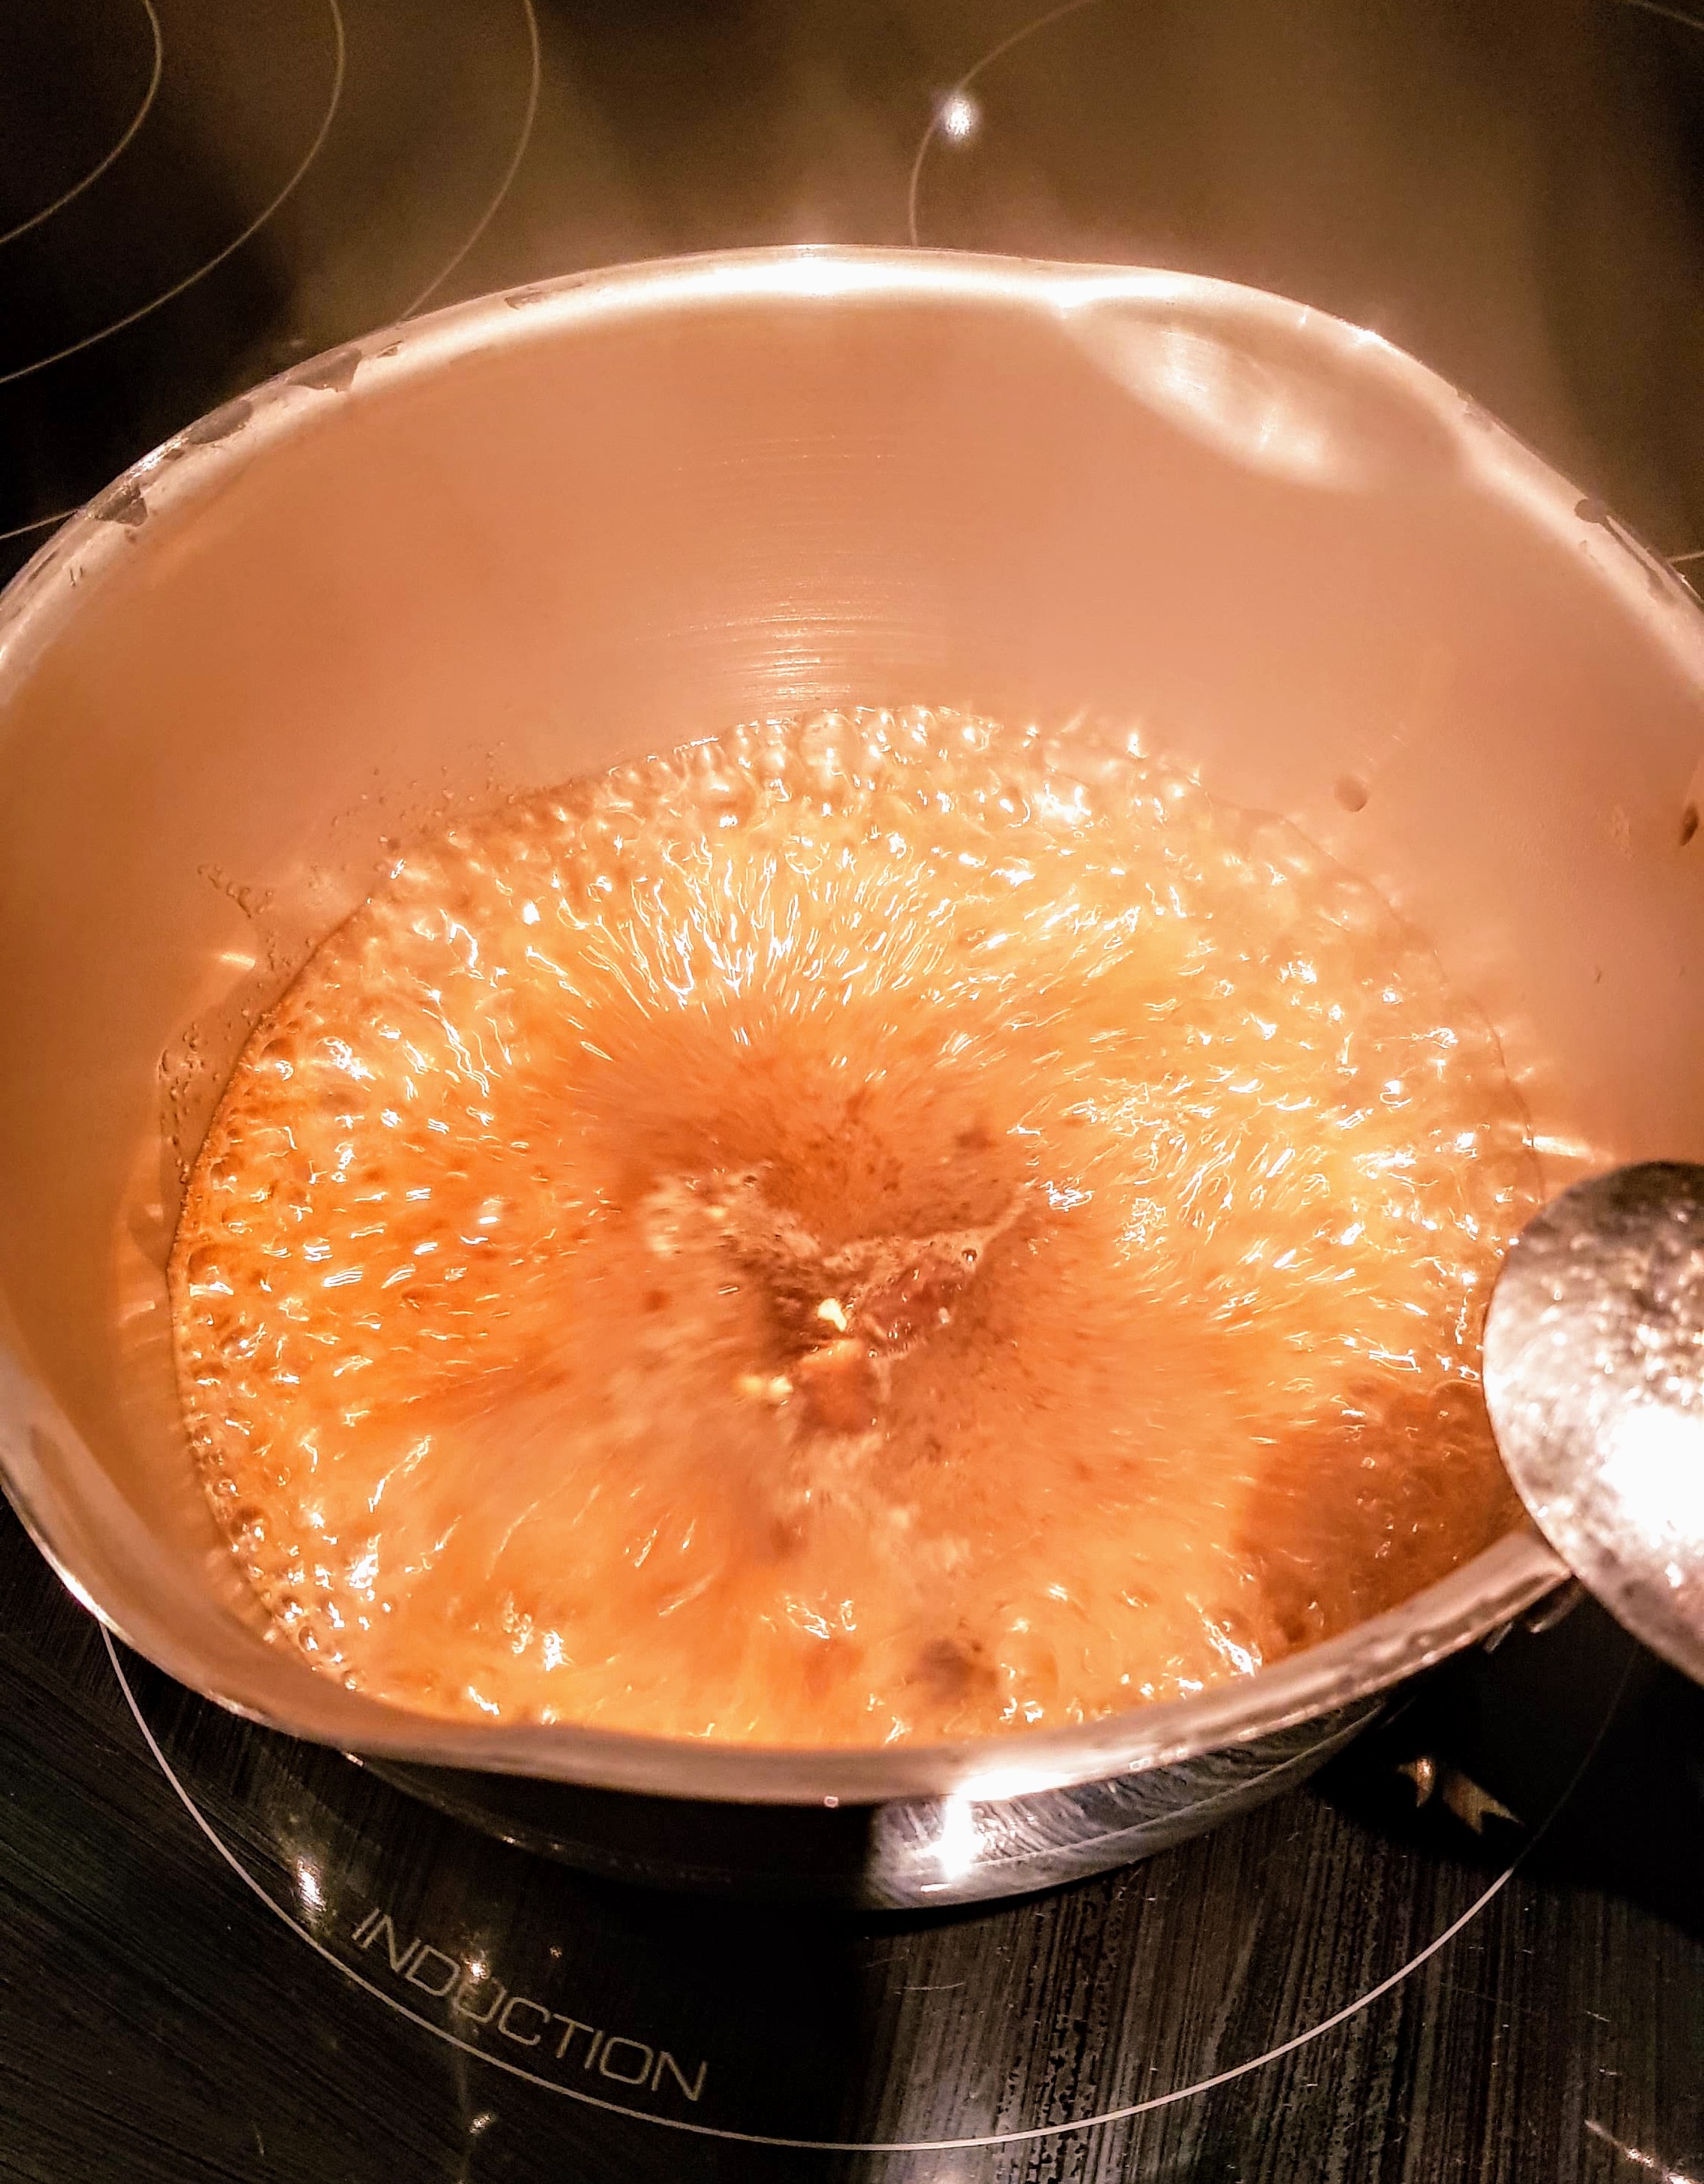

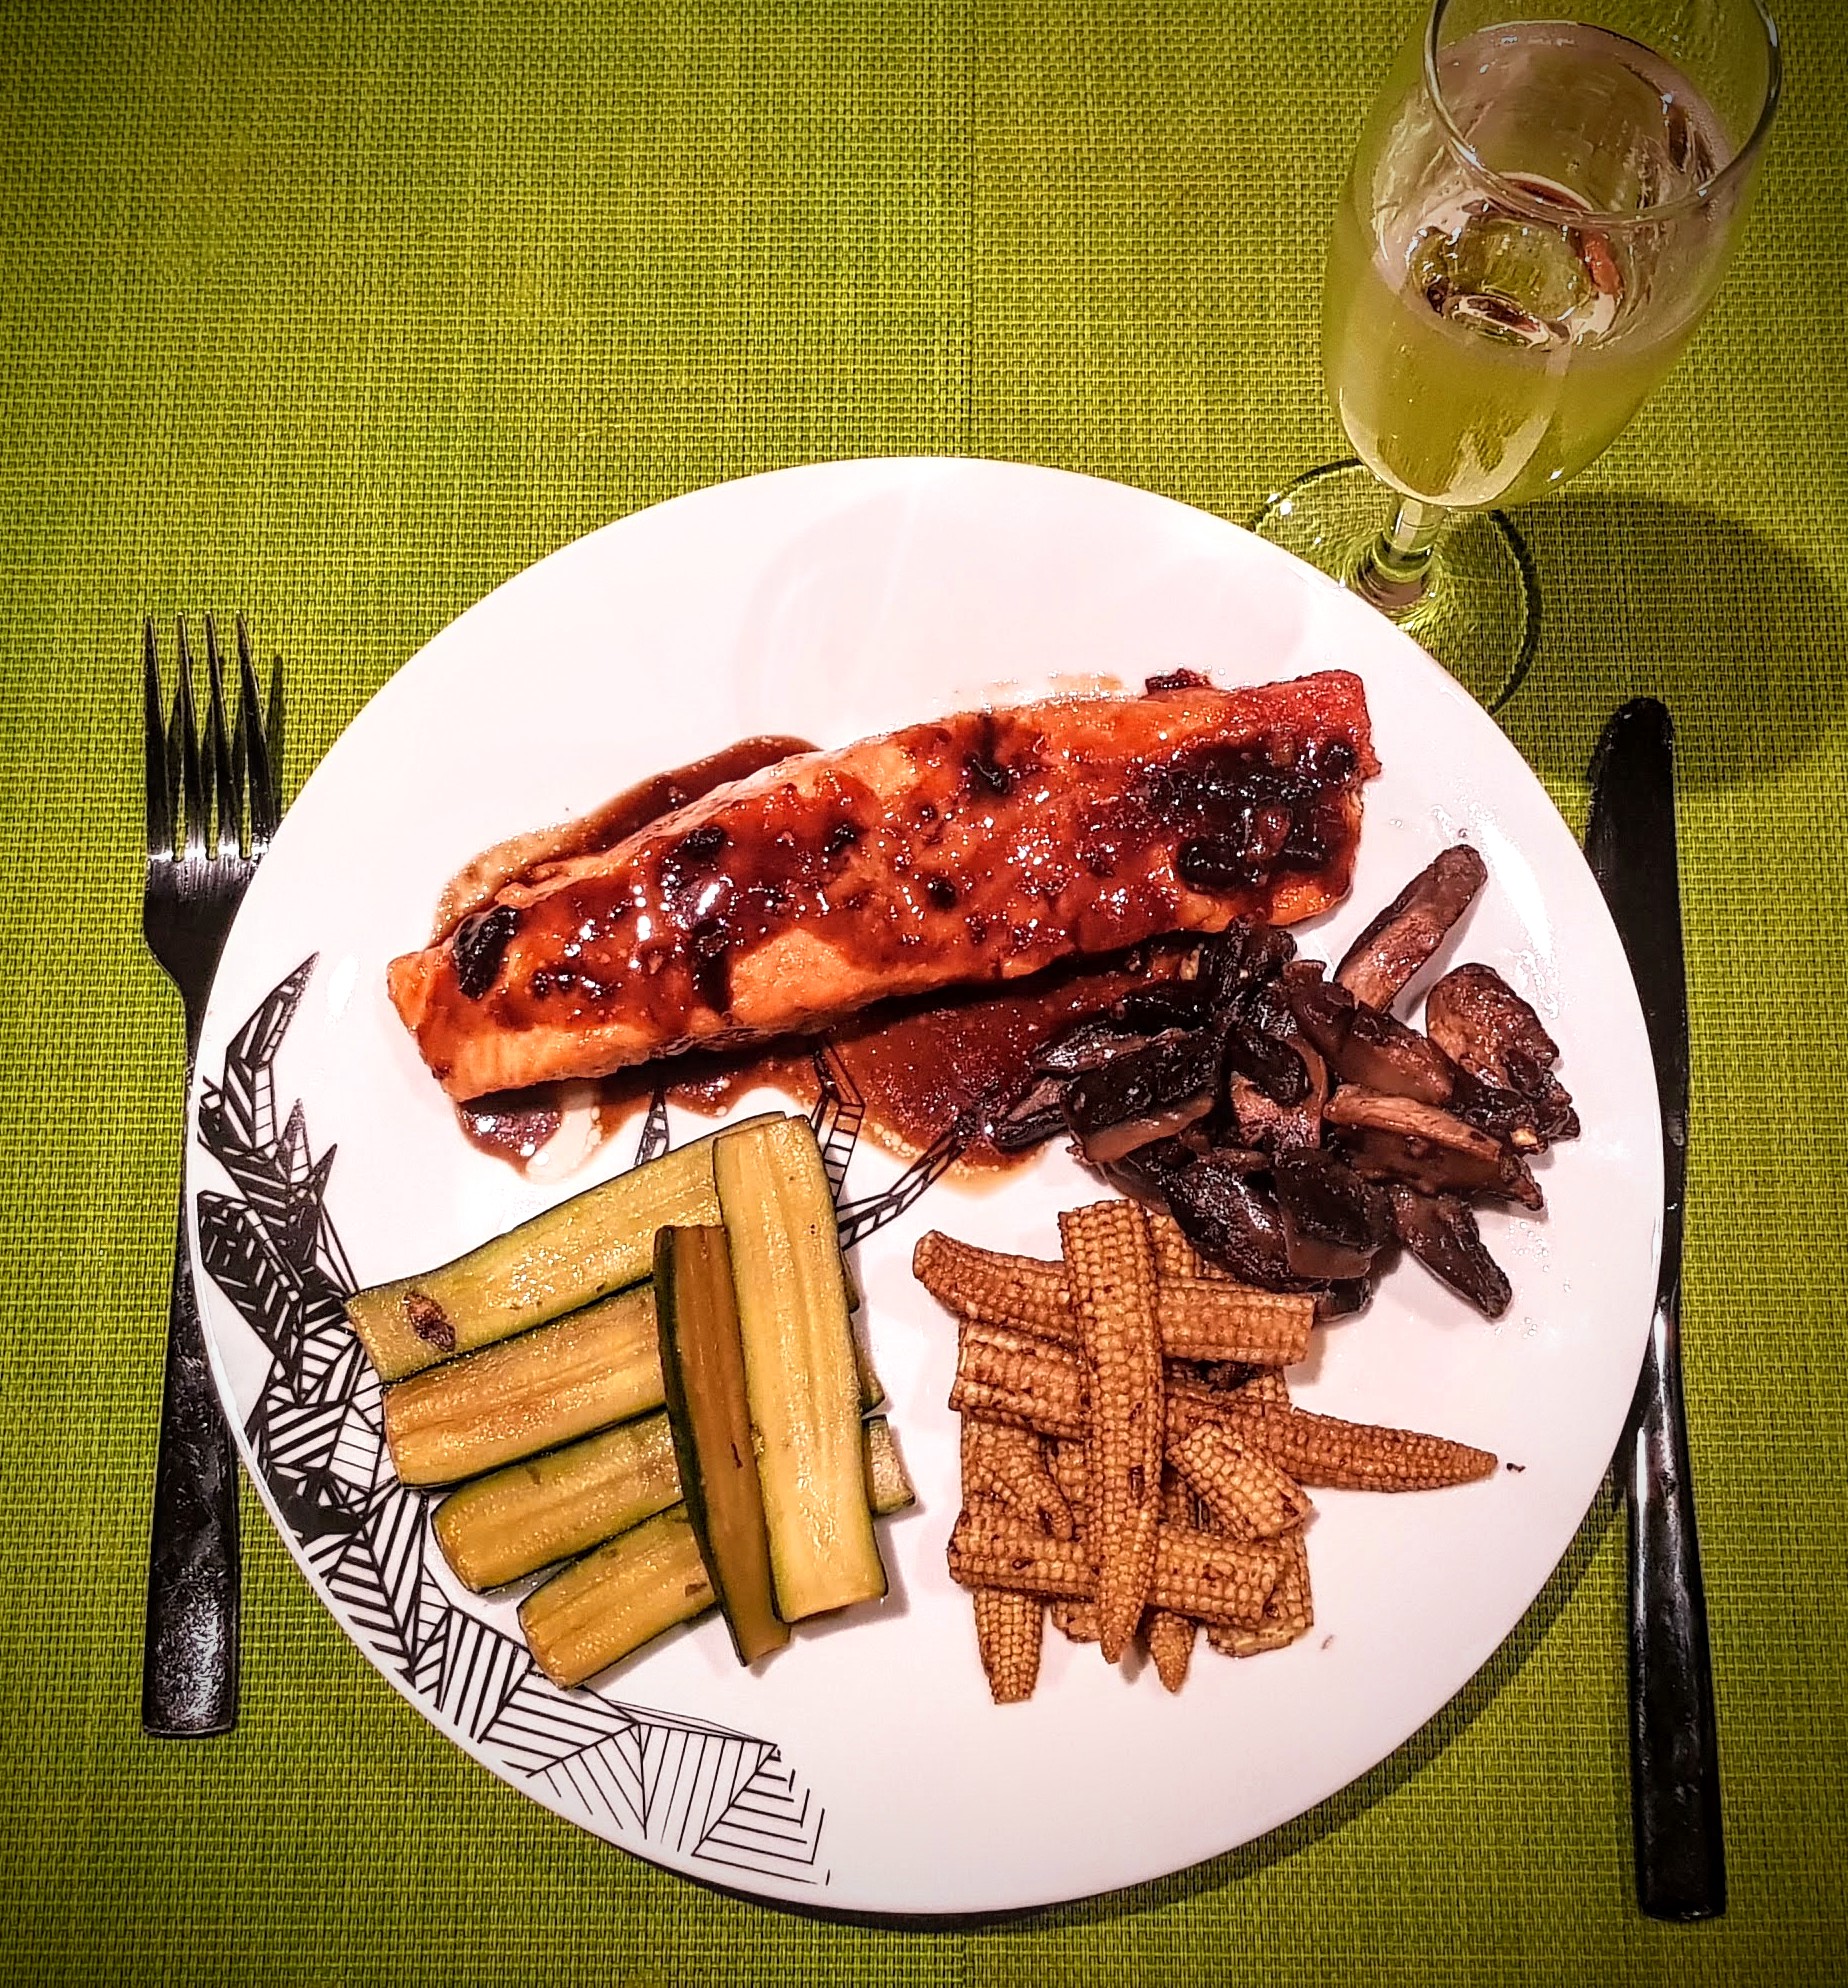
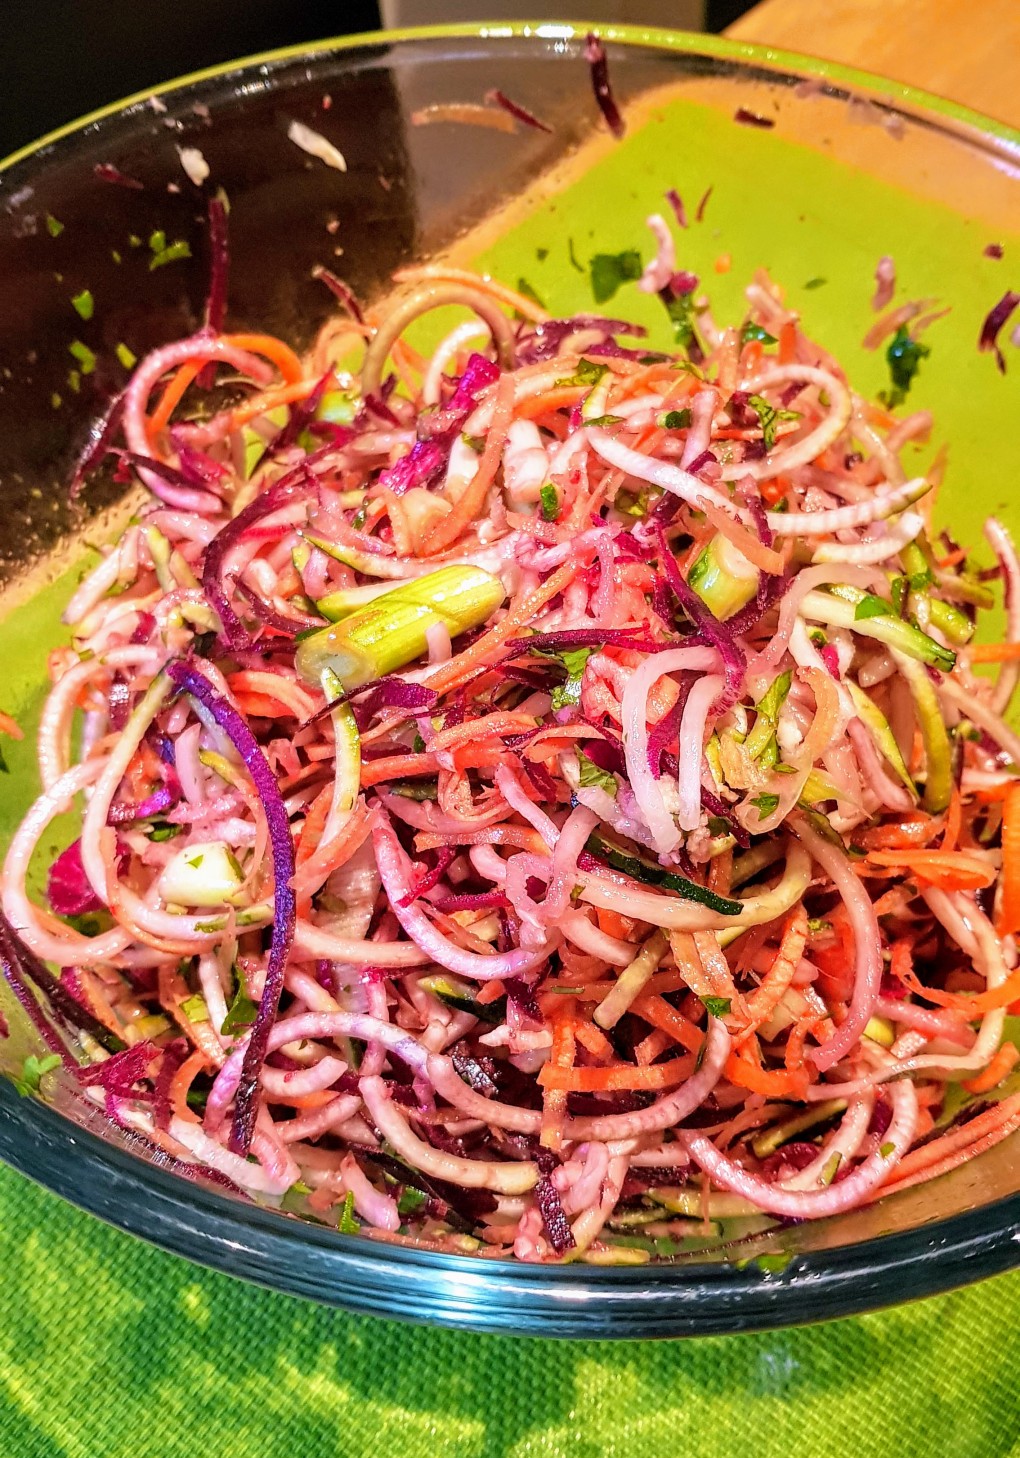
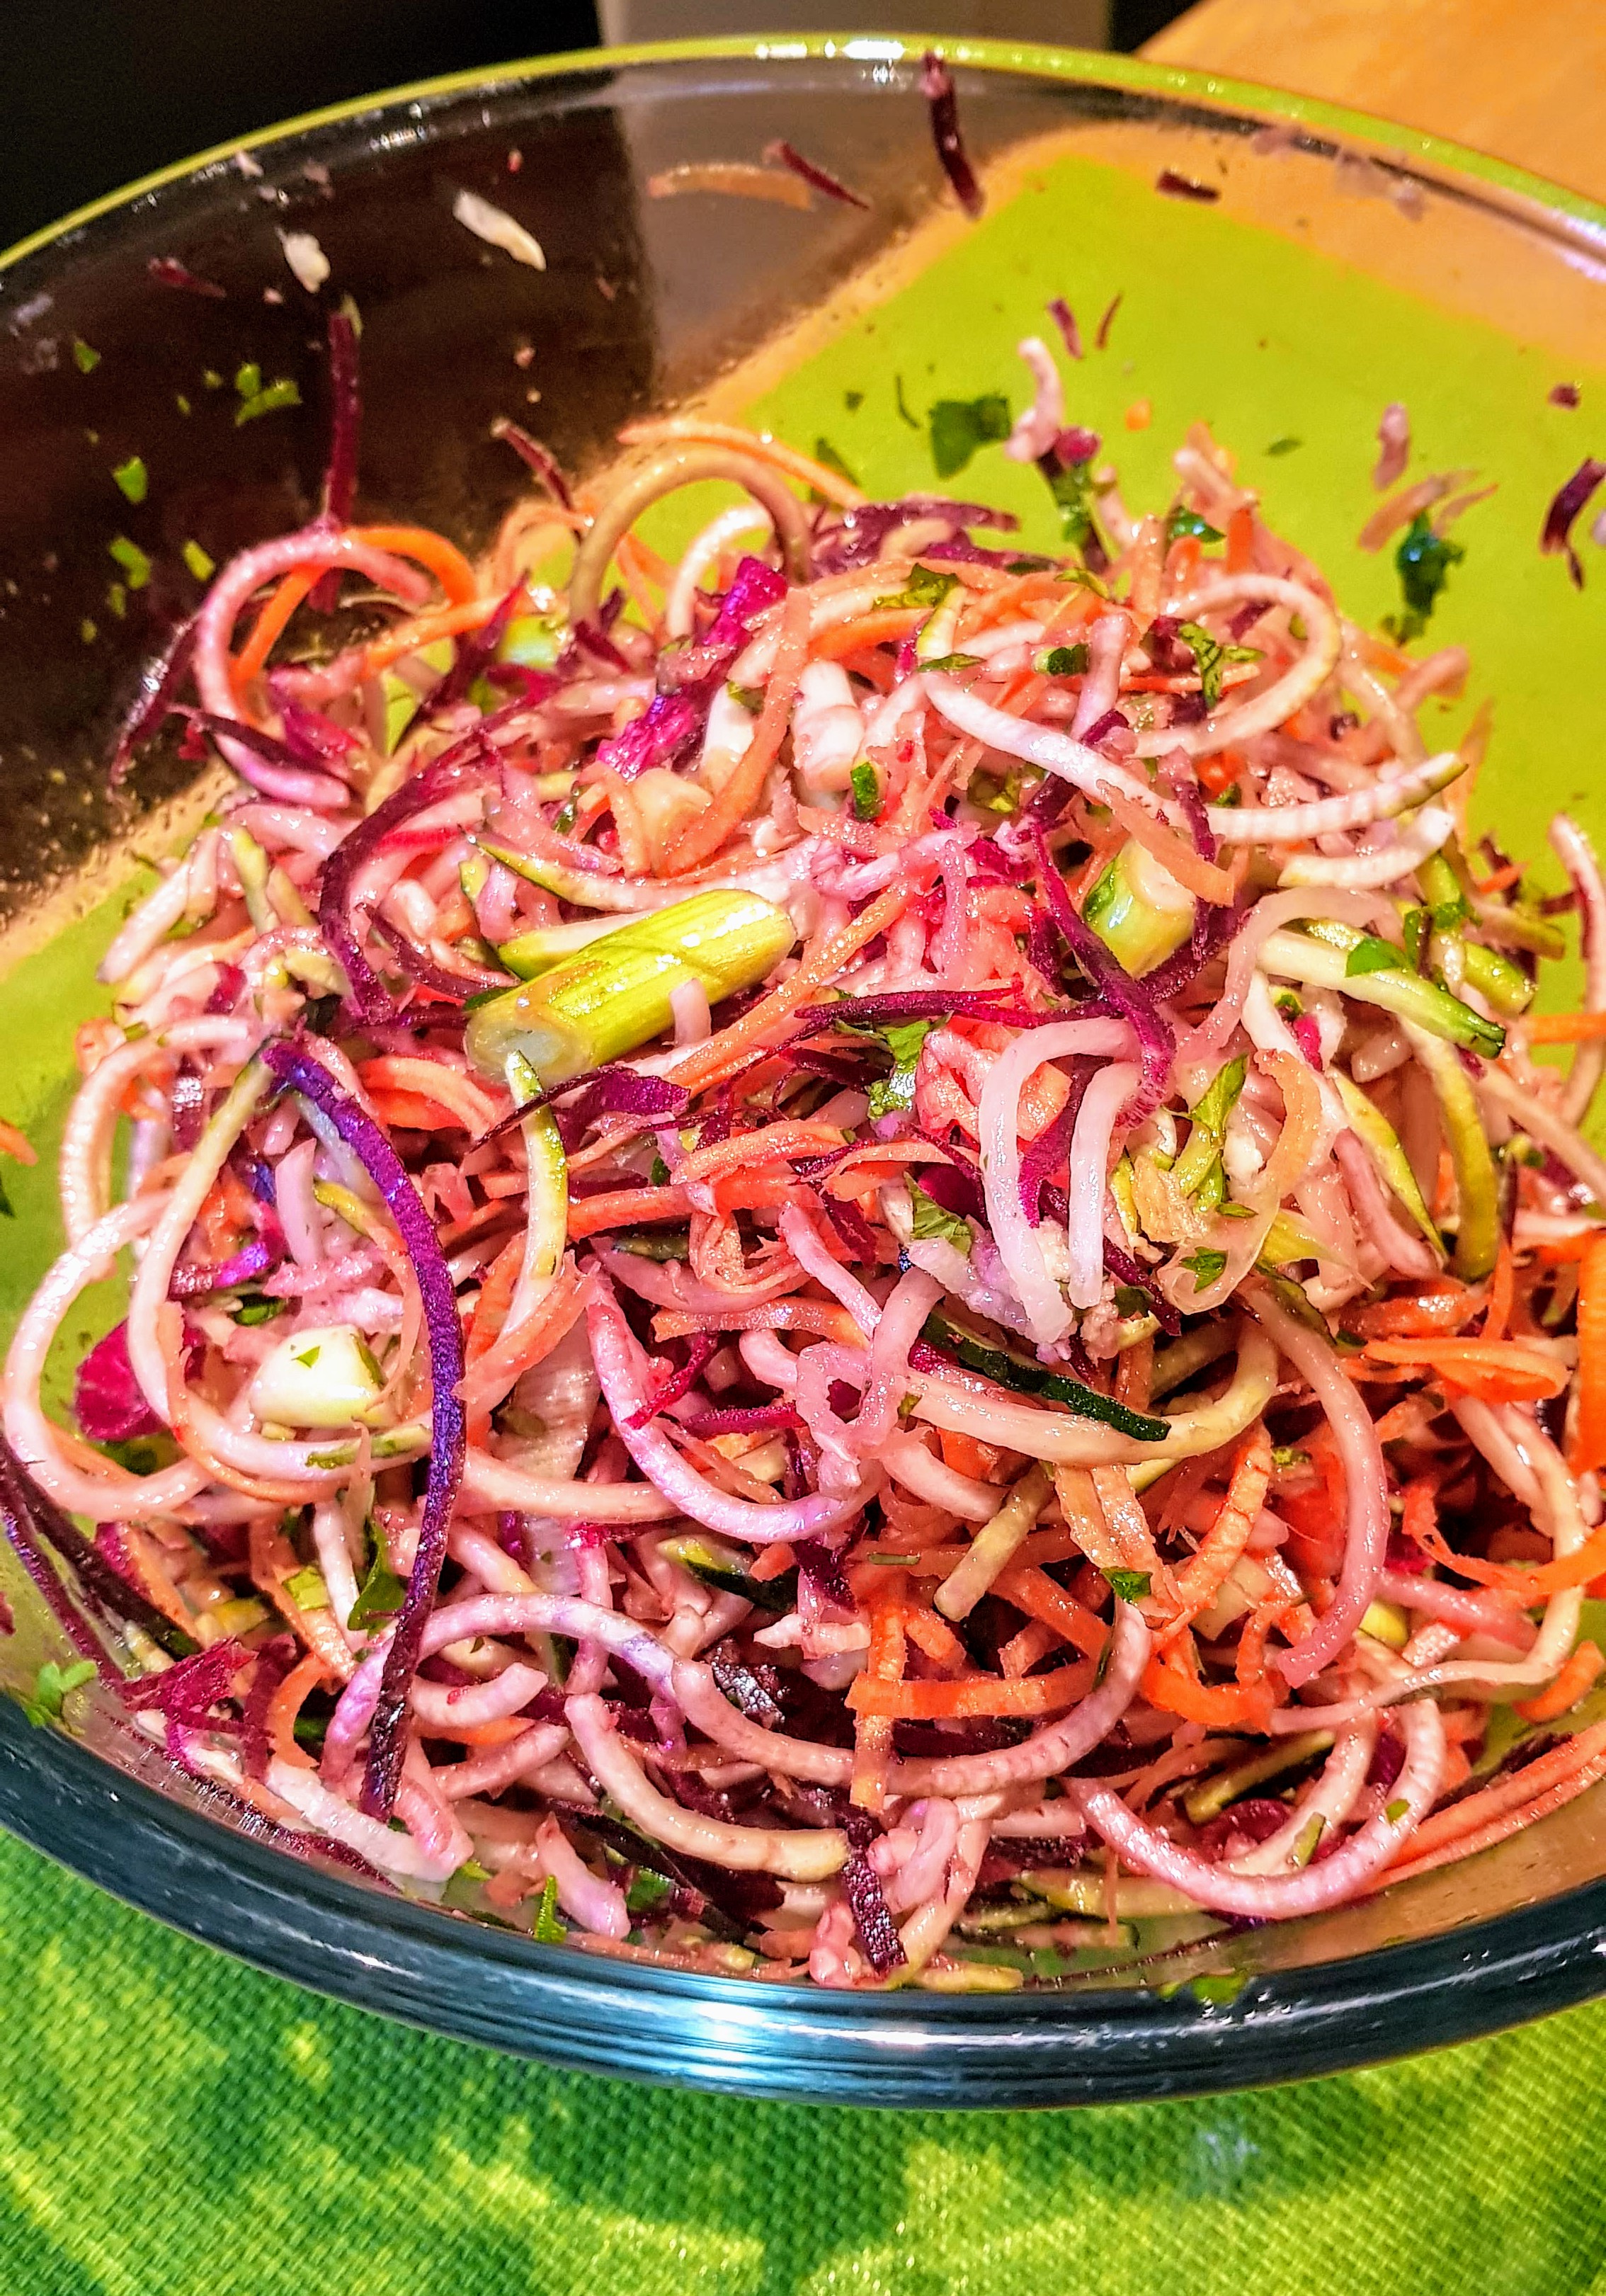


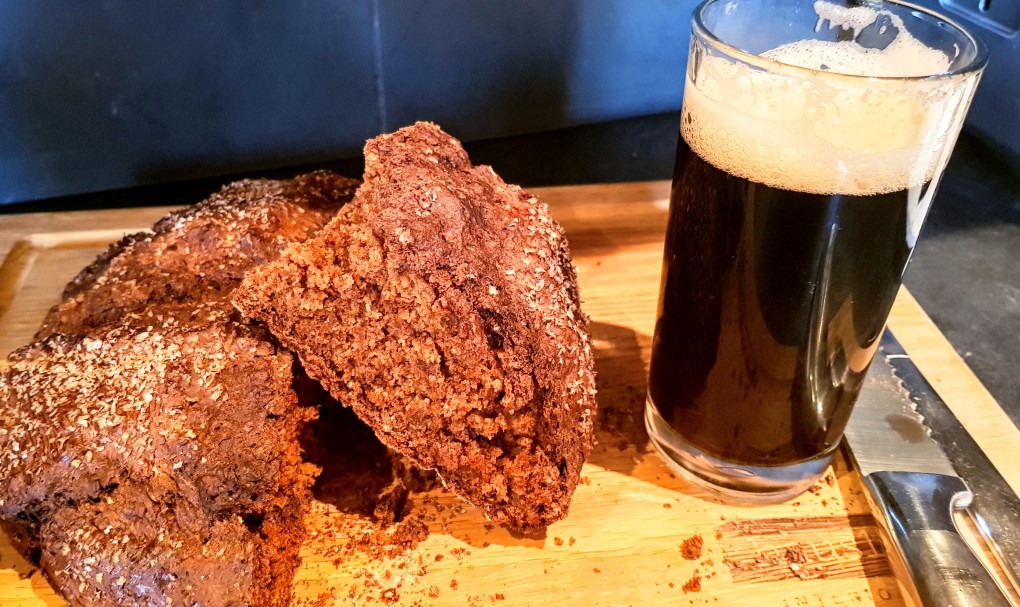


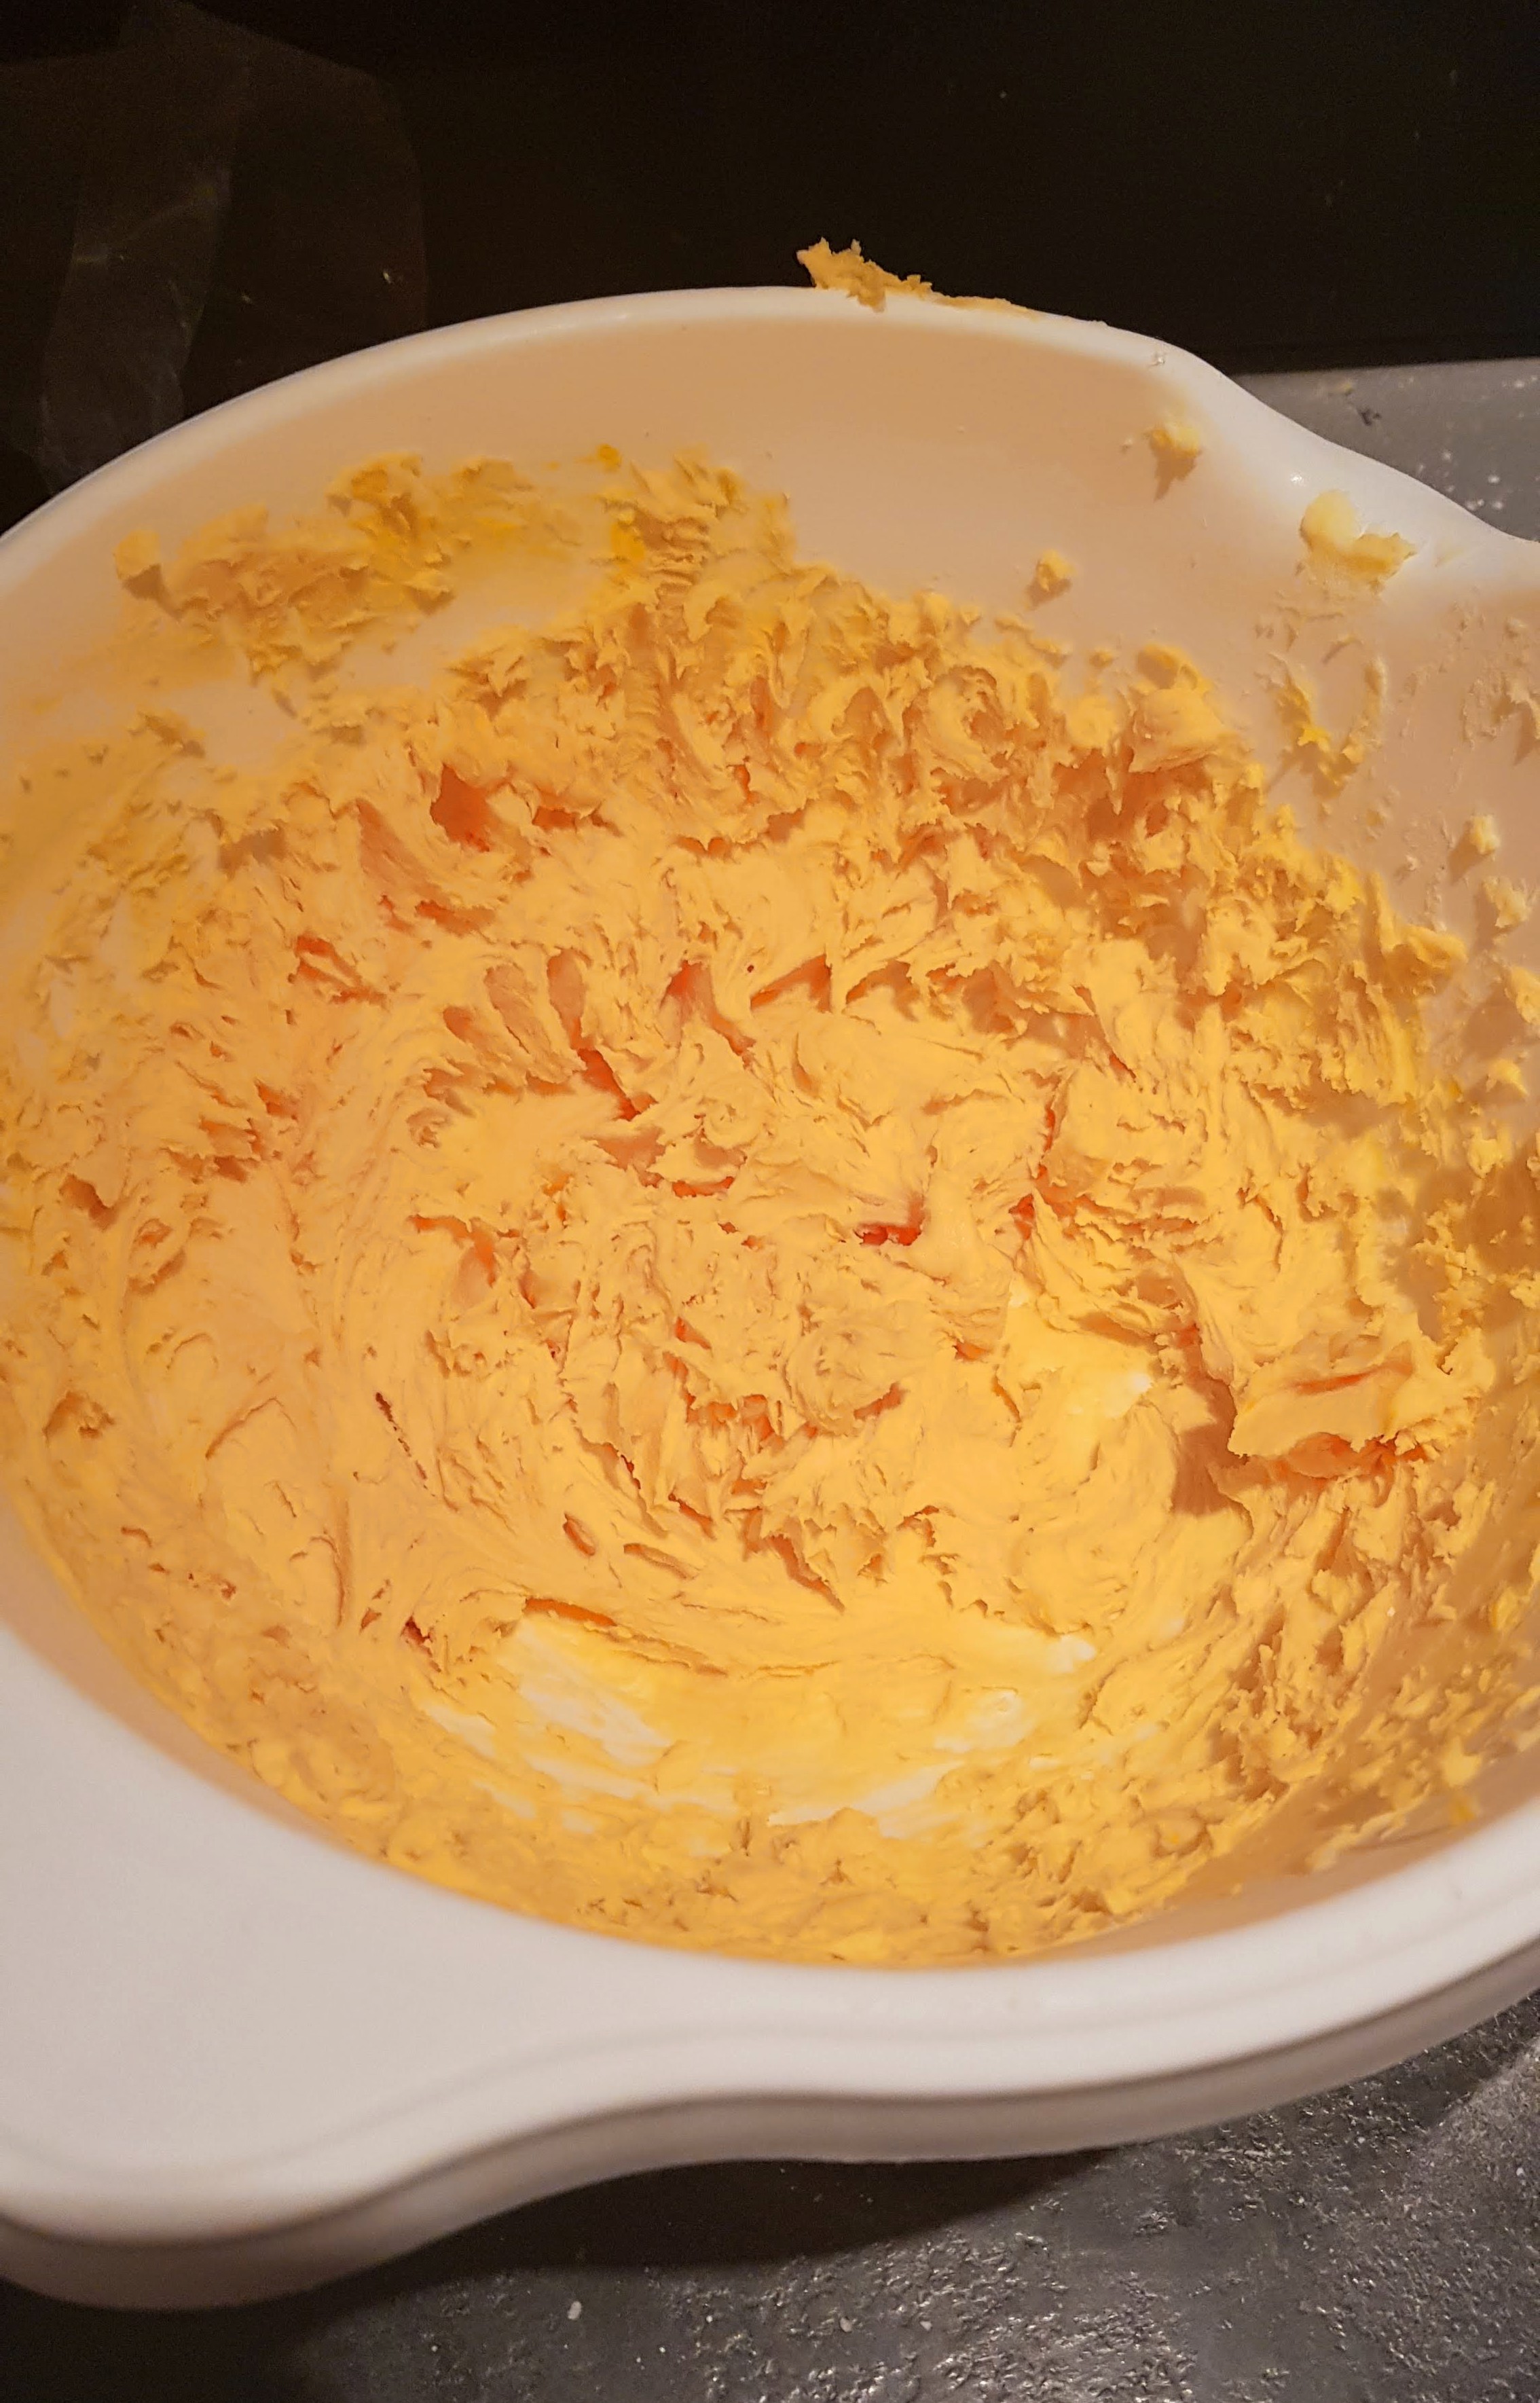


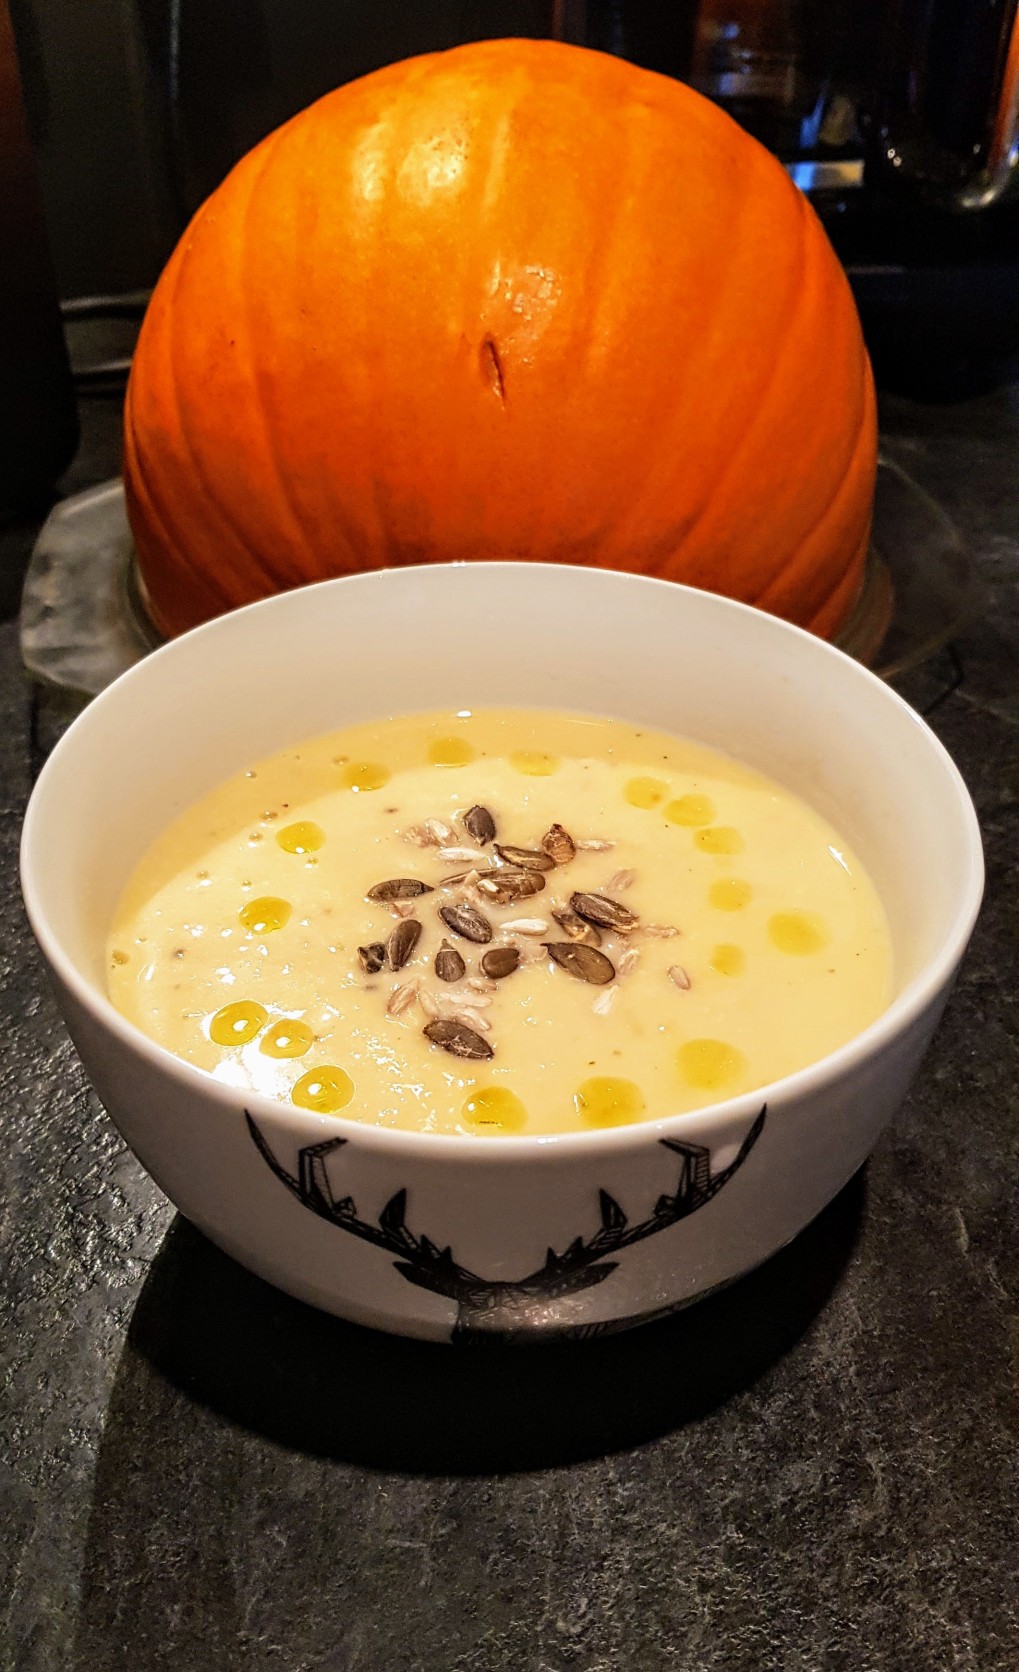


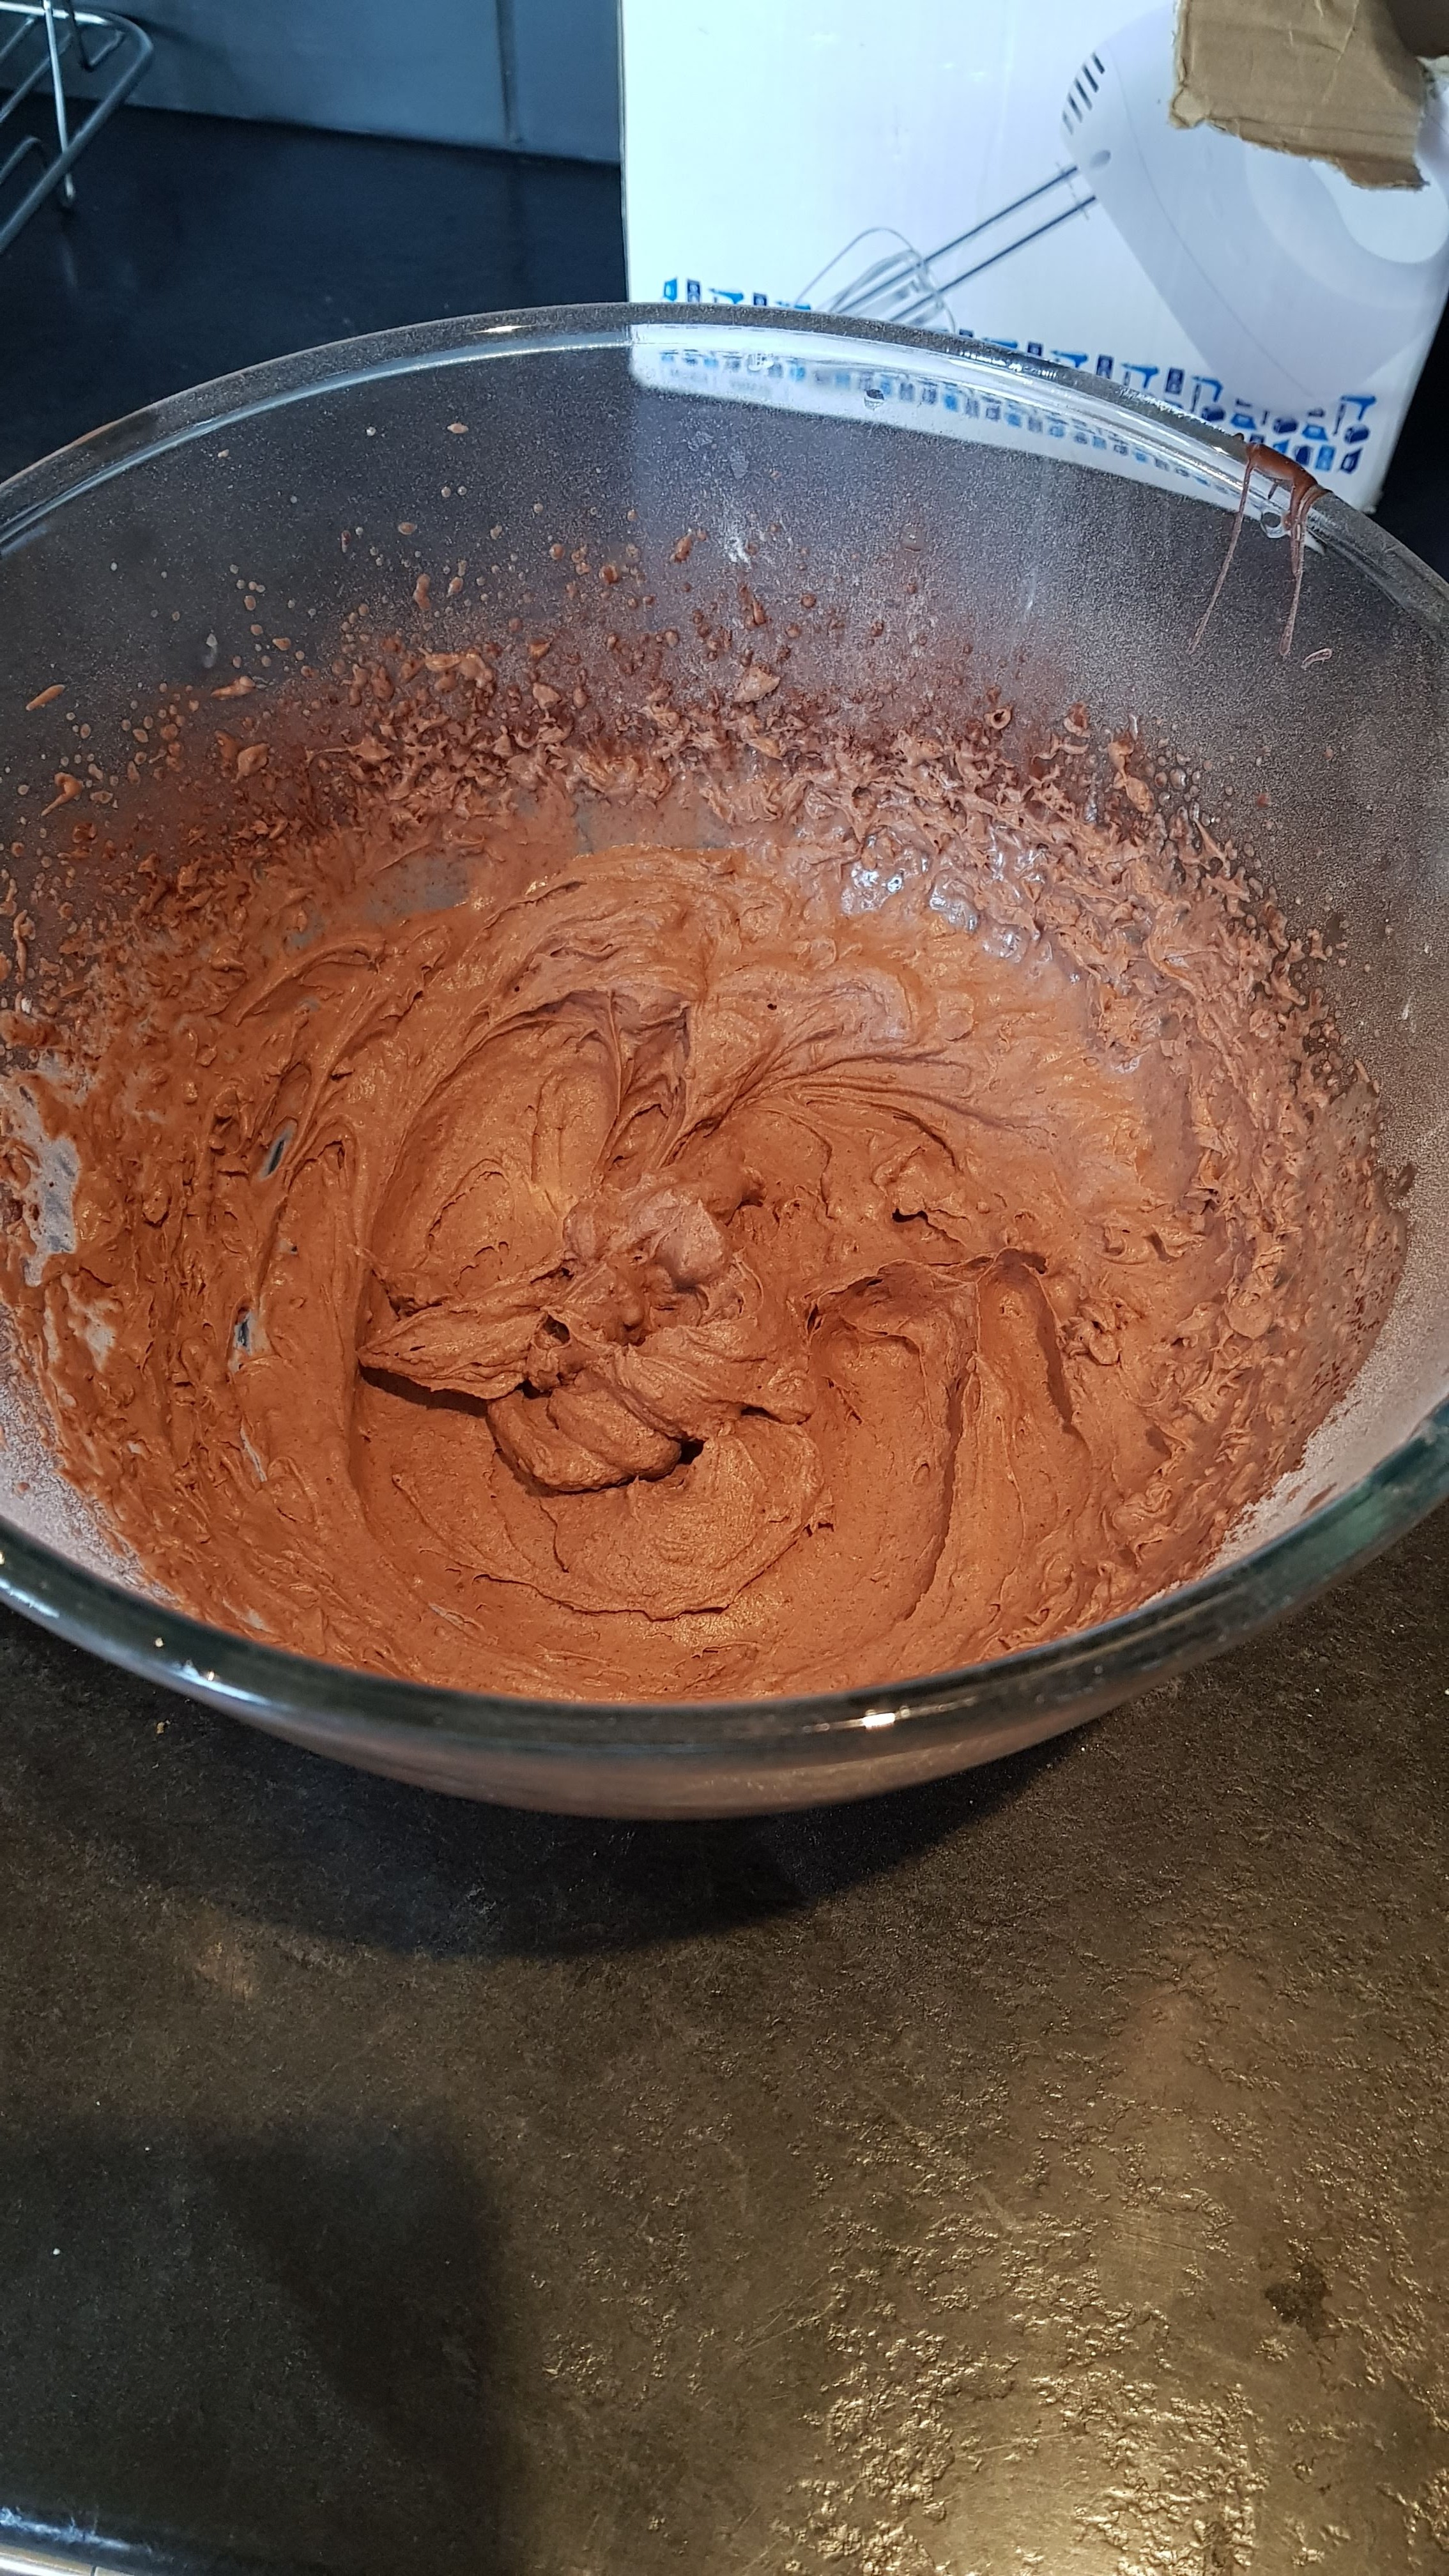
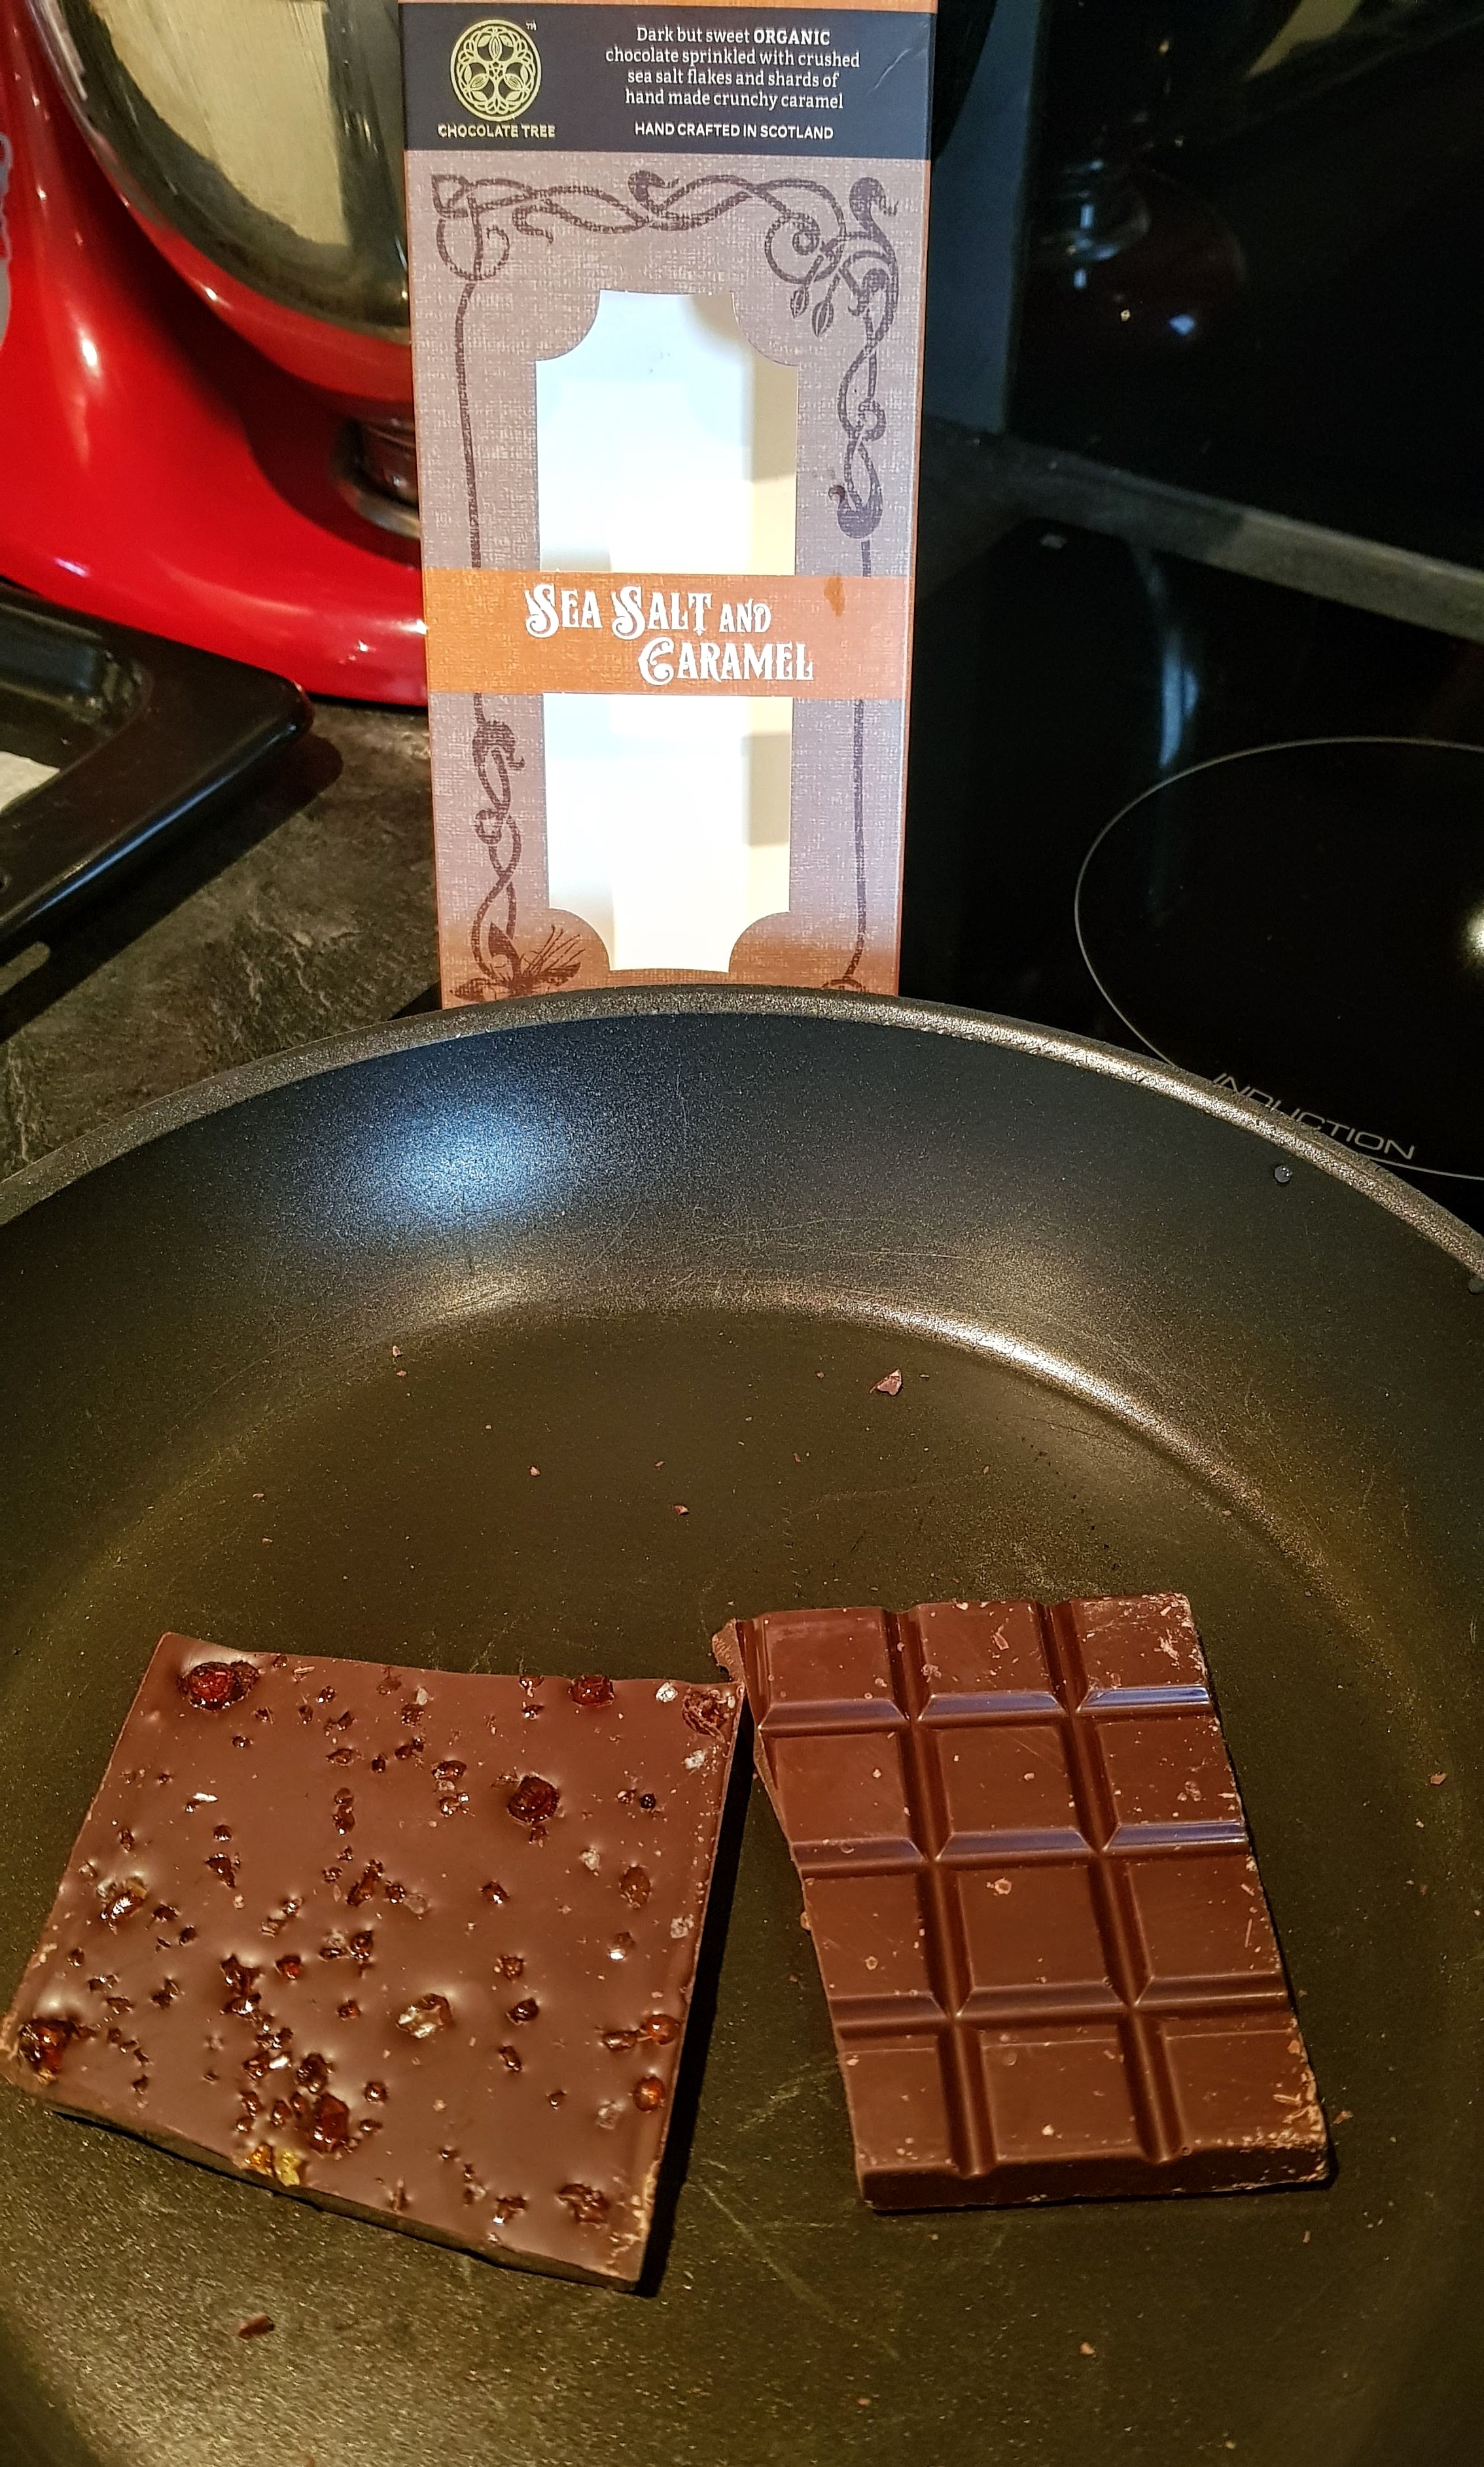


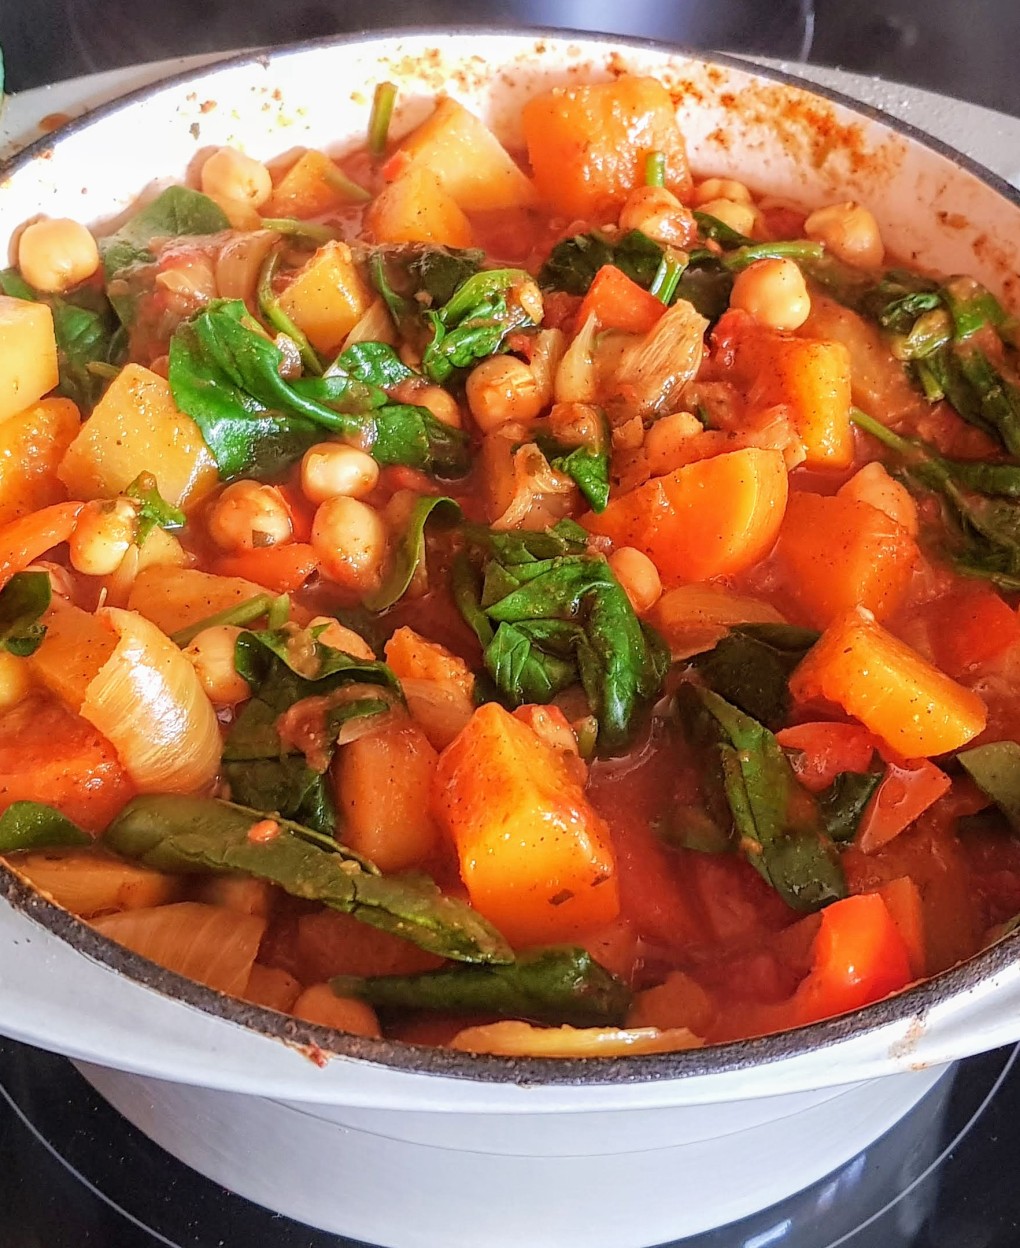


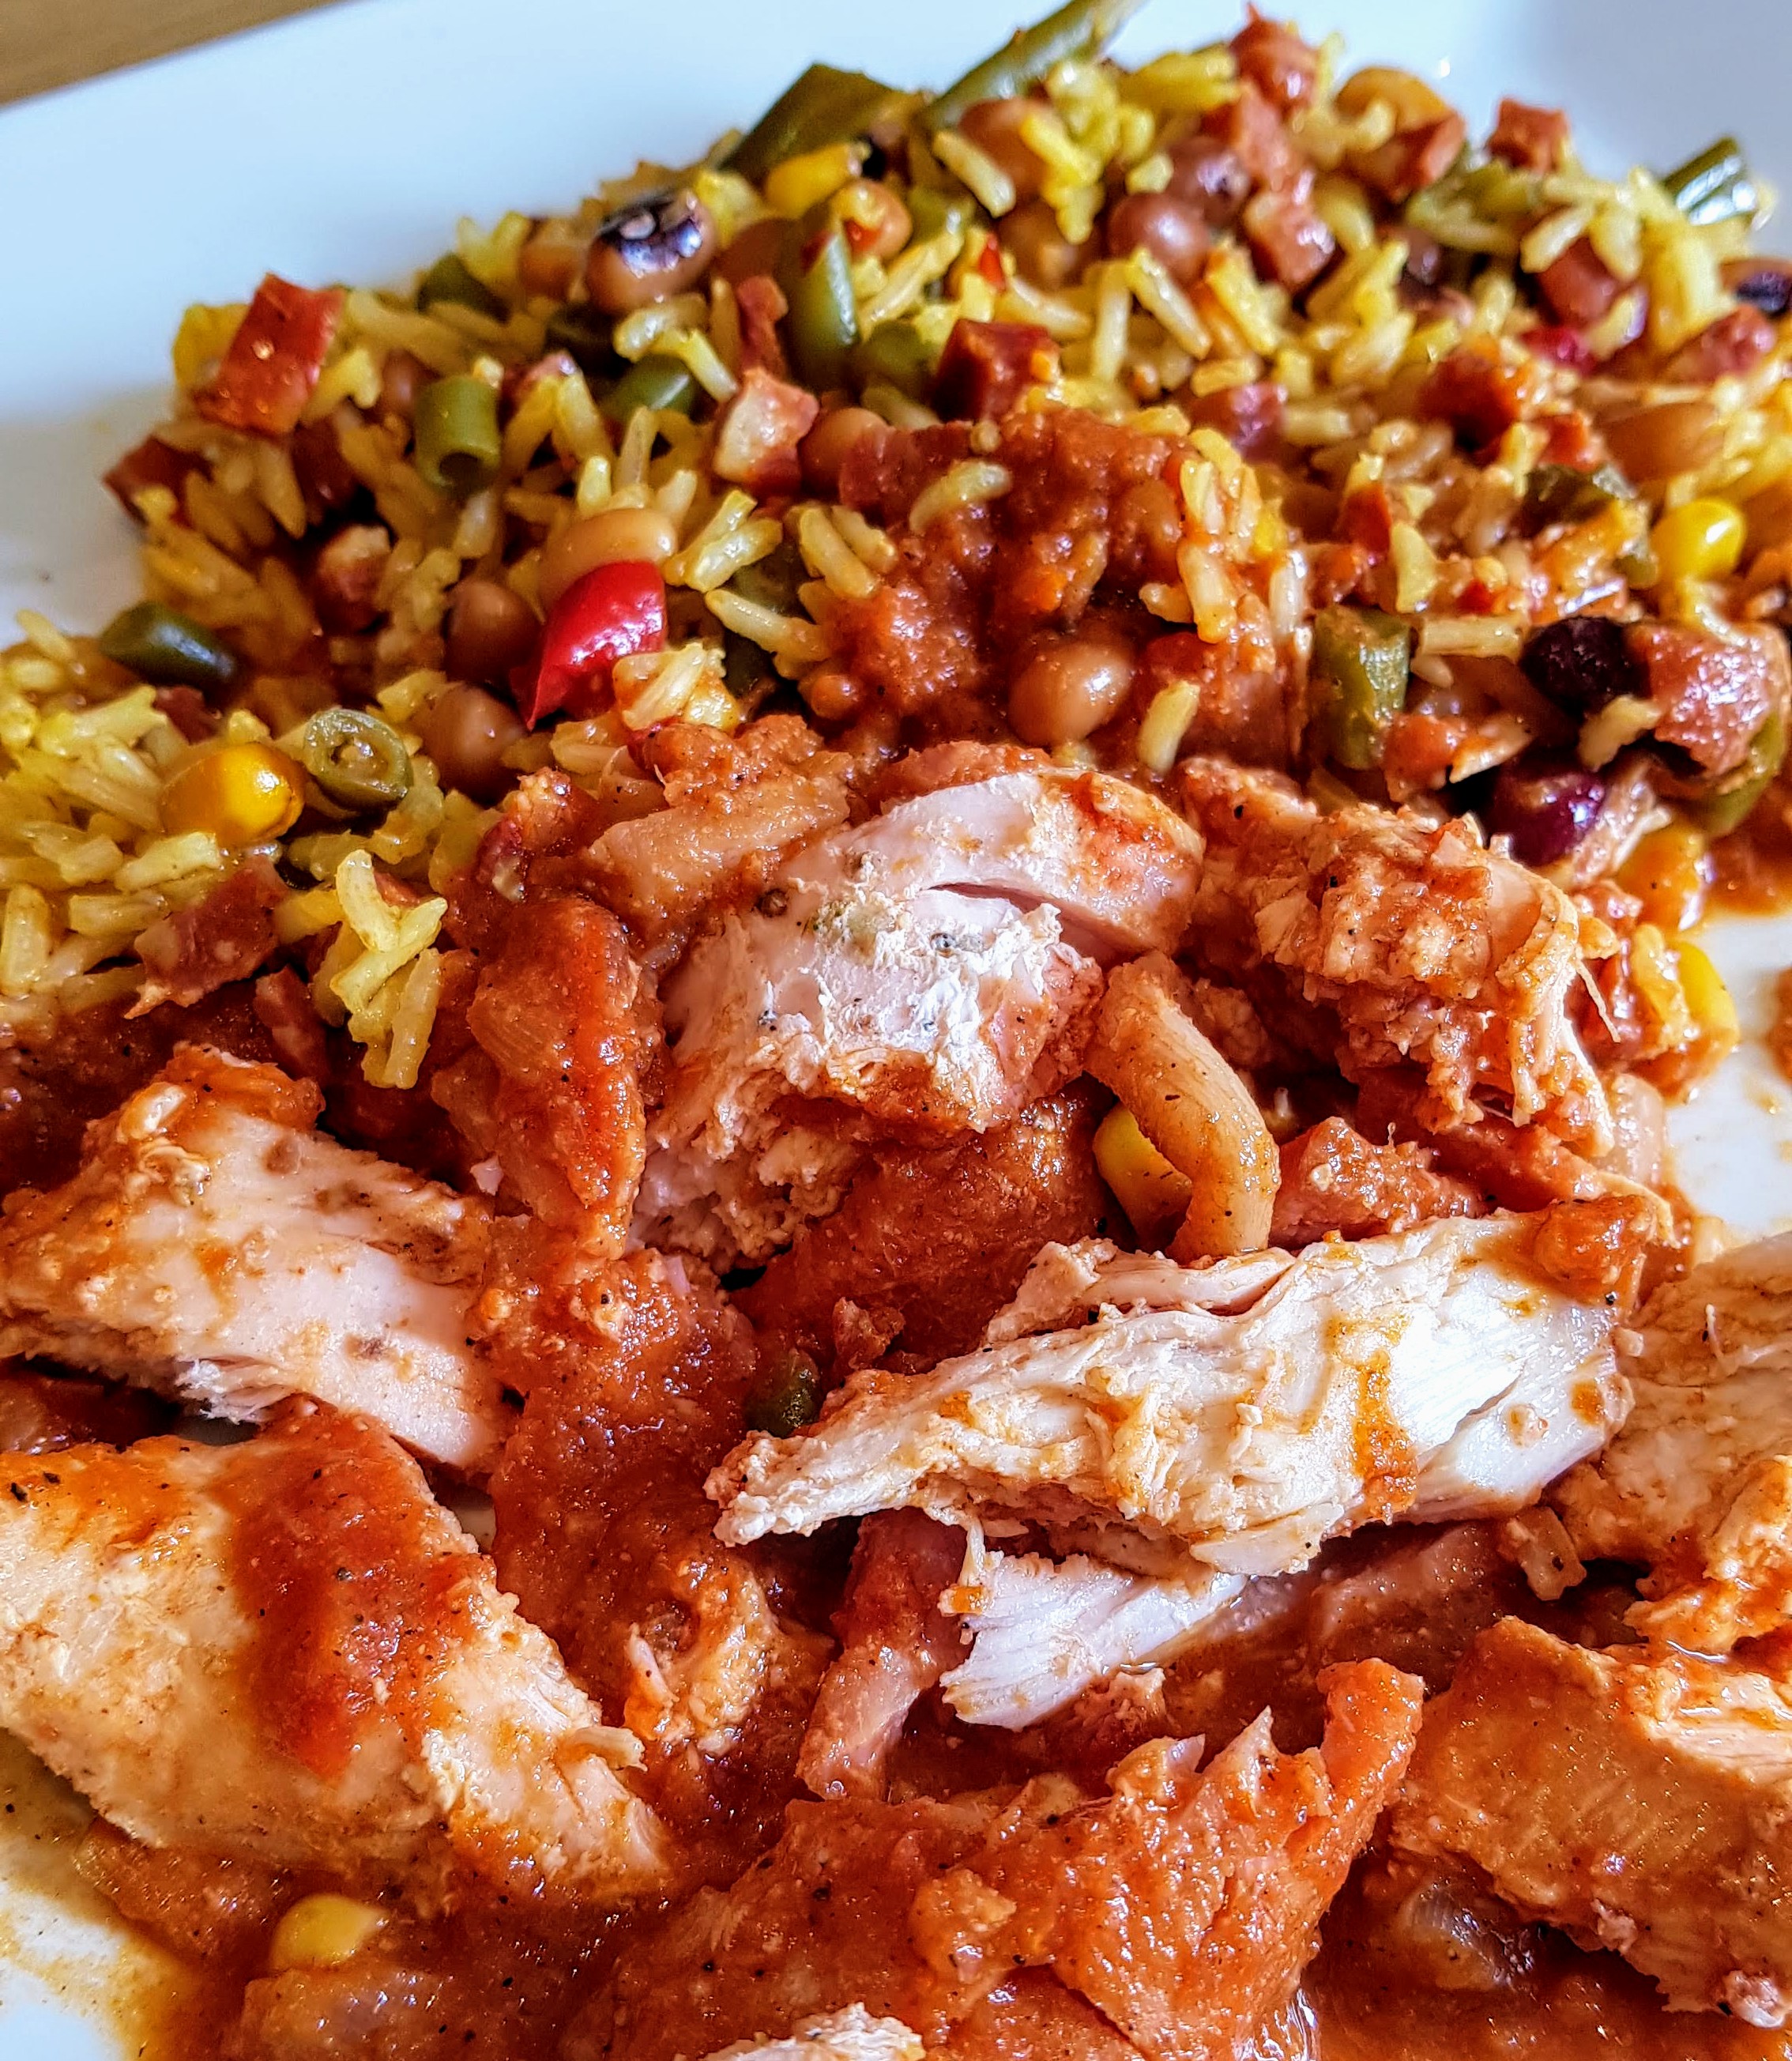


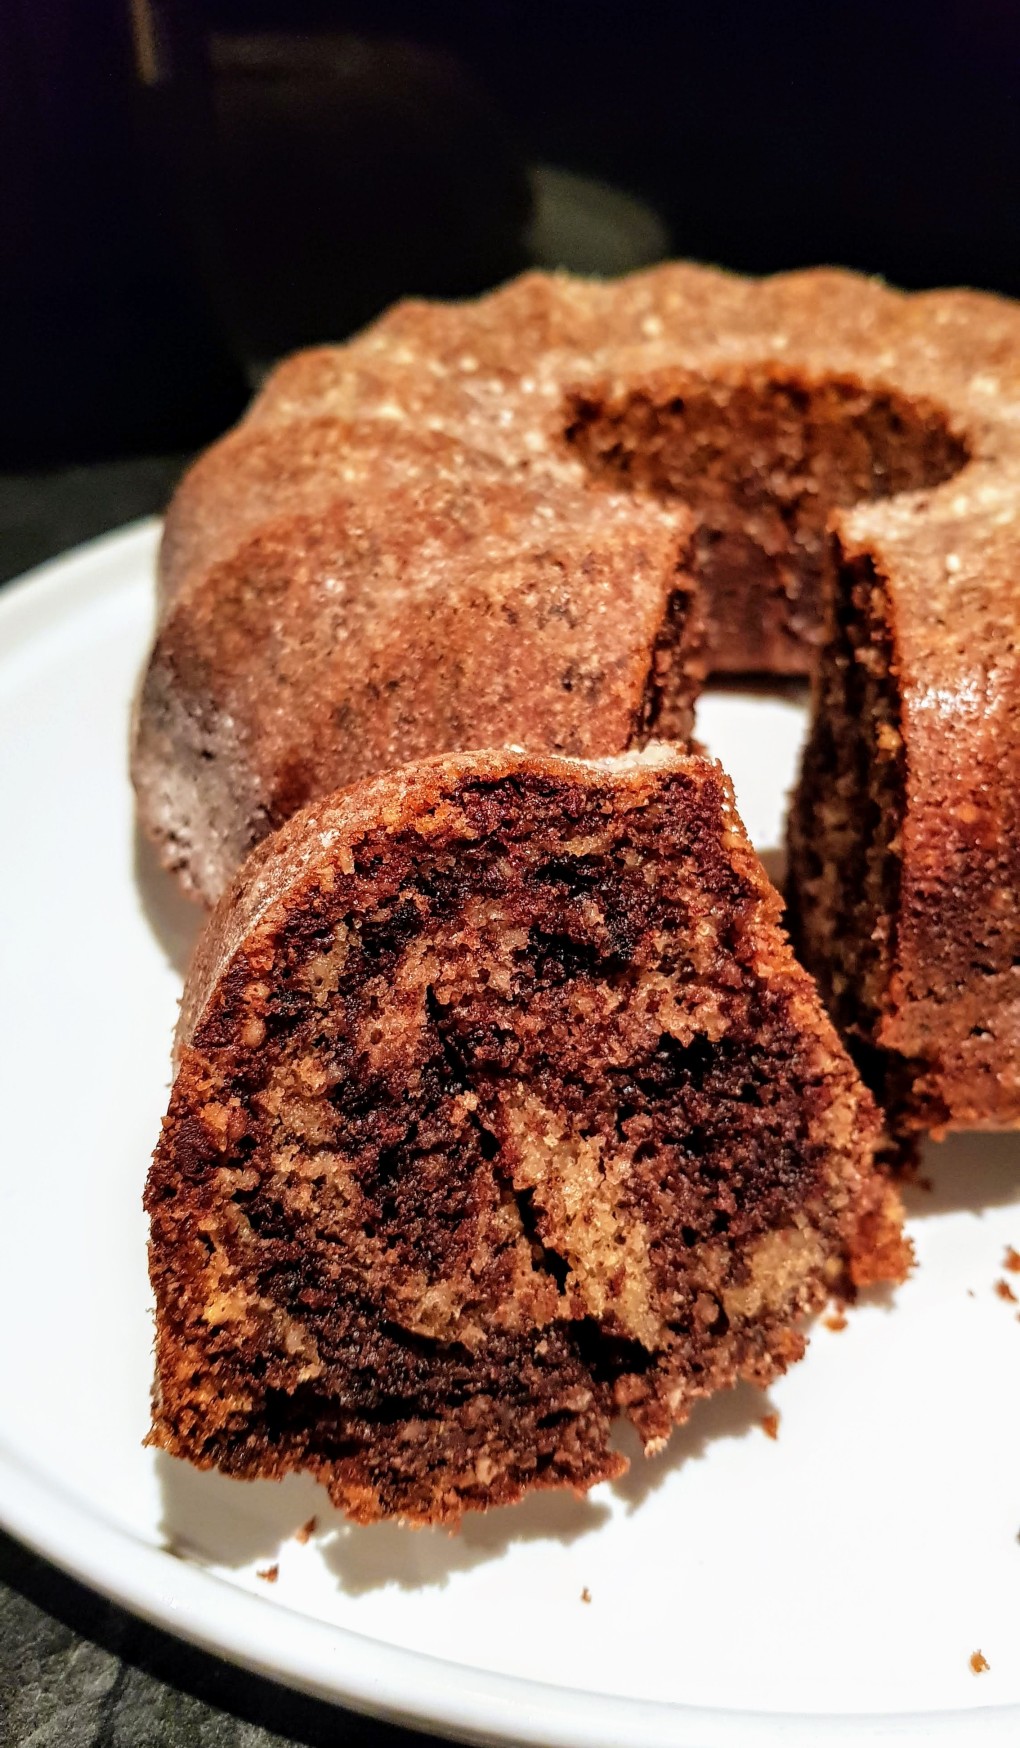


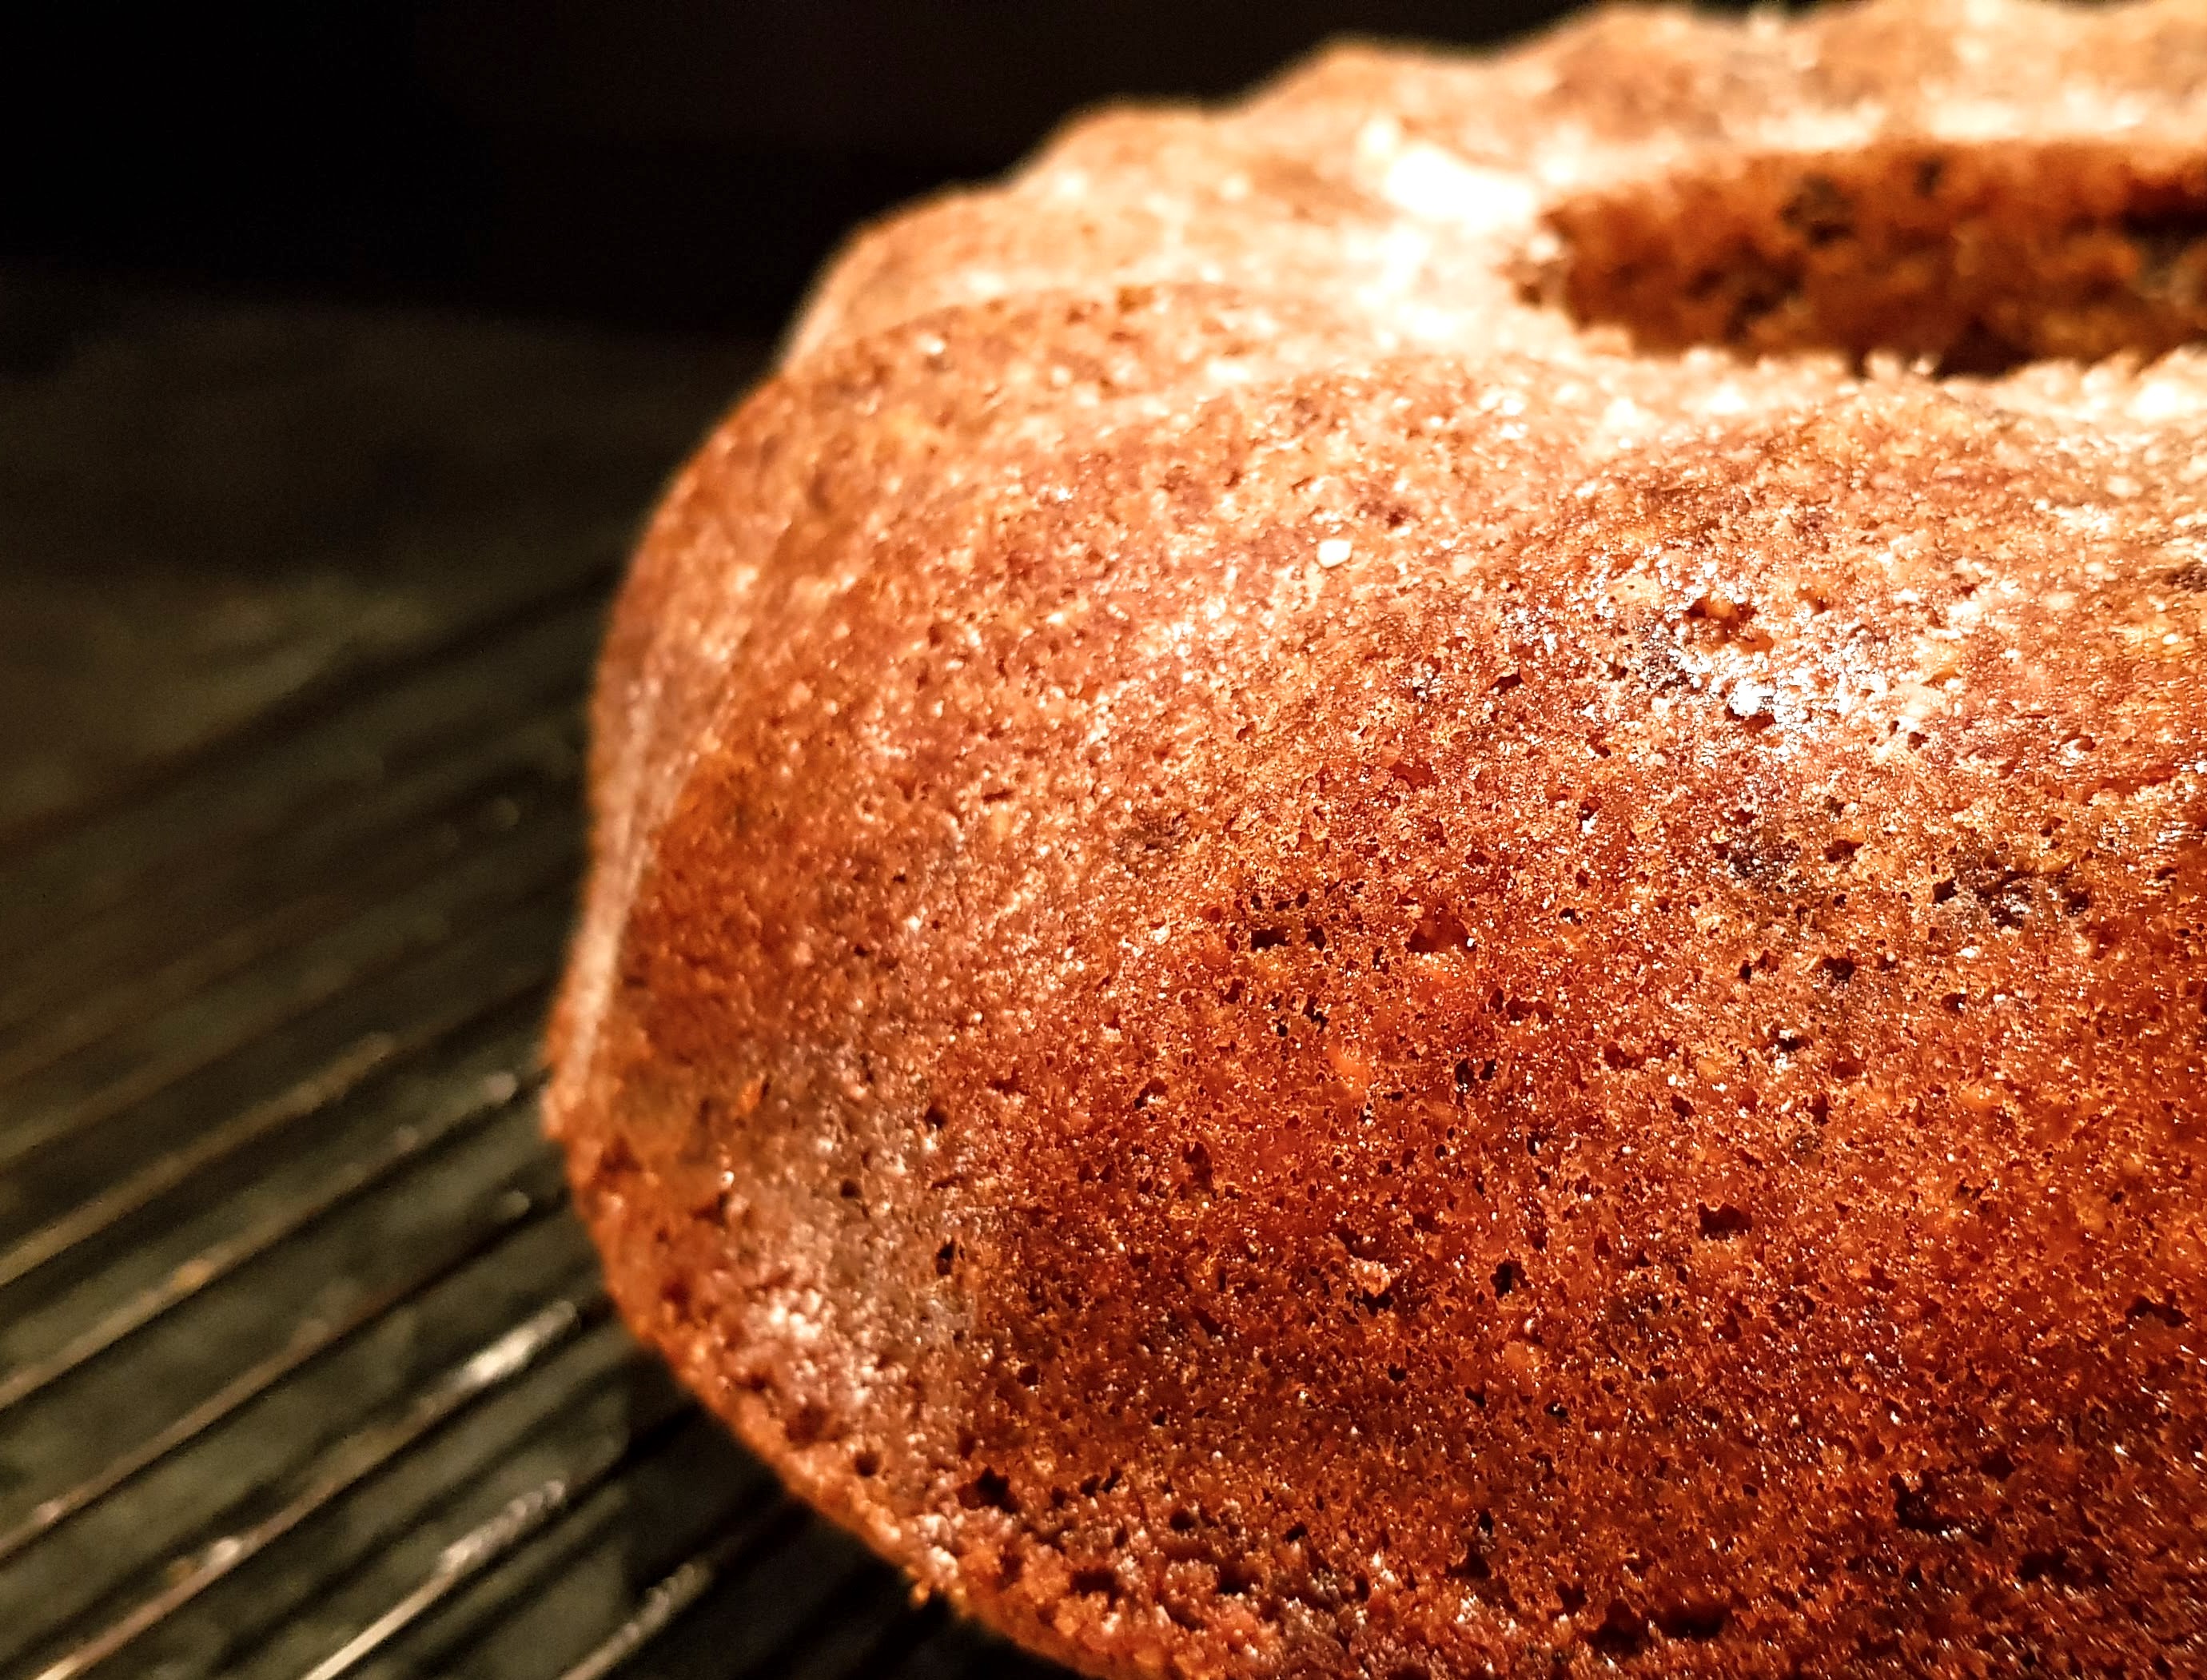


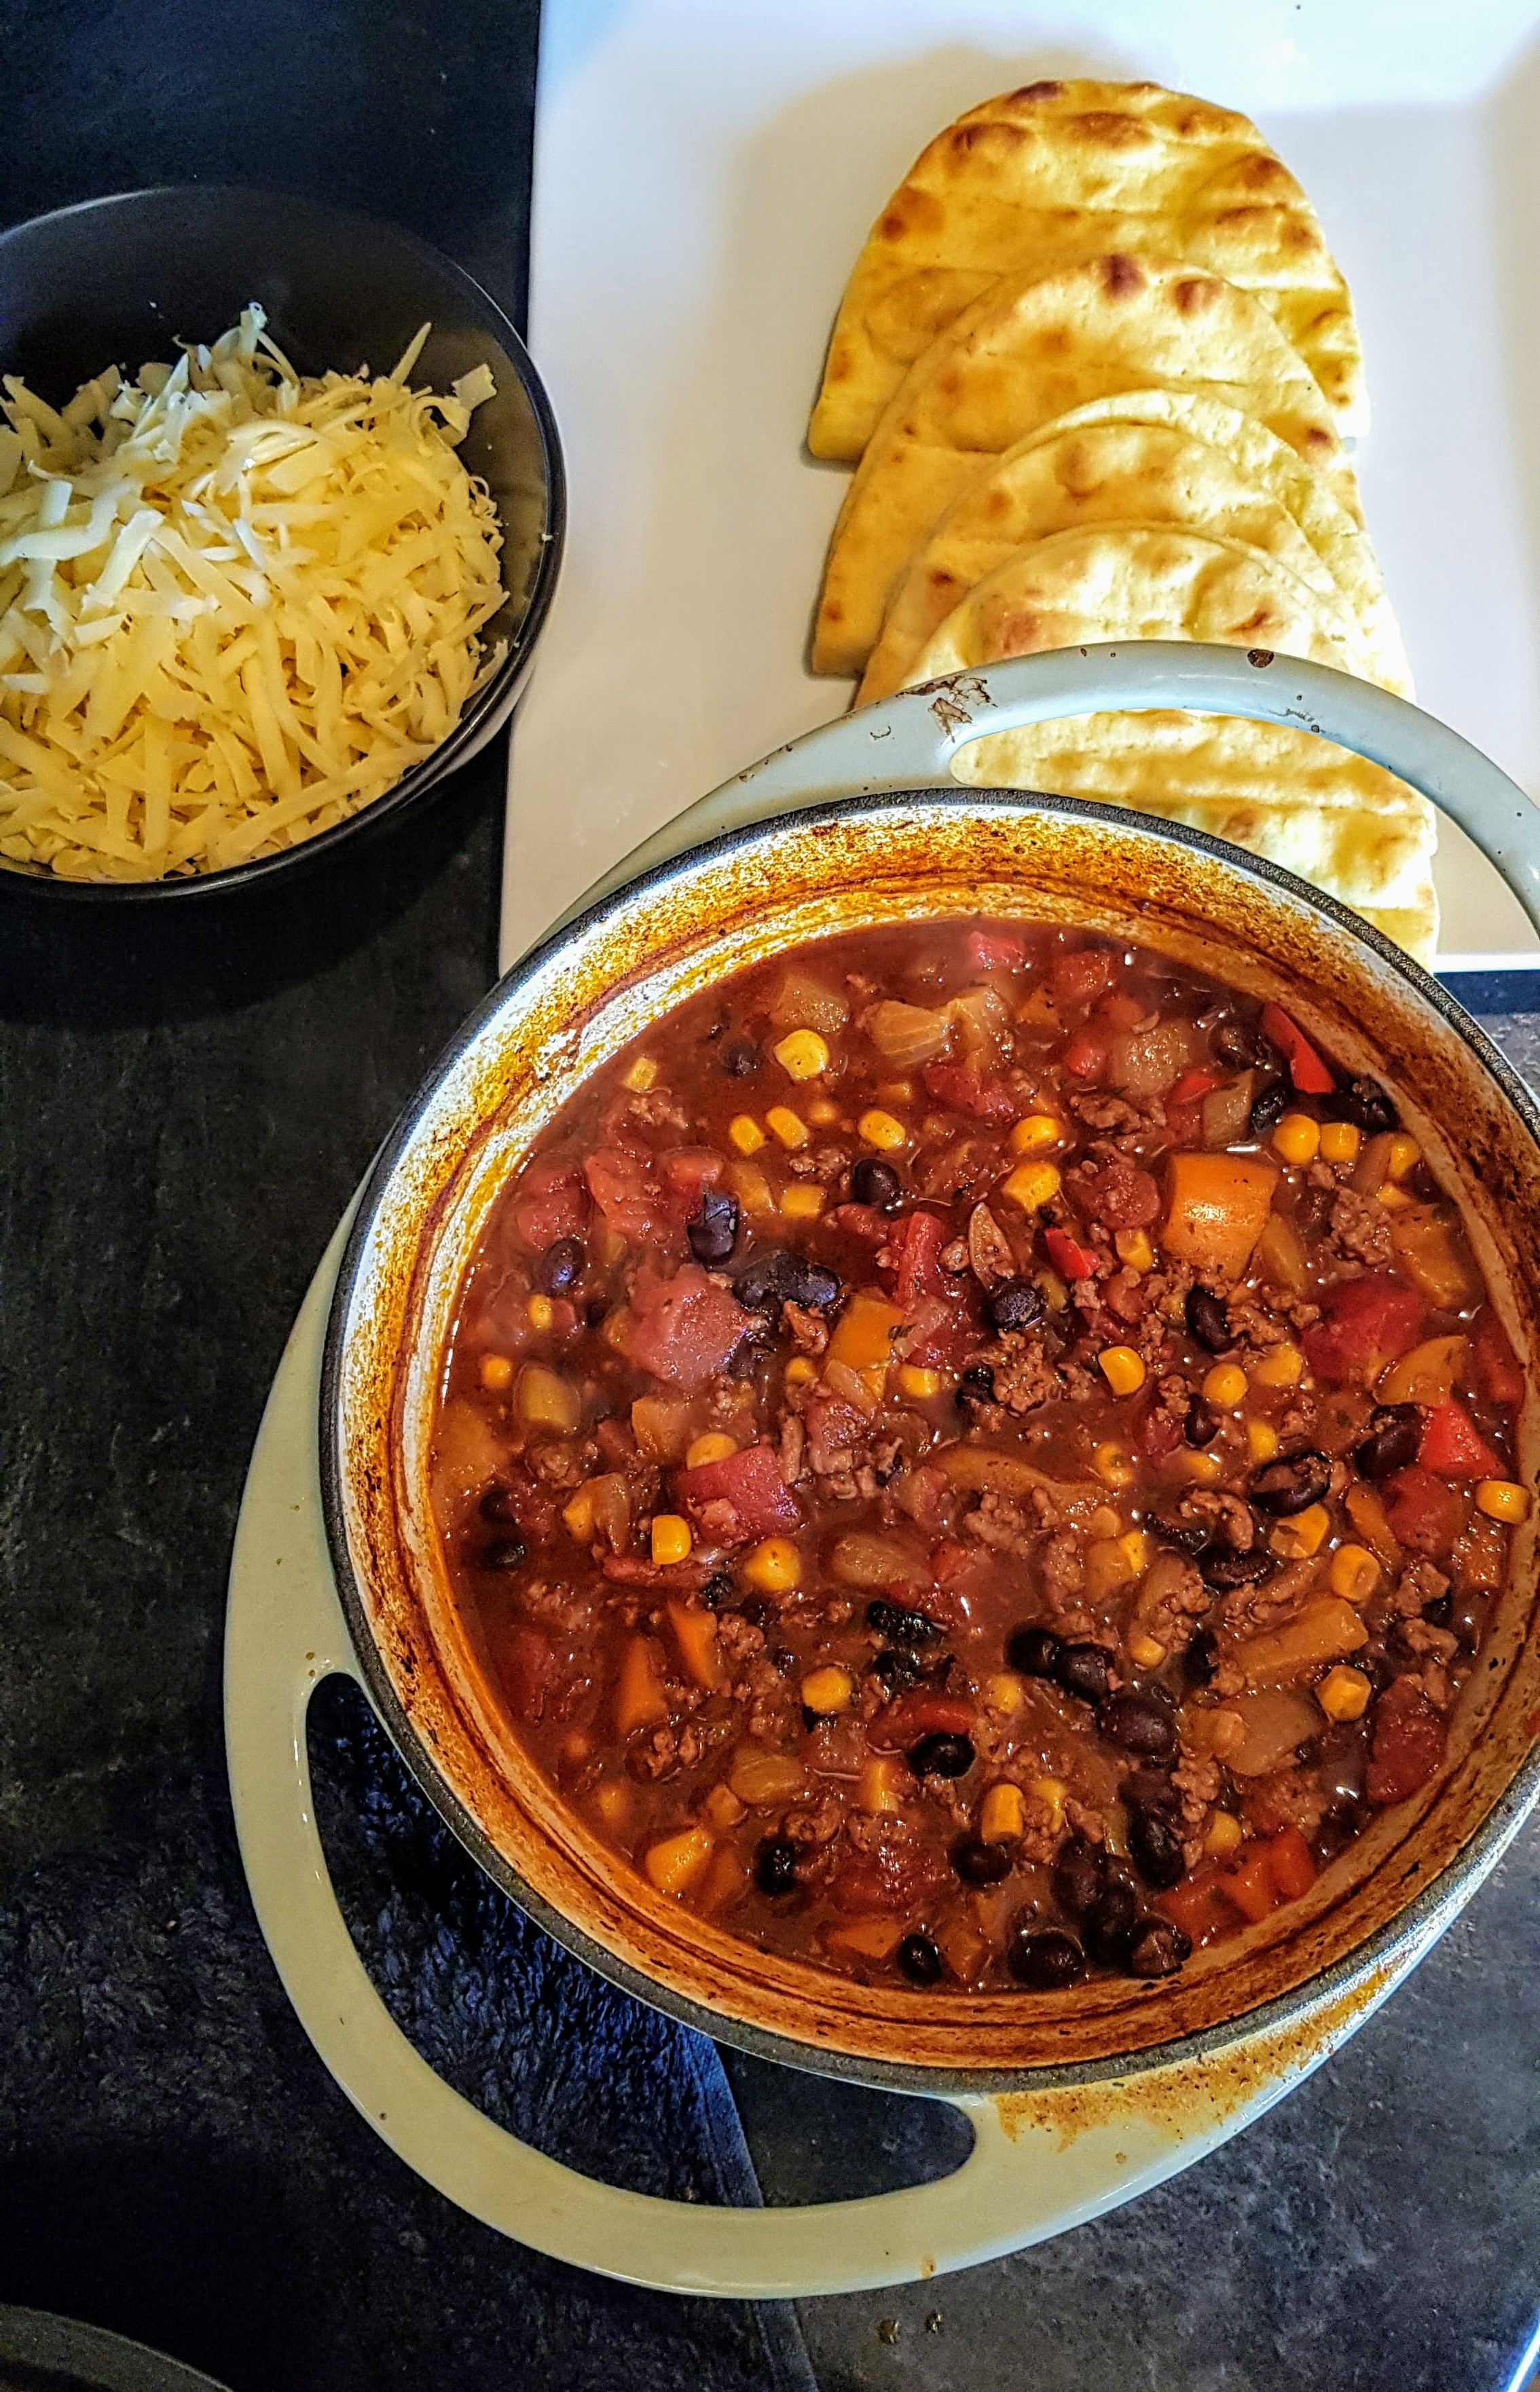


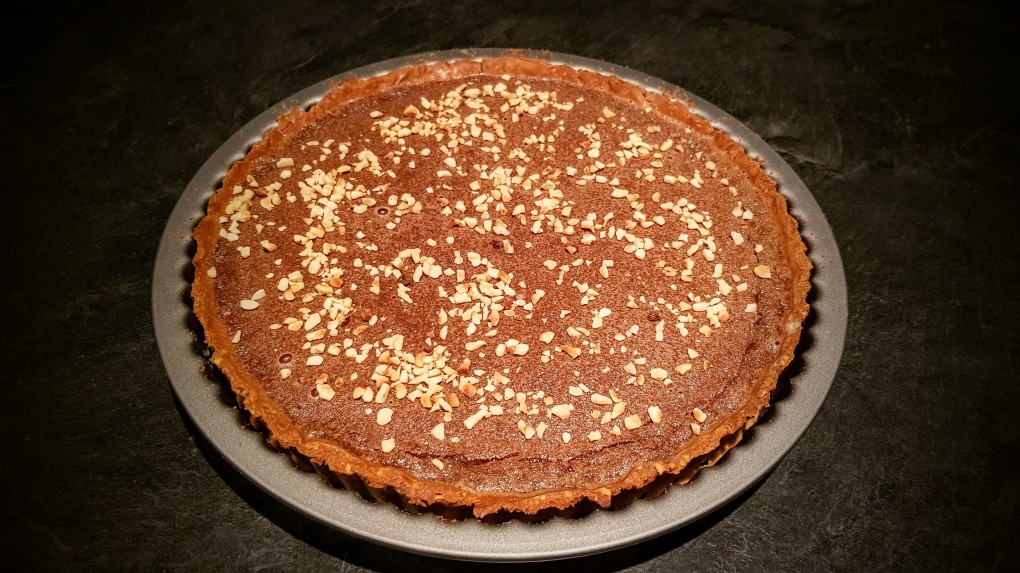


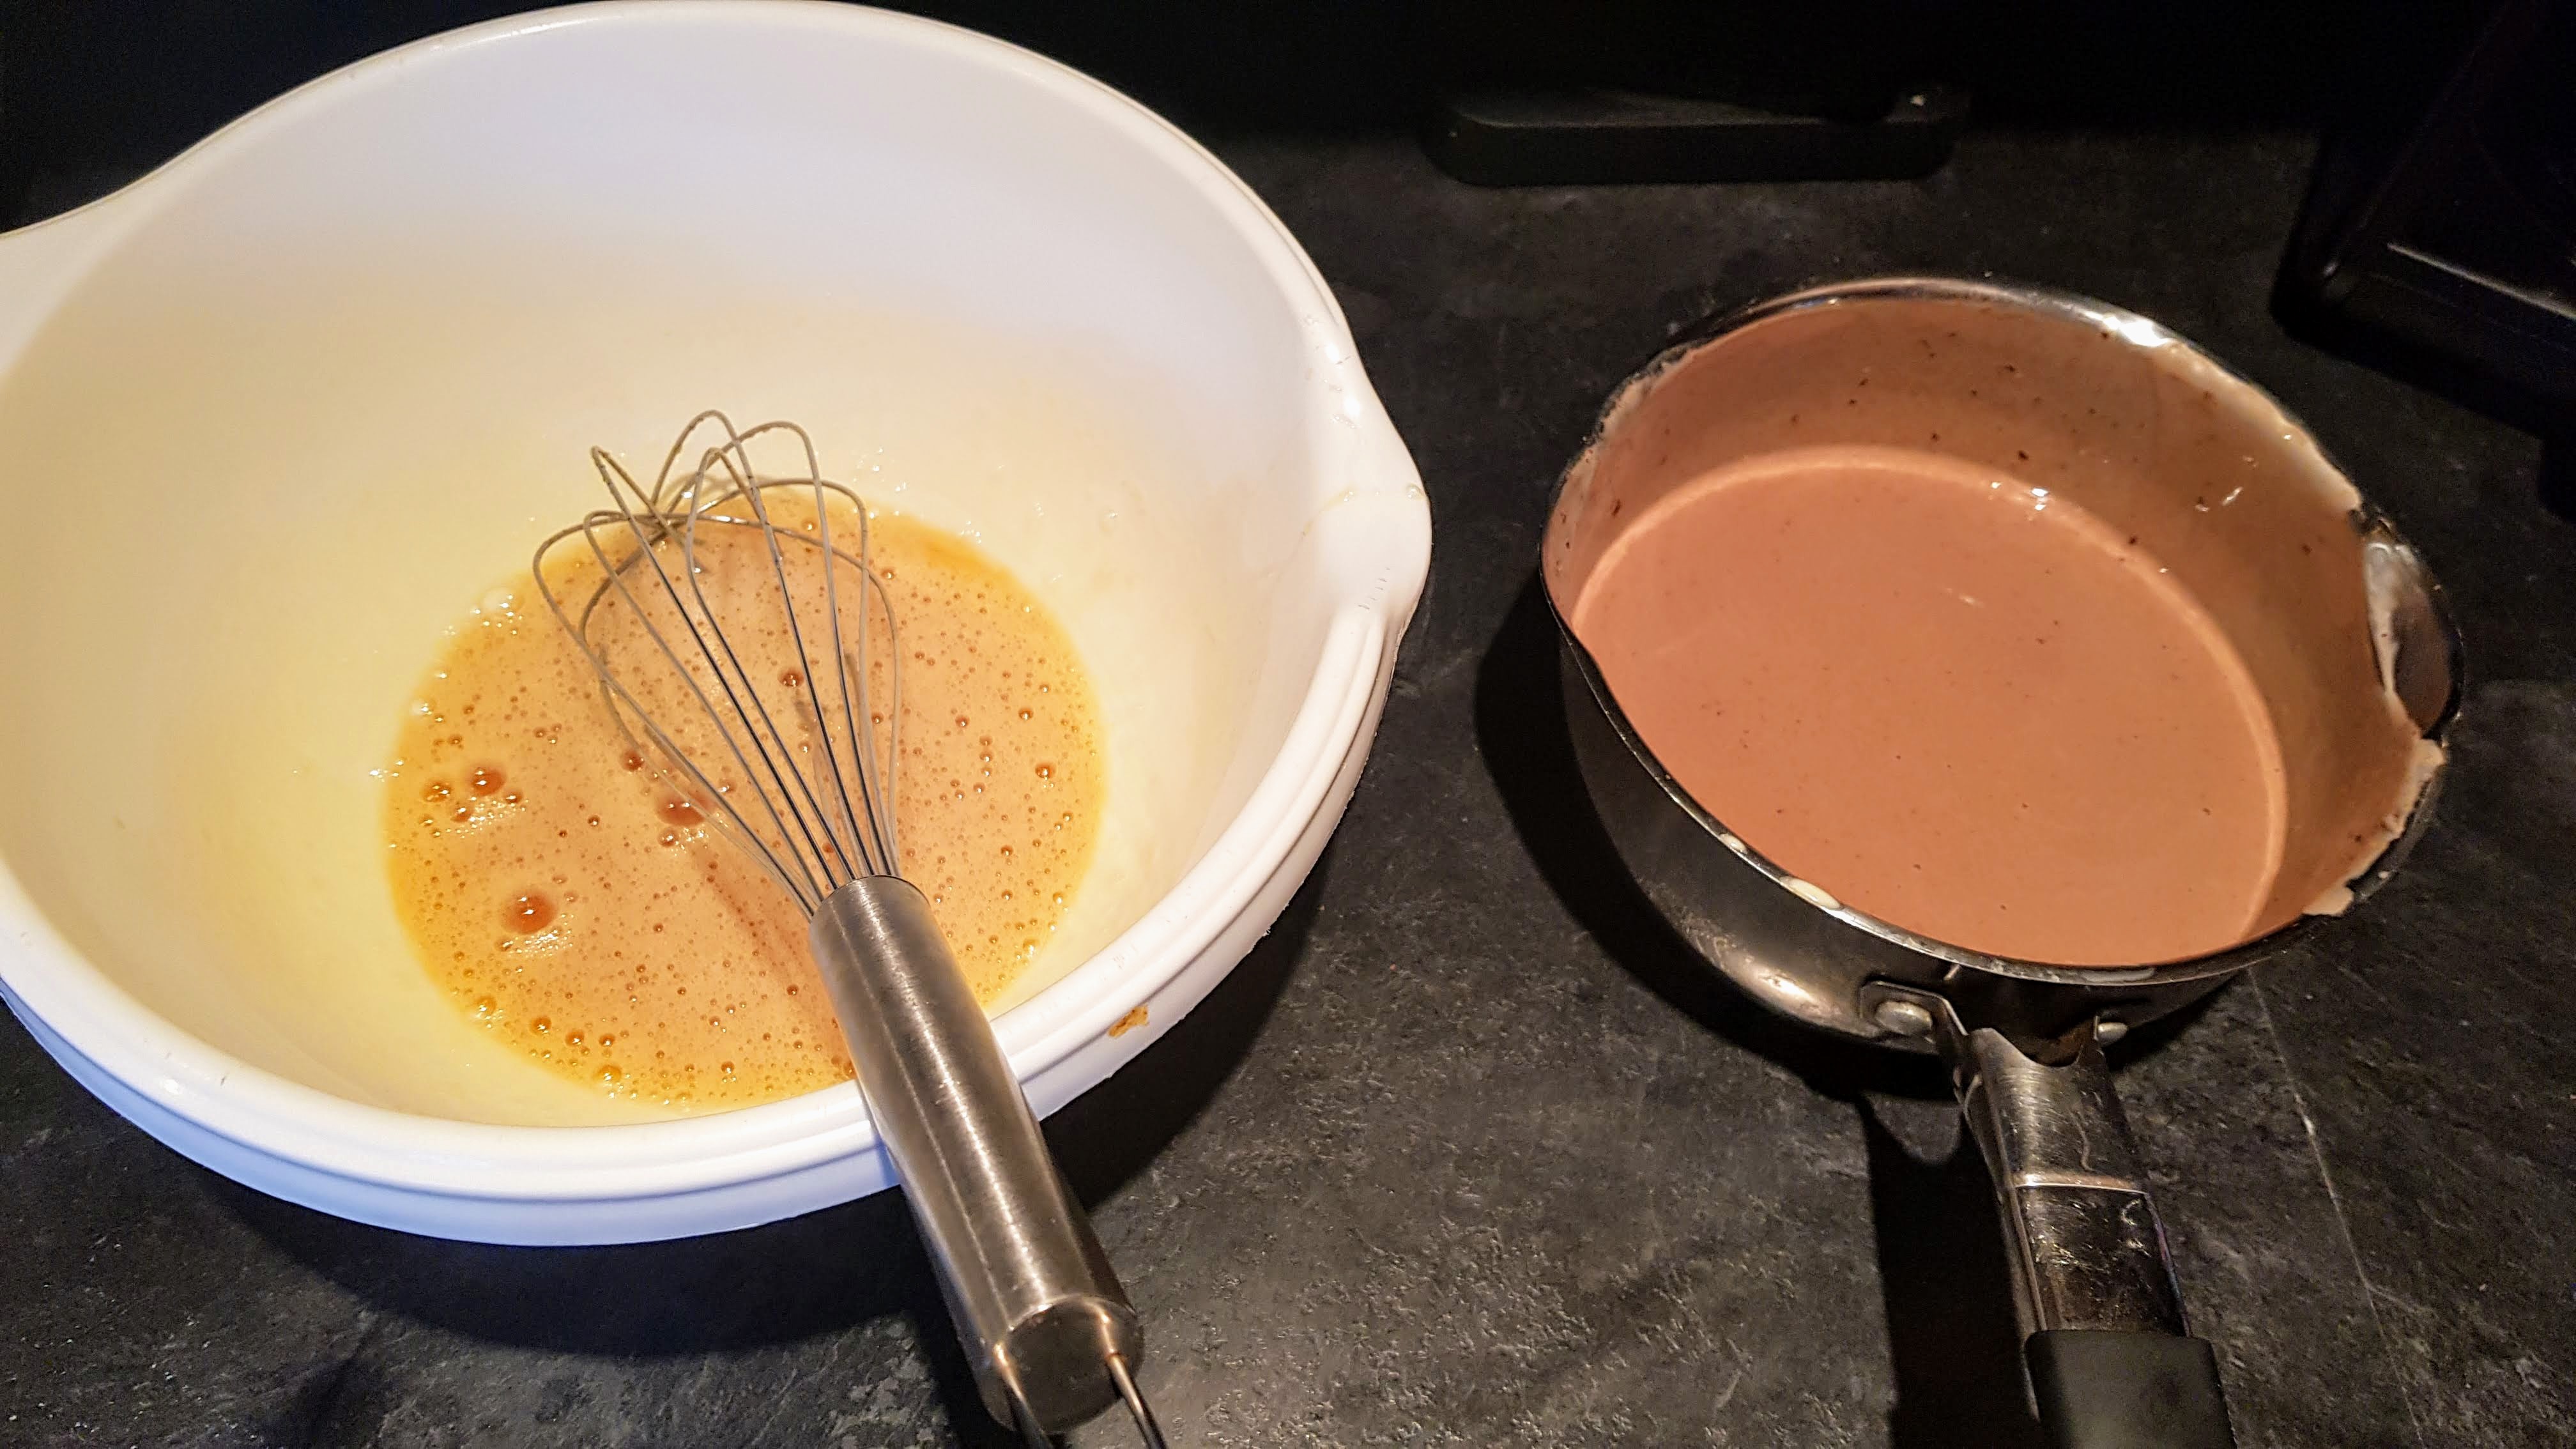


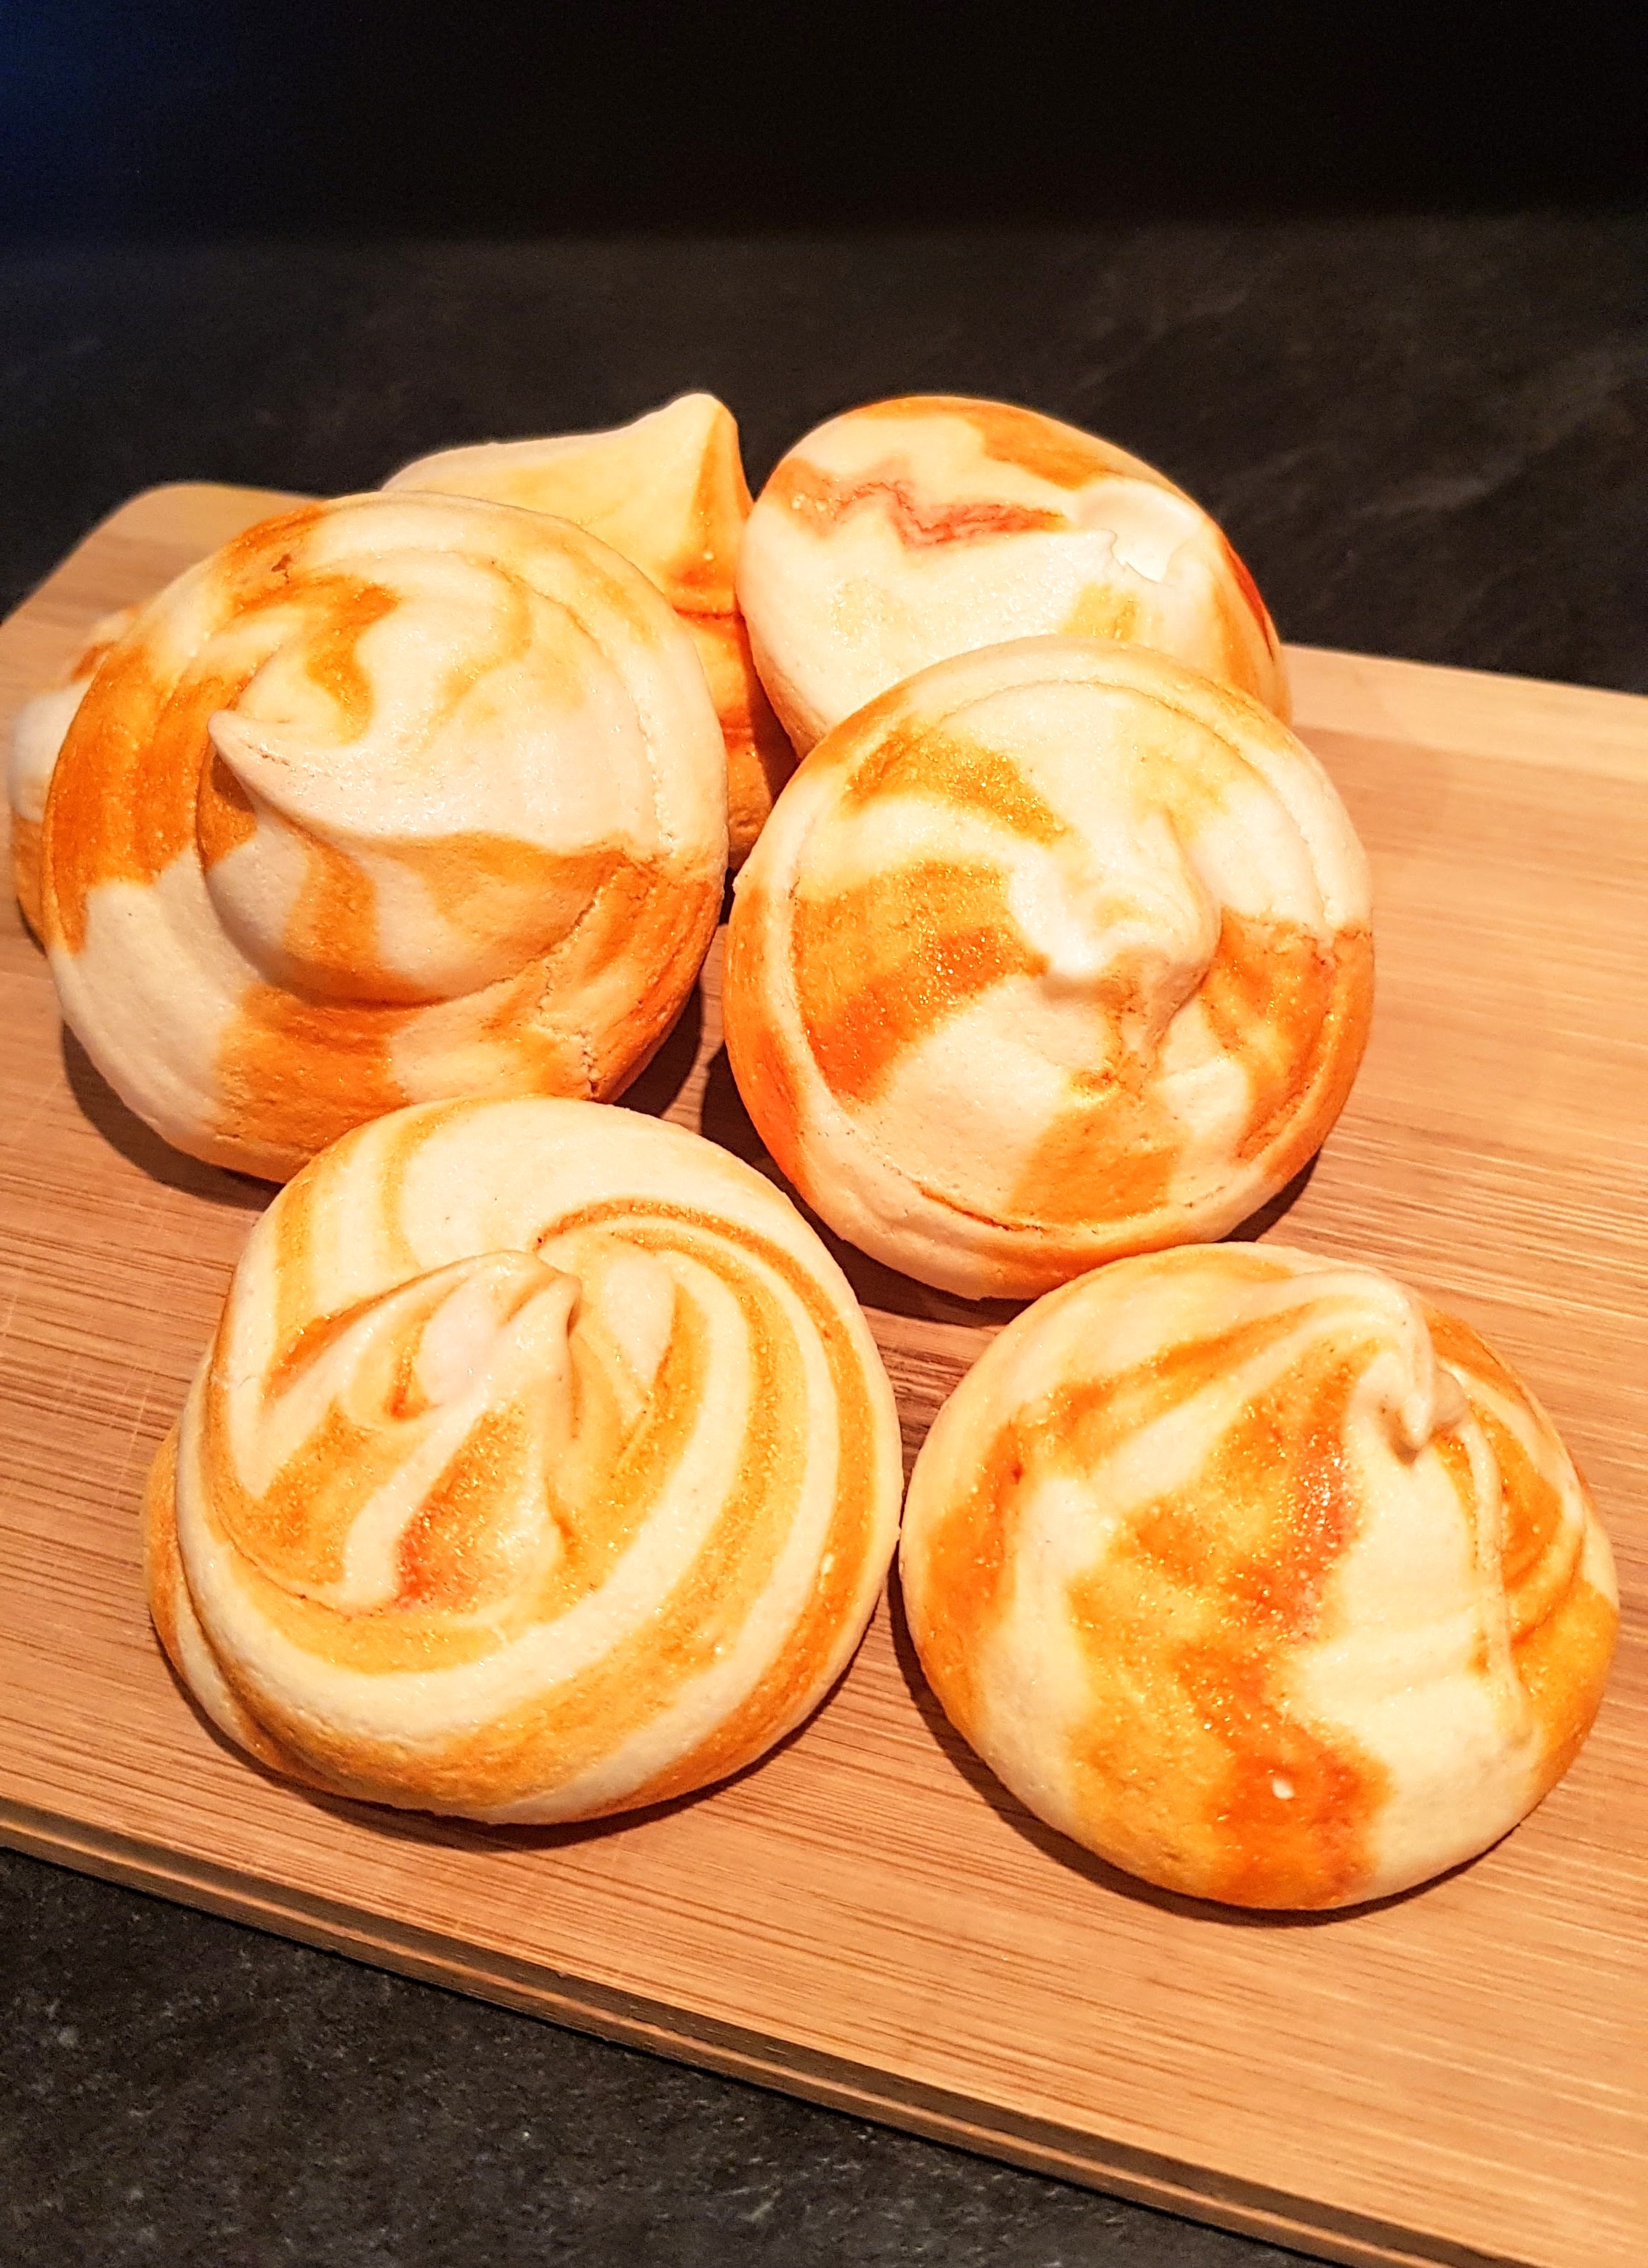


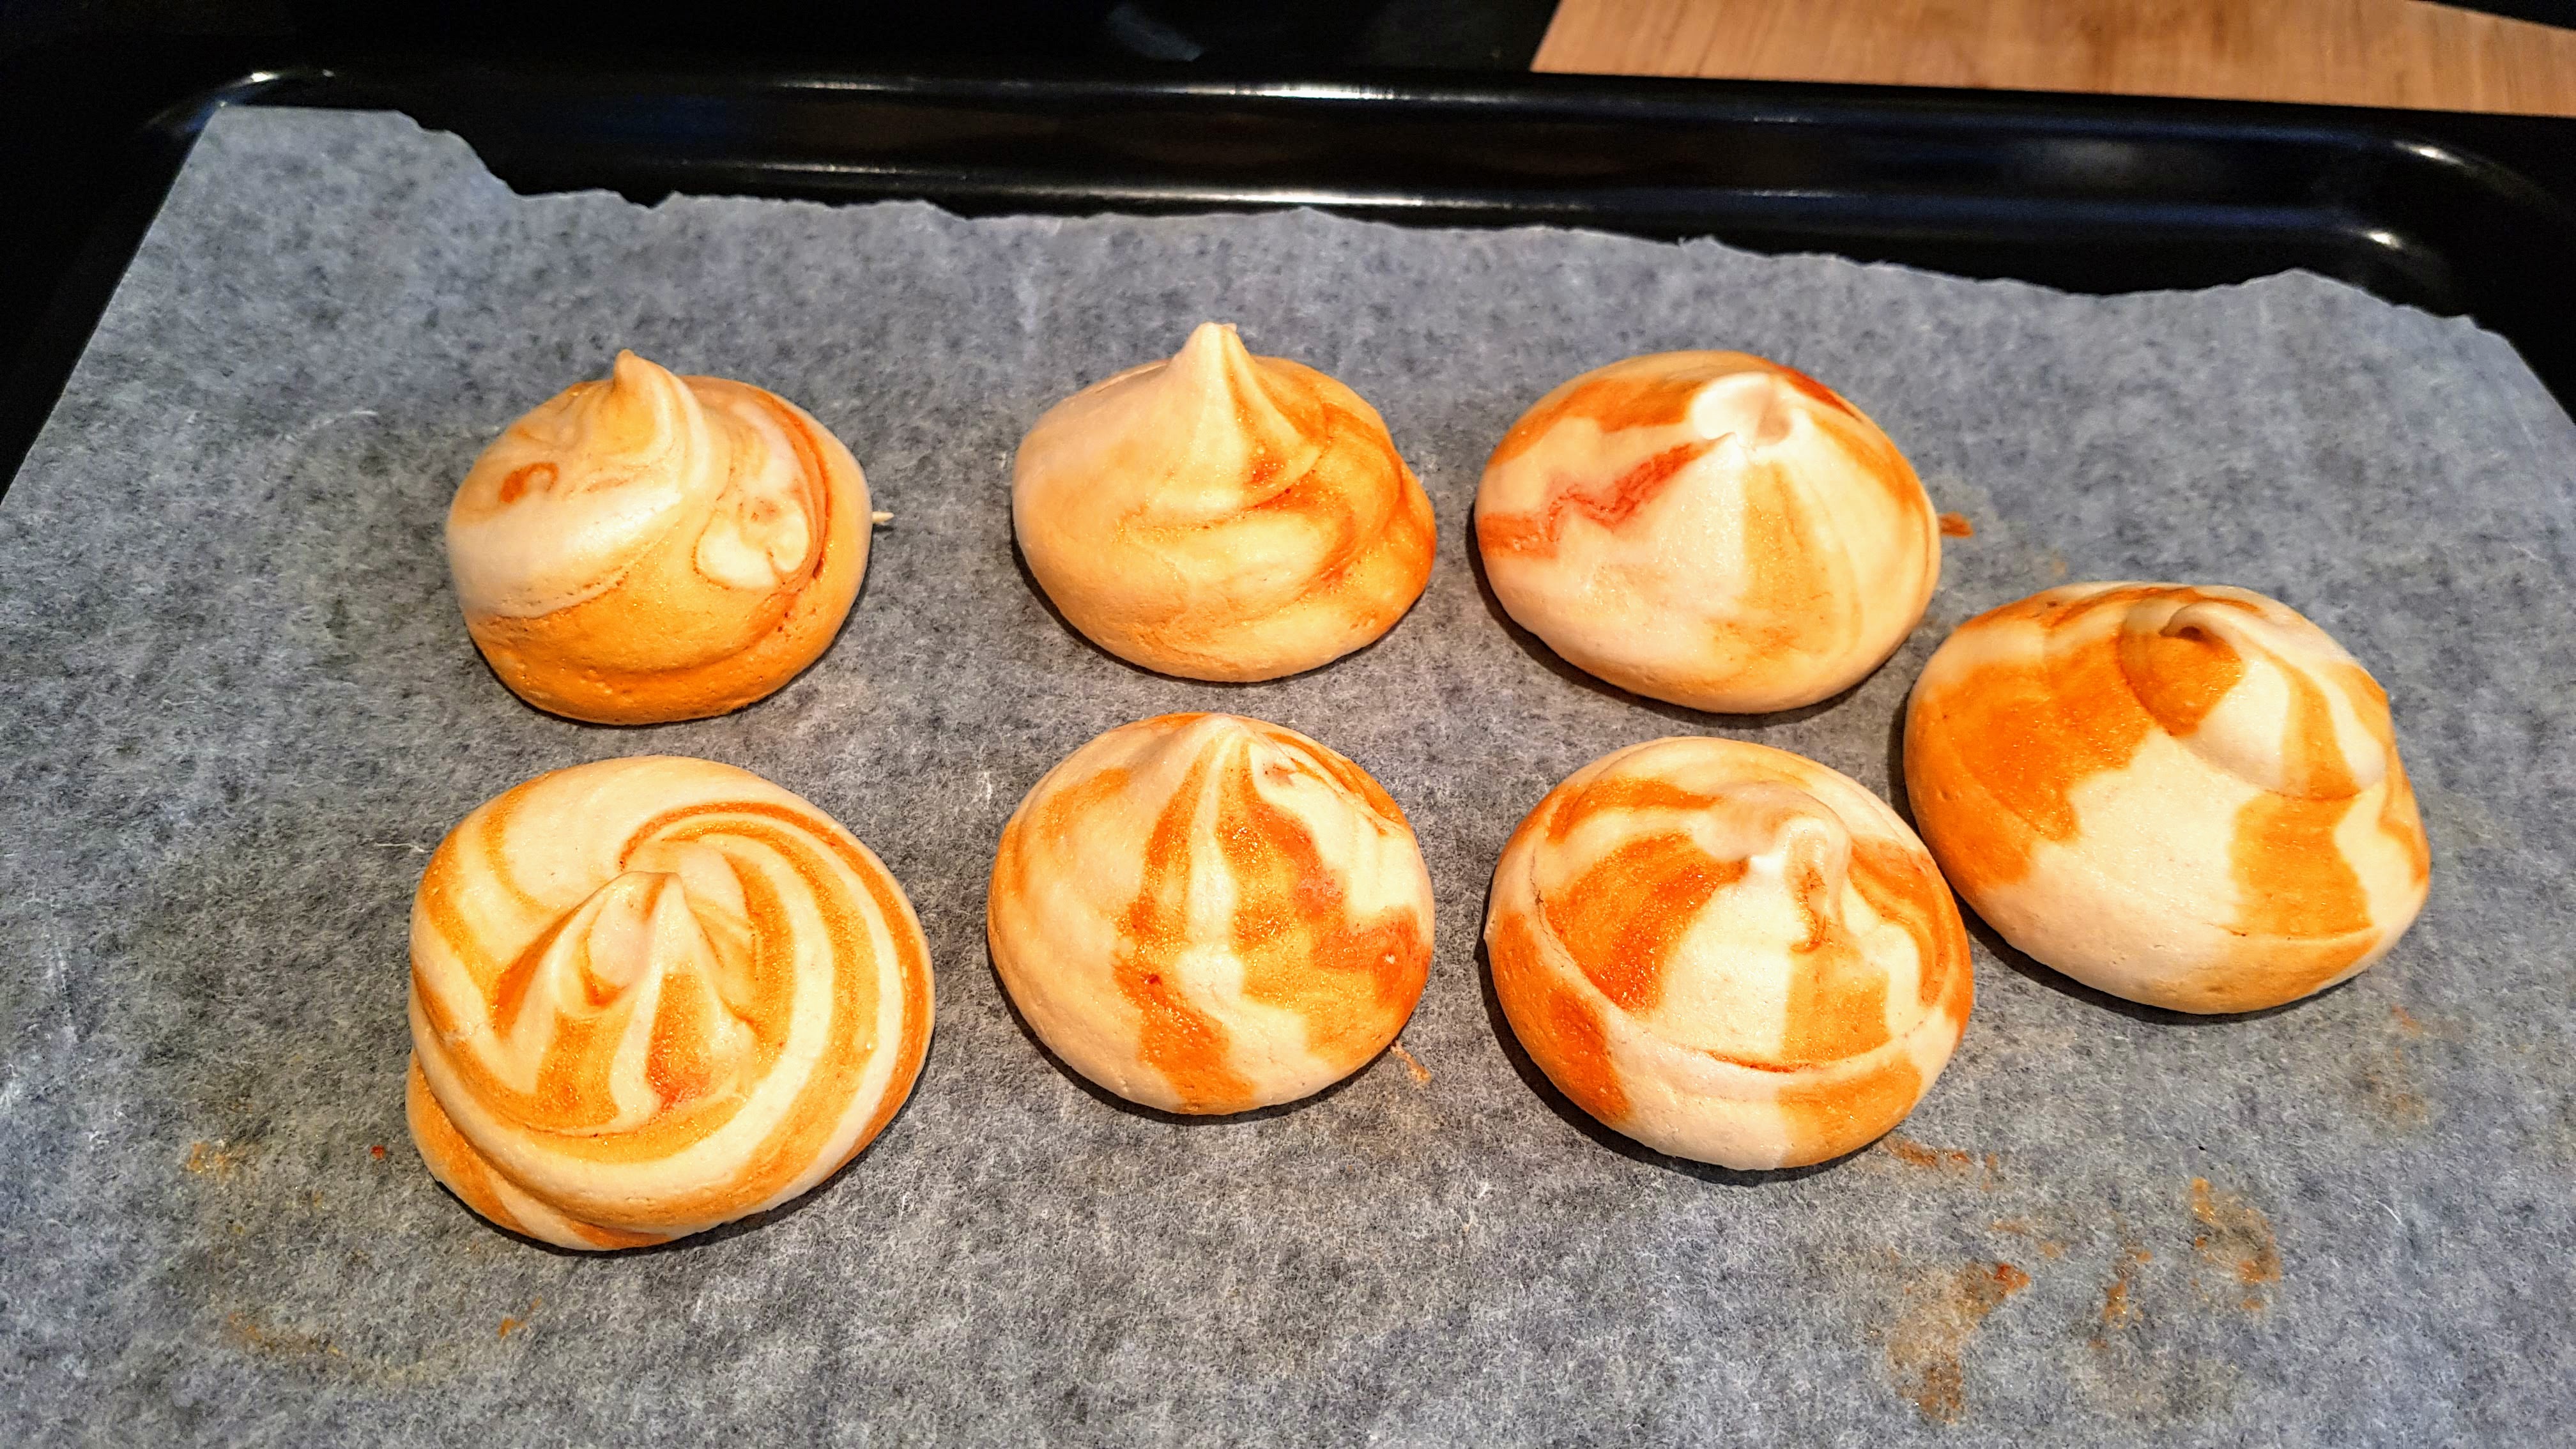


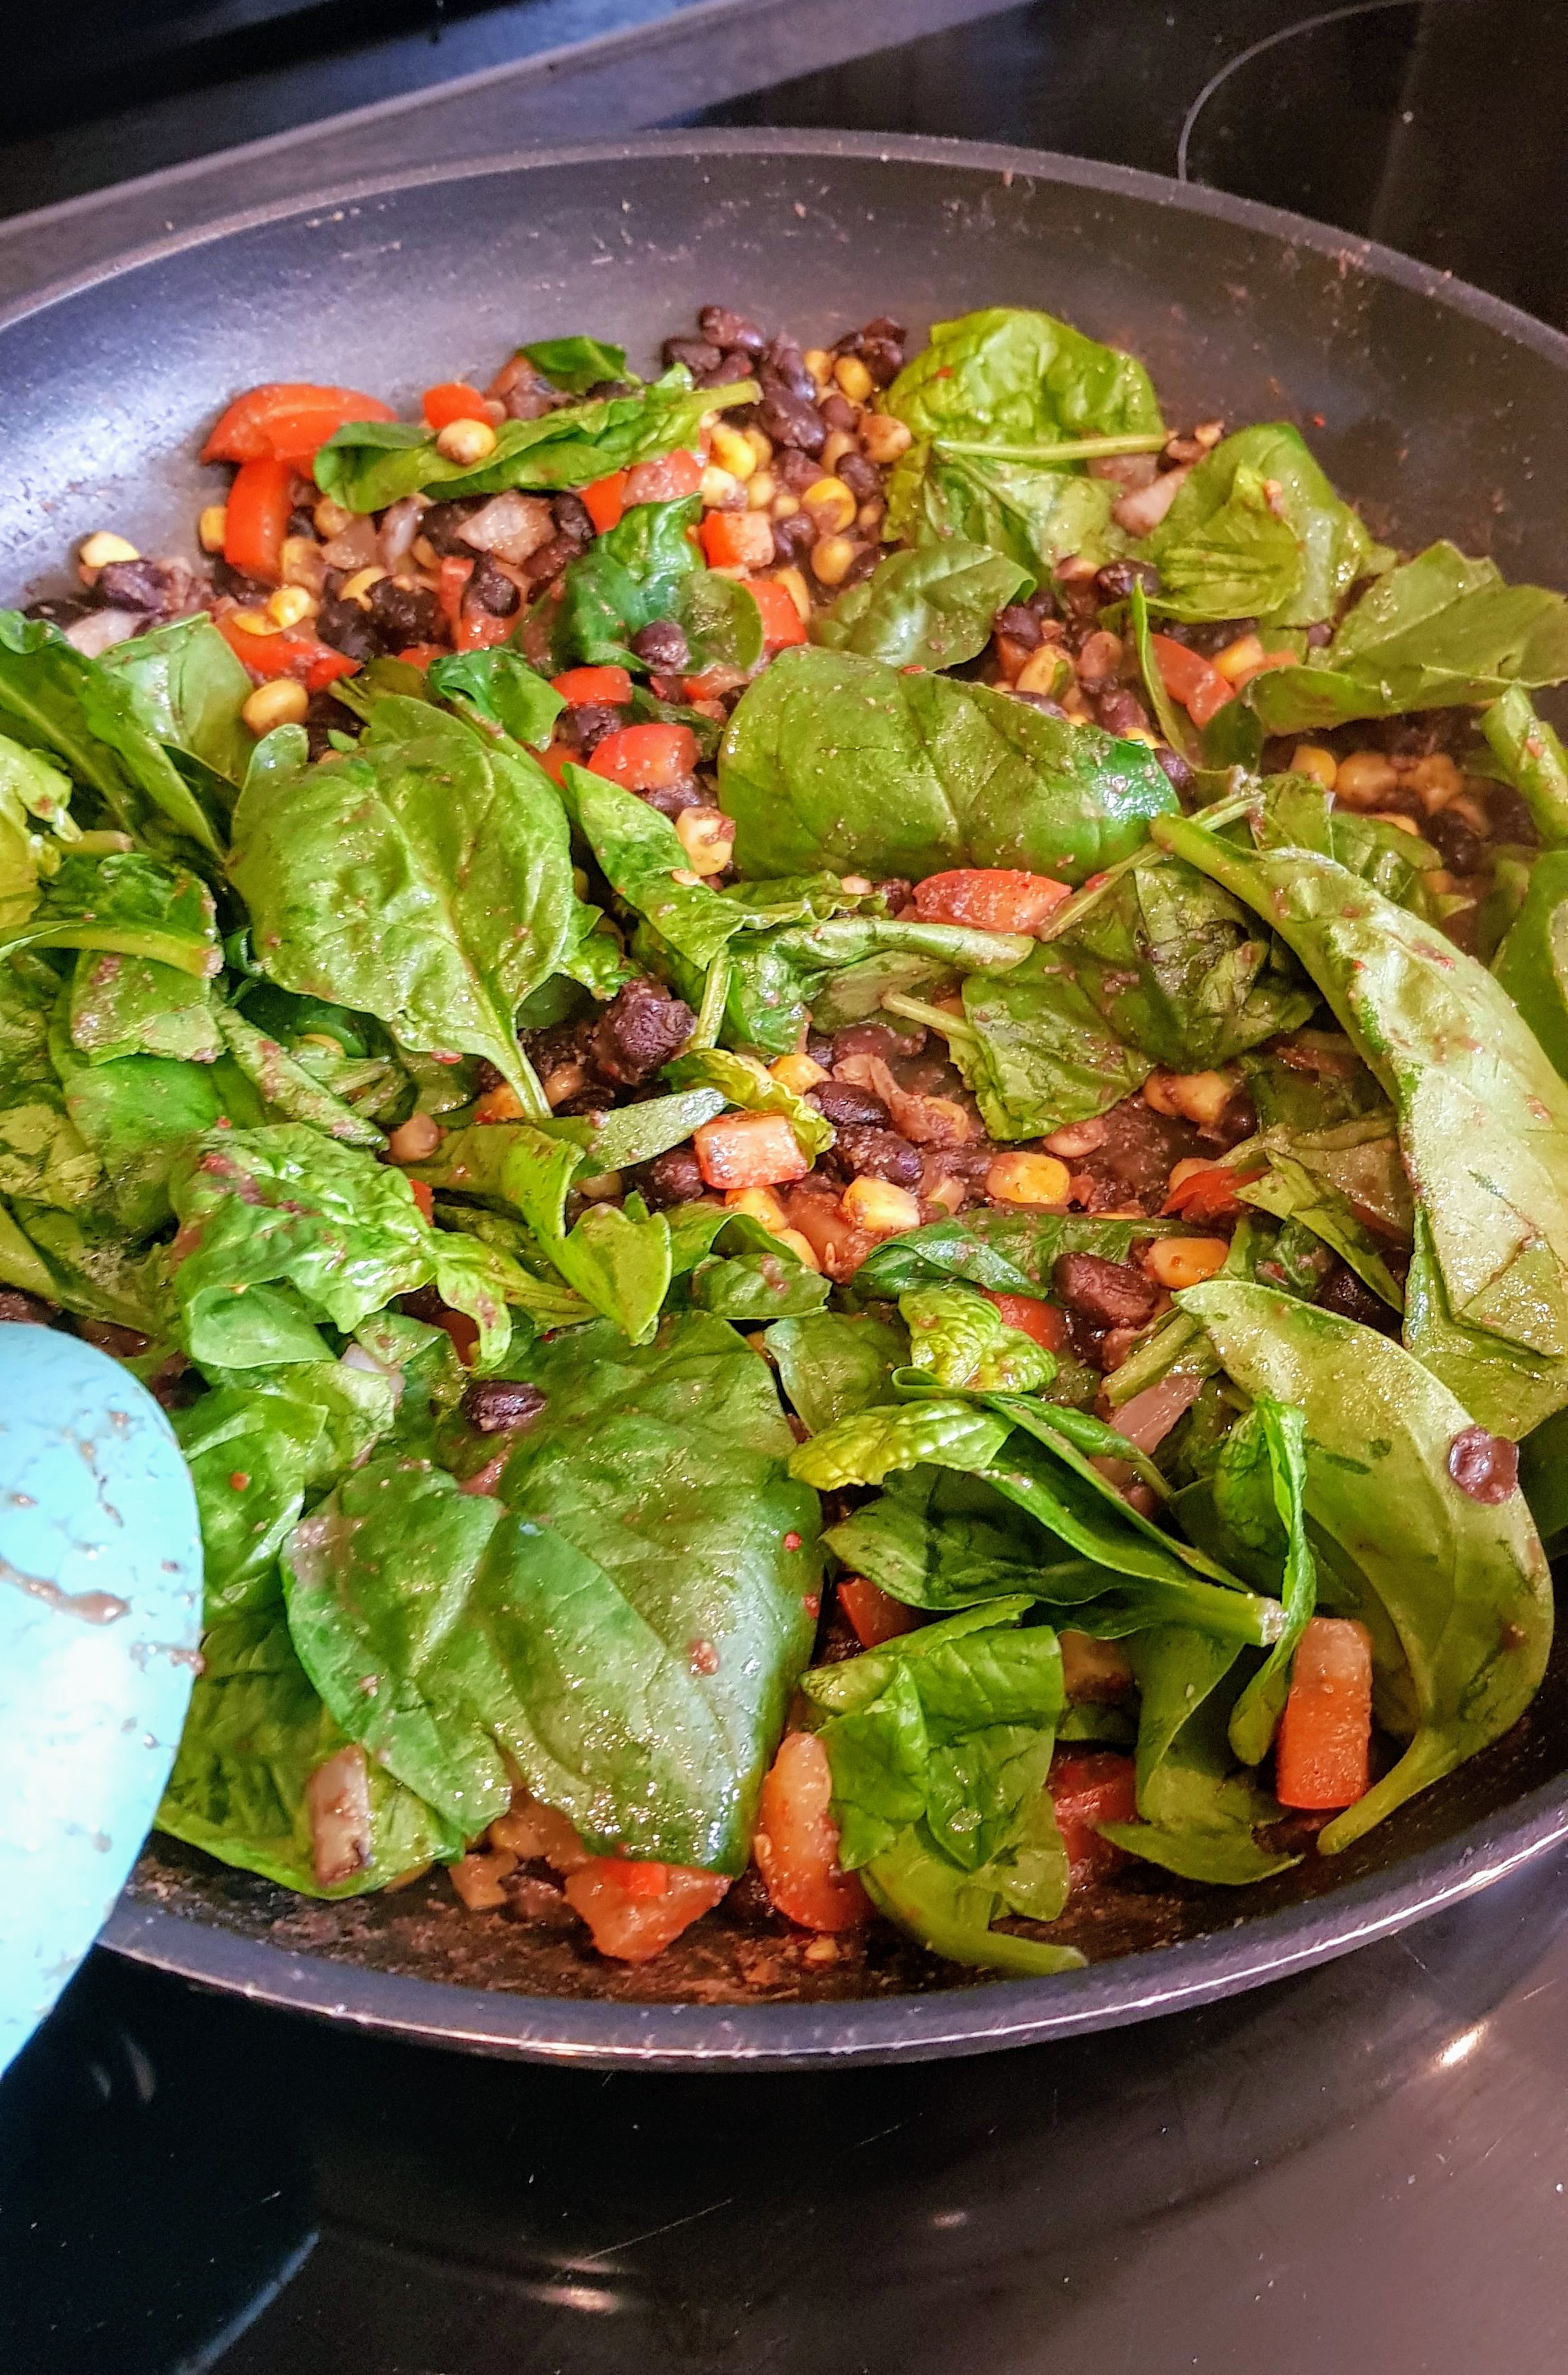

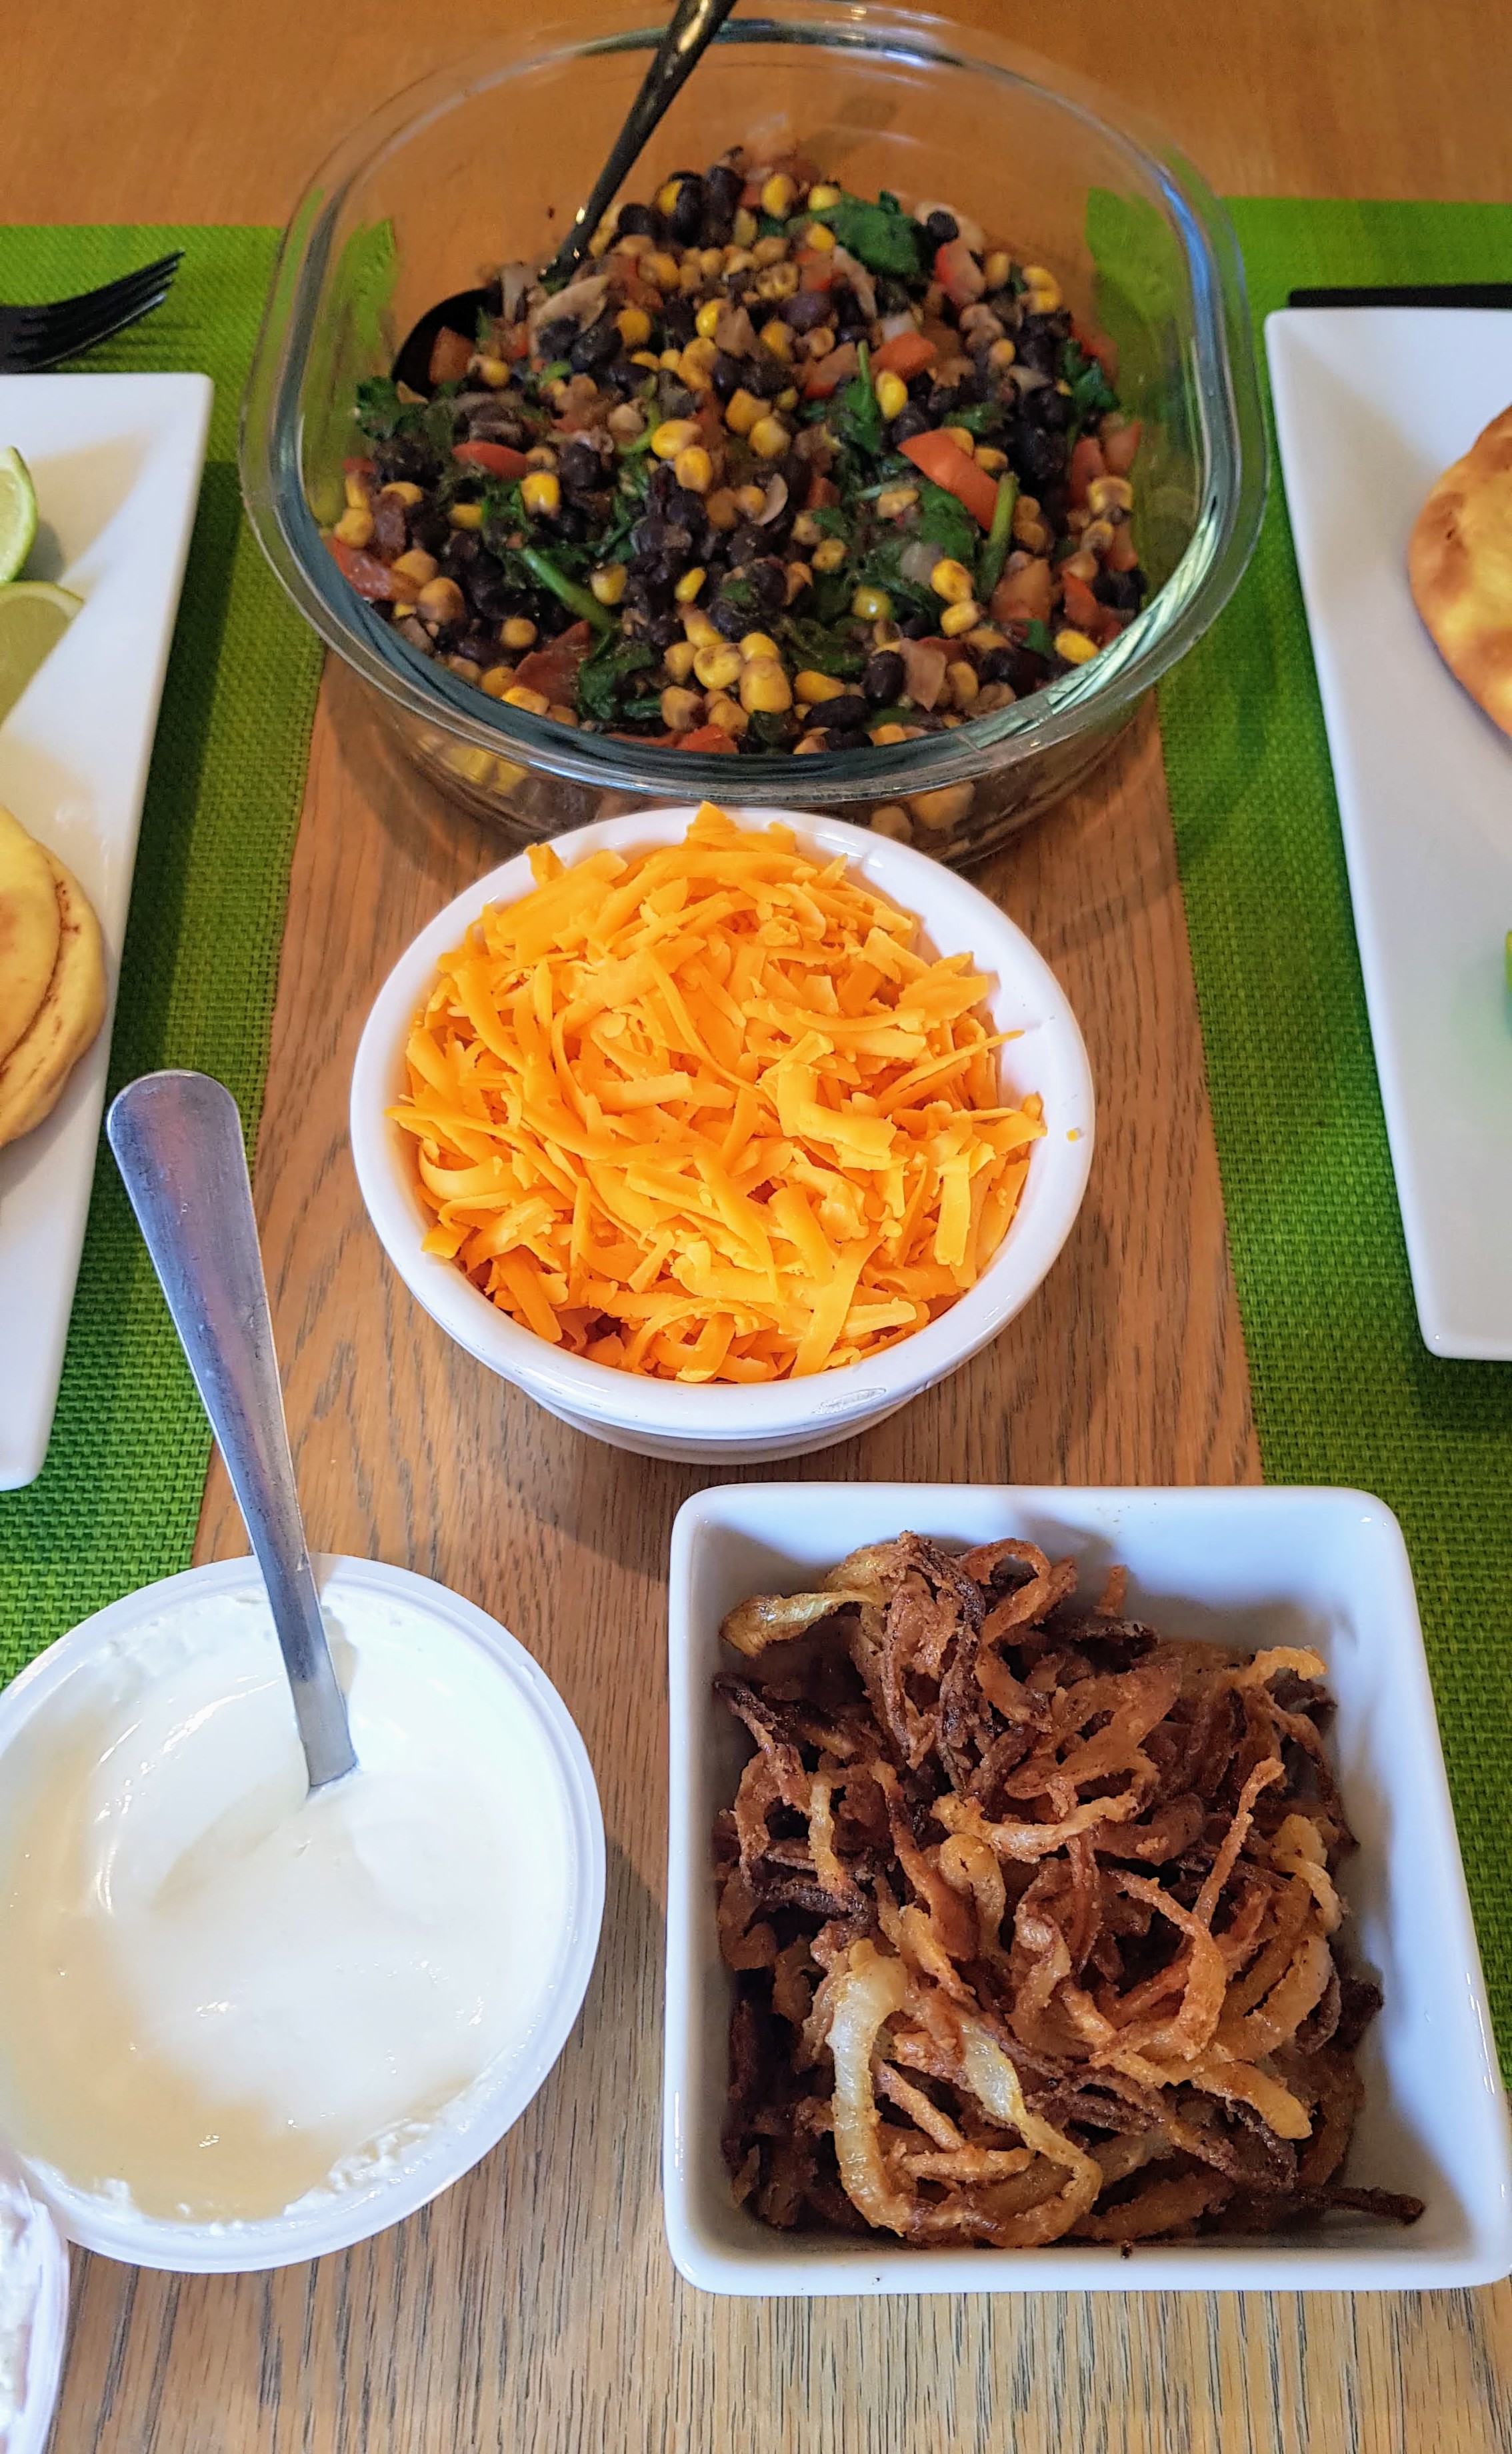


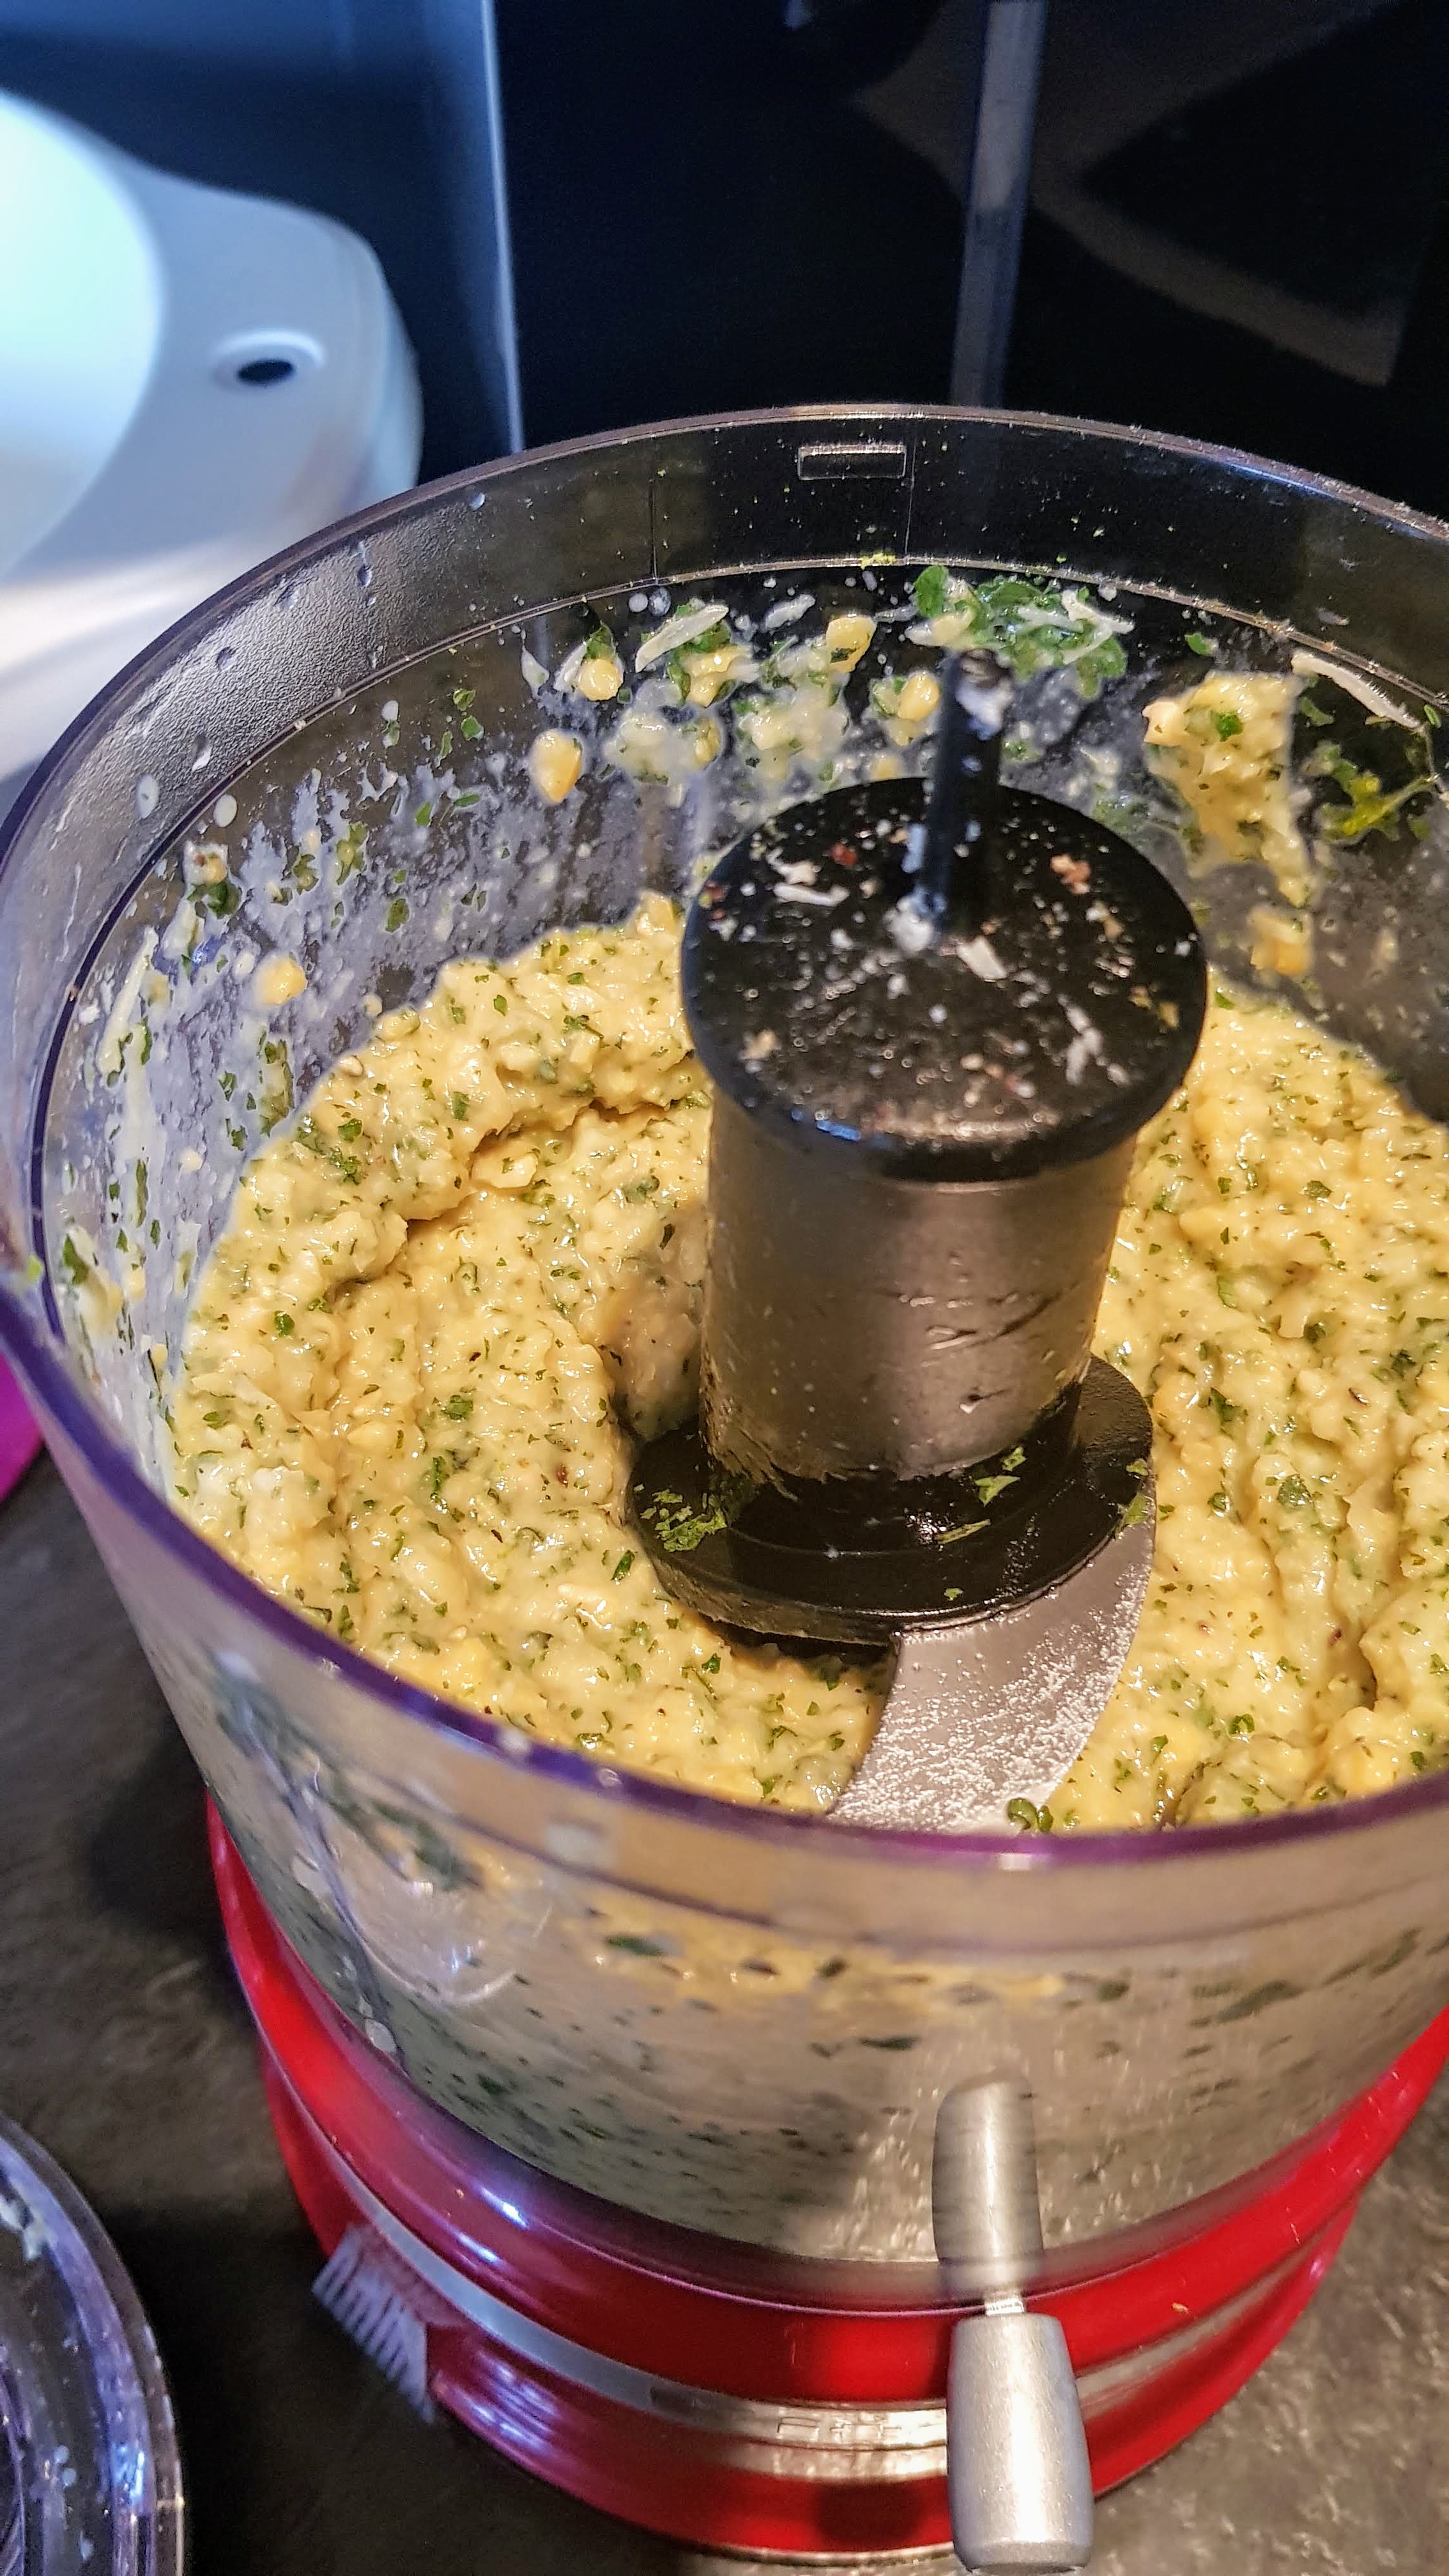


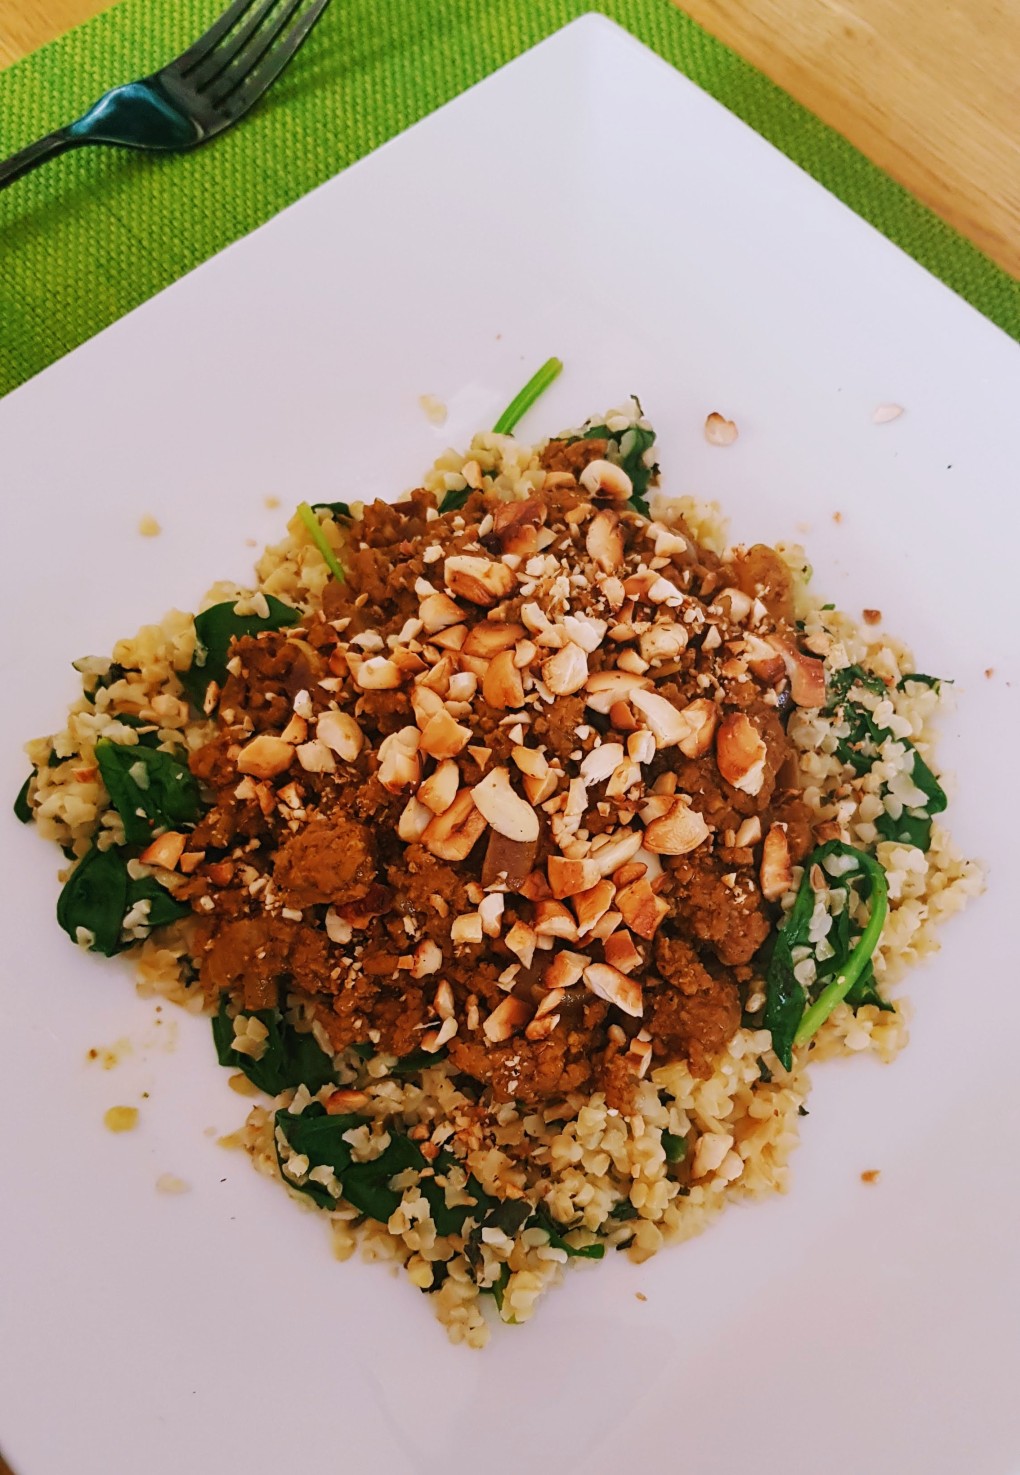


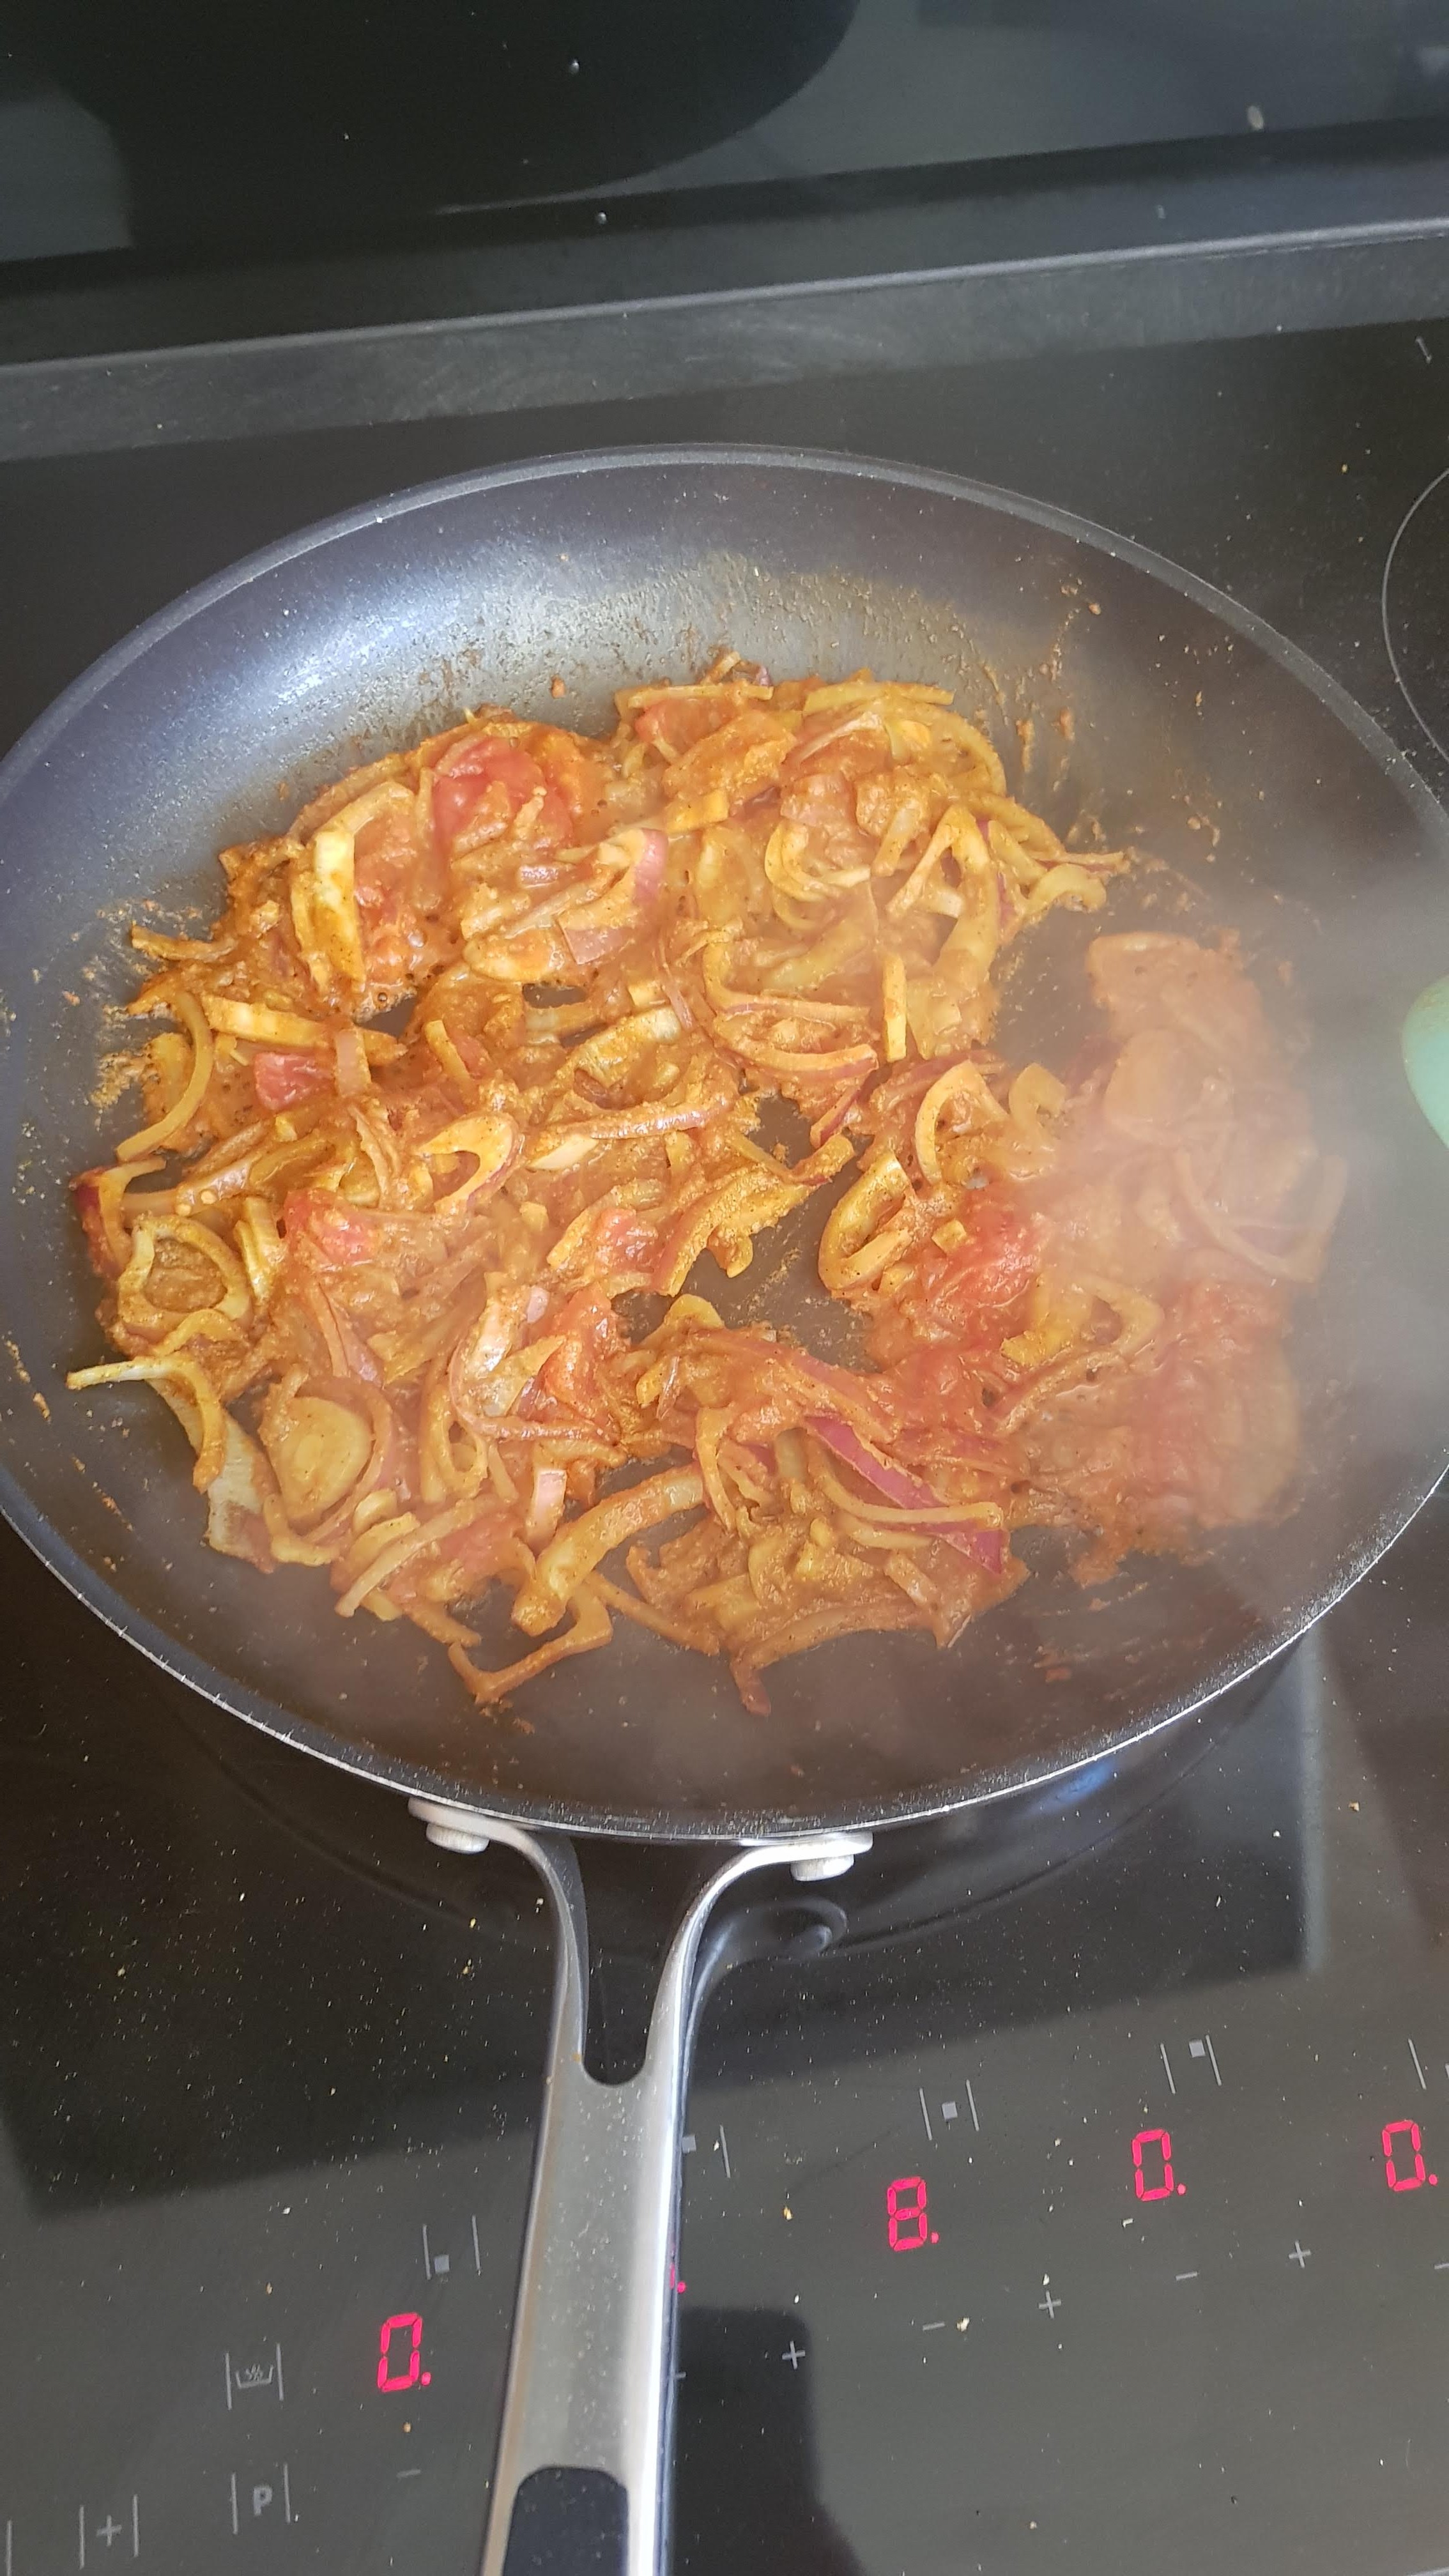
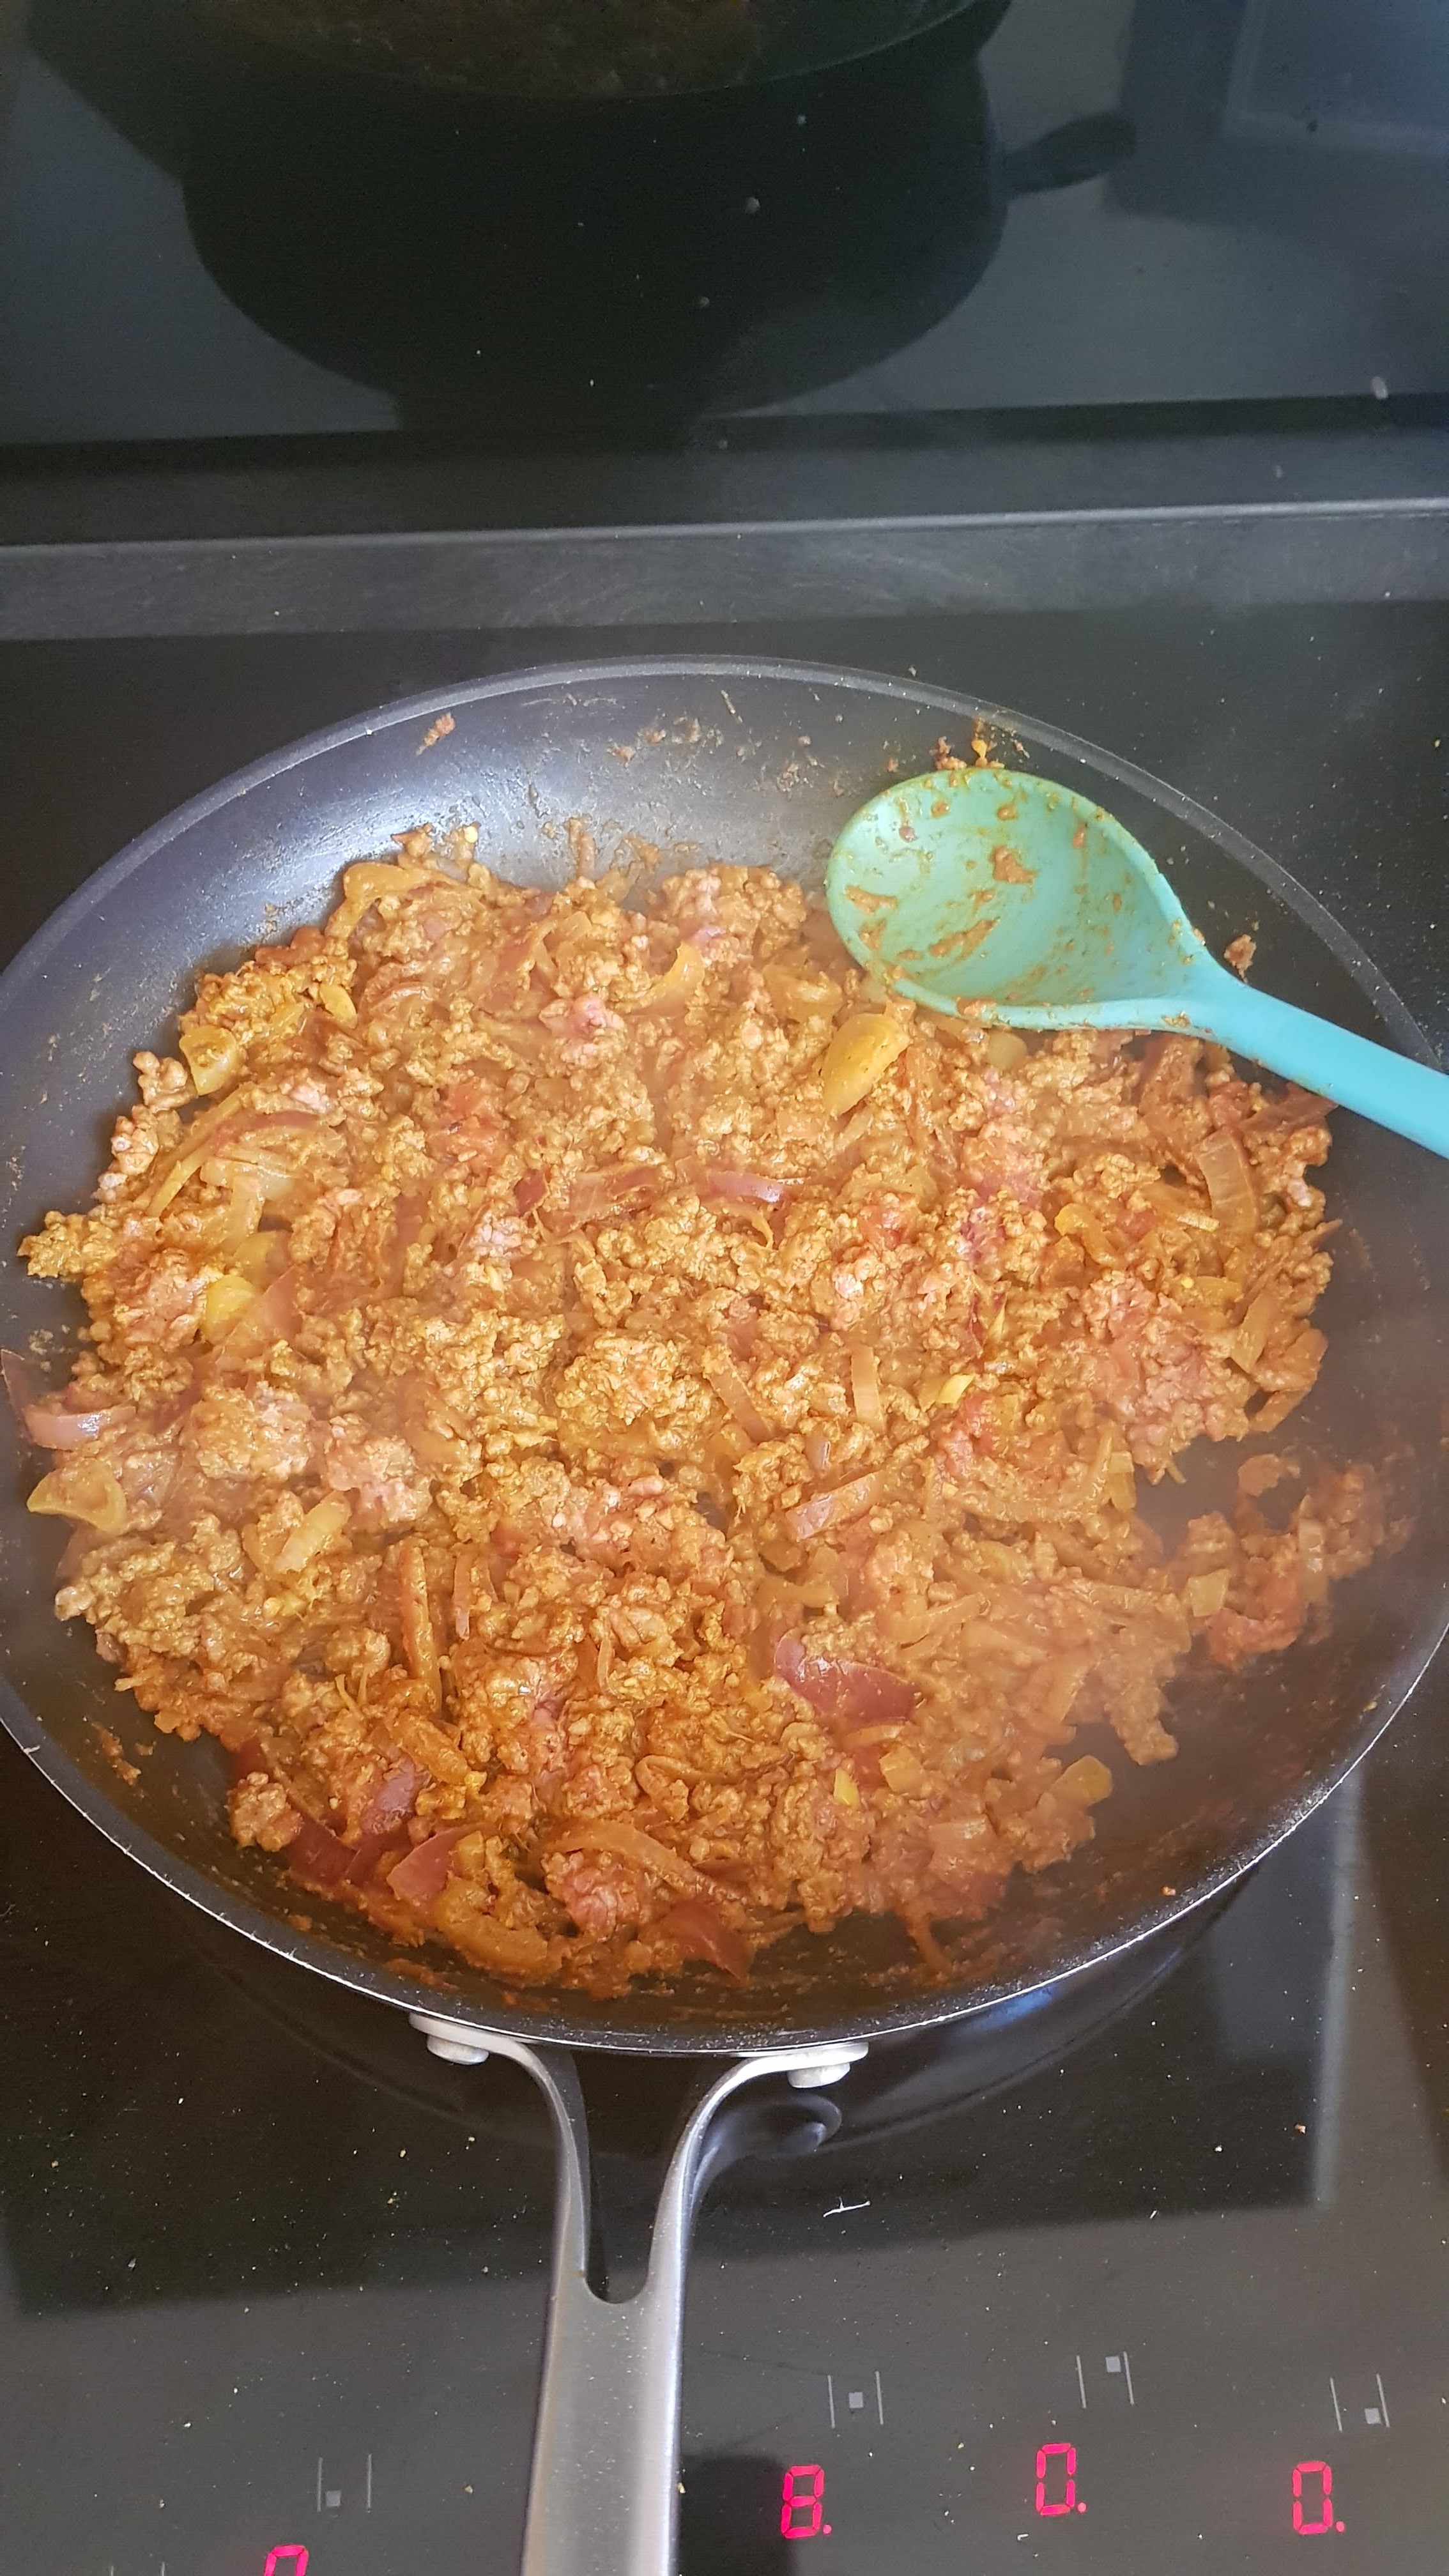


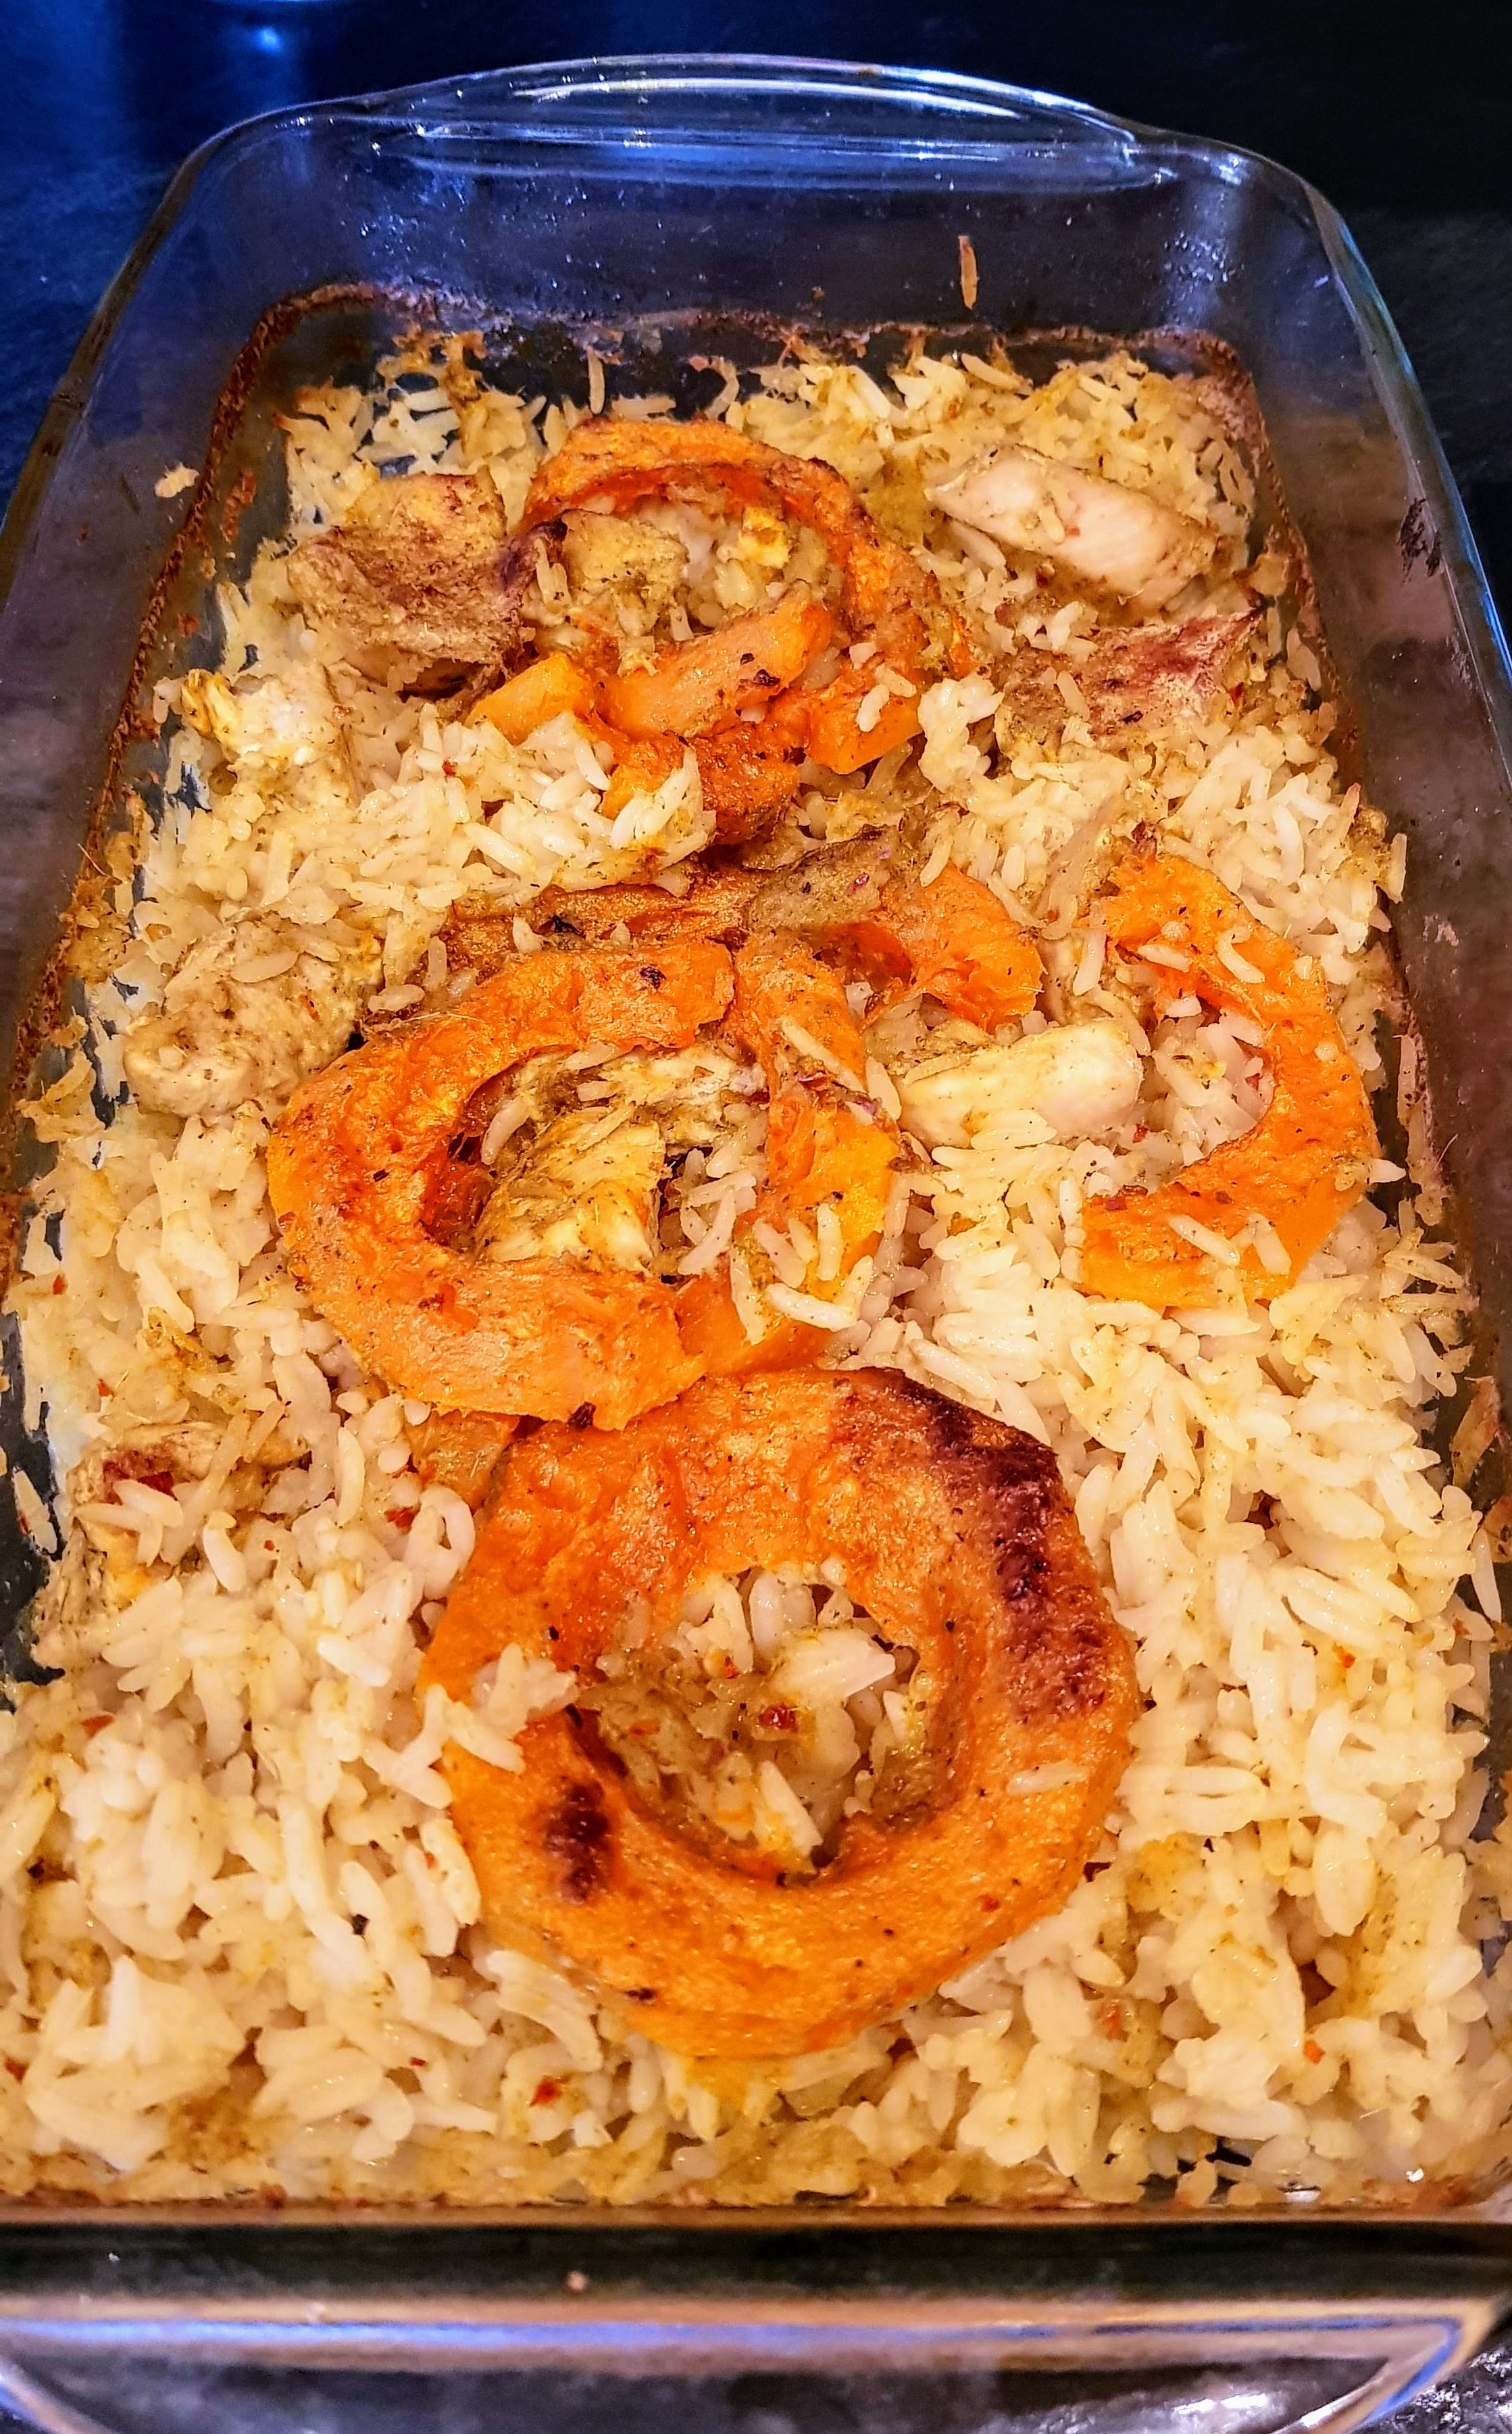


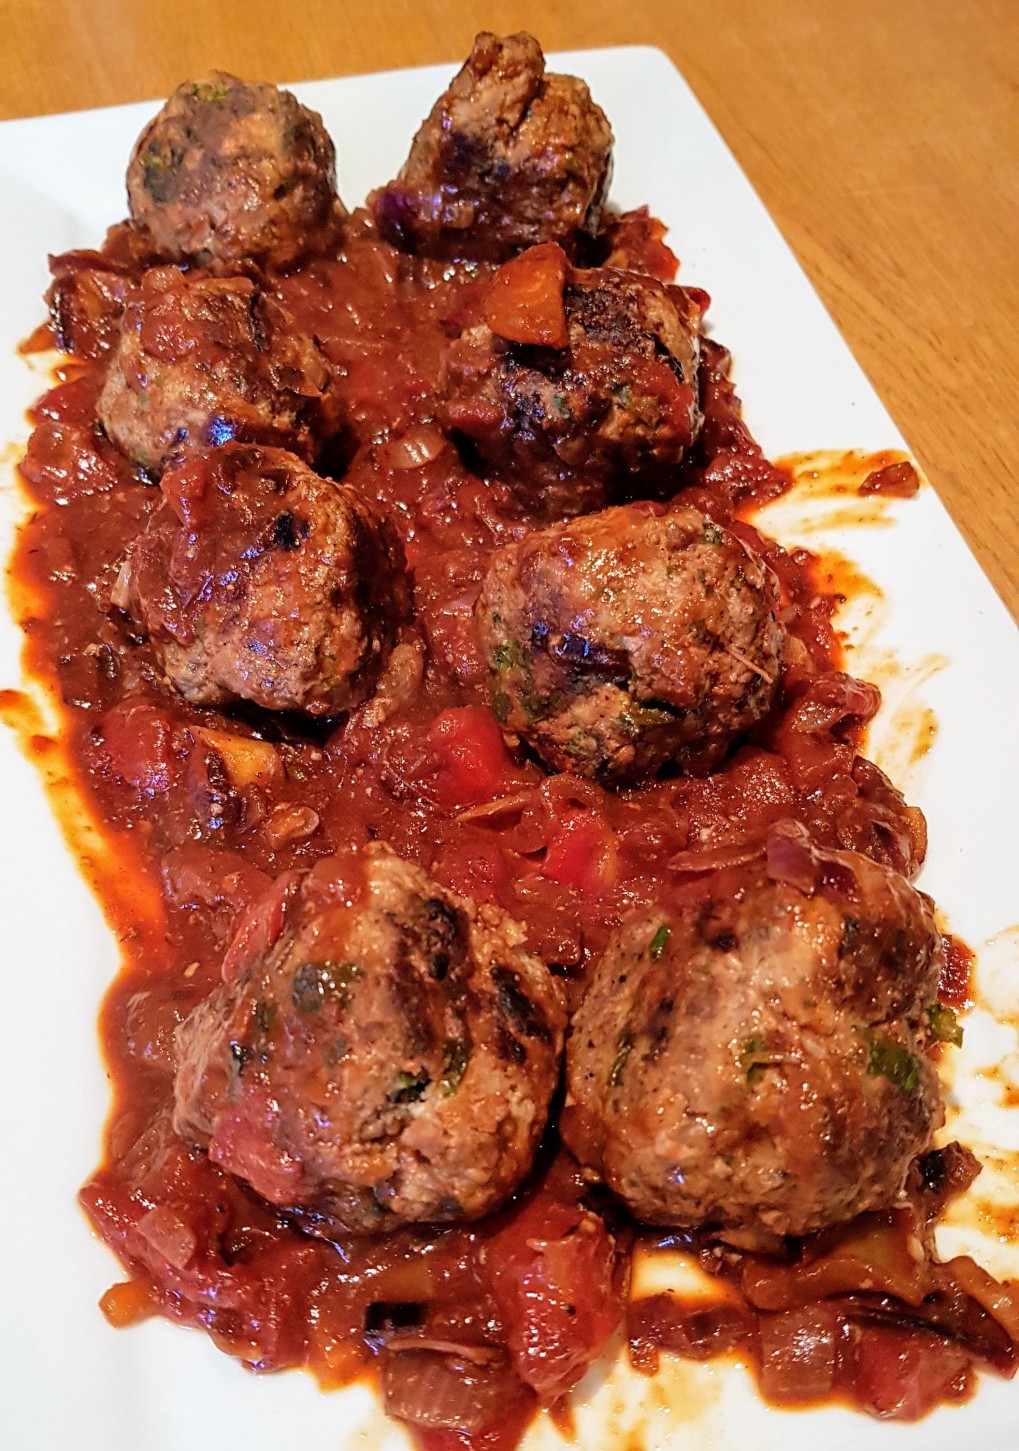


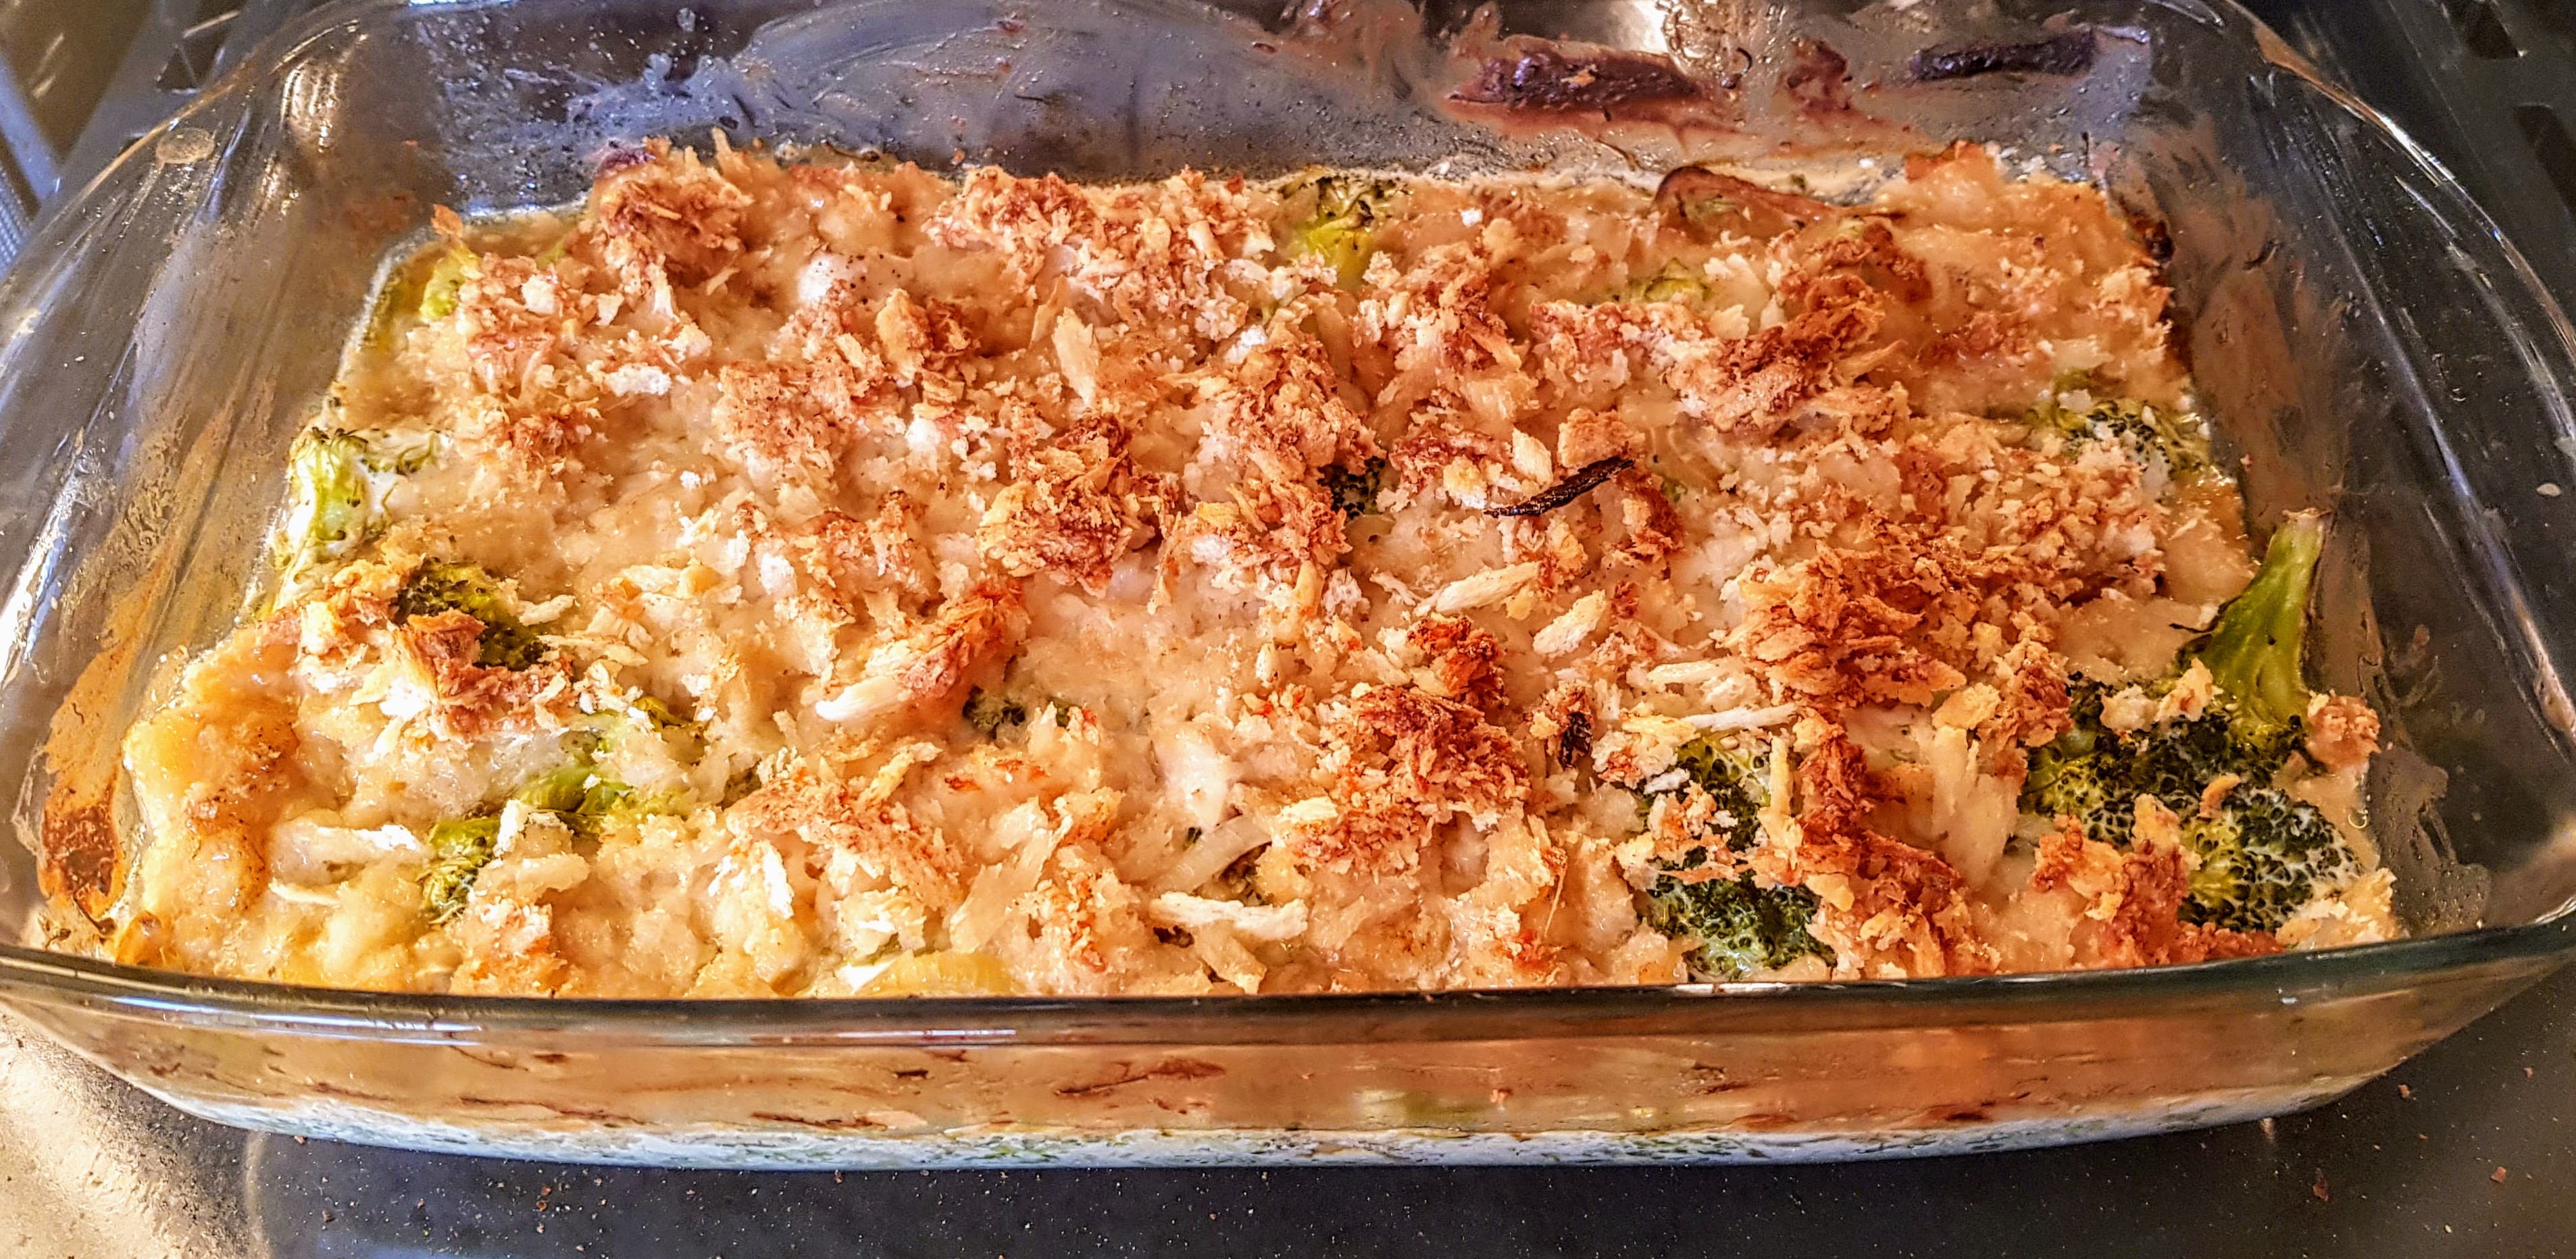
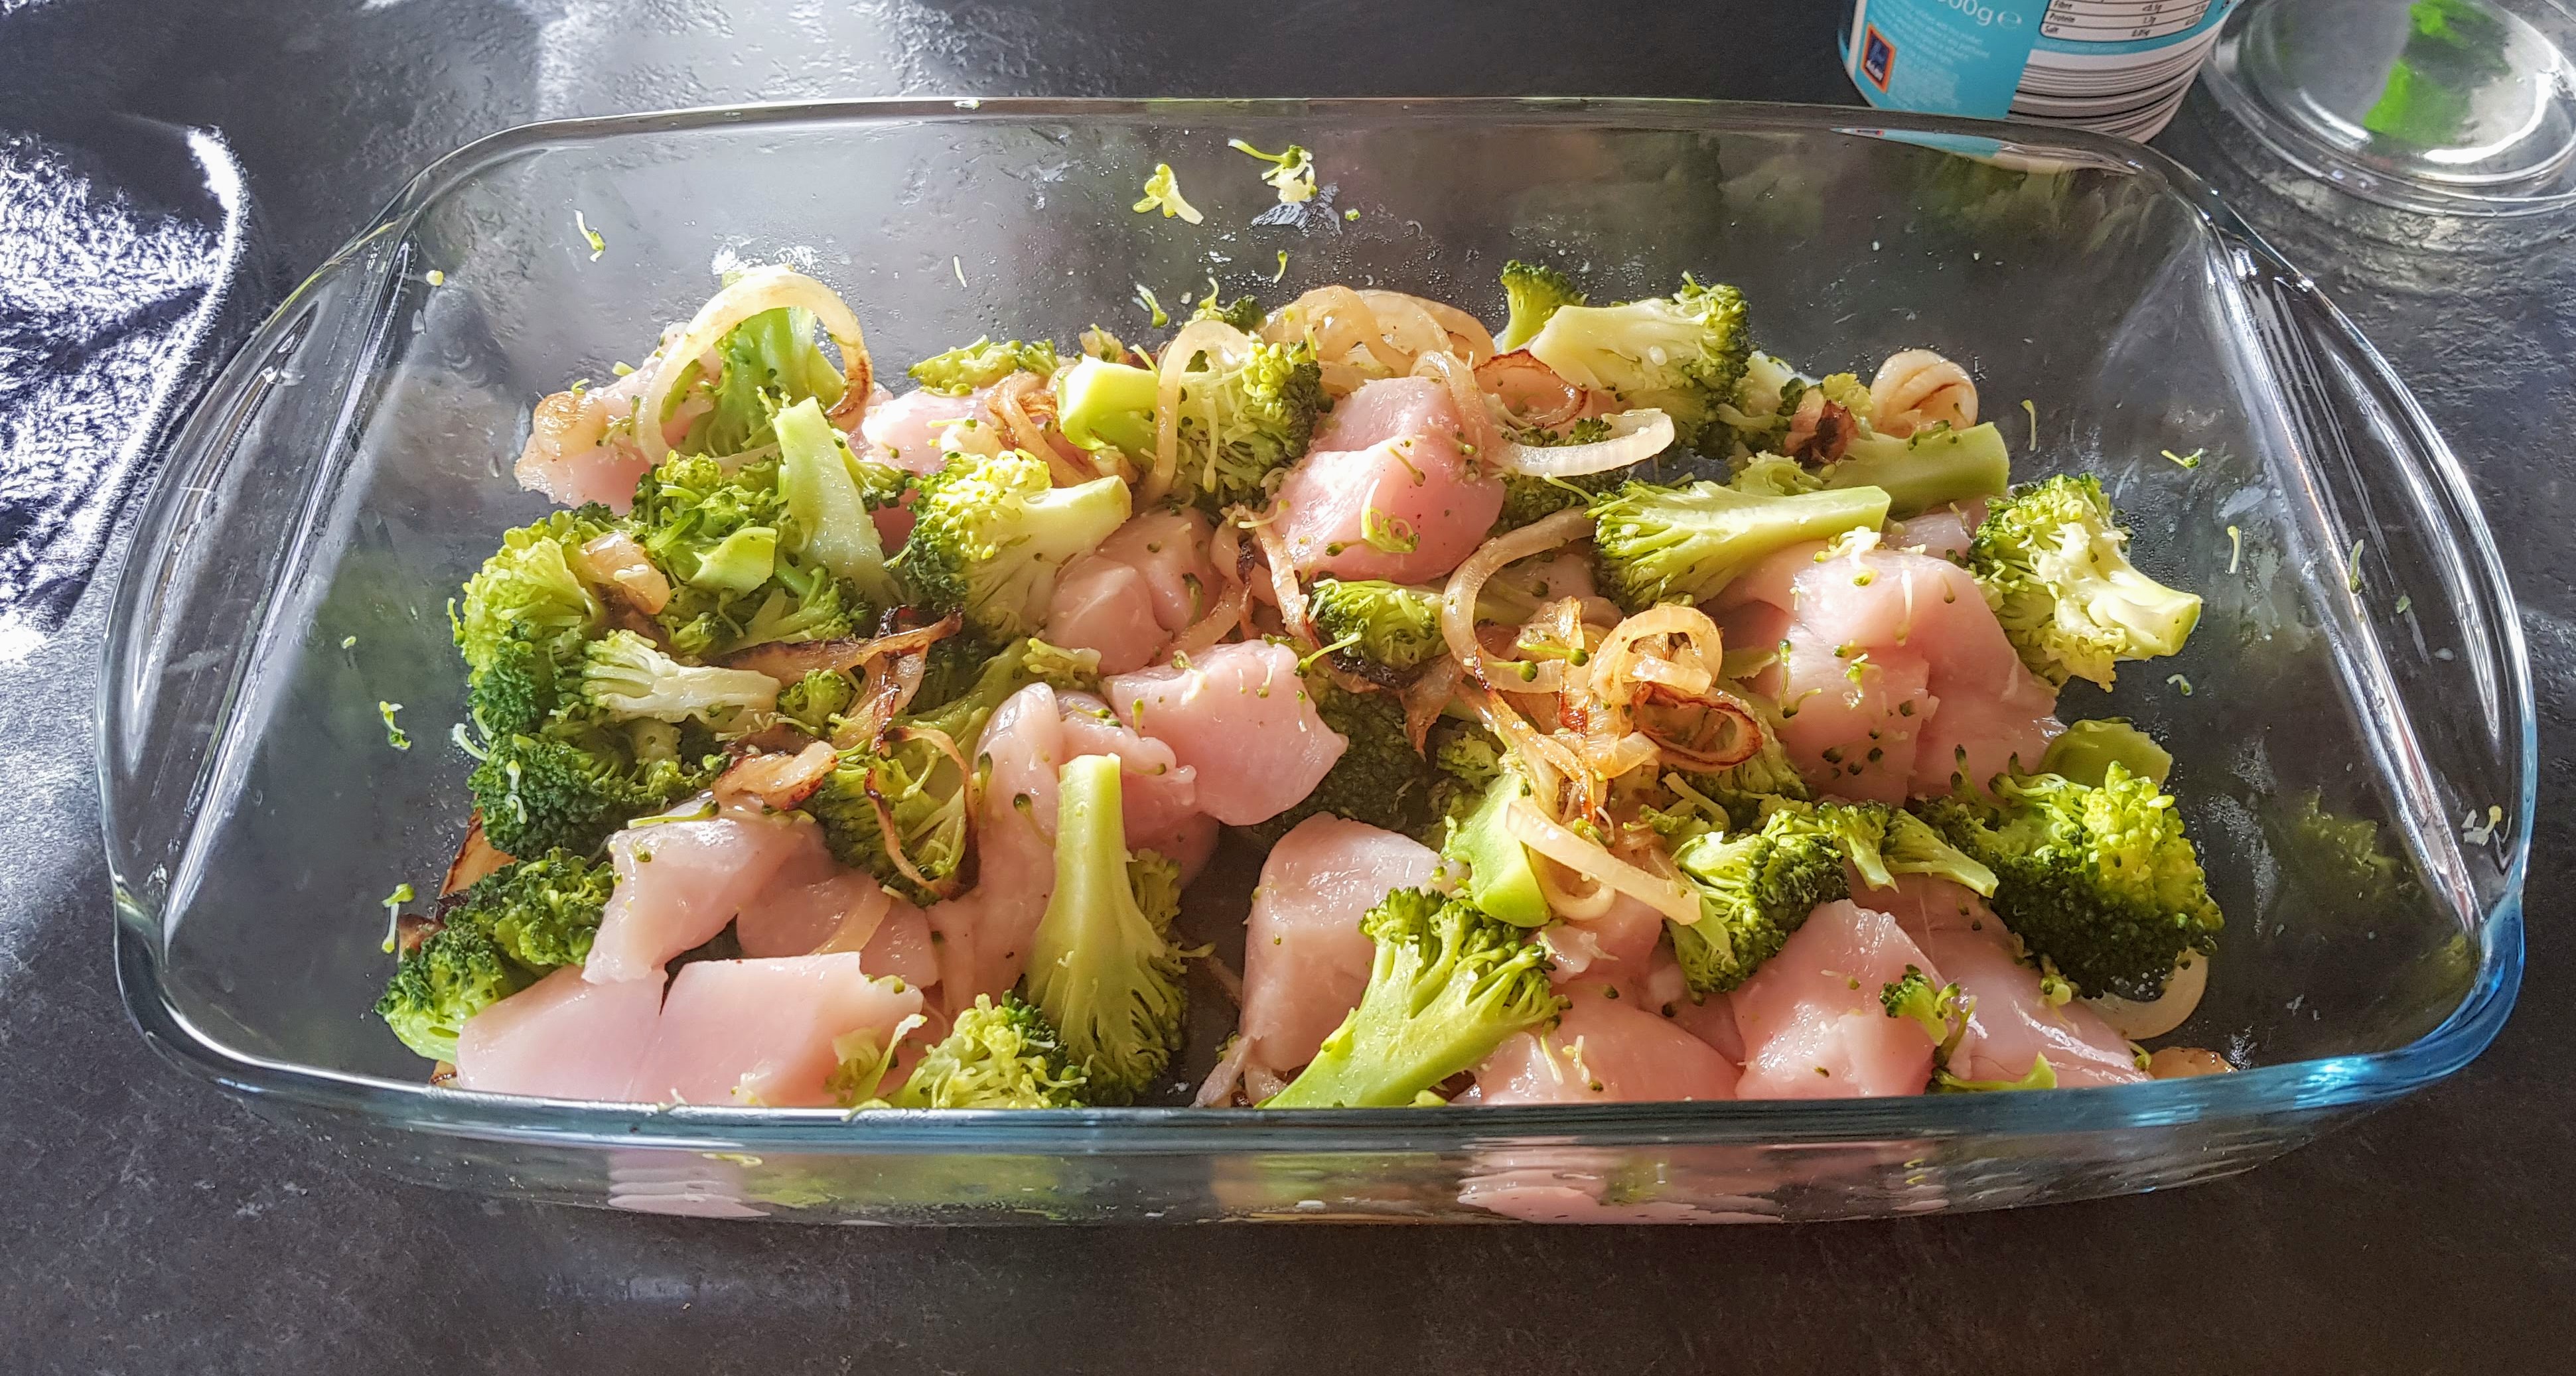


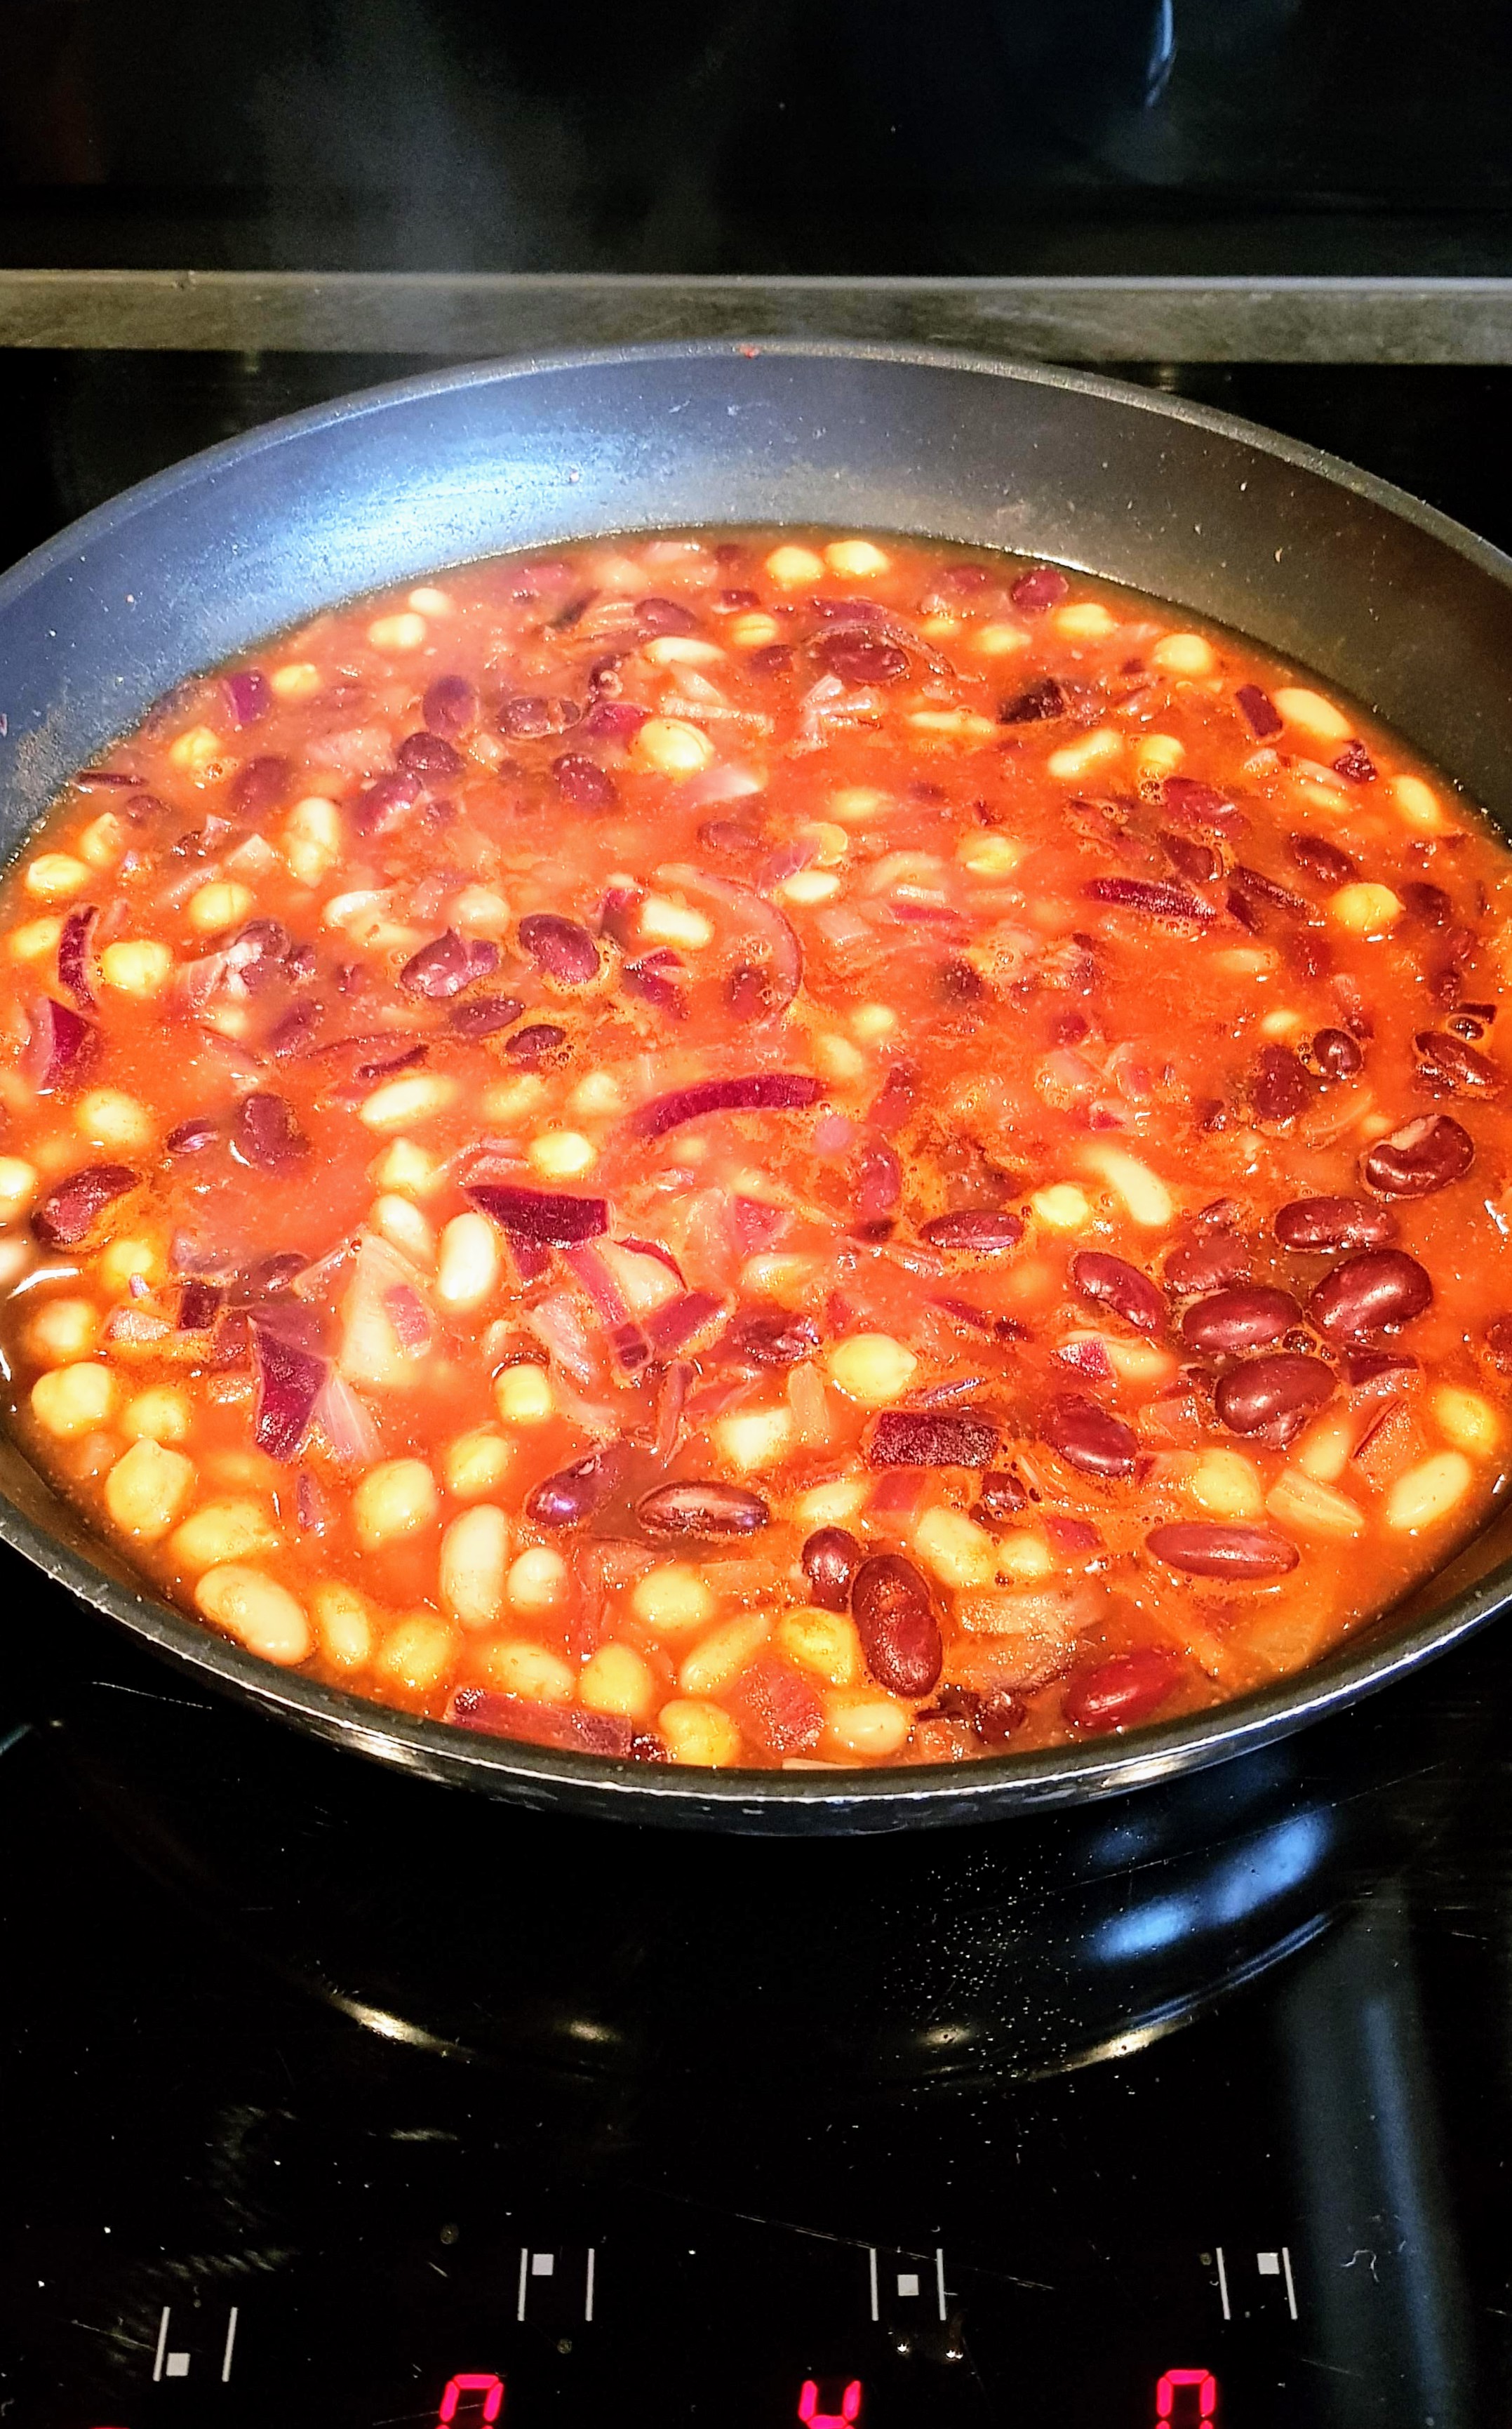


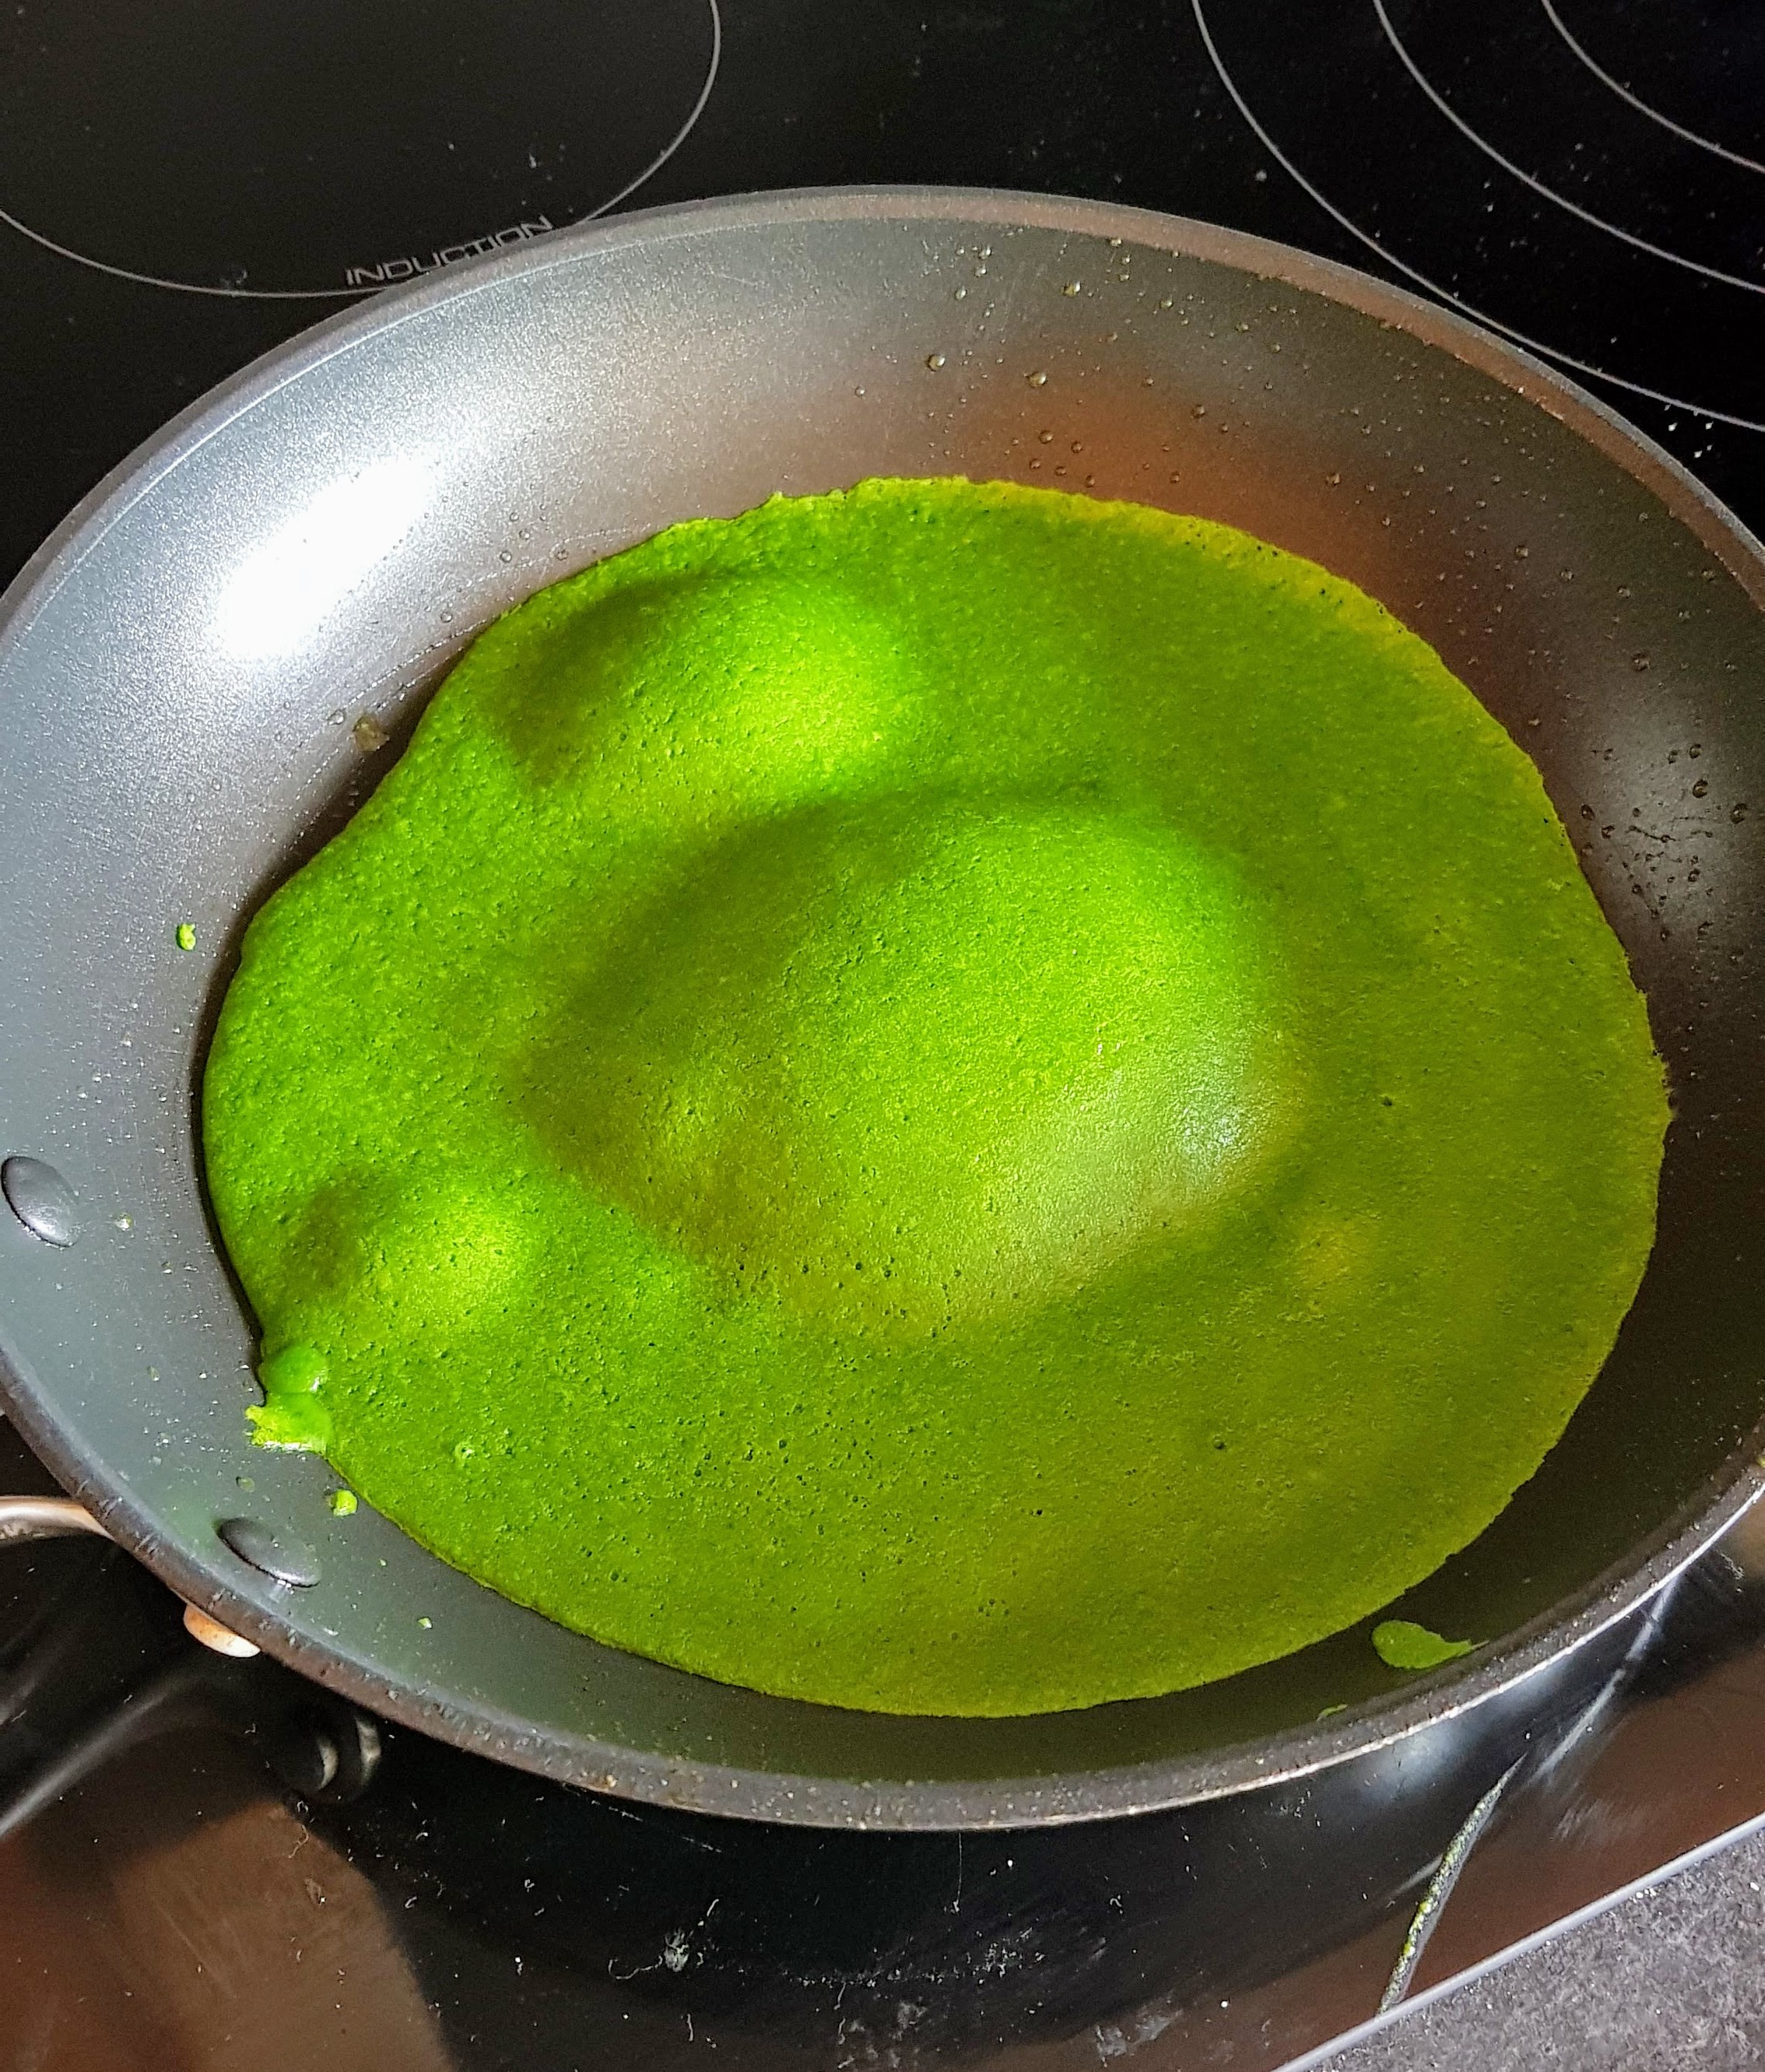


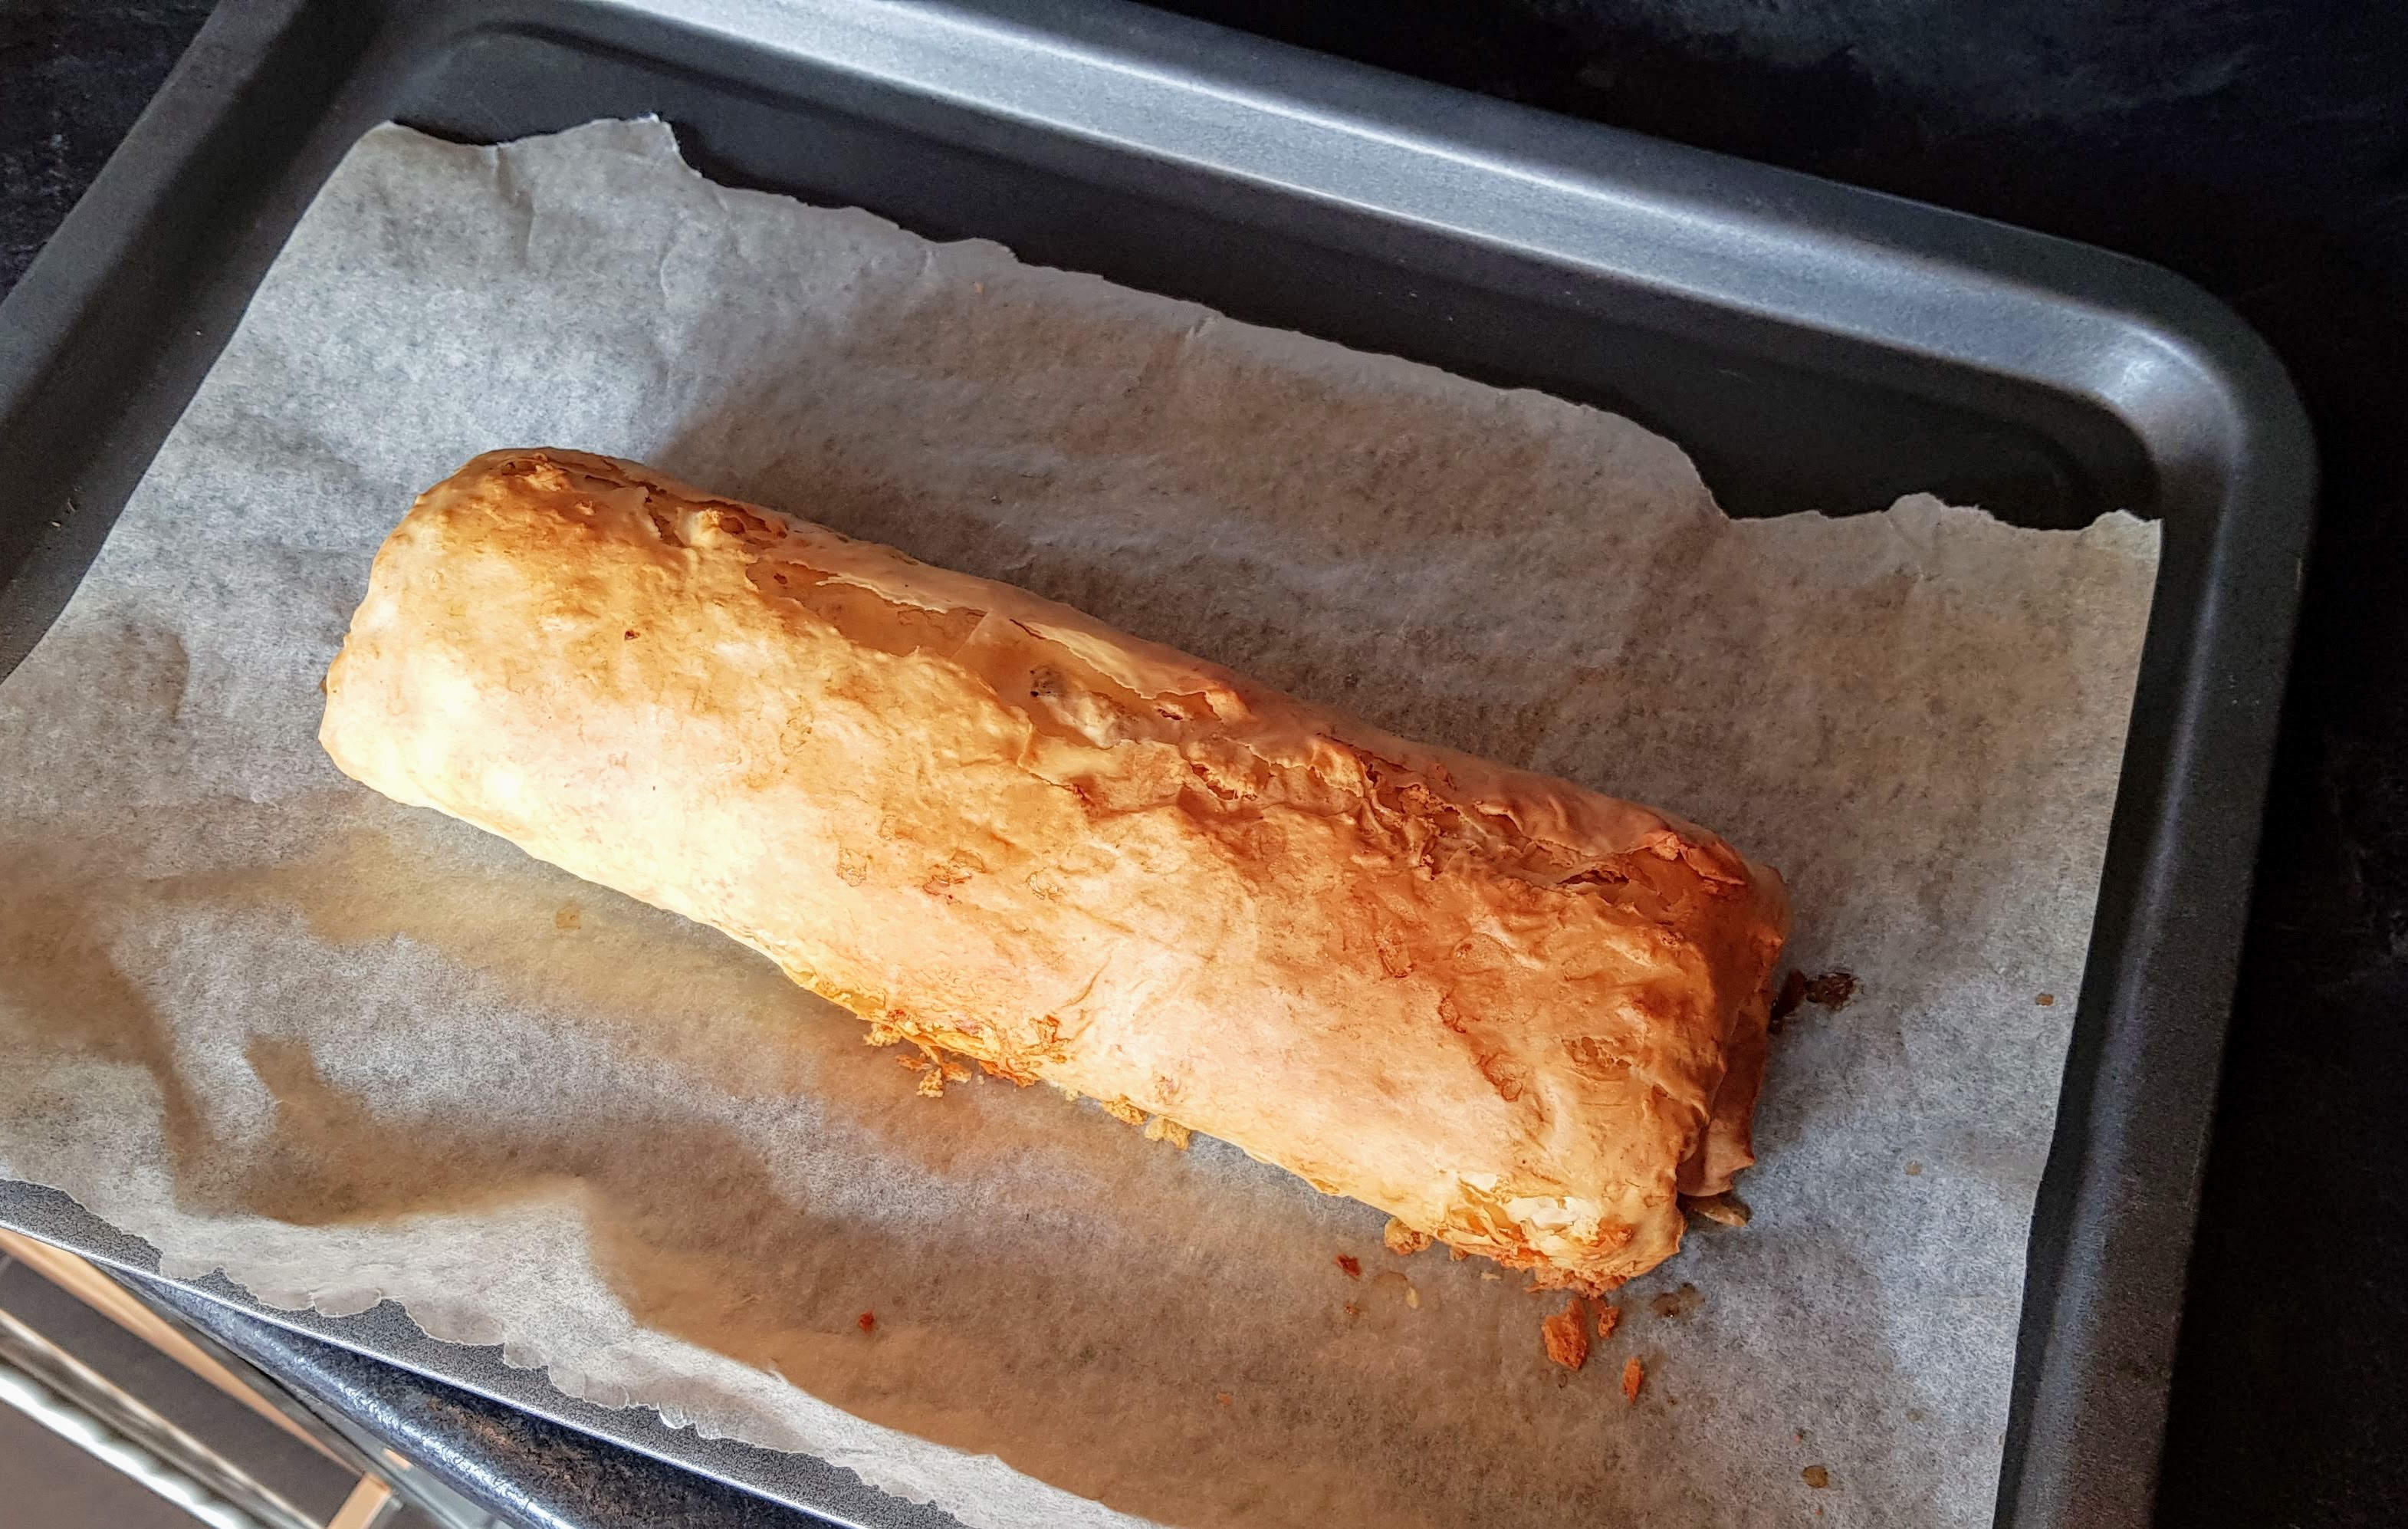


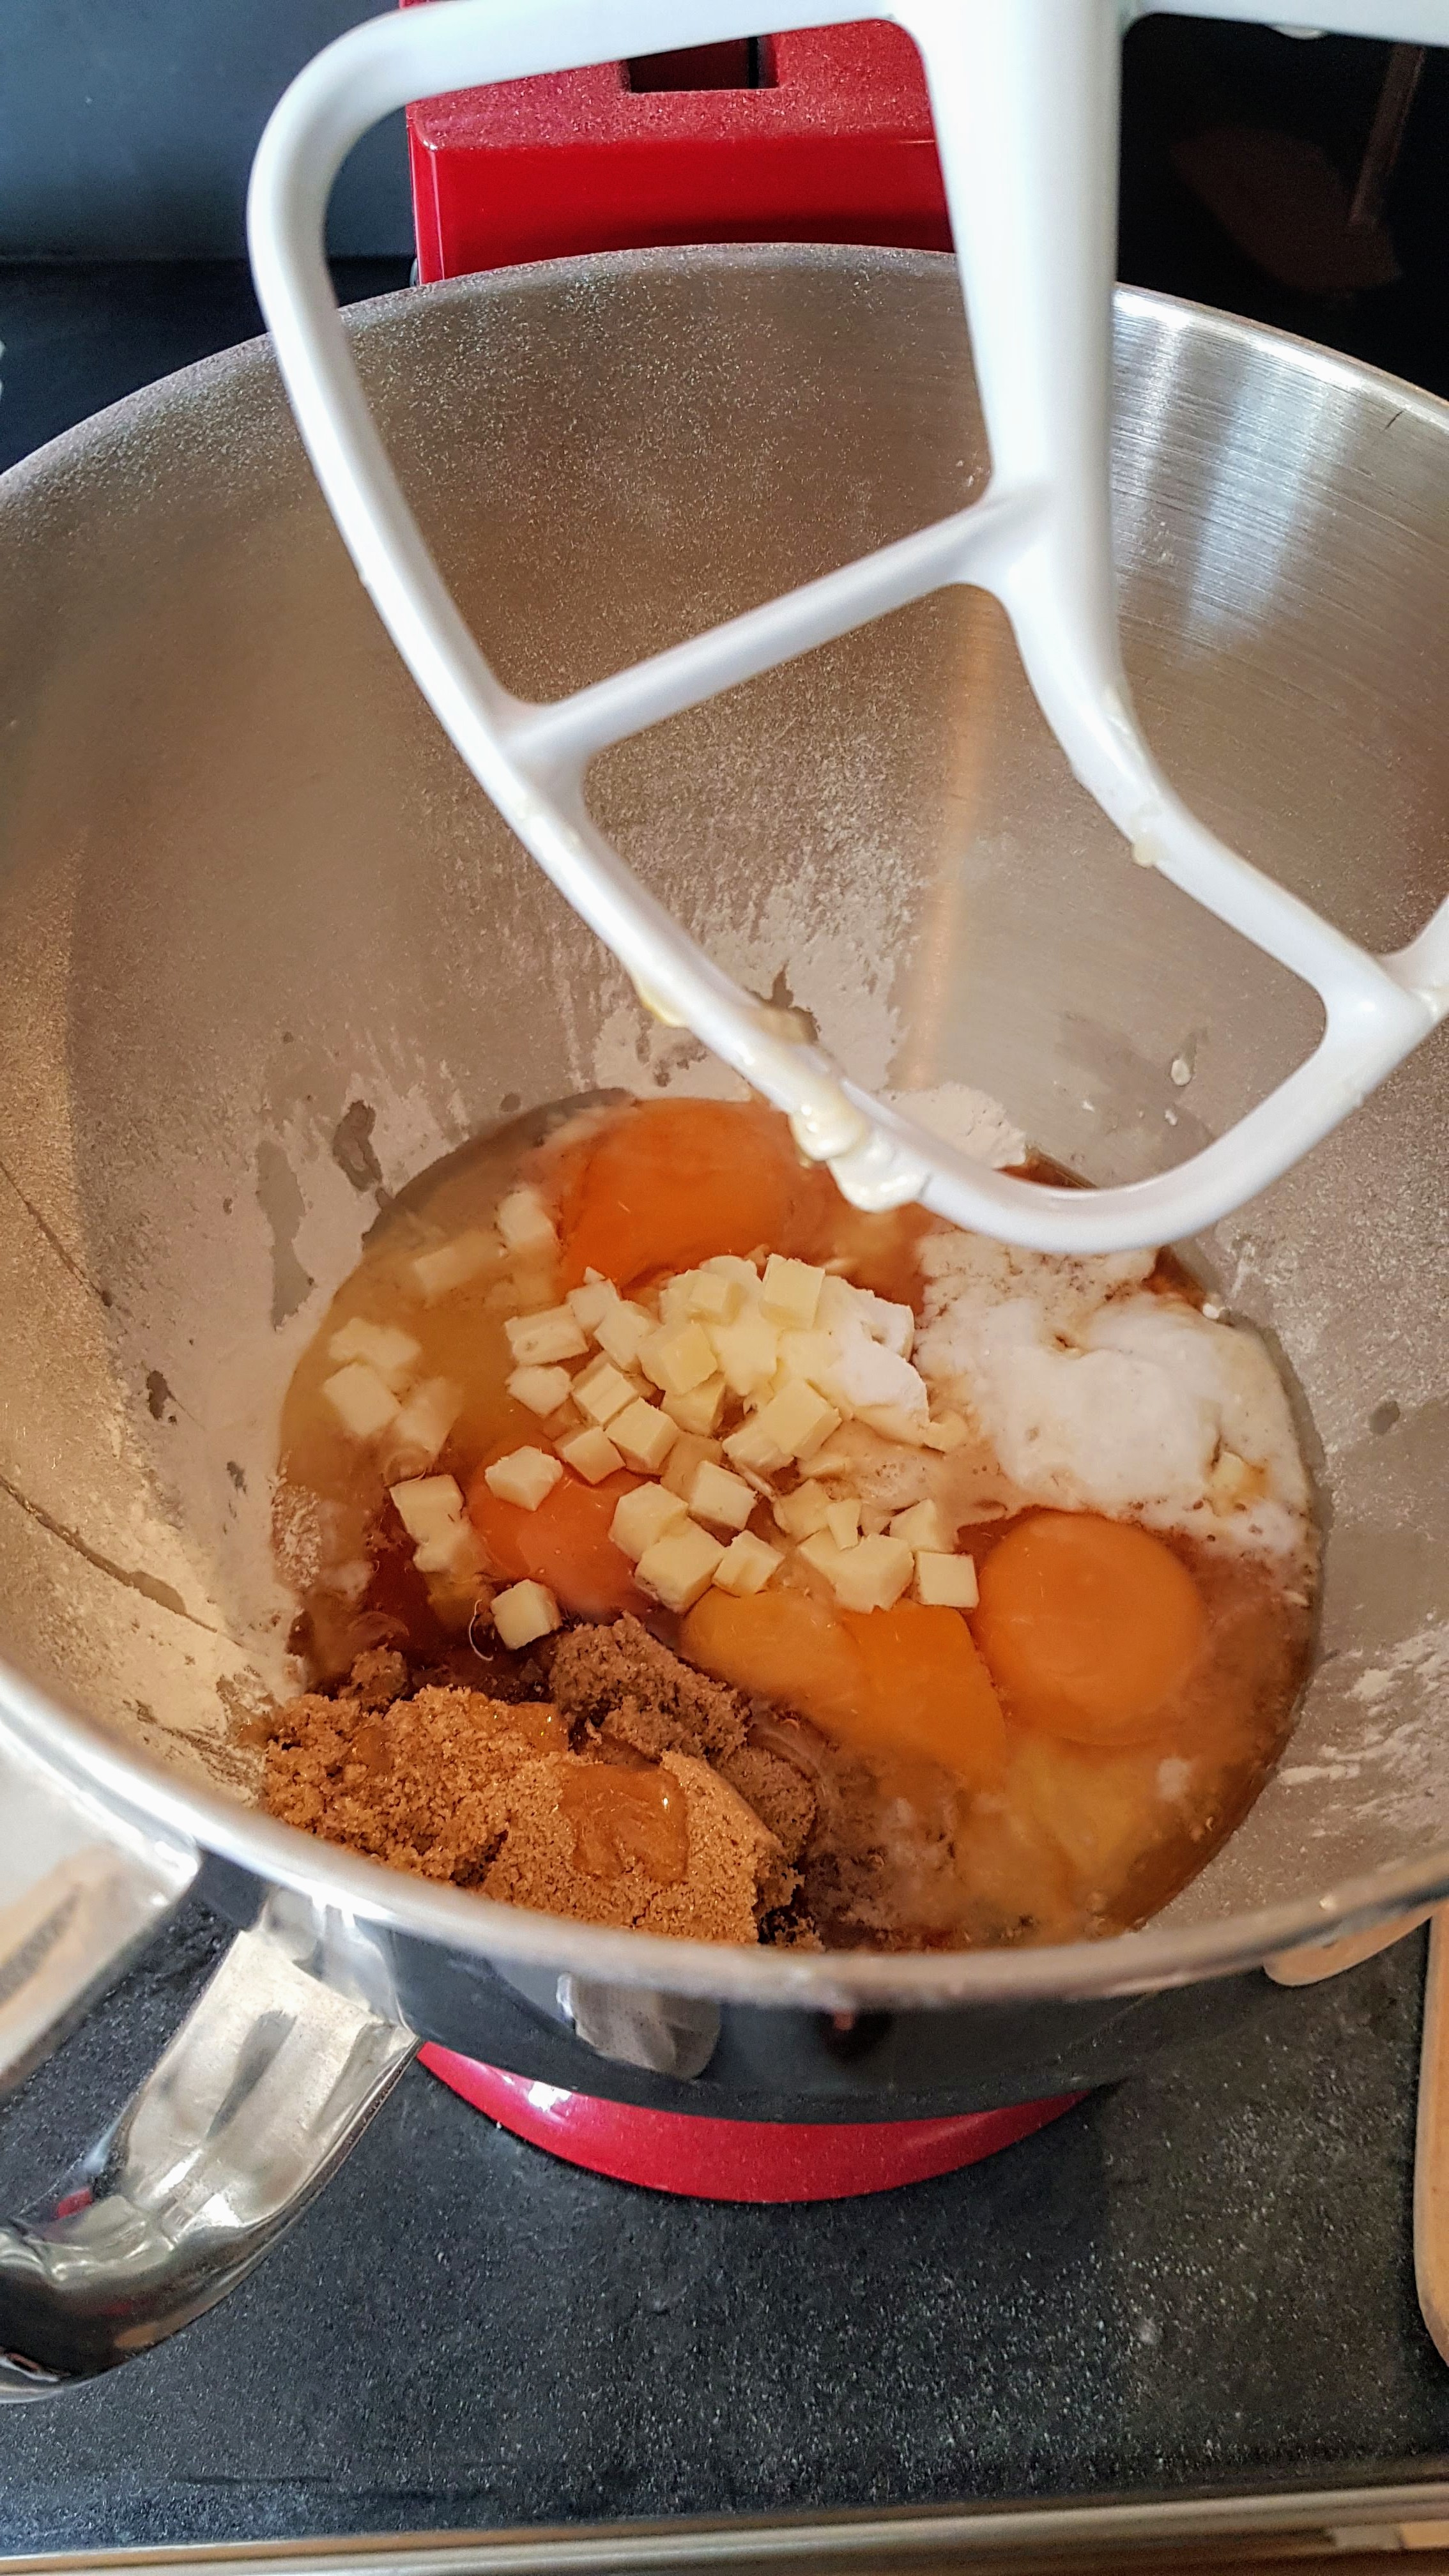


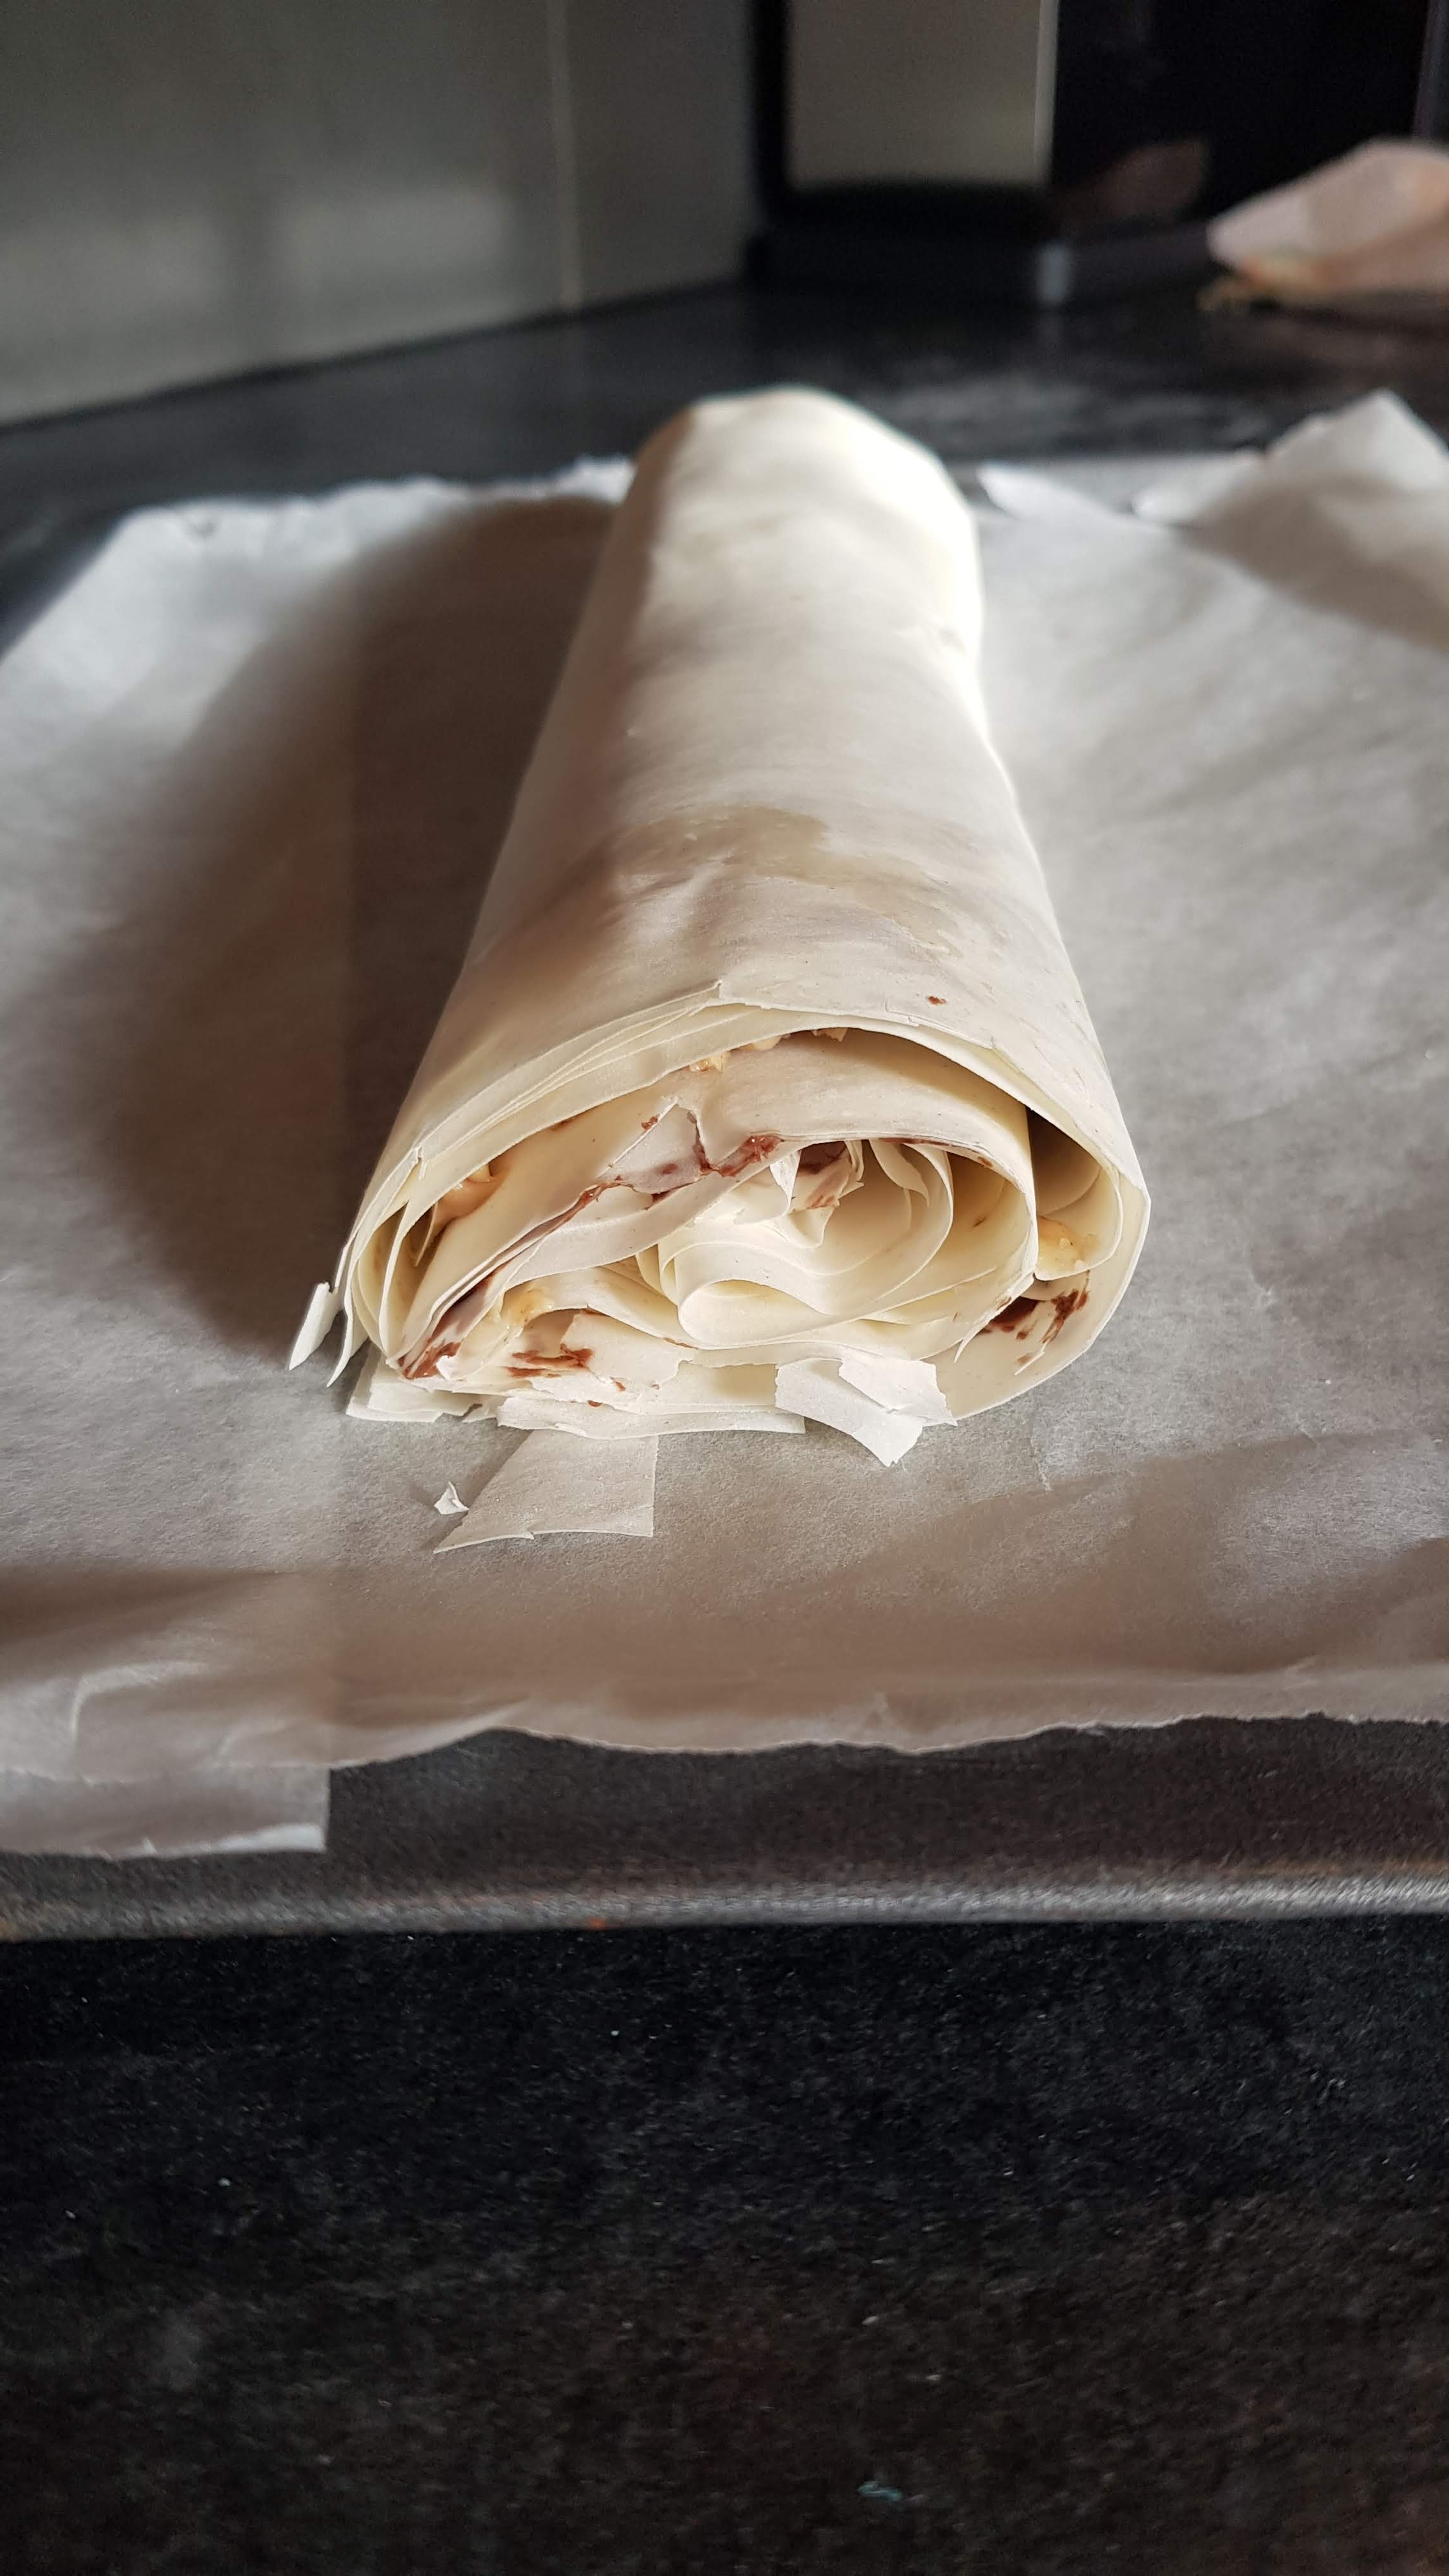


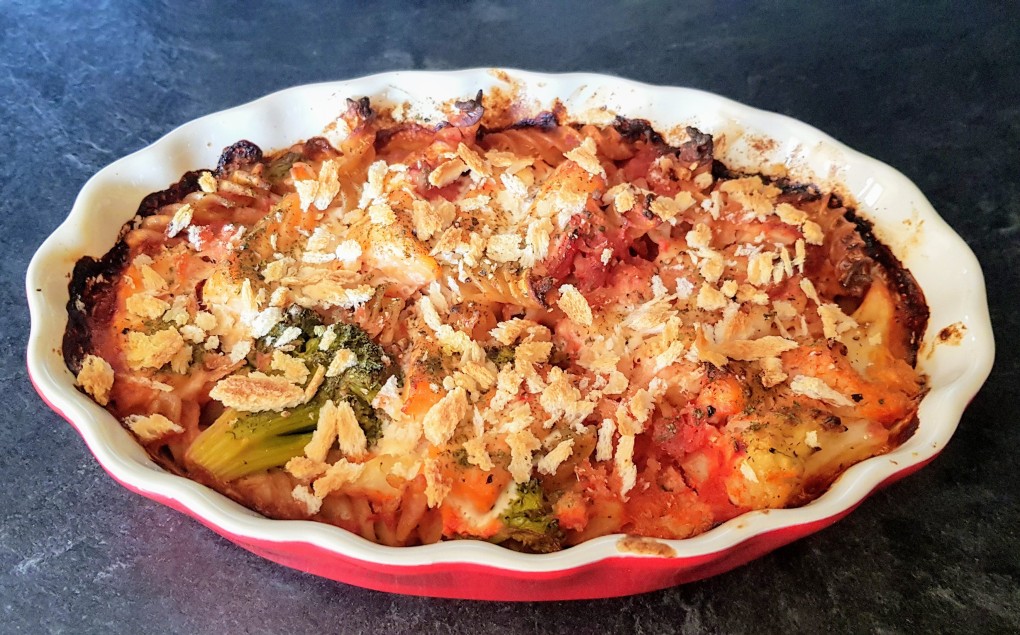


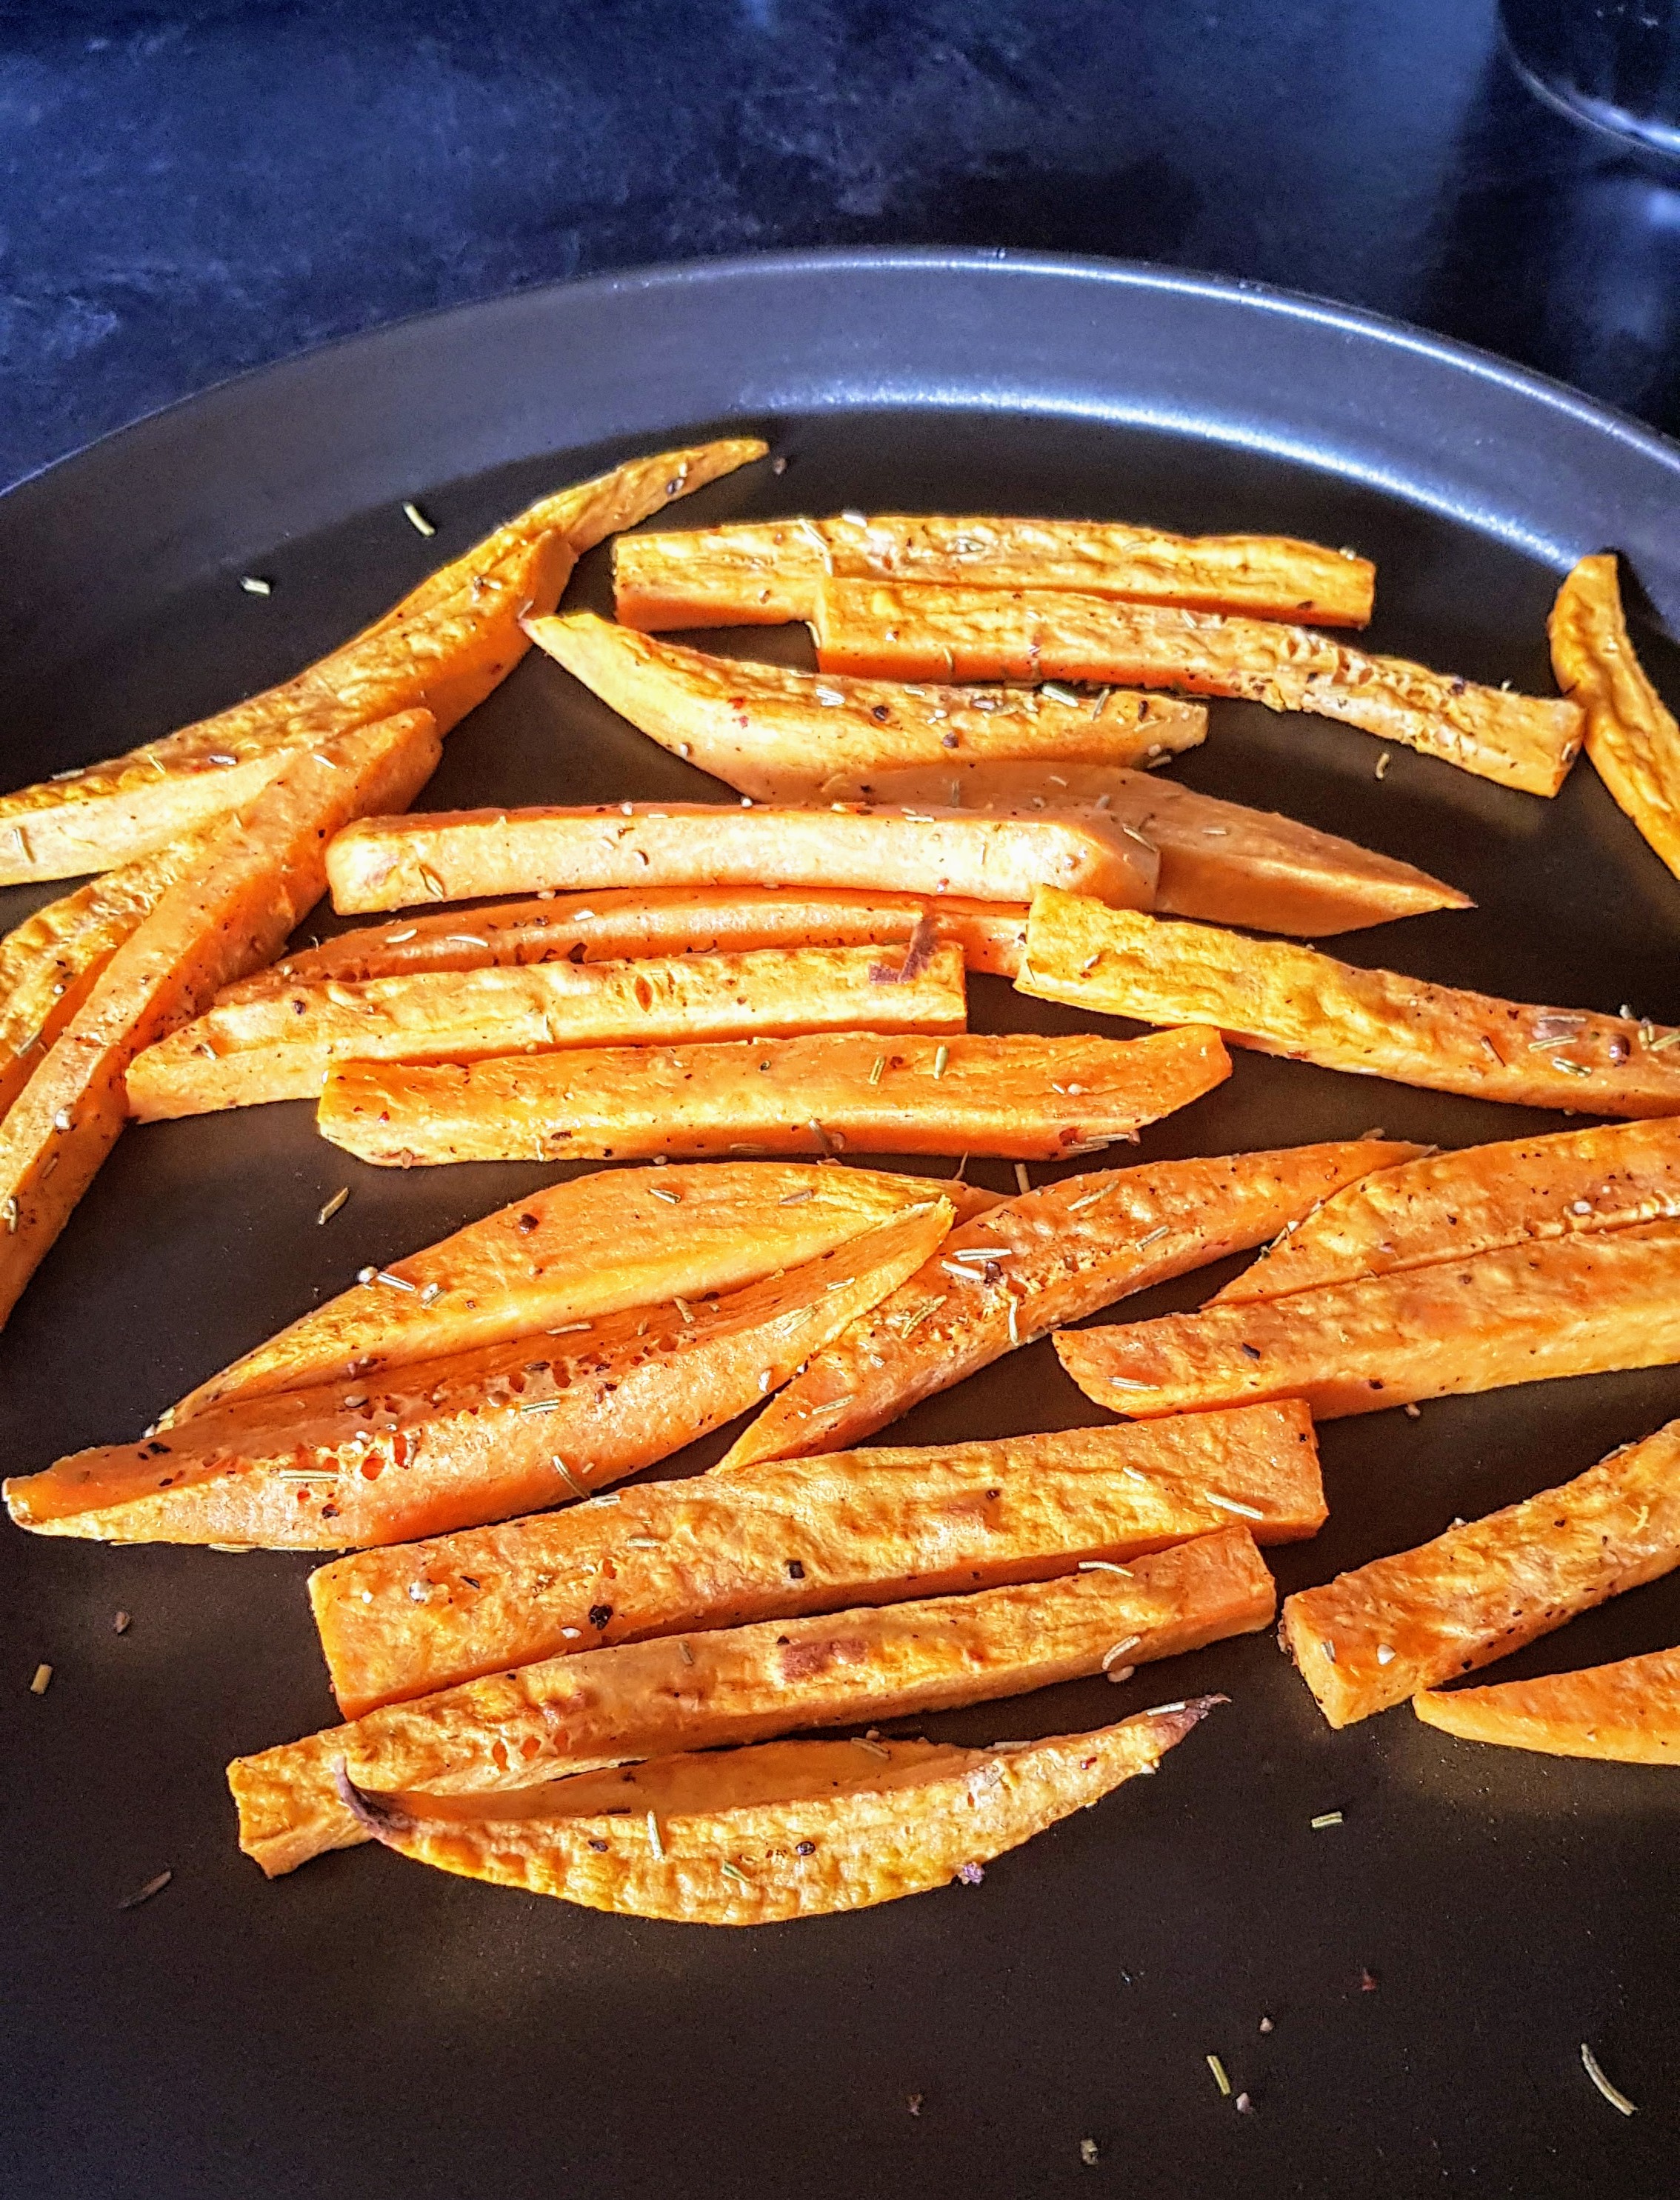


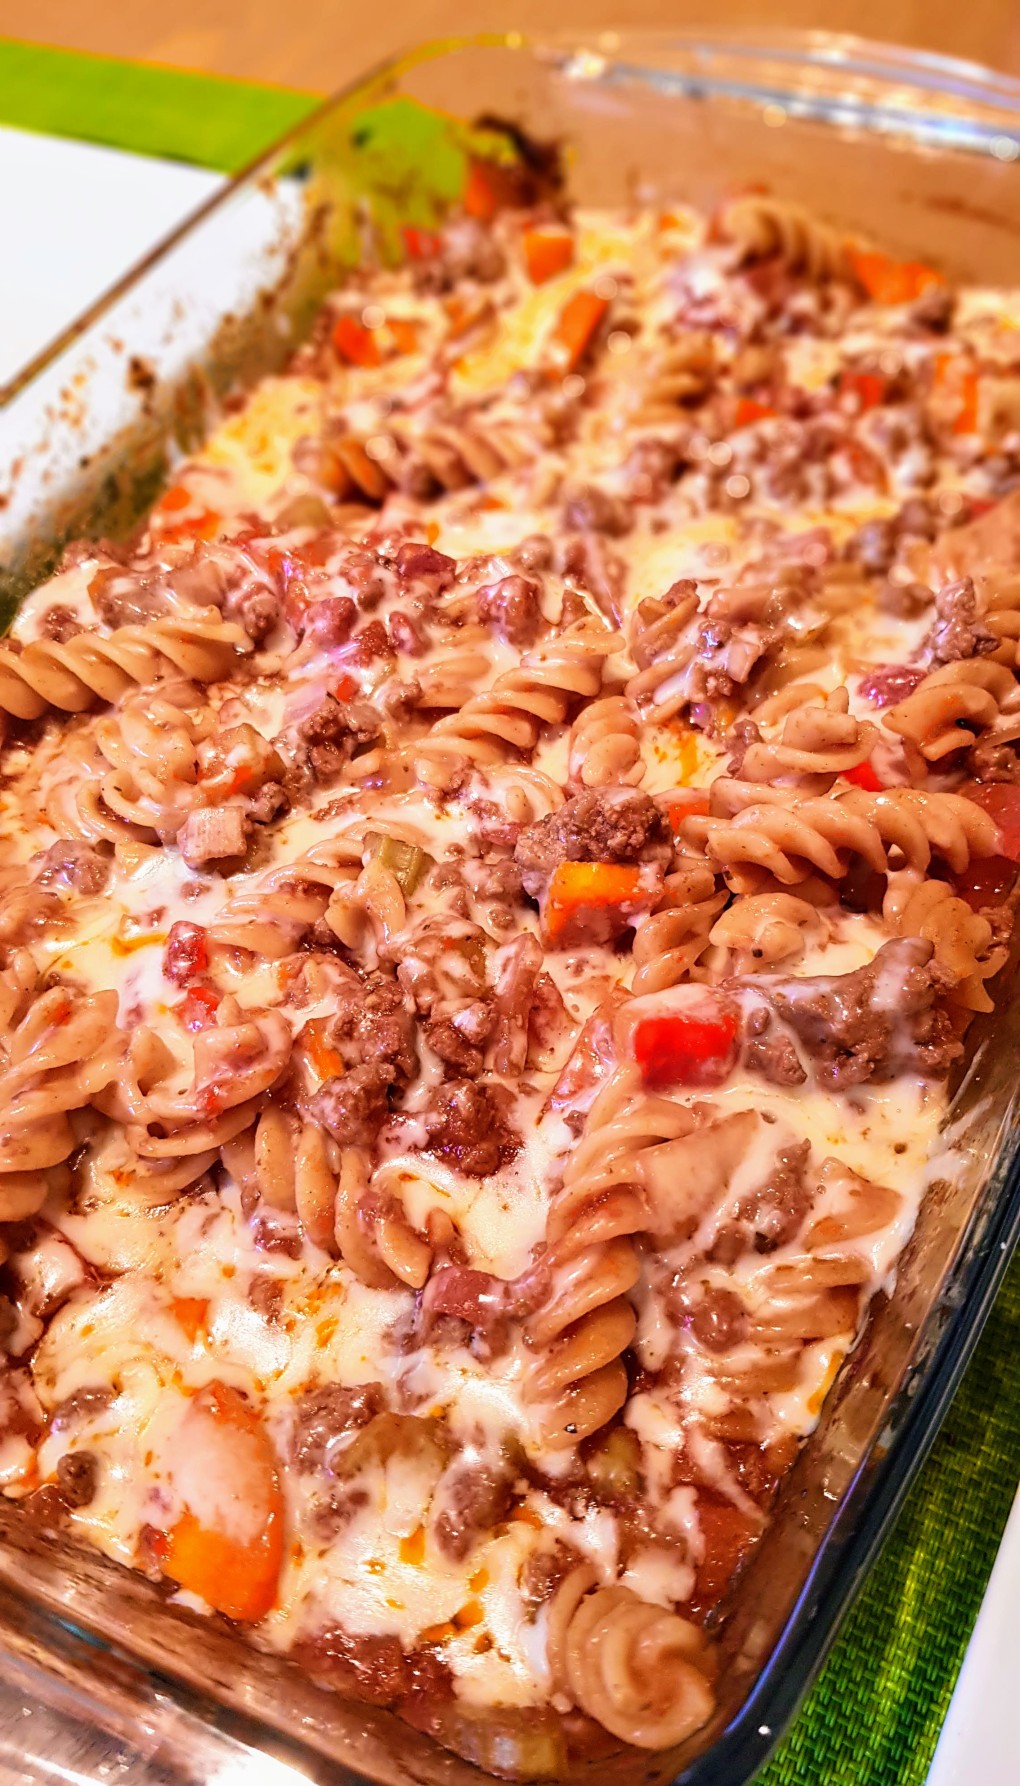


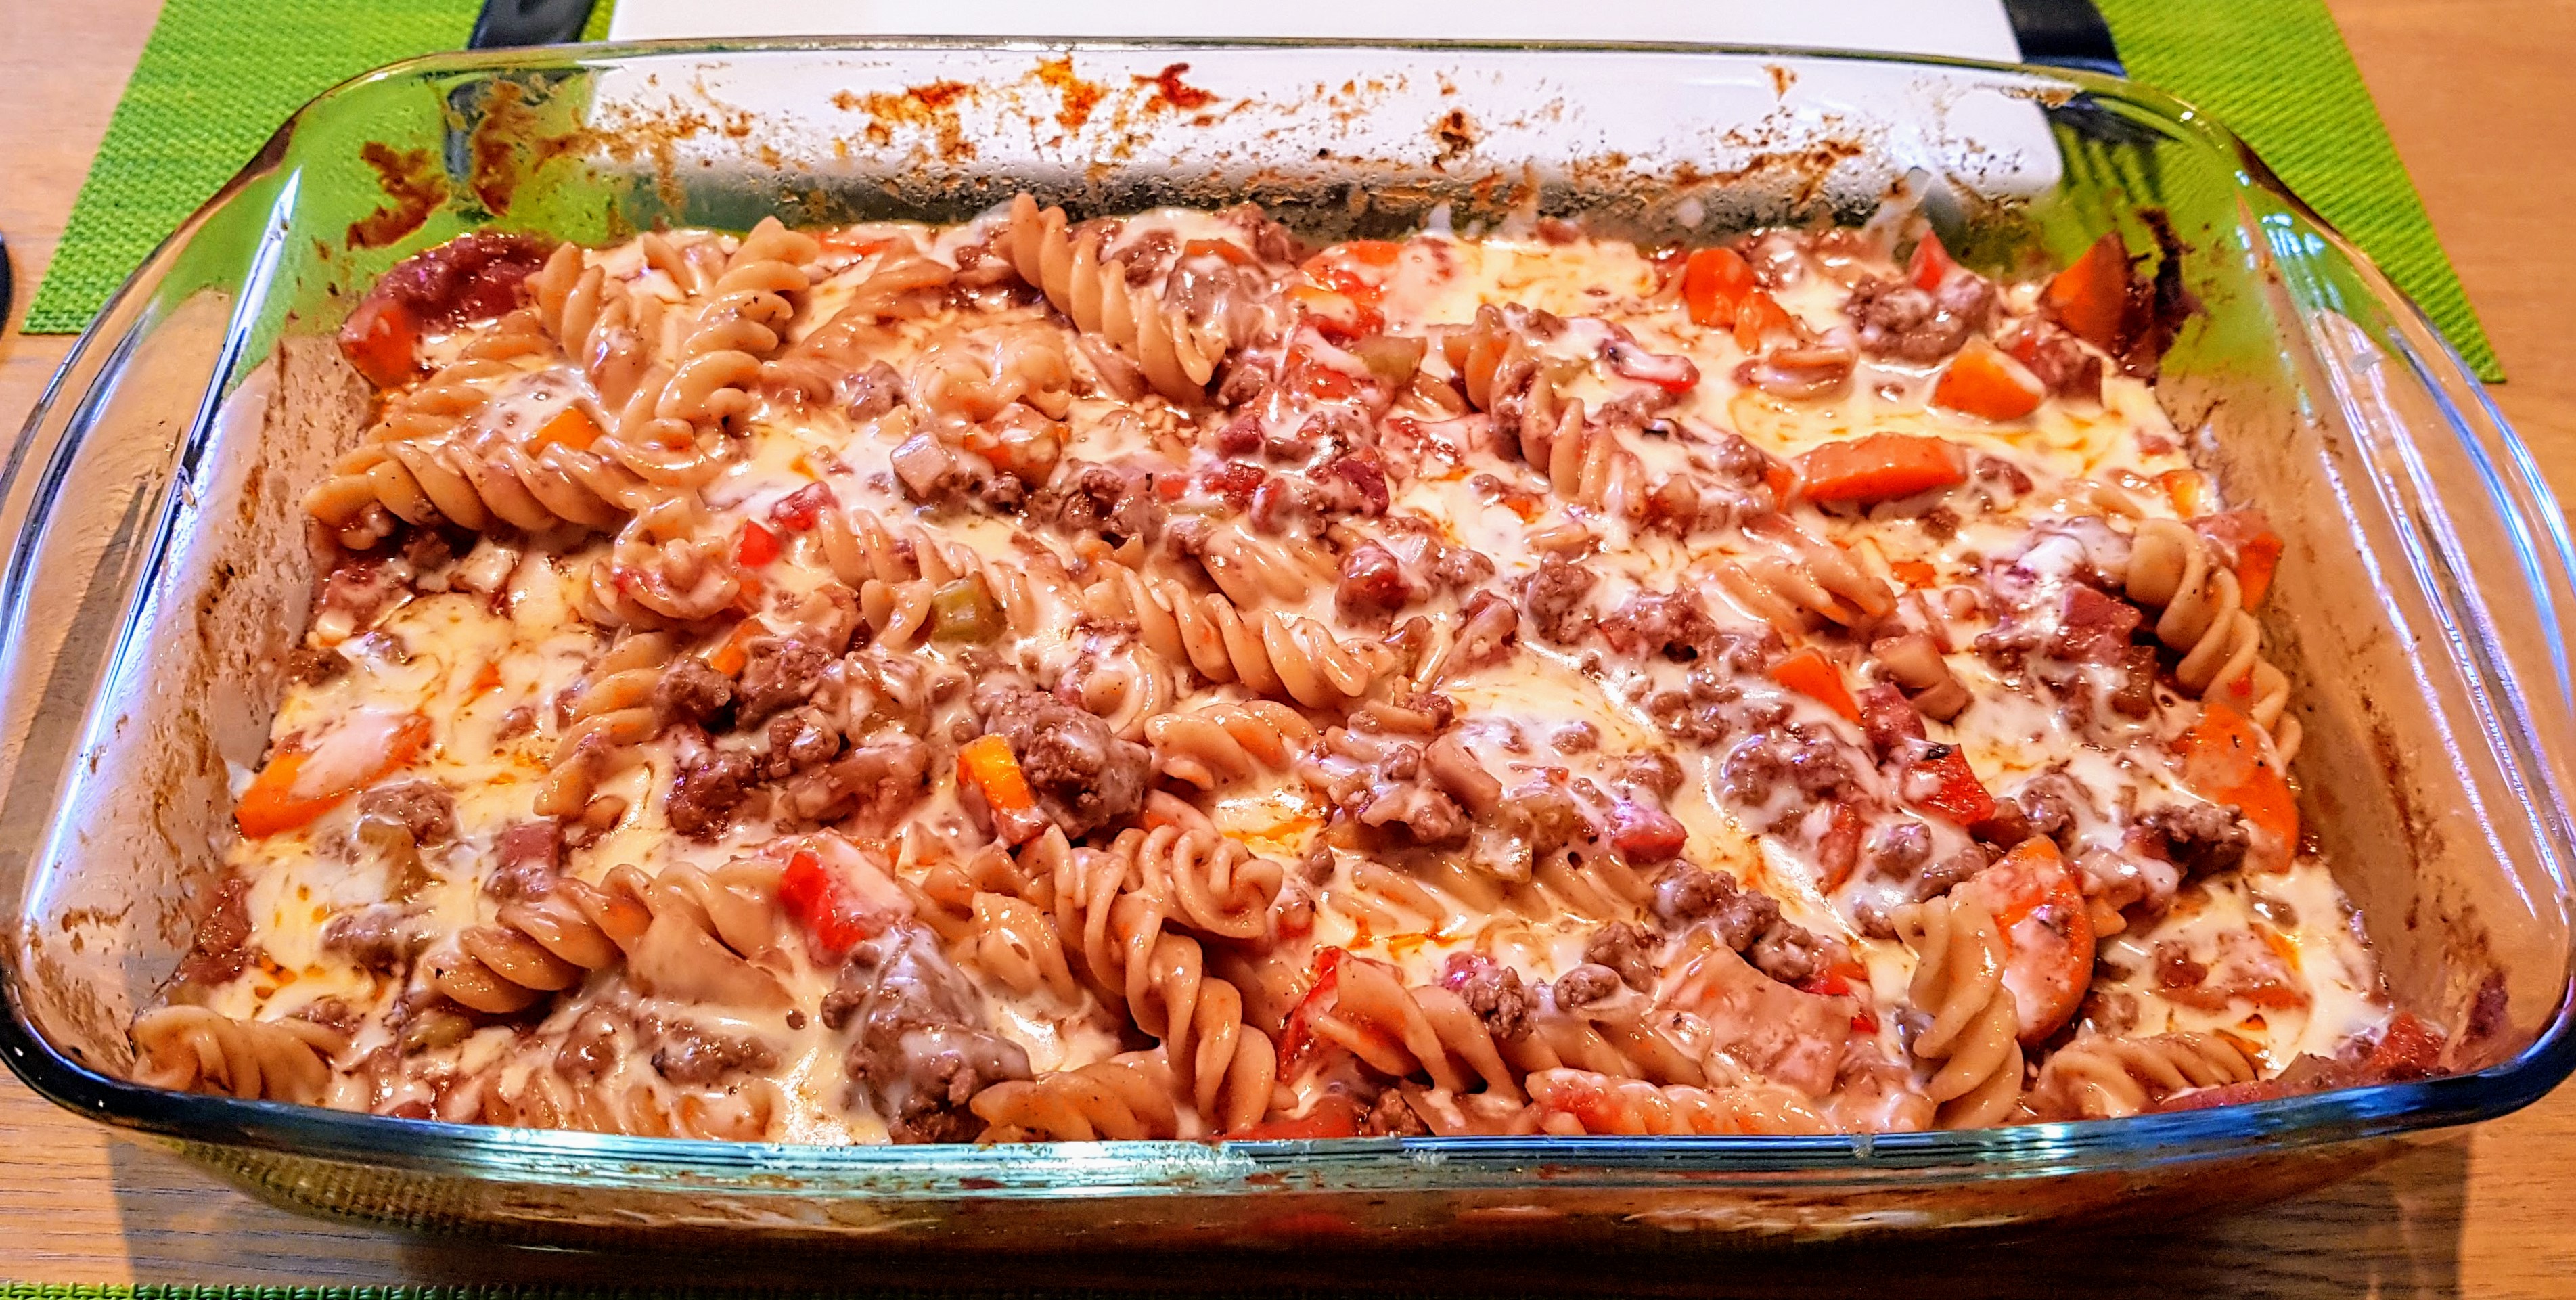

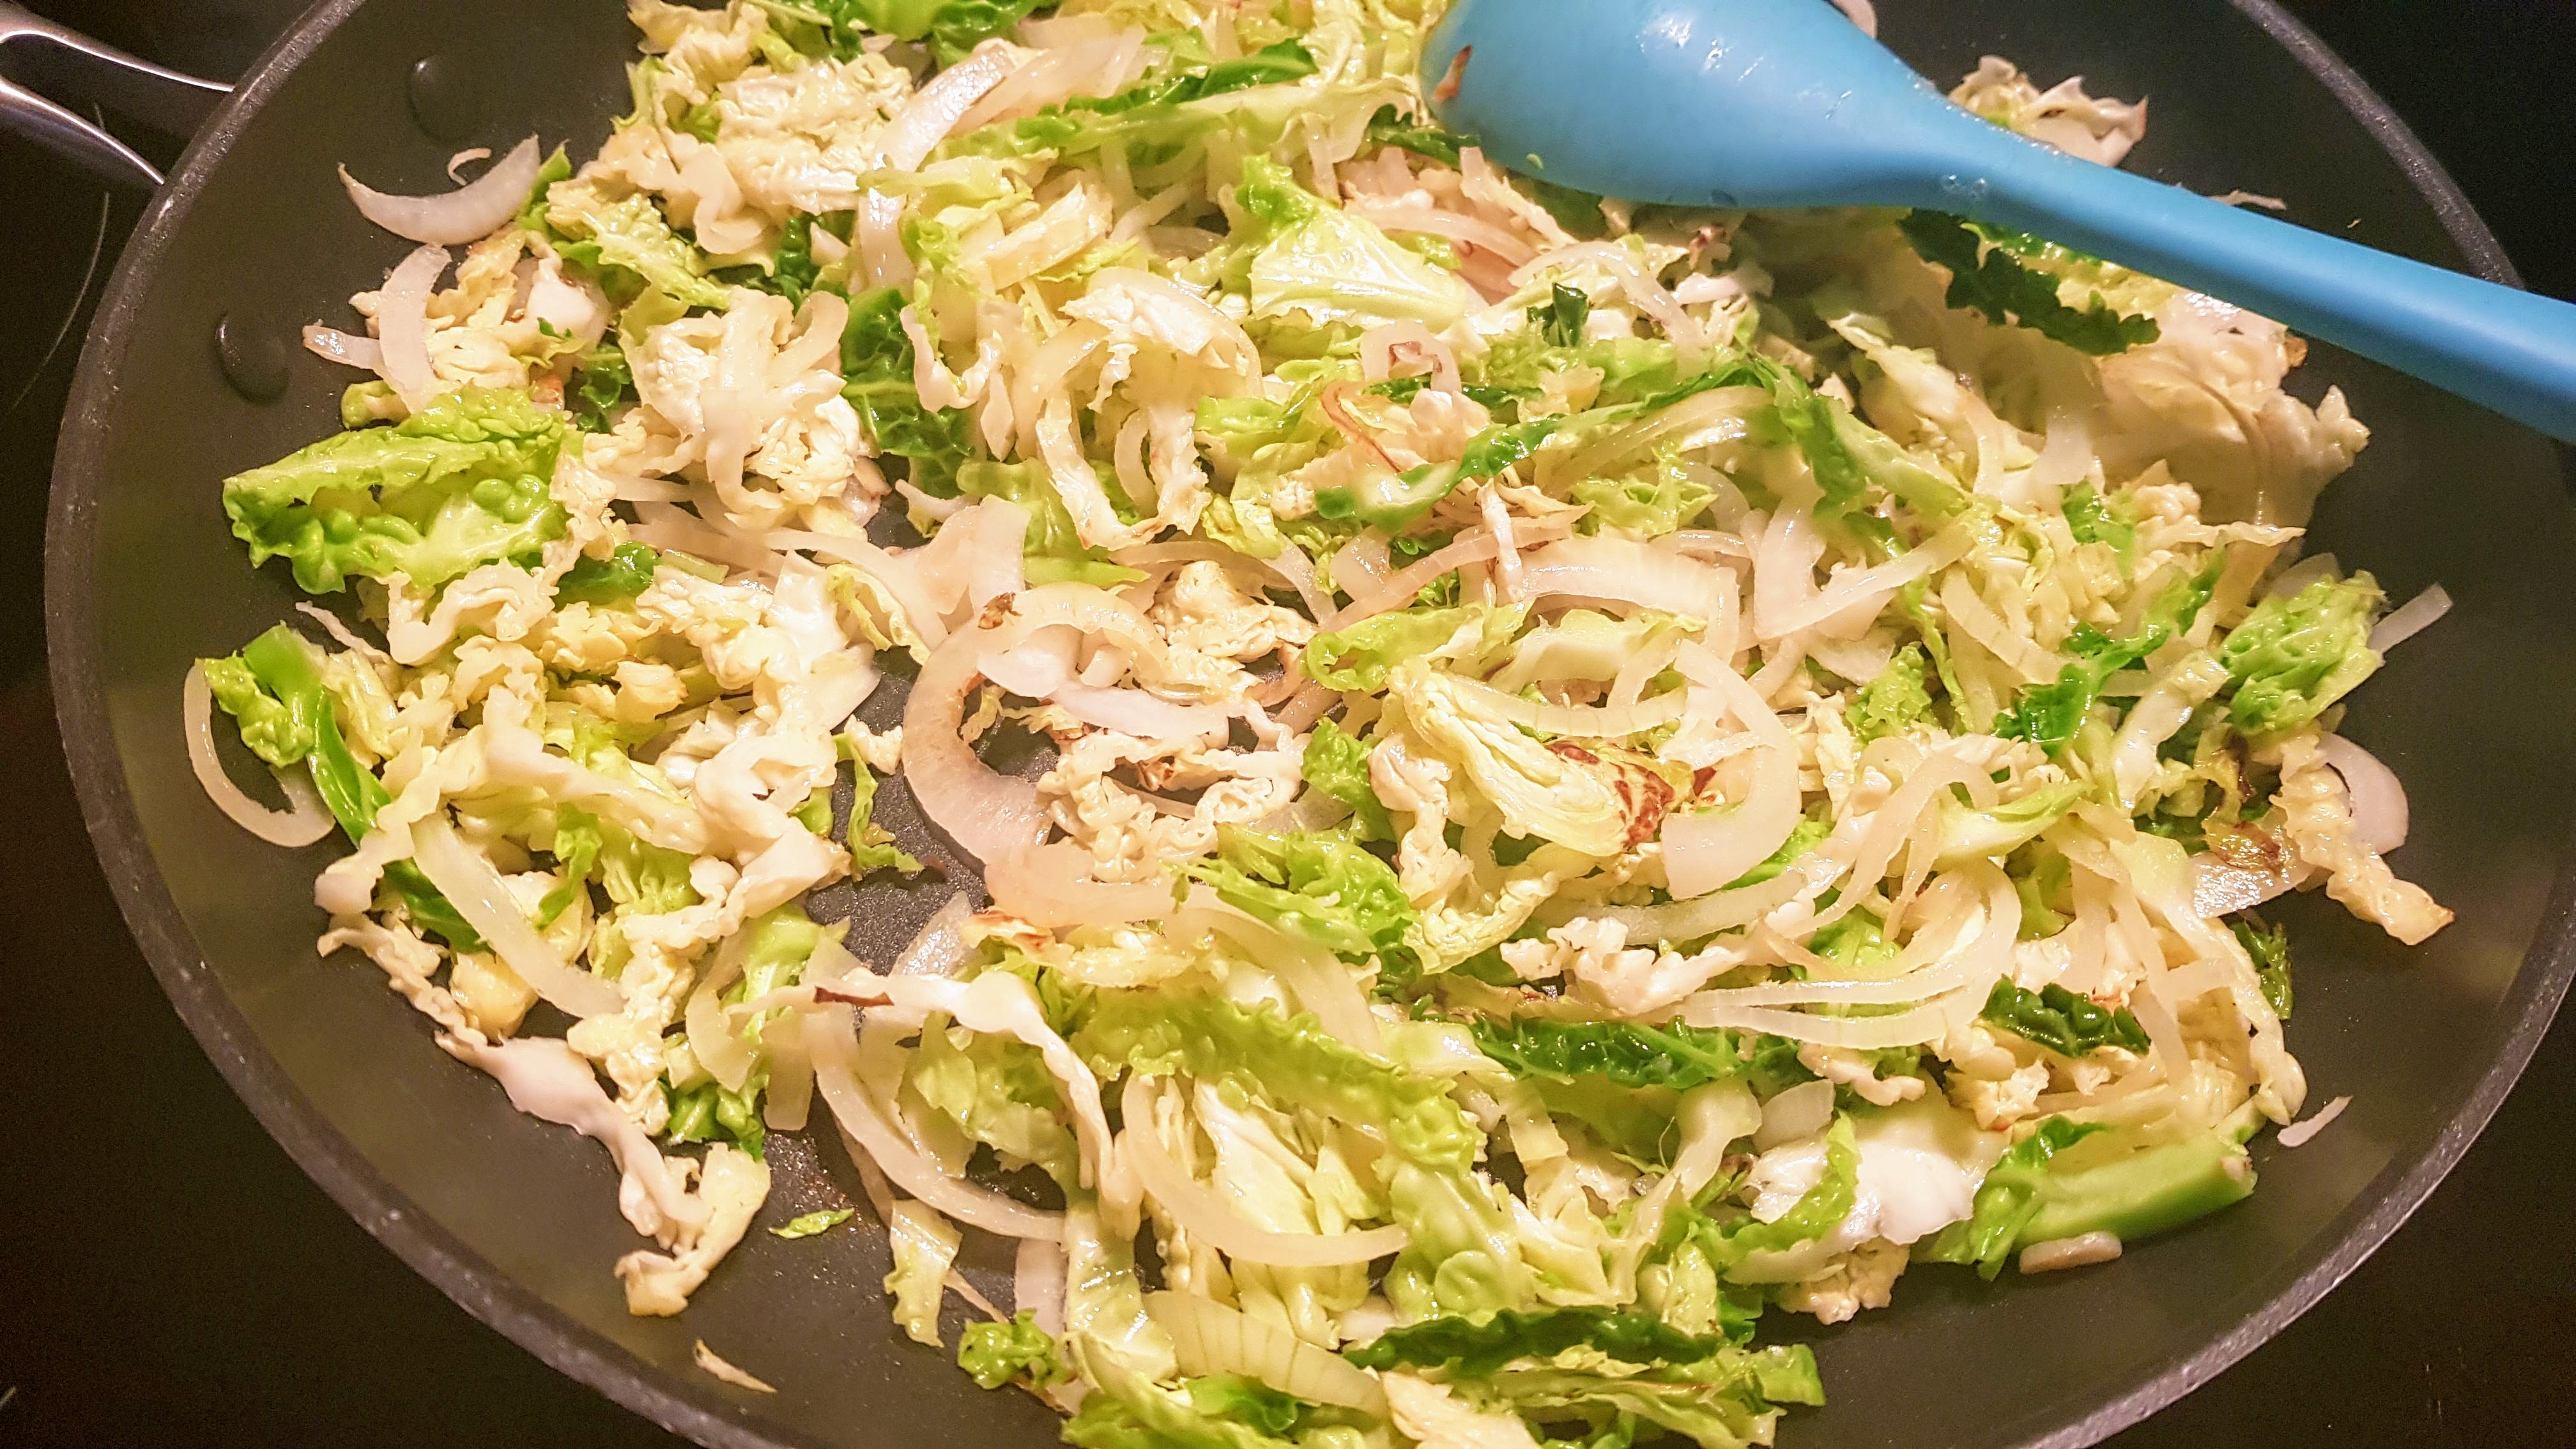


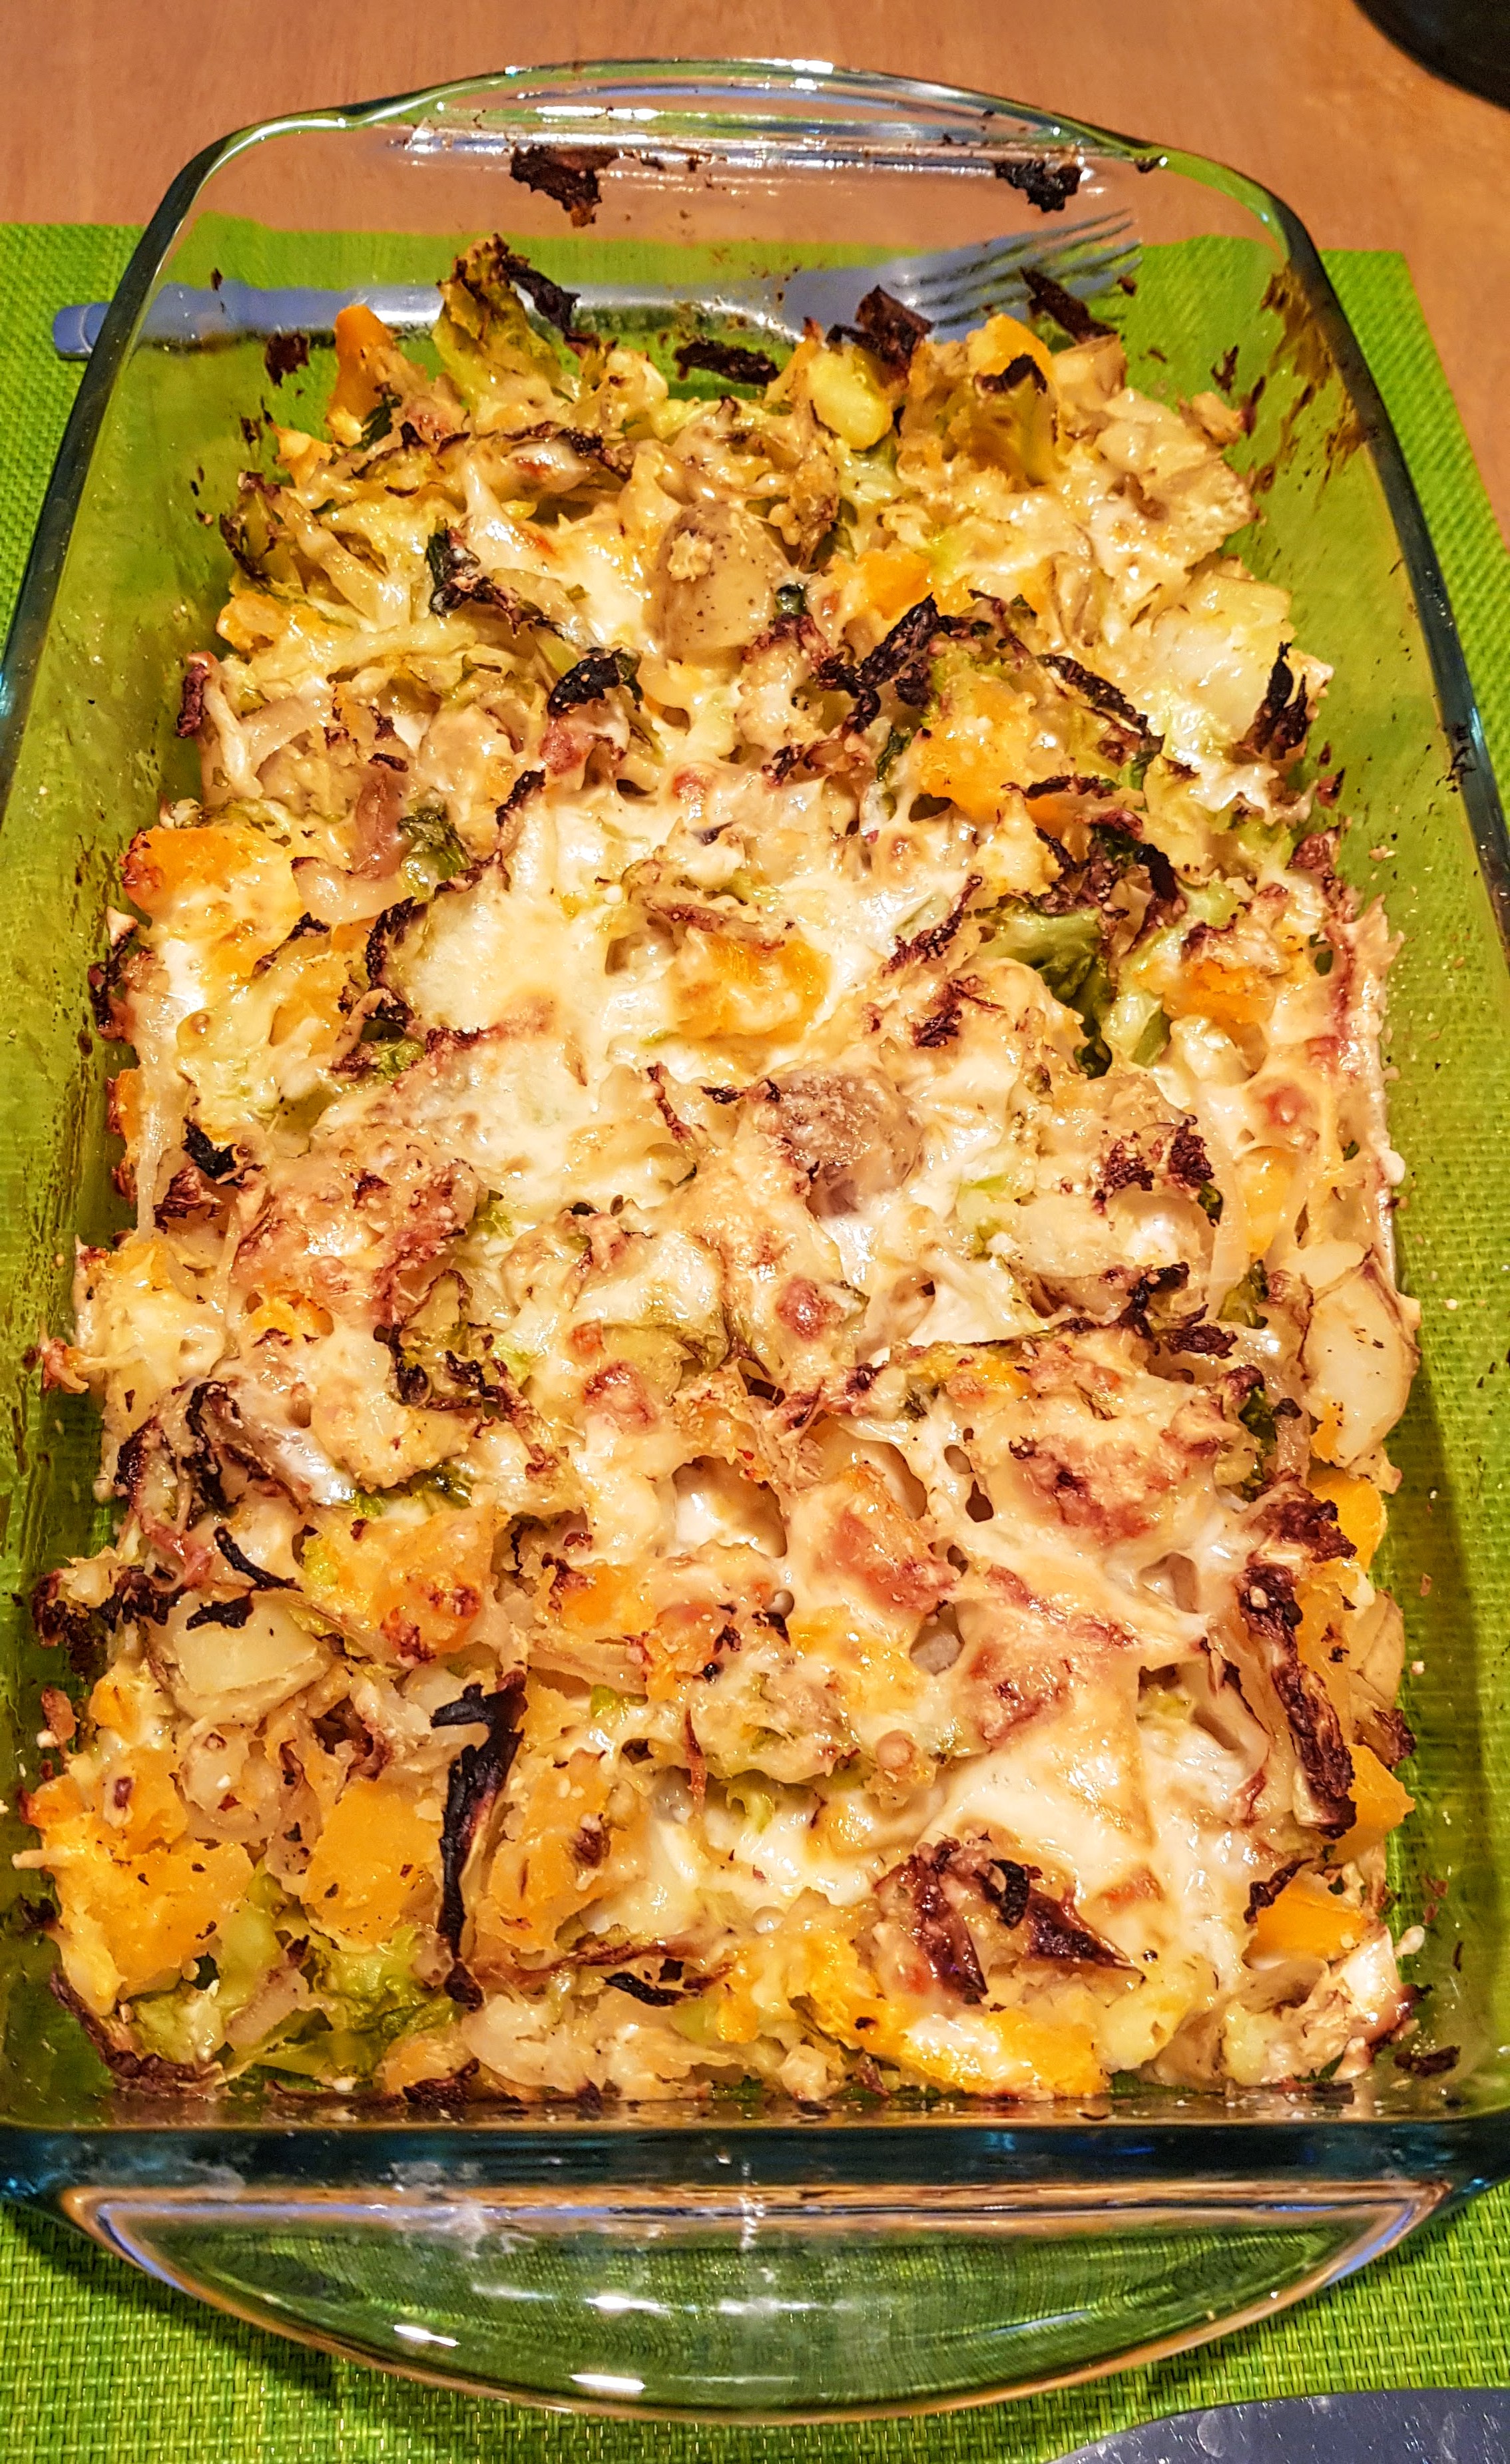


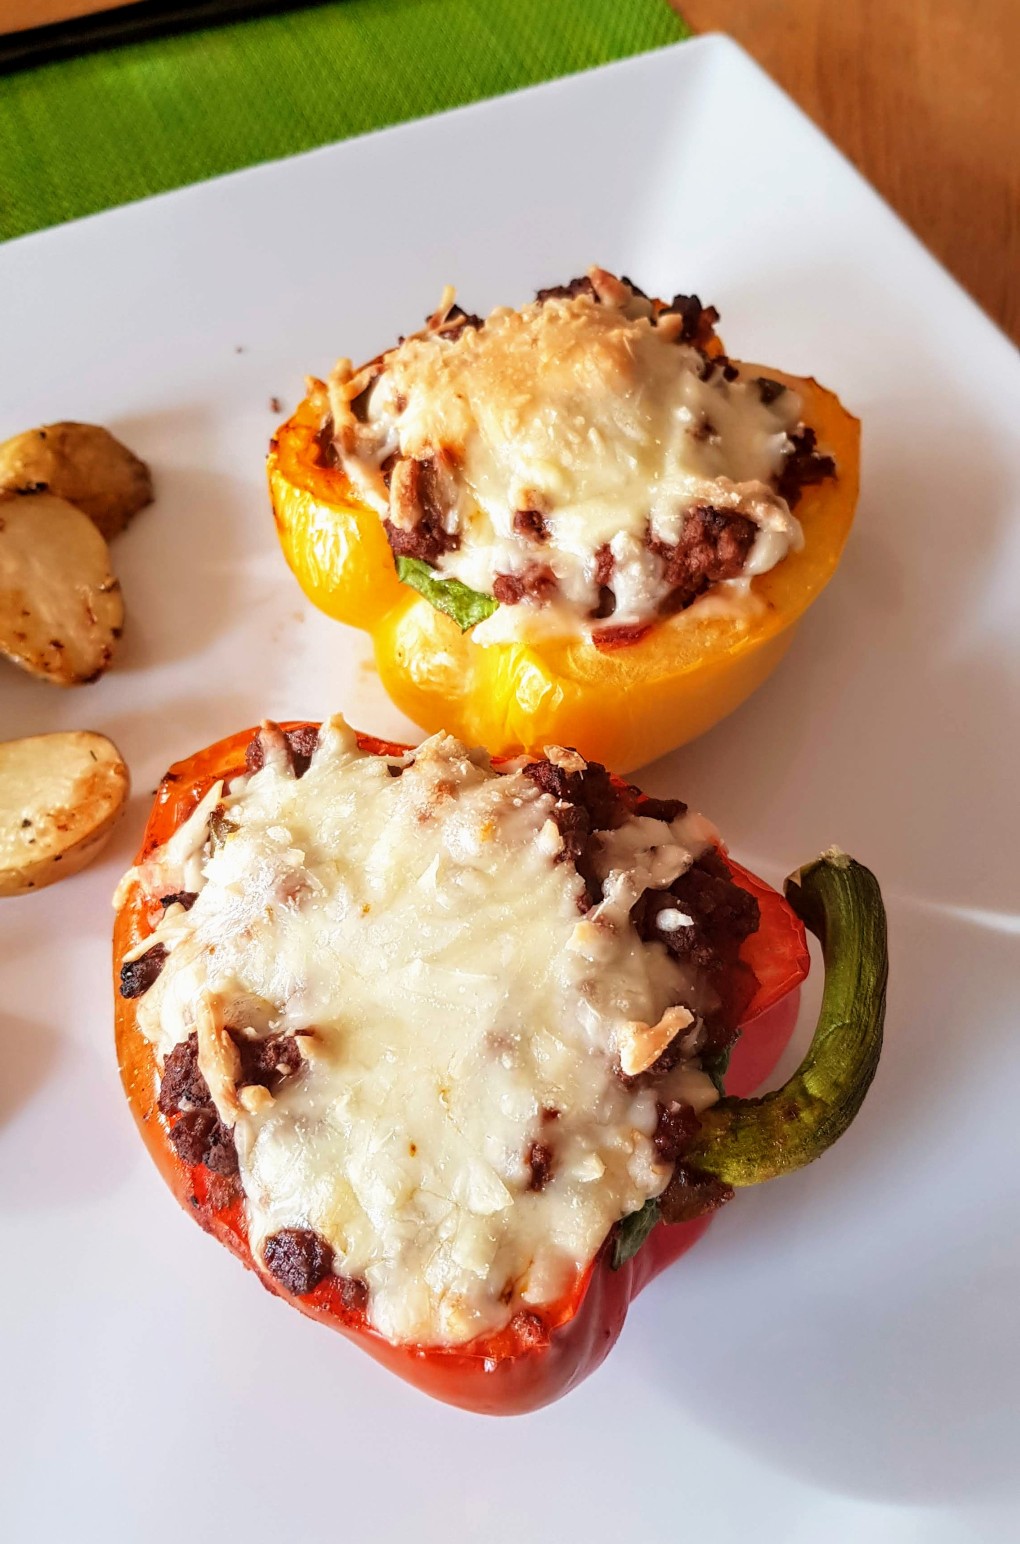


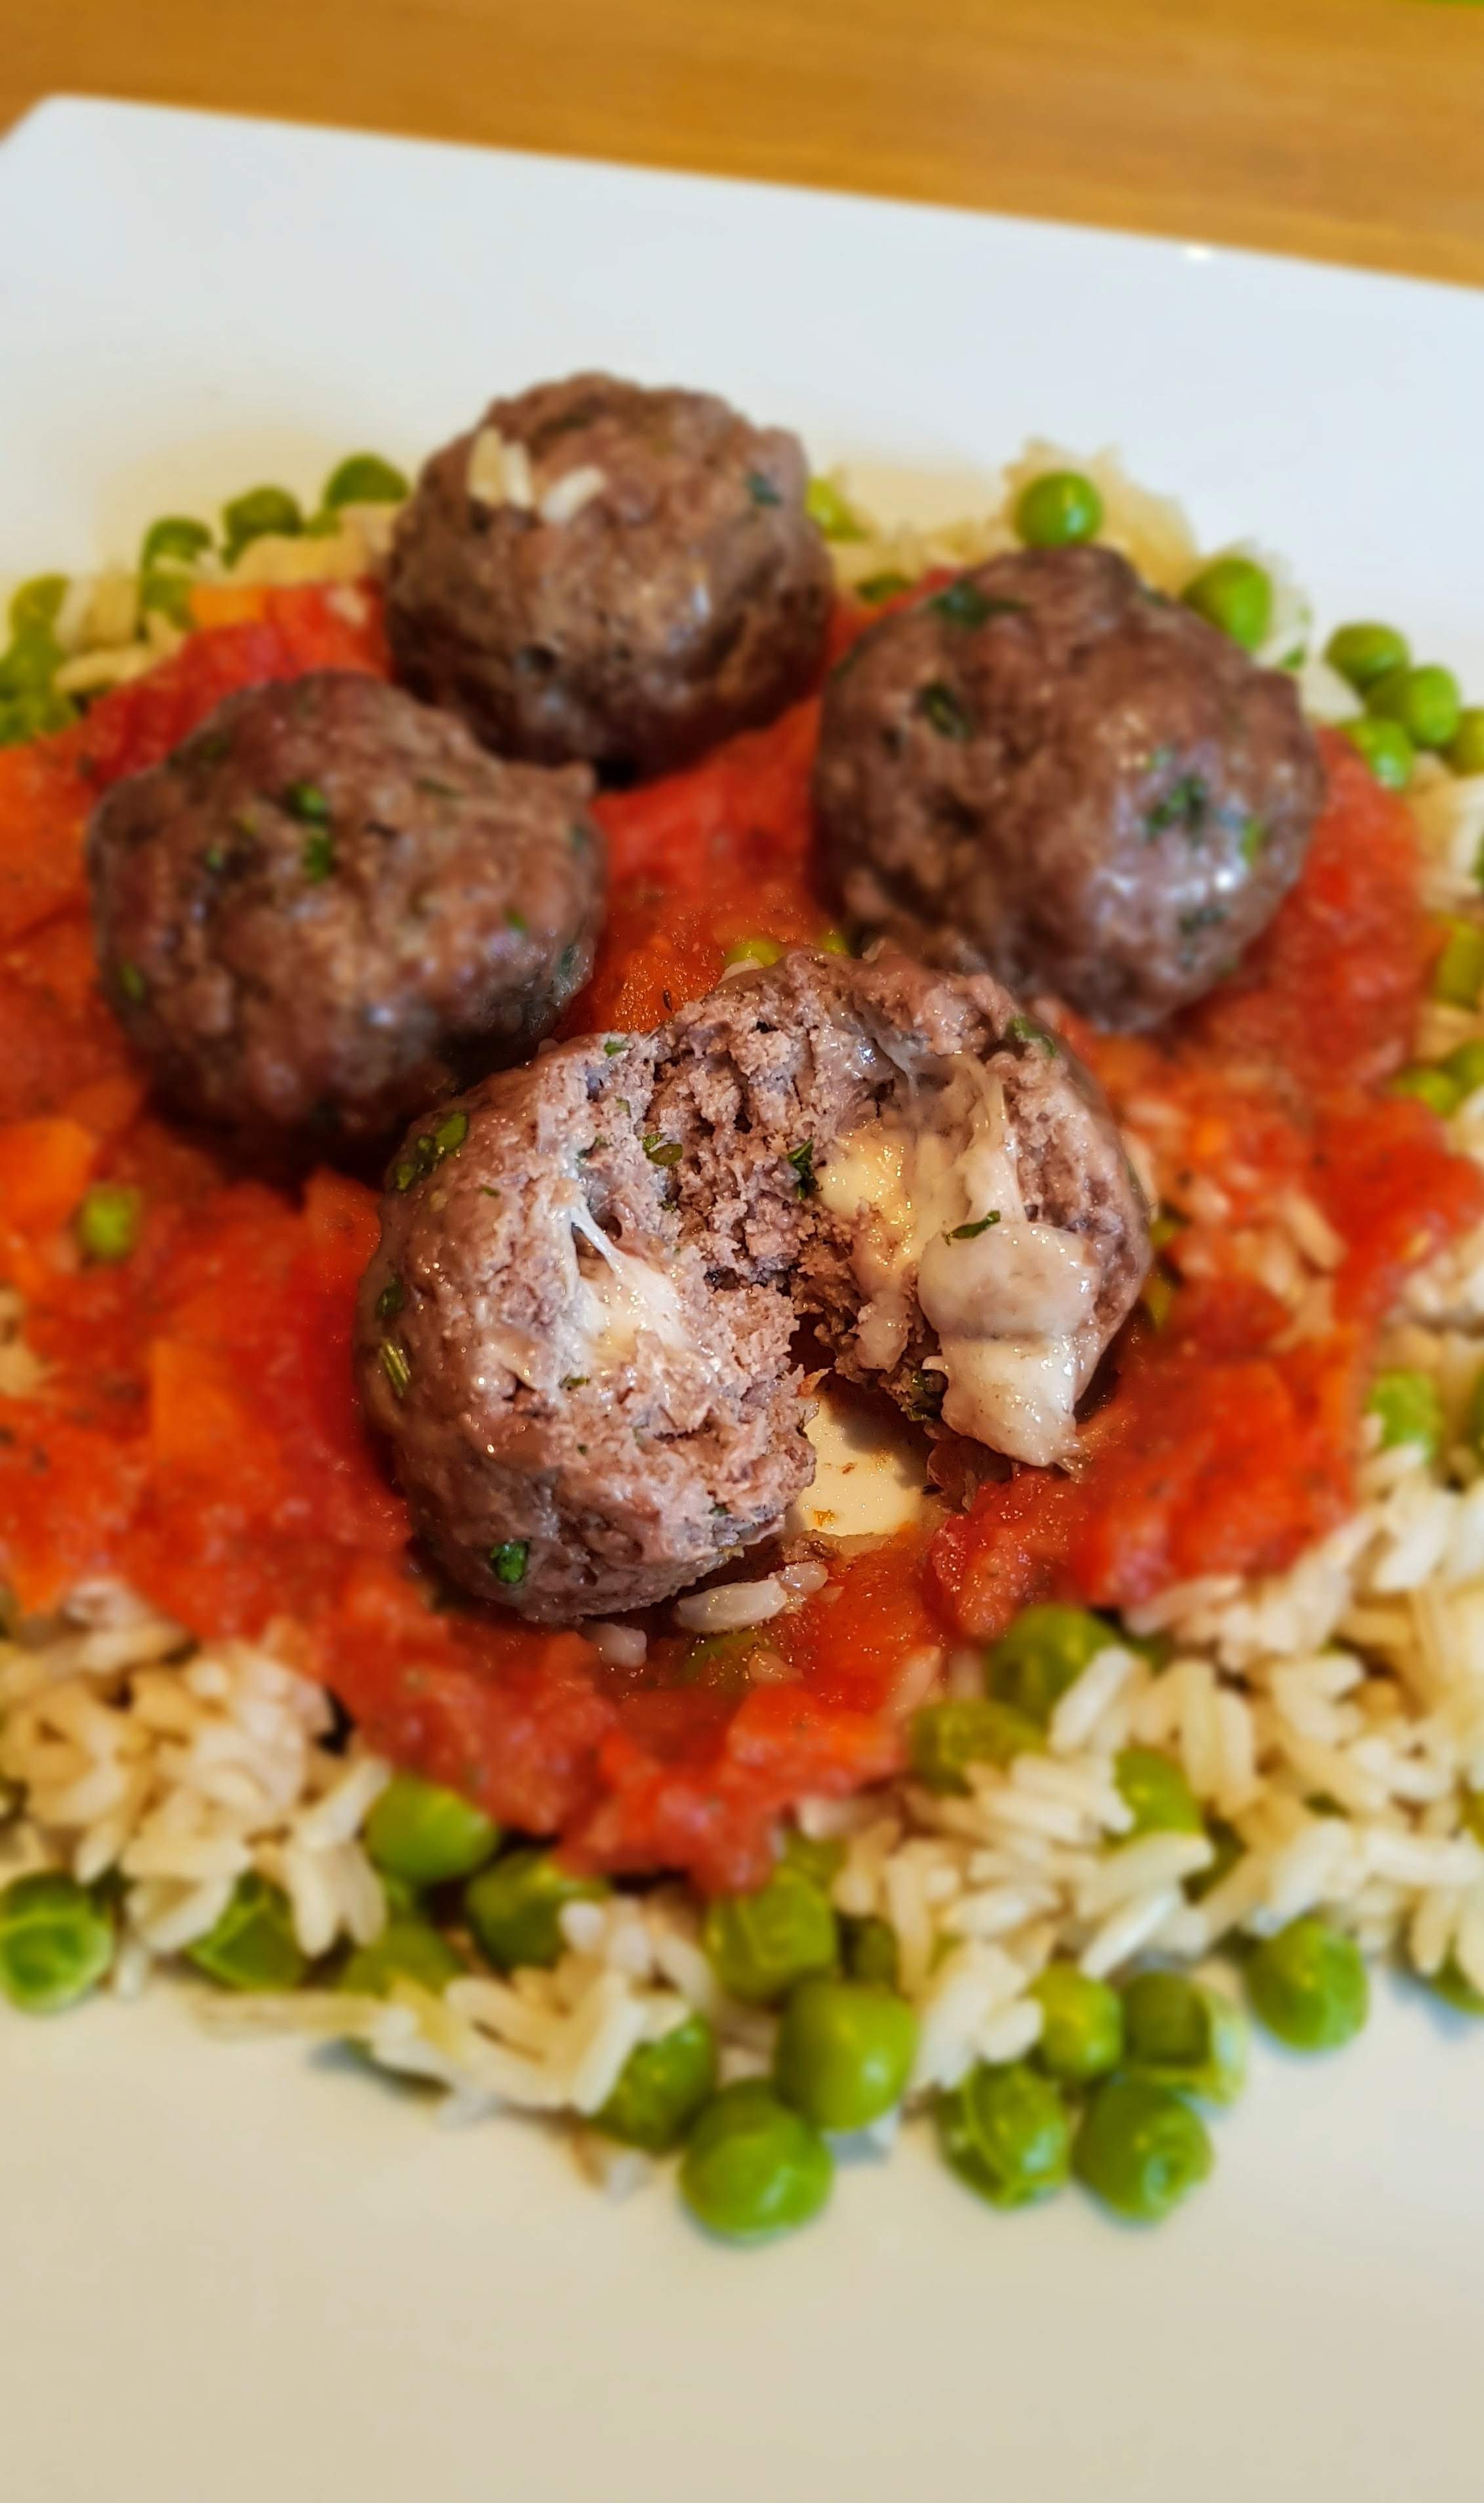


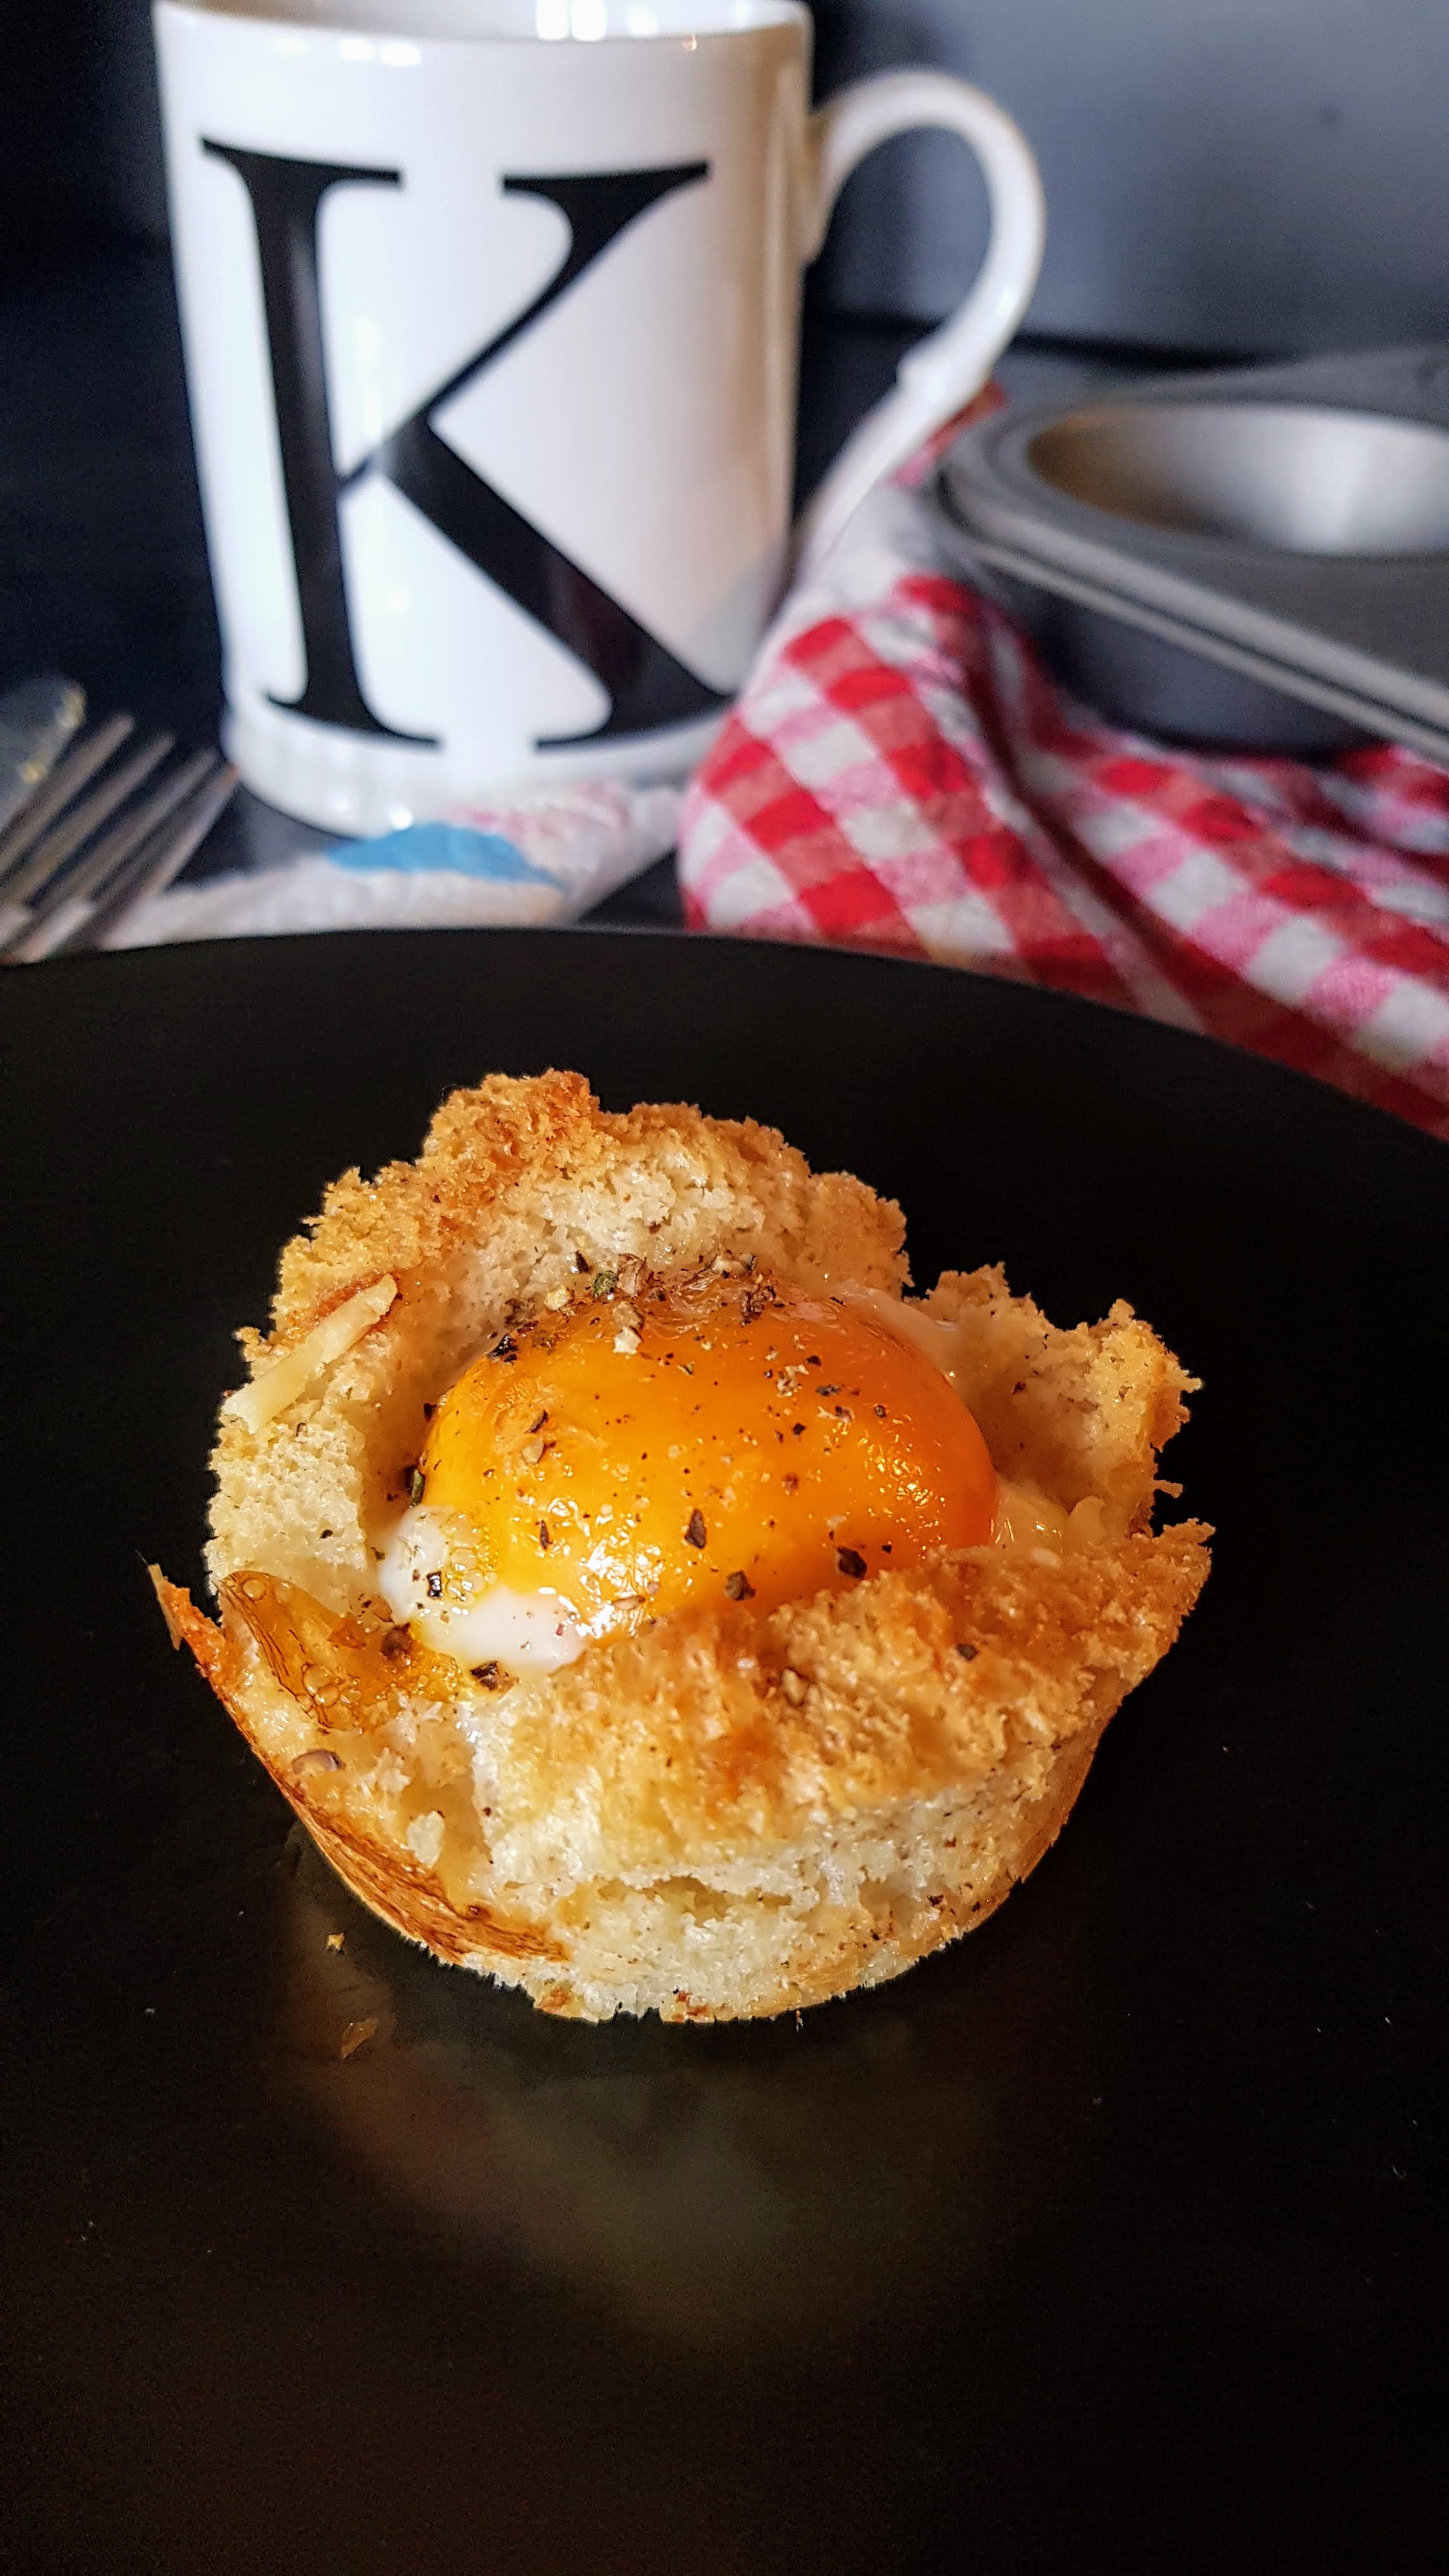


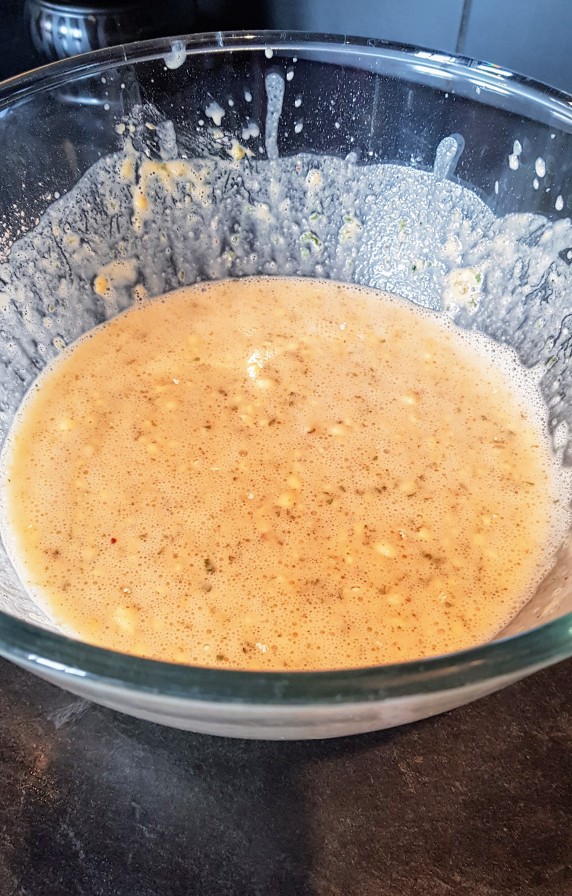
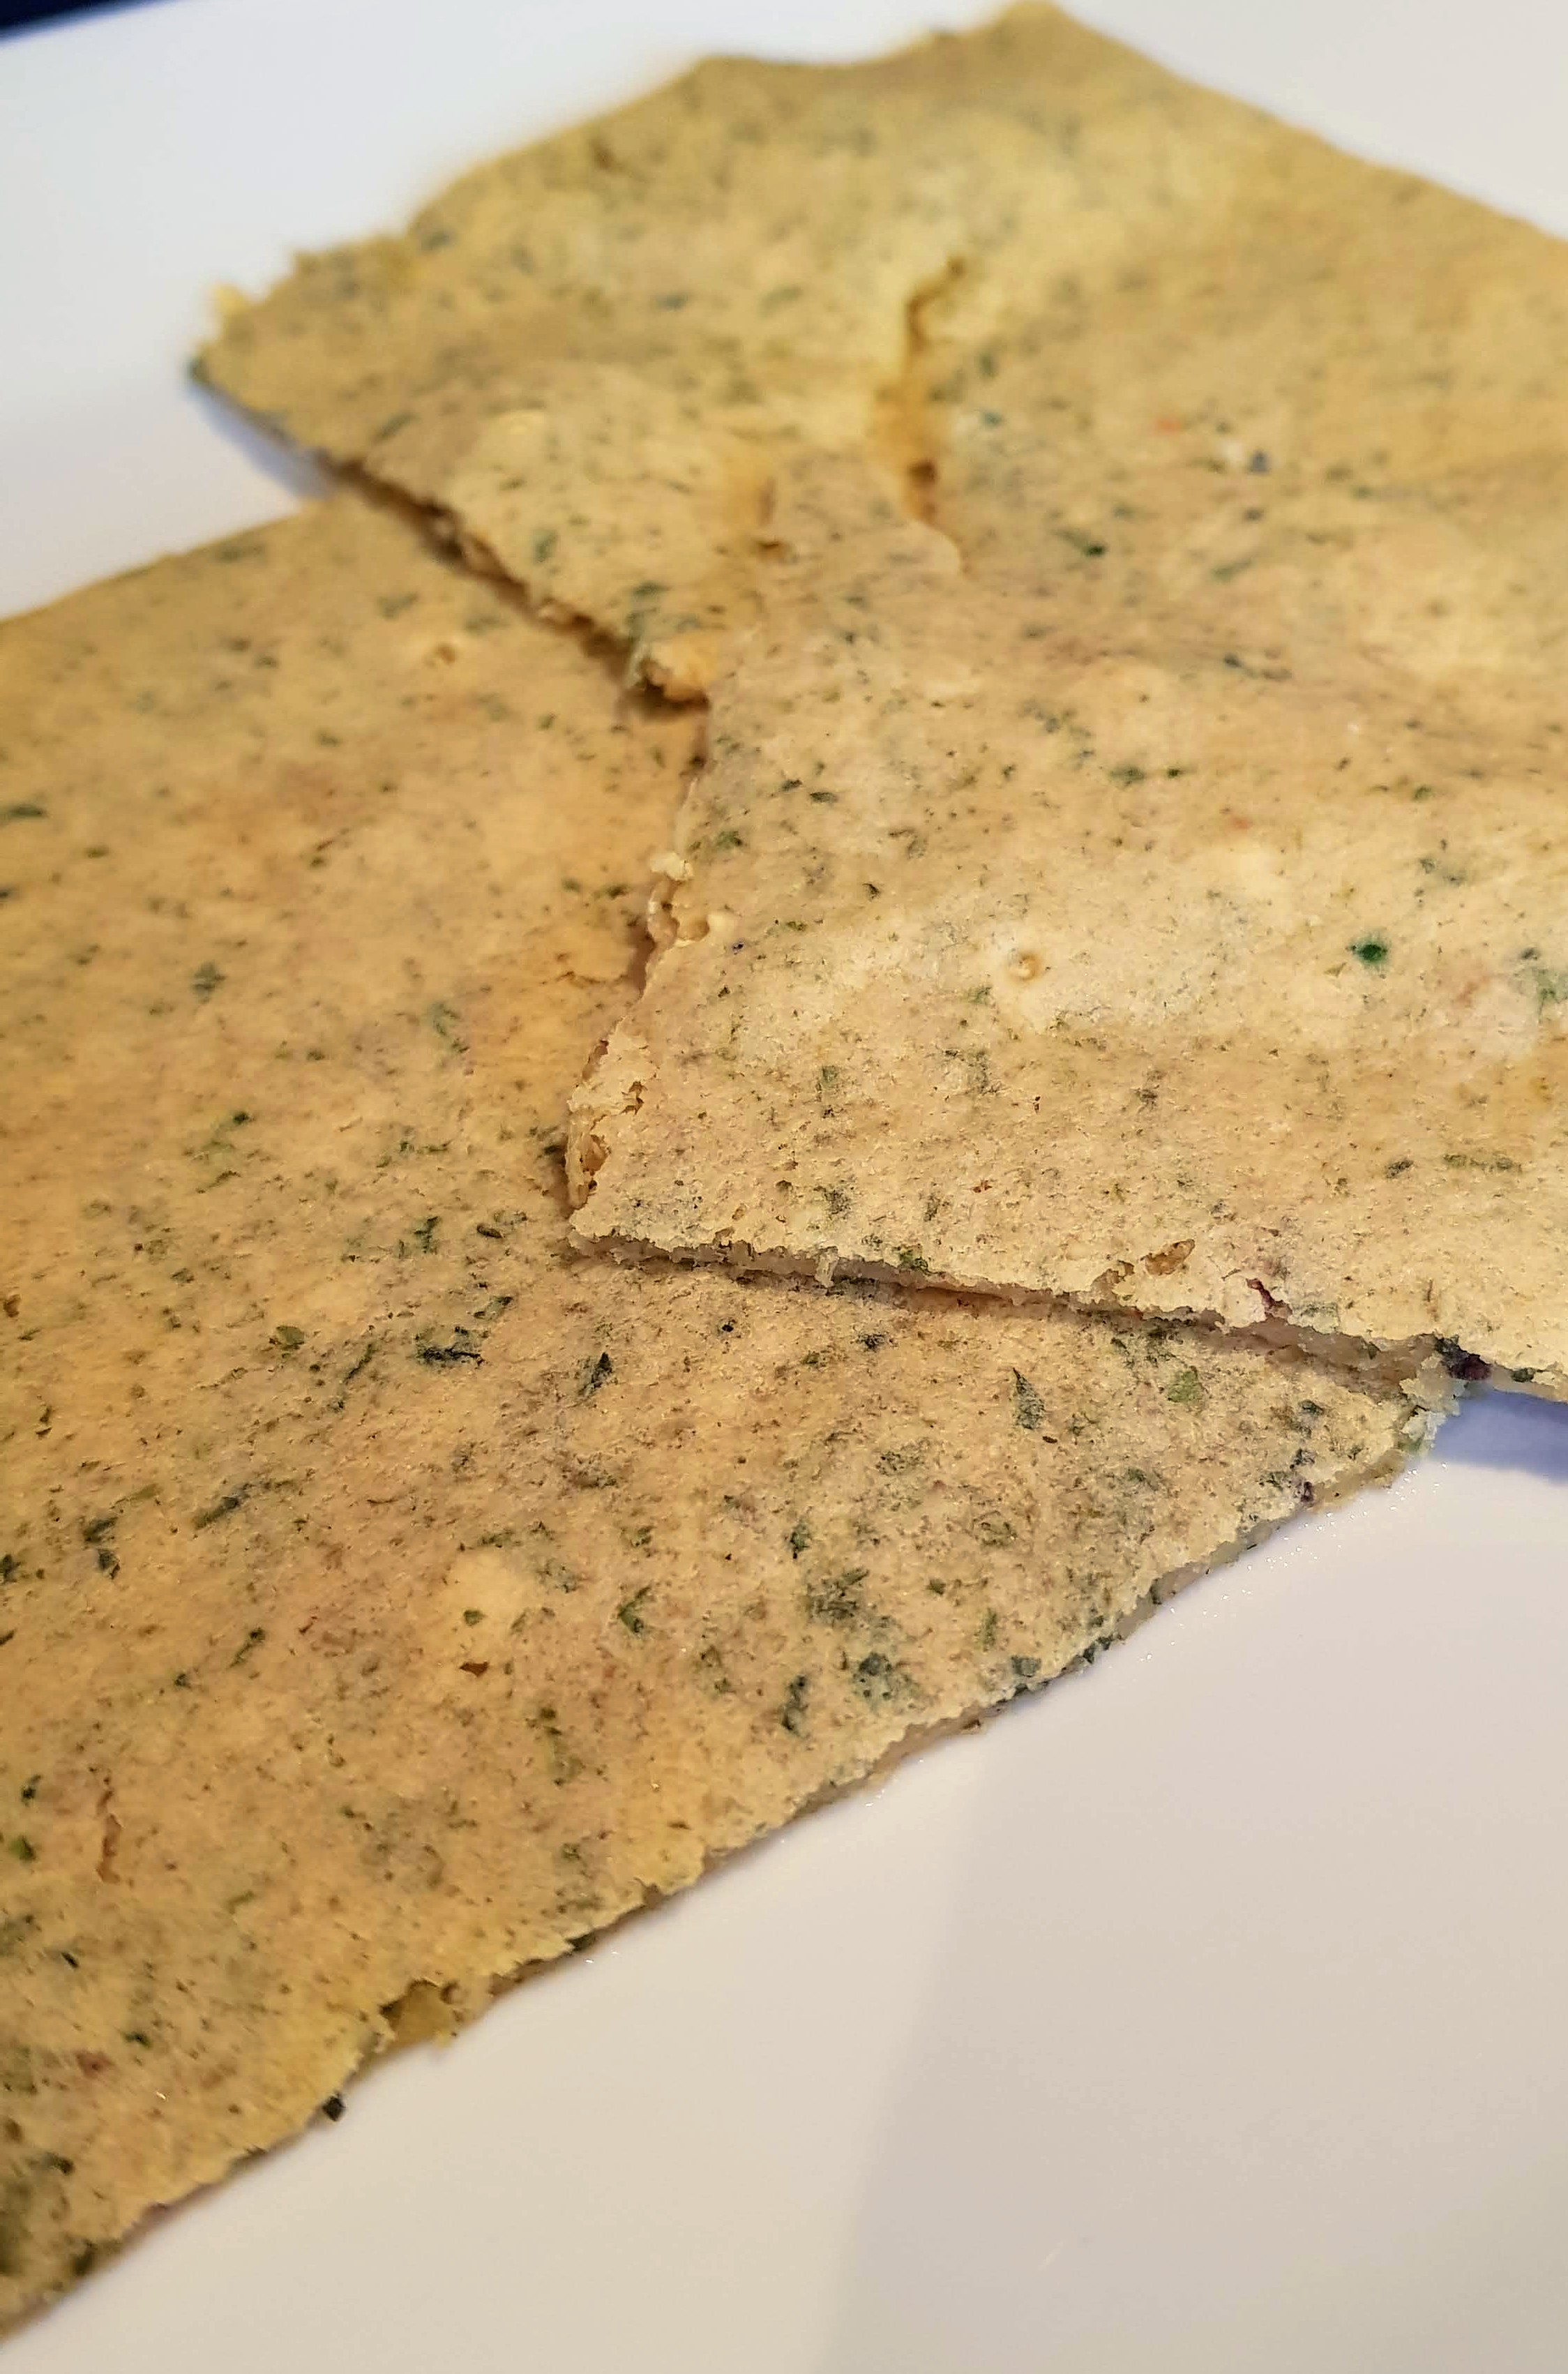


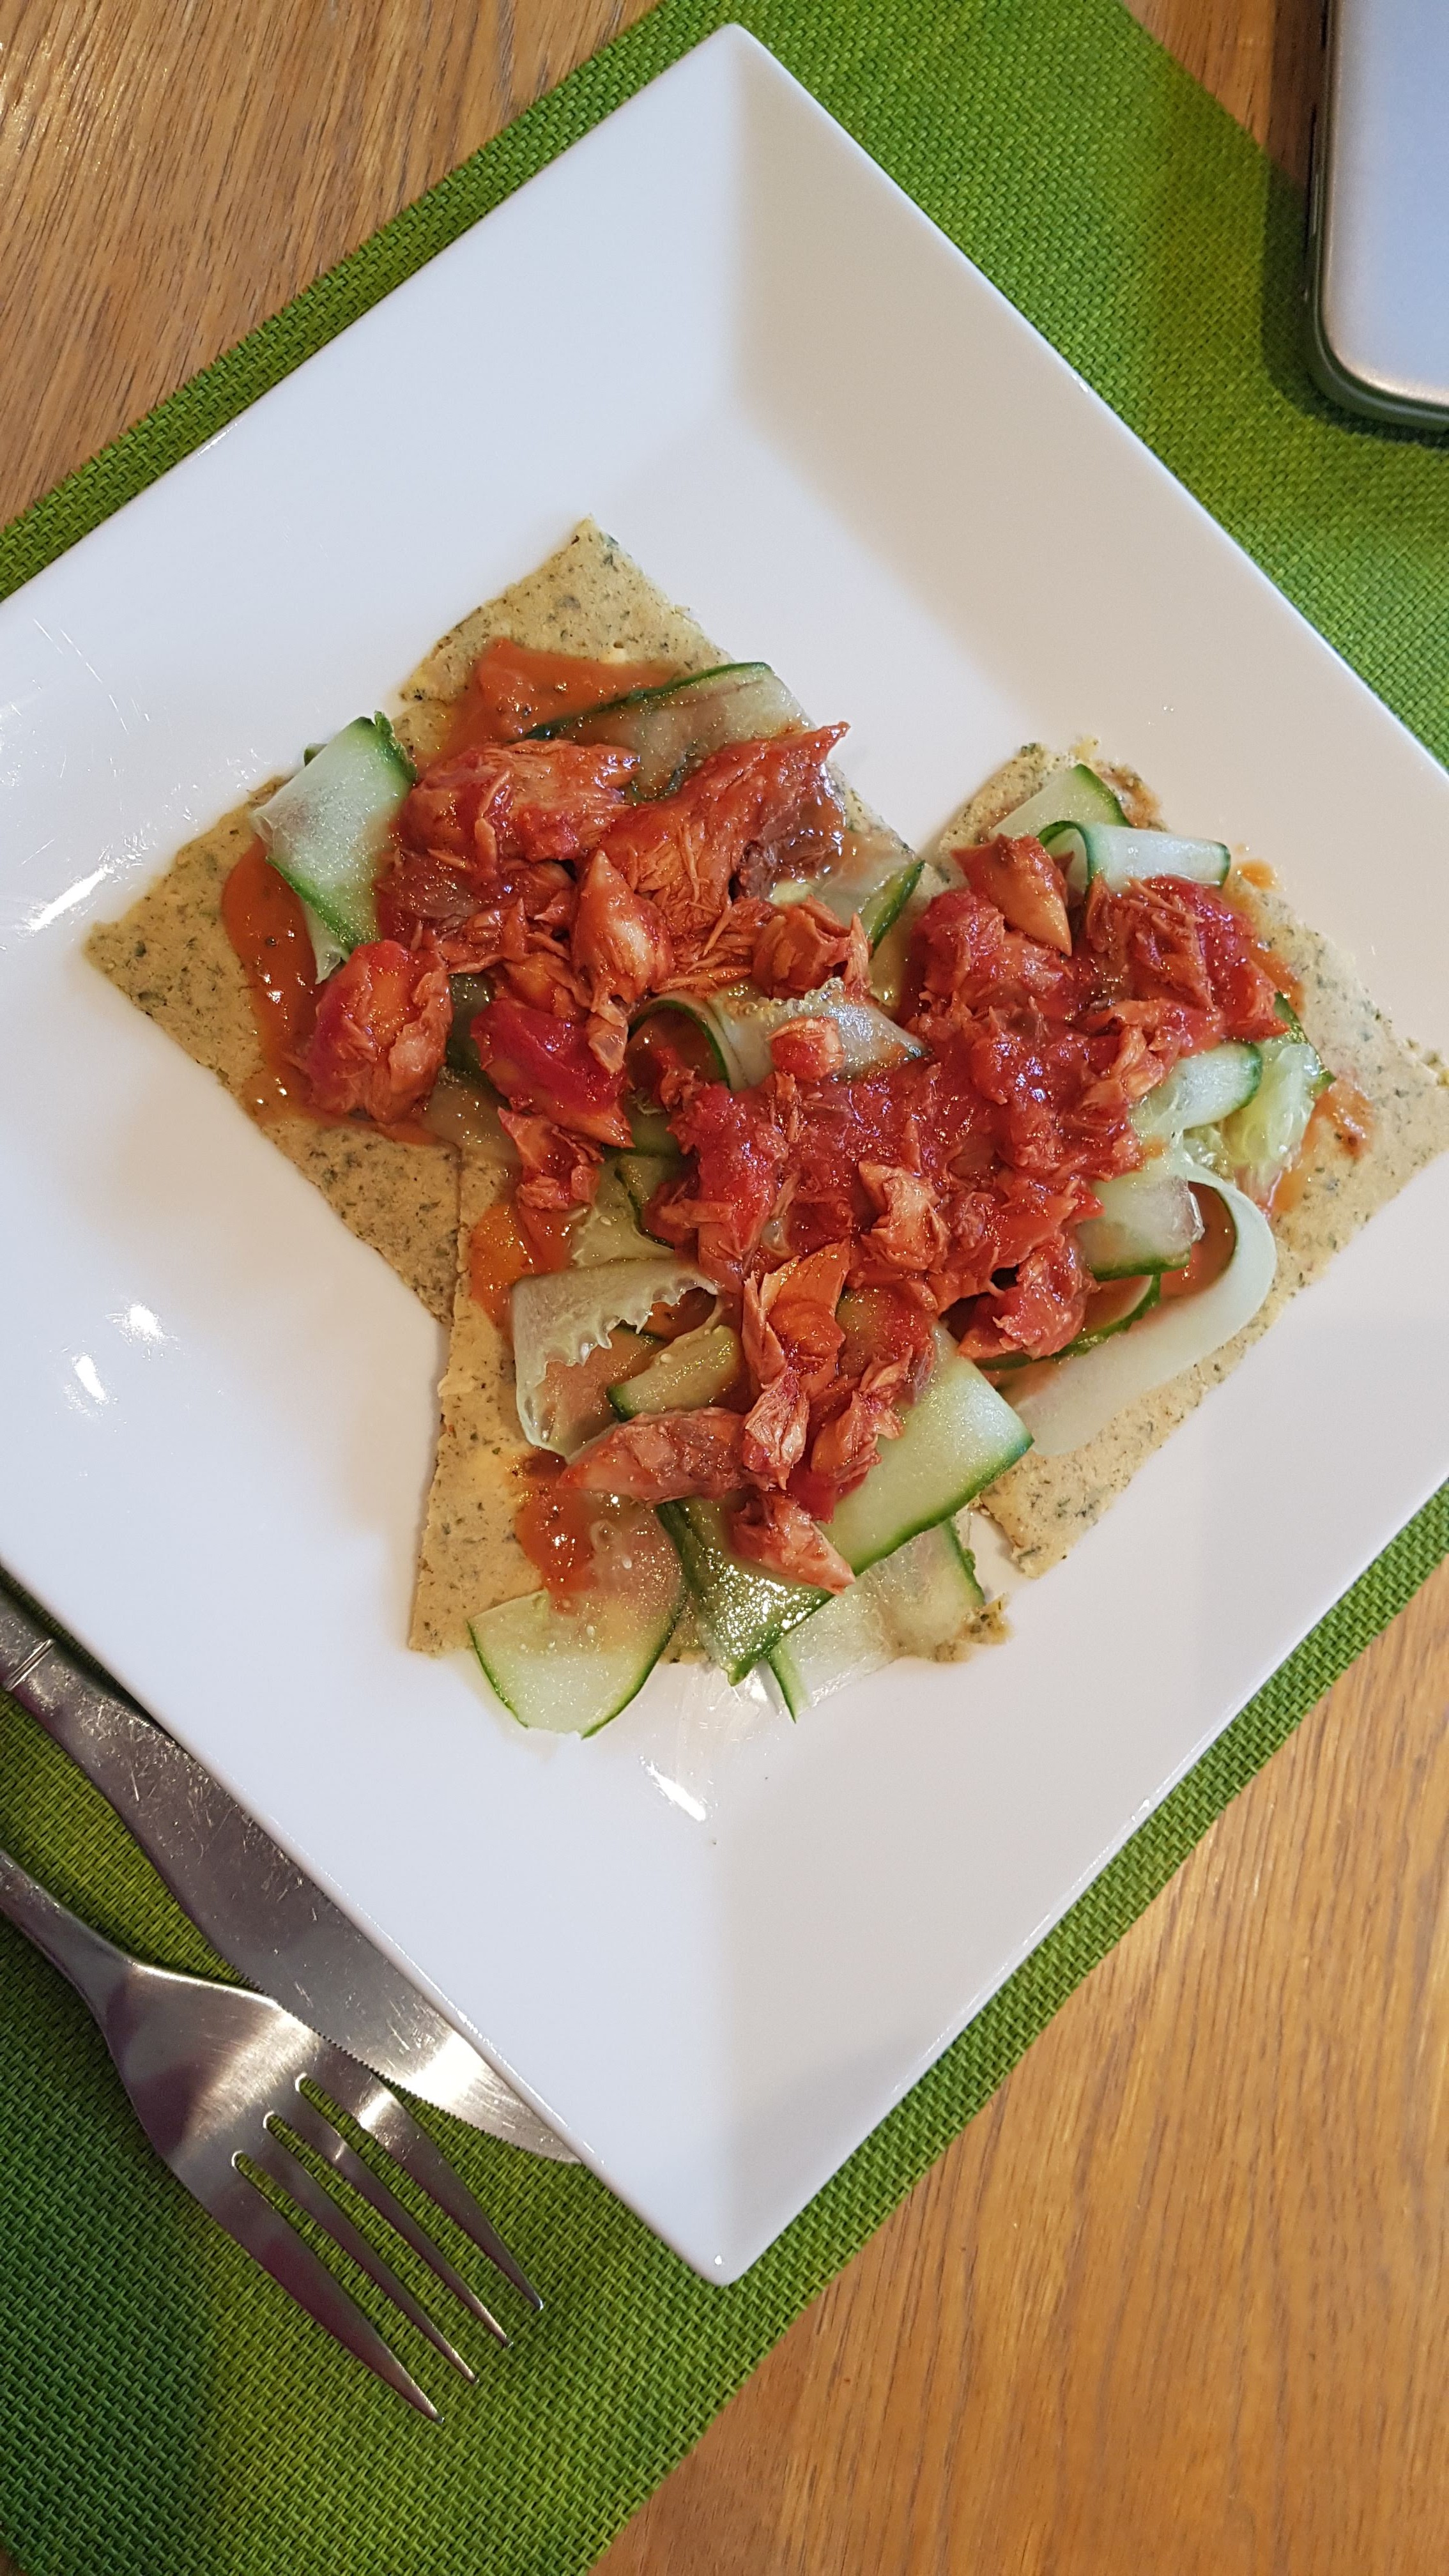

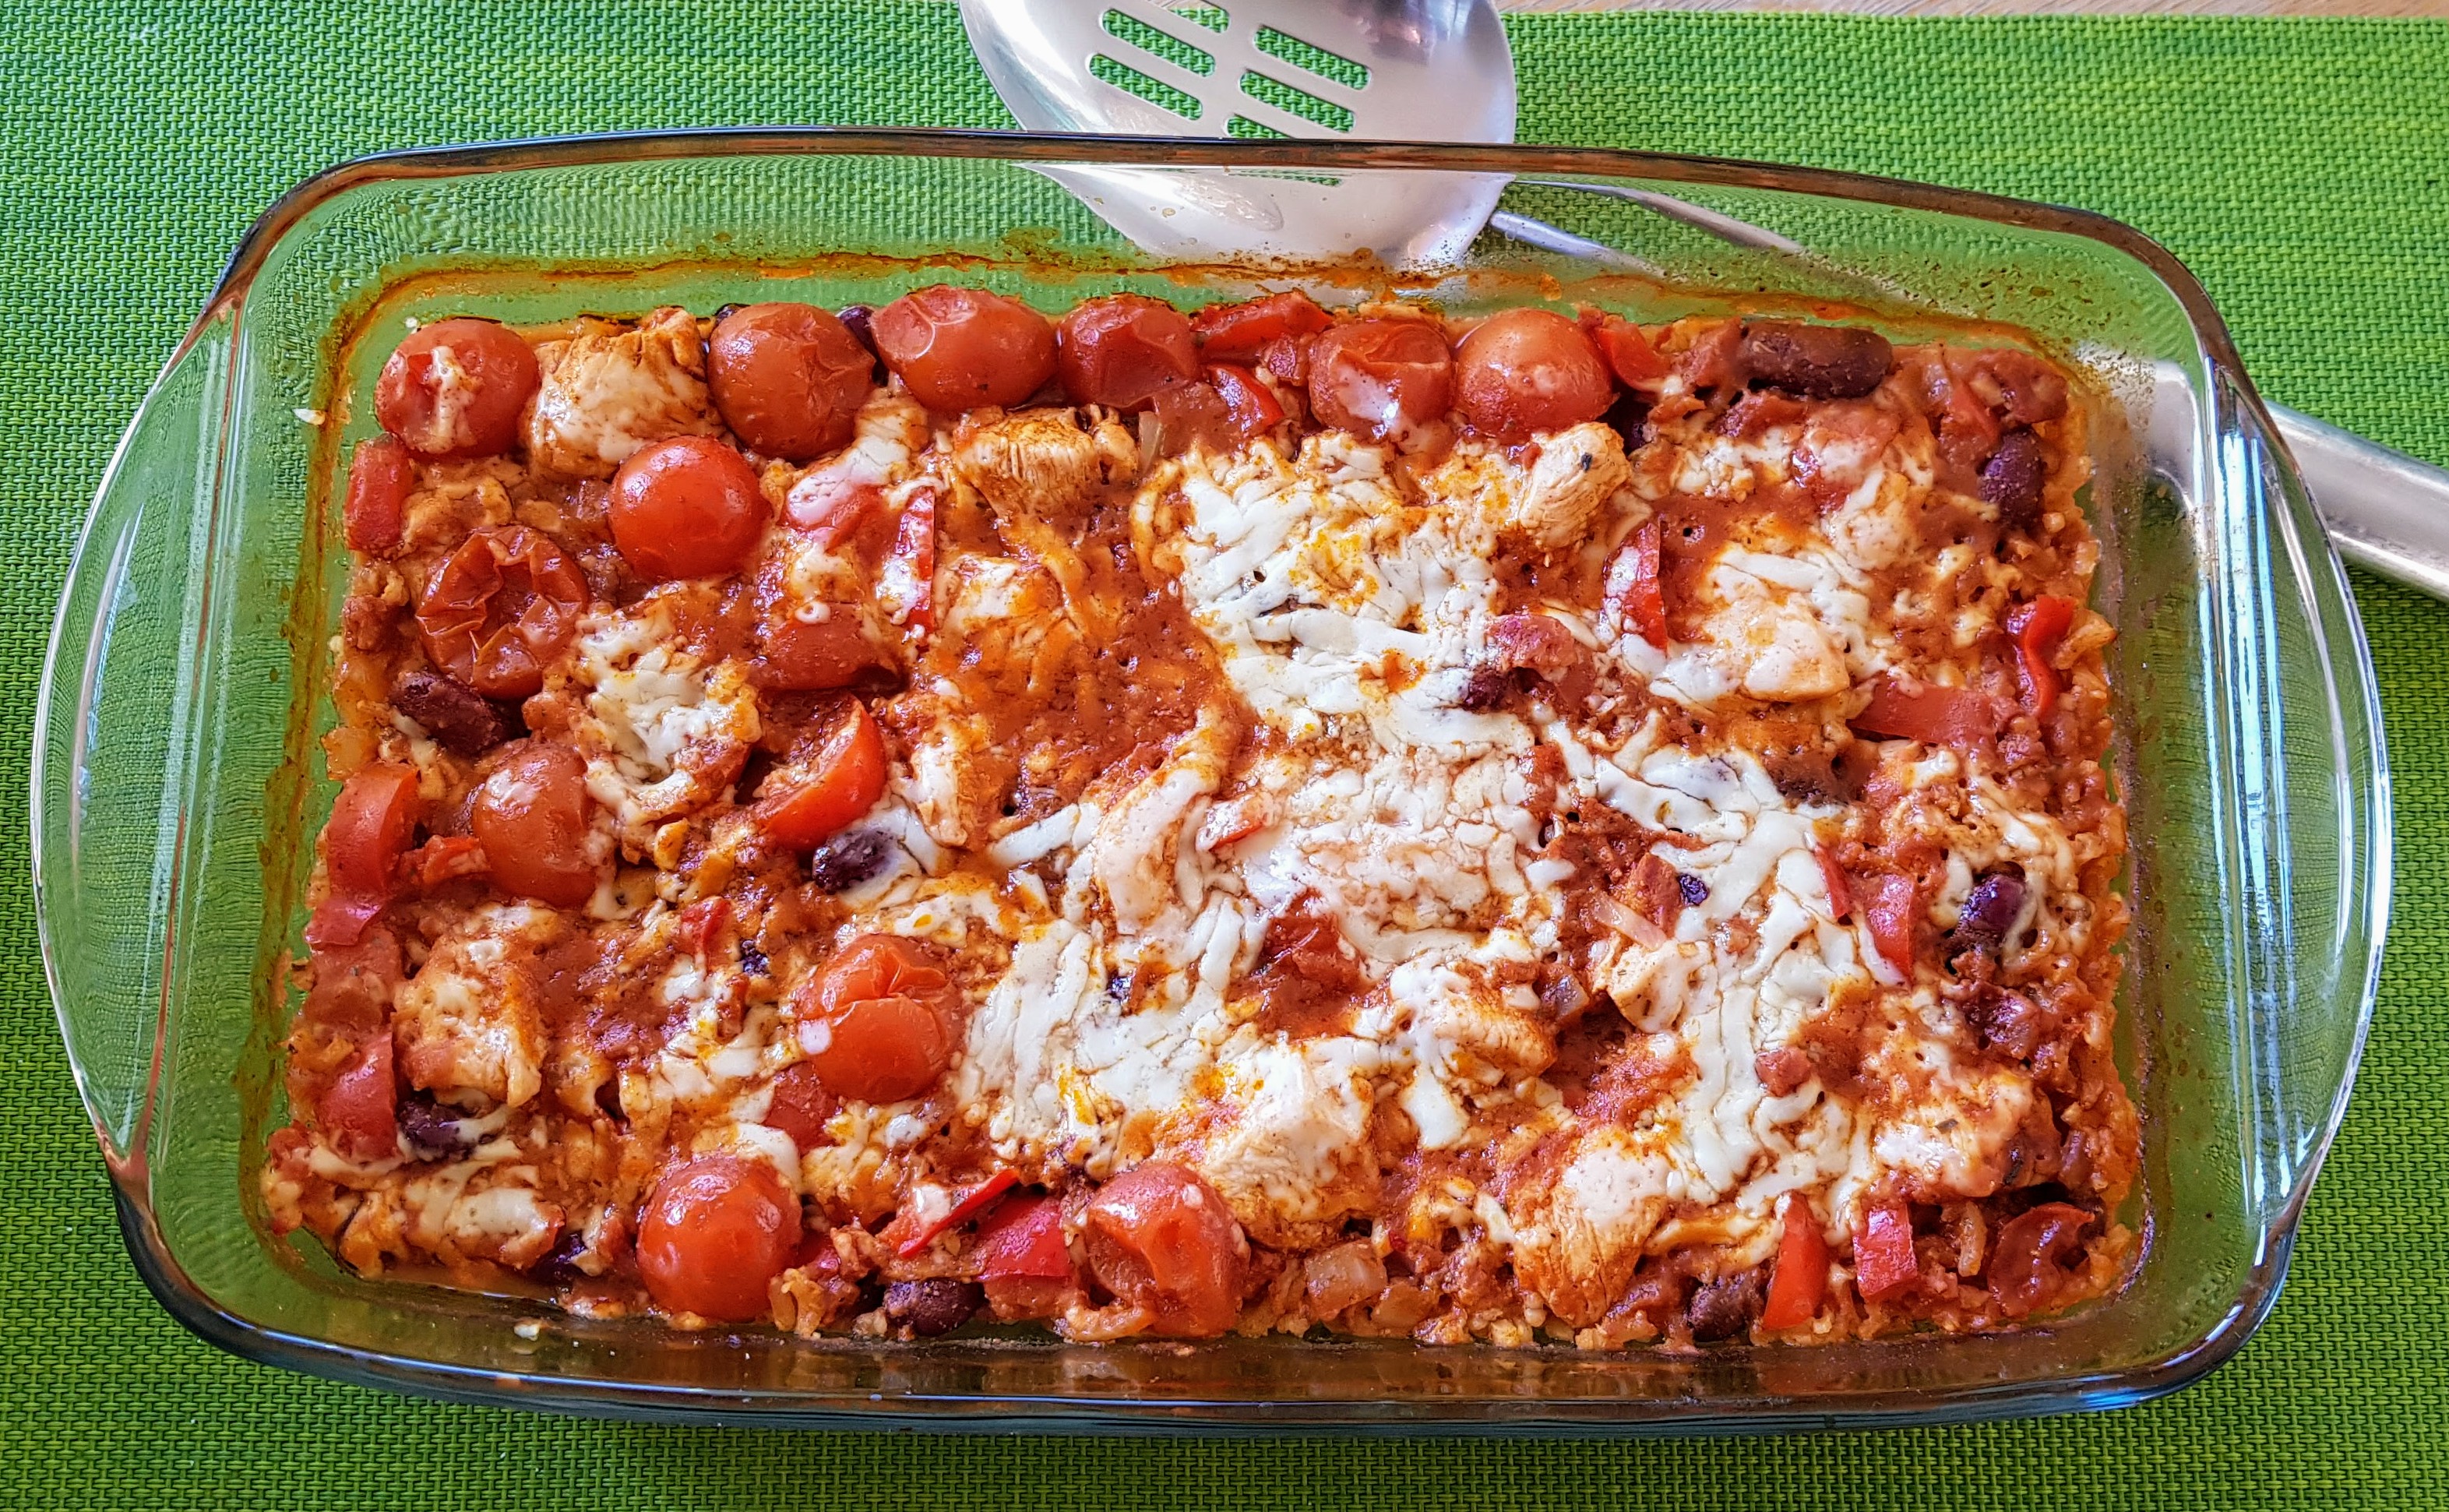


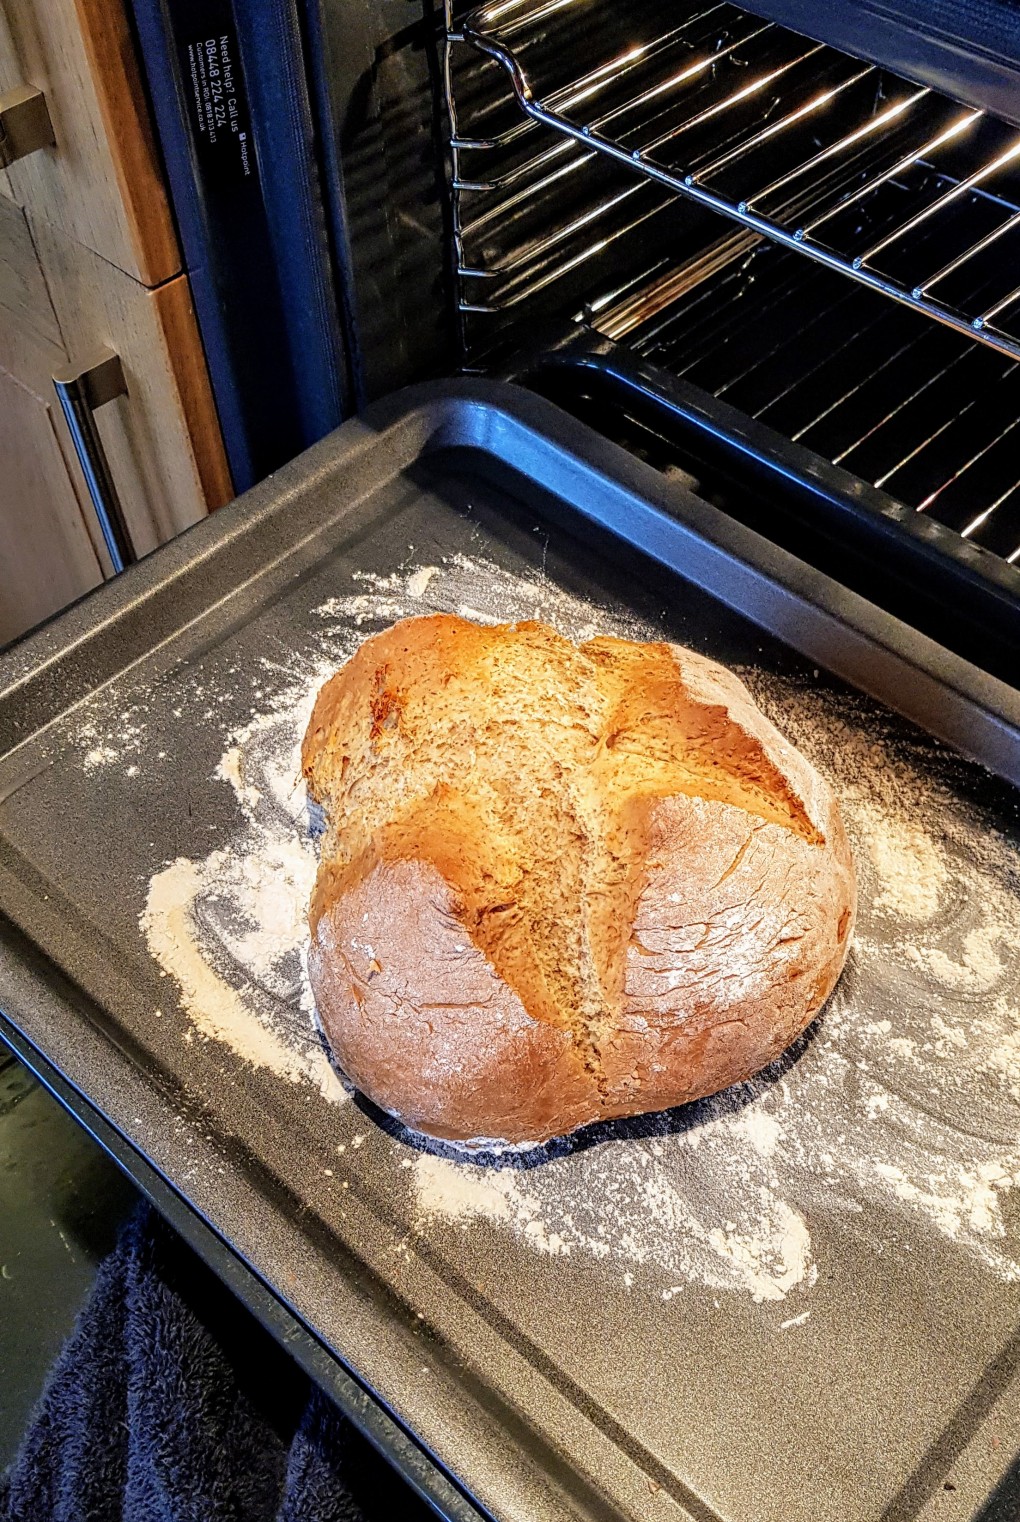
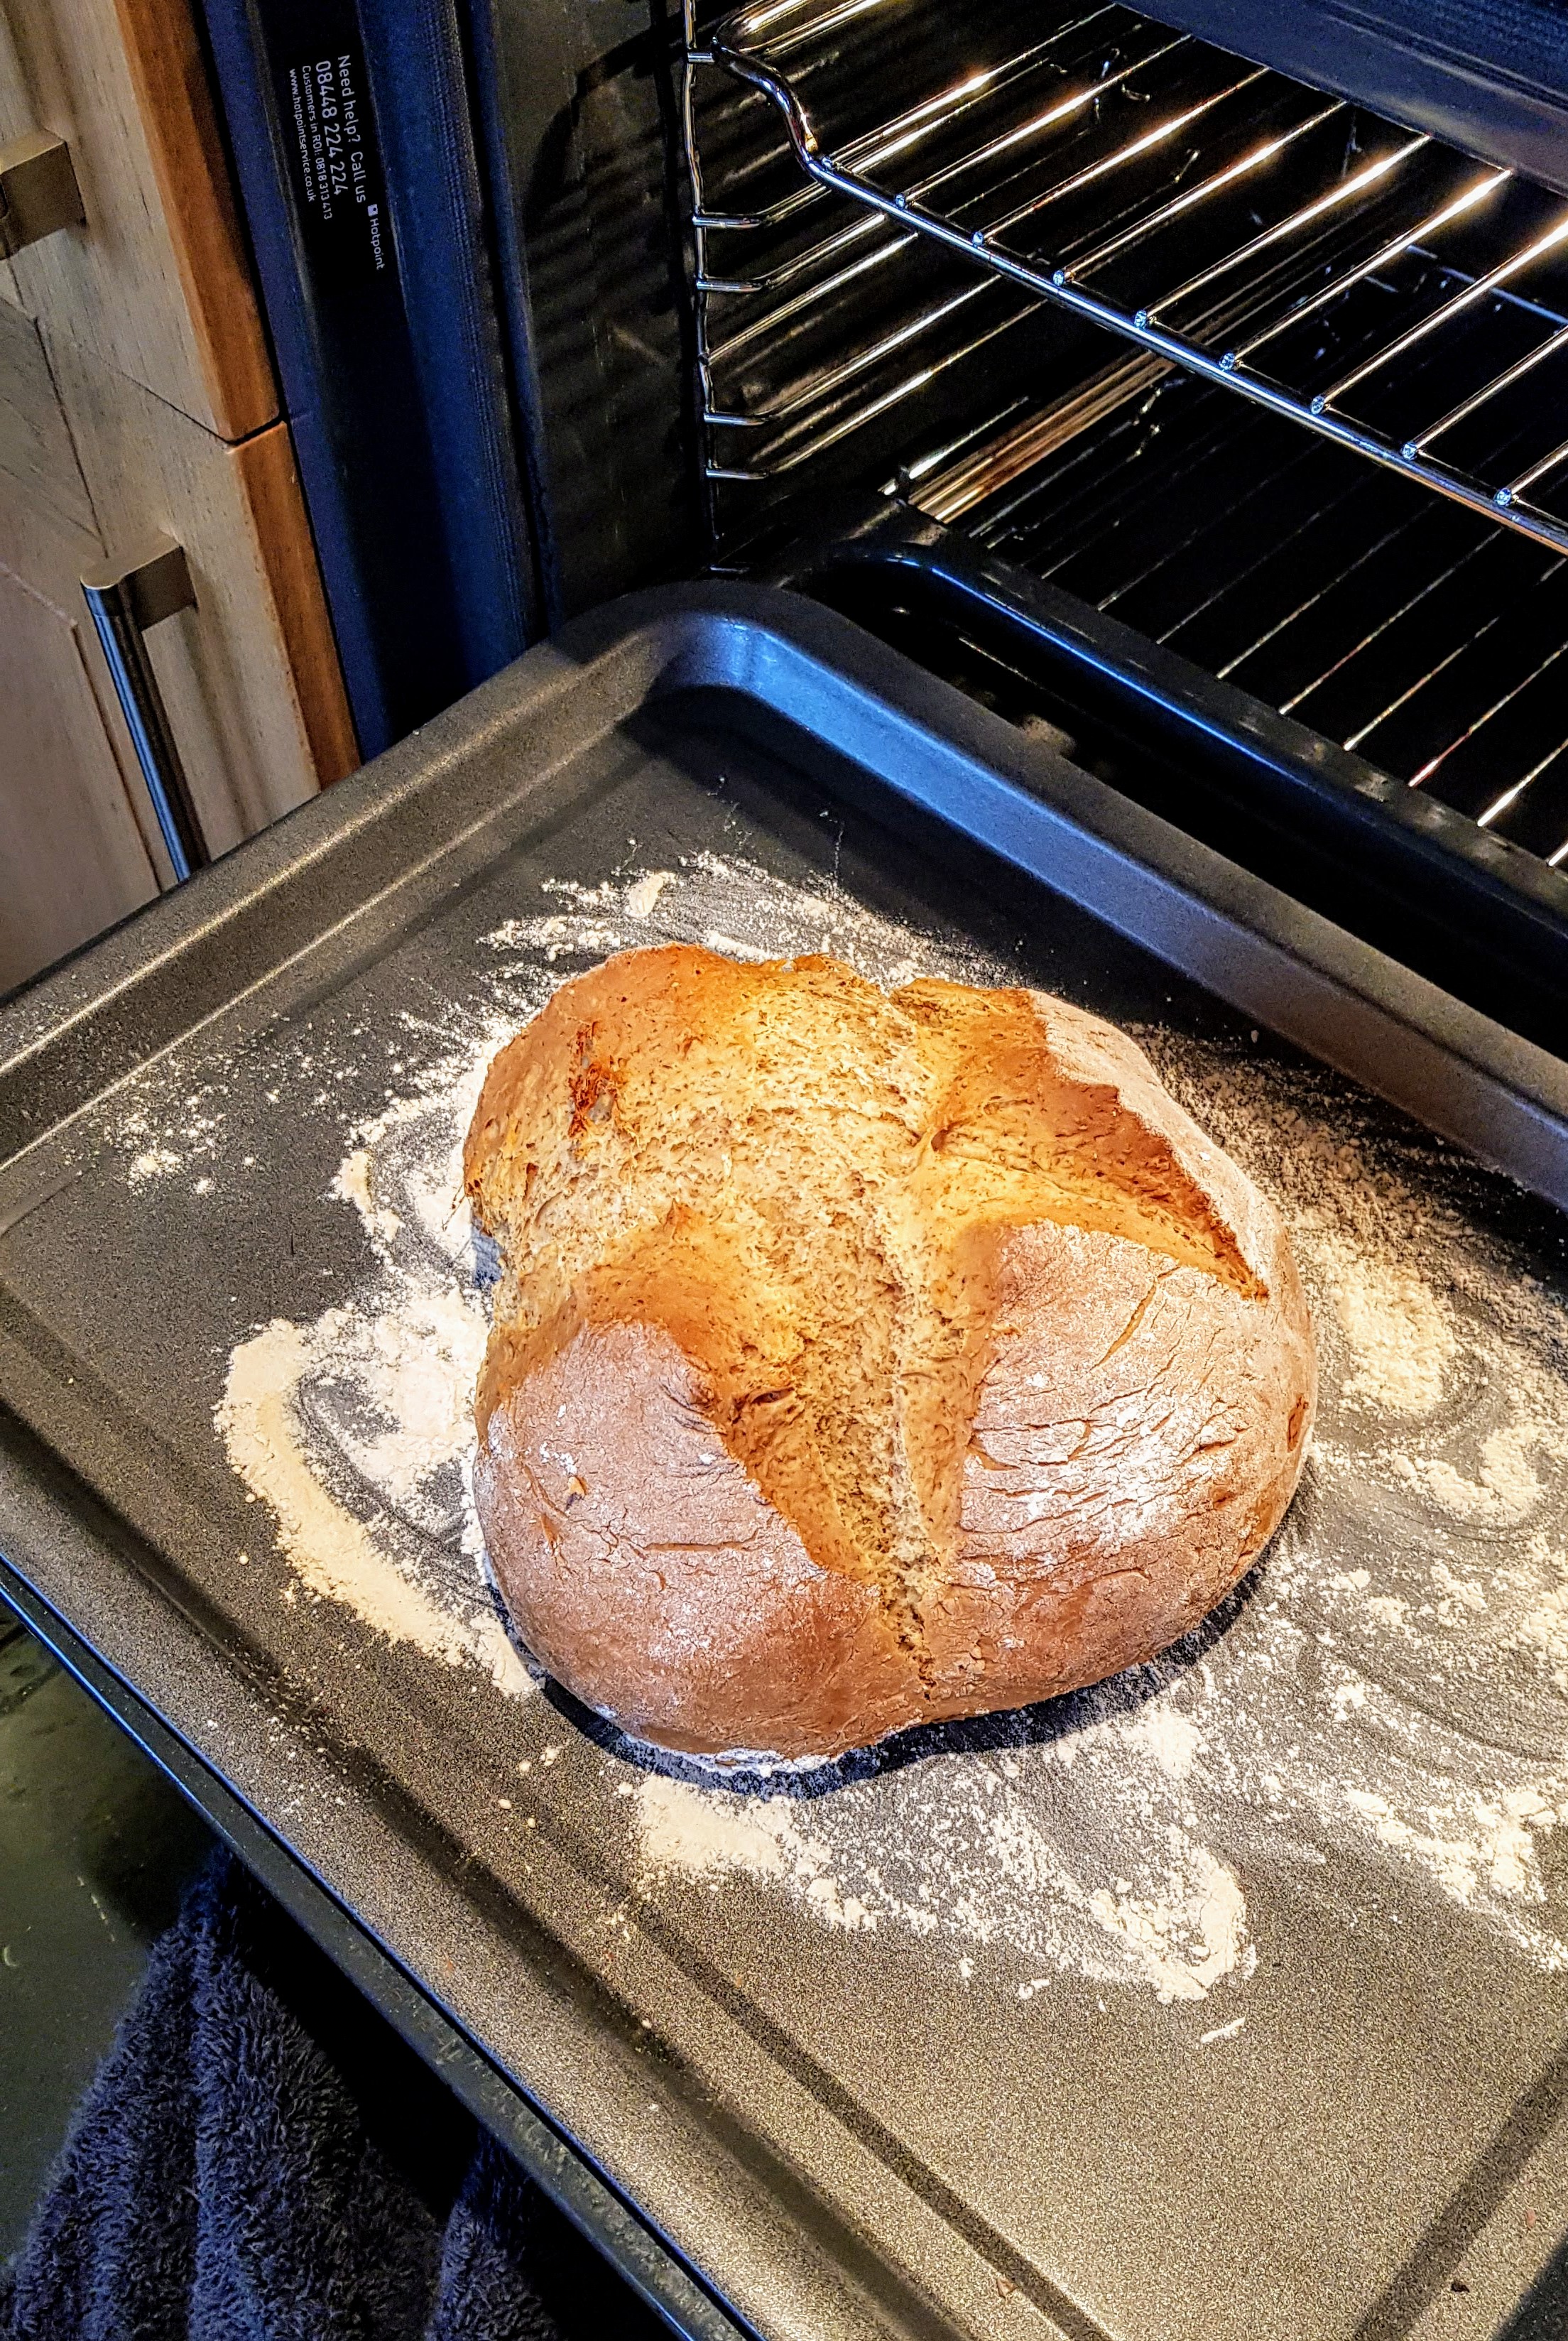

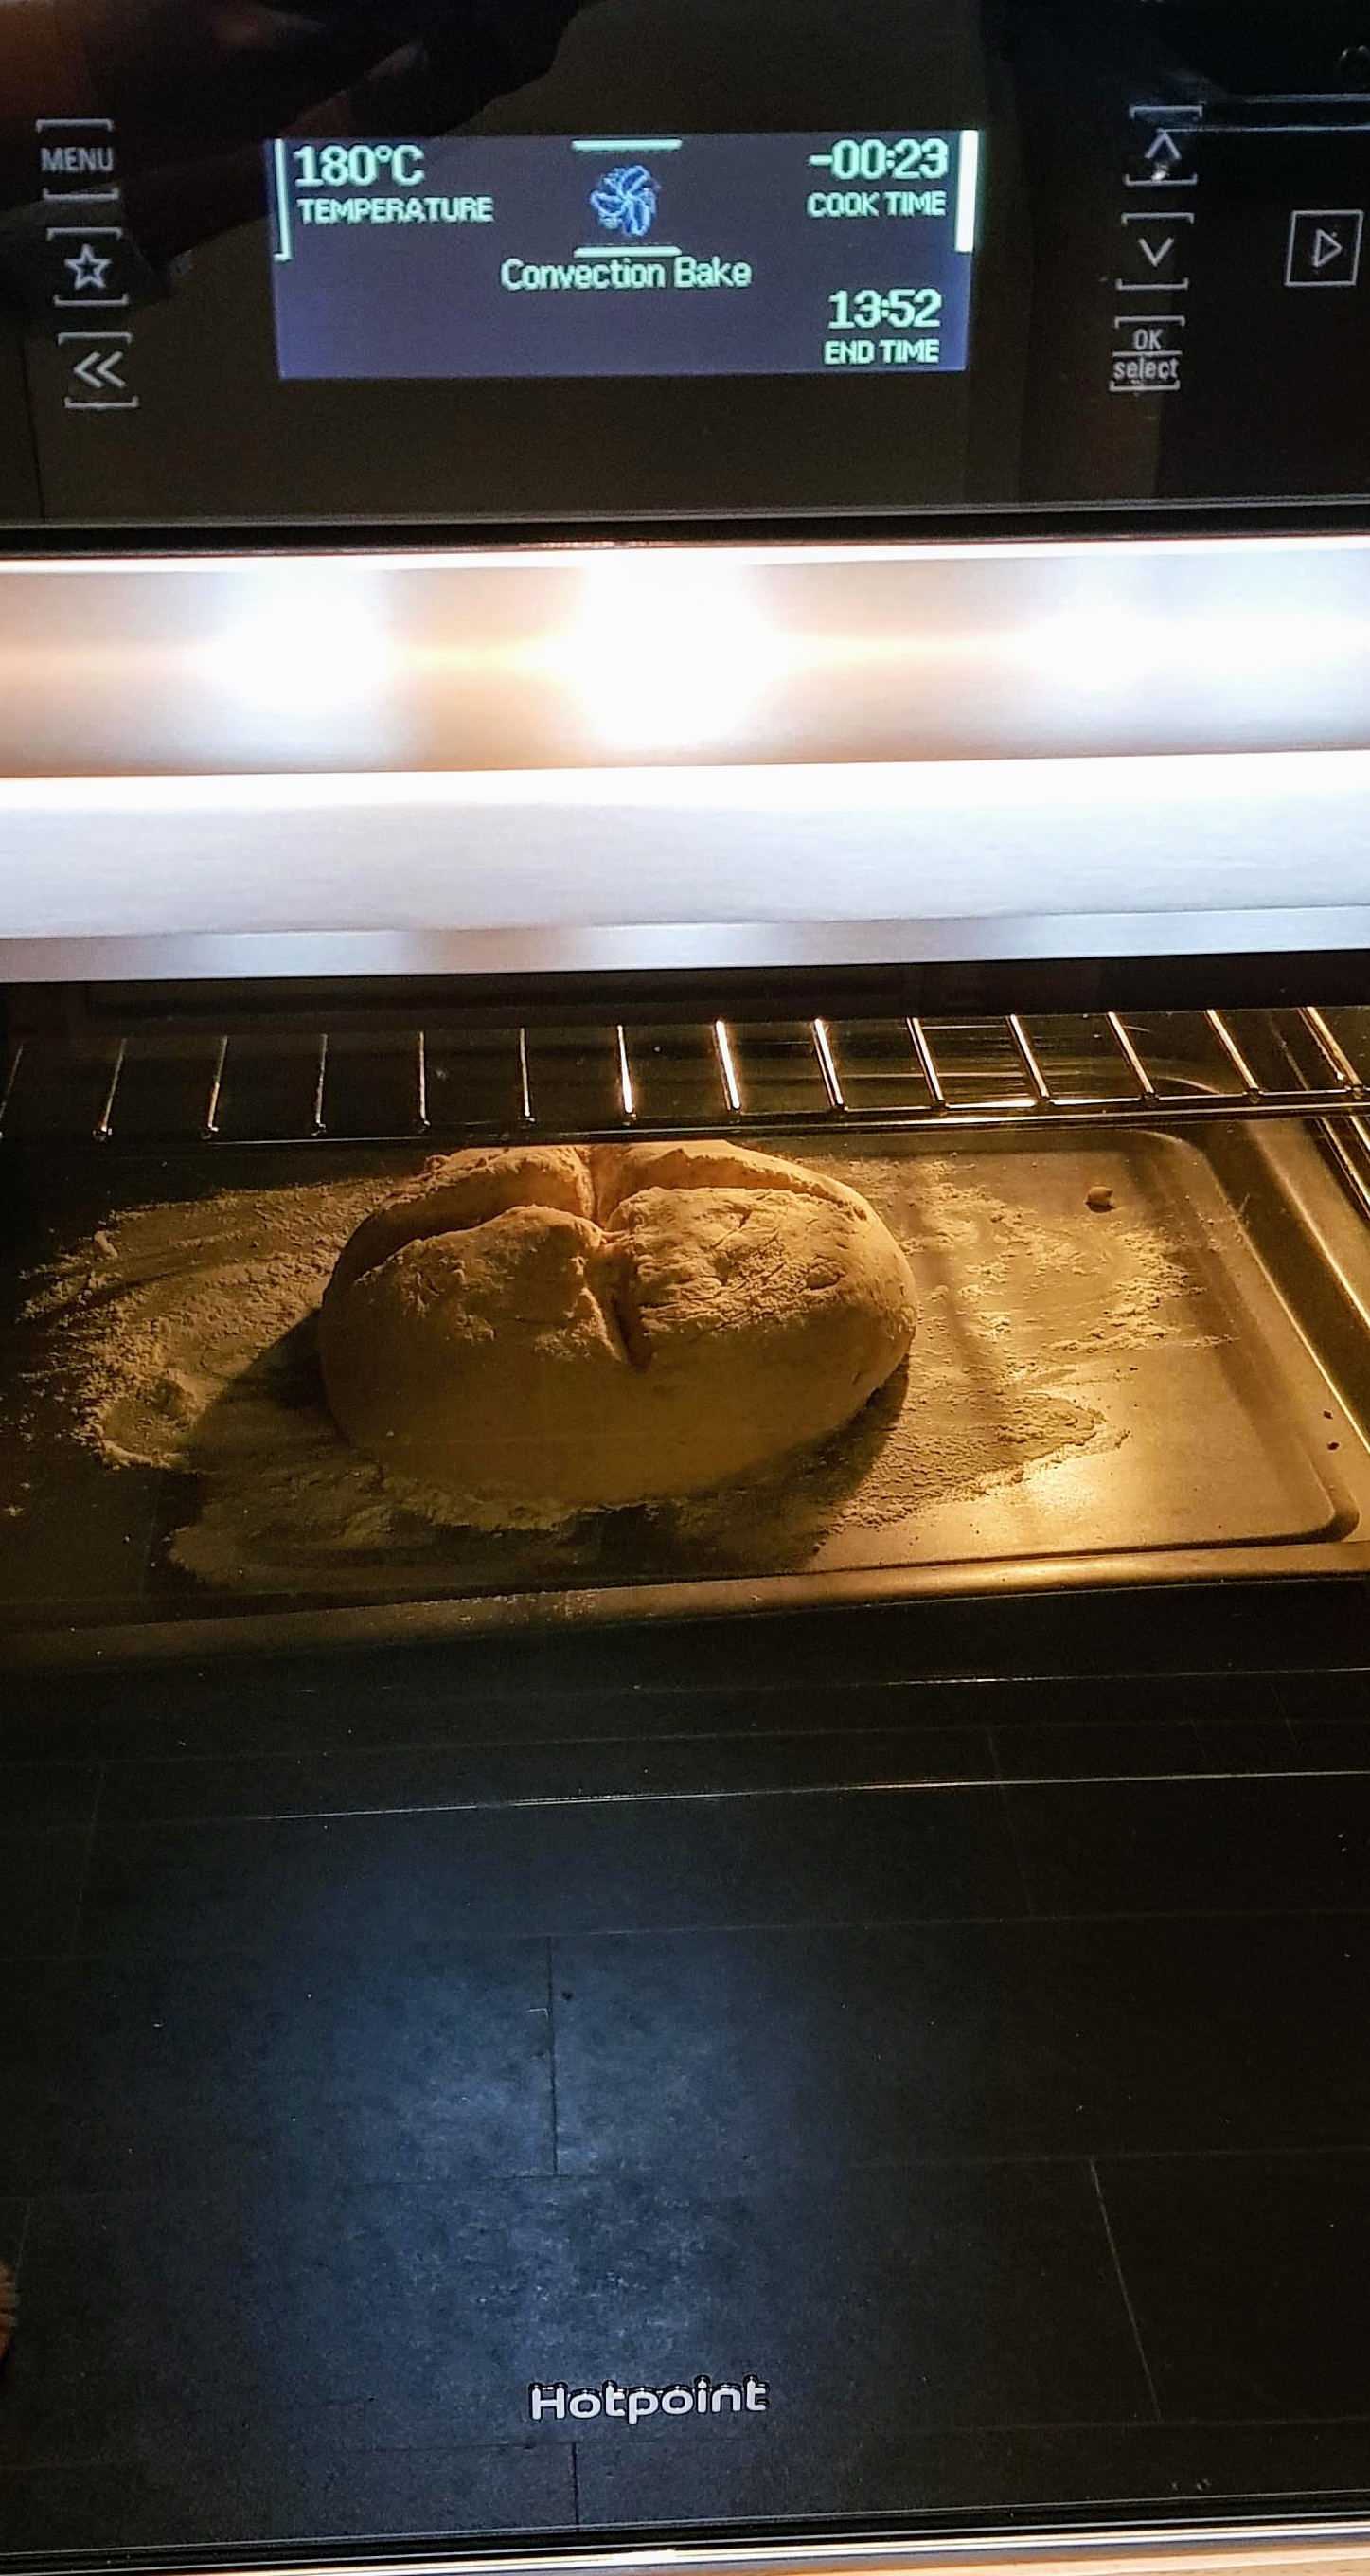
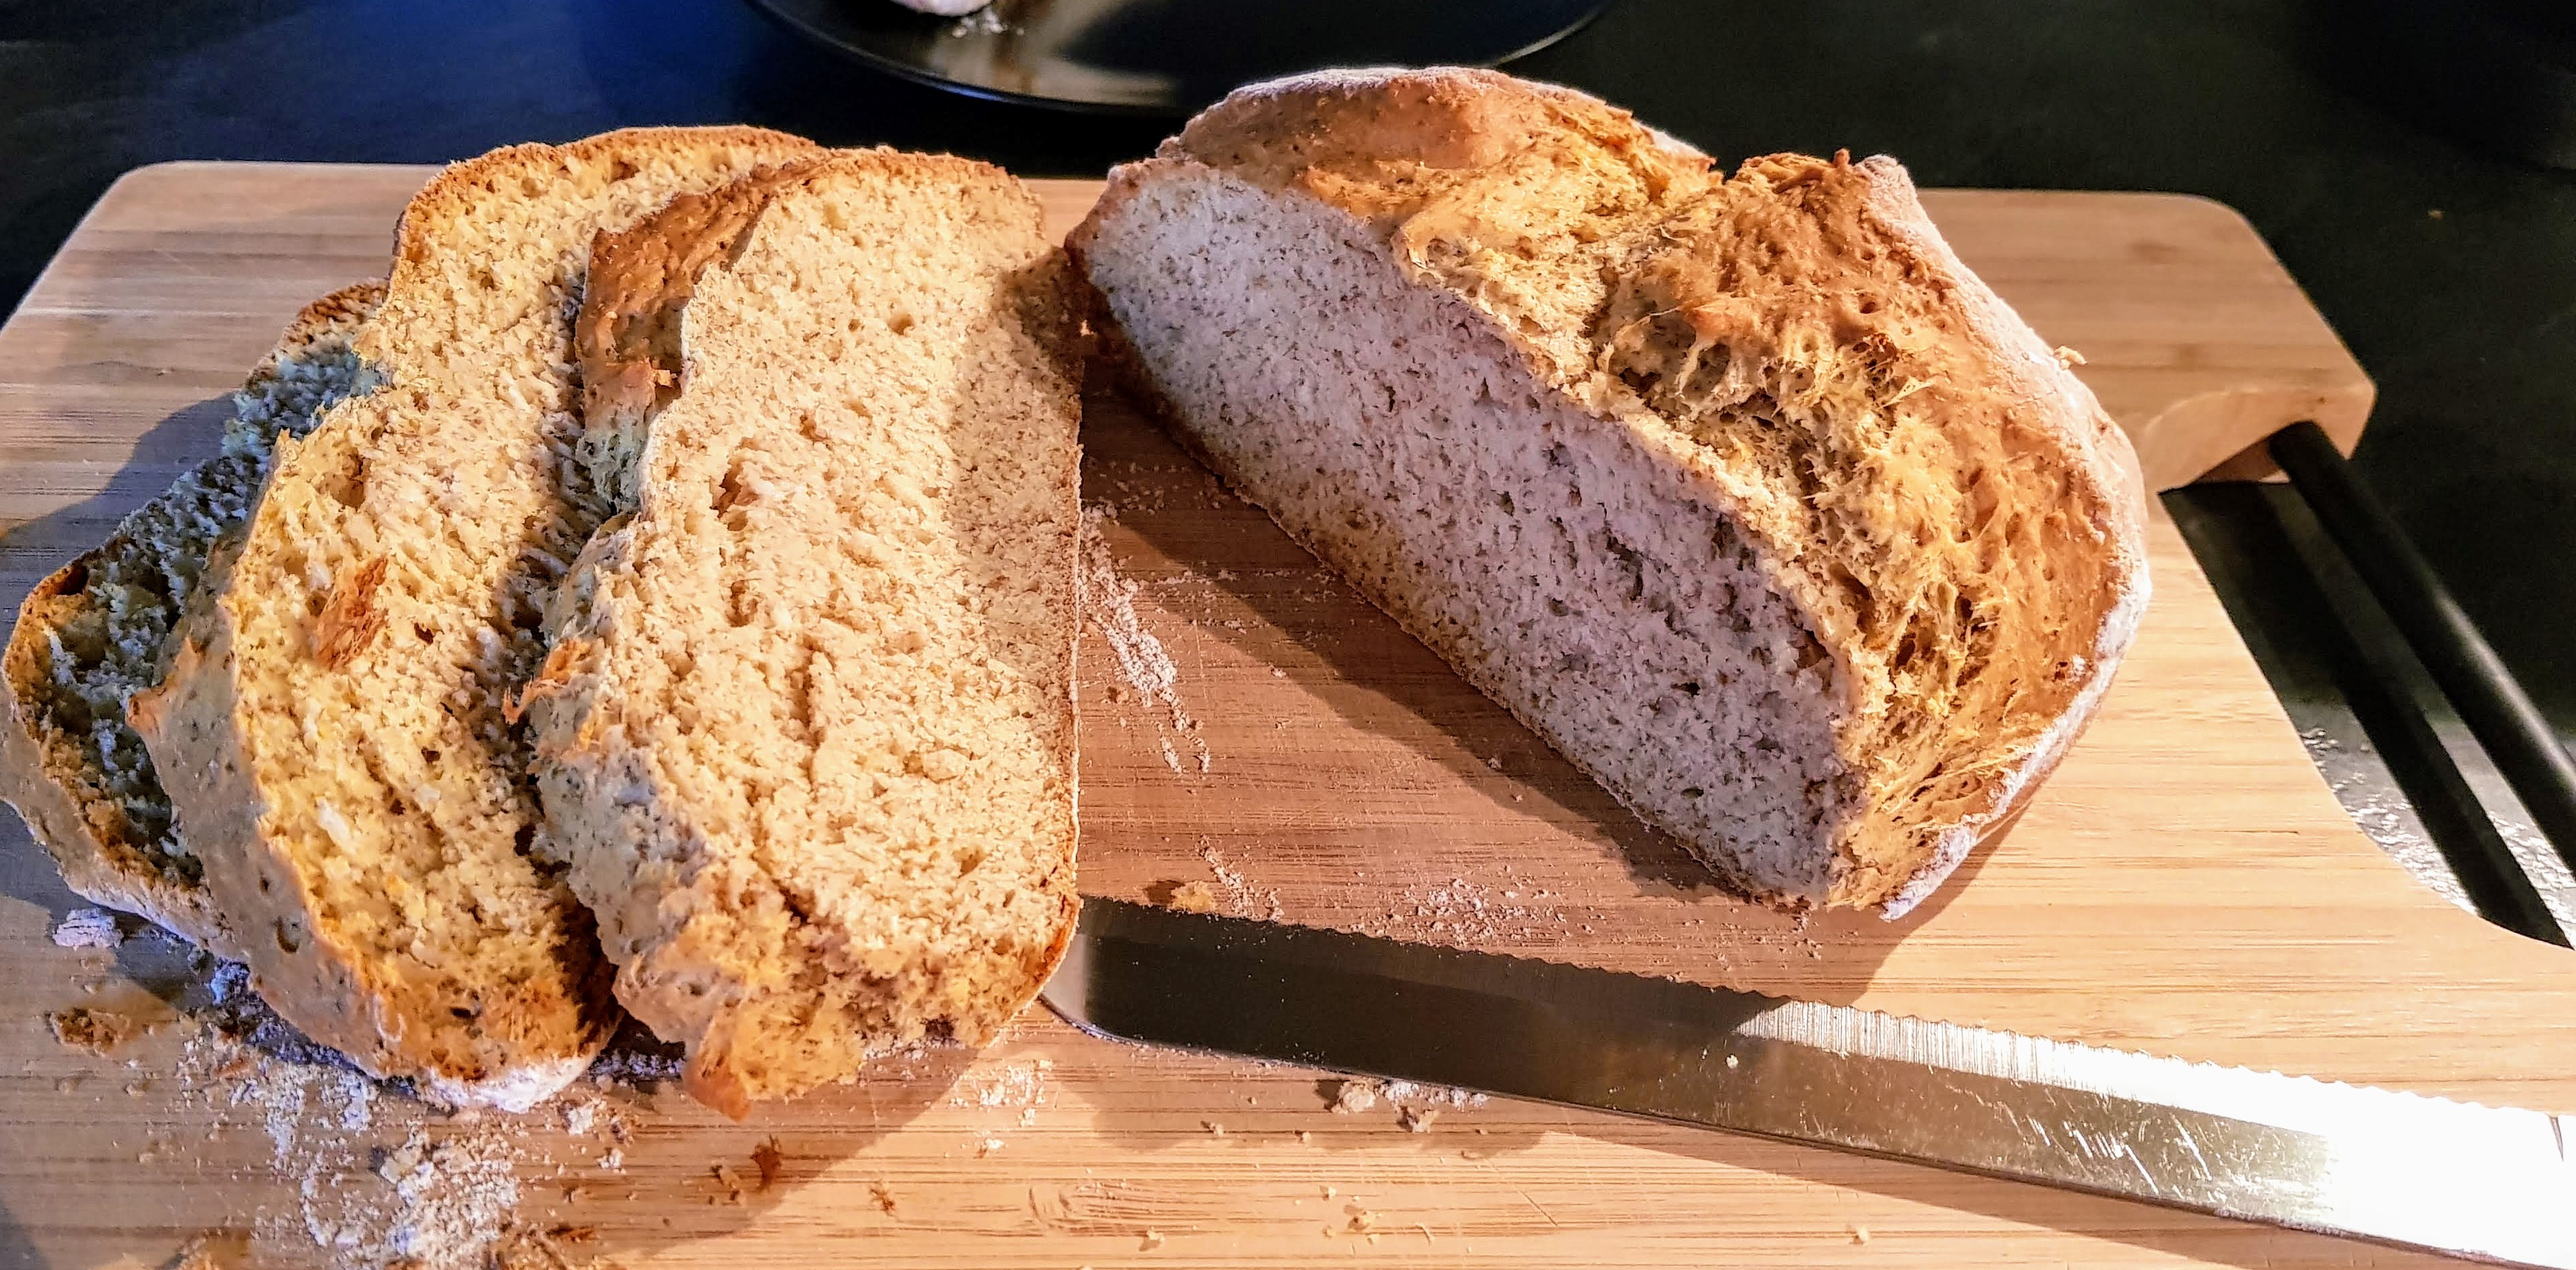


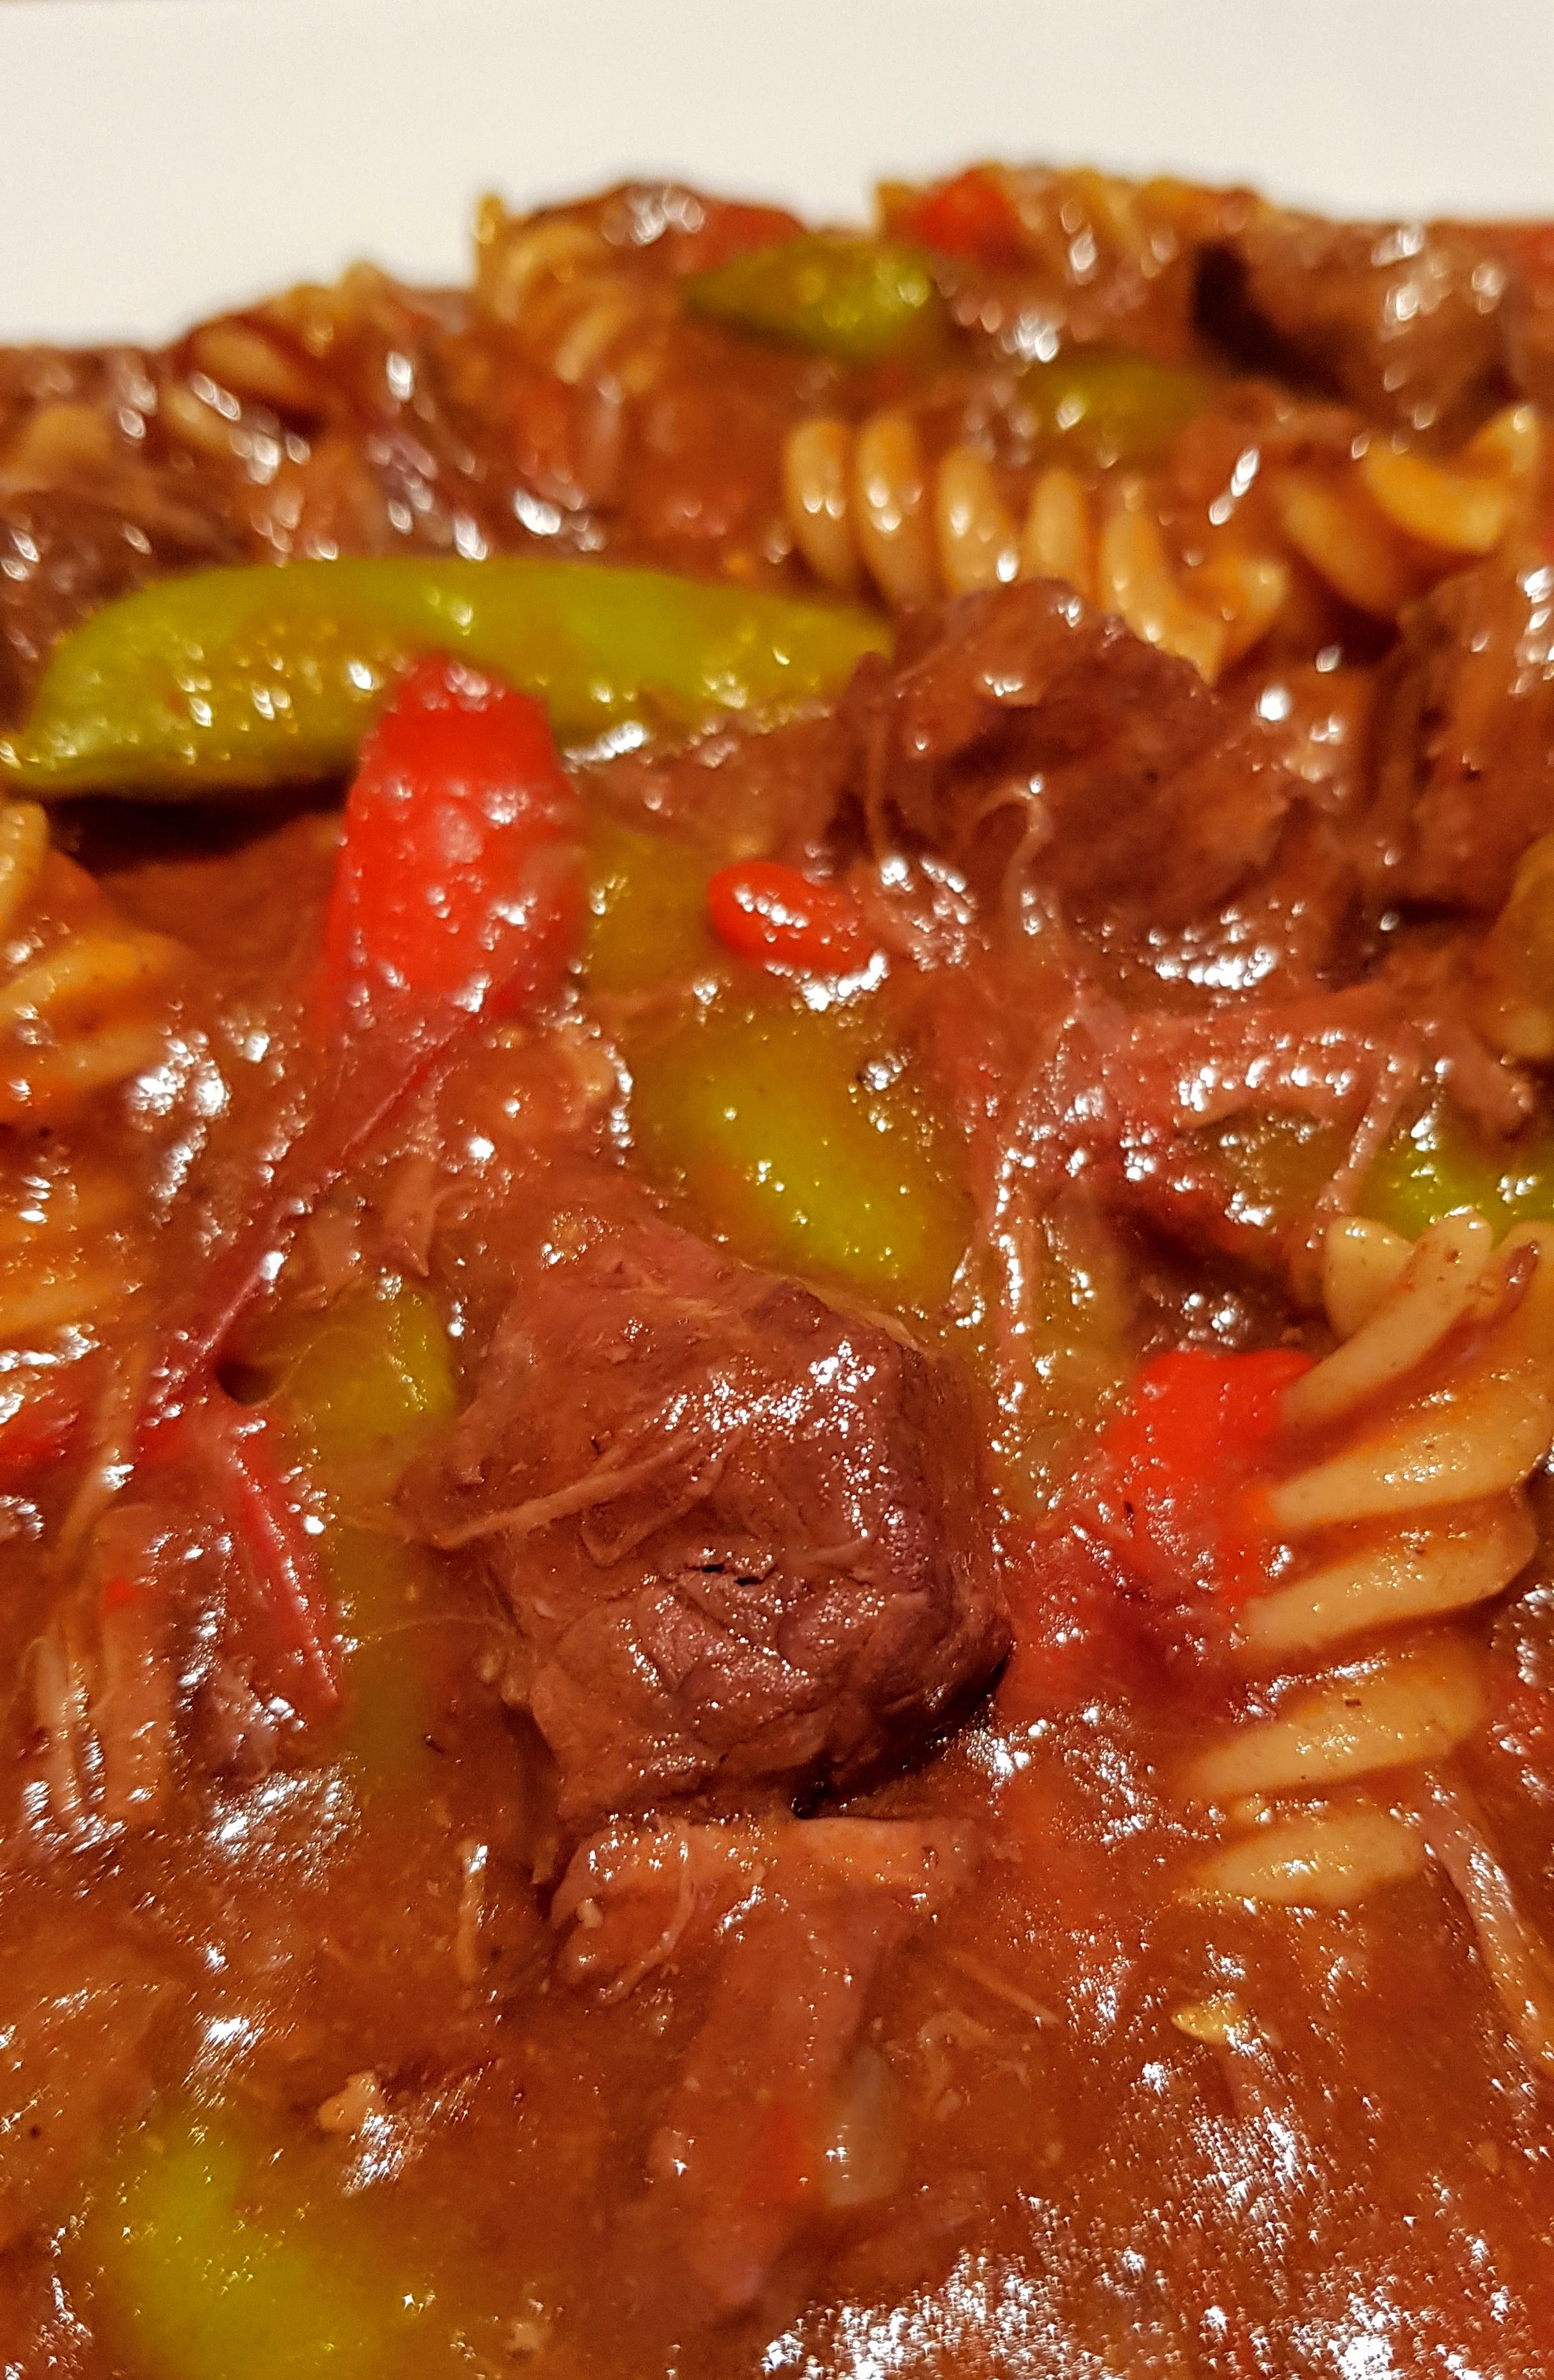
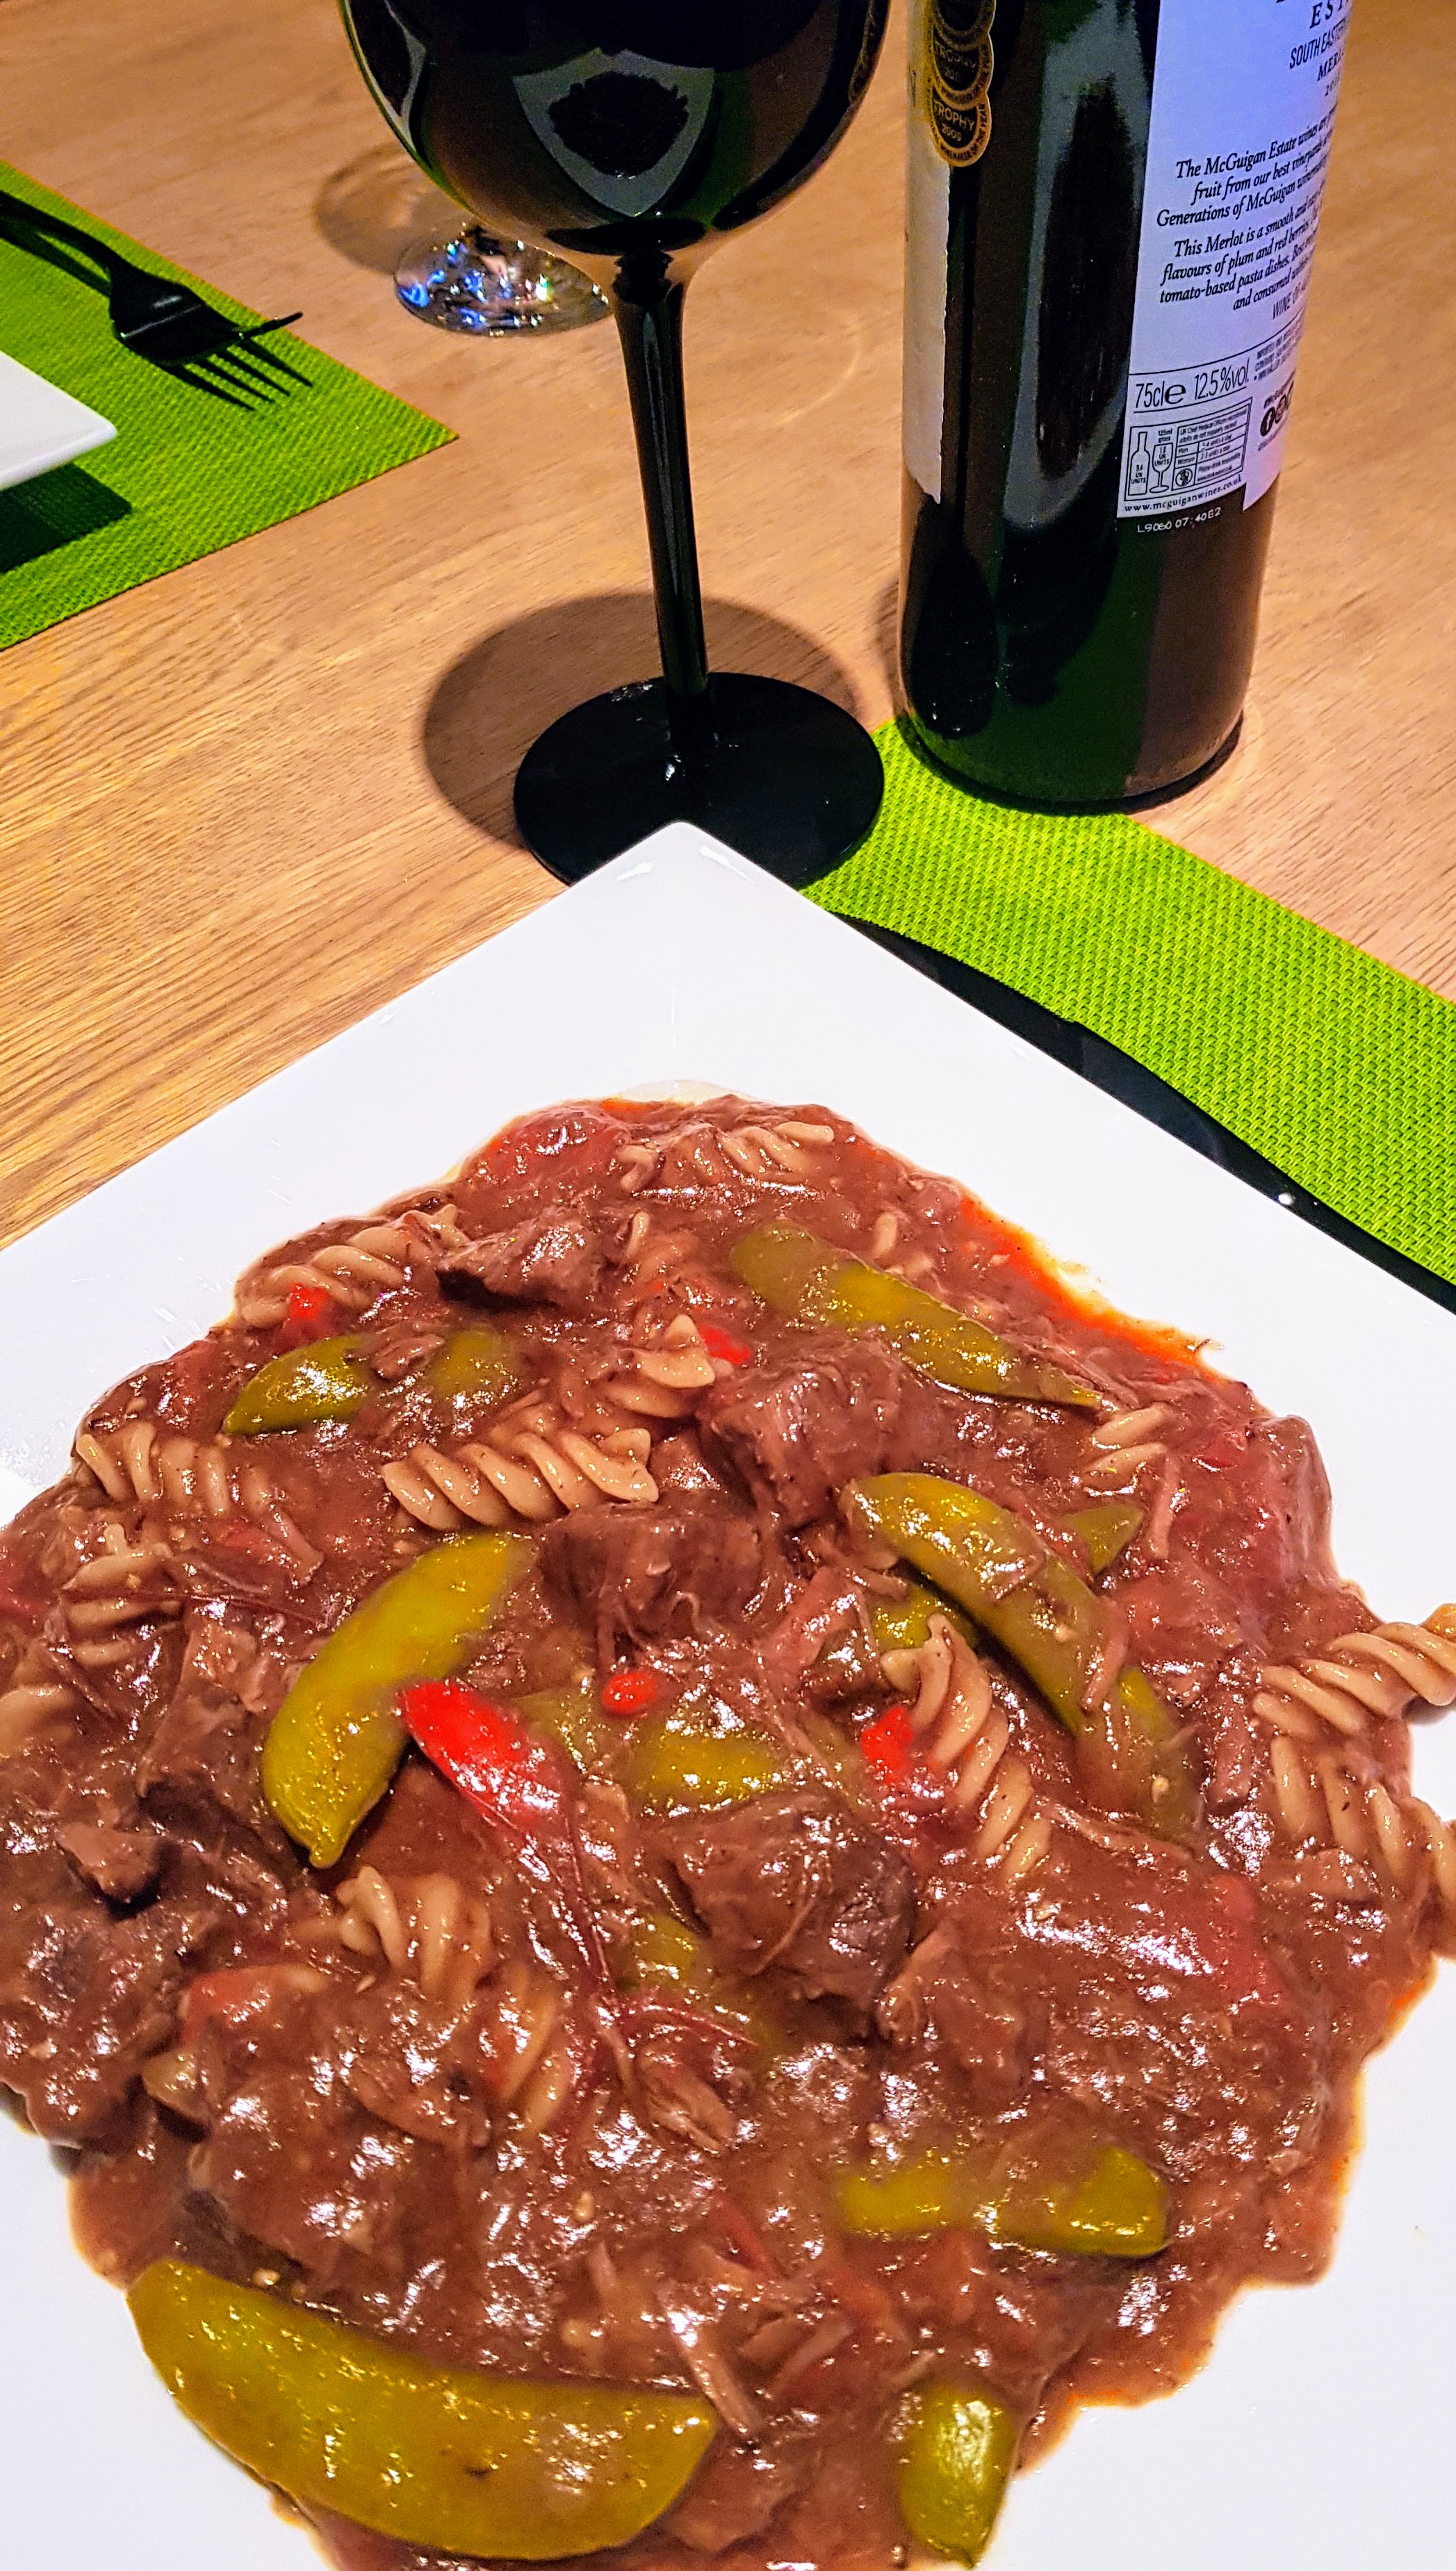


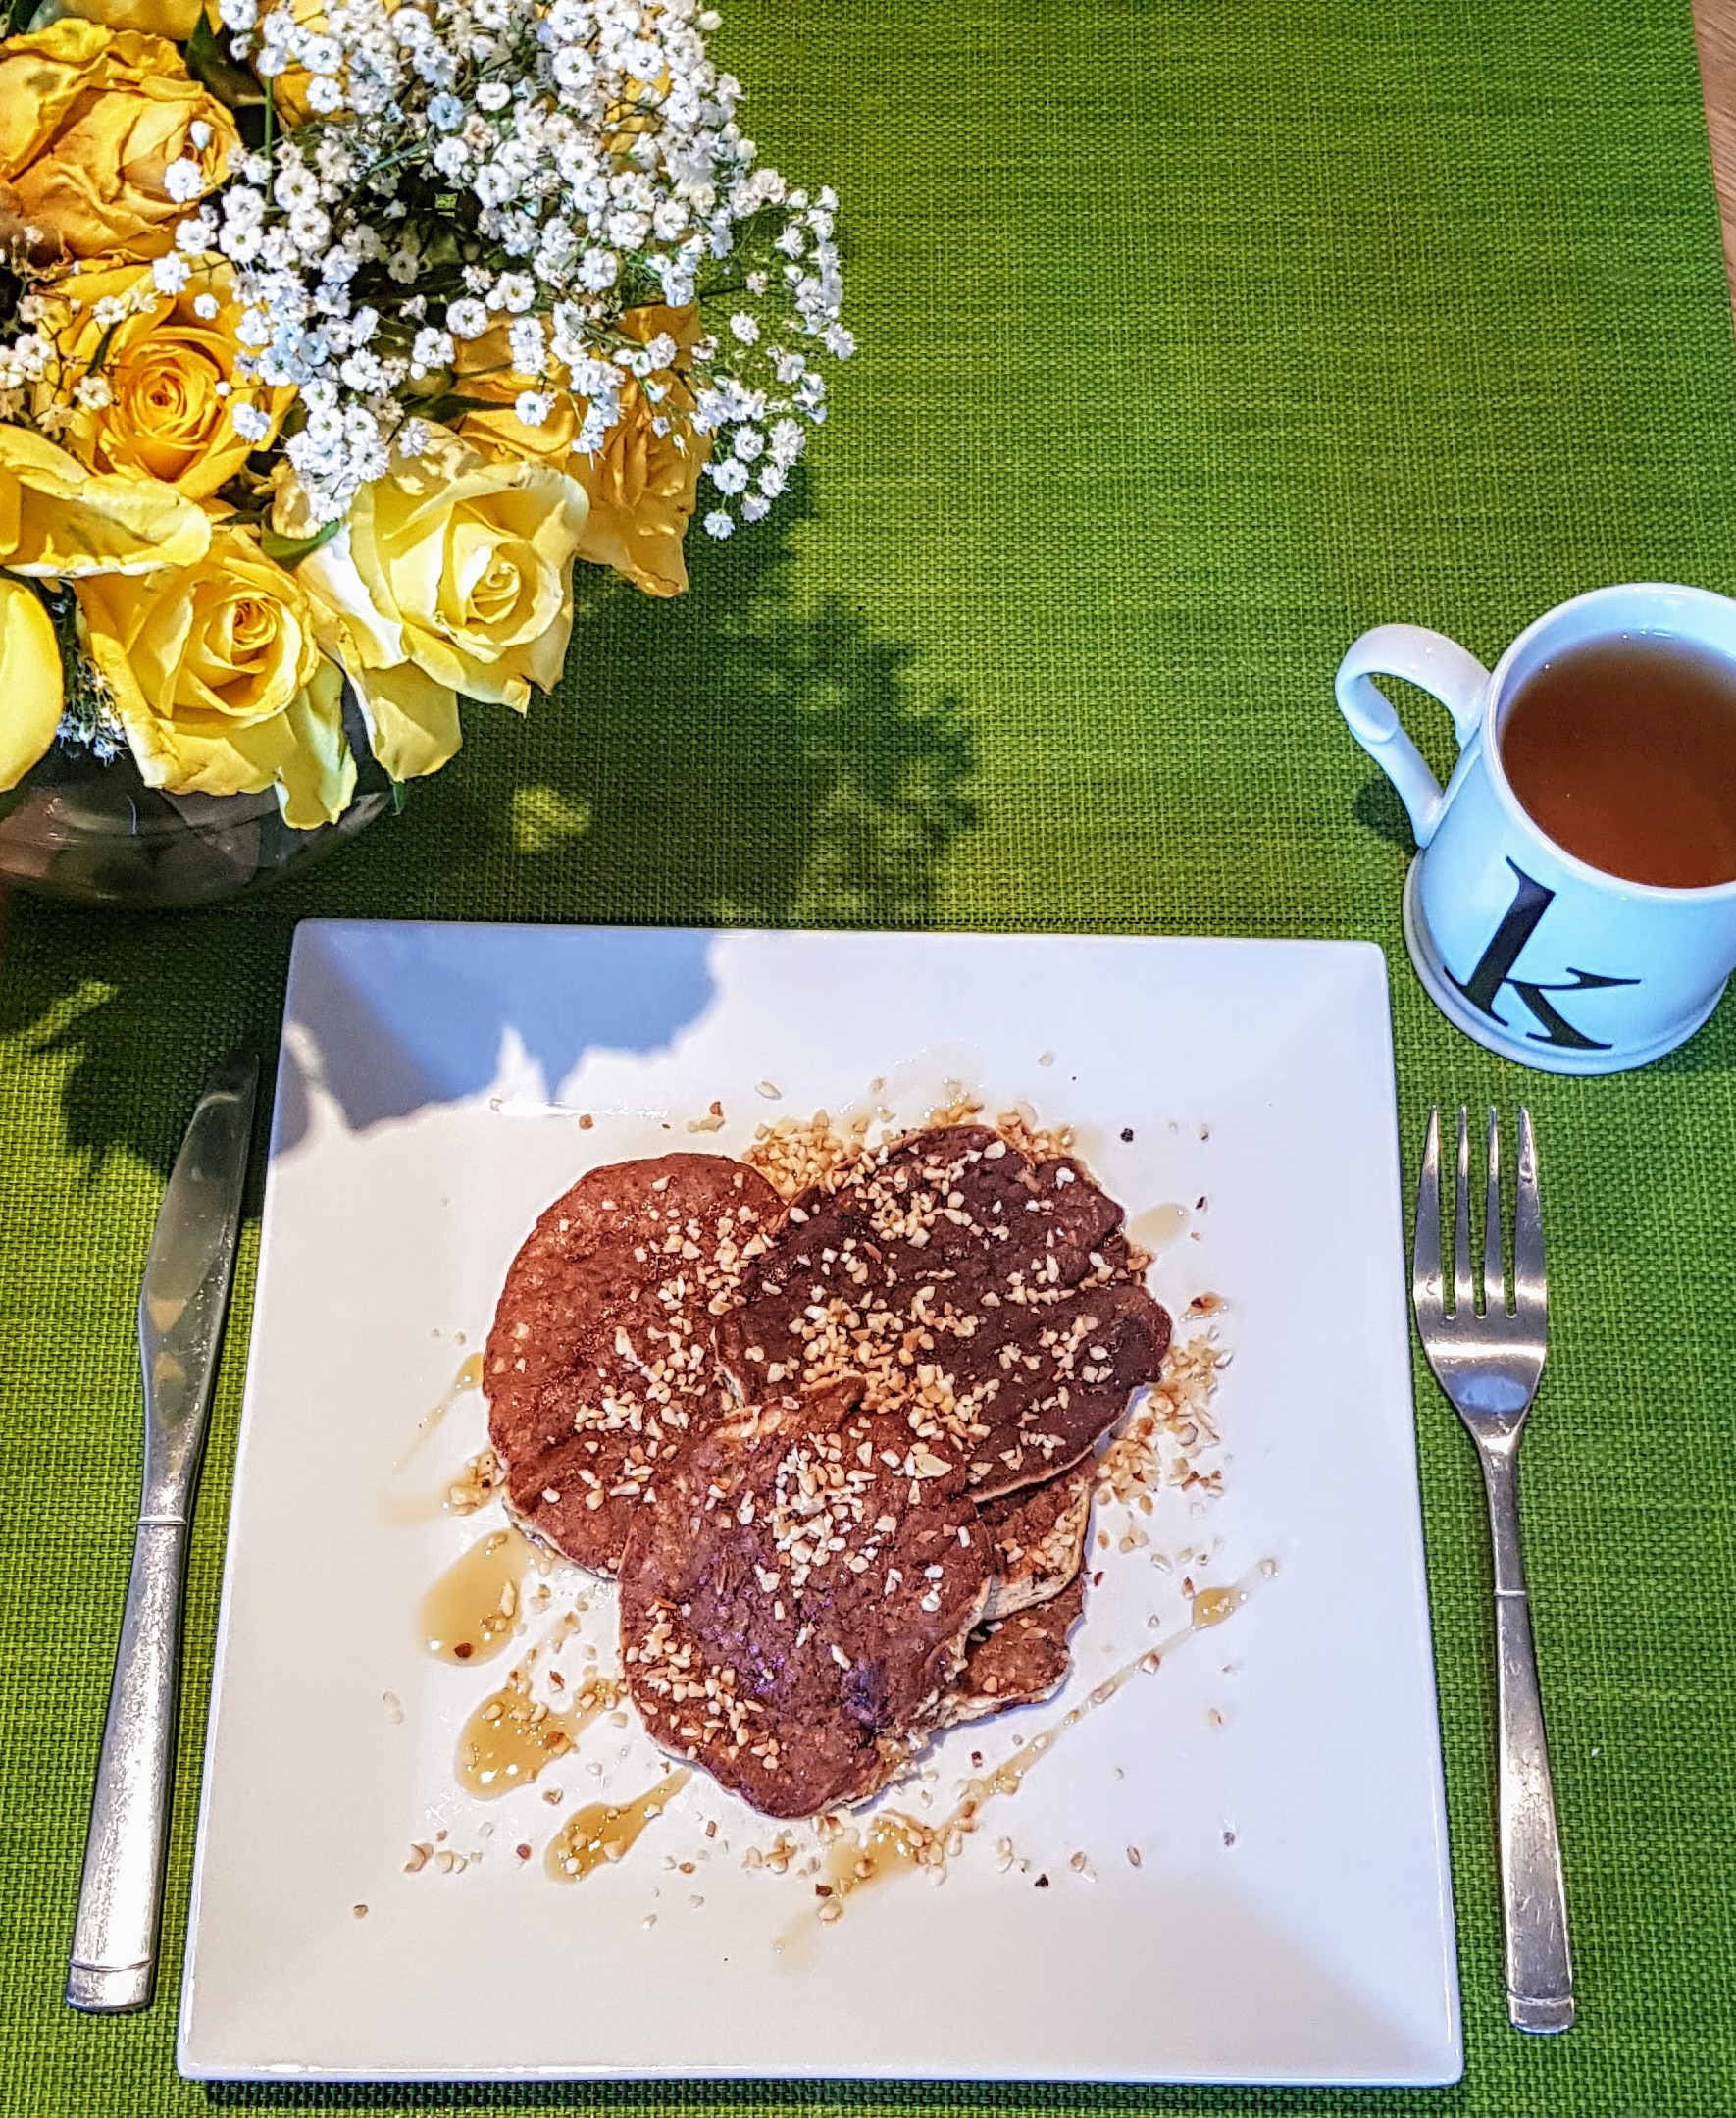
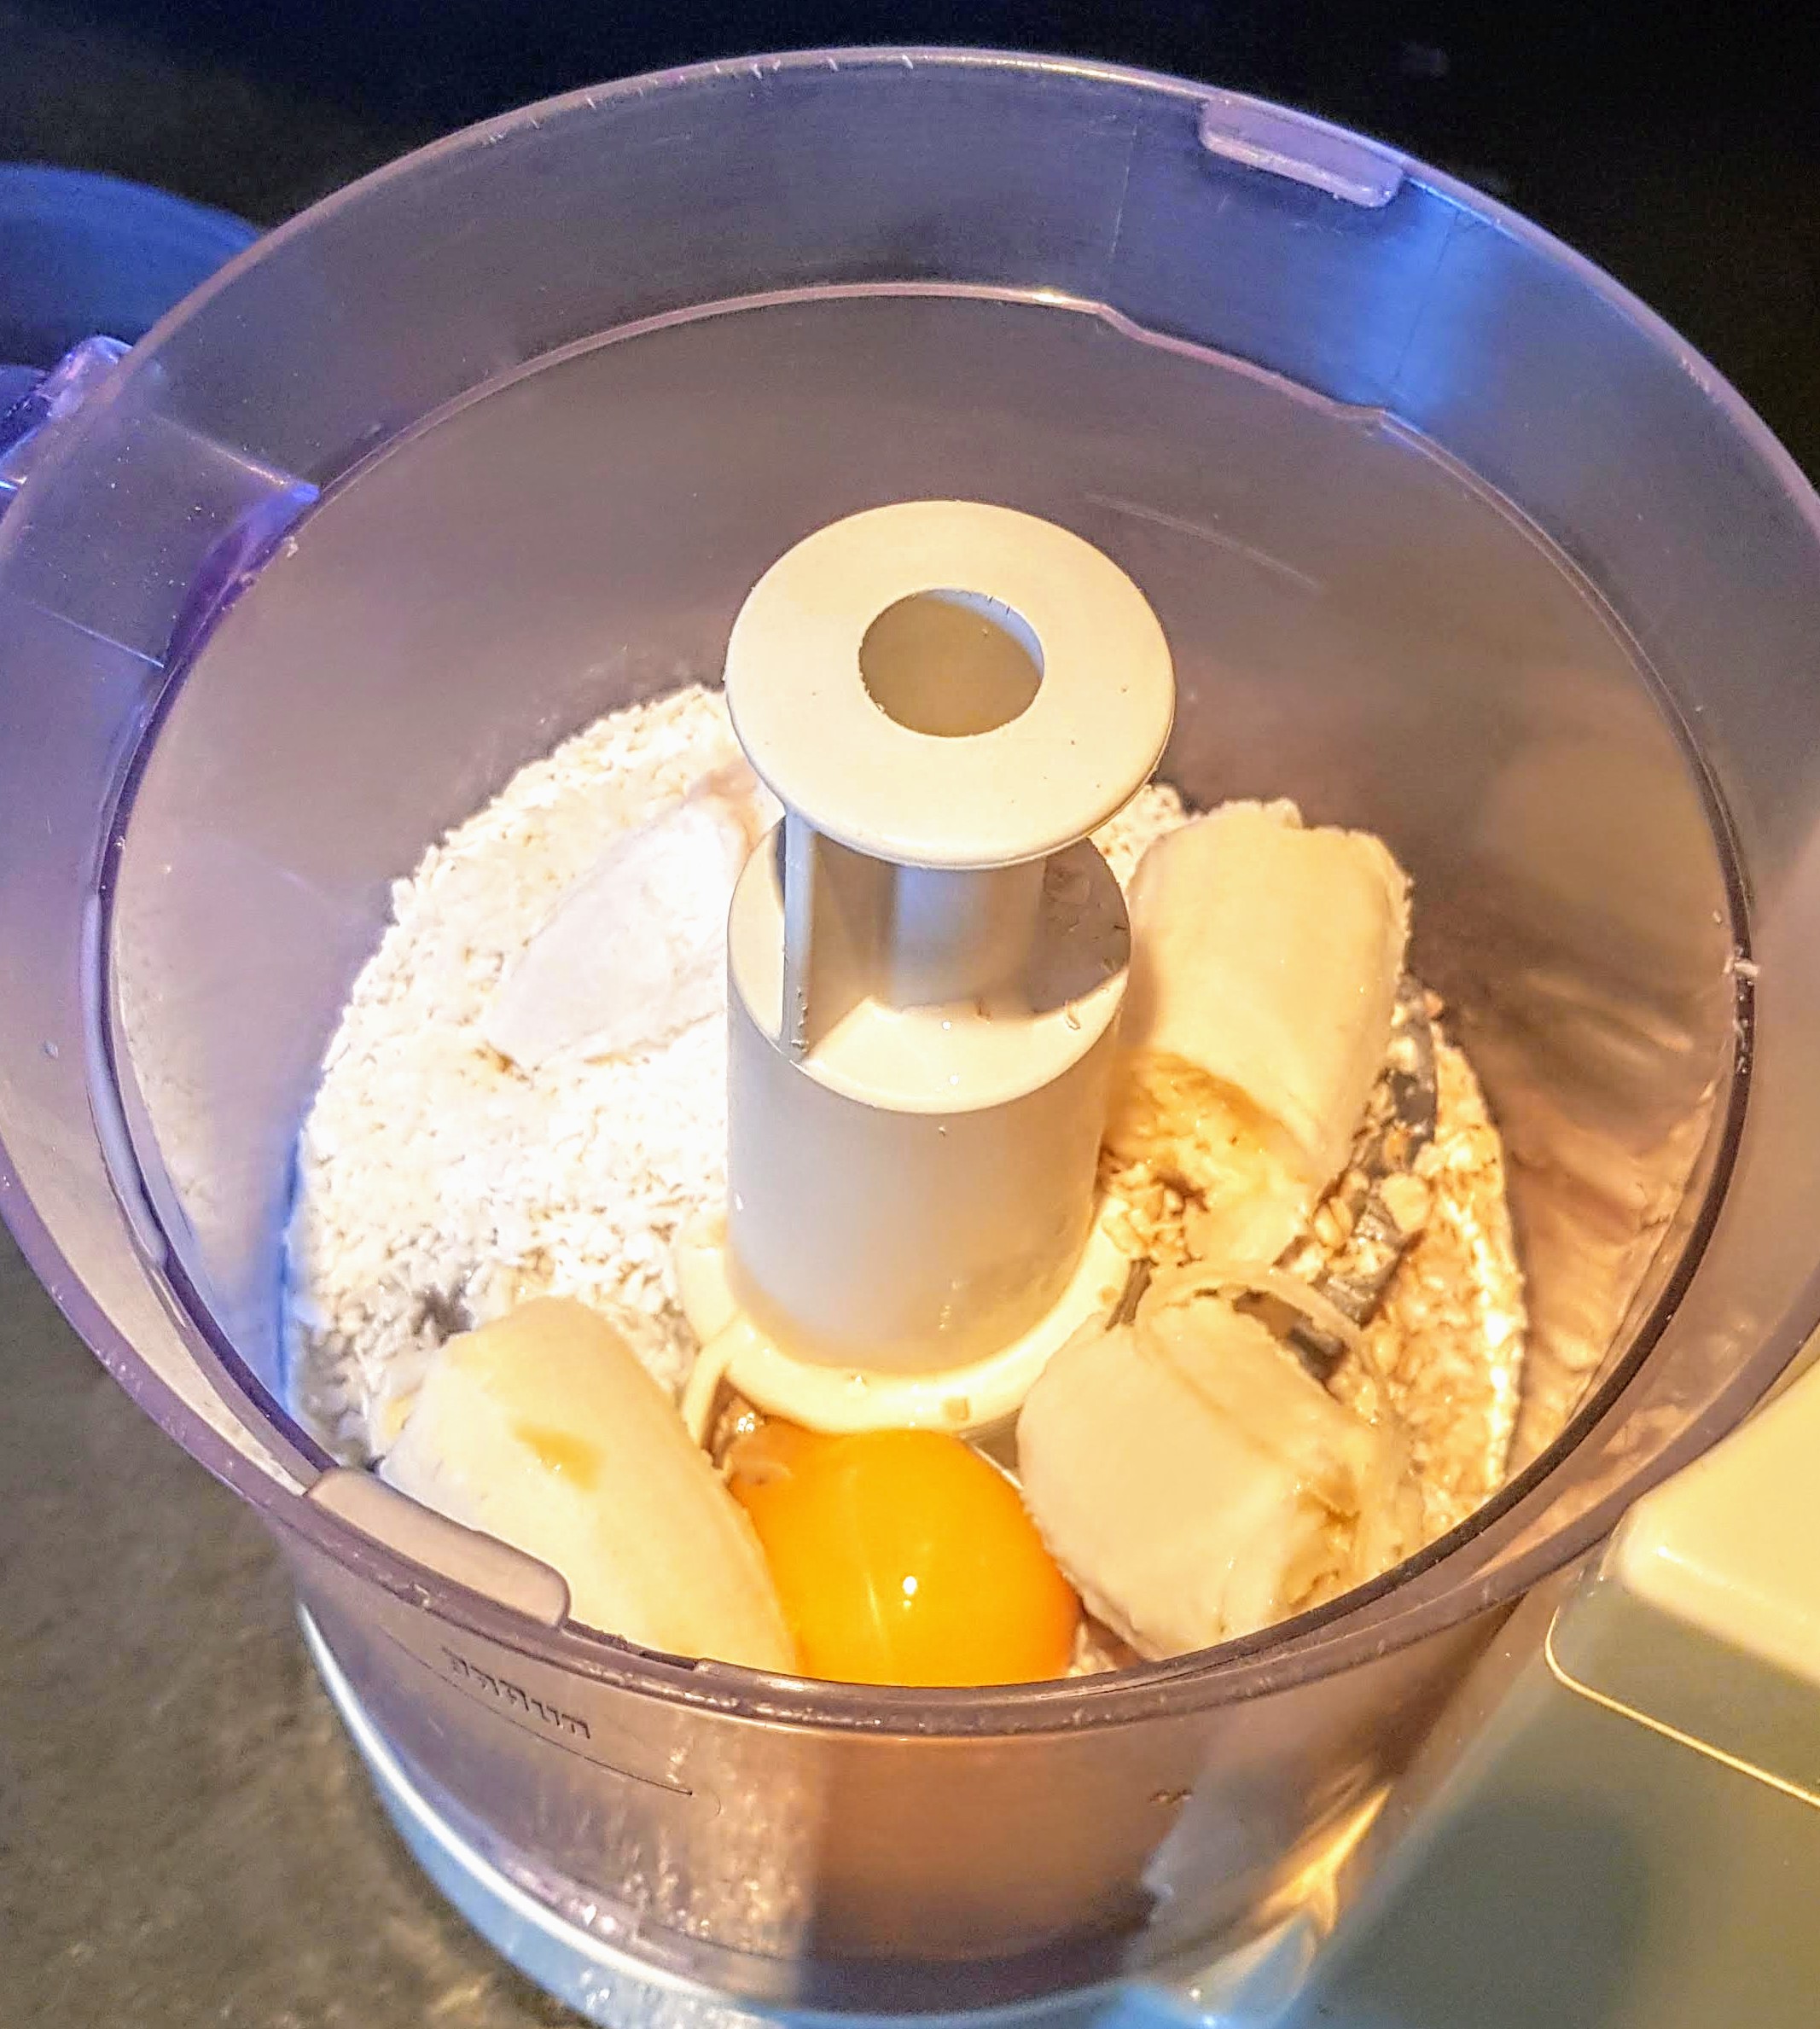

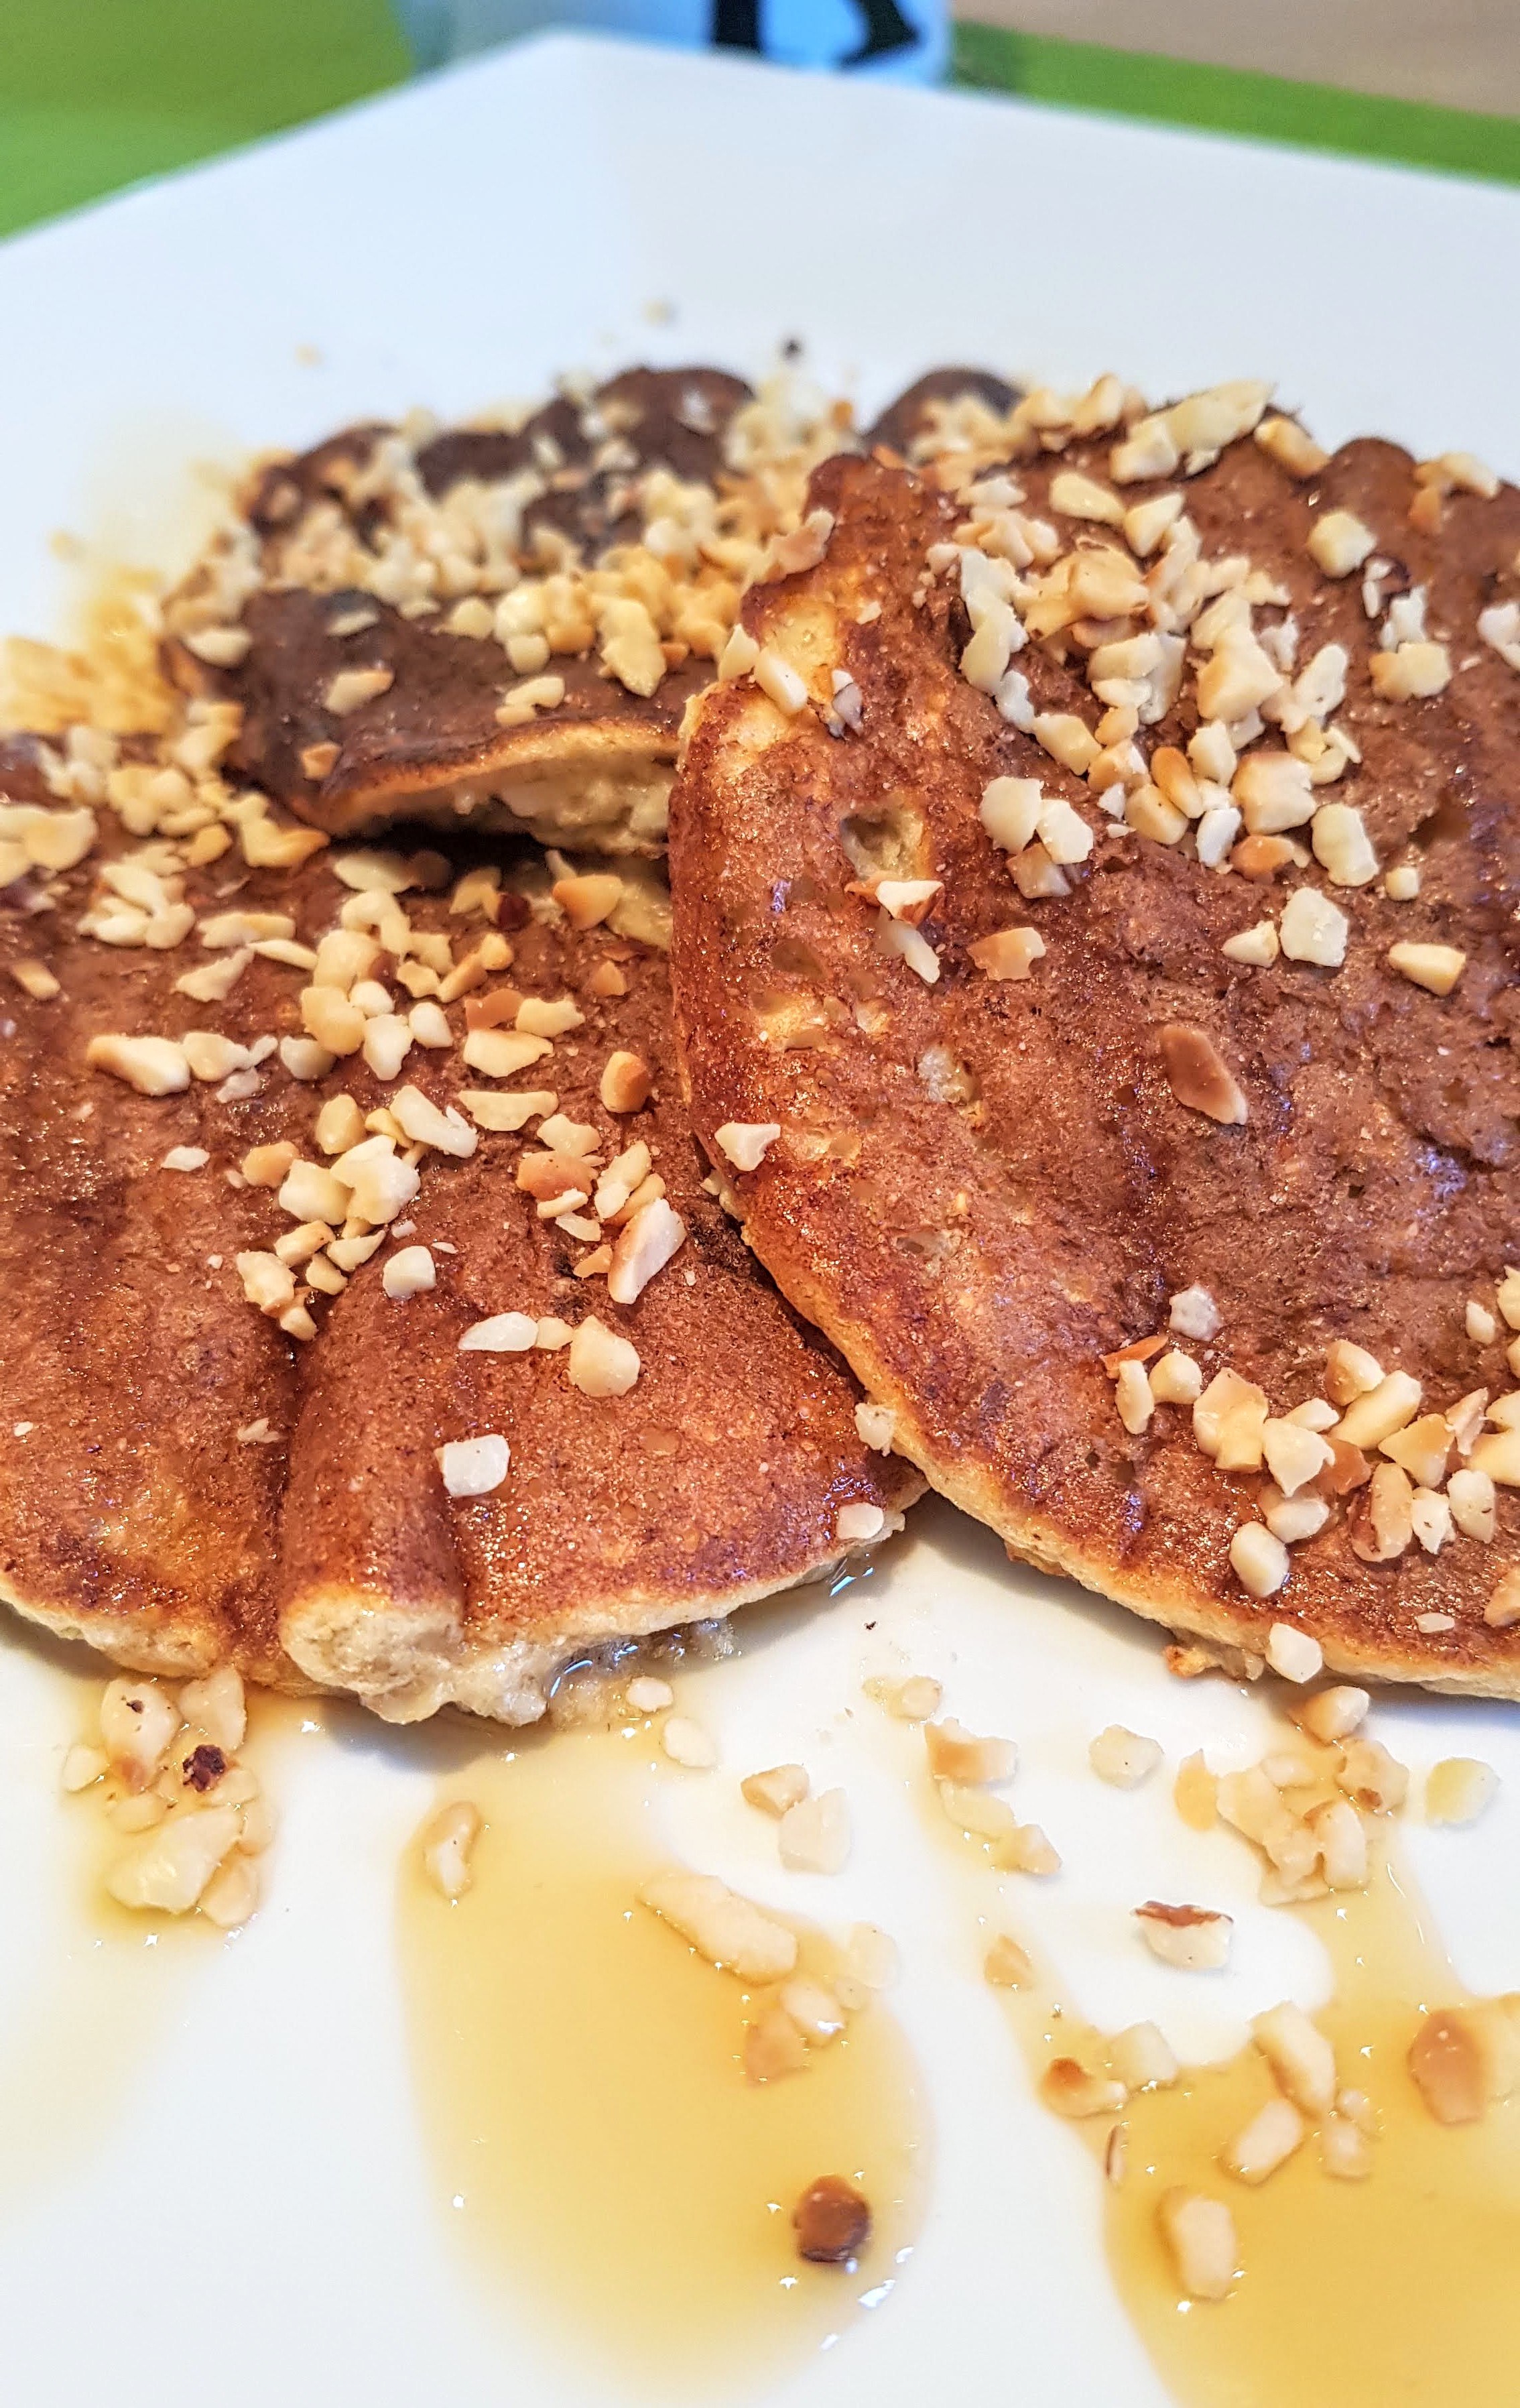


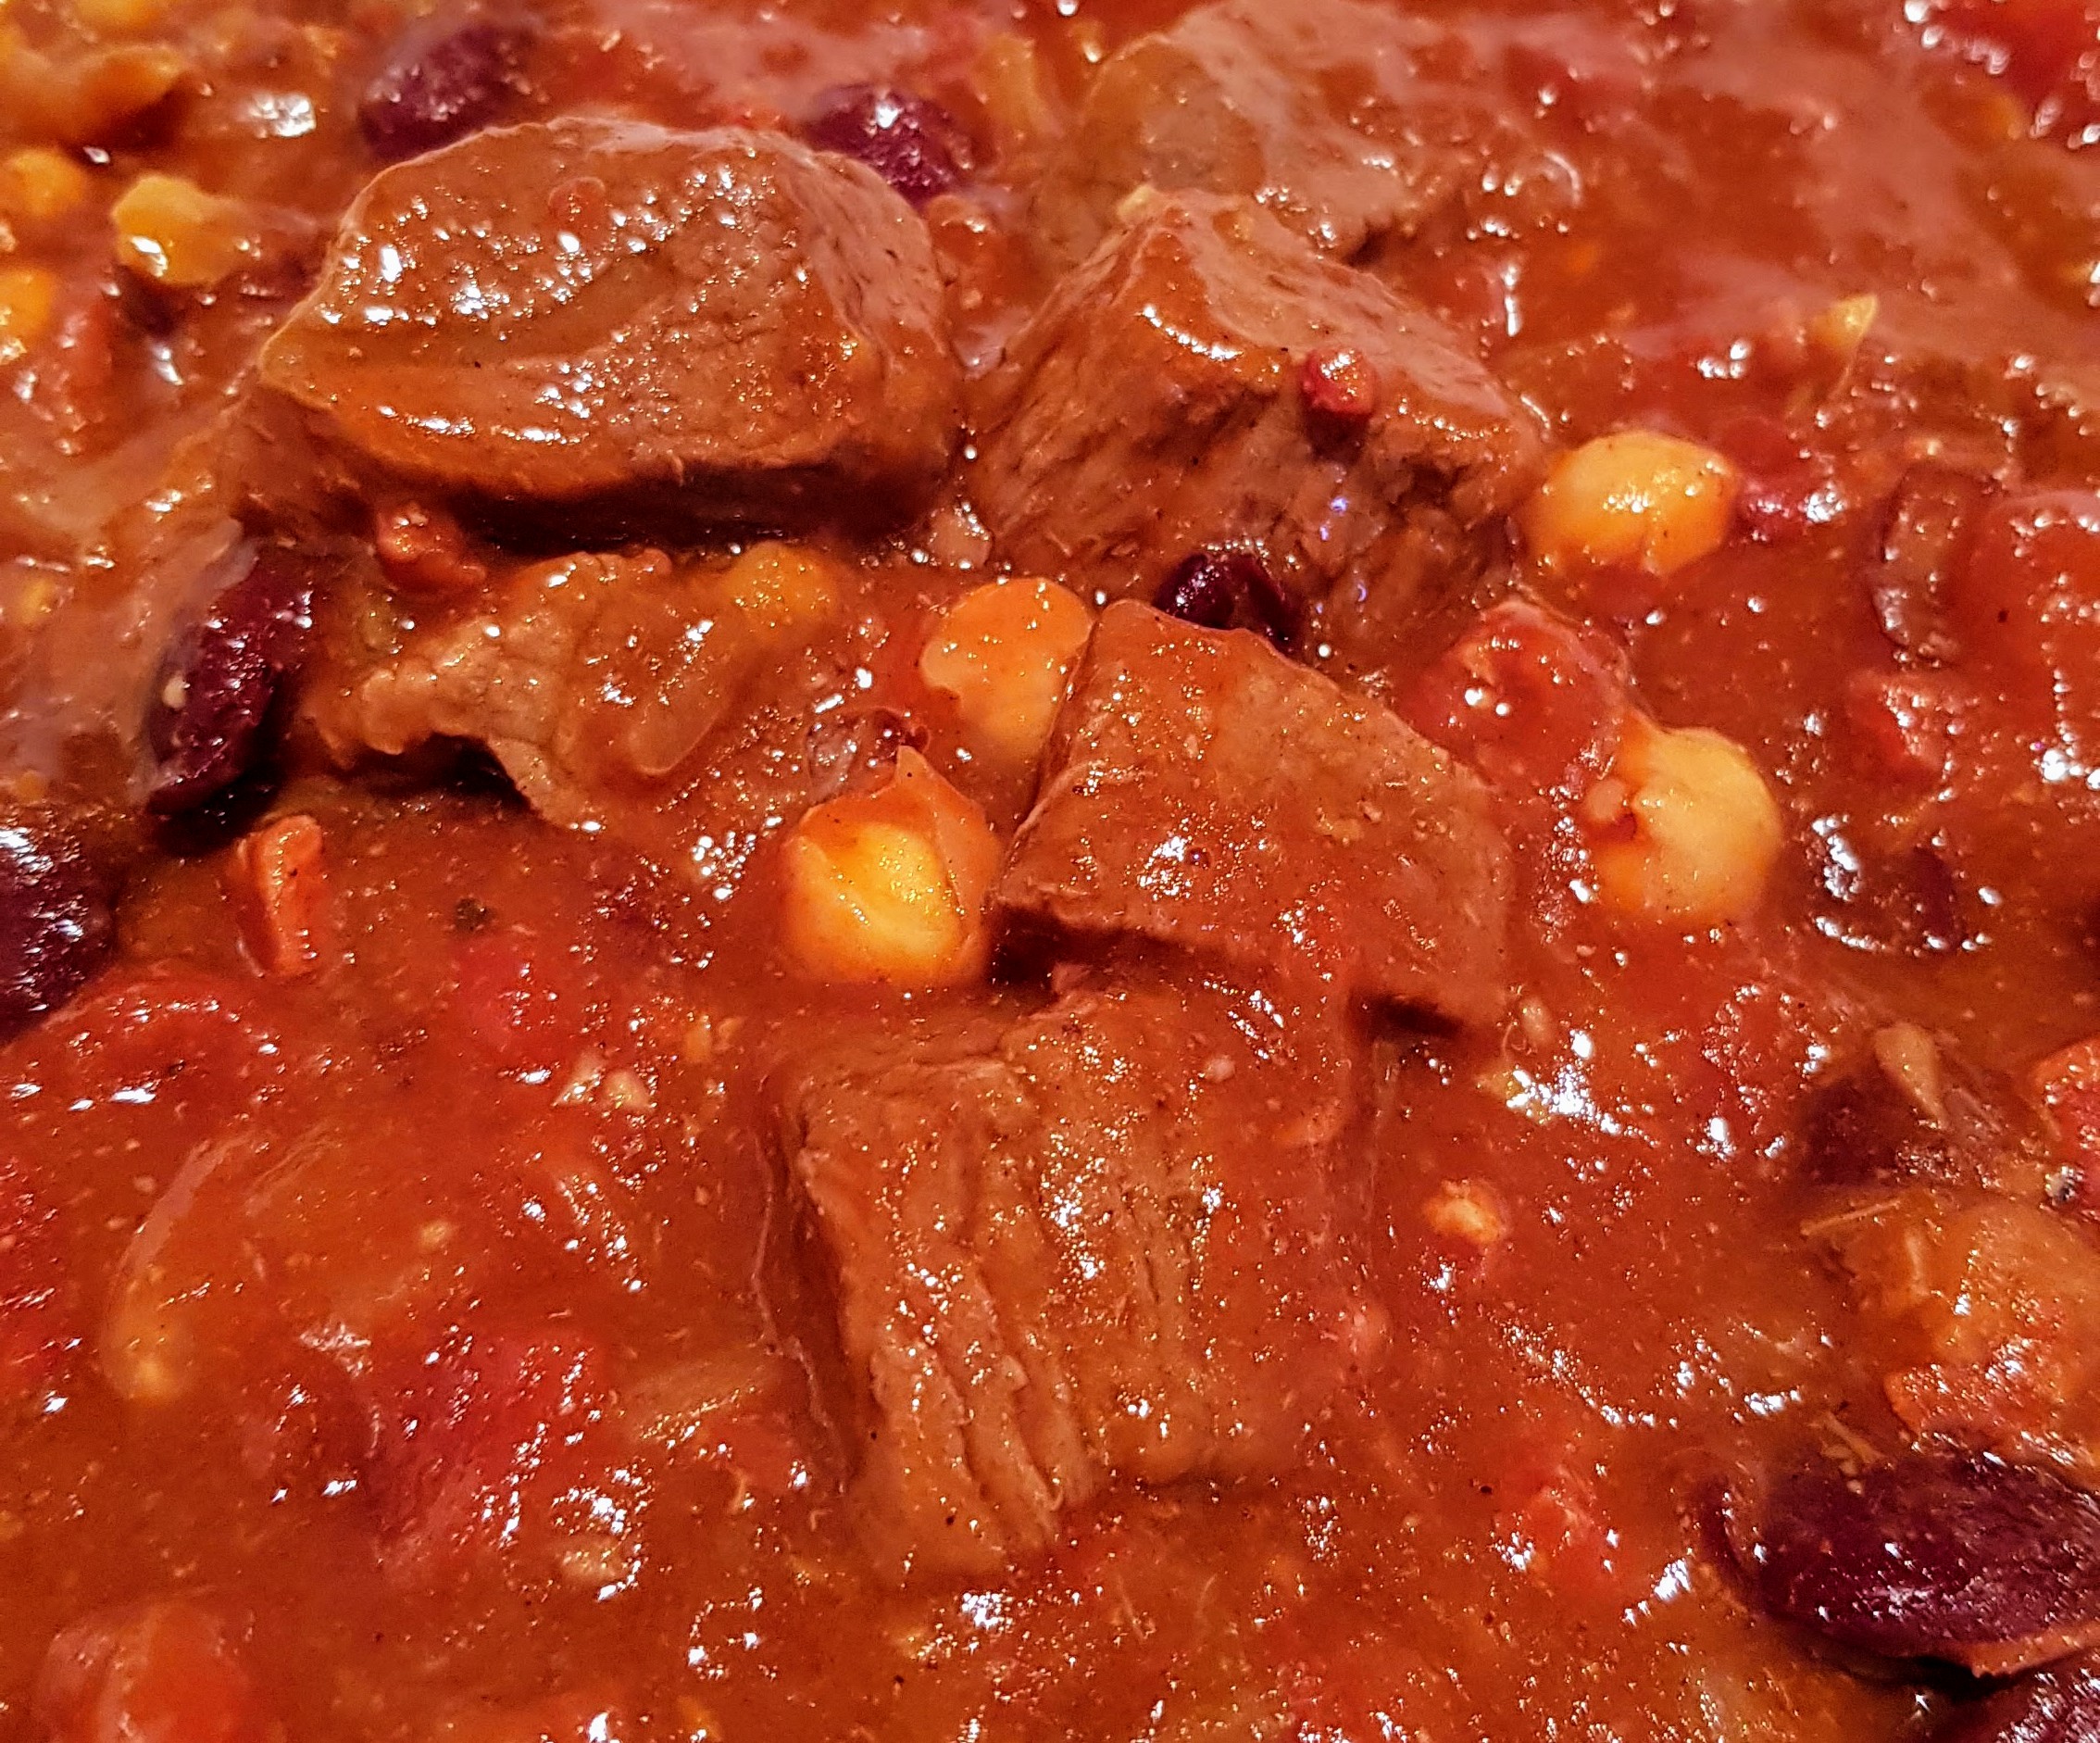


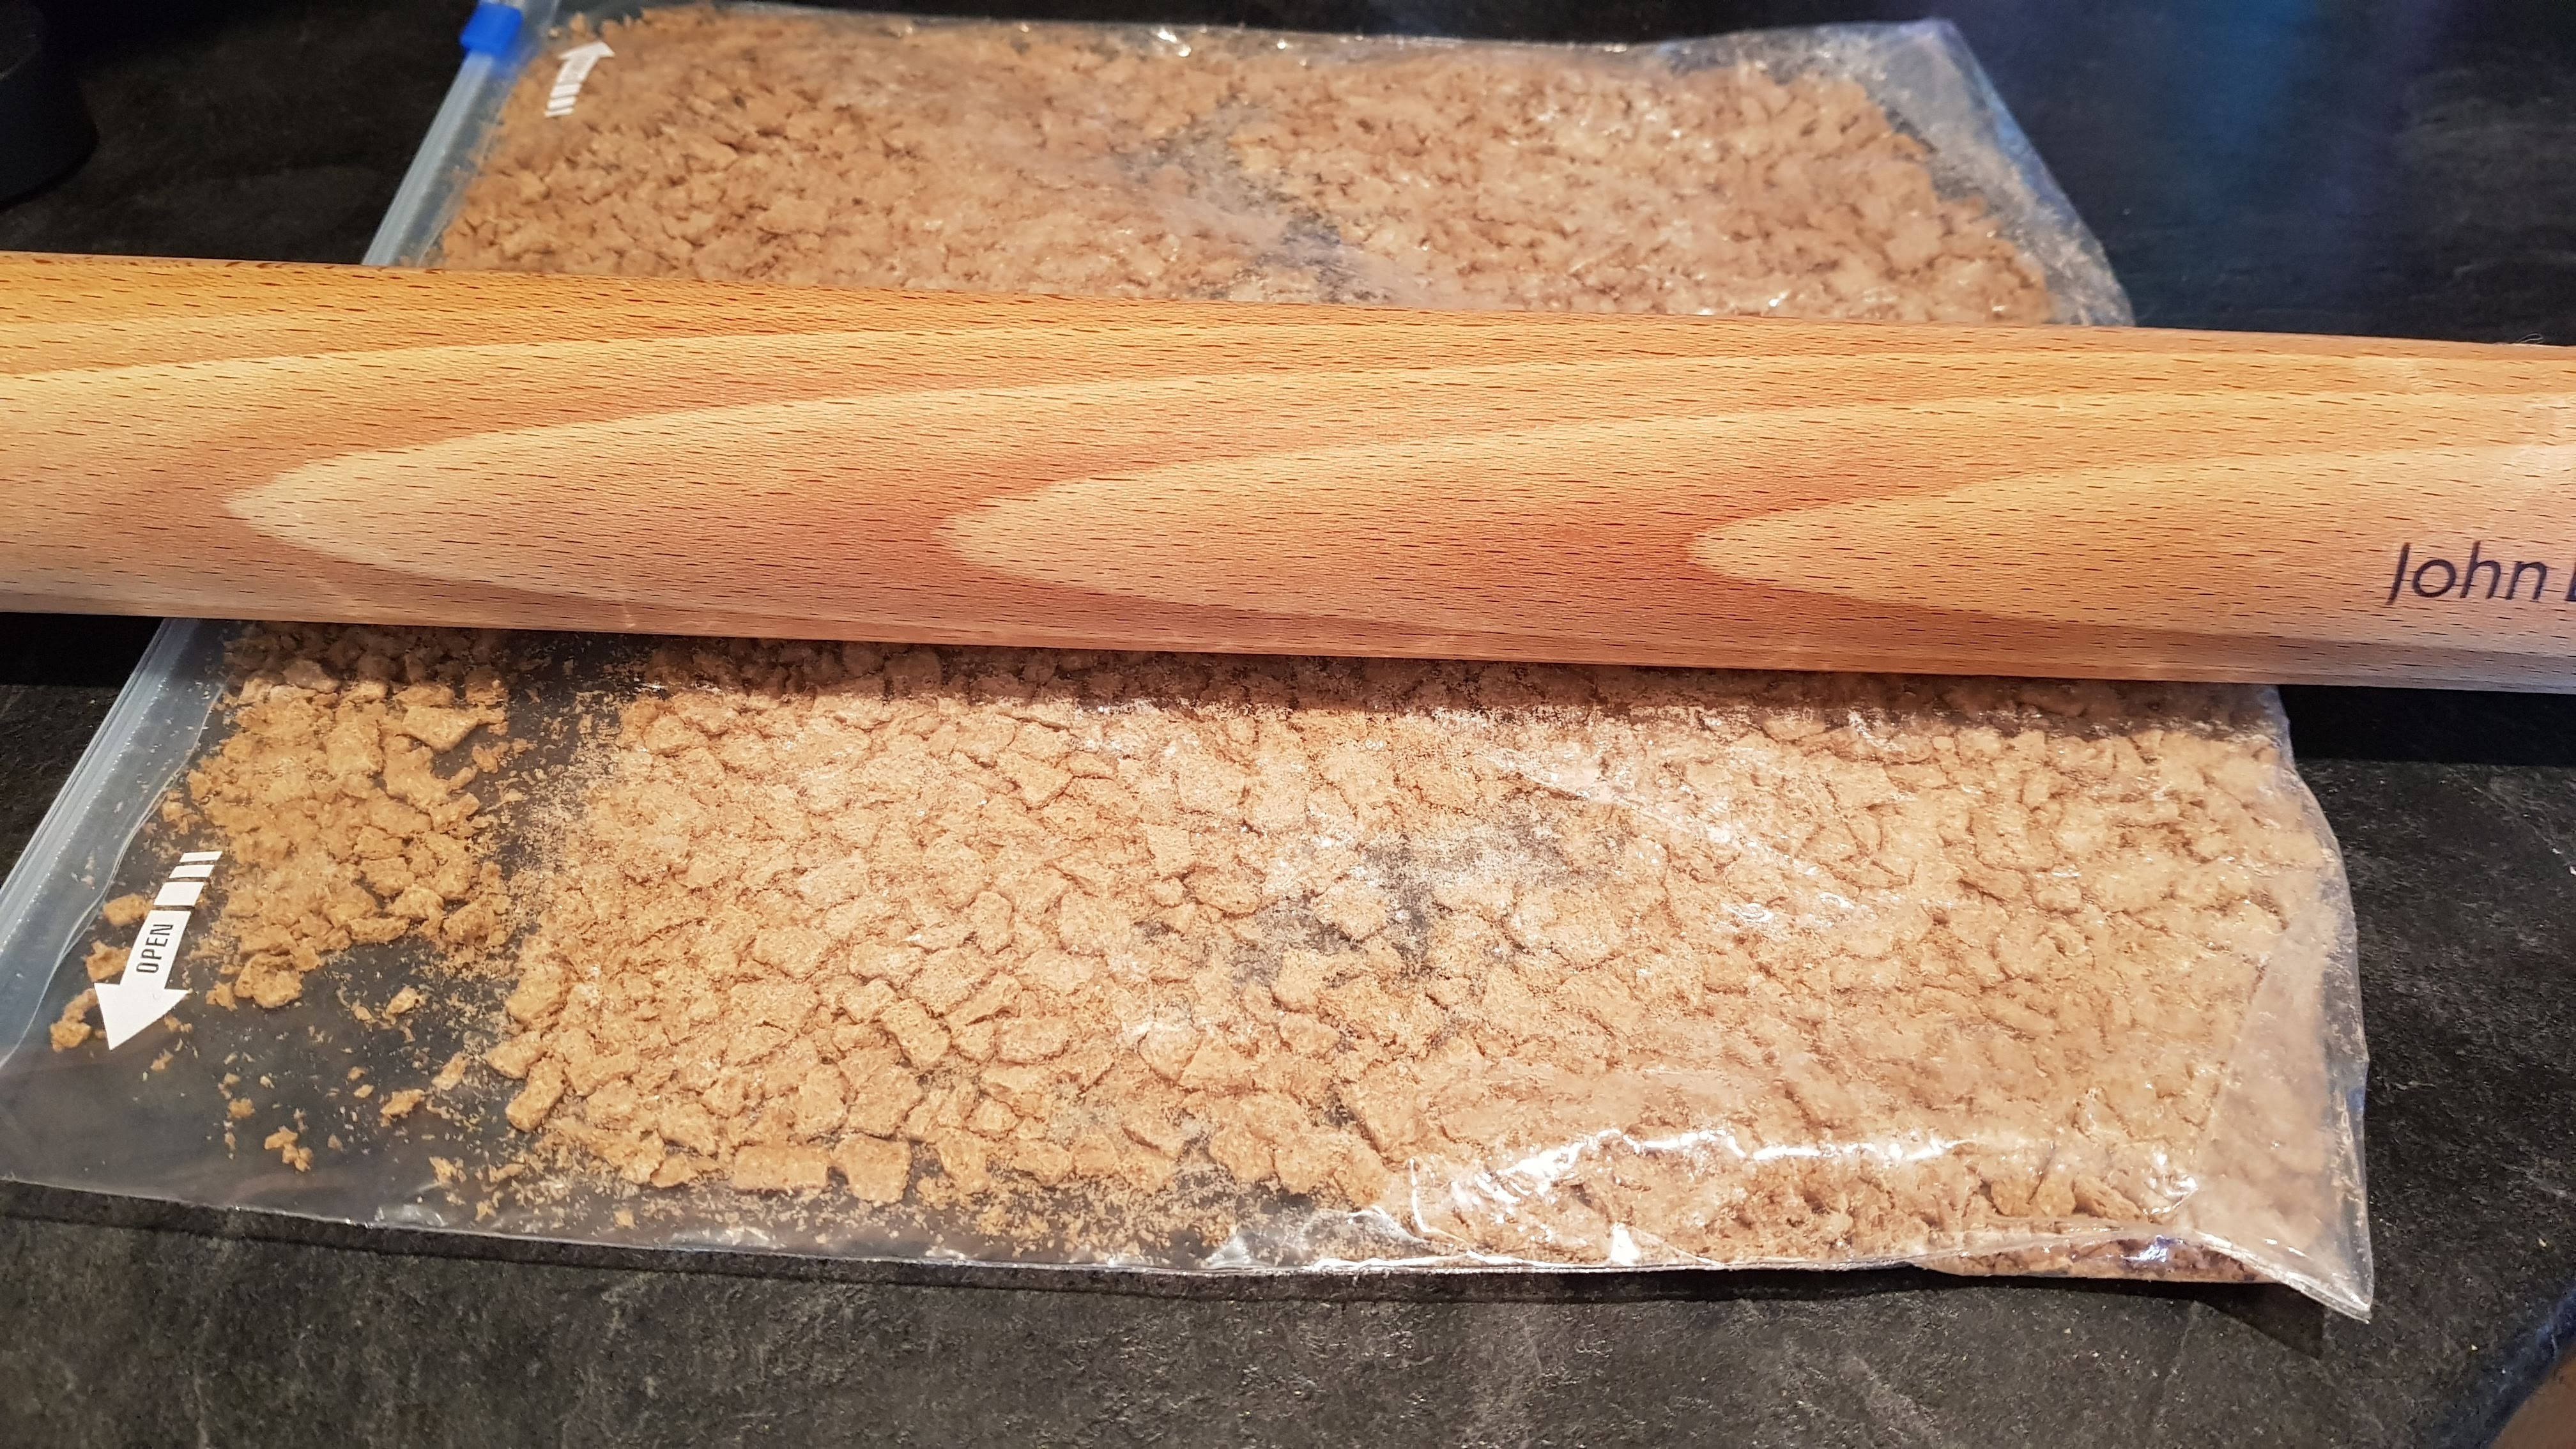


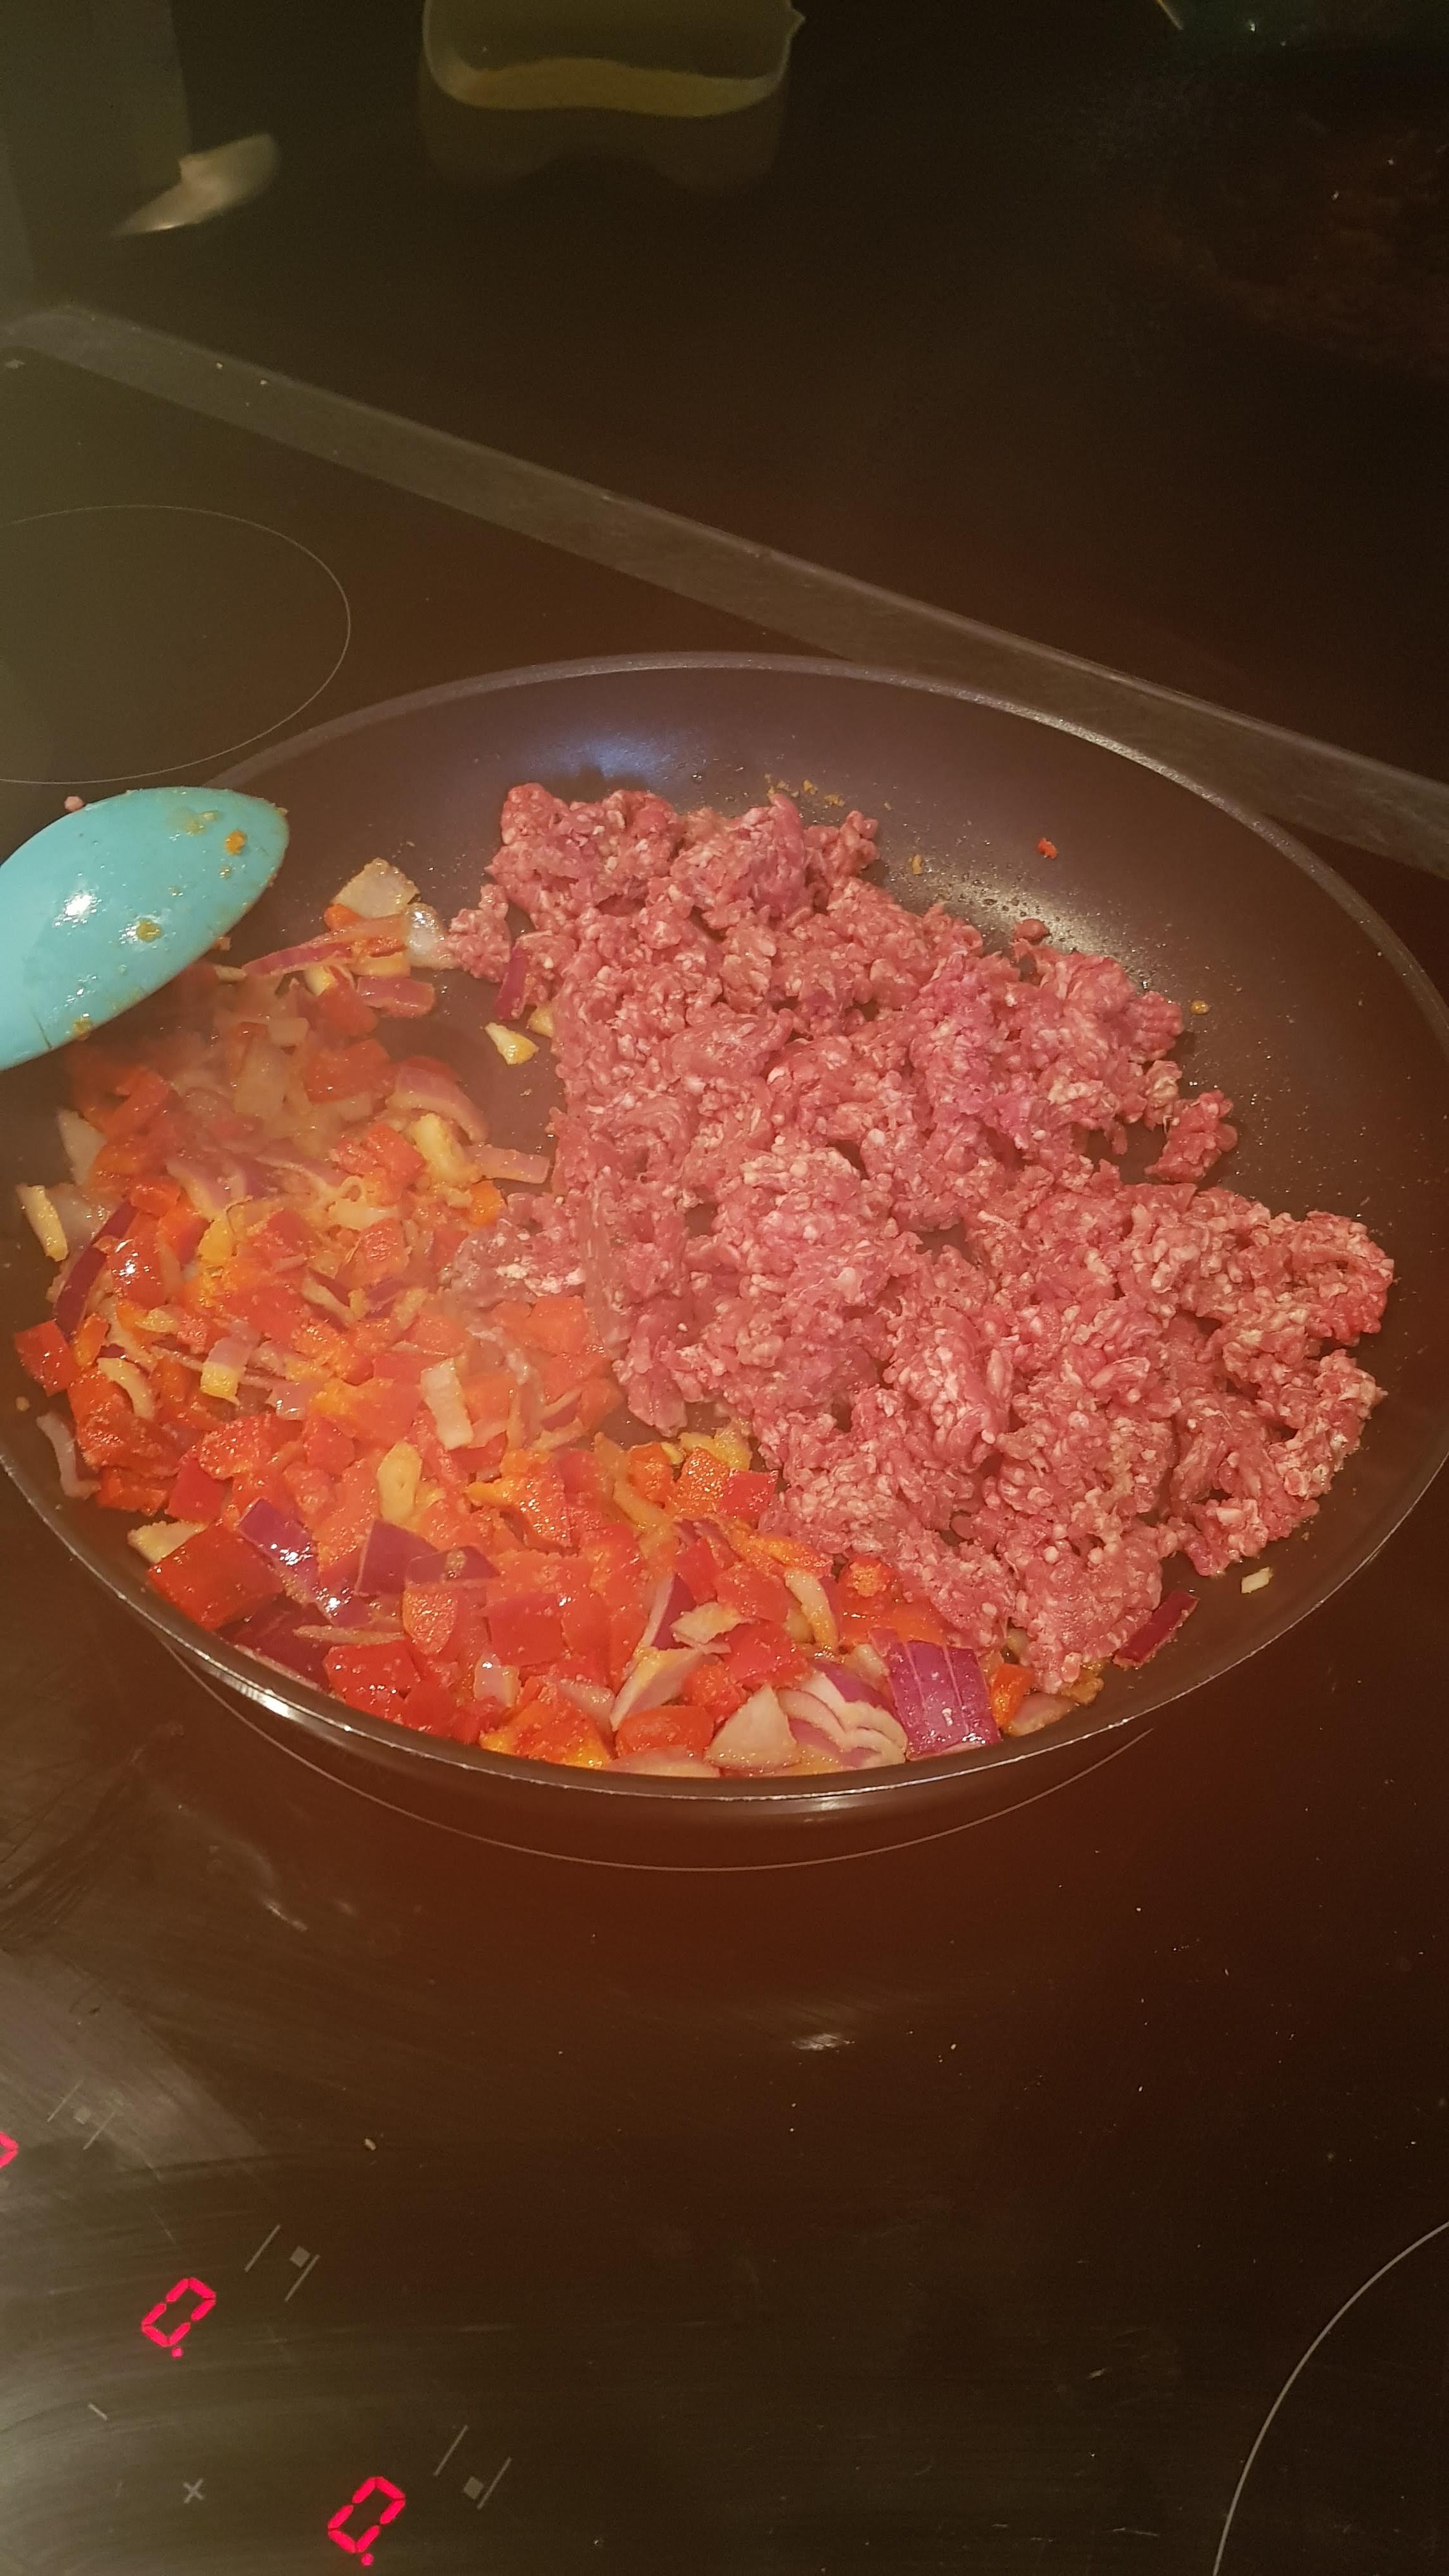
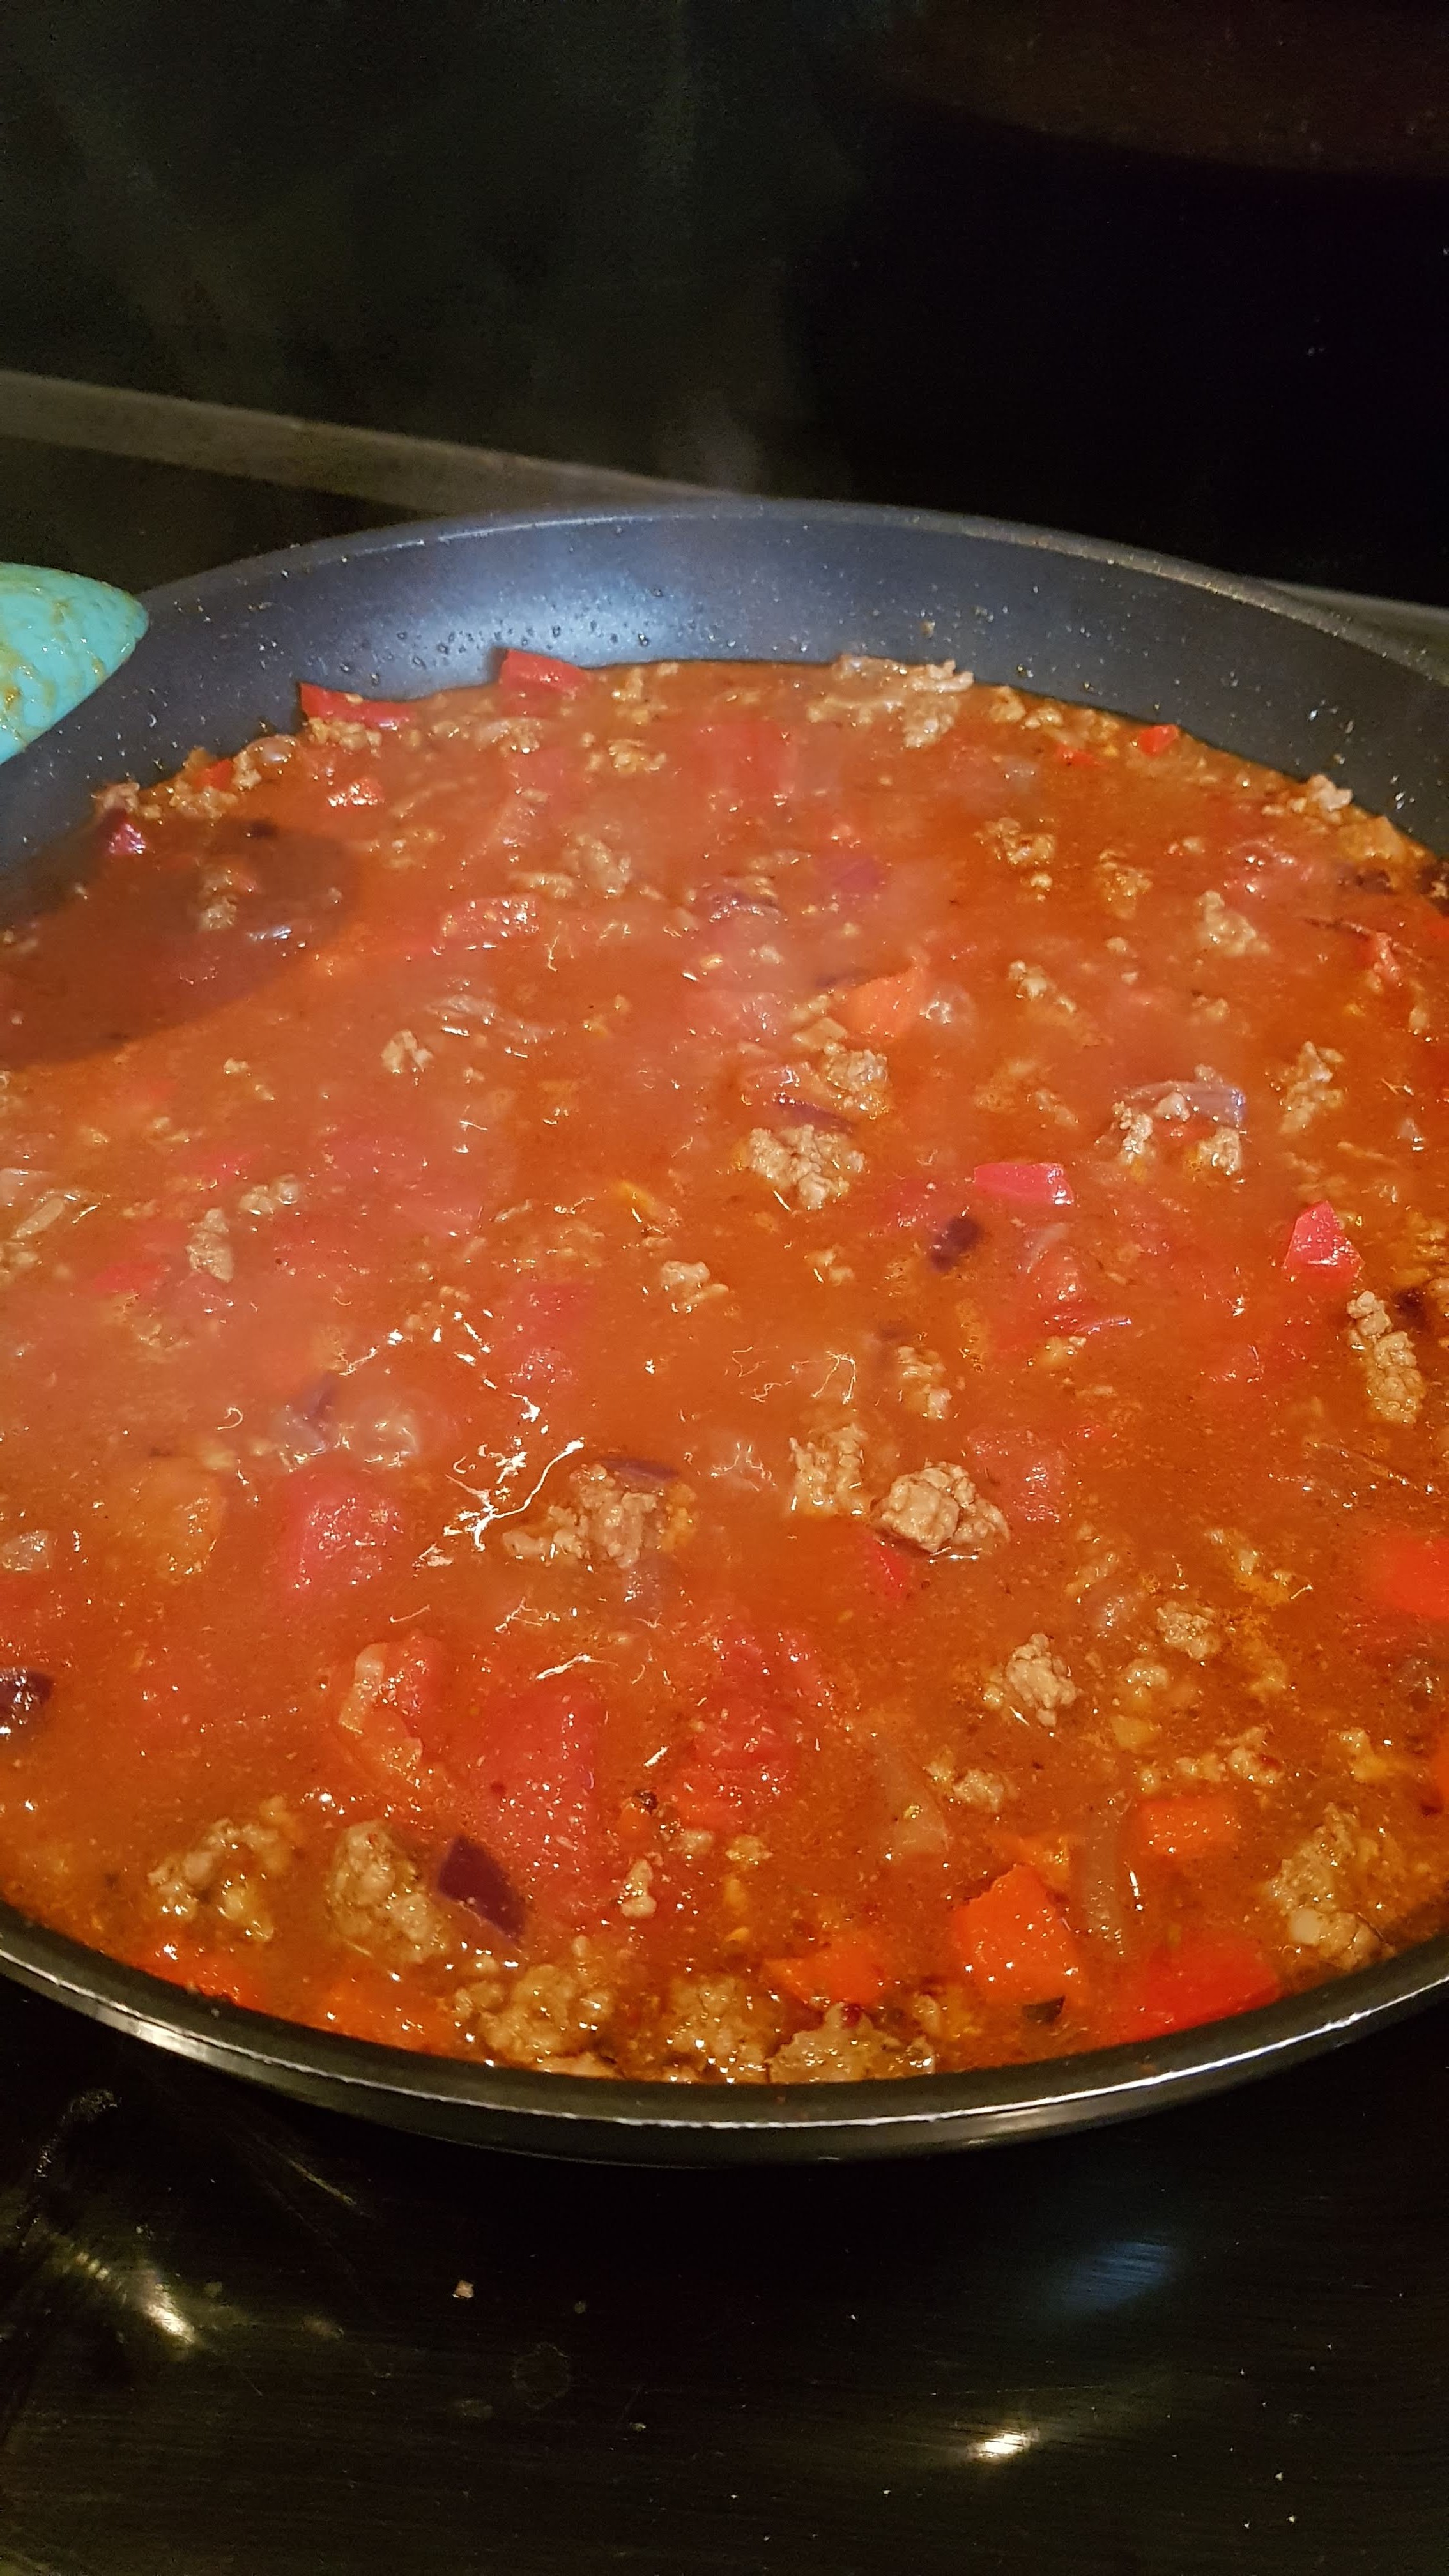


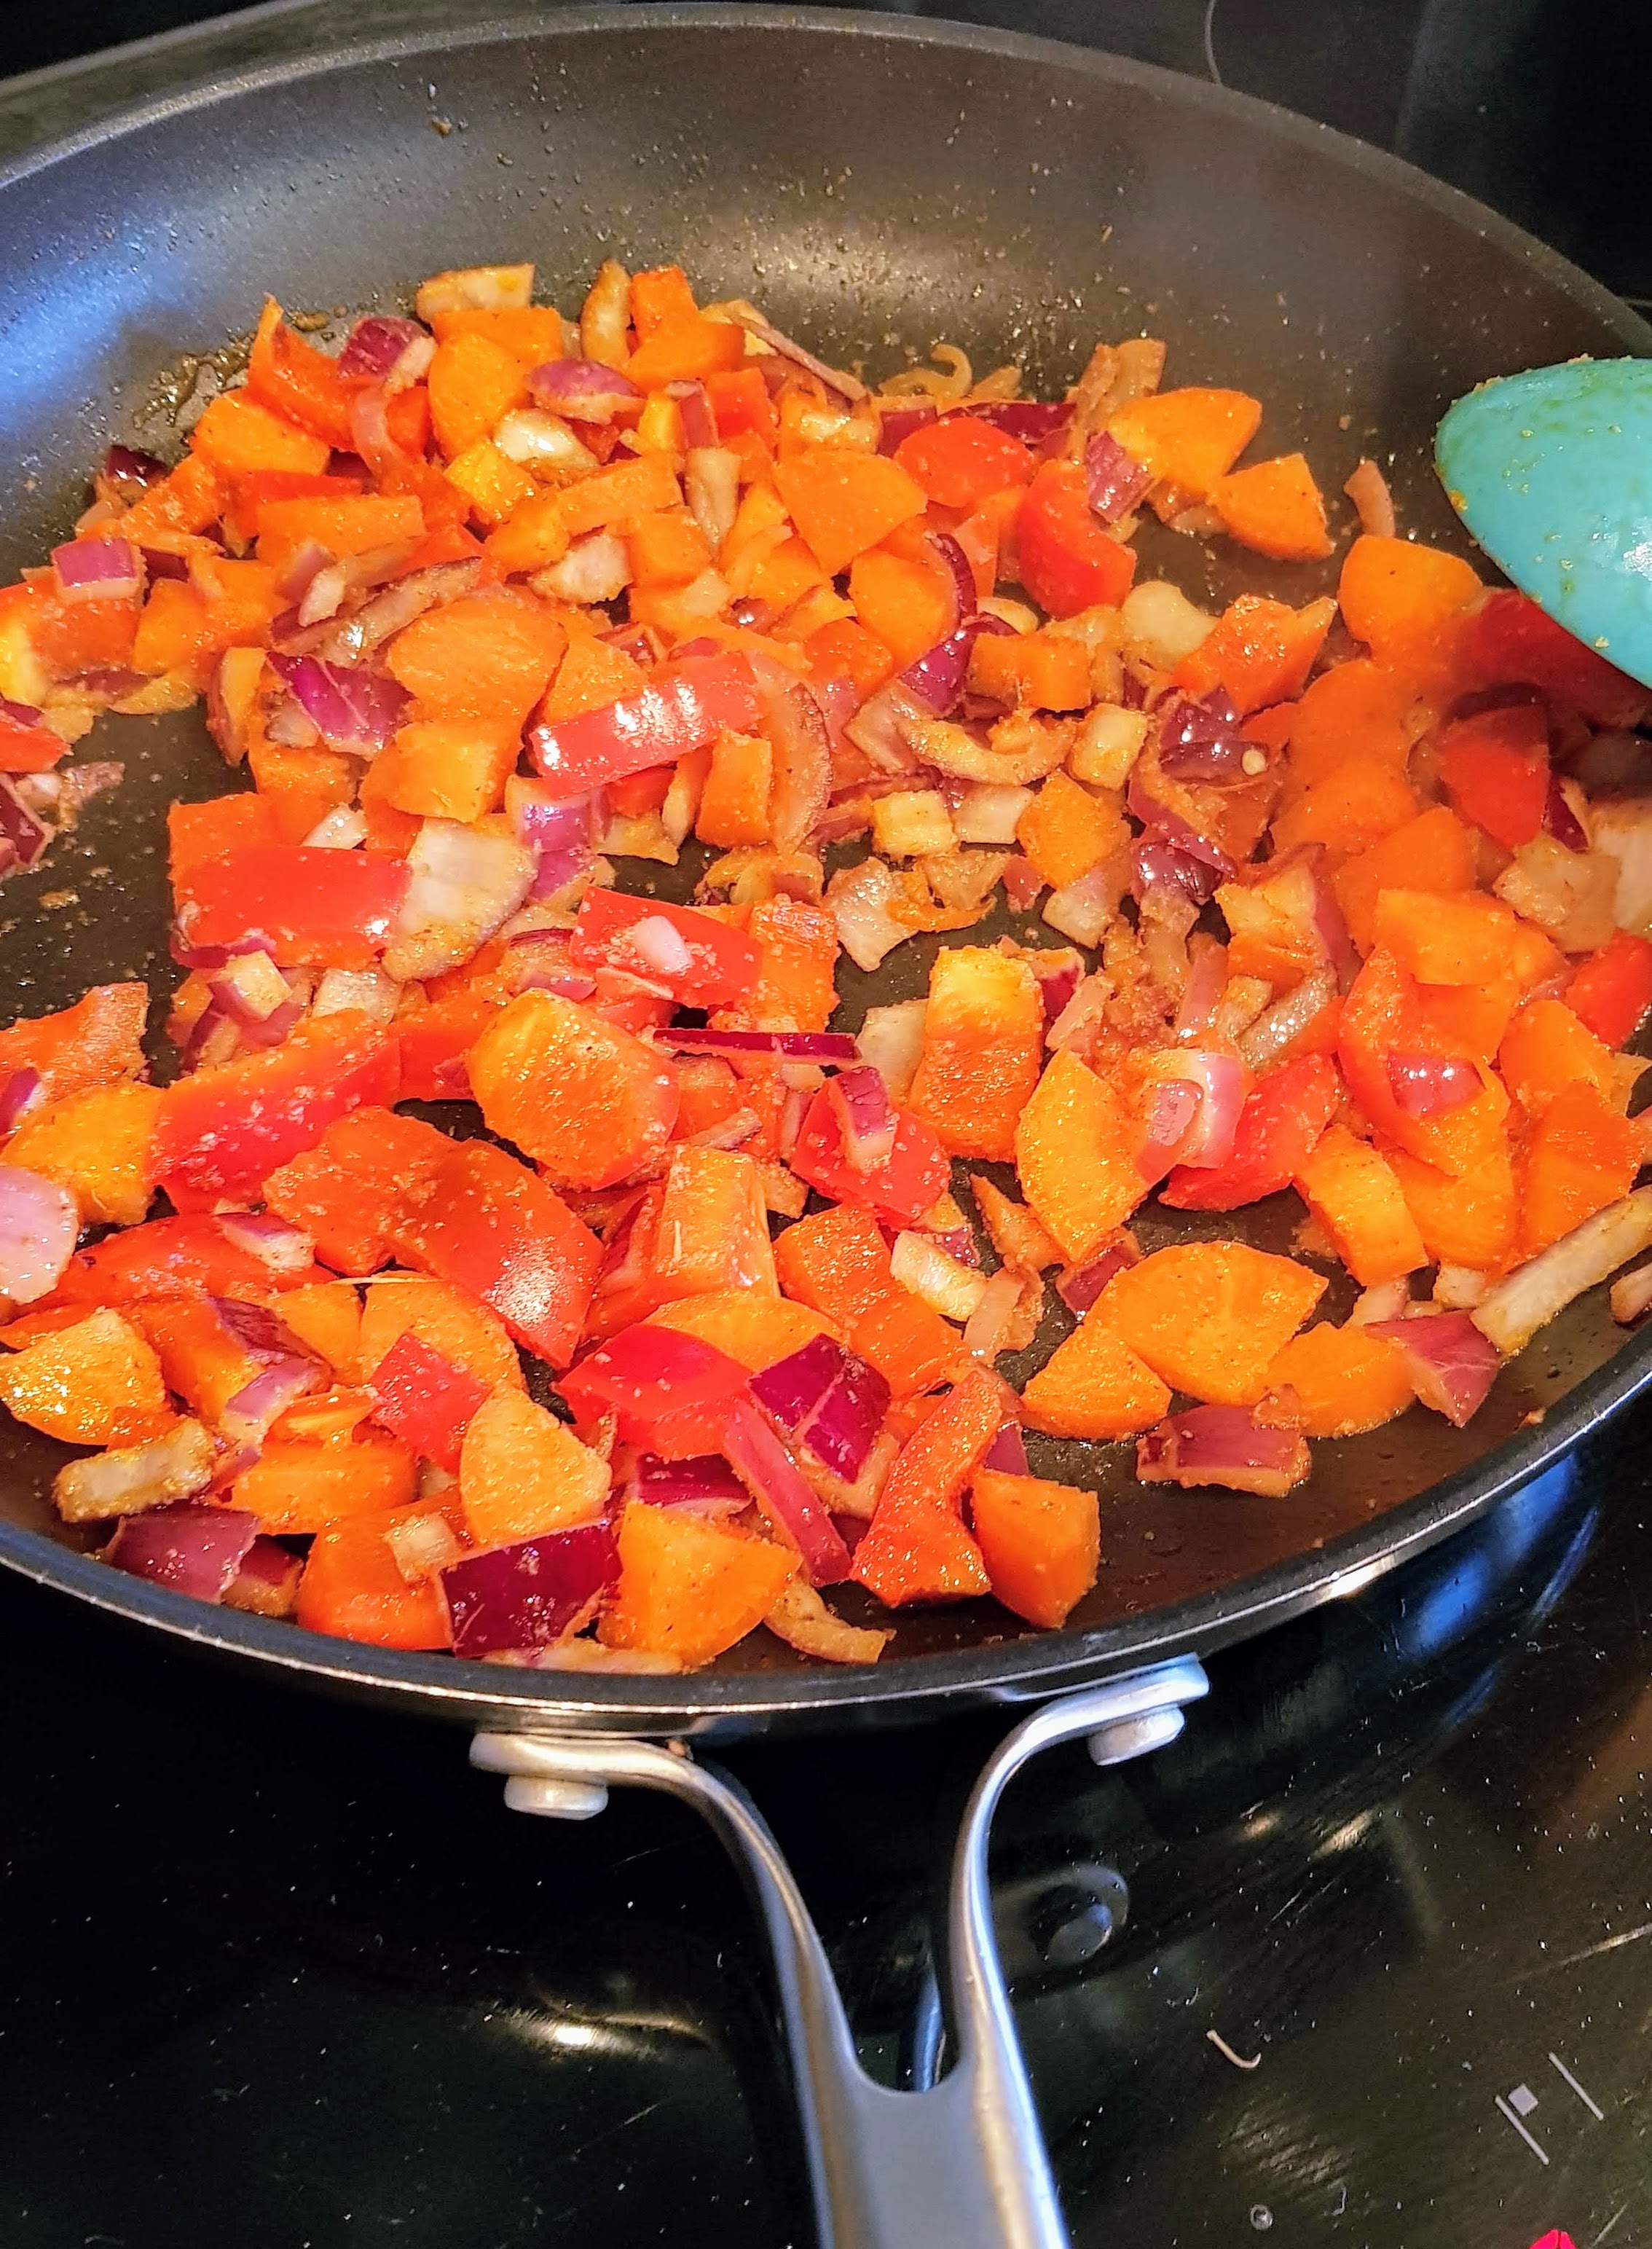


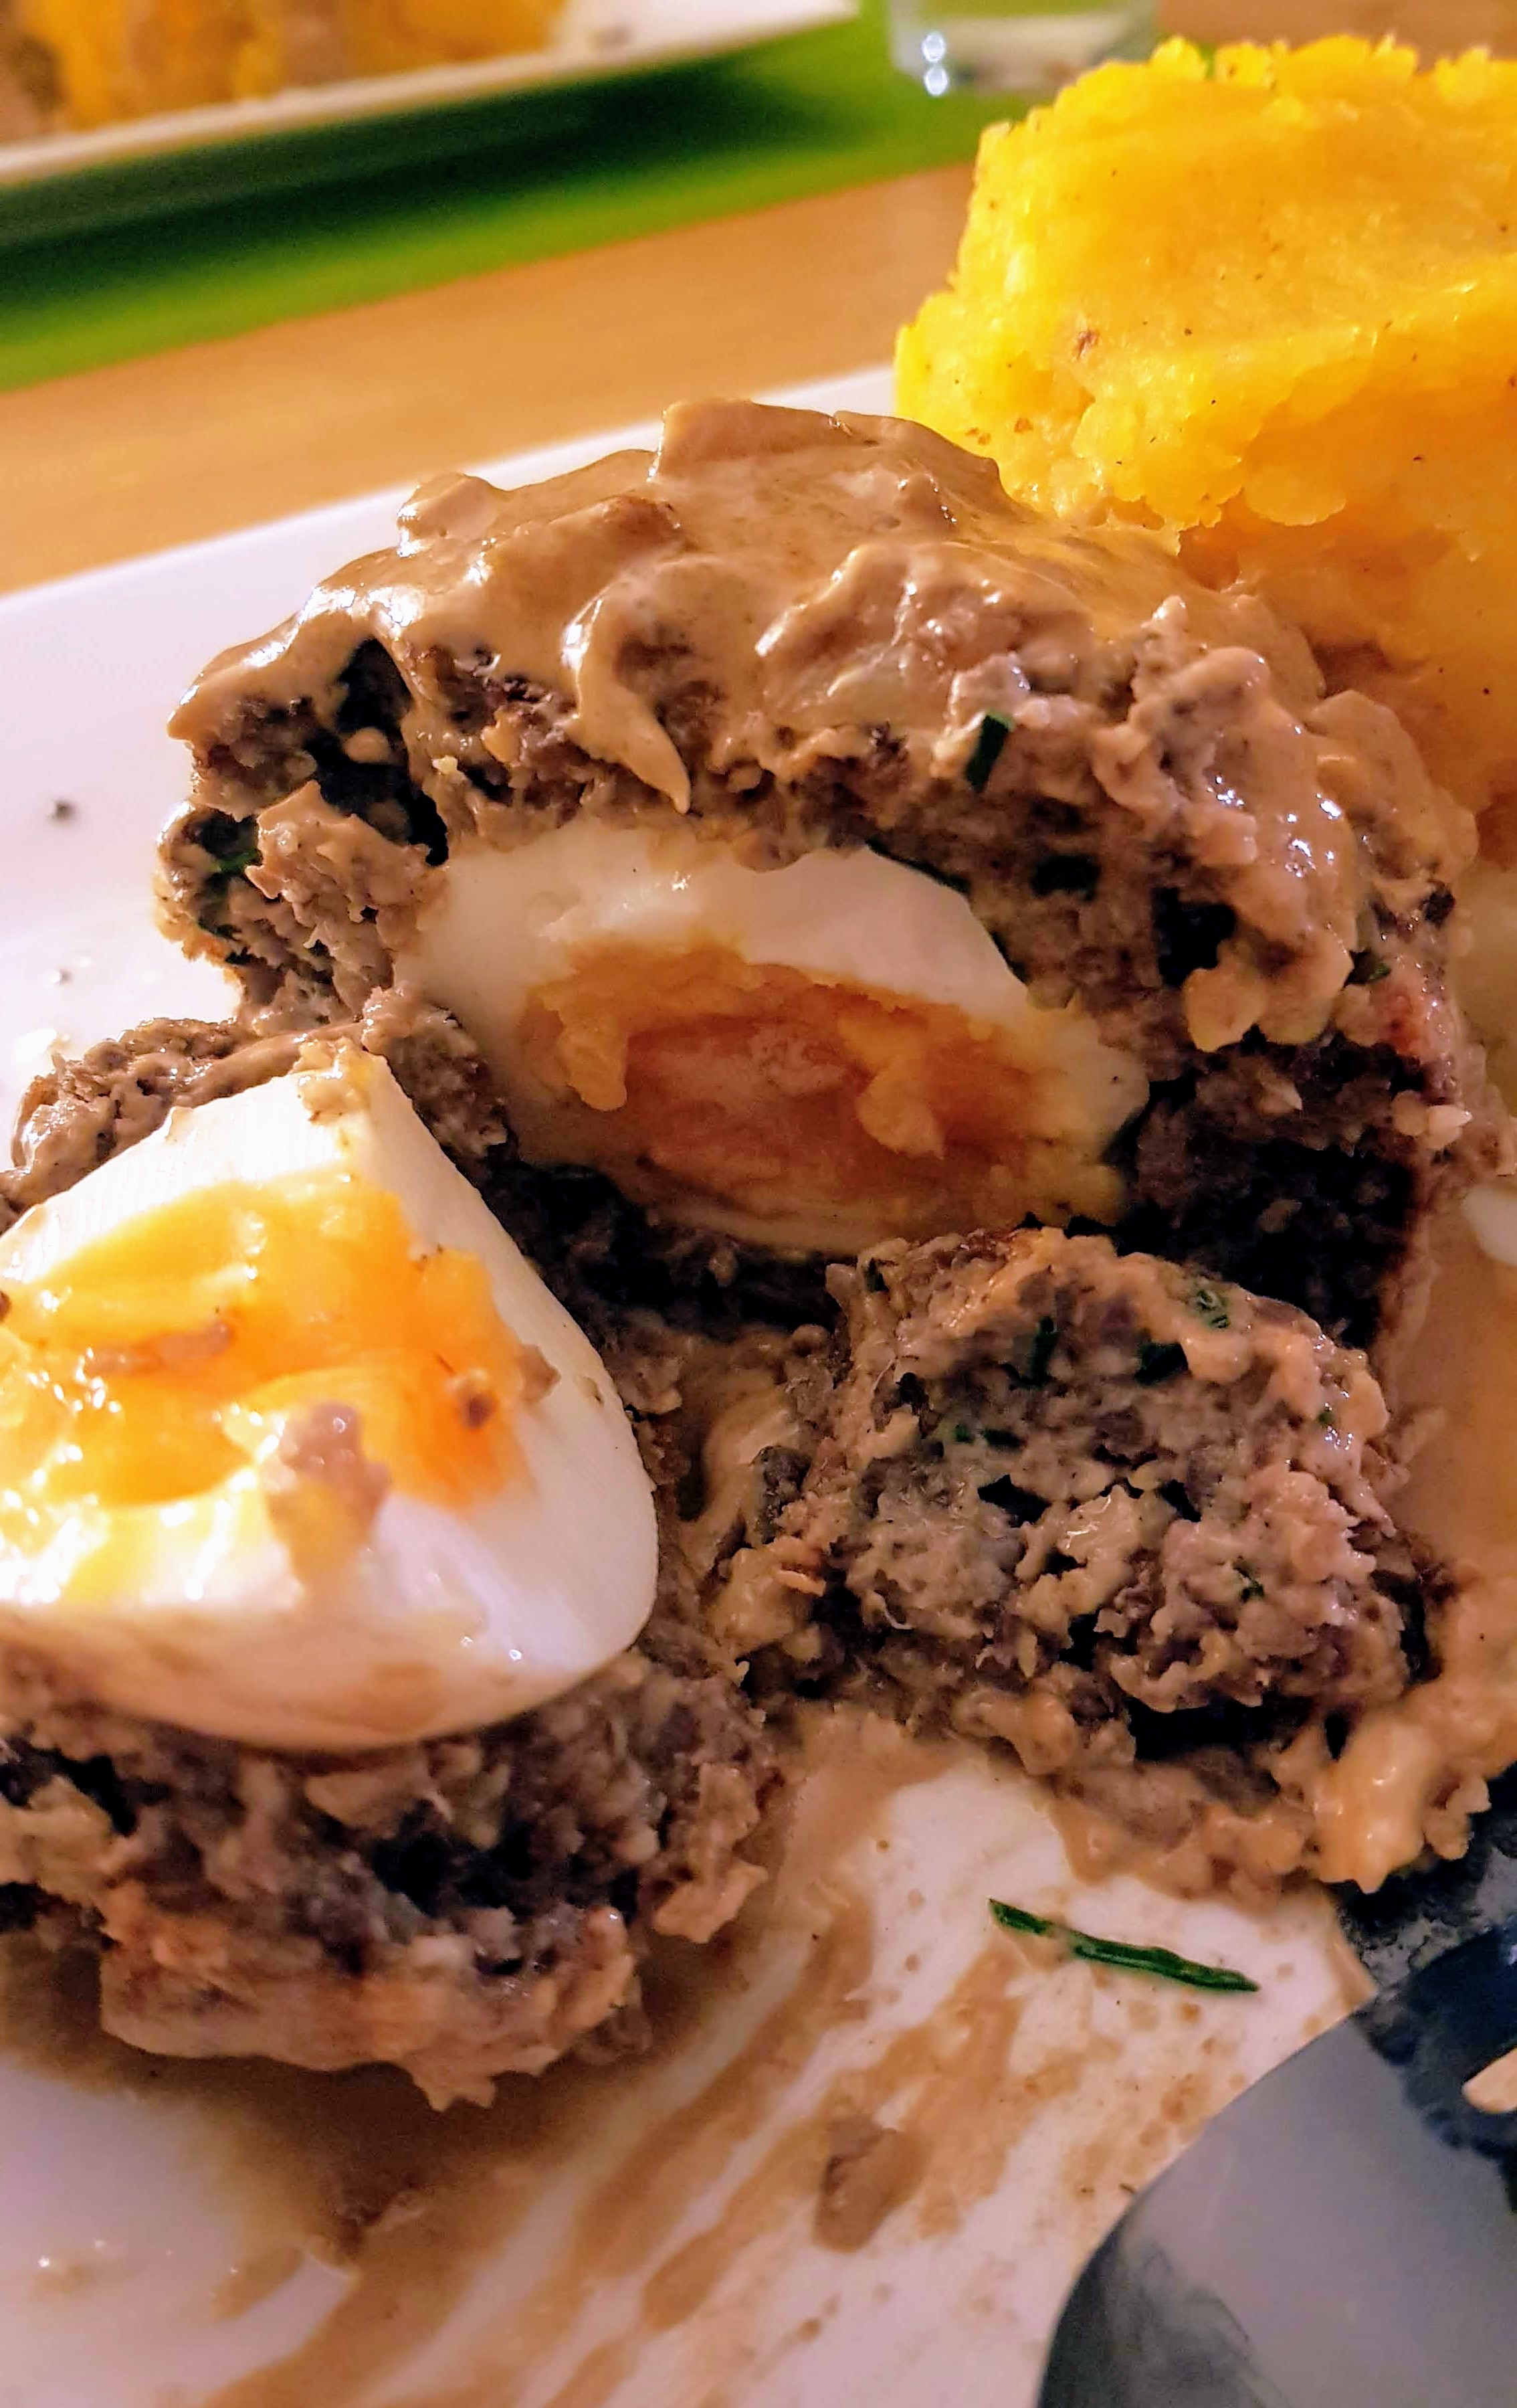
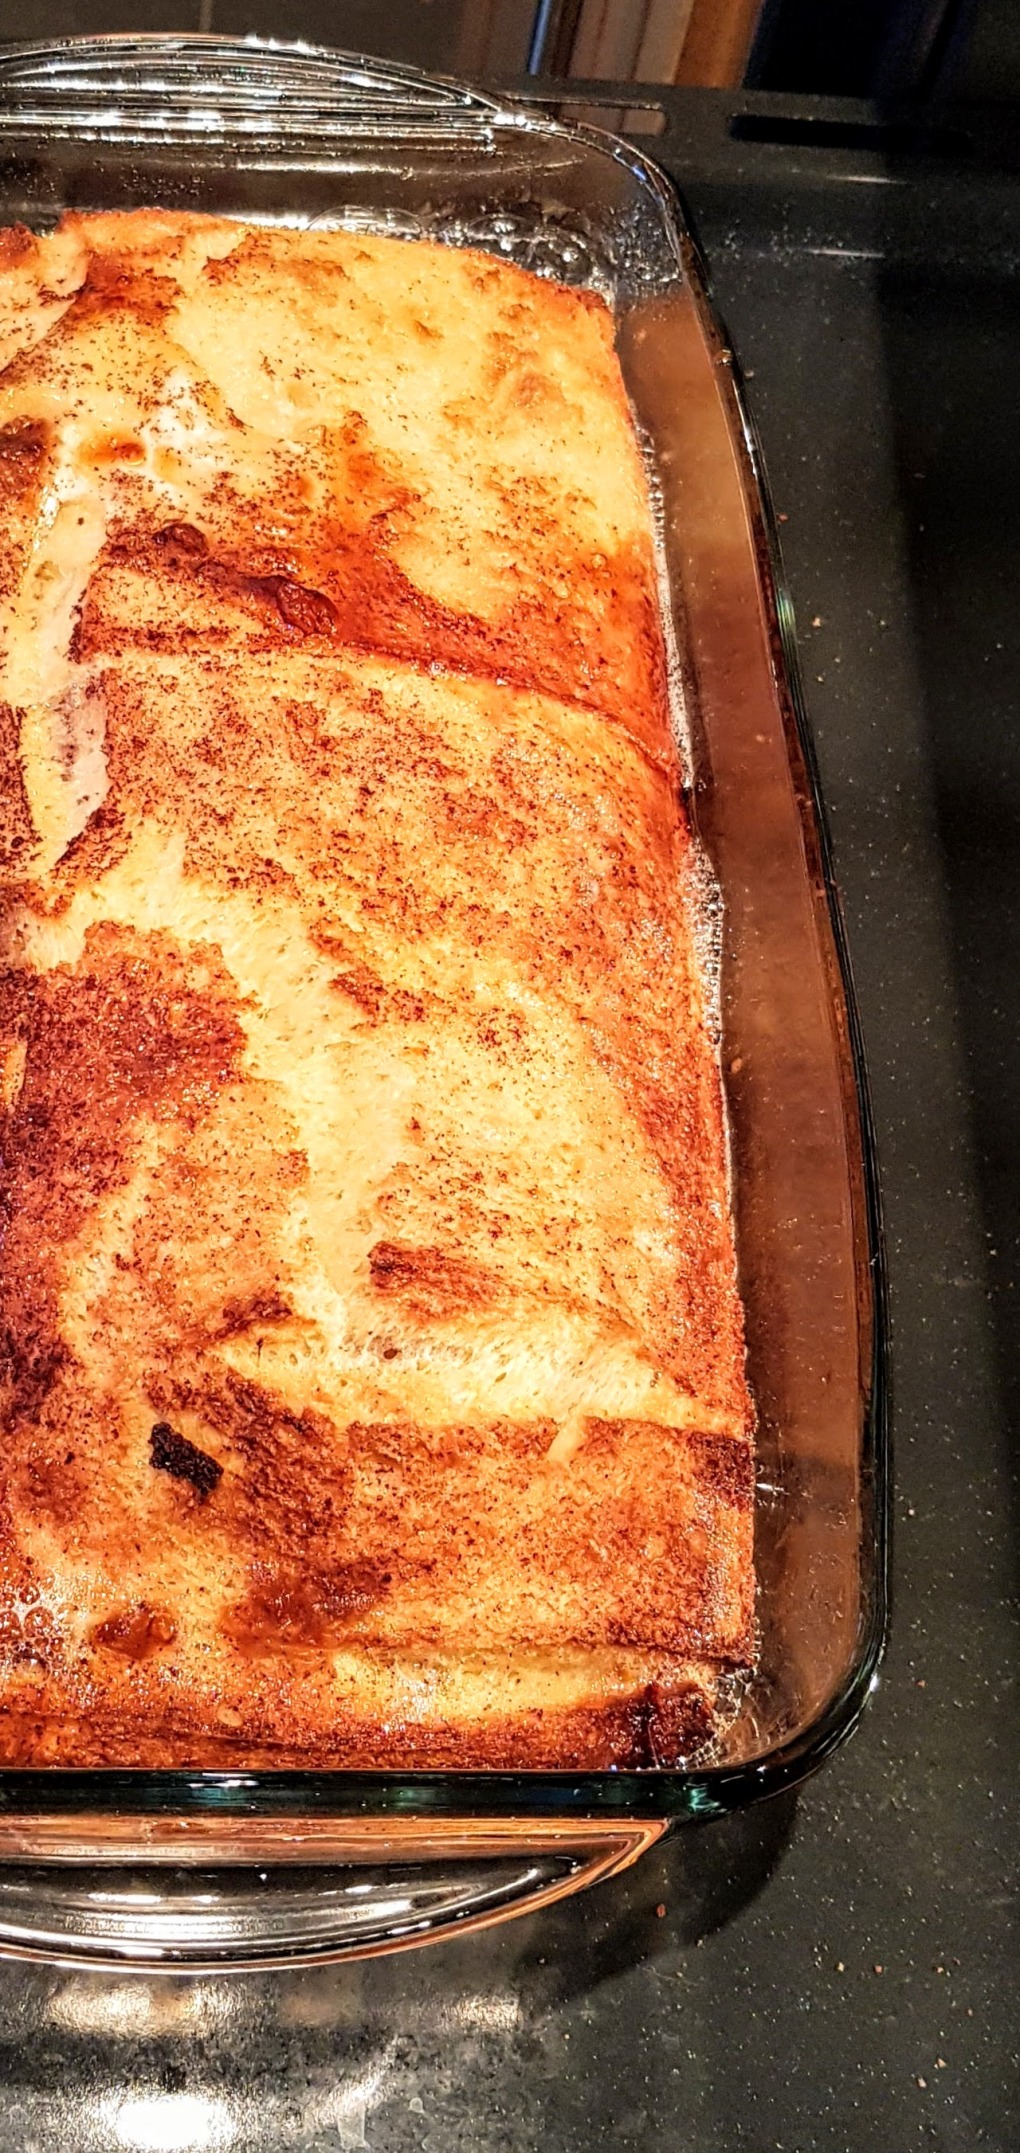

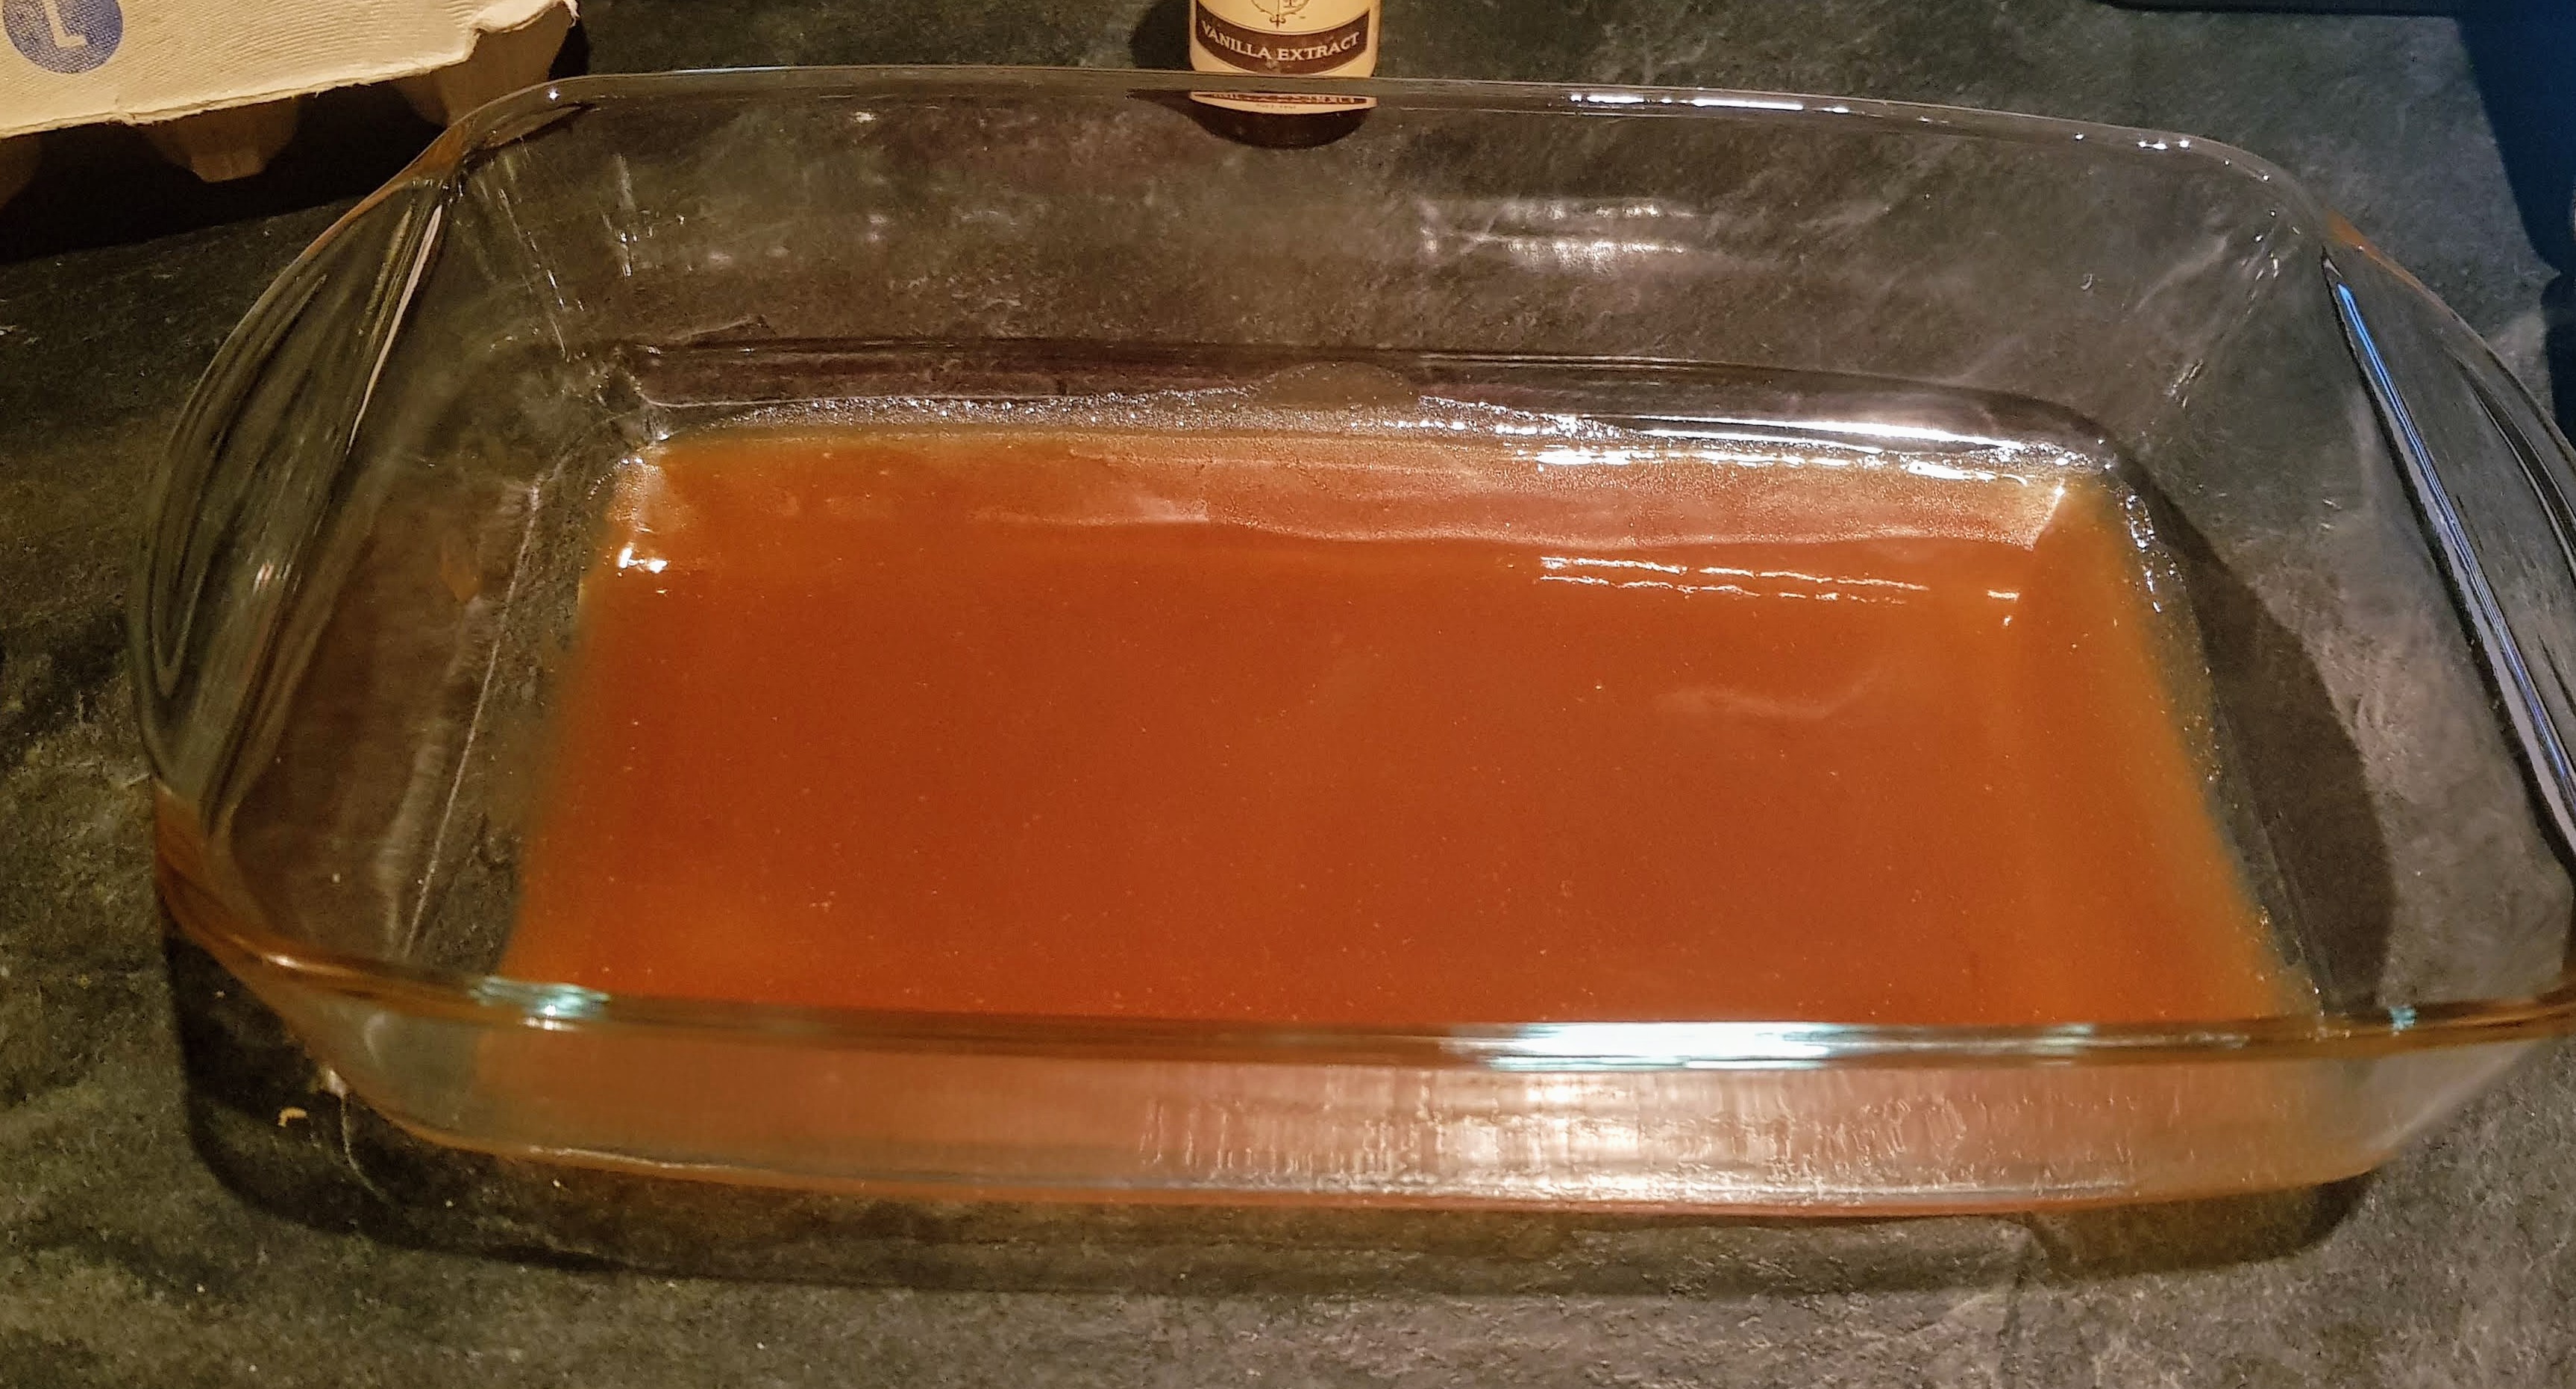


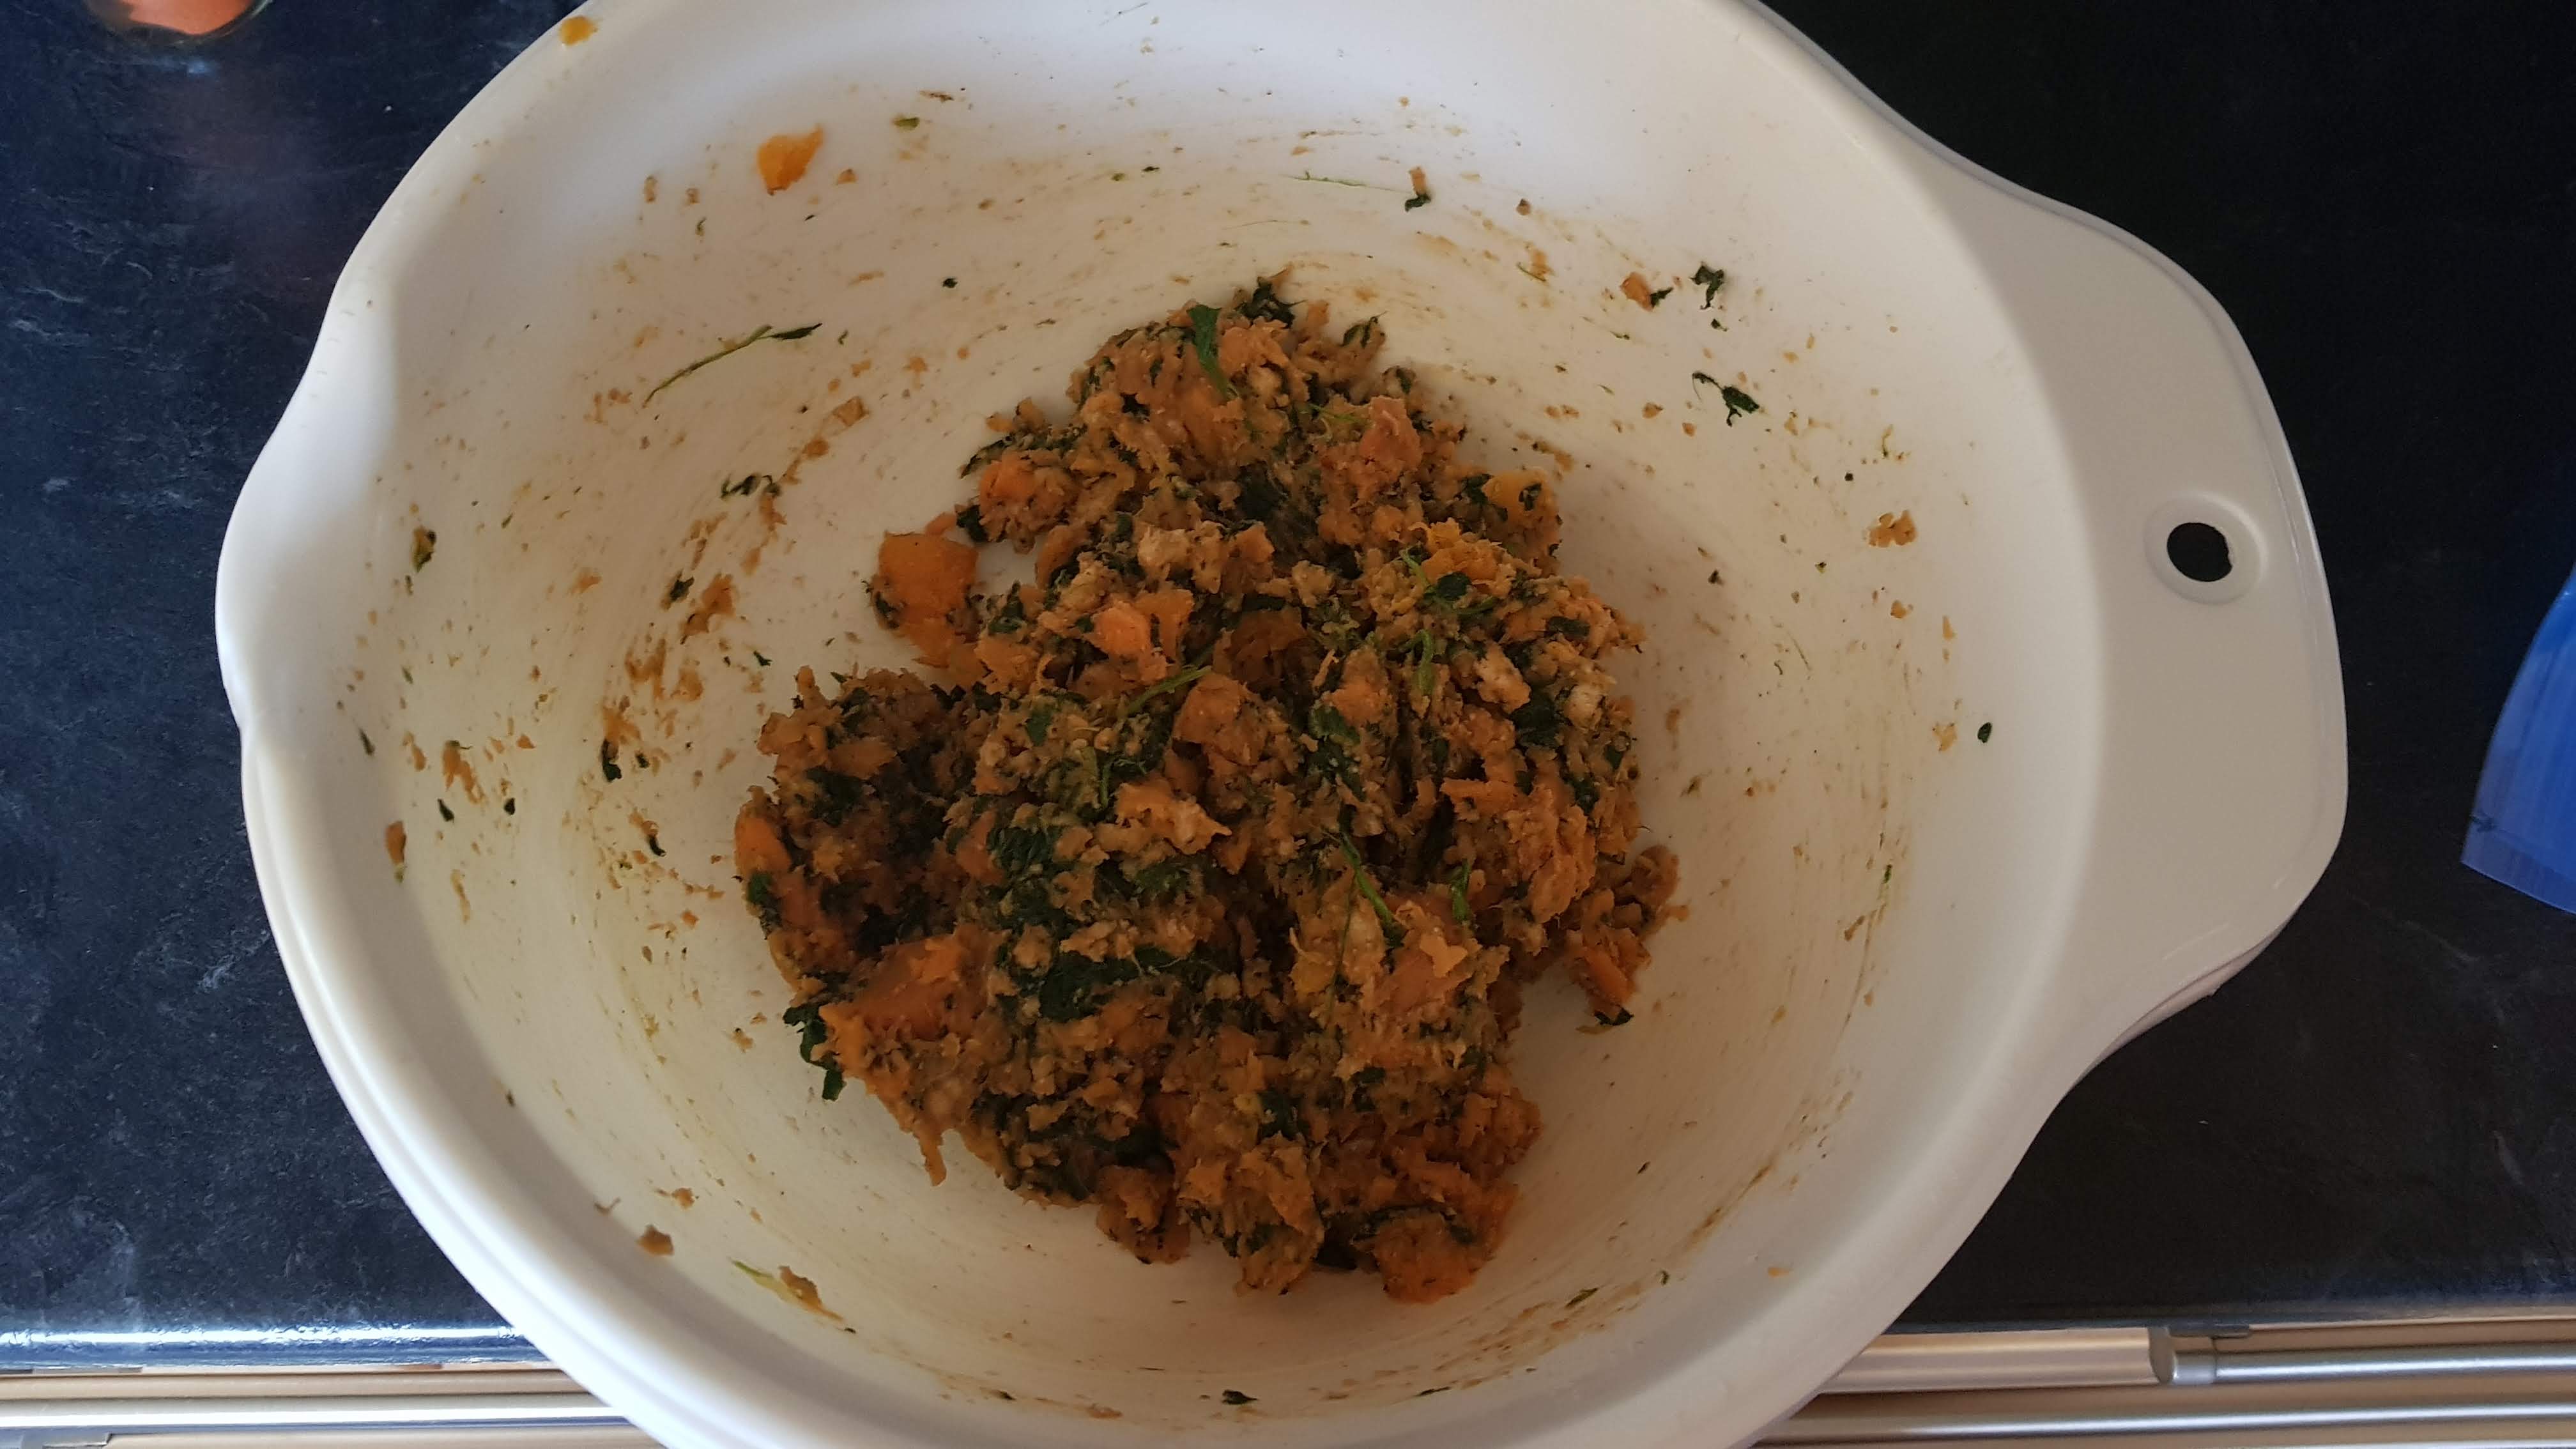

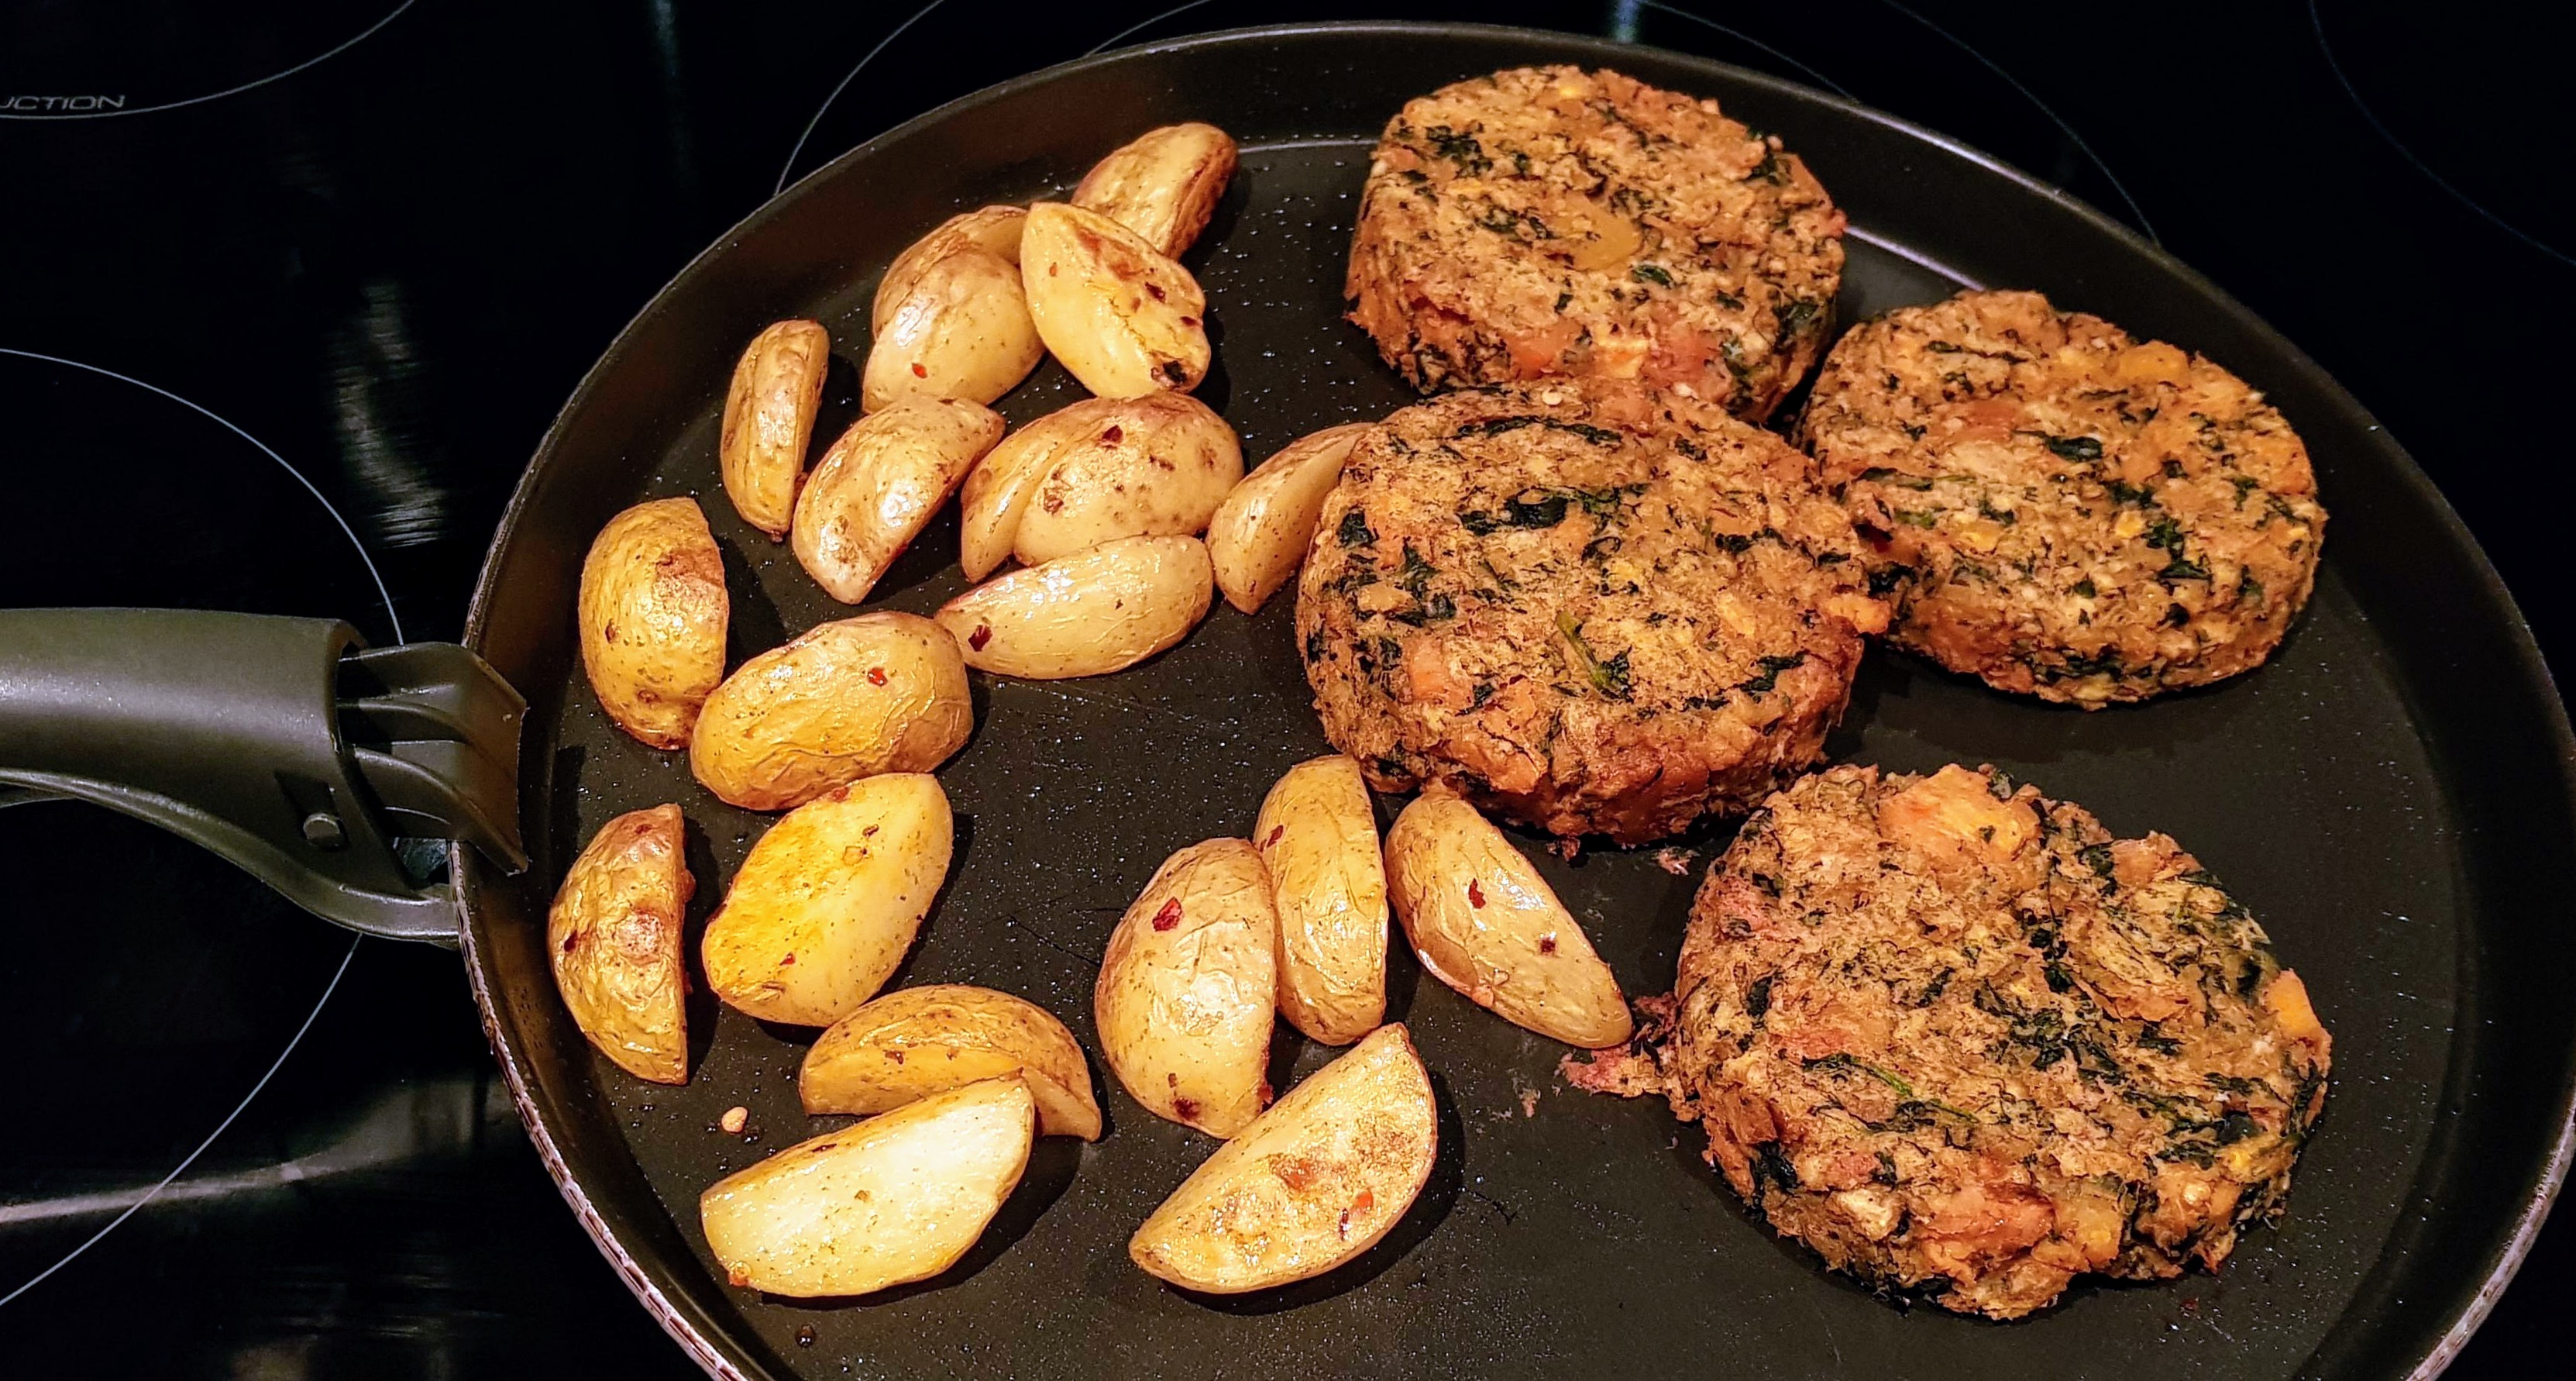


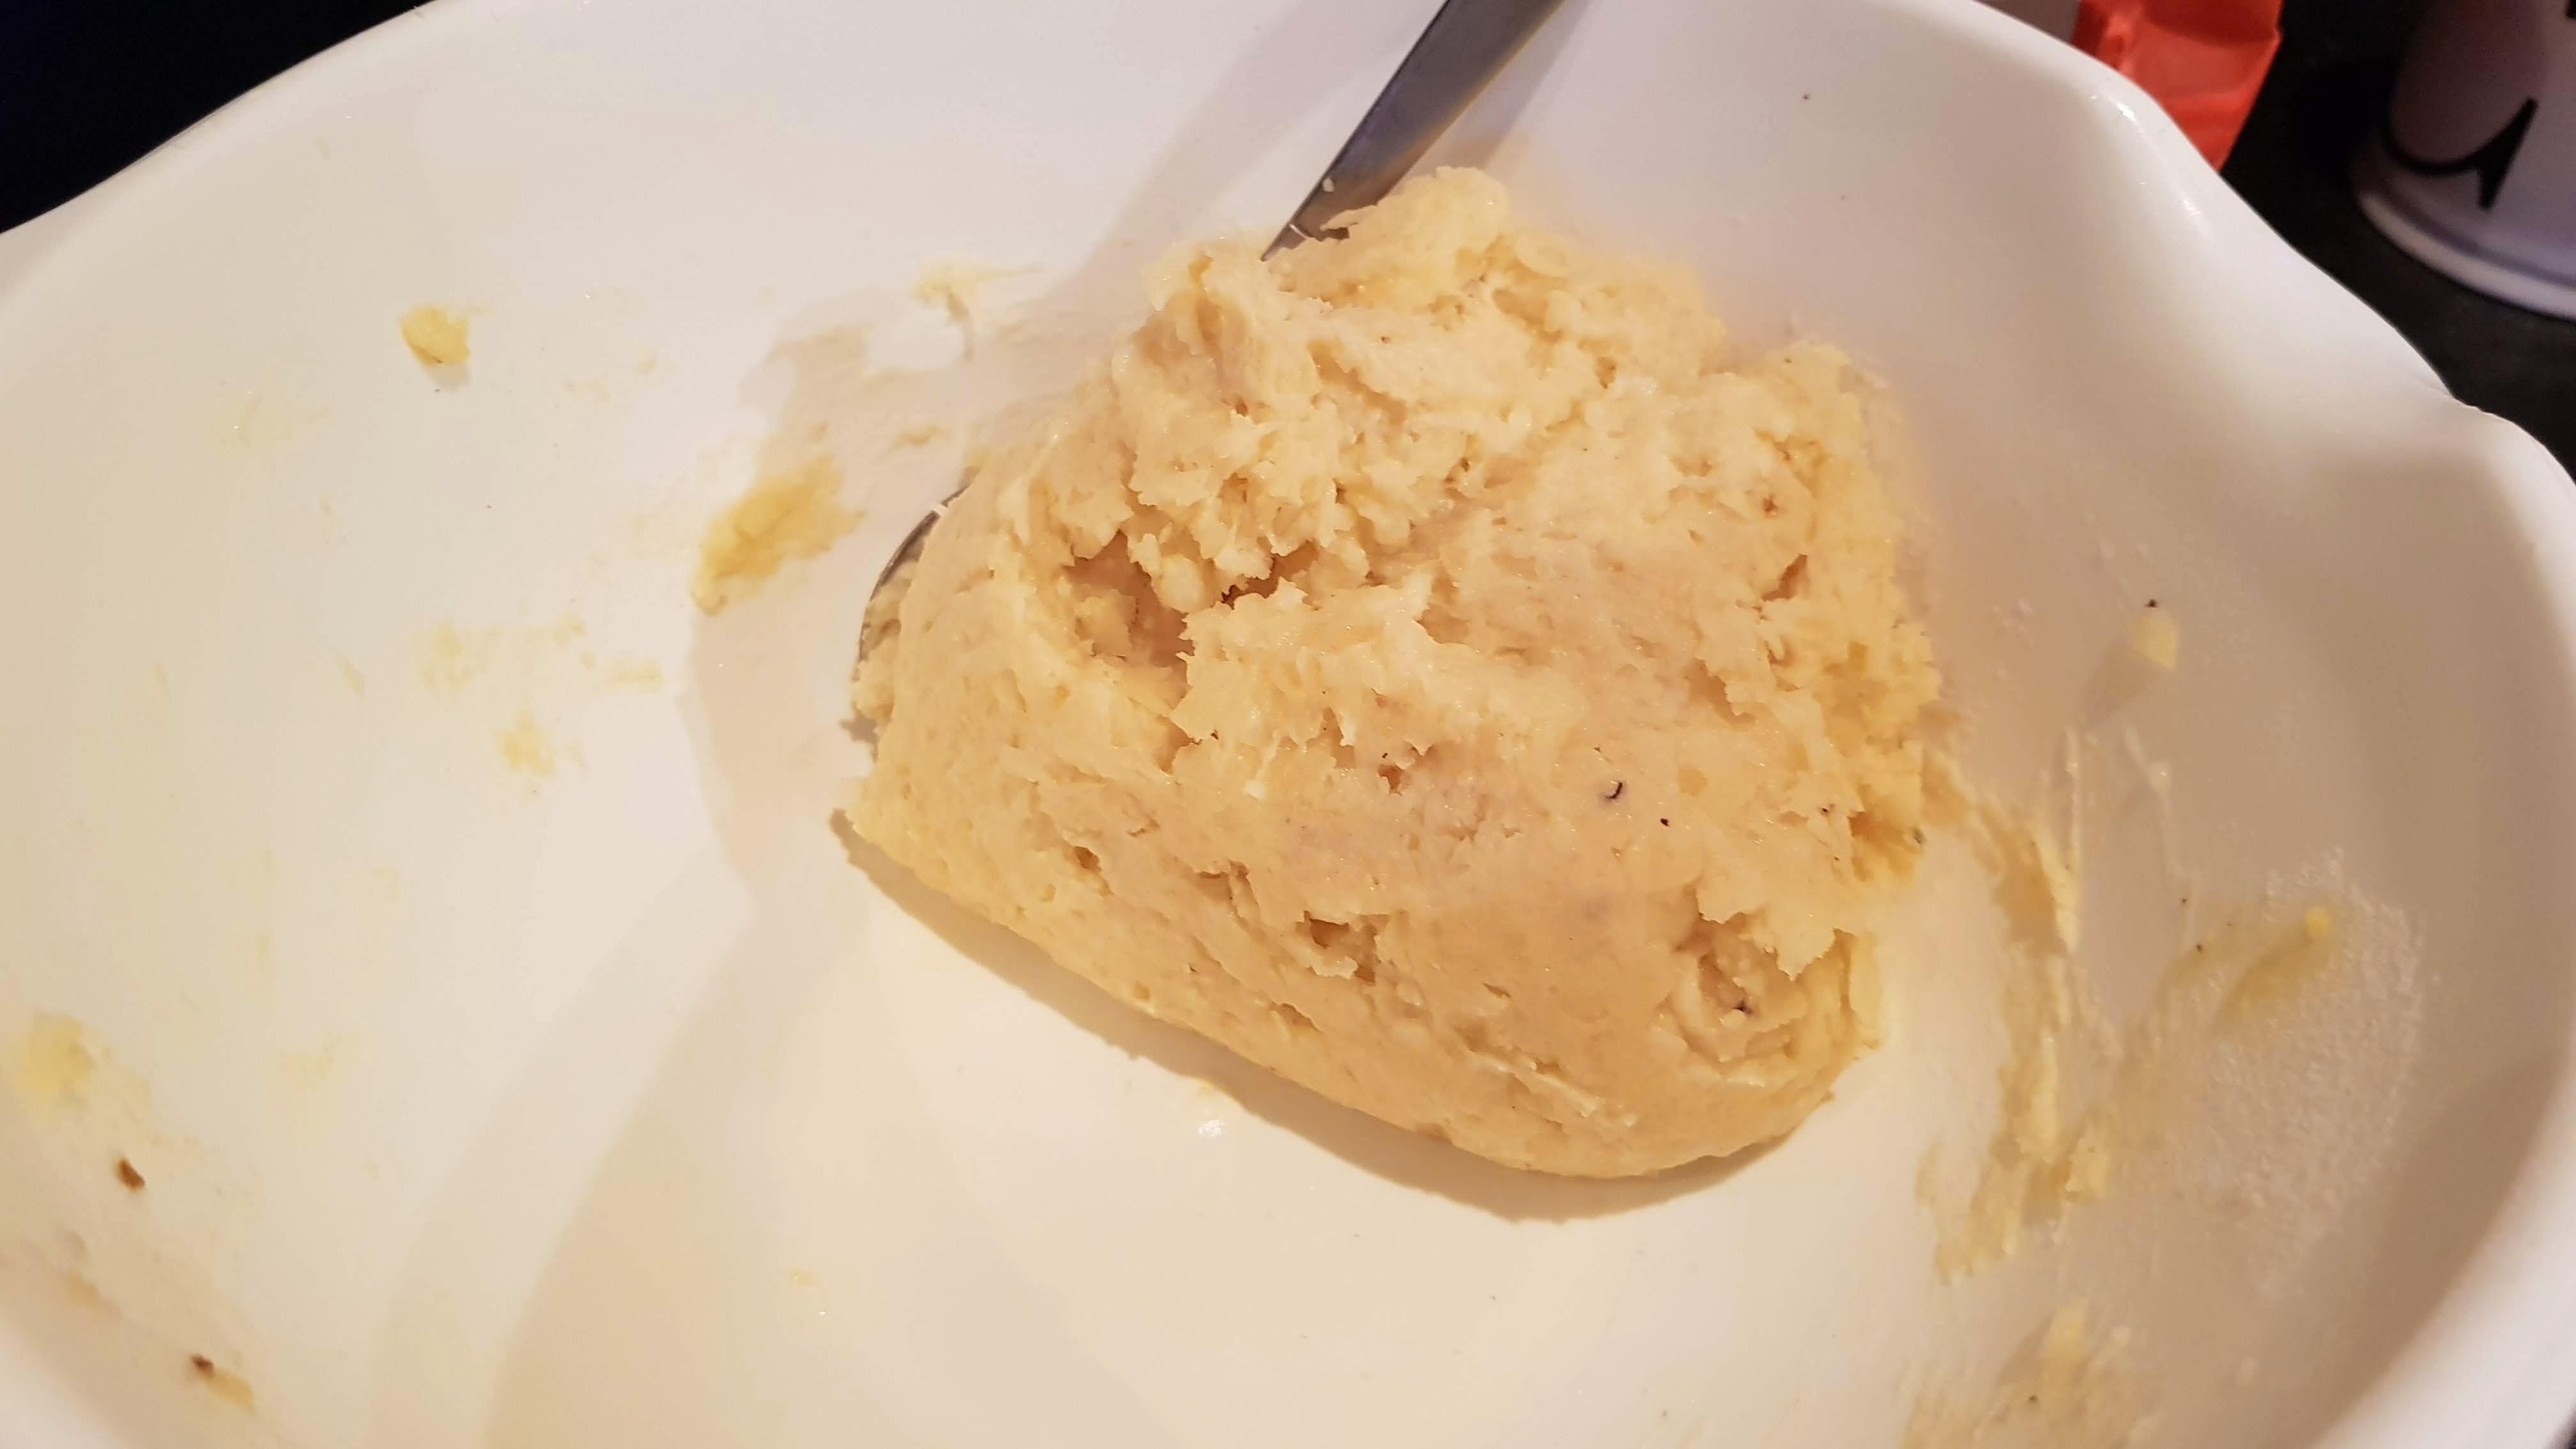
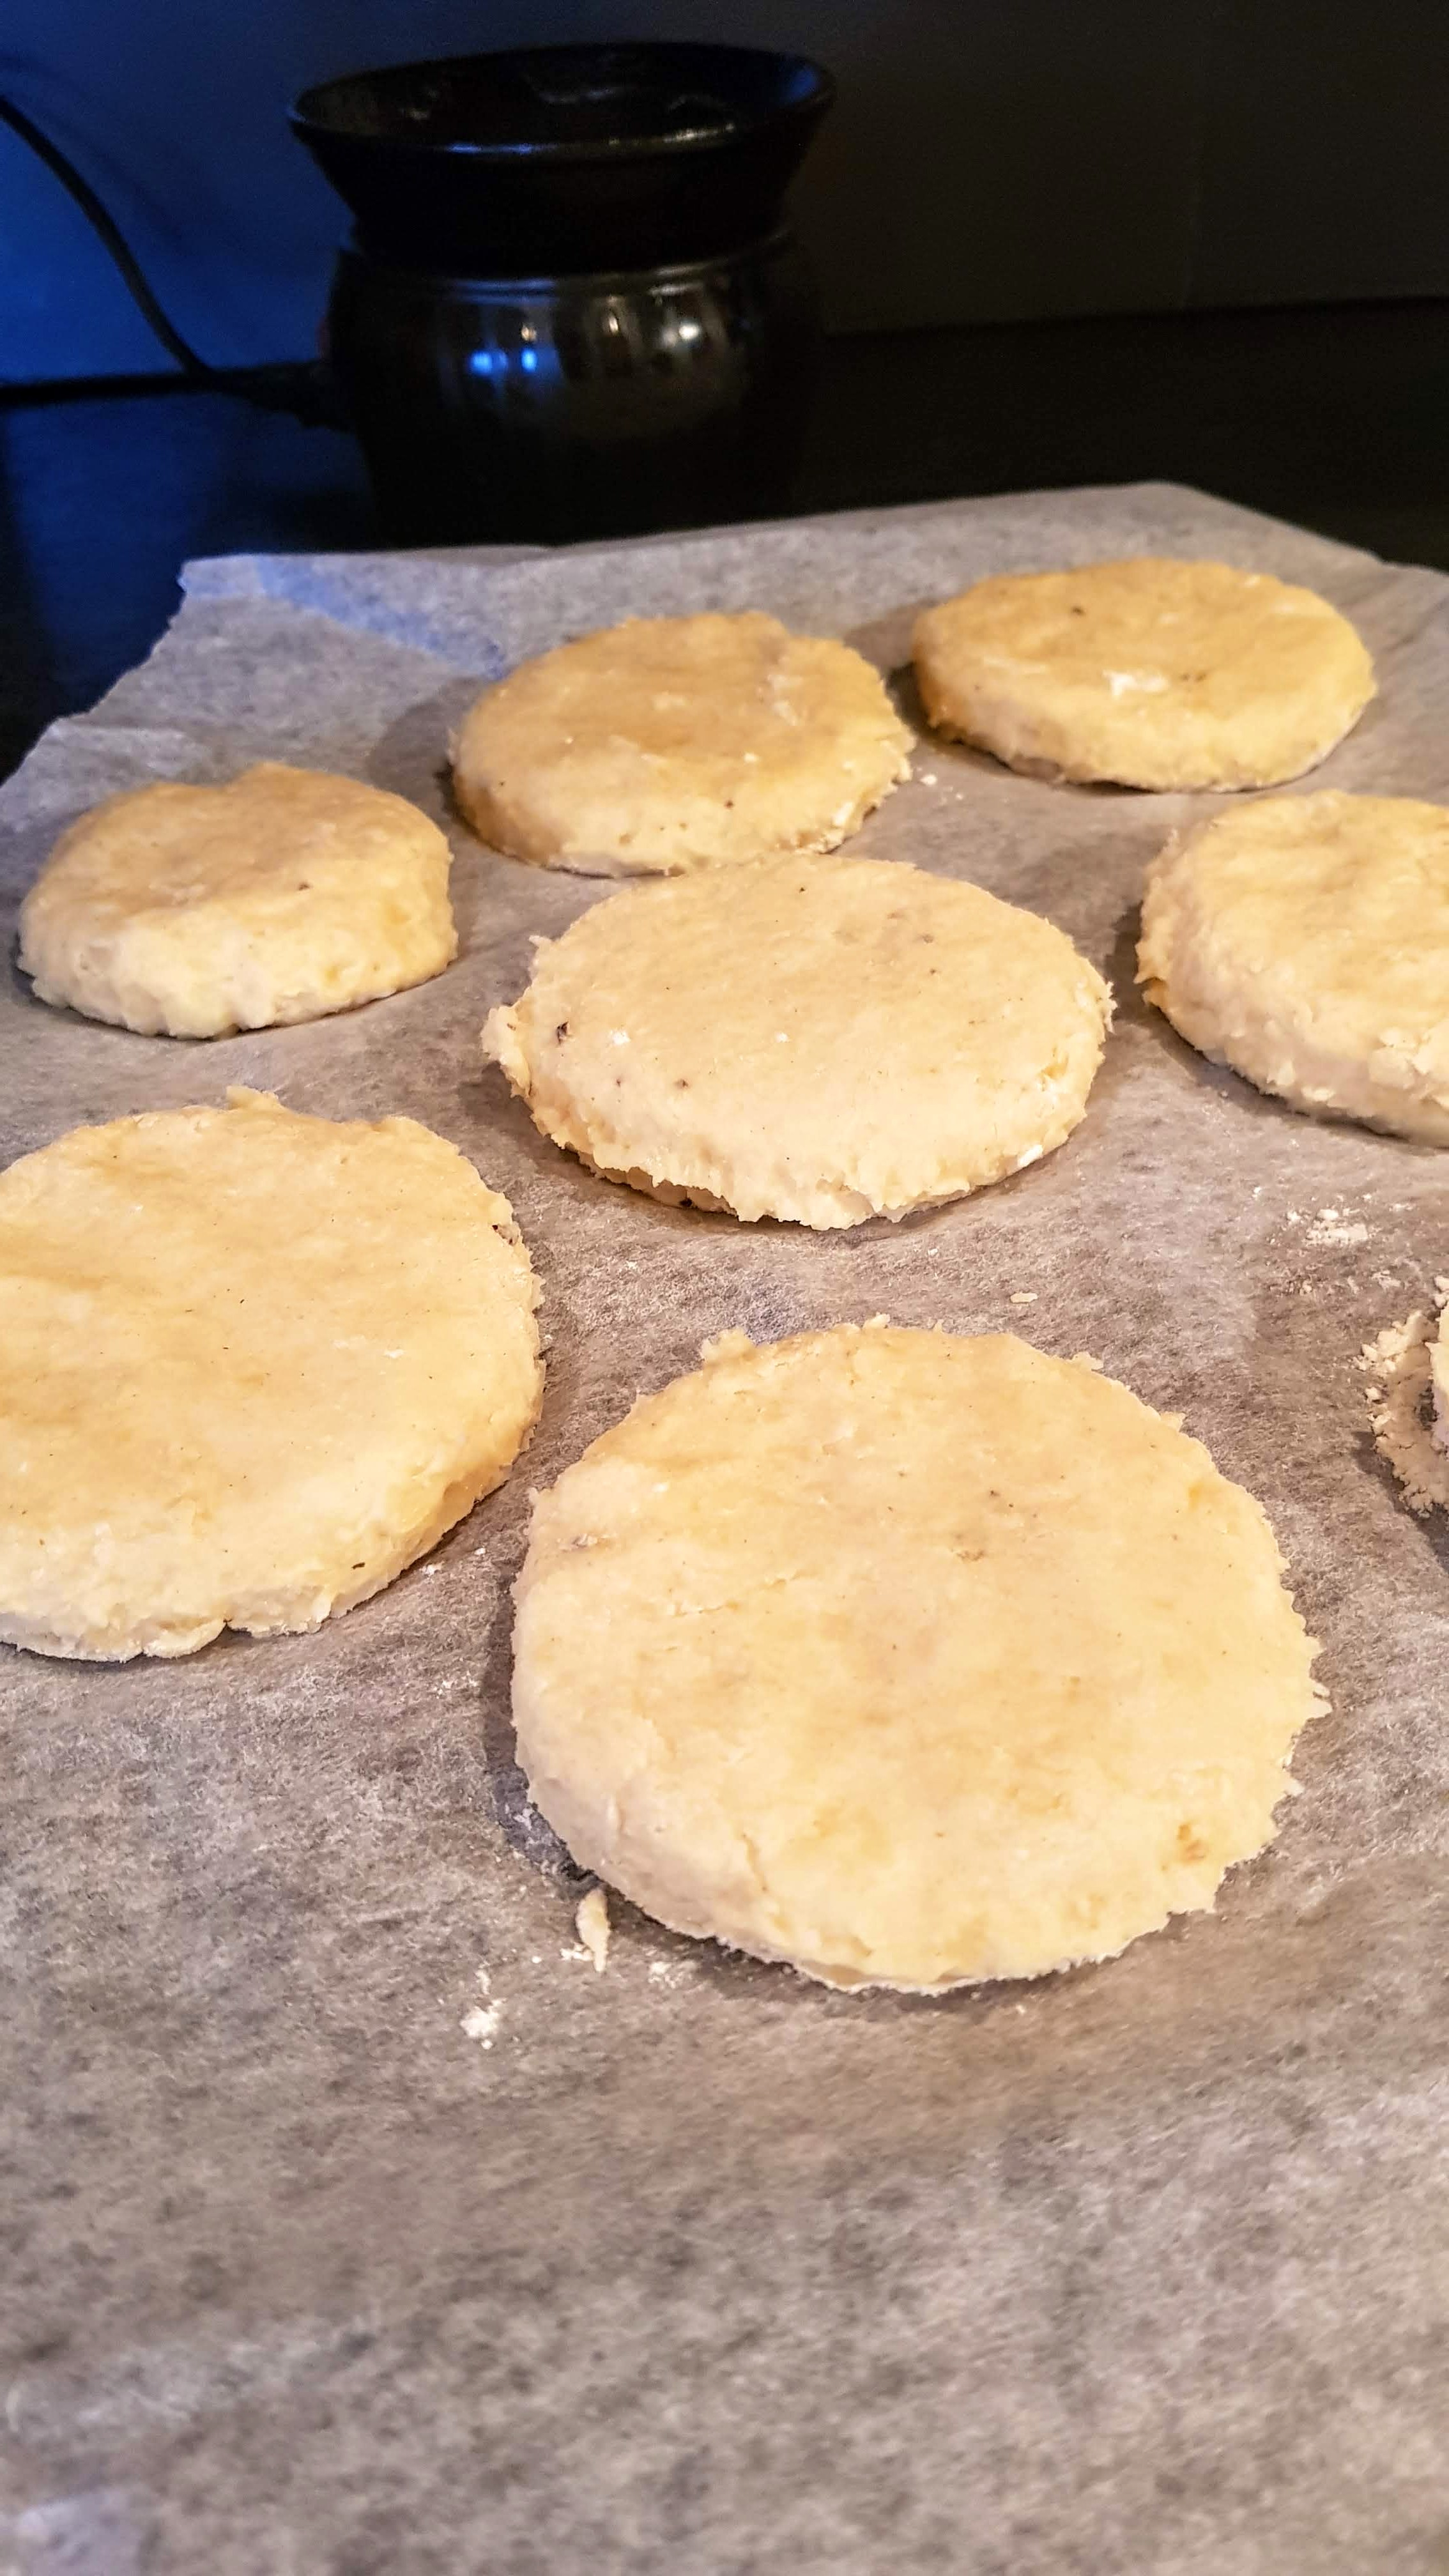


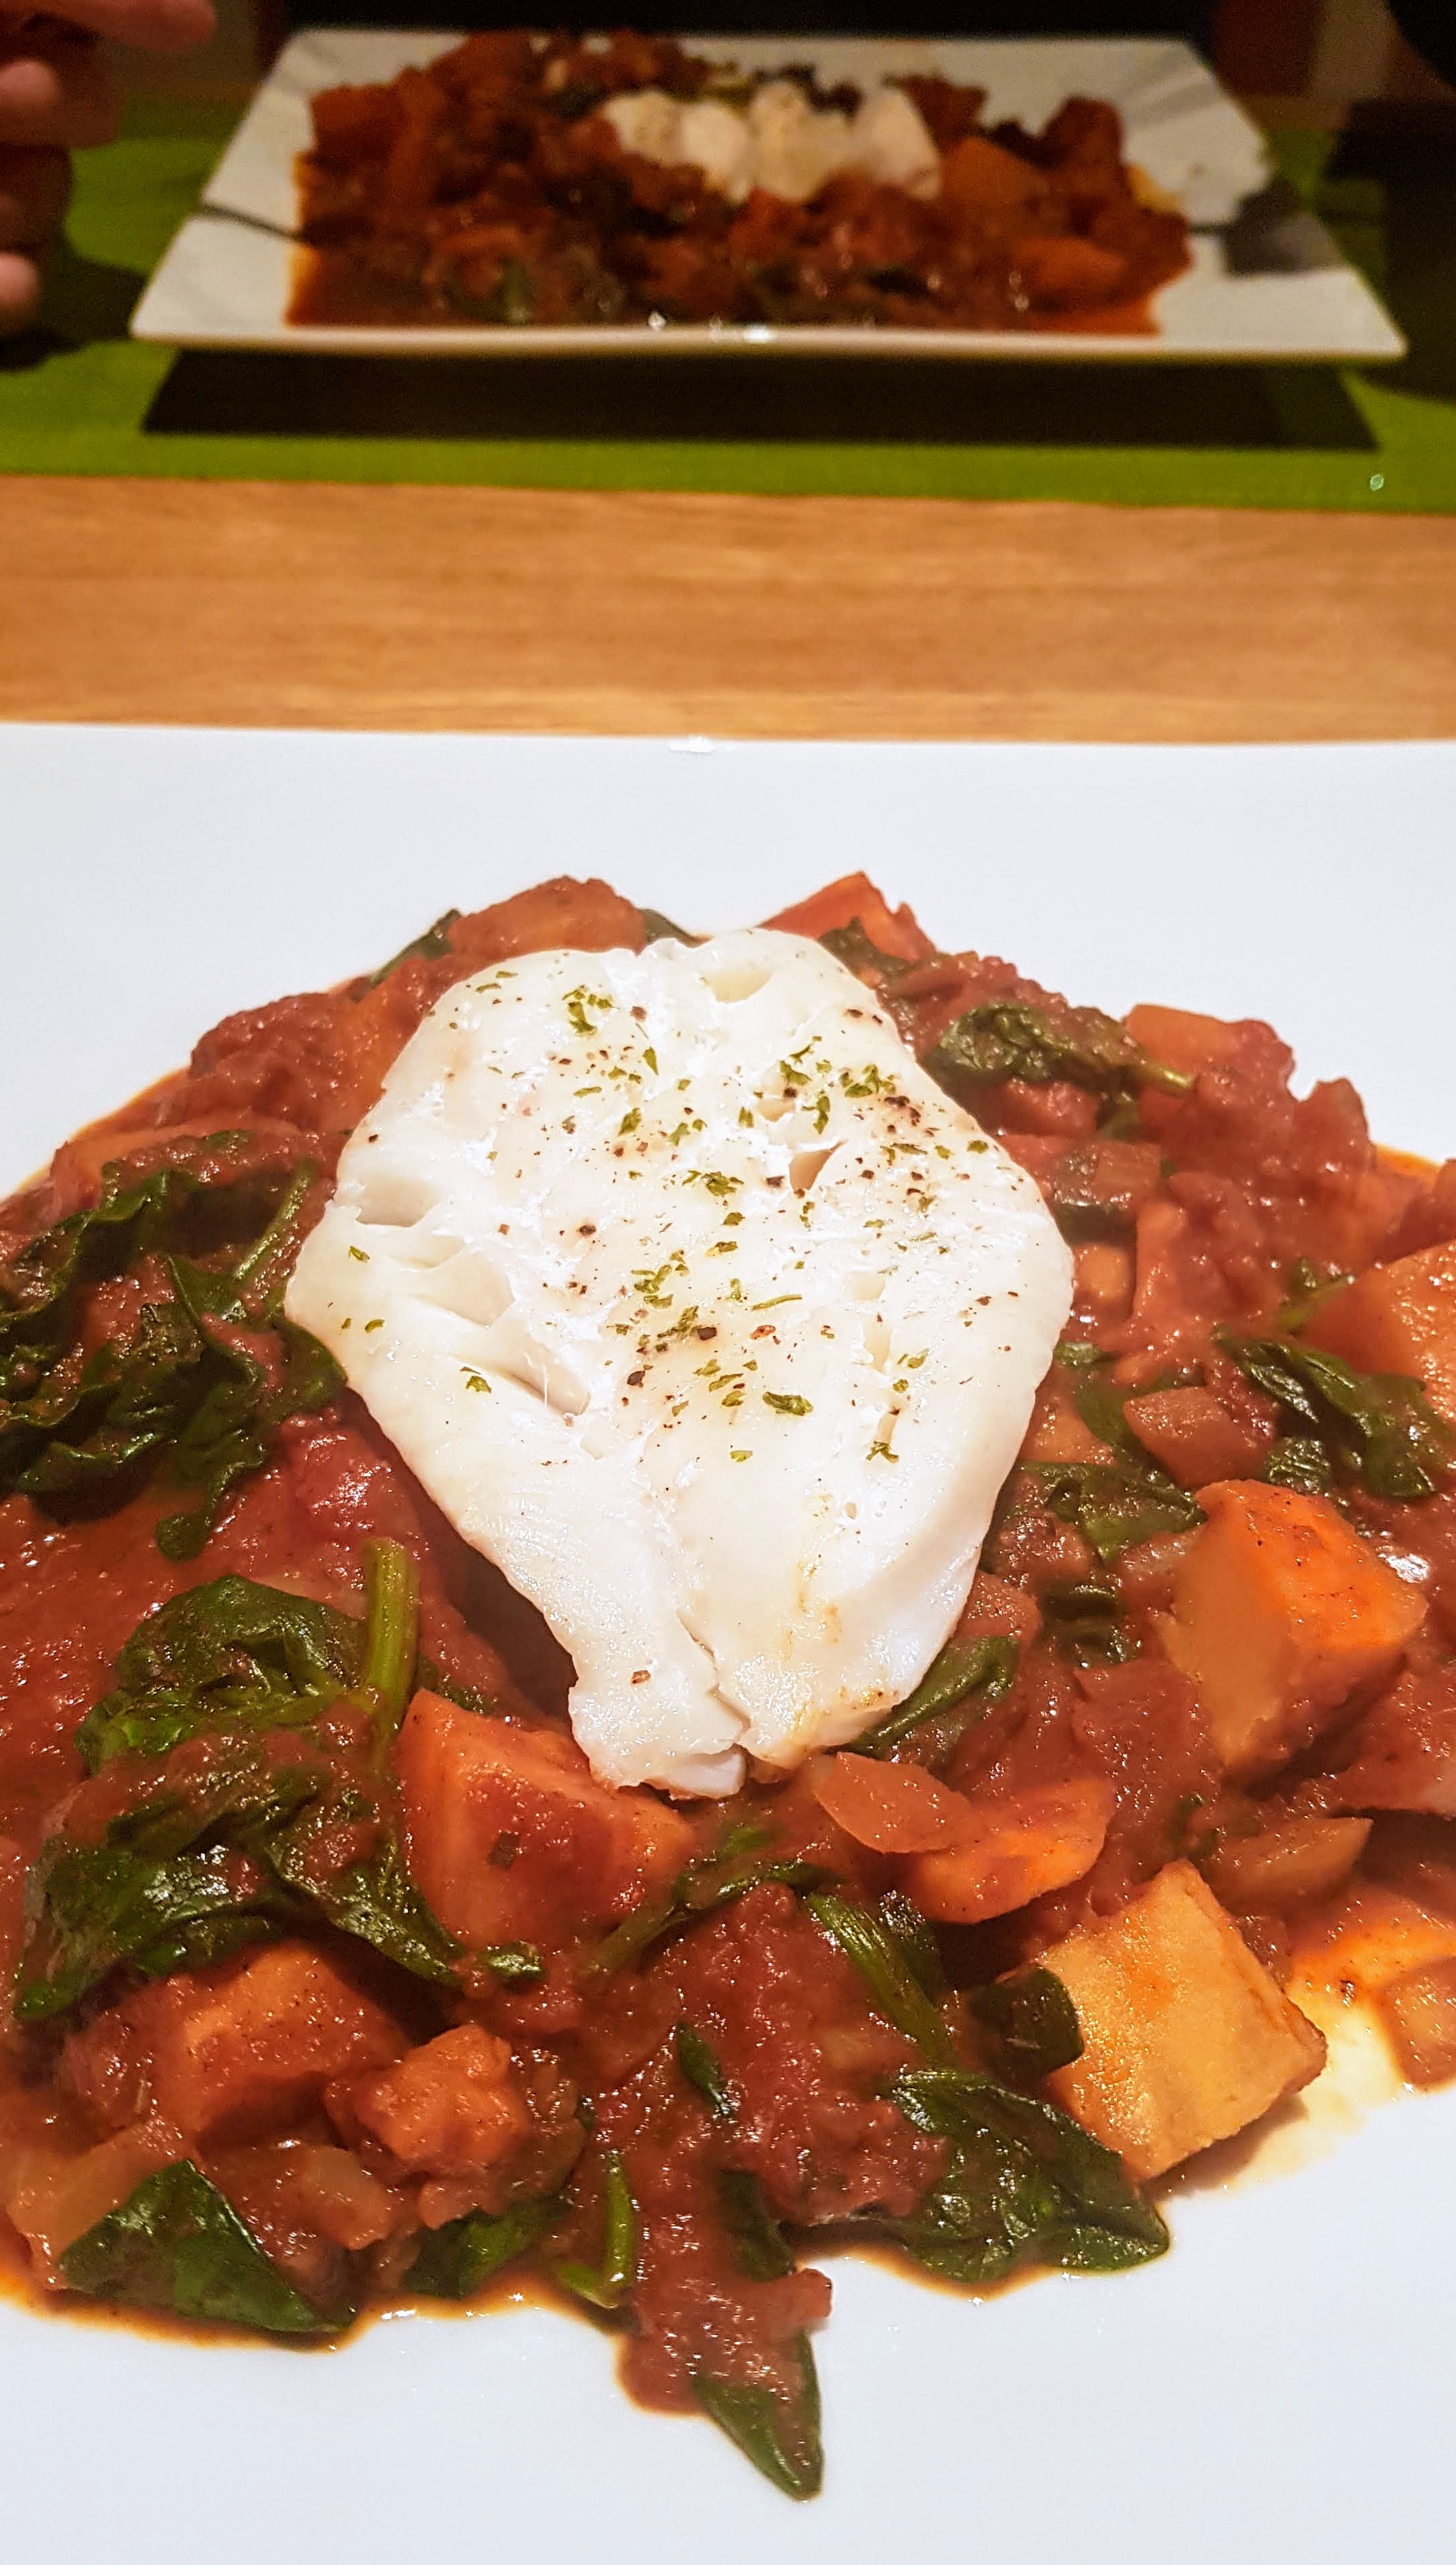


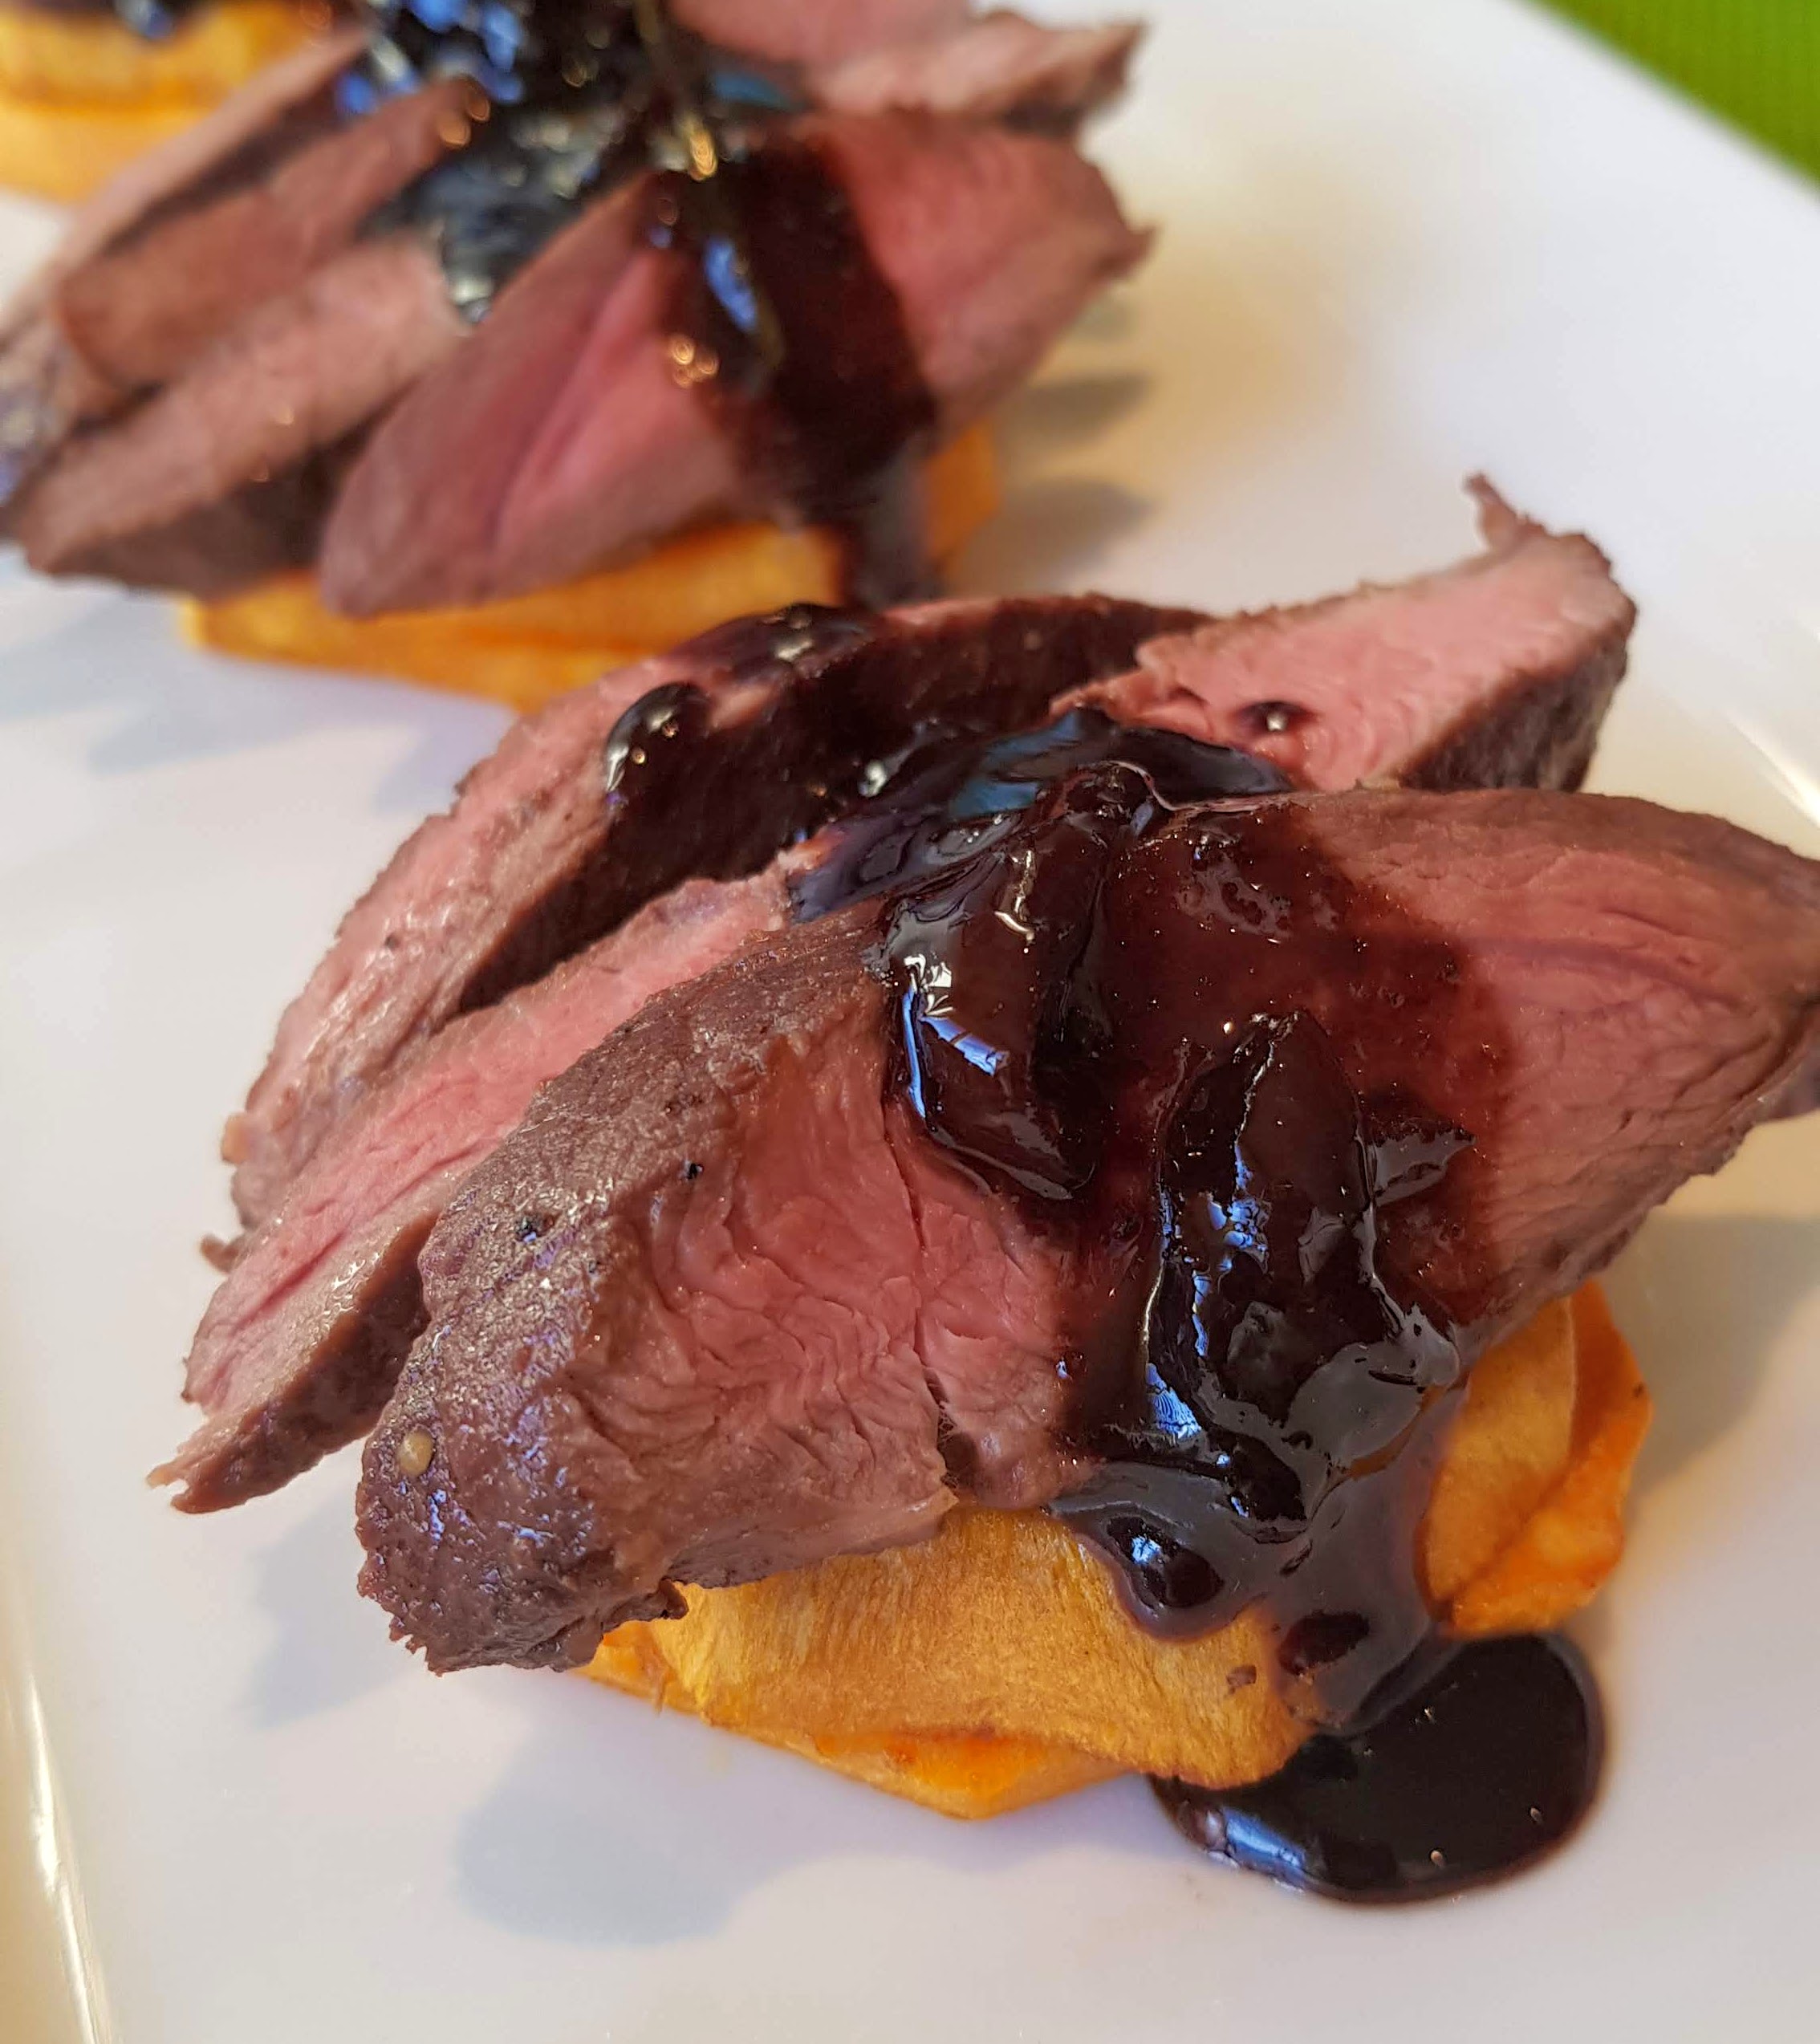


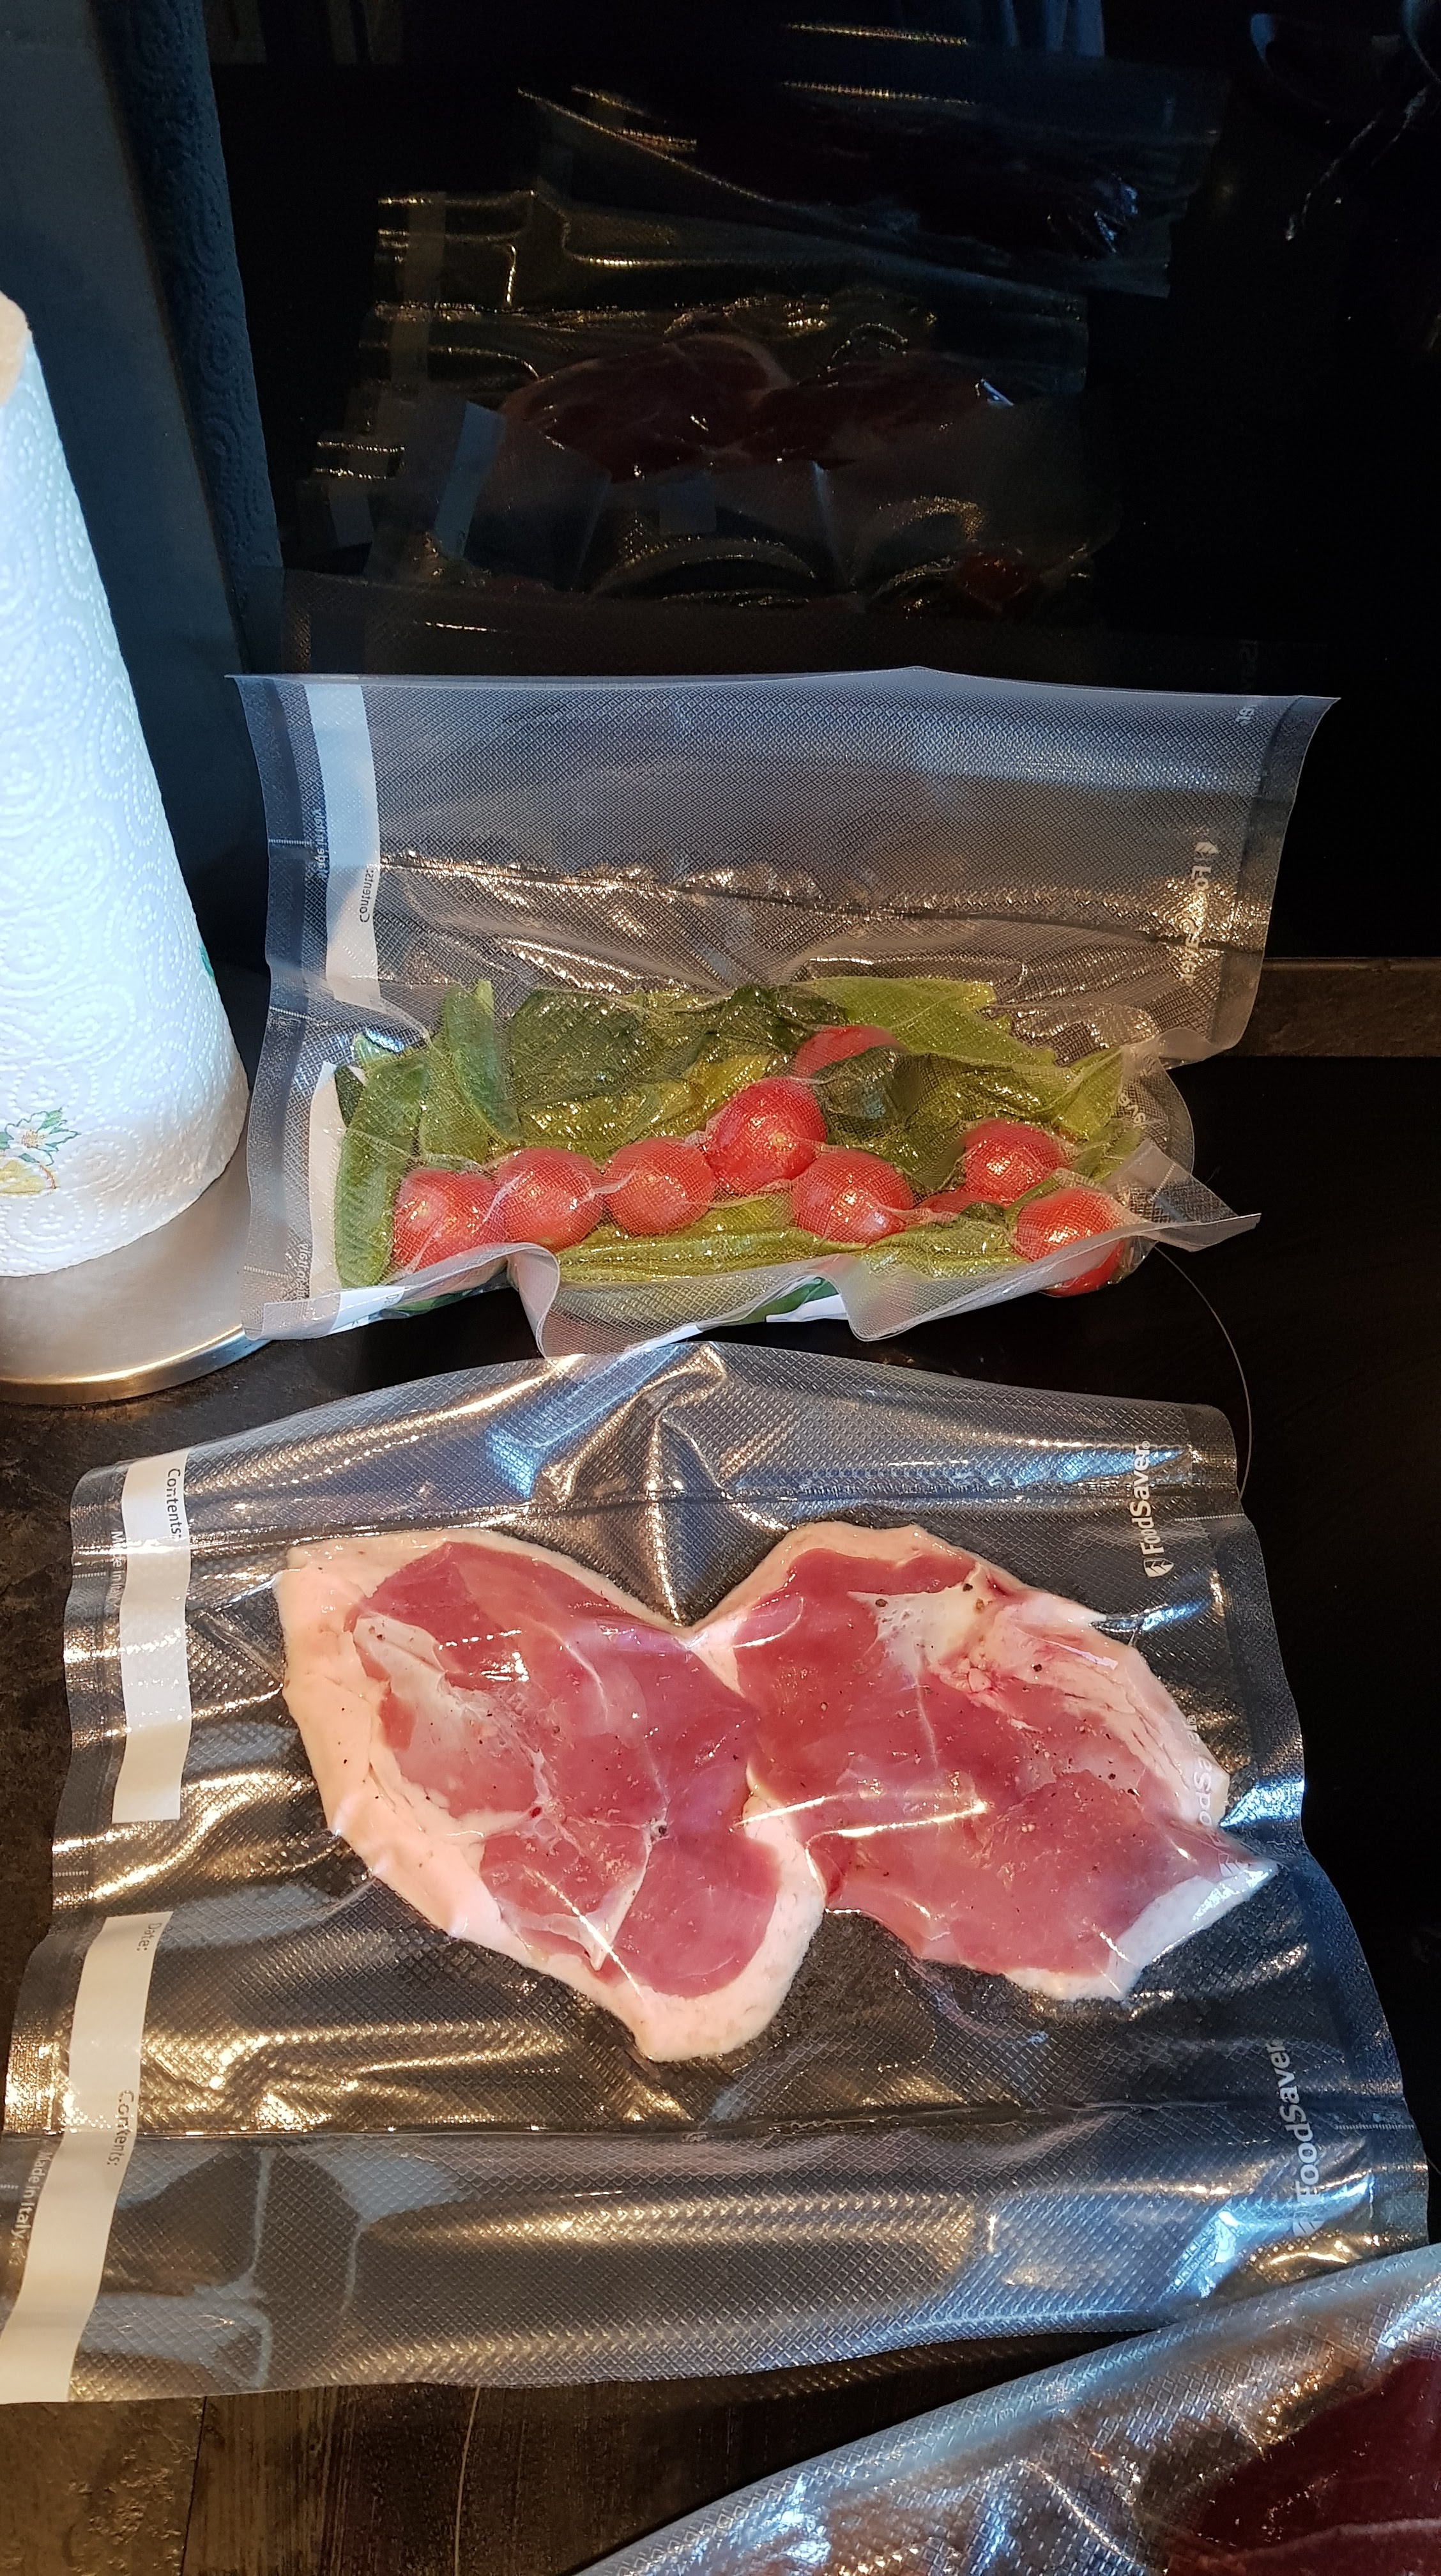


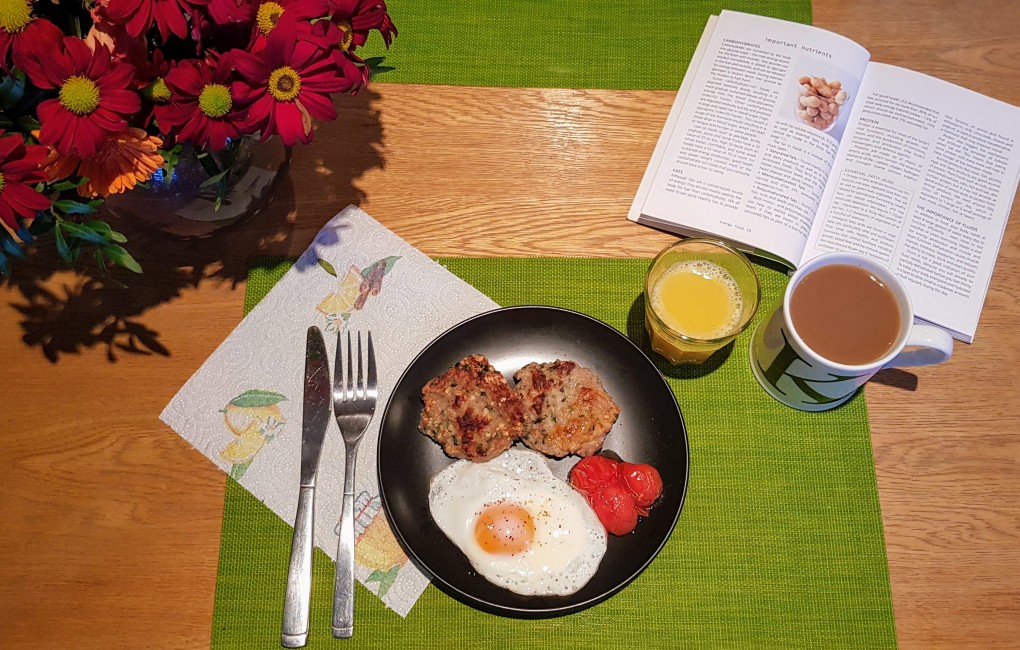


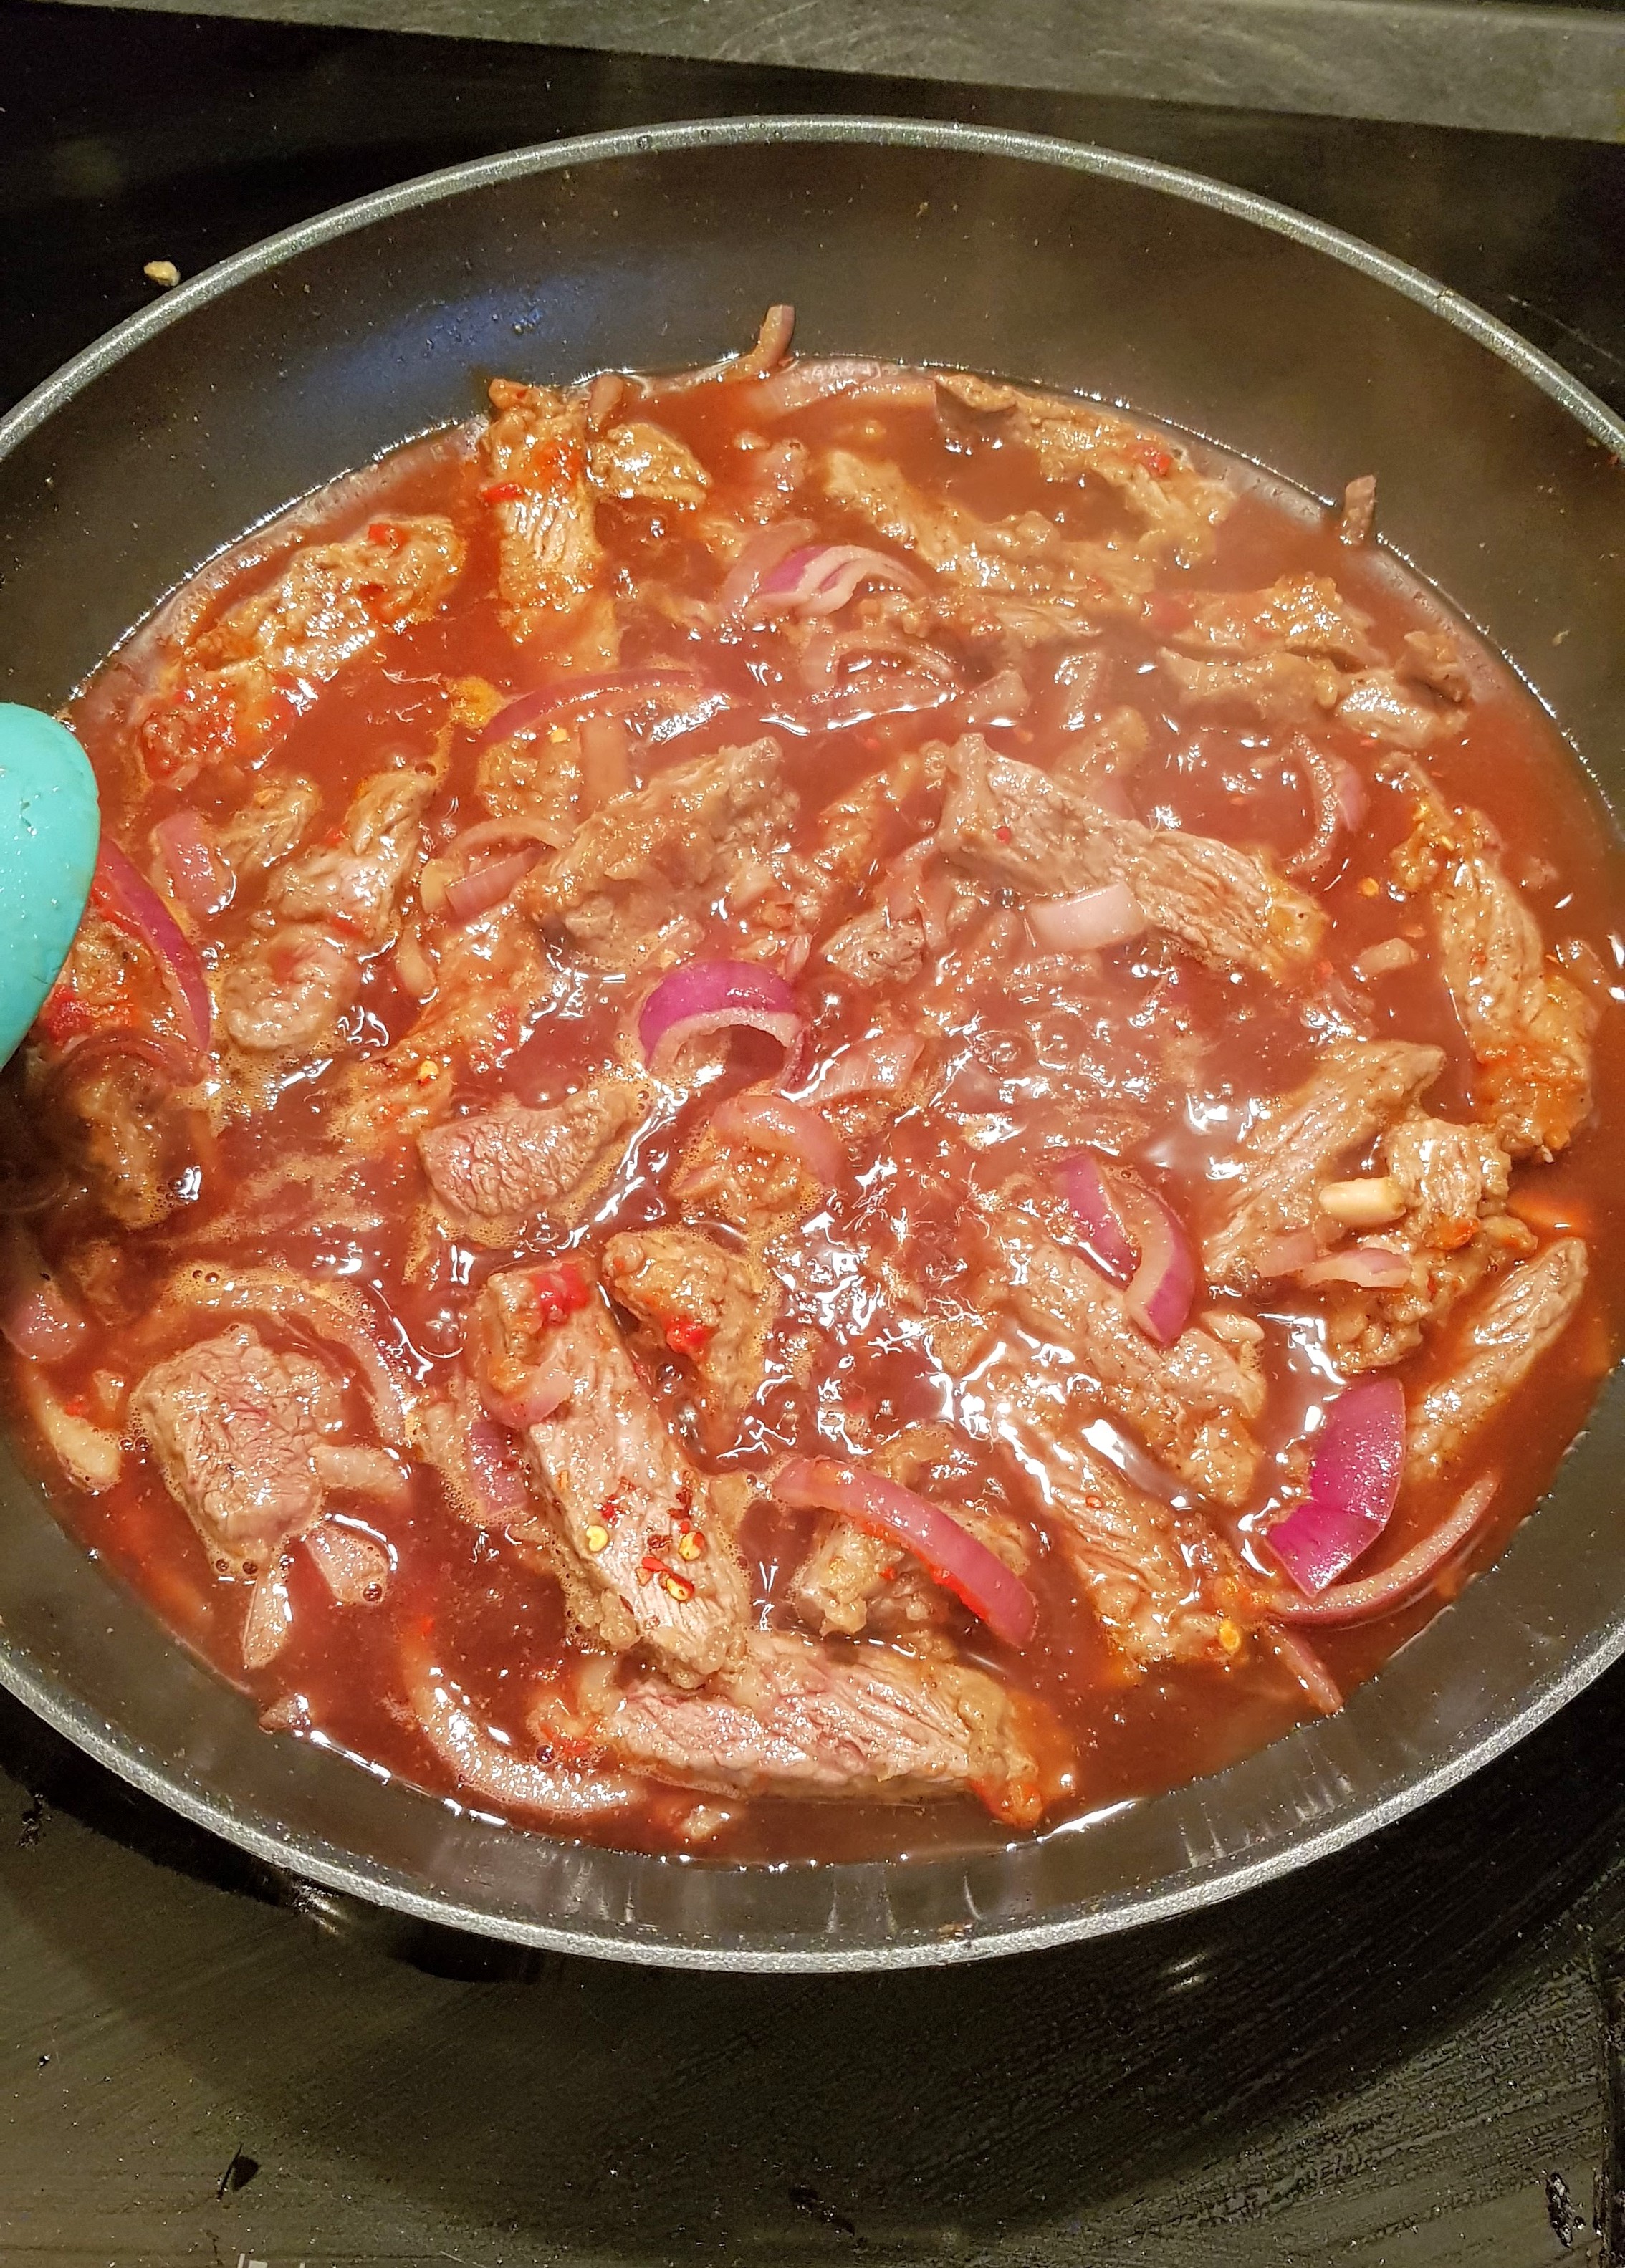


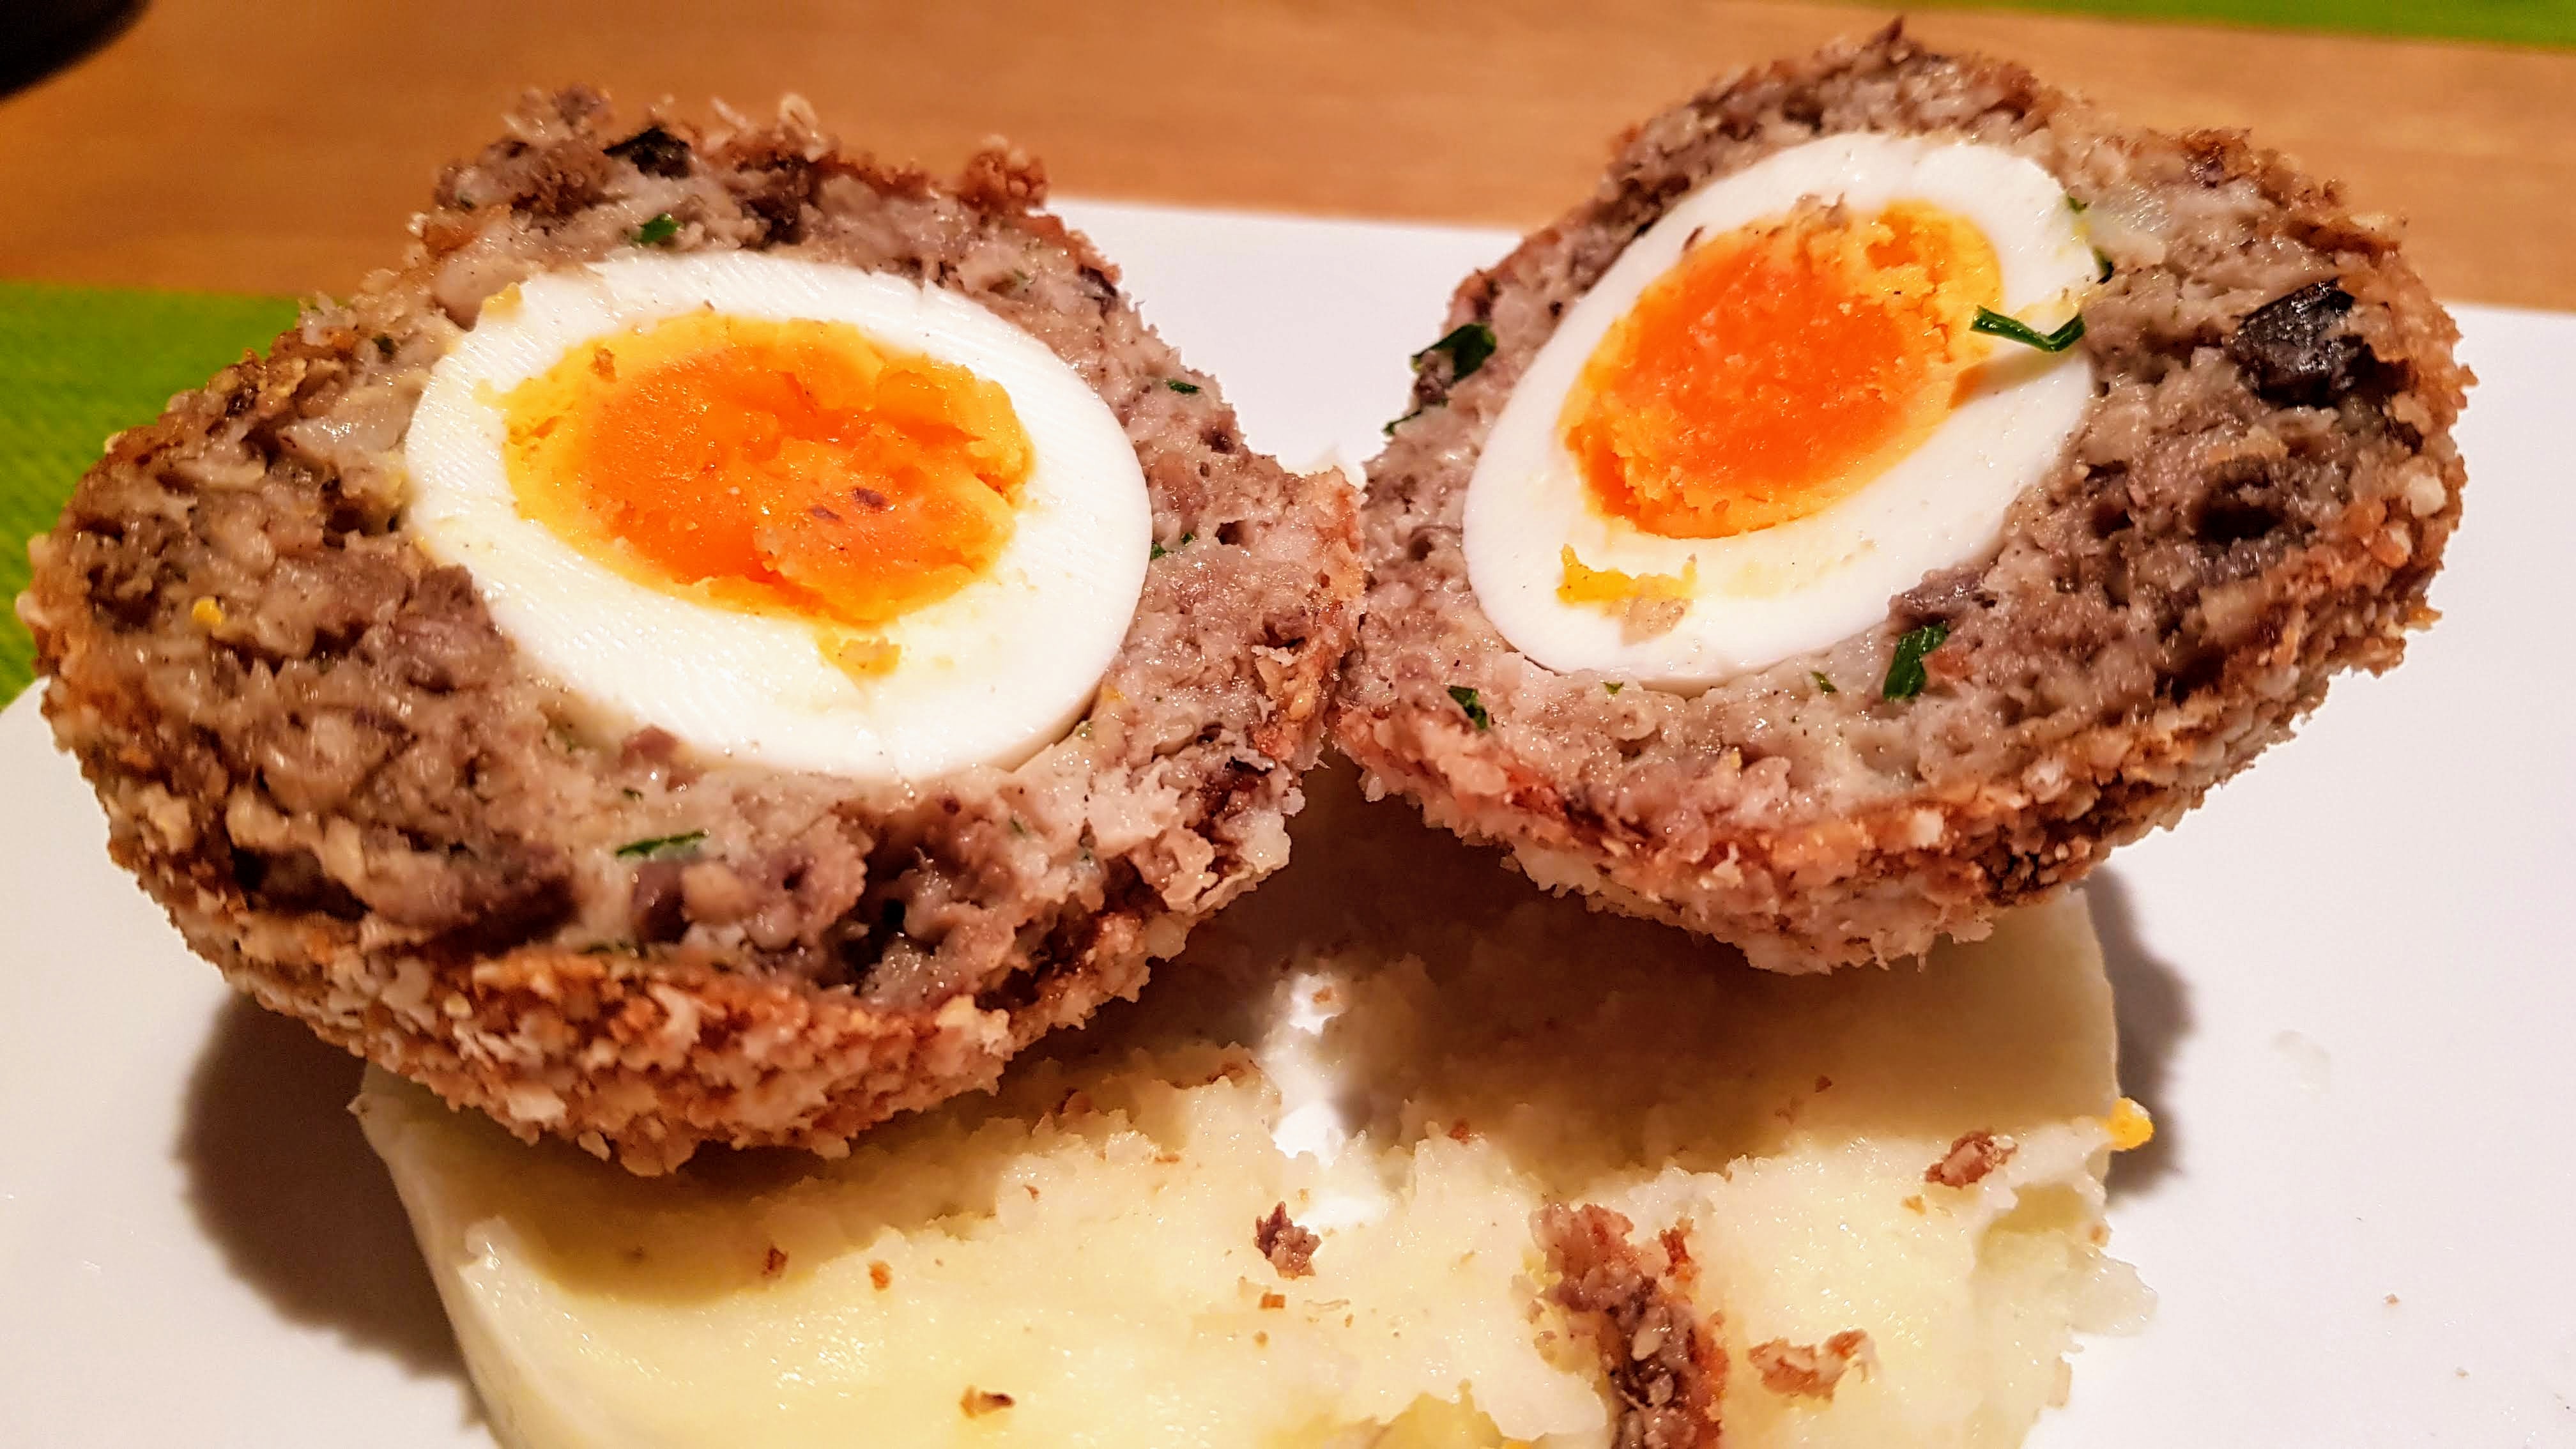
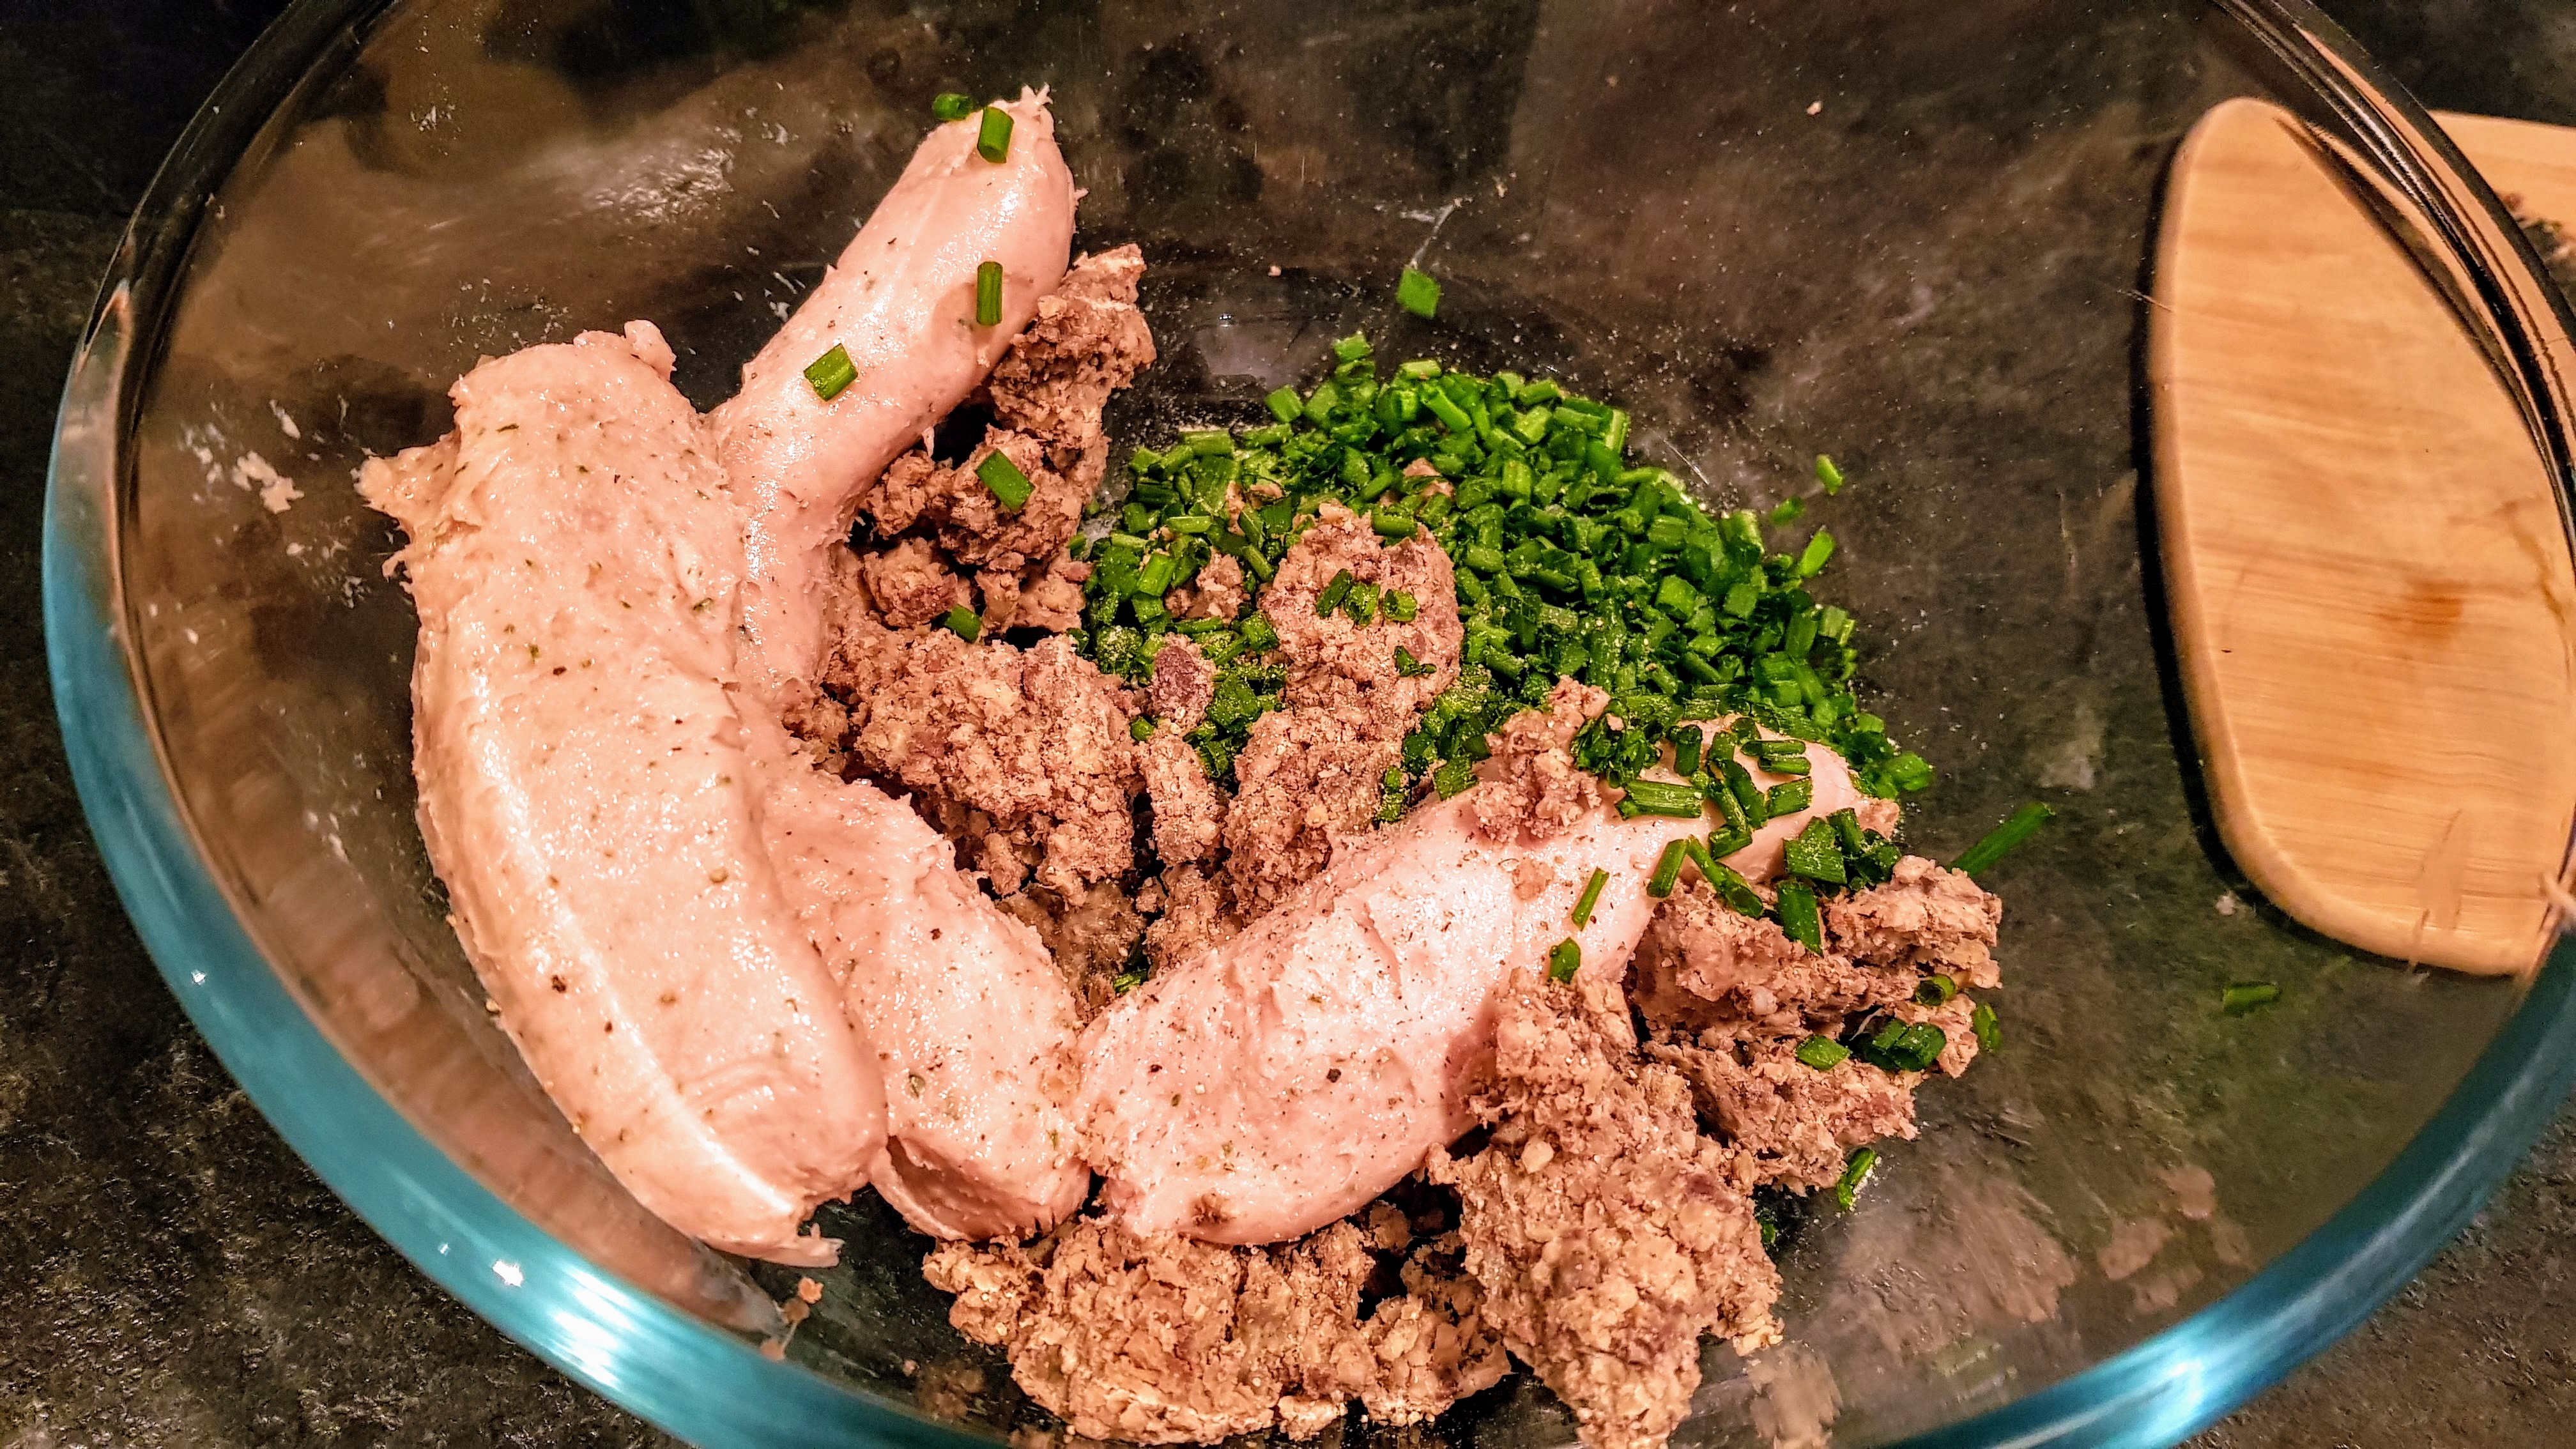


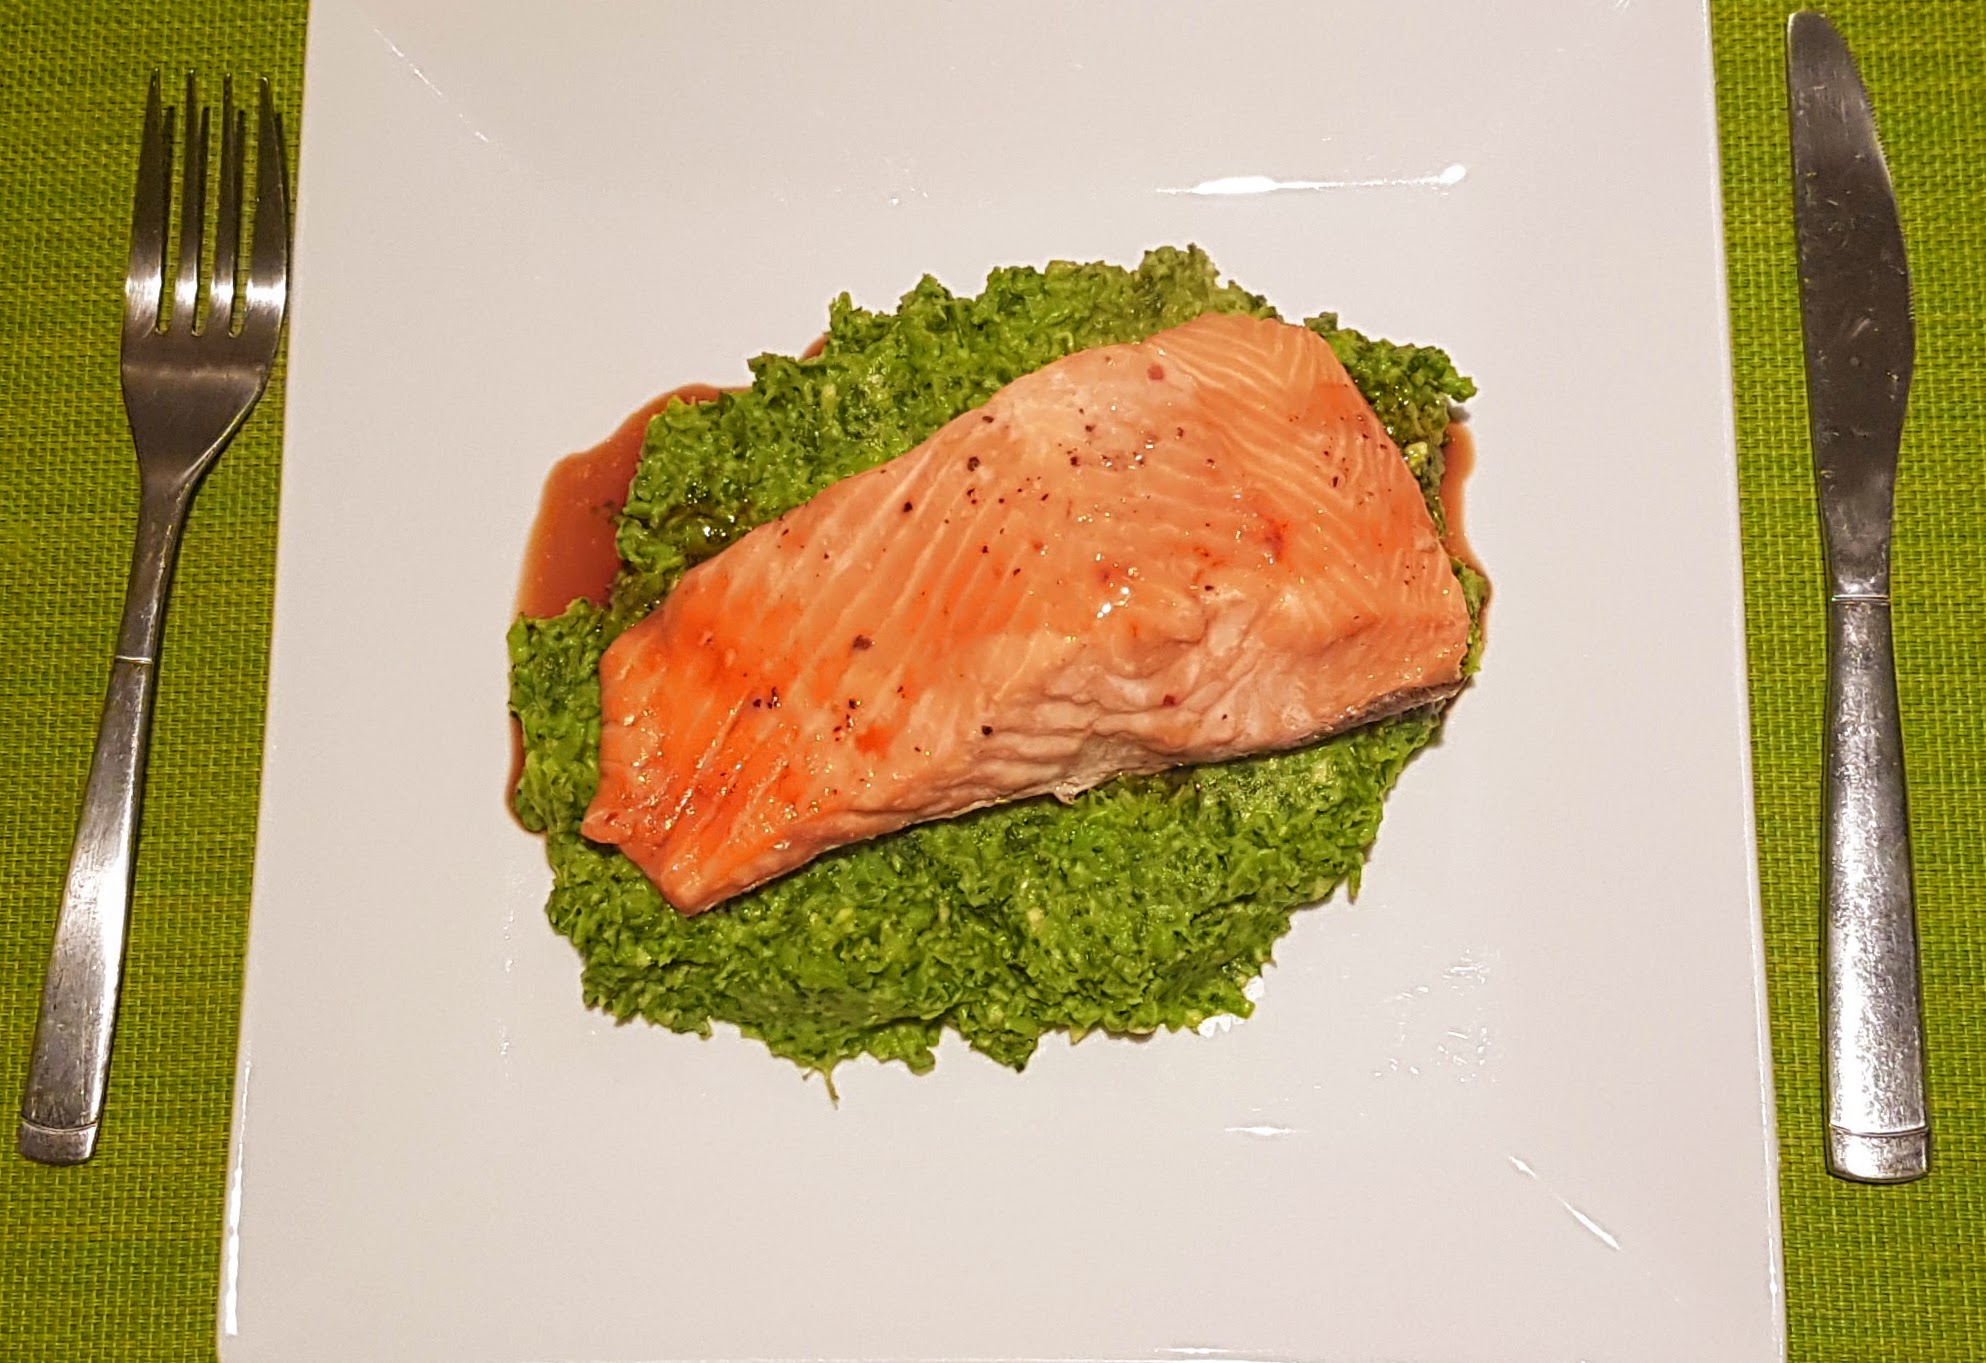


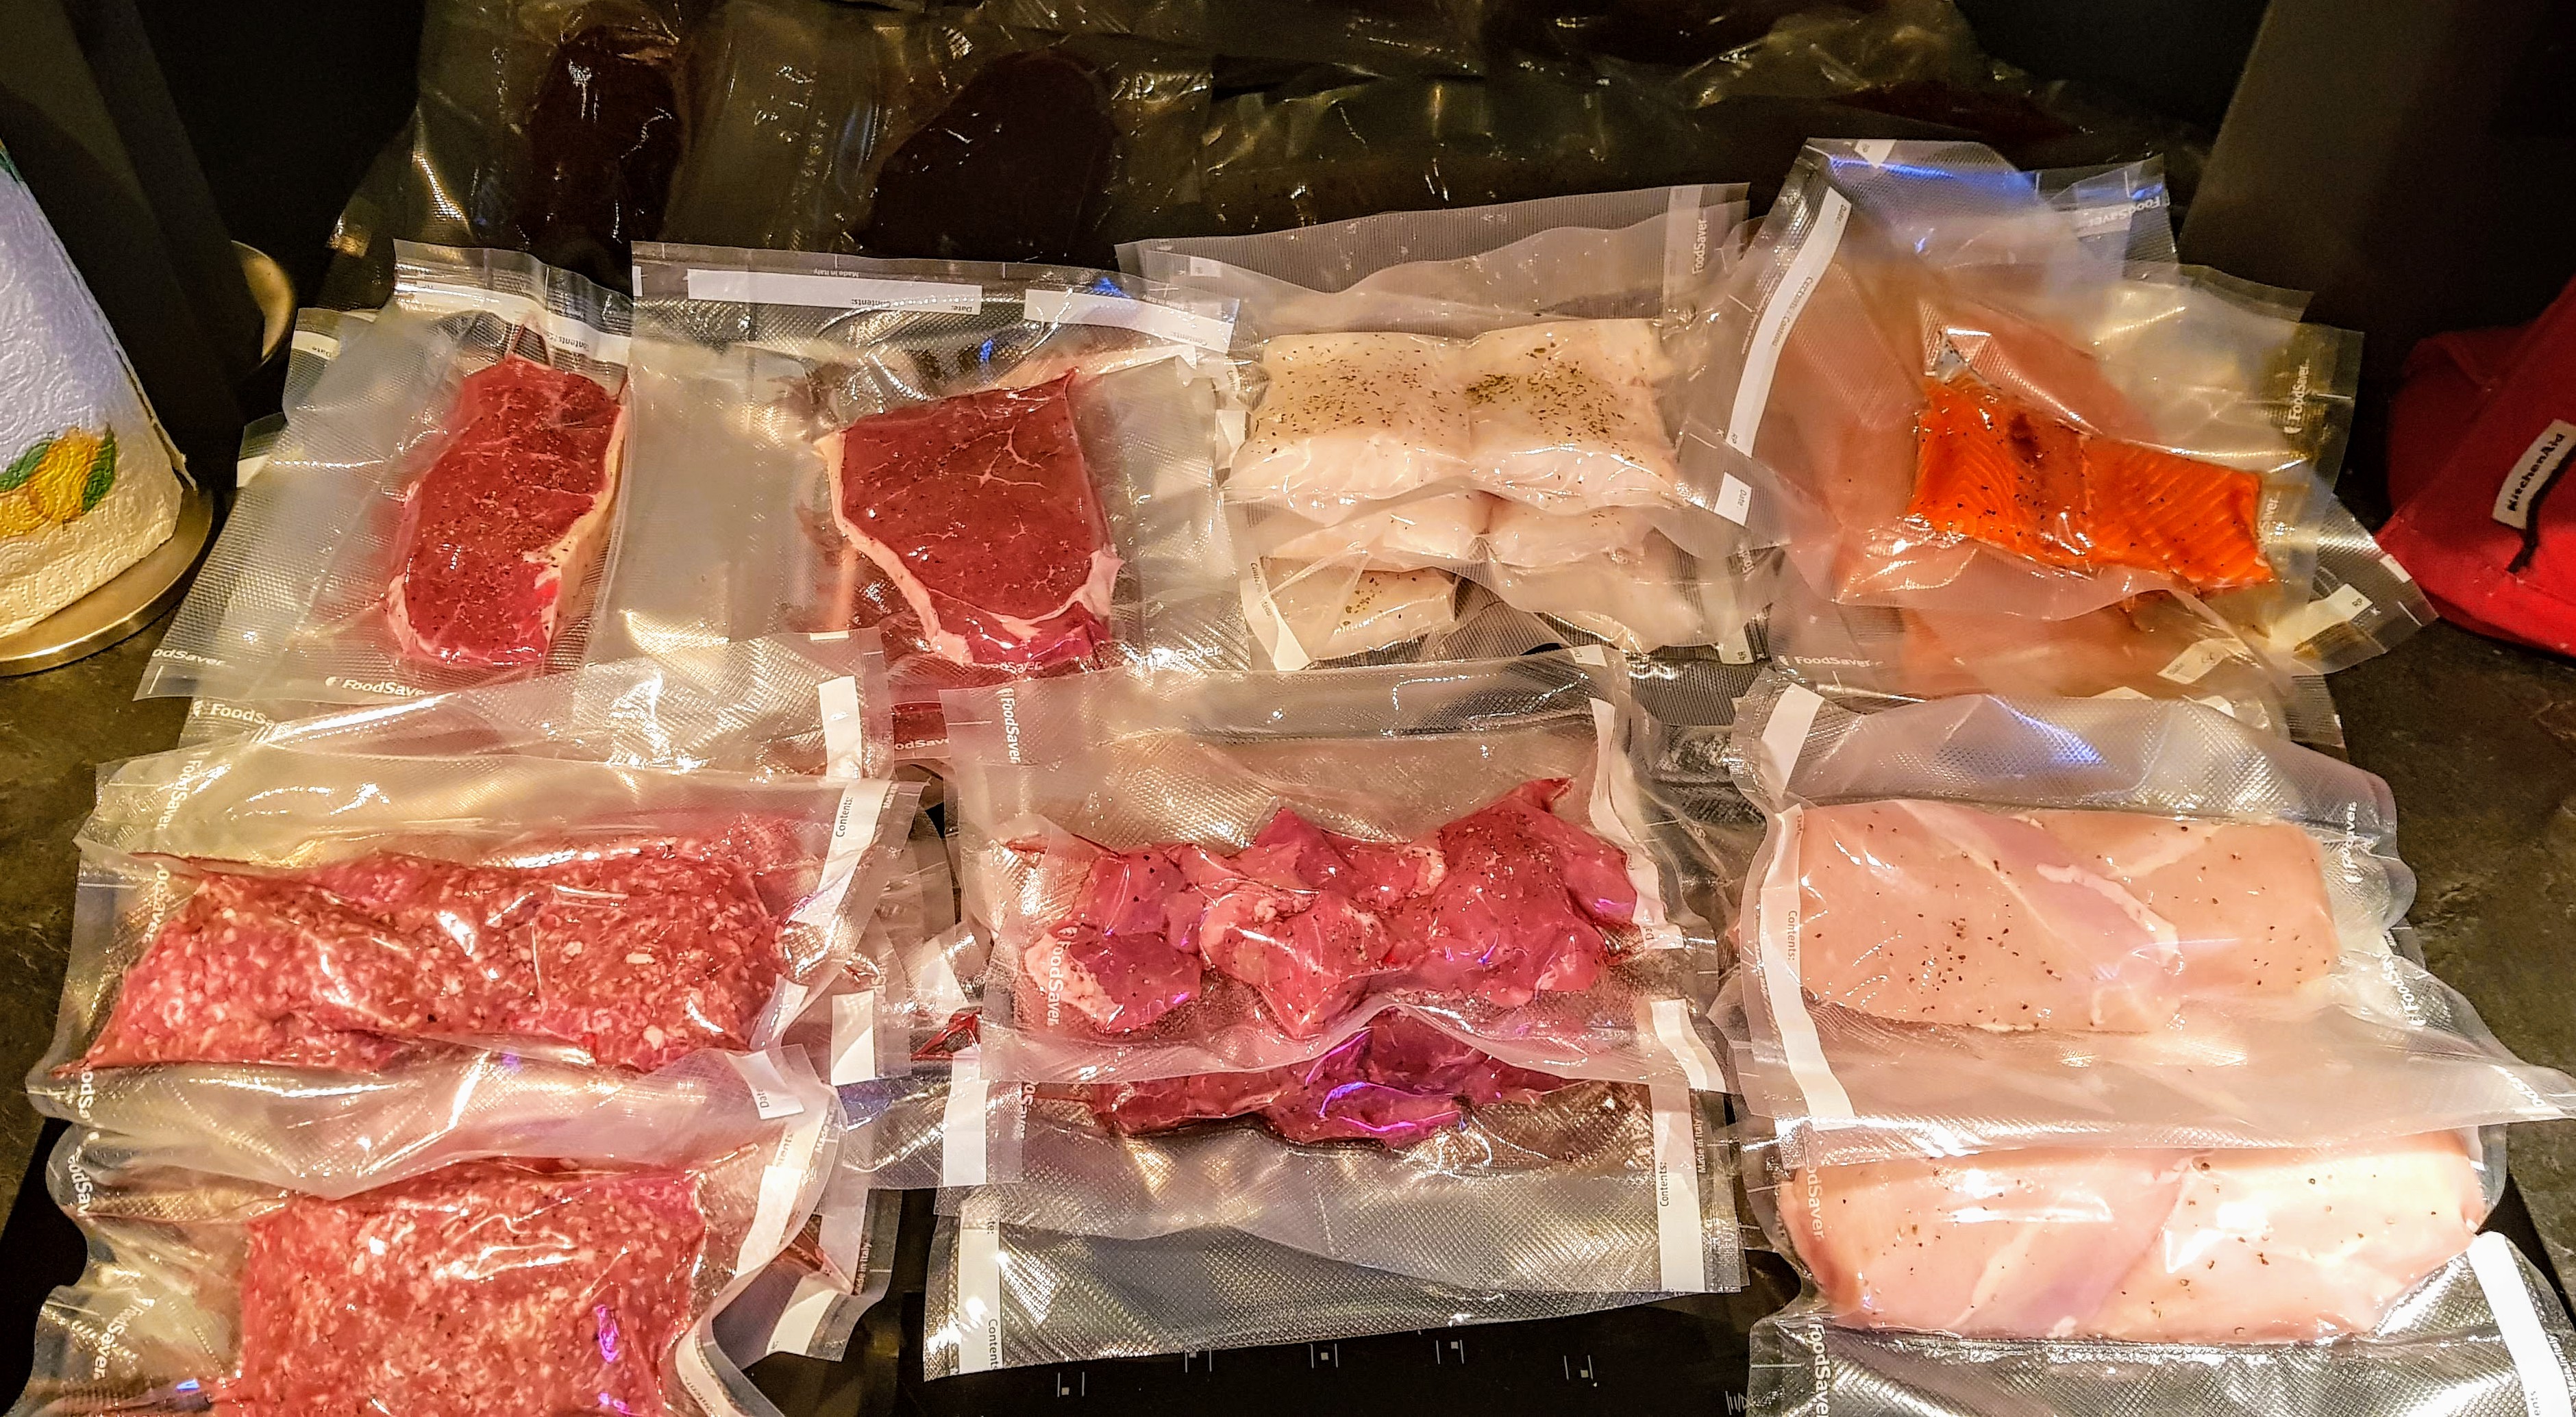
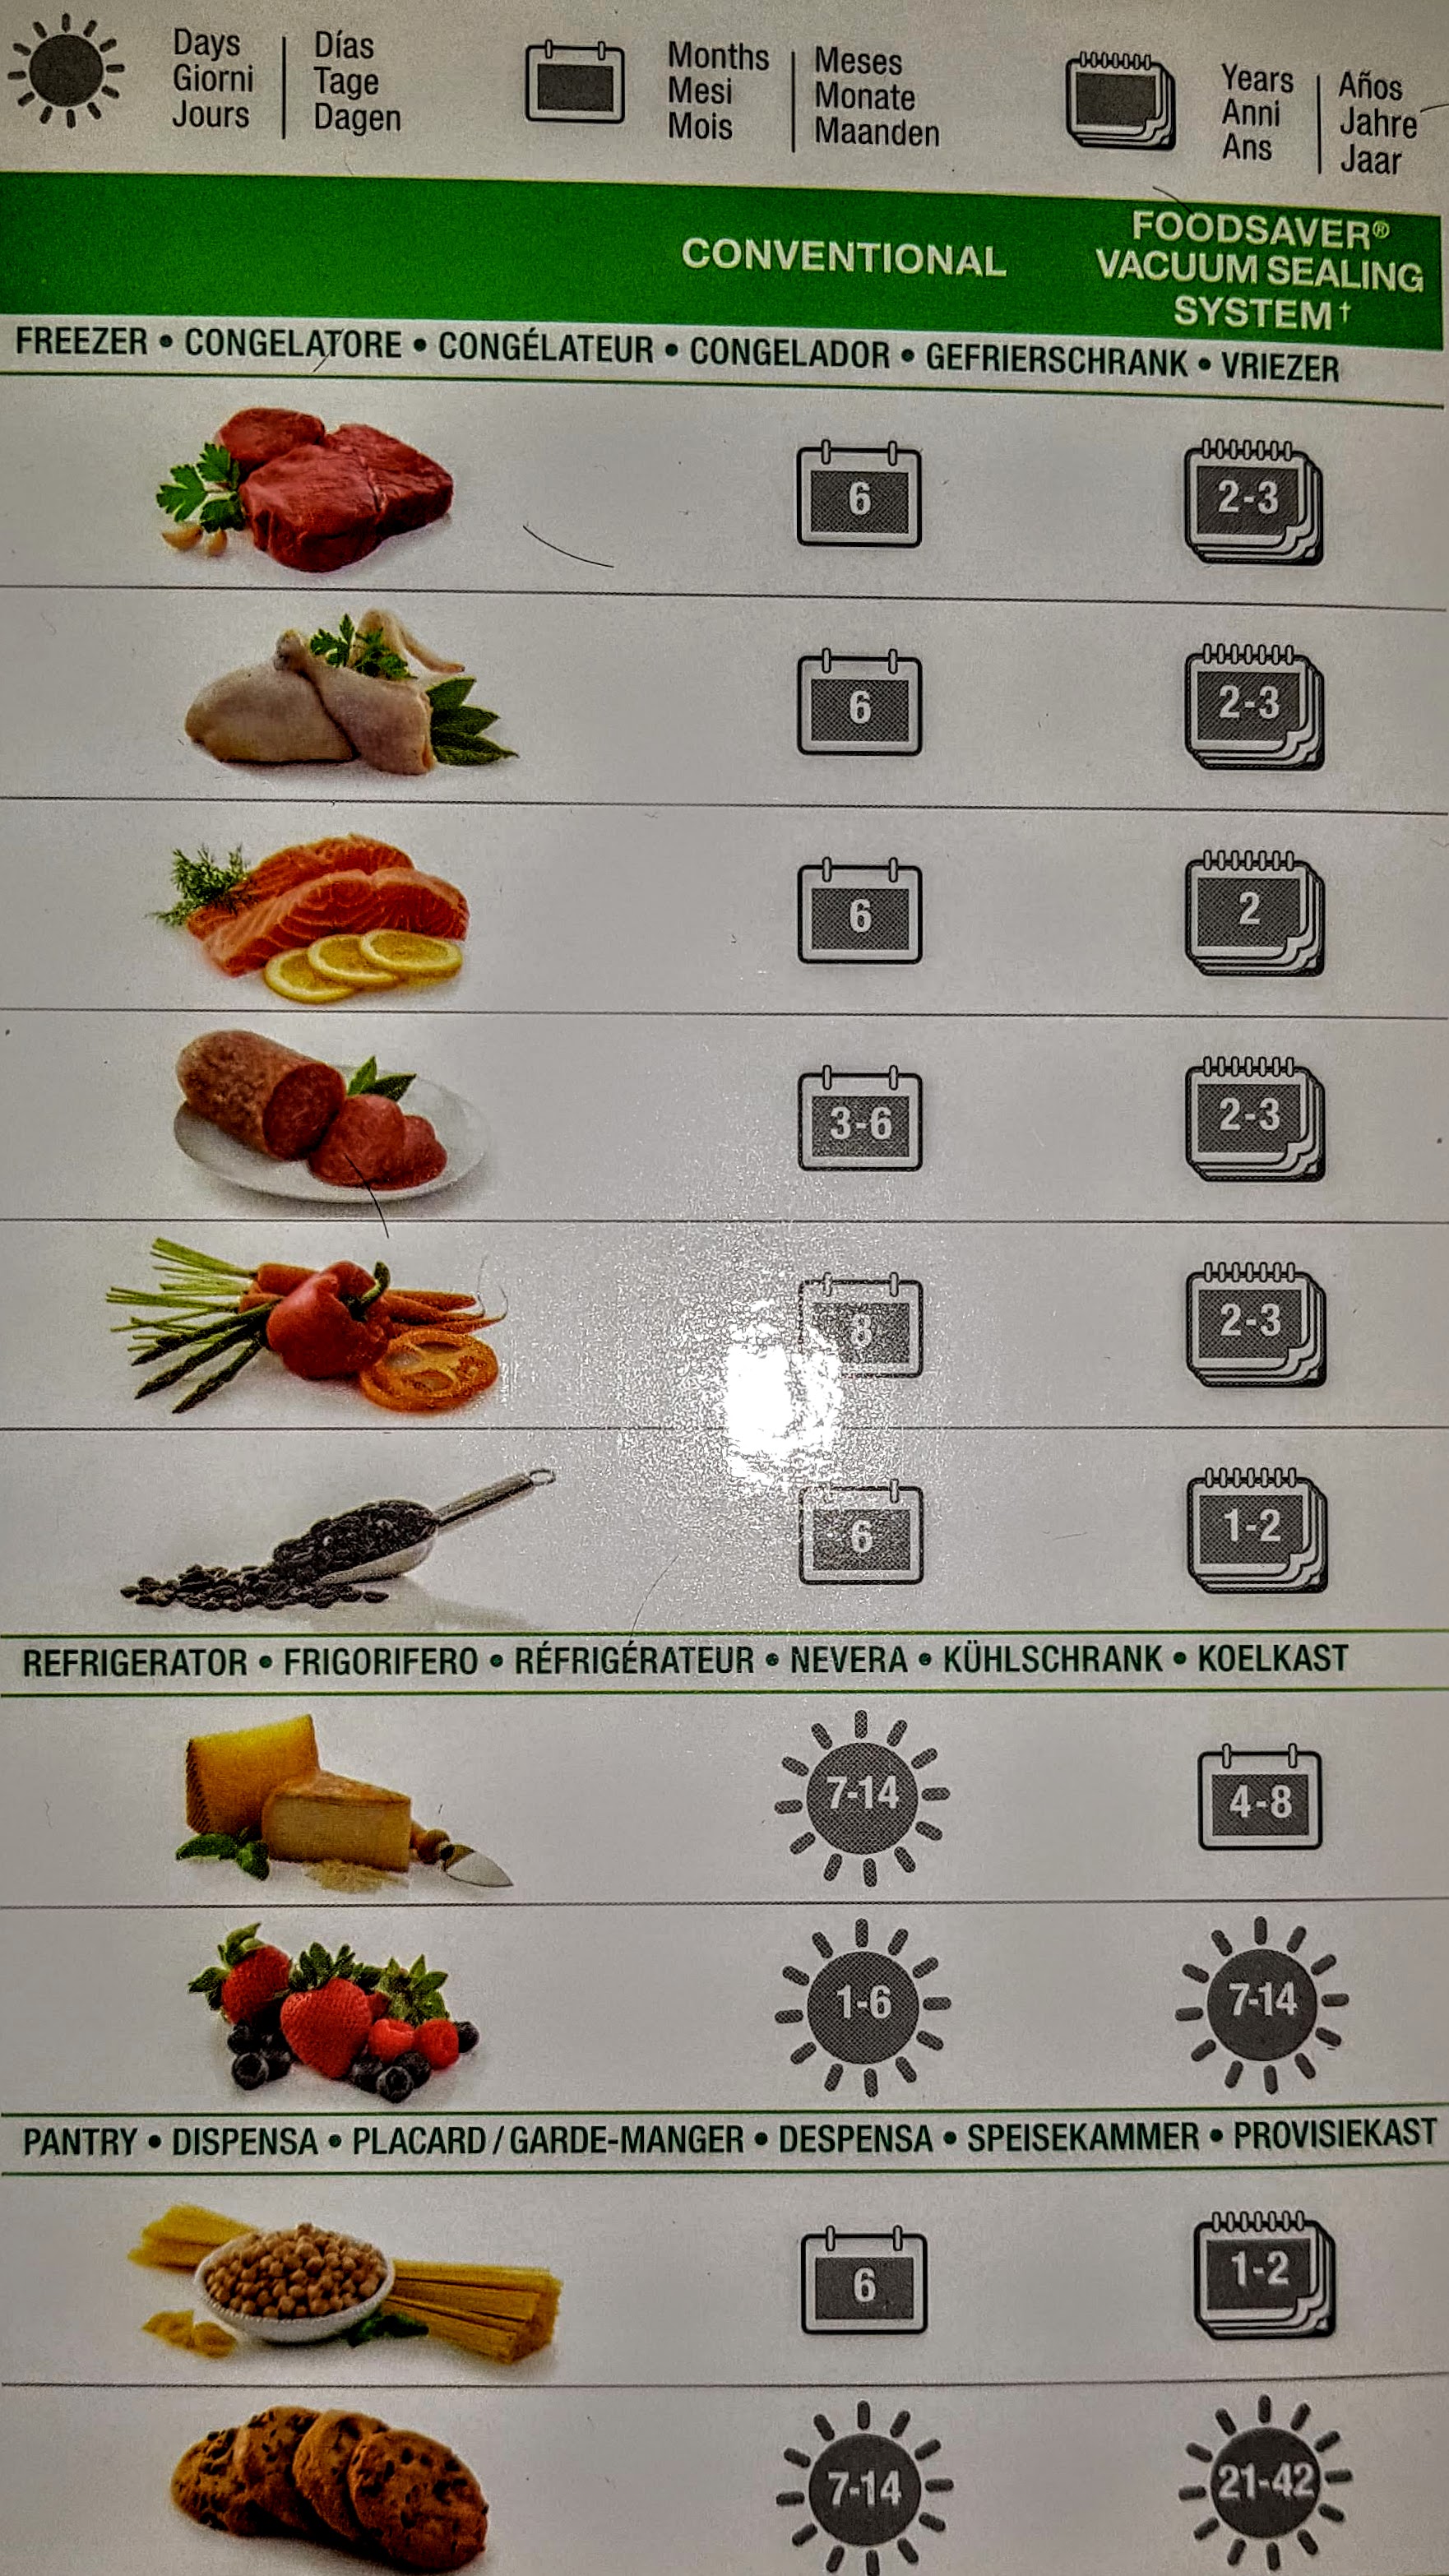


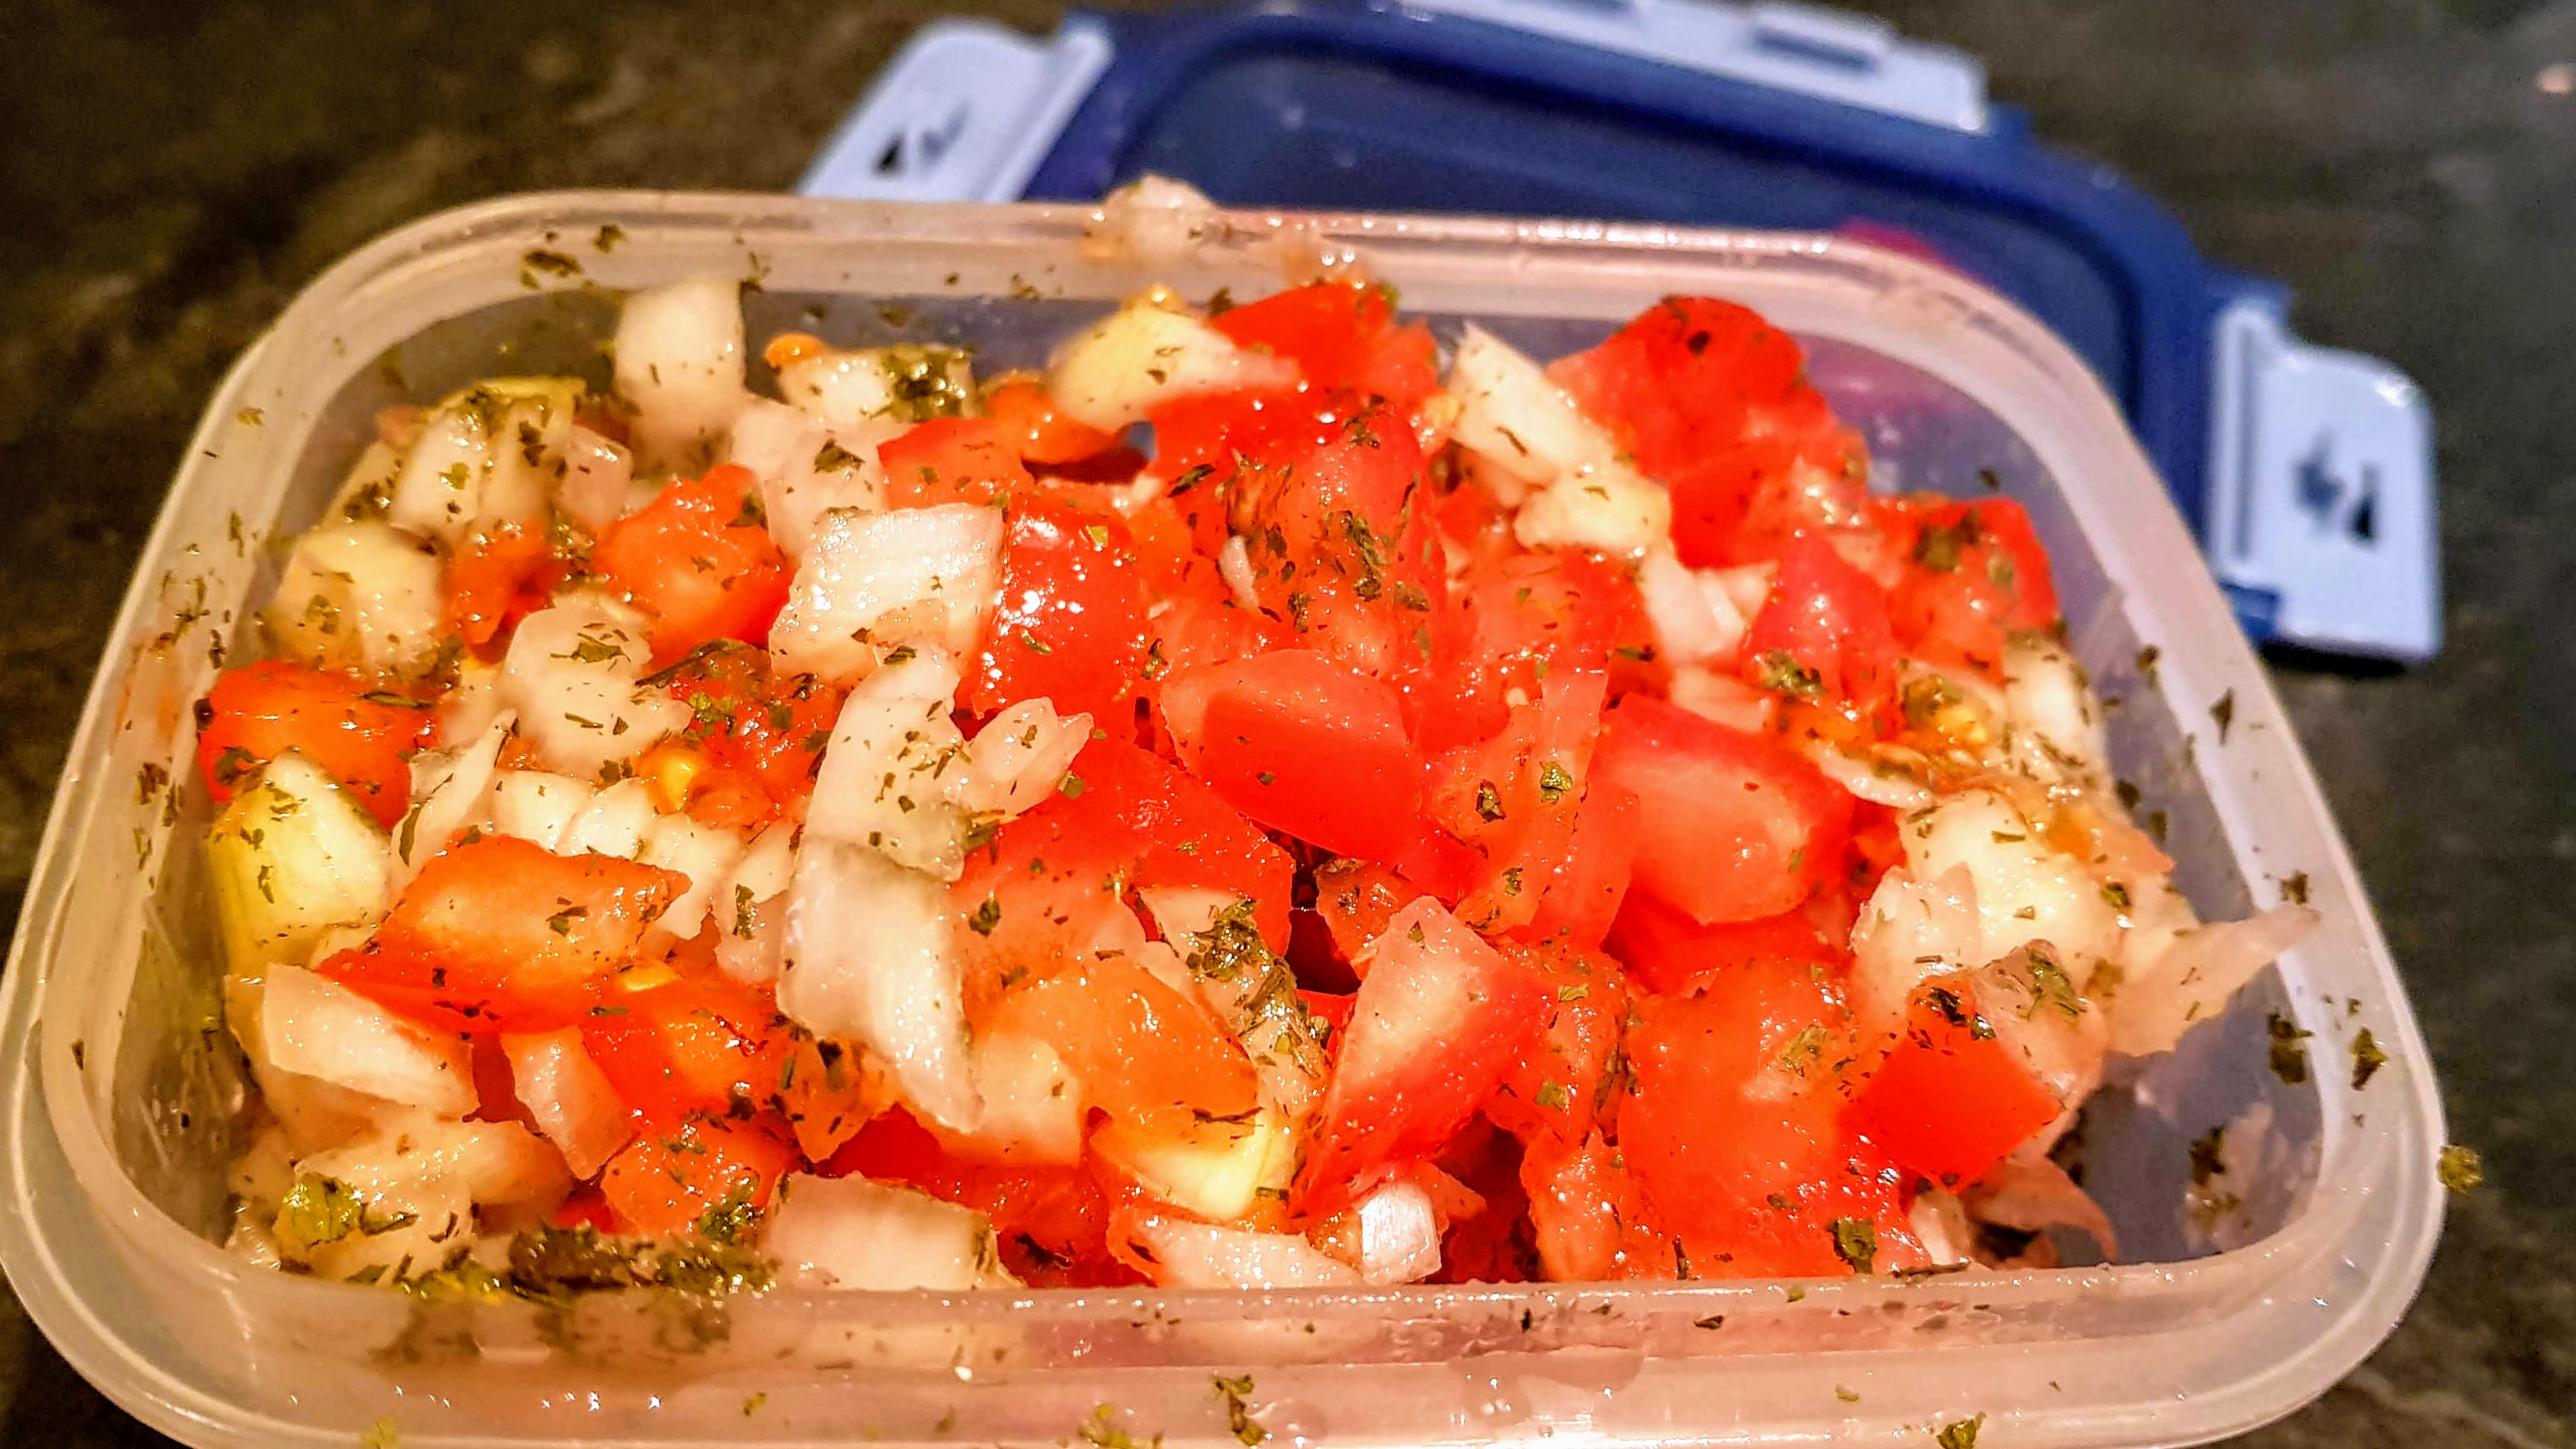


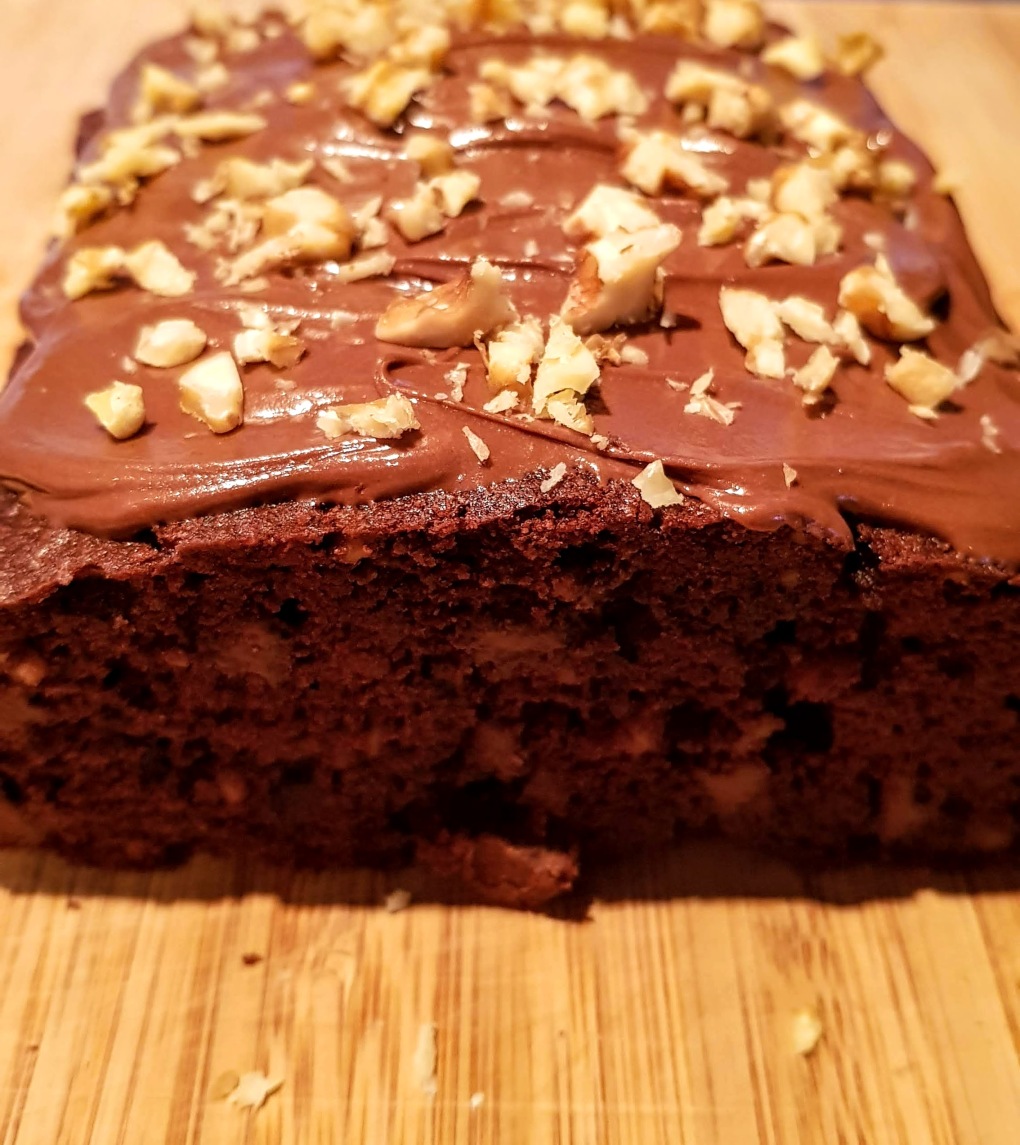


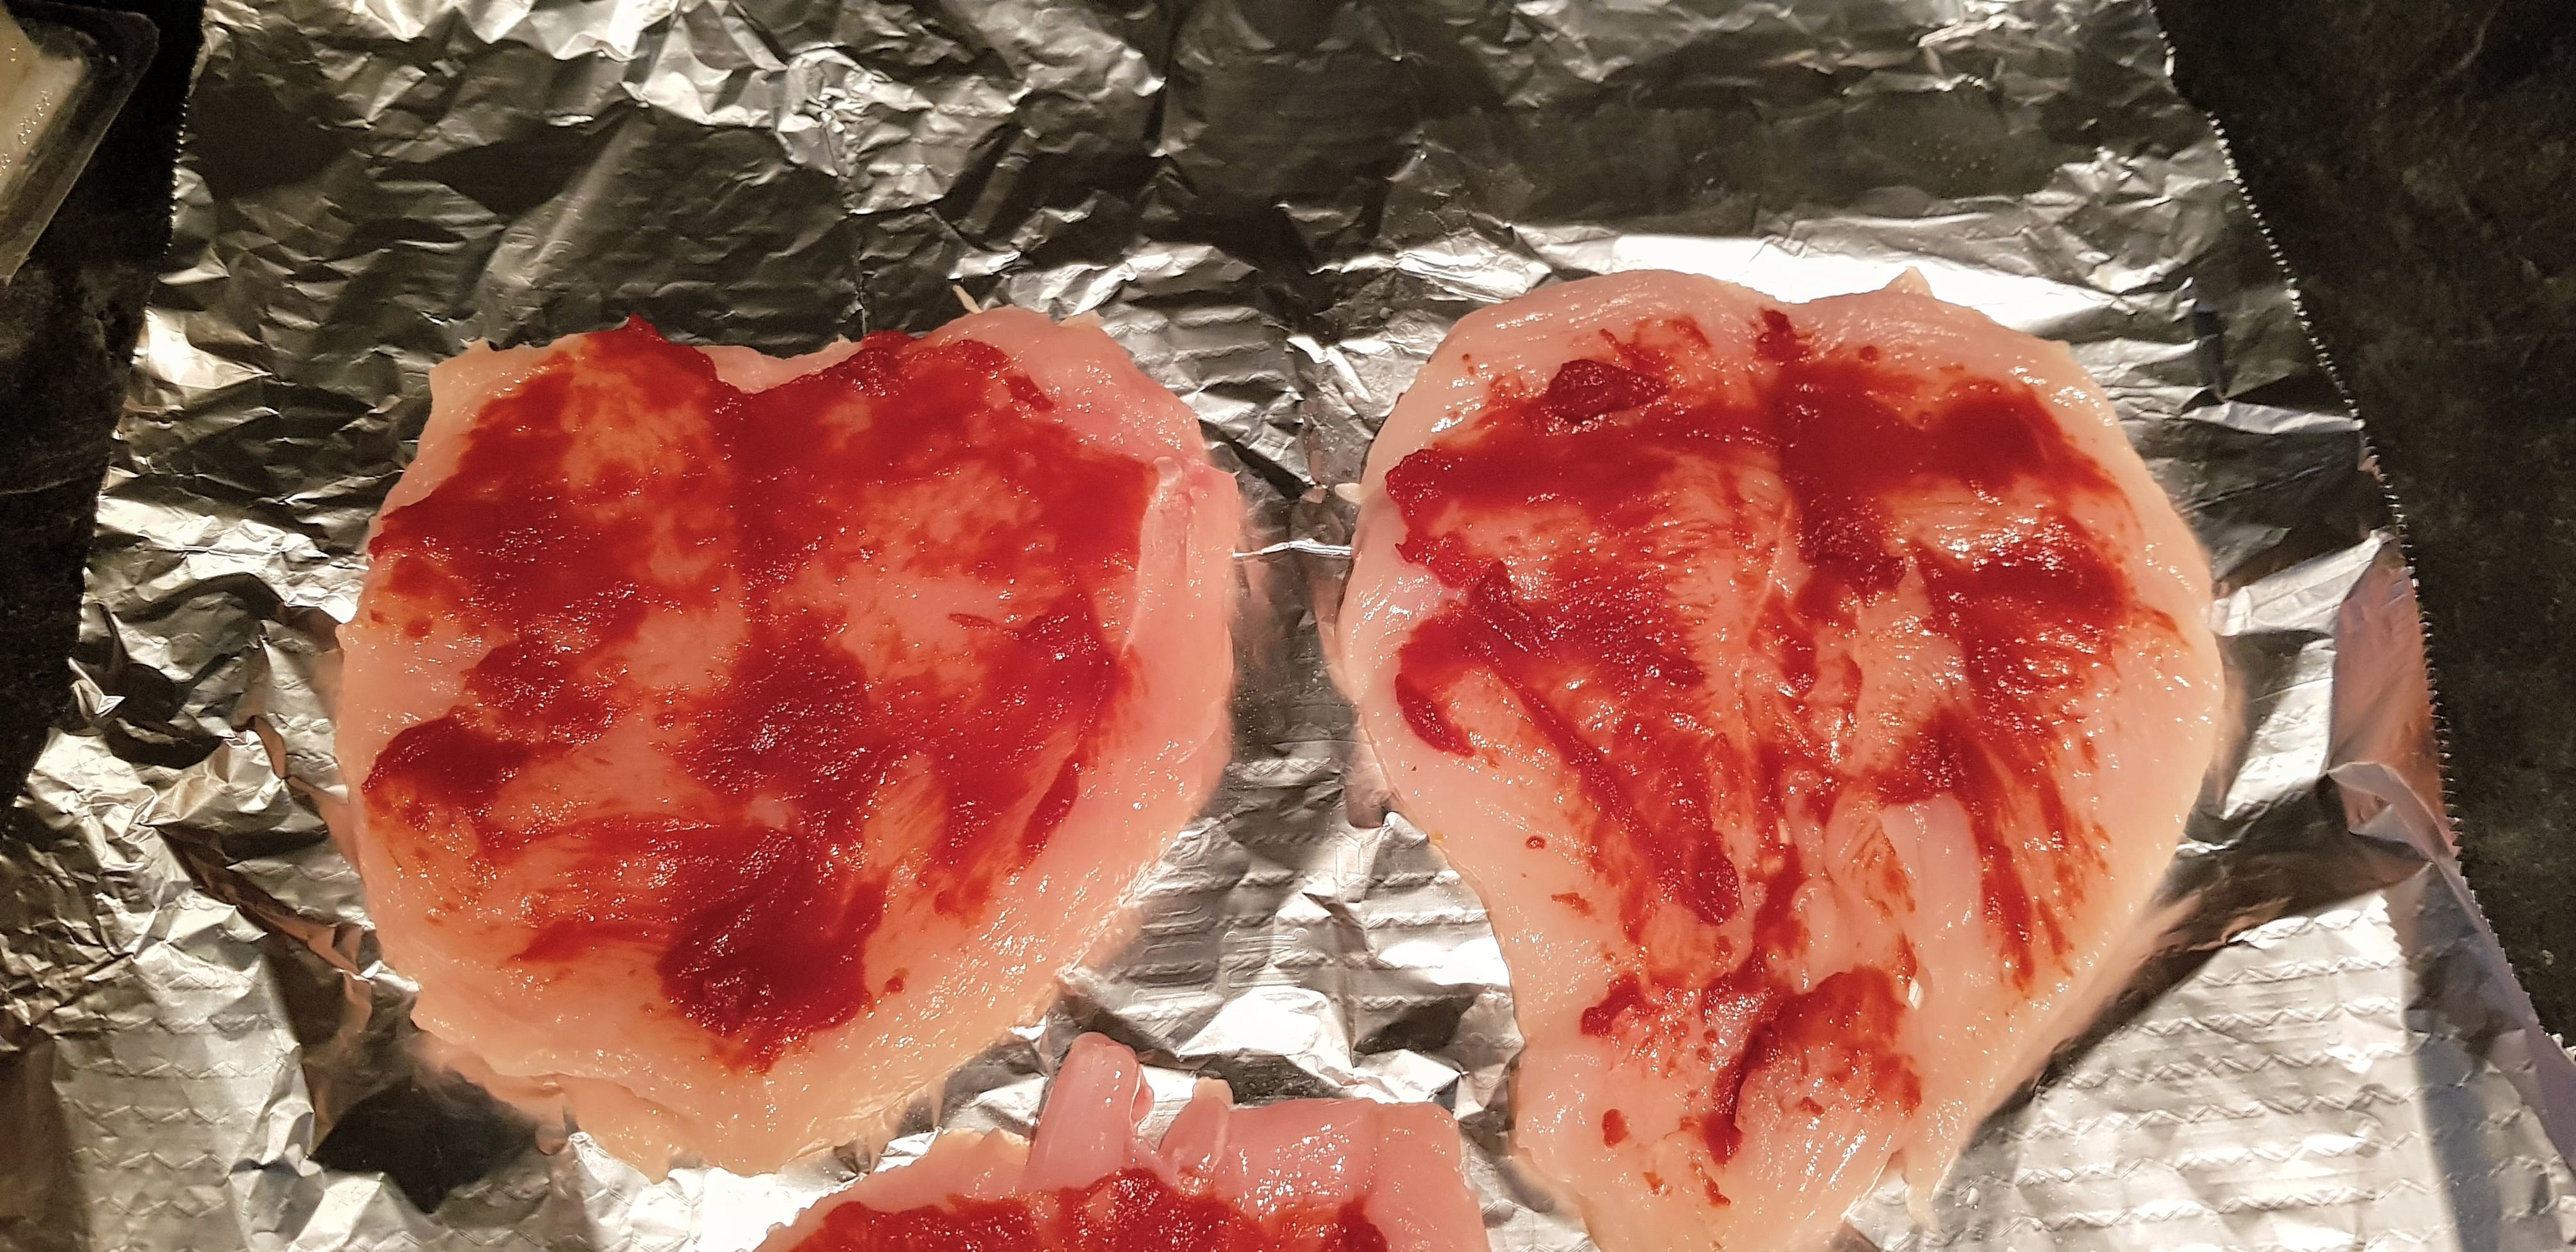


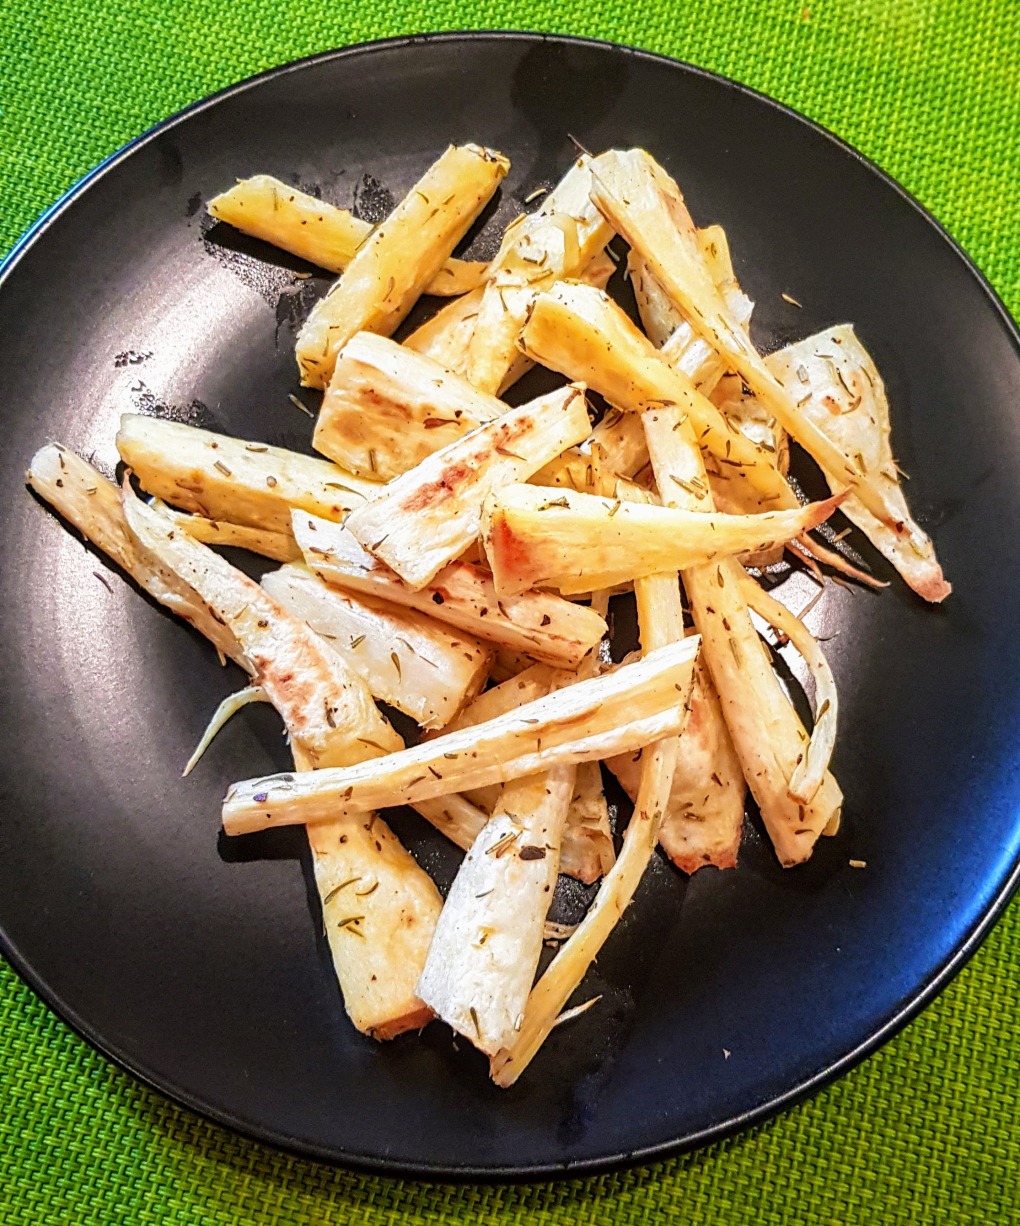

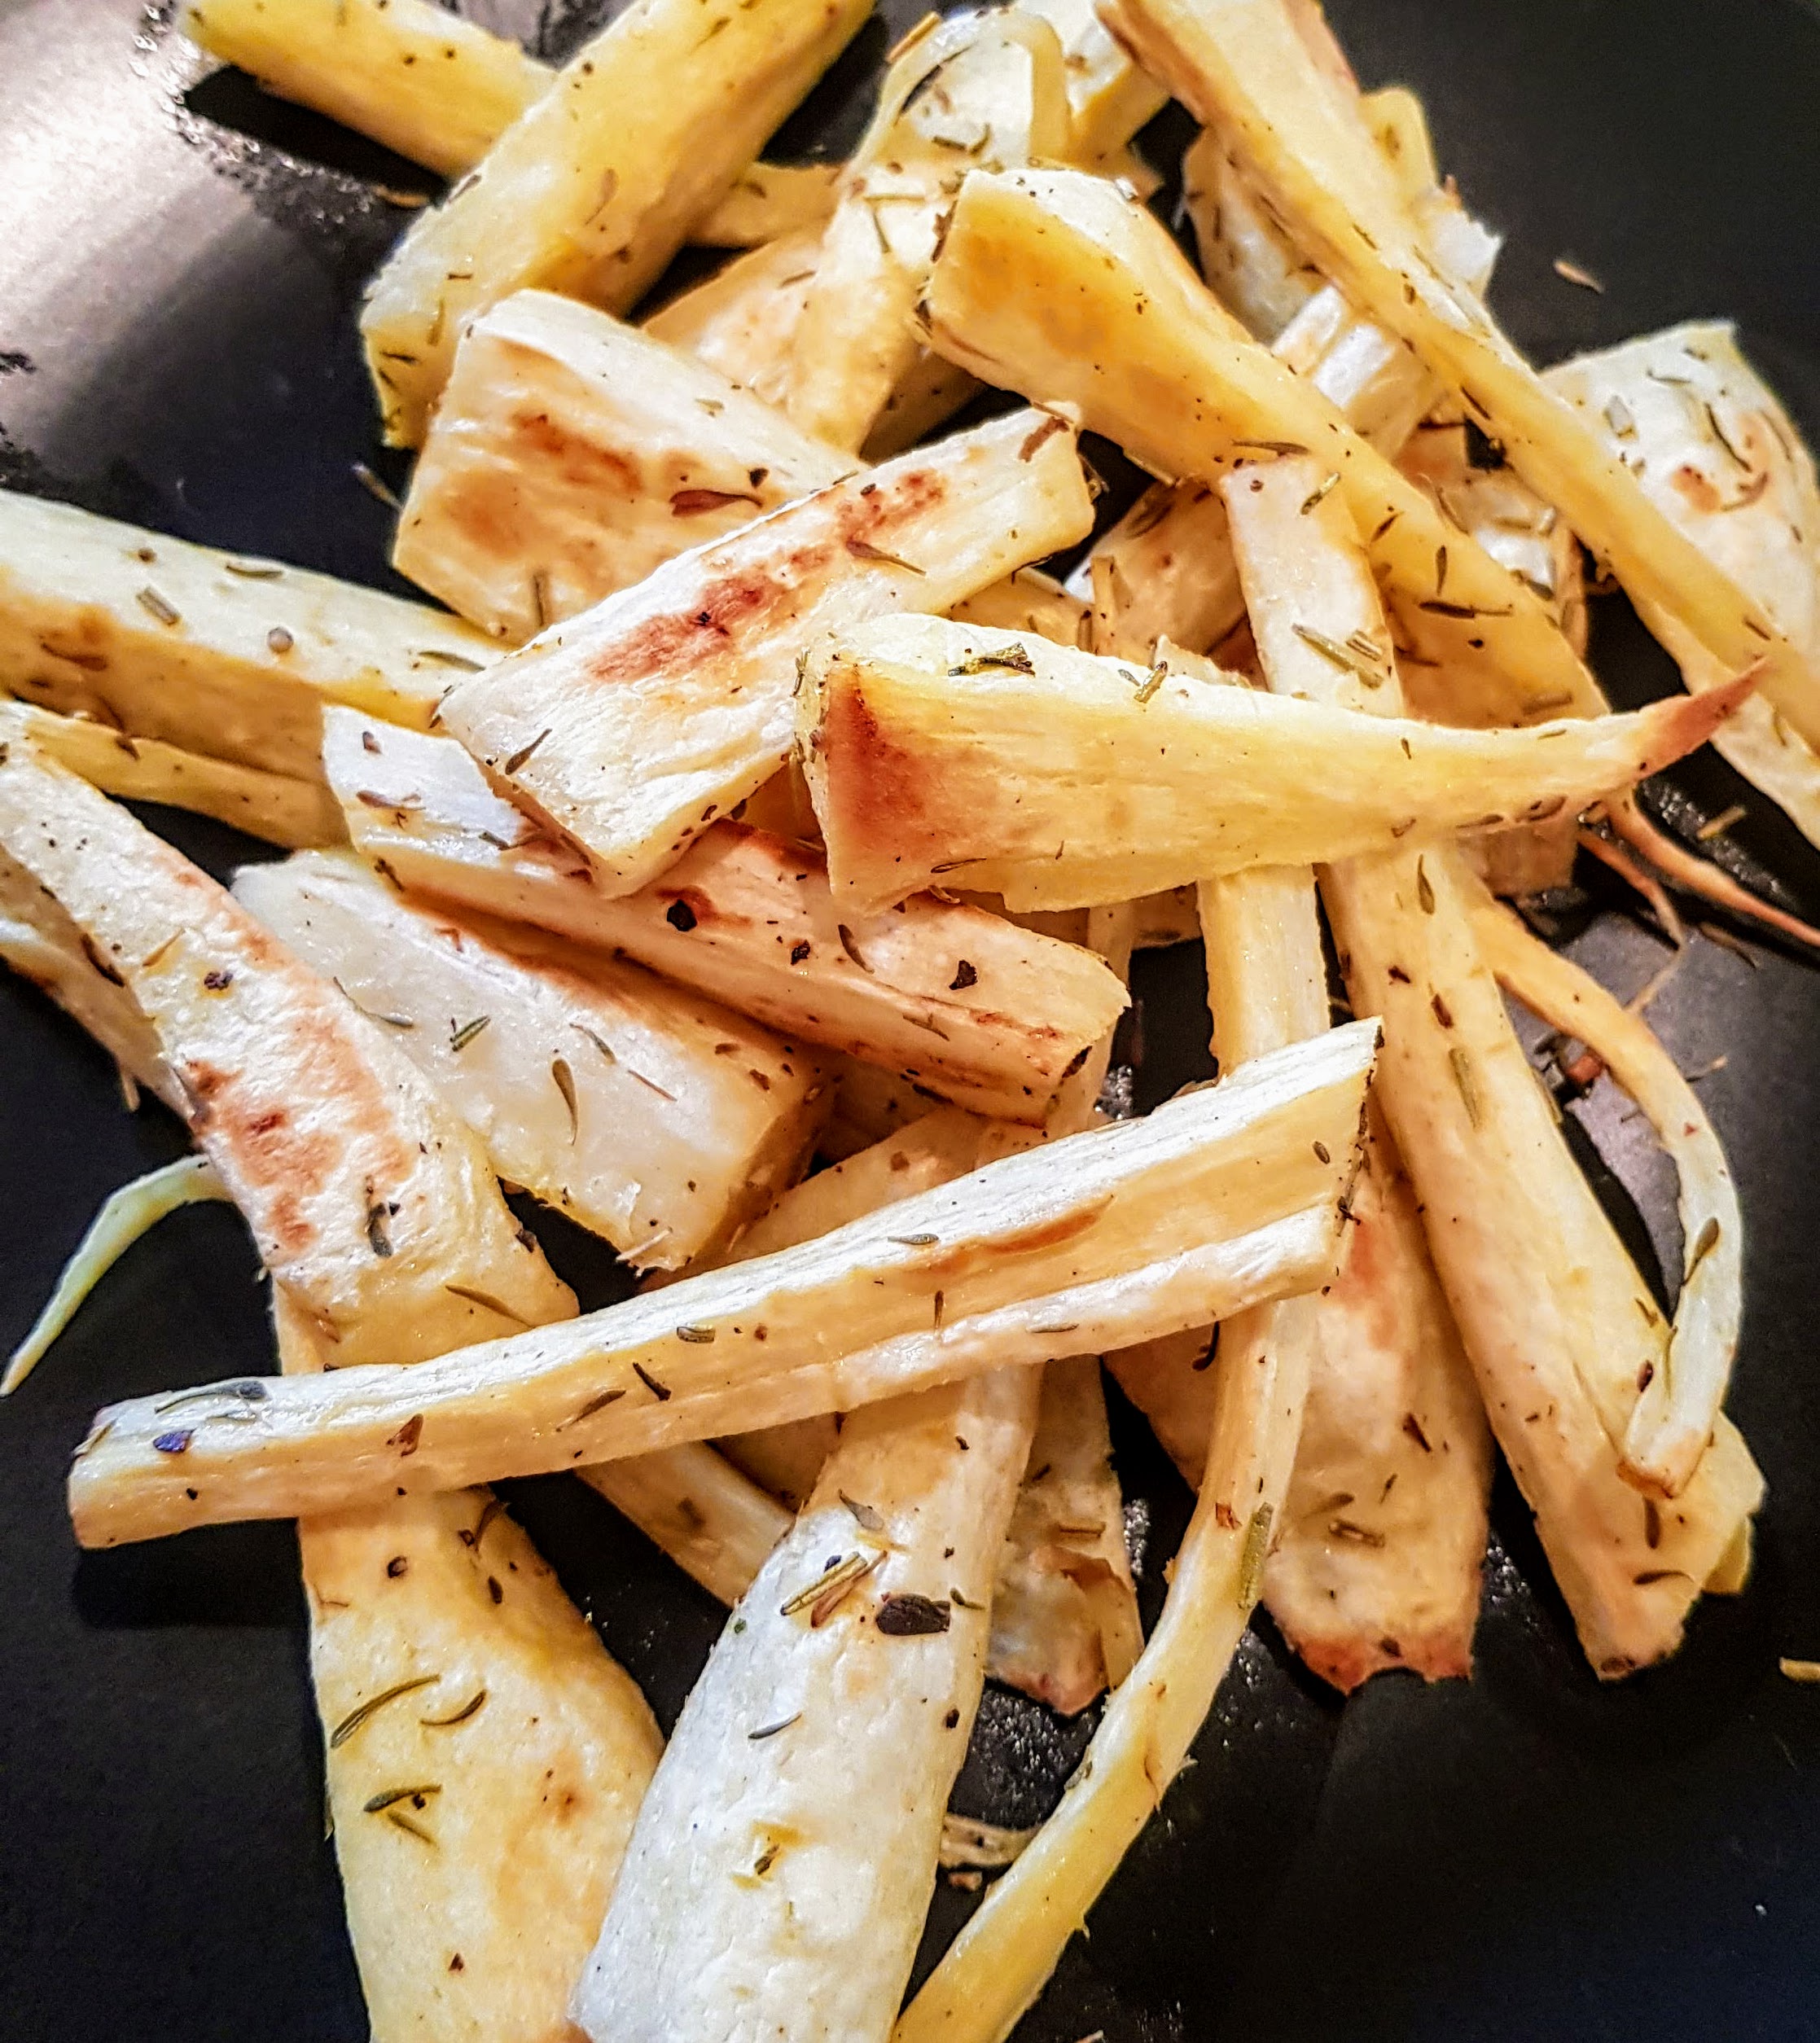


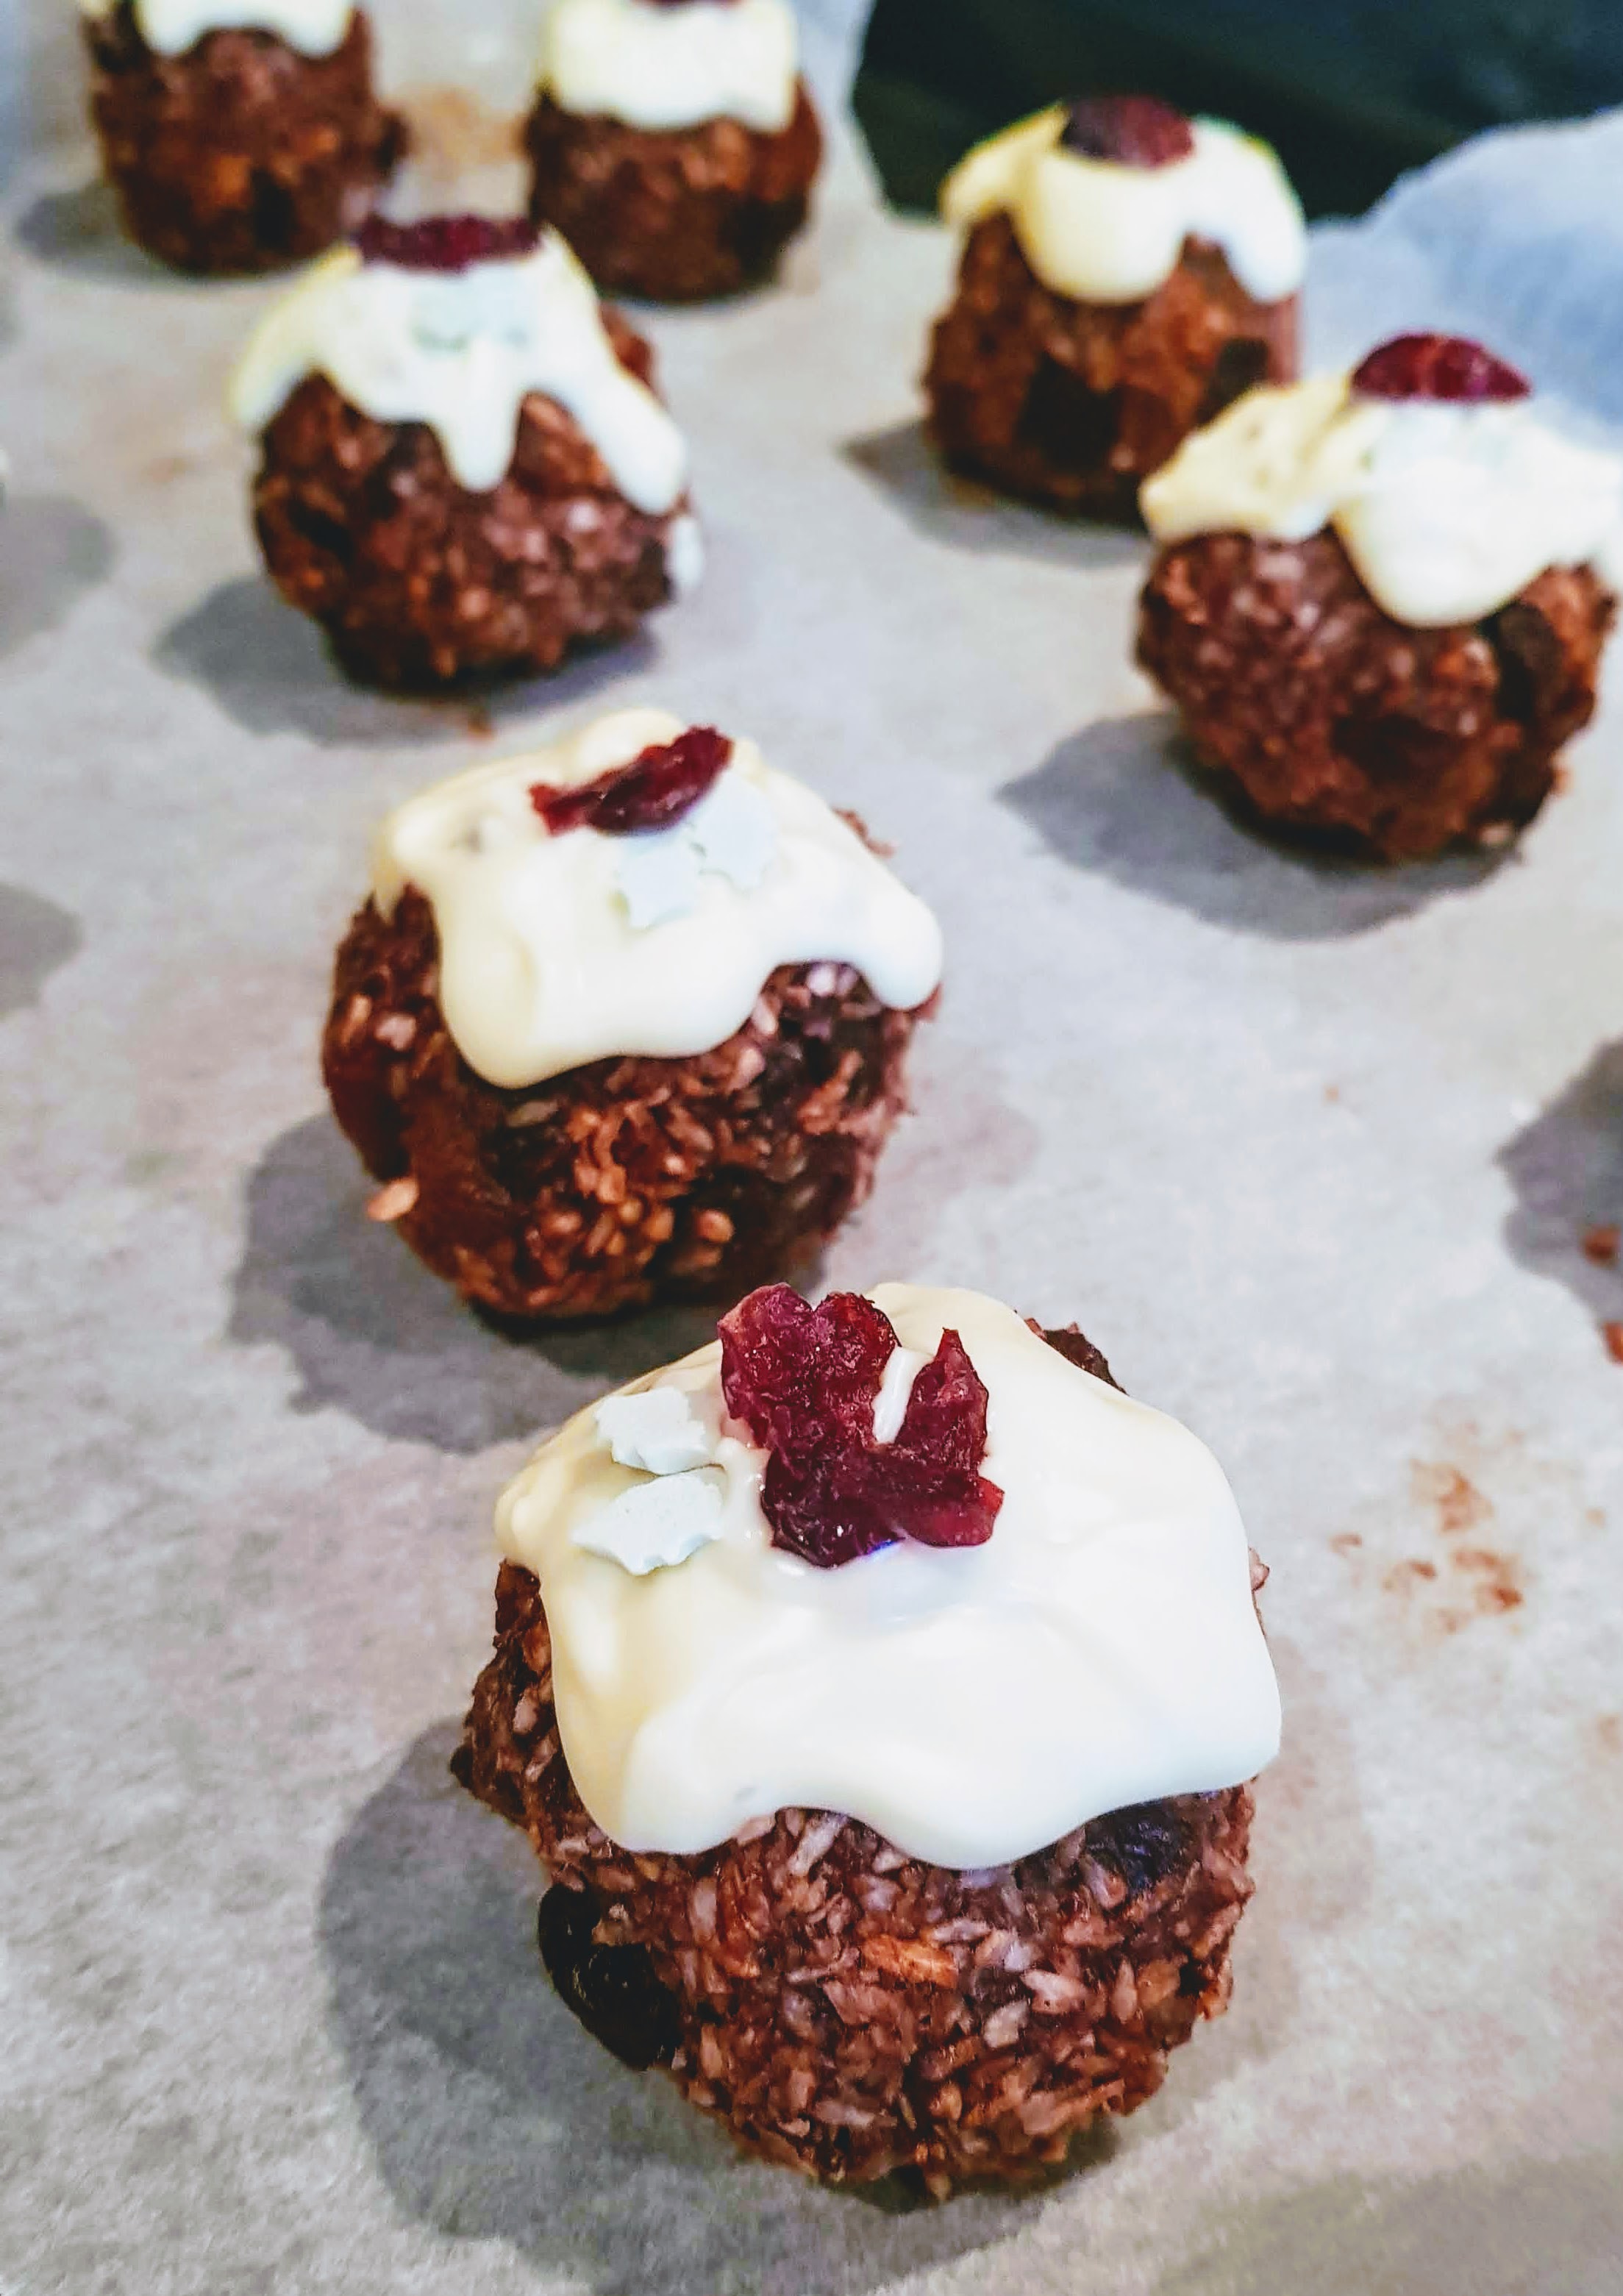


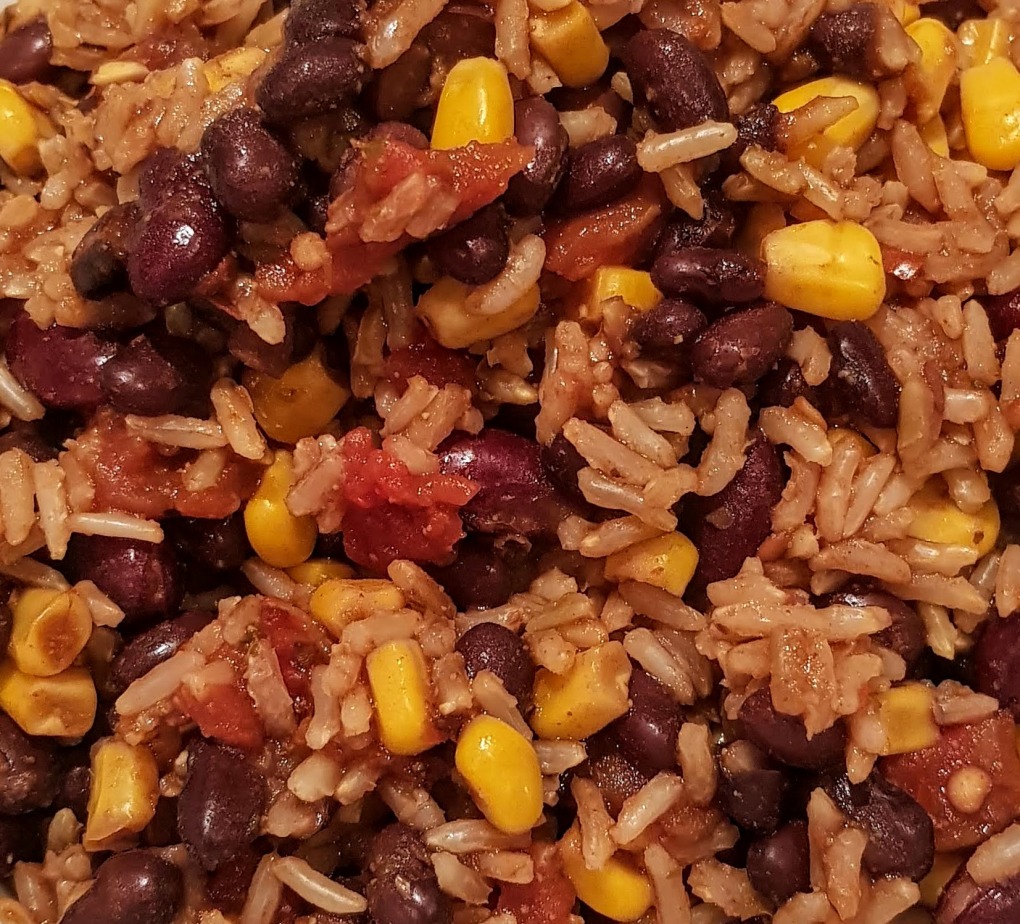


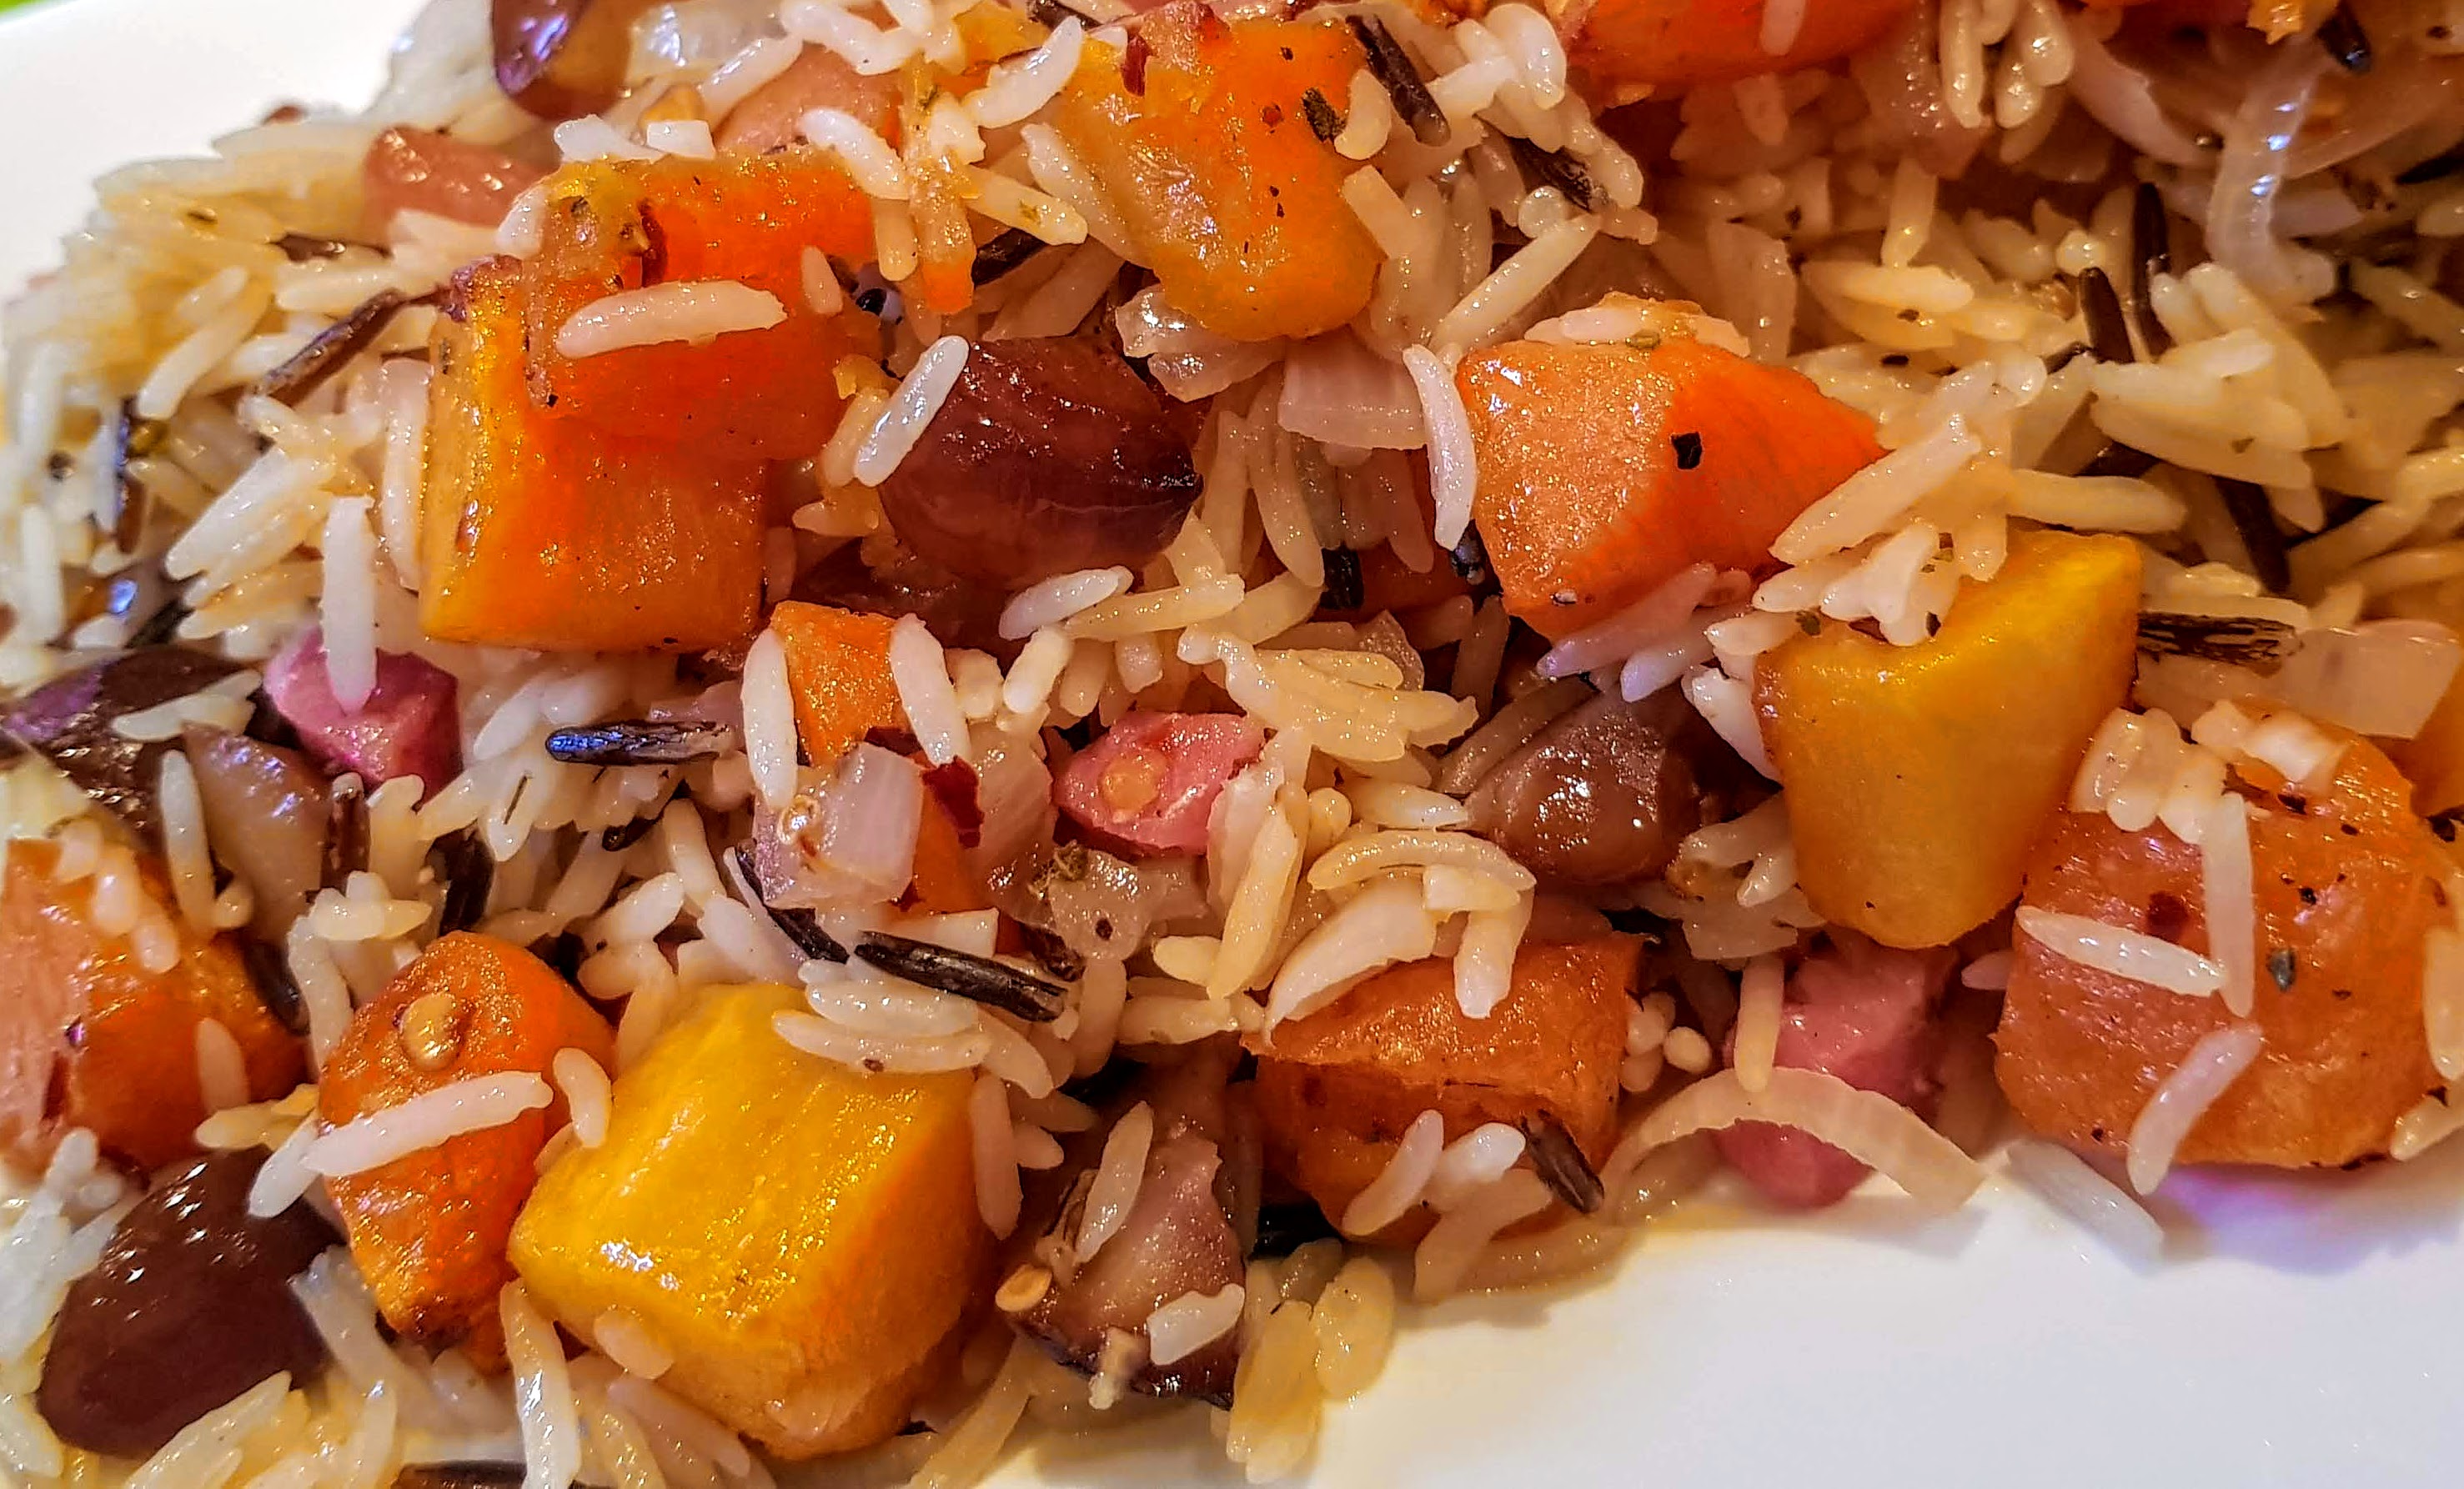


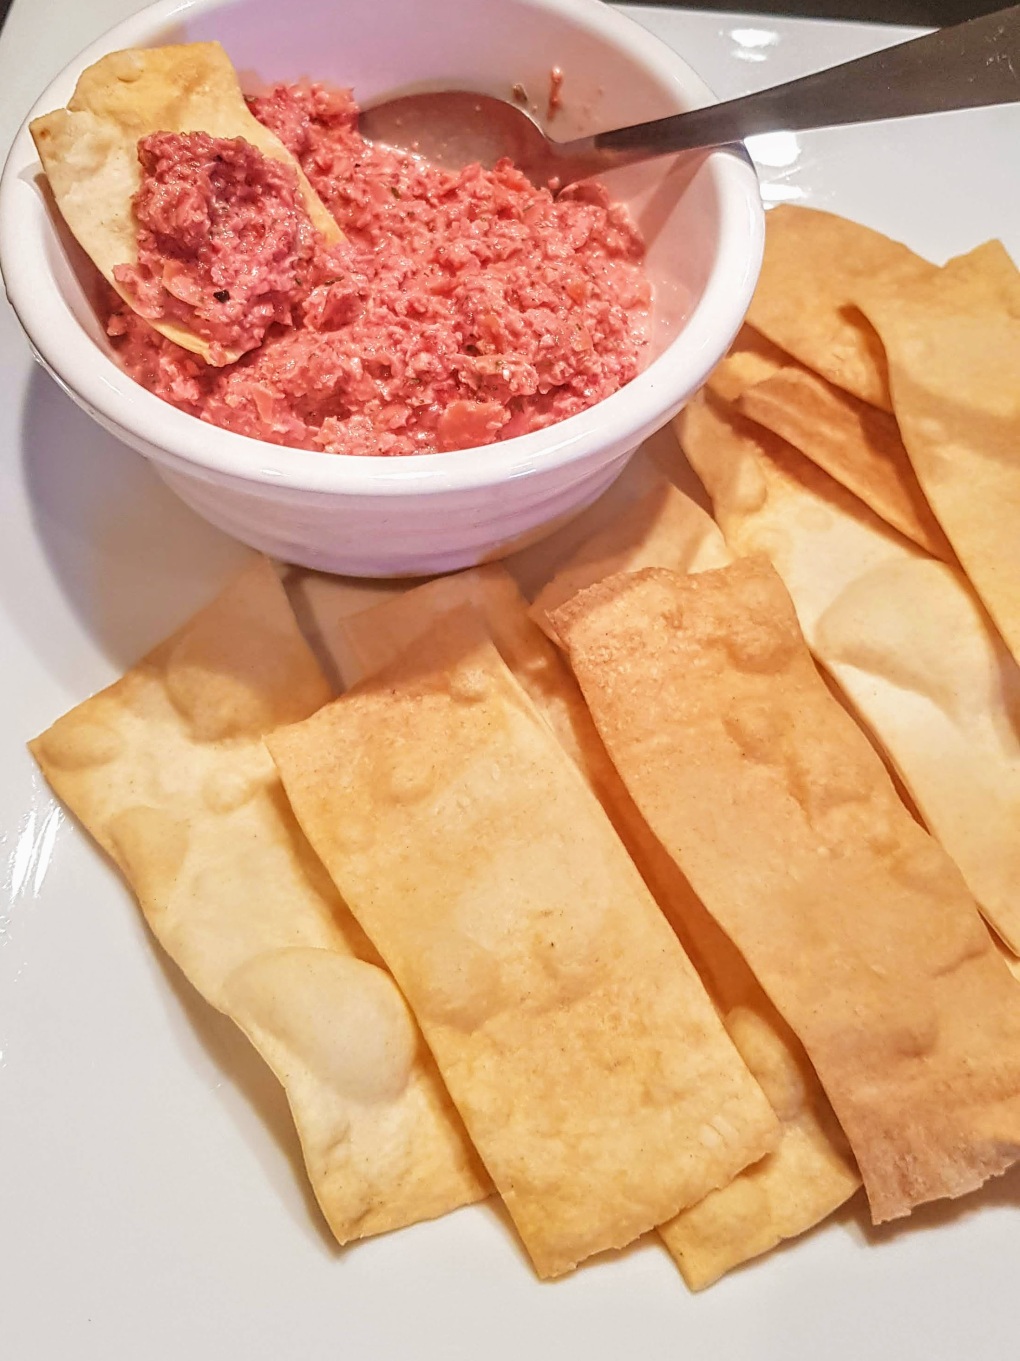


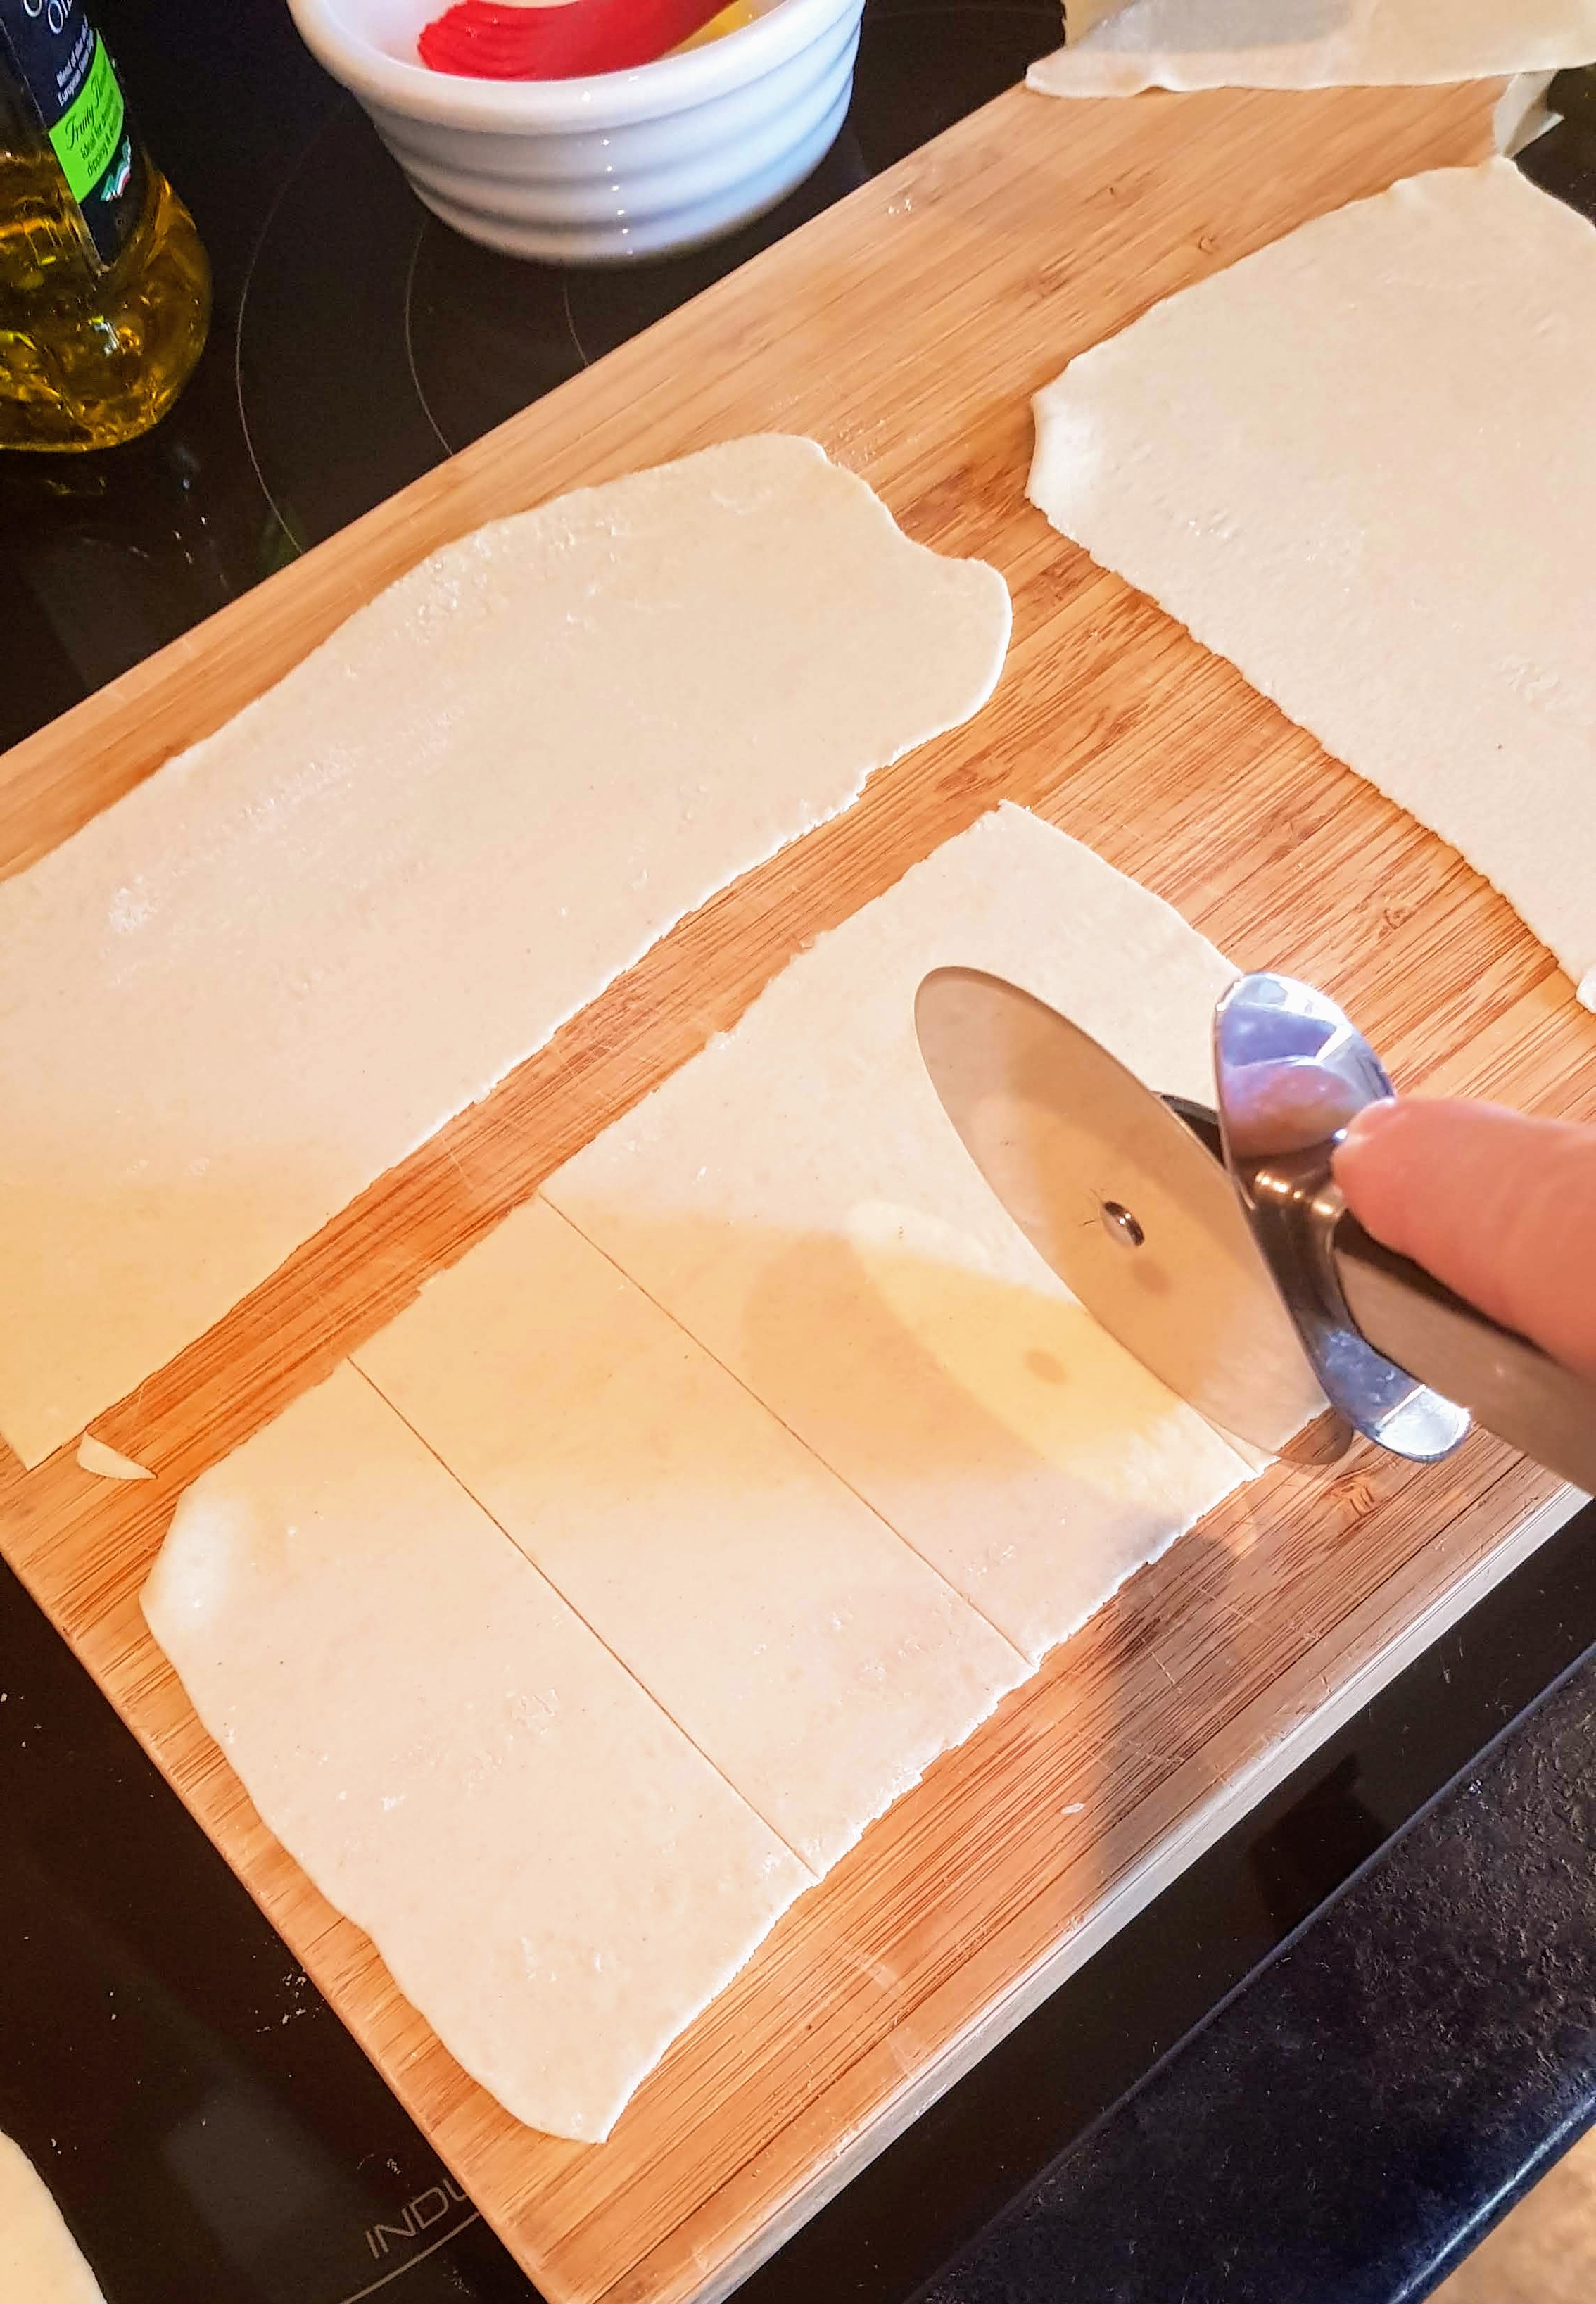


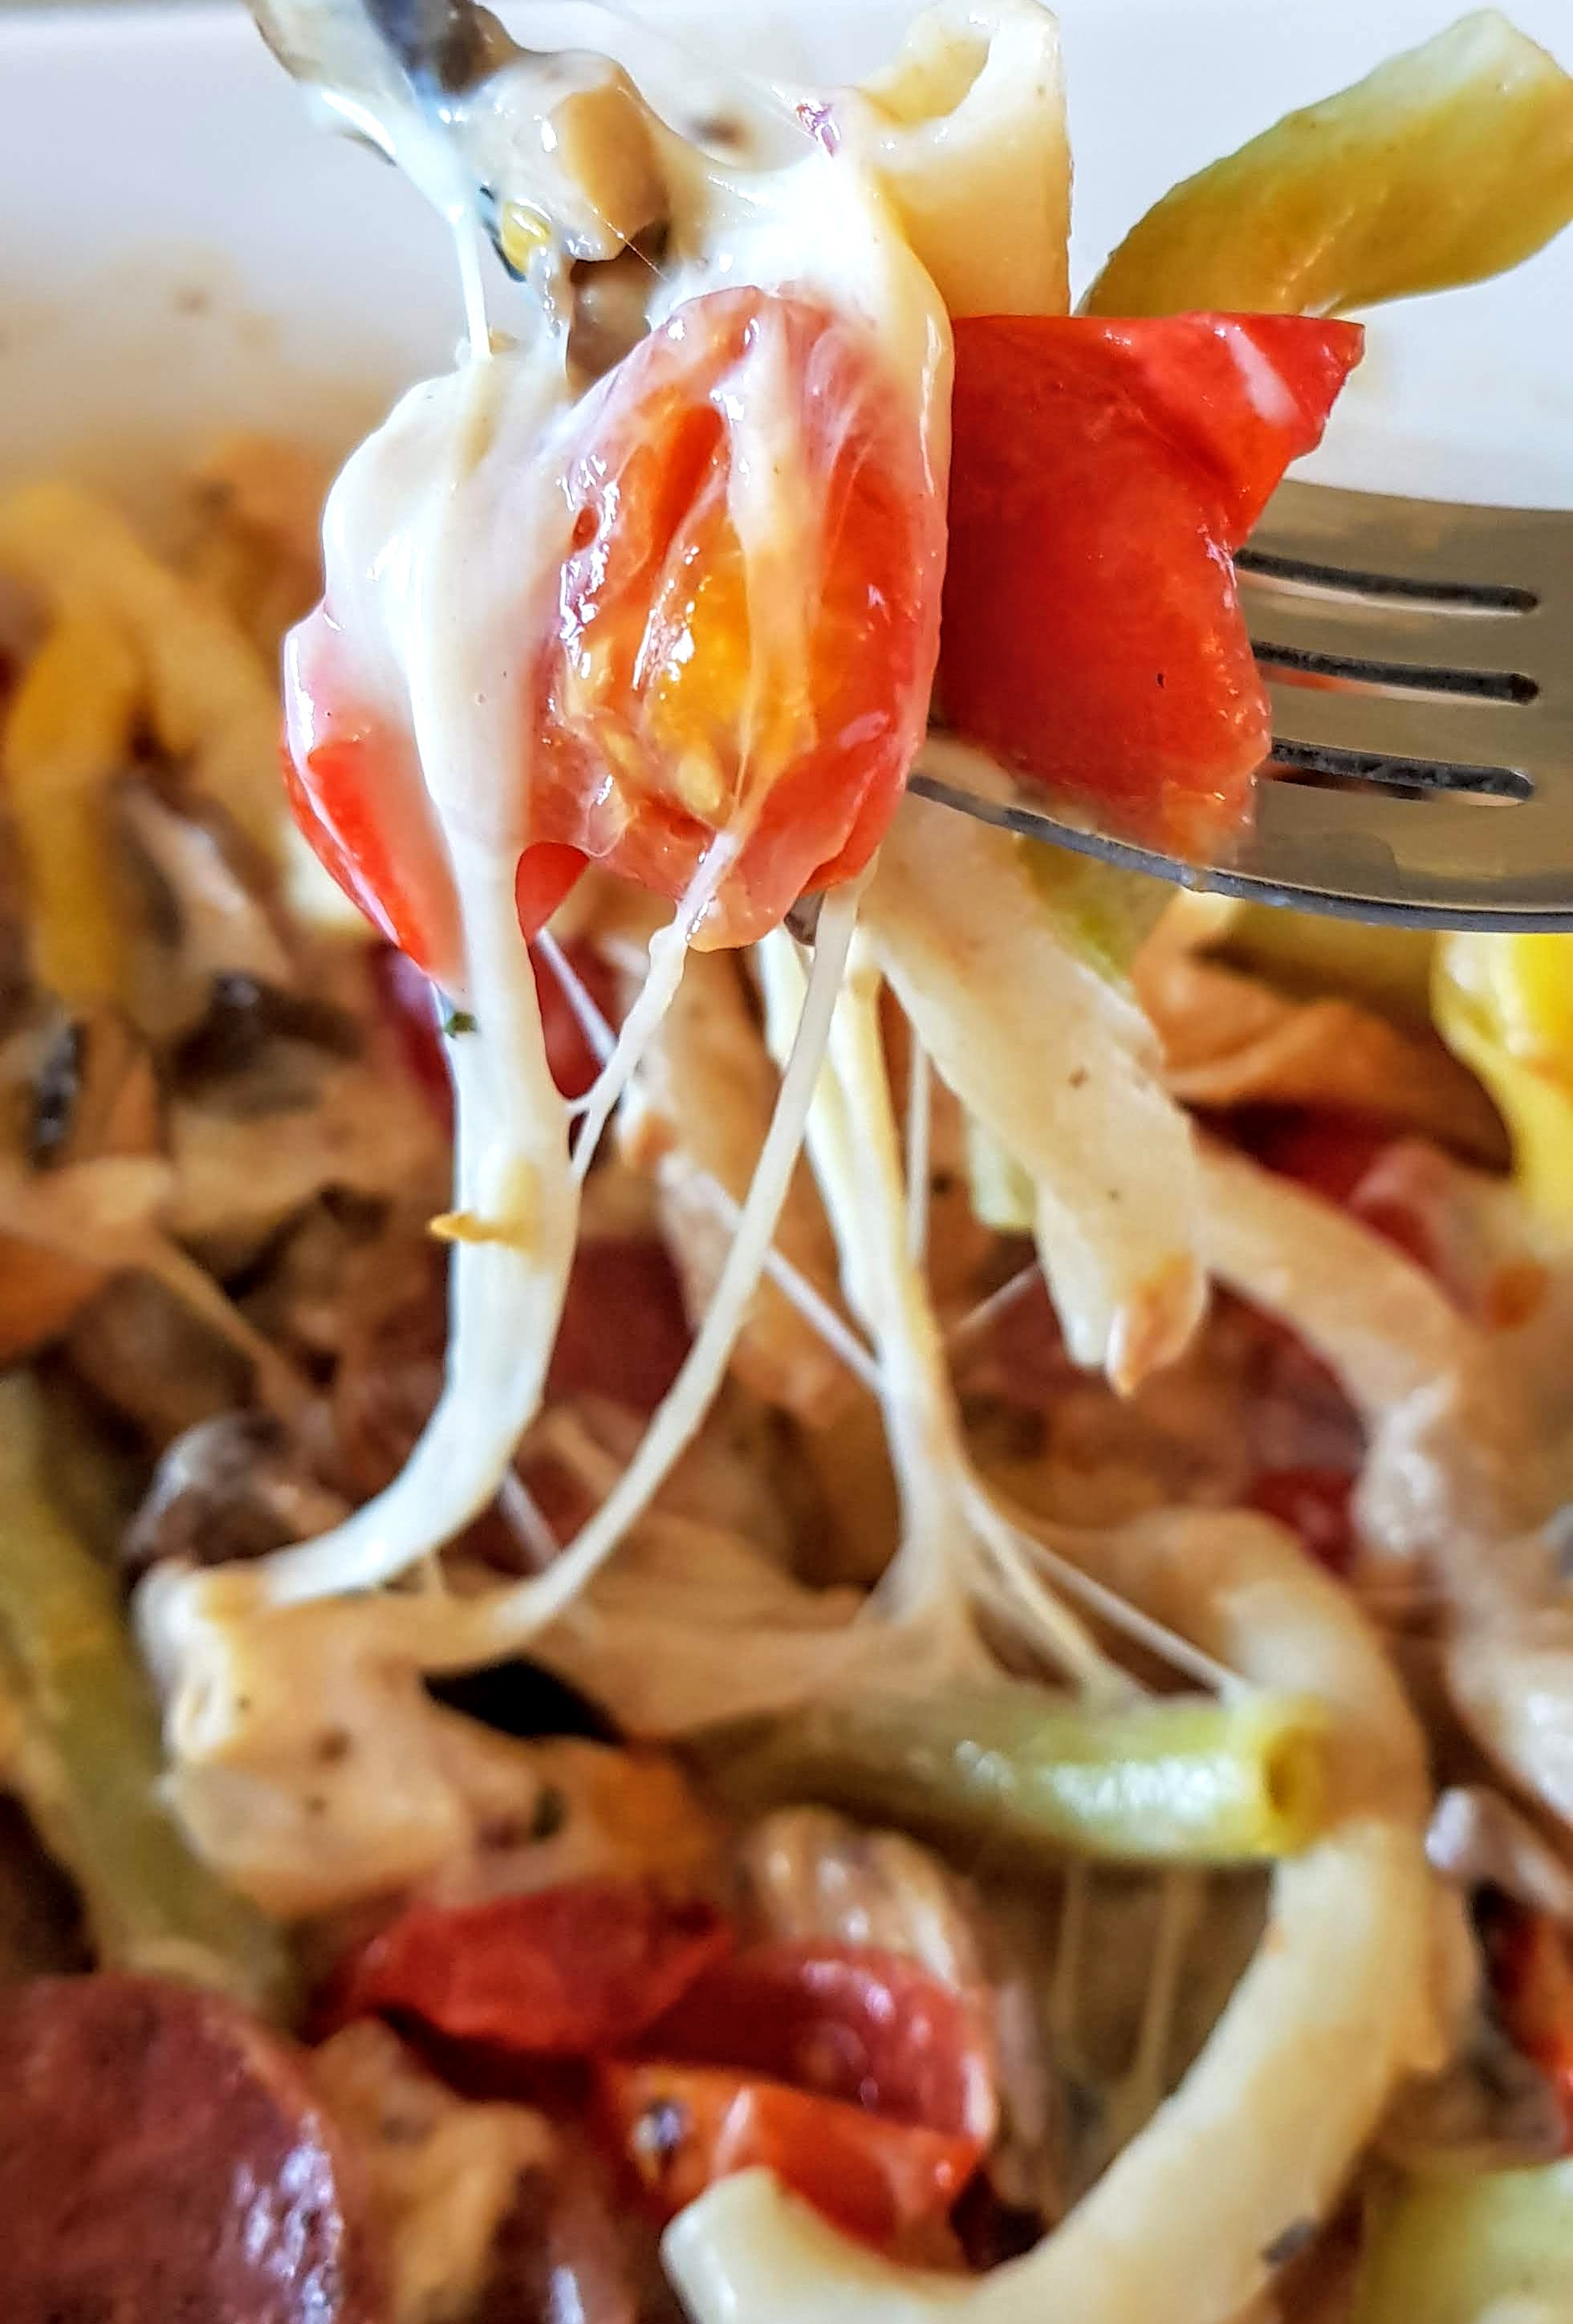


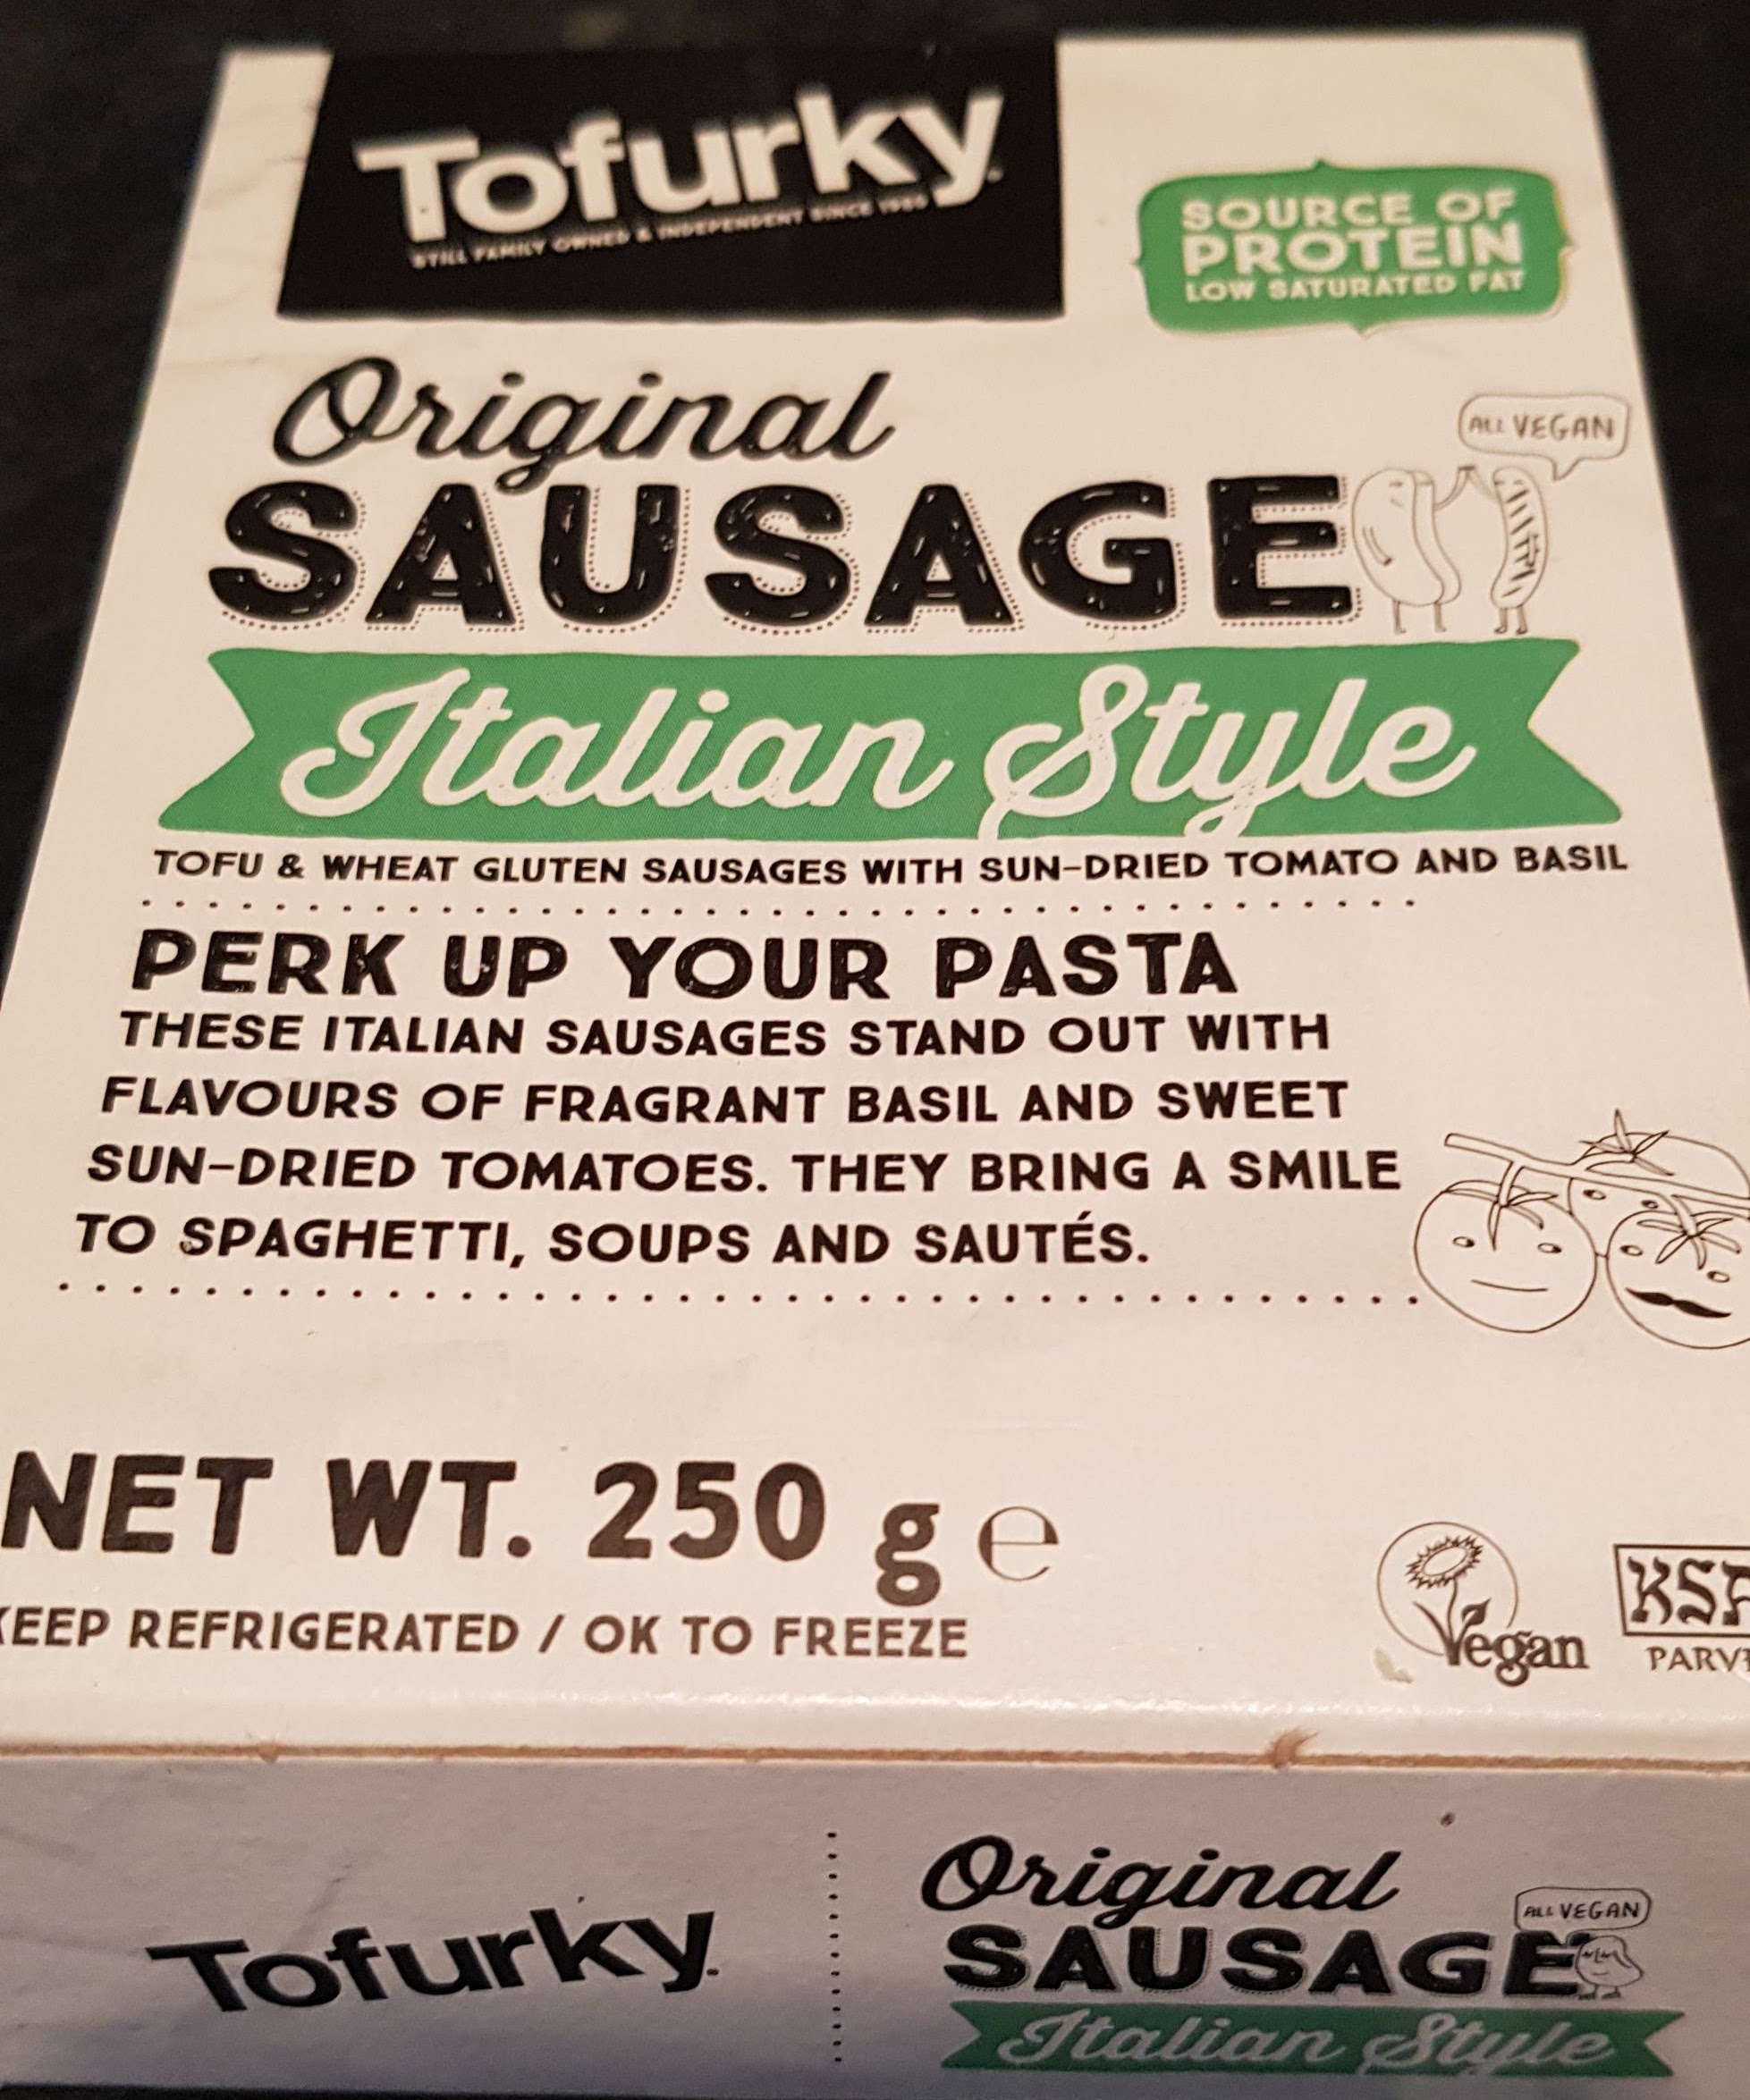


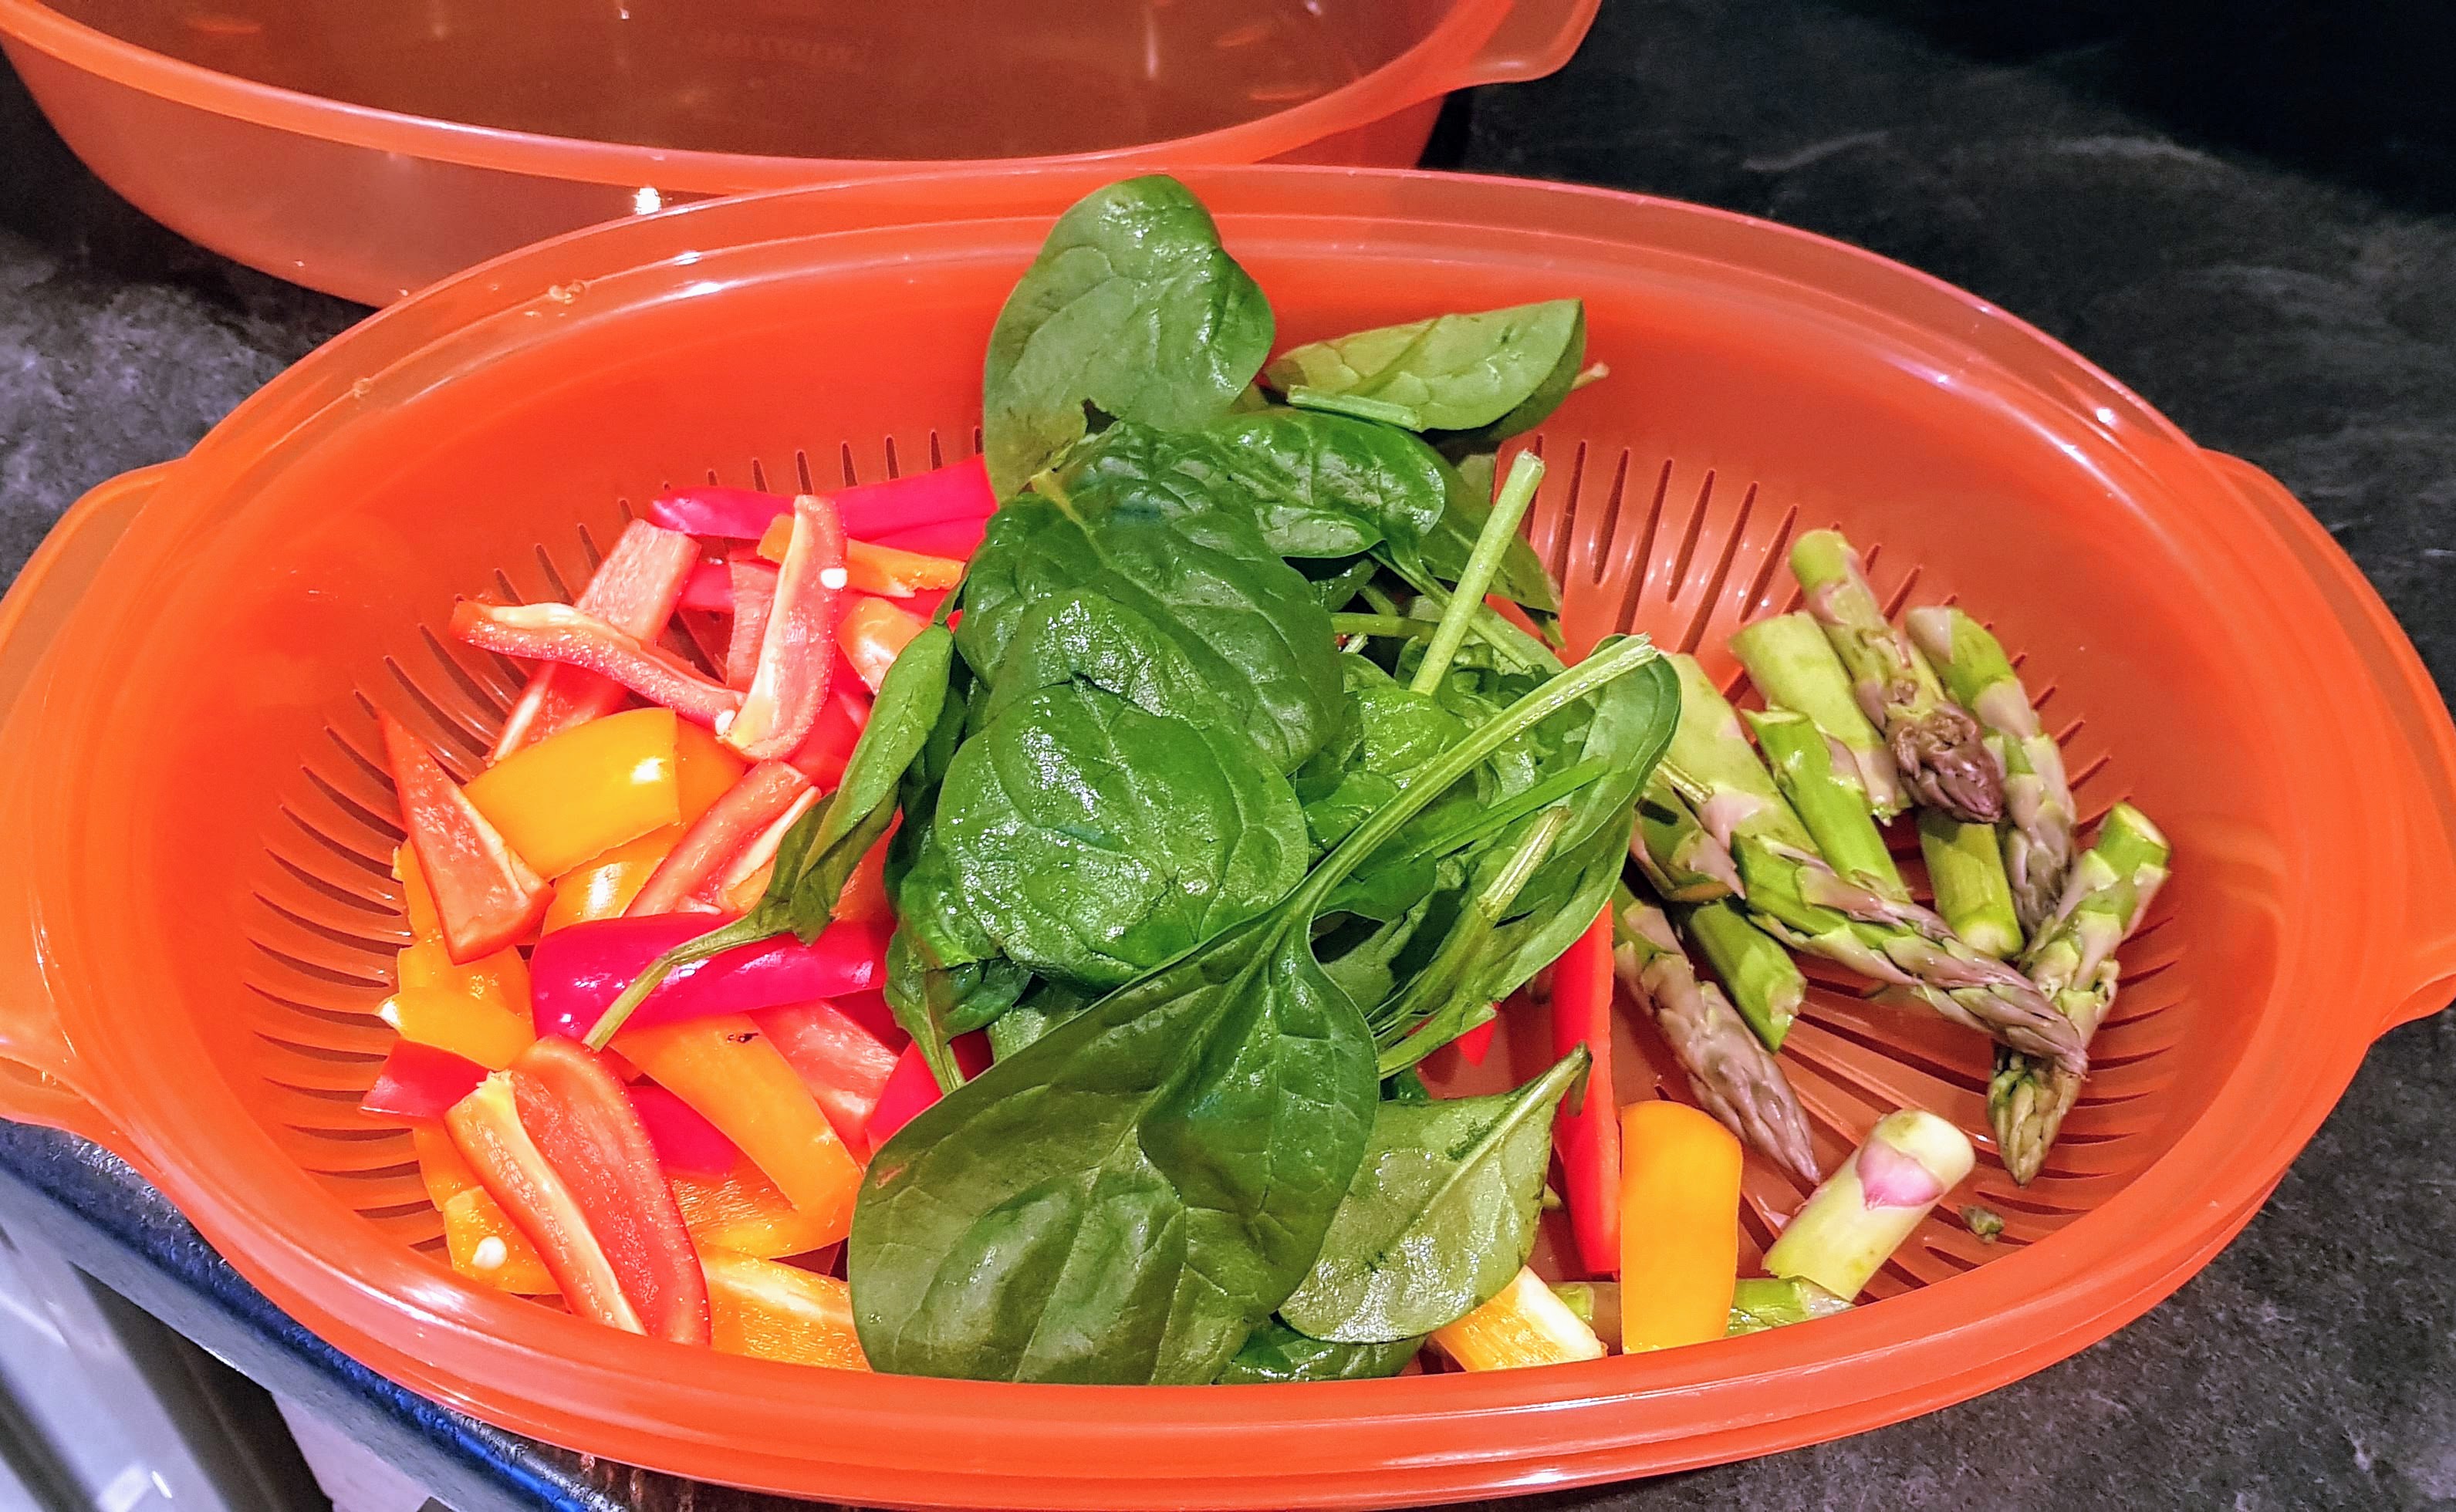


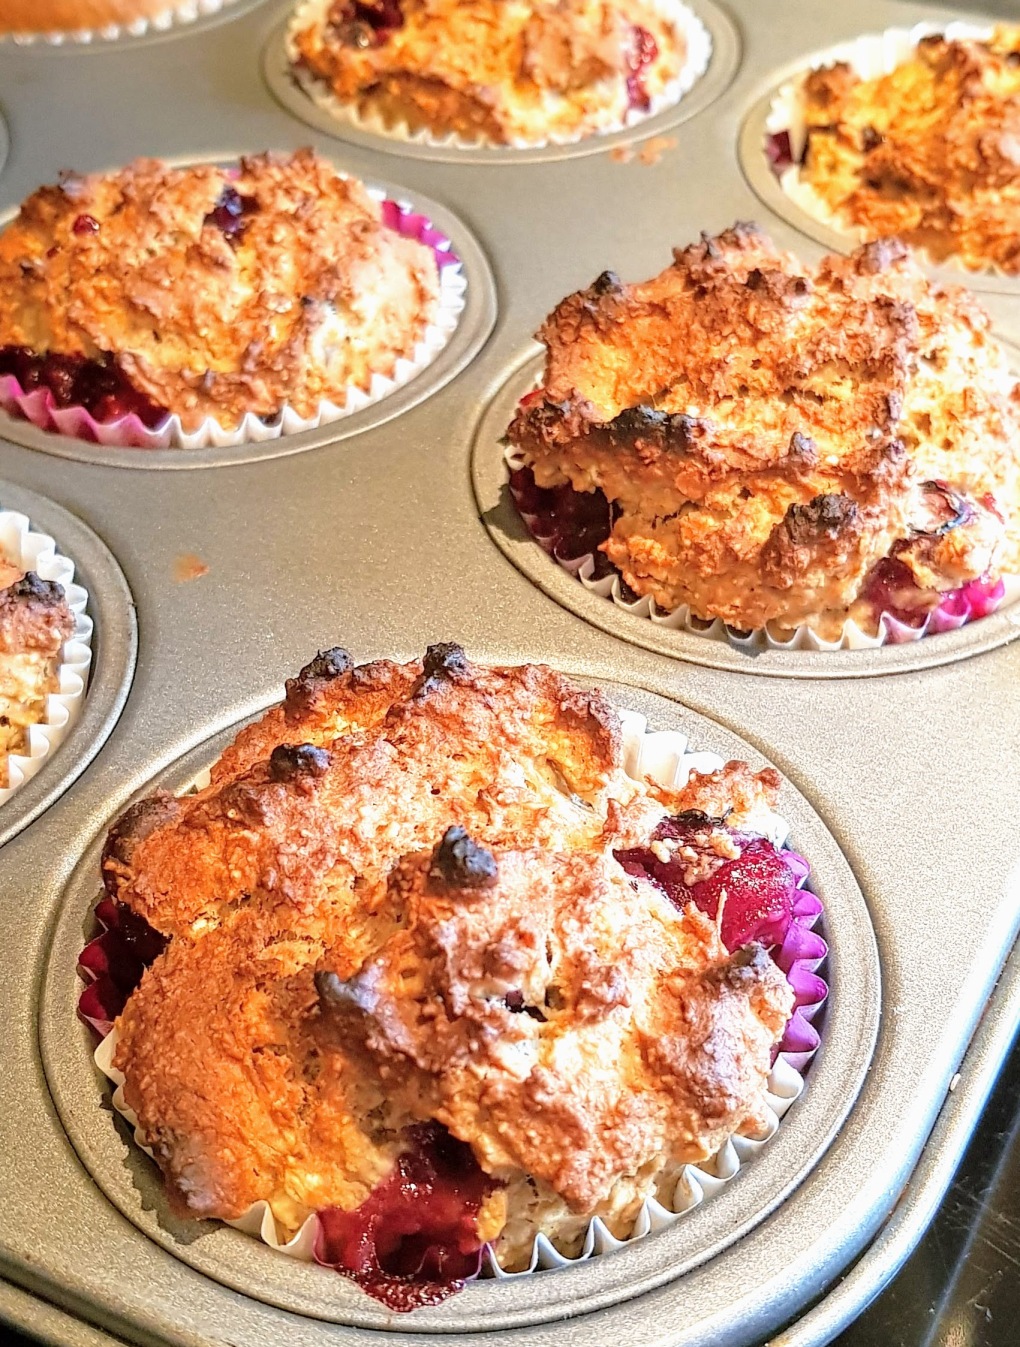


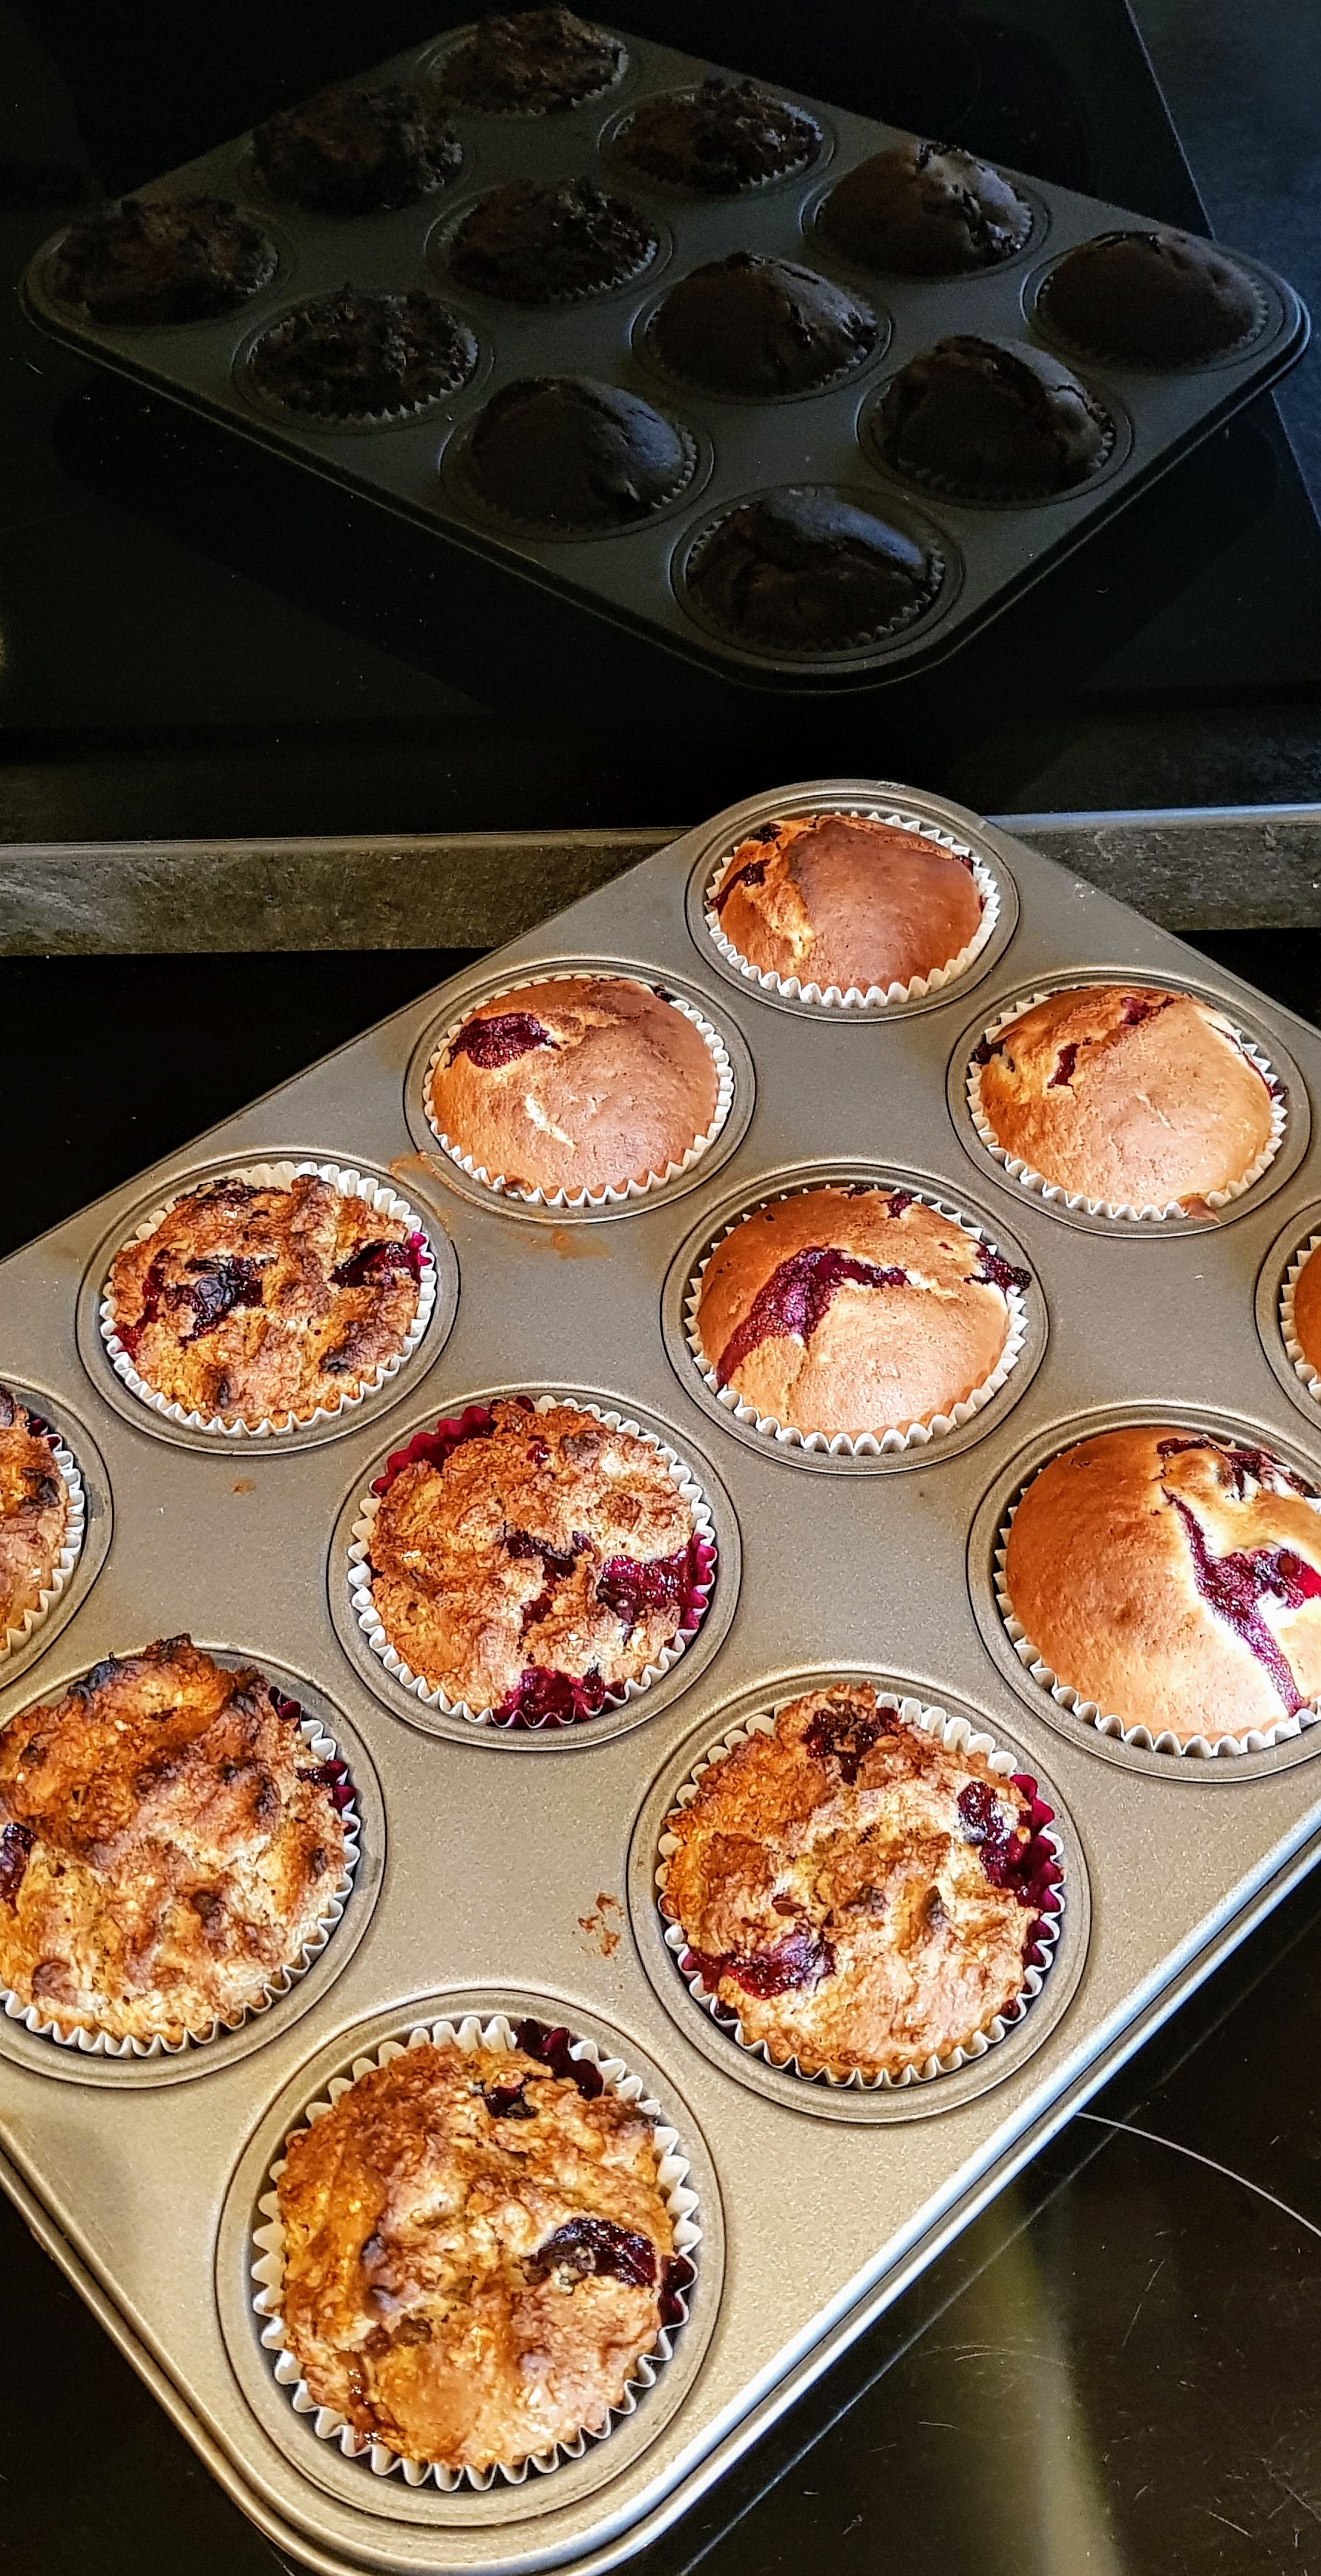


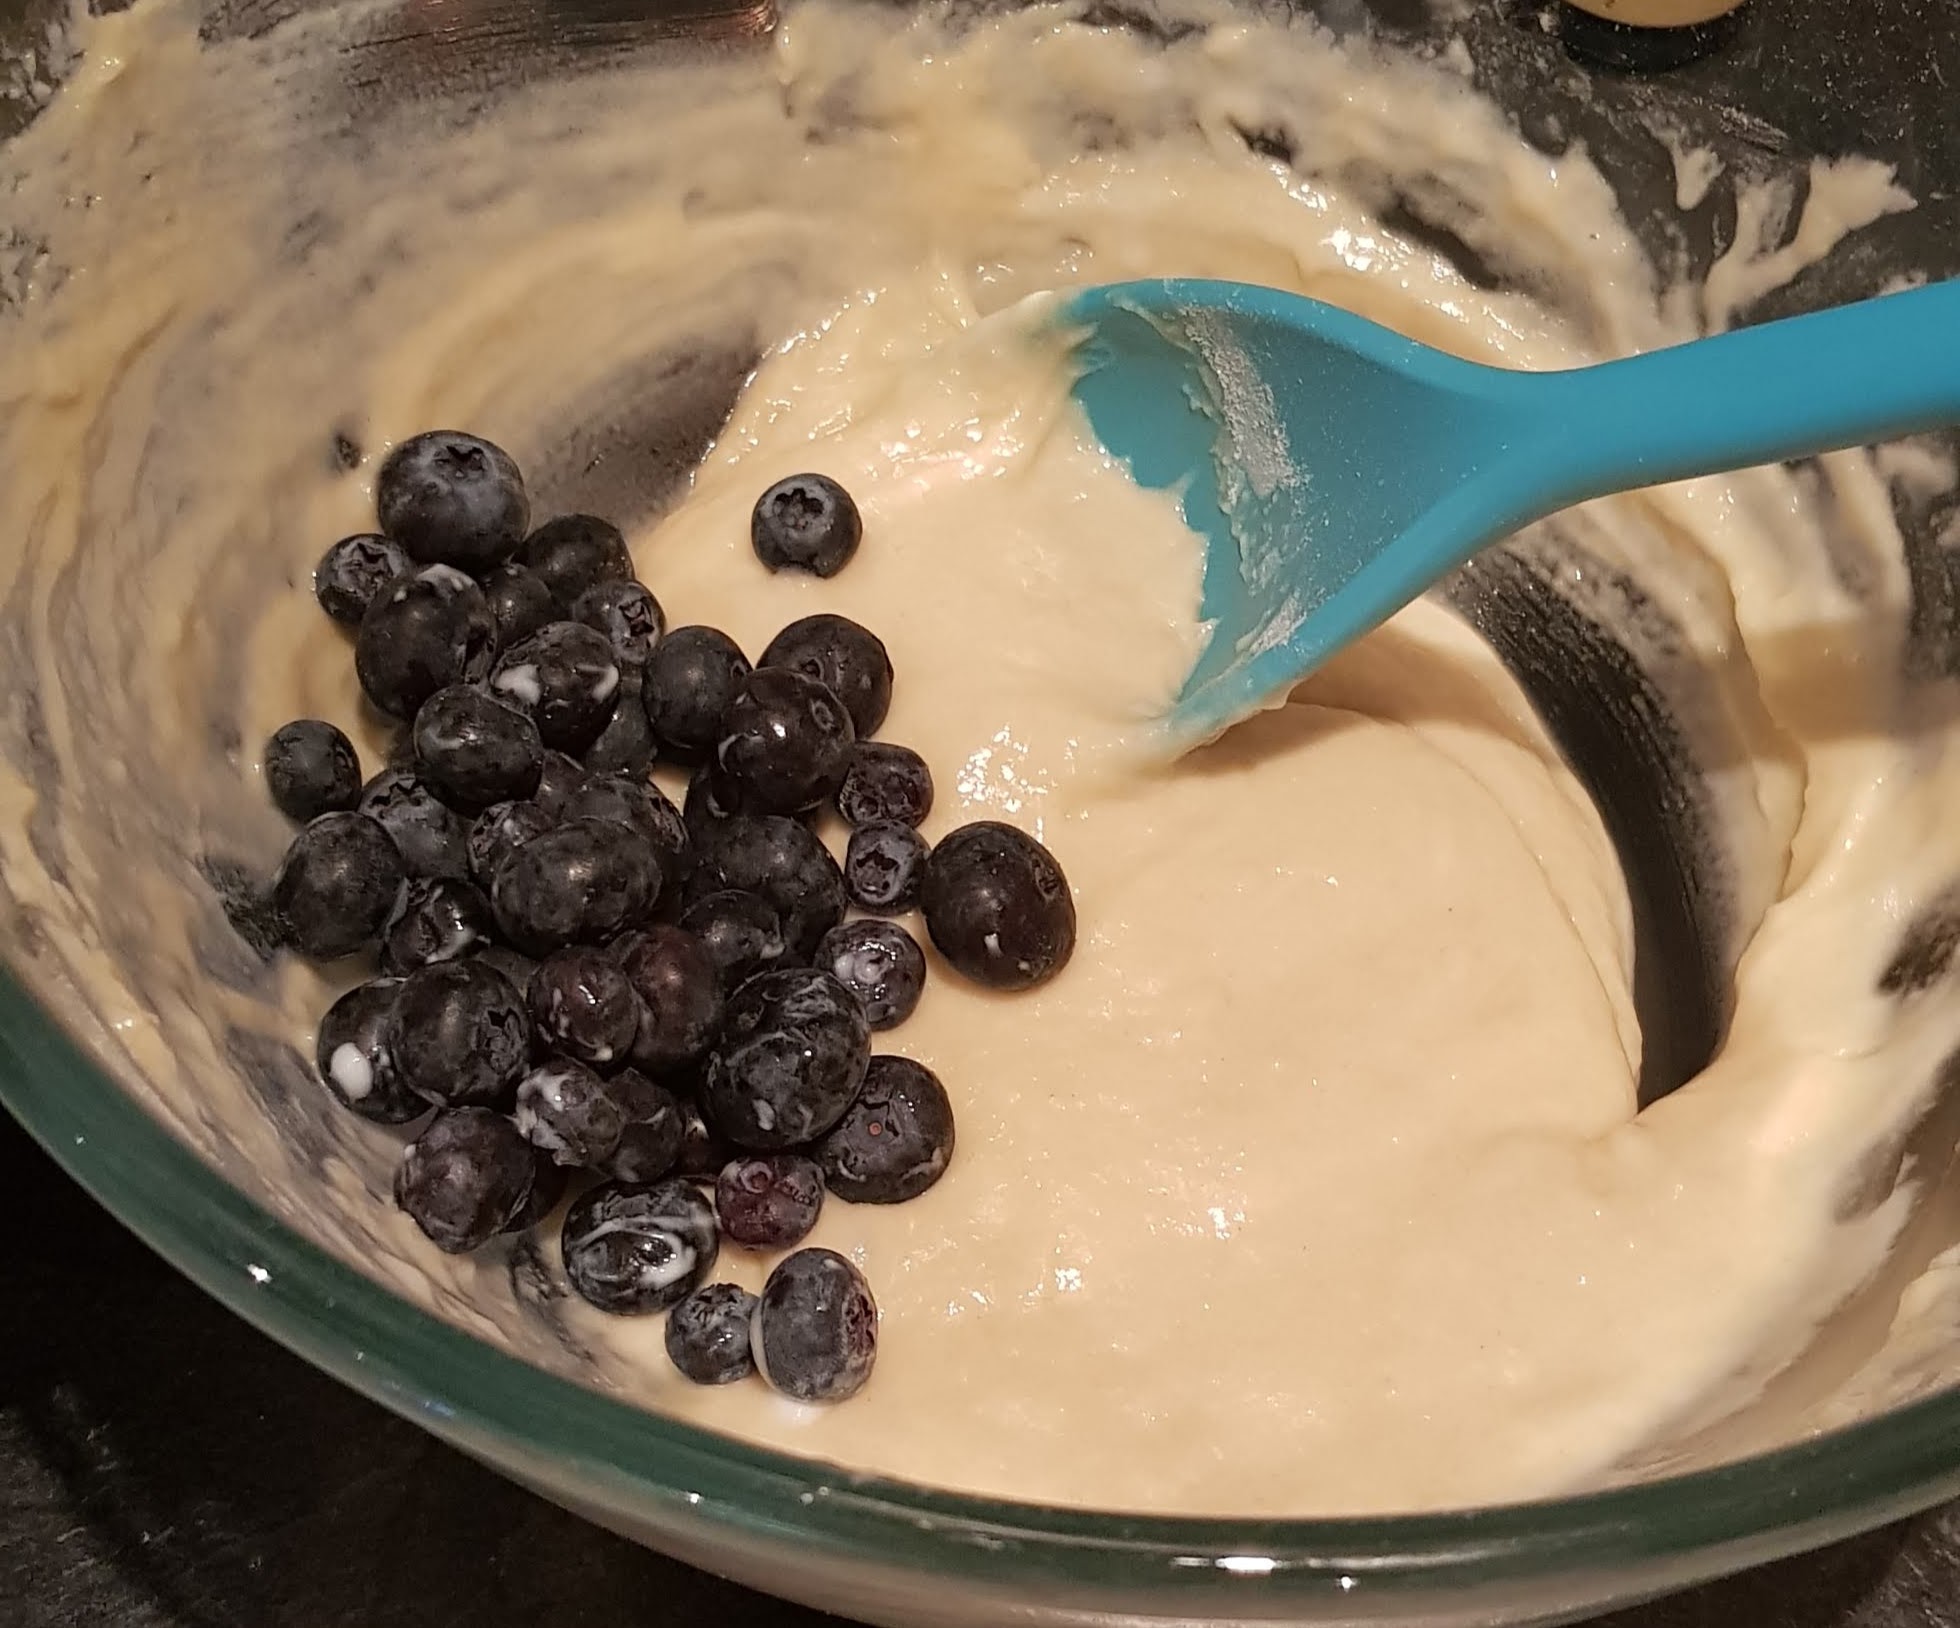


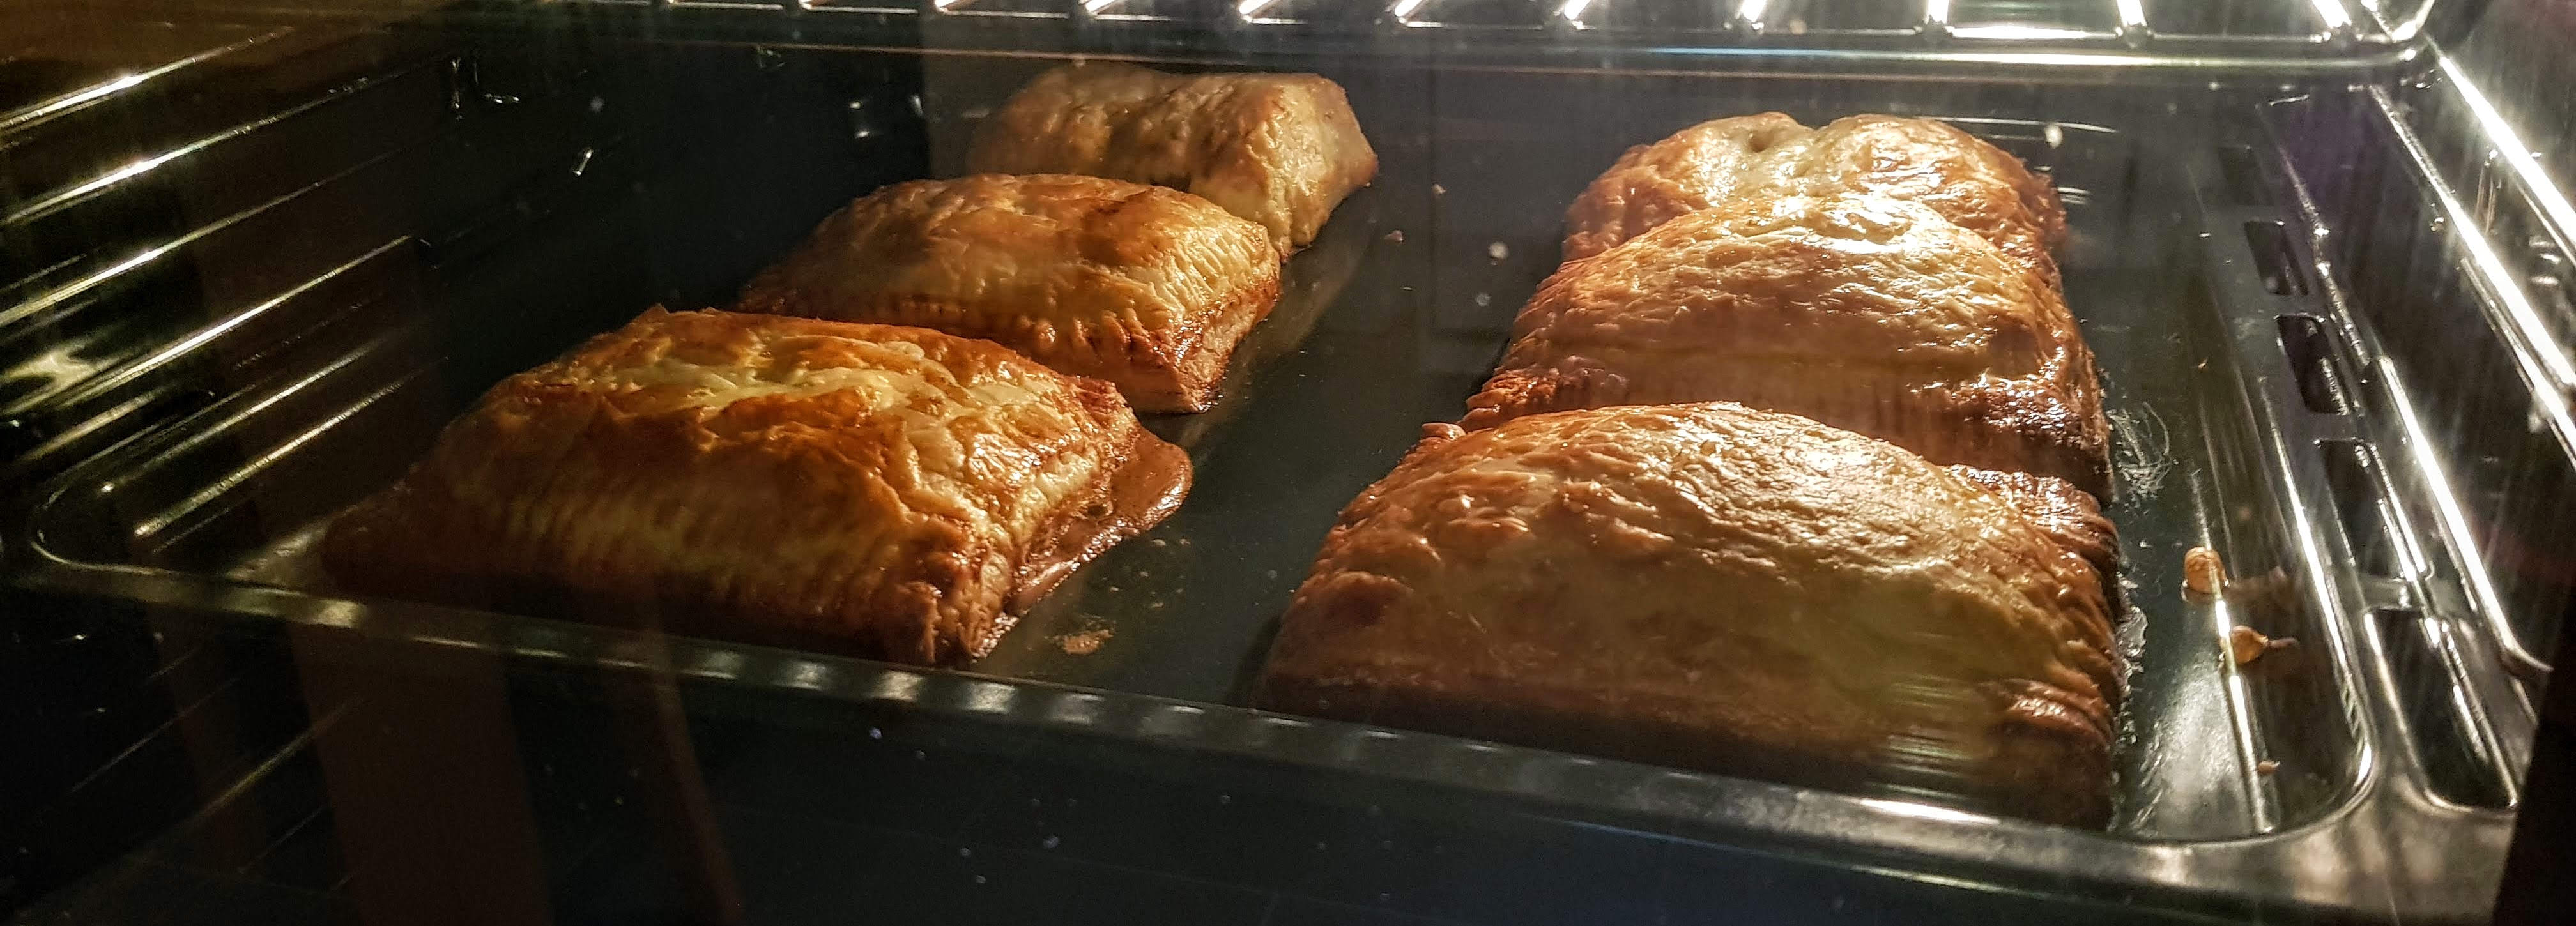
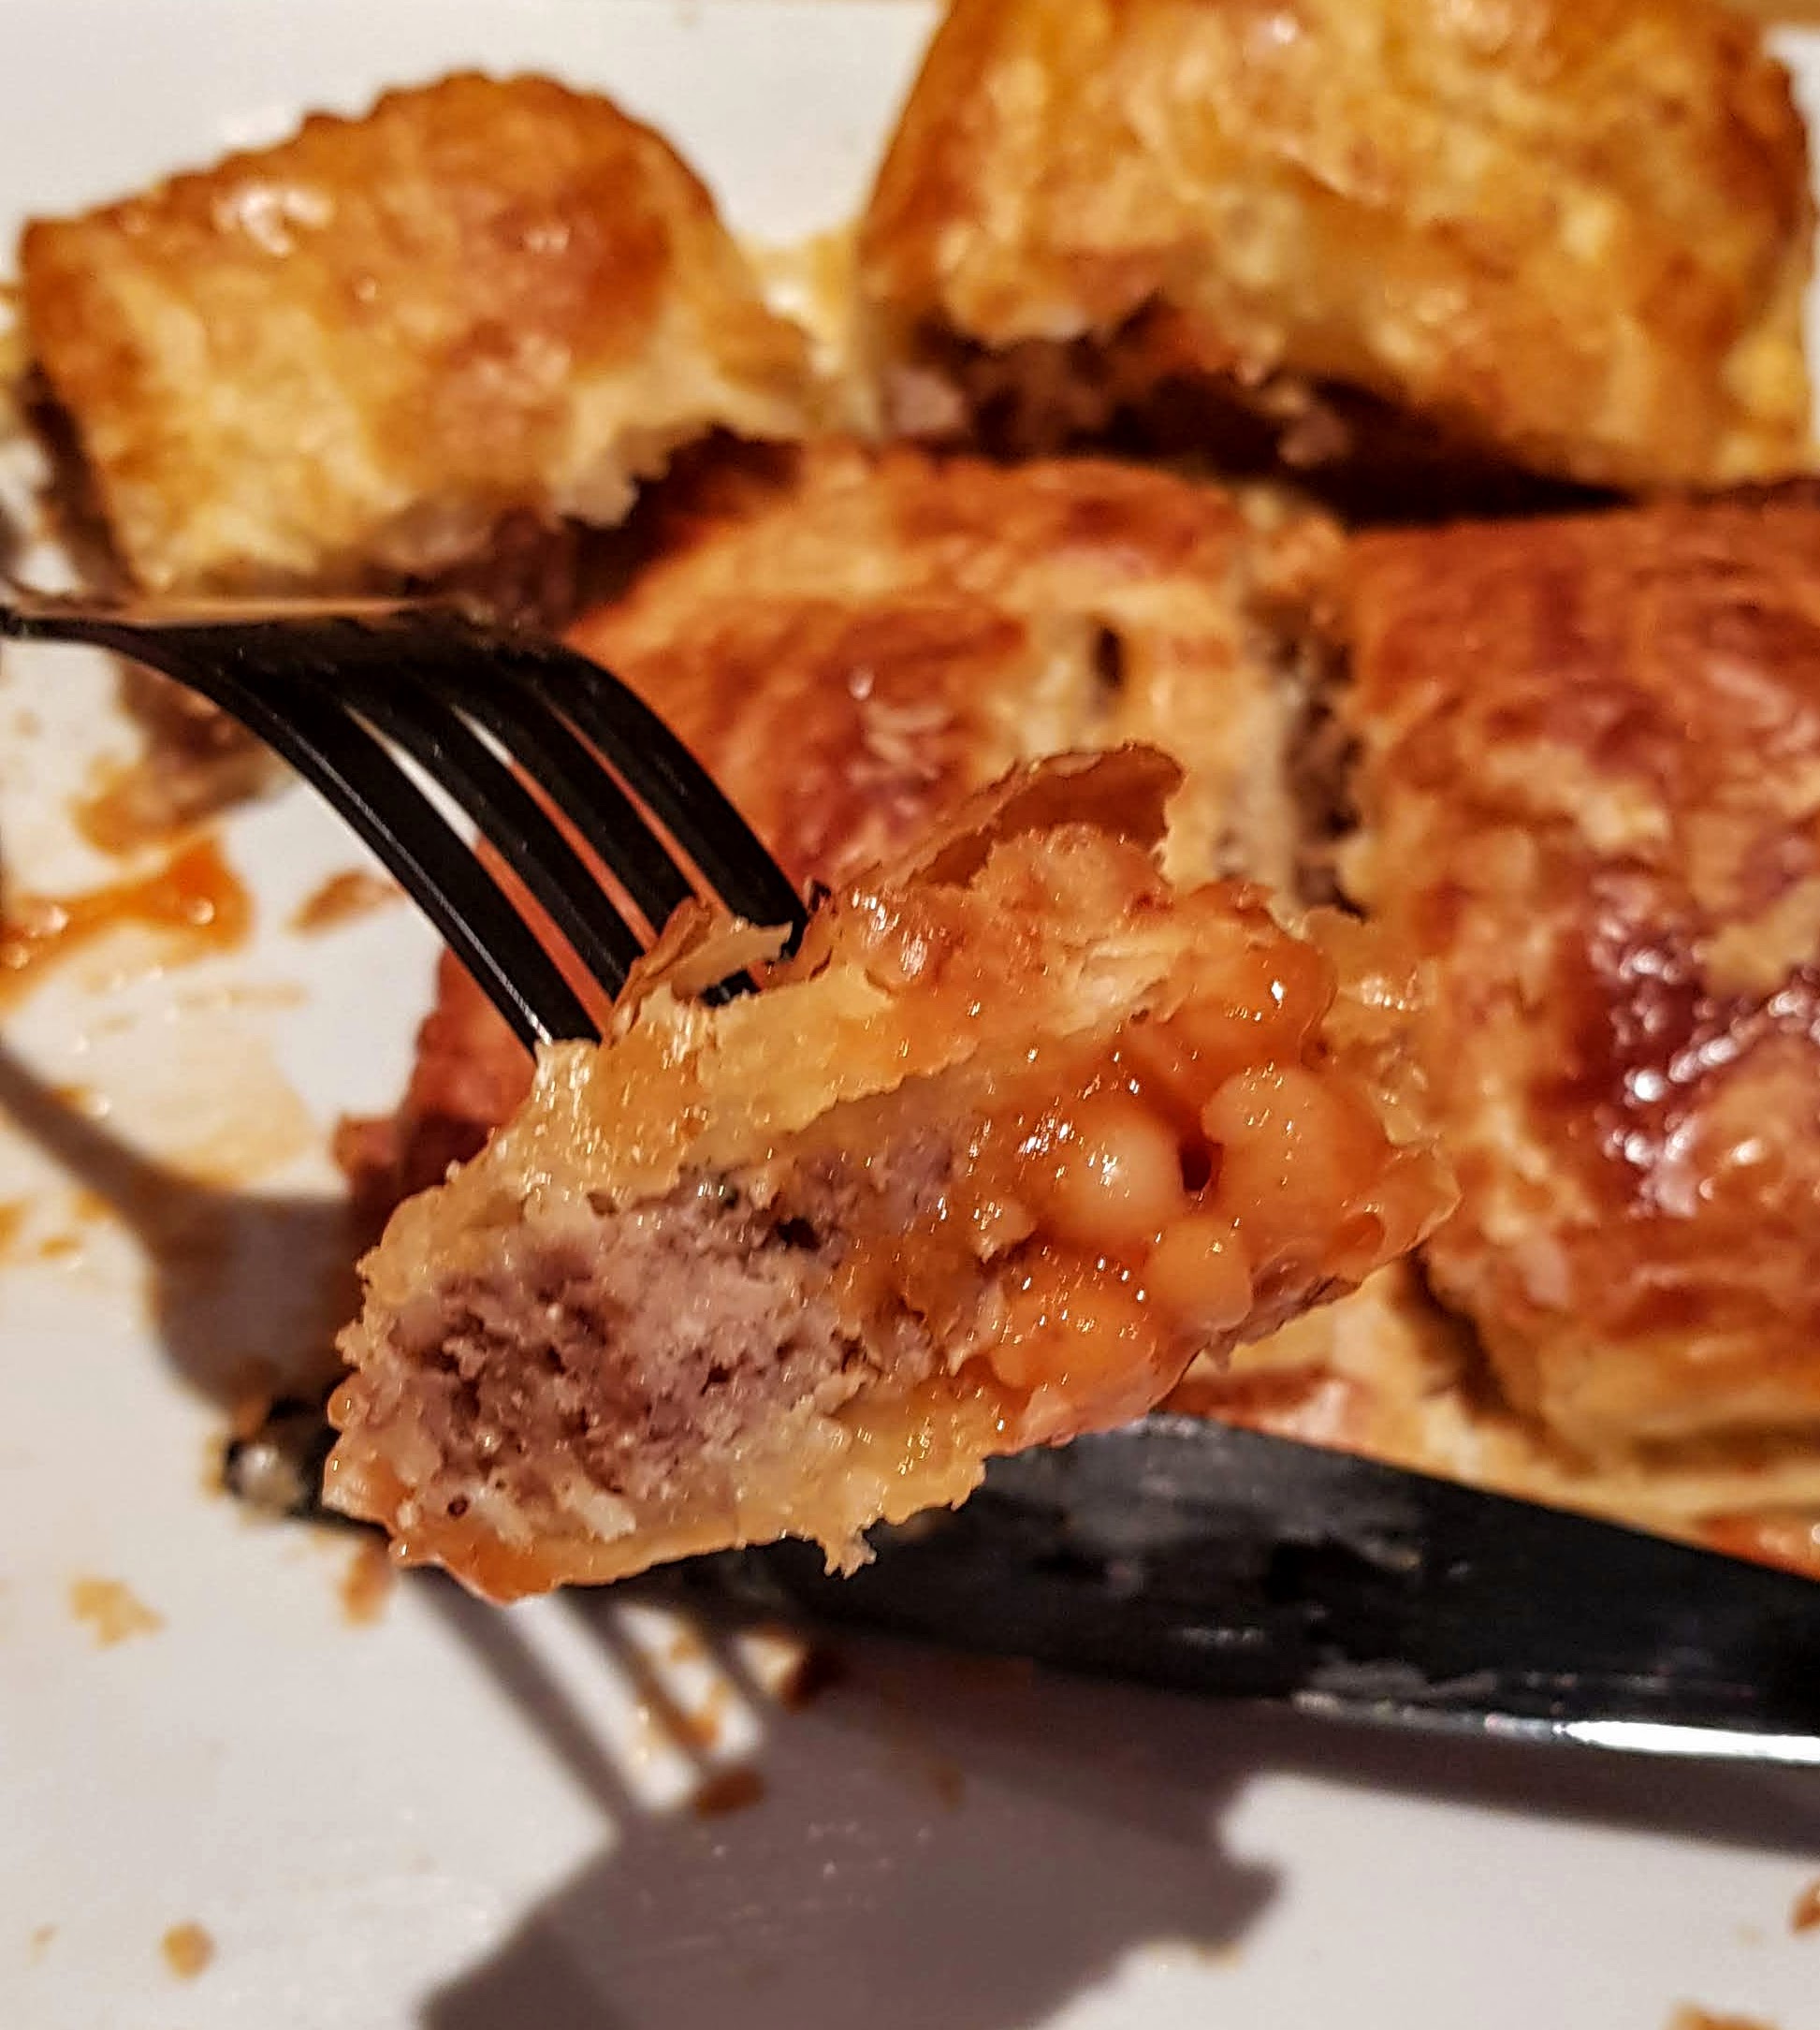

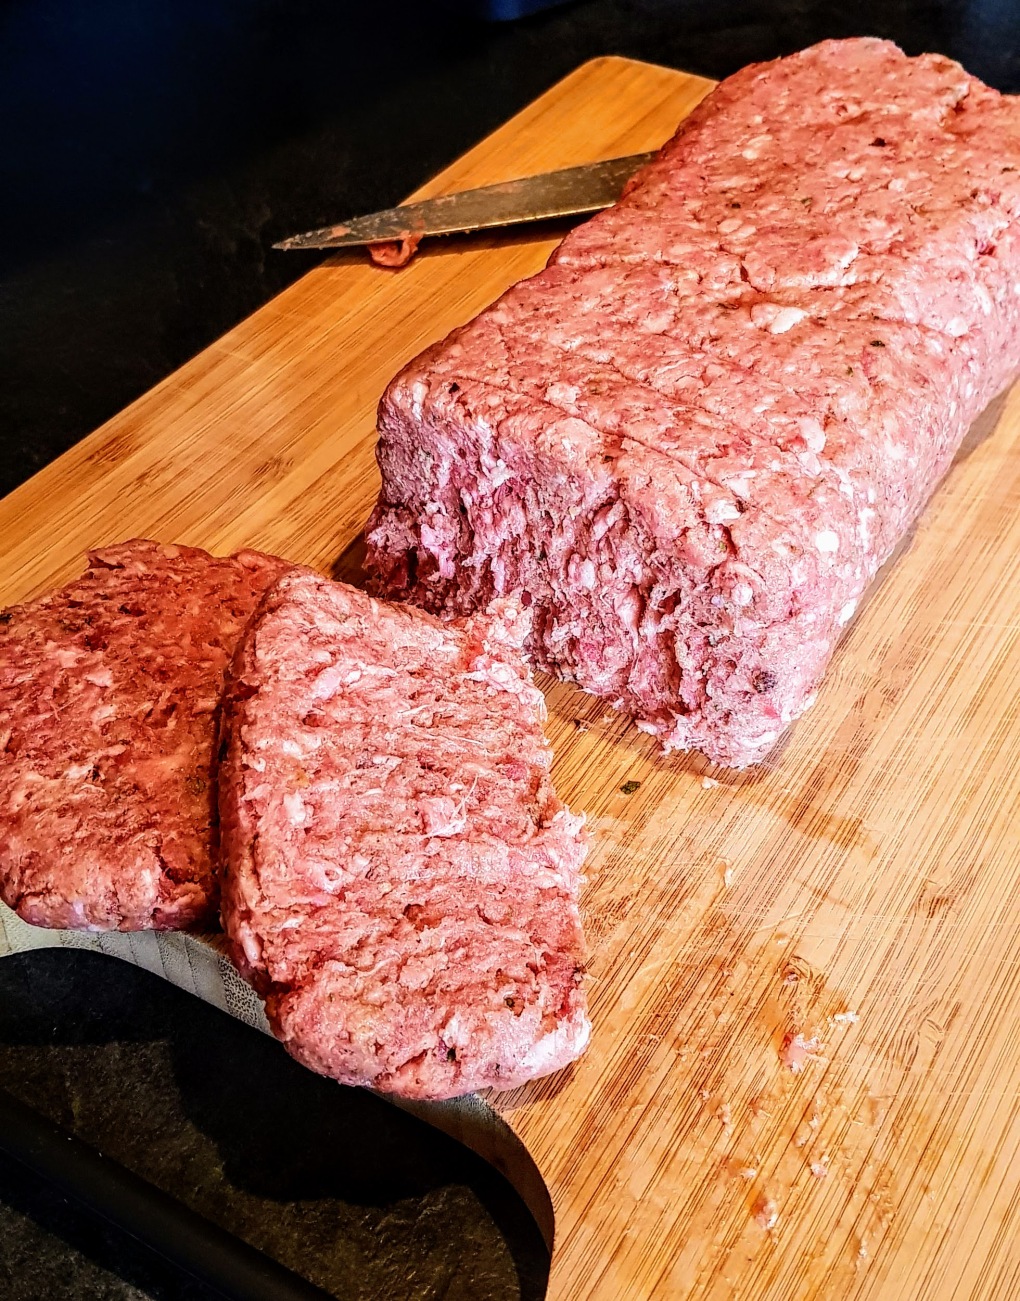

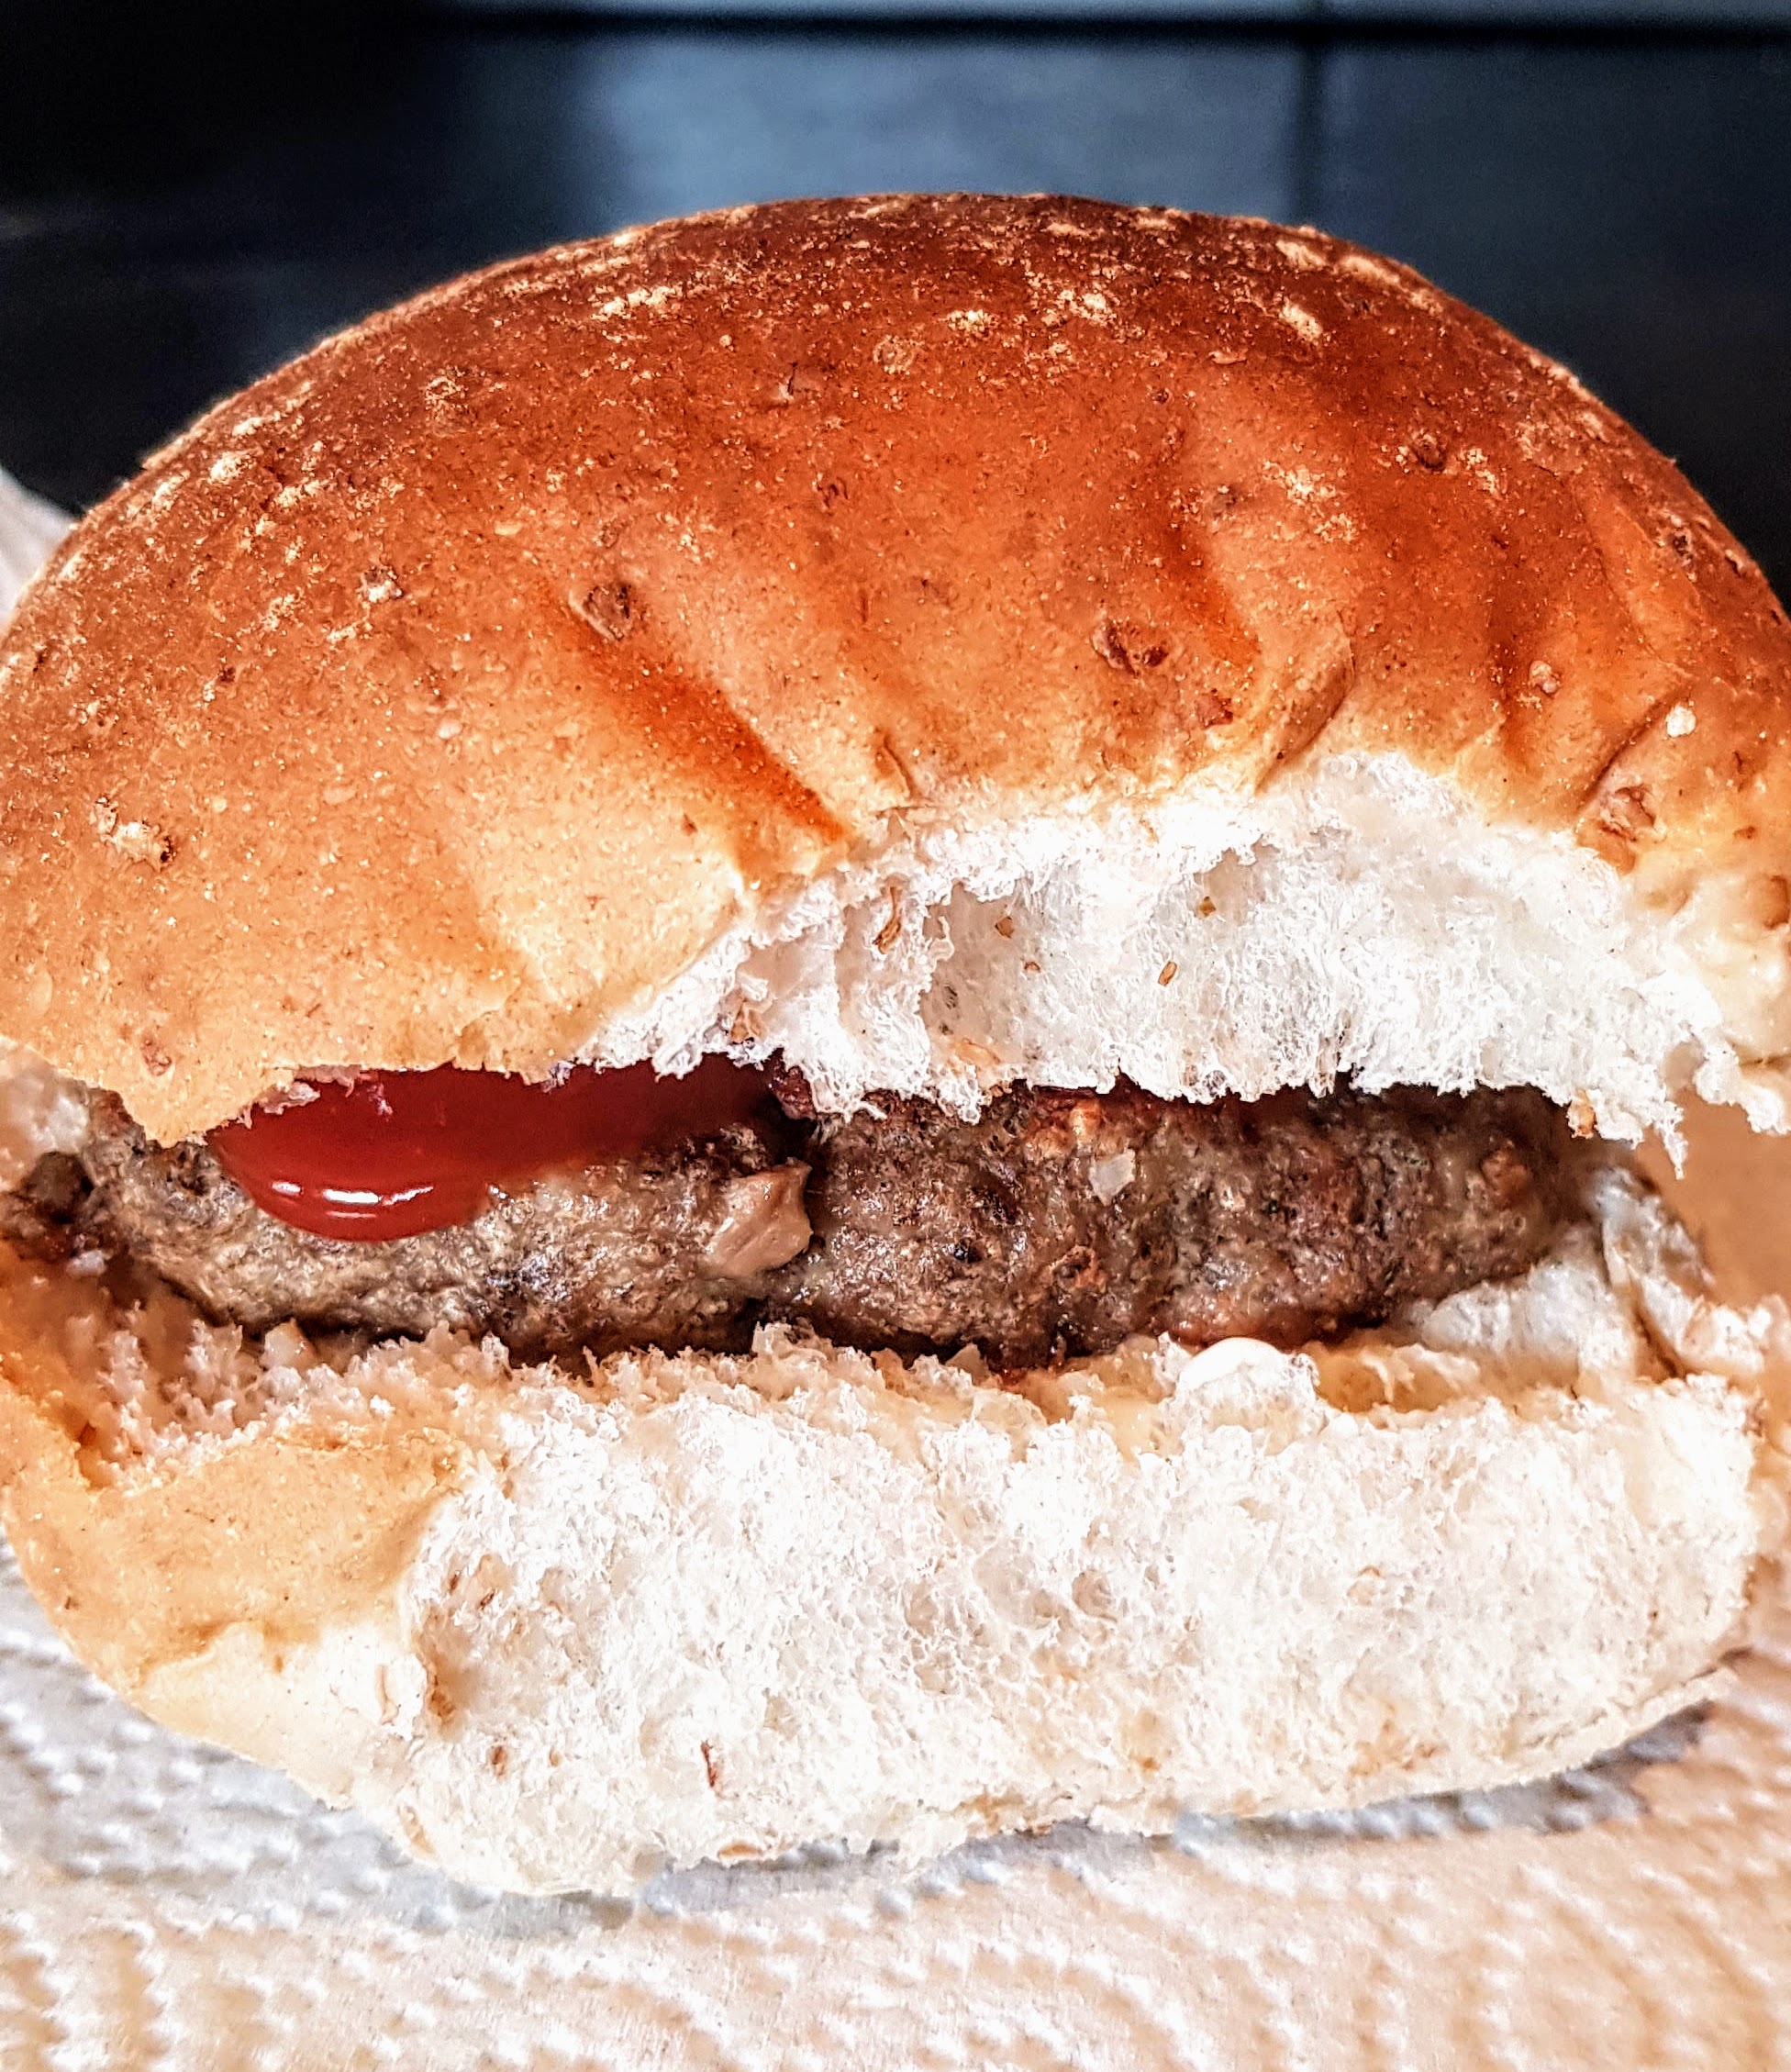


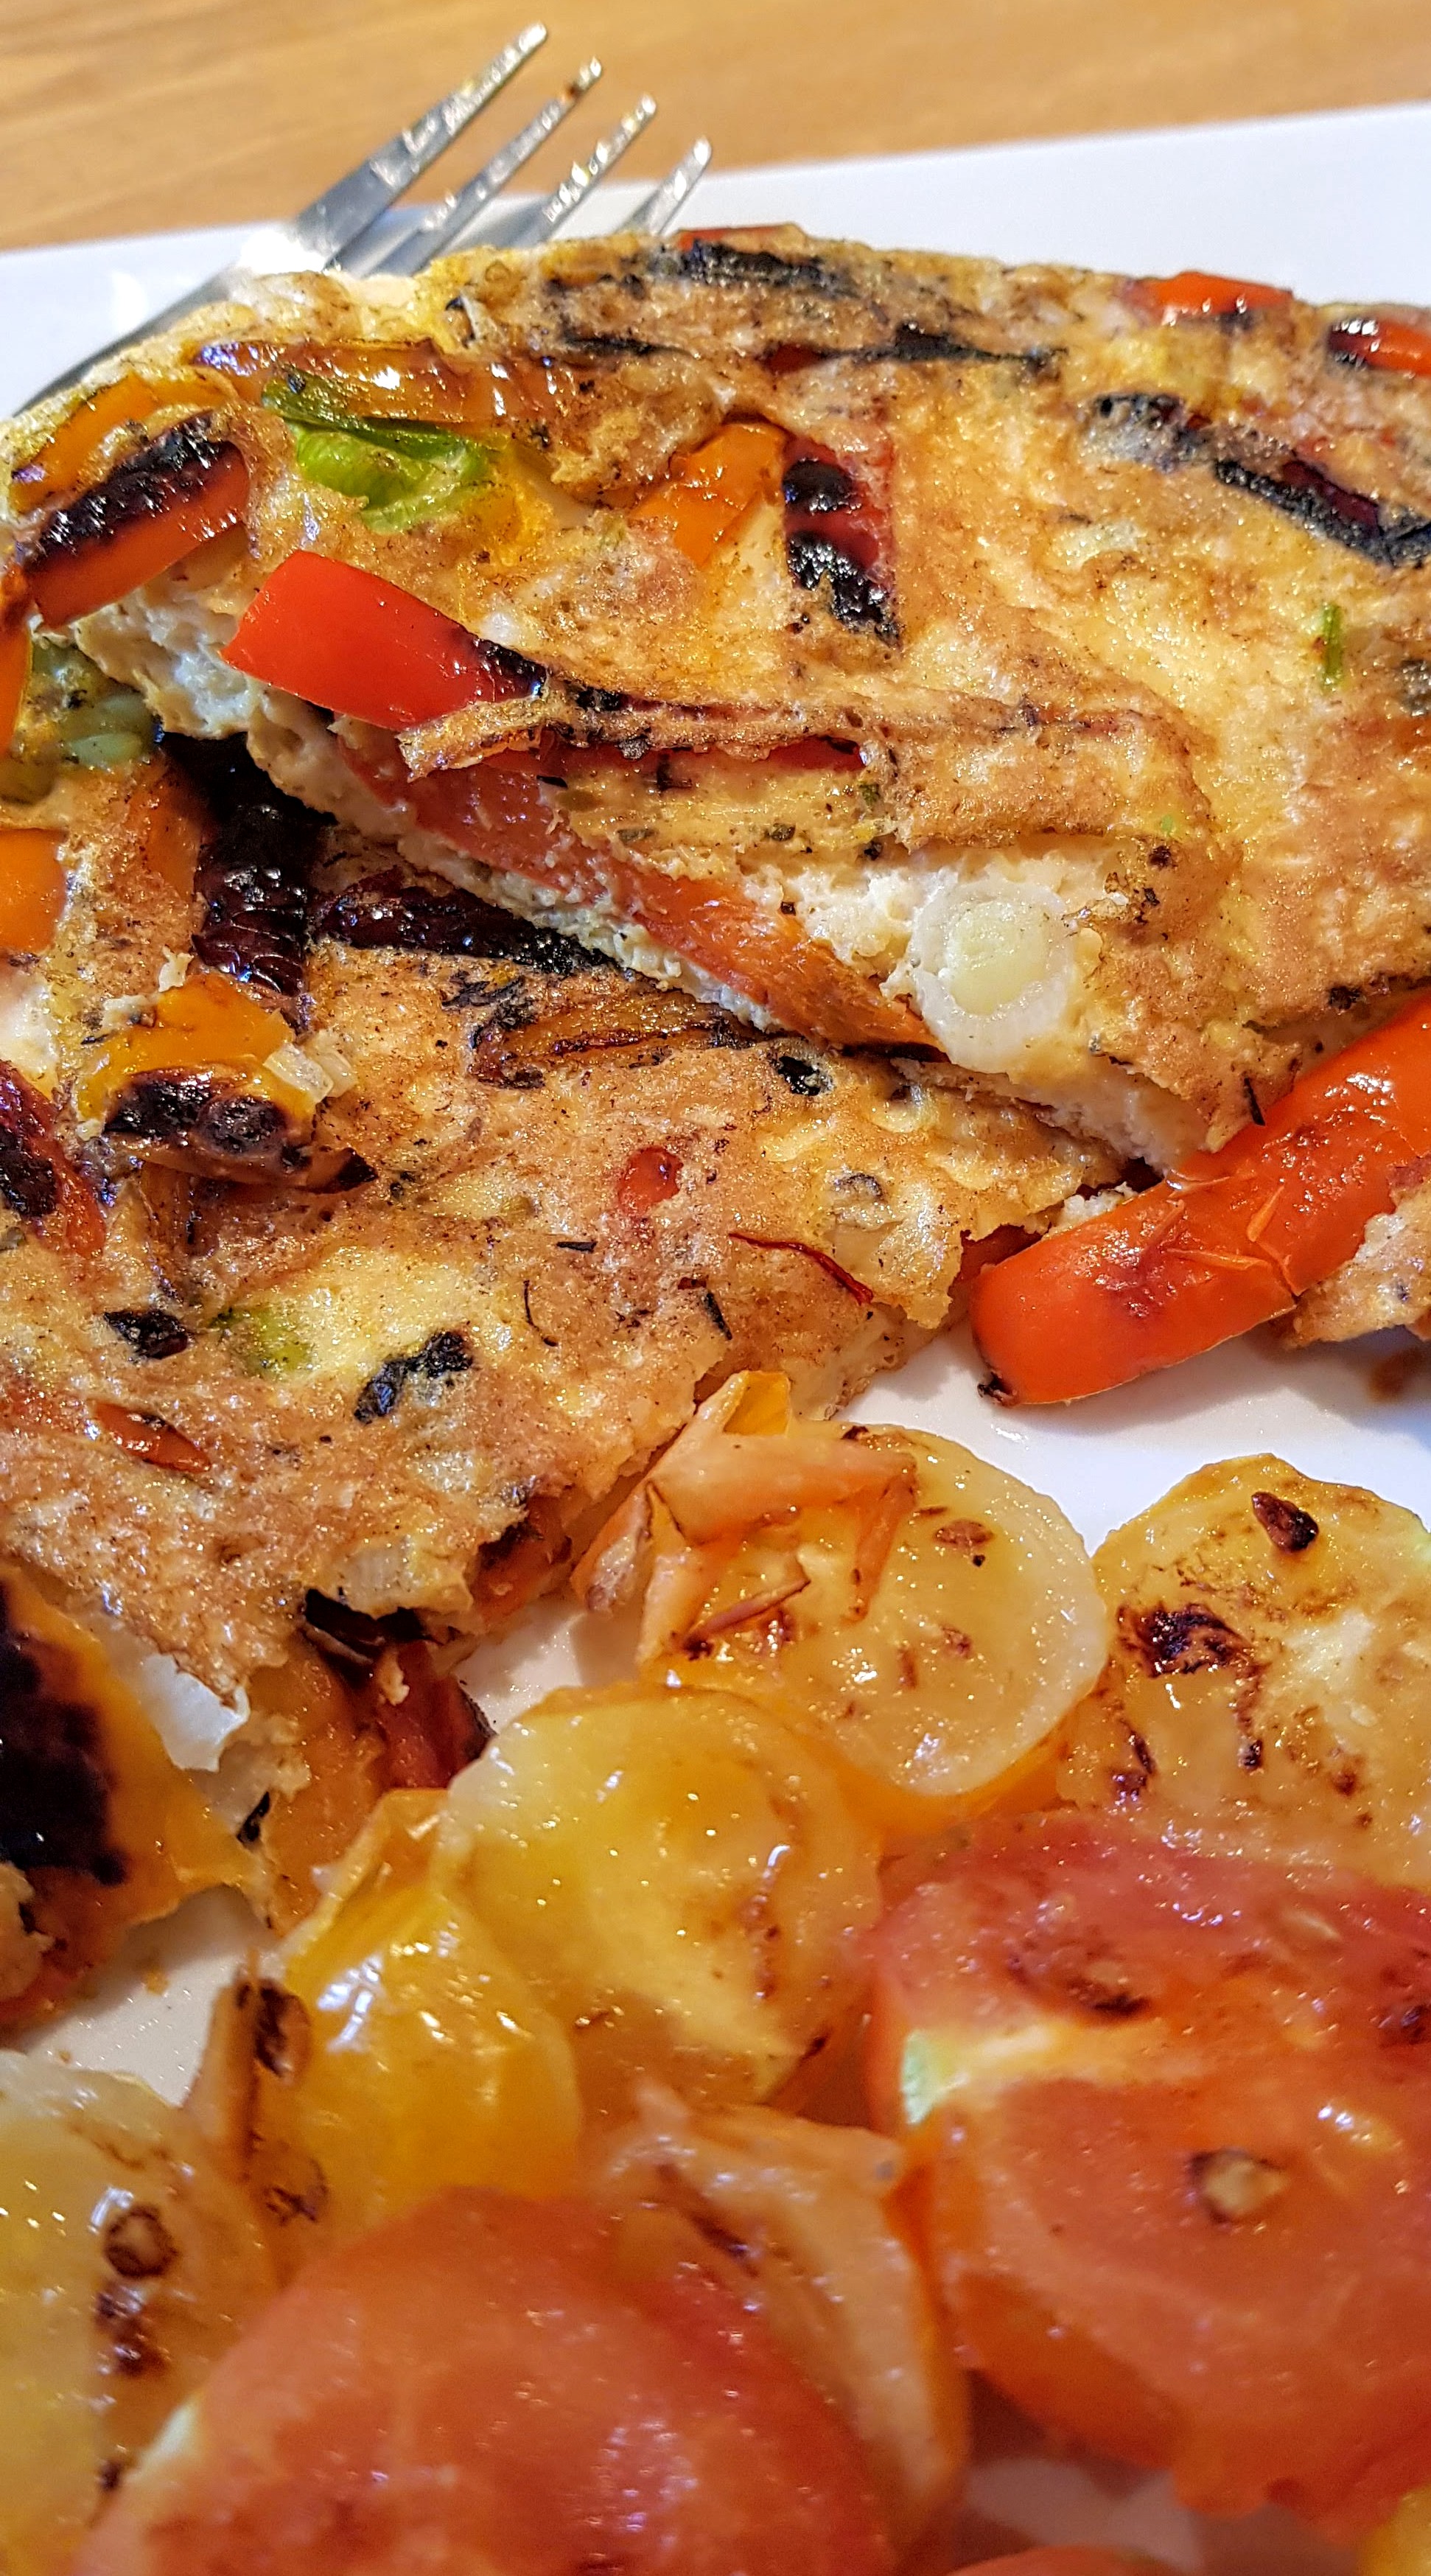

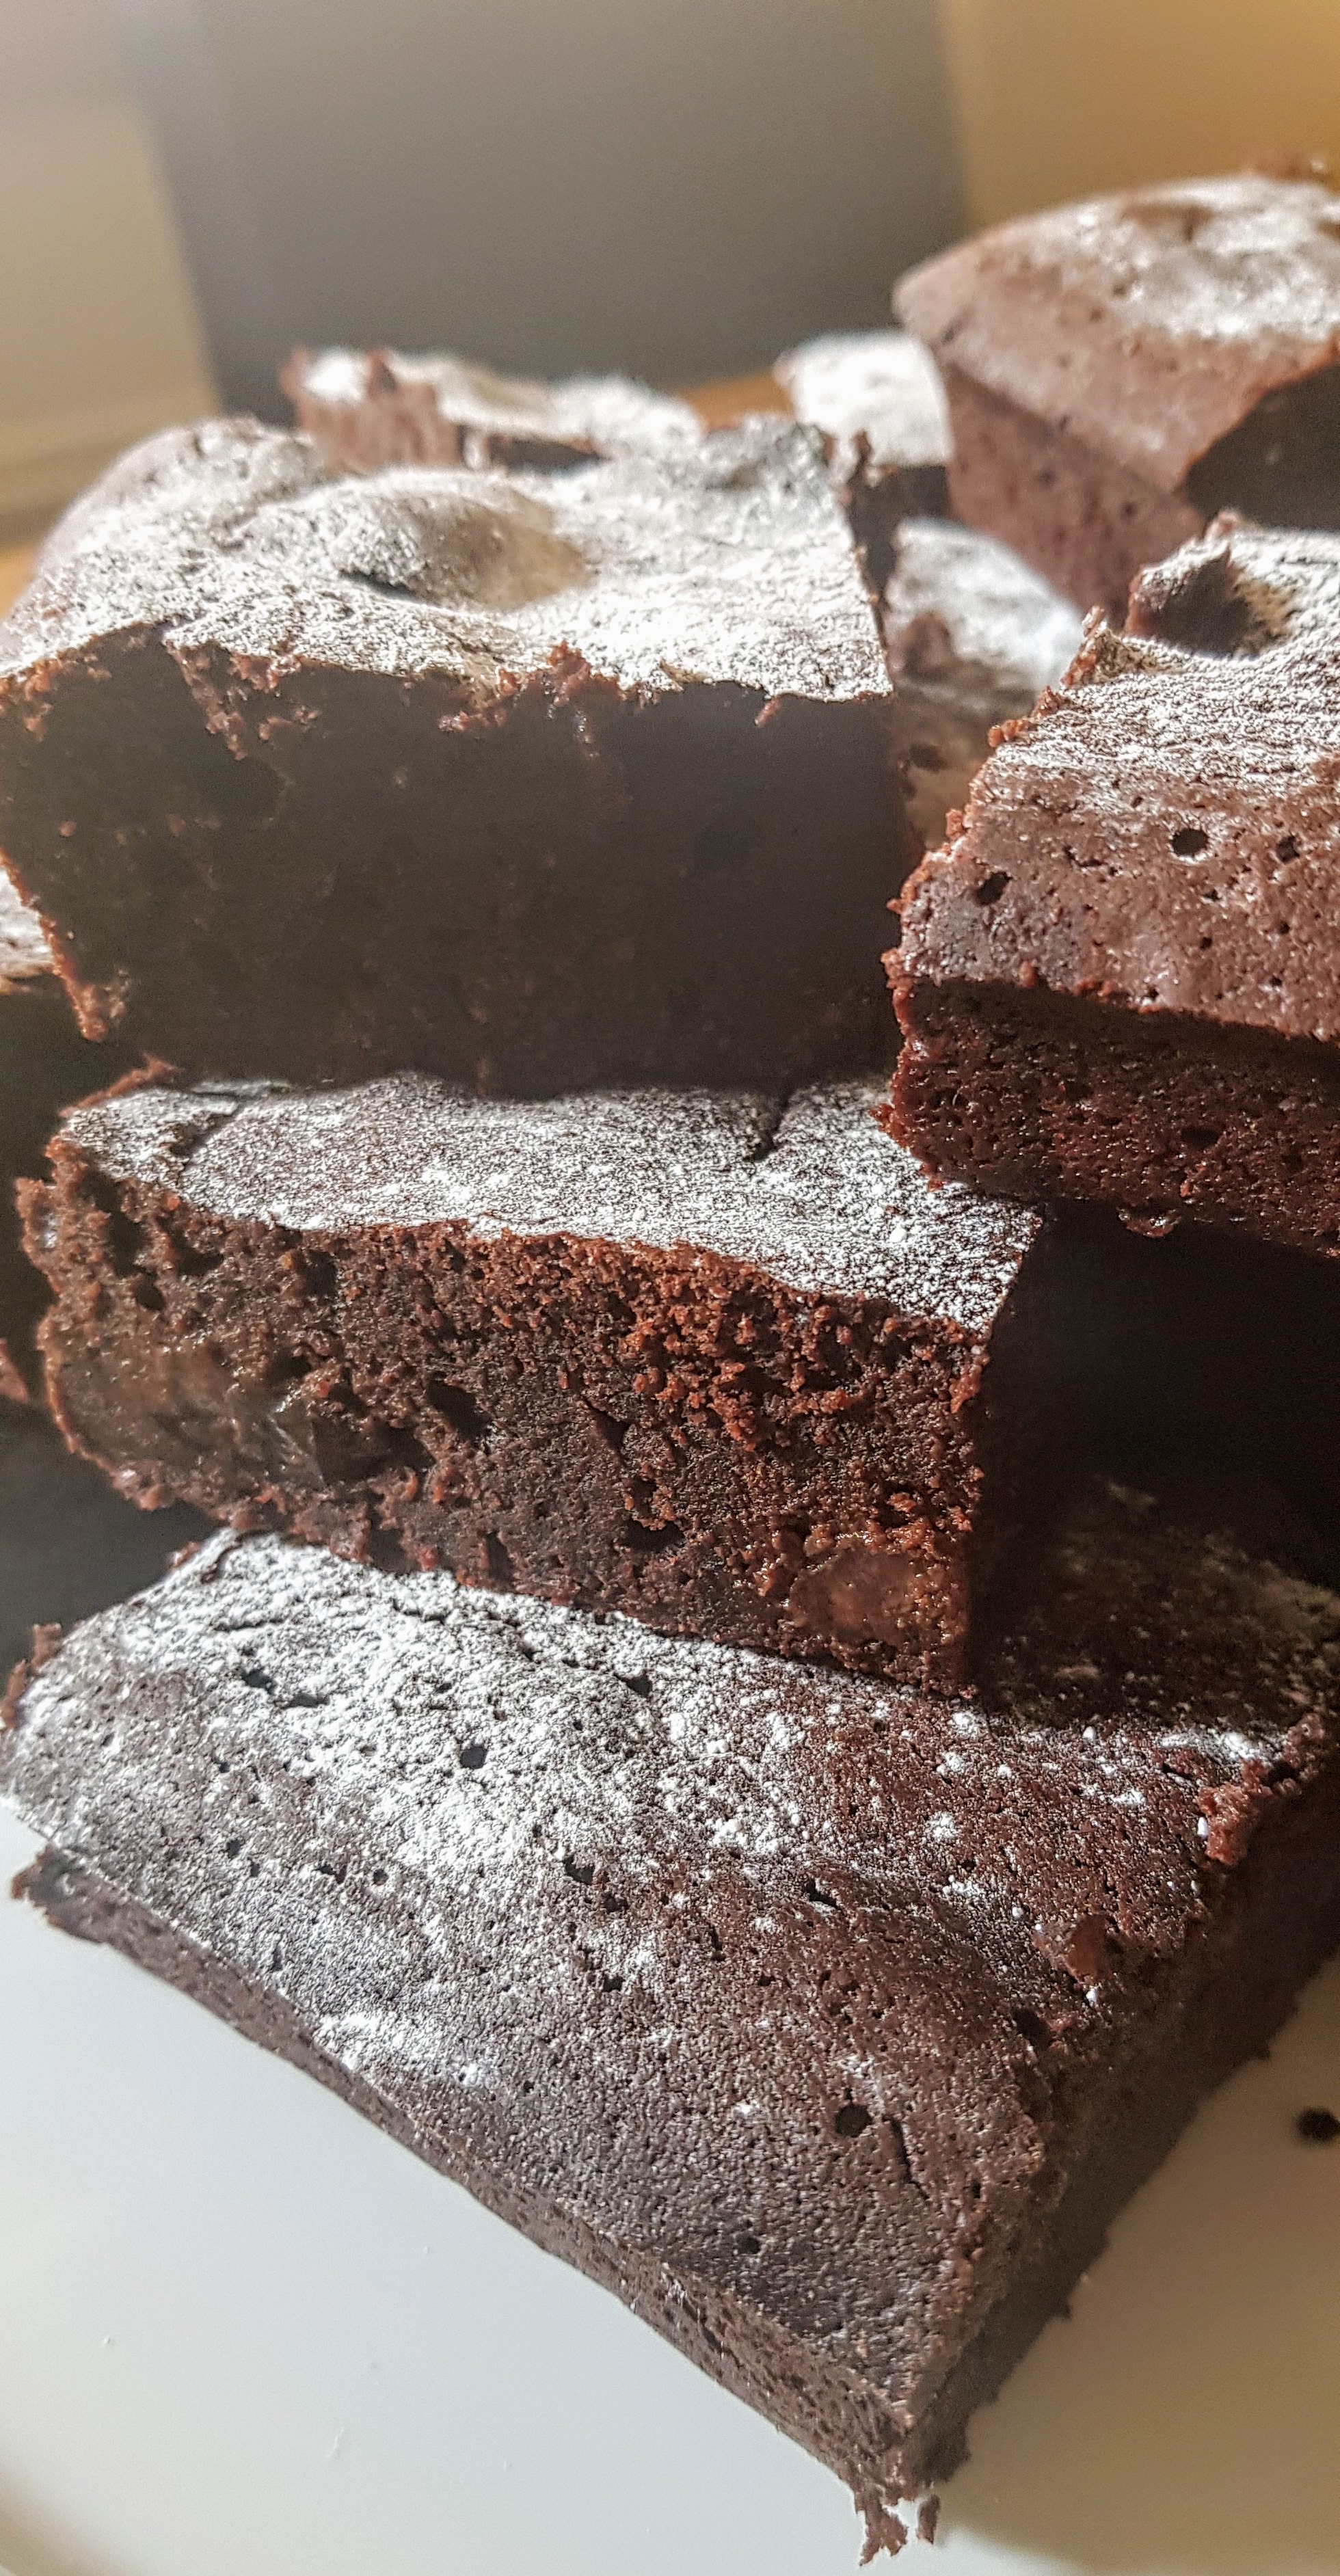
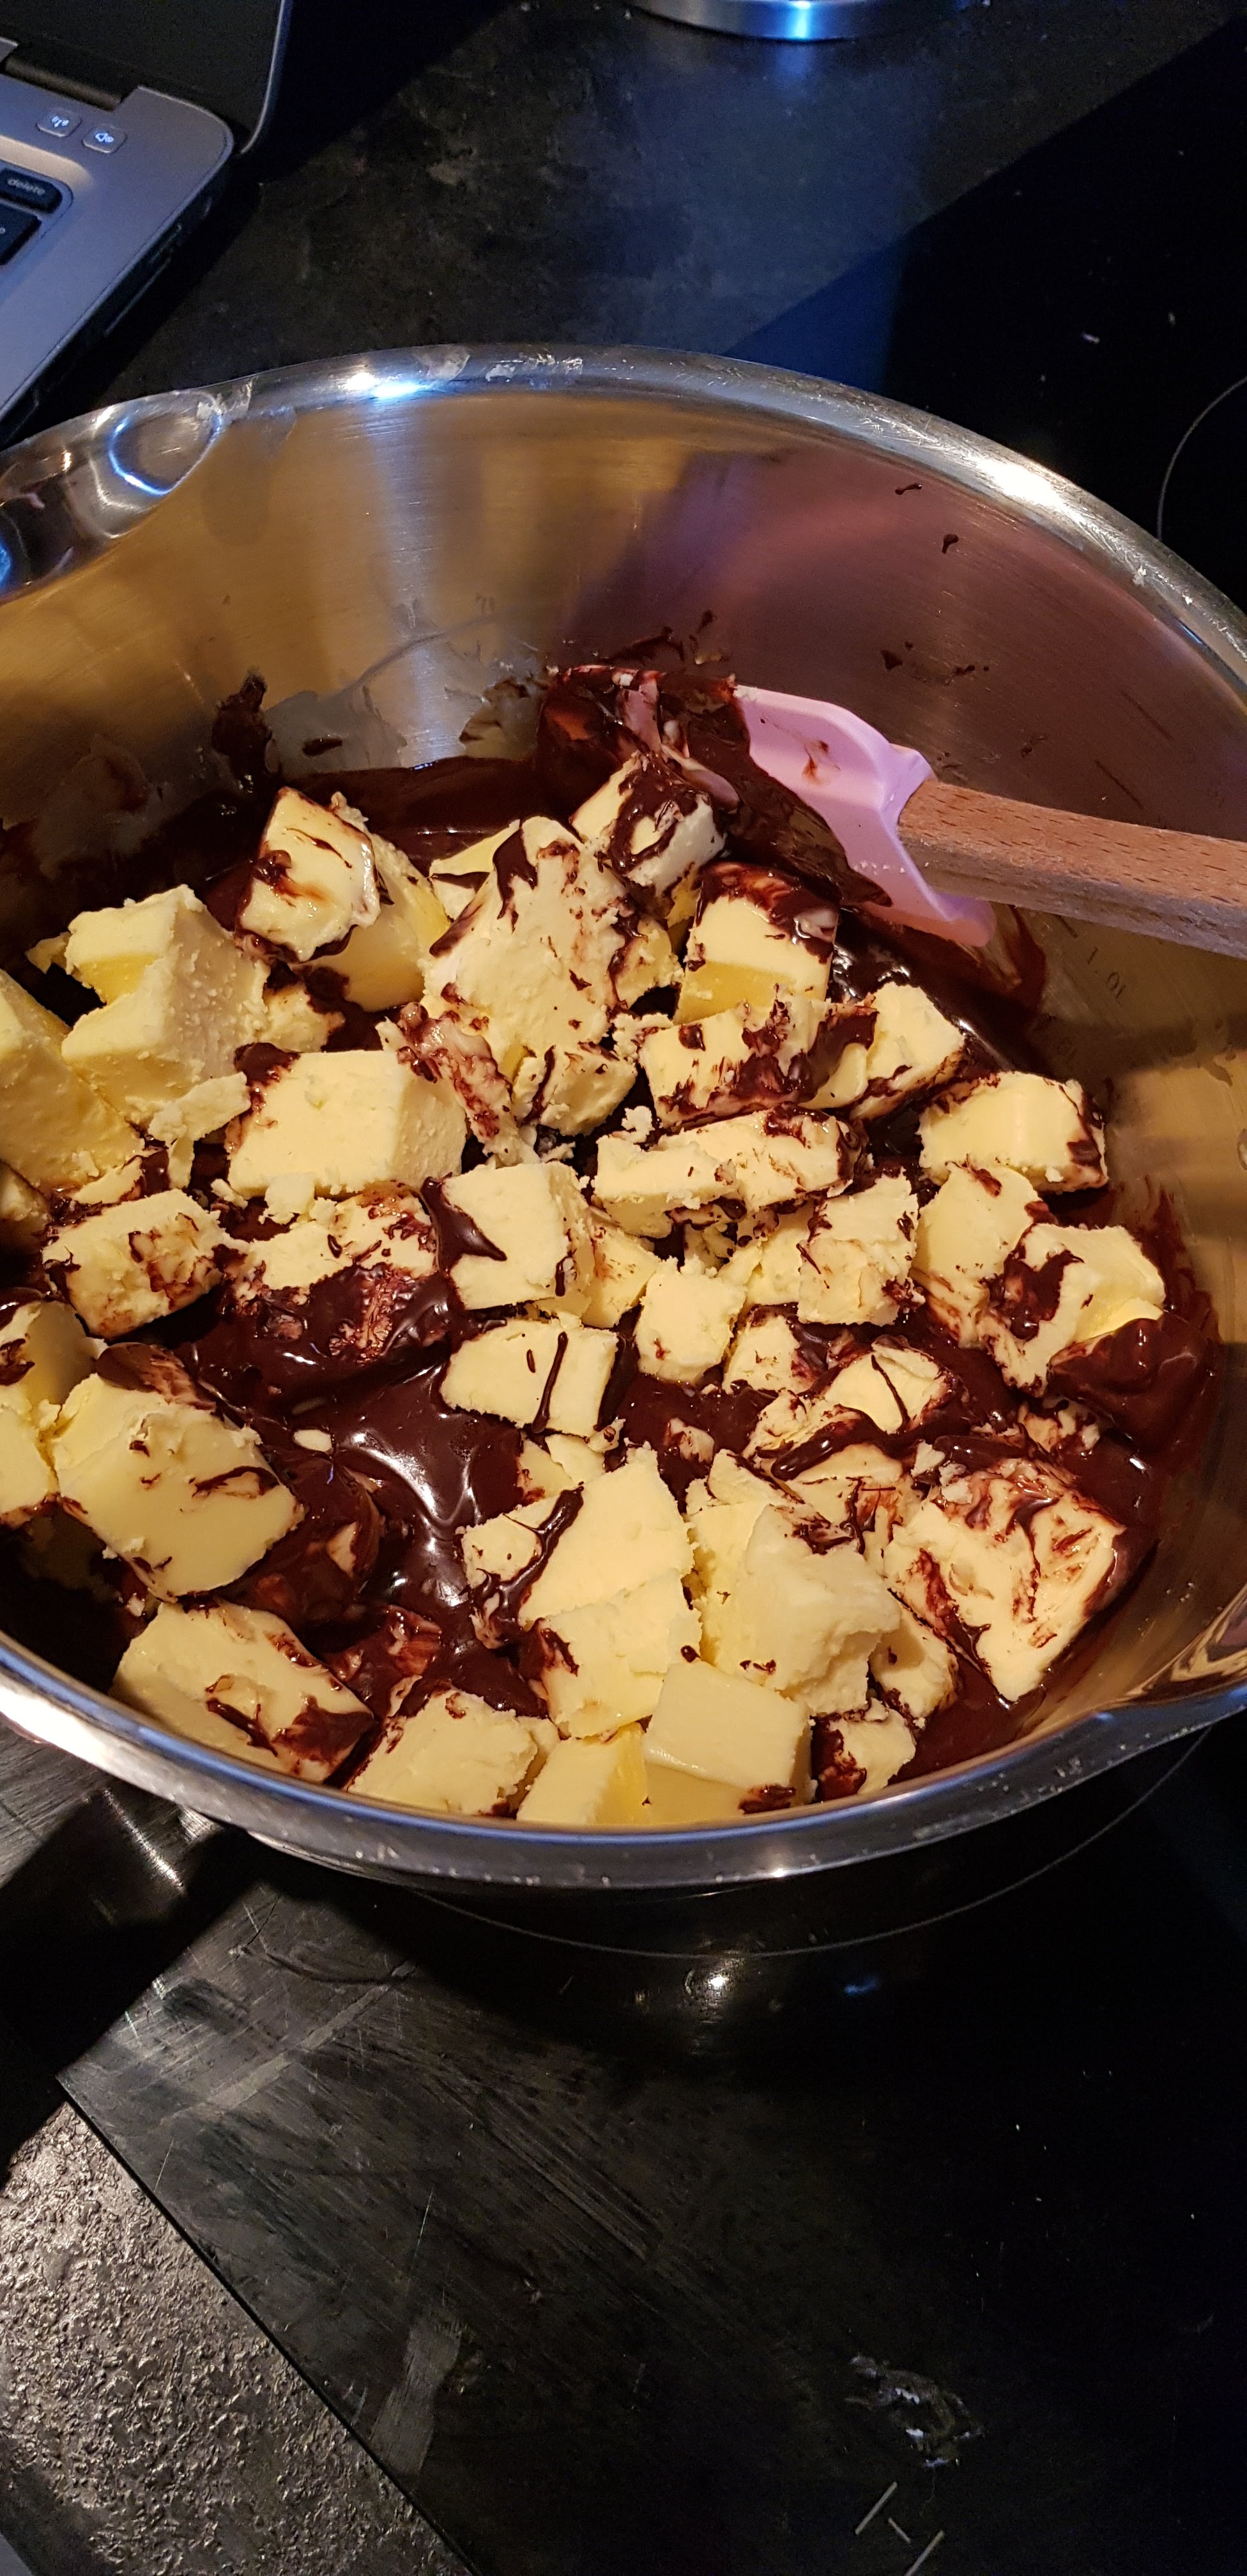

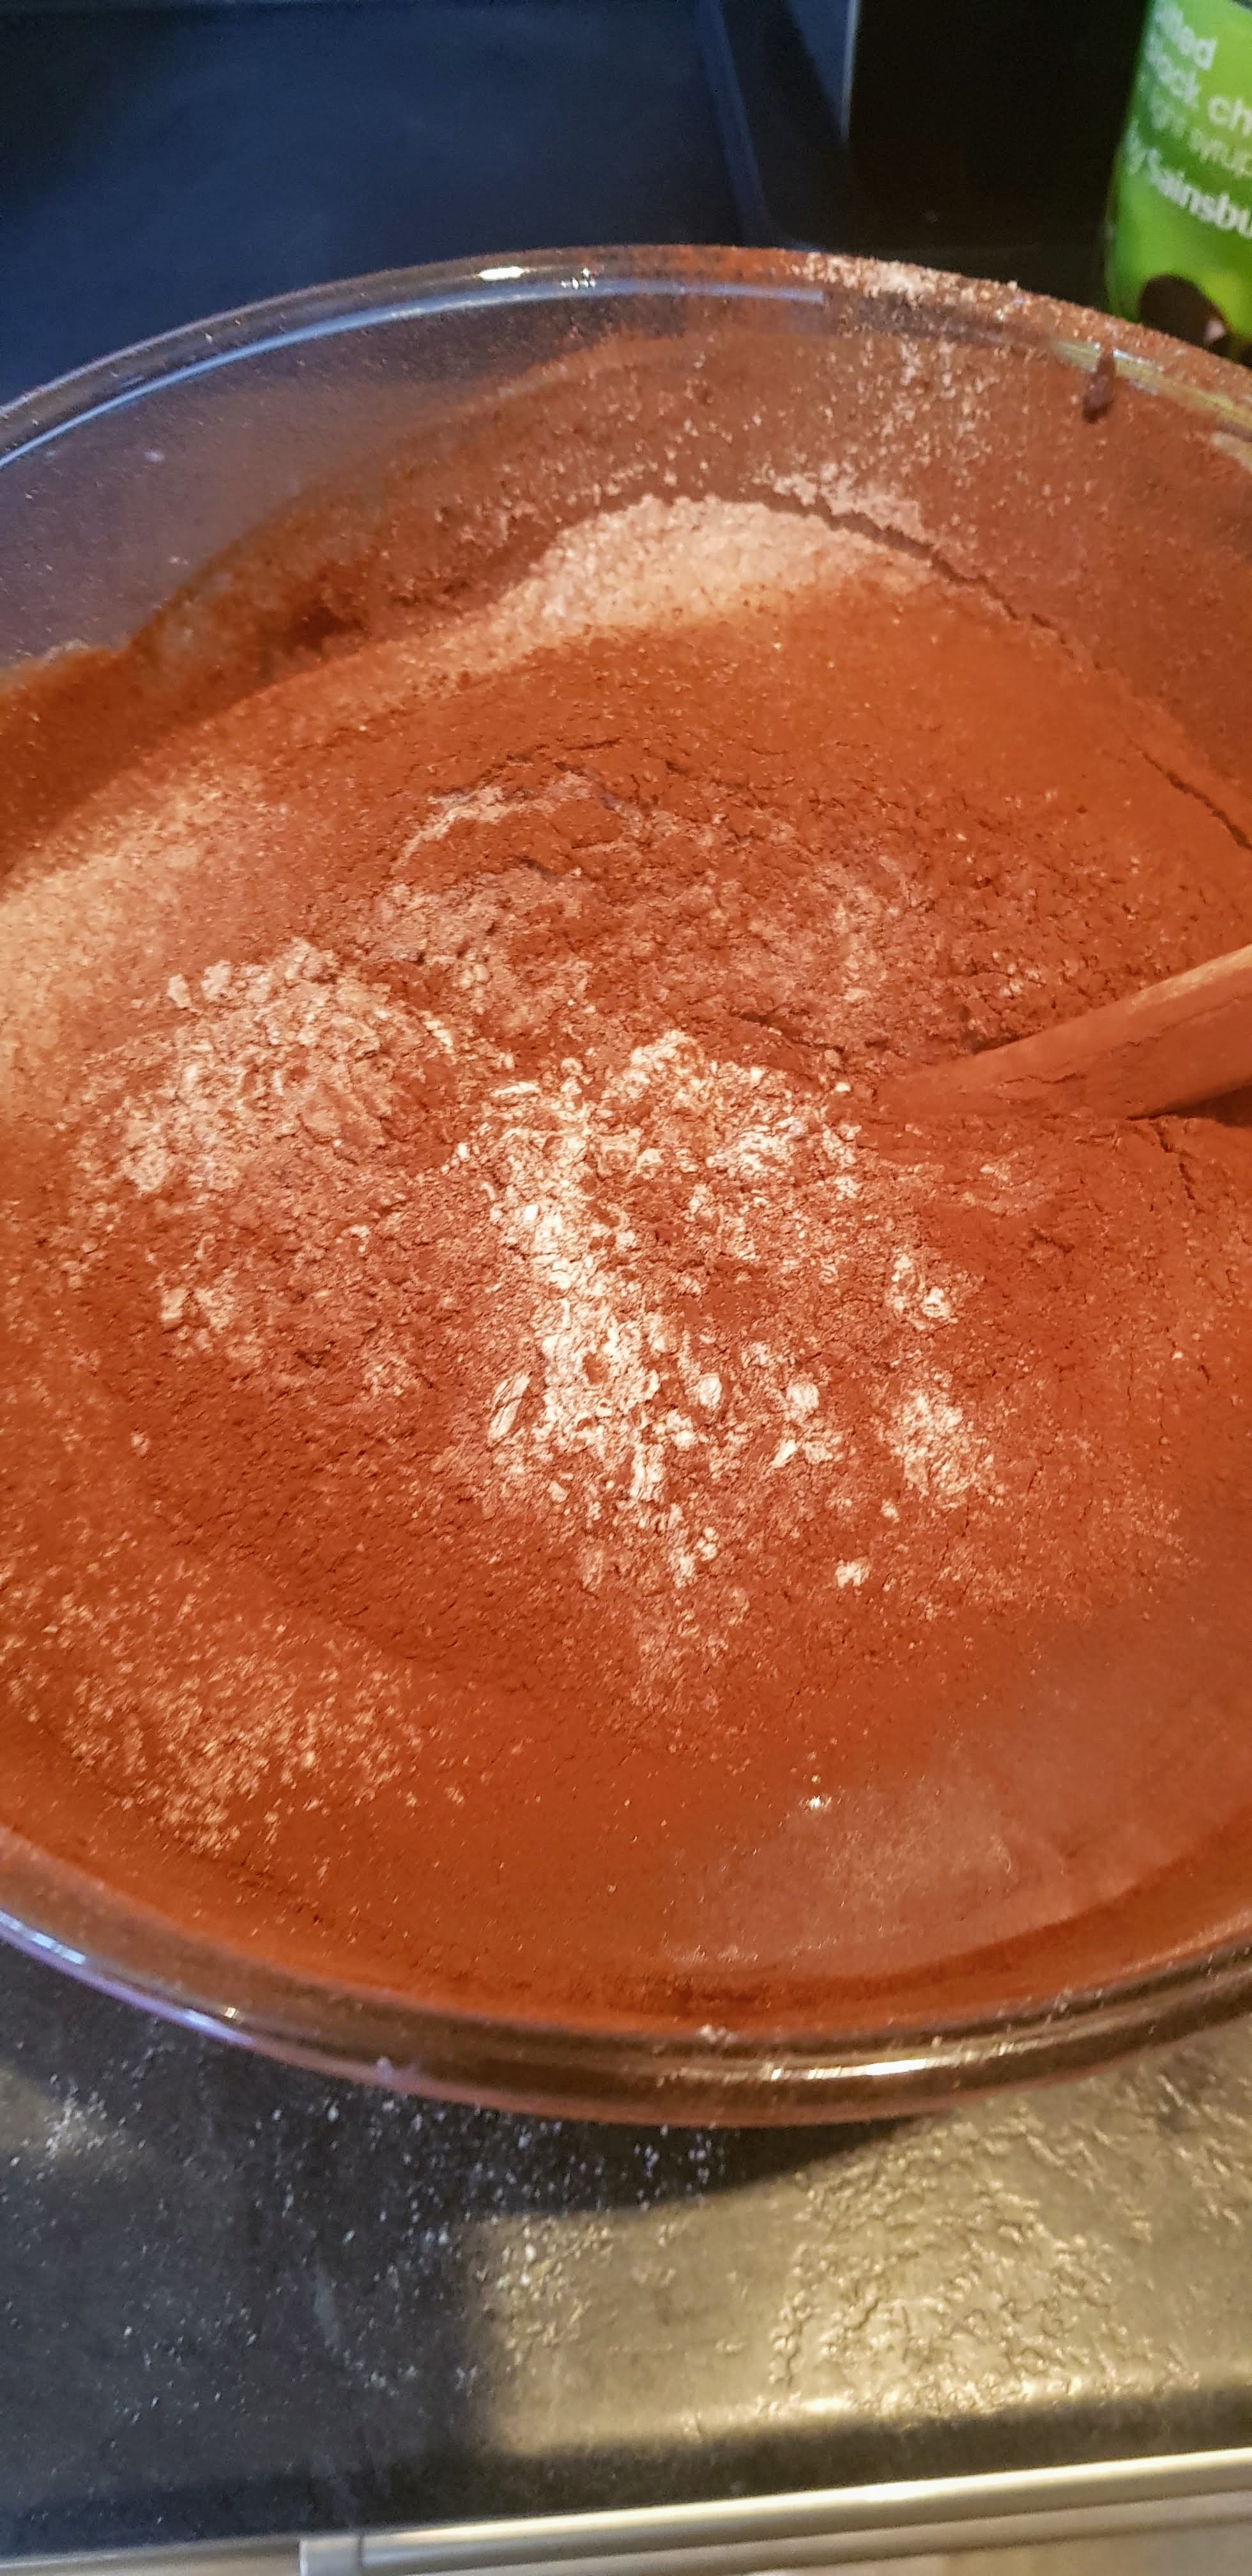
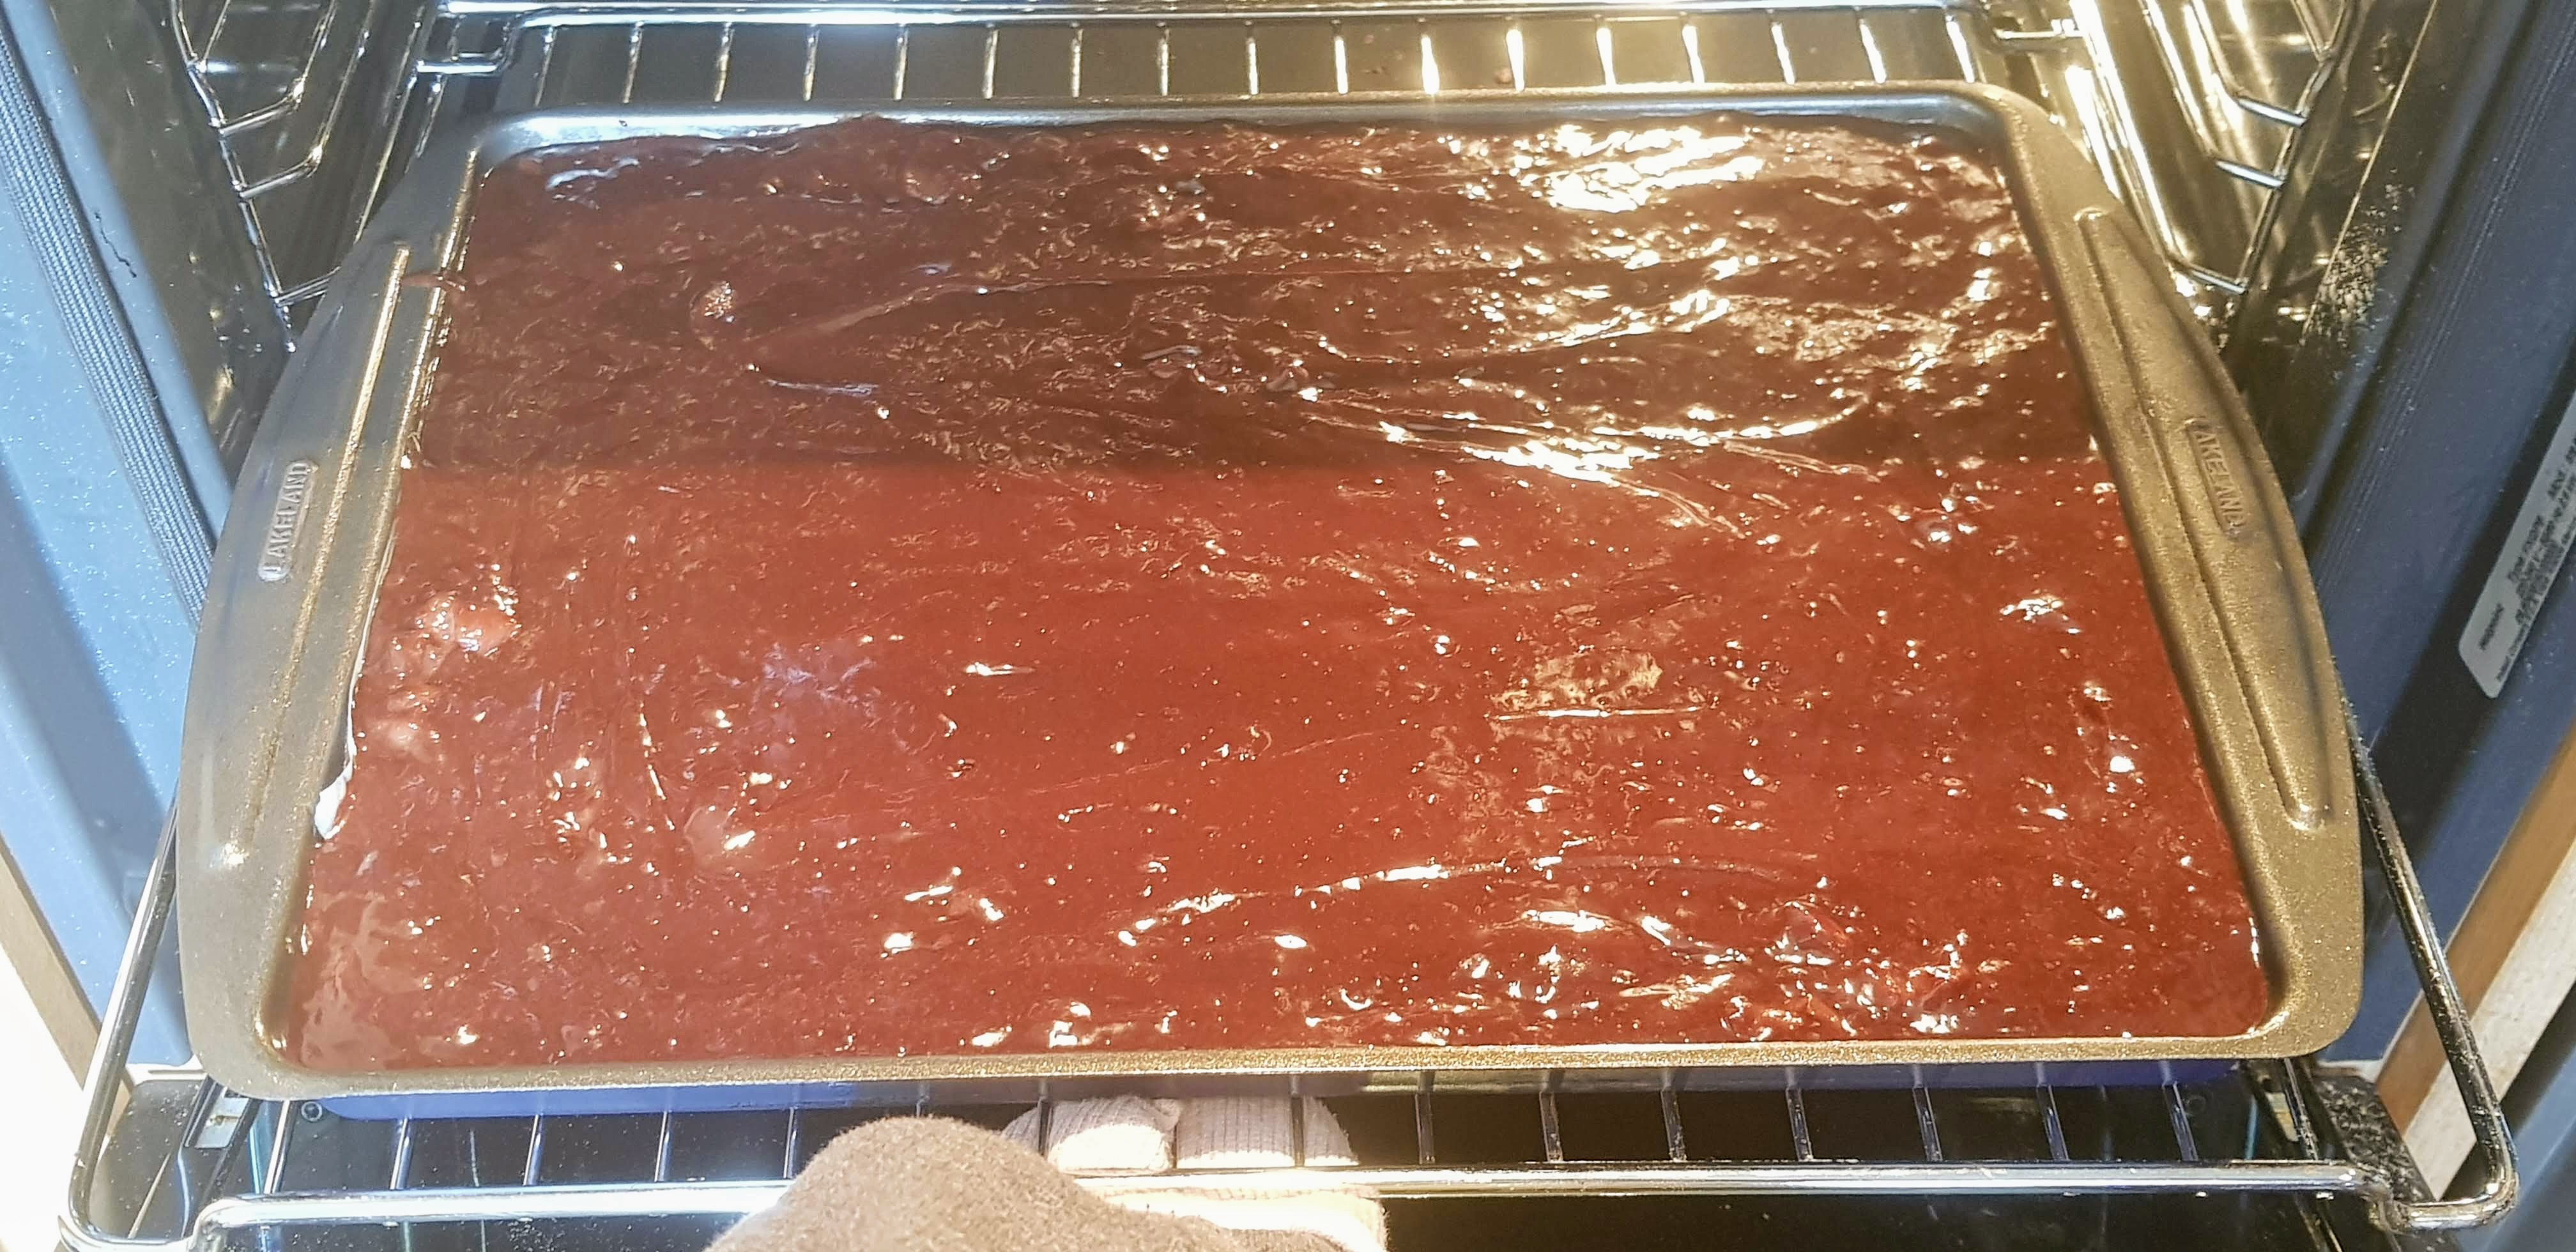
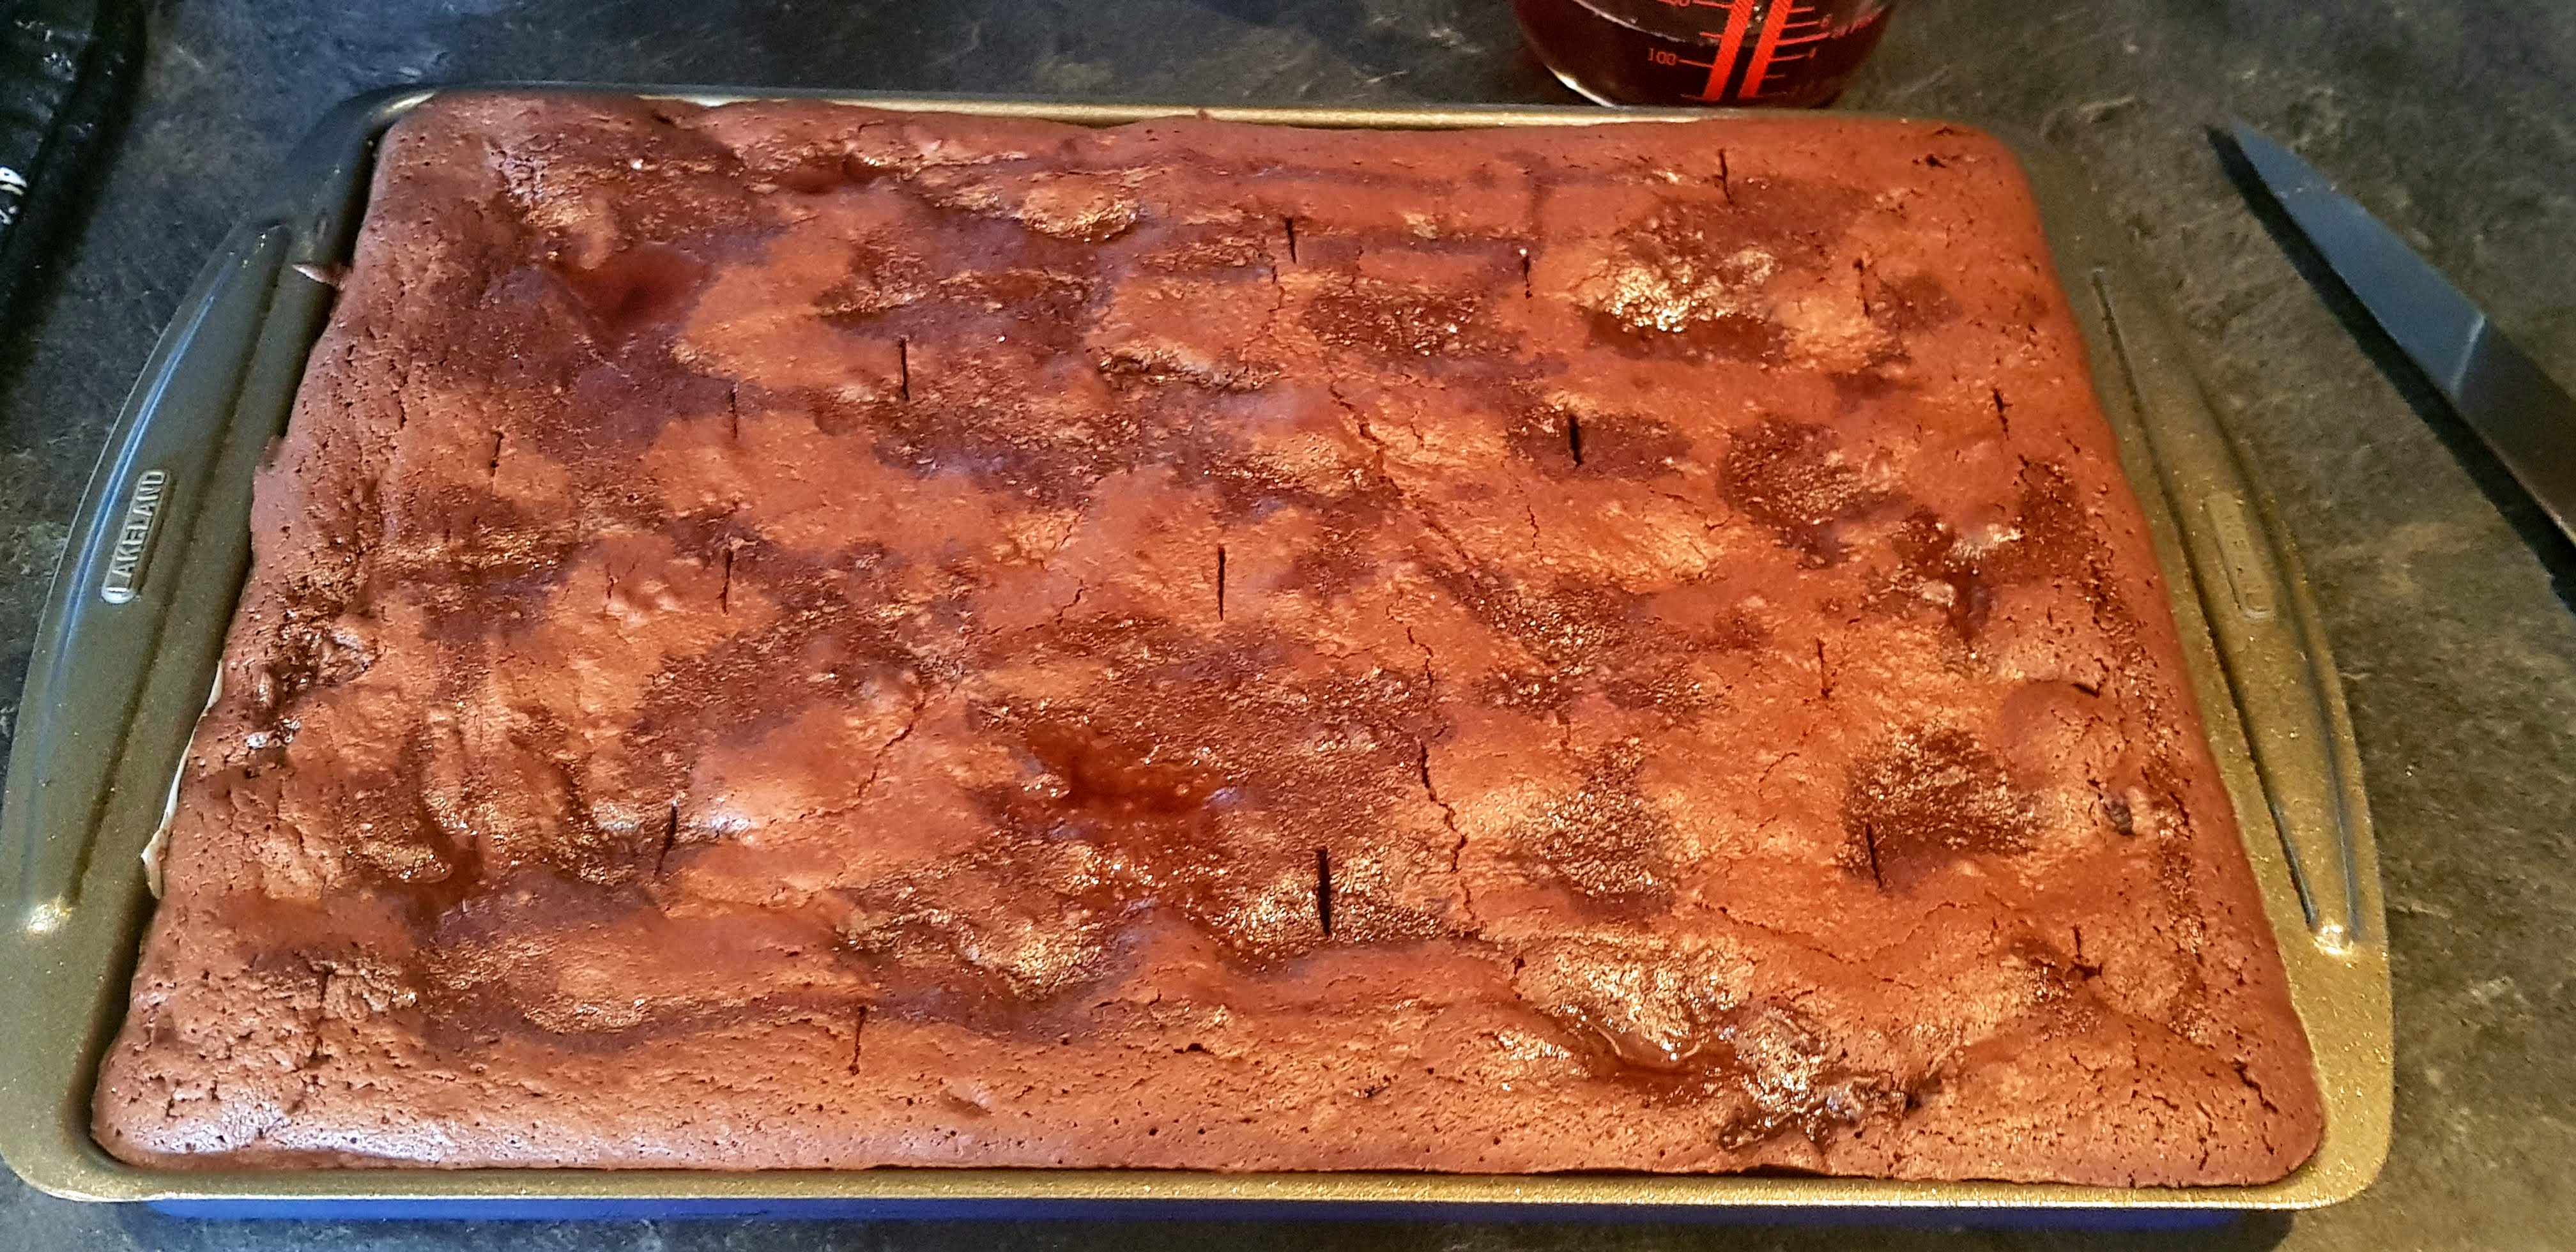


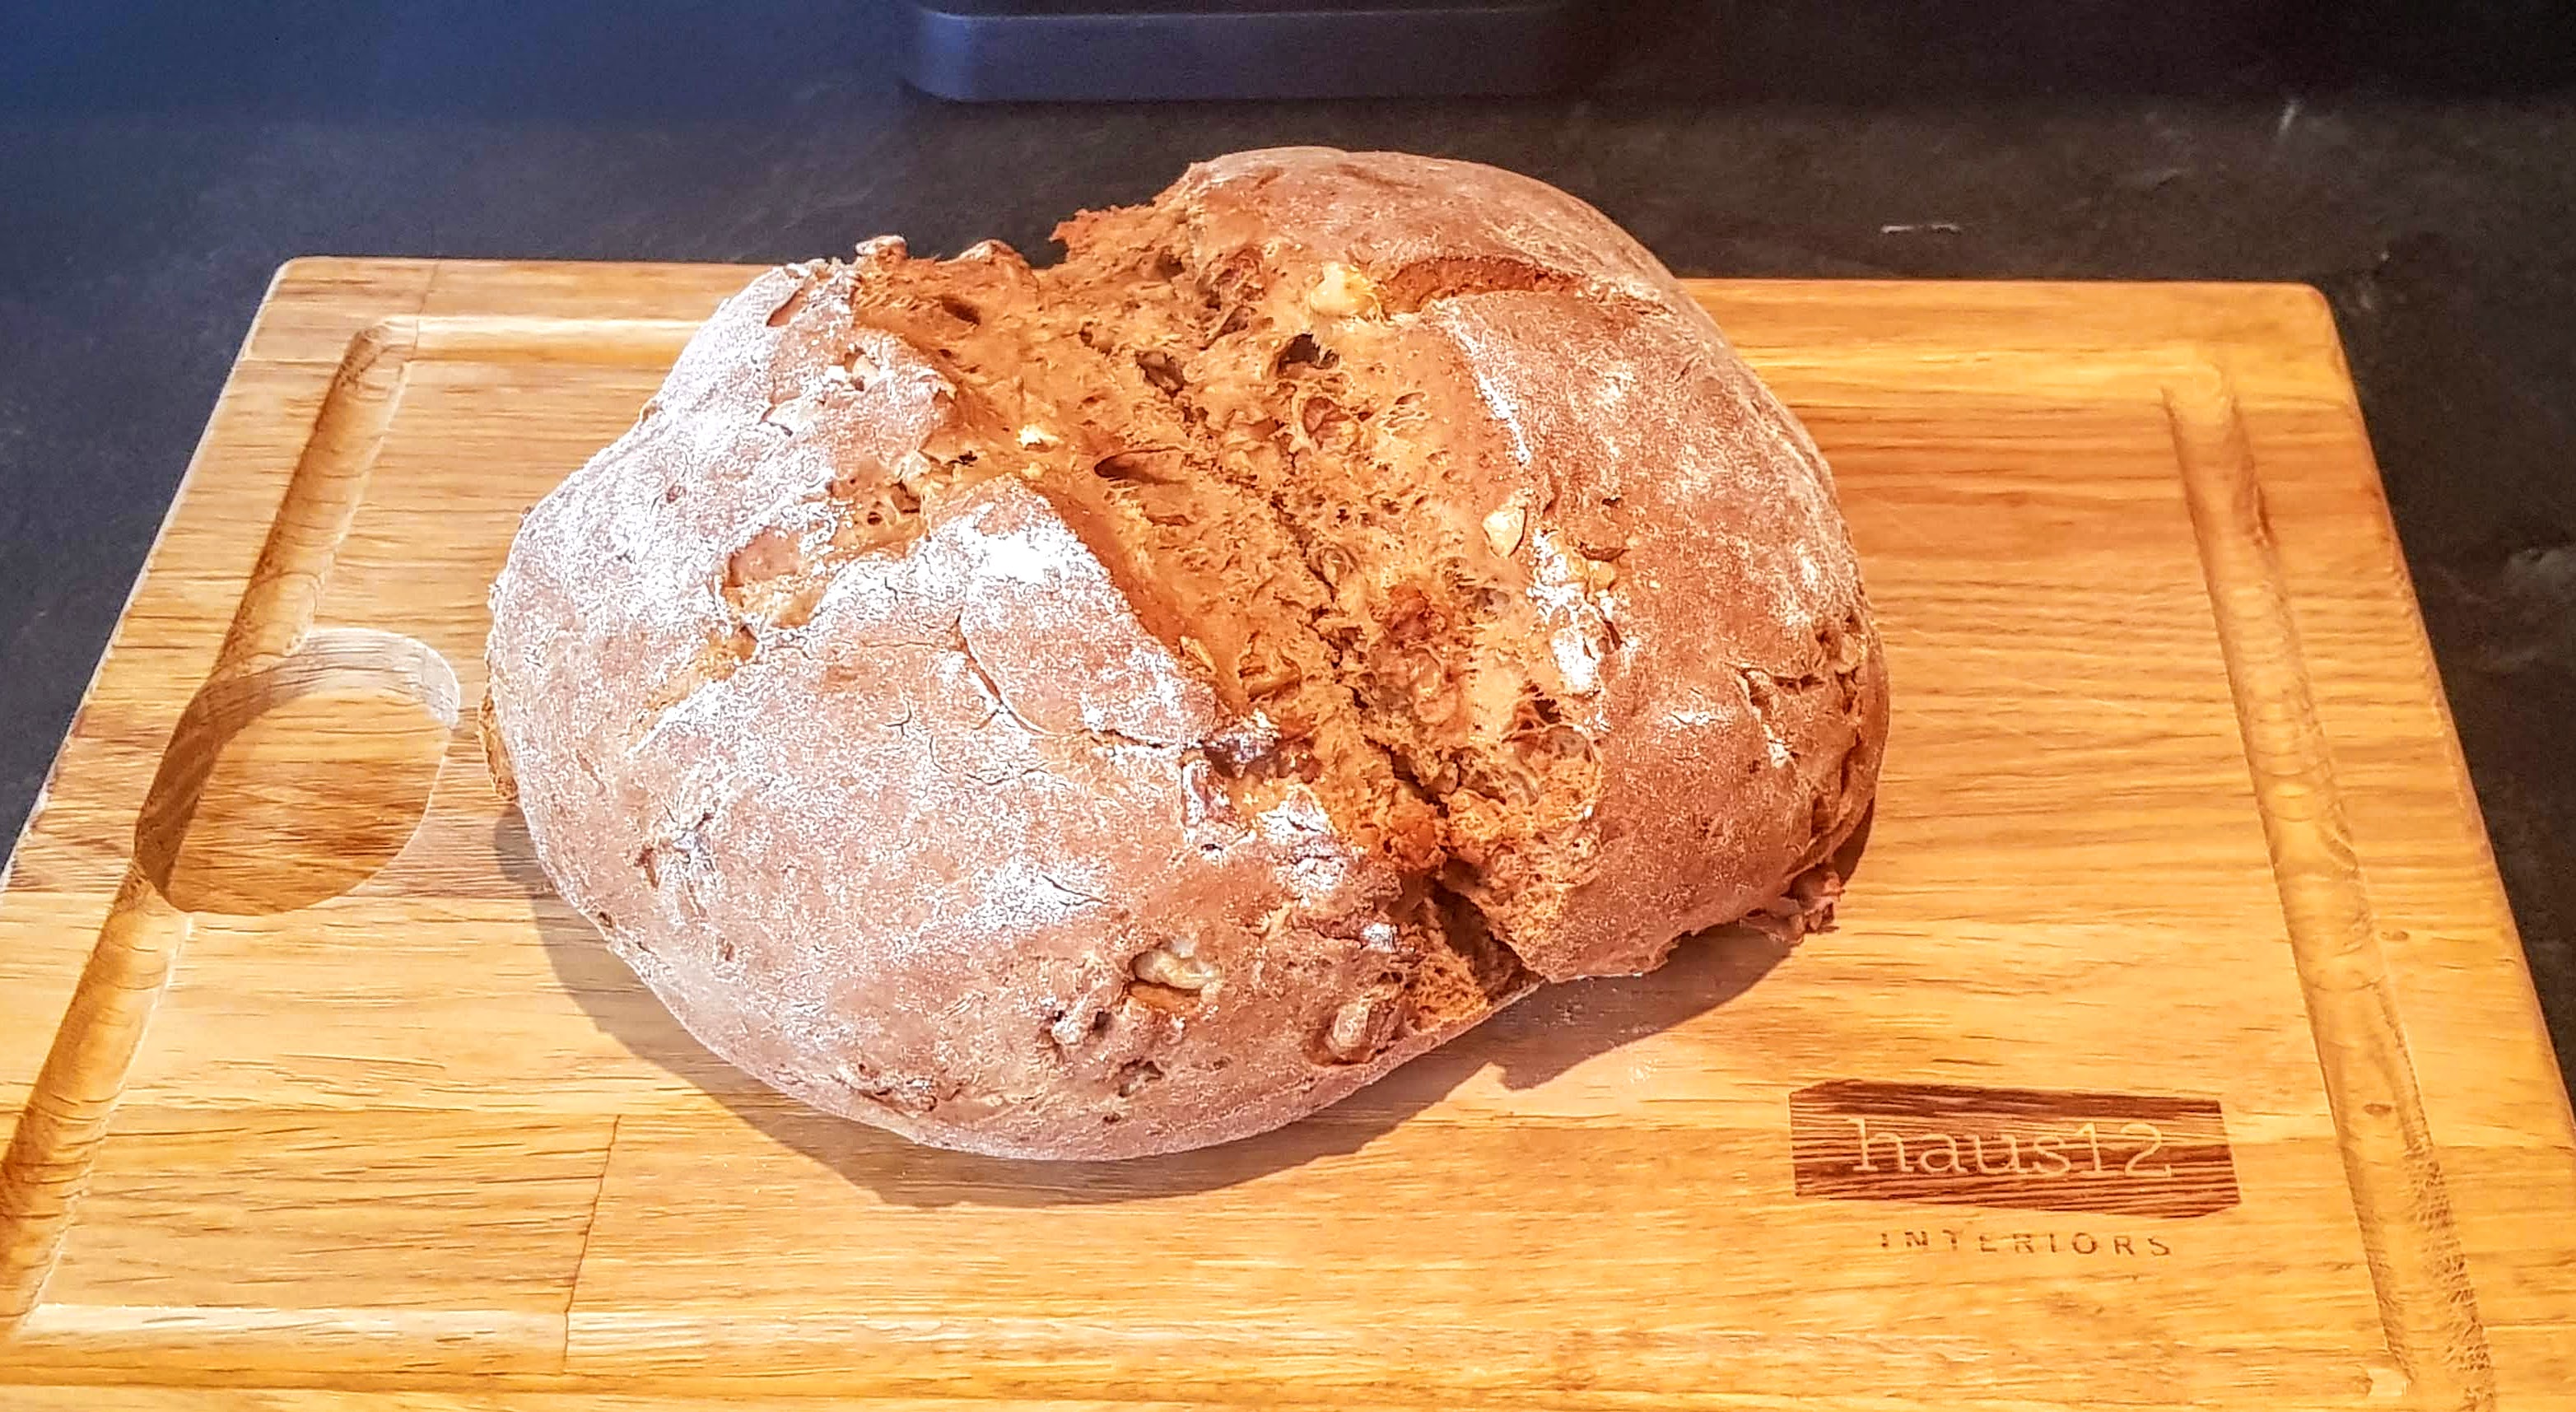


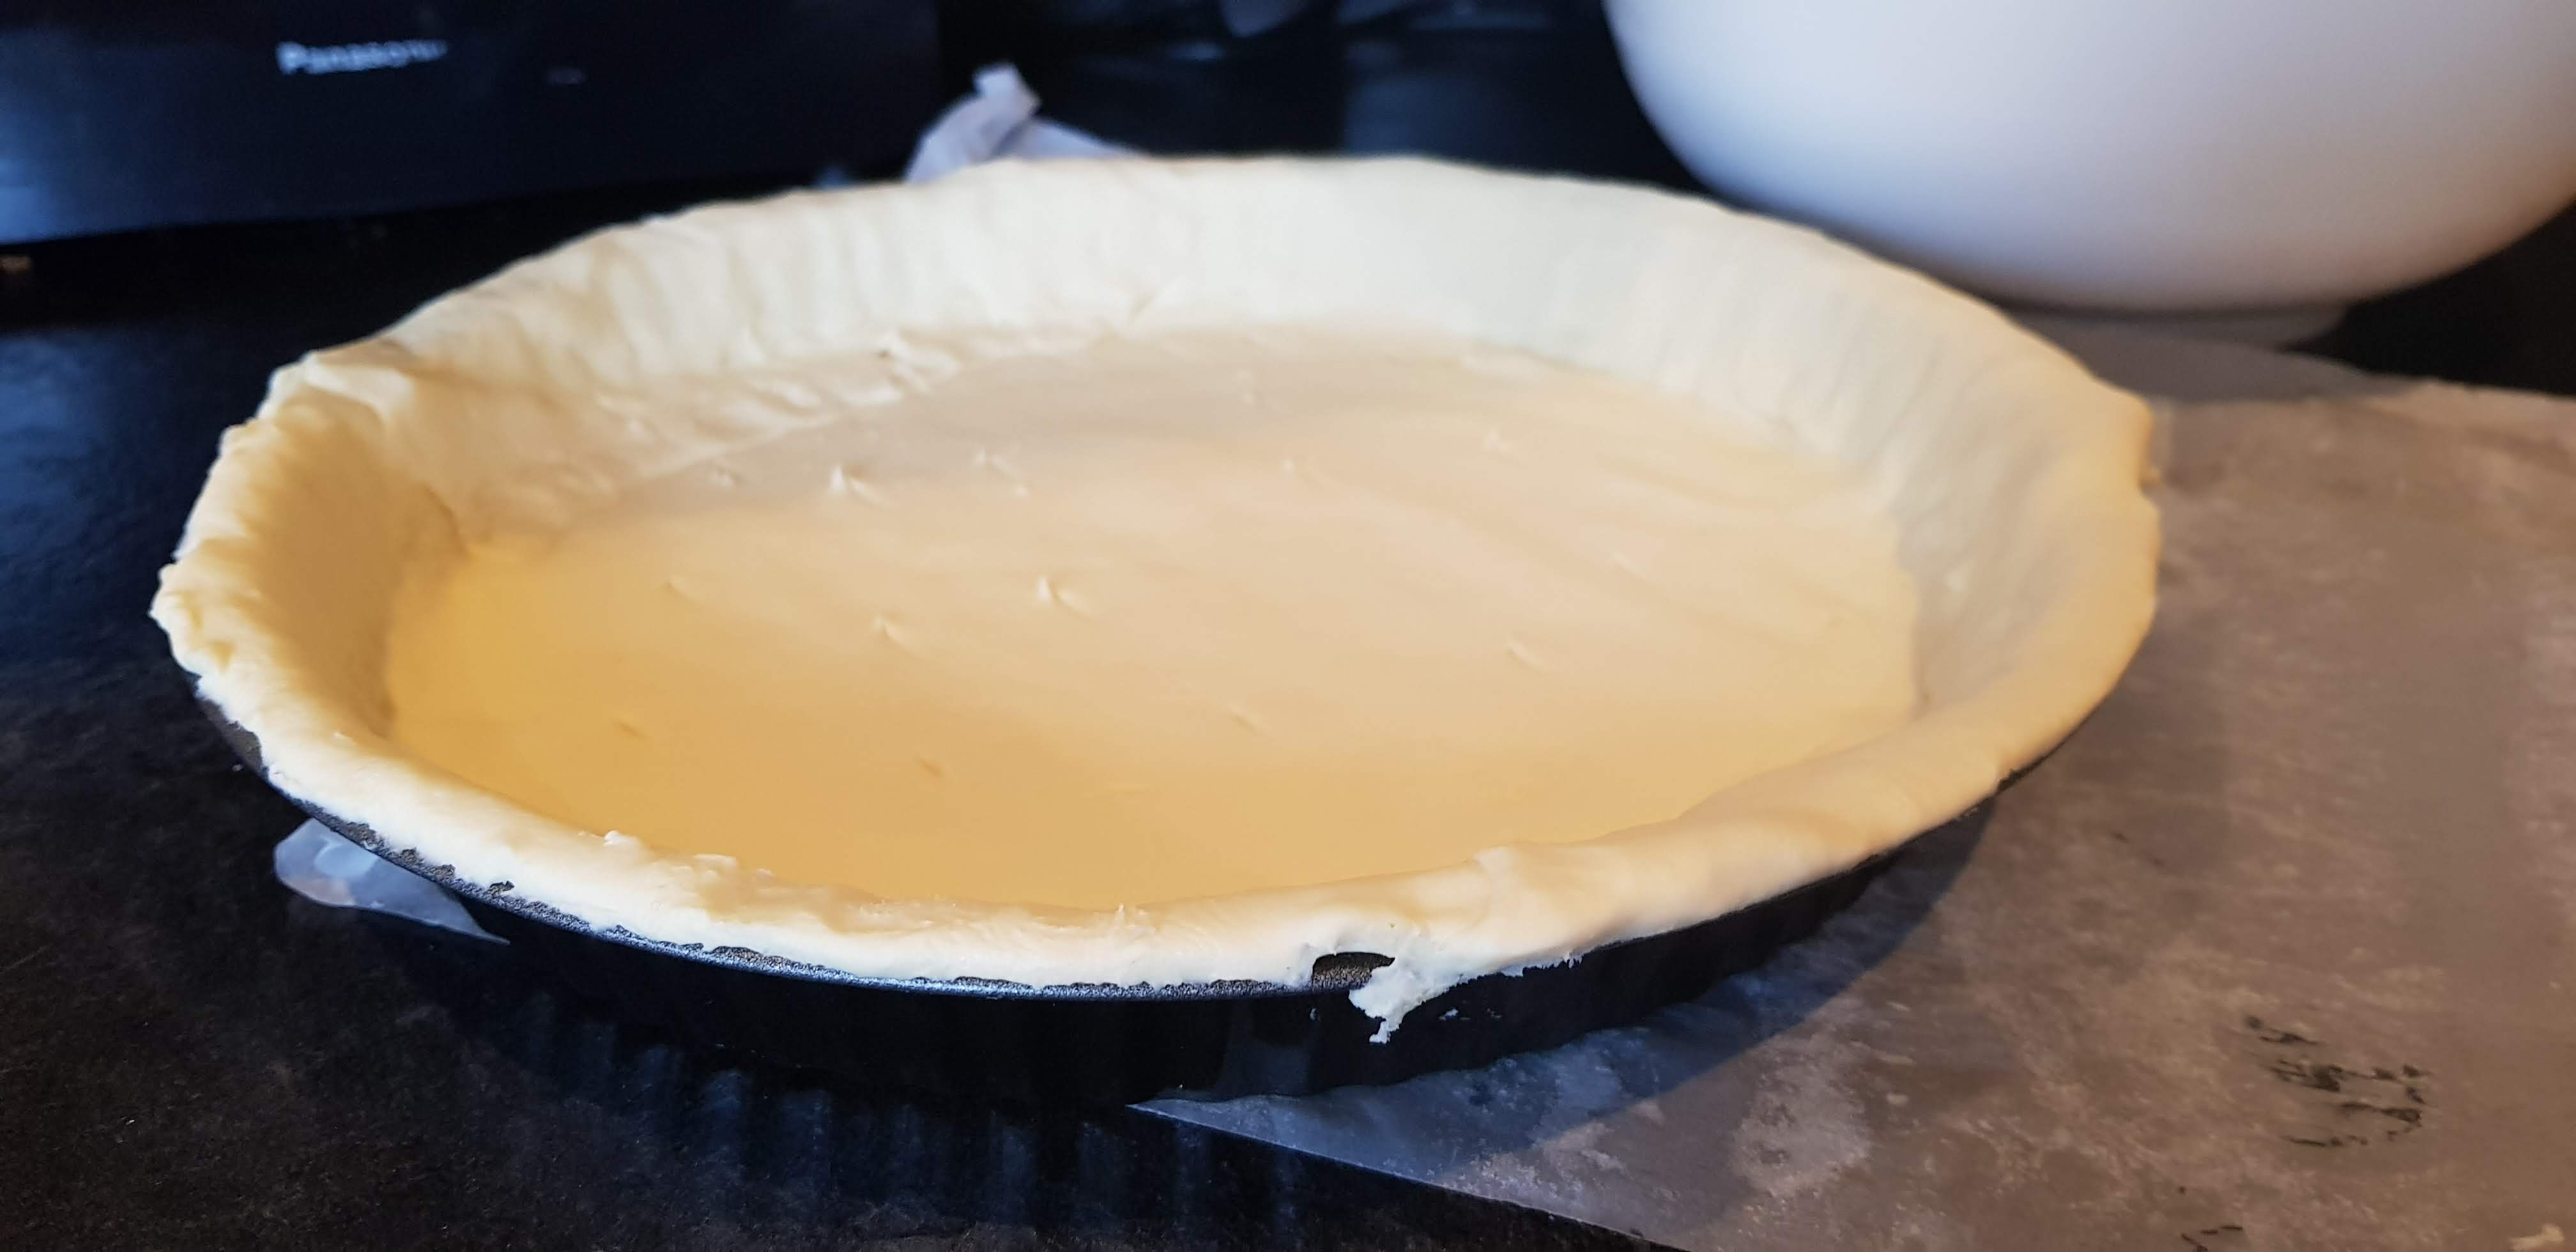


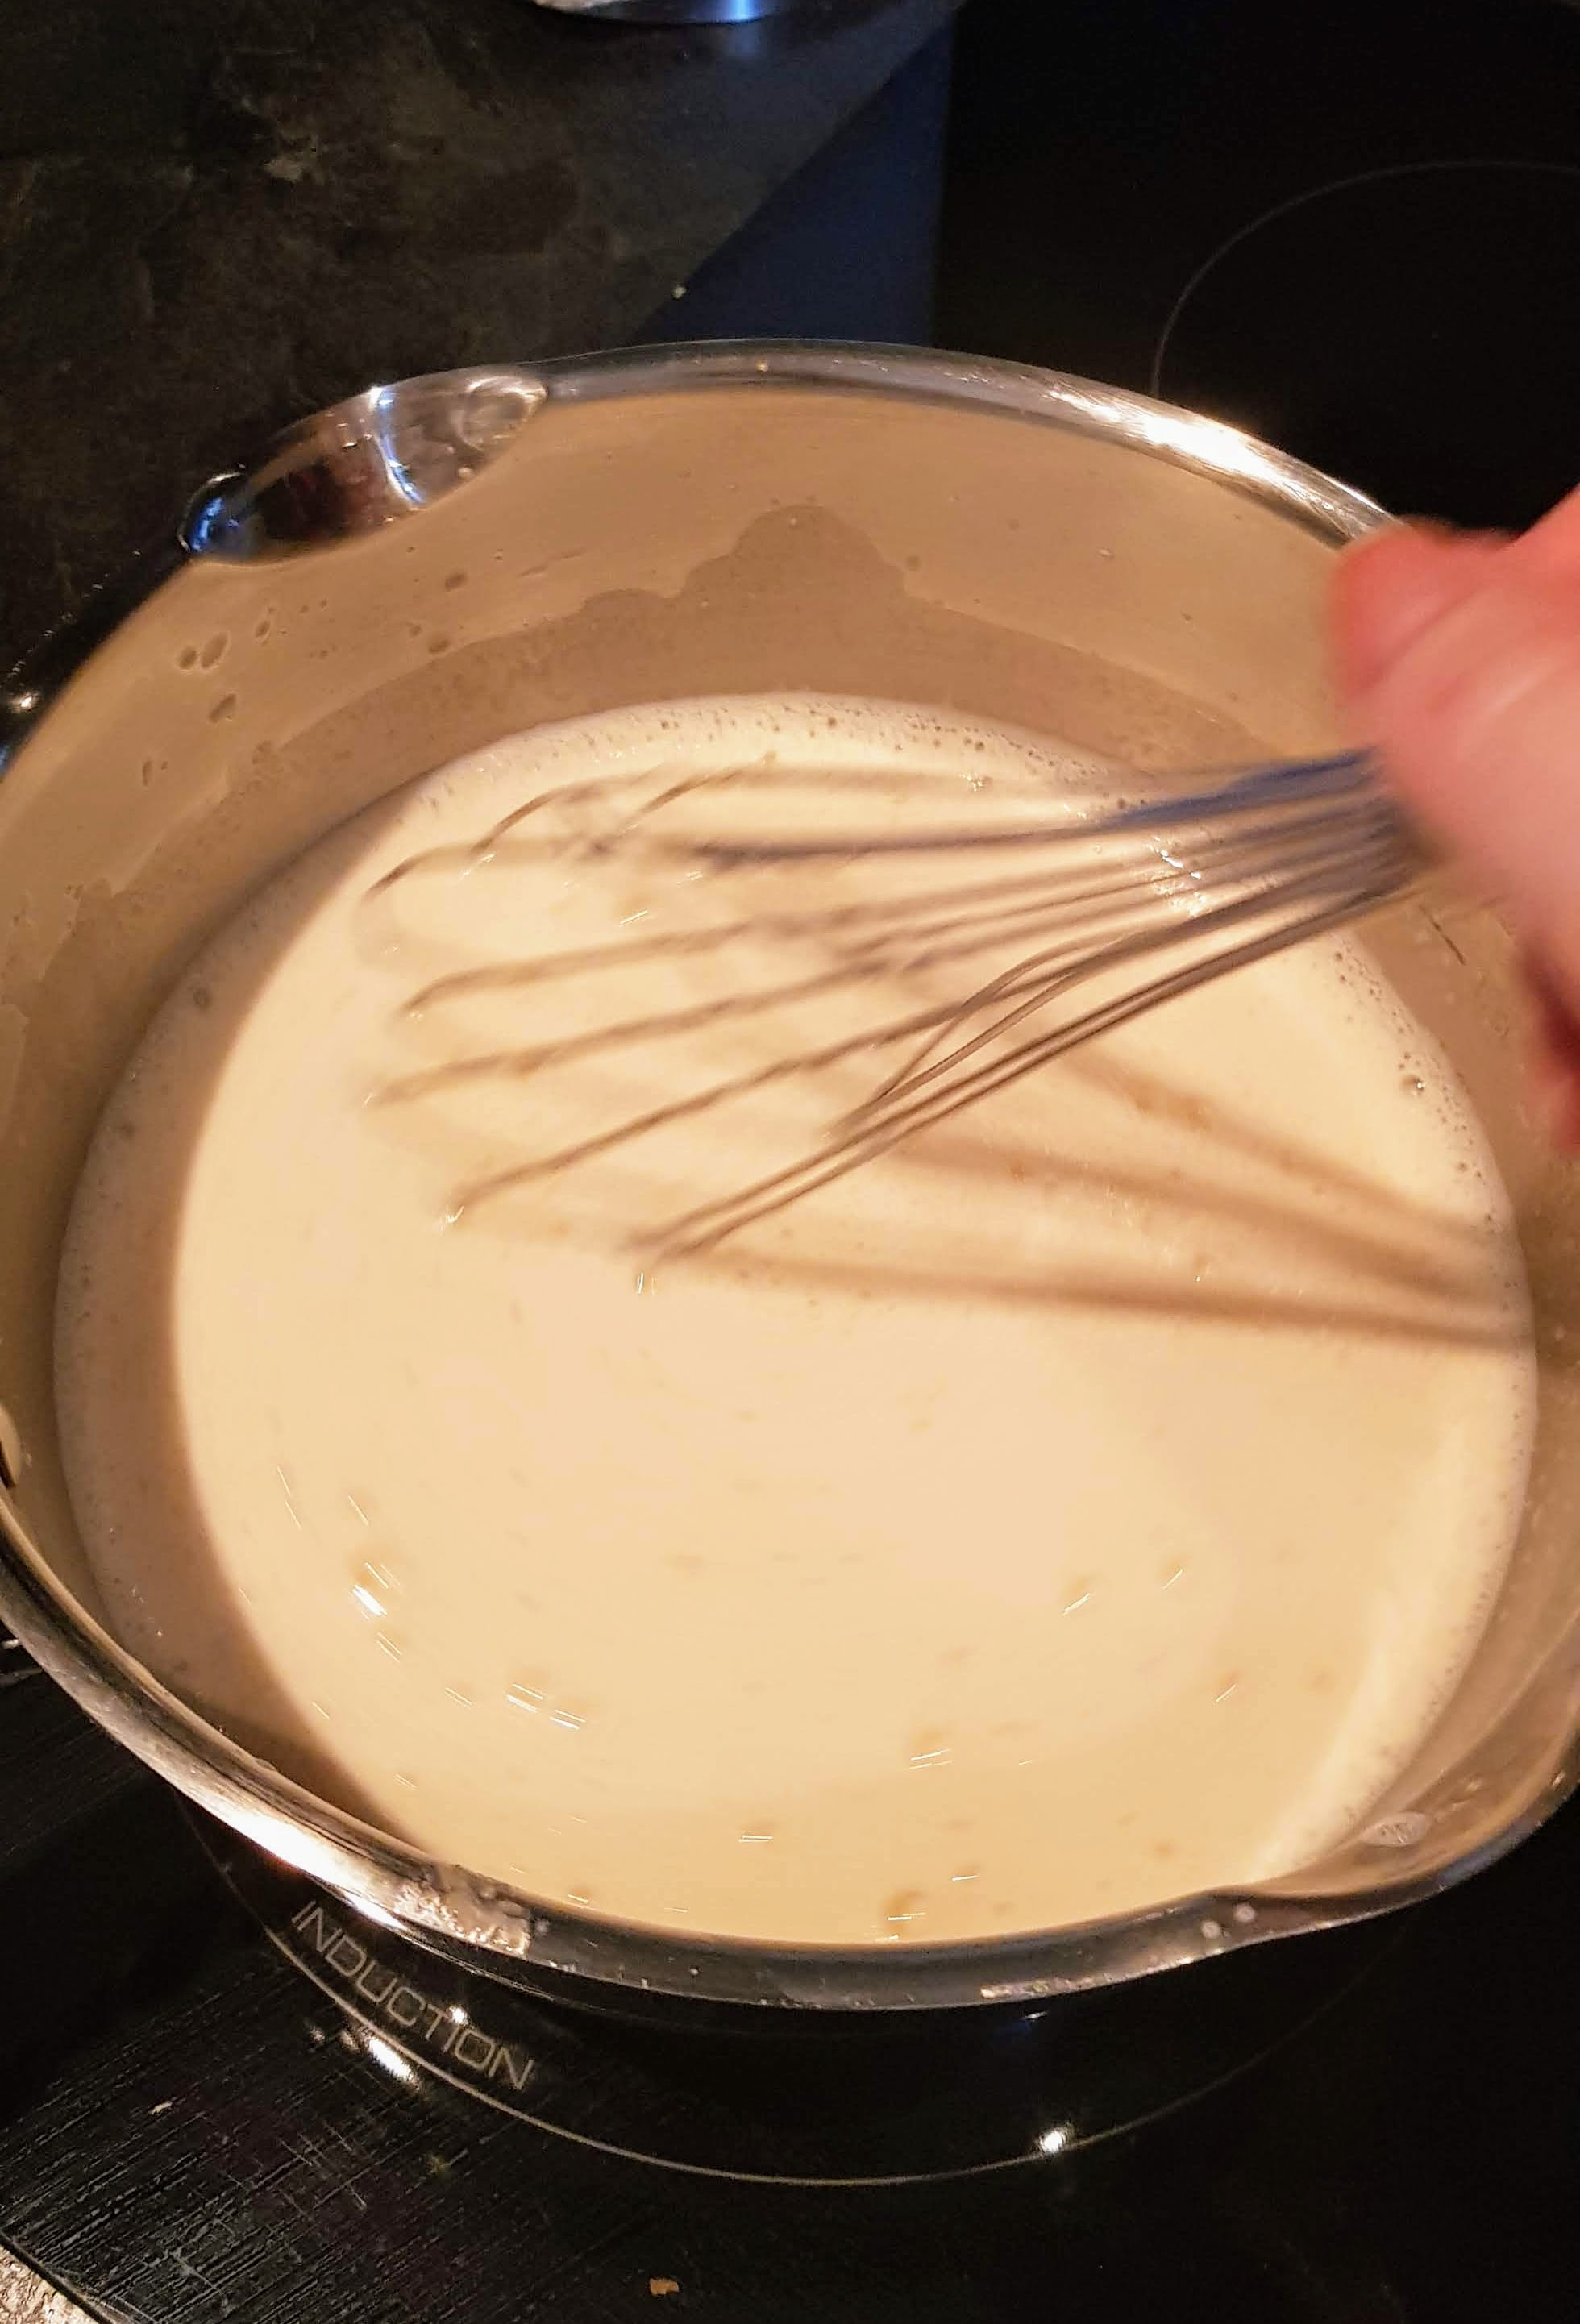


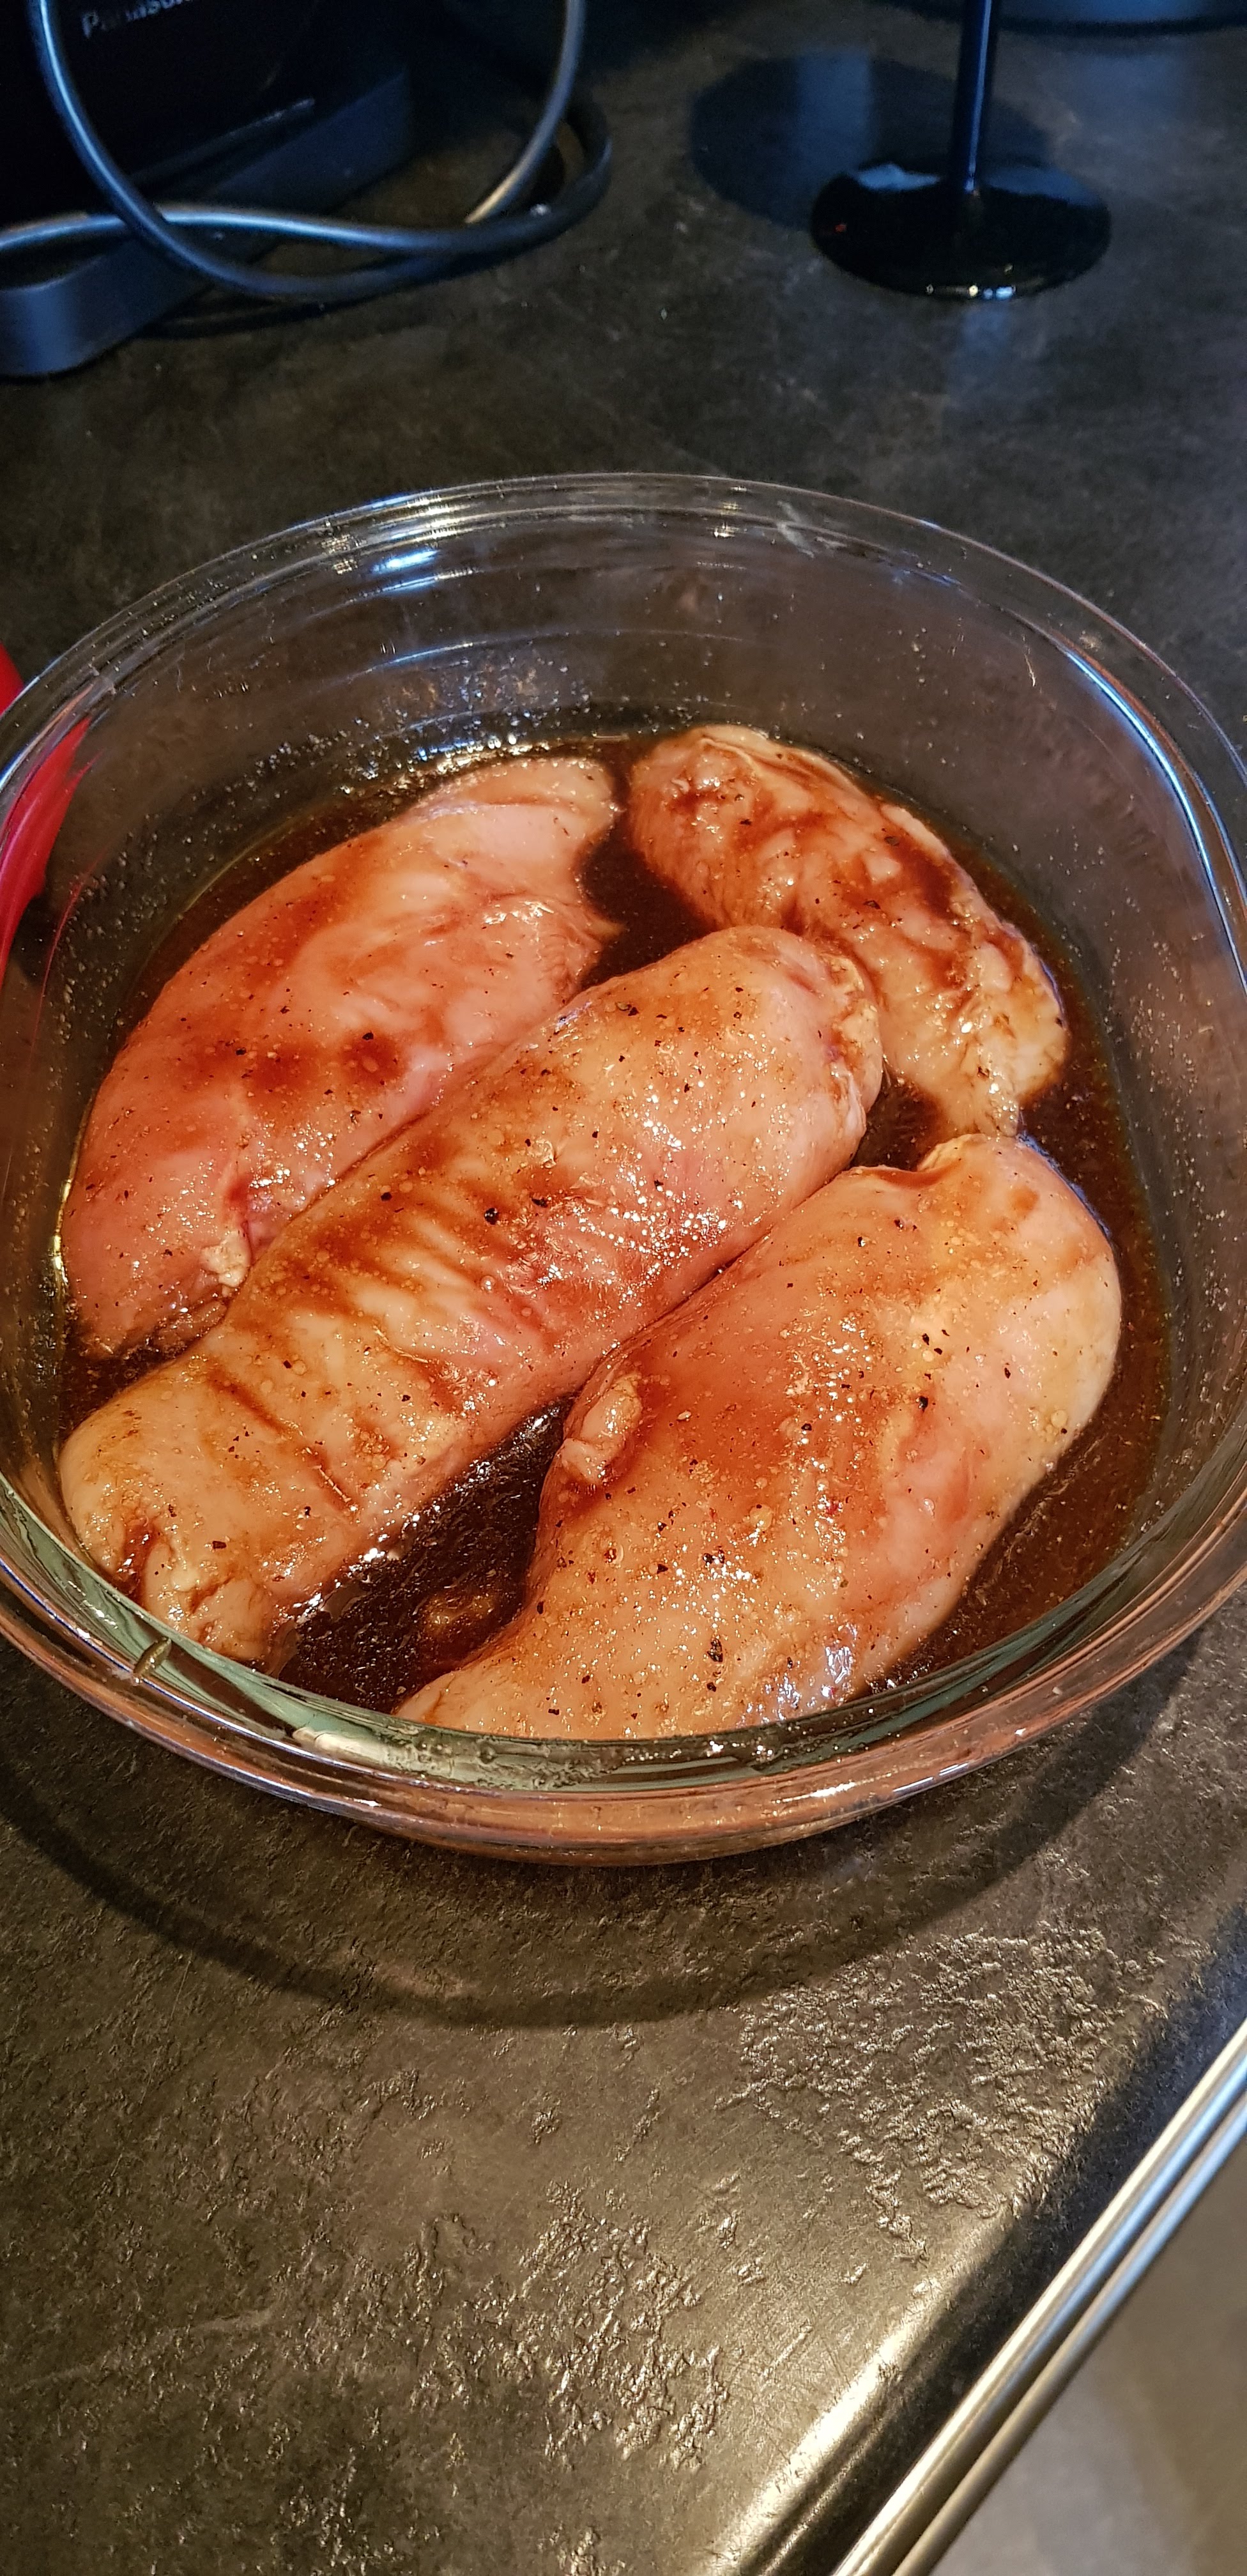


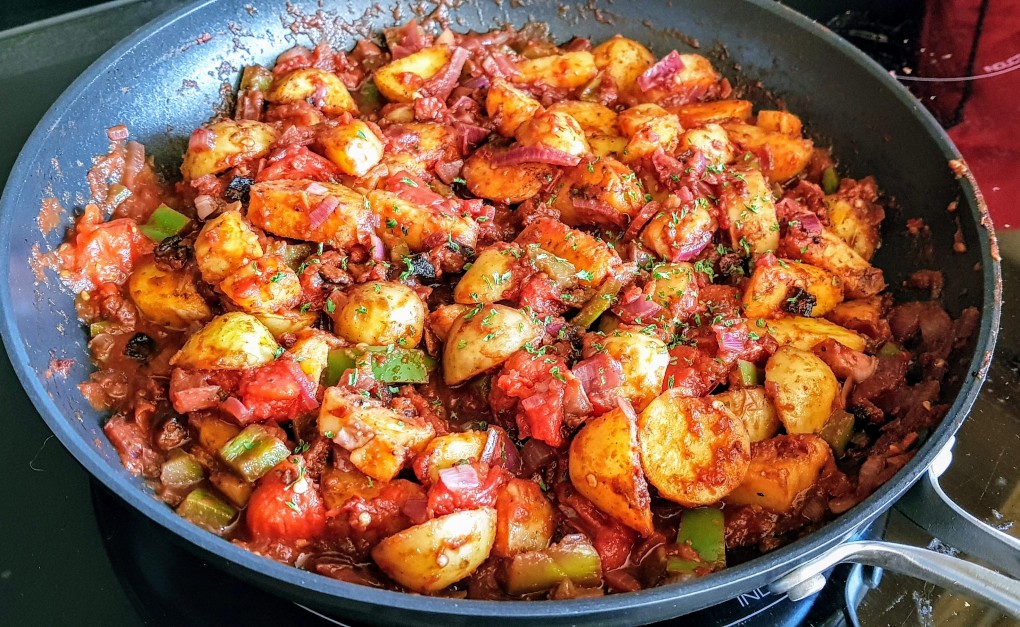

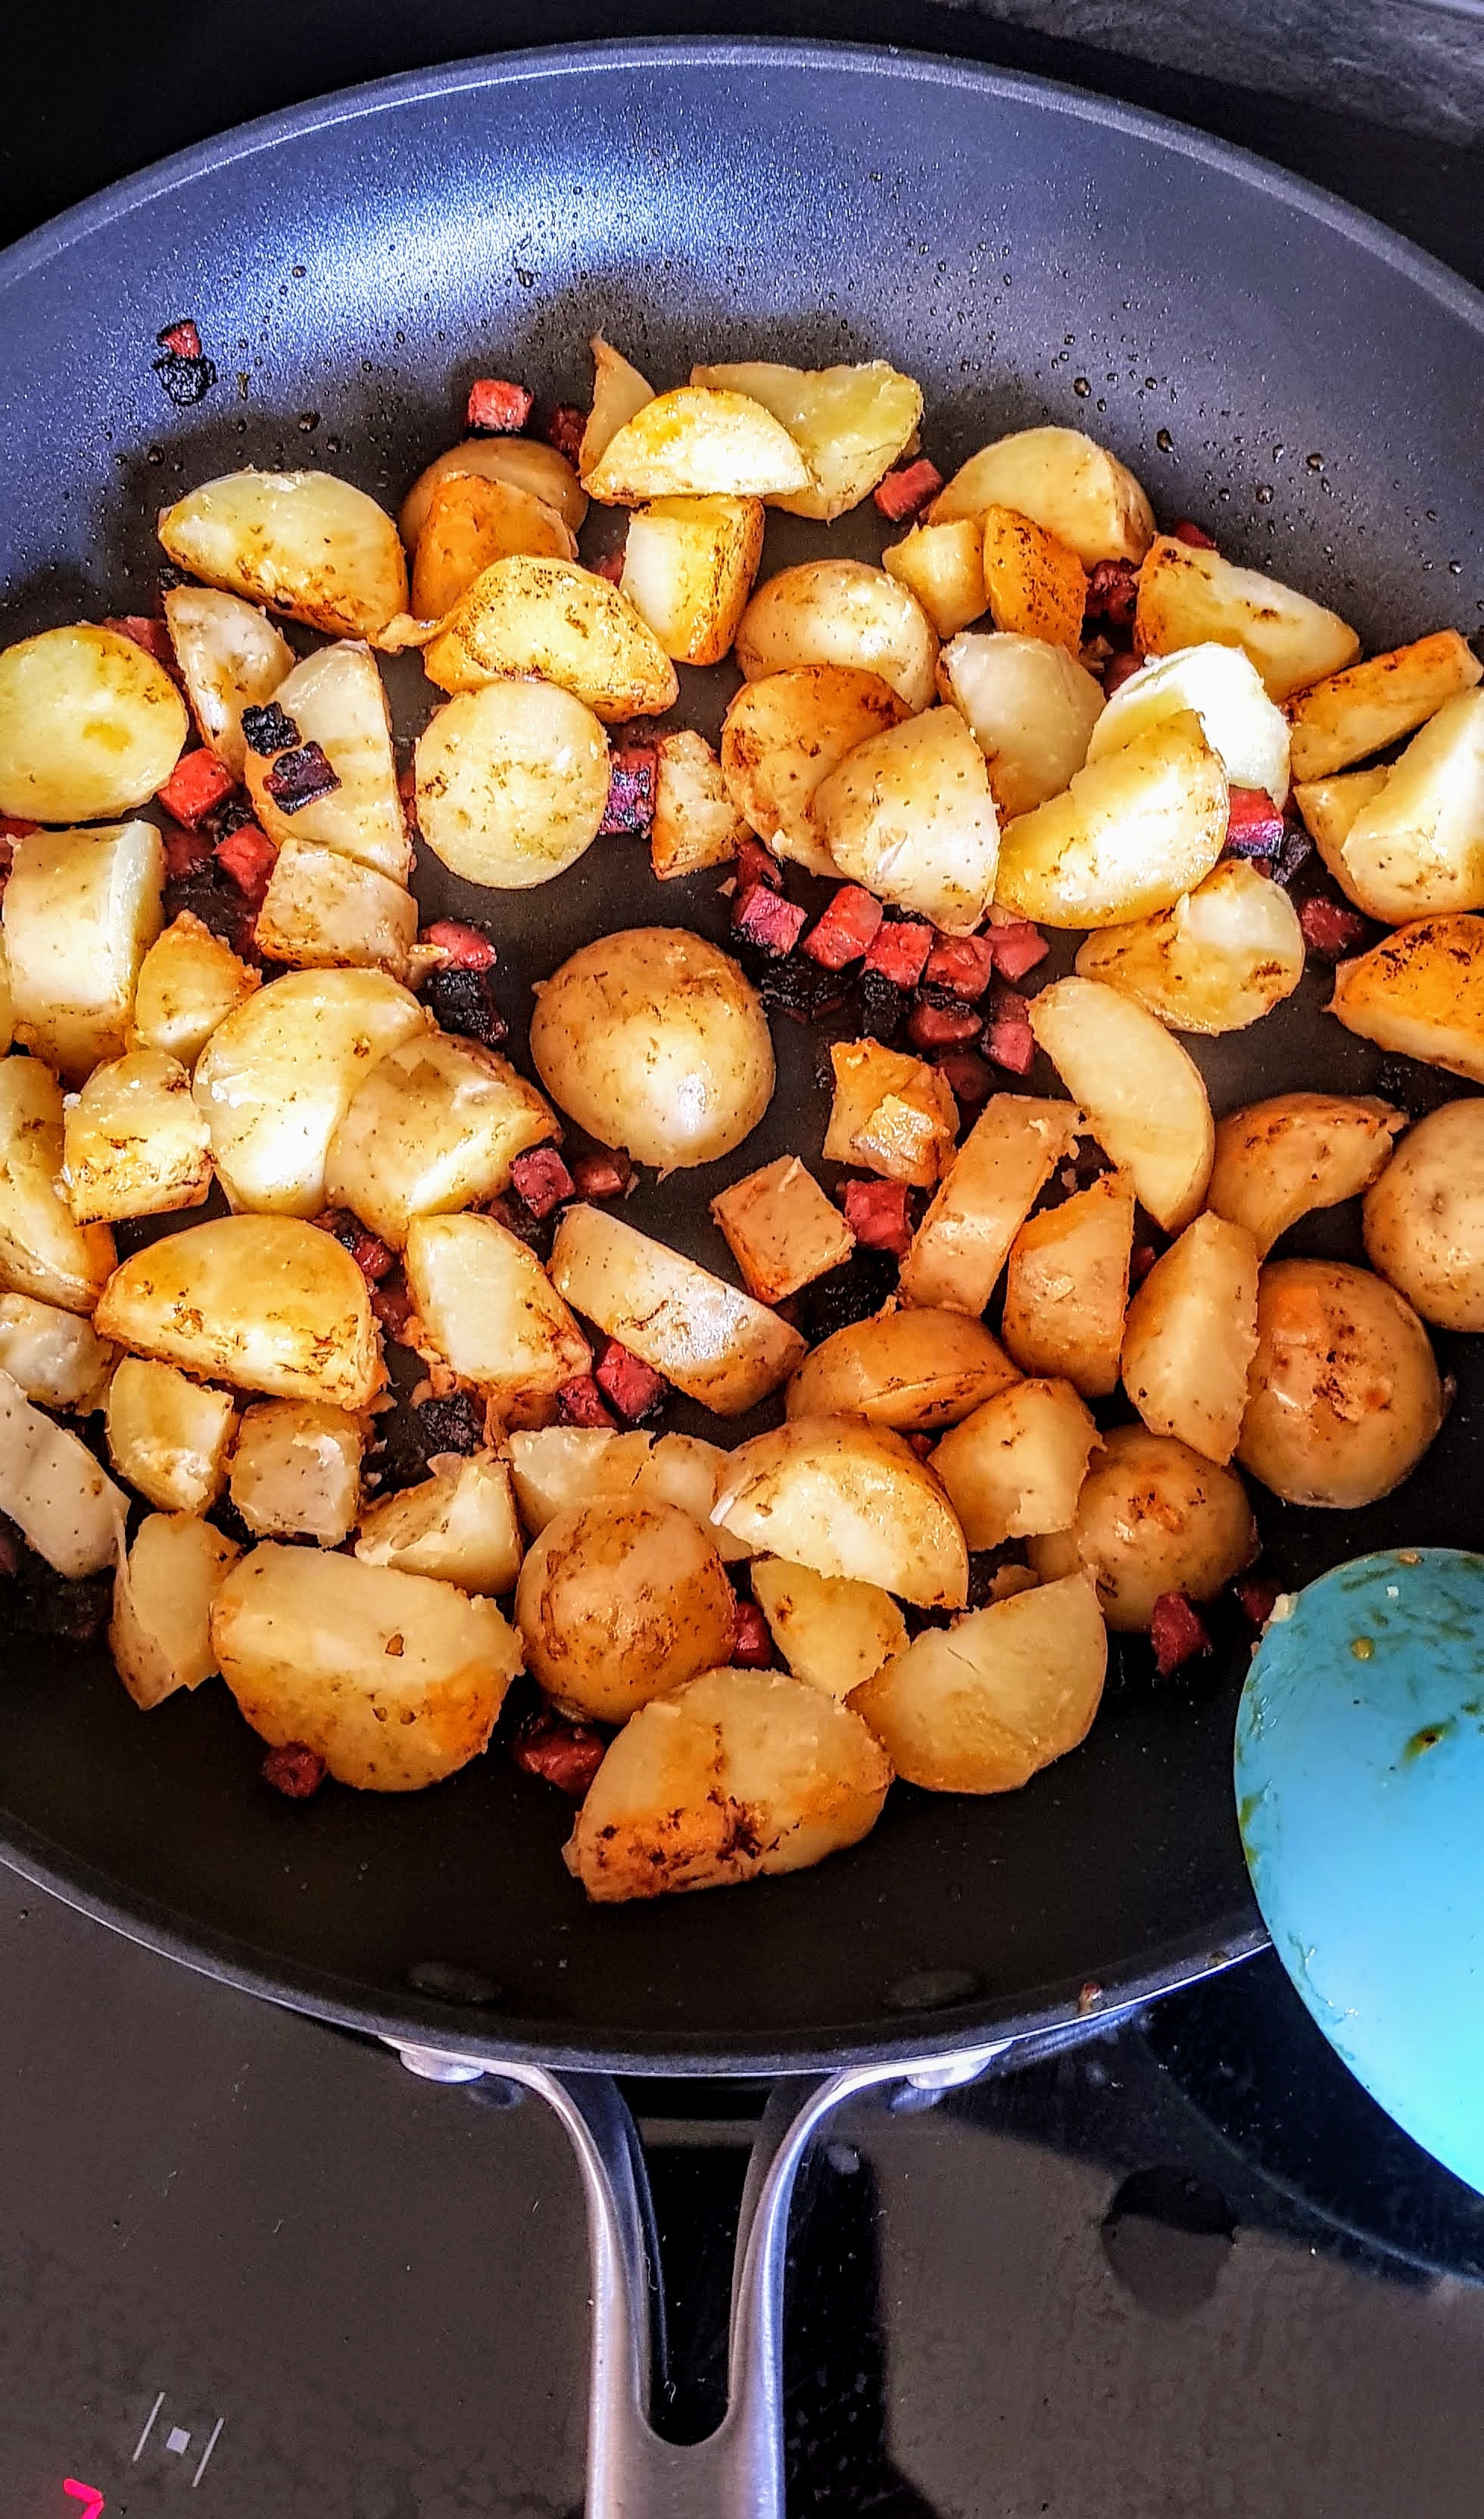


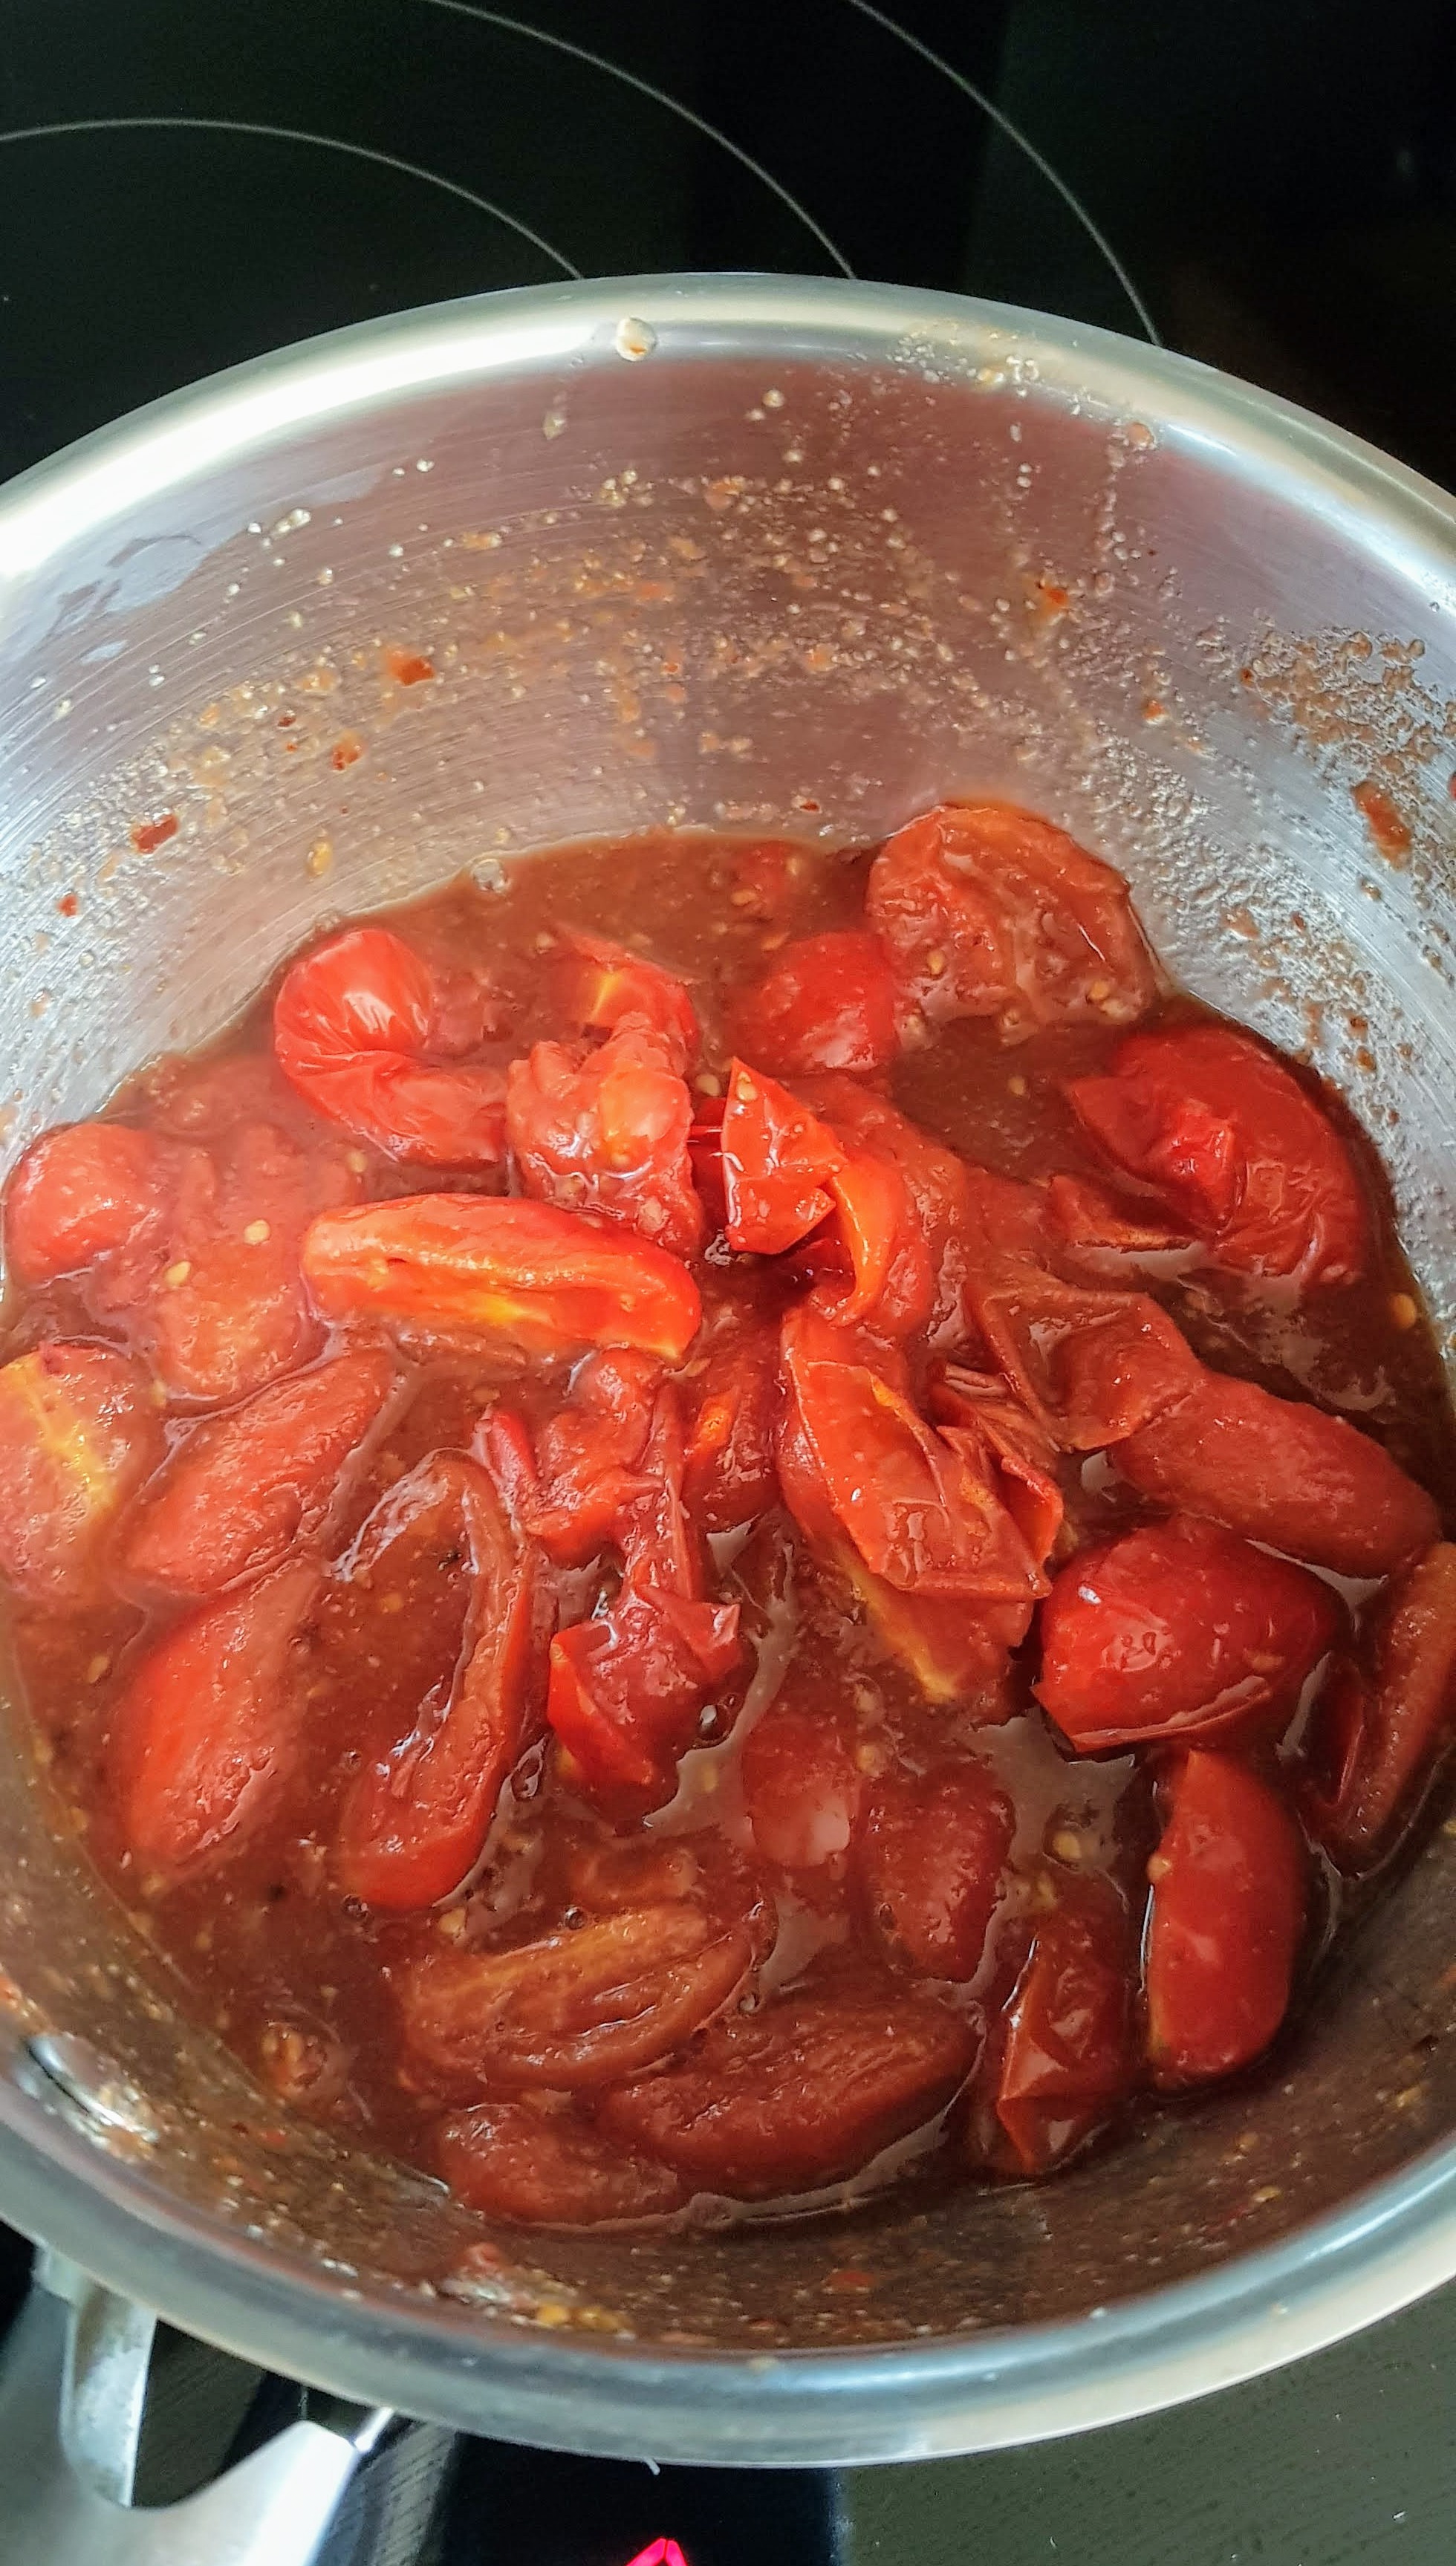
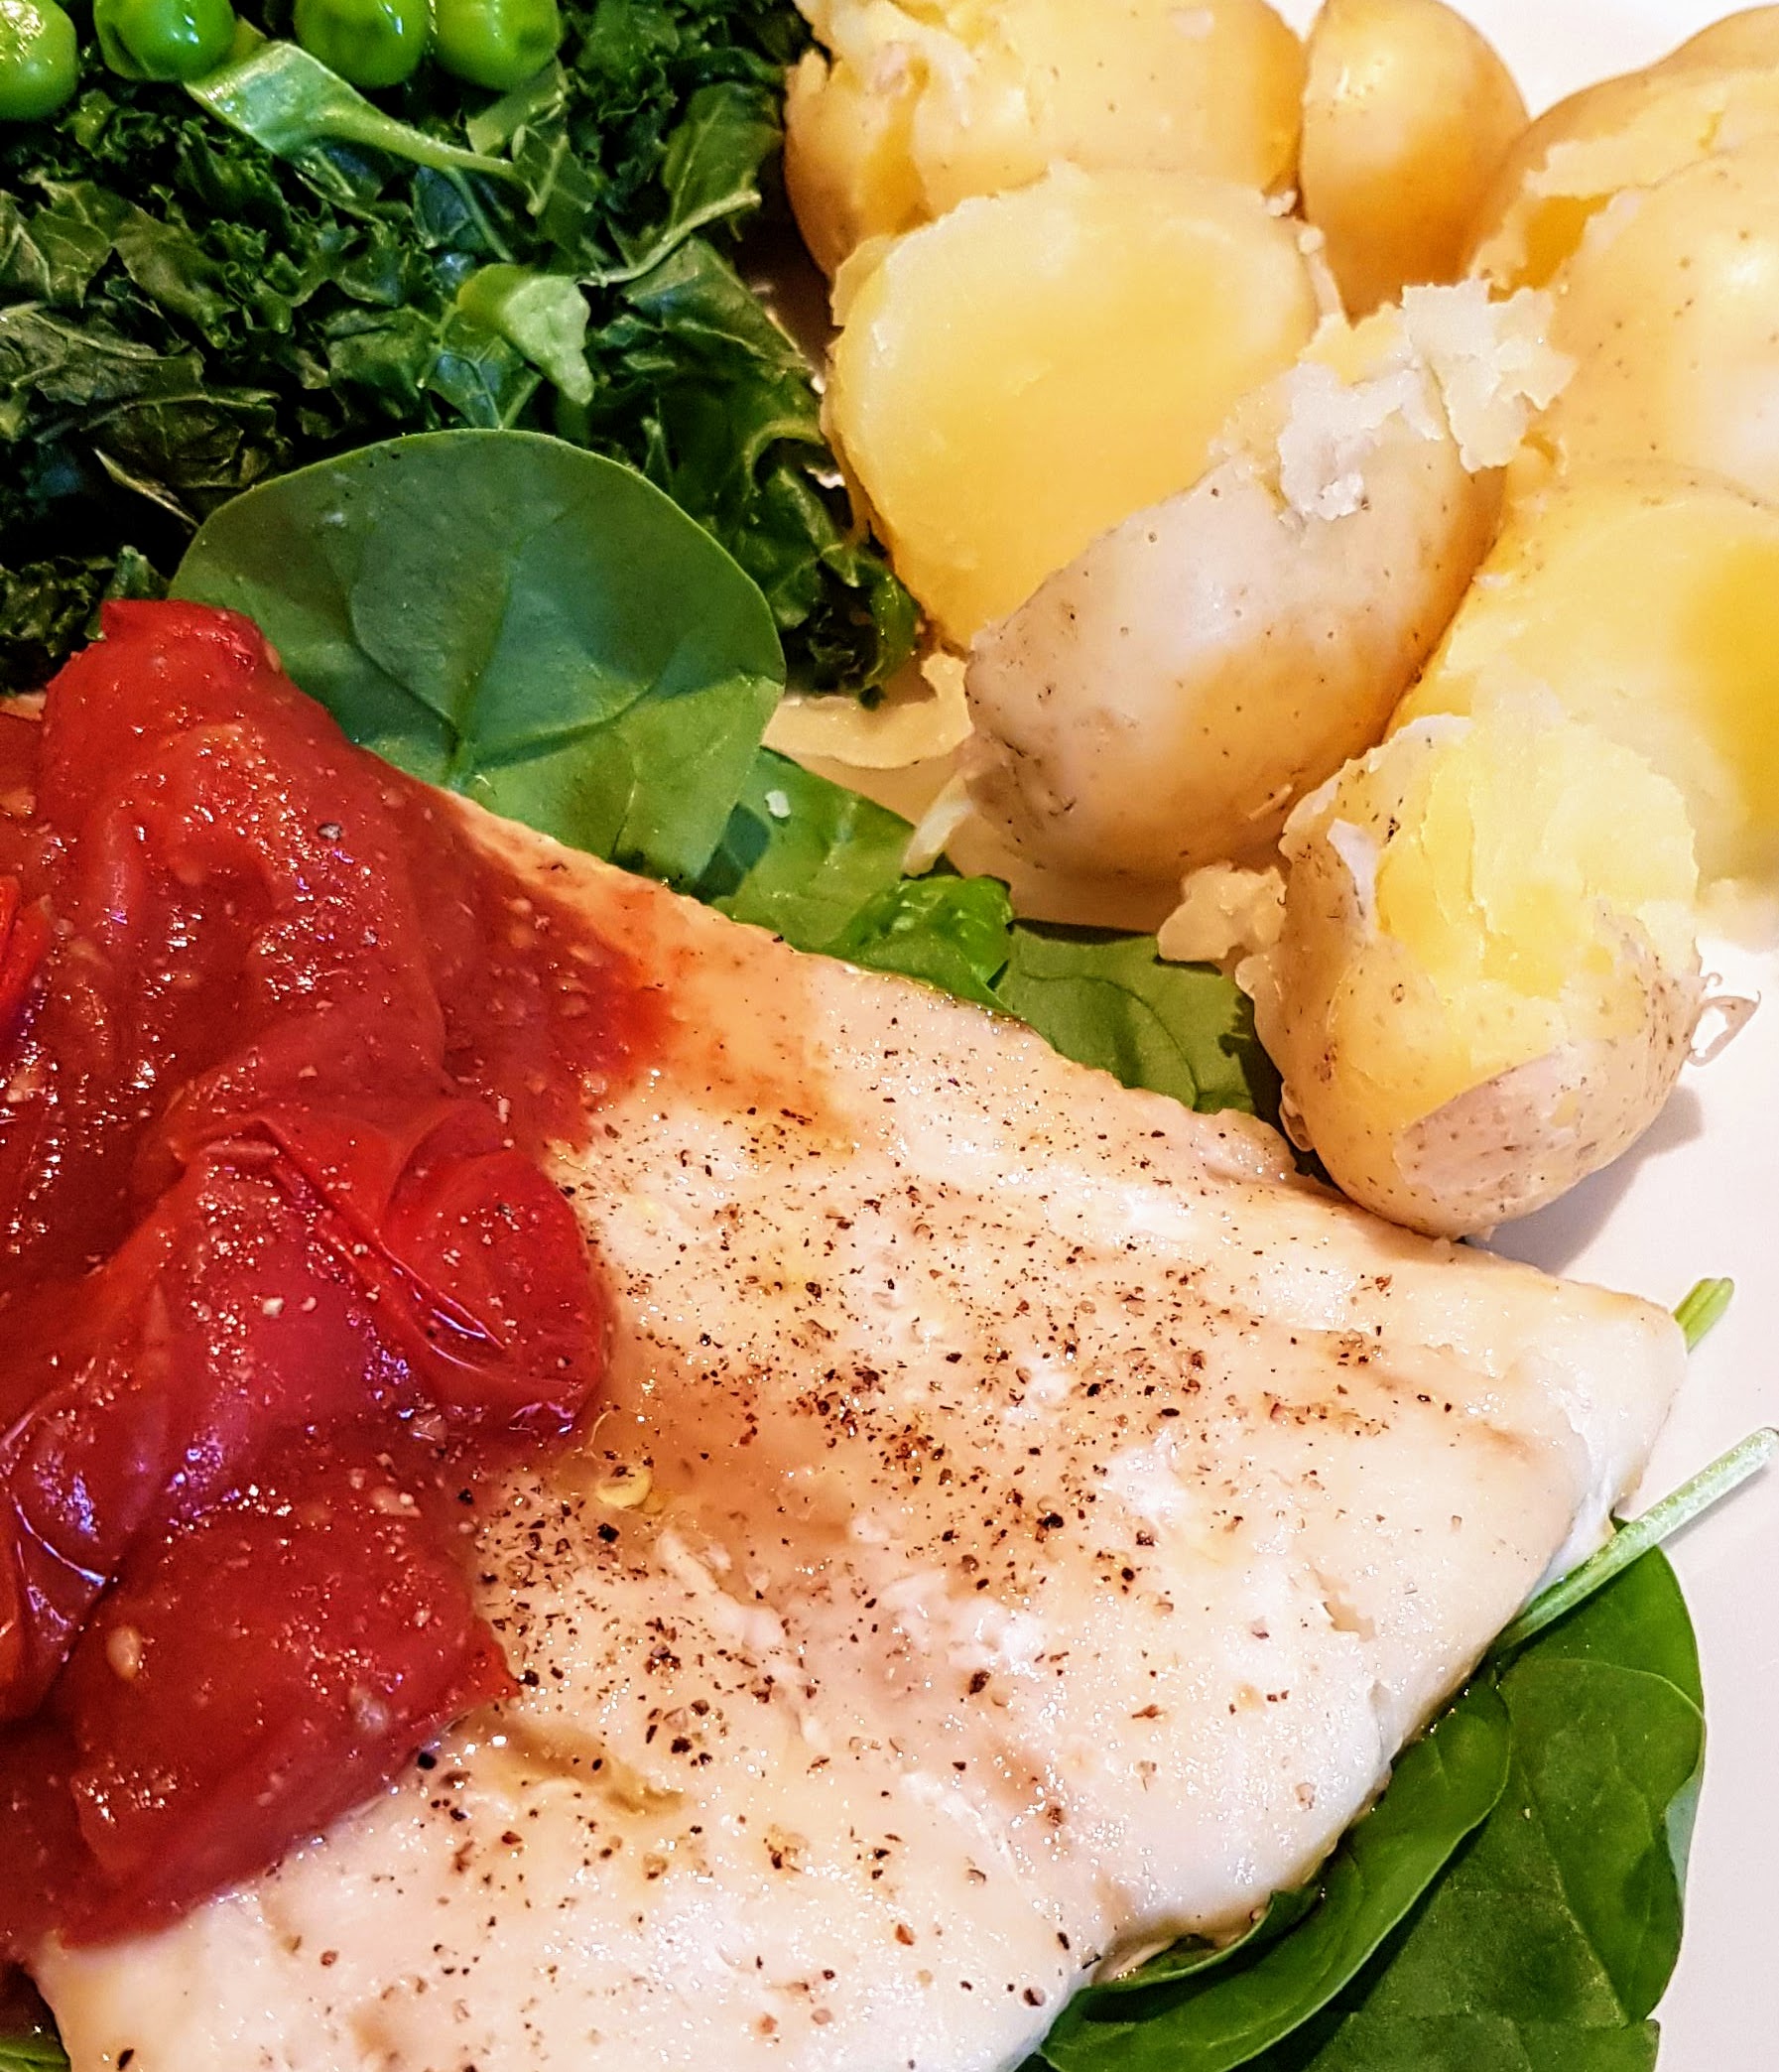


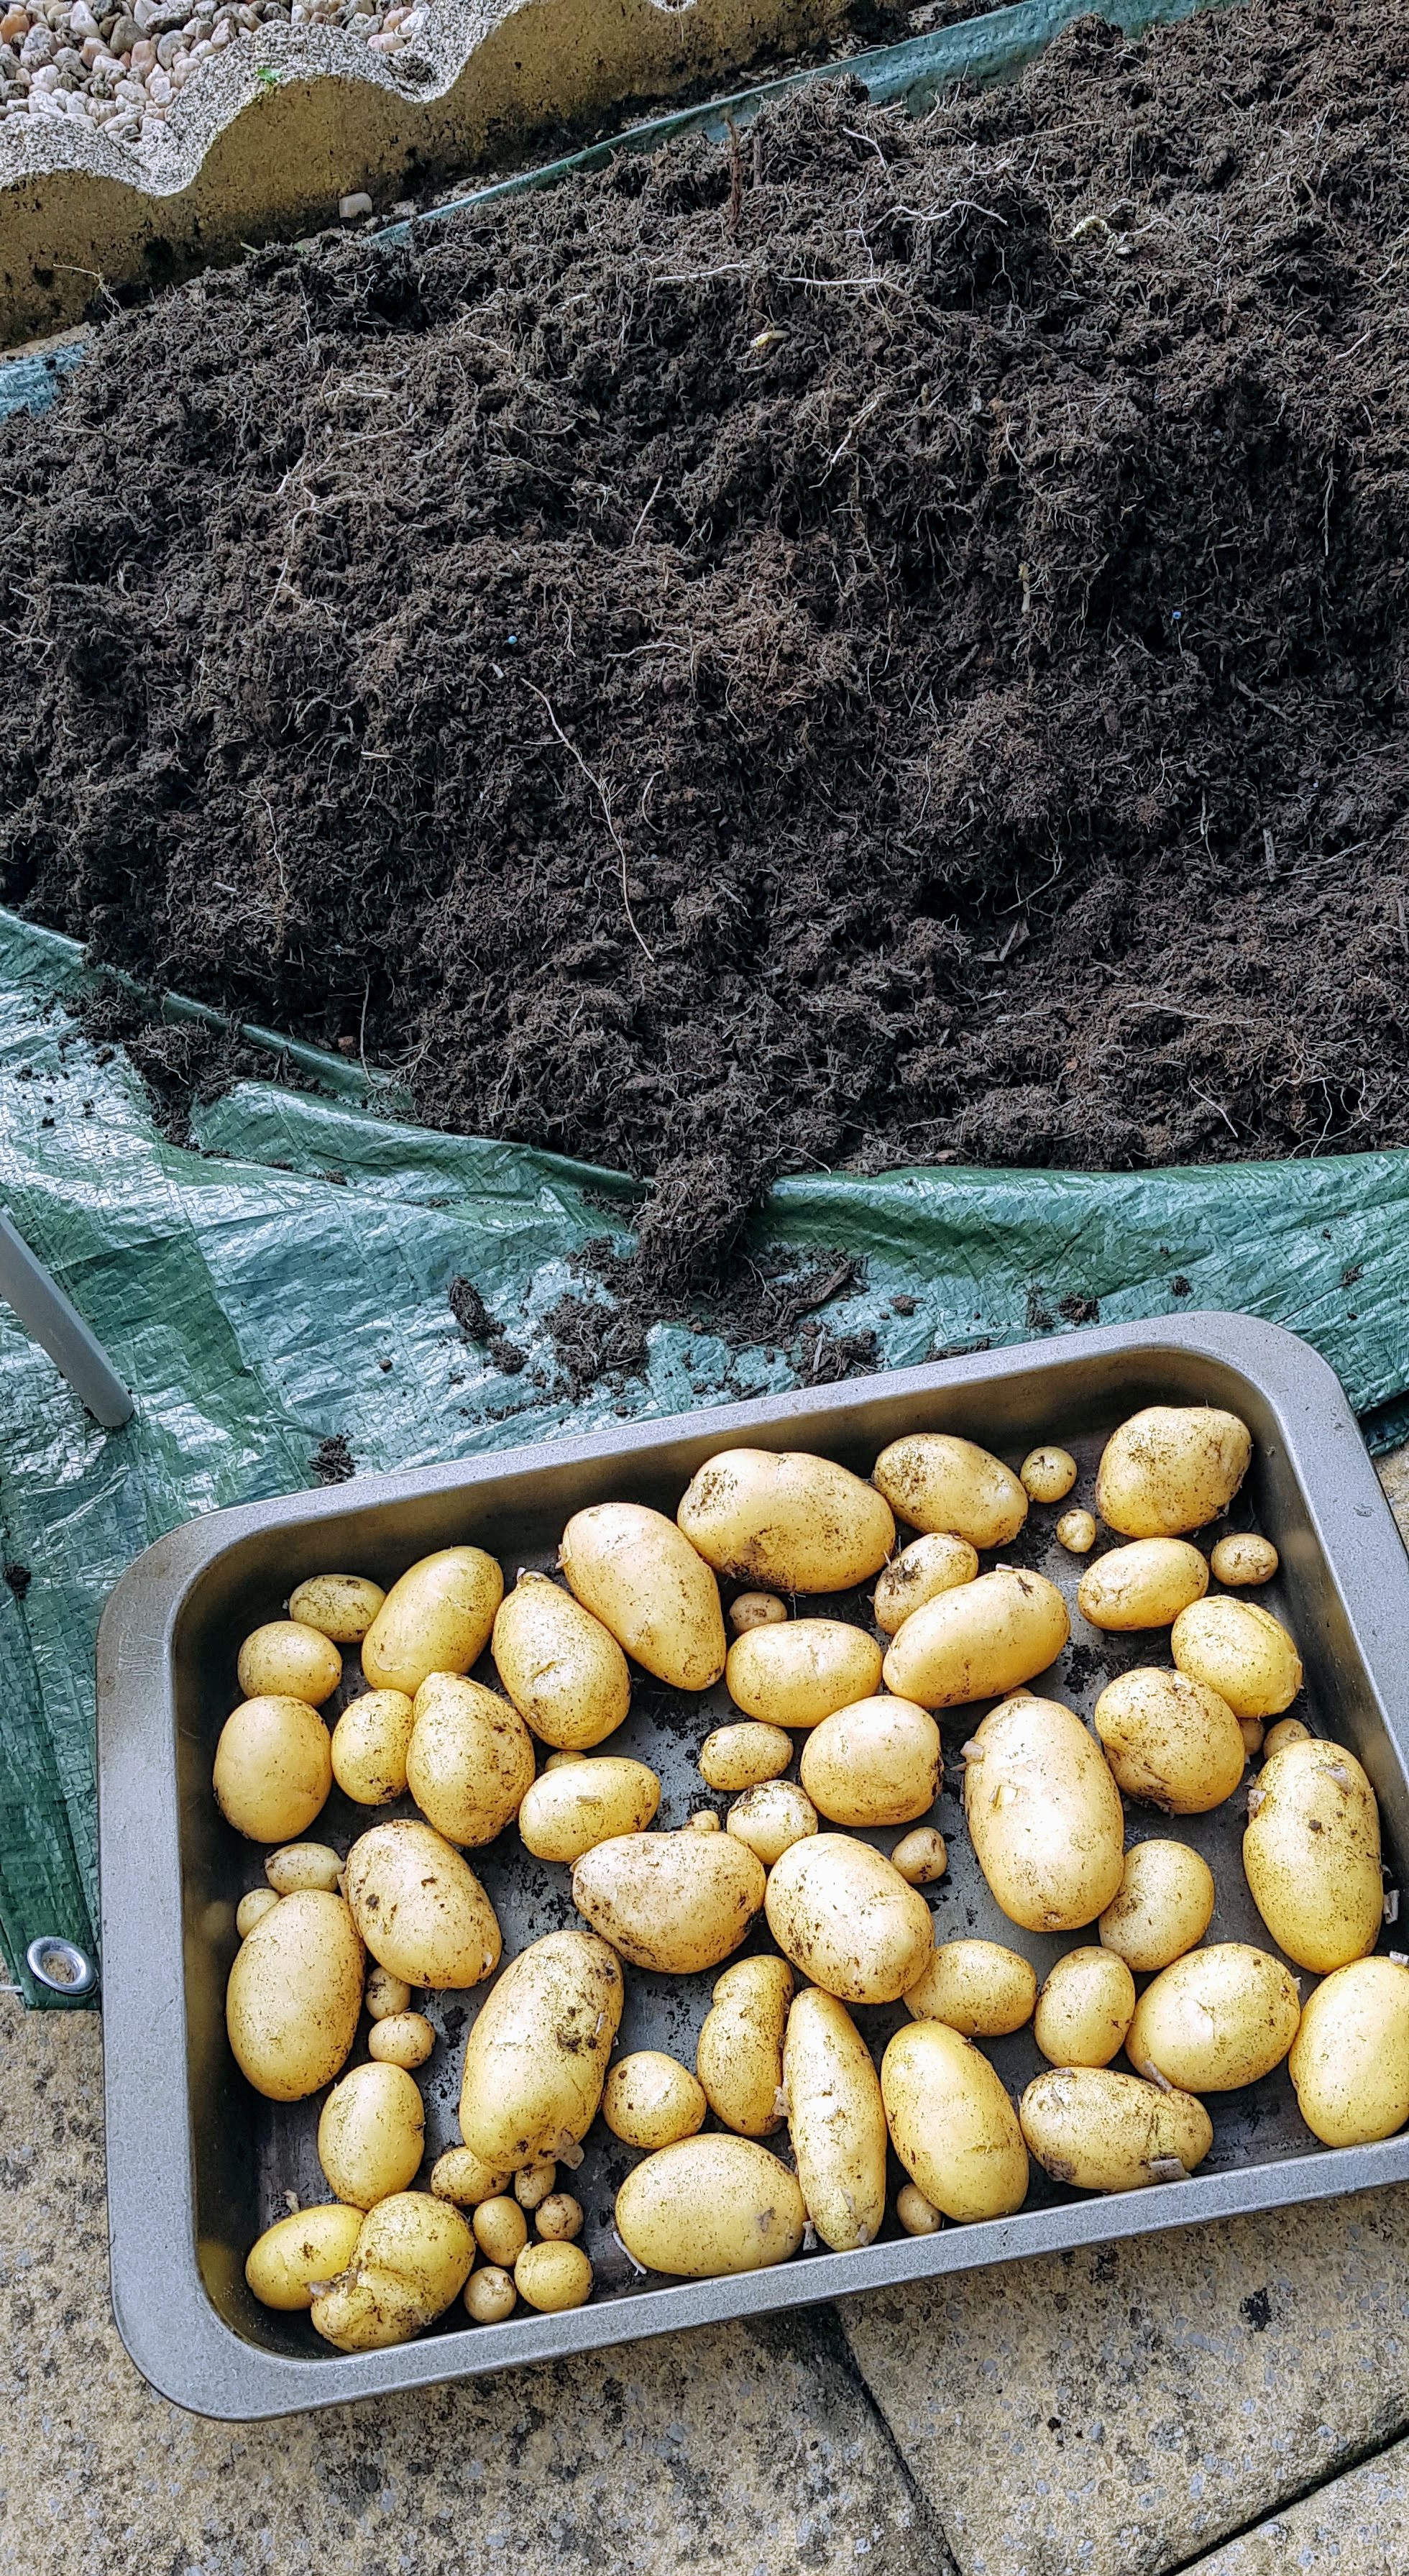

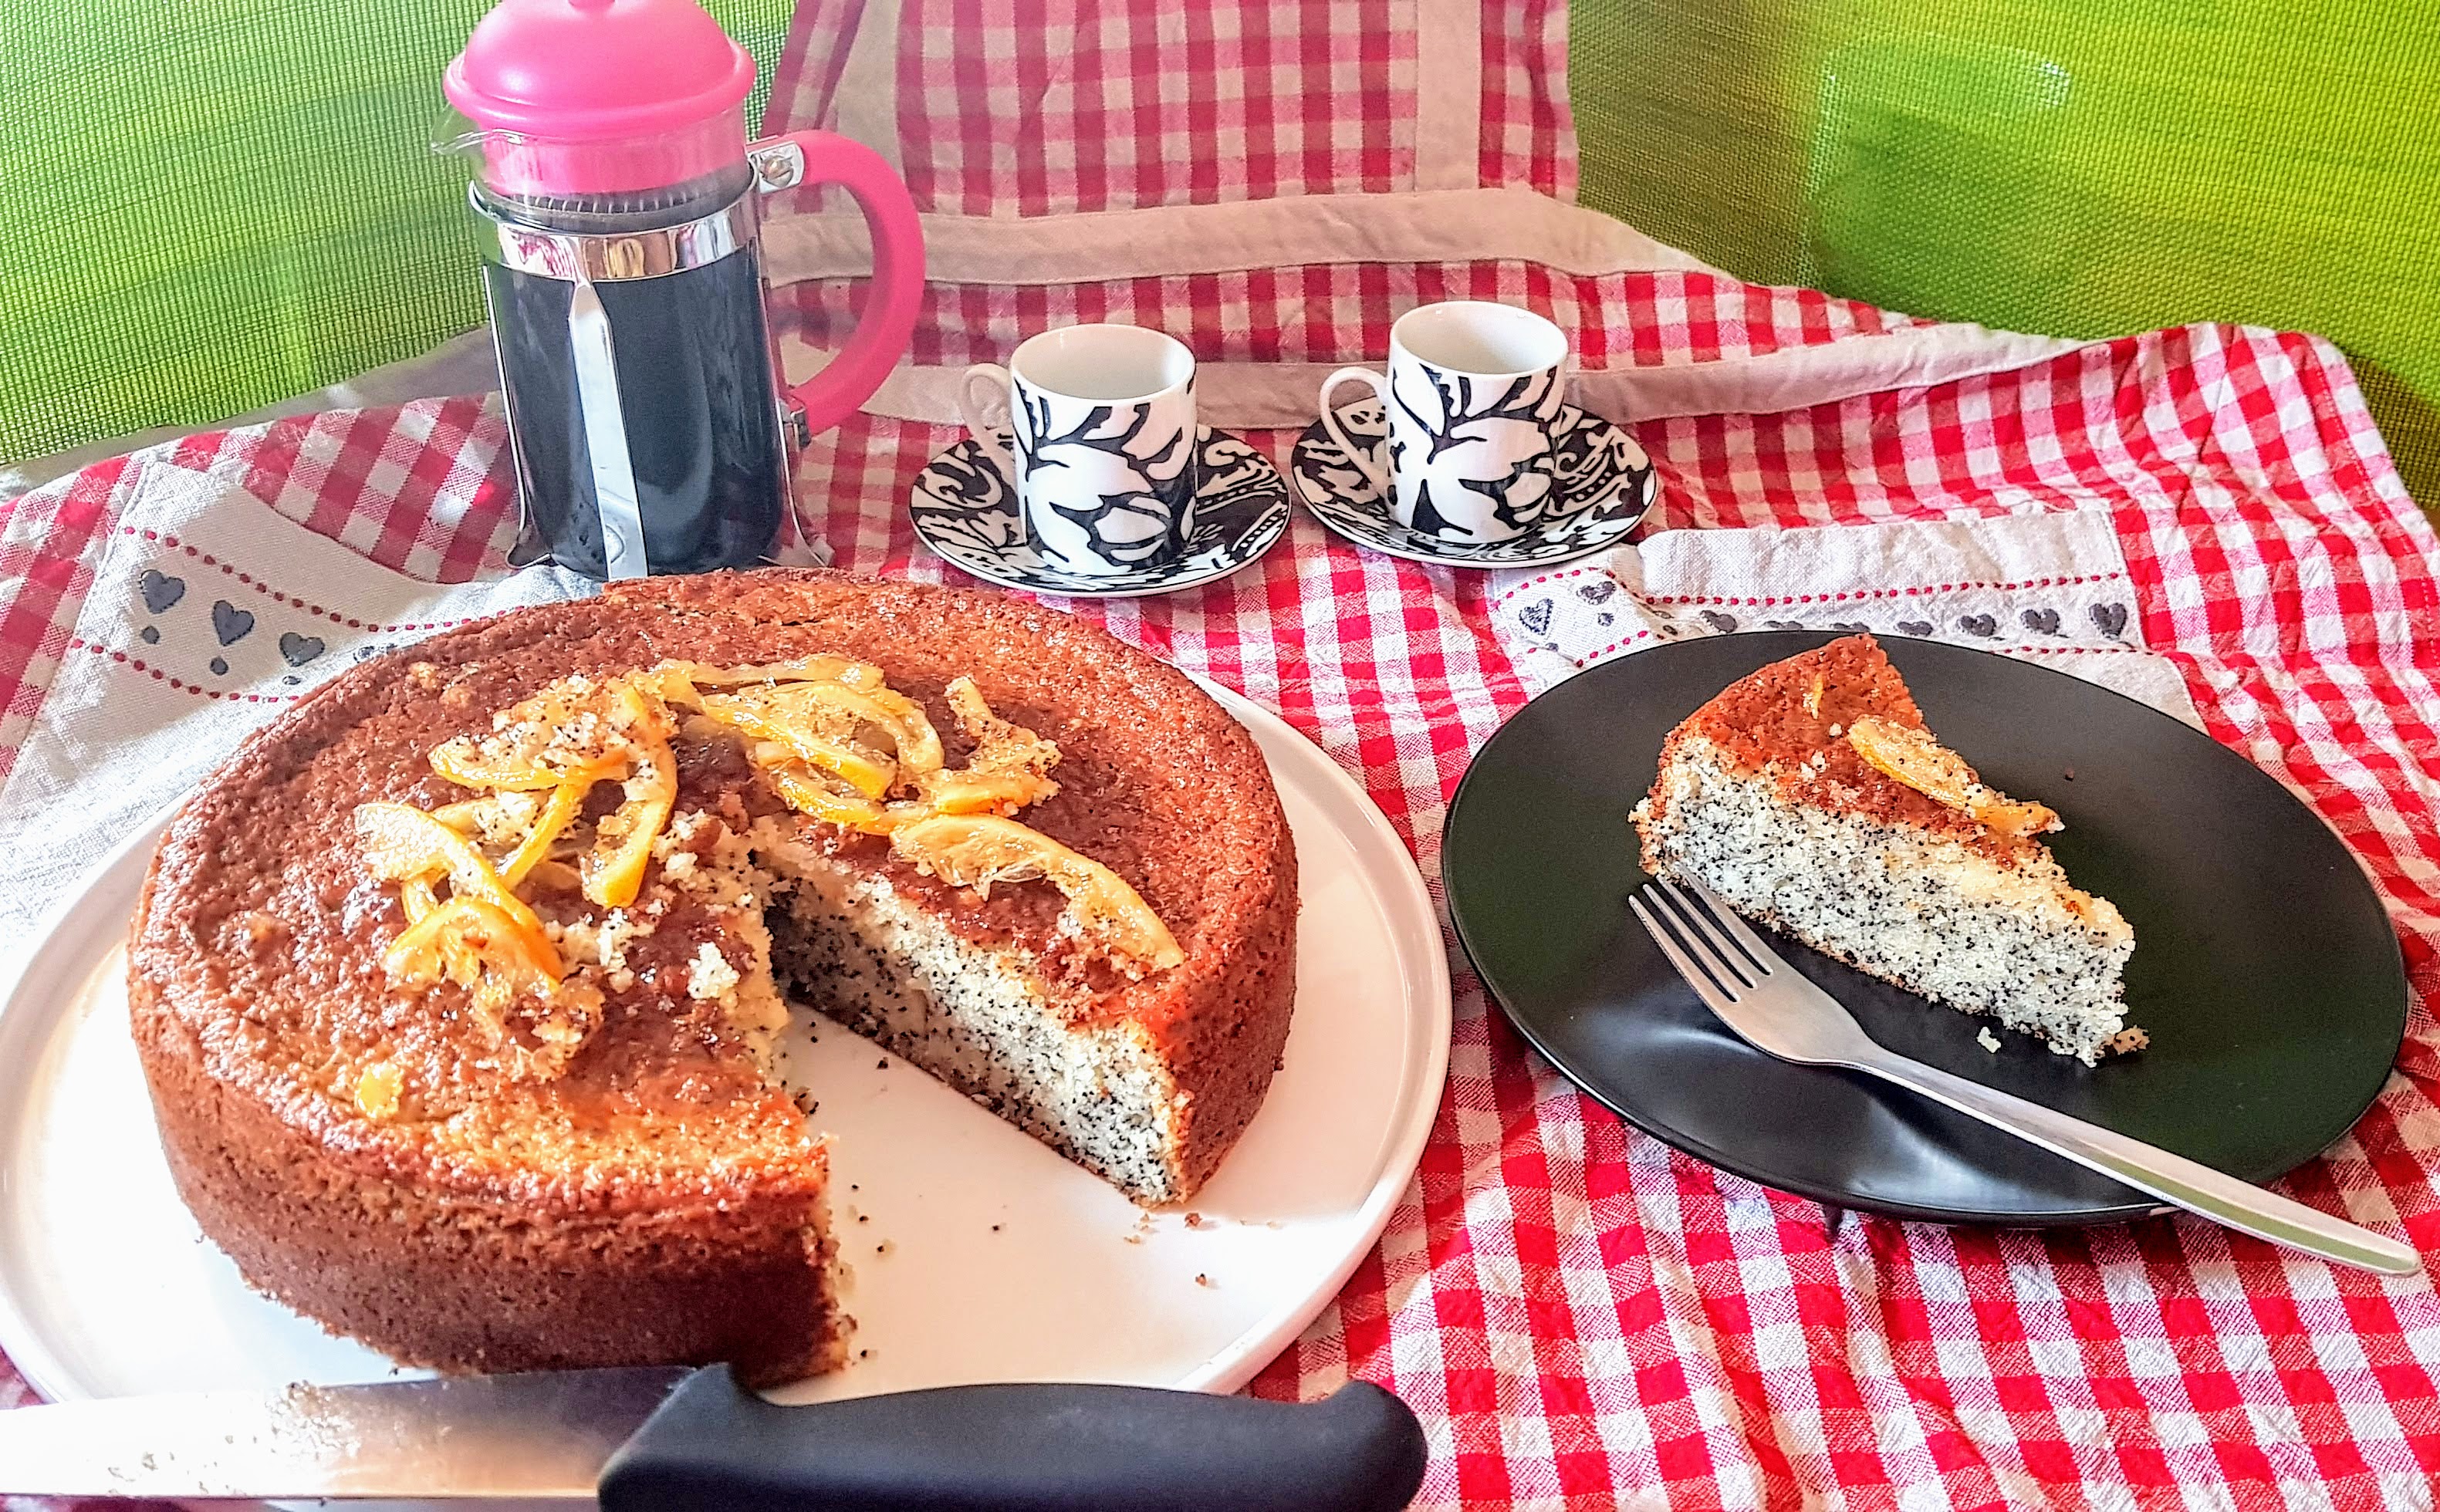


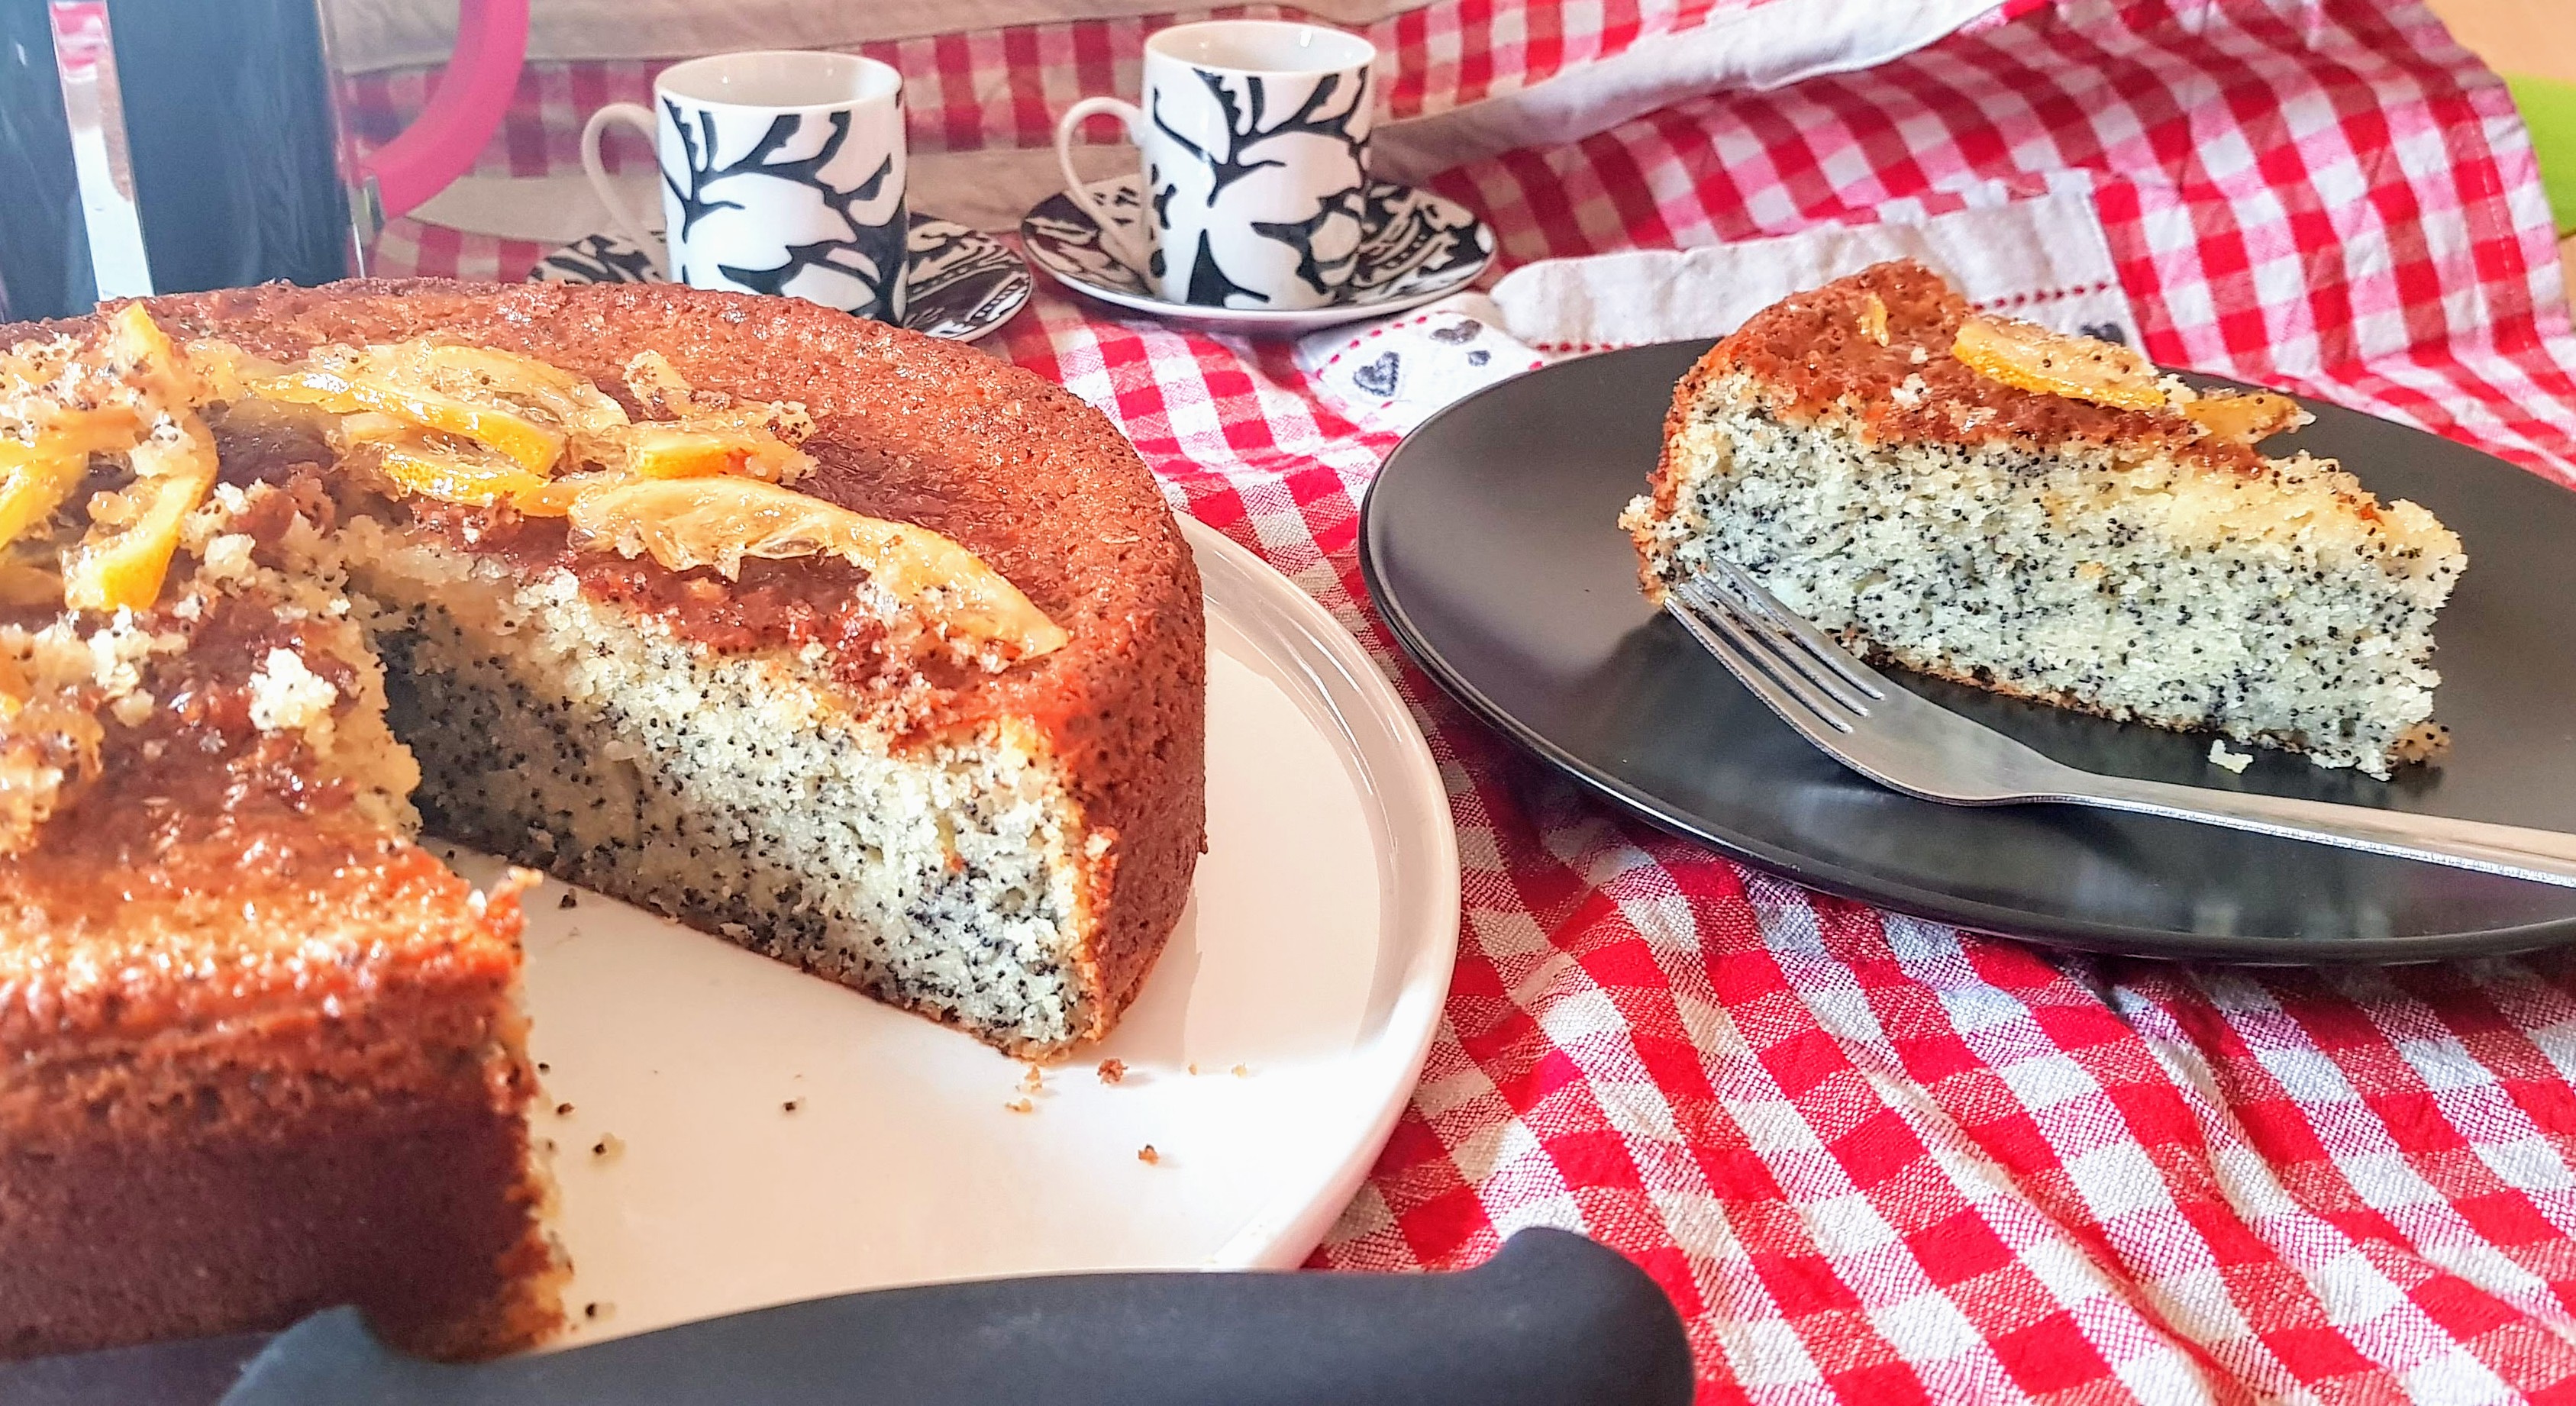


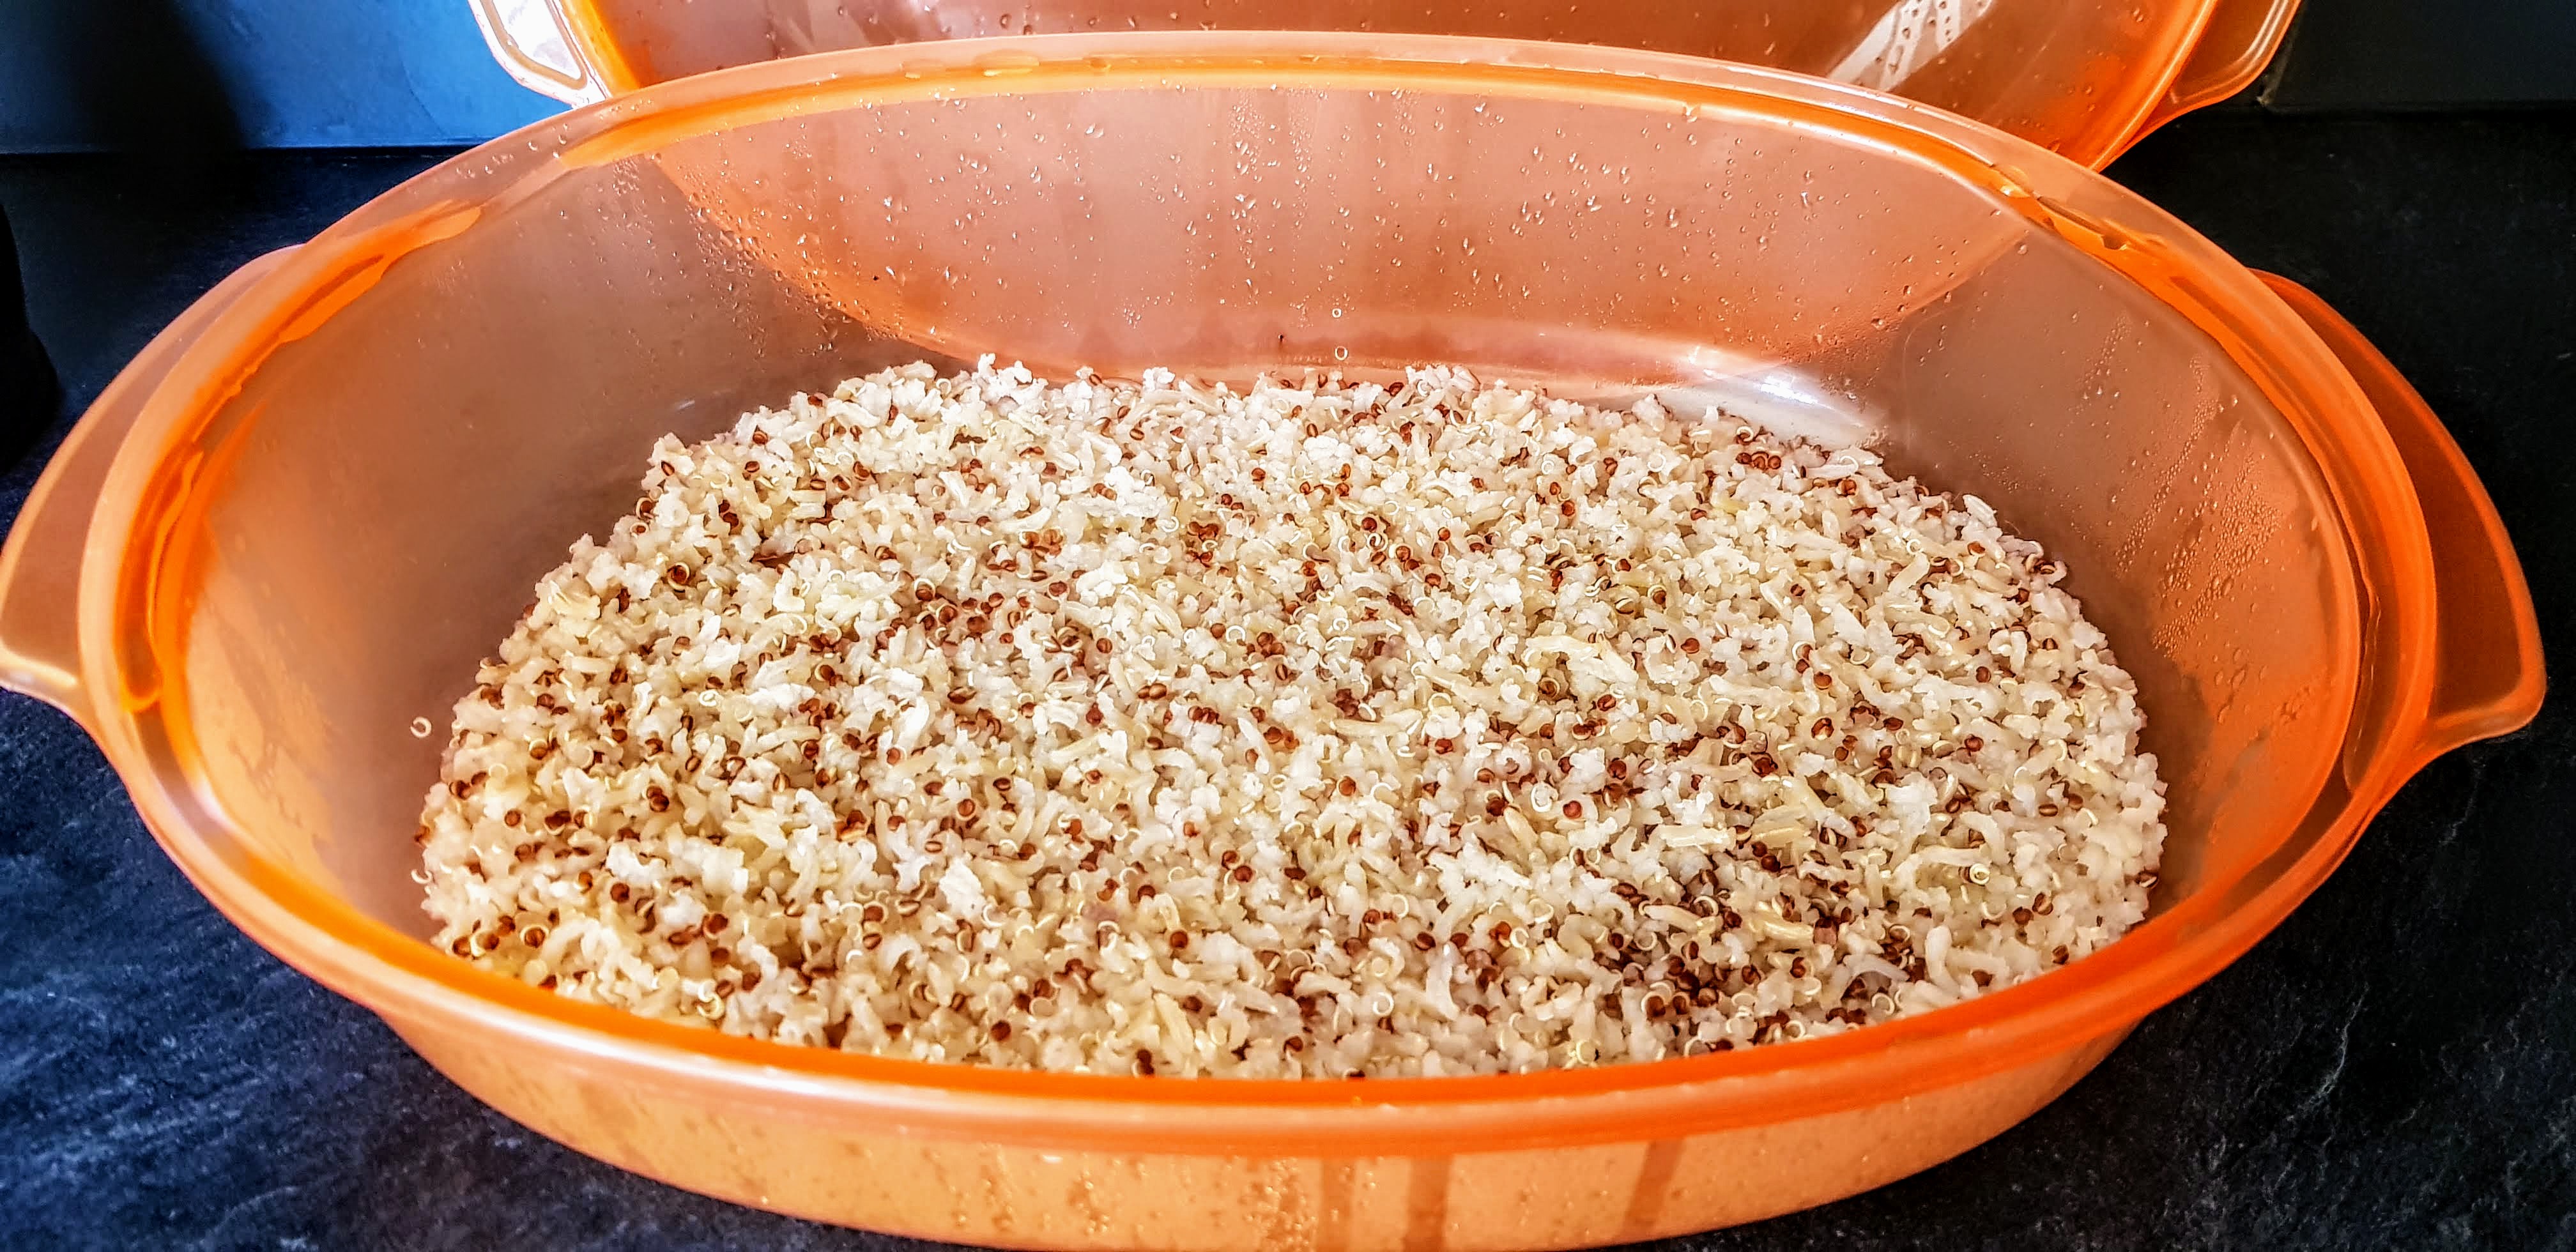


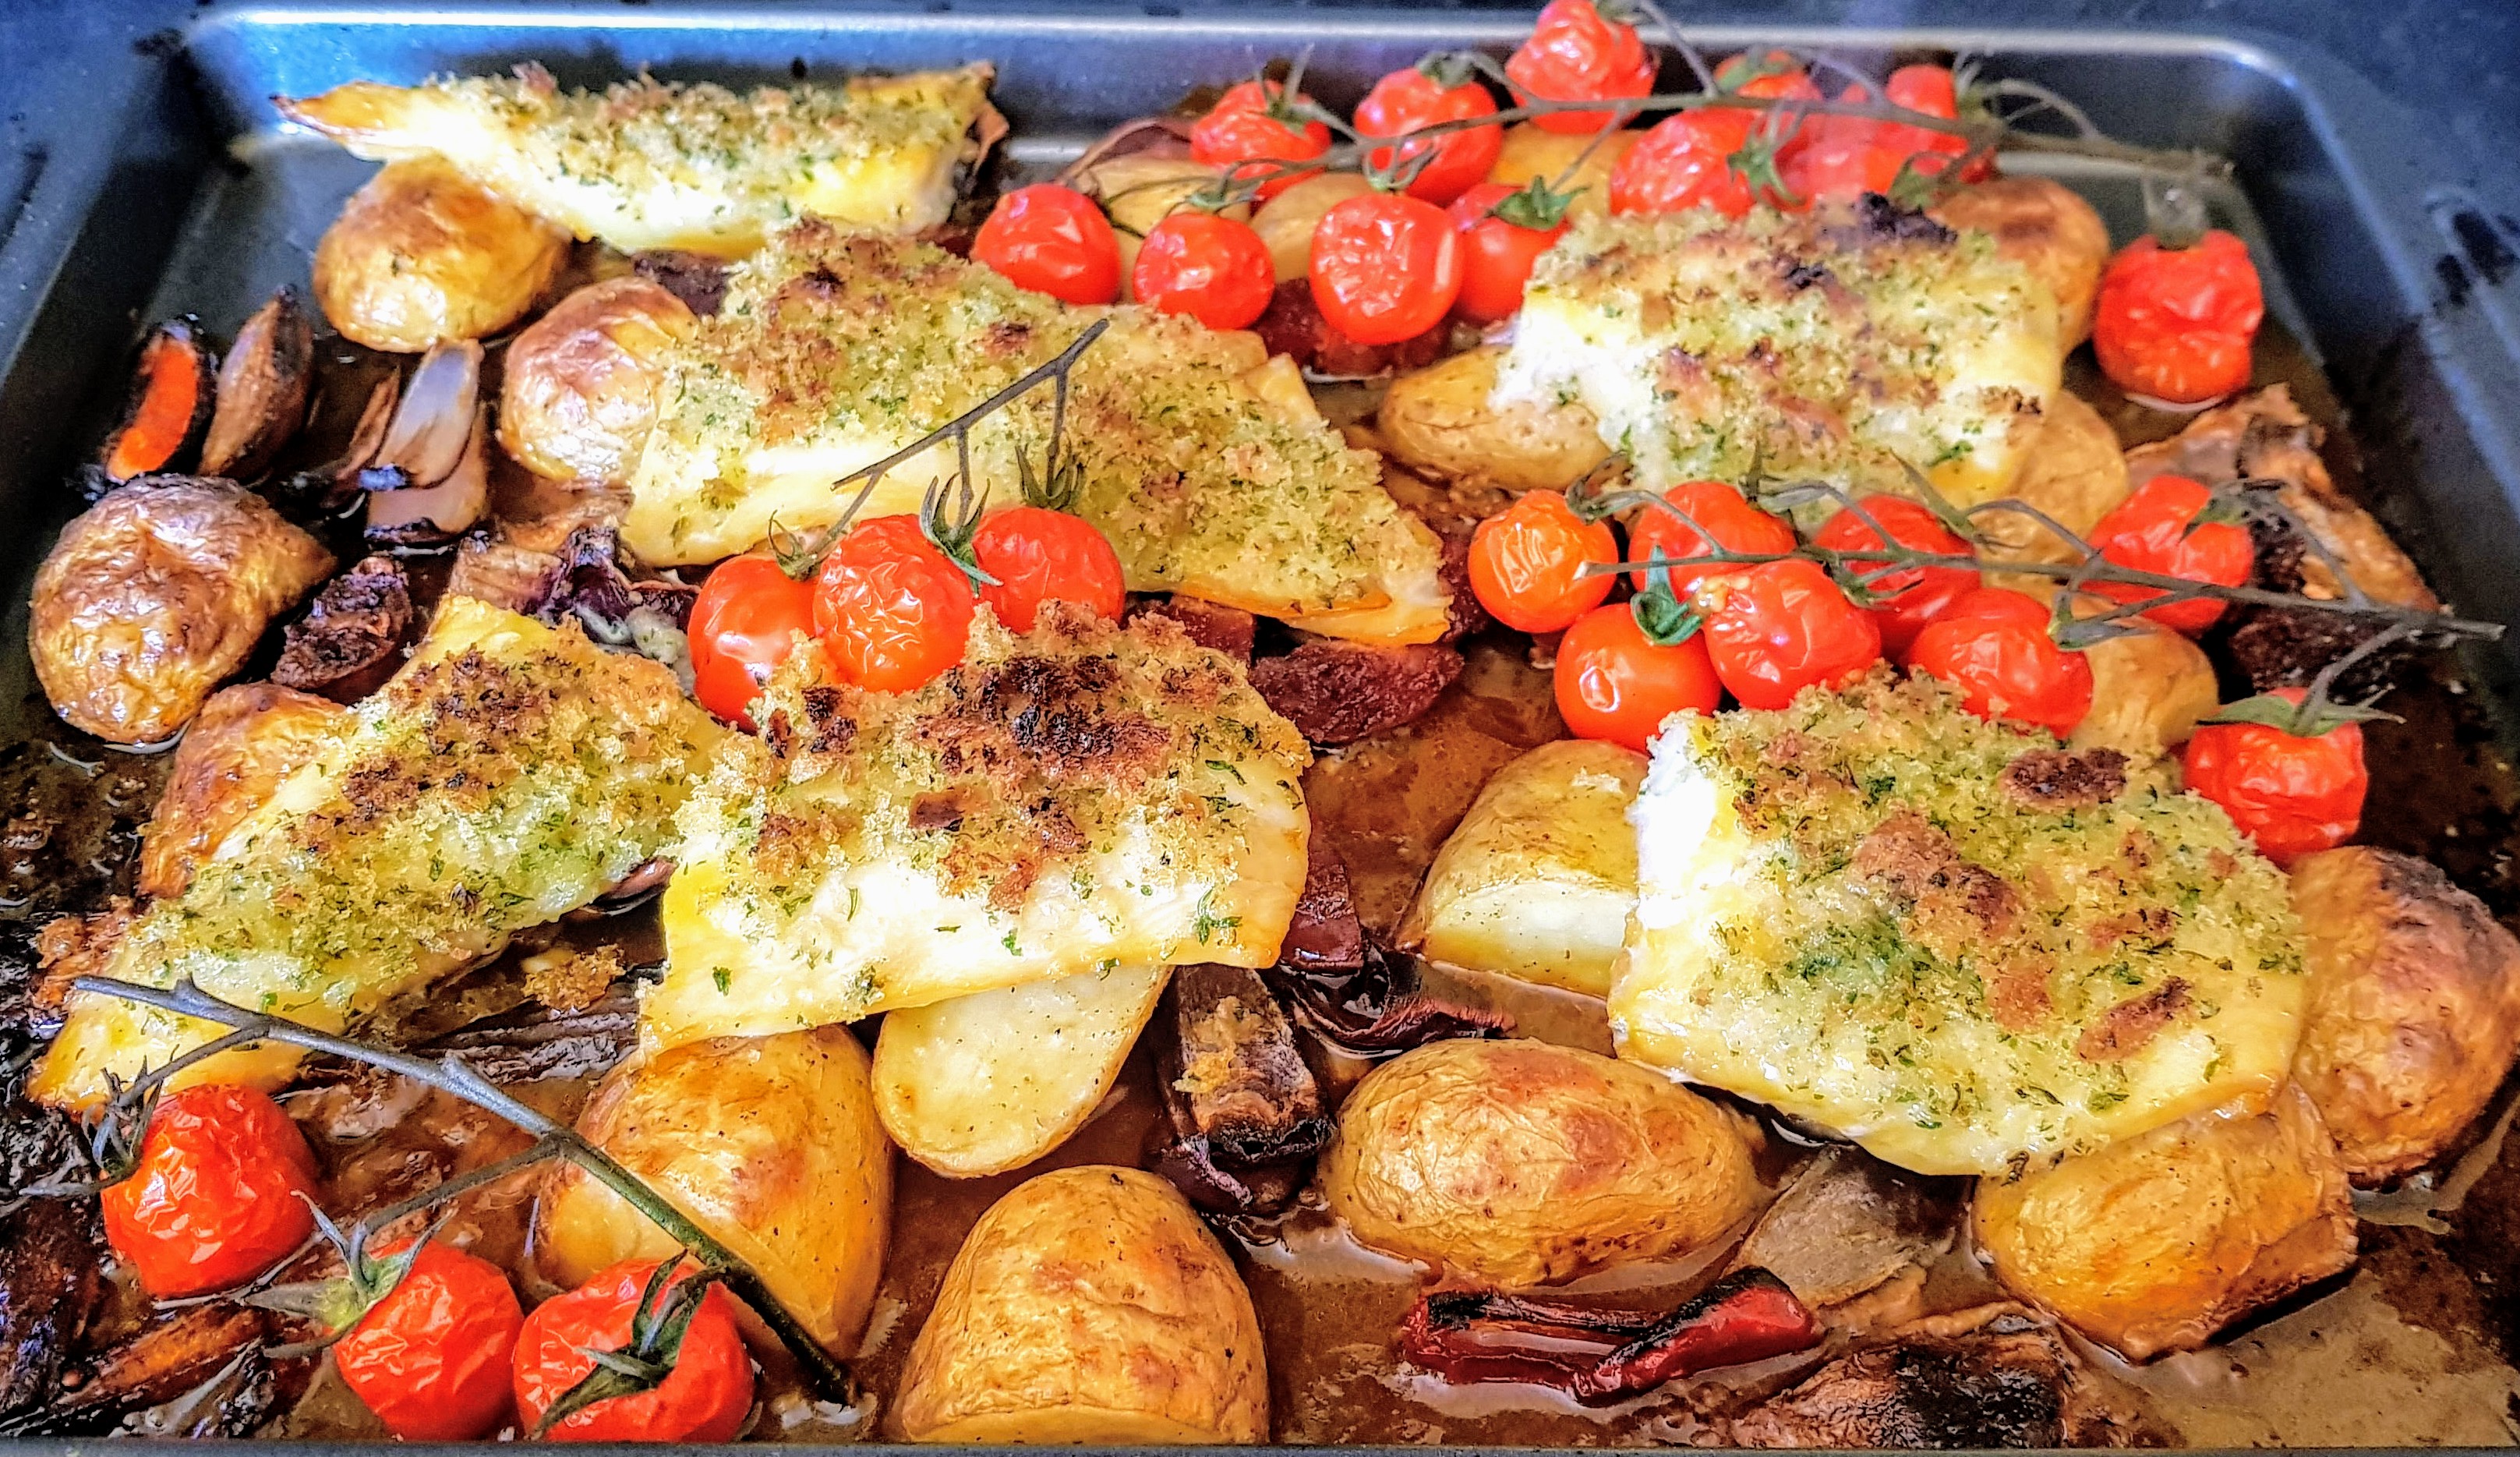
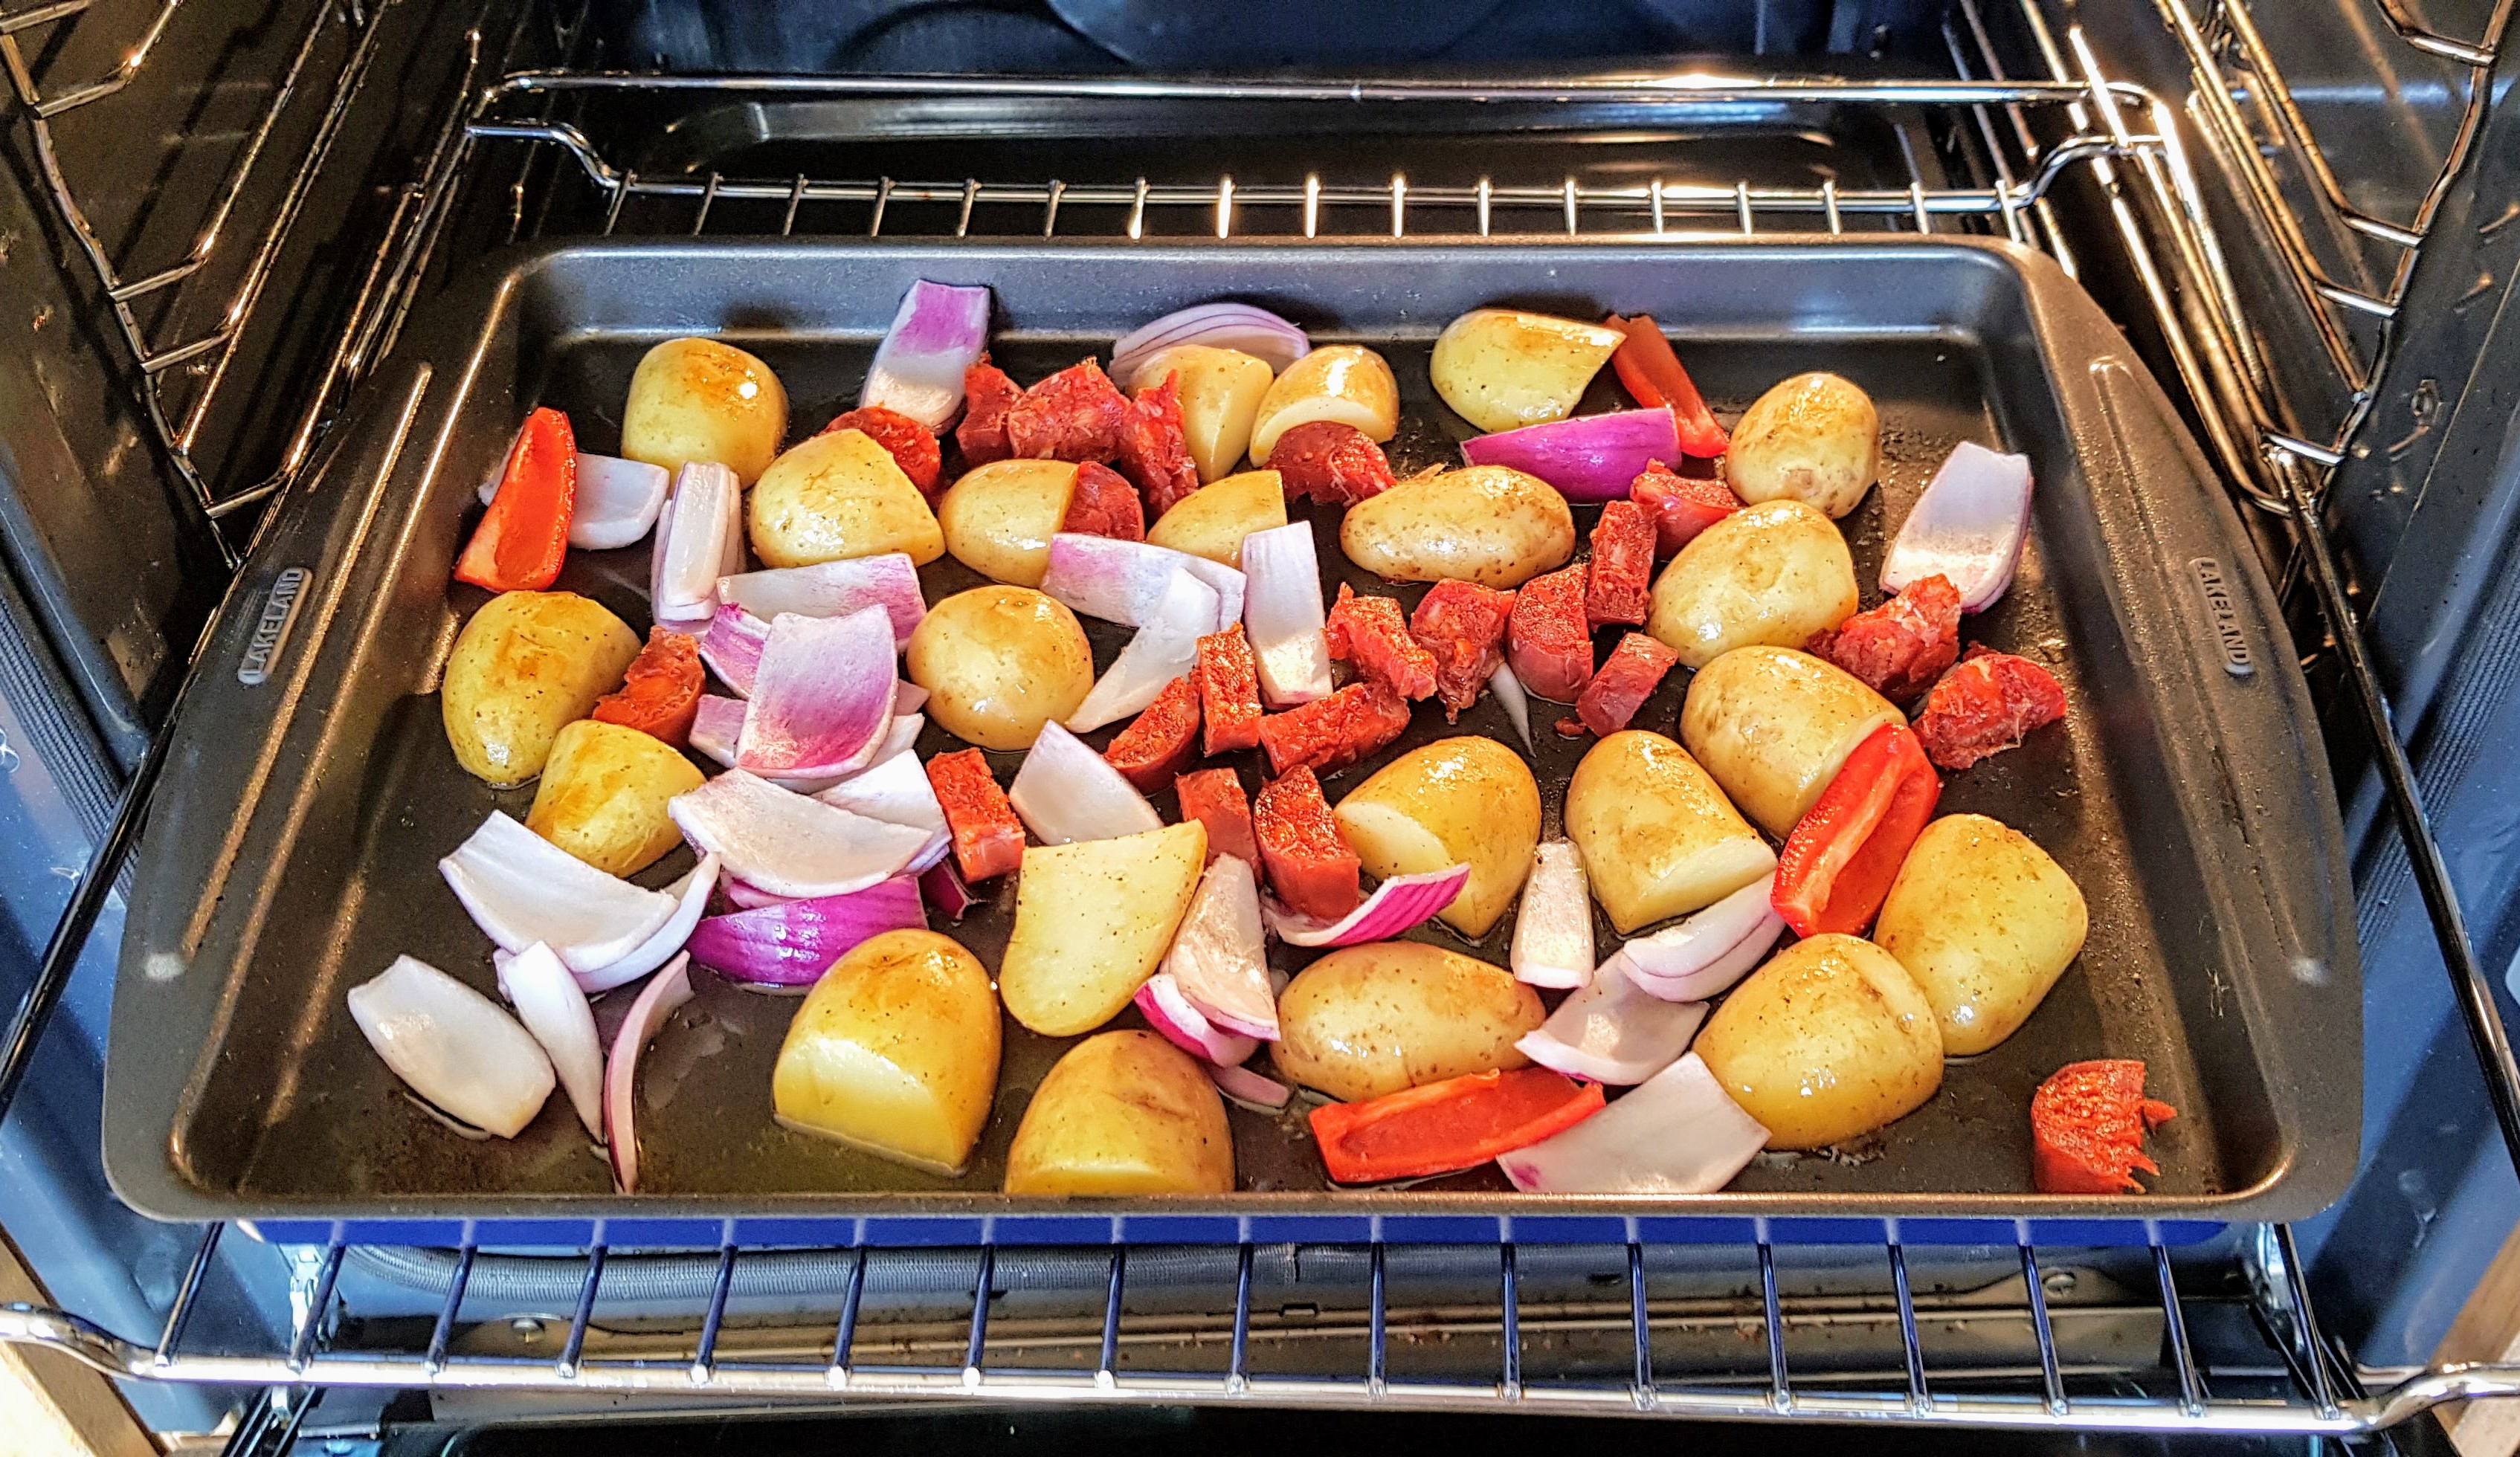
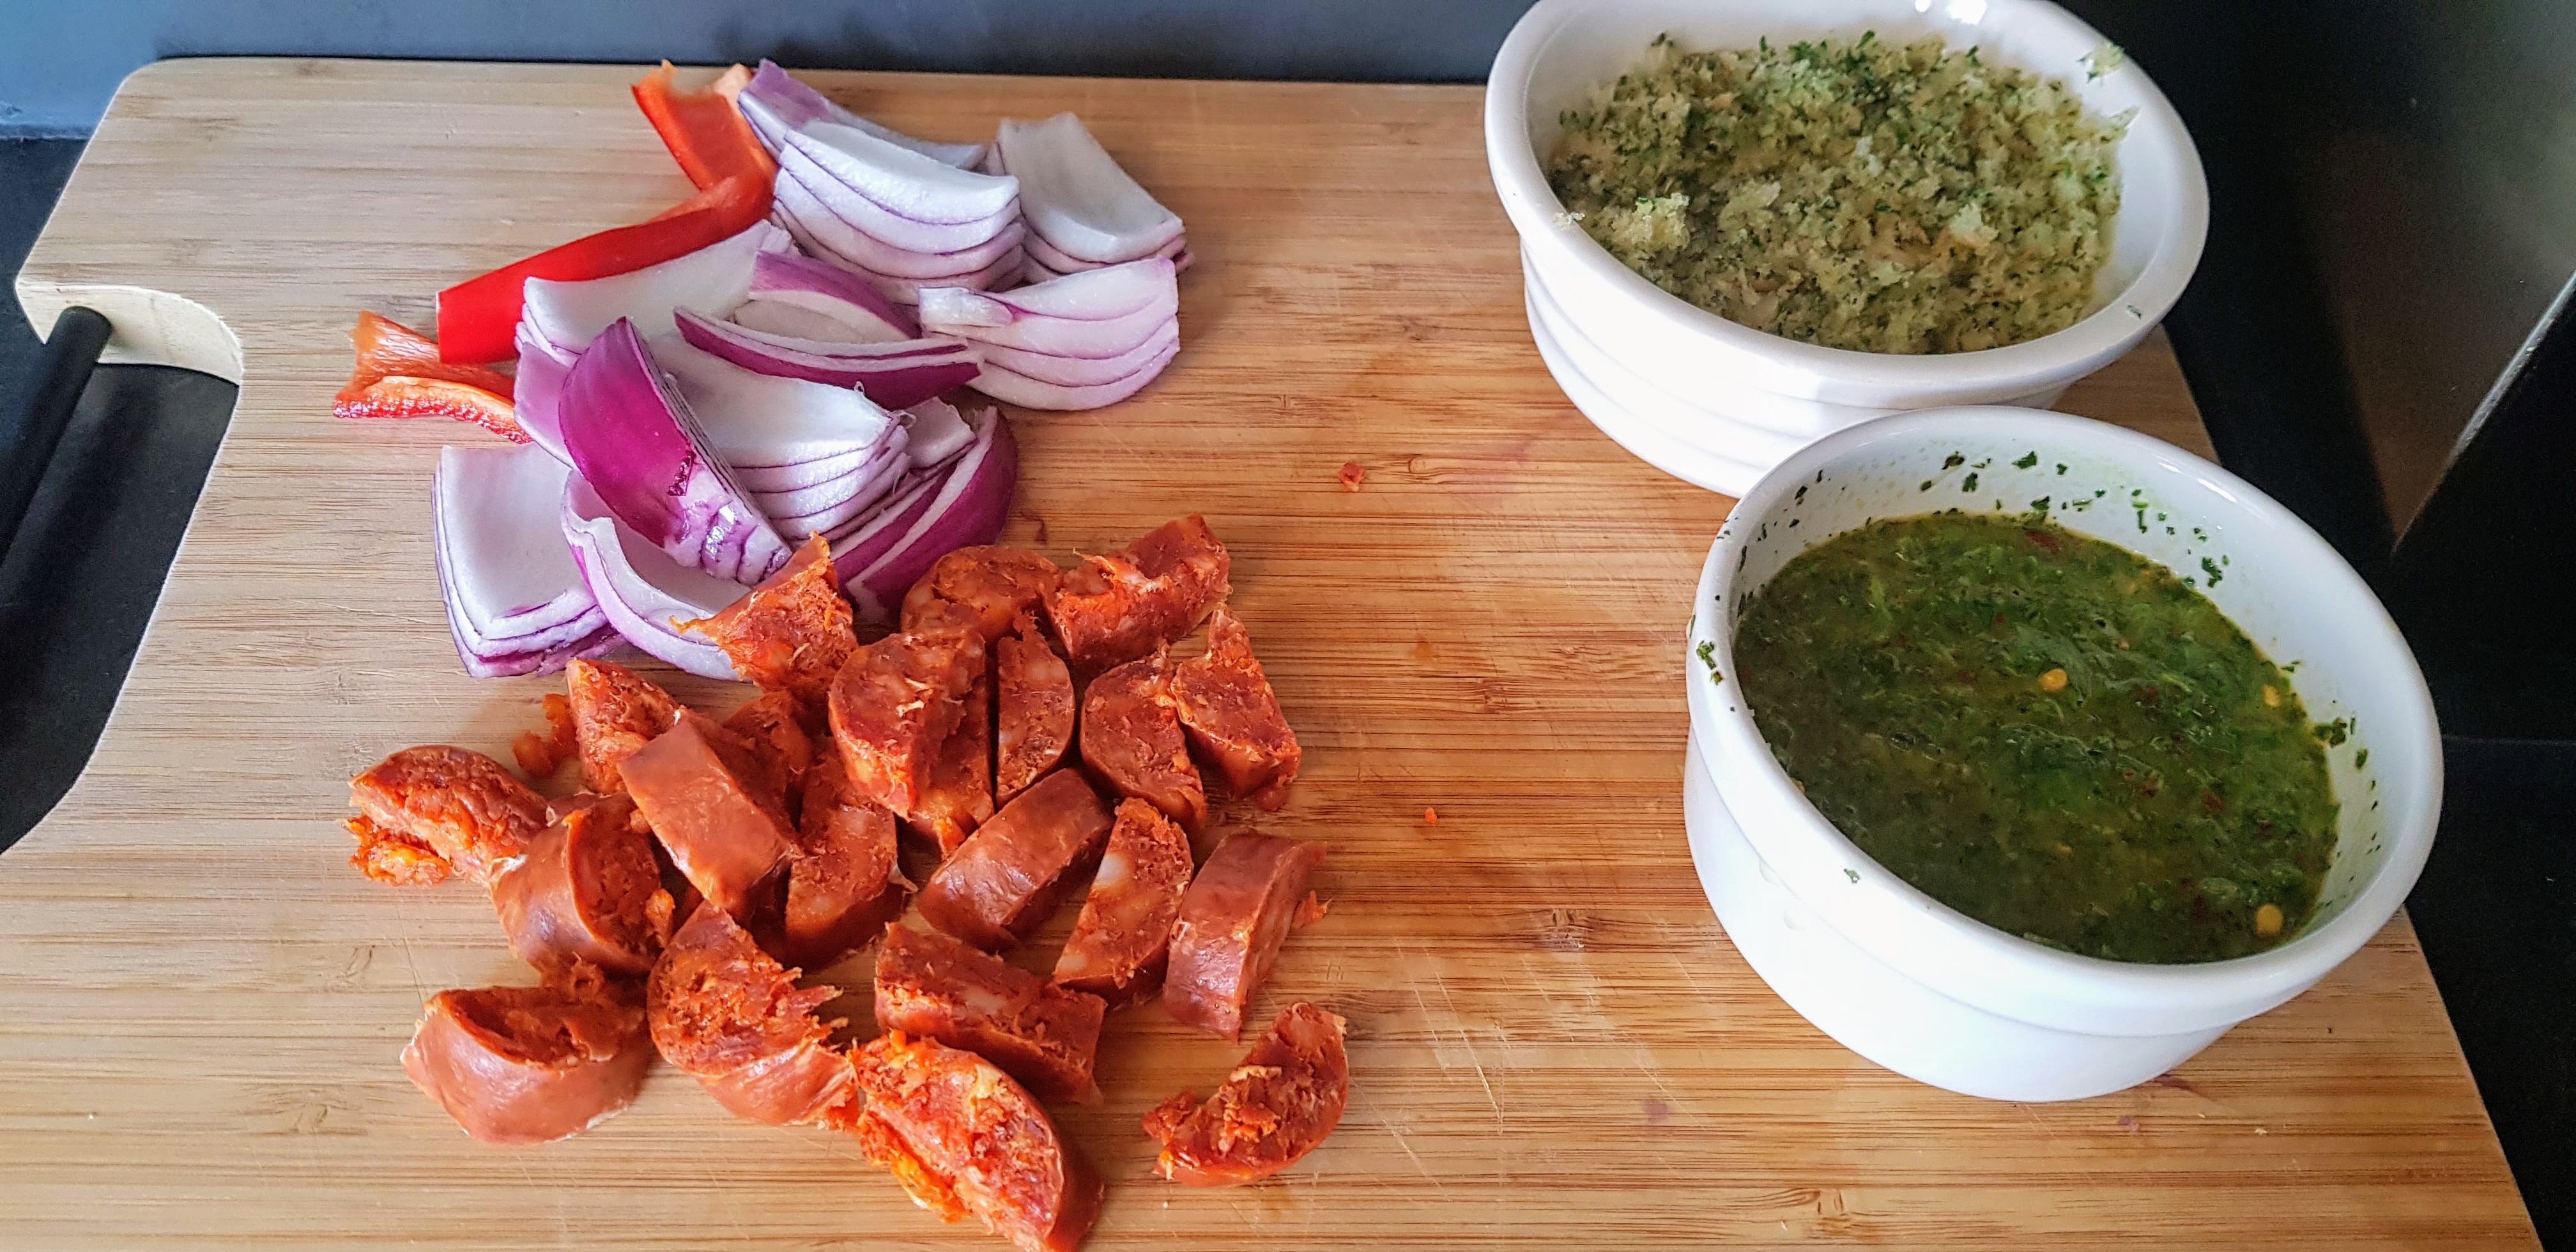


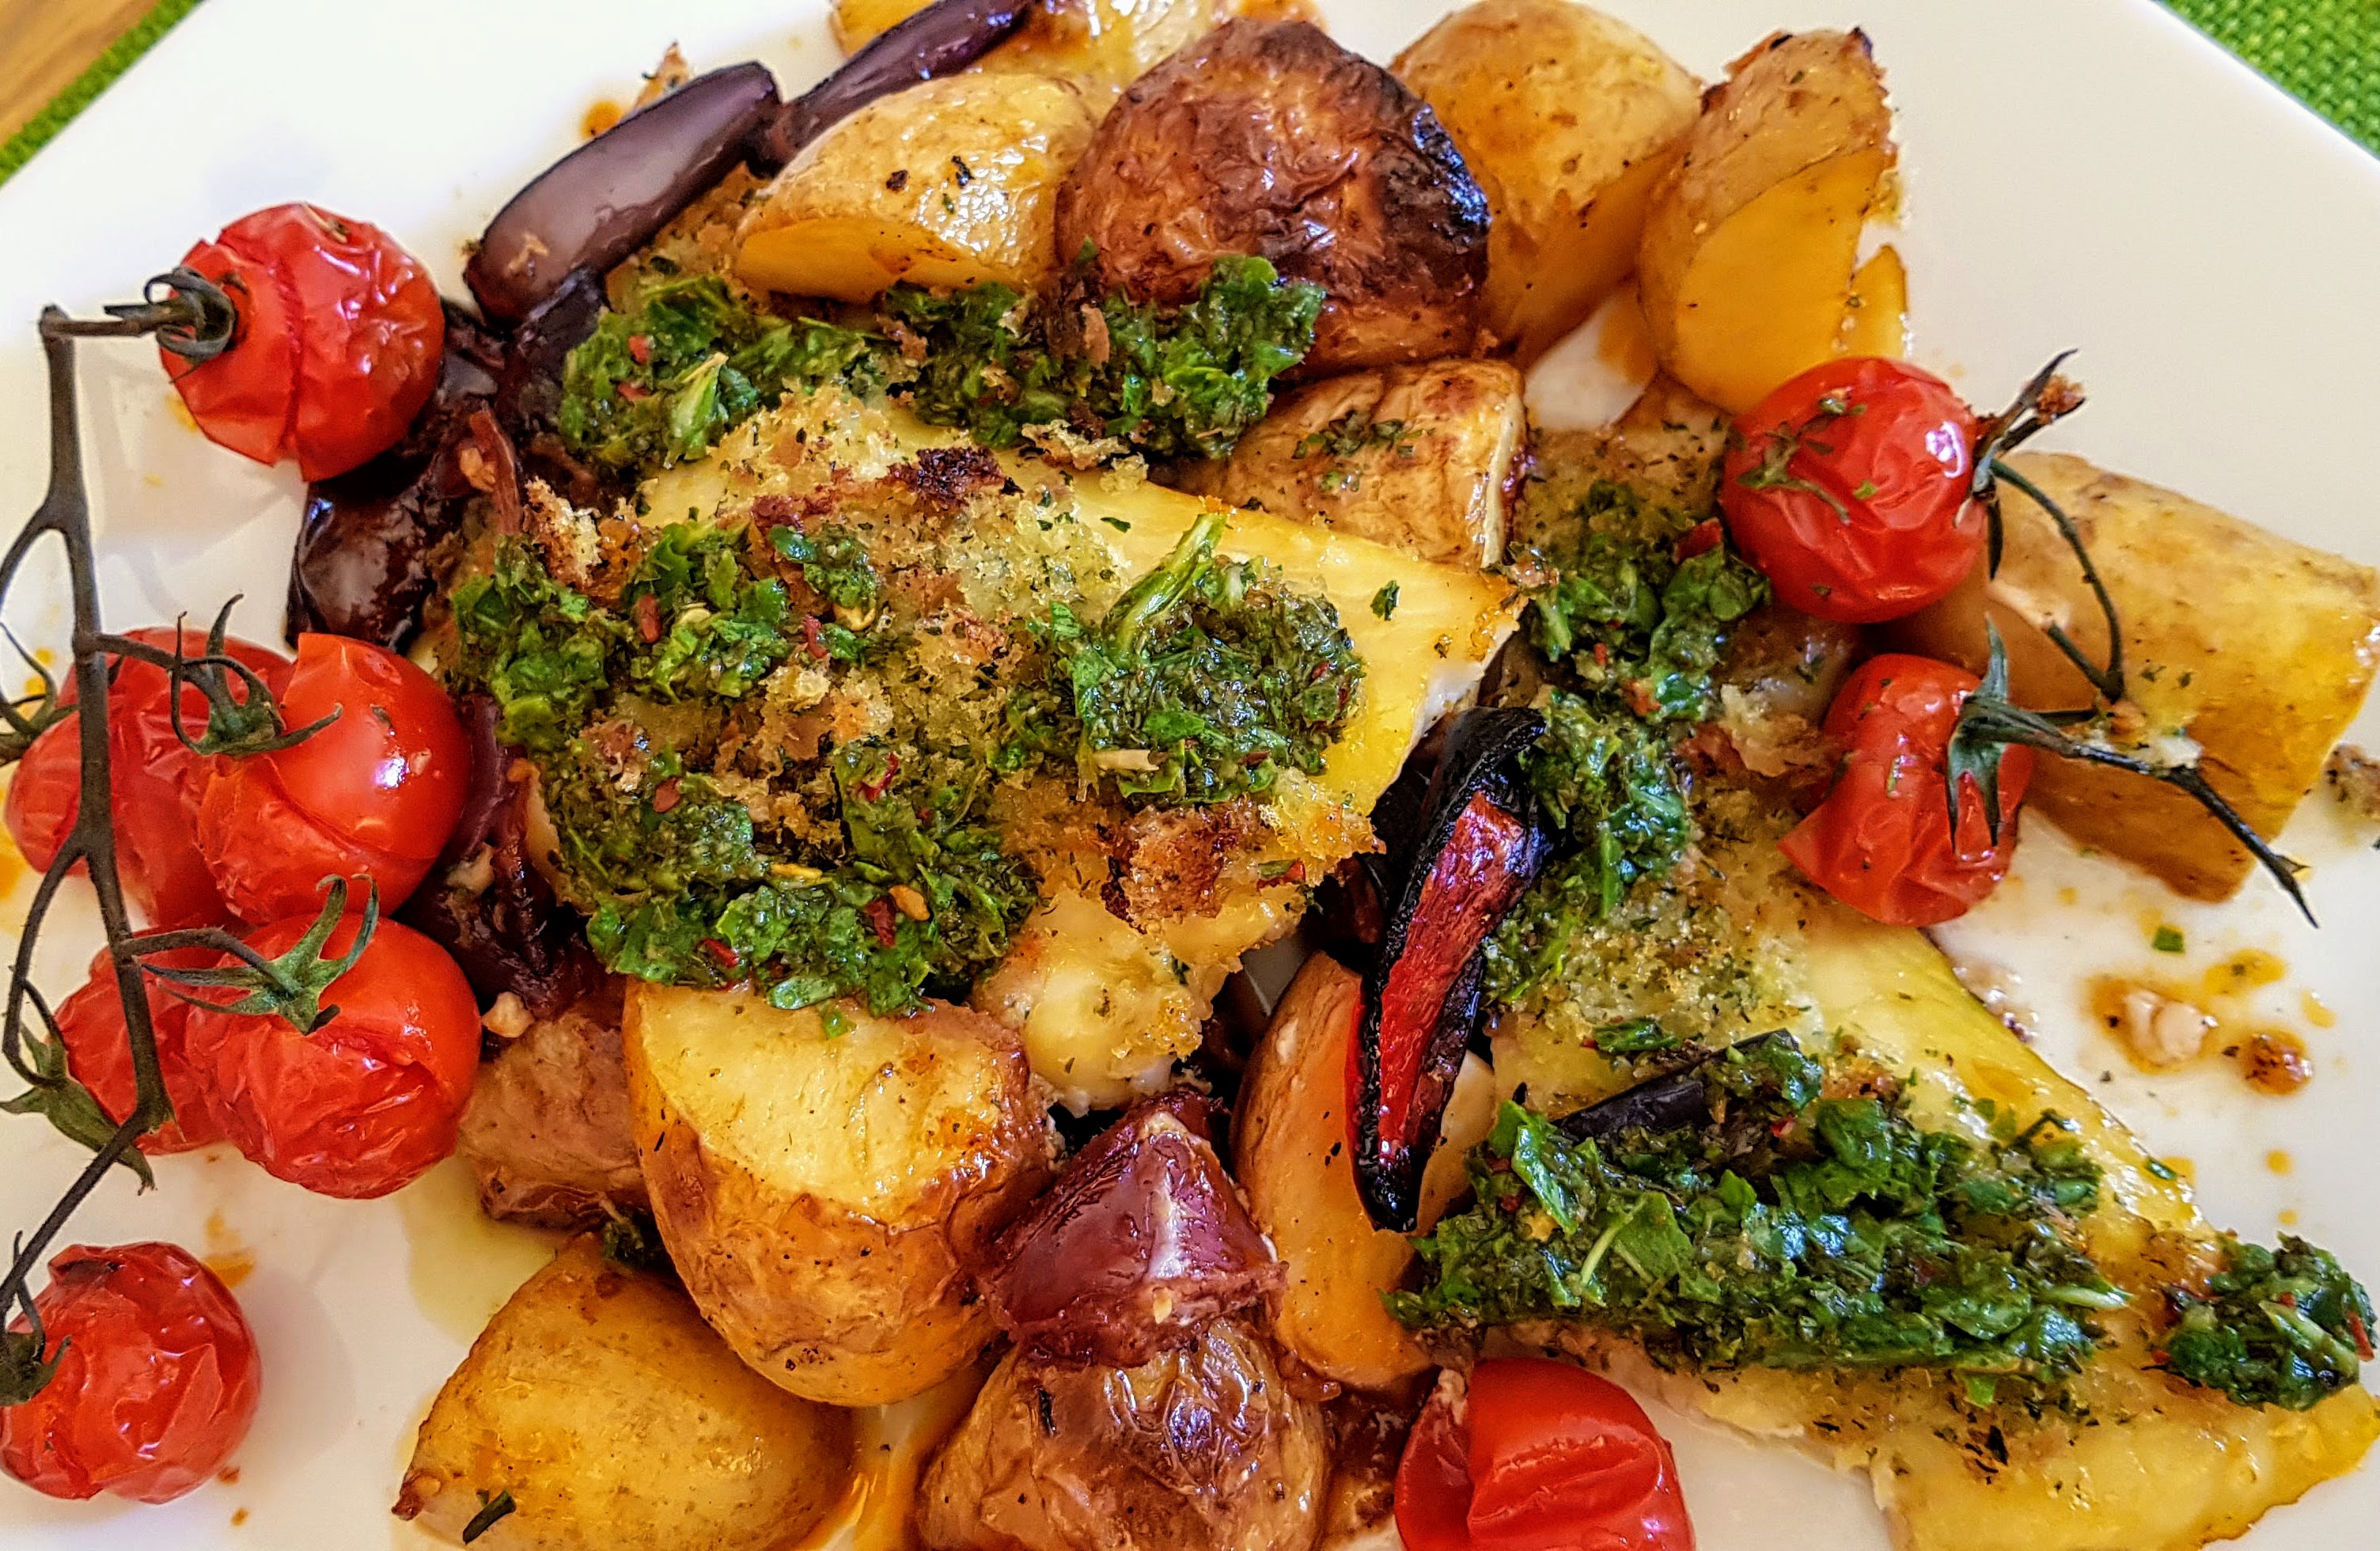


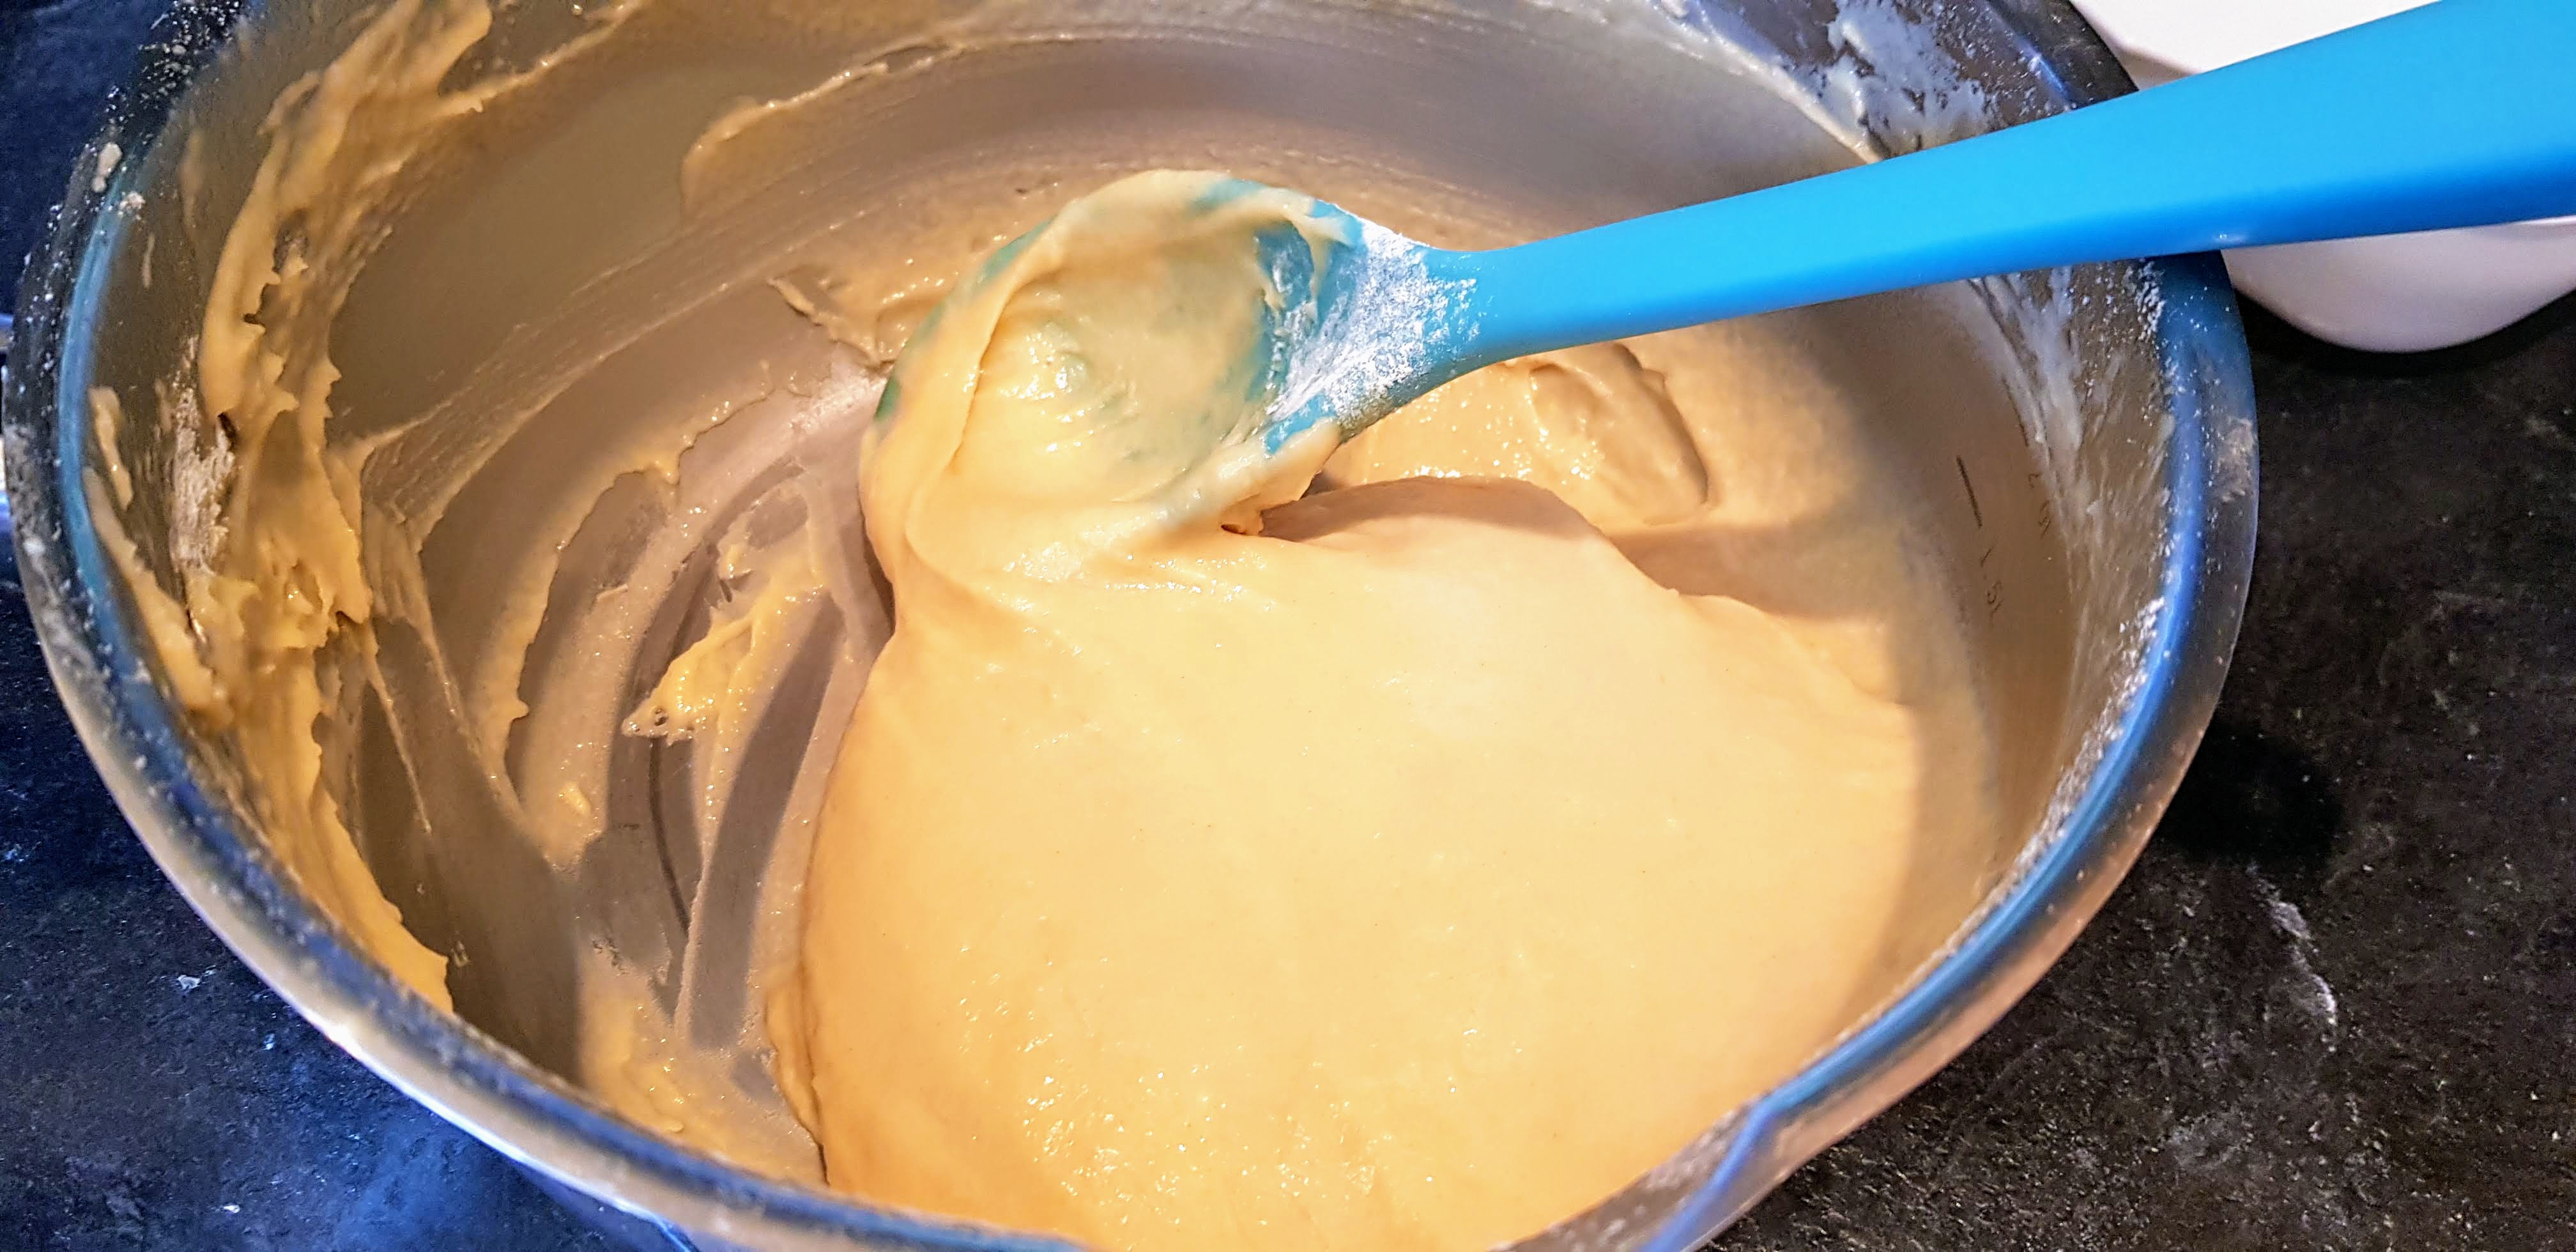


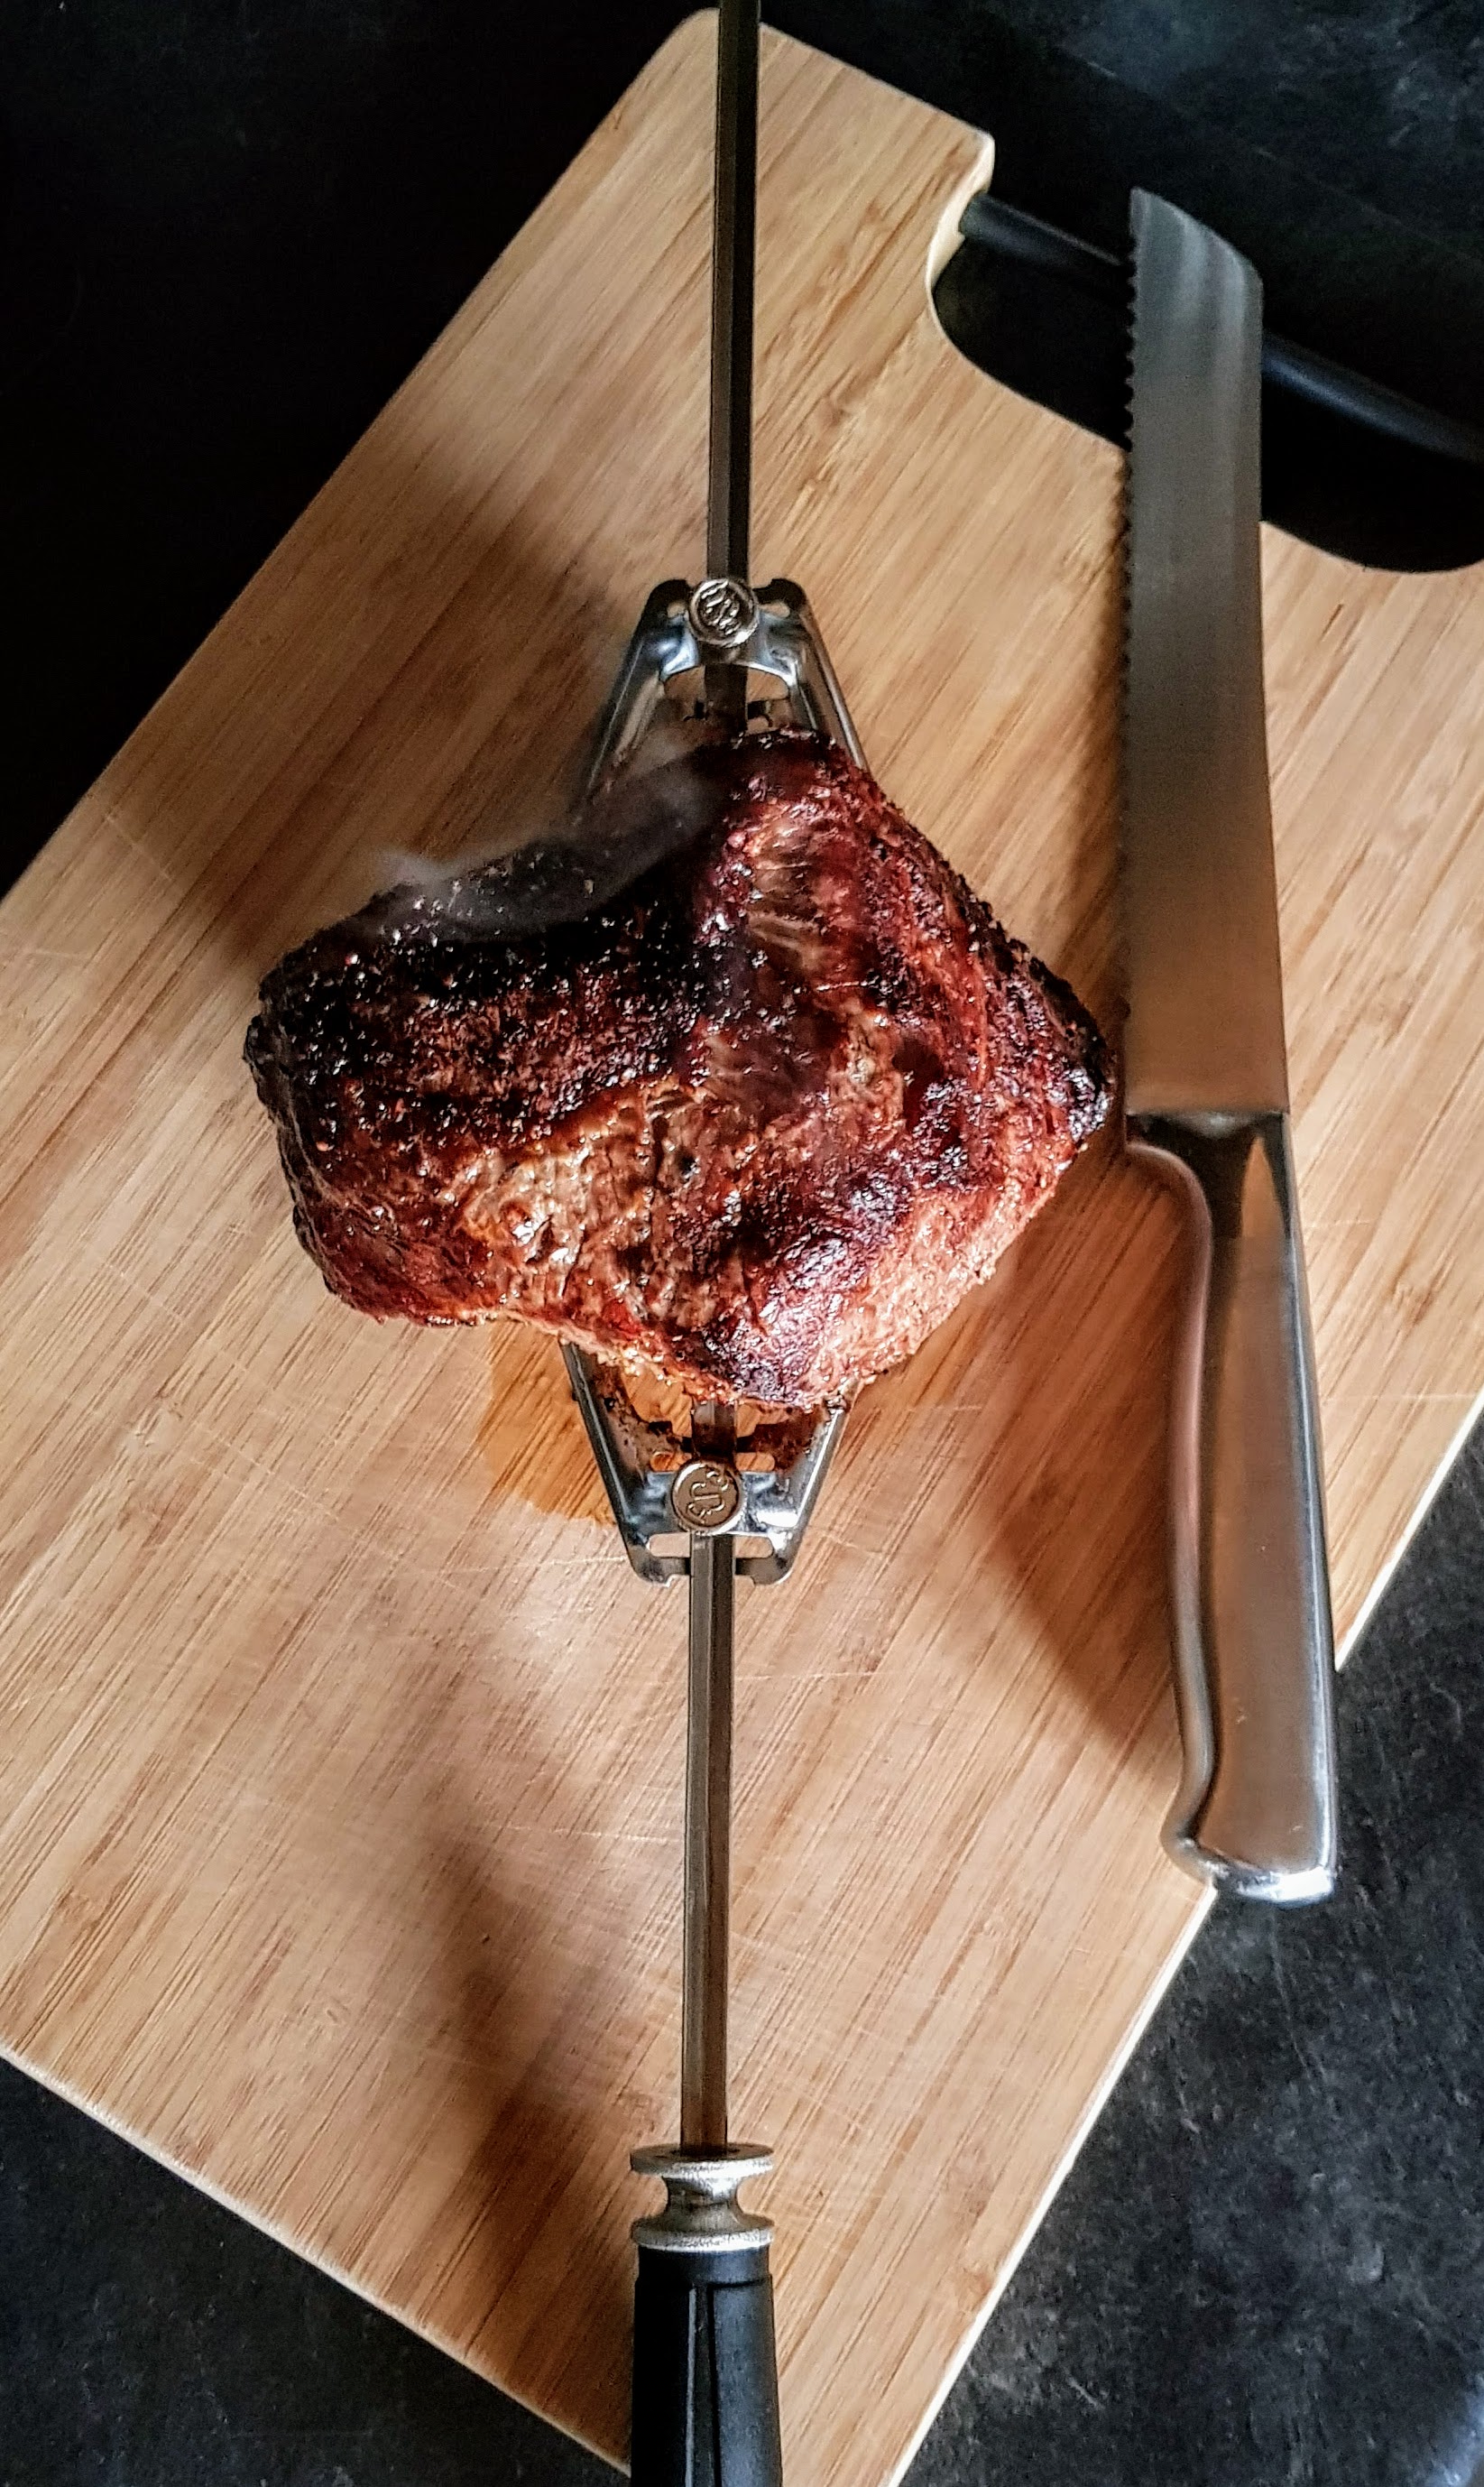
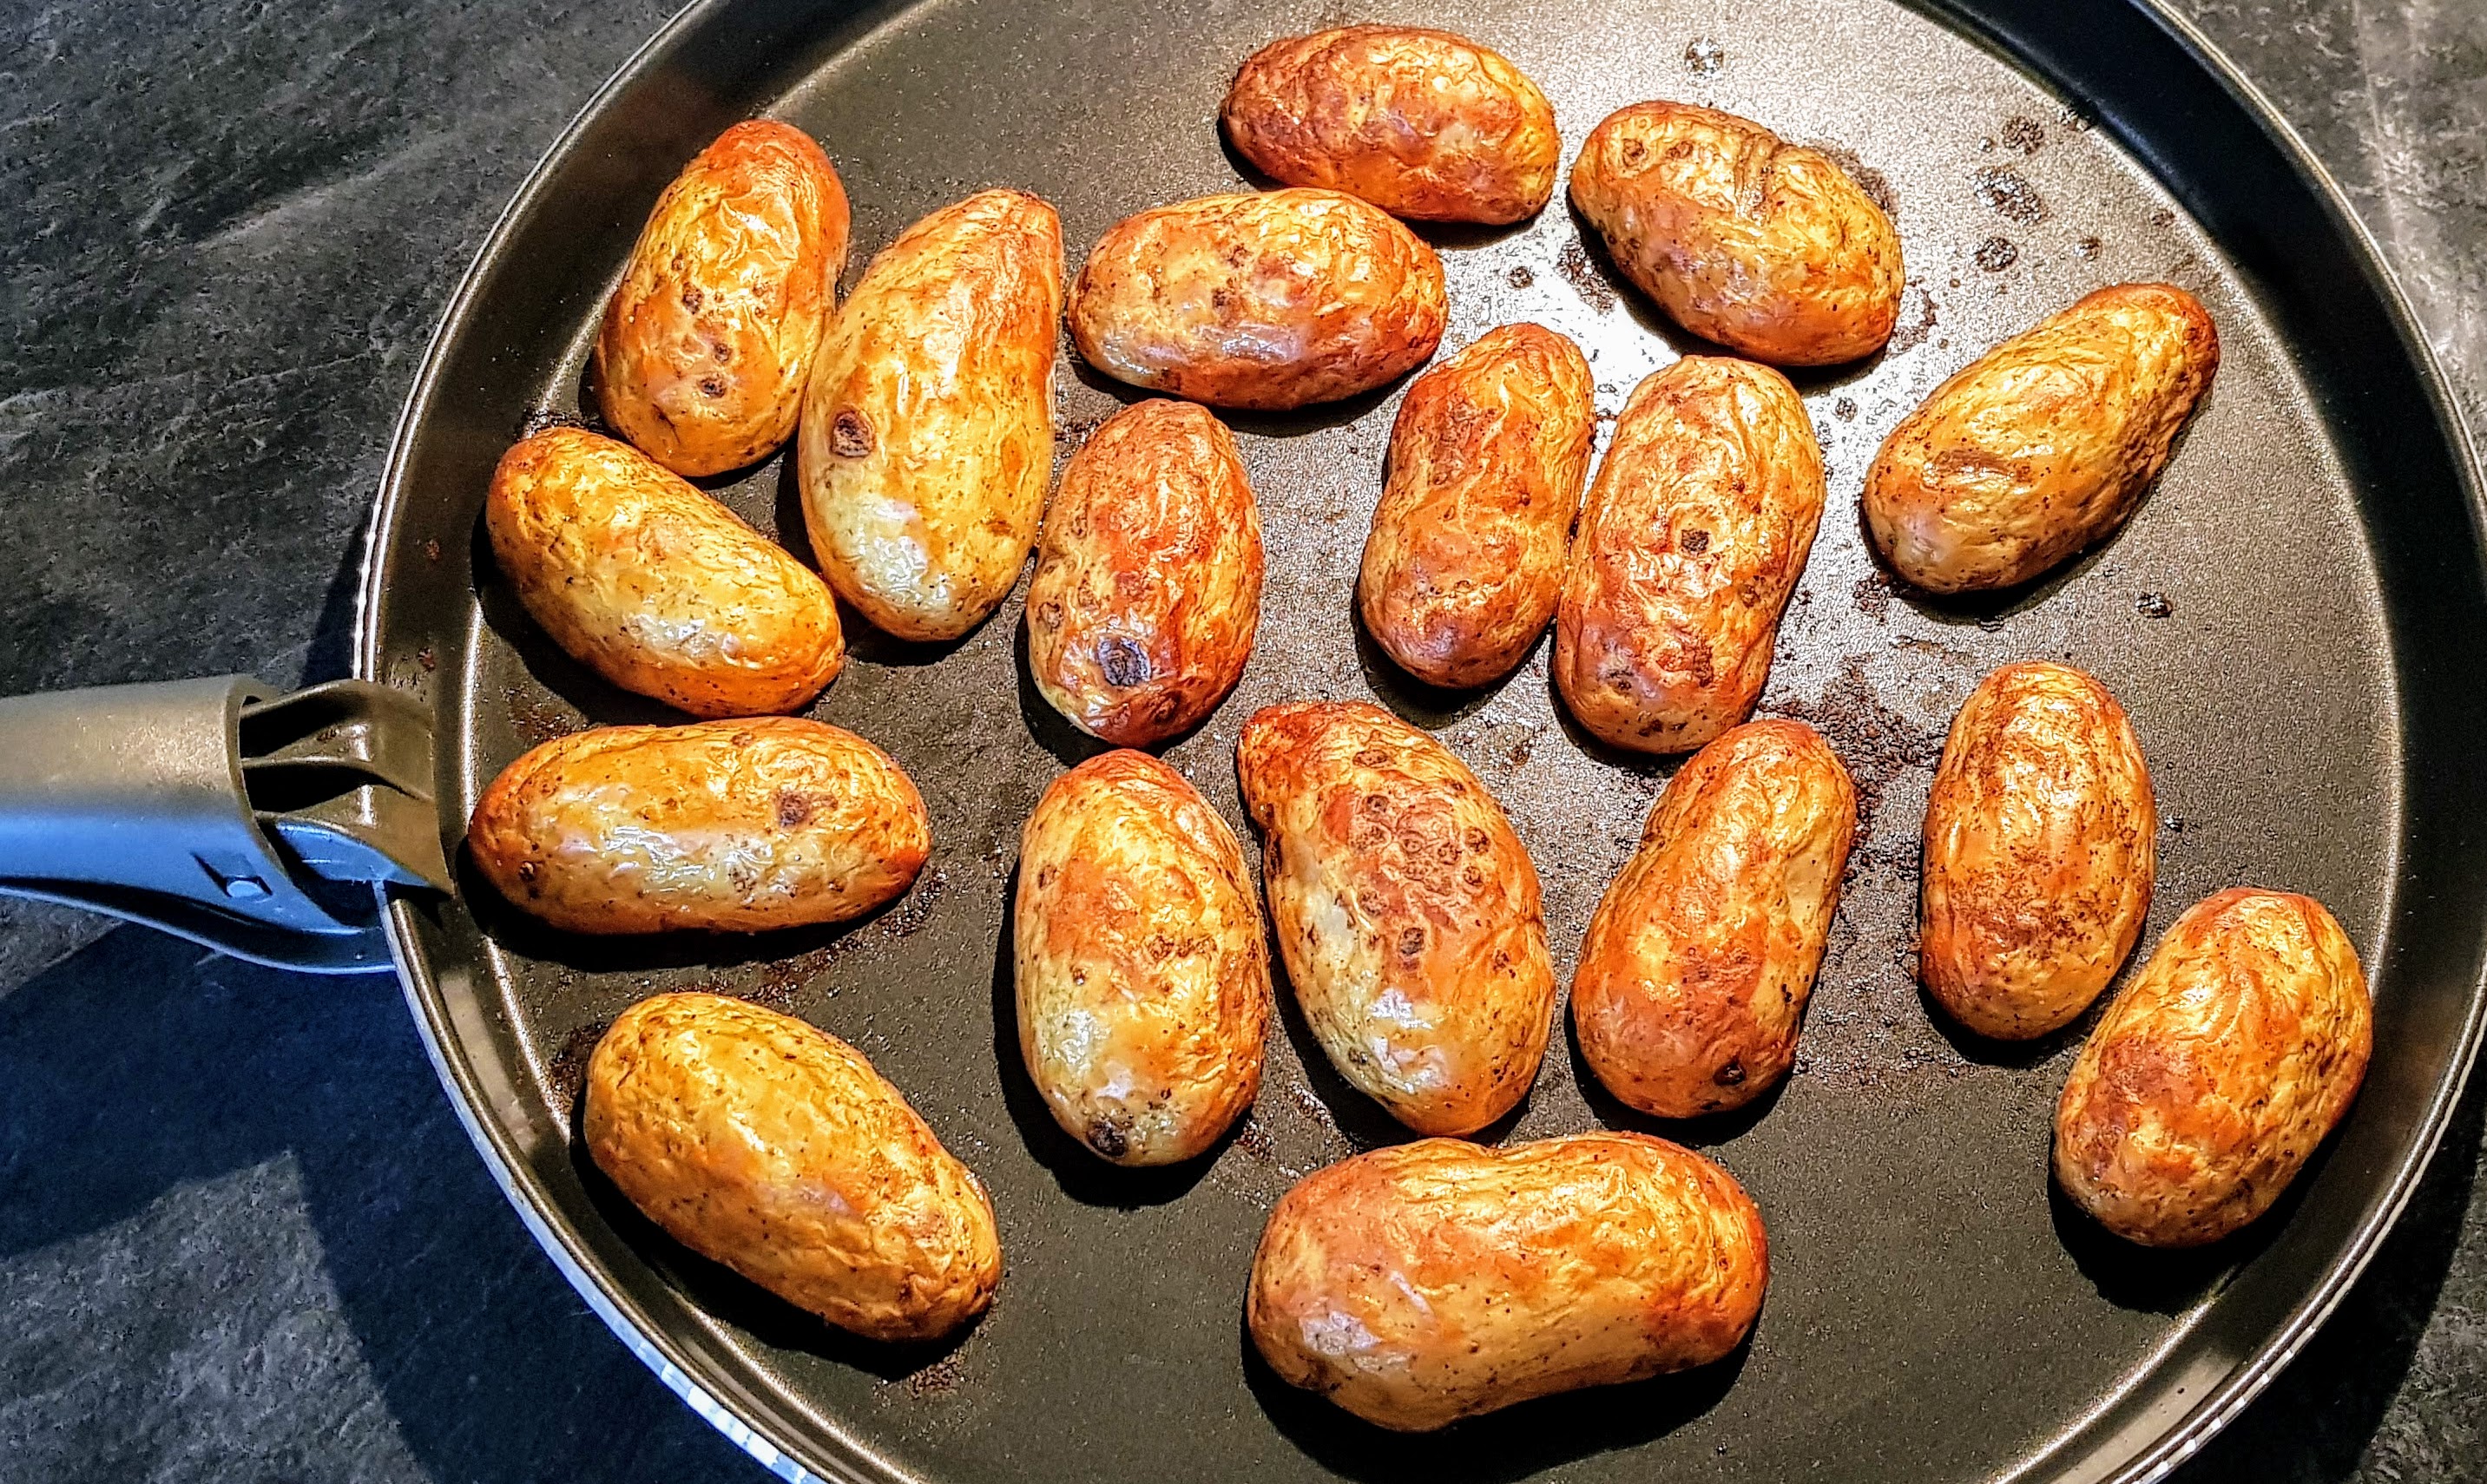
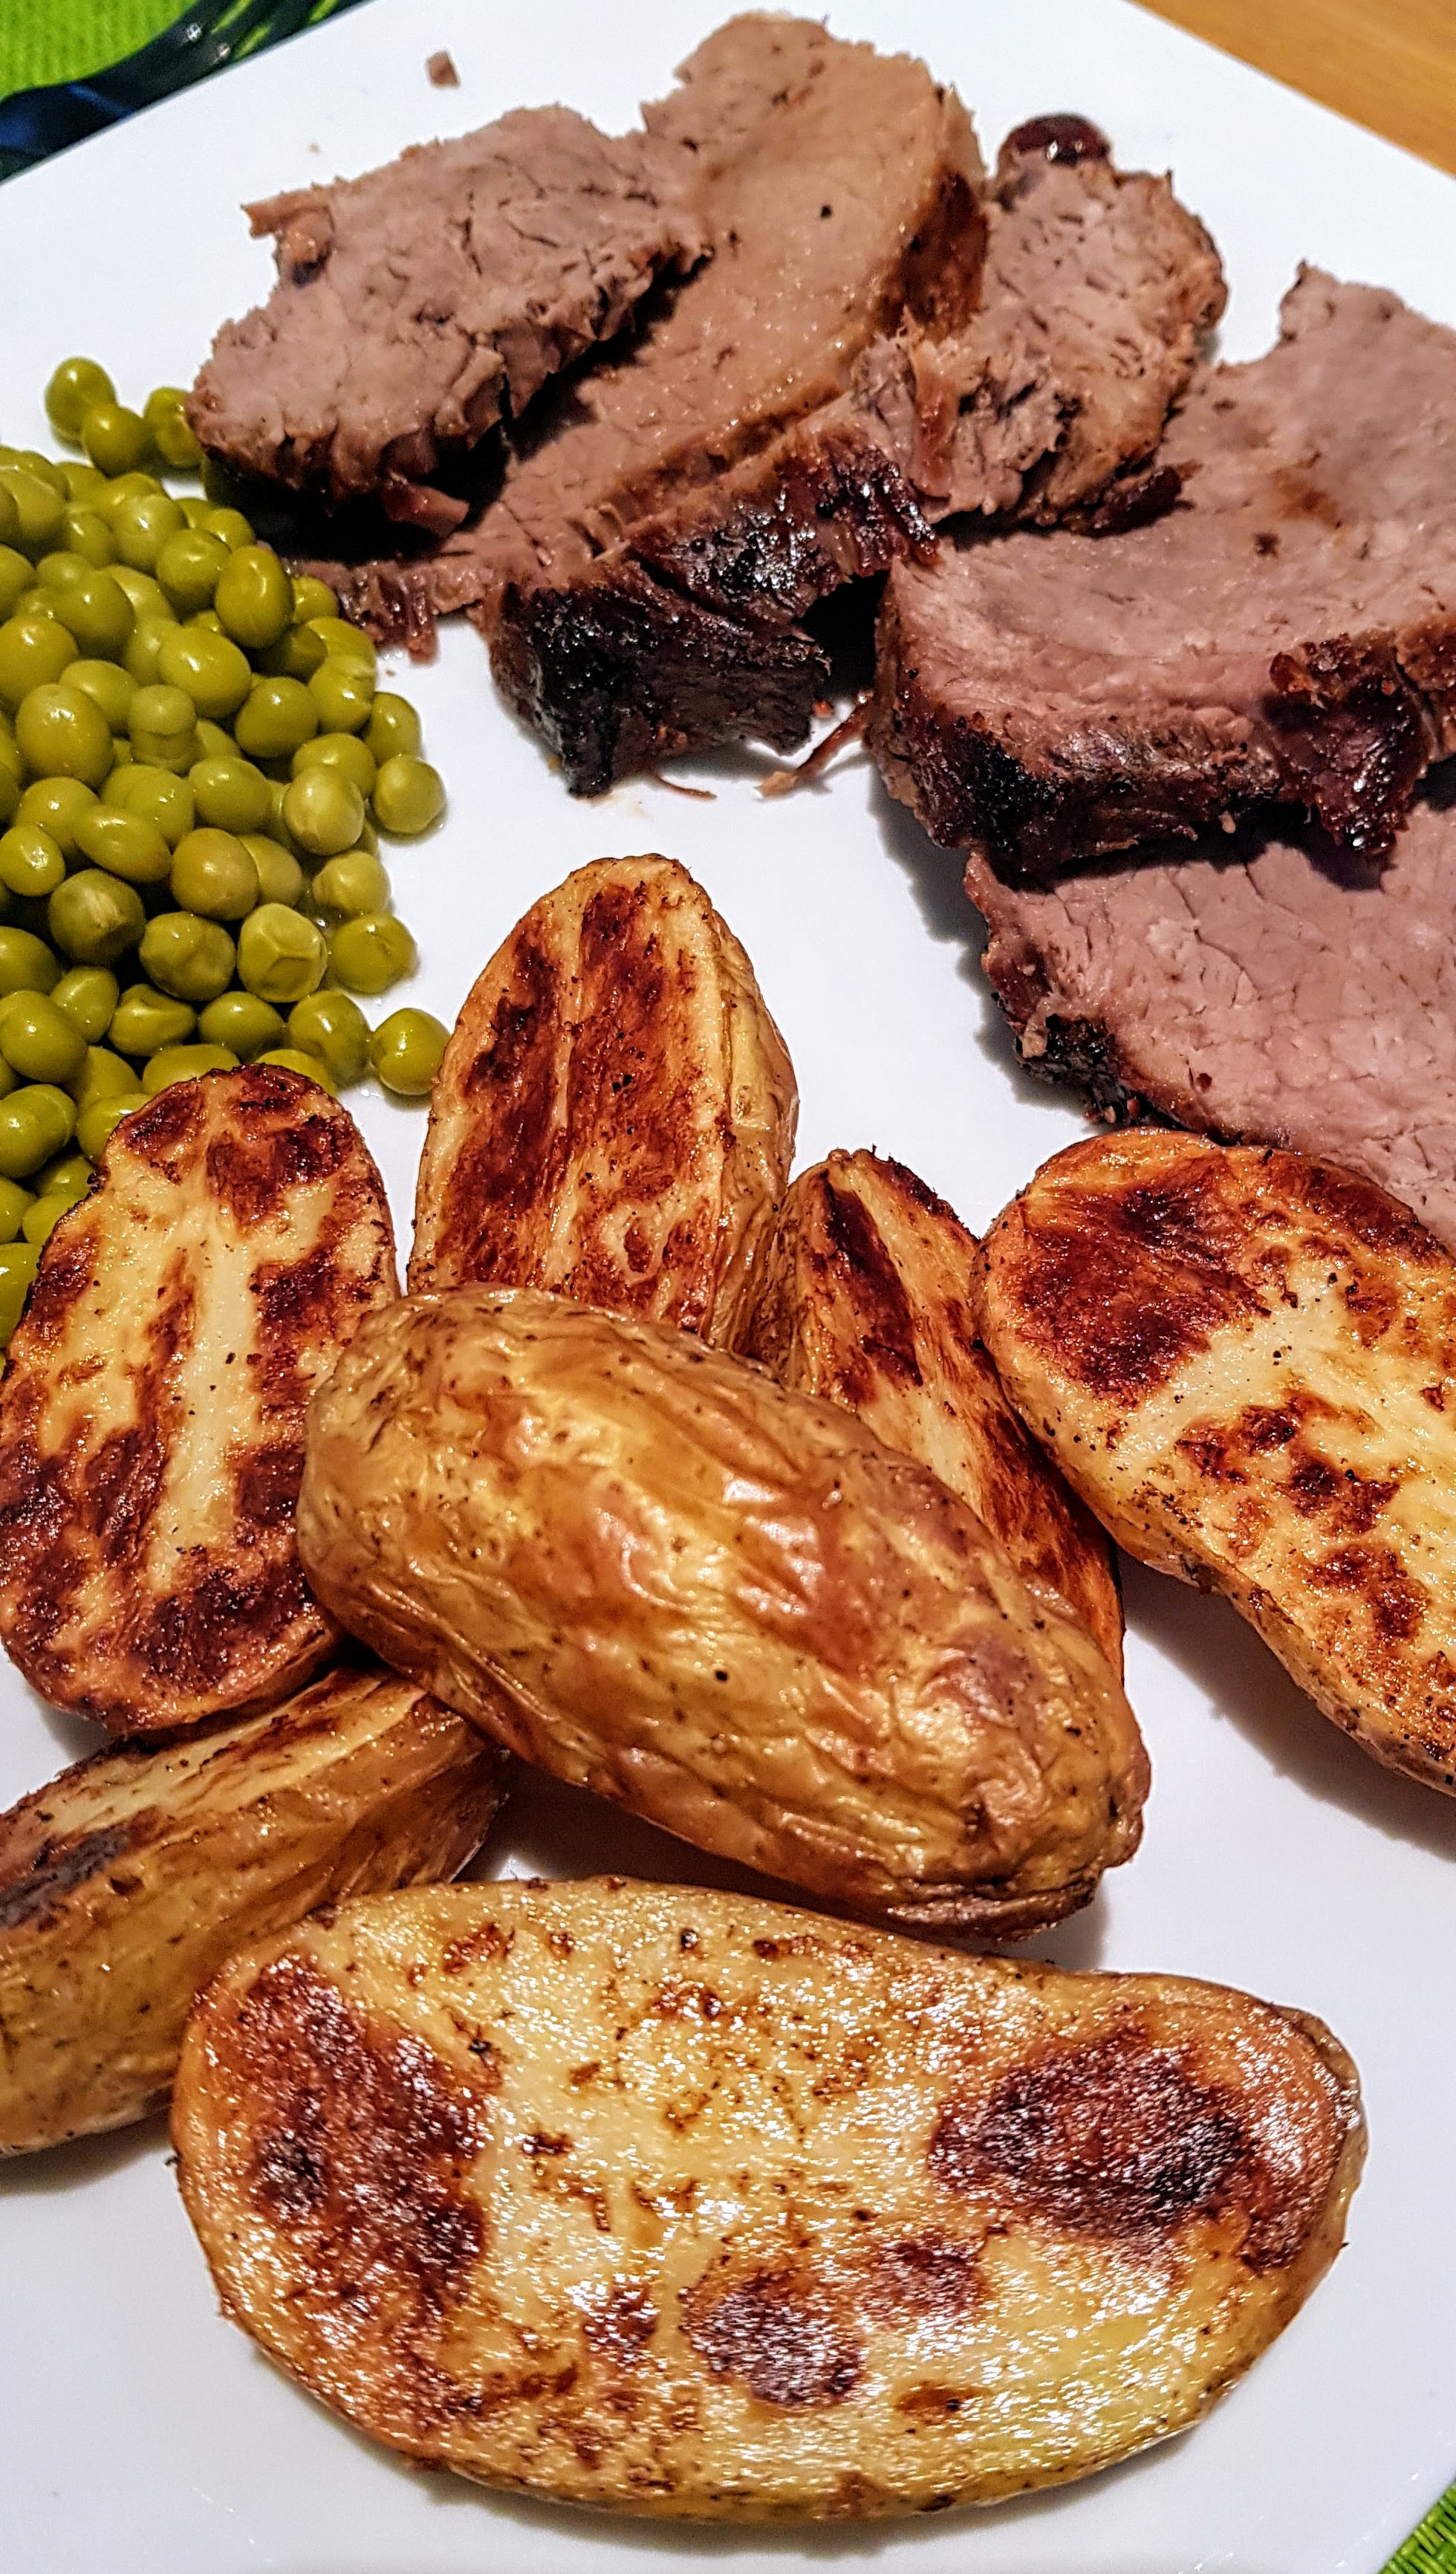


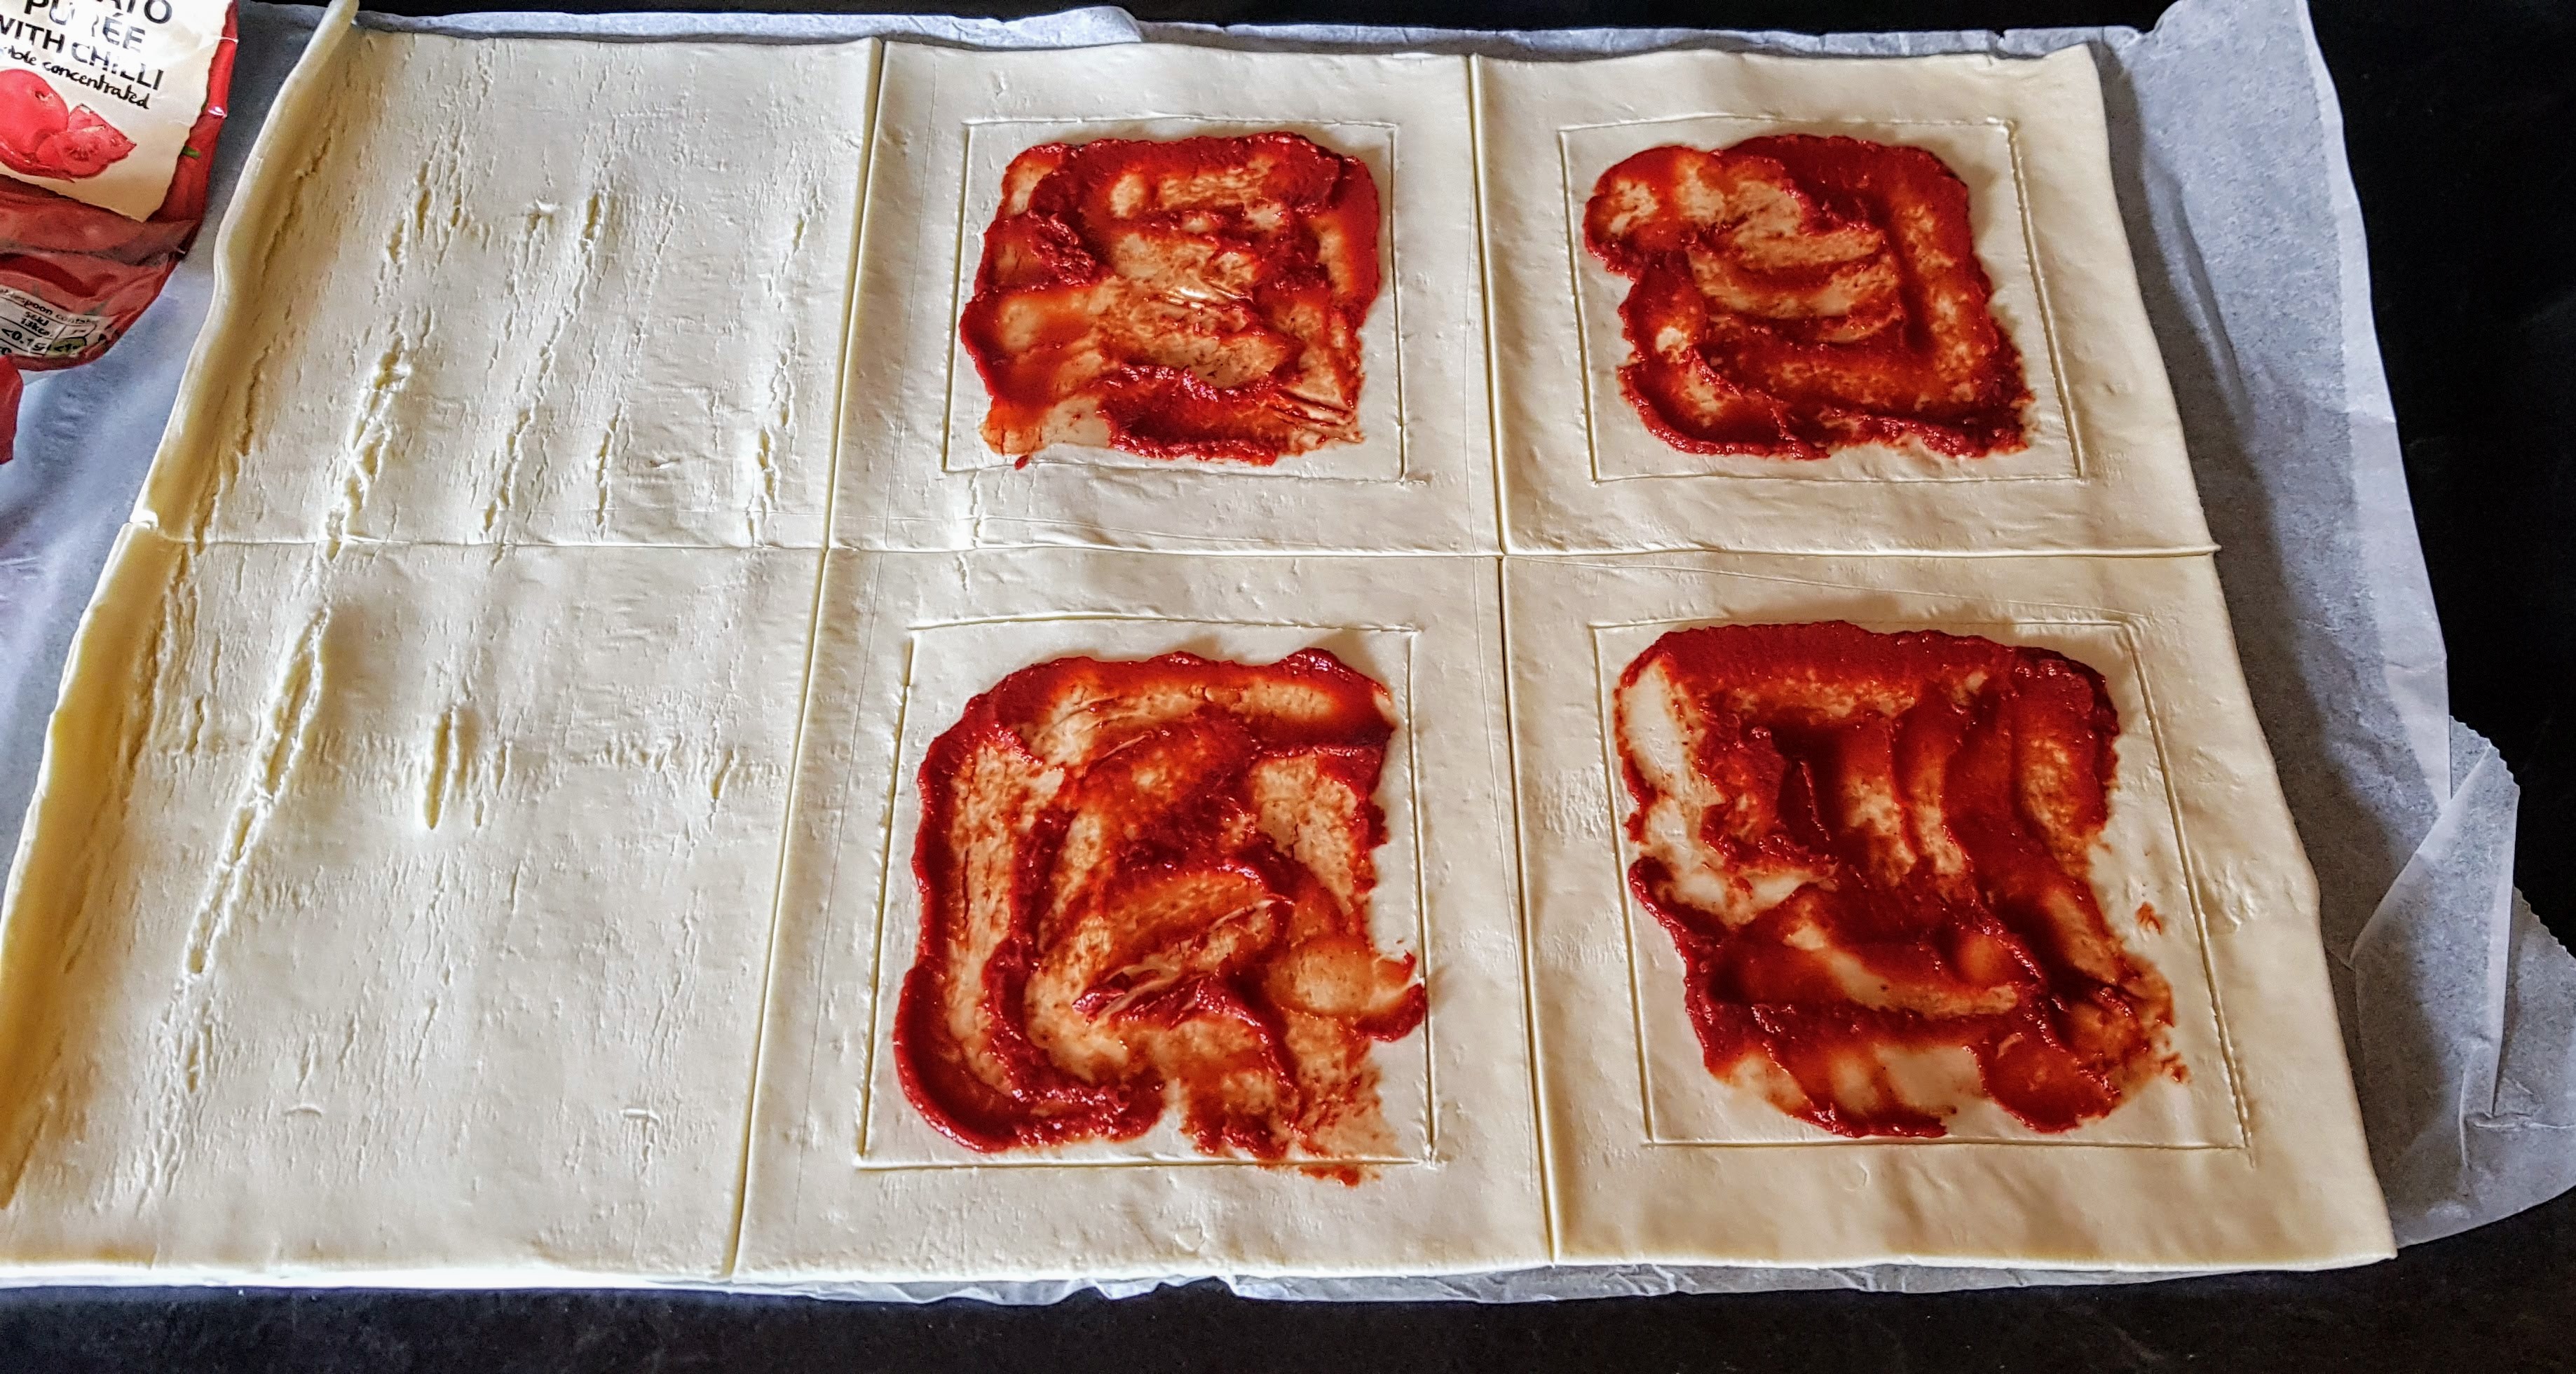


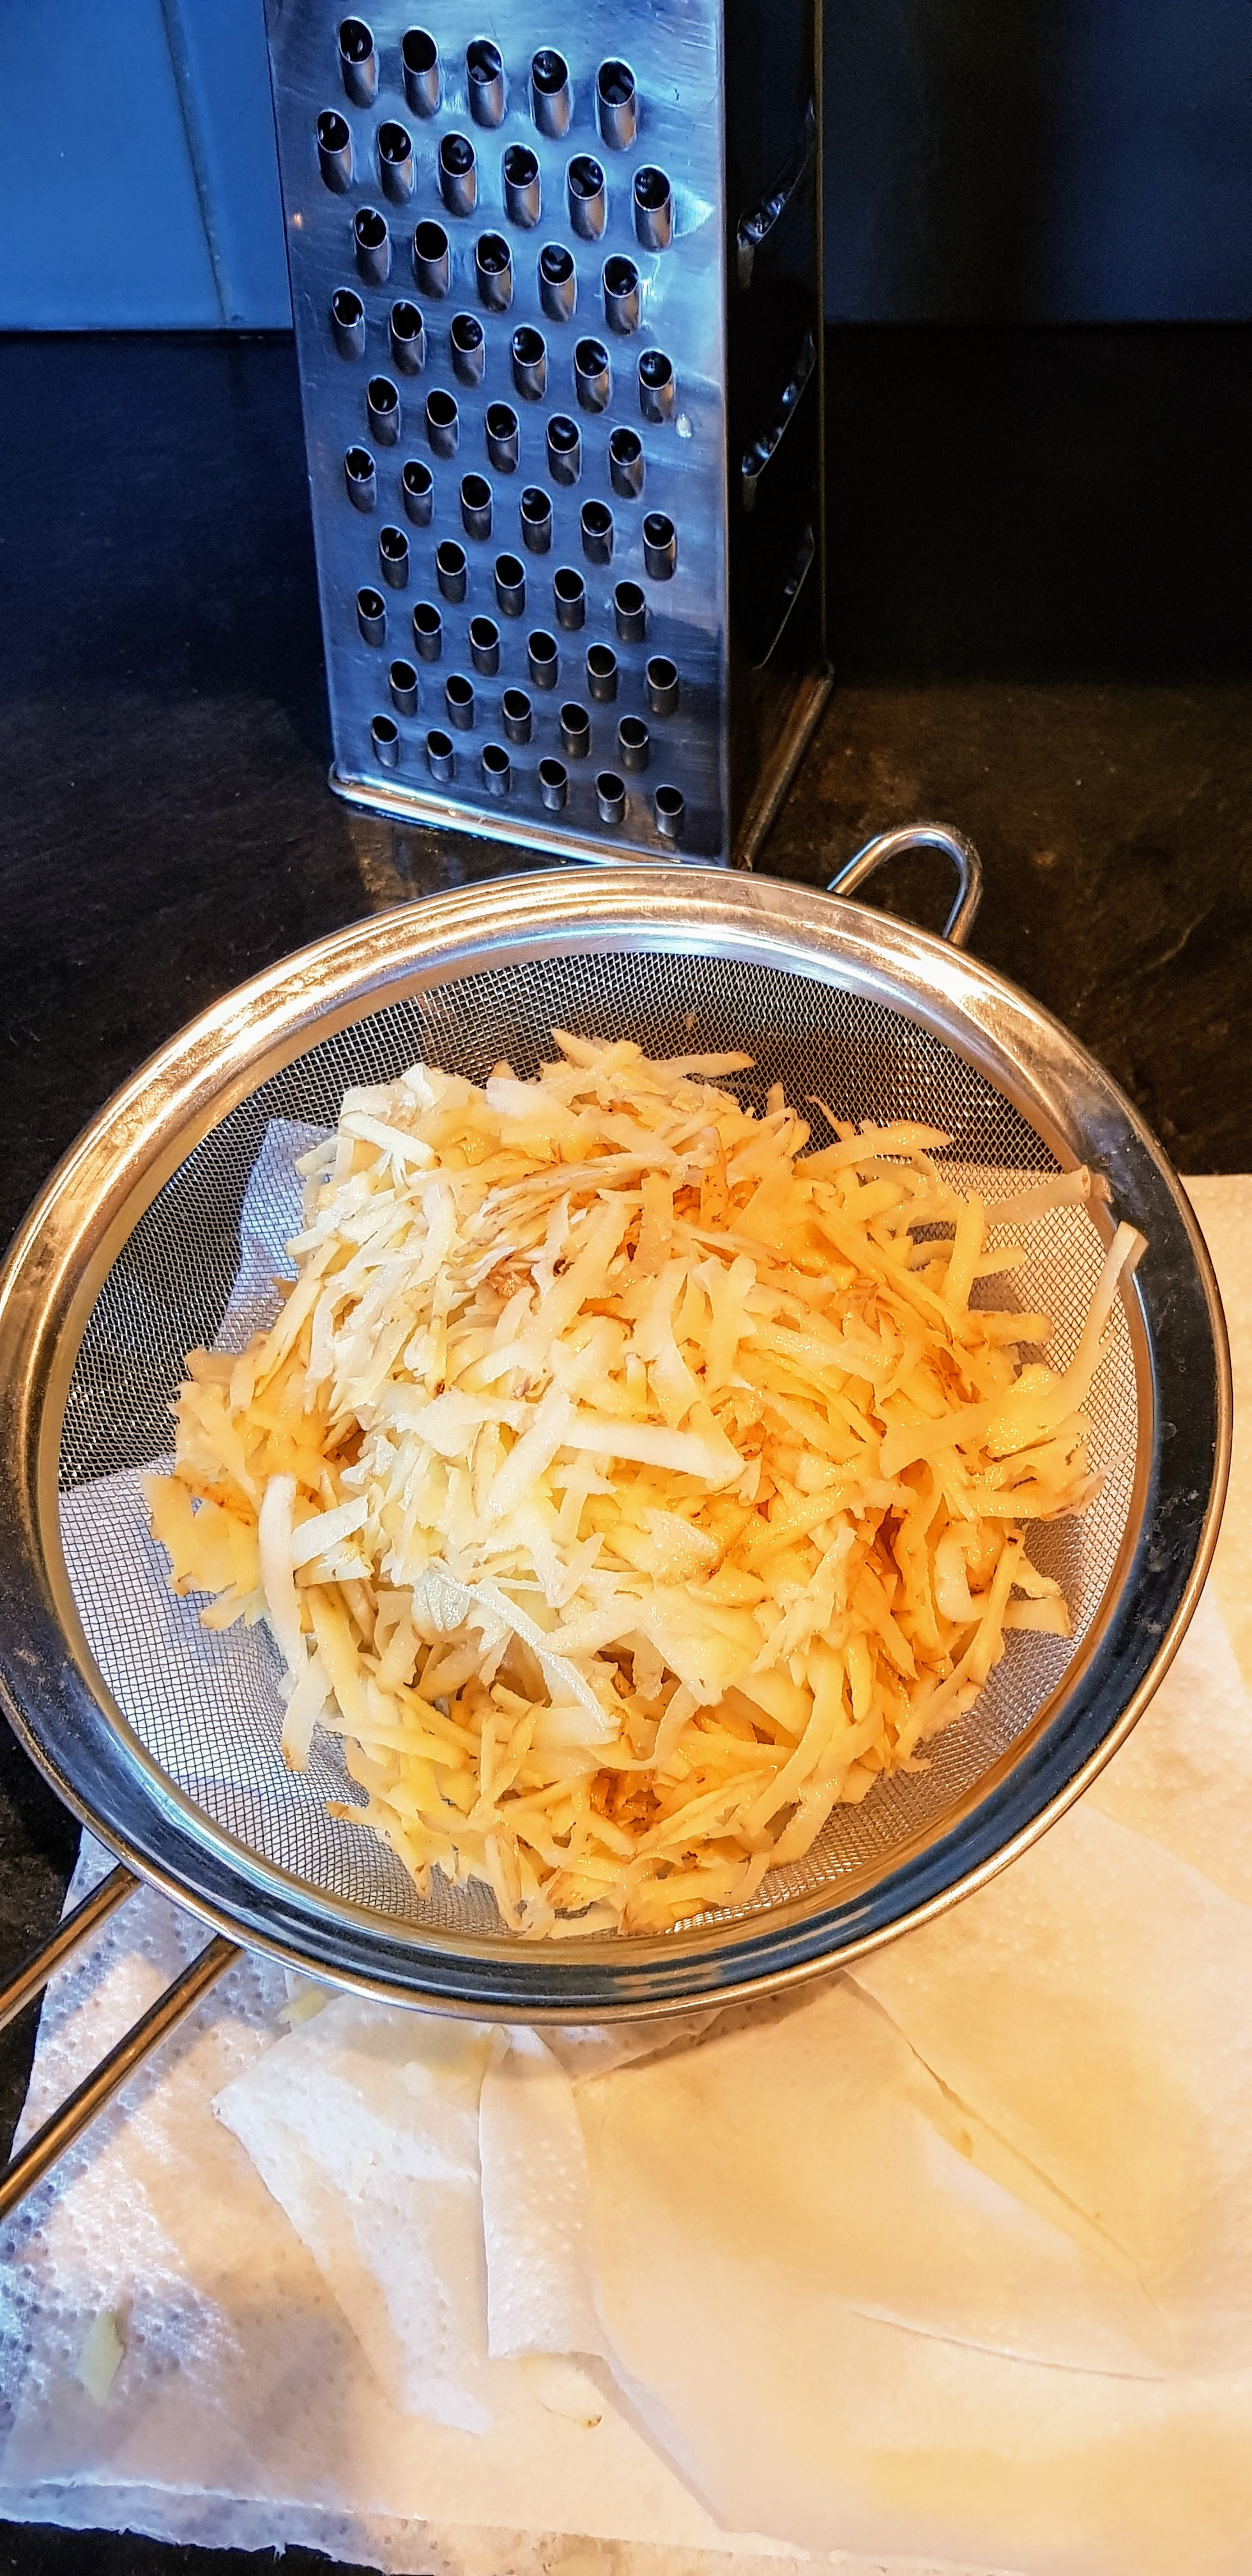
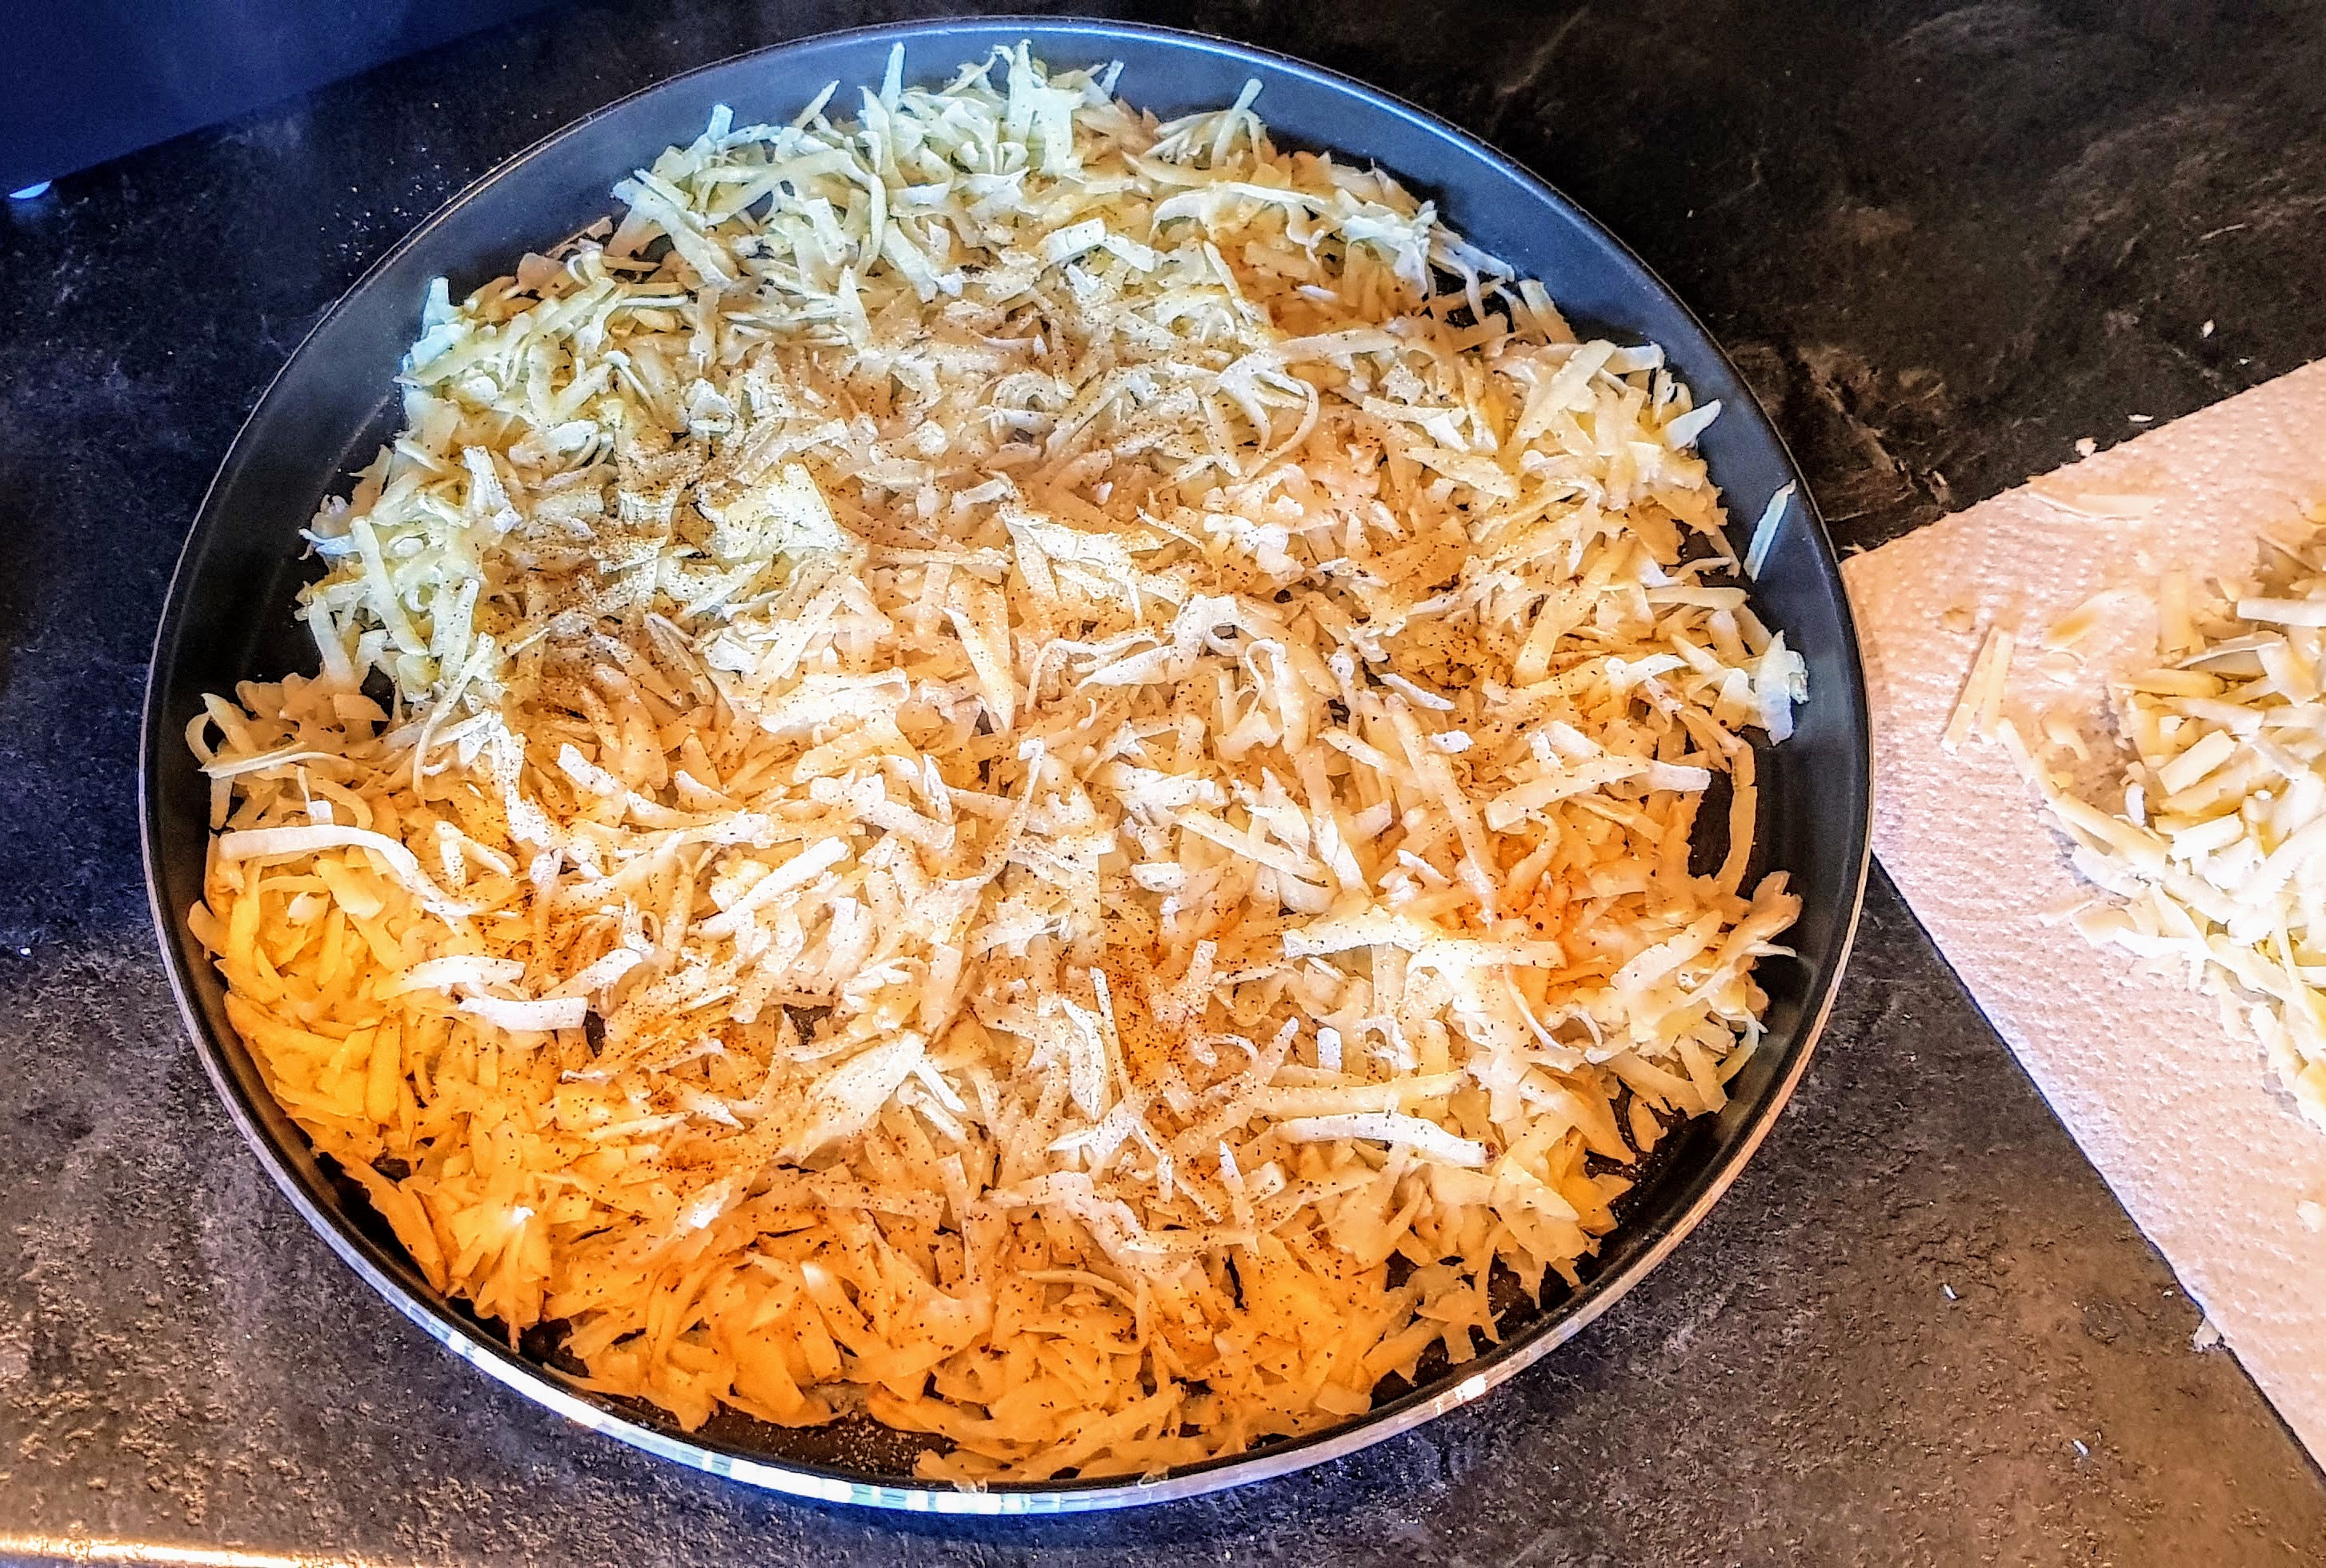


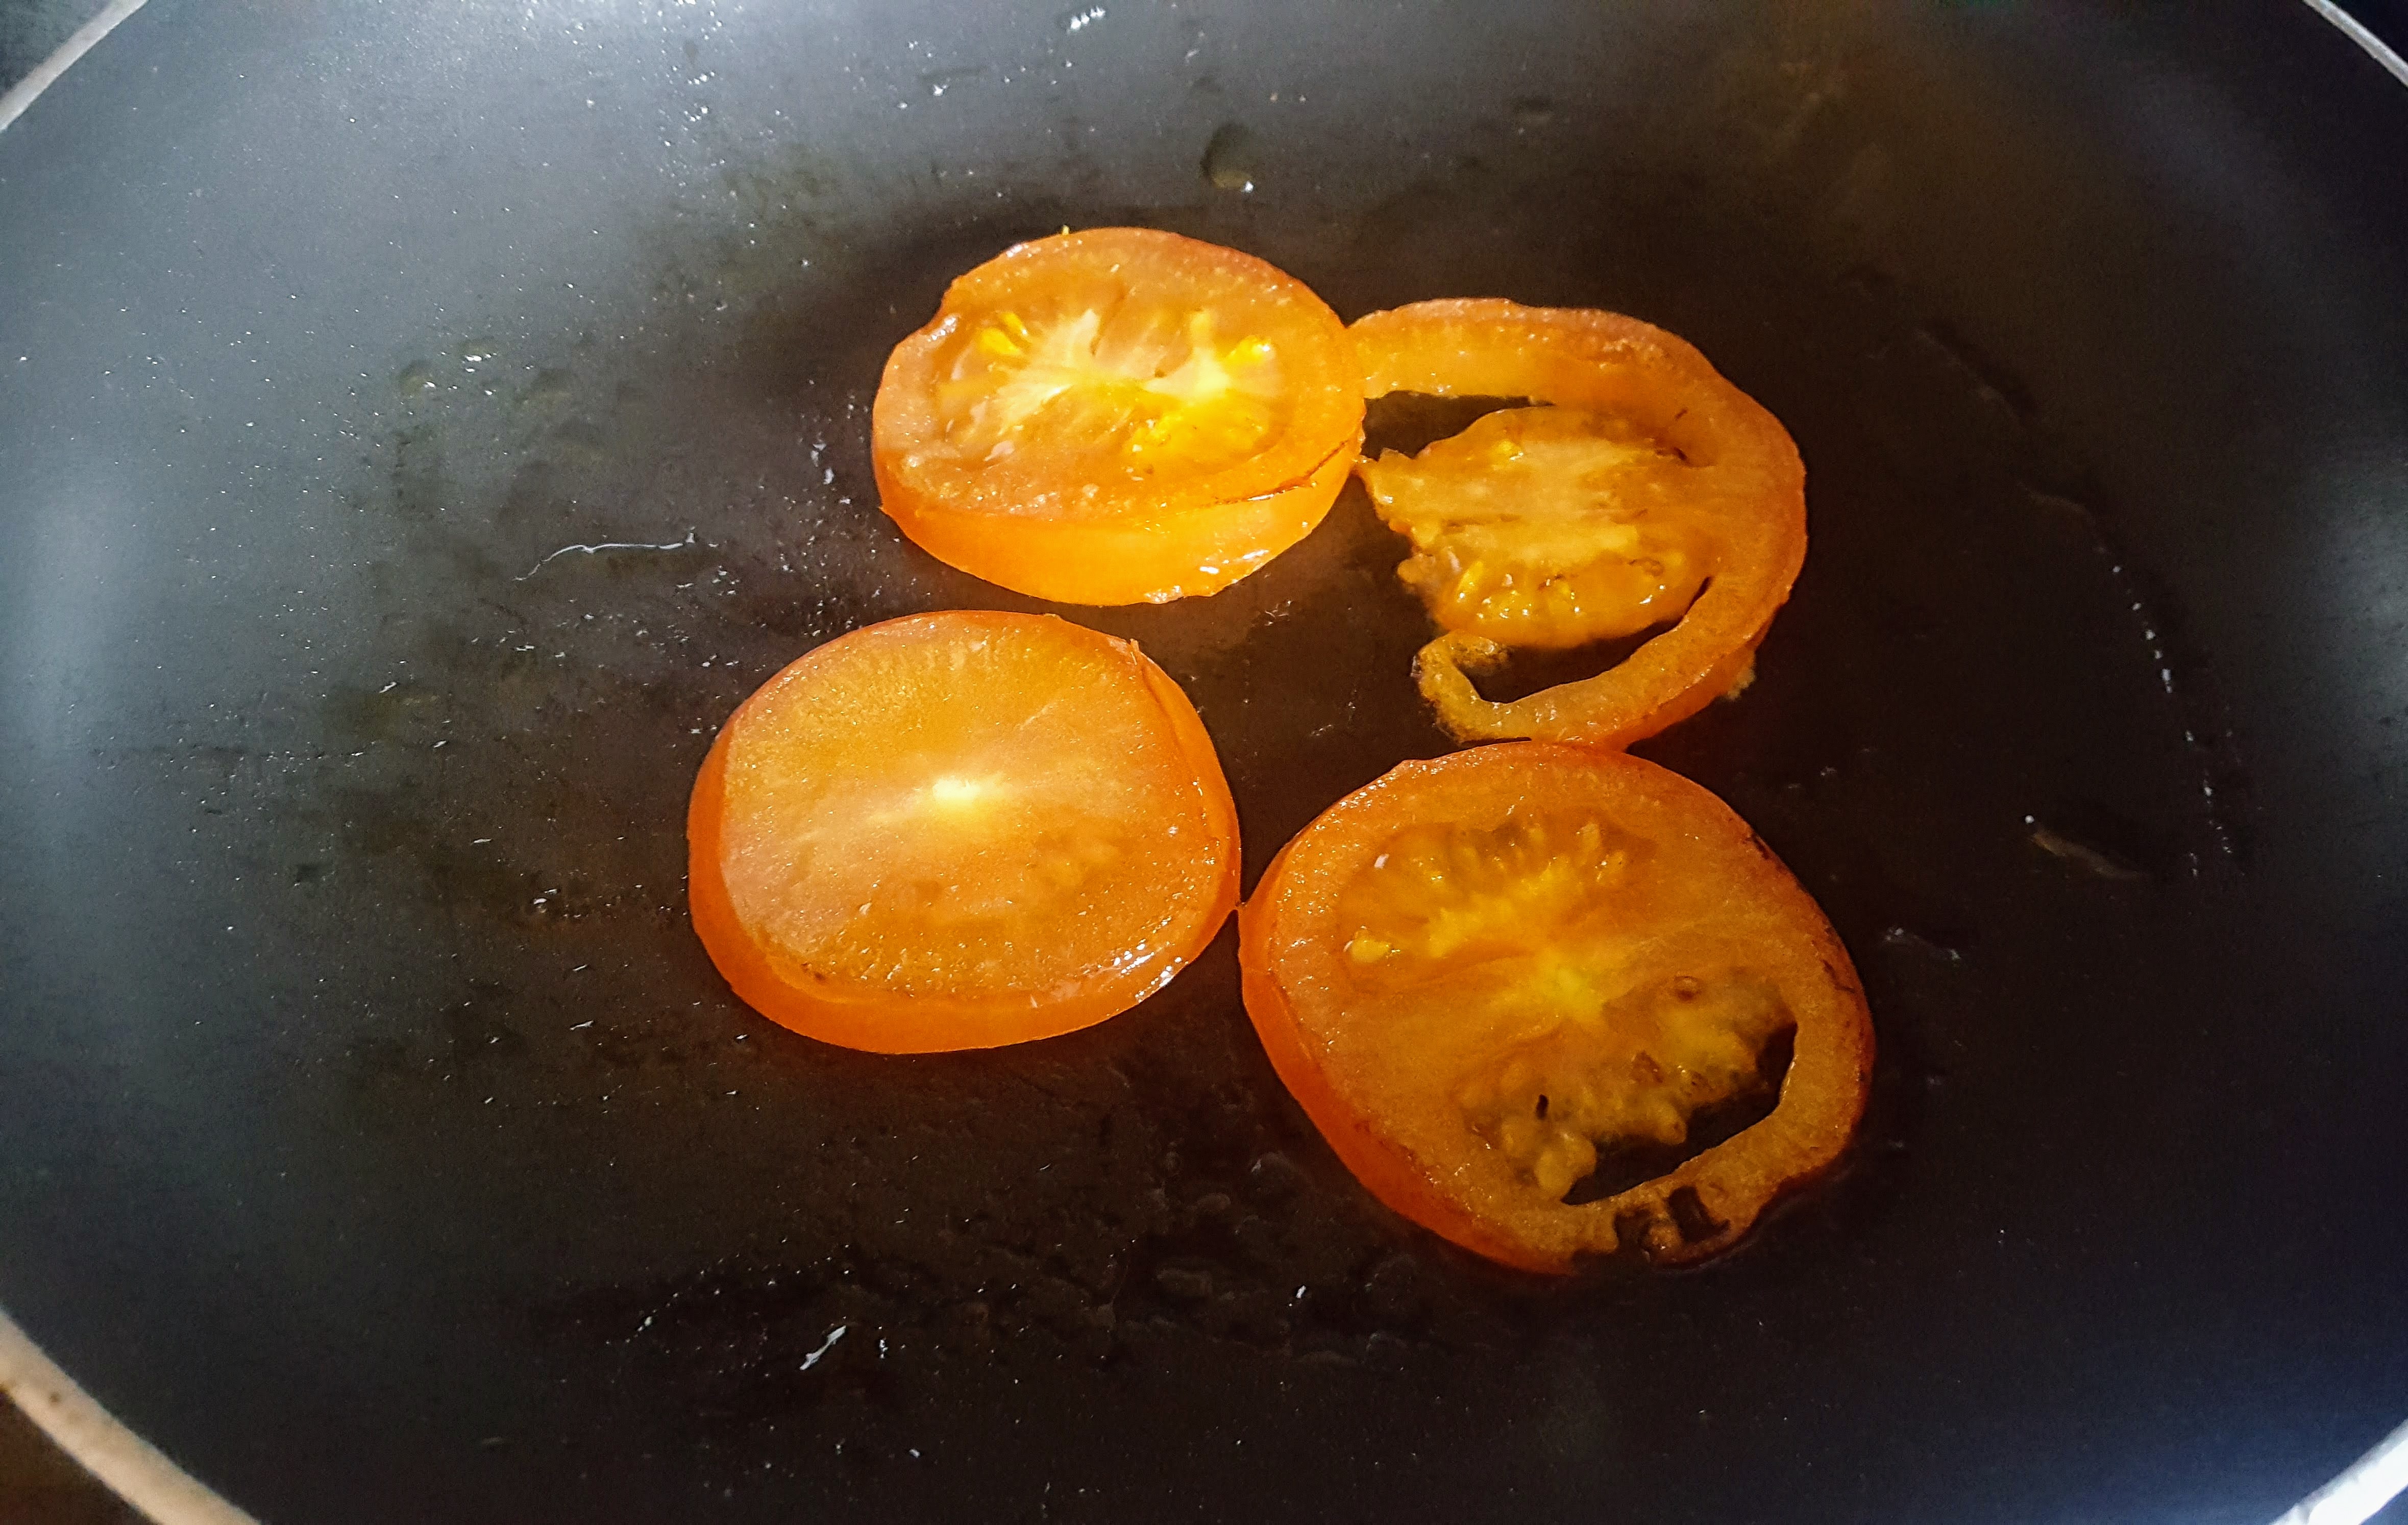


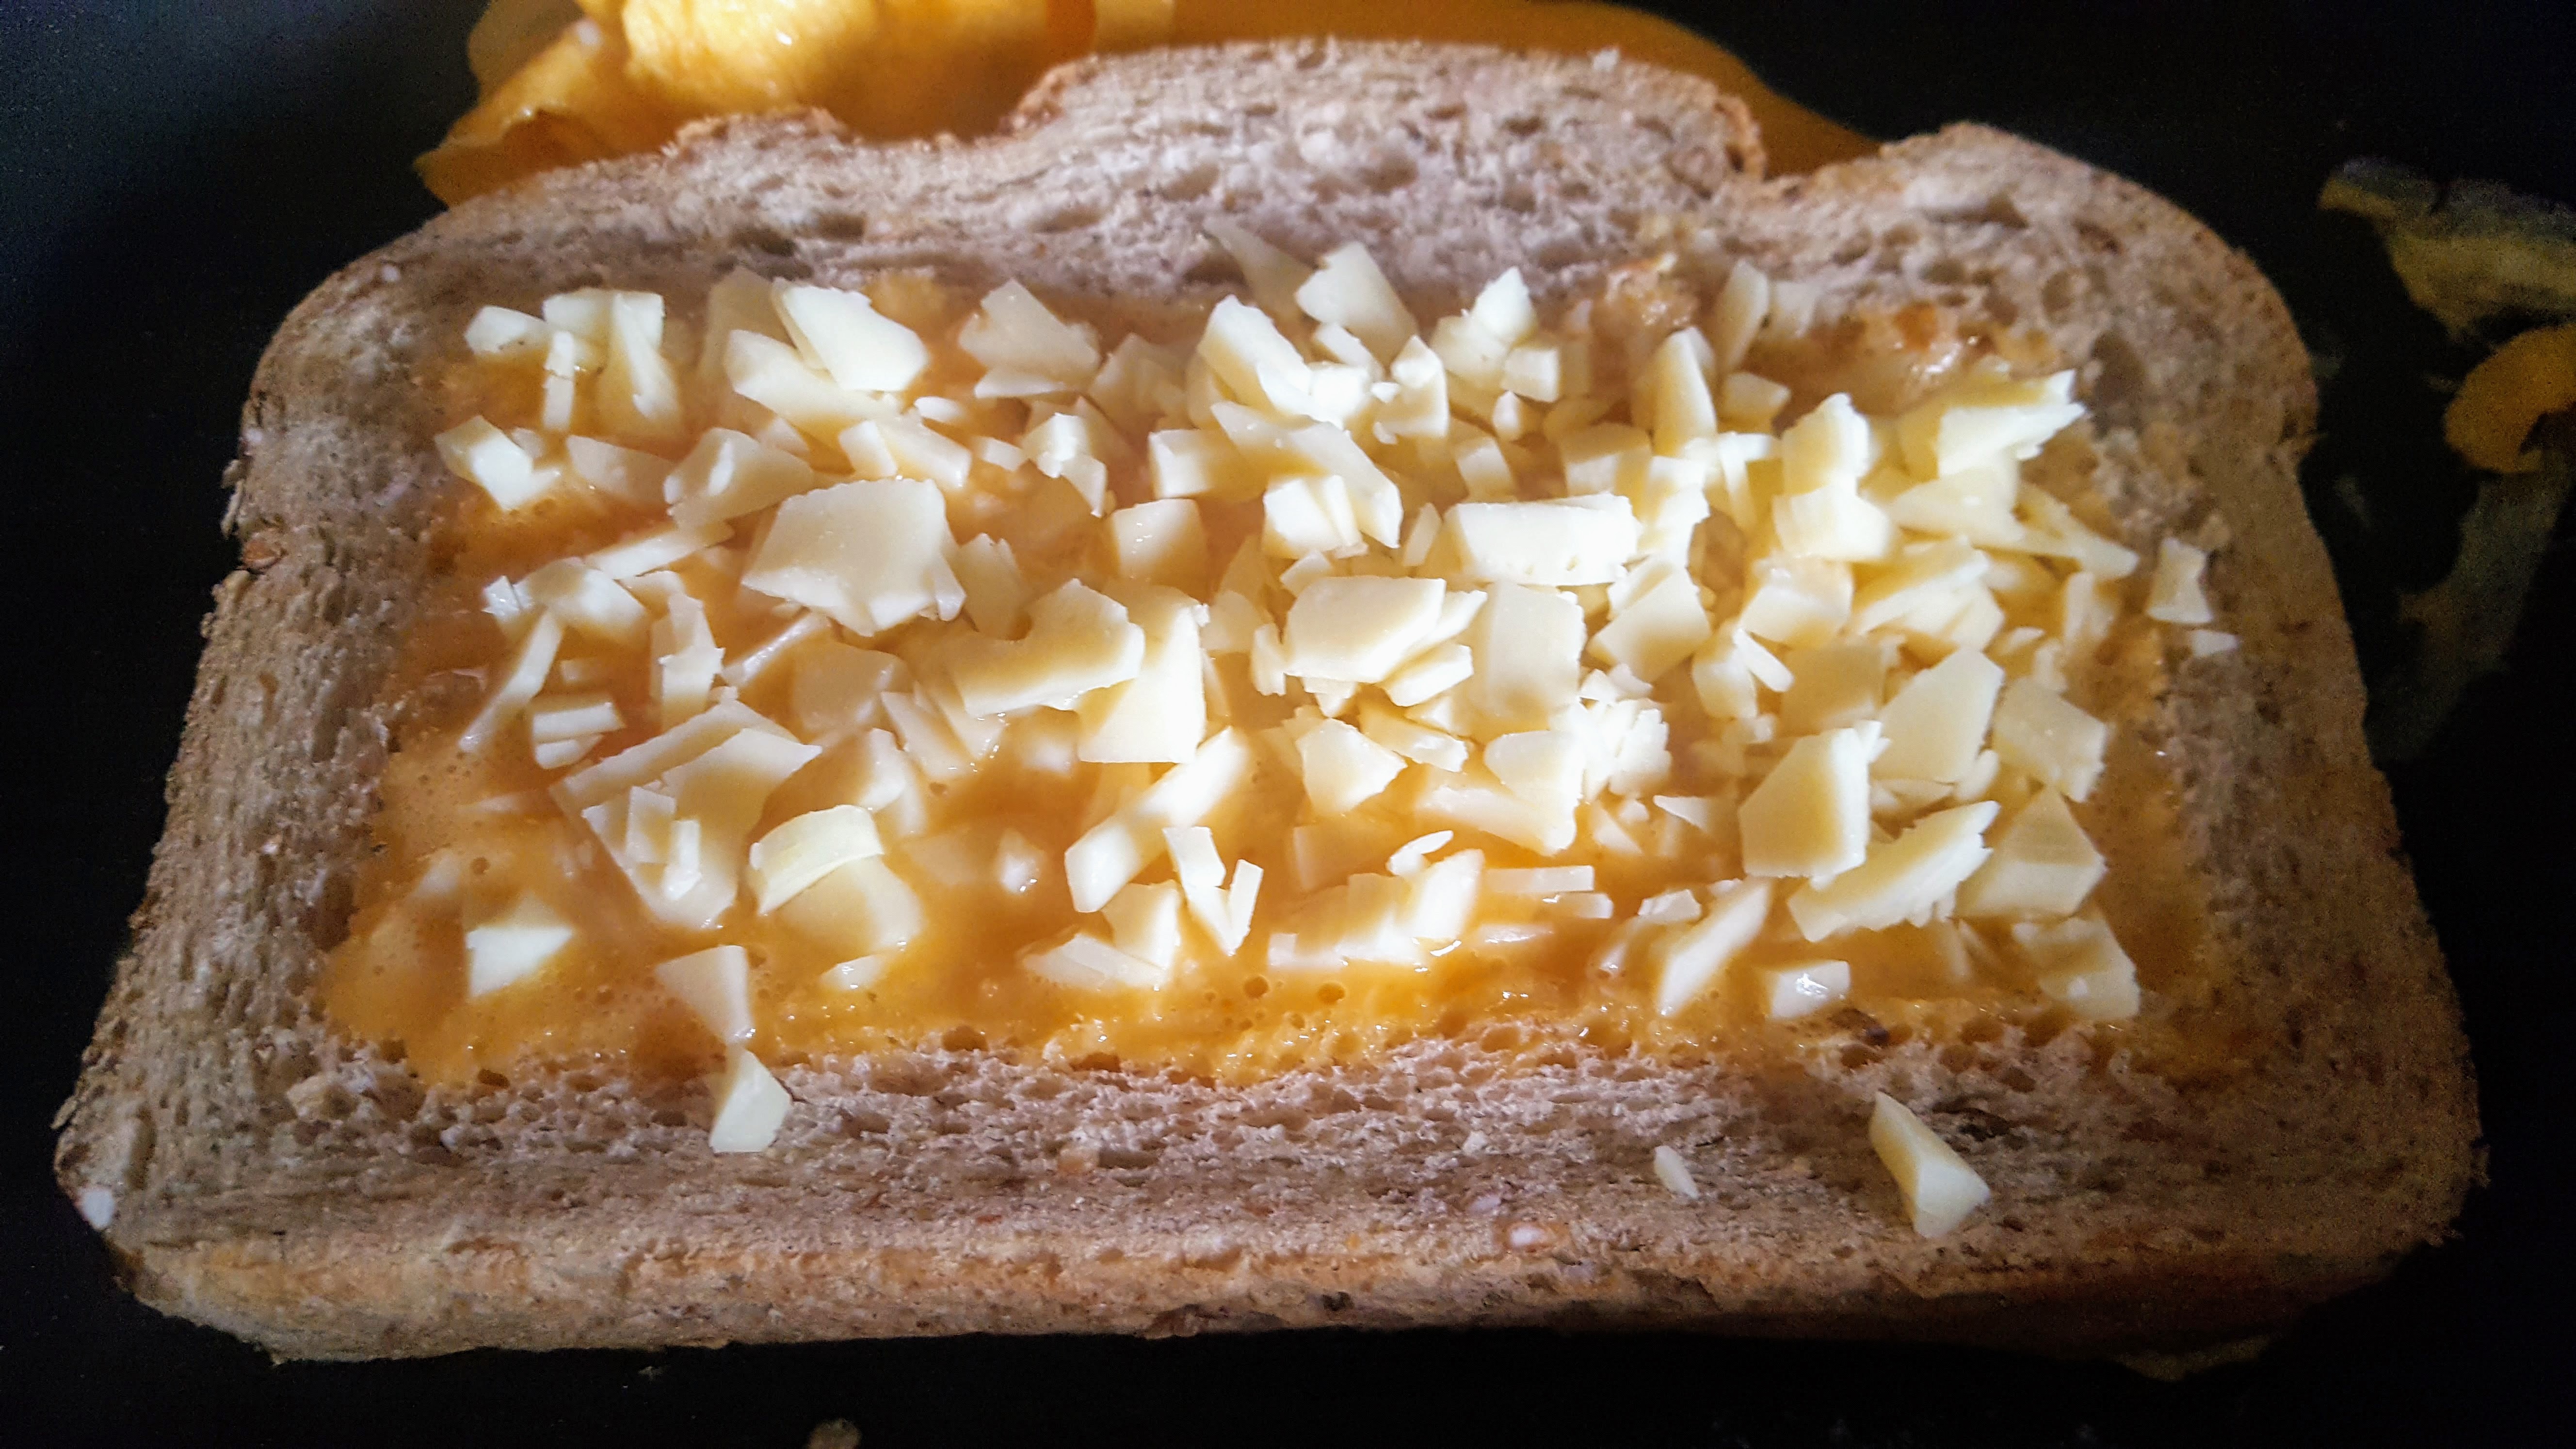


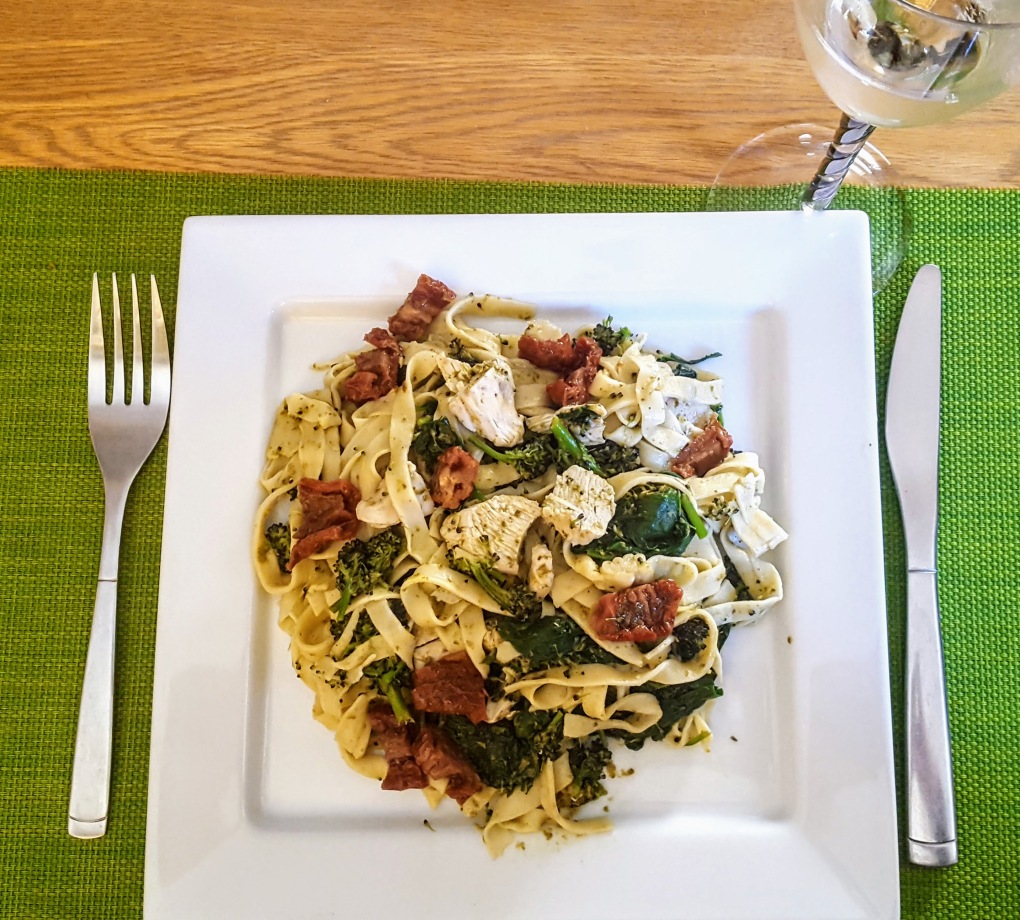
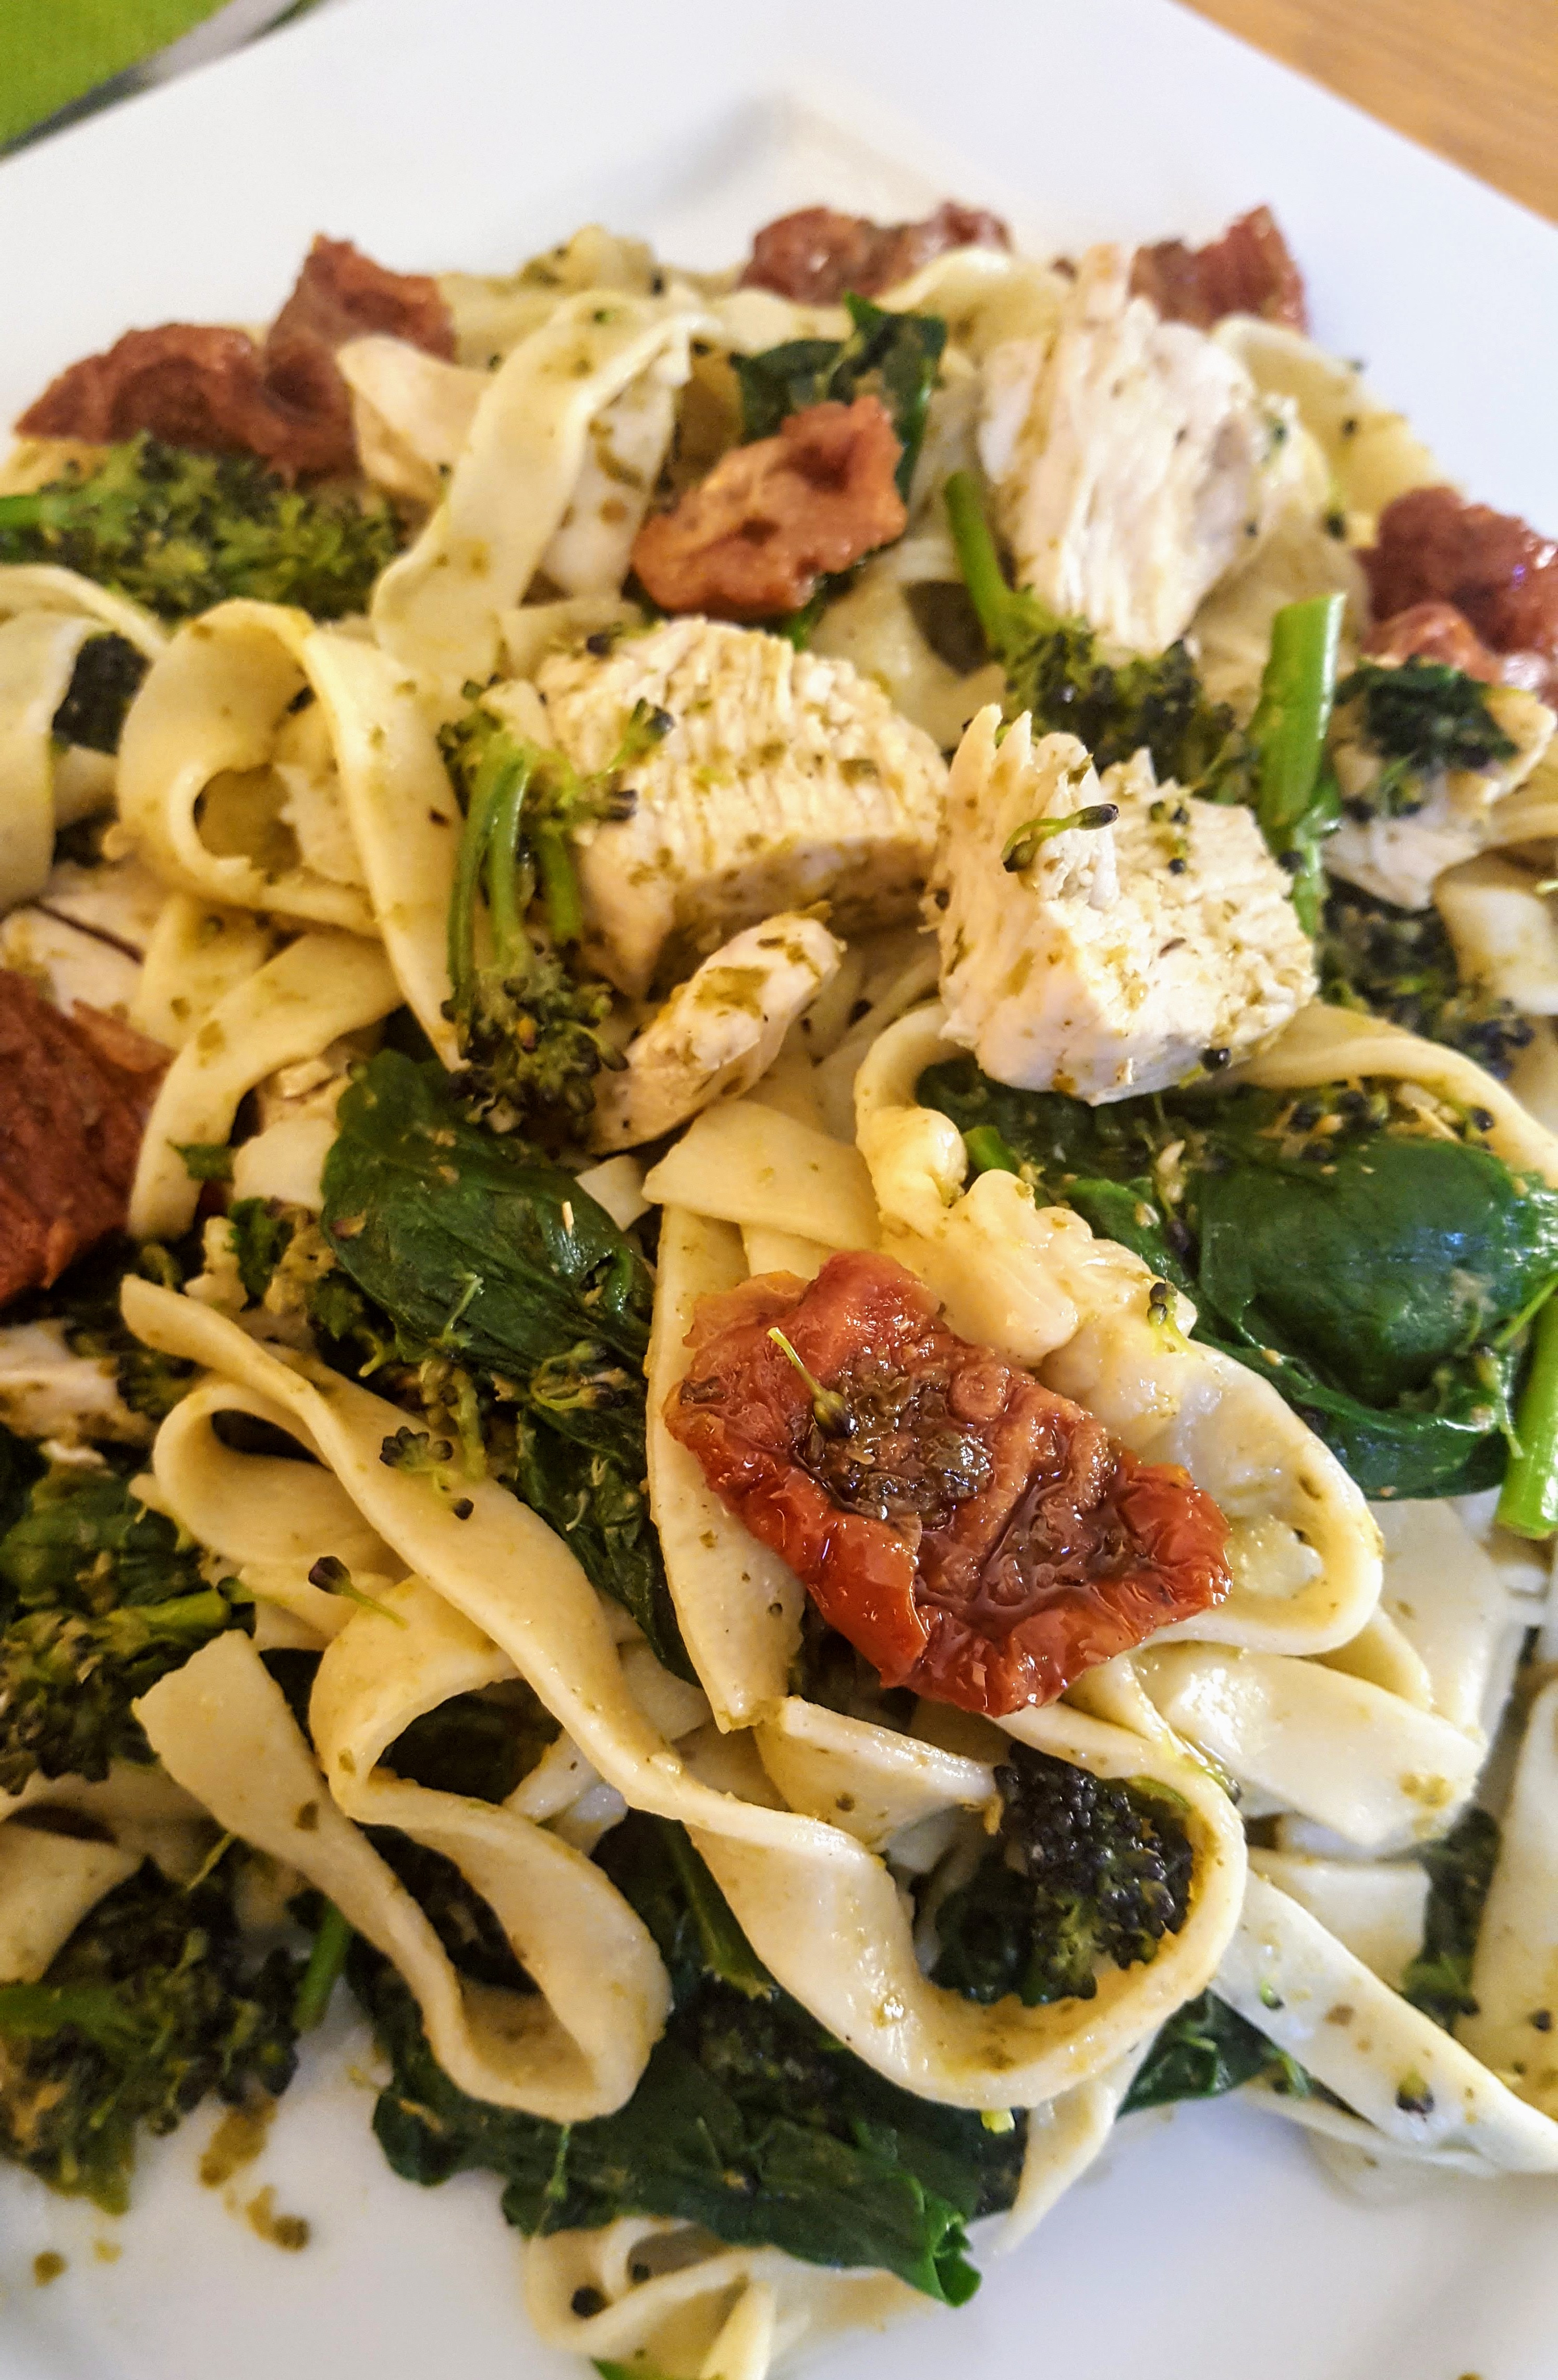
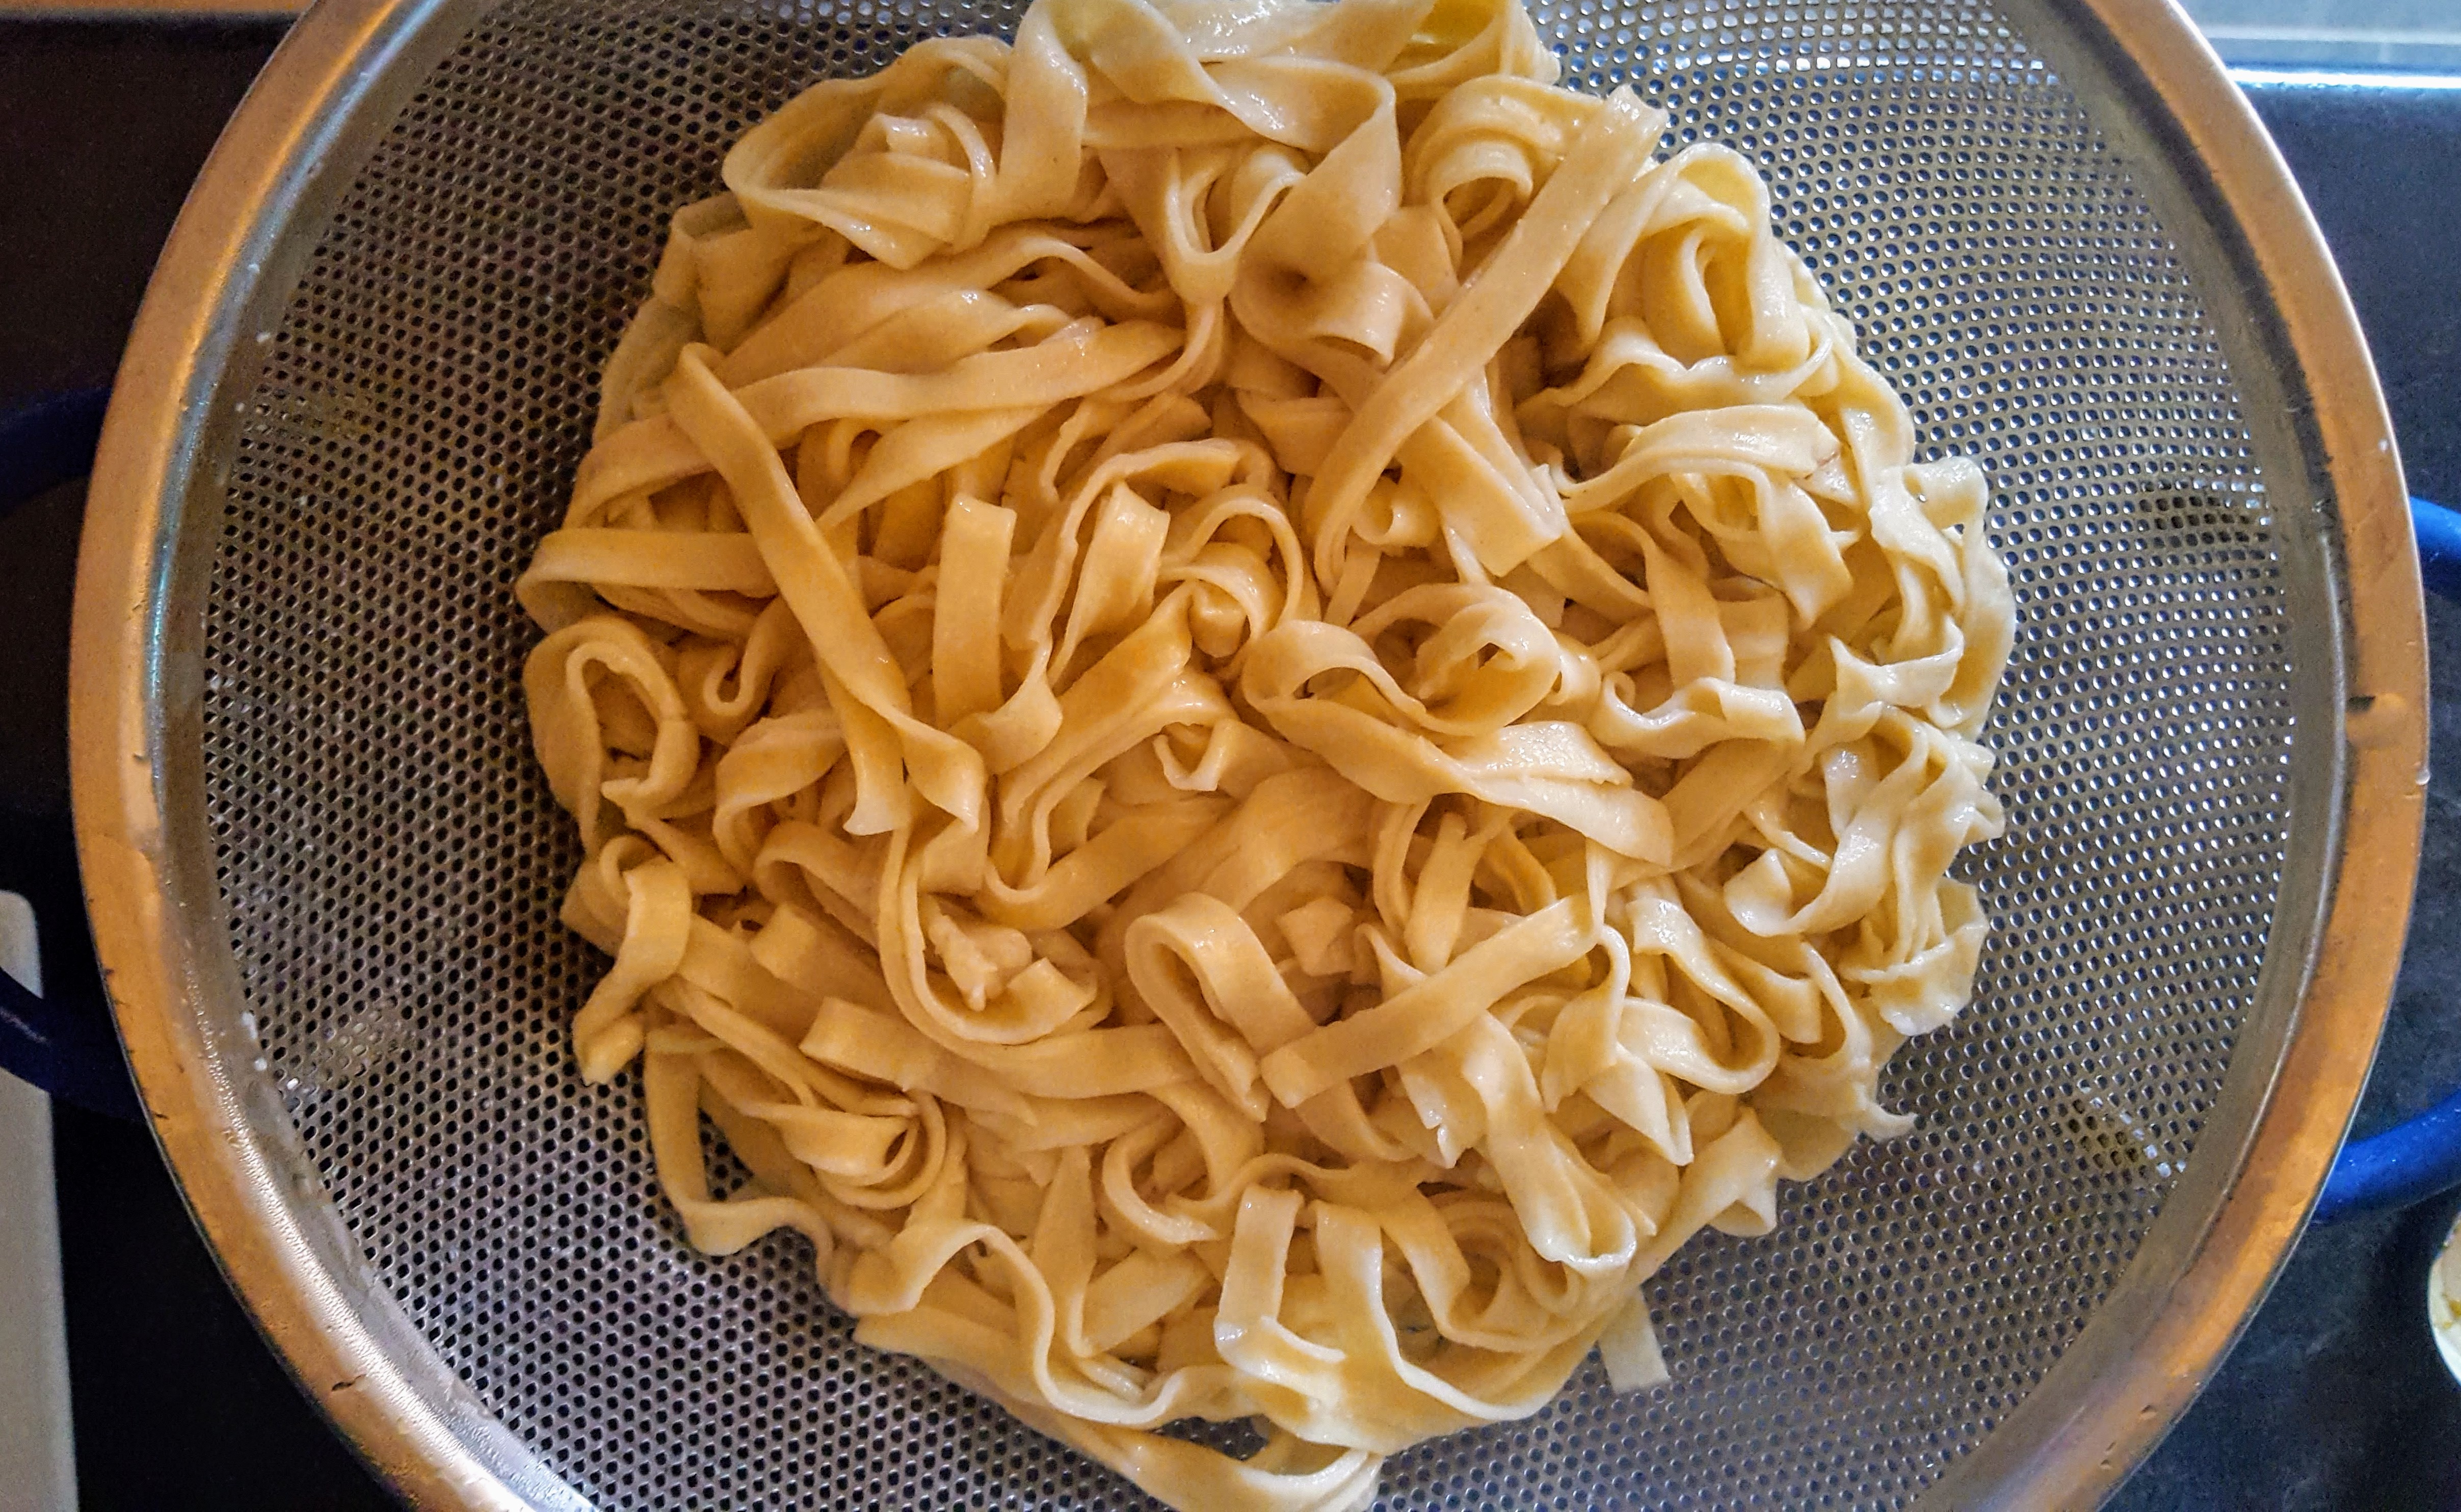


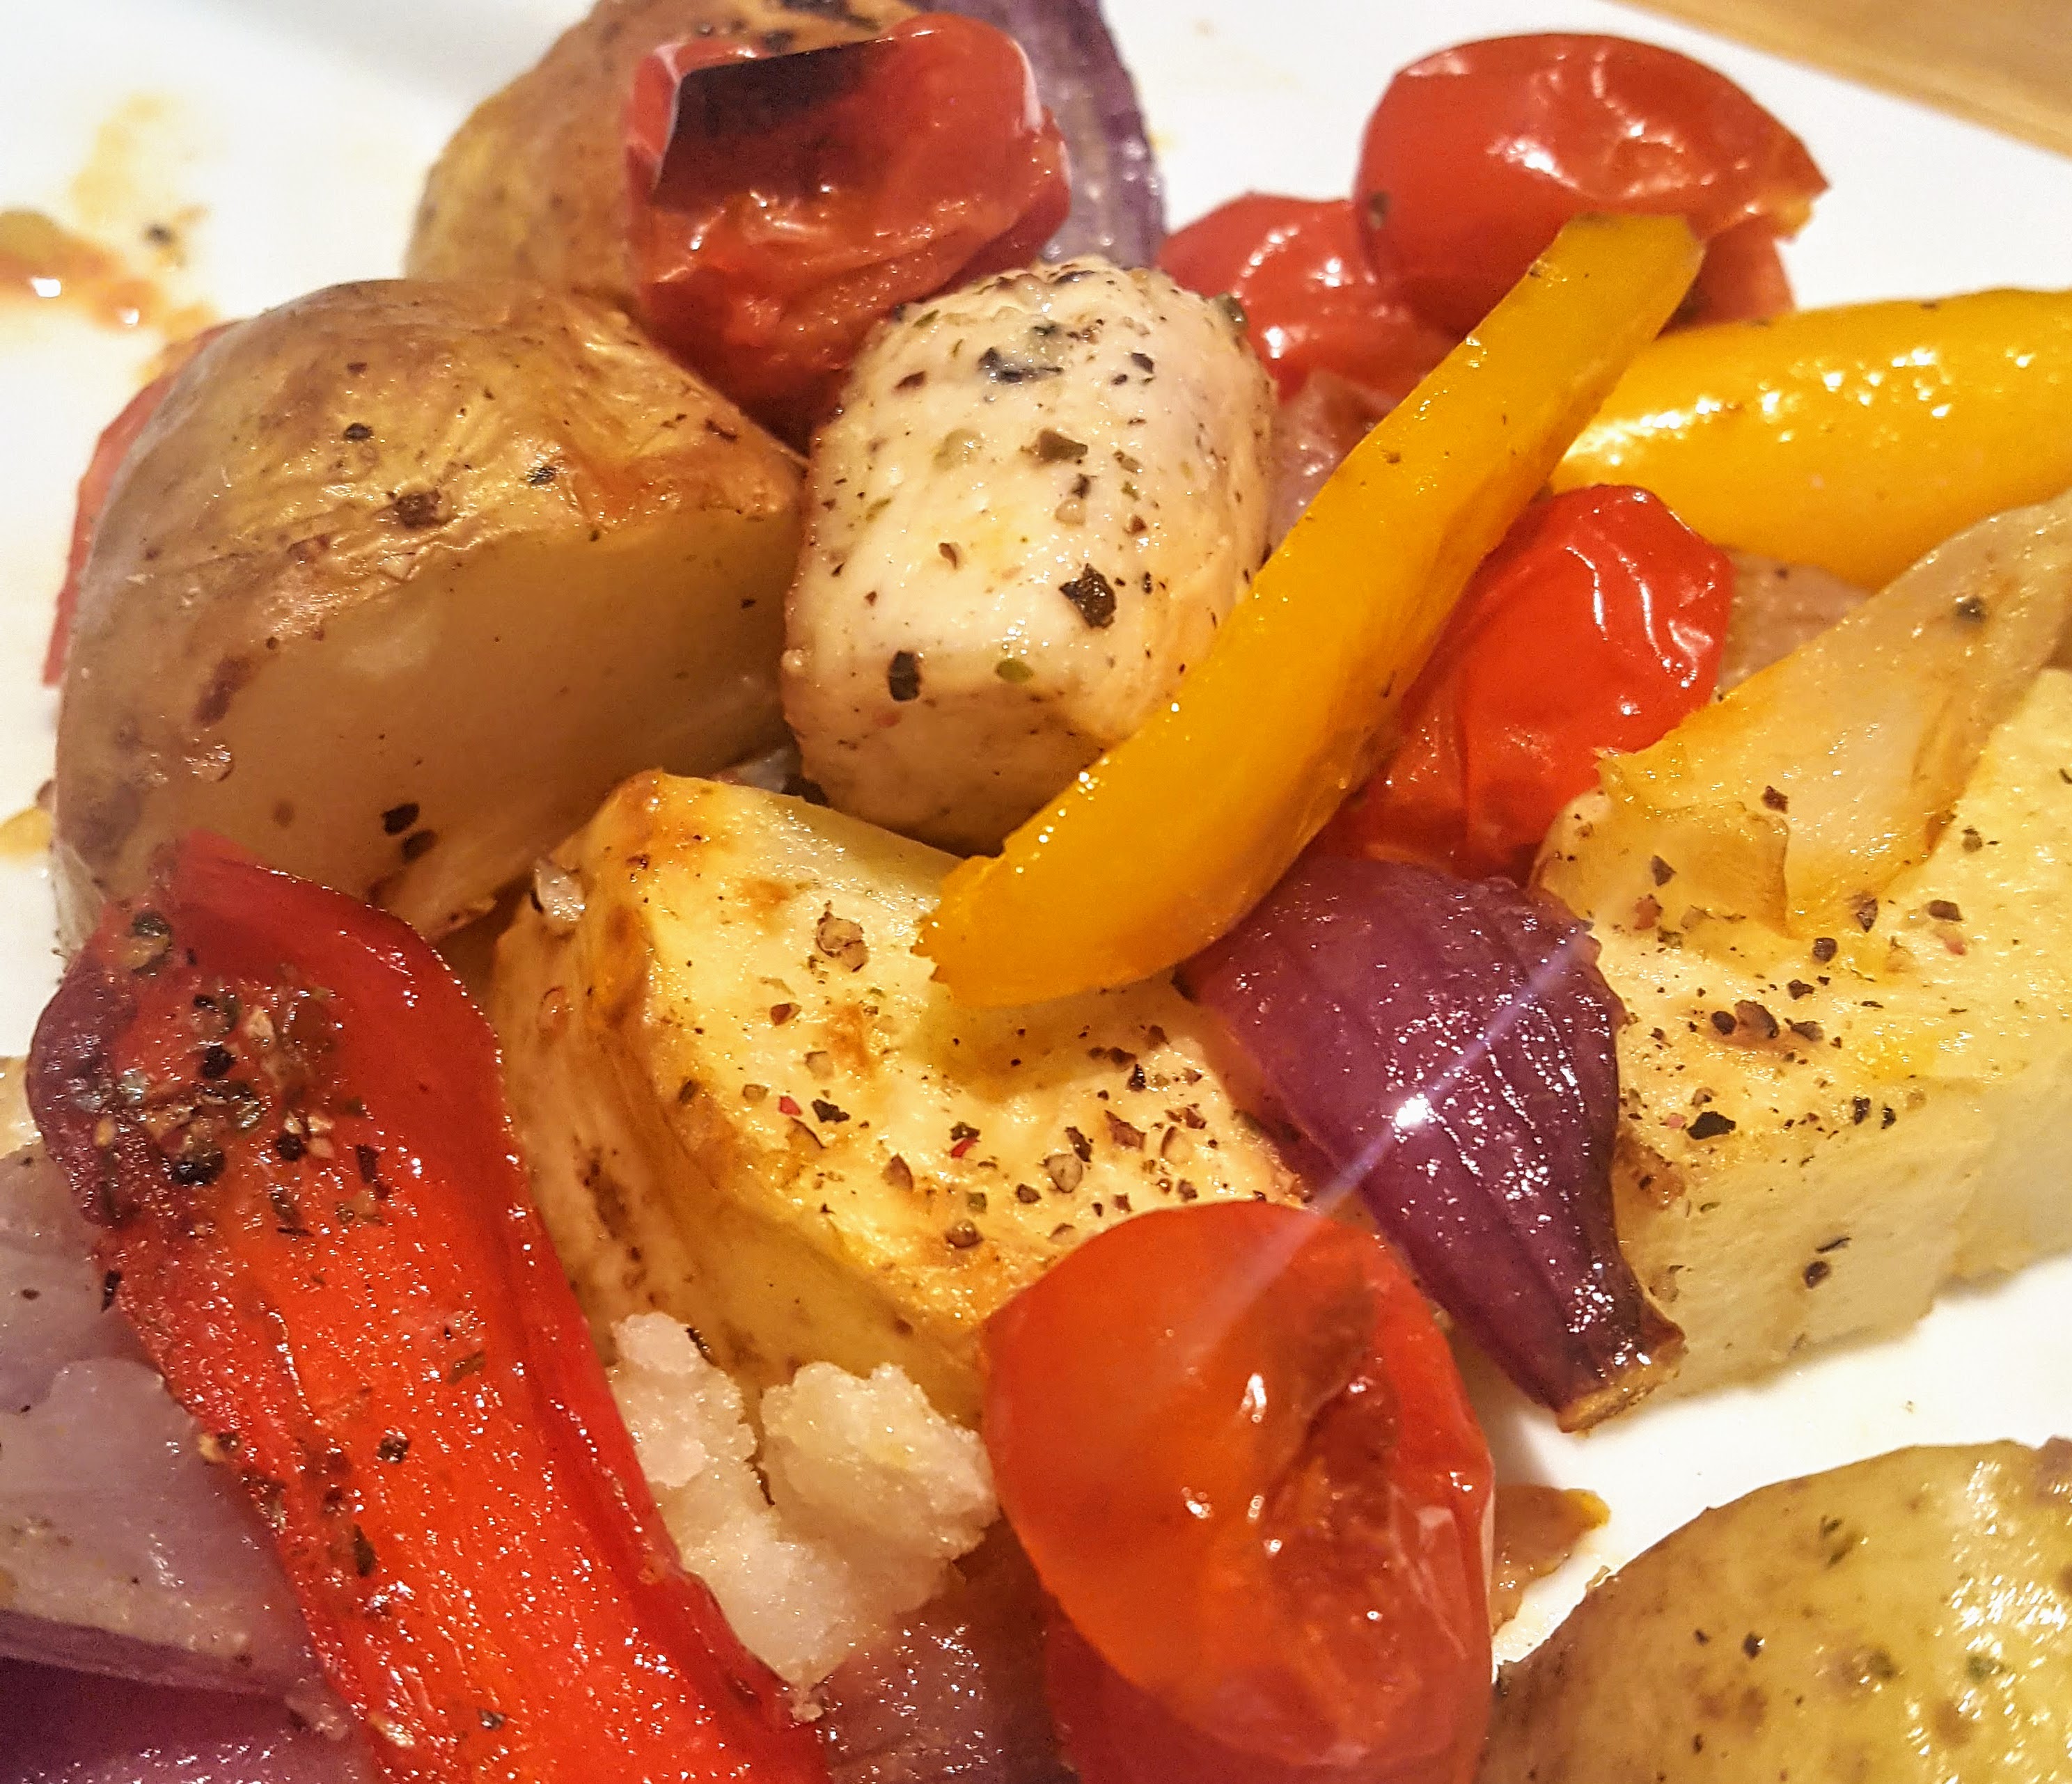


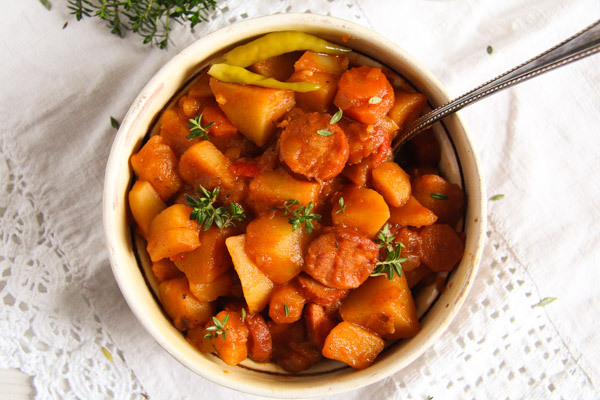


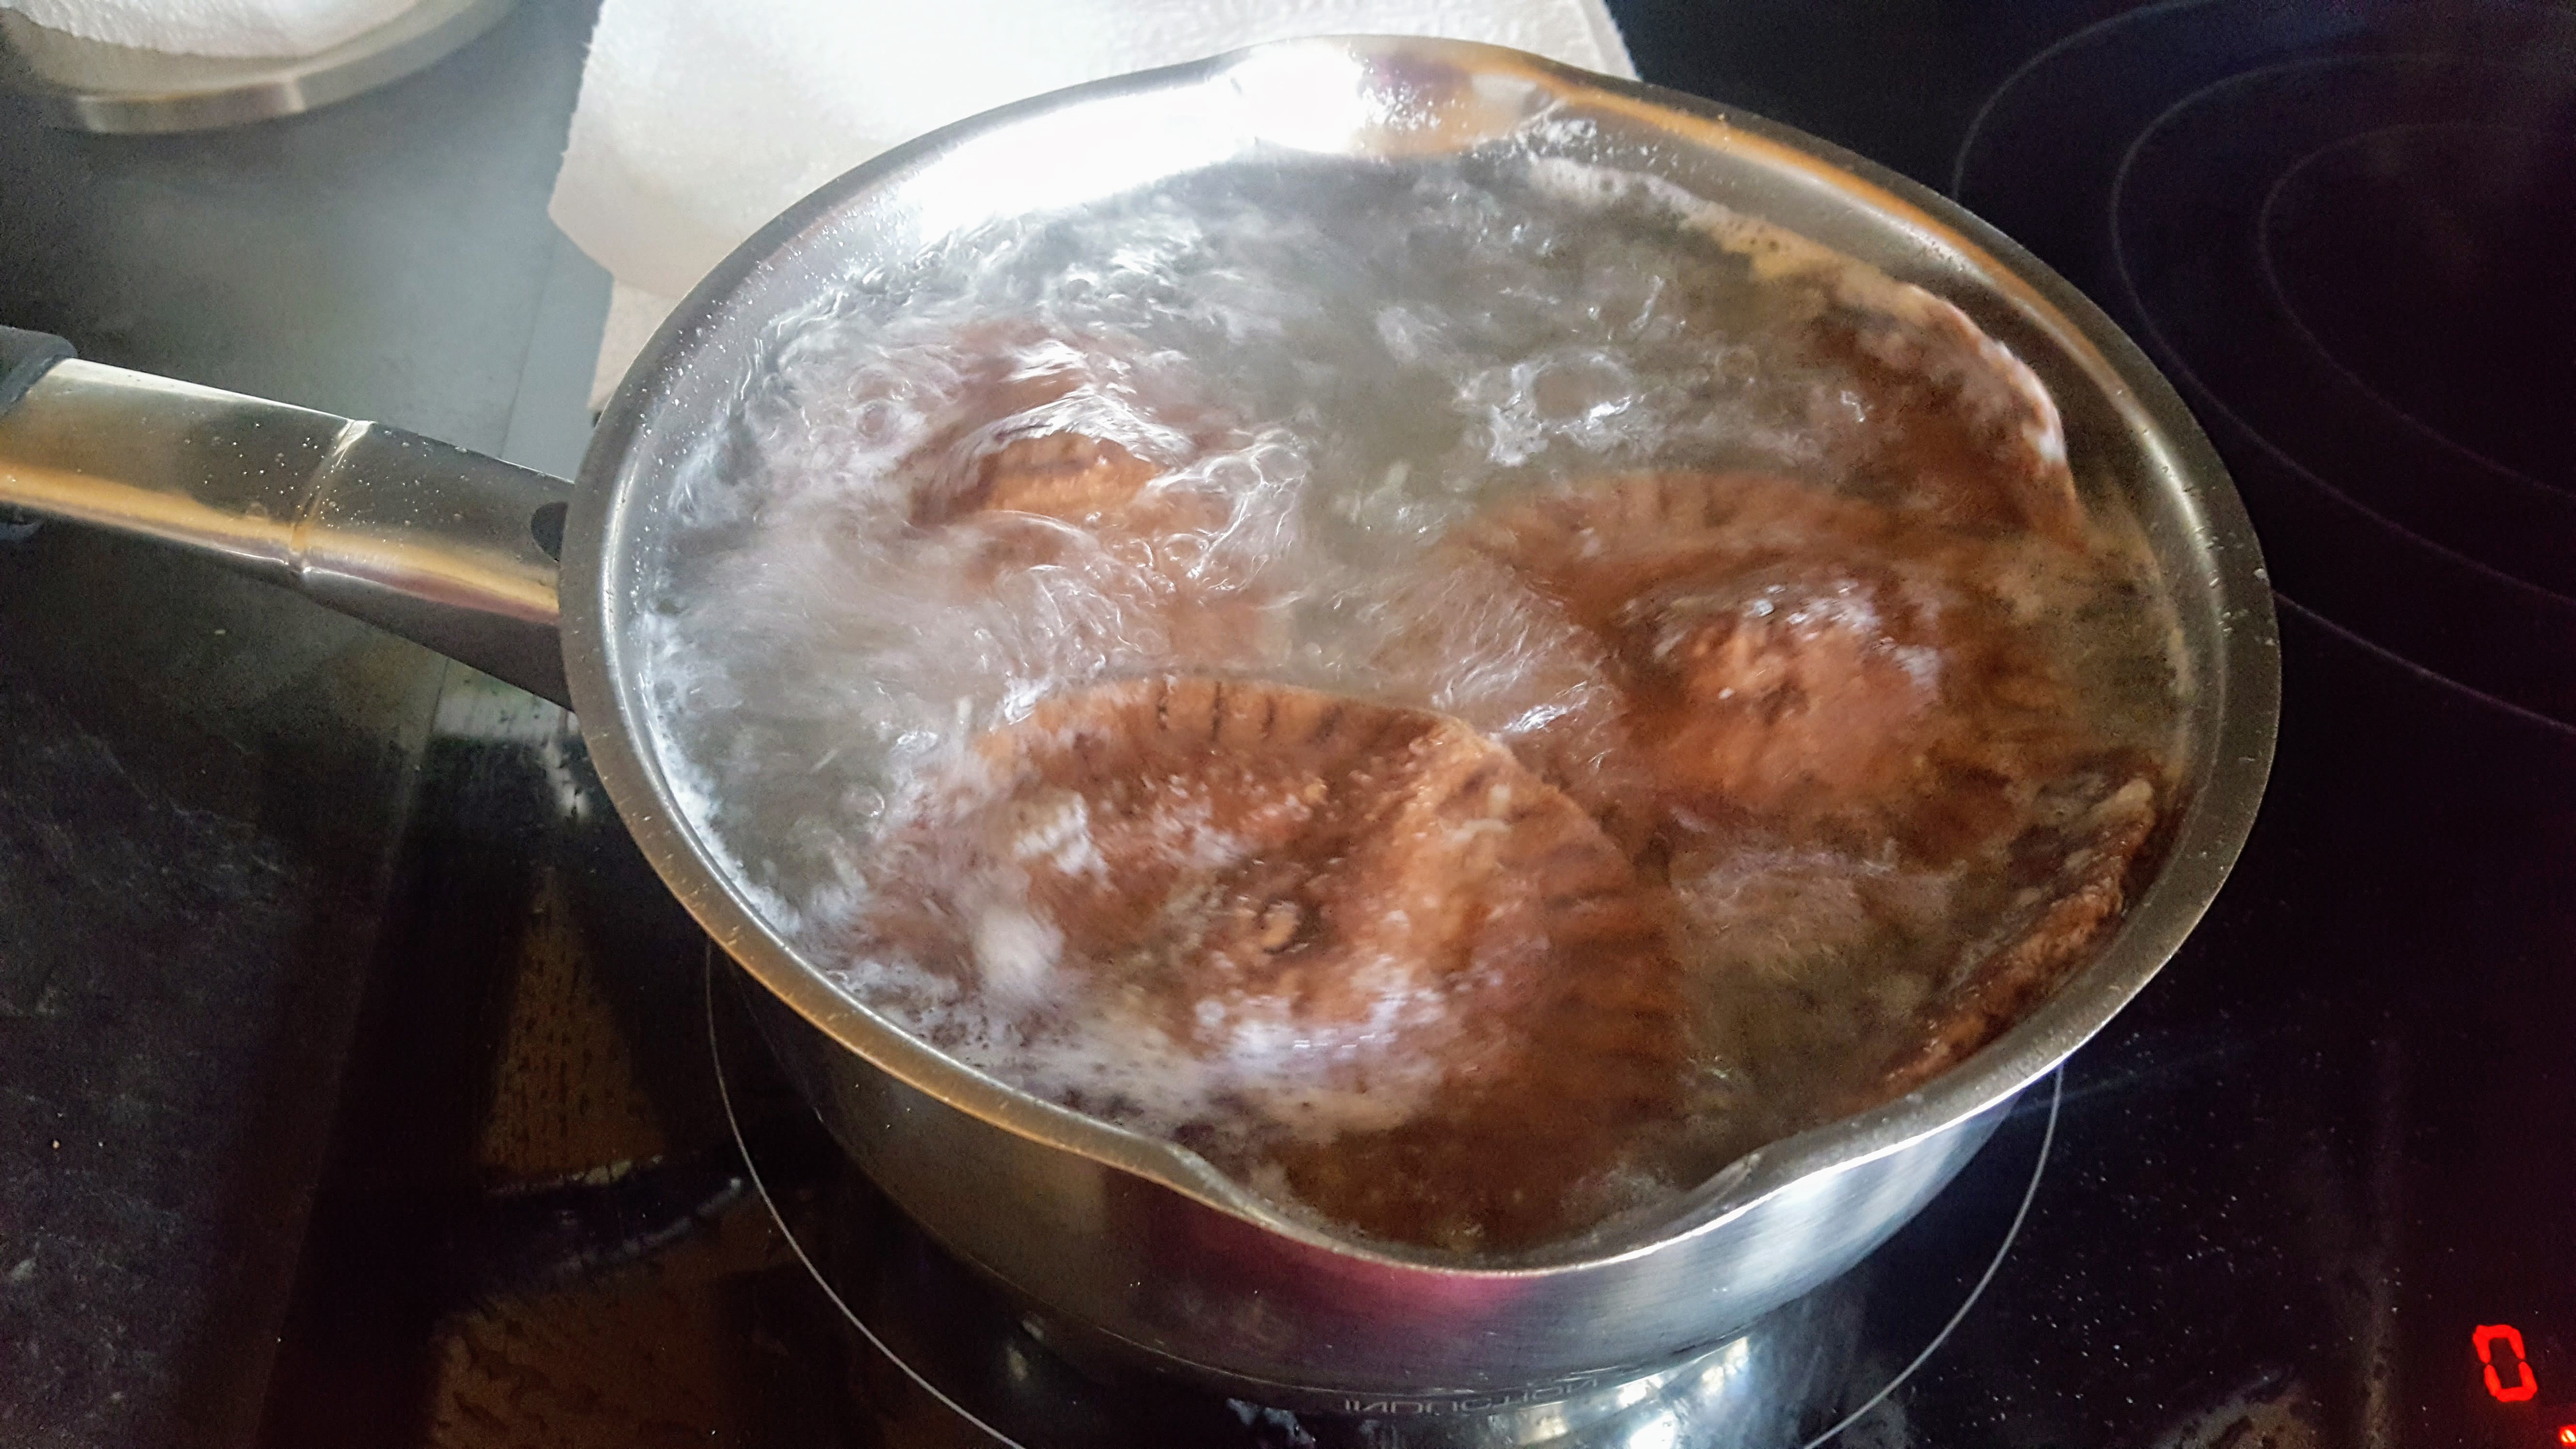


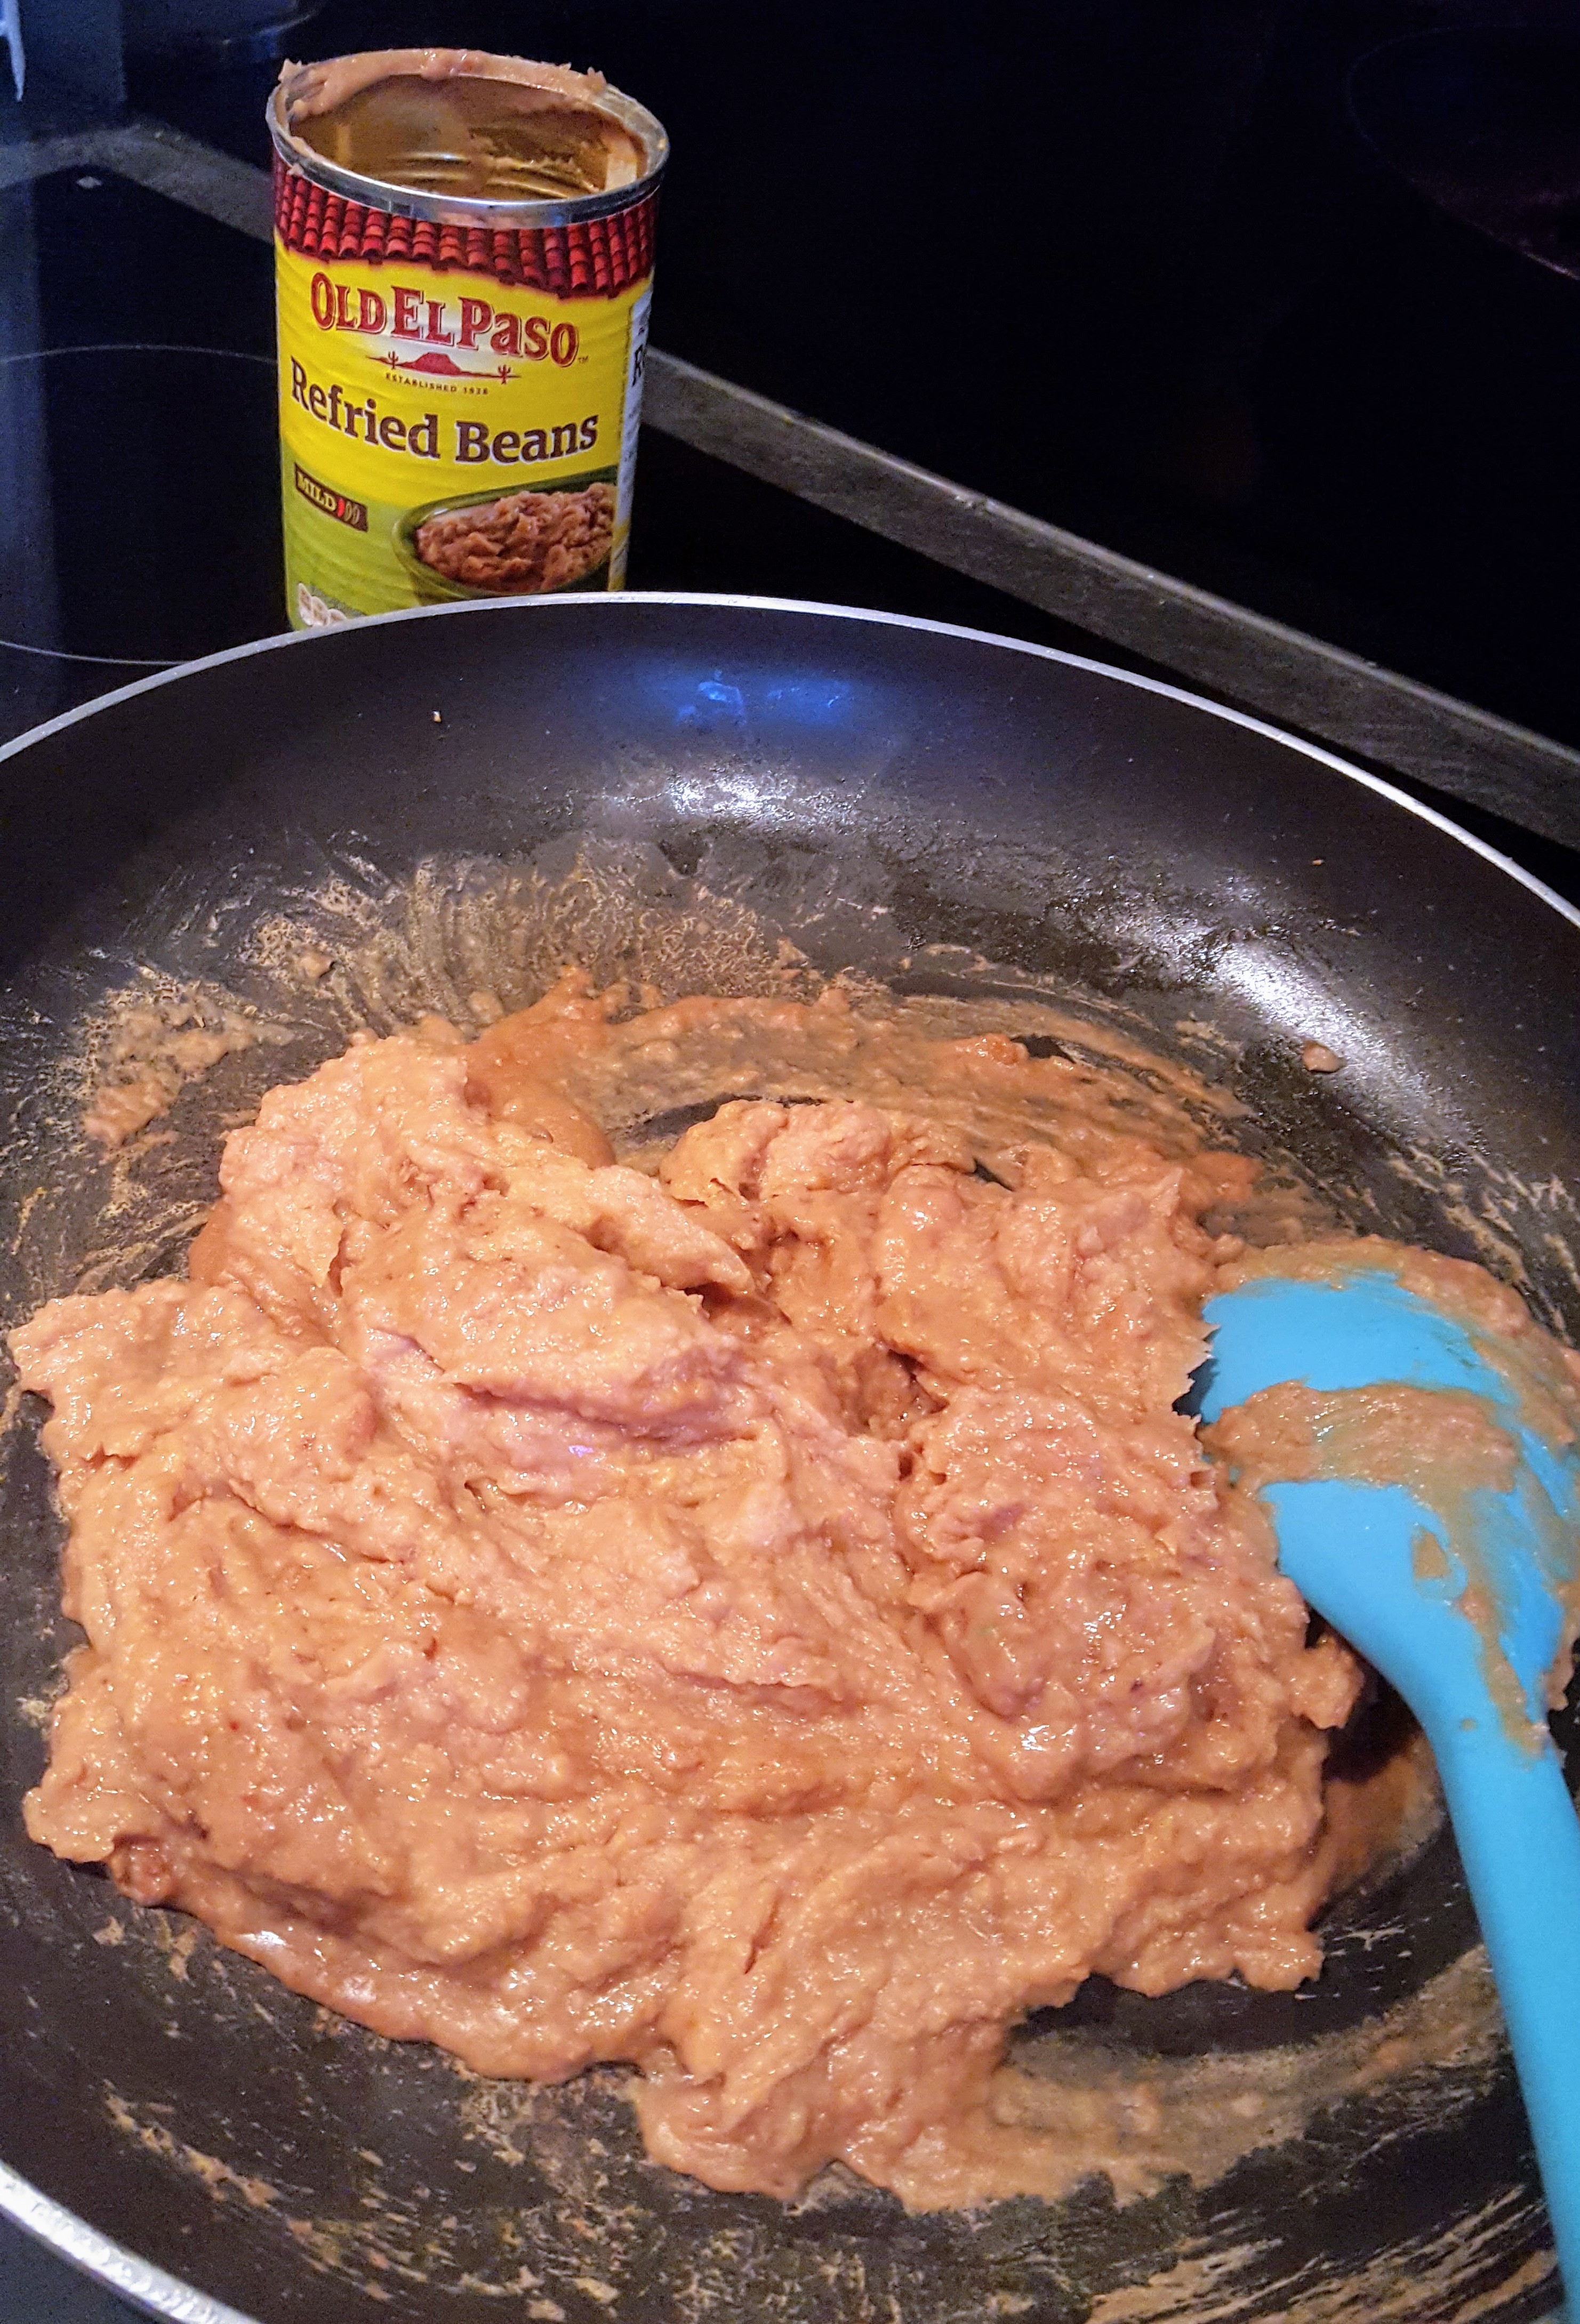


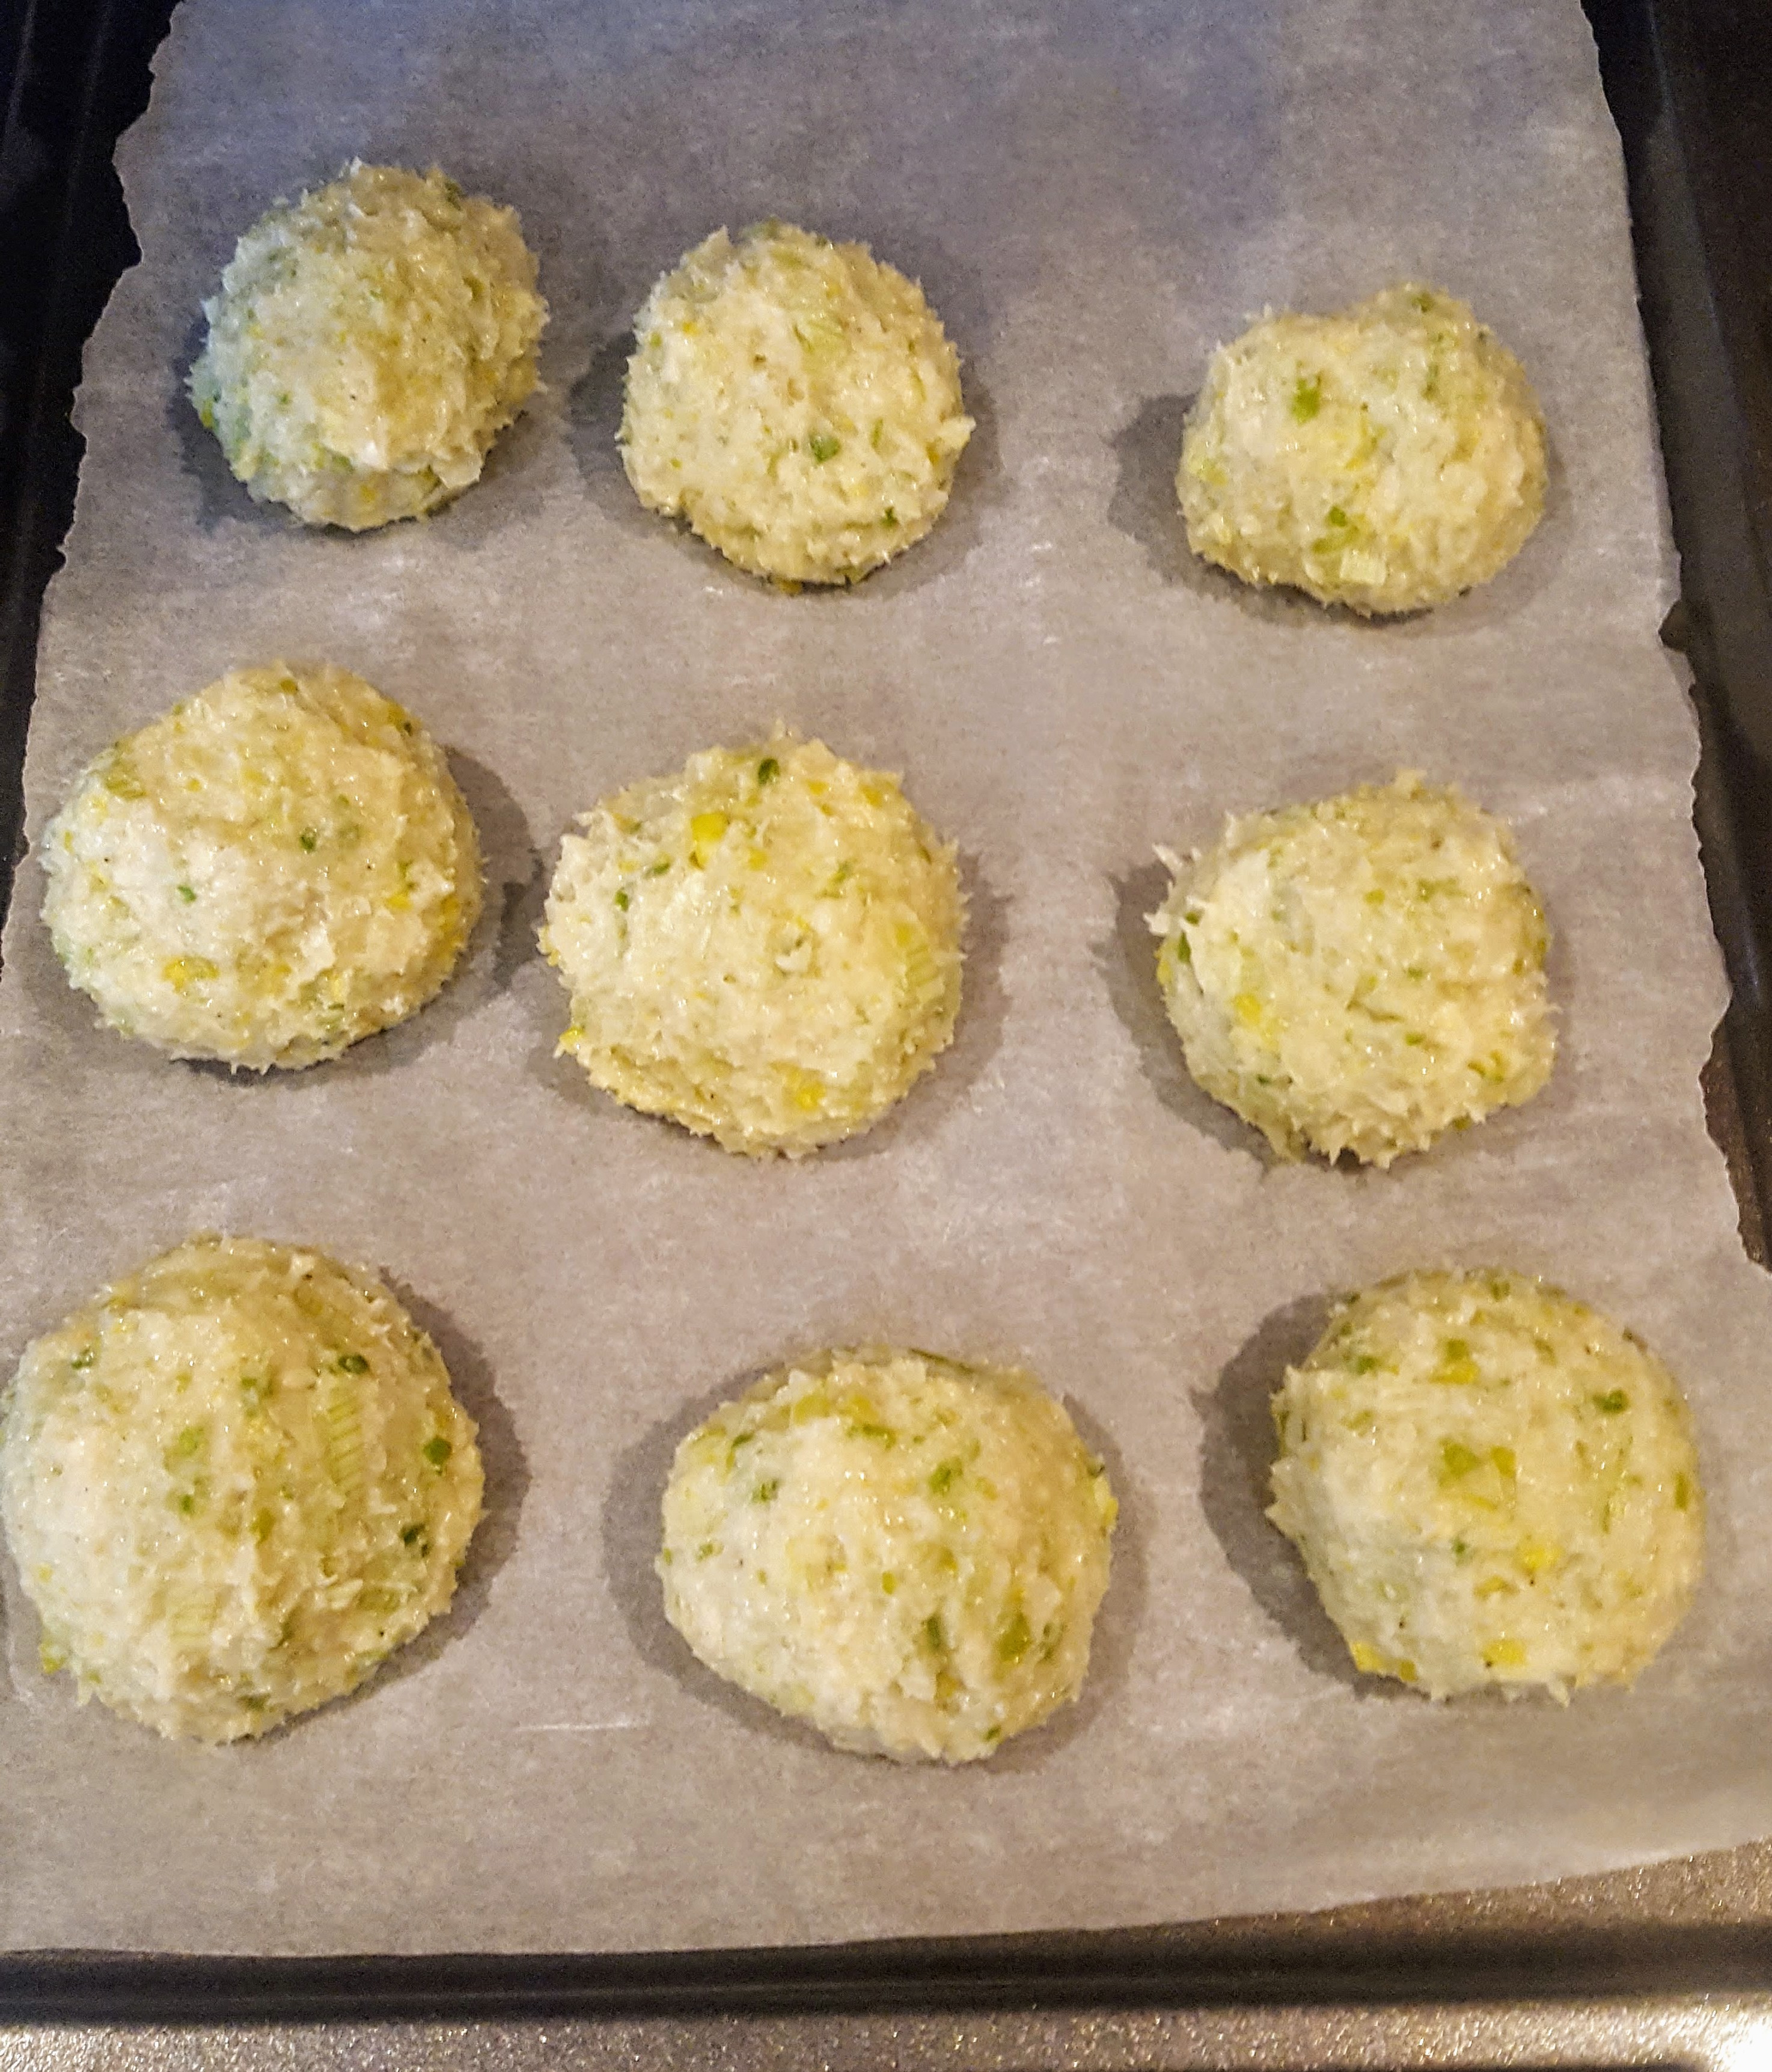


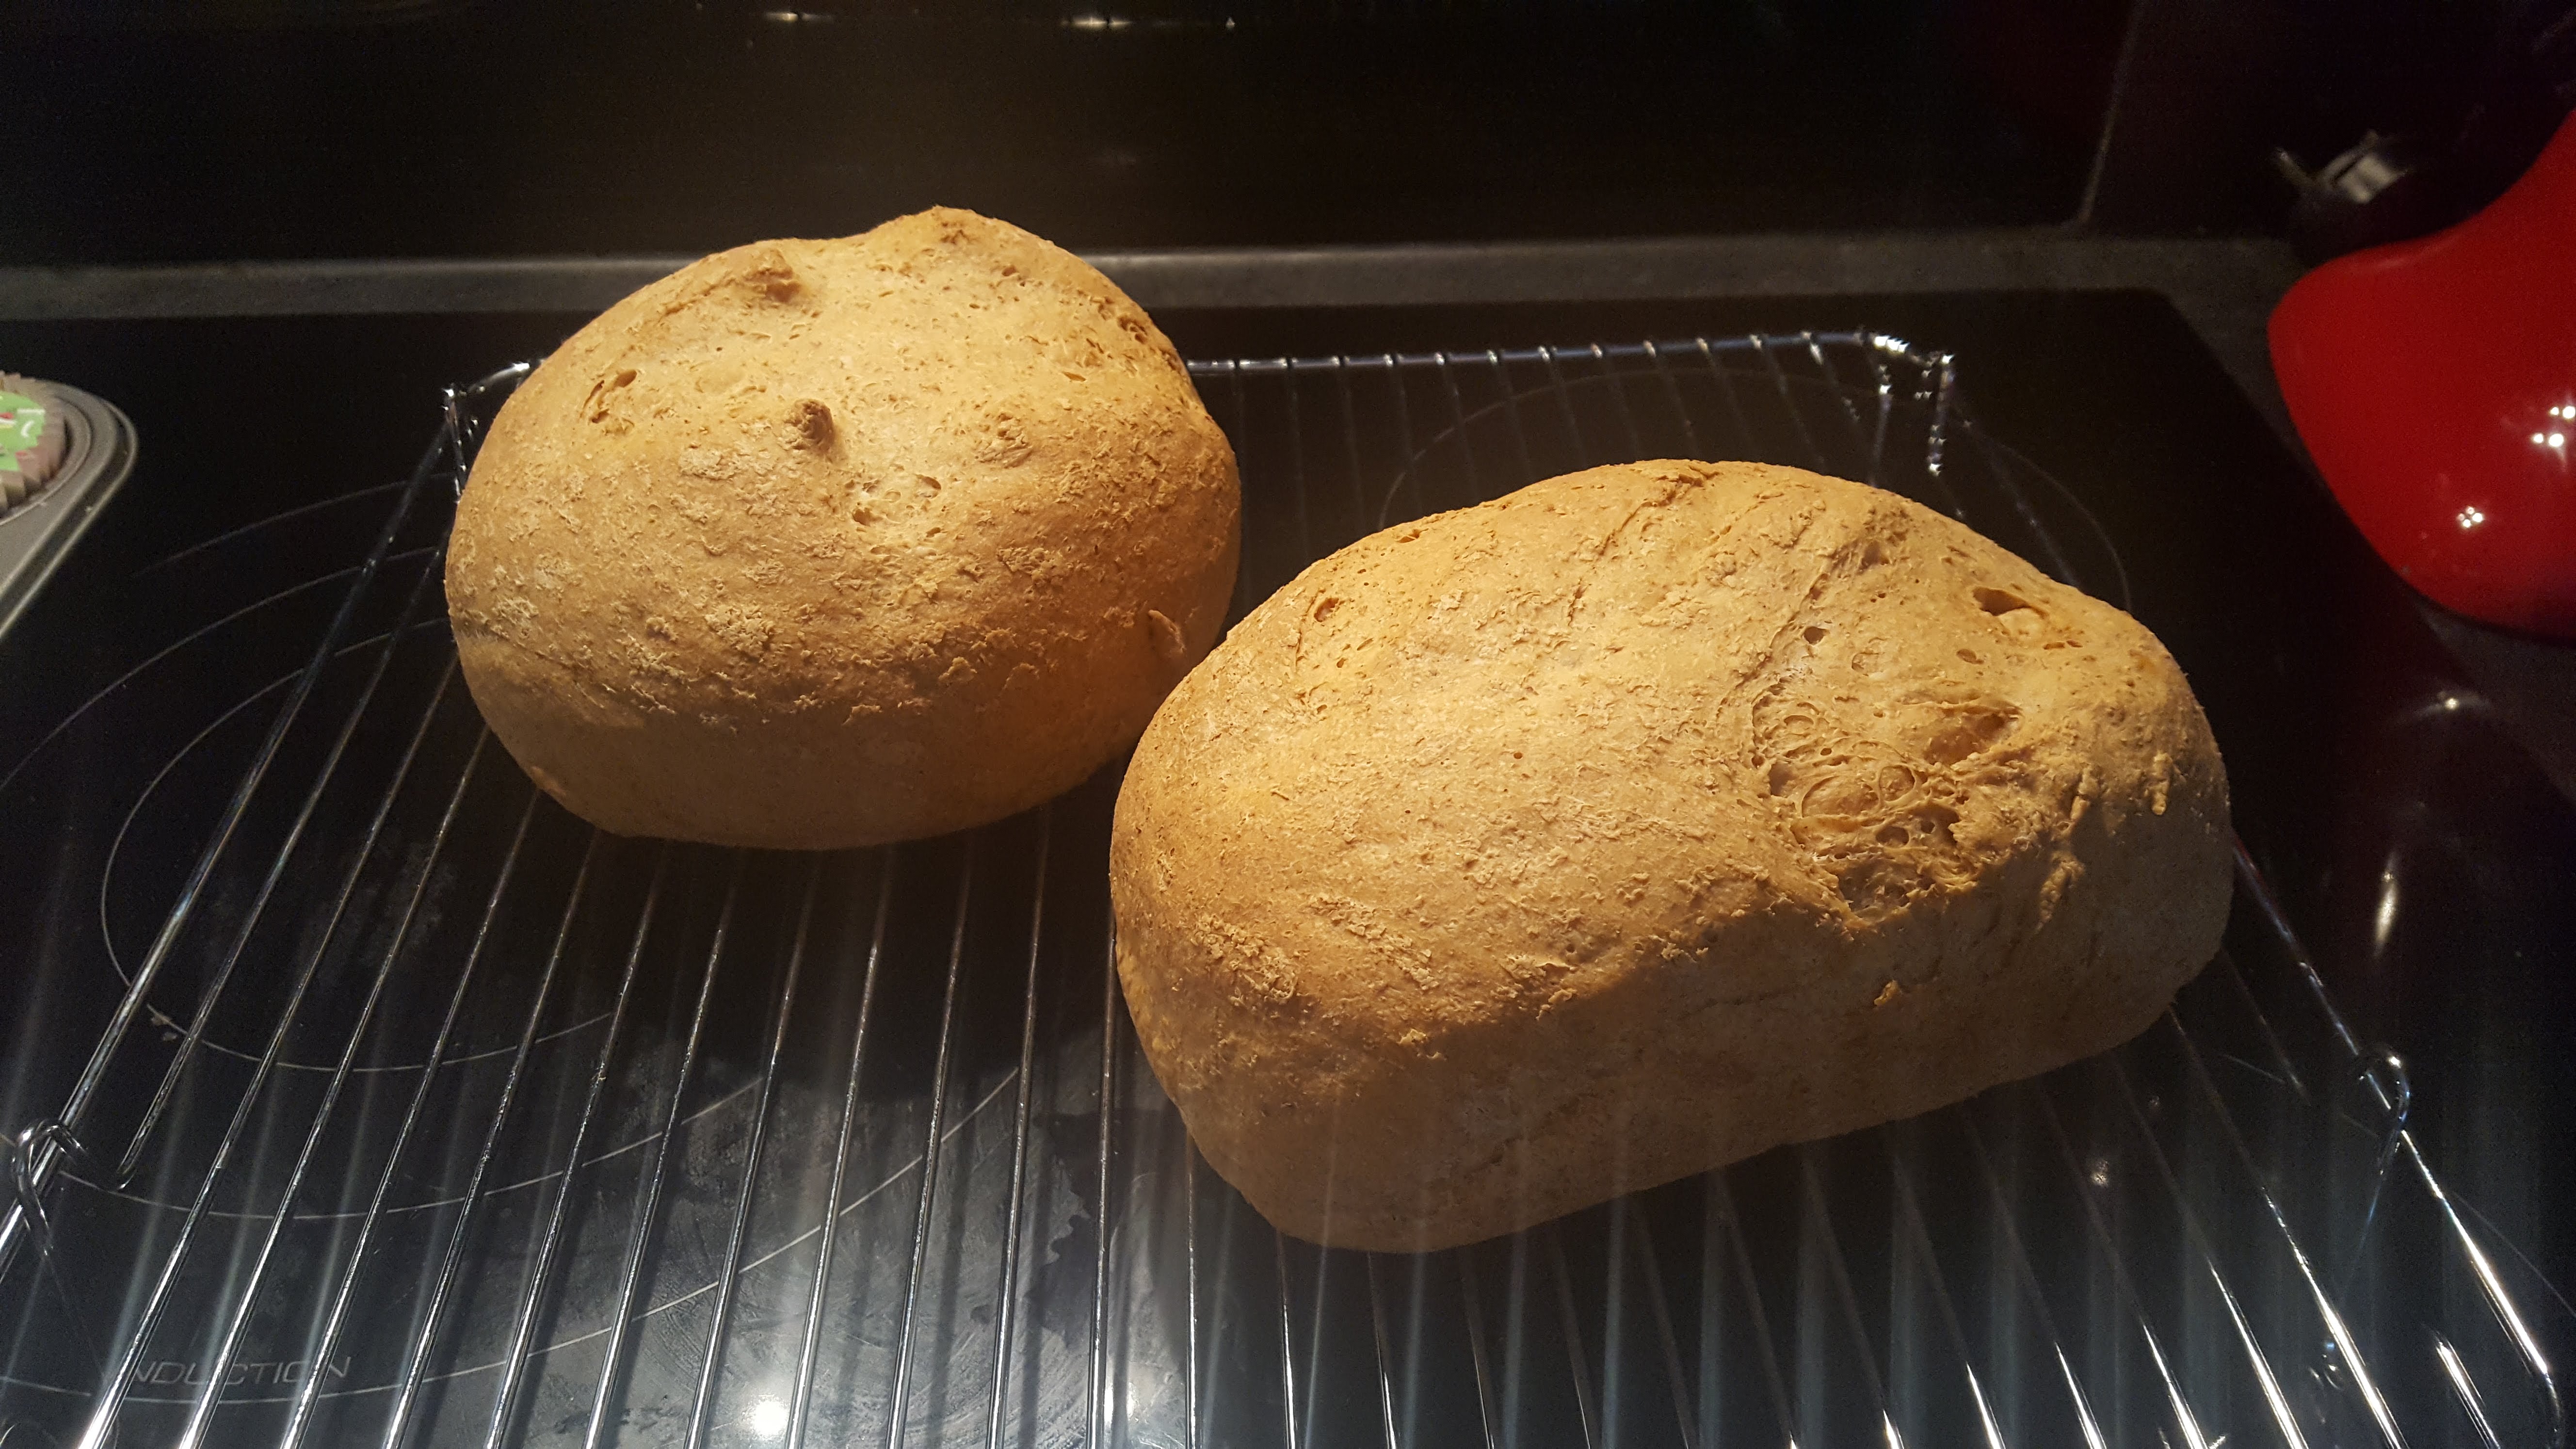
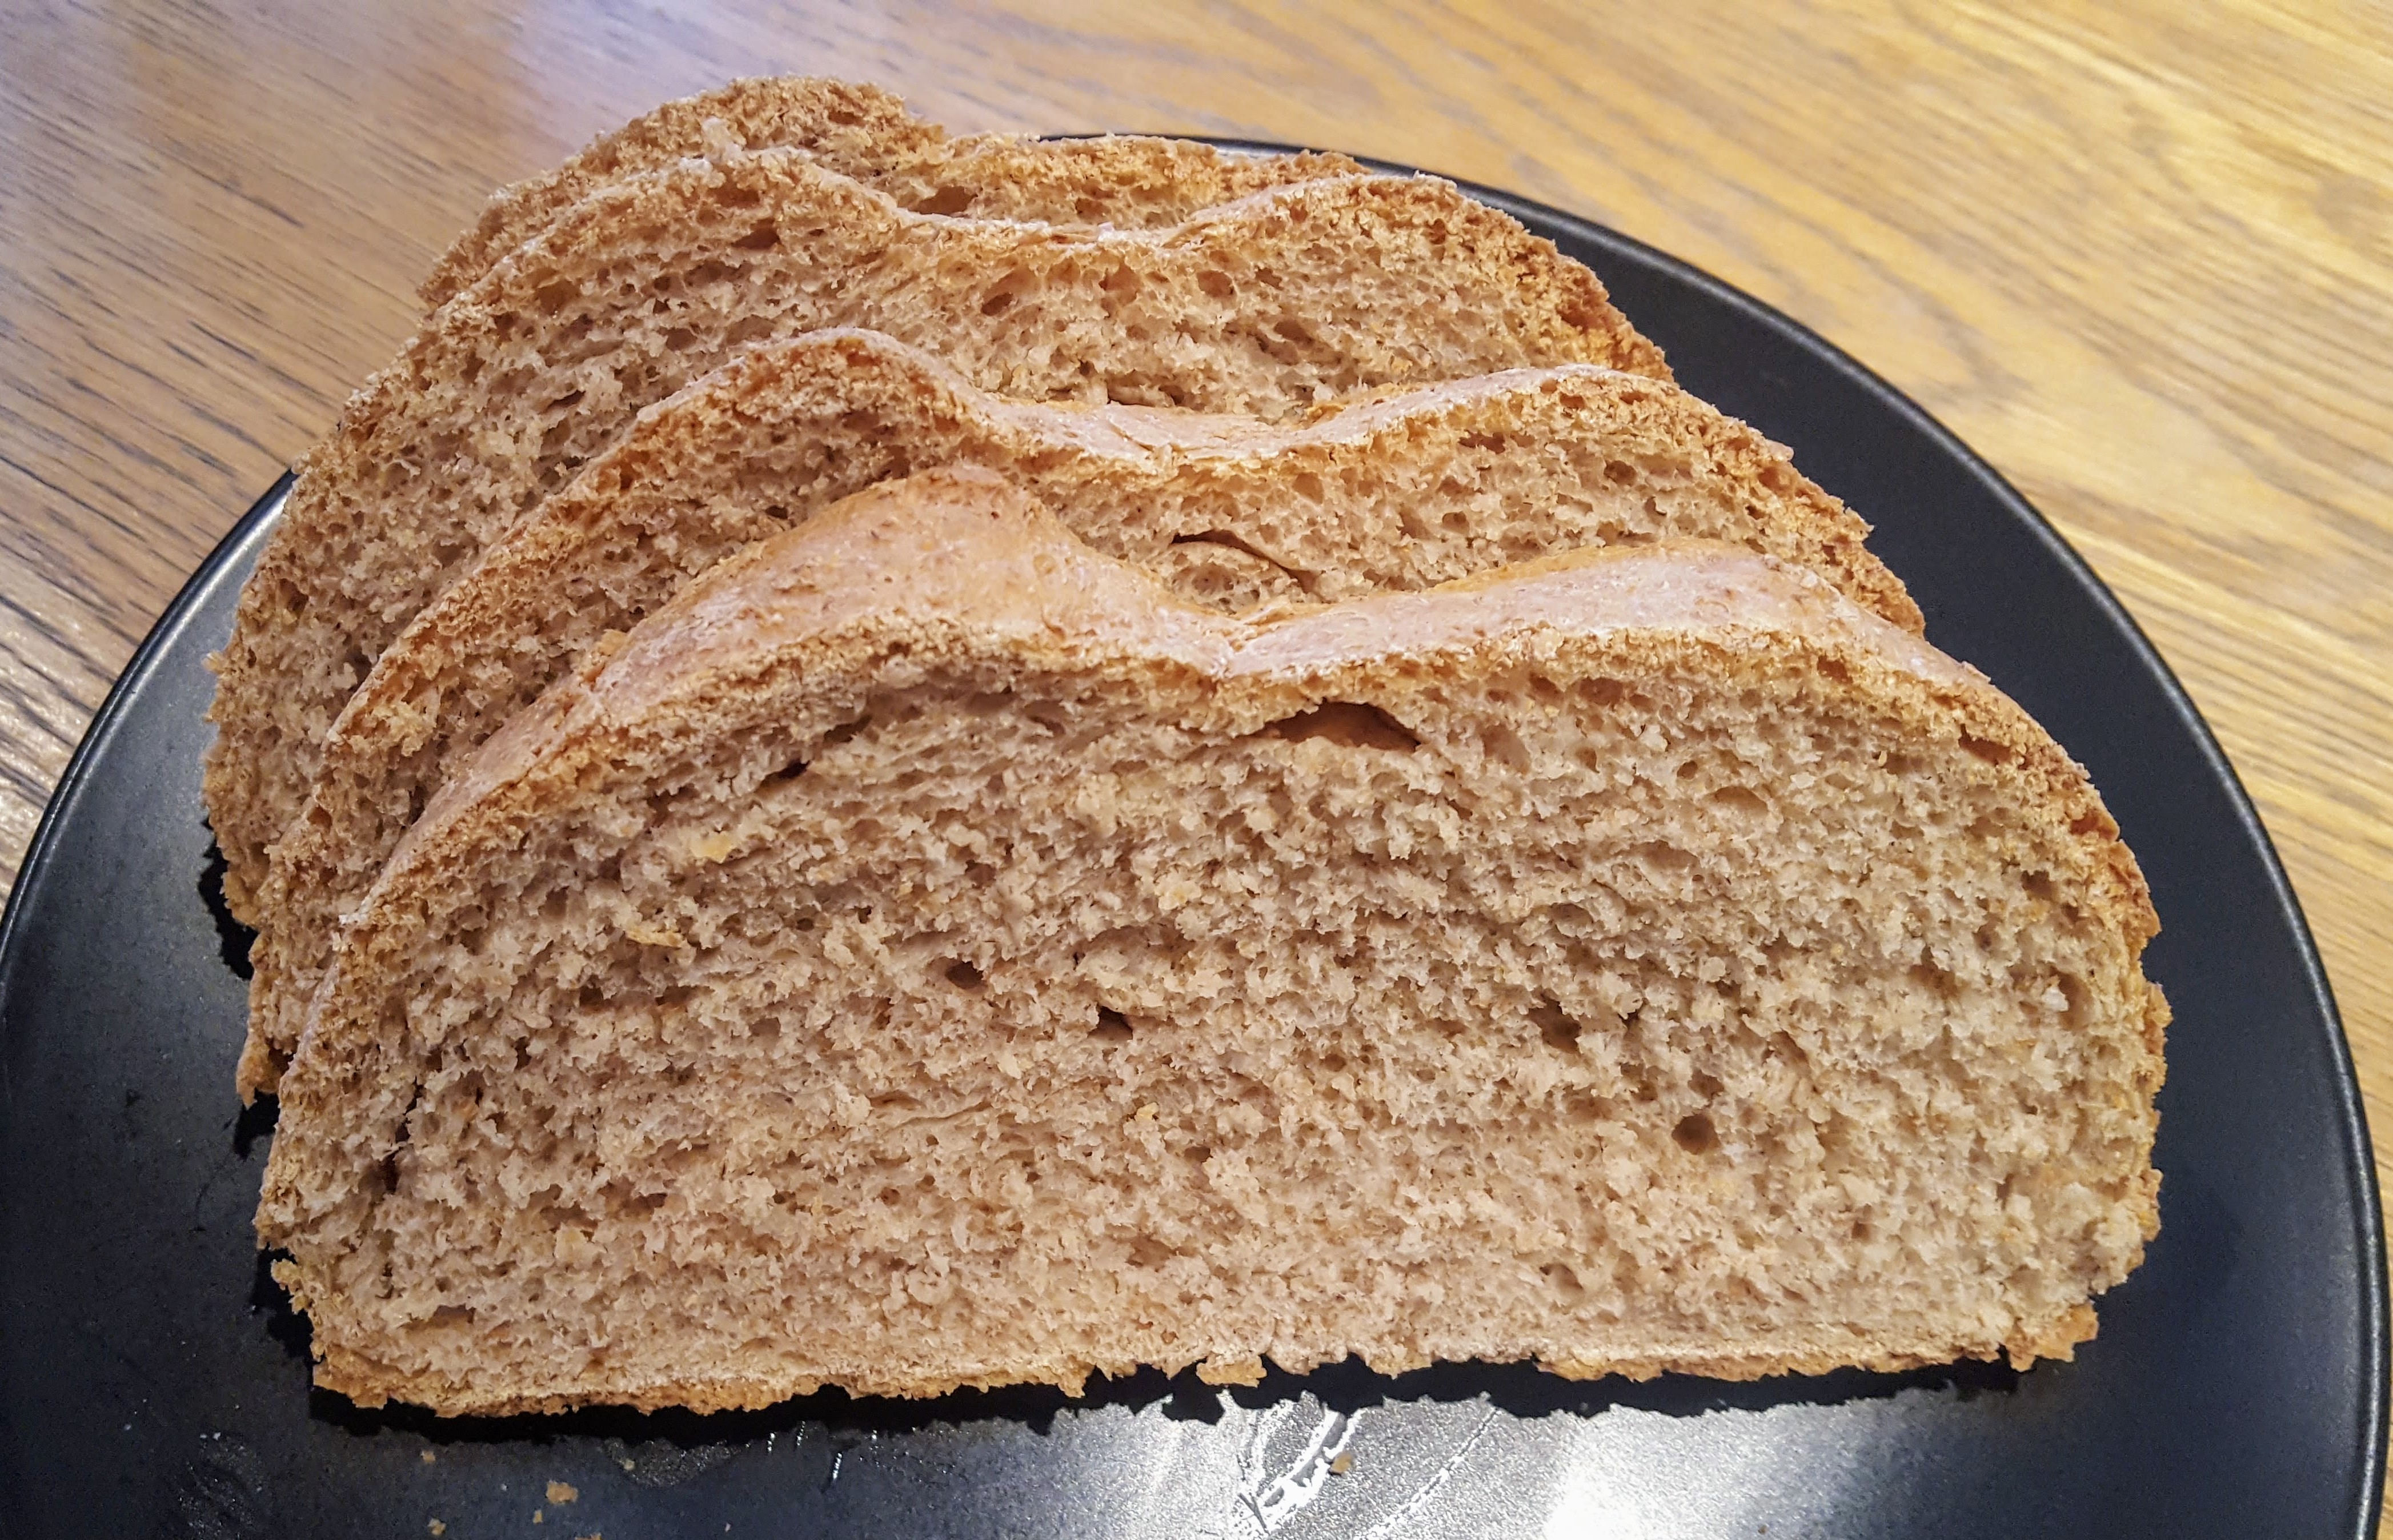


You must be logged in to post a comment.